In recent years, Google has been moving more towards rich results (also known as rich snippets). With the advent of smart devices, having structured data on your website is more important than ever. This is where configuring Schema markup in Rank Math comes in.
In this tutorial, we will explain the Schema options in Rank Math and how you can use them to add Schema to your website.

But, before we get into this knowledgebase article, you will want to understand how rich snippets & Schema work and what they are – check out our complete Schema Markup guide.
Schema is the most recognized form of structured data, and Rank Math supports it out of the box without any external plugins. And in the article, we’re going to explain the entire process from start to finish.
Table of Contents
- Enabling Schema from Global Options
- Setting up Default Schema for Your Website
- Adding Schema on Posts and Pages
- Schema in Rank Math vs Rank Math PRO
- Variables in Rank Math
- How to Configure Each Schema Type with Rank Math
- Introducing Schema Templates – Supercharging Schema
- Display Conditions
- Importing Schema
- Custom Schema
- Advanced Schema Editor
- Code Validation
- Adding Multiple Schema To A Single Page
- Schema for Custom Post Types
- Conclusion
1 Enabling Schema from Global Options
First things first. Assuming that you’ve already installed and configured Rank Math on your website, the first thing you need to do is to activate the Schema module from the settings.
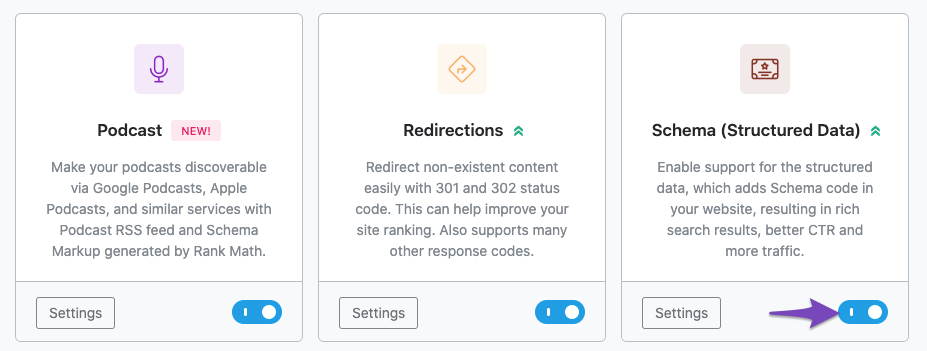
To do that, head over to Rank Math SEO → Dashboard.
And make sure that the Schema (Structured Data) module is enabled.
2 Setting up Default Schema for Your Website
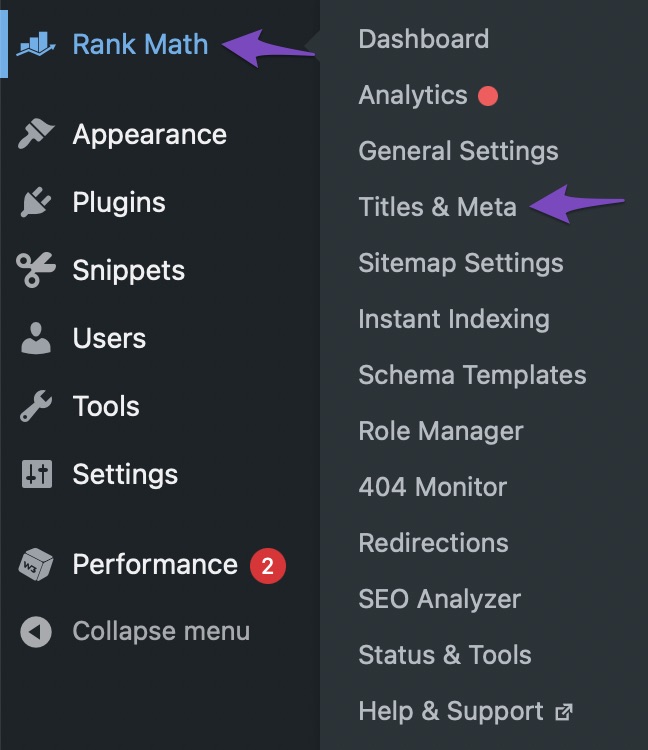
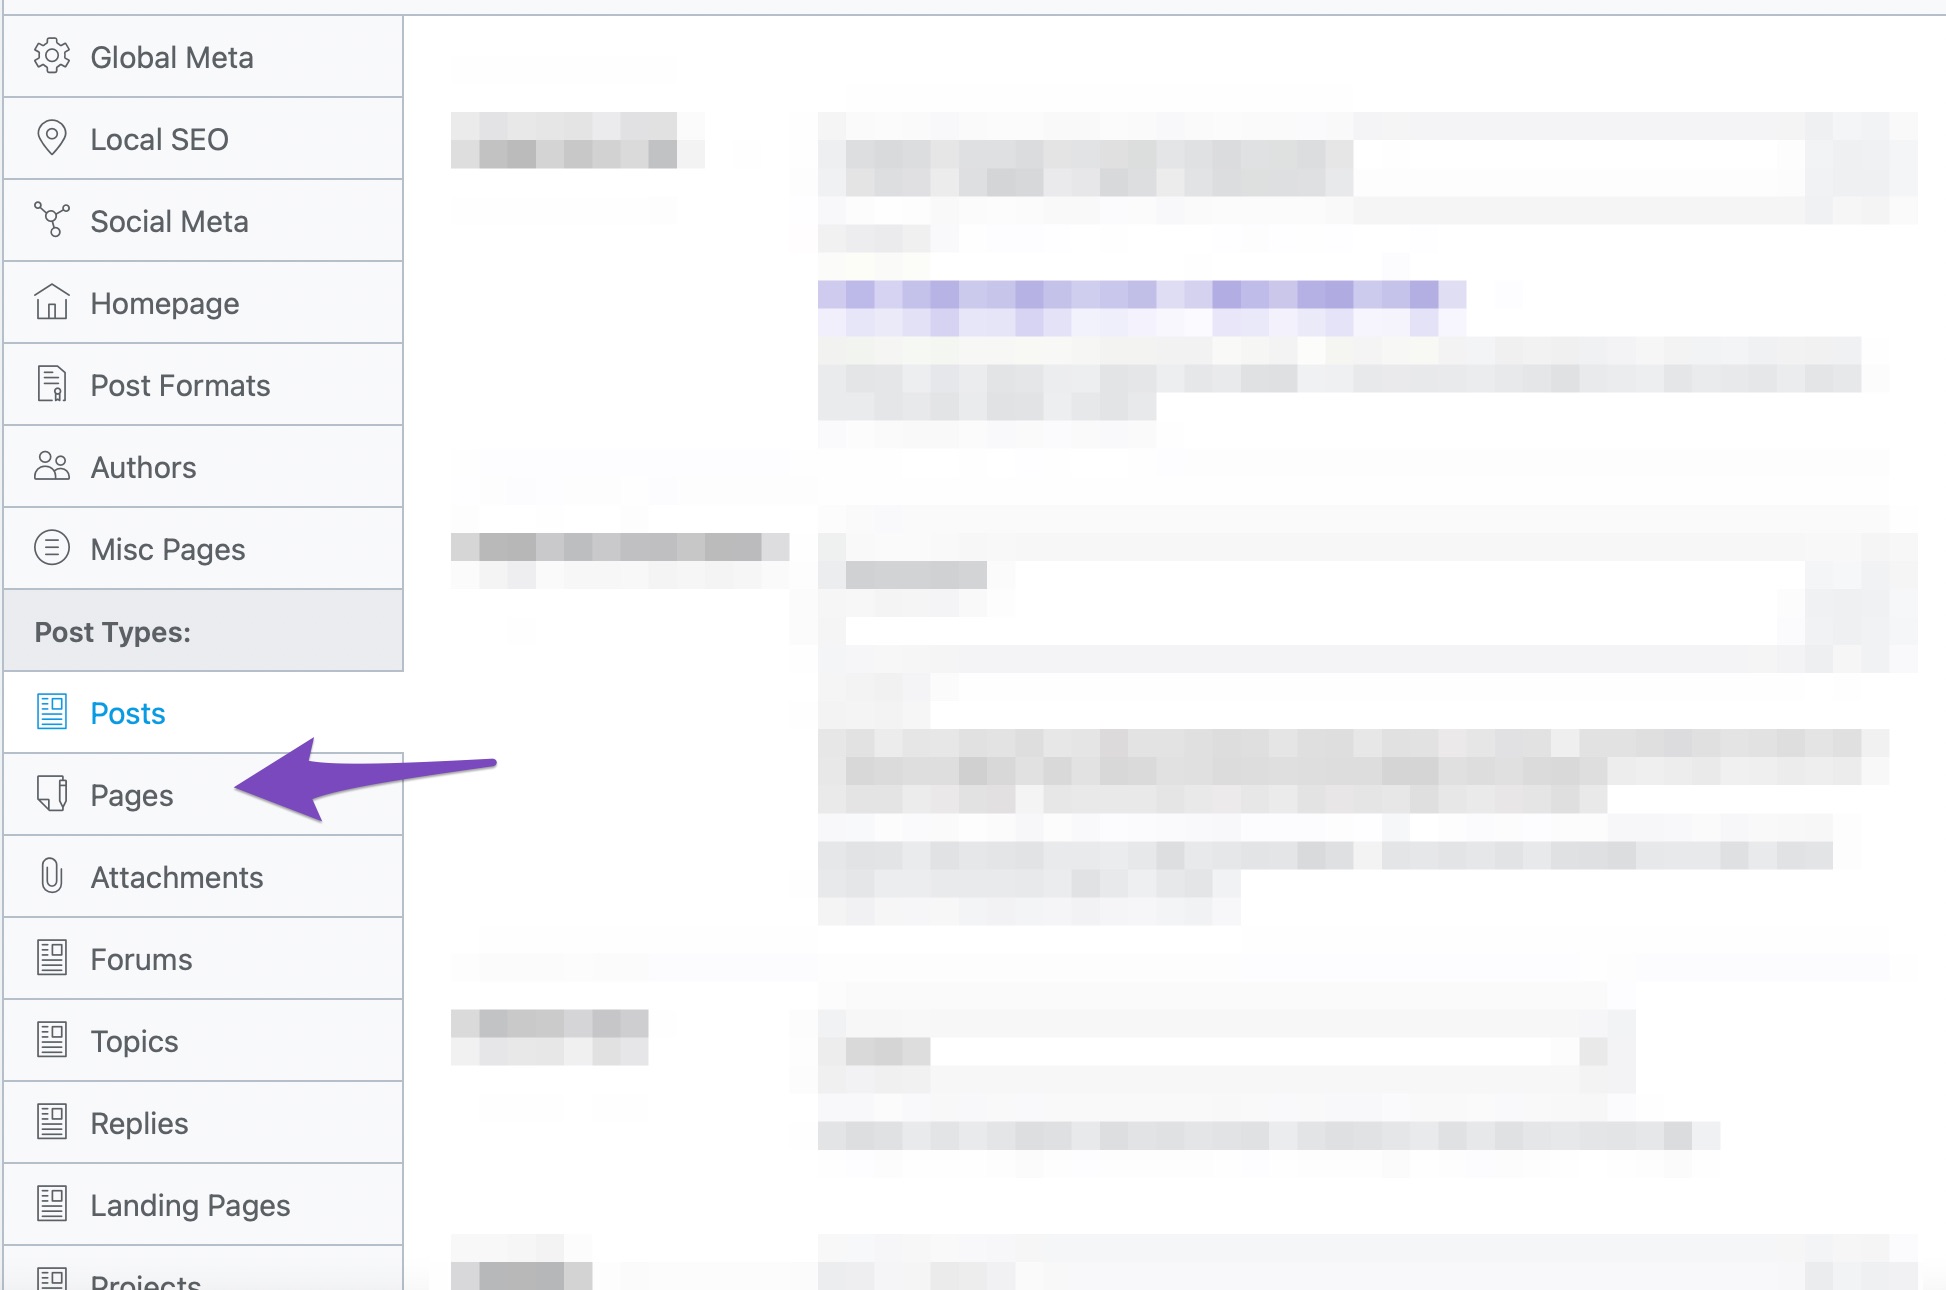
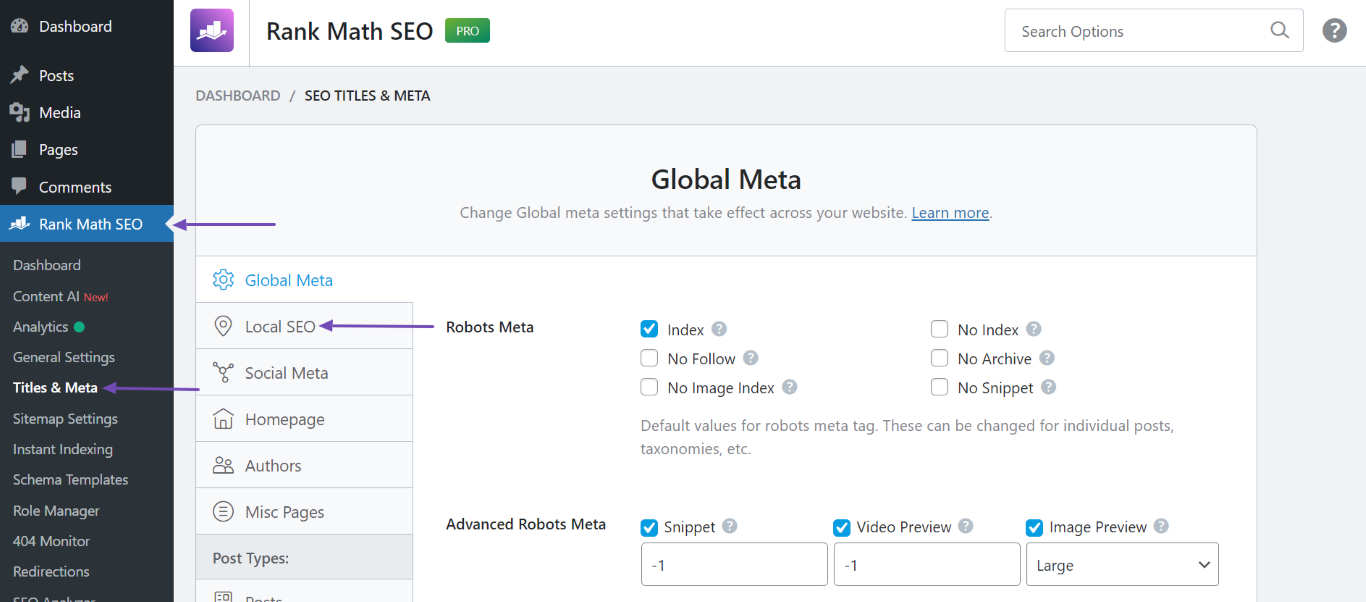
Since the Schema is more important than ever, every post or page on your website should have a Schema or structured data. With Rank Math, we’ve made it easy to select a default Schema type to appear on all your posts and pages. You’ll find the options inside Rank Math settings. Head over to Rank Math SEO → Titles and Meta.
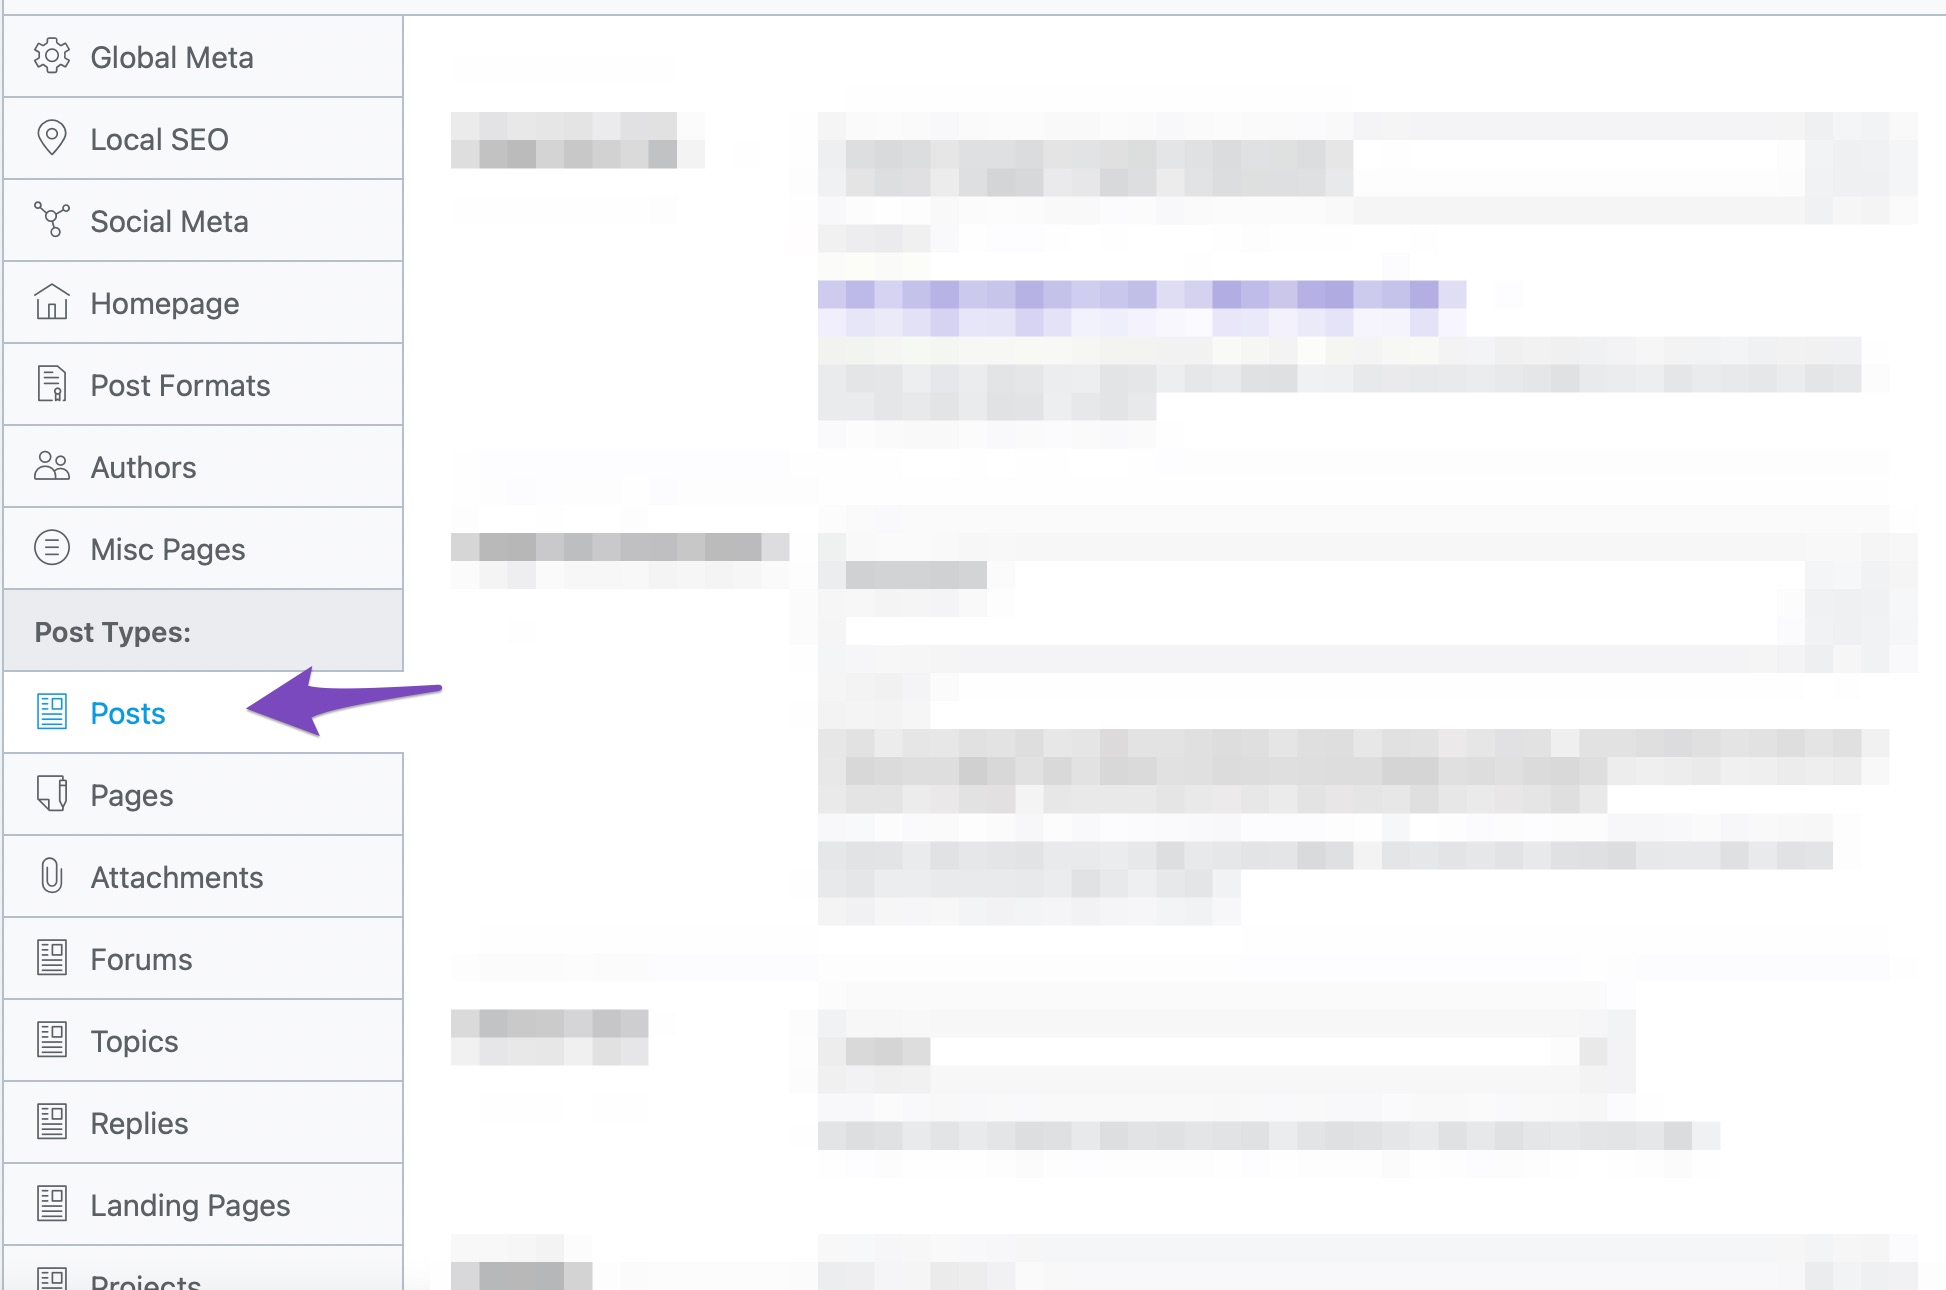
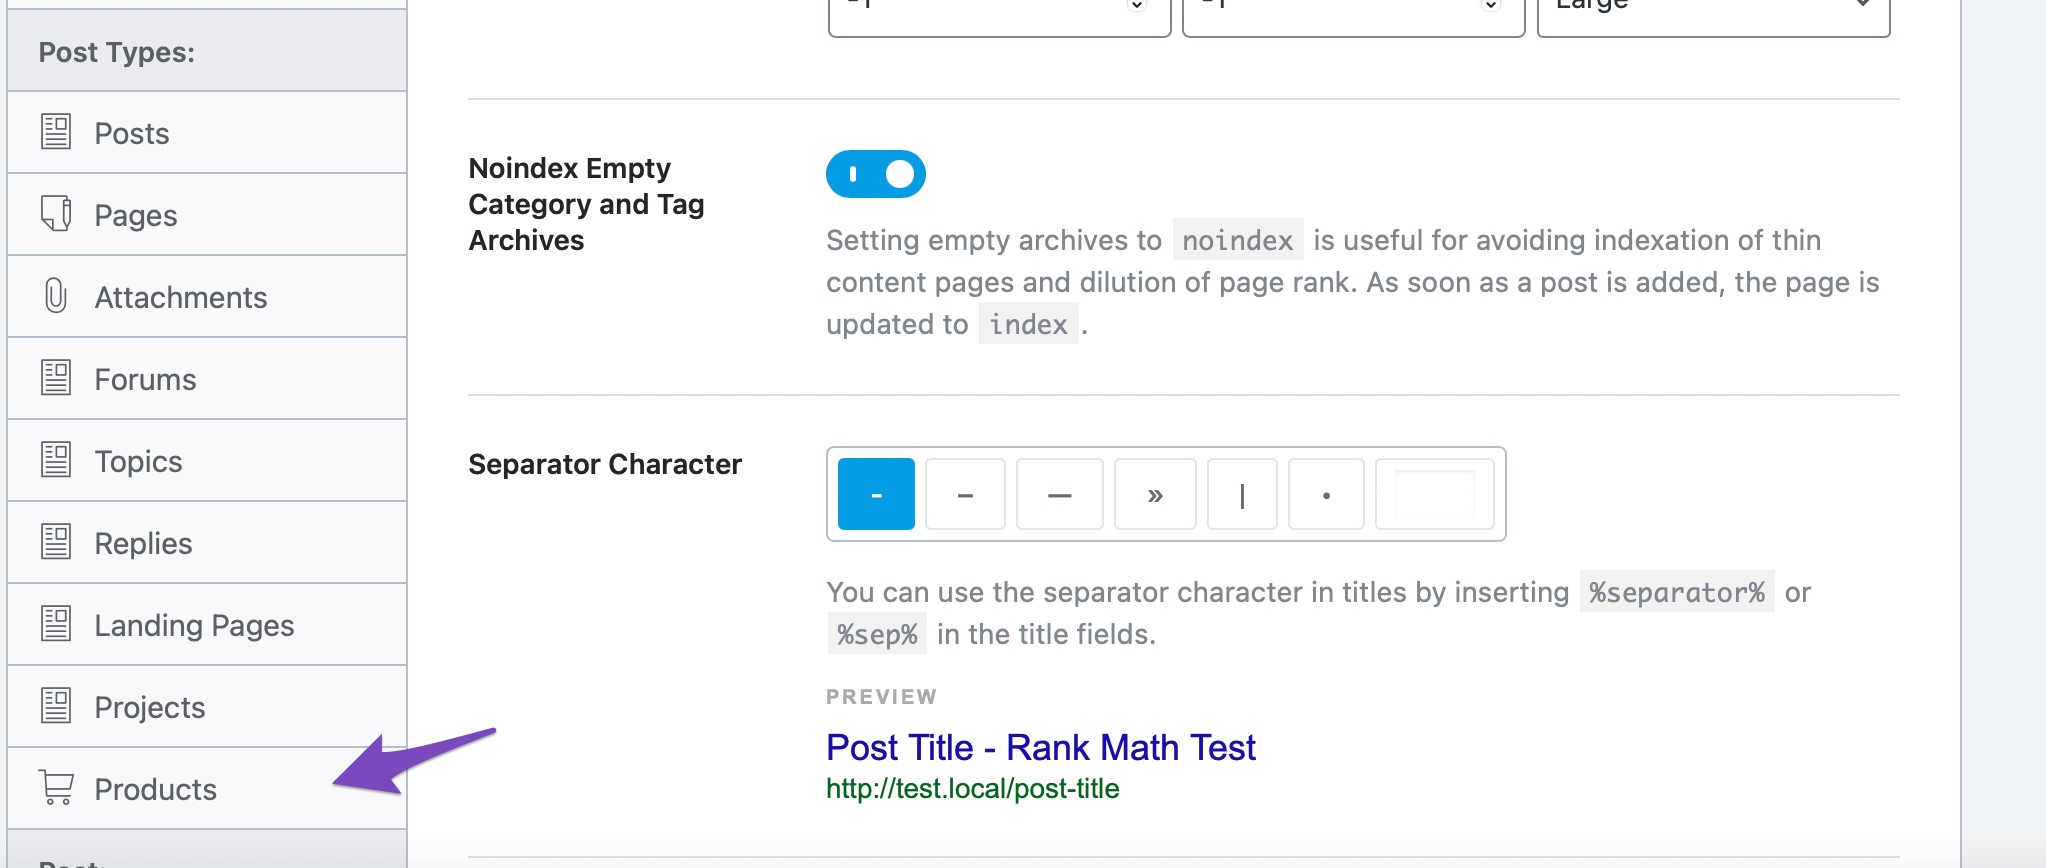
You will reach Rank Math’s Title and Meta settings. On the page that appears, click the Posts option from the left tab menu.
On the page, scroll a bit to find the Schema Type option.
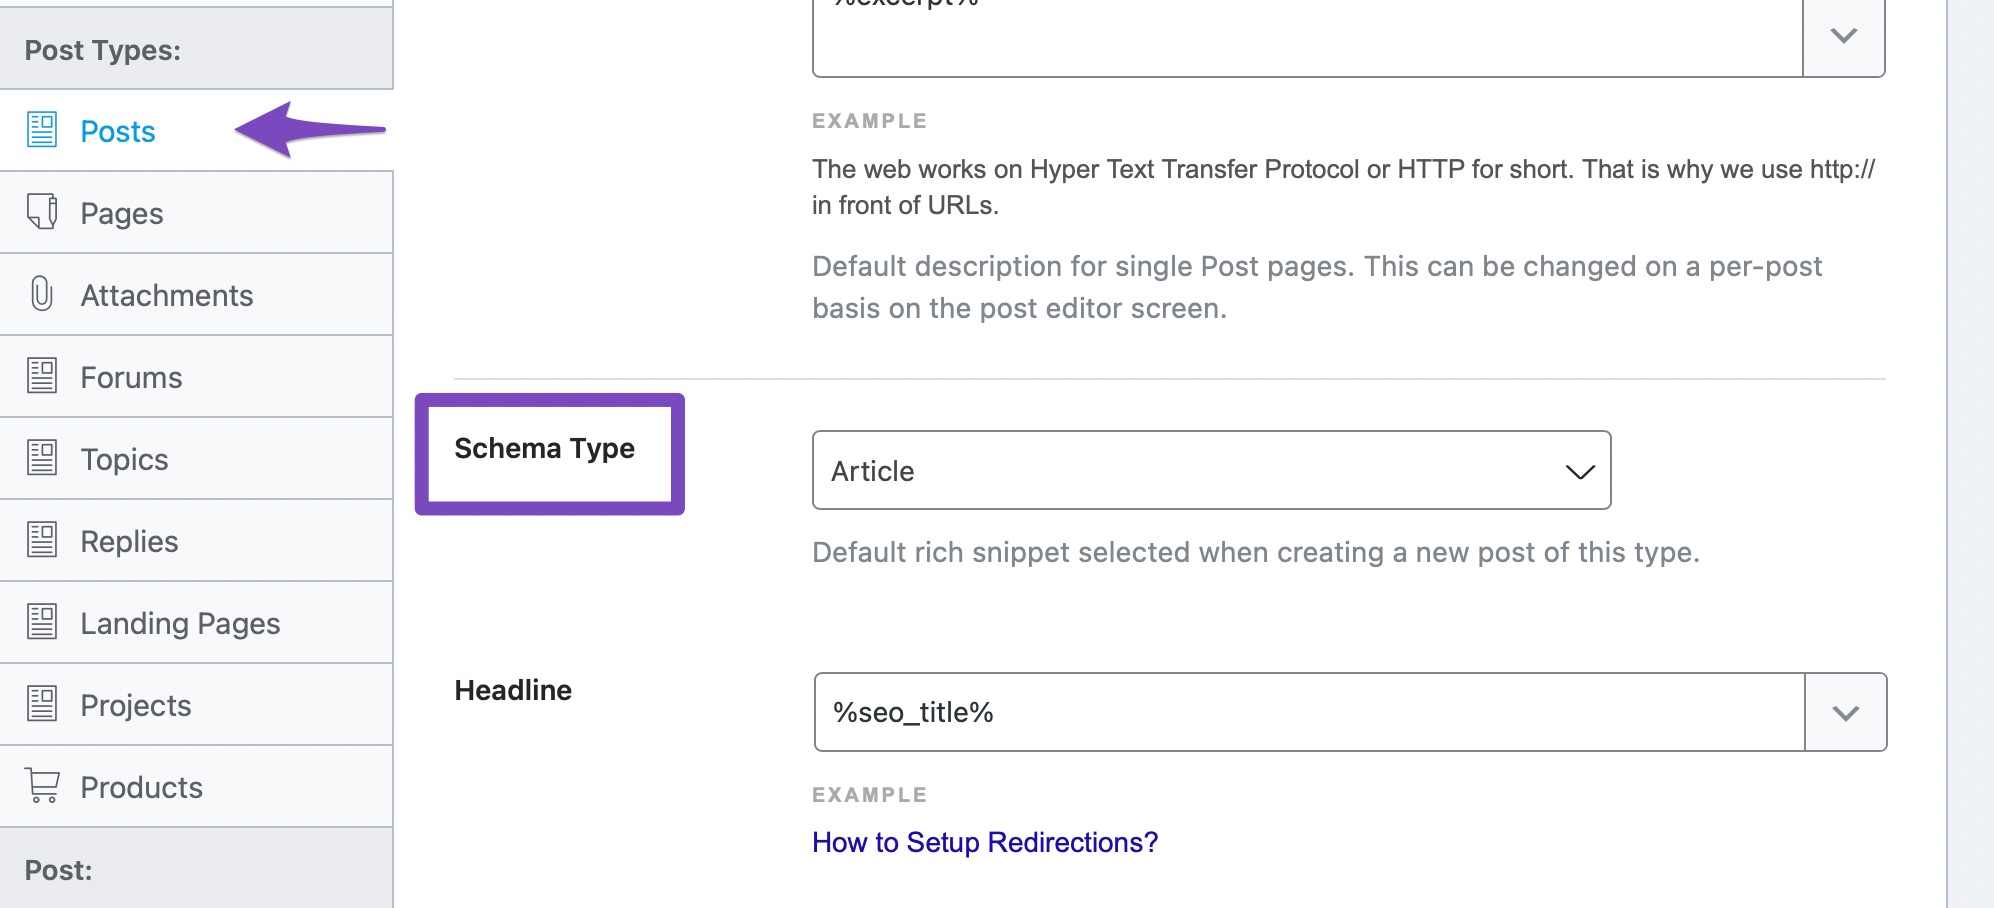
To see all the Schema Types supported, click the drop-down menu. You can then scroll or search for all the different Schema types supported by Rank Math.
Select the Schema type that you use the most on your website, and save your settings.
After saving, repeat the process for your pages. If your website has custom post types, they will show up in the menu as well. It is recommended to do this for all post types.
It is important to understand that till now, we’ve not added any Schema to any of our posts; we’ve just selected the default Schema type that will be added to the post, which we can then customize on a per-post or per-page basis.
3 Adding Schema on Posts and Pages
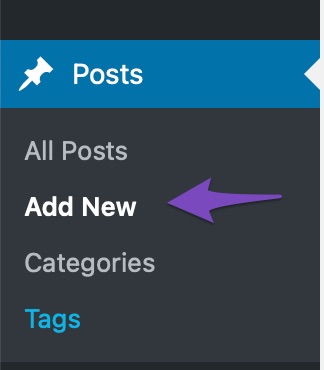
Now that we’ve selected a default Schema type to be added to your pages, we can start adding or customizing the Schema that will be added to our posts. To demonstrate, we will create a new post by going to Posts → Add New. We’ll then give our post a title and add some dummy text to it.
Classic Editor
In the Classic Editor of WordPress, we’ll see Rank Math Metabox as we scroll down to the bottom of the page. If you’re unable to see the Rank Math Metabox in the Classic Editor, click the Screen Options and select Rank Math SEO from the Screen elements.
Then choose the Schema tab in the Rank Math Metabox as shown below.
Gutenberg
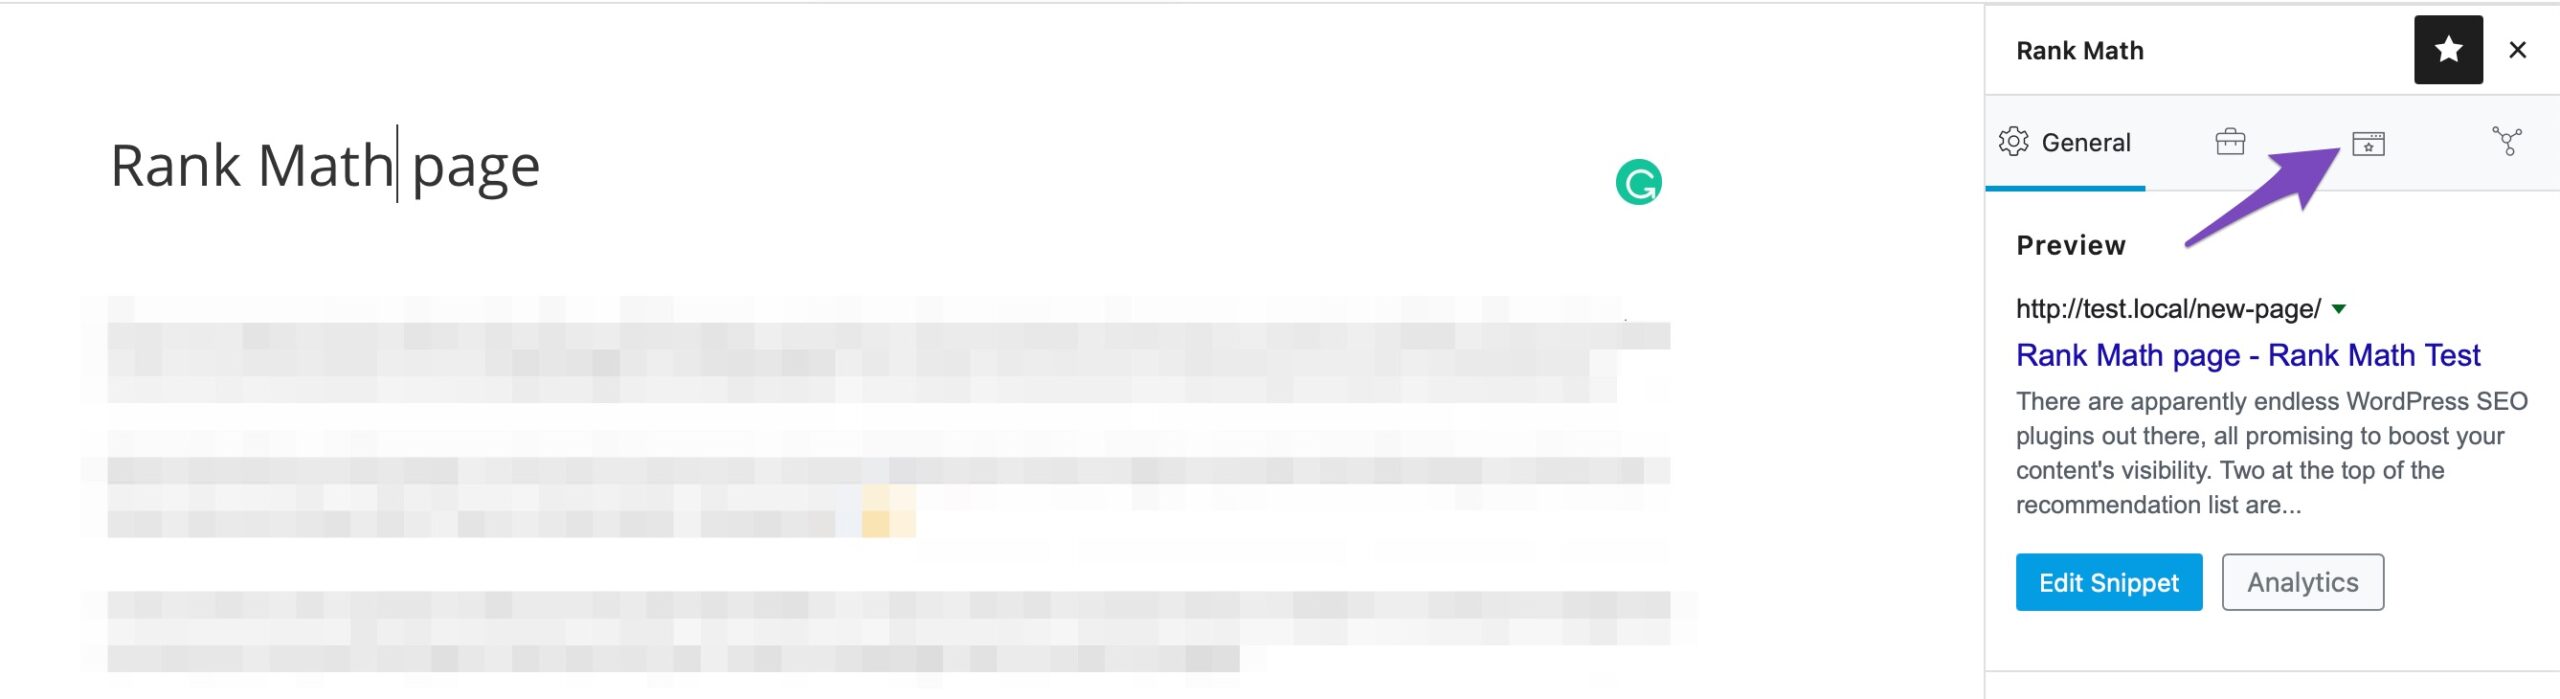
In the Block Editor (and the one we’ll use for the rest of the tutorial), we’ll open up Rank Math by clicking the Rank Math icon on the WordPress menu.

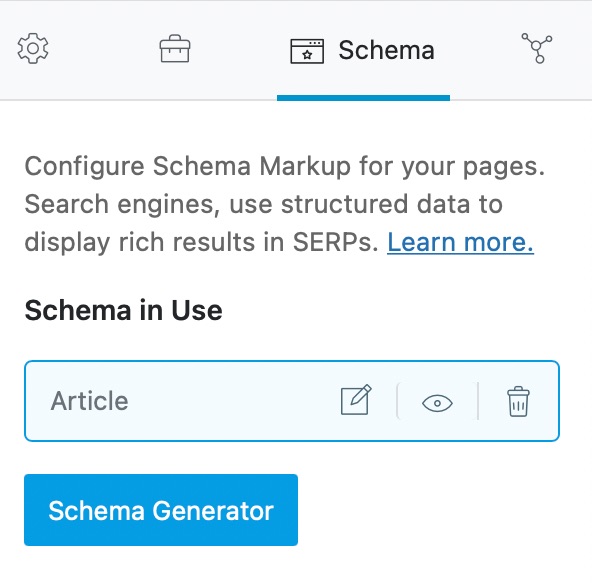
Once the Rank Math menu is open, we’ll open the Schema Tab by clicking the icon from the menu.
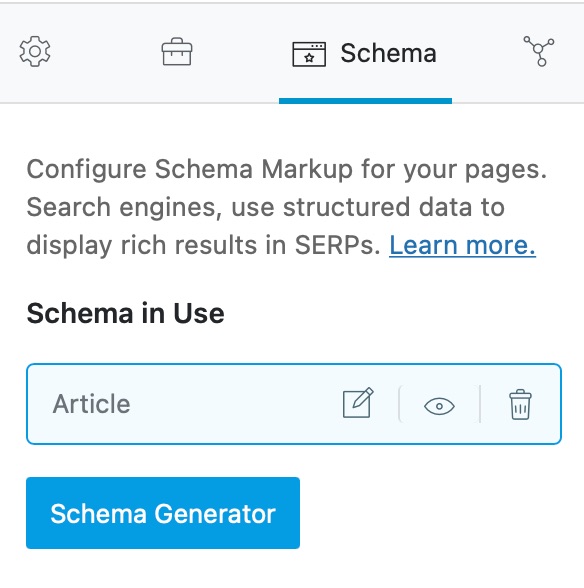
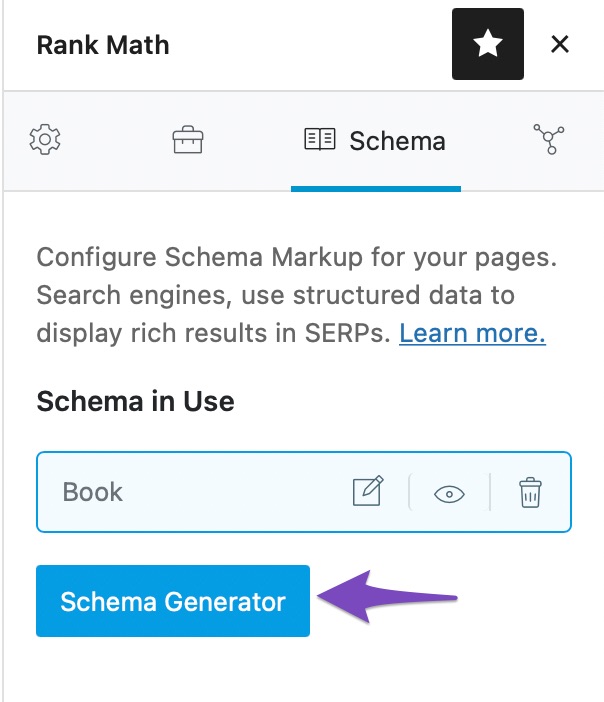
This is what the new Schema Generator will look like. If you remember, we set up a default Schema type (Article) above, which is why it shows up here. If you selected a different Schema type as default, that one would show up here.
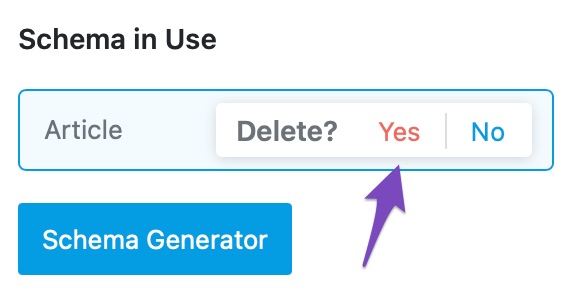
Since we will cover adding all kinds of Schema, we will delete the existing Schema by clicking the delete icon next to the Schema and clicking Yes on the confirmation dialog.
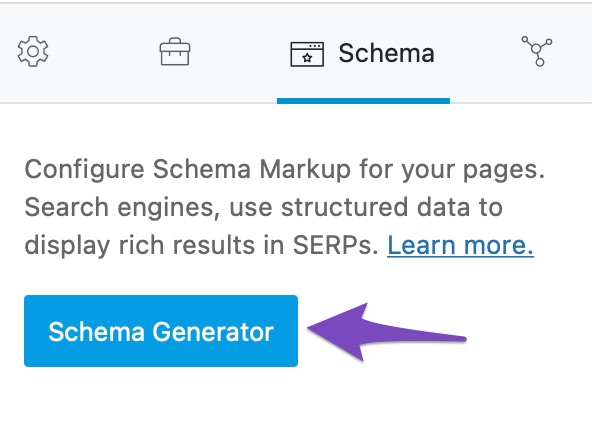
Now, we’ll start with a blank slate. Let’s add a brand new Schema by clicking the Schema Generator button.
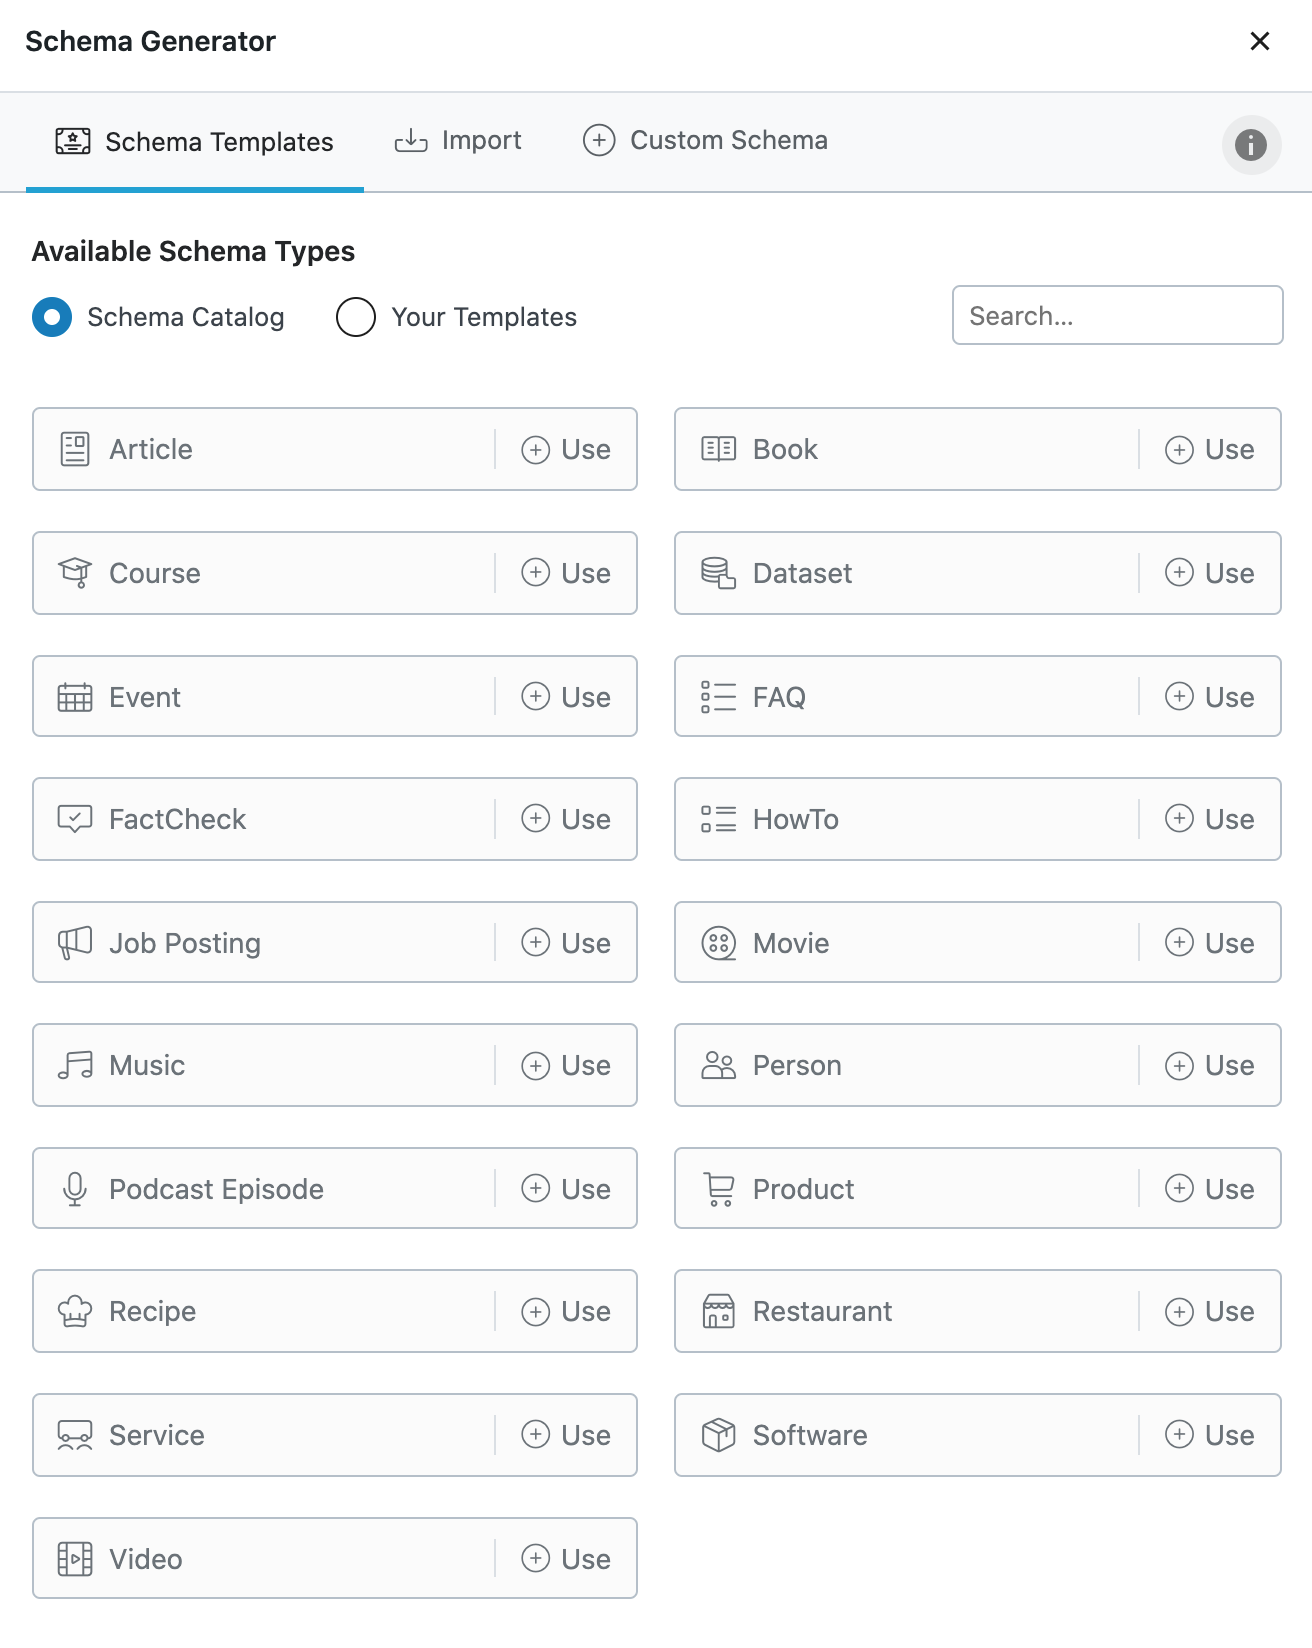
This is what you will see on the screen. You will see all the different types of Schema that Rank Math supports and a bunch of other options that we will explain in the article.
If you’re using the free version of Rank Math, you might not see some of the features. Those features will only be available in Rank Math PRO. Here is a side-by-side comparison of how the Free vs. PRO will look like.
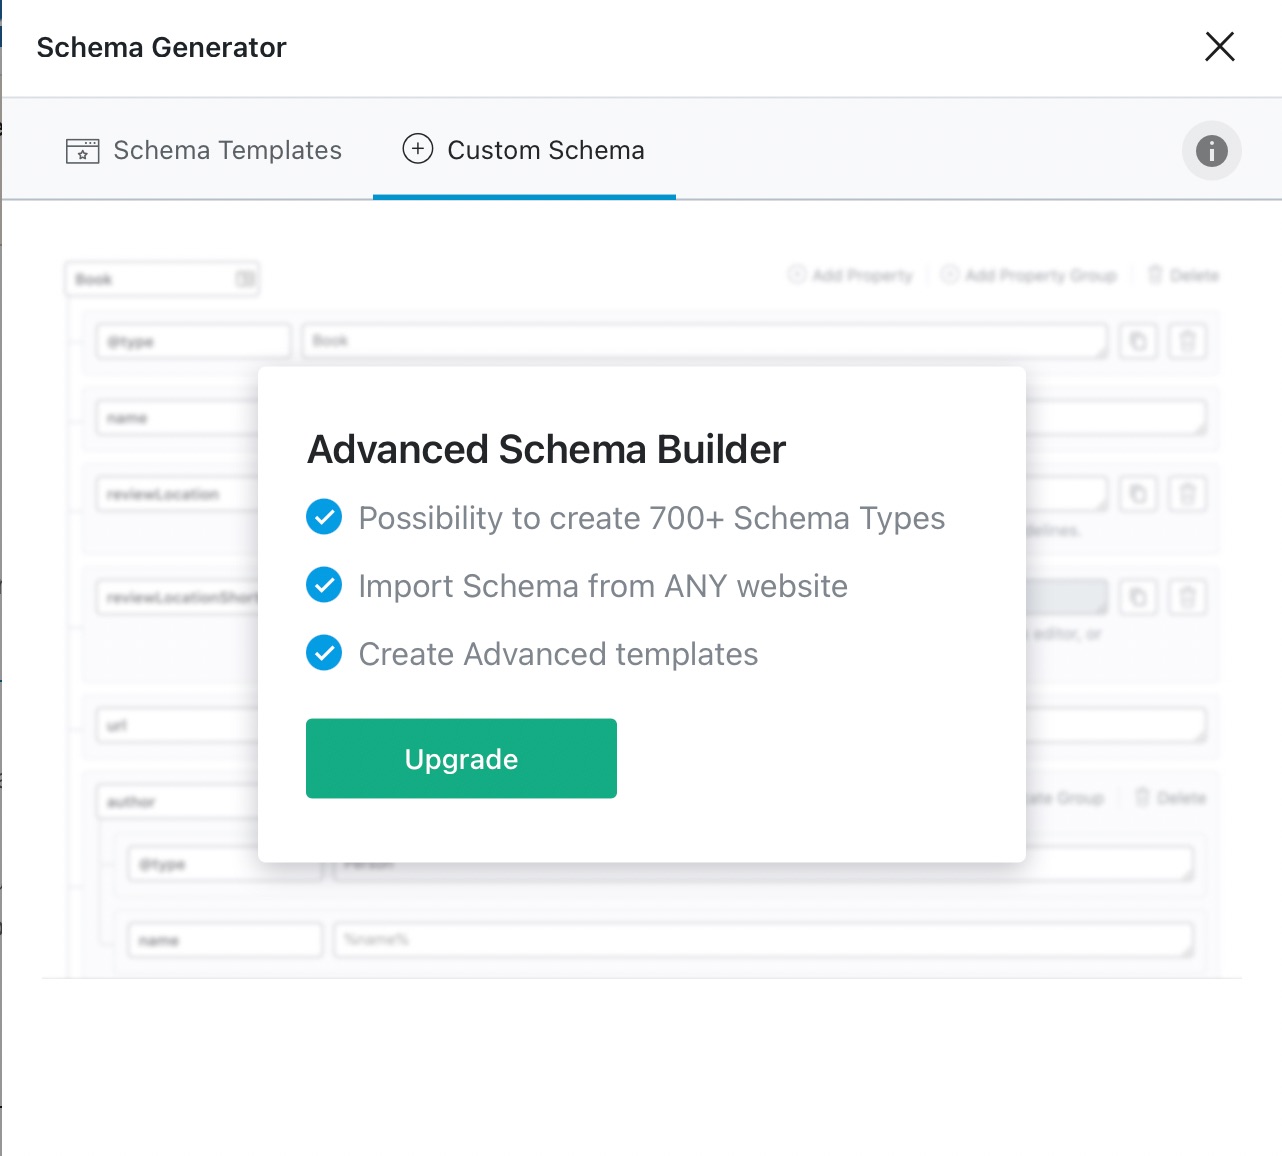
On the Free version, you do see the Custom Schema tab, but it is not operational. If you access it, it will prompt you to upgrade to Rank Math PRO.
Here is a complete list of all the Schema types supported by Rank Math.
4 Schema in Rank Math vs Rank Math PRO
Here is the text version of the Schema Types. We’ve also grouped them based on their availability in Rank Math Free and PRO versions. Click on any of the names to go directly to it.
Schema Types Available in Rank Math (Free)
- None
- Article
- Book
- CollectionPage
- Course
- Event
- FAQ Schema
- HowTo Schema
- Job Posting
- Music
- Person
- Person or Organization
- Product
- ProfilePage
- Recipe
- Restaurant
- Service
- Software Application
- Video
- WebPage
- WebSite
- Blog Posting
- Breadcrumb Schema
- Easy Digital Downloads Schema
- Local SEO Schema
- News Article
- Sitelinks Search Box Schema
- WooCommerce Schema
- SiteNavigationElement Schema
Schema Types Available in Rank Math PRO
We’ve also added a search option in the Schema Generator to find the Schema you’re looking for quickly. In this article, we’ll be using Rank Math PRO, and we will highlight the features exclusive to Rank Math PRO so you can differentiate them easily.
Before starting, let us make it easy for you to understand the features exclusive to Rank Math PRO. They are:
- Global Schema Templates
- Importing Schema
- Custom Schema
- Advanced Schema Editor
- Code Validation
- Adding Multiple Schema on a Page
We’ll cover these features in detail as we come across them. Now let’s try to understand a simple concept, variables.
5 Variables in Rank Math
Variables are nothing but containers for values, and they are common in programming and any scientific field. Inside Rank Math’s perspective, variables represent a value that will be derived from your post. Let us explain.
If you have any experience using Schema, then you must have observed that many times, the value that you add to a Schema is already present in your post in some way.
Want to add a headline for Schema? It could be the same as the title of your post.
The description in Schema could be the same as your post’s meta description.
And so forth.
To avoid re-work, Rank Math lets you refer to this content using variables instead of adding the value every time. That is like saying, “Hey Rank Math, just use my post’s title as the headline for Schema for all my posts. I don’t want to add it manually to every post”. And you can do this for many other Schema fields, not just your titles.
Rank Math supports plenty of variables, and each of them allows you to refer to different areas of your post, your website, or other metadata. This makes it useful to set up a standard Schema to be used on multiple pages.
Here is a full list of variables you can use for Schema:
5.1 Basic
%sep%
%search_query%
%count(varname)%
%filename%
%sitename%
%sitedesc%
%currentdate%
%currentday%
%currentmonth%
%currentyear%
%currenttime%
%currenttime(F jS, Y)%
%org_name%
%org_logo%
%org_url%
5.2 Advanced
%id%
%focuskw%
%keywords%
%customfield(field-name)%
%page%
%pagenumber%
%pagetotal%
%pt_single%
%pt_plural%
%randomword(word1|word2|word3)%
%randomword_np(word1|word2|word3)%
5.3 Post
%title%
%parent_title%
%excerpt%
%excerpt_only%
%seo_title%
%seo_description%
%url%
%post_thumbnail%
%date%
%modified%
%date(F jS, Y)%
%modified(F jS, Y)%
%category%
%categories%
%categories(limit=3&separator= | &exclude=12,23)%
%tag%
%tags%
%tags(limit=3&separator= | &exclude=12,23)%
5.4 Term
%term%
%term_description%
%customterm(taxonomy-name)%
%customterm_desc(taxonomy-name)%
5.5 Author
%userid%
%name%
%user_description%
5.6 WooCommerce
%wc_price%
%wc_sku%
%wc_shortdesc%
%wc_brand%
5.7 BuddyPress
%group_name%
%group_desc%
Important Note: The WooCommerce (wc_) variables only work on WooCommerce related pages/products. Similar (group_) variables will only work on BuddyPress group pages.
6 How to Configure Each Schema Type with Rank Math
Now that you’ve understood let us move to the actual Schema types.
6.1 No Schema
While Schema is important, not all your pages need it. If you set up Schema from the global options, then by default, all your pages and posts will get some default Schema added to them. To avoid that, you can either add the Schema manually by keeping the global Schema off, or you could use Rank Math PRO to set up display conditions and have Schema appear on specific pages only.
If you’re using the global Schema and want to remove the Schema from a page, then you can just delete it. First, head to the post. You should see the Schema added to the page or post like this.
Then, you need to do this.
And the Schema will be deleted from your page.
6.2 Article
The Article Schema type should be used on all articles on your website, so we recommend setting it up as the default Schema type.
Within this Schema type, you will find several options, such as Headline, Description, and others, as seen below.
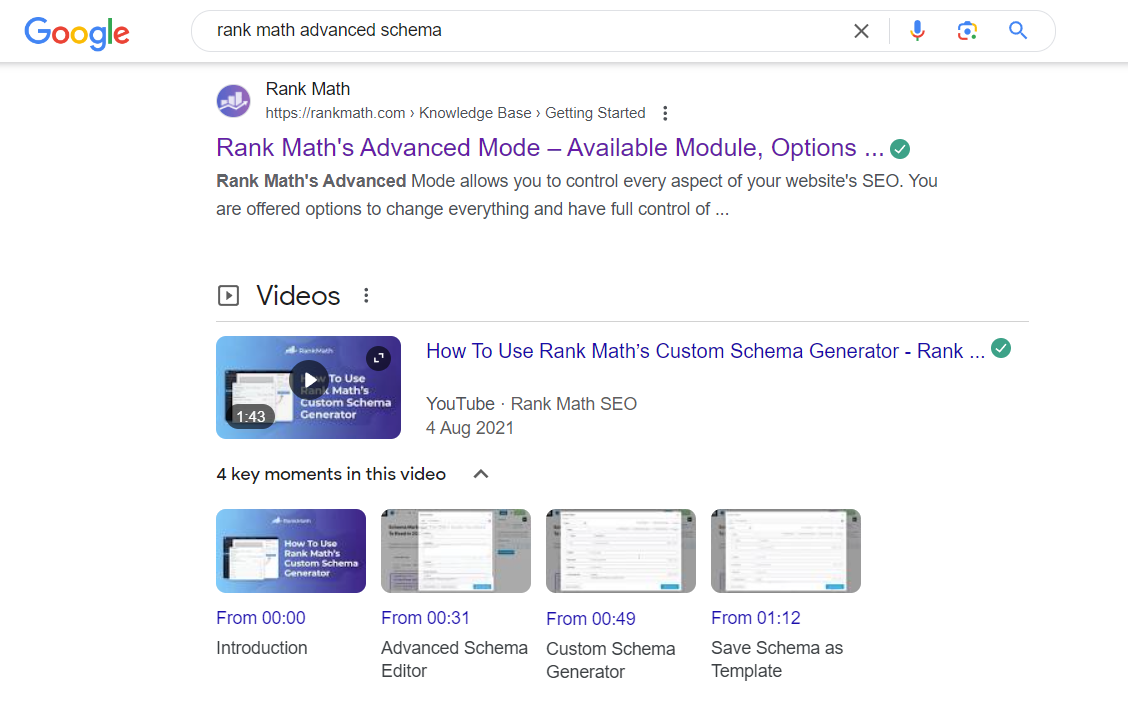
Once you have incorporated this Schema type into your articles, the rich snippet might appear in the search results, as depicted below.
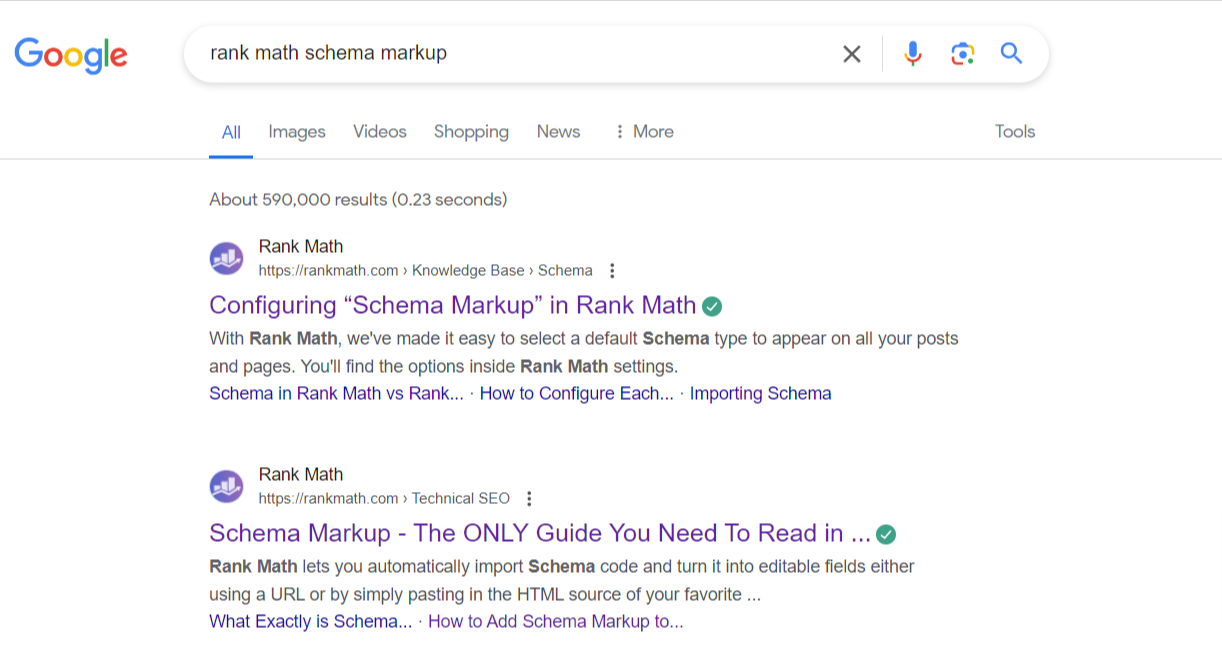
In the example above, our Knowledge Base article is displayed in search results with the SEO title and description intact. Notably, Google accurately identifies the keywords searched by the user and even links to specific subheadings within it.
And to set up this Article Schema markup, you can refer to our comprehensive guide.
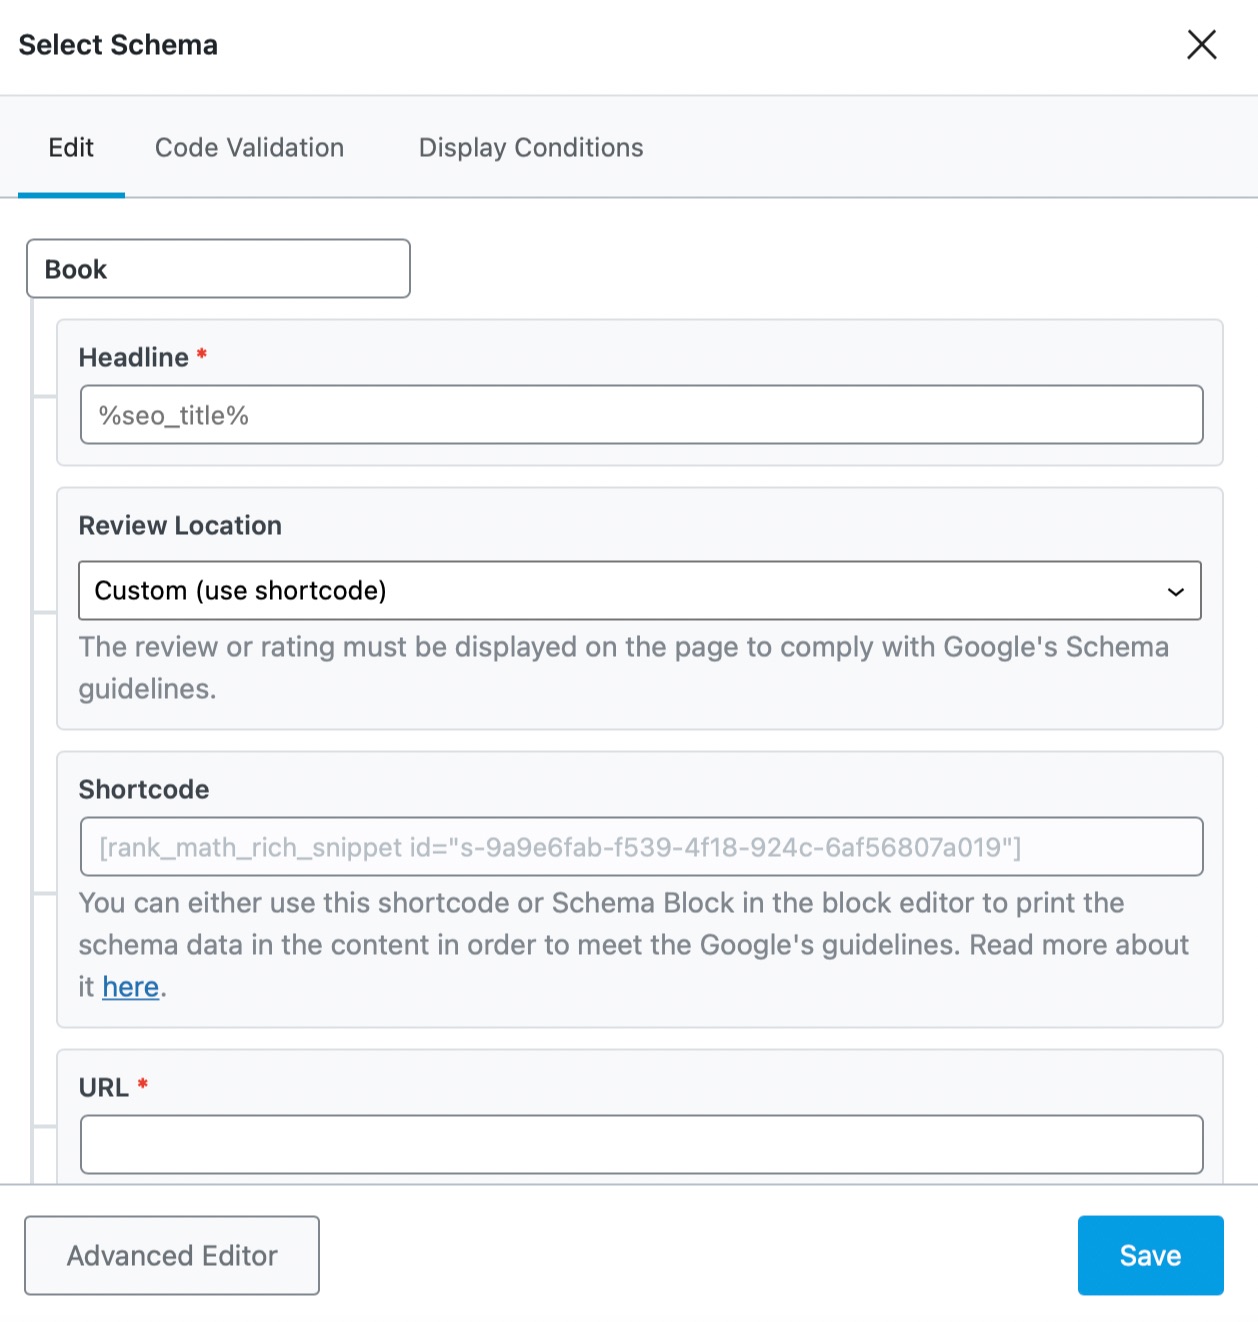
6.3 Book
If your post pertains to a book of any kind, it is recommended that you make use of the Book Rich Snippet type. When you select the Book option, you will be presented with various options that you should fill in.

Once you have configured and utilized this Book Schema type on your posts, search engines such as Google will likely showcase it as rich results on the search results page, similar to the image below.

As can be seen from the image, Google featured a book on the search results page, displaying the author’s name, reviews, date of publication, and other relevant information. This can attract more attention from potential readers or users.
To configure the properties of the Book Schema type, you may refer to our detailed guide.
6.4 CollectionPage
The CollectionPage Schema is added by default to pages that are a compilation of other posts and pages. For example, Category and Tag pages. It will also be added to your homepage (if it is set to display your latest posts and not a static page).
6.5 Course
If you’re reviewing or discussing an online course, you can use the Course Rich Snippet. Here are all the options you would see if you select the Course Schema type.
Once you implement the Course Schema type on your course pages, your website becomes eligible to display a rich snippet for courses in search results, as depicted below:
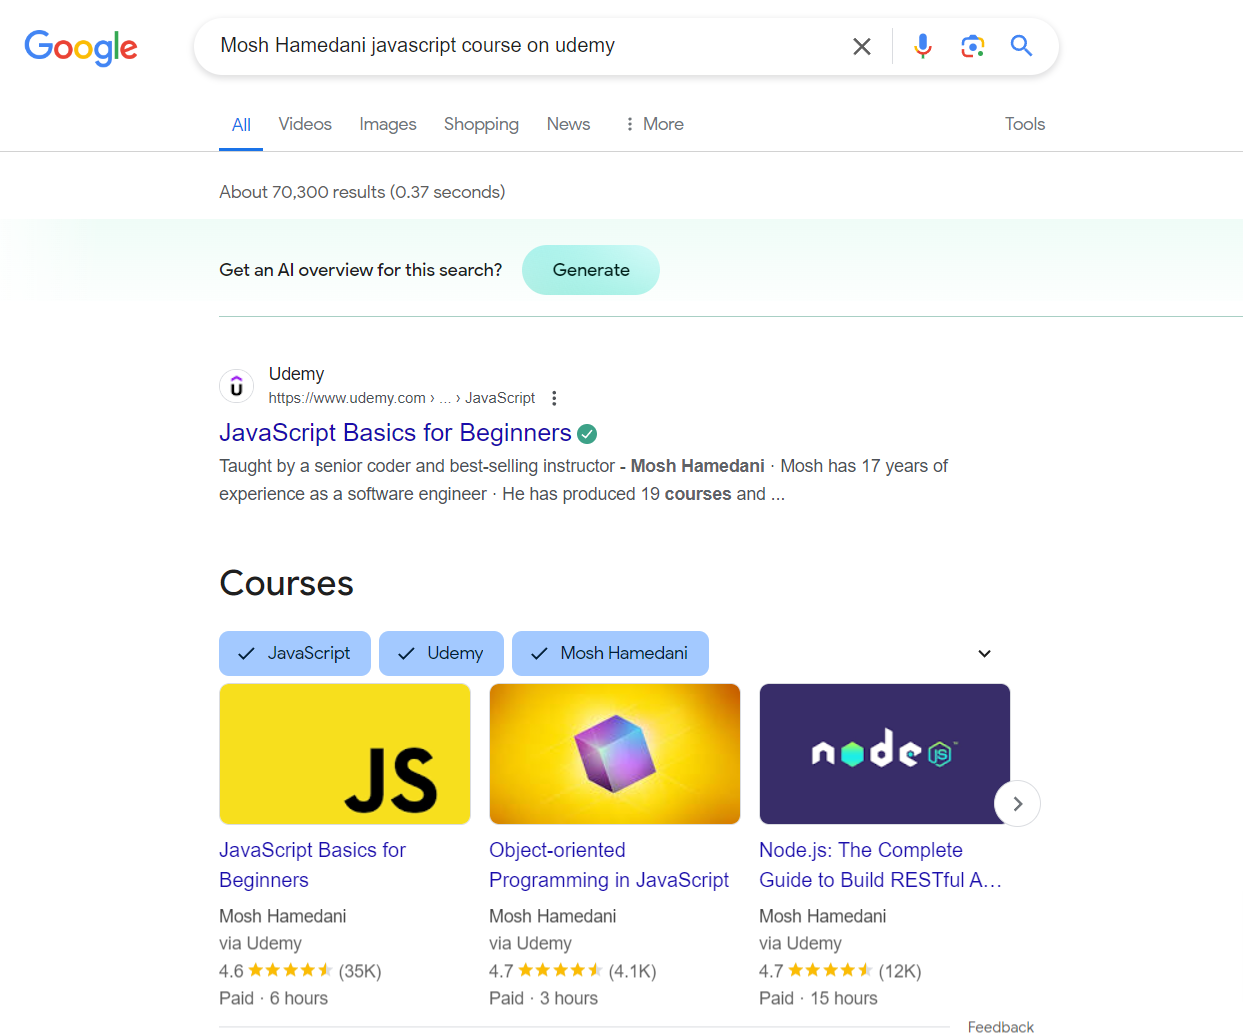
From the image, you’ll notice a course with a rich snippet highlighting key details such as the course owner, pricing category, course name, reviews, duration, and more.
These snippets can be easily configured using Rank Math by following this detailed knowledgebase article.
6.6 Dataset PRO
The Dataset Schema type is best suited for pages or posts where you are talking about a publicly accessible data set. You might just talk about the data or even draw conclusions from it—the Schema applies in both cases. You can learn more about the Schema type here.
Here are the fields you will need to configure in the Schema.
You can refer to our guide on how to configure the Dataset Schema type.
6.7 Event
Is your post or page about a public event? Then, use the Event type to markup your metadata. Here are all the fields that you should see when using the Event Schema in your post.
When utilizing the Event Schema on your web pages, Google can display them as event-rich results that may feature important details such as the date, location, address, and more, as illustrated in the image below.

That said, the Event Schema type offers a wide range of customization options. To learn more about configuring it, refer to our comprehensive guide.
6.8 FAQ Schema
If you own a page containing a list of questions and their respective answers about a particular topic, then using the FAQ Schema will help increase your page’s overall visibility.
FAQPage Schema is a structured data/markup that indicates to Google that the page has a section with Frequently Asked Questions (FAQs) and the respective answers to the questions.
With Rank Math’s FAQ Block, adding the appropriate FAQ Schema to your blog posts is effortless. You can also easily add FAQ Schema with Elementor and Rank Math. Rank Math’s advanced Schema generator helps to add FAQ Schema easily, but this feature is available only in our Rank Math PRO version.
Anytime you write a post on your website that could be made better with some FAQs, use Rank Math to quickly and easily add the appropriate Schema Markup.

In the Free version, you can add the FAQ Schema only by using the FAQ by Rank Math block from the Block Editor.
6.9 FactCheck (Claim Review) PRO
The Claim Review is used when you fact-check certain claims made by individuals or organizations. You can learn more about it on Schema.org. Google has also created a dedicated page to explain the Claim Review structured data. Google calls it Fact Check.
Here are all the options that you see in the Claim Review Schema.
So, when you incorporate the FactCheck Schema, Google will display rich results that encompass the details of the claim, who claimed it, and its truthfulness, as shown below.
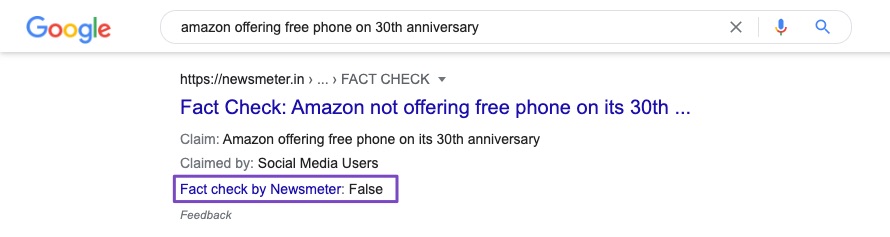
You can read our guide on configuring the FactCheck Schema type in Rank Math for more details.
6.10 HowTo Schema
If you run a website with content in the form of tutorials or explanations of any kind – you should consider using the HowTo Schema type. “How-to” snippets aim to provide step-by-step guidance directly in the SERPs for instruction-based queries.
You can add HowTo Schema Markup to pages using Rank Math’s Schema Generator, available only in Rank Math PRO.
The benefit of the Schema Generator option is that it allows the HowTo Schema to be used with Classic Editor, Elementor, or any other page builder for that matter. At the same time, the HowTo Block only works on Gutenberg.
From the free version, you can only add HowTo Schema by using the HowTo by Rank Math block from the Block editor.

6.11 Job Posting
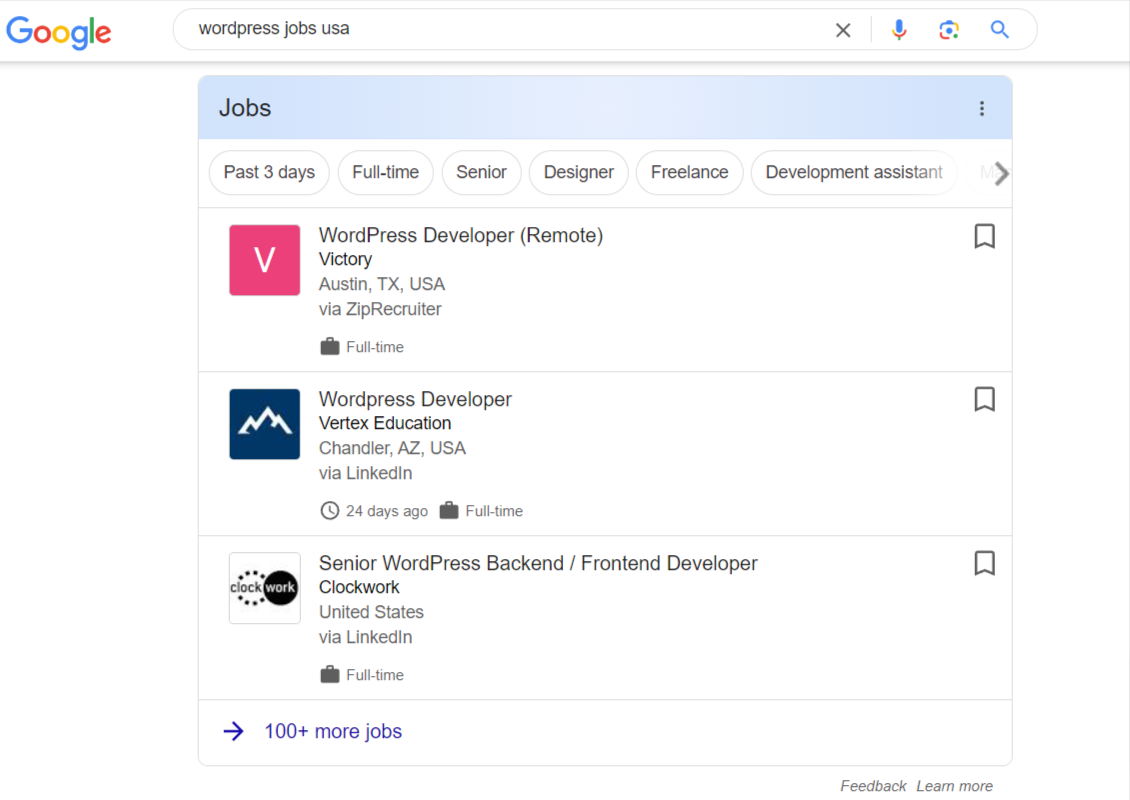
If you list specific jobs on your website, you should add the Job Posting Schema on the page. This Schema type will be most valuable to job sites, job boards, and similar websites.
Here are all the options to configure in the Schema type.

When you apply the Job Posting Schema markup to your job pages, they are more likely to be eligible for inclusion as rich results in search engine results pages.
These rich results may include important data such as the job title, location, type, date posted, and more, as shown in the image example below.
You can refer to our guide on how to configure the Rank Math Job Posting Schema type for more details.
6.12 Movie PRO
If you discuss movies in your posts, you should use the Movie Schema type. Here are the options that you’ll need to configure.

Configuring the Movie Schema markups and including them on your page can help you become eligible for your discussed movie to appear on Google rich snippets, just like the movie shown in the image below.
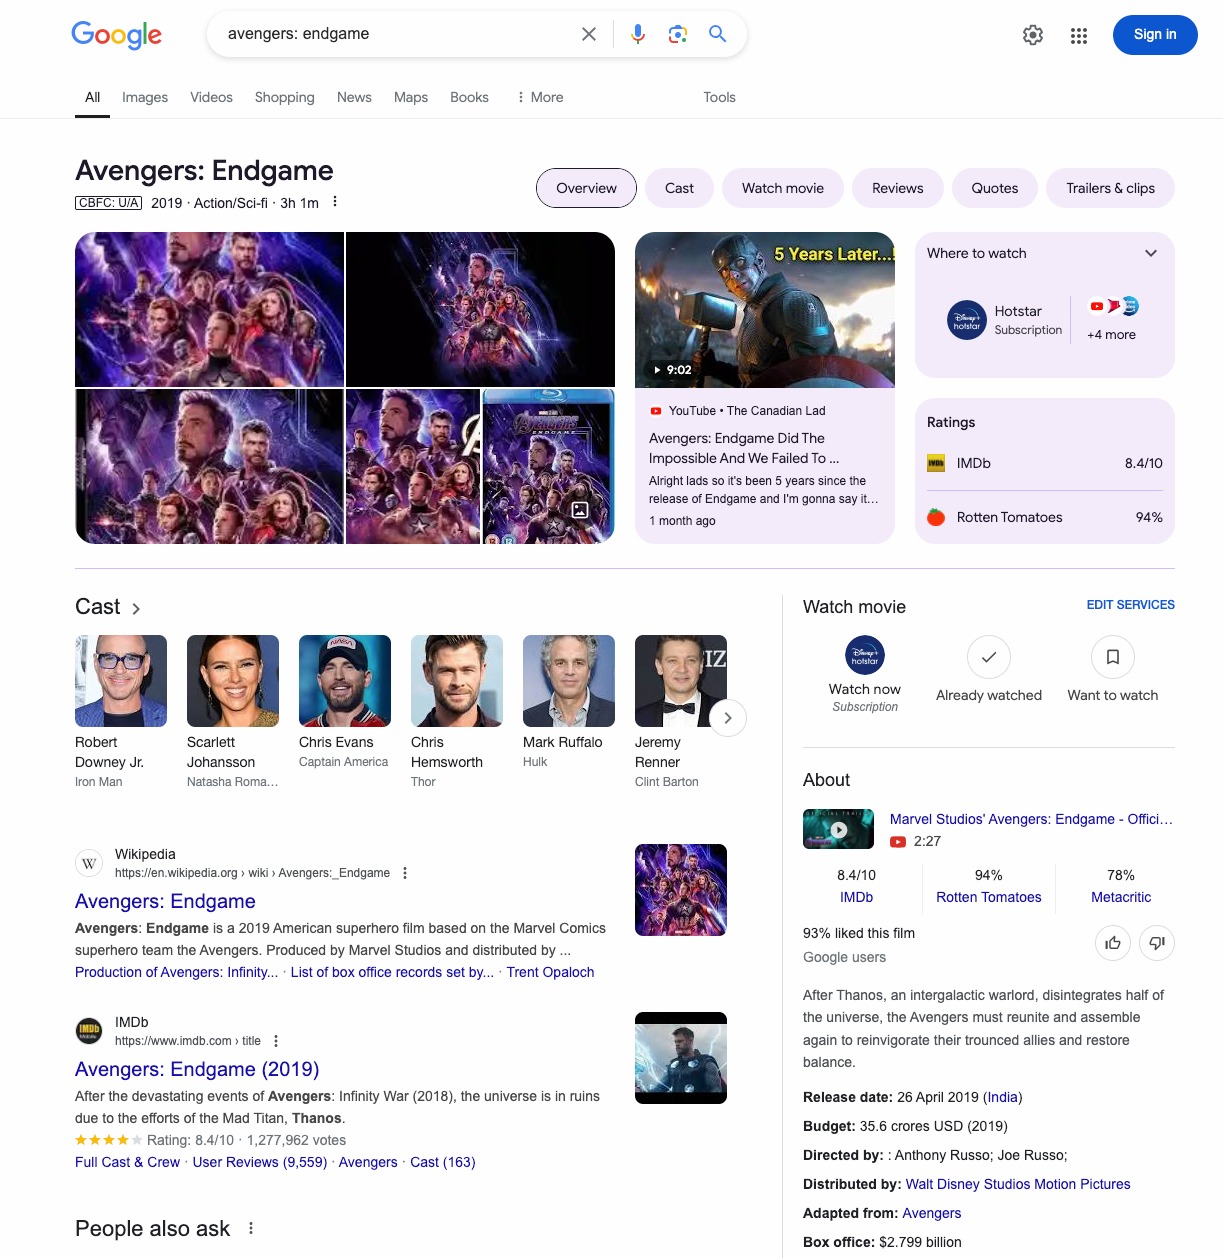
As you can see in the image, Google featured the movie’s structured data, including the name, release date, director, ratings, and other relevant information.
For more details, you can read our guide on how to configure the Movie Schema type.
6.13 Music
If your post discusses music, then you should use the Music Rich Snippet. Here are all the options that should be available for the Music Rich Snippet type.
You can refer to our detailed guide to configure the Music Schema type on your page.
6.14 Person
The Person Schema type is to be used when discussing a specific person on your page, and you want it featured on rich snippets in search results. The person can be alive, dead, undead, or even fictional.
Here are all the options that are visible when you select the Person Schema type.
Here is a detailed guide to help you configure the Person Schema type.
6.15 Person or Organization
The Person Schema is included by default when the site is operated on behalf of a person. Similarly, the Organization Schema is added by default when the site is operated on behalf of an organization.
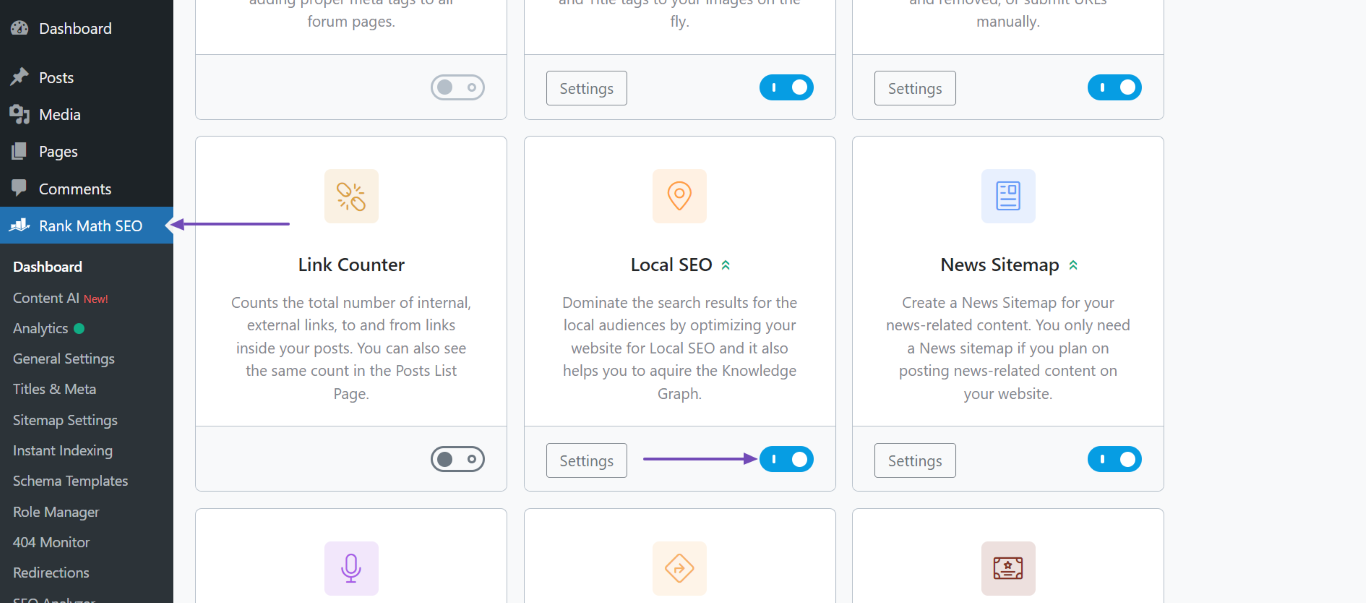
You can access the Person and Organization Schema by heading to WordPress Dashboard → Rank Math SEO and enabling the Local SEO module, as shown below.

Next, navigate to Rank Math SEO → TItles & Meta → Local SEO.
Now, head to Person or Company and select Person if the site is owned by a person or Organization if an organization owns it. Once done, scroll down and click Save Changes.

6.16 Podcast Episode PRO
When you list your podcast episodes on your page, you can use the Podcast Episode Schema type to help search engines understand and display your podcast episodes as rich snippets in search results.
These snippets can include details like episode titles, guest names, and even thumbnail images, making your podcast stand out and enticing users to click.
When you select the Podcast Episode Schema type, it will look like this:

You can further refer to our guide on for configuring the Podcast Episode Schema markup.
6.17 Product
The Product Rich Snippet is particularly beneficial when featuring products on your website, whether as reviews or affiliates. Moreover, if you operate an eCommerce store, it’s recommended to incorporate the Product Rich Snippet into your product pages.
Here are all the options that you would see in the Product Rich Snippet.
Utilizing the Product Schema markup on your web pages enables Google to display the product’s rich results in search results.
These rich results may include important details such as product prices, reviews, ratings, availability, and more, as shown in the image below.
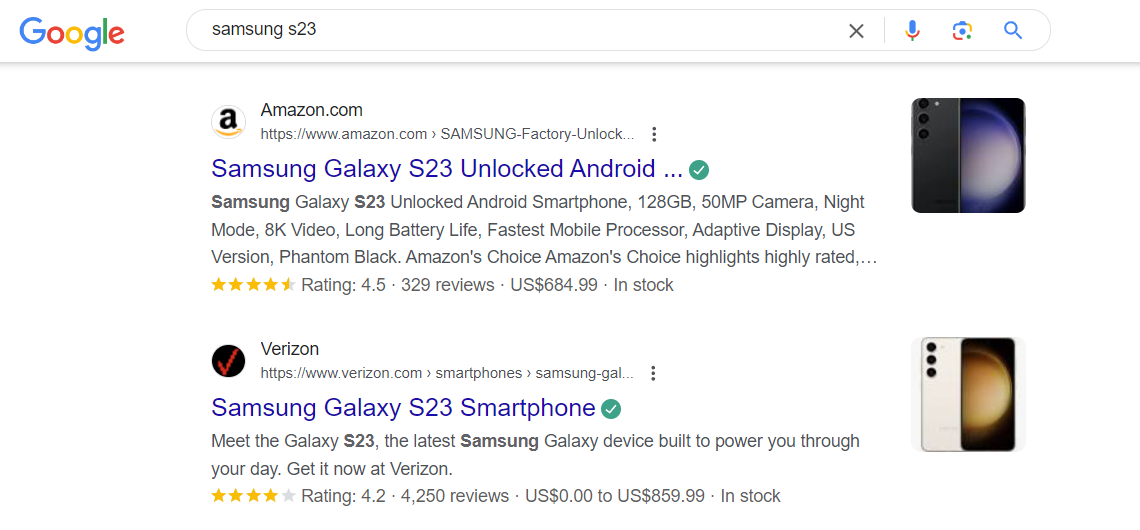
You can refer to our detailed guide to configure all the essential properties for the Product Schema type.
6.18 ProfilePage
The ProfilePage Schema is added to your author pages by default. You can disable it by heading to WordPress Dashboard → Rank Math SEO → Titles & Meta → Authors.
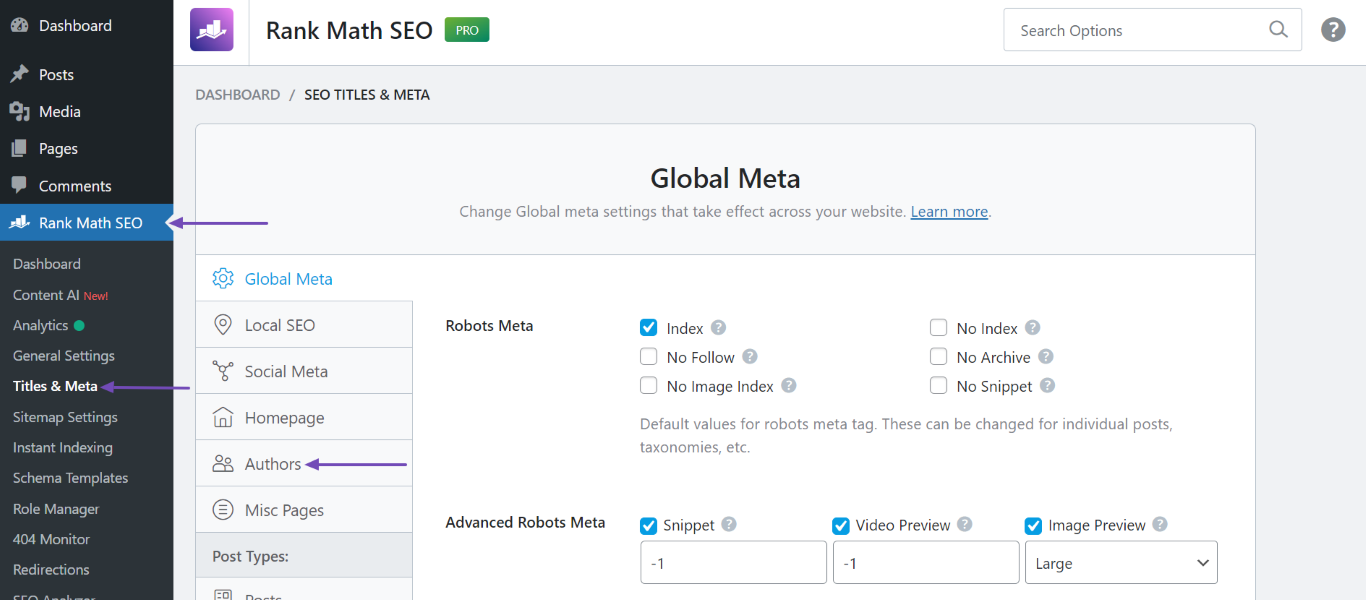
Then, navigate to Author Archives and click Disabled. Once done, scroll down and click Save Changes.

6.19 Recipe
Are you discussing food or beverages? Adding the Recipe Schema can be a valuable addition to your page. However, remember that there are many settings to configure in this Schema.
Here’s the thing: the recipe world is highly competitive, with search engine results flooded with rich snippets. To stand out and attract more traffic to your recipe website, it’s crucial to meticulously configure and fill in all the details within this field.
Here are all the options that you’ll need to configure.

Once you’ve applied the Recipe Schema markup to your recipe pages, they become eligible to appear as rich results on search engines like Google, as shown below:
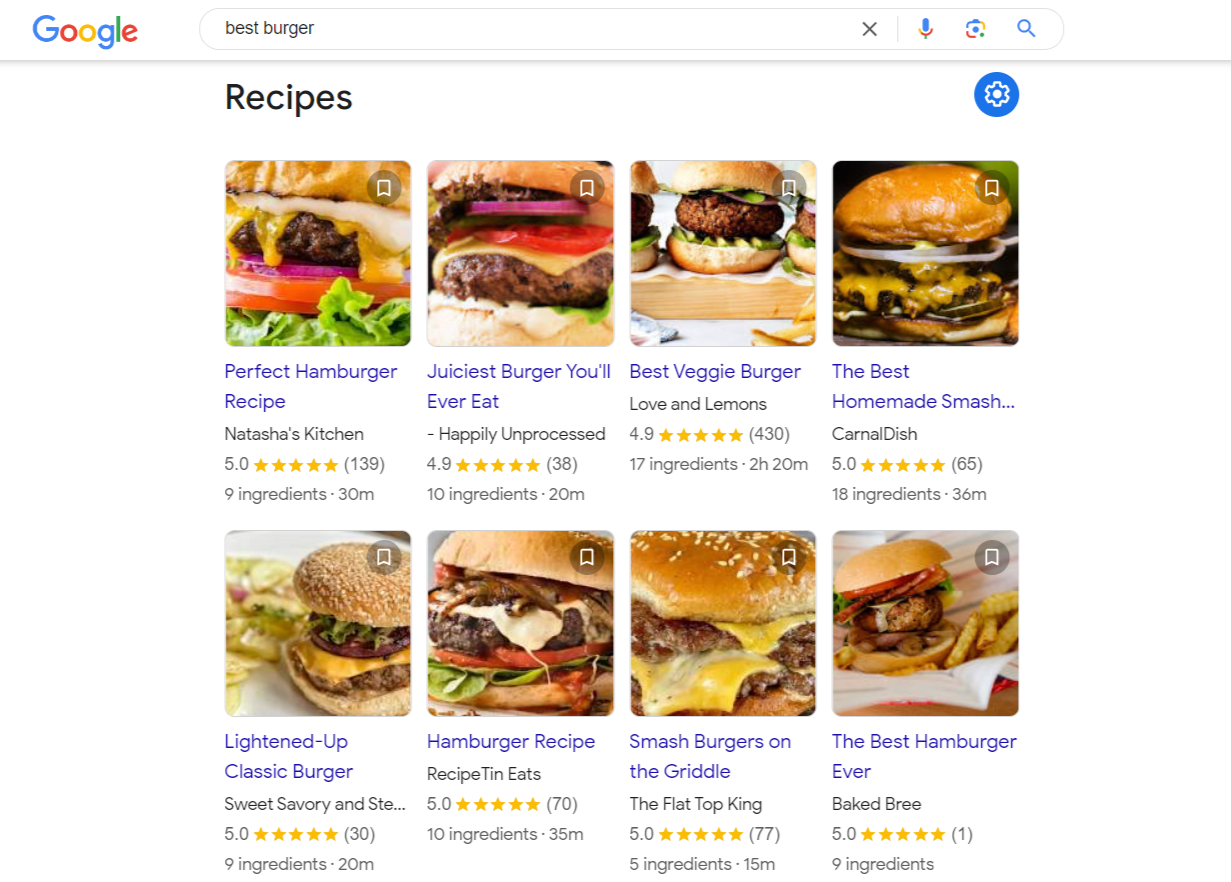
To configure Recipe Schema markup, follow our detailed guide over here.
6.20 Restaurant
The Restaurant Rich Snippet should be used when your post discusses a food joint, cafe, or restaurant. Here are all the options that you would see when you select the Restaurant Schema type.
For more details, you can follow our guide on how to configure the restaurant Schema type.
6.21 Service
The Service Rich Snippet should be used when you’re talking about a specific service. For example, if you’re talking about a local business, a plumber, or an electrician, you’d use the Service Schema.
You can also use this Schema type on your own local business website. Here are the options that you’ll need to configure.
To configure the Service Schema options, you will want to follow our detailed guide on how to do that.
6.22 Software Application
The Software Application Rich Snippet is used when you’re talking about software applications. If you sell or discuss software products on your website, then you should use this Rich Snippet Type.
Here are all the options that should be visible to you.

By implementing the Software Application Schema, you enable search engines to grasp the content of your page and gather information about the software you’re featuring or evaluating.
This, in turn, makes your page eligible to appear as rich snippets in search results, as shown below:

In the image provided, you’ll notice a rich snippet of the app displayed in search results, showcasing details such as the app name, description, ratings, category, and offers.
Similarly, your rich snippet could display these details when you use the Software Application Schema.
To configure this Schema type effectively, refer to our detailed guide.
6.23 Video
When you’re discussing a video in your post, you should use the Video Rich Snippet.
Here are the options that you would see when you select the Video Schema.
When you apply the Video Schema to videos on your page, it streamlines the process for search engines to comprehend your video content, thus facilitating the display of its details on search results.
In the image above, you’ll notice that Google has showcased various details of the featured video, including the title, thumbnail, upload date, source, and even specific video clips or moments.
To implement the Video Schema on your page and ensure similar visibility for your videos, you can follow our detailed guide on configuring the Video Schema type.
6.24 About and Mentions Schema PRO
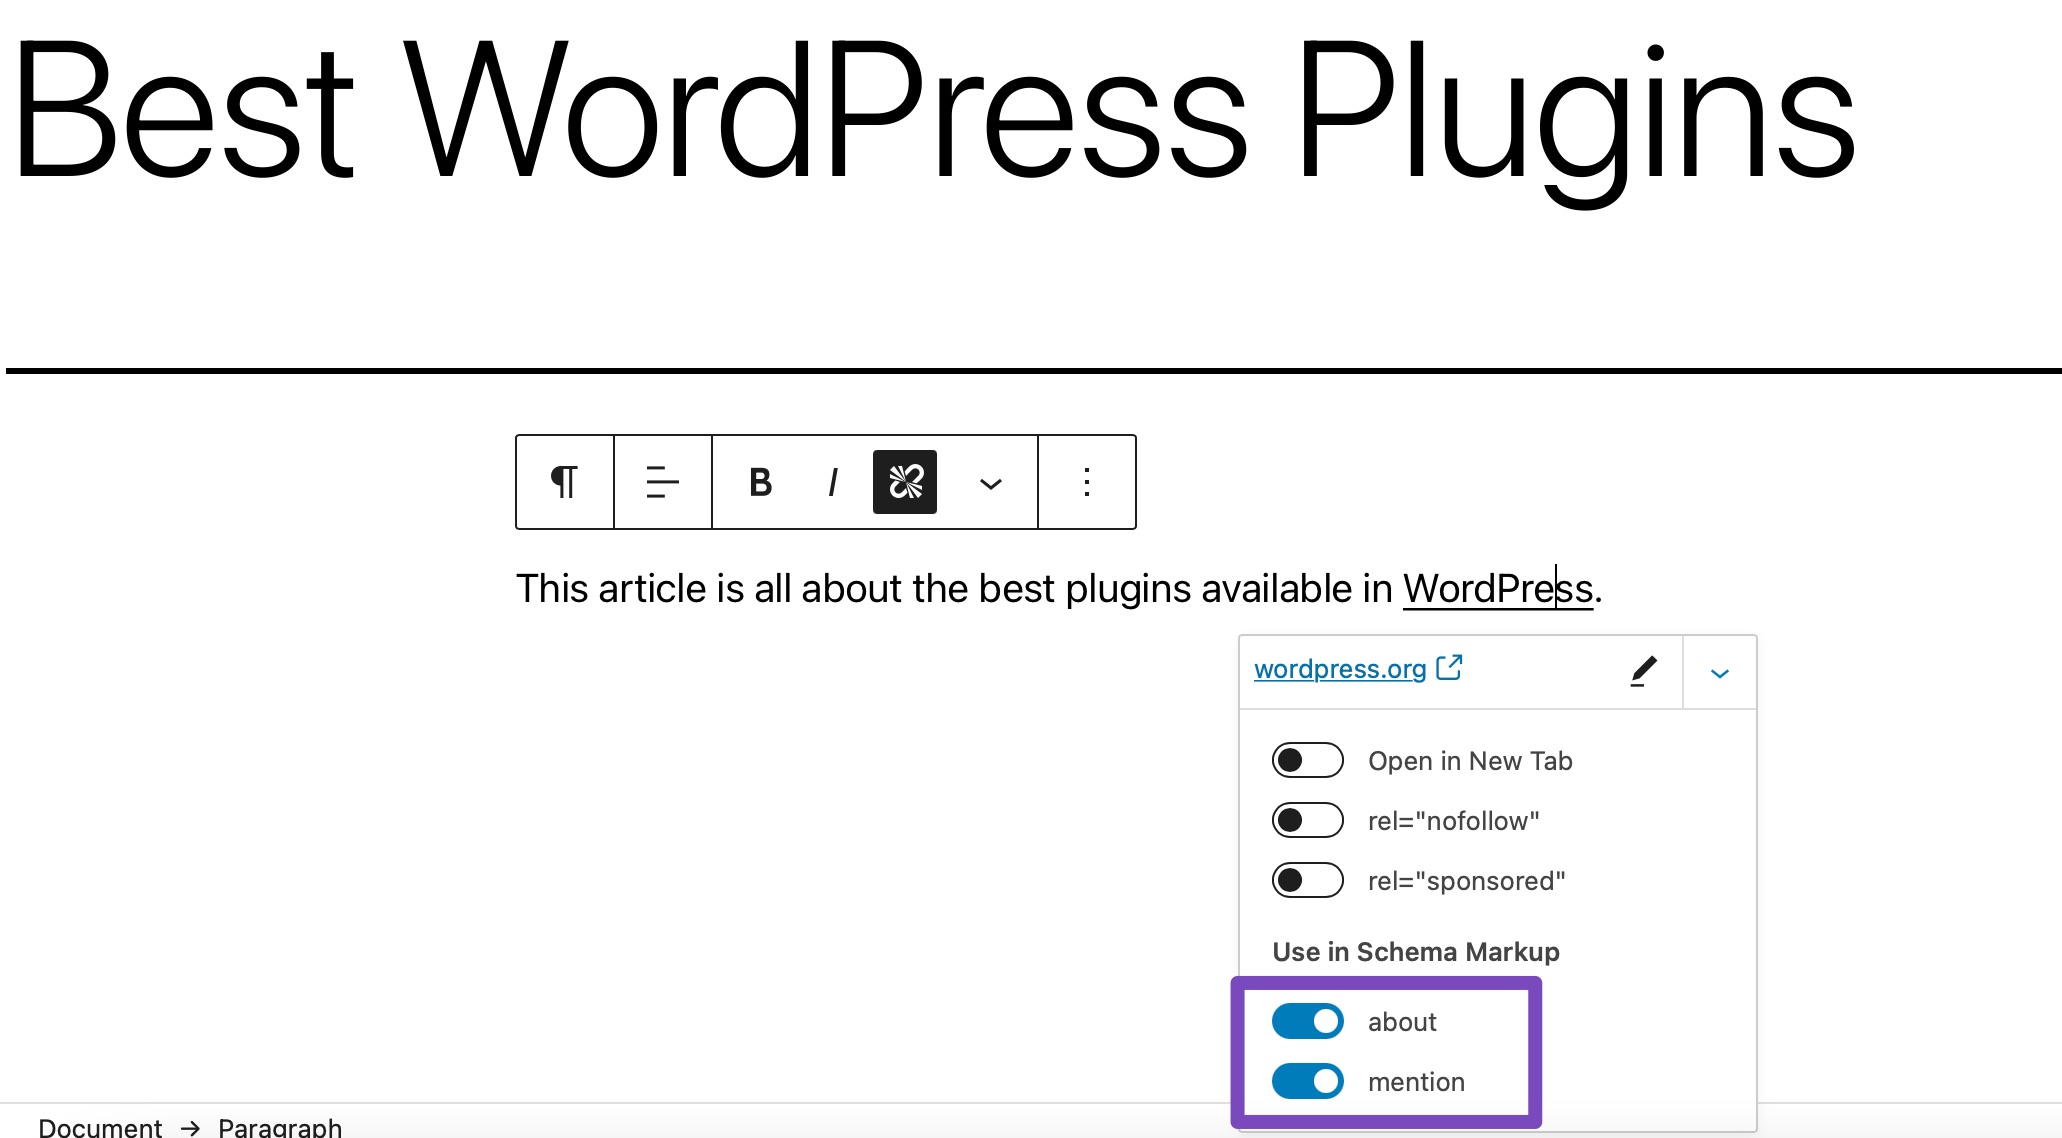
You can make the most of the About and Mentions Schema by appending extra information to your outbound links to mark them as mentions or references. Note that this is only available in the Rank Math PRO version.
You can add an About and Mentions Schema in your post by adding a link to your text and enabling the About and Mention option as shown below:
To learn more, please refer to our dedicated KB article covering About & Mentions Schema here.
6.25 Blog Posting
Article objects can be based on one of the following types: Article, NewsArticle, Blog Posting. Adding BlogPosting Schema Markup to your blog posts helps search engines quickly find out what the post is all about and increases the chances of getting ranked higher in the SERPs. The Article and Blog Post fields can be used interchangeably.
6.26 Breadcrumb Schema
Adding Breadcrumbs to your website can help improve your website’s navigational experience. Rank Math makes it easy to include Breadcrumbs on your website and includes the relevant Breadcrumb Schema.
To enable Breadcrumbs on your website, navigate to Rank Math SEO → General Settings → Breadcrumbs in your WordPress dashboard and activate the Enable Breadcrumbs function.
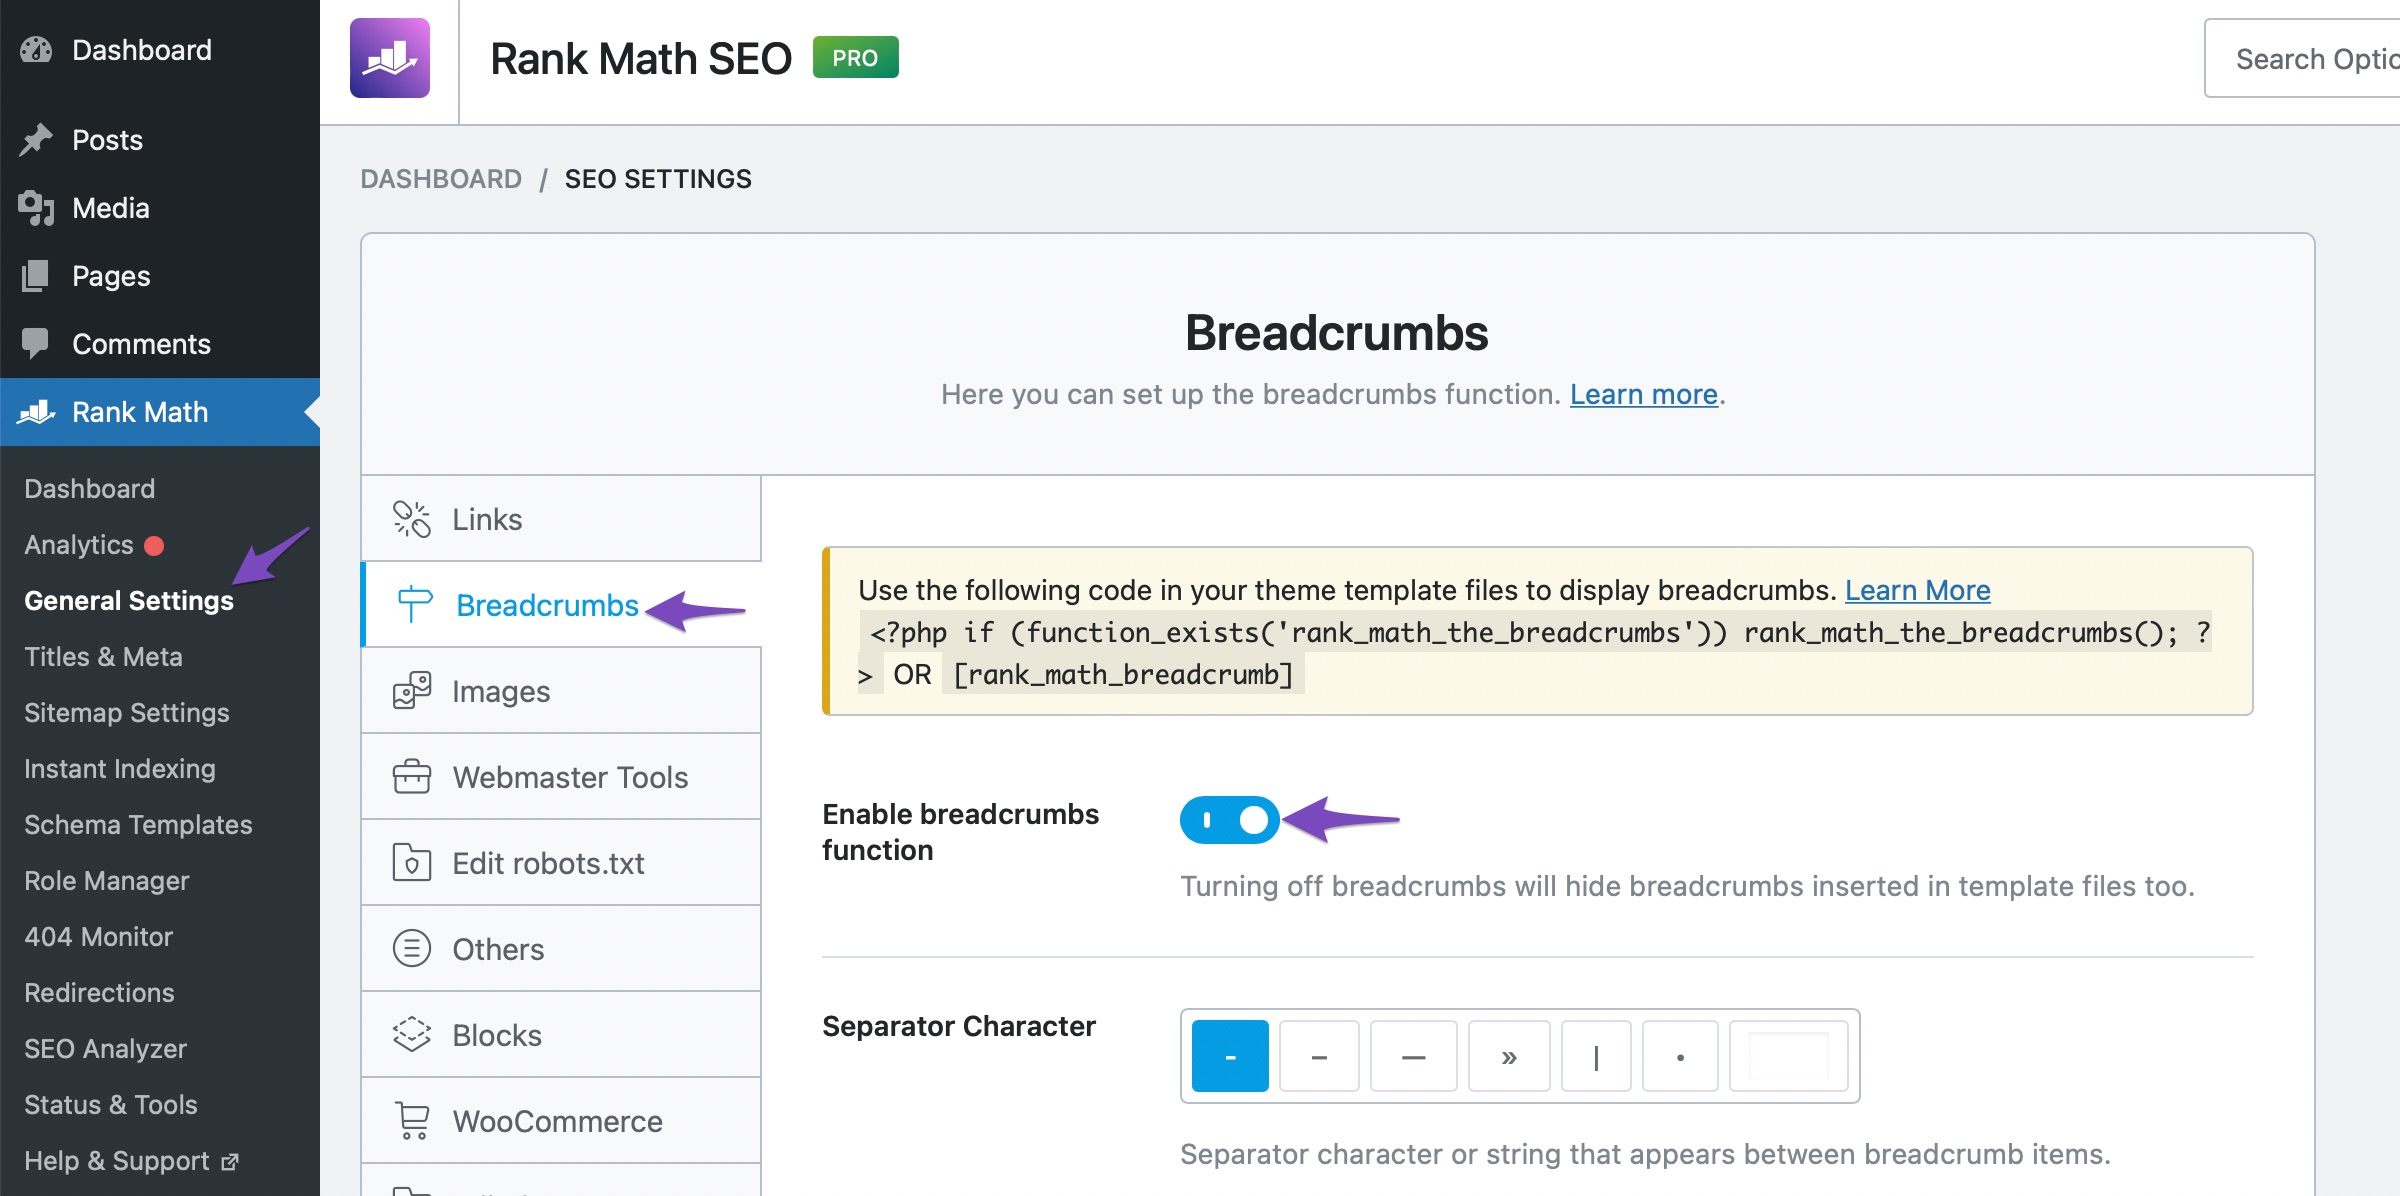
Once Breadcrumbs is activated and placed inside your website using the shortcode or using the function, Rank Math automatically adds the Schema code.
To configure all the settings relevant to Breadcrumbs, please refer to our detailed documentation on Breadcrumbs.
6.27 Carousel Schema PRO
Carousel structured data is a horizontal list of search results displayed in a carousel format. In most cases, the Google search engine displays a carousel of movies with the content image, title, and year of release. This is also used for books and a variety of other items.
Rank Math PRO automatically adds Carousel Schema to a post/page when a user uses multiple Schemas of the same type. For example, when a user uses Course Schema two times for two separate courses, Rank Math will add the Carousel Schema to that page apart from the Course Schema.
6.28 Easy Digital Downloads Schema
Rank Math works seamlessly with Easy Digital Downloads and similar plugins, which help you sell digital products online with your WordPress website. Rank Math detects if the EDD is installed on your website and adds Schema configuration settings to the Title and Meta settings inside Rank Math.
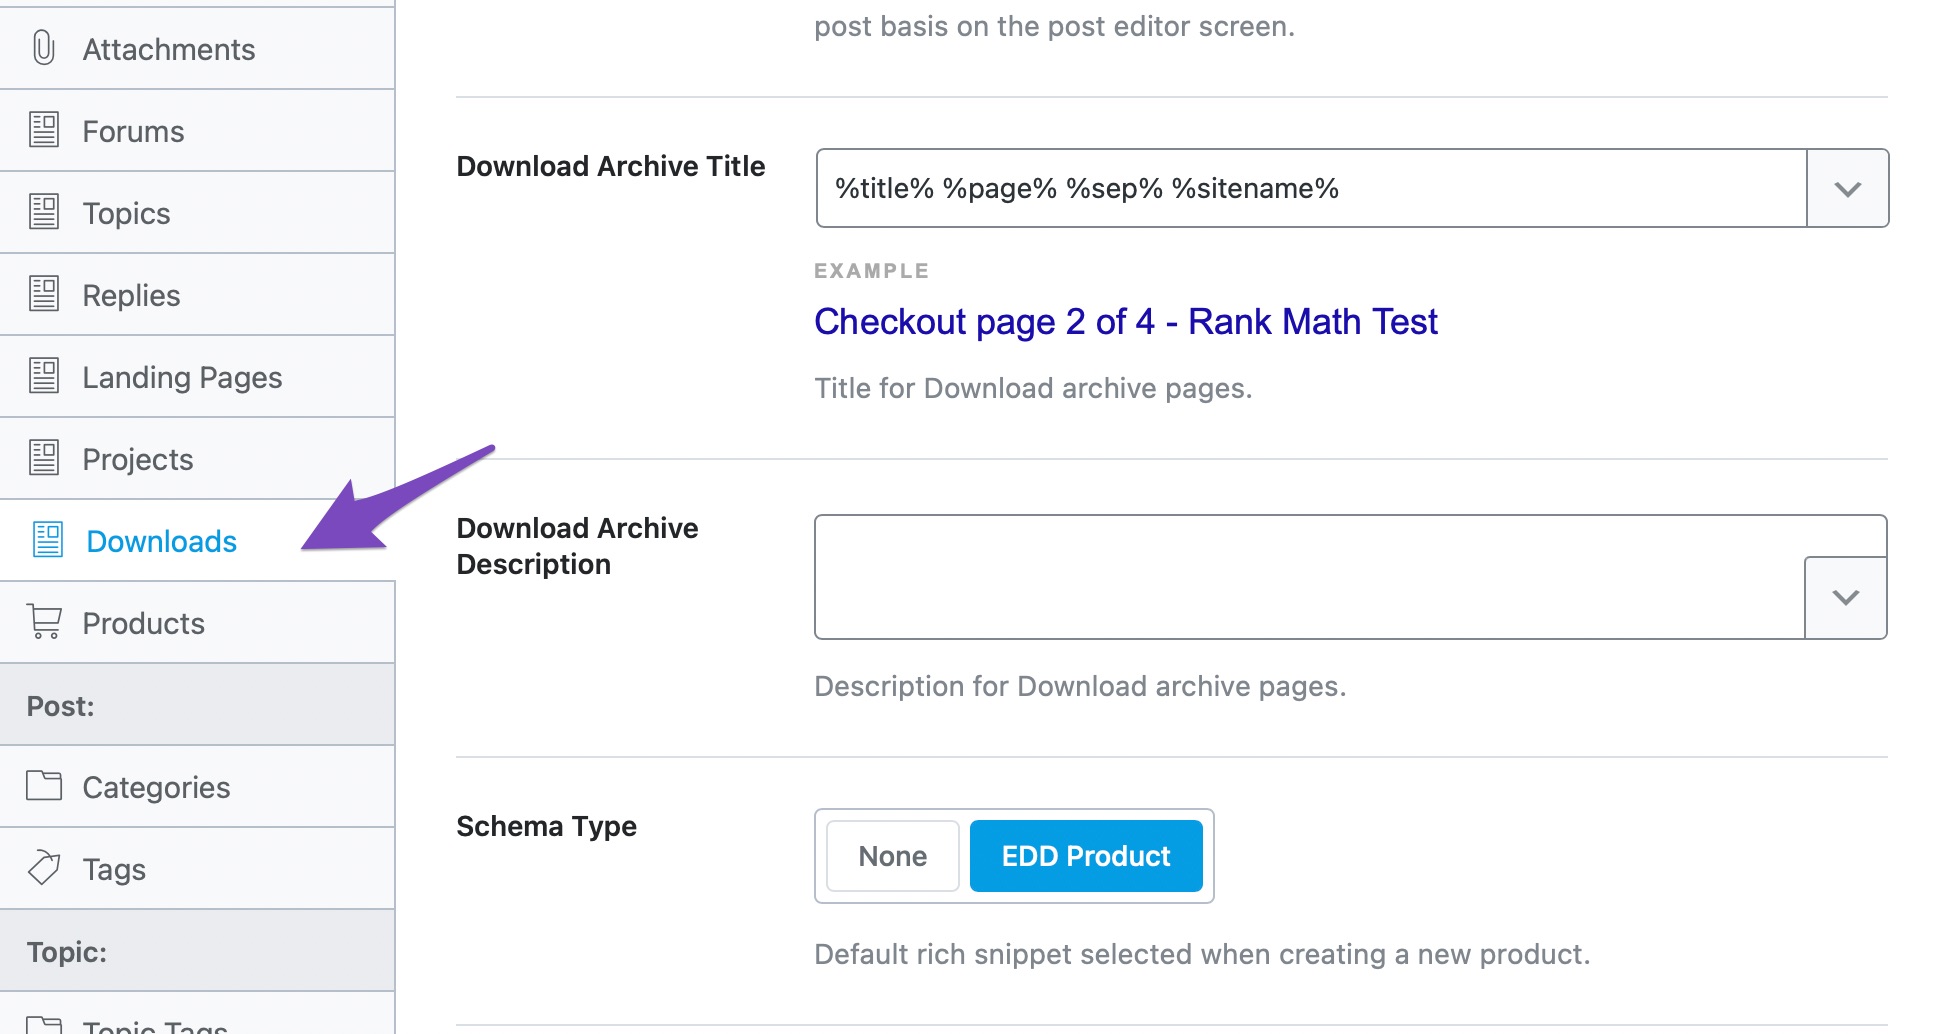
Rank Math will also add the appropriate Schema to any of the products you create, and they will inherit the settings from the global settings. You can customize the Schema just as you would customize any other Schema.
6.29 ItemList Schema PRO
ItemList refers to the list of items. All URLs in the list must refer to separate pages on the same domain if used on a summary page. You can also read the complete definition of ItemList in Schema.org’s documentation if you wish to understand how it works from a technical perspective.
Rank Math adds ItemList Schema automatically to a category, product, and tag archives. For this functionality to work, you have to enable the Schema module in your Rank Math Dashboard (in your site’s WordPress admin area) located under Rank Math SEO → Dashboard.
6.30 Local SEO Schema
Rank Math also features dedicated Schema (Structured Data) settings specifically for local businesses (i.e., businesses that serve customers at one or more physical locations). This is part of Rank Math’s Local SEO Module.
For a full guide on how to set up Rank Math’s Local SEO module, create new locations, show your business & location information on the front-end of your website (which is advised if you’re using Local SEO Schema) & every other available setting, please refer to our documentation on Local SEO.
6.31 News Article Schema
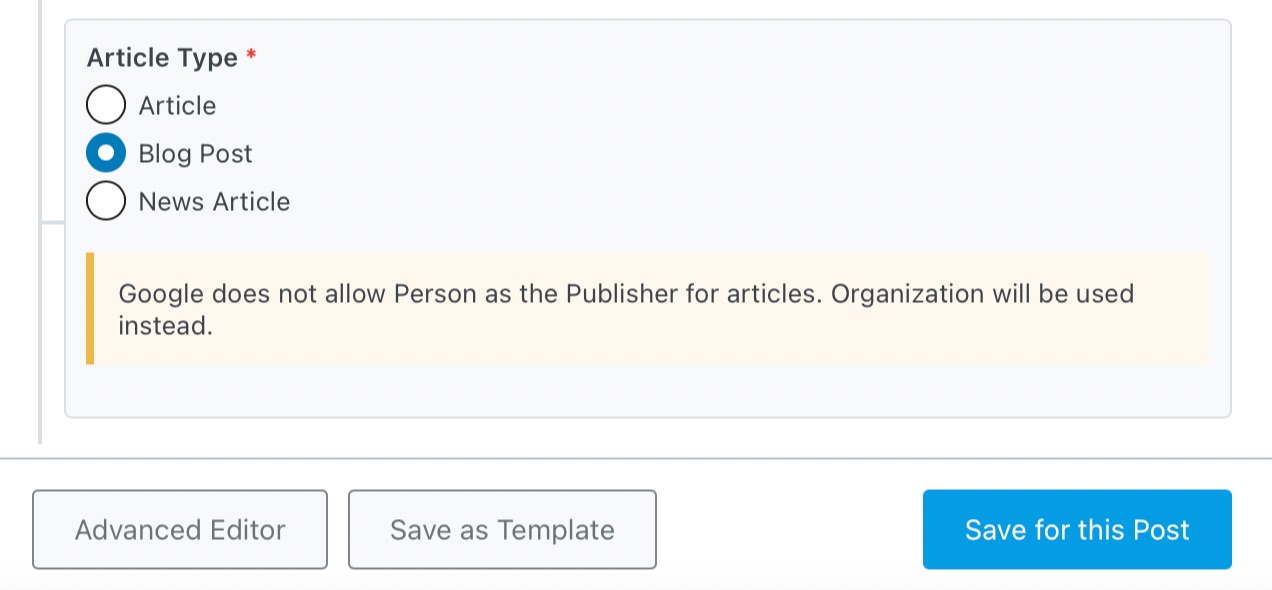
A NewsArticle is an article whose content reports news or provides background context and supporting materials for understanding the news. In addition, a non-post format (e.g., a page, a custom post type, a homepage, a product page, etc.) may be elected as a news type in some rare cases. A more detailed overview of News Markup is also available.
Rank Math supports News Schema, and you can choose your article to be News Article for the factual news content.

6.32 Q&A Page Schema PRO
Q&A Schema is used on pages in the question and answer format, and what it means is that the content of the page is to be marked with QAPage, Question and Answer structured data types.
If you’re running a forum, you should consider adding a Q&A Page Schema for your forum pages. Rank Math can automatically detect if the bbPress plugin is used on your website and activates the bbPress module.
Once the module is activated, you don’t have to configure any settings specific to the Q&A Page Schema. Rank Math automatically includes the Q&A Page Schema when the forum topic is marked resolved, thus taking the weight off your shoulders in improving the discovery of your forum in search results.
6.33 Sitelinks Search Box Schema
Sitelinks are additional links that appear underneath a search result. They are known to increase the visibility of your website in search results, and at times, they include a search box. Although the decision to include the sitelinks and search box for your website’s search result is solely the decision of Google, adding appropriate Schema can help increase your chances.
When the Schema module is enabled, Rank Math automatically includes the Sitelinks Search Box Schema to your website according to Google’s guidelines. Hence, you don’t have to configure any additional settings to experience this functionality.
6.34 Speakable Schema PRO
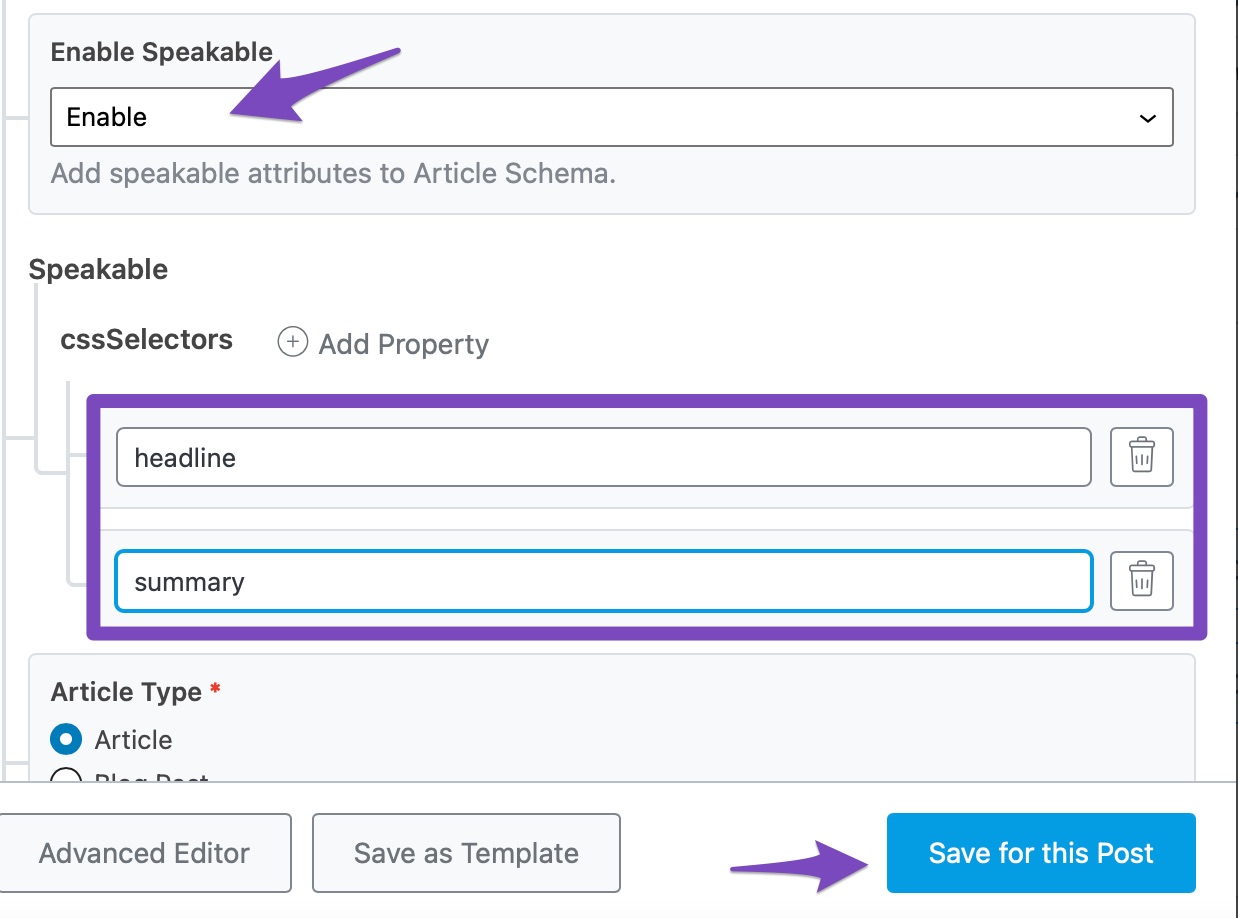
With the rise in the number of voice searches and everyone looking to get ahead of the game, Speakable Schema makes your most important information coherent and easy to read.
The Speakable Schema available in Rank Math PRO lets you select the information you want Google to read and use for your audience. Rank Math will add the appropriate markup to the post, informing Google where it should pick the text to speak to the user.
6.35 WebPage
The WebPage Schema specifies that a page is a webpage. It is added by default to your webpages and contains details like the date the page was published and modified. It also includes the page’s URL, title, and language.
6.36 WebSite
The WebSite Schema contains the details of your site, including its name, alternative name, and whether a person or organization owns it. It is added to your site by default.
You can configure your WebSite Schema by heading to WordPress Dashboard → Rank Math SEO. Once done, enable the Local SEO module.
Next, Rank Math SEO → Titles & Meta → Local SEO.

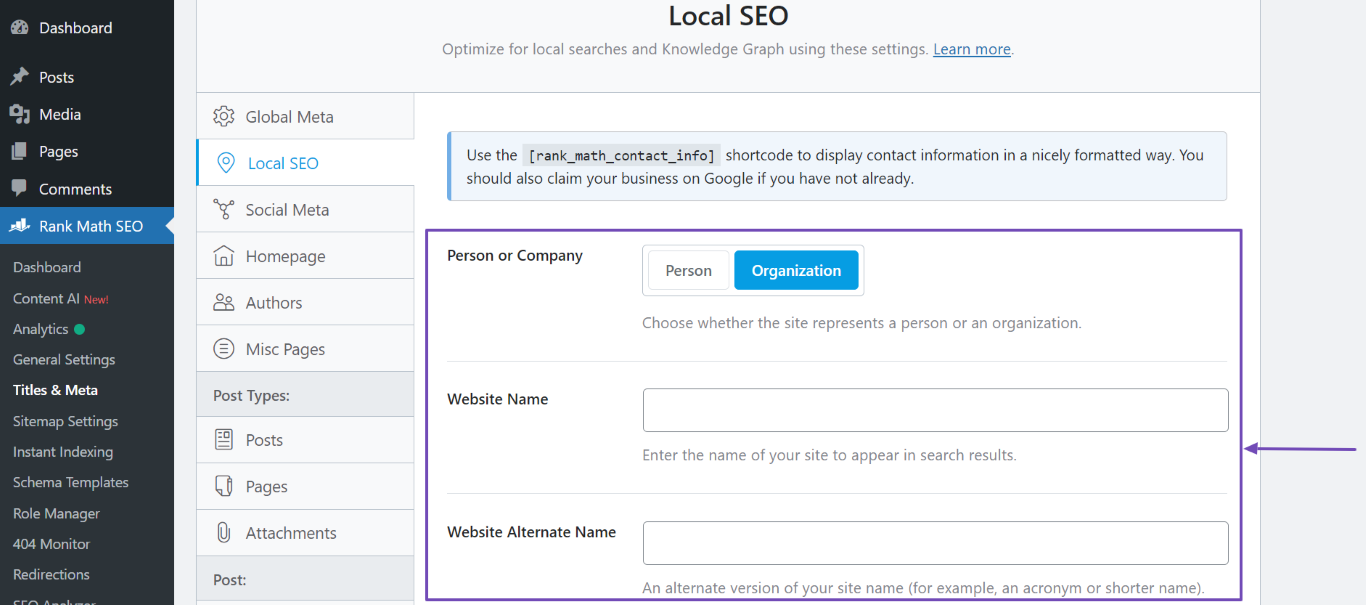
You will see several options on the page. You can edit your WebSite Schema using the Person or Company, Website Name, and Website Alternate Name settings, as shown below.
Here is how you configure the WebSite Schema.
Person or Company
Select whether the website belongs to a person or organization.
Website Name
Enter the name of the website.
Website Alternate Name
Enter an alternative website name. This could be an acronym or a shortened version of your site name. If your site has no alternate name, leave this field blank.
6.37 WooCommerce Schema
If you operate an online store with WooCommerce, you should definitely enhance your products with the Schema to increase sales and attract more traffic. Rank Math automatically detects if you install WooCommerce or similar plugins and adds the appropriate Schema to your product pages.
The interface looks different, as WooCommerce uses the classic interface. Unlike the other Schema types we’ve discussed so far, you don’t need to add/edit the data in the Schema Editor.
Instead, Rank Math will automatically pull the product data from WooCommerce. This ensures your Schema data and WooCommerce product data are always accurate, irrespective of any changes in the product’s data (like price, availability, ratings, etc.).
If you’d like to configure the details of the Schema that is added to products, some global configurations are available at Rank Math SEO → General Settings → WooCommerce, and for the rest, you can configure at the Titles and Meta settings inside Rank Math. We’ve got a dedicated guide to help you with WooCommerce Schema settings.
6.38 SiteNavigationElement Schema
Rank Math automatically includes the SiteNavigationElement Schema for the headings added to the Table of Contents by Rank Math.
We have a dedicated tutorial to help you add Rank Math’s Table of Contents block.
Saving Your Schema
Once you’ve filled in all the information in the Schema, it is time to save. But, when you go to save, you’ll see two different options (if you’re using Rank Math PRO). The options to Save for this Post and Save as Template.

Let us understand the differences.
7 Introducing Schema Templates – Supercharging Schema PRO
Traditionally, Schema in Rank Math worked in the following steps.
- You choose a type of Schema to be added to your post/pages
- You customize the data added to the Schema code from the page itself
This system works beautifully, but it has its limitations. As your website grows and introduces multiple types of pages, you would want to have more control over the Schema data that you add to the pages.
That is why we created Schema Templates.
Using templates with Schema will make working with Schema much faster, easier, less prone to errors, and also will avoid issues with keeping Schema updated on pages—all at the same time.
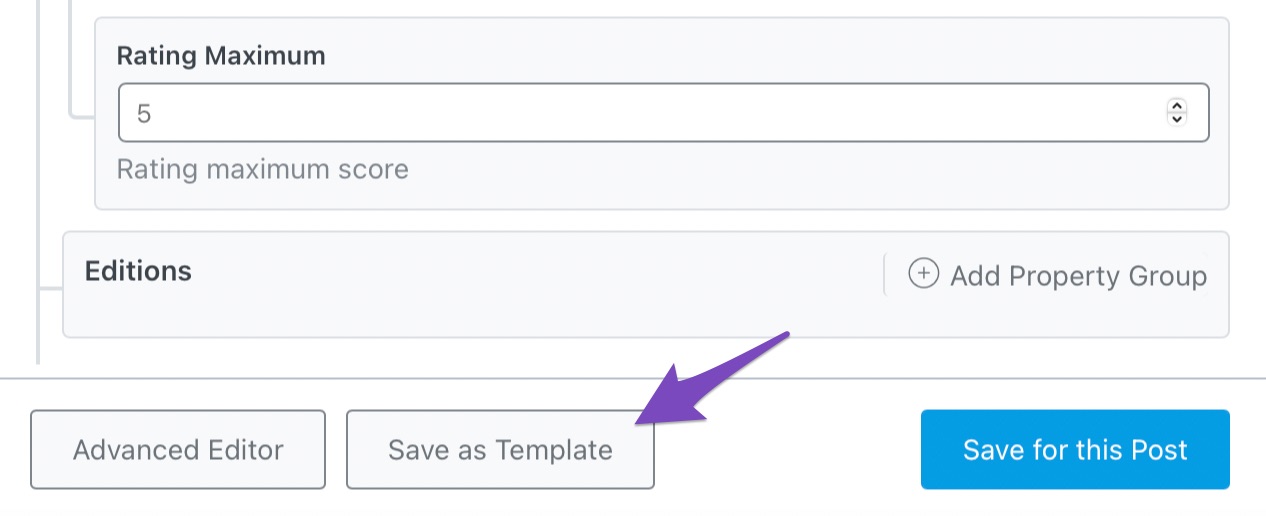
As we mentioned above, when you create a Schema from the post itself, you can create a template for your current configuration by simply clicking the “Save as Template” button.
However, you also have a dedicated interface from which you can start creating templates. And that interface offers additional benefits. We will cover them in detail later in the article; right now, let us get back to the schema creation option and finish setting it up.
7.1 Saving the Schema (Again)
We’ve filled up all the information in the Schema post, and now we’ll save it as a template.
Once saved, you should see the button change to something similar. We’ll also save the Schema for this post.
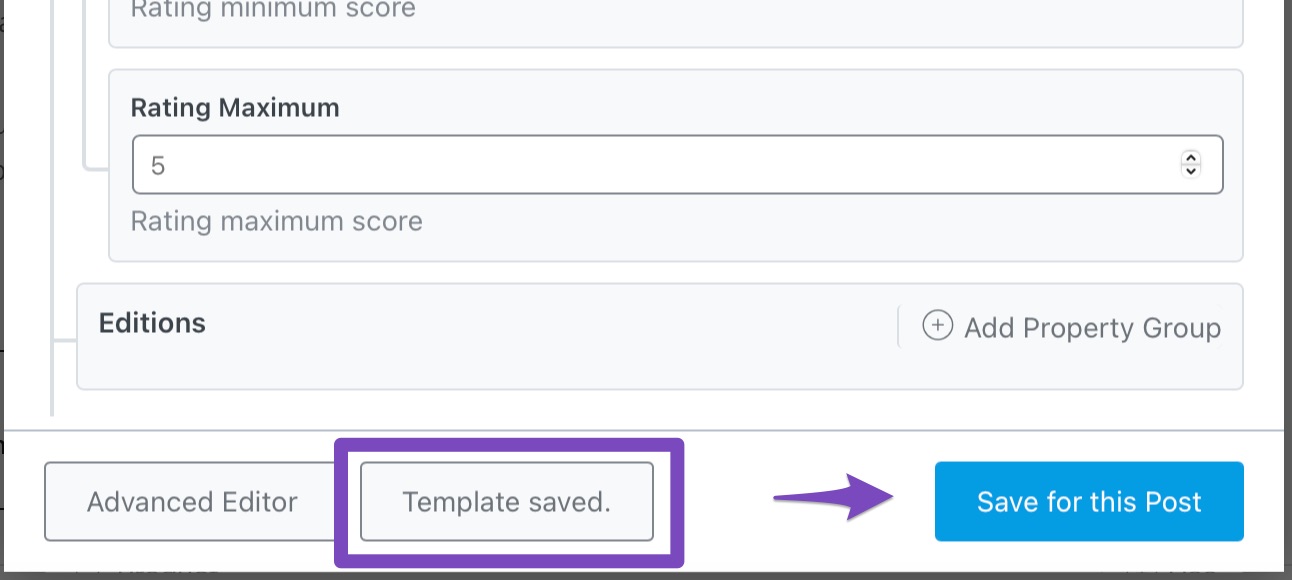
The template button change is temporary, after which it goes back to “Save as Template”. If you don’t see it and try to save the Schema as a template again, you will get a warning, which is a sign that the template was already saved.
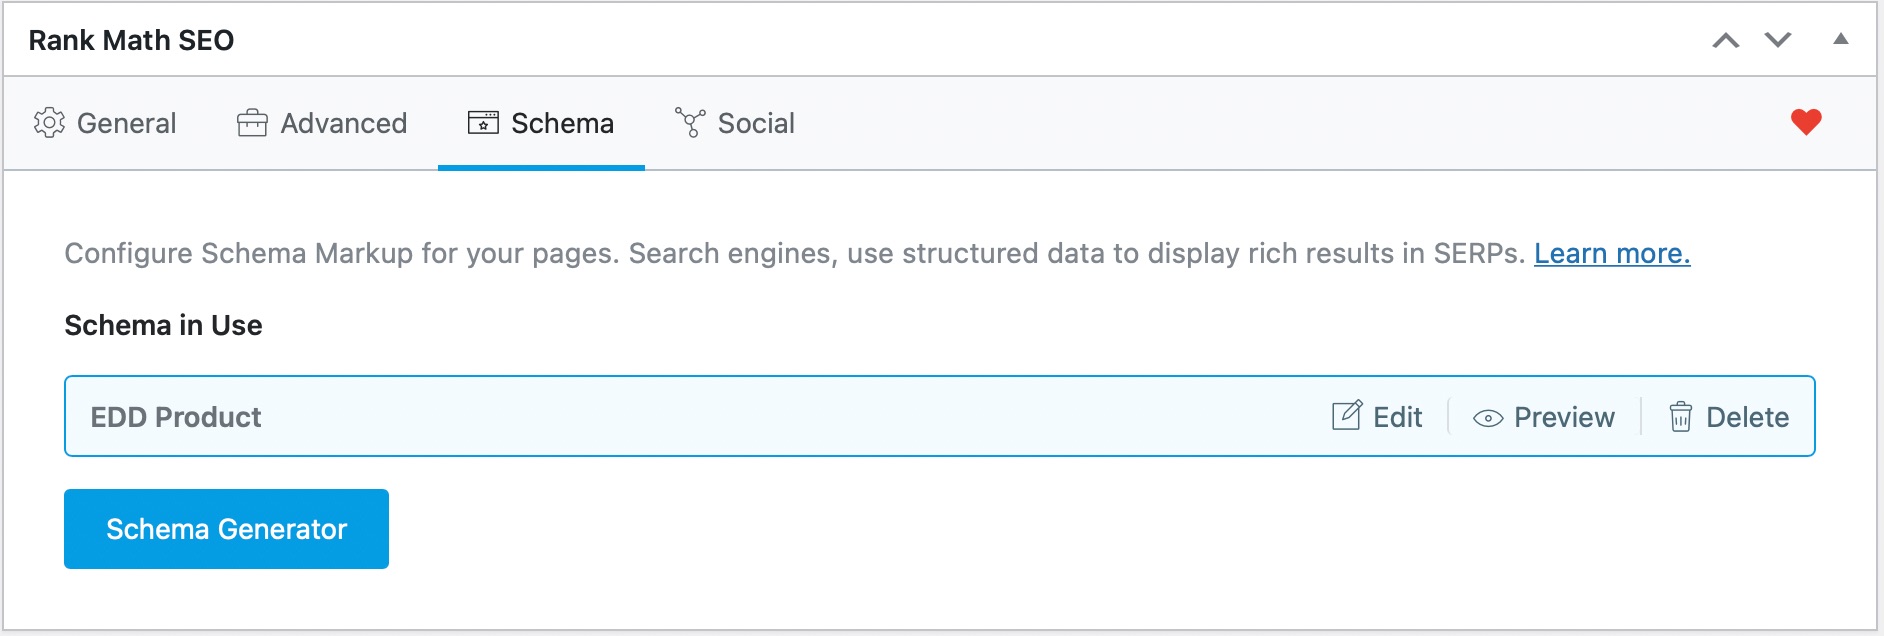
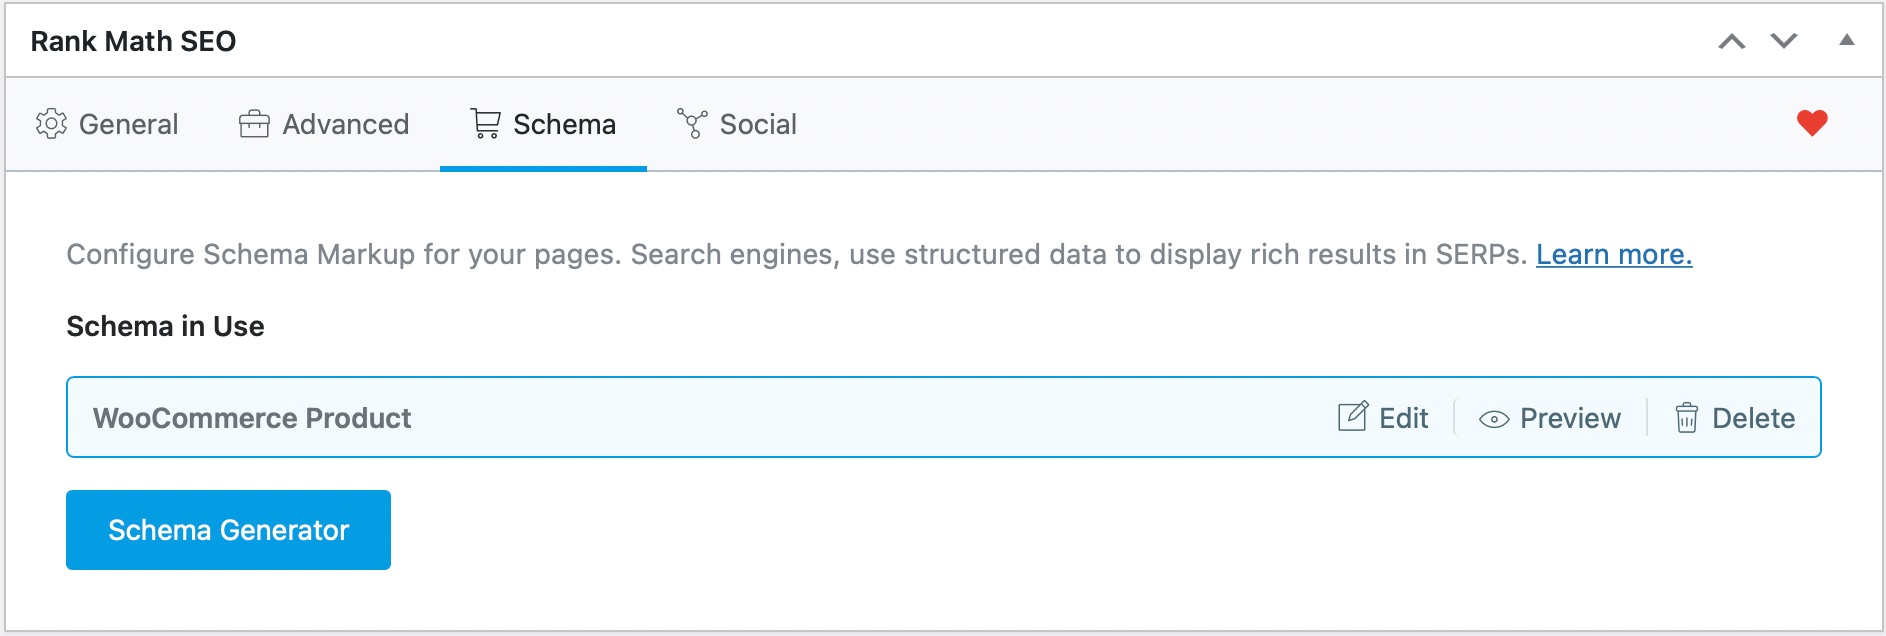
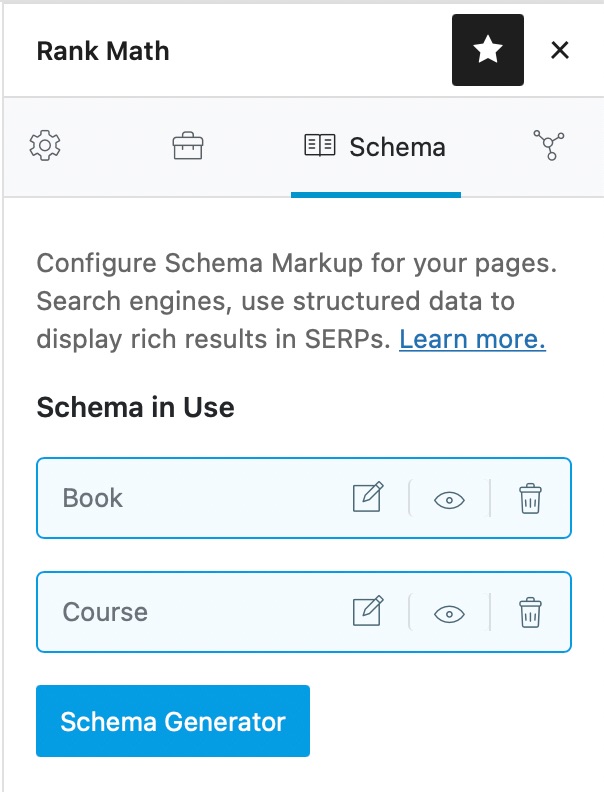
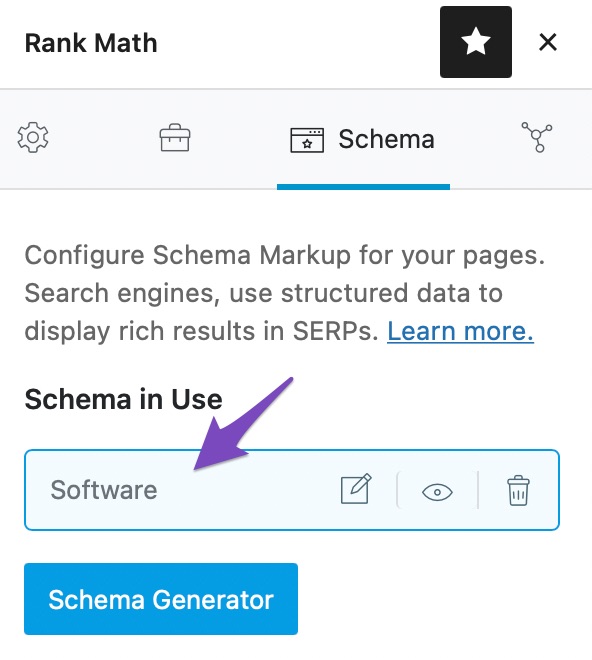
Once the Schema is saved for the page, this is how the added Schema will look like inside the Rank Math menu.
If you noticed, then you still have the Schema Generator button on the page. That is because Rank Math now supports adding multiple Schema types on a single post or page (Rank Math PRO only). You can click the button and add another Schema type the same way we demonstrated.
7.2 Schema Templates Explained
Rank Math PRO supports Schema Templates, a powerful new way to create different types of Schema and add them to multiple pages or posts. When we showed you how to create a Schema with the new Rank Math, we also showed you how to save a Schema as a template.
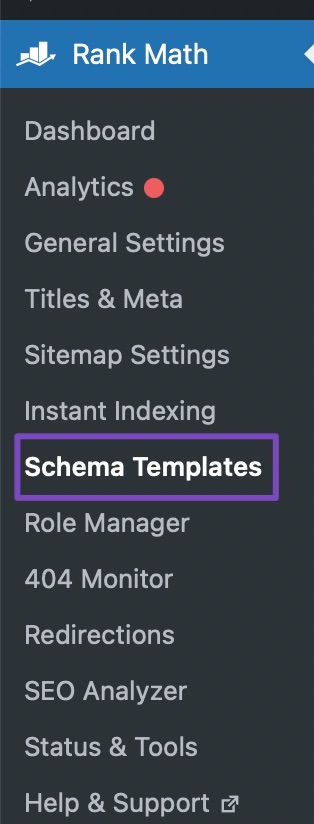
But, that is not the only way to create a Schema template. If you’re using Rank Math PRO, you’ll see an entirely new option inside the Rank Math menu called Schema Templates.
Schema Templates is where you will find all the different types of Schema you create. Think of it as a repository for all your Schemas. This is how ours looked like when we opened it.
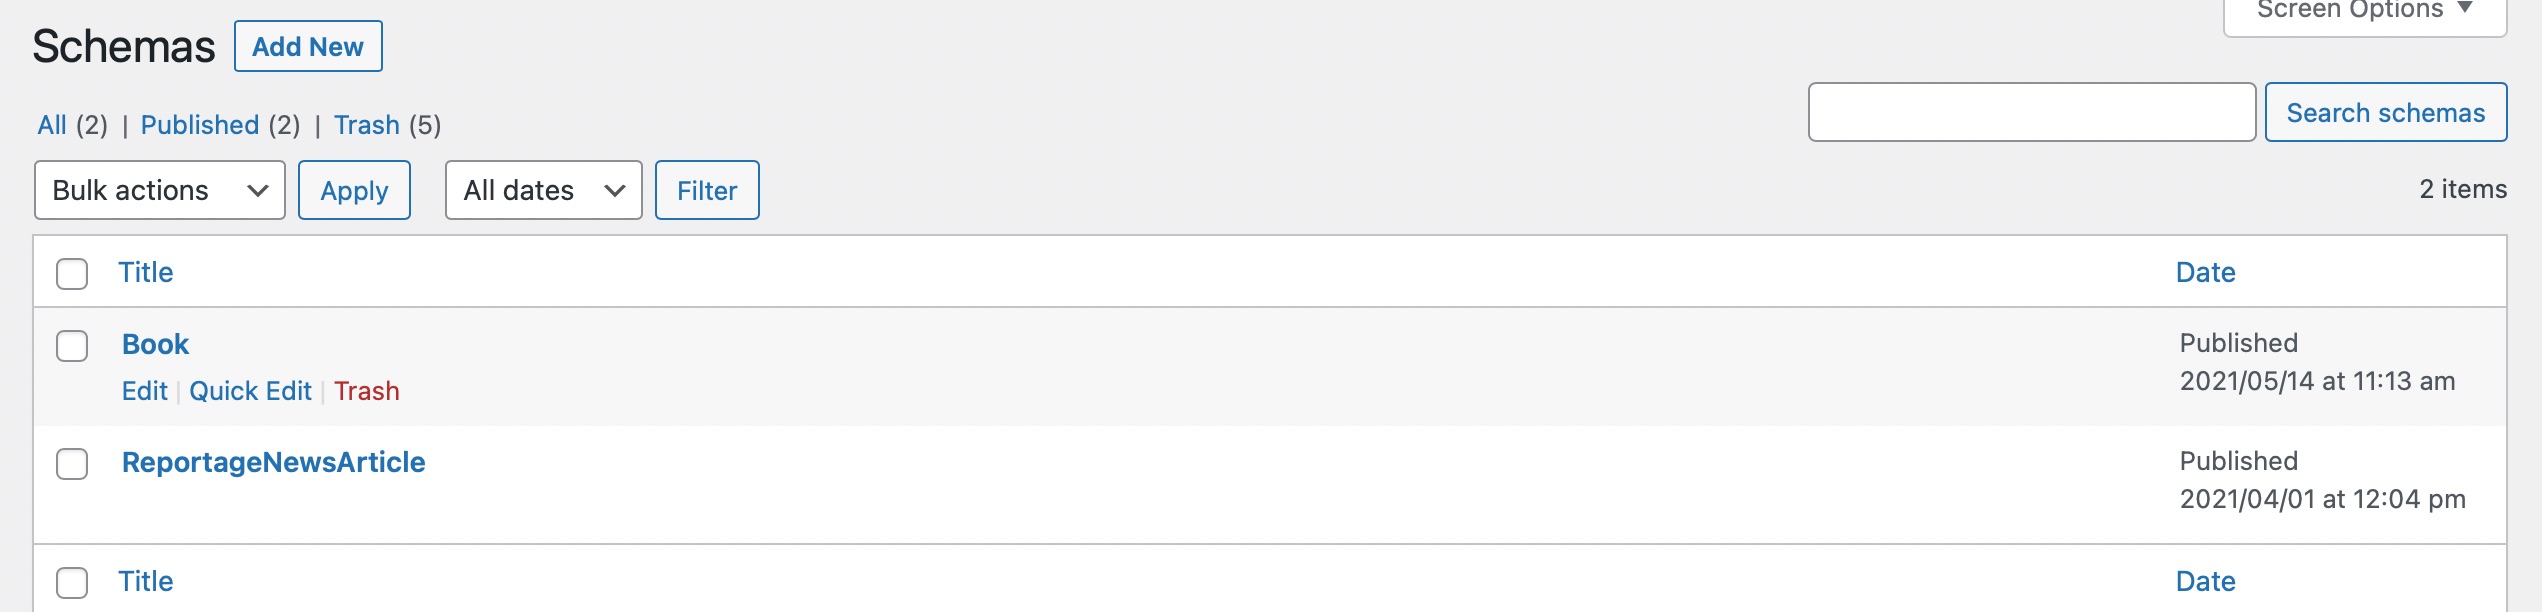
As you see, it has the Book Schema that we created earlier in the article. You will see all the templates that you create here.
Before we see the options for individual Schema, let us look at the options in the interface. It is similar to what you would see inside WordPress for posts and pages. You have bulk edit options, search options, filter by date, and you will also see a trash field when you delete a Schema template.
From the Schema Templates section, you can create new Schema Templates or edit existing ones. You also get options to quickly edit and delete a Schema template if you hover your mouse over a specific Schema template.

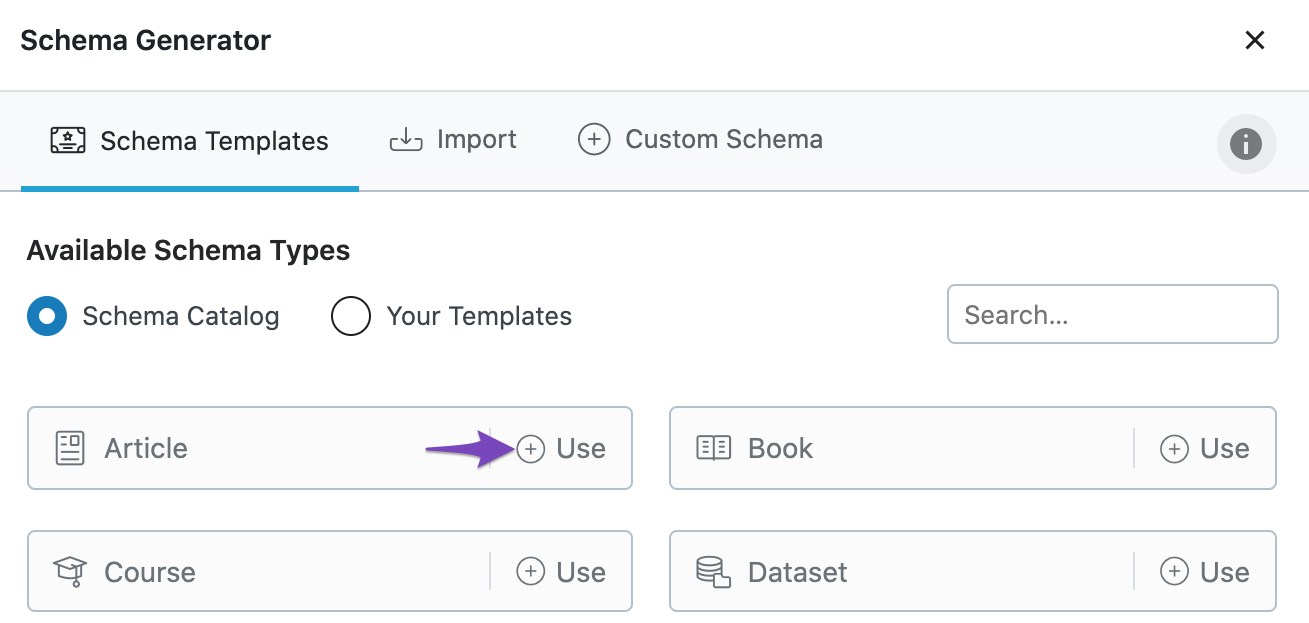
Let us start by creating a new Schema by clicking the Add New Schema button on the top.

On clicking the button, you will see the familiar option of choosing the Schema type to use for your template.
This is nothing new. You’ve already seen this when you created a Schema on the page. The only difference is that there you chose to save the Schema on the page or as a template, and here, it will be saved as a template by default.
Let us edit an existing Schema template and see all the options that we see. We will do that by clicking the Edit link that appears just below the Schema template.
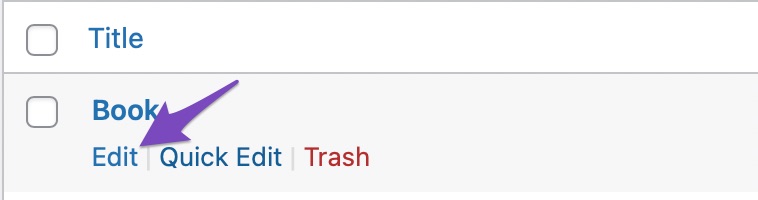
Once you do, the Schema editor will open up, similar to what you saw on the post screen. You will see all the options to configure the Schema, as you saw on the post as well.
But, as we said, the options here are similar to the ones you see on the post; they are not the same. Specifically, there is one feature that you will not see on the post screen. That option is the Display Conditions option.

8 Display Conditions PRO
What are Display Conditions? Let us answer this question in a simple way.
When you create Schema on a post or page, you have the option of adding it to the post or saving it as a template. When you add it to the post, the Schema is added to that specific post, right?
But, if you save the Schema as a template, which posts or pages does it get added to? That is decided by the Display Conditions.
The Display Conditions are a powerful way to add Schema to a lot of pages and posts. With Display Conditions, you can add the right type of Schema to hundreds, even thousands of posts at once. It is Schema automation at scale. Let us show you how they work.
For this example, we will create a new Schema template so that we can show you the process of creating targeting options from scratch. We’ll click the Add New button and choose the Article type Schema, for example.
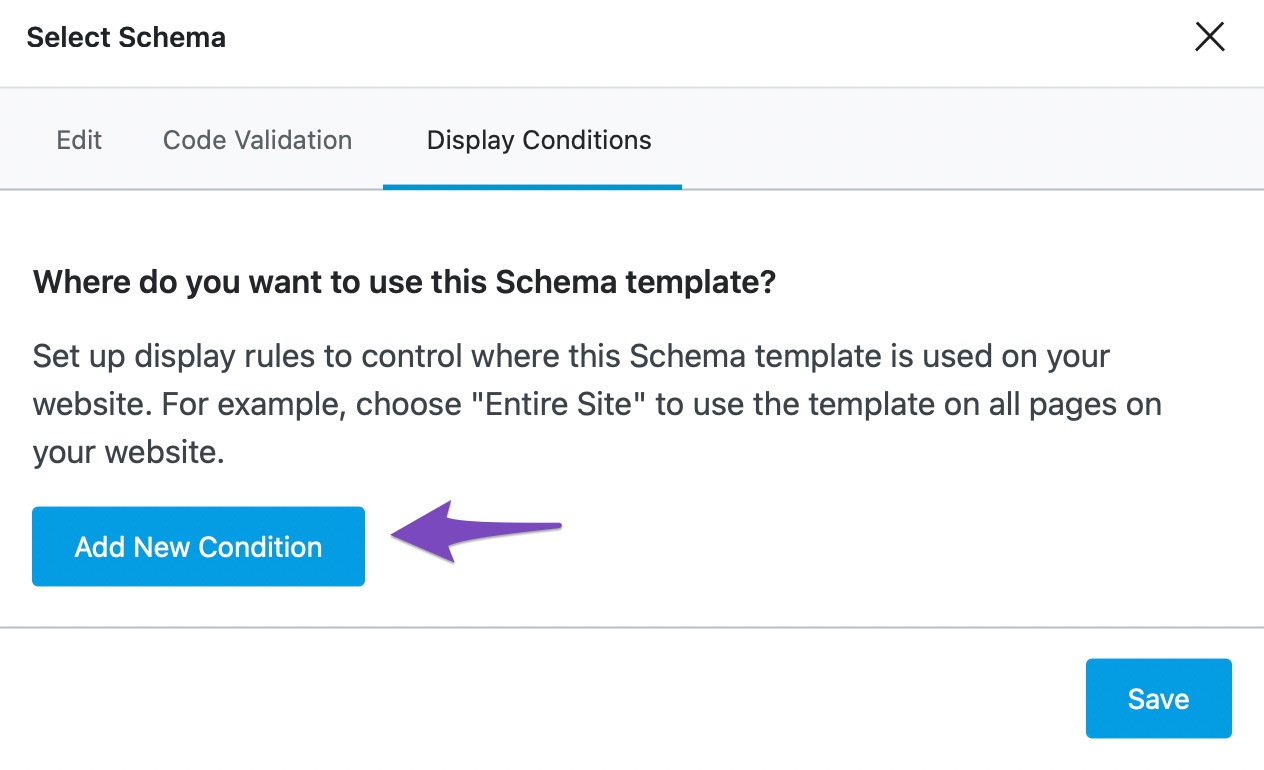
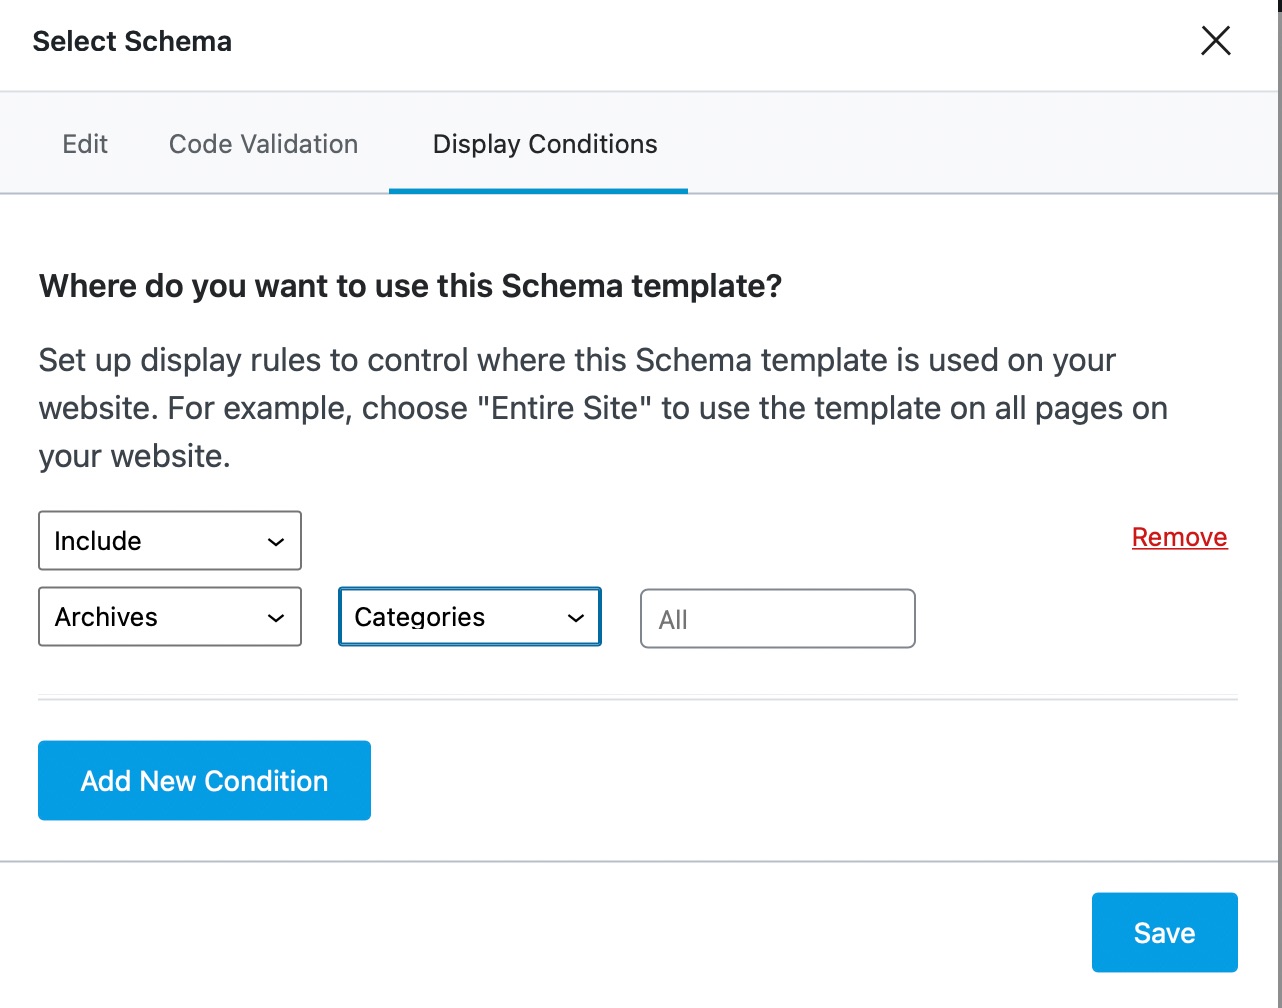
When the Schema page appears, we’ll switch to the Display Conditions tab.

A sample display condition will be set. We will remove it to start from scratch.

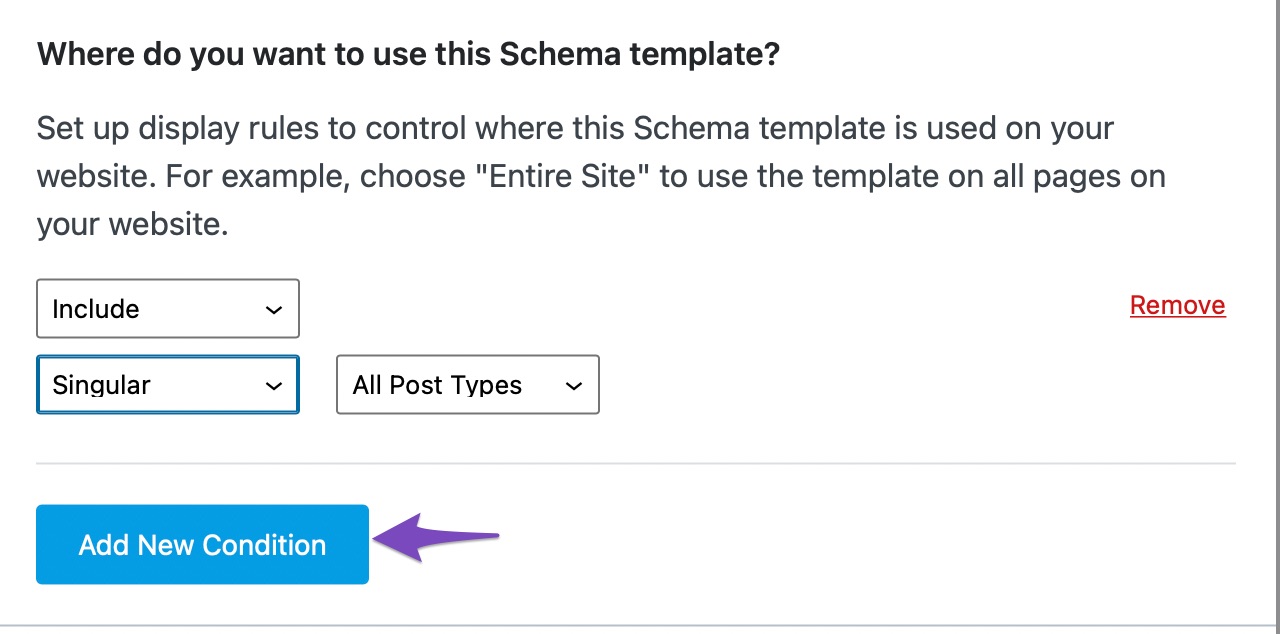
Then, we will click the Add New Condition to create a new condition.
Before showing you the options, let us briefly explain how they work.
On a typical WordPress website, you have a few different types of posts. You have posts/pages, then you have taxonomies, which include categories and tags, and you also have singular pages and archive pages. You can use these types to organize your website into logical structures.
For example, if you had a website about watches, you would generally have a category dedicated to watches related topics. Also, if you reviewed watches, then you would also have a category for those.
Here is the fun part. Most of the time, all the posts/pages of a single type would need the same type of Schema. Following the watch example, if you had a category called “reviews”, then all the pages/posts in that category would use the Review Schema, right?
If you had an eCommerce store, then all the products would use the Product Schema, right?
This is the exact type of thing that the Display Conditions help you achieve. By creating templates and rules, you can have one type of Schema appear on all the pages or posts that fulfill that condition. Combine that with variables in Rank Math, and you have an amazing Schema recipe.
Now that you understand that, let us get back to the practical example. Since we added the first display condition already, a sample condition was presented to us.
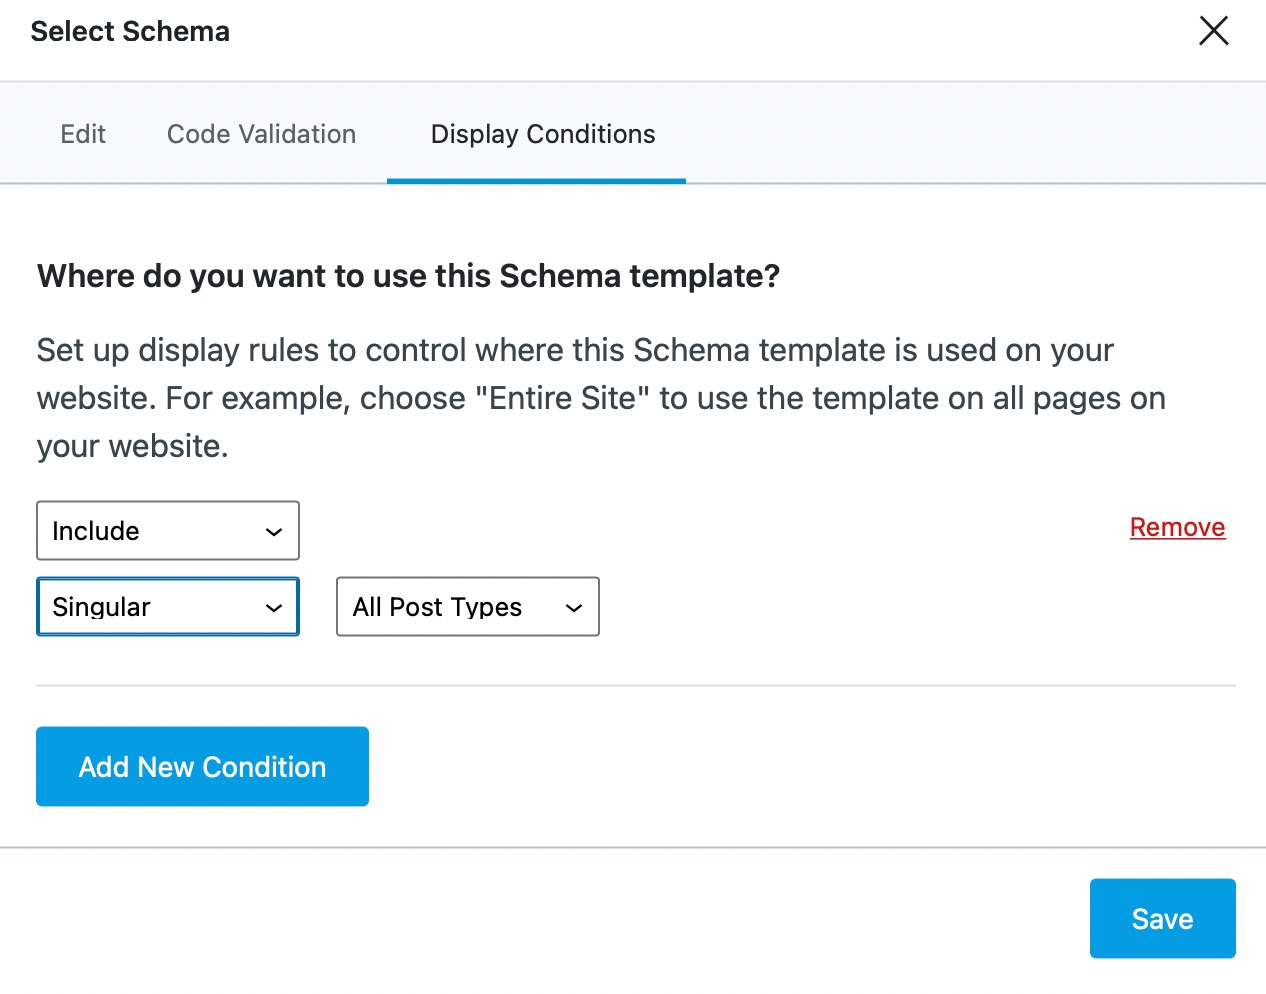
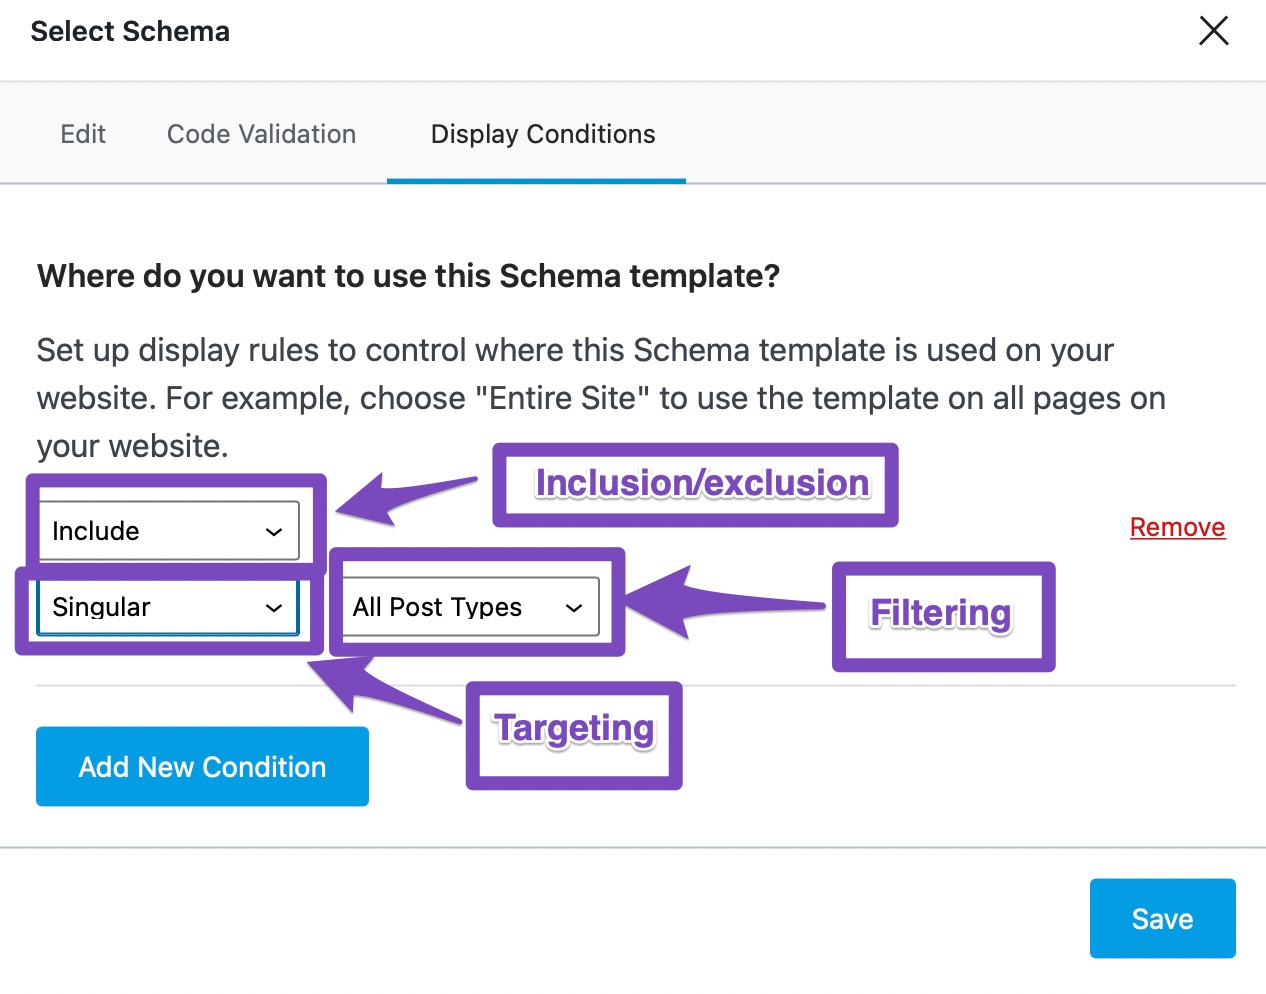
In the Display Conditions, you have 3 things to configure.
- Whether the condition is inclusion or exclusion or insert.
- Does it target the entire site, or archives, or only singular pages
- Additional filtering
Here is how you configure these options.
Let us quickly explain these options.
8.1 Inclusion and Exclusion
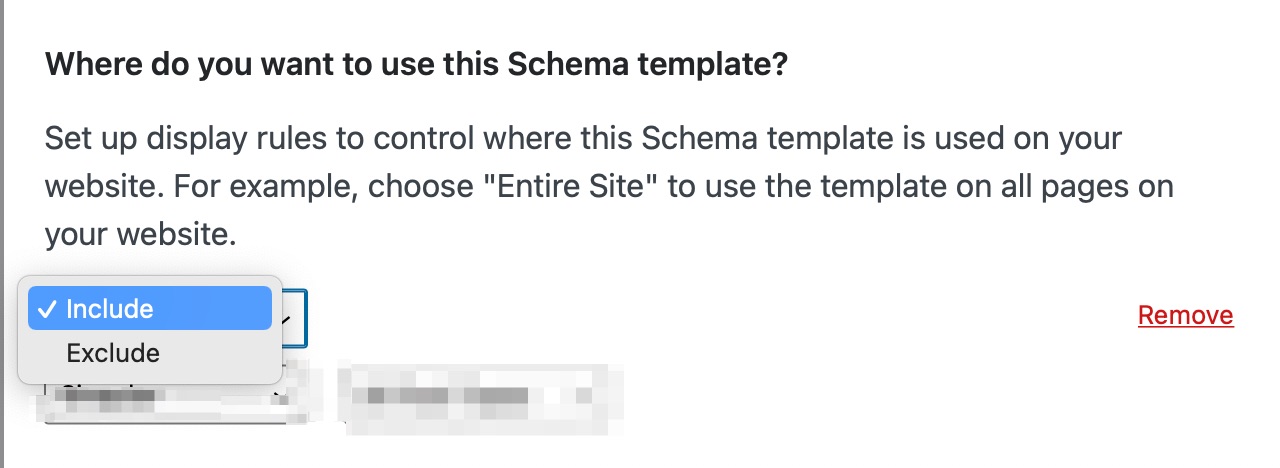
Display conditions can be Inclusive or exclusive.
In the simplest of words, when you choose inclusion rules, then all the pages that fulfill the conditions will get the Schema. And when you choose an exclusion rule, all the pages that fulfill the conditions will not get the Schema. This way, you have complete control over the pages that the Schema is added to. You can choose the type of rule by clicking the drop-down menu and selecting the rule-type of your choice.
8.2 Targeting
The targeting option is where you set which pages you want to target. You might want a Schema to appear on your entire website, just your posts, or just a specific category. And the targeting options lets you choose just that. Here are all the options you’ll find inside.
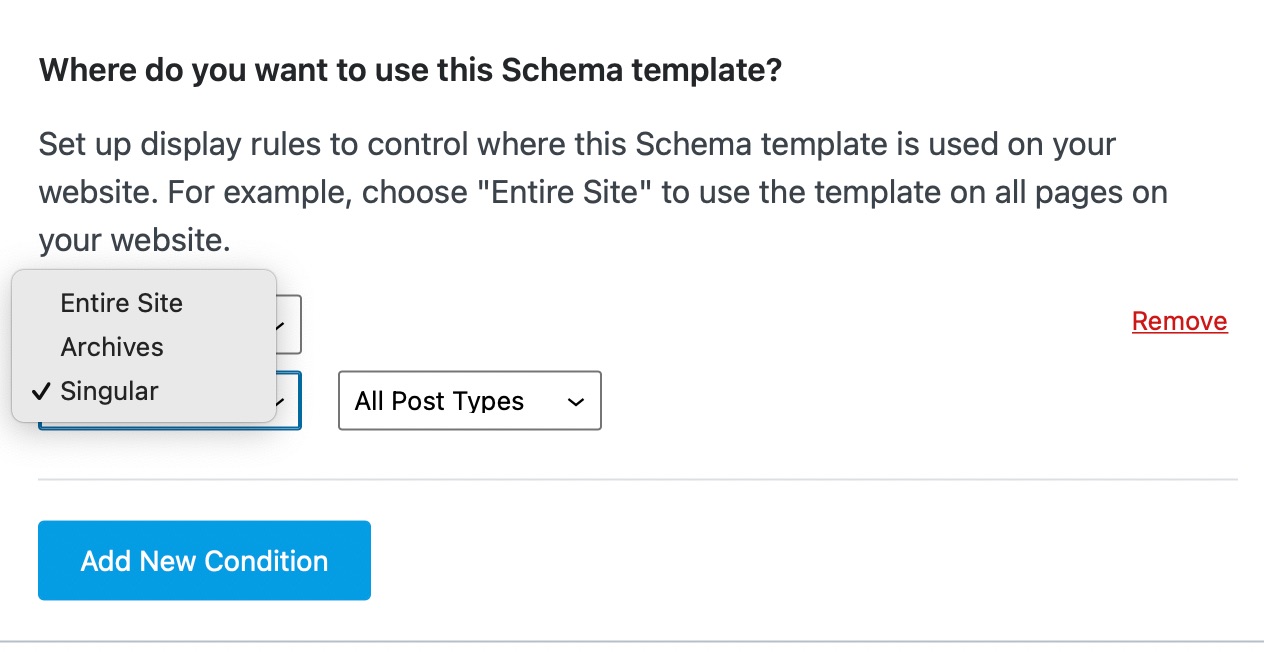
As you can see, you have the option to choose the entire website, just the archives or singular pages.
Depending on the option you choose, additional options will come up on the screen.
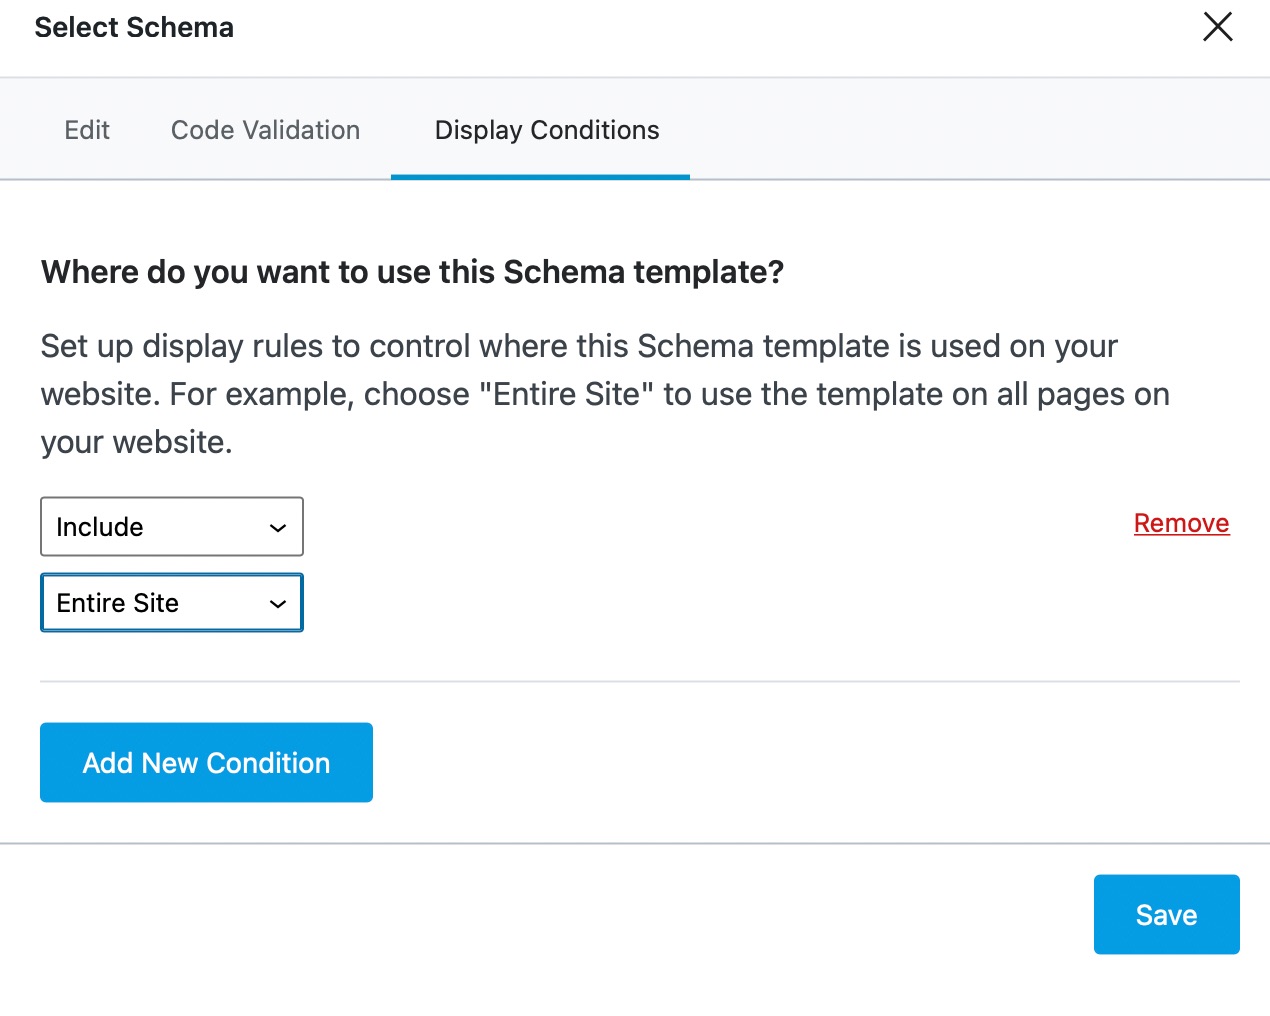
Here is what you will see if you choose the Entire site.
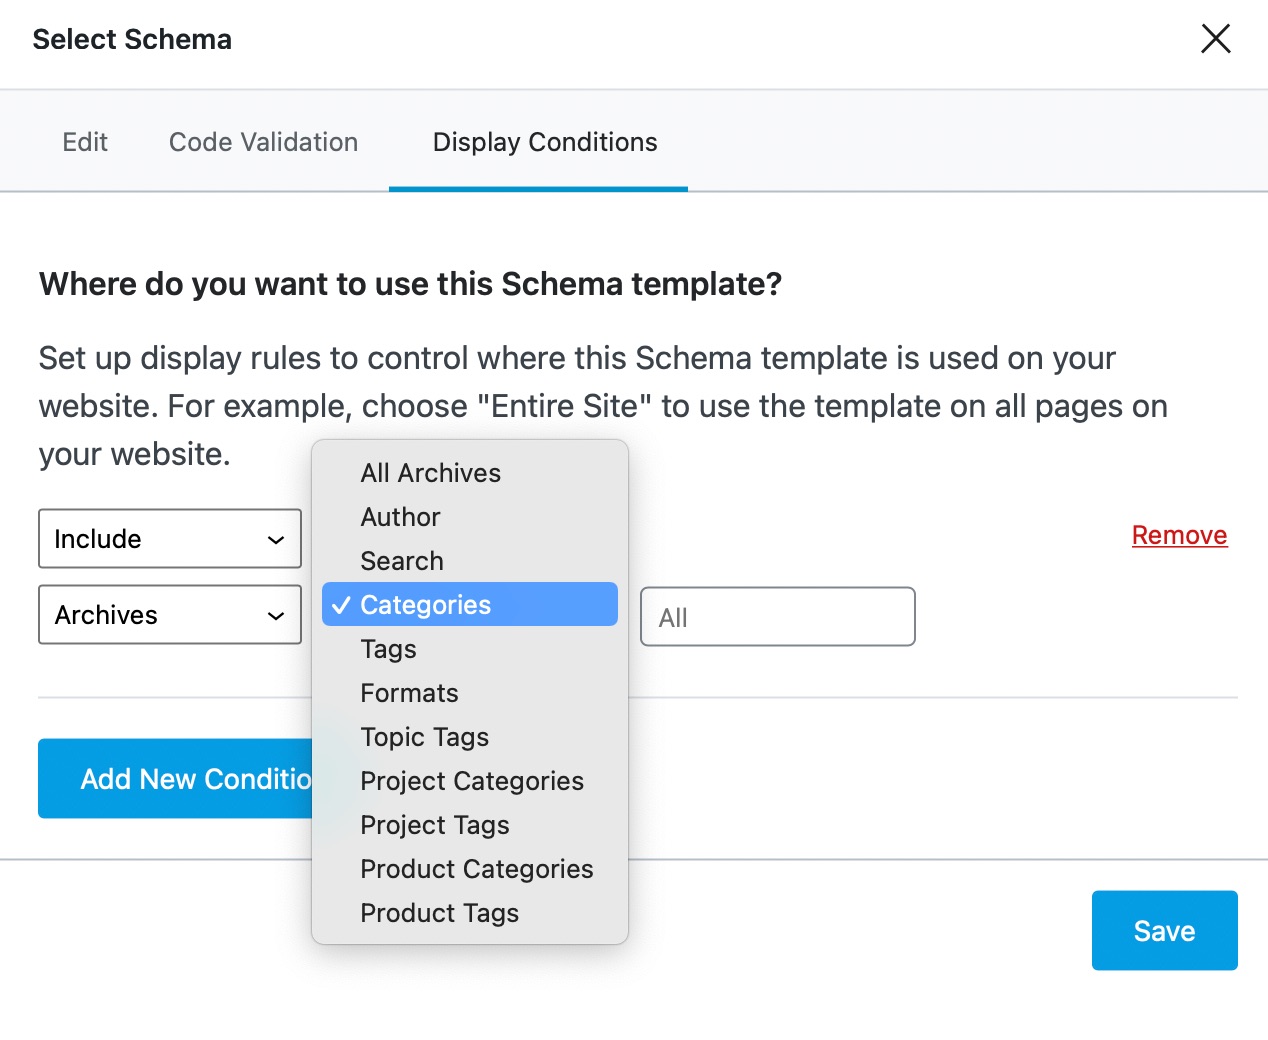
Here is what you will see if you choose Archives.
From the new drop-down, you will be able to choose which archive pages the Schema be added to.
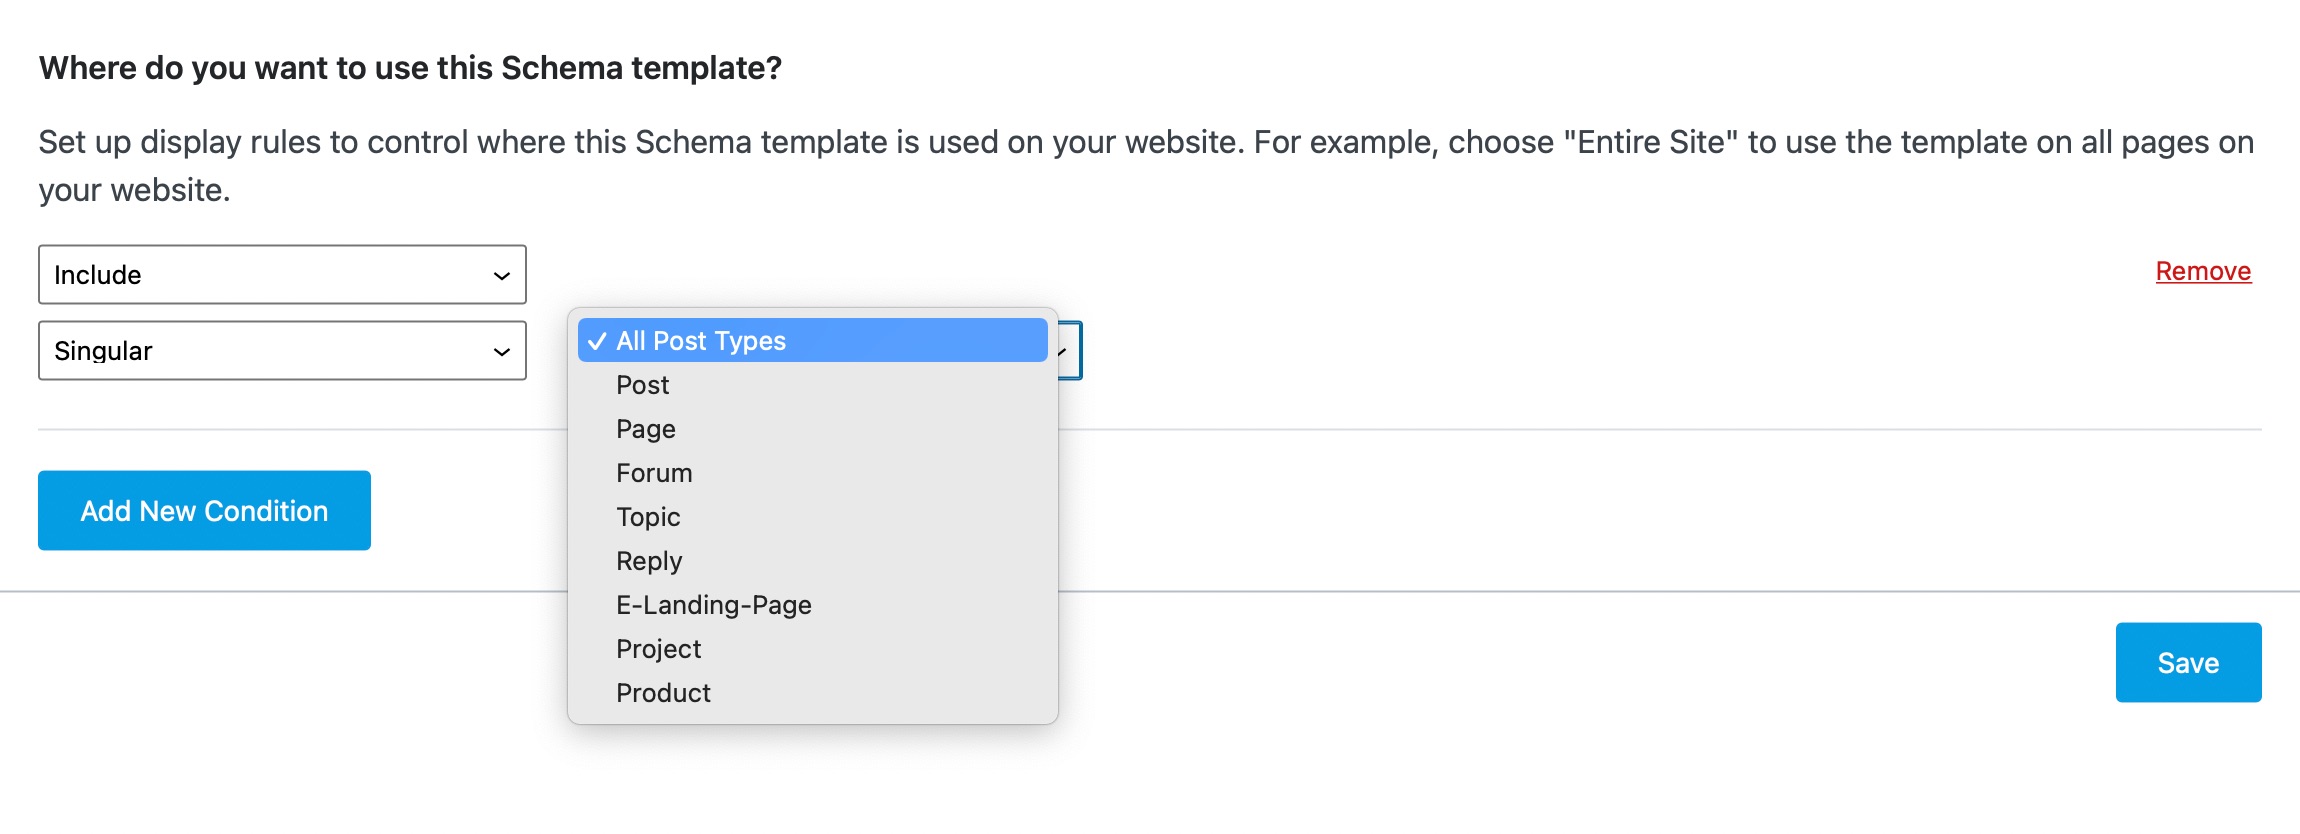
Here is what you will see if you choose Singular.
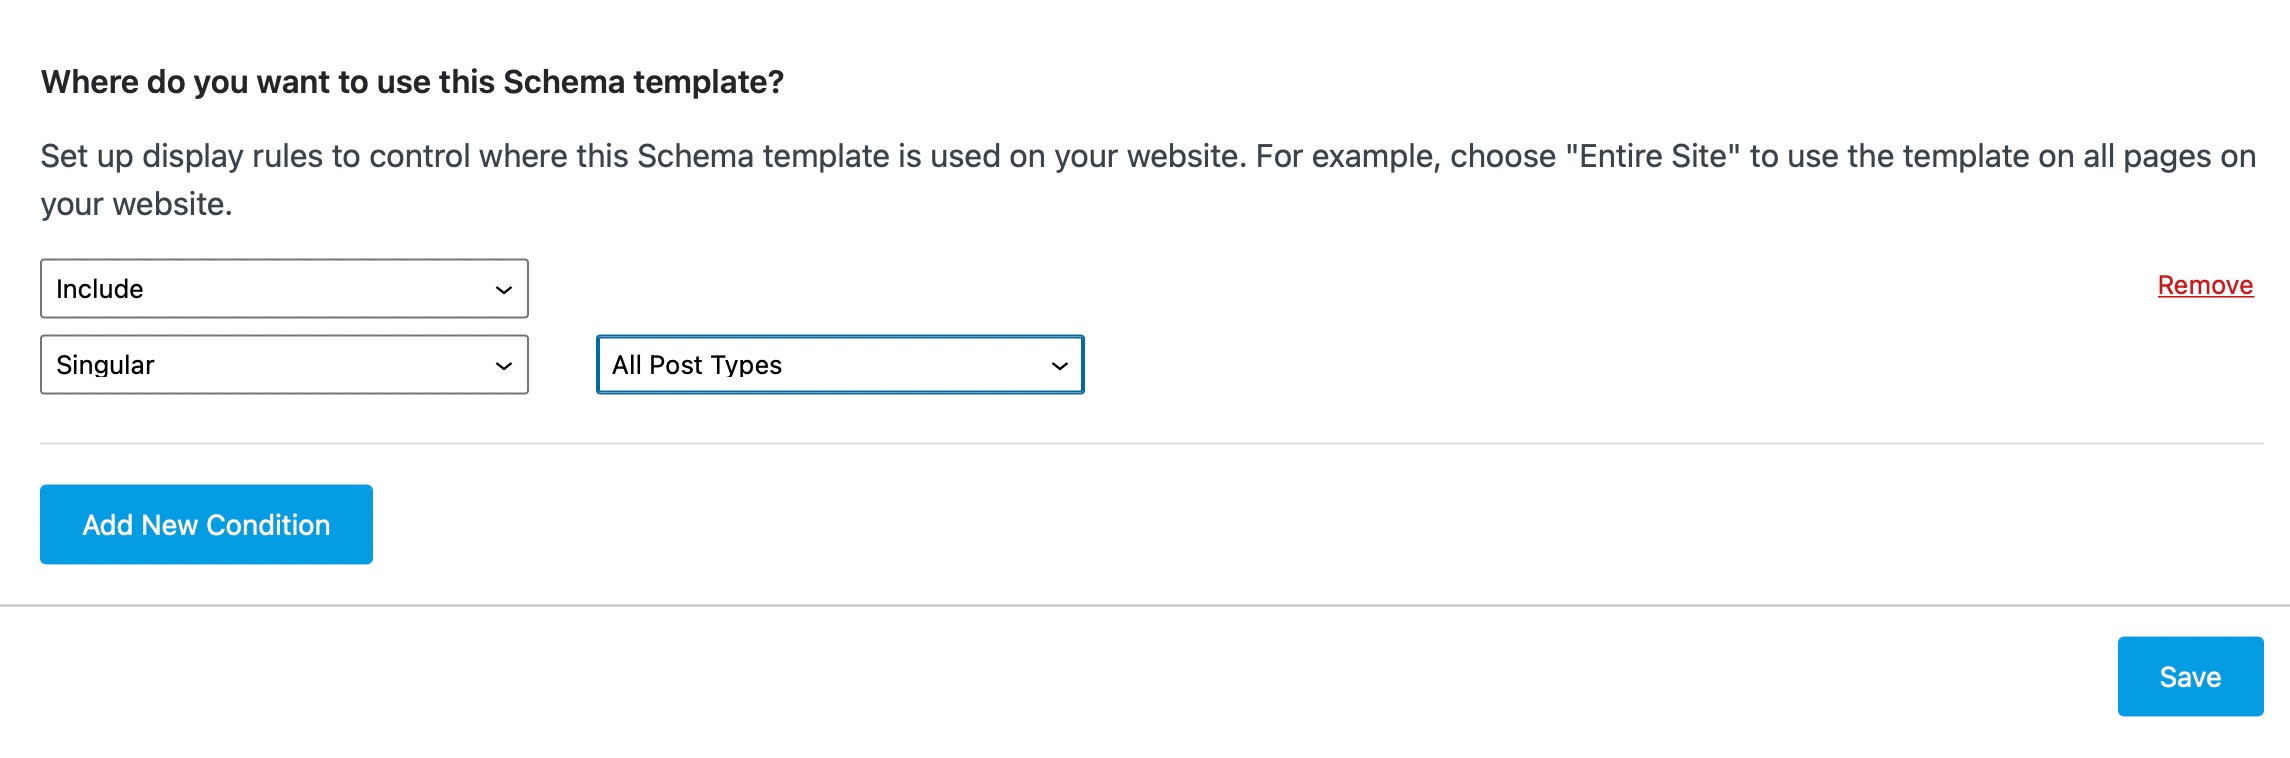
You’ll be able to choose Posts, Pages, or custom post types (if your website had them) from the new drop-down.
8.3 Filtering
The filtering option is where you finally decide the pages or posts the Schema gets added to. For example, if you chose Archives → Category for targeting, then the filtering will help you choose which category the Schema will actually be added to.
All you have to do is start typing the name of the category, post, page, or whatever targeting you’ve chosen, and Rank Math will search for them and let you select them. Here is a demo.
The same process will be used regardless of what targeting you’ve chosen; it works for authors, categories, tags, pages, and posts.
If you want to add more than one category to the display condition, you will need to add another rule.
8.4 Adding and Deleting Rules
To make the targeting precise, you can only choose specific display conditions. But, there will be many cases where you’ll need to add the same Schema to multiple categories.
That is where stacking comes into play. In simple words, you can create multiple rules that stack on top of each other to create complex targeting options with ease. Here are a few examples of complex targeting options that can be created with Rank Math’s targeting options easily.
- Posts that appear in category 1 and category 2, except for posts that are also in category 3
- All singulars in a particular category except pages that have a certain tag
- All pages on your website except a few pages that you handpick
- All posts are written by a specific author
And many more.
To stack or add another condition to the display condition, click the Add New Condition button.
Which will add another condition, similar to the one above, for you to configure easily.
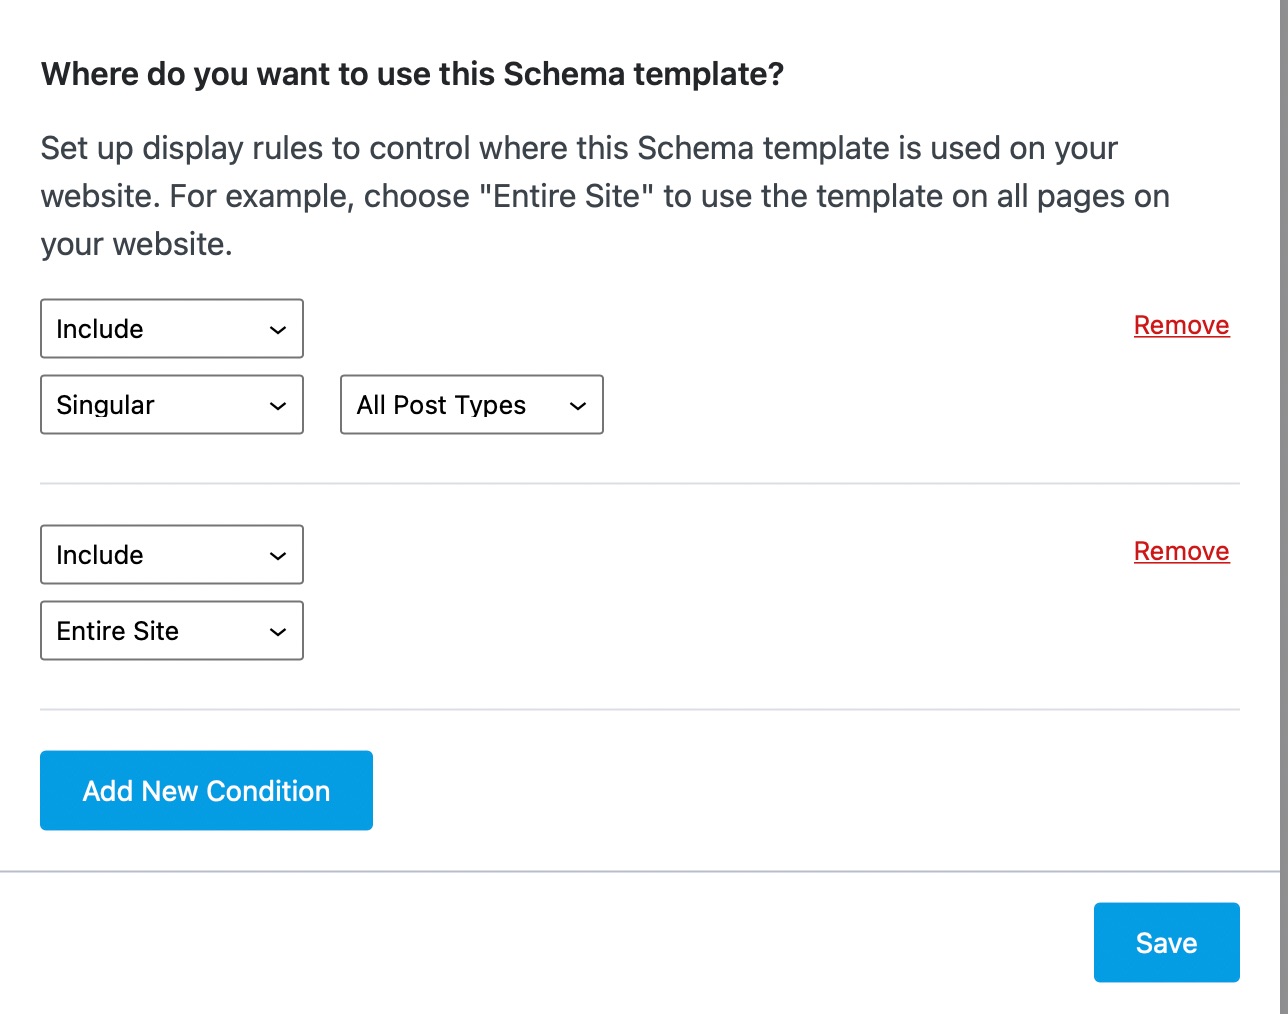
You can also delete a specific condition by clicking the Remove link next to the condition.

With the Display Conditions, you will be able to target every page or post on your website with the correct Schema type once you create the right template and the right rules. And since there is no limit to the number of templates and display conditions that you can apply, you have complete granular control over which pages get which Schema.
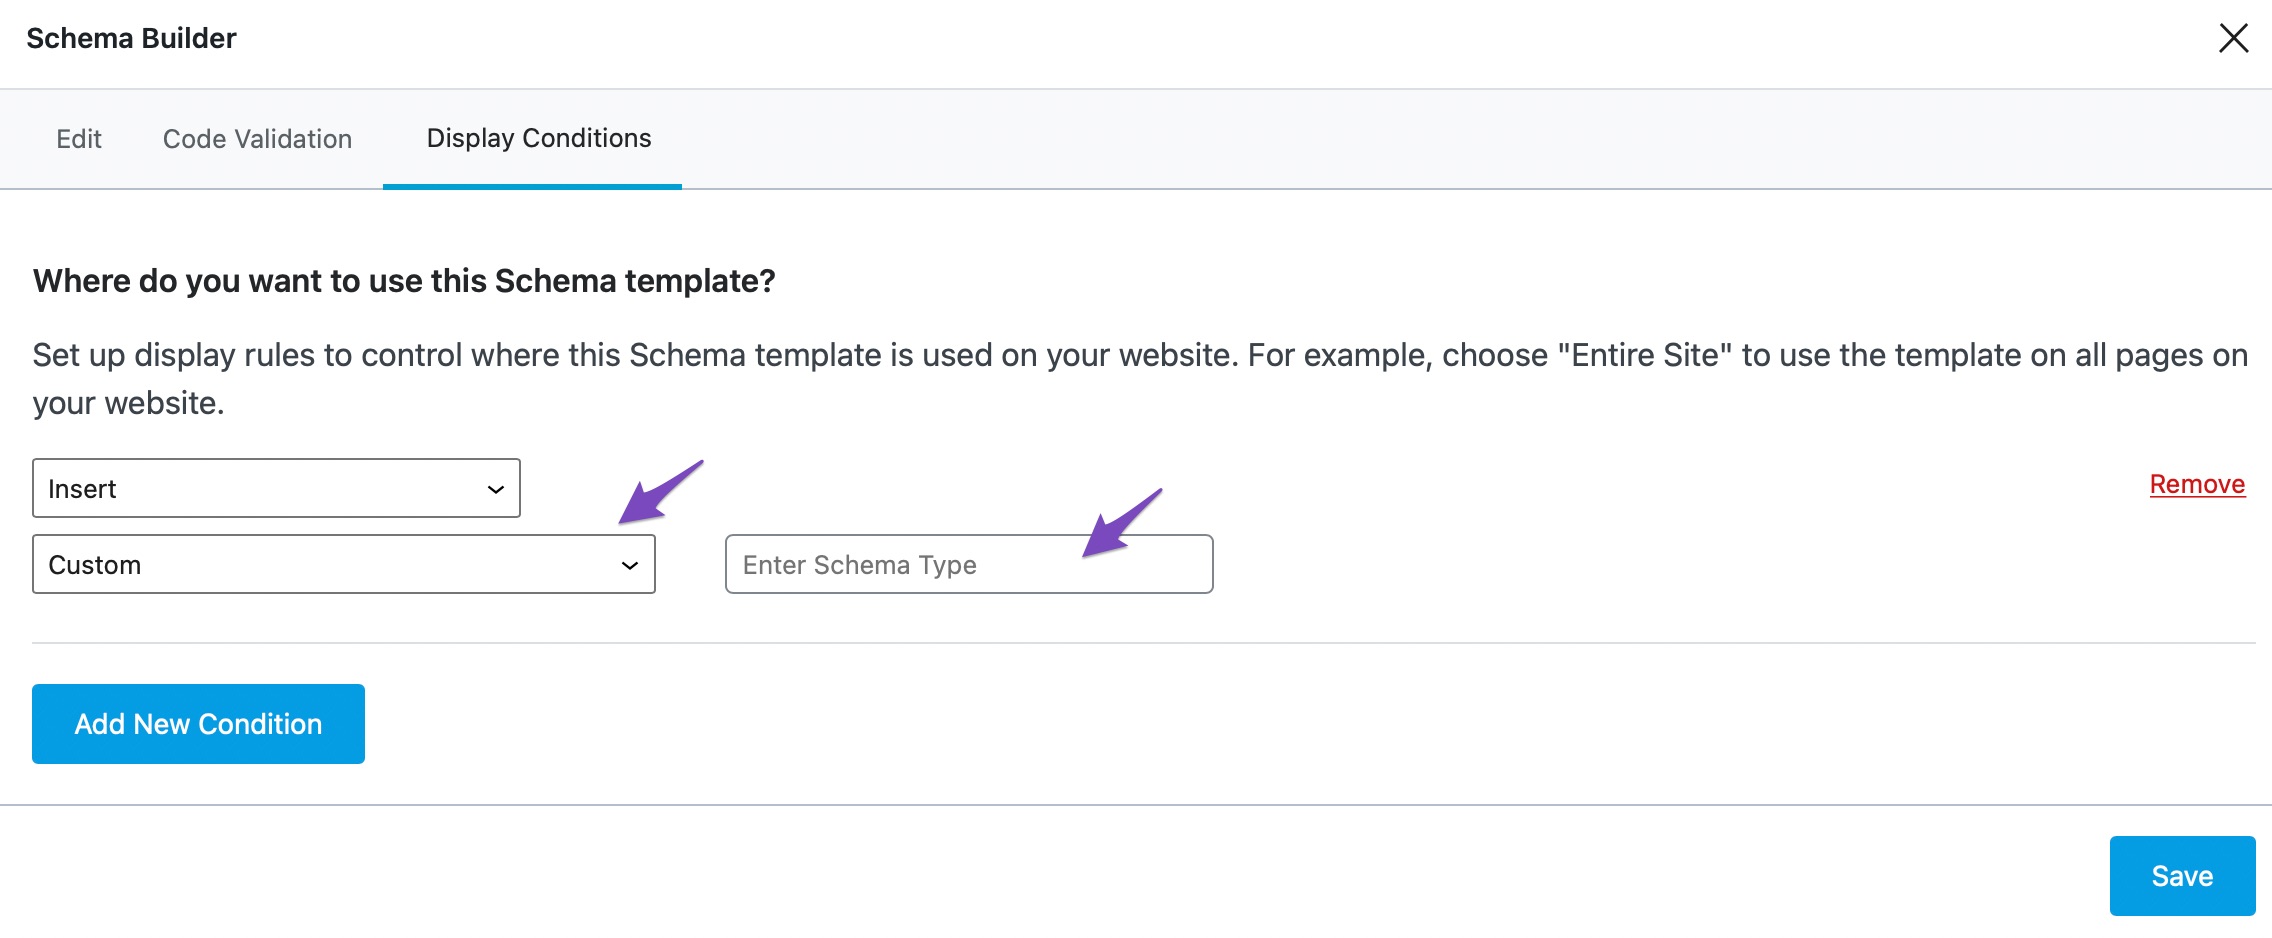
8.5 Insert
Rank Math PRO makes it very easy to insert Schema properties into any existing Schemas with the help of the Insert display condition. This field is useful for advanced users who want to extend their current Schema with additional information.
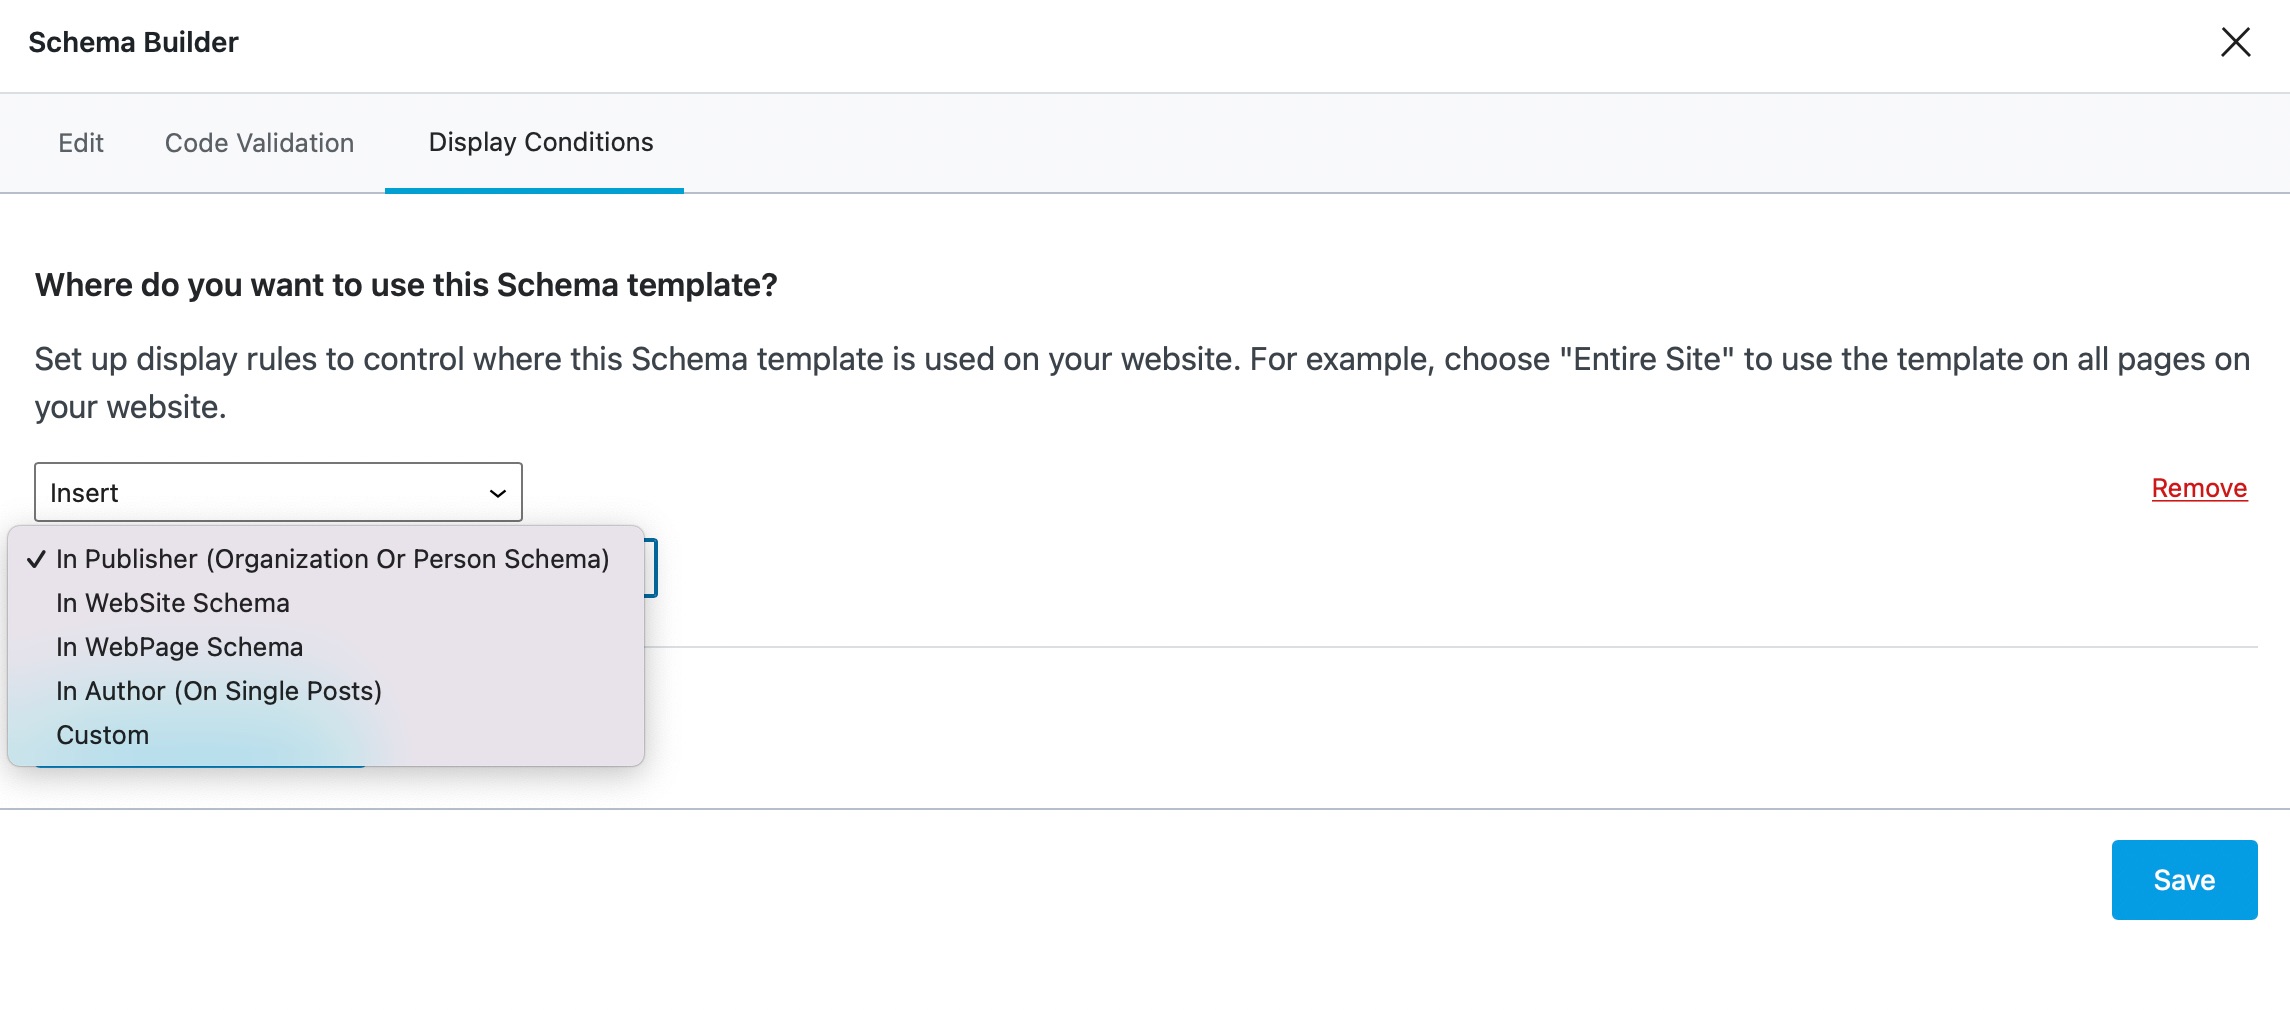
You can select an option from the drop-down list where you wish to extend the Schema. If you choose the Custom option, enter your Schema type in the Enter Schema Type field, as shown below.
8.6 Rule Priority
Since there are many rule types, it is important to know which rules take precedence over others. Without going into too much detail, you should know the following:
- Exclude takes priority over Include
- And Singular & Archive takes priority over the Entire site option.
Hopefully, this will help create better rules on your website.
9 Importing Schema PRO
With the arrival of Rank Math PRO, not only can you add Schema of your own with templates, but you can also import Schema from other tools and even other webpages. Let us show you how.
To import Schema, first, open up the Schema Generator as usual by clicking the button in the Rank Math menu.

On the Schema Generator, you should see the Import tab. Click to open it. You’ll see it only if you’re using Rank Math PRO.
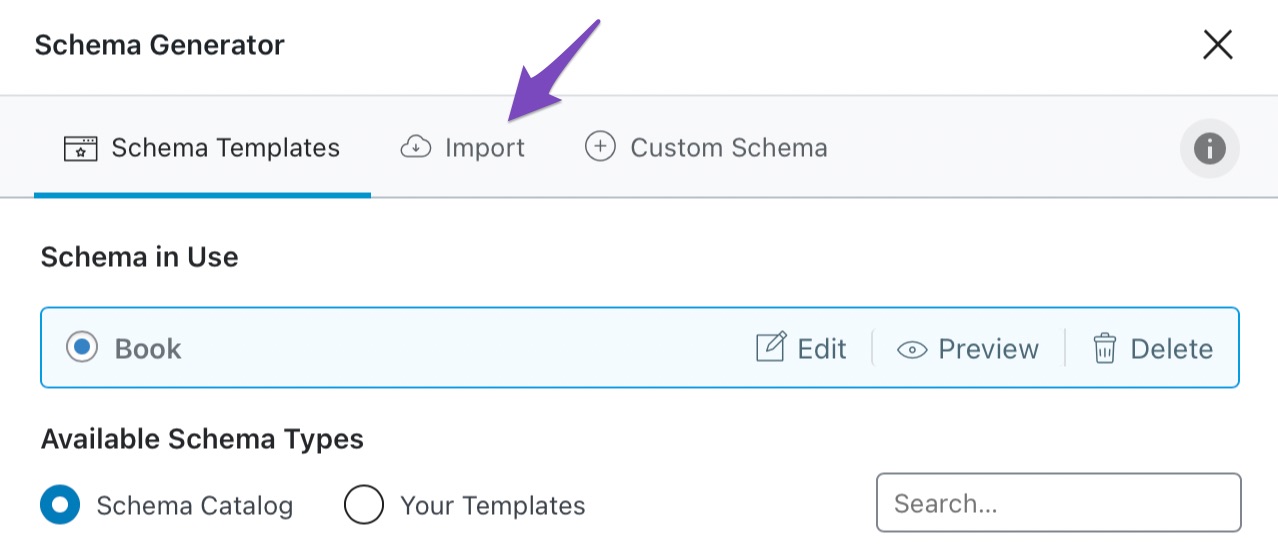
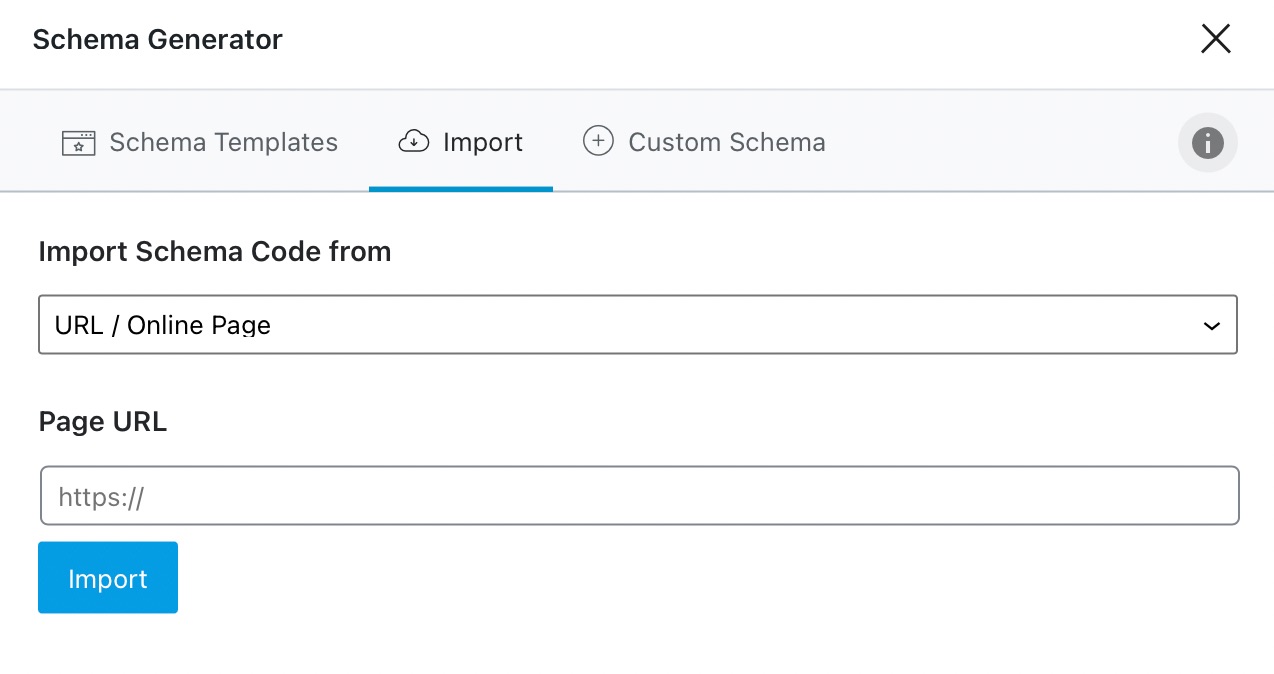
This is how the Import section will look like.
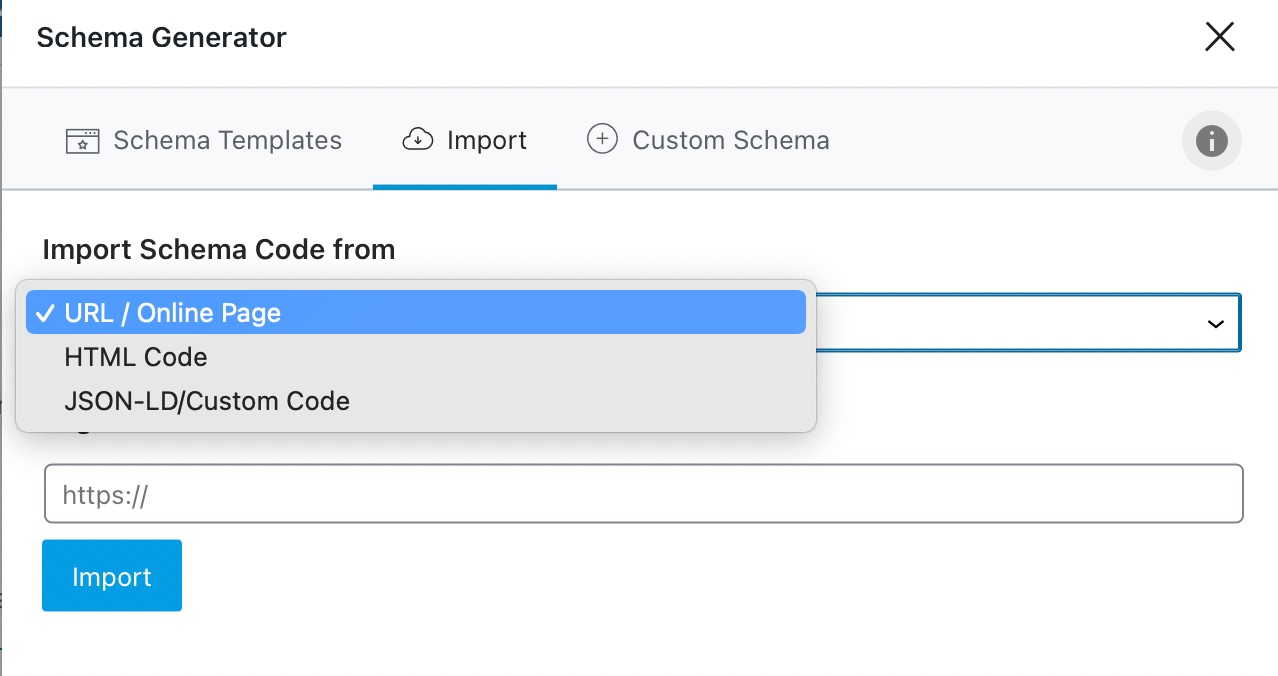
You have 3 options to Import Schema Code from. You can choose a live web page, add HTML code, or add JSON-LD formatted Schema to import Schema from.
Let us explore the importing options quickly.
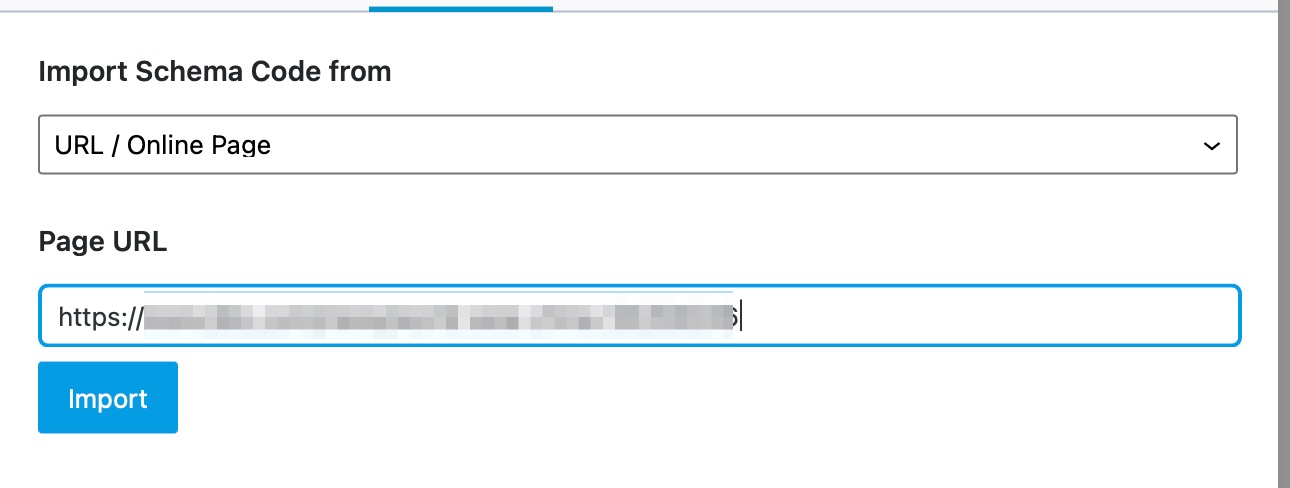
9.1 Importing URL/Online Page
This option is perhaps the easiest to understand and follow. In this step, you give the Schema importer the URL of a live page, and it will extract the Schema from it. Let us test it out.
Add the URL of the page you want to extract Schema data from, and click the Import button.
And in just a few moments, the Schema importer will extract all the different kinds of Schema from the page and present it to you.
Then, you can click on any of the individual Schemas that were fetched neatly organized by type. You can also check the Schema by clicking the individual Schema. Once you do check it, you will have the option to add it to the post or save it as a template.
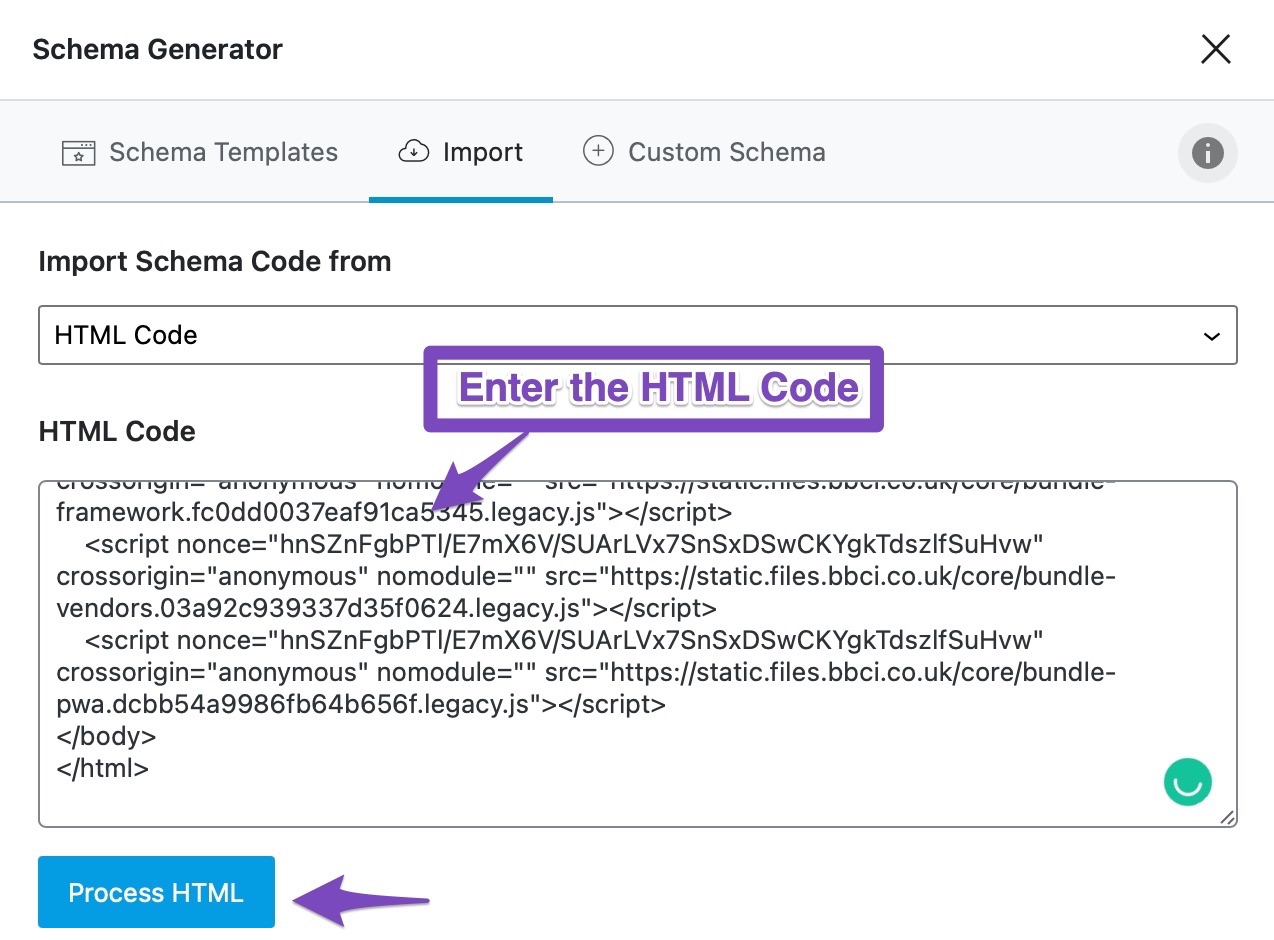
9.2 Importing HTML Code
The HTML import option lets you import the Schema from HTML code. This option is fairly useful when working on local websites or in scenarios where it is not possible to extract the Schema from a live page.
The process is quite similar to fetching Schema from a live URL. But, in this case, you have to paste the HTML code of the page in the field. To demonstrate, let us add the HTML code of the same page that we fetched Schema from. Then, we’ll click the Process HTML button.
And in the same way, Rank Math will parse the Schema from the page and present it to you.
Again, you can check out all the Schema types imported and save them as a template or individually to the post.
9.3 Importing JSON-LD/Custom Code
There are plenty of JSON-LD Schema Generators out there, and instead of using them to add Schema to your pages individually, you can import them as a template with Rank Math and add it to multiple pages. Here is how to do it.
We used this tool to create a simple Schema Markup for a blog post. Then, we copied it and pasted it inside Rank Math’s Schema importer and clicked the Process Code button.
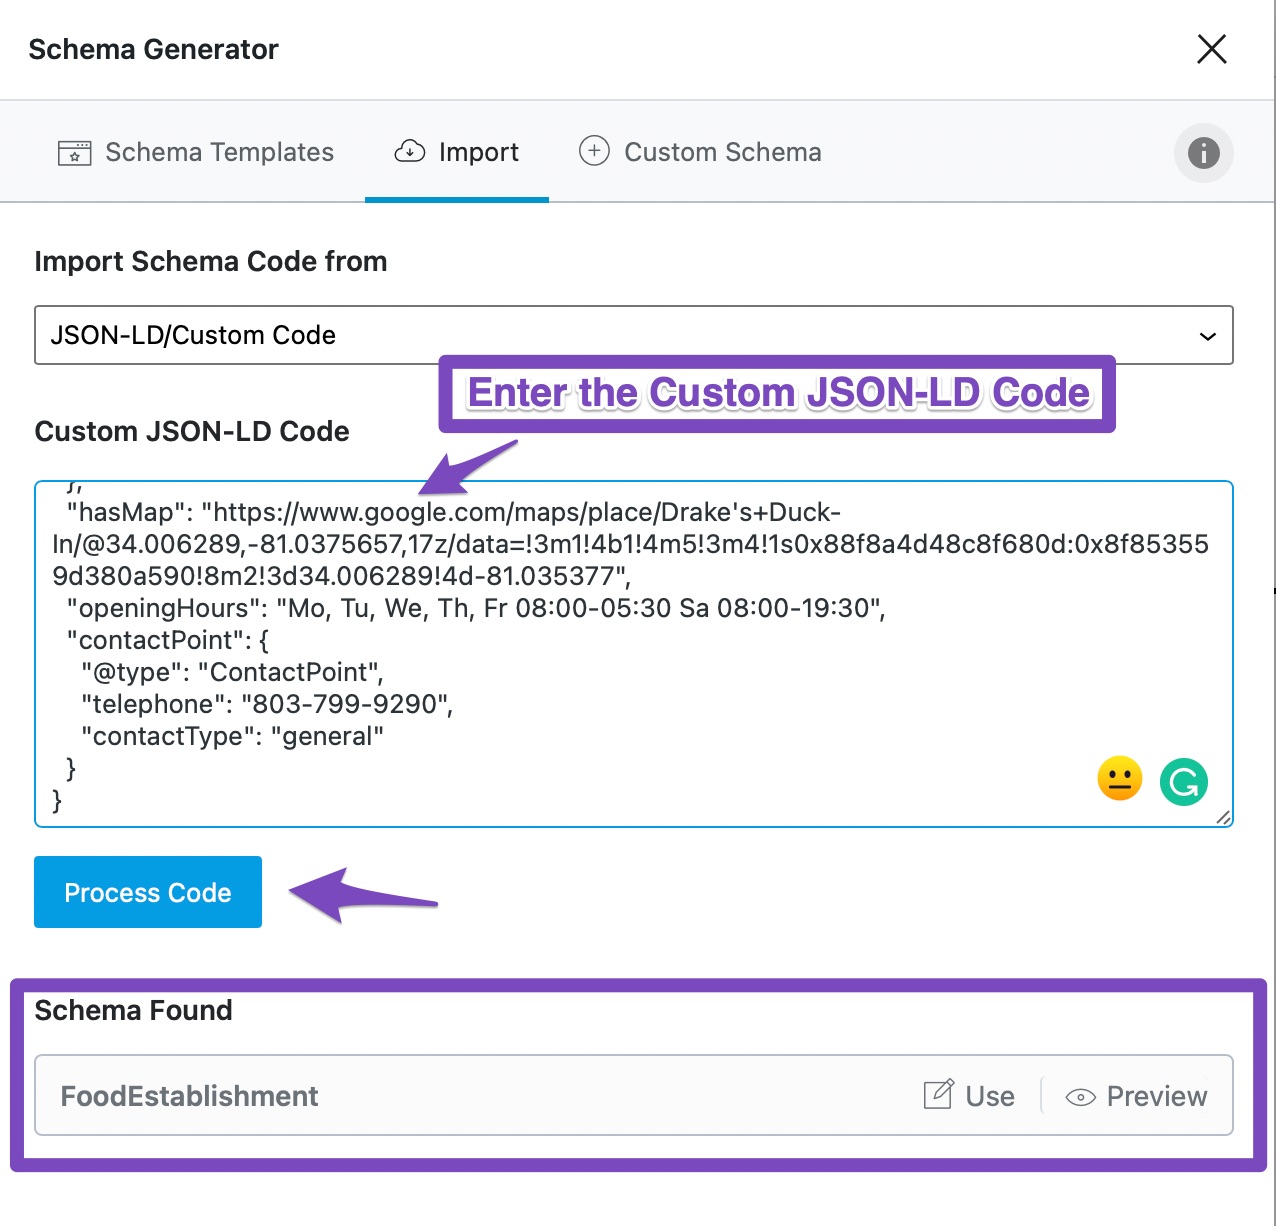
In just a few seconds, Rank Math was able to parse the code and generate the Schema. We can now add this to the page or use it as a template to add on multiple posts.
9.4 Advantages of Importing Schema
The Schema importing tool gives you access to interesting tools that are not available with other plugins. But, what are the advantages of using importing tools when Rank Math can generate a Schema of its own?
There are several advantages to this approach. But, we must clarify that it is not useful for everyone. It is likely that only advanced users will use these options. But, we’ve kept these options as we want all kinds of users to benefit from Rank Math.
Many people don’t realize that Schema.org definitions are not limited to the ones that Rank Math supports; it actually supports hundreds of products and services. But, if we add support for all of them in Rank Math, it will become a huge mess and make it difficult to use. That is why we’ve added the Schema Generator for the most popular Schema types and created the Custom Schema Builder and the Schema Importer.
Using these options, you can import a variety of Schema types and even create the perfect custom Schema for your website.
10 Custom Schema PRO
As we mentioned earlier in the article, the Schema is not limited to a handful type of structured data. That is for simplicity. In reality, Schema, or Schema.org’s structured data definitions, extend to hundreds of types of Schema.
In a majority of cases, the Schema types included in Rank Math are sufficient, and the Schema creator makes it easy to create and add Schema to your page. However, for some advanced users, that might not be sufficient.
When you think about it, Schema is just metadata, and it doesn’t have to be bound by certain definitions. In theory, you can add any sort of structured data on your page, and Google will parse it. It might not be used for any rich results, but Google will still parse it.
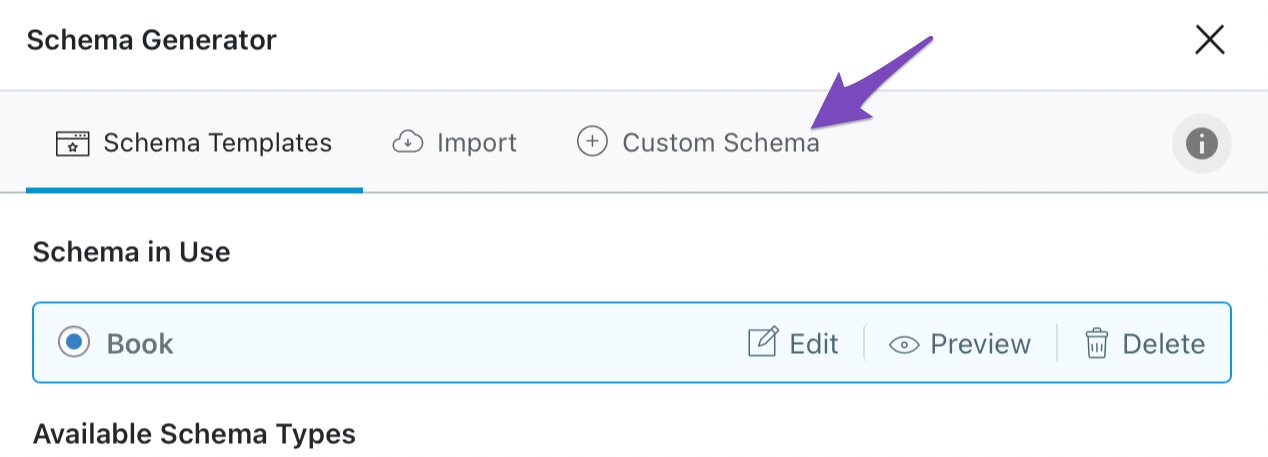
To make the process of adding custom Schema to your pages, we built the Custom Schema generator in Rank Math PRO. Let us have a look at it.
The Custom Schema creator can be accessed on the same page as the Schema Generator, and you’ll see a tab similar to this. If you don’t see it, make sure you have Rank Math PRO installed, as this is a PRO feature.
Once you click the tab, you should see something similar to this.
Now, we understand that this is scary and intimidating. But, as we said, this is only for a select few who want to add custom Schema on their websites or pages.
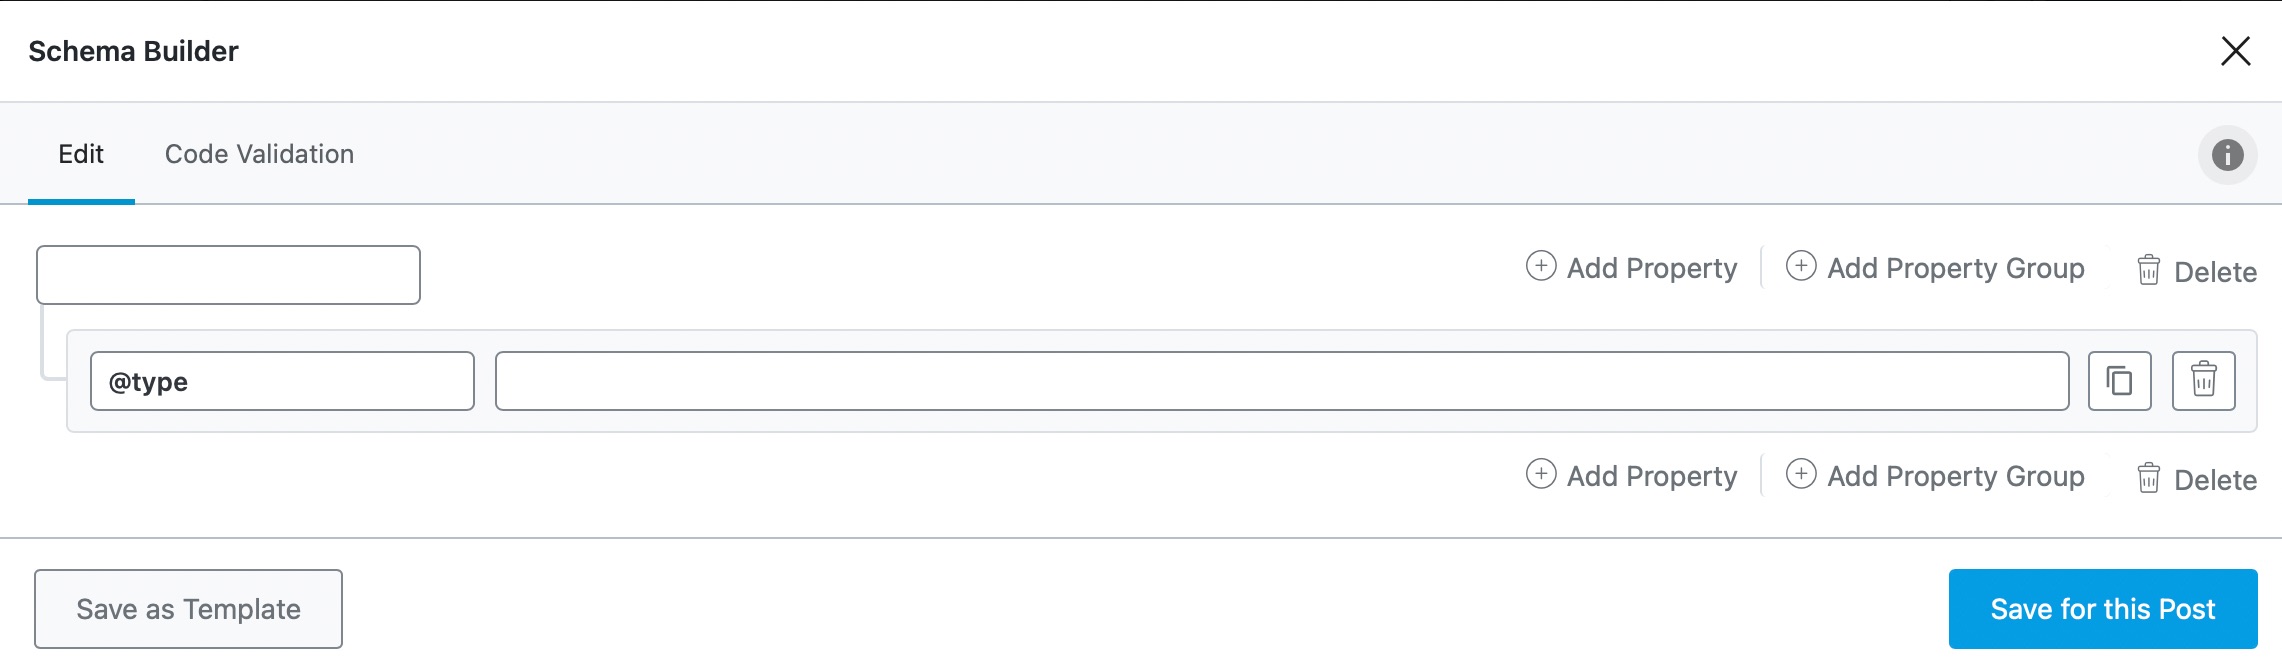
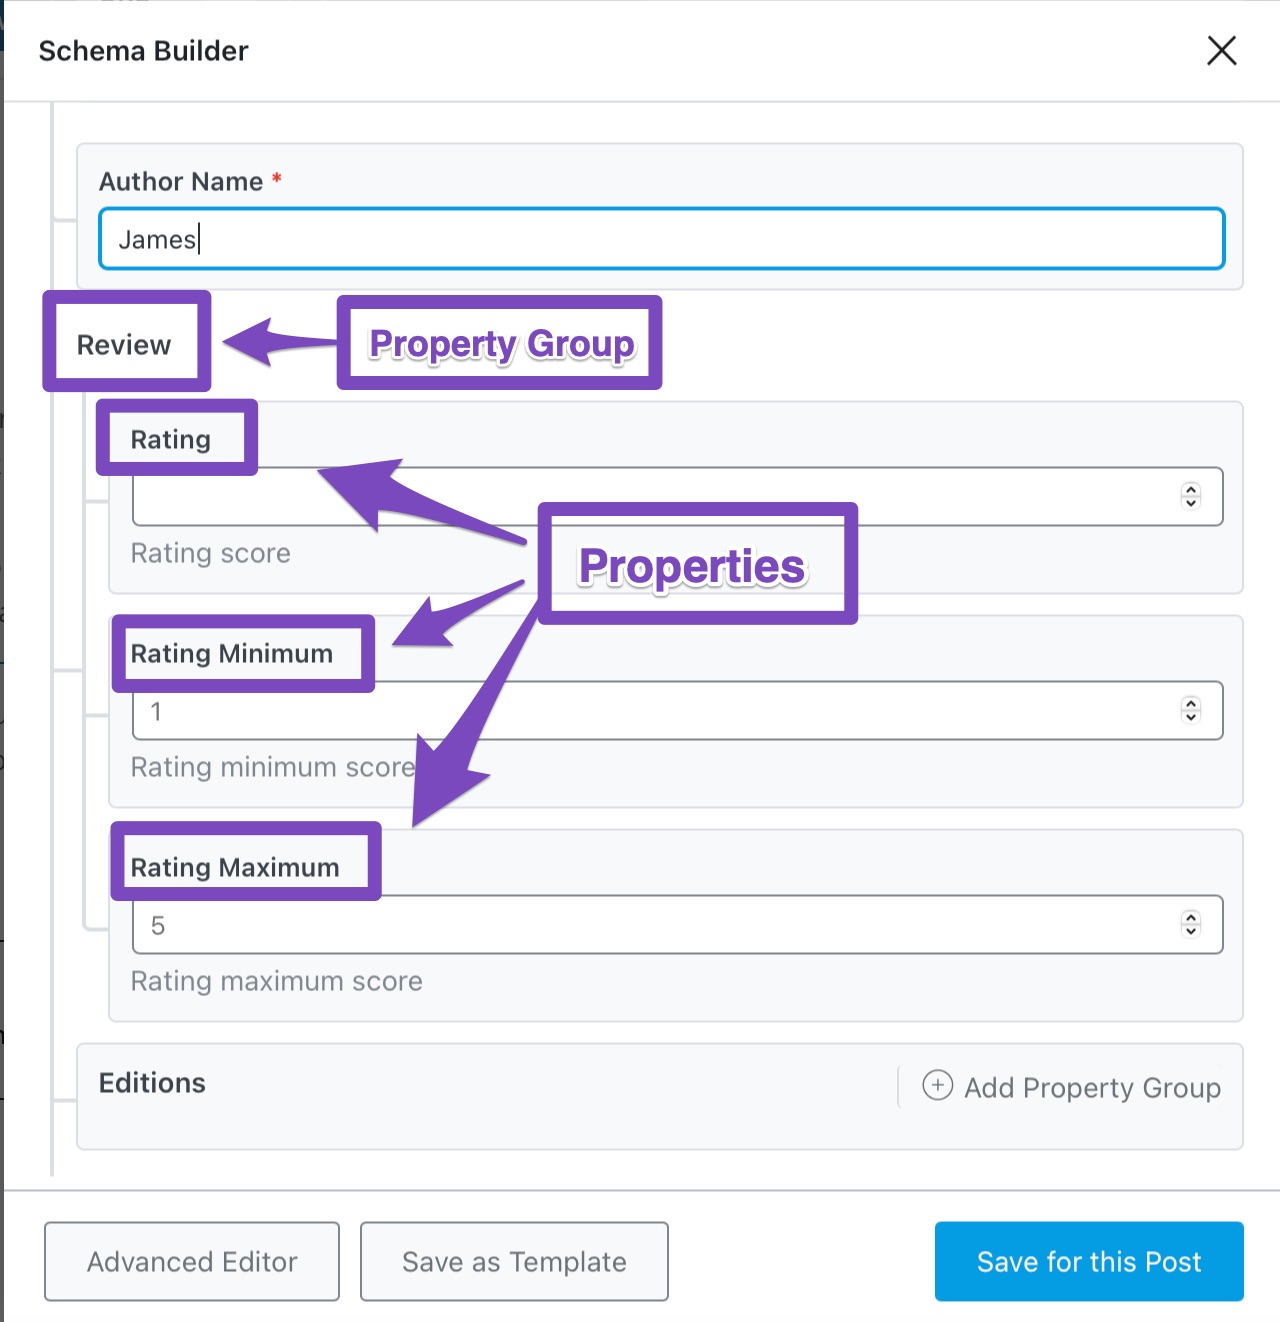
The idea here is quite simple. The Schema Generator creates the fields in which you fill in the data, and the Custom Schema Builder allows you to create the fields as well. You start with a blank slate, and then you add properties and properties groups to your Schema.
The difference between properties and property groups is quite simple. When properties can be organized in a logical way, it is better to put them in a group. For example, Review is a property group, while Rating, Rating Minimum, and Rating Maximum are properties.
Using the Custom Schema option, you can create a custom Schema, fill in the Schema, and add it to a page. Or, you could create a blank Schema structure and save it as a template to be used on multiple pages.
11 Advanced Schema Editor PRO
Rank Math now also includes an Advanced Schema editor, which lets you customize the Schema that you’ve created with the Schema Generator and also the Schema that you’ve created with the Custom Schema Builder.
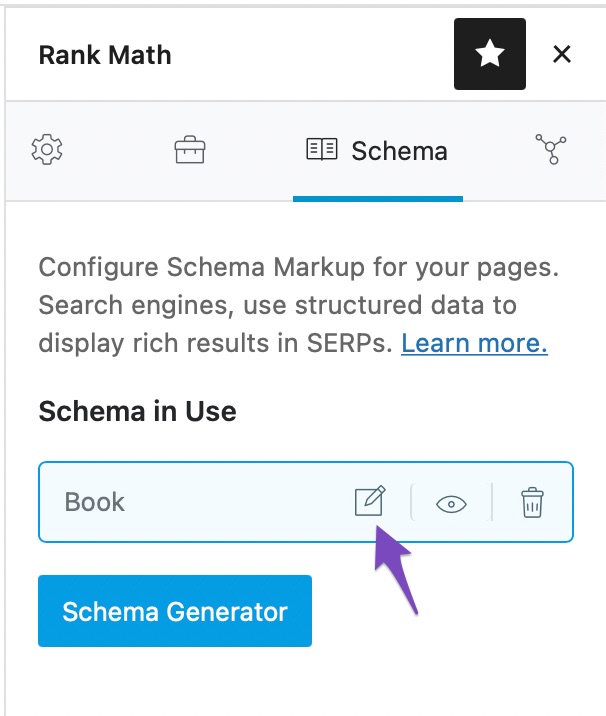
To use the Advanced Editor, open any of the Schemas that you’ve added to the page or post.
If you haven’t yet added any Schema, you will need to add one before using the Advanced Editor.
You’ll find the option right next to the Save as a Template option, and the reason why we’ve discussed this now is that we wanted to first explain the Custom Schema creator.
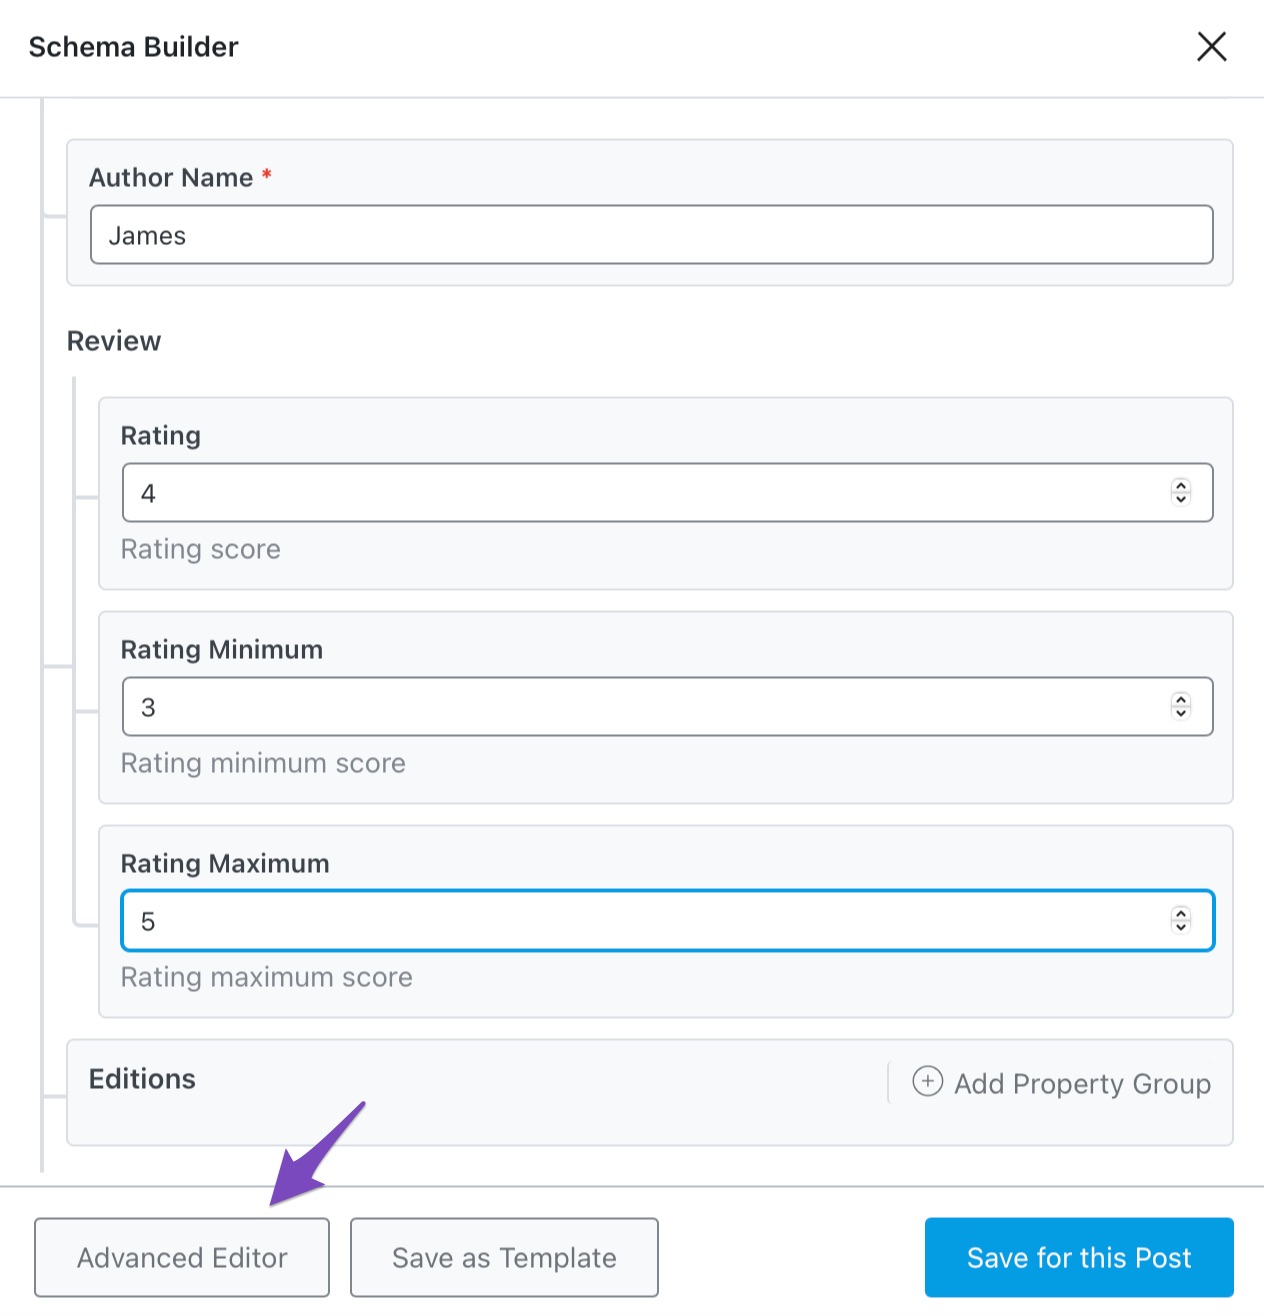
Once you click the Advanced Editor button, you will see a confirmation button on the screen. Click OK to proceed to the Advanced Editor.
Note: Once you switch to the advanced editor, that specific Schema type will always have to be edited with the Advanced Editor. But, there is nothing to worry about. If you’re curious, you can use the Advanced Editor on any Schema you create, then don’t save the post. If you refresh the post without saving it, then you will still be able to use the regular Schema Generator option for the Schema.

Once you click the OK button, the Schema type that you selected (book type in our case) will open up in the Advanced Editor.
Fair Warning: Just as the Custom Schema creator, the Advanced Editor is also, well, advanced. And, if you don’t understand a few things here, that is all right. Here is how the Advanced Editor looked like for the book-type Schema we created.
Using The Advanced Schema Editor As a Reference
Let us circle back to the Custom Schema Generator for a second. As you saw, the Custom Schema Generator is not suitable for people who do not have a good understanding of Schema. Even then, you might need trial and error before it works on your page.
But, there is a silver lining. You don’t have to always start with a blank slate when creating a custom Schema. You can use the Advanced Schema Editor as a guide.
If you didn’t notice already, the Advanced Schema Editor and the Custom Schema have identical interfaces. Here is an image comparing them side by side.
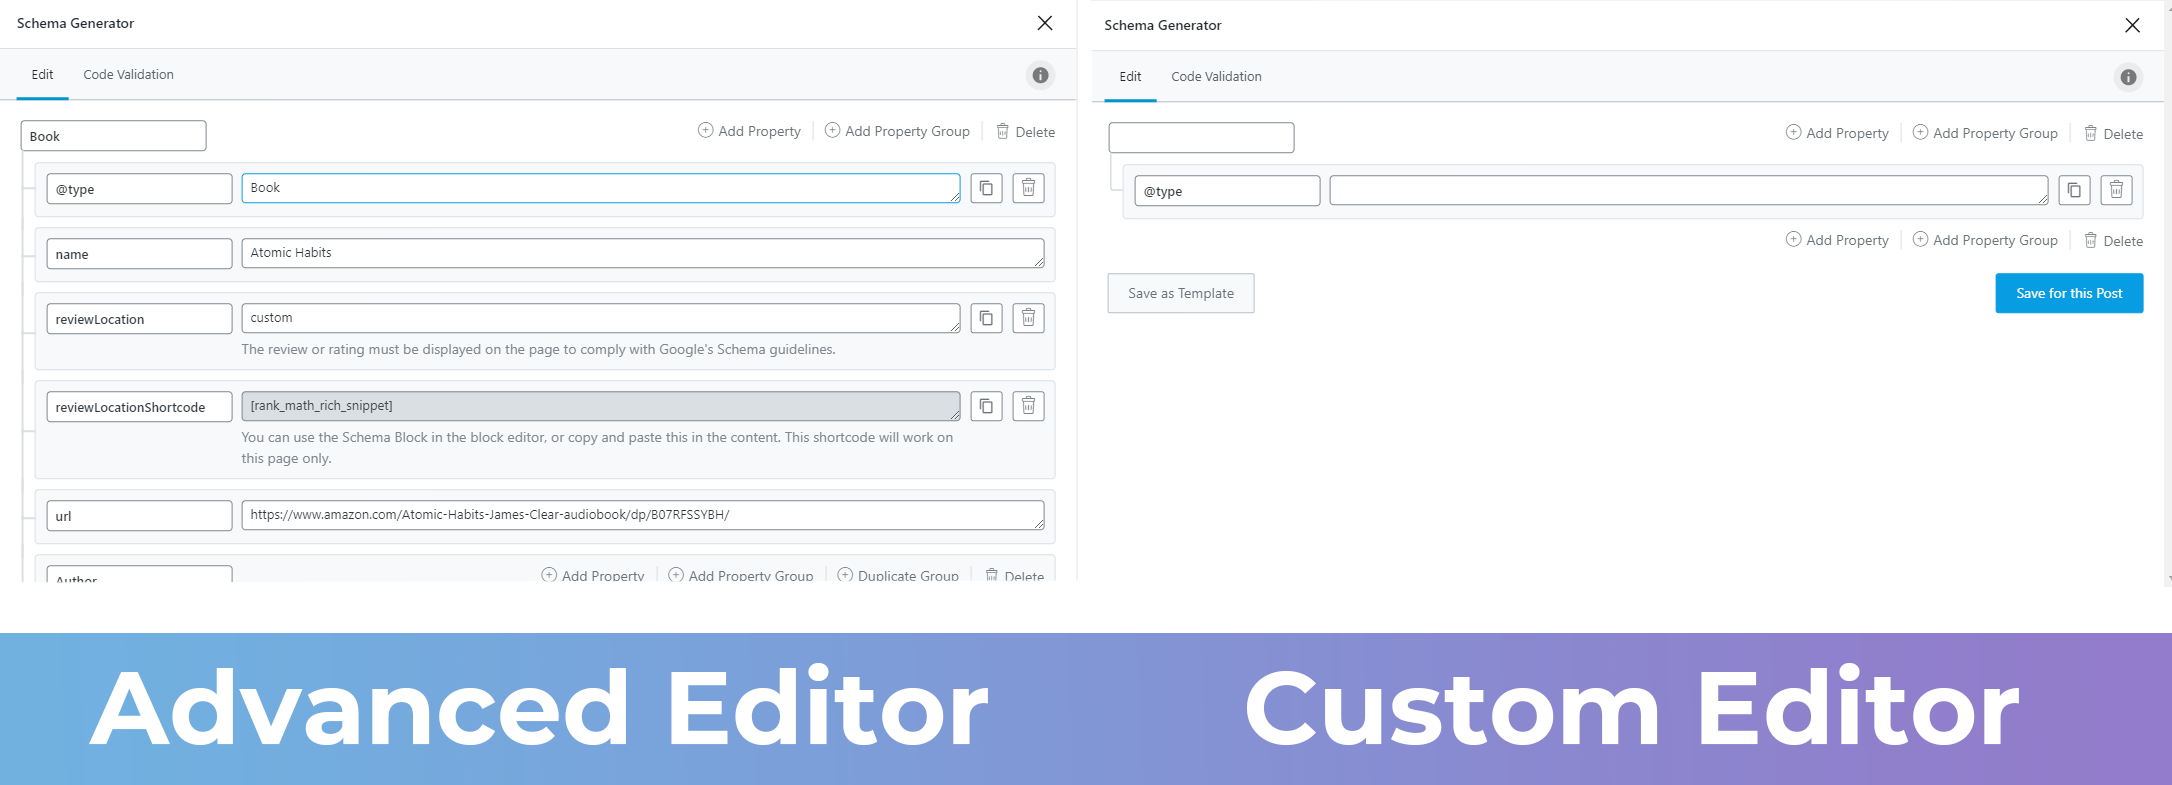
In fact, the Advanced Editor just looks like the Custom Editor was used to create the custom Schema. And that is the idea here. If you’re using the Custom Schema option in Rank Math, you can use the Advanced Editor as a guide to help you out in the process.
12 Code Validation PRO
Having Schema on your pages or posts is important. We’ve already established that. But, having the right Schema on your page is even more important.
That is because if you have the wrong or incomplete Schema on your page, then Google obviously will not consider your page for rich results, but Google will also be more careful in displaying rich results for your other pages. And even if you correct the Schema on your page, Google will not immediately consider them for rich results, even the Schema is correct. In some rare cases, Google might also give you a penalty.
We’ve built the Code Validation feature in Rank Math to avoid this issue. What the Code Validation feature does is help you identify Schema issues with your code before you hit publish, and Google indexes your page.
You will find the Code Validation option on the page and also in the Schema Templates section, but you should use it only on pages. Because with templates, Rank Math will store variables for many of the fields. Since the actual value of the variable will depend on the post, it is used on, and testing the template’s code is defeating the purpose of the Code Validation.
To access Code Validation, open up the Schema and click on the Code Validation tab.
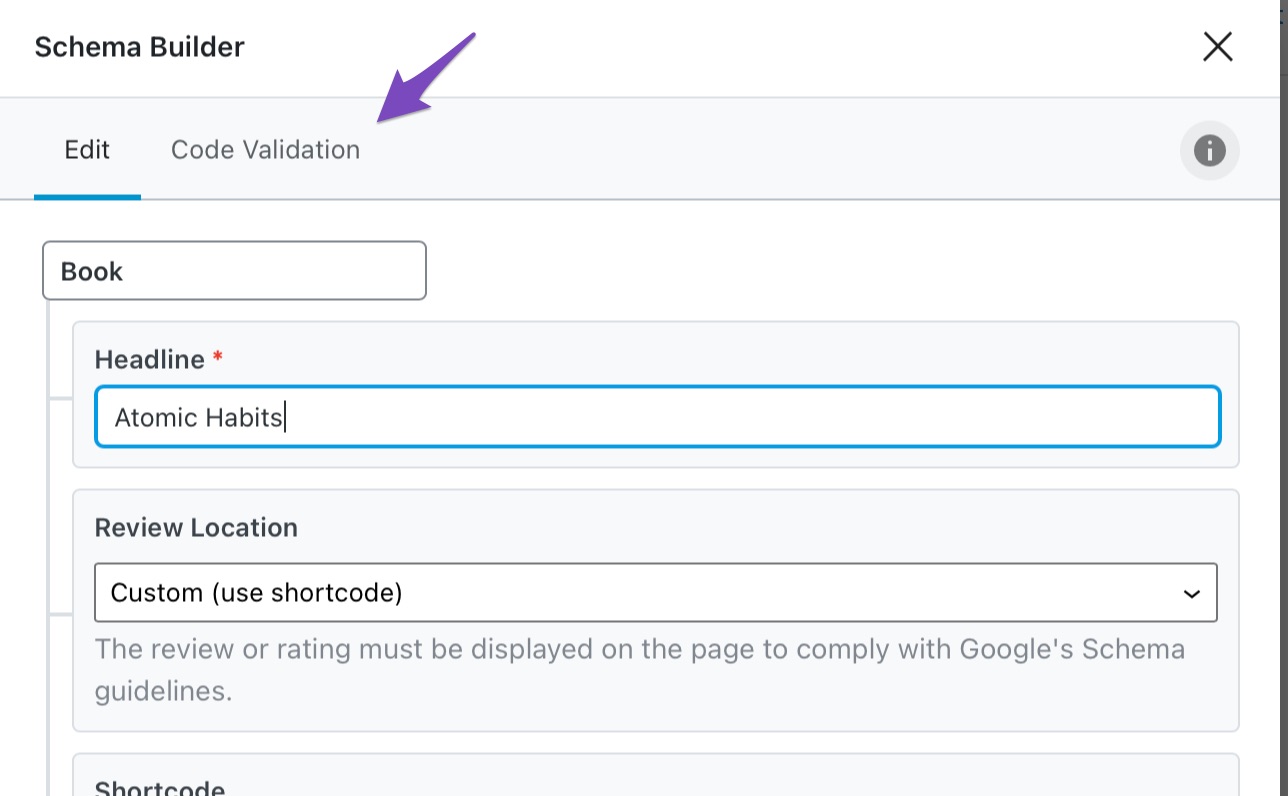
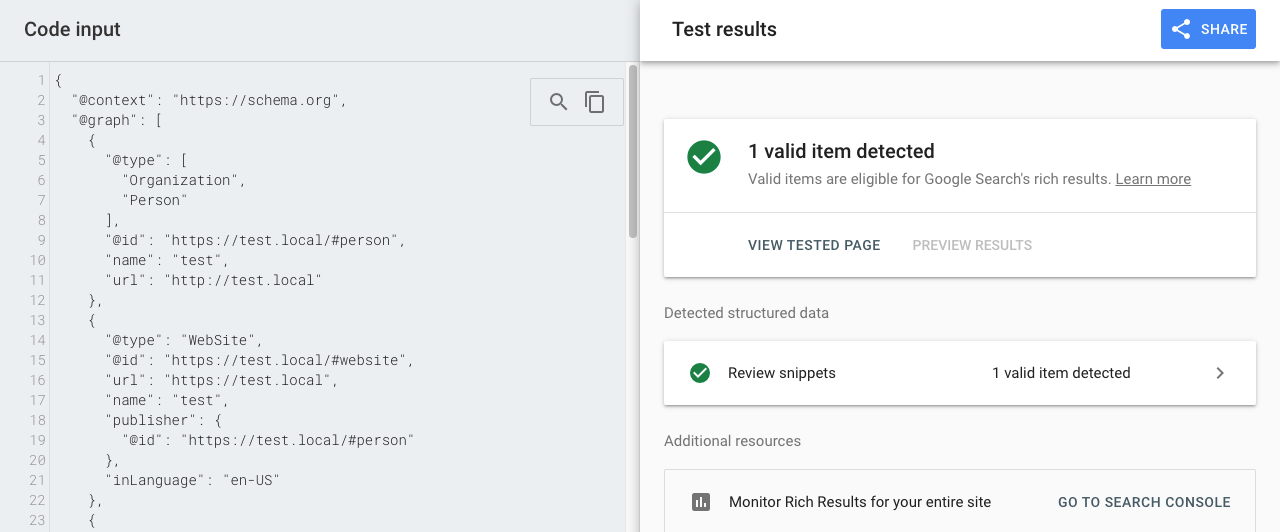
Once the tab is opened, you will see the actual JSON-LD code for the Schema on the page. Make sure that your post is saved as a draft at least; otherwise, you won’t see the complete code.
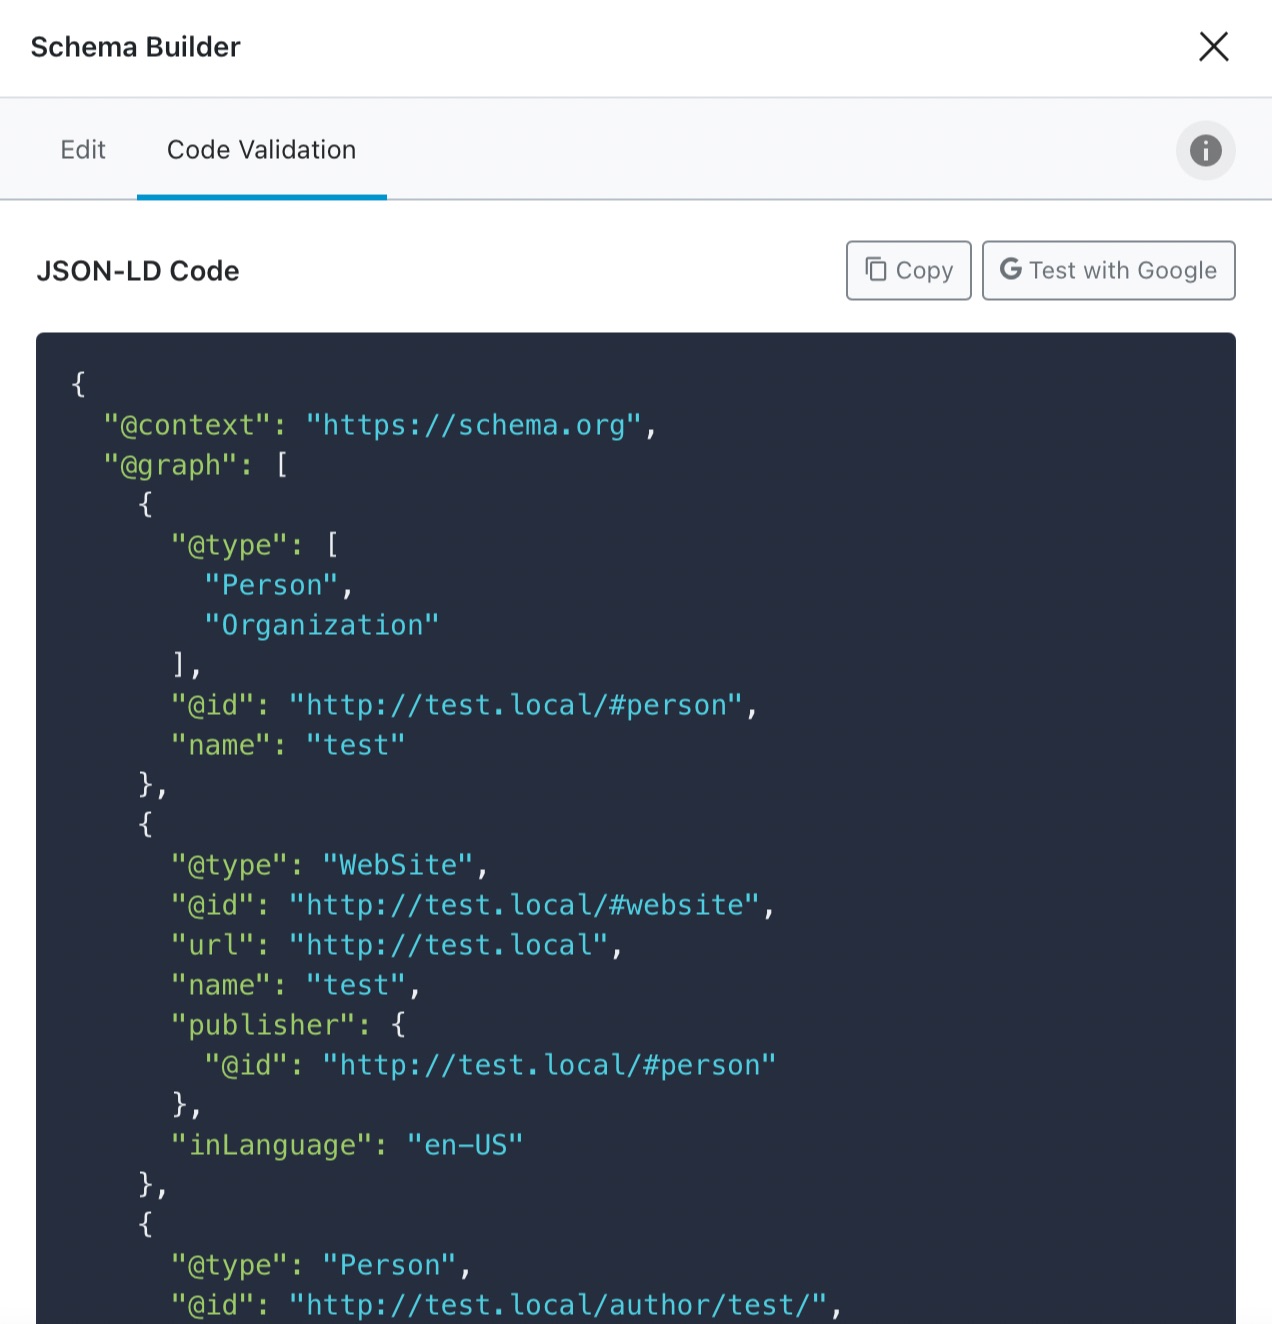
On the right, you will see 2 buttons as well. Clicking The Copy button will copy the code to your clipboard, and clicking the Test with Google button will open the Google Rich Results Testing Tool in a new tab with Schema data already pasted in the tool. To test the code, all you have to do is click the Test Code button, and Google will test the code and tell you if it is valid.

Rank Math pastes the code into the tool and not the URL of the page because if the page you’re adding Schema on is not live, then the test won’t work. Here is how the results should look like.
Using the Code Validation feature, you can quickly identify if the Schema you’re adding to your website or page is valid or not, which will save you a bunch of time and headaches in the future.
Note: Google’s Rich Results Testing tool will only recognize the rich snippets that Google officially supports. For other custom Schema types, you may need to use the Schema Validator tool for validating.
13 Adding Multiple Schema To A Single Page PRO
With Rank Math PRO, you can now add multiple types of Schema to a single page. It is a powerful way of improving the Schema on your page even further.
A practical example where you would need multiple Schema types on a page is when you’re operating an eCommerce store. Your product pages would need the Product Schema and also the Review Schema. Of course, that is not the only scenario, there are hundreds of others, but with that, we hope you understand where this would be useful.
To add another Schema type to your post with Rank Math PRO, all you have to do is click the Schema Generator button when a Schema is already present on the page.
Then follow the process that we’ve described above, just the same. Once you add the Second Schema, this is how Rank Math will present it.
Then you edit, delete, and add even more Schema types to the page using the same process.
You can also do this by using Schema Templates. Just assign the display rules as such so that one page gets more than one type of Schema. Once you do that, you will see all the Schema types on the page by default.
14 Schema for Custom Post Types
Rank Math fully supports custom posts whether you create them with code or by using a plugin like CPT UI. Once you register a custom post type, Rank Math will include a section in the Titles and Meta settings where you’ll be able to configure global options for the custom post type. For example, we just created a custom post type called tools.
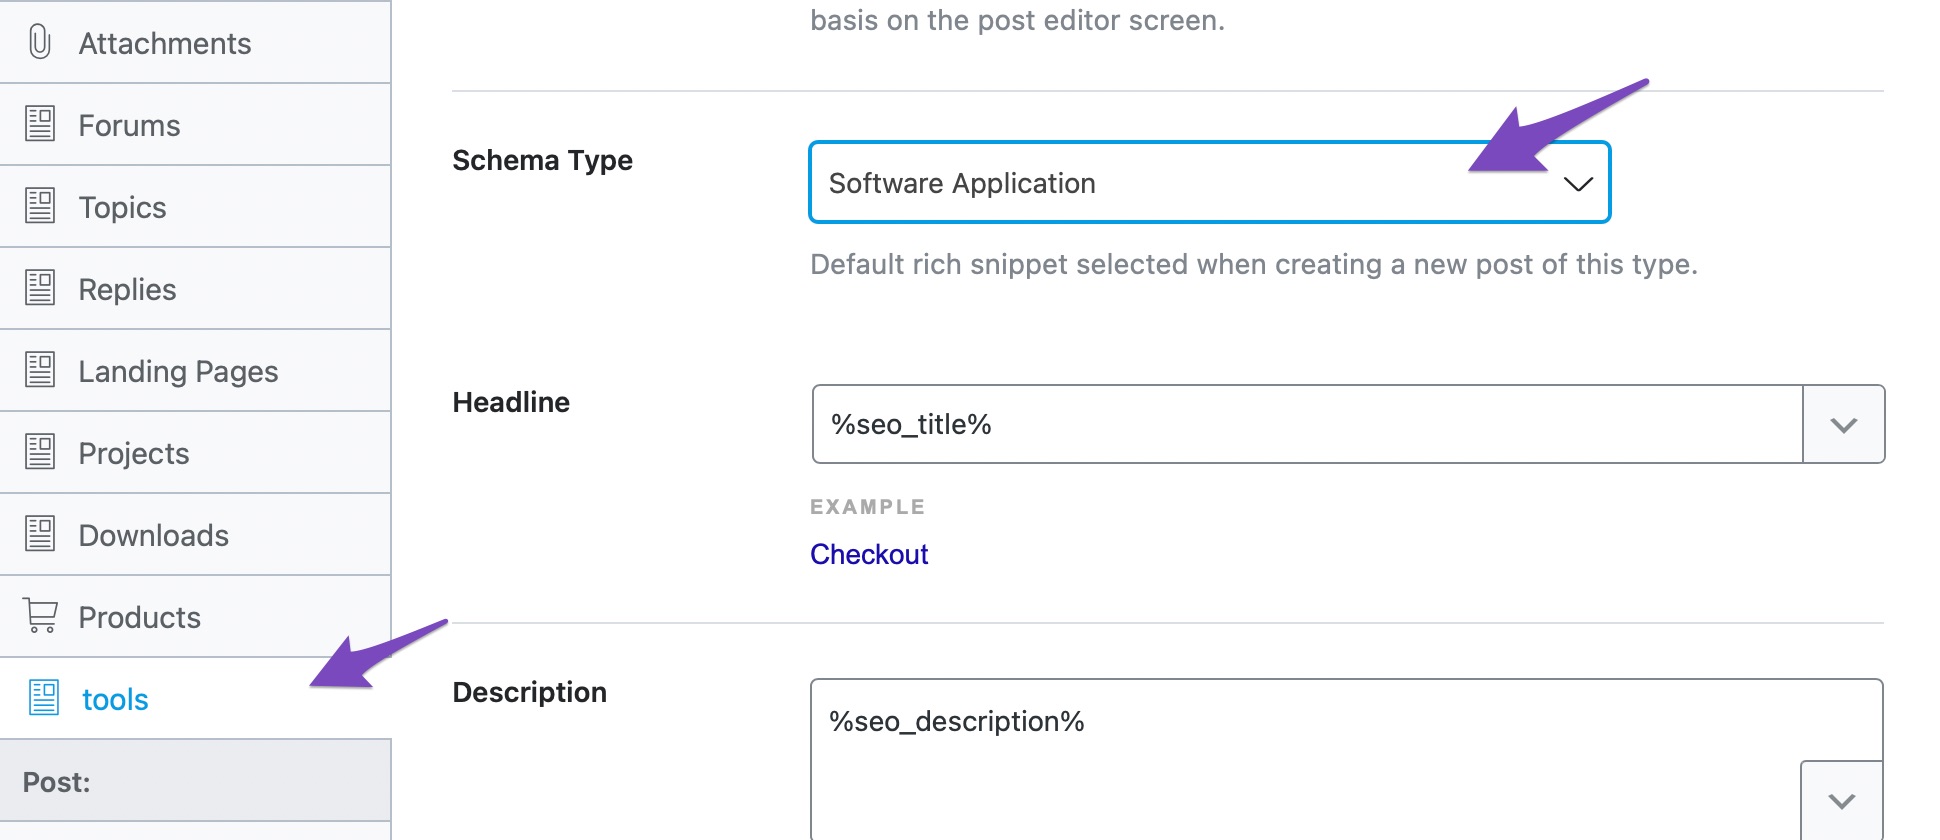
And when we created a new tools post, we instantly saw the global Schema applied to it.
15 Conclusion
We hope that it is clear how you can use Rank Math to add structured Schema data on your website with a lot of precision.
Although it may seem like you have to spend a lot of time creating Schema templates, rules, display conditions, and custom Schema, it is far more efficient than creating Schema from scratch.
Most of the time, you will create these once and add them to multiple pages on your website while retaining control over the Schema on each page.
Also, remember that if you find adding Schema difficult, then your competition will also feel the same way.
Once you consider that and also weigh in the rise of structured data and the SEO benefits it brings, you will see how beneficial it can be to add Schema to all your pages to beat your competition and also develop a competitive advantage. Of course, we will keep updating Rank Math to make it more powerful while making the process as simple as possible.