If your website has posts or pages with content about public events, you should consider using the Event Schema type. And when you do so, your events become eligible for featuring under the Events rich snippet in Google search results.

The event experience in Google makes it easier for more people to discover and attend your events.

Fortunately, applying the Event Schema type to any number of pages on your website couldn’t be easier than it is with the help of Rank Math.
Table Of Contents
How to Add Event Schema Markup to Your Posts/Pages
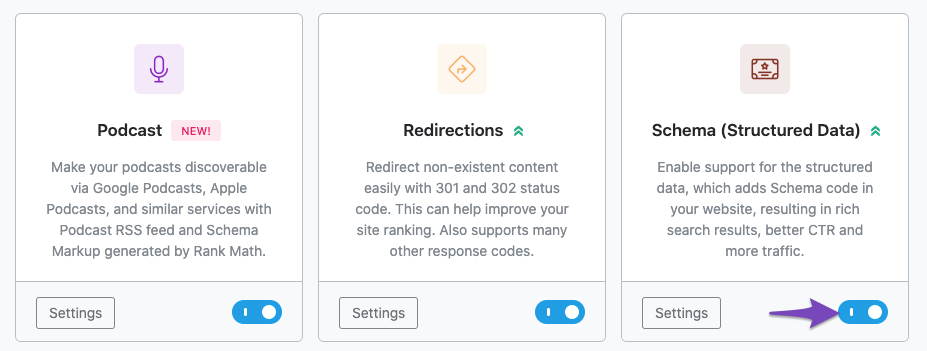
Before we begin, you’ll need to ensure that Rank Math’s Schema module has been enabled on your website by navigating to Rank Math SEO → Dashboard in your WordPress admin area.
In this tutorial, we’ll walk you through how to use the Event Schema type on a post or page, as well as the various available settings for it – let’s get started:
1 Edit Your Post or Page
To set the Event Schema Type, at first, head over to the edit page of that post by clicking Edit as shown below:

2 Open Rank Math in the Gutenberg Sidebar
Click on the Rank Math SEO icon that displays alongside this post/page’s SEO score to open the SEO settings for this page.
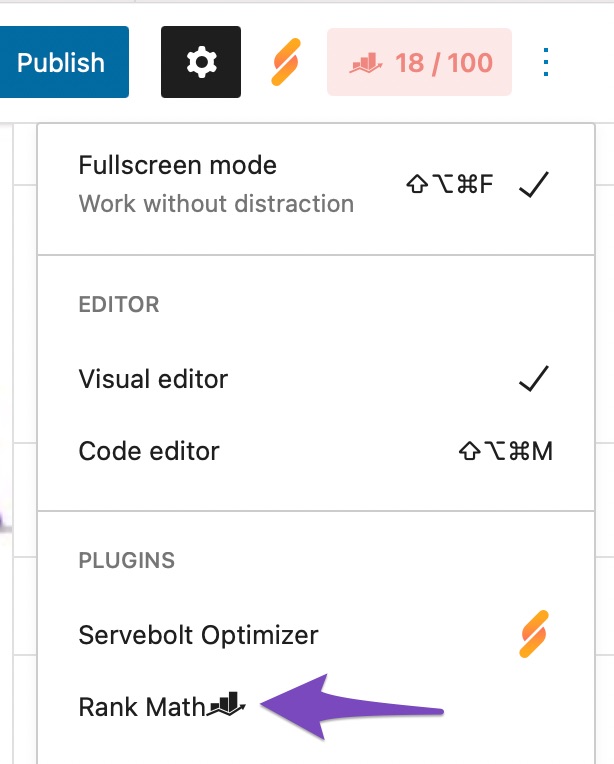
Alternatively, click the three vertical dots in the top right-hand corner of the edit page and select Rank Math in the Plugins section – as shown below:
3 Navigate to the Schema Settings for This Post/Page
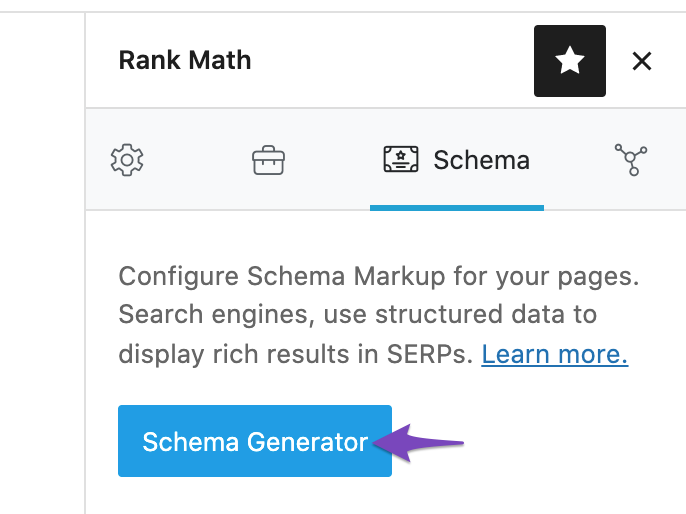
Navigate to the Schema tab and then click on Schema Generator.
4 Navigate to Rank Math’s Schema Builder
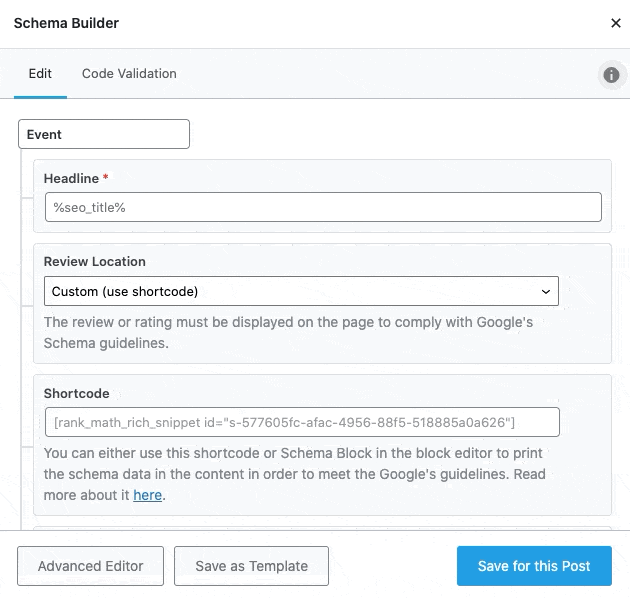
From the list of available Schema types, click on Use against the Event Schema type to open the Schema Builder.

The Schema Builder will then show up as shown below:
Event Schema Type Setup & Available Options
Now, let’s have a closer look at each of the available options in detail.
1 Headline
Enter the headline of the event here. This would appear as the name of the event in the rich result, hence make sure that the name of the event is descriptive. You can also make use of variables to create dynamic headlines.

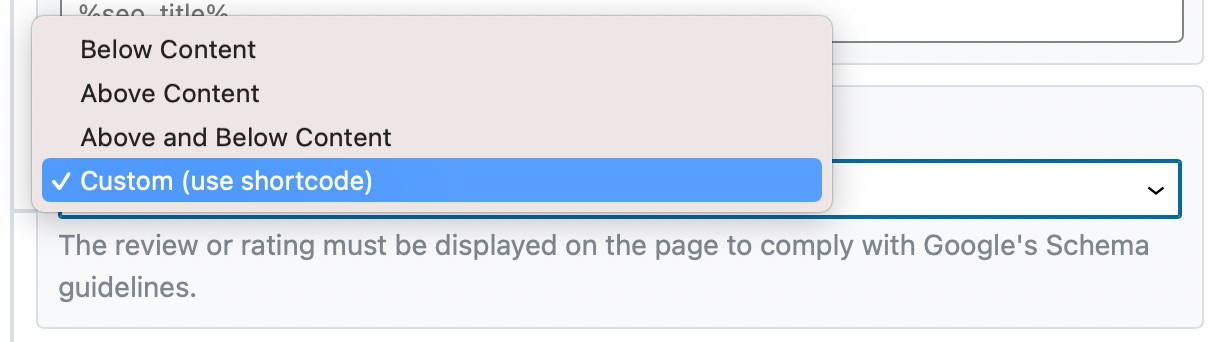
2 Review Location
Review Location lets you configure where the Schema for the event type will be shown on the page. You can select the Review Location from the options available in the drop-down list.
You can add it to the top of the post, the bottom of the post, both the top and bottom of the post, or at a custom location using a shortcode.
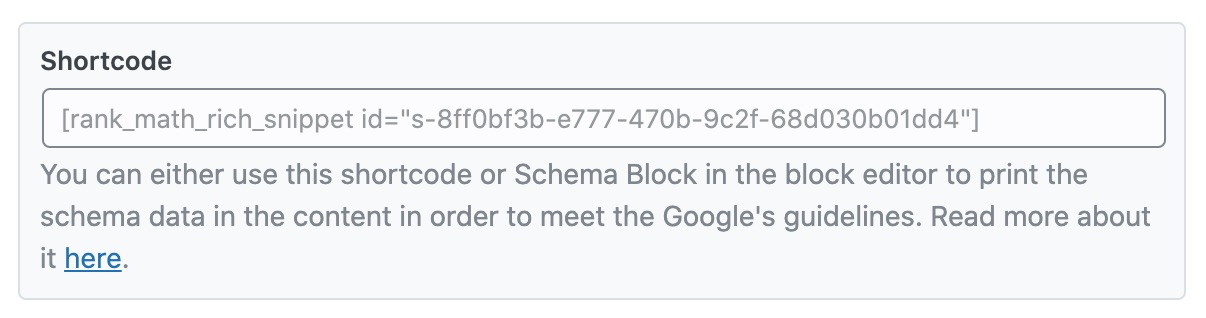
3 Shortcode
The Shortcode field is only visible if you select the Shortcode option in the Review Location field. Copy and paste the shortcode into your content.
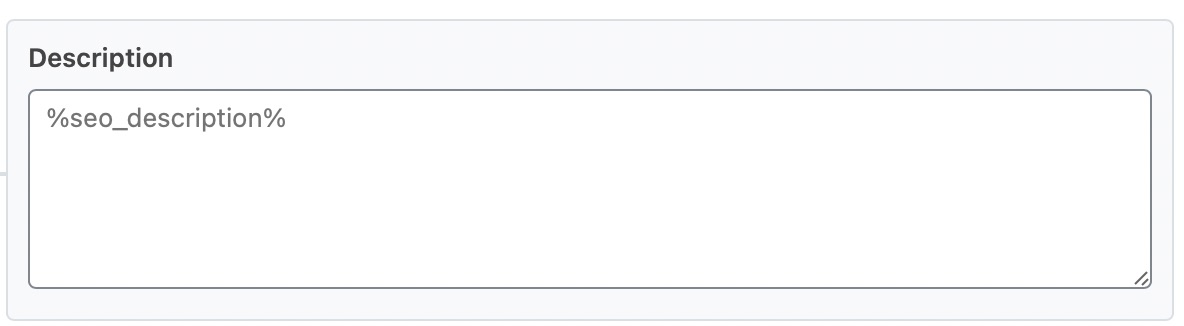
4 Description
Enter the description of the event. While Rank Math uses the SEO description for this field by default, the best practice would be to include all the details of the event here. So that search users would find it easy to understand and attend the event.
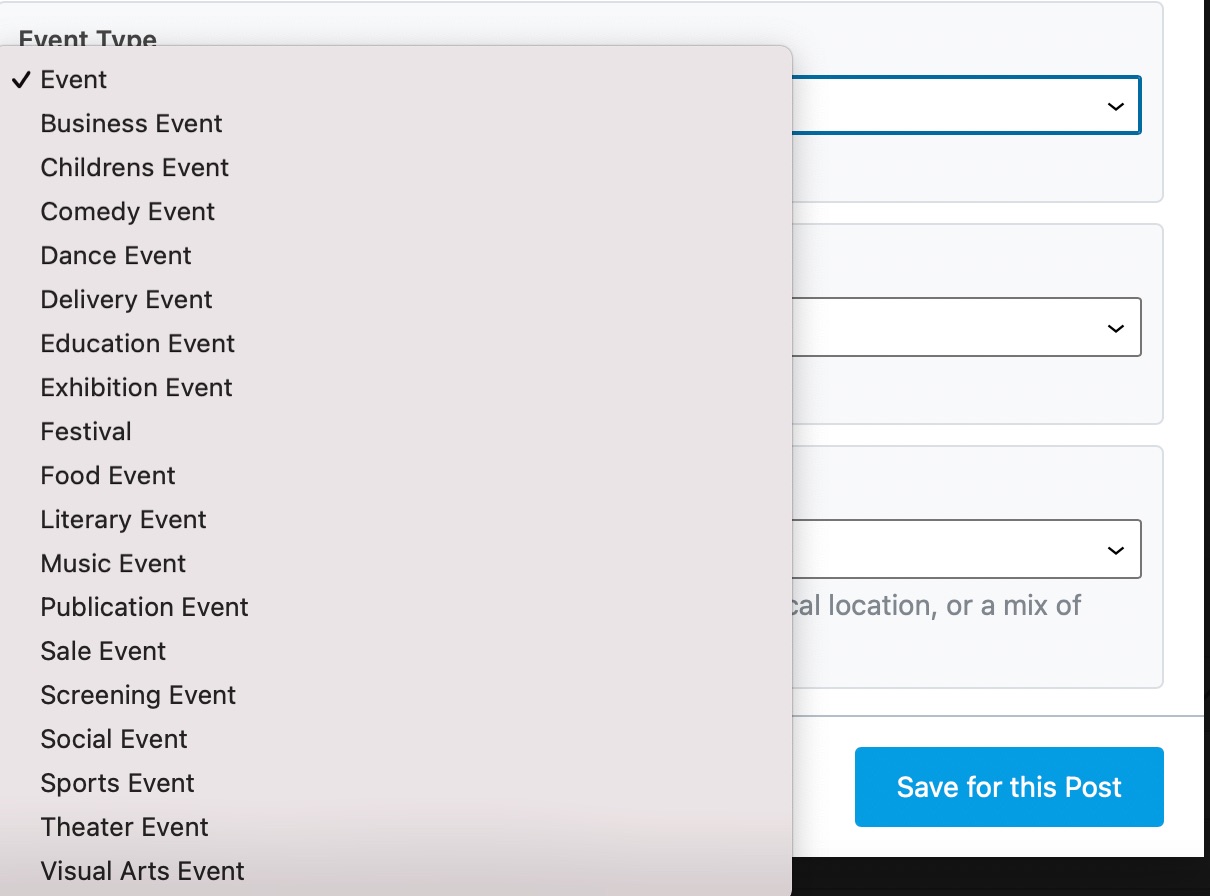
5 Event Type
Select the type of event from the drop-down list. There are various event types that are recognized in Schema.org markup.
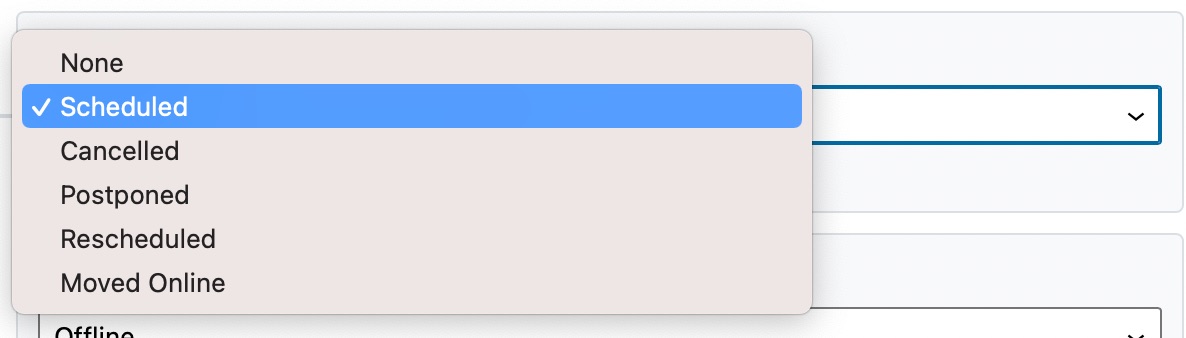
6 Event Status
Select the current status of the Event from the drop-down list as shown below.
Scheduled: Here, a particular event is scheduled to happen. This informs search engines when the event is going to happen so as to reflect the same on search results whenever someone searches for the same.
Cancelled: If the event has been cancelled, then set the status as “cancelled”.
Postponed: It means that the event has been postponed to a different date that is unknown. Once you receive the information on the new date of the event, make sure the event status is changed to Rescheduled. After that, you should update the new start date and end date.
Rescheduled: This means that the event has been rescheduled to a later date that is known. You should update the start date and end date with relevant new dates. You can also update with a previous start date for the events rescheduled.
Moved Online: There is no physical event; this is an online event. That is, the event is being relocated from in-person attendance to online attendance.
This is an optional field, so keep it to “None” if you’re not aware of the event status.
In case there is a change in the status of the event, update the status here so that you can communicate the same to the search engine to keep users informed in search results.
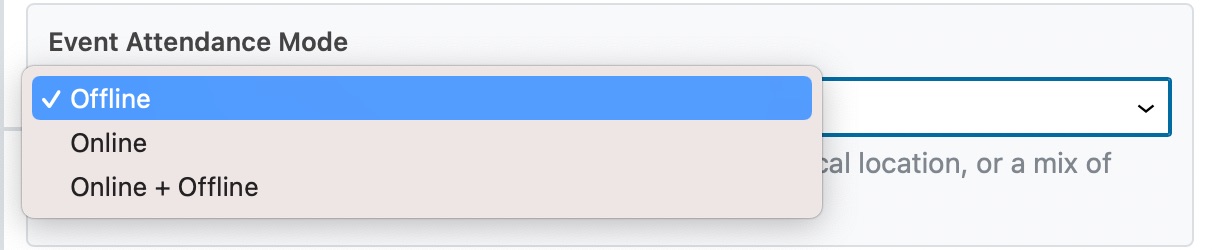
7 Event Attendance Mode
Select the Event Attendance Mode from the drop-down list. The event can either be online, offline, or both online and offline.
8 Online Event URL
If you’ve set the event to be online or both online and offline in the previous setting, this option will be available for you. Enter the URL of your online event in this field, where people can join your event.

9 Venue Name
Enter the name of the venue where the event will take place. This option is available only when you choose the event to be offline or both online and offline.

10 Venue URL
Enter the Website URL of the venue in this field. Only if you had chosen the event to be offline or both online and offline, this option would be available.

11 Address
Enter the Address details such as Street Address, Locality, Region, Postal Code, and Country of the Venue. This option is available only when you choose the event to be offline or both online and offline.
Note: The country should be specified using the two-letter ISO 3166-1 alpha-2 format, for example, US for the United States.

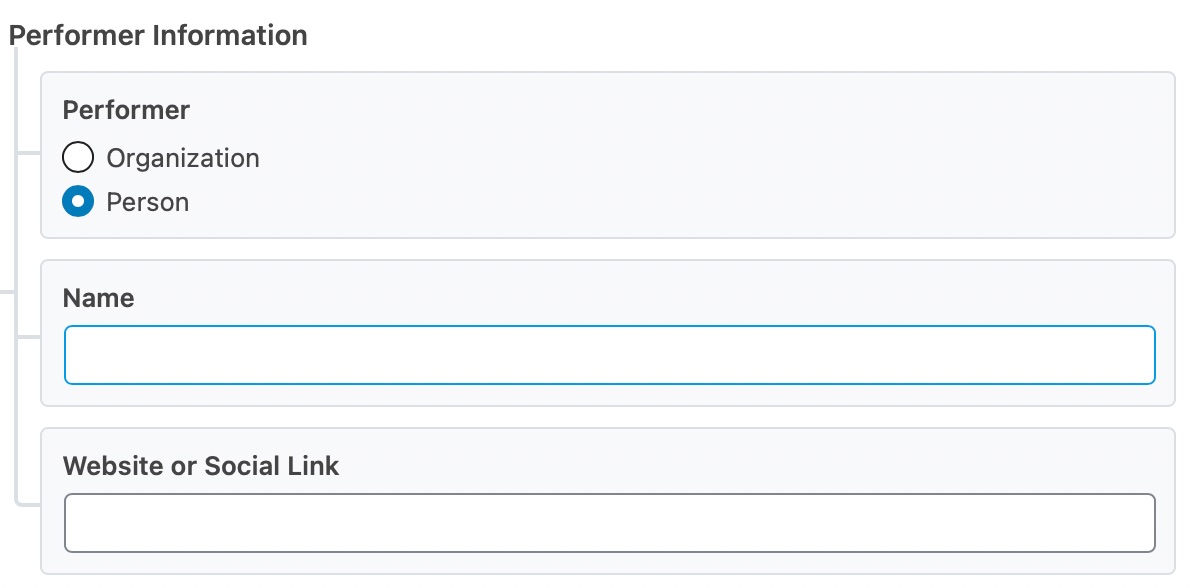
12 Performer Information
Enter the Performer Information here. You can choose whether the performer is an organization or a person. Also, you can mention the name of the performer and the website or social link of the performer.
13 Start Date
Enter the start date and time of the event with the help of the date and time picker.

14 End Date
Enter the end date and time of the event with the help of the date and time picker.

15 Offers
Enter the various fields in this section as shown below:
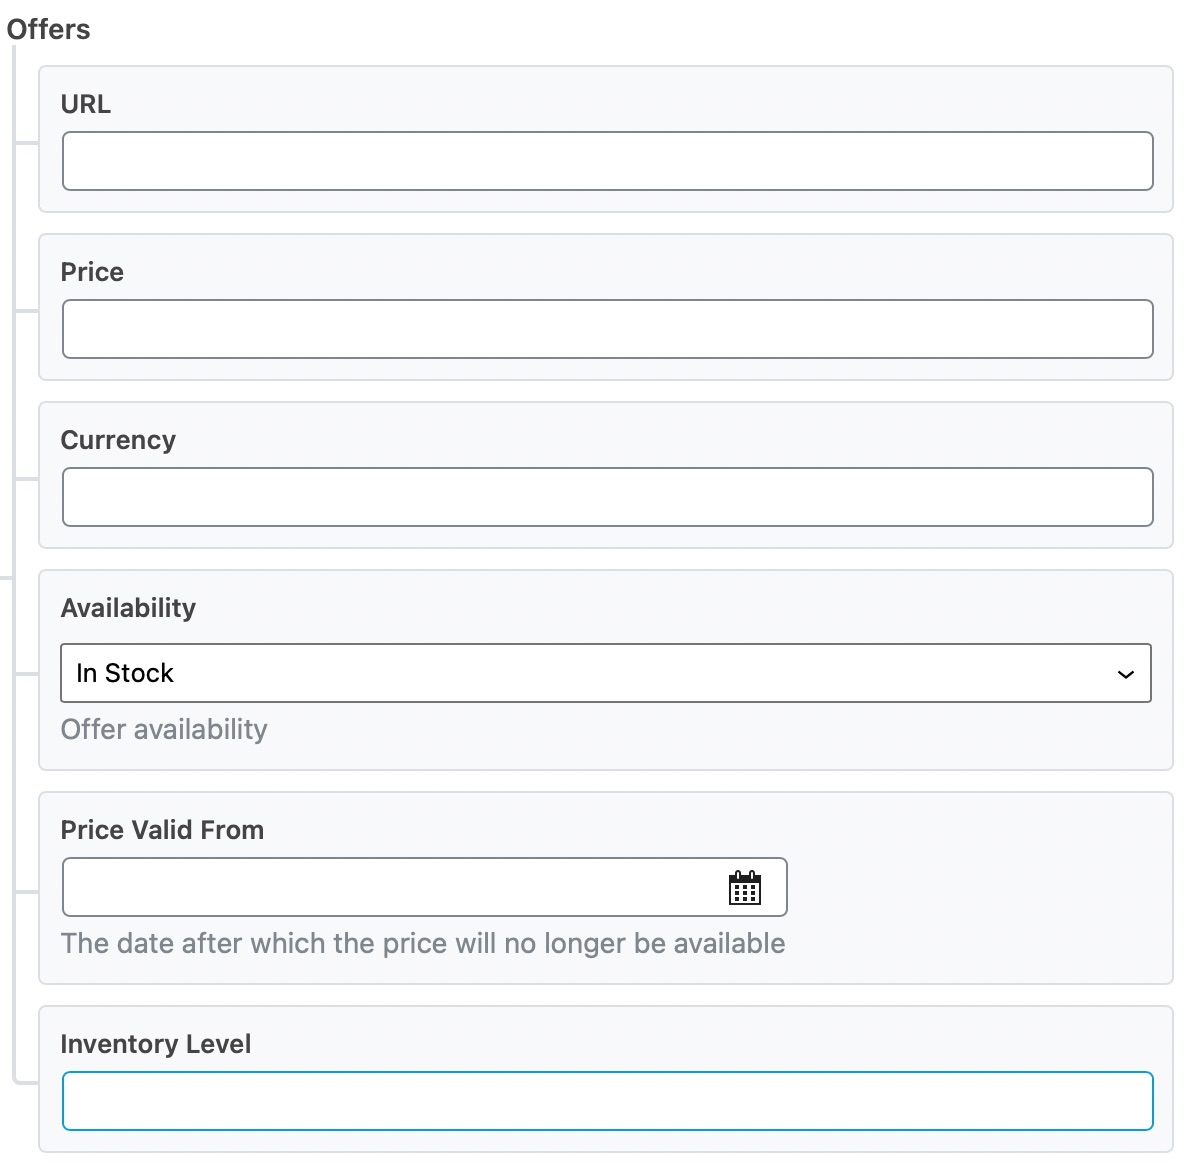
- URL: Enter the URL where the audience can buy the tickets from. If the event is free, then leave it blank.
- Price: Enter the price of the event. Only enter the number without any currency symbol in this field. If the event is free or you’re not aware of the price, then leave this field blank.
- Currency: Enter the currency of the price here. You will specify the currency using the ISO 4217 Currency Code. If you don’t know the ISO code of your country’s currency, Wikipedia has an active code list.
- Availability: Select the availability of the tickets here from the drop-down list. The options available are: In Stock, Sold Out, and Preorder.
- Price Valid From: Select the date when the price of the ticket becomes valid.
- Inventory Level: If you know how many tickets are available for sale, enter the number here, or leave this field blank.
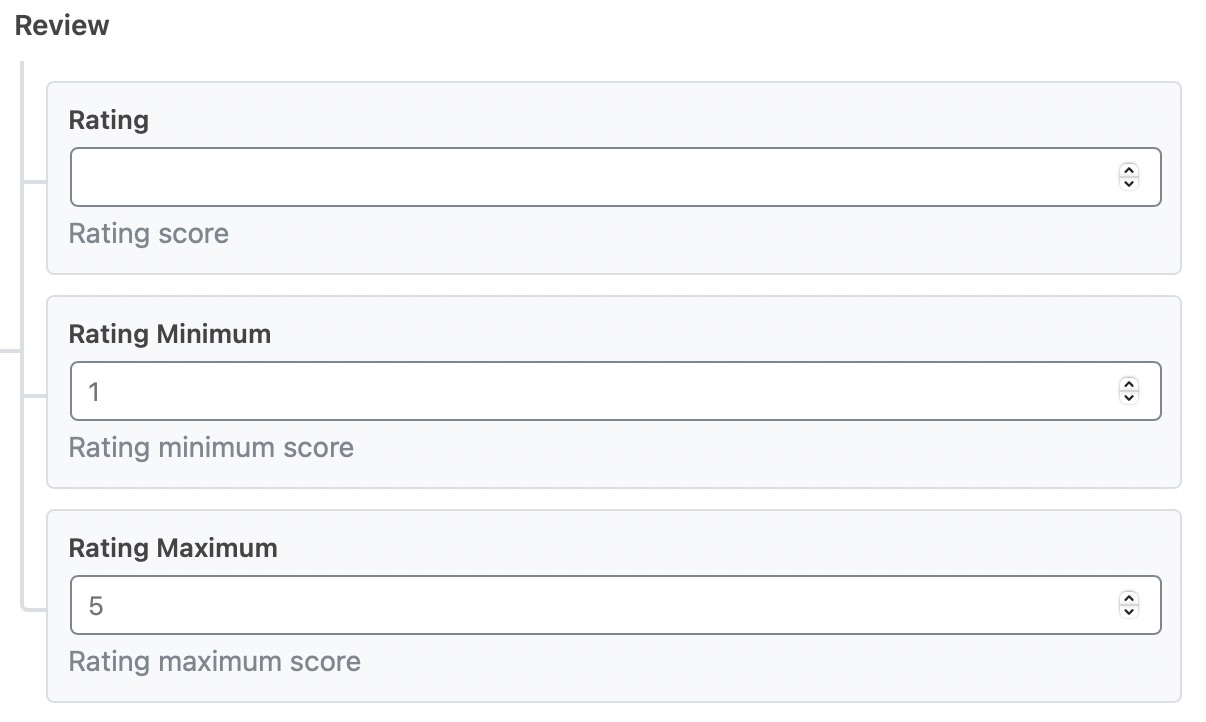
16 Rating
Enter the Rating score for the event along with the minimum and maximum score in your rating scale.
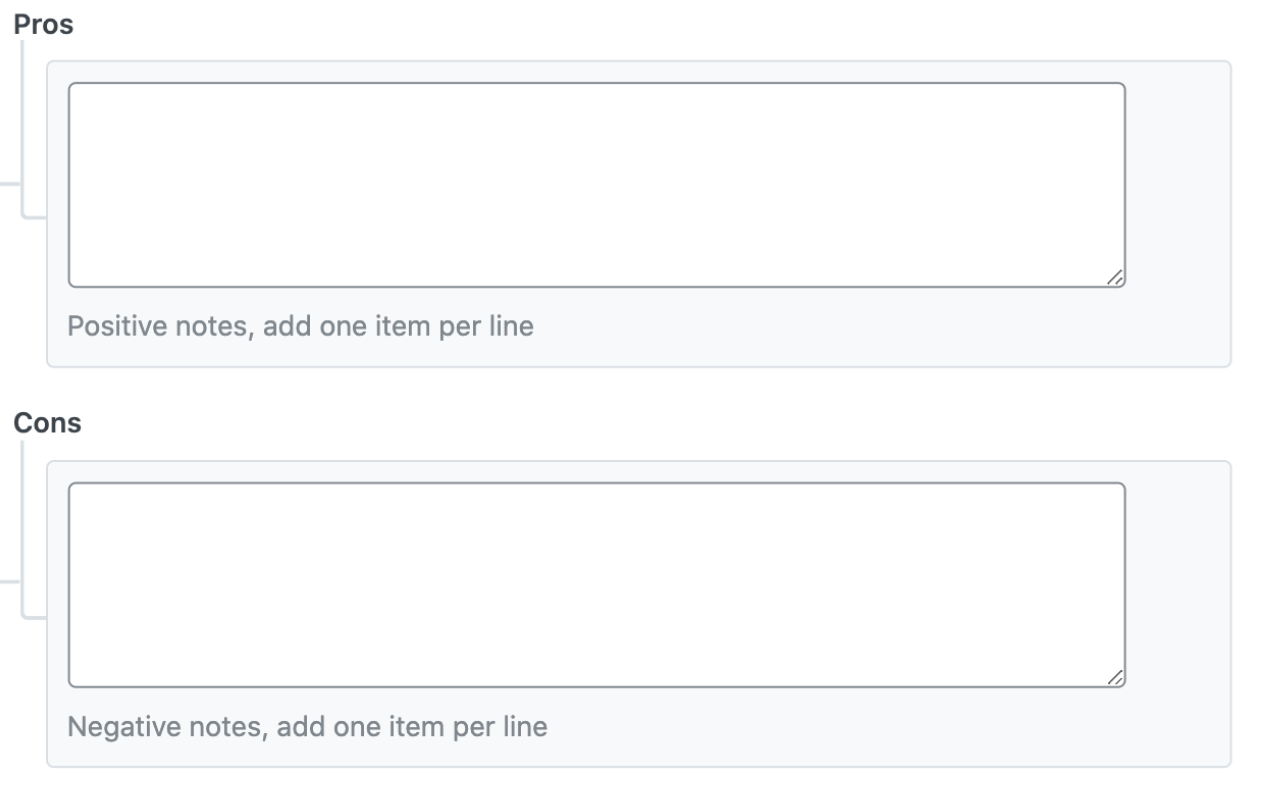
17 Pros and Cons PRO
Enter the Pros and Cons for the event here, if applicable. These fields are available to add only in the PRO version of Rank Math and when you add, ensure that you add only one item per line.
And, that’s it! Simply click on Save for this Post once you have made the changes. Now save the existing post/page as you generally would do after making a change or click on Publish (if this is a newly created post/page). And, whenever making adjustments to Schema Markup, we then recommend you proceed to validate this page’s Schema with the help of Google’s Rich Results Testing Tool.