Do you want to show your business location, highlight nearby landmarks, or make your contact page more interactive?
Embedding Google Maps in your WordPress site is a simple yet powerful way to do just that.
Google Maps, a widely used mapping service, enables your audience to search for locations, obtain directions, and explore nearby places effortlessly.
In this post, we’ll walk you through the easiest methods to embed Google Maps in WordPress—no technical skills required.
Are you ready? Let’s get started.
Table Of Contents
1 Why Embed Google Maps in WordPress?
Embedding Google Maps in your WordPress site is more than just adding directions—it’s a smart way to improve user experience, build trust, and boost visibility.
1.1 For Business Owners
If your business has a physical location, adding Google Maps helps customers easily find you. Whether you run a store, restaurant, or office, maps make it simple for visitors to get directions and reach you faster.
This is especially useful if your location is remote or hard to find. Plus, making your location visible can lead to more foot traffic, better customer satisfaction, and increased sales.
1.2 For Bloggers and Content Creators
Including maps in your posts gives readers a clear view of the places you mention—ideal for travel blogs, local guides, or event coverage. It adds an interactive touch, letting users explore locations directly from your page.
Maps also build credibility. Showing real locations proves you’ve done your research and makes your content more trustworthy.
For travel bloggers or location-based creators, Google Maps can even open up new monetization options, like affiliate links to local tours or sponsored content tied to specific areas.
1.3 Boosting Local SEO
Adding Google Maps to your WordPress site can improve your local SEO. When search engines see consistent business details—like your name, address, phone number, and hours—they’re more likely to show your site in local search results.
This can lead to better visibility in Google searches and help you attract nearby customers searching for services you offer.
2 Methods to Embed Google Maps in WordPress
Let us now discuss the ways to embed Google Maps in WordPress.
The second method proves more beneficial as it adheres to all local SEO best practices. By opting for this method, Google will include your location on Google Maps and showcase essential business information, including name, logo, address, phone number, and opening hours in local search results.
2.1 Embed Google Maps in WordPress Without a Plugin
Embedding Google Maps without using a plugin utilizes the Iframe technique.
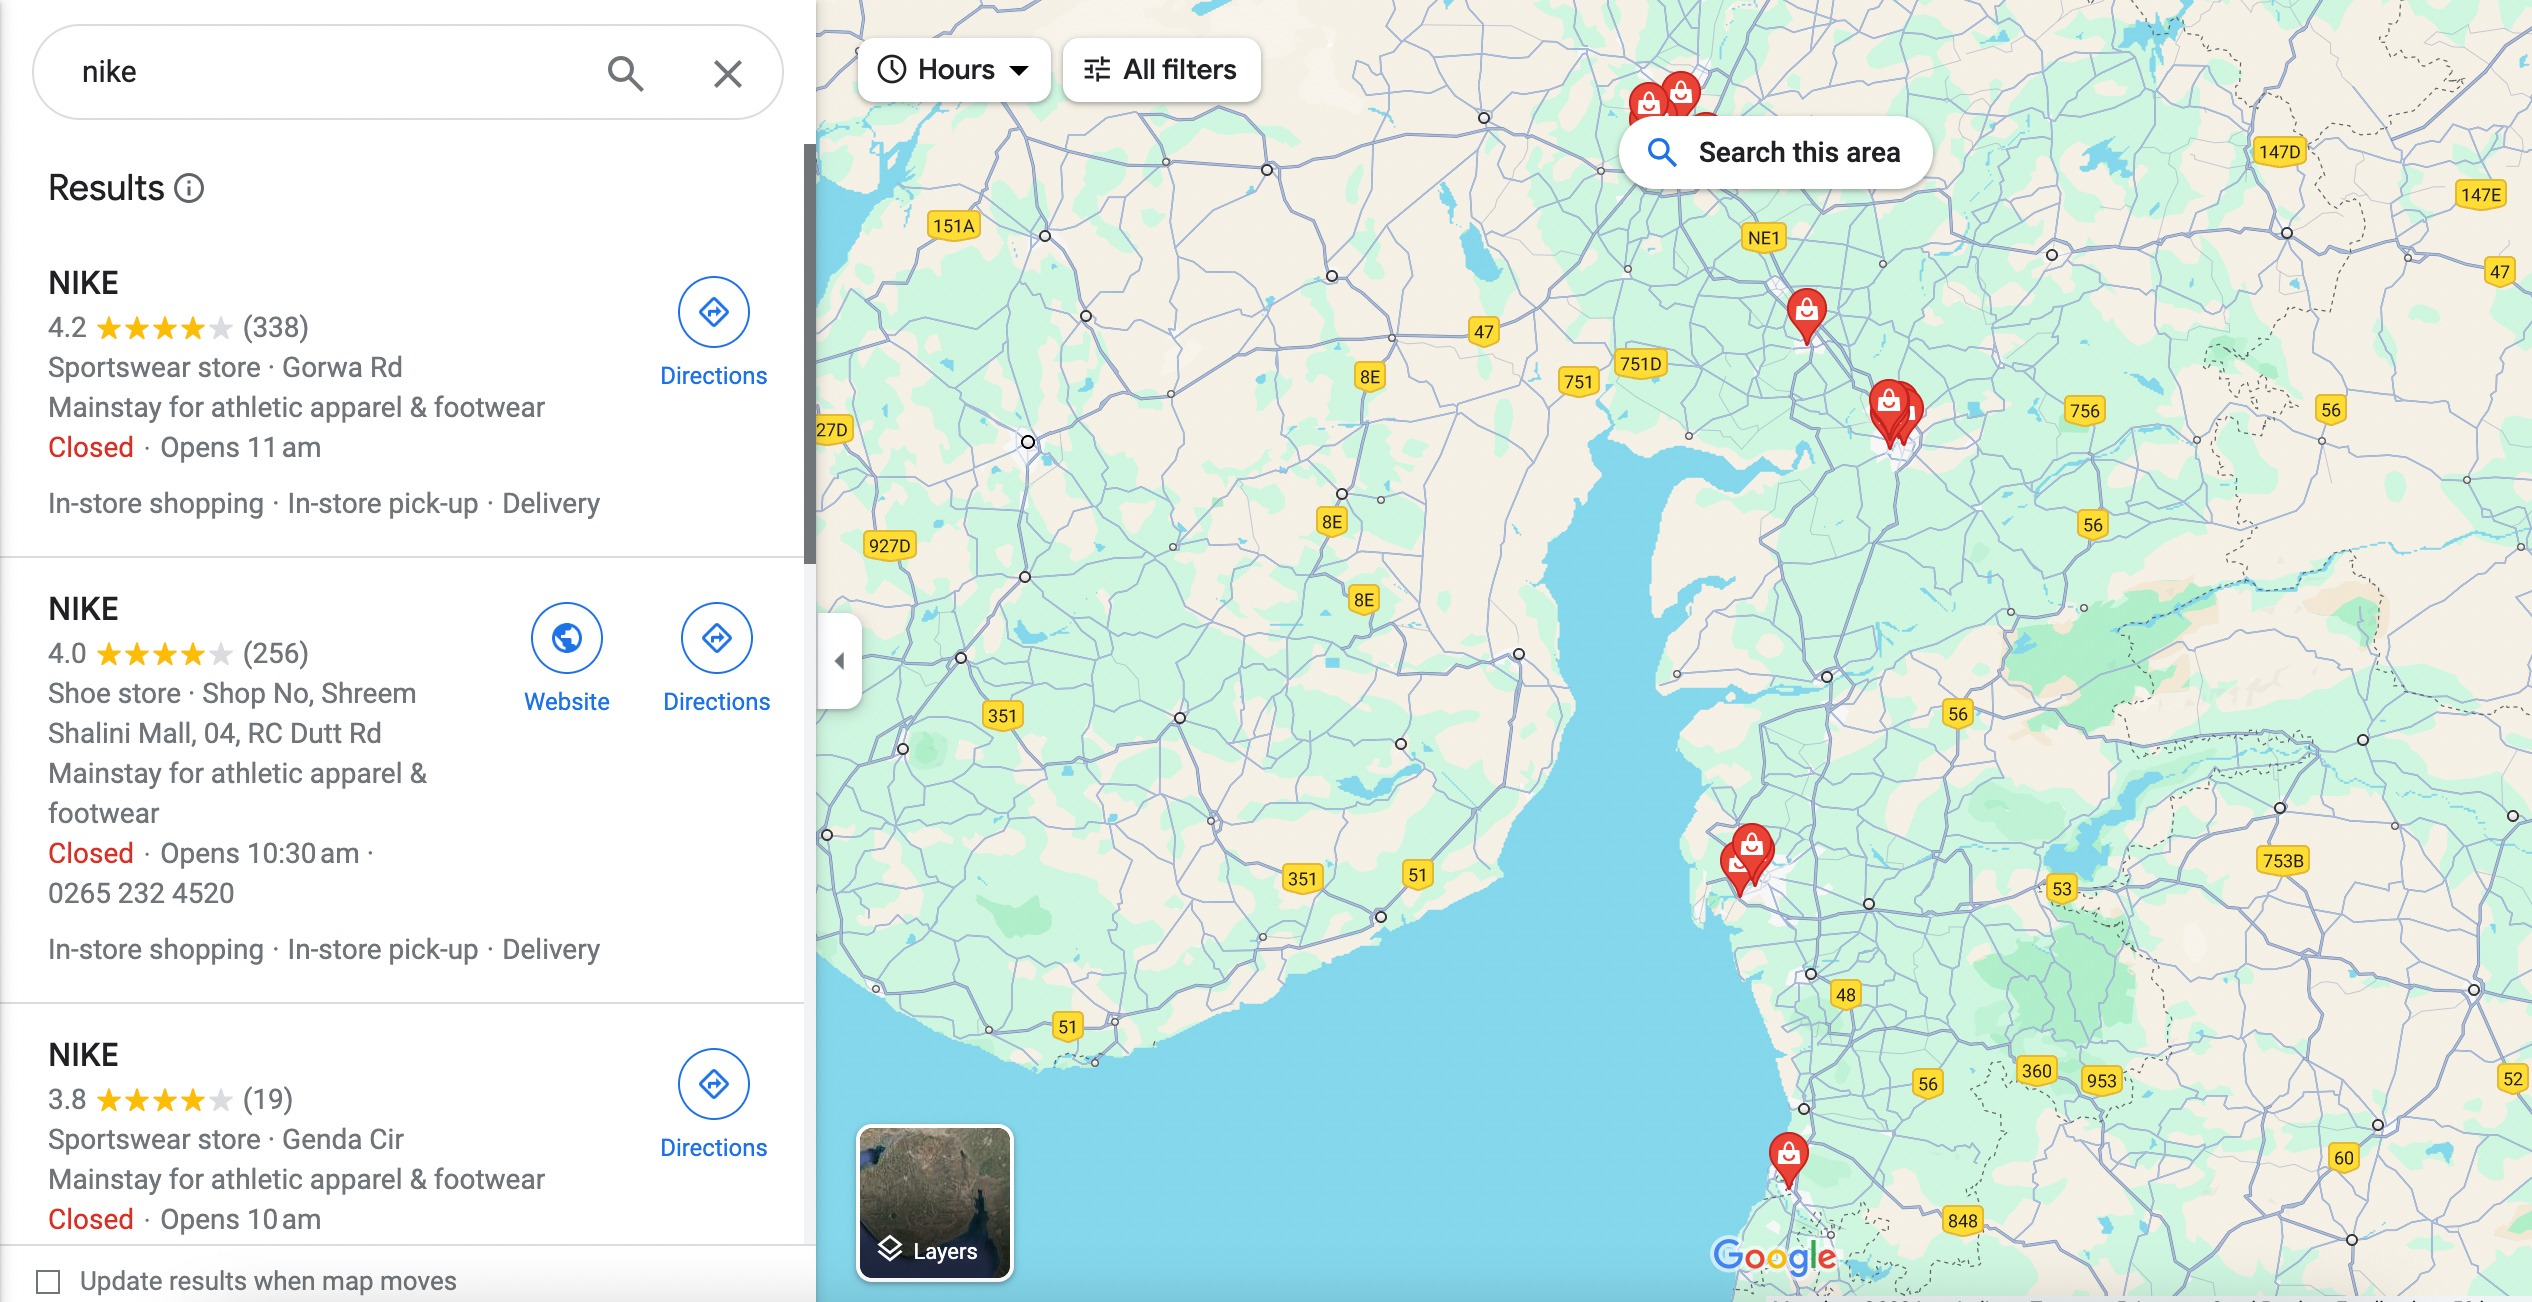
To begin with, navigate to the Google Maps website and enter your company’s street address in the search bar.
Once you have the desired location on the map, click the Share button.
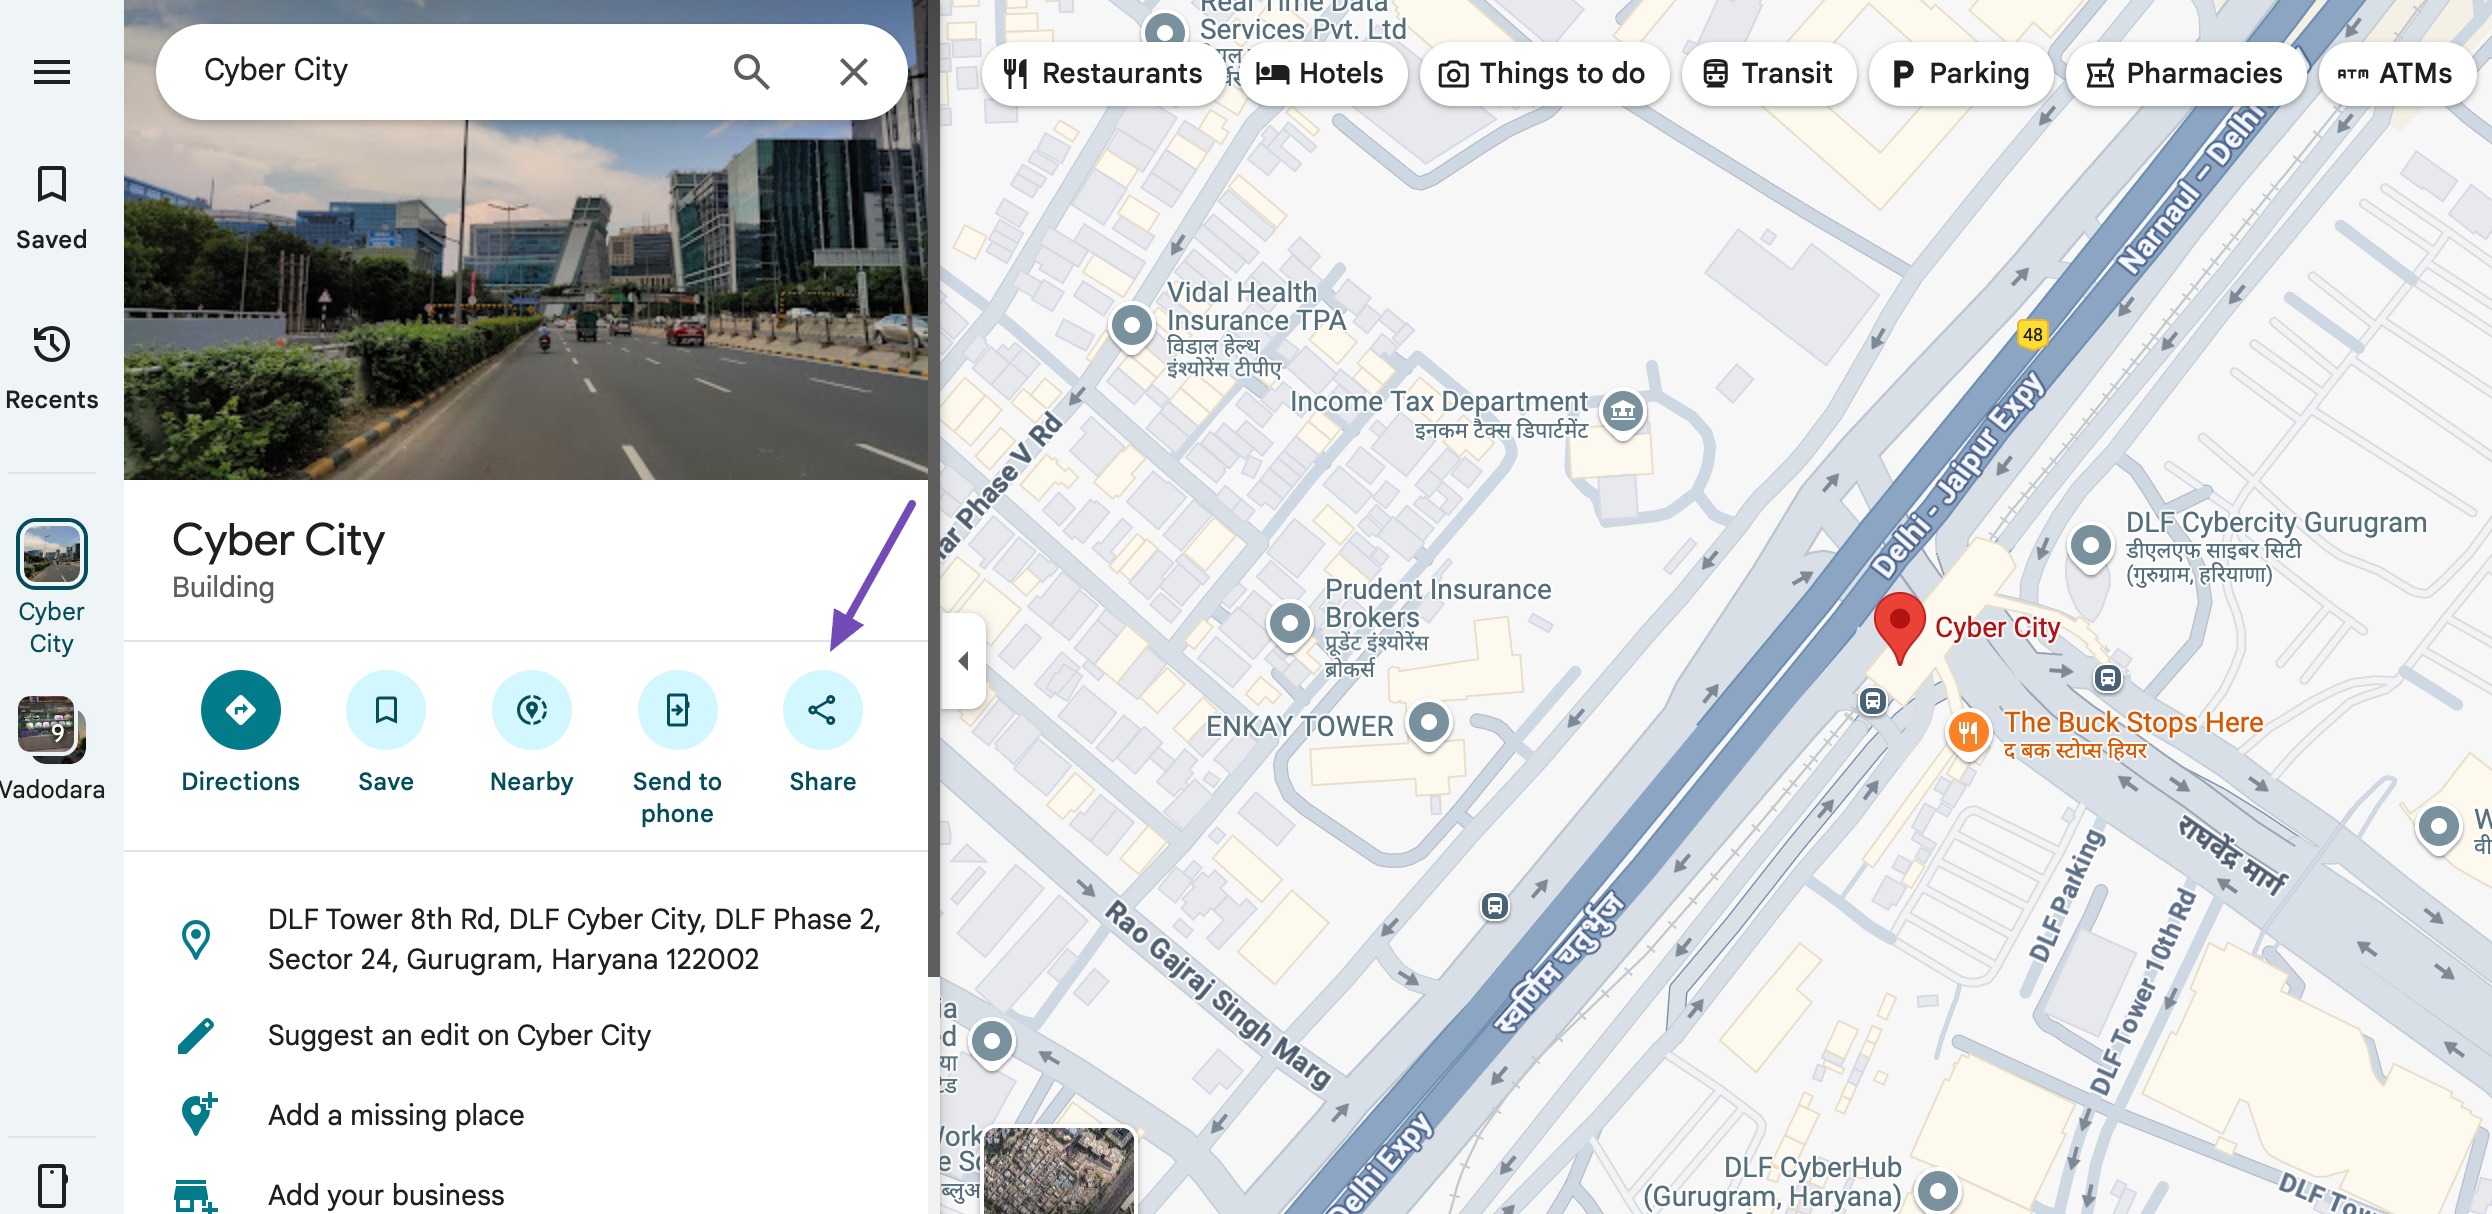
A window will appear with sharing options, as shown below.
In the sharing options, choose the Embed a map tab. Here, you can customize the size of the map according to your website layout by selecting a preset size or entering custom dimensions.
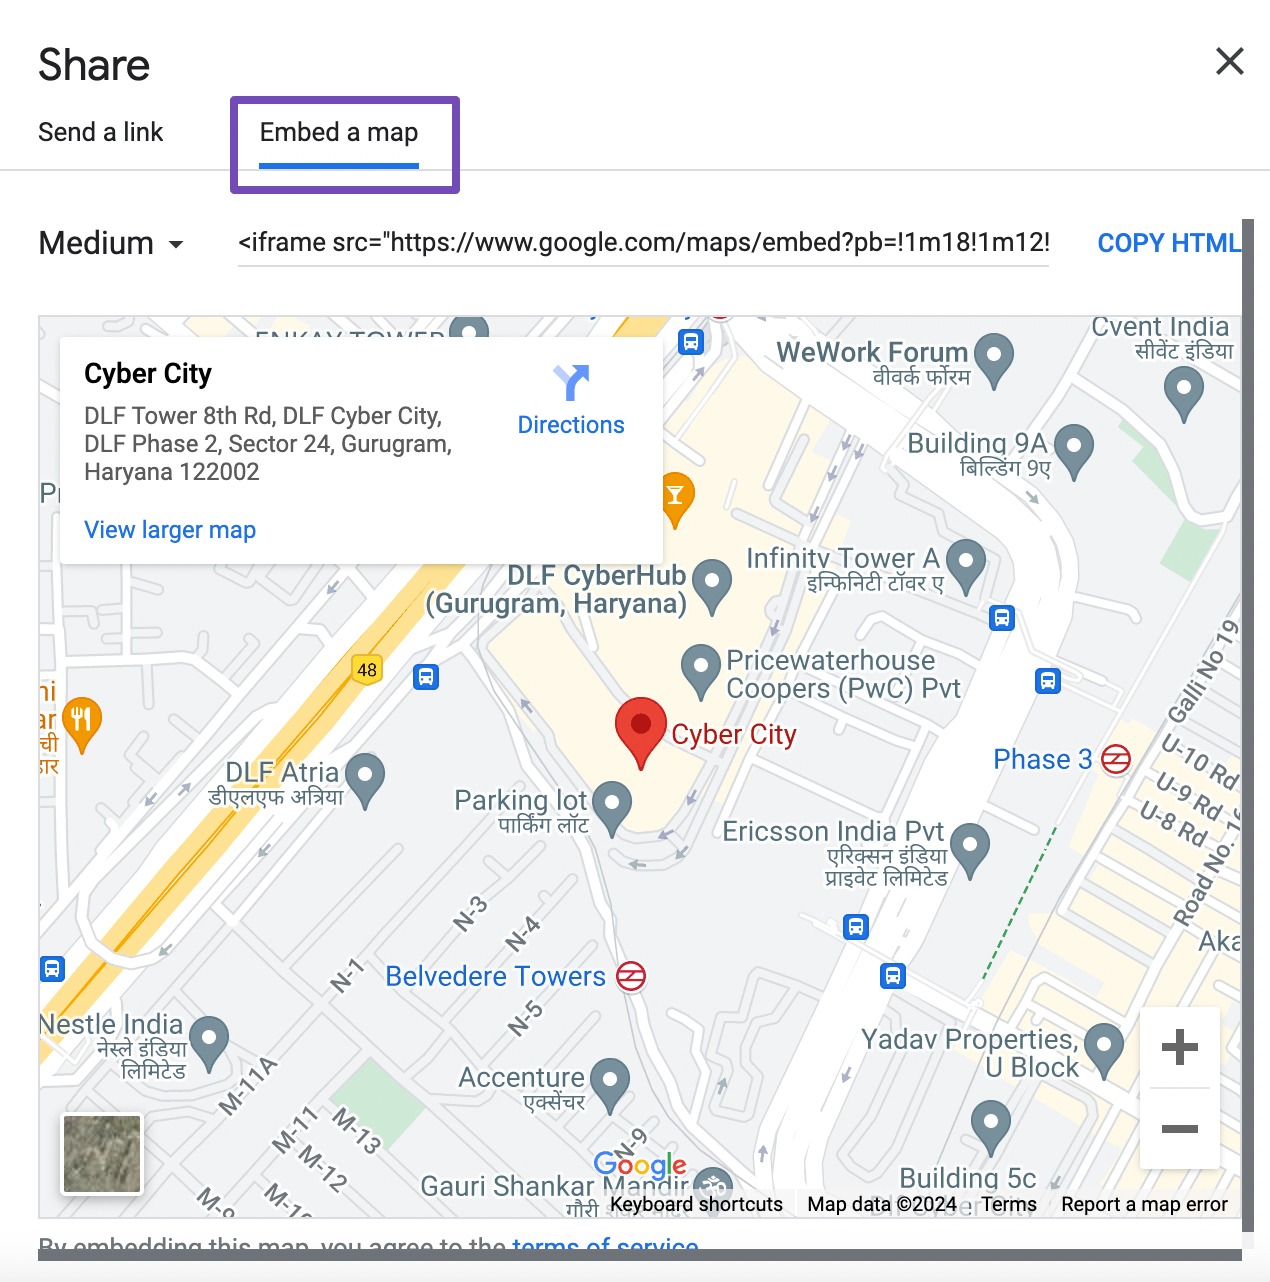
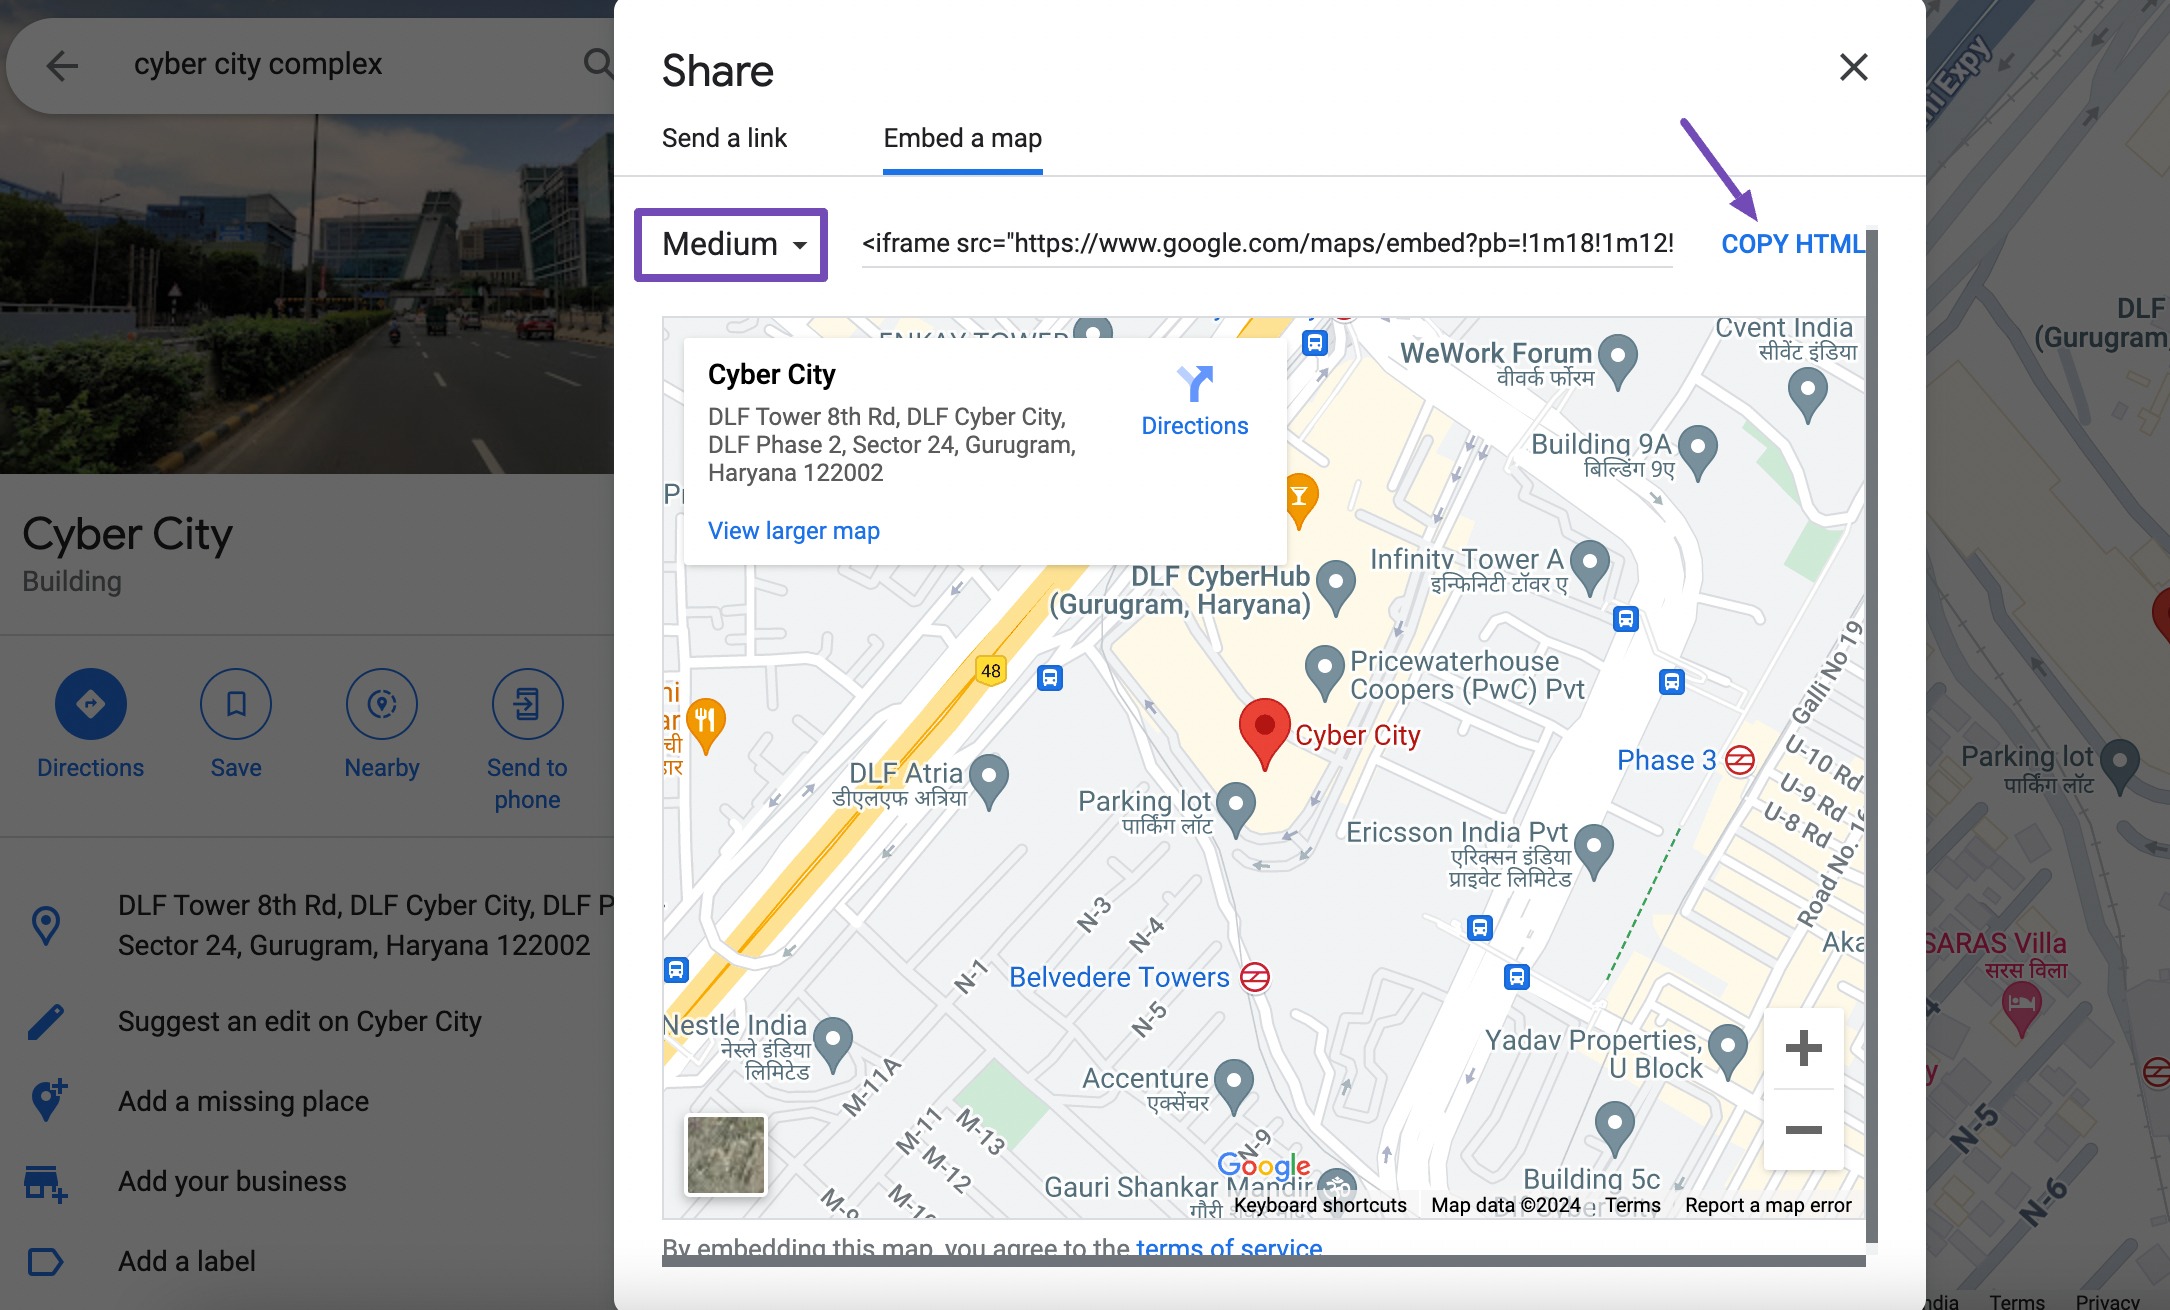
After adjusting the map size, the embed code will be generated. Simply click the Copy HTML button to copy the code to your clipboard. You can also customize the map size by selecting the drop-down arrow next to Medium, as shown below.
Once you’ve successfully copied the map code, return to your WordPress dashboard and choose the post/page where you wish to embed the map.
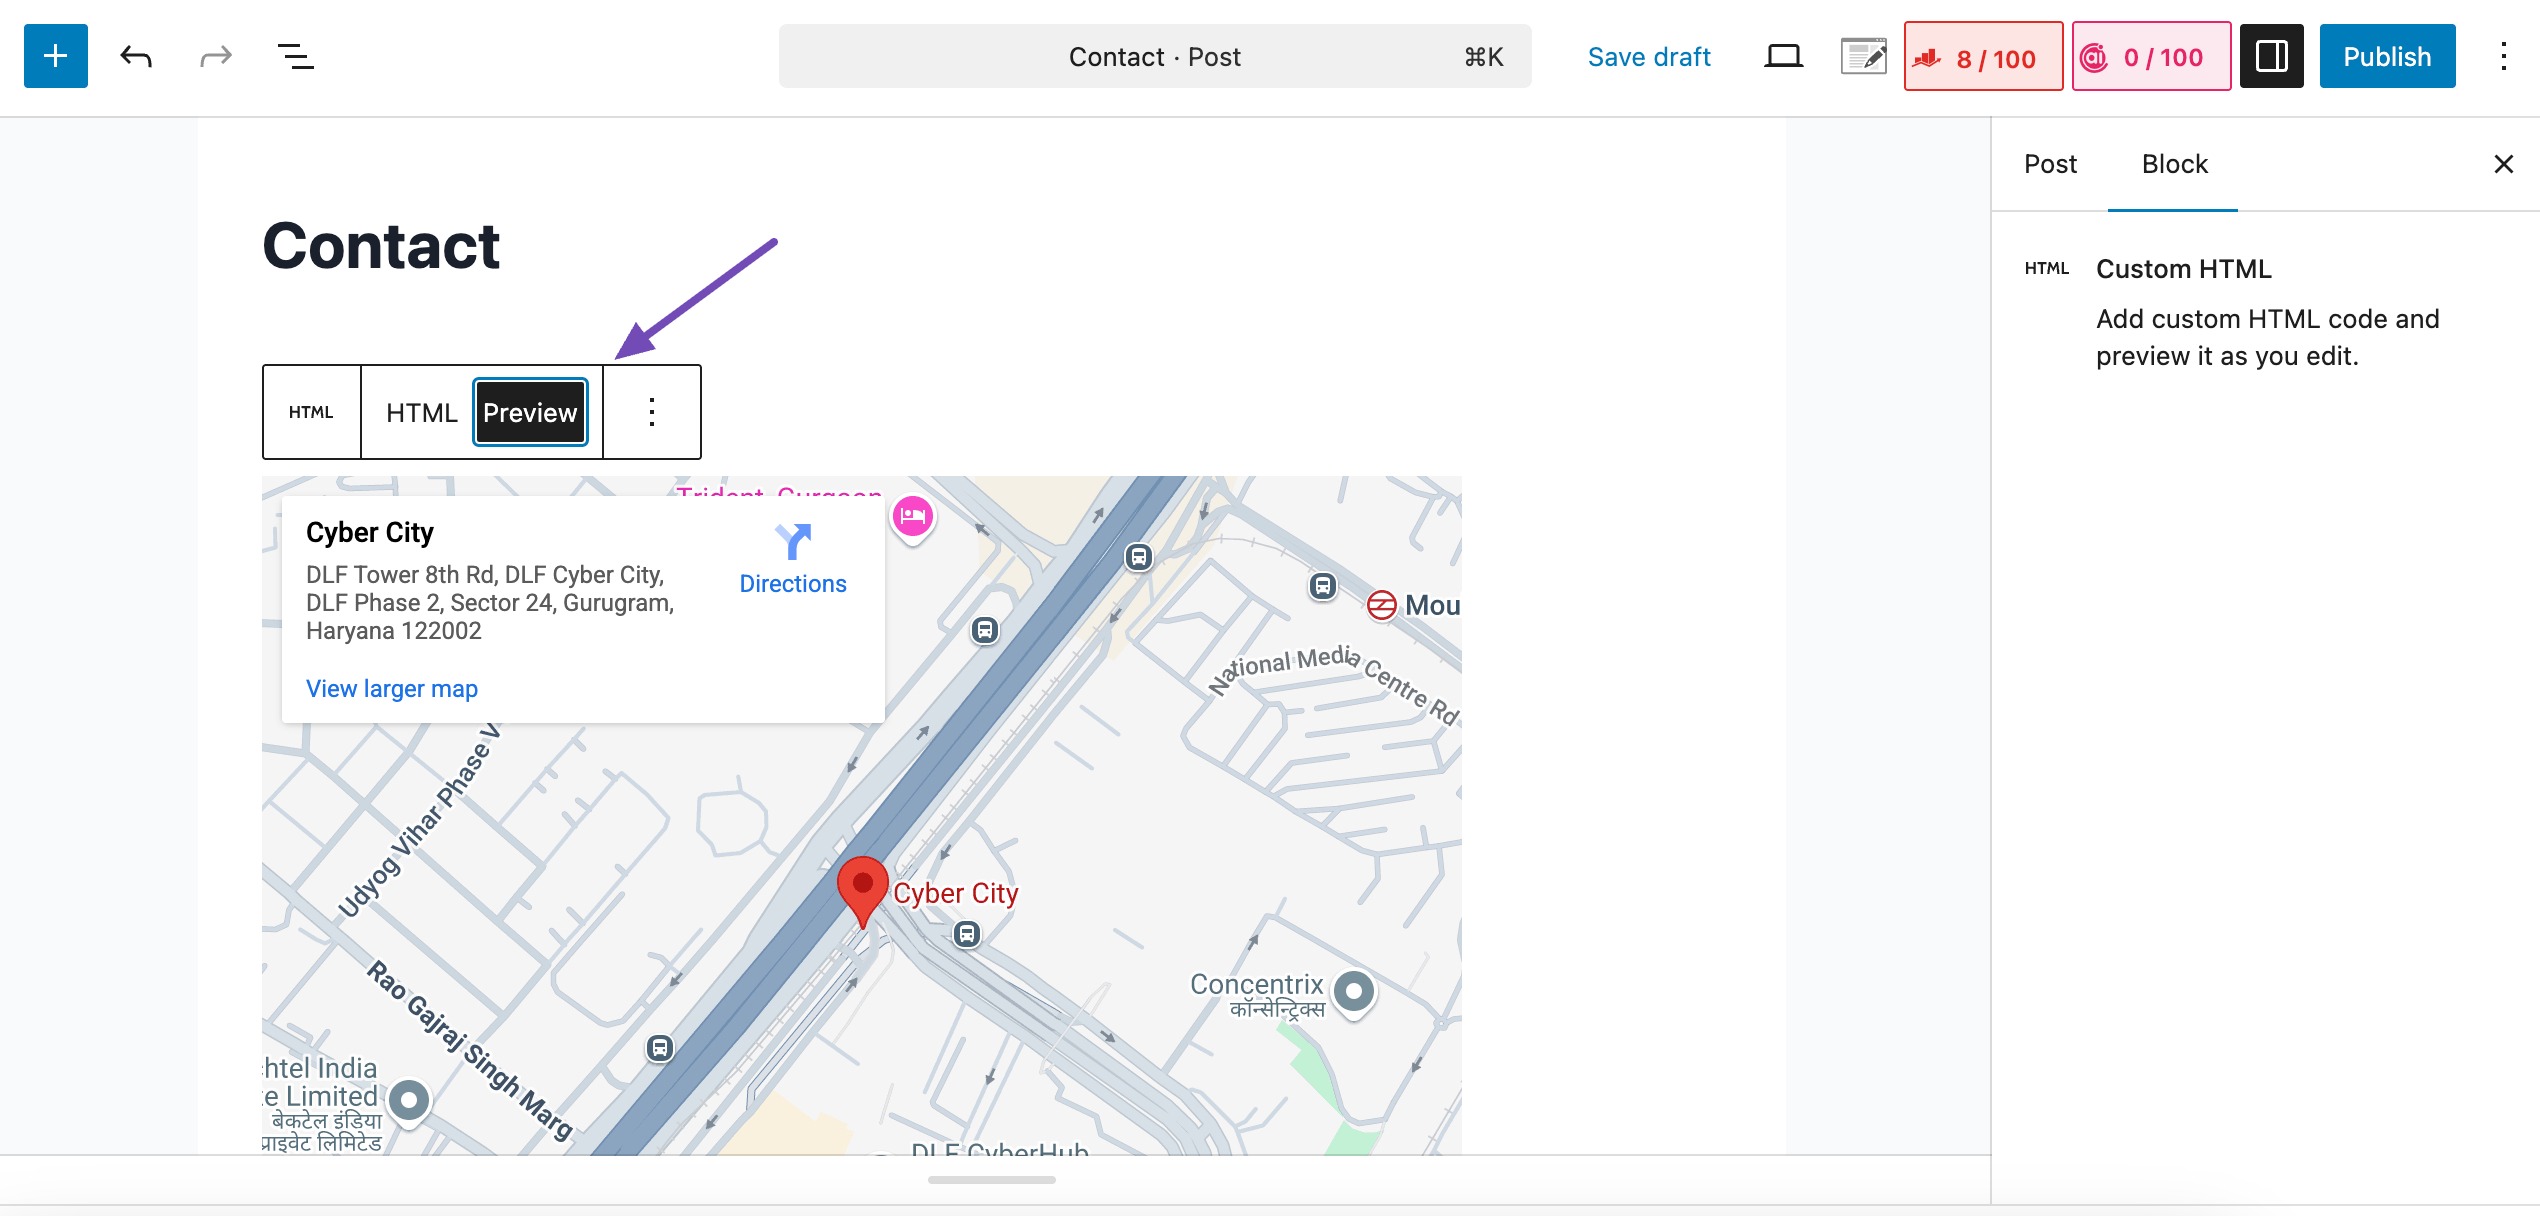
In the block editor, search and add the Custom HTML block.
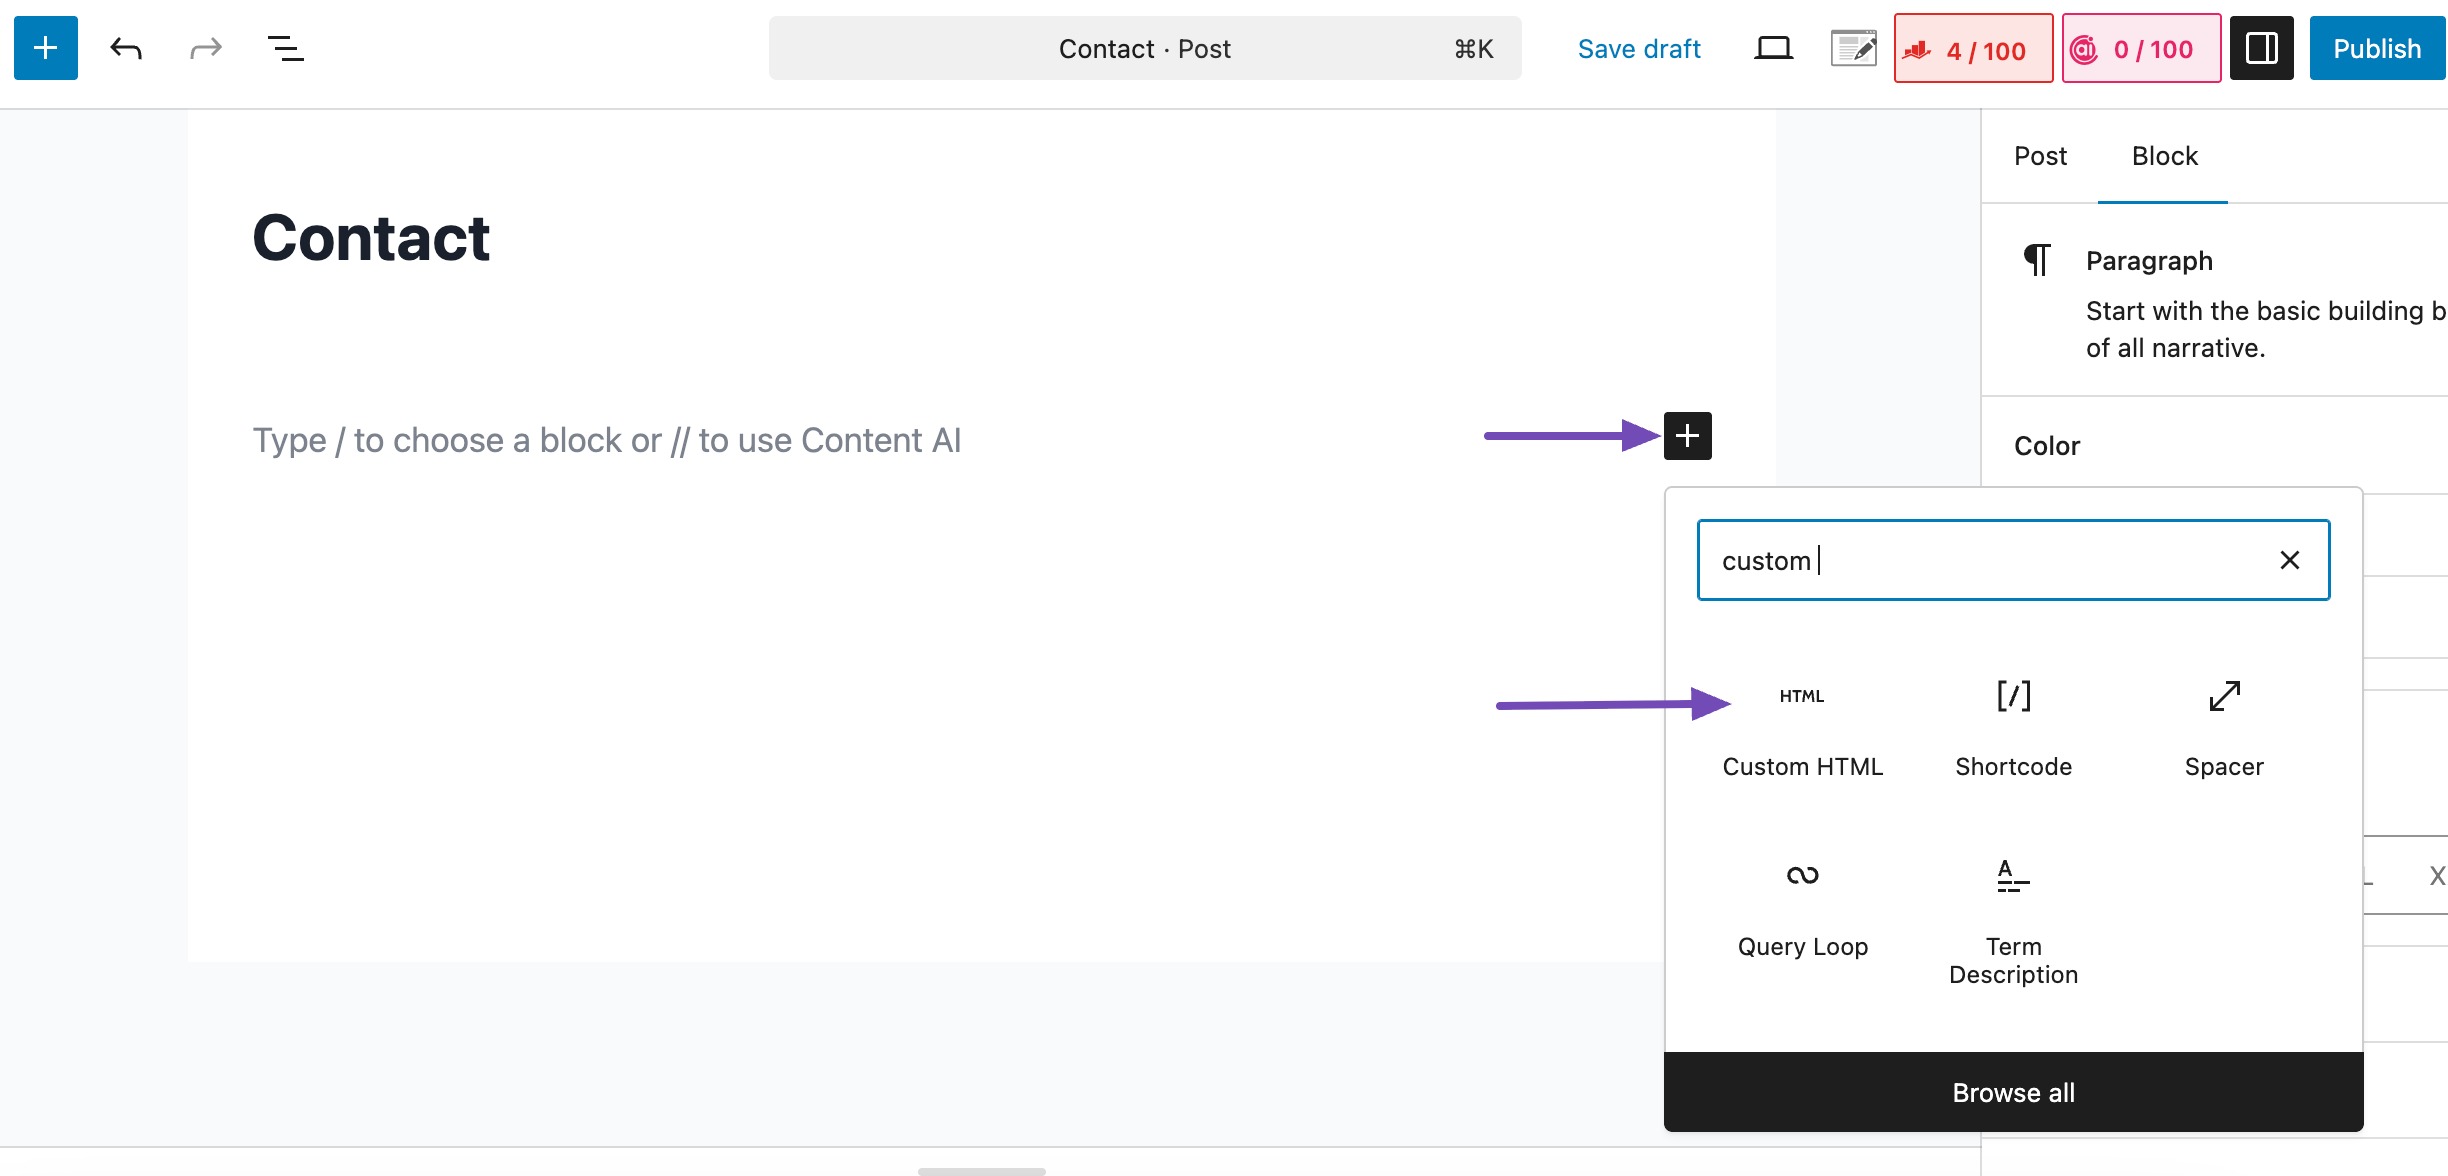
Then, paste the HTML map code into this block, as shown below.
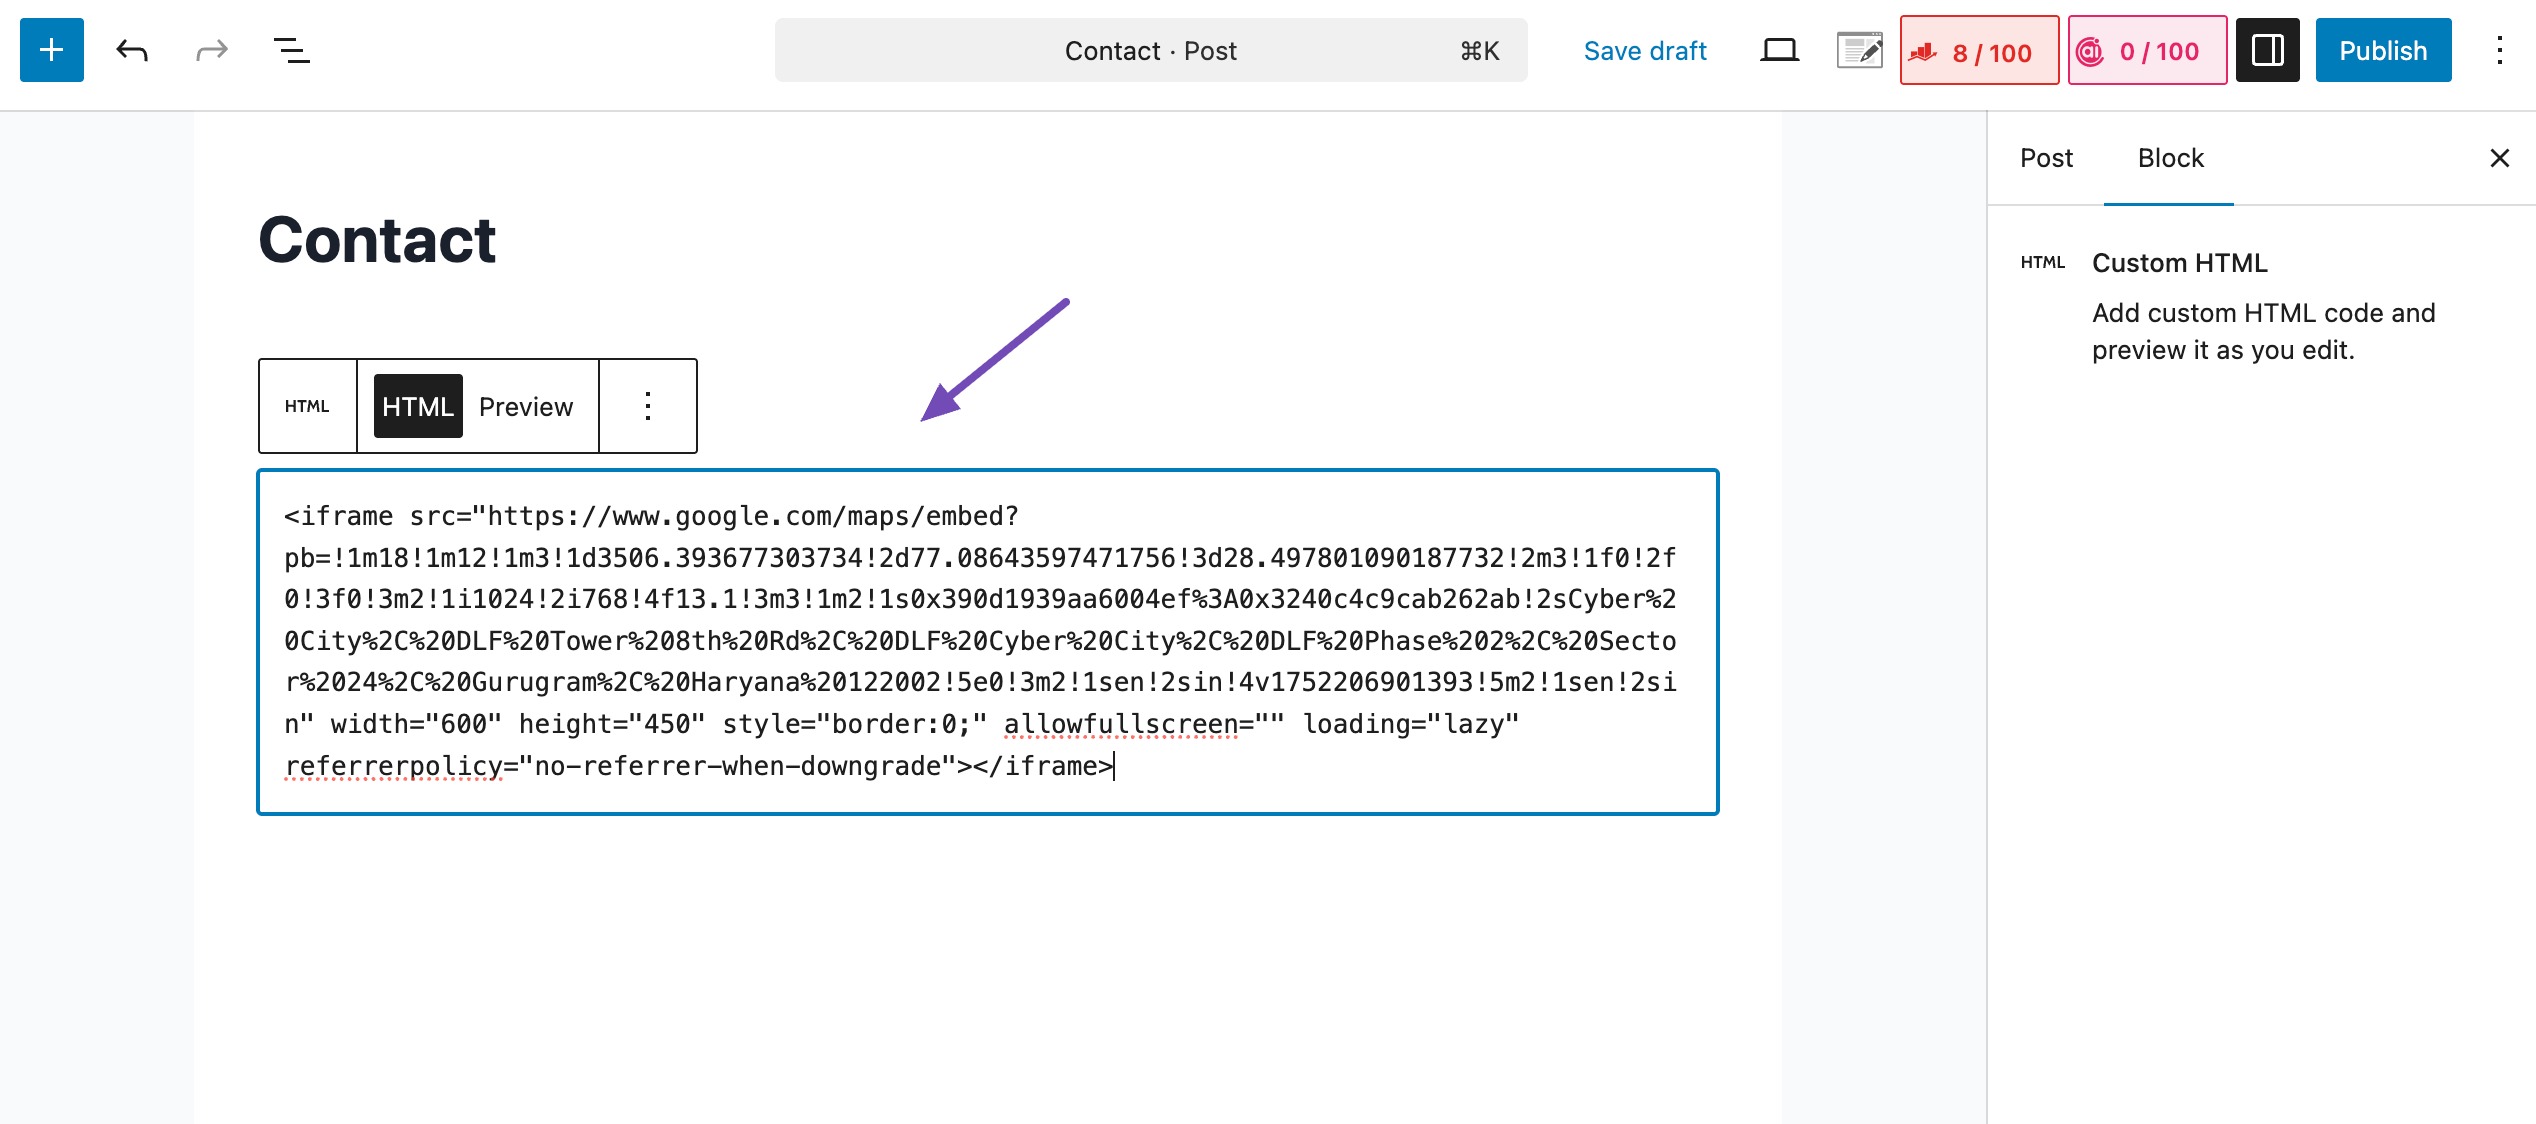
Preview your page or post to ensure the map displays correctly. Once satisfied, save your changes and publish the content.
And that’s it! This way, you can quickly embed Google Maps into your WordPress site without relying on a plugin.
2.2 Add Google Maps to WordPress With a Local SEO Plugin
While manually embedding a Google Map works for basic needs, using Rank Math’s PRO Local SEO module offers far greater benefits, especially for businesses that rely on local visibility.
With Rank Math, you’re not just adding a map; you’re also optimizing your site for local SEO, helping search engines better understand the details of your business.
To begin, install and activate the Rank Math SEO plugin on your WordPress site. Once activated, follow the setup wizard. For step-by-step guidance on configuring Rank Math on your website, refer to our dedicated tutorial on setting up Rank Math on your site.
Configure the Local SEO Settings
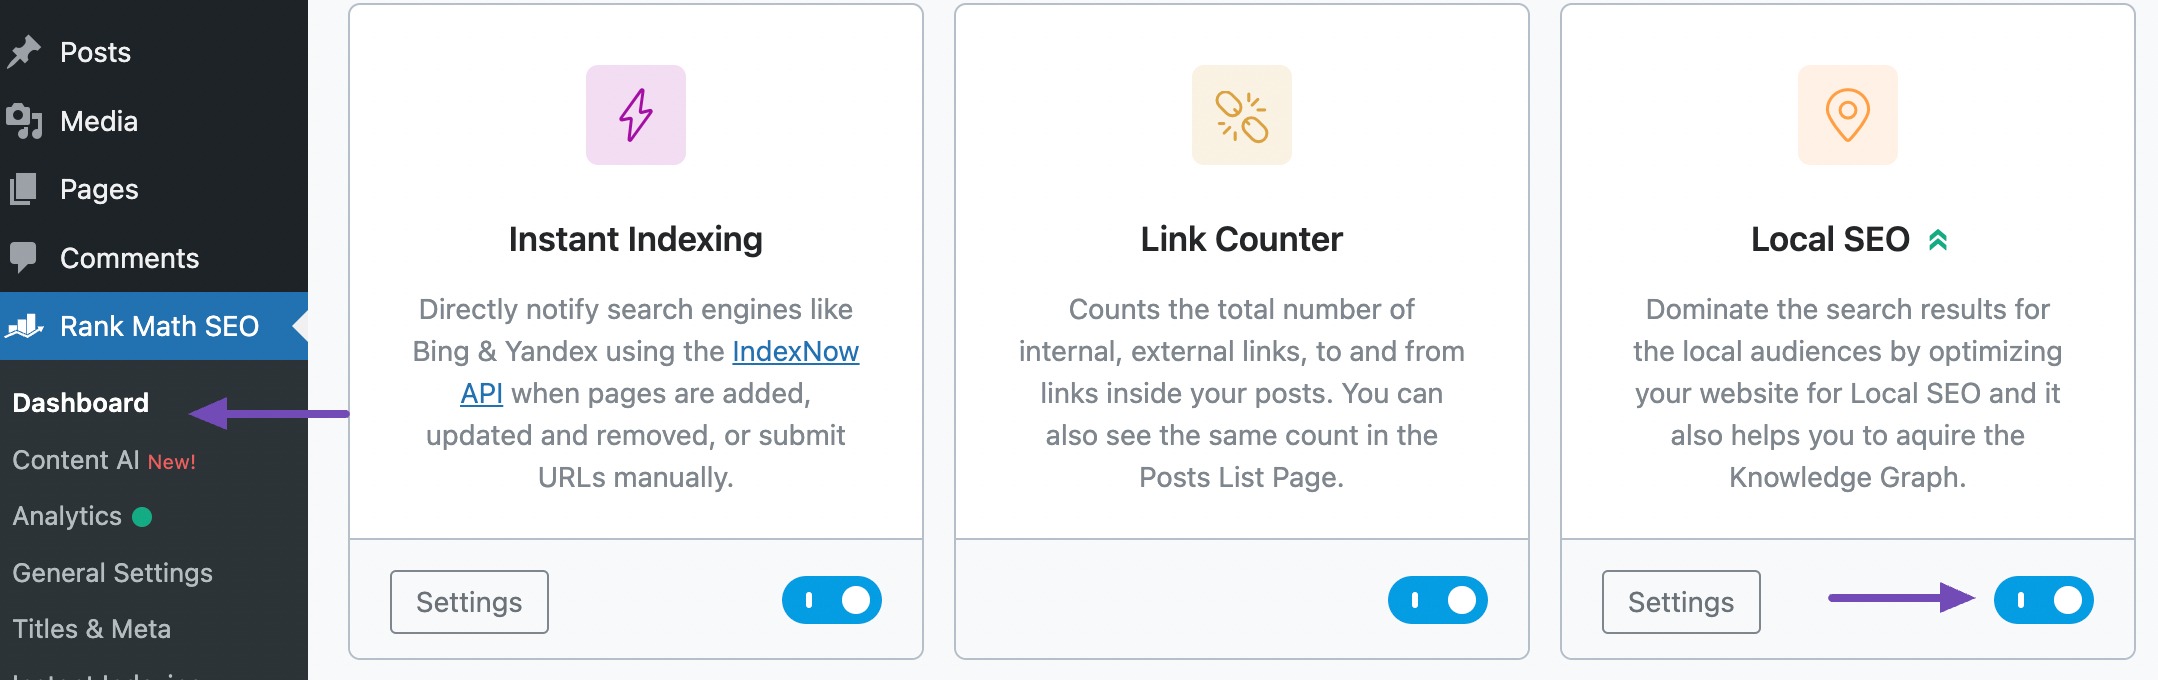
After successfully setting up the Rank Math plugin, enable the Local SEO module on your WordPress dashboard by navigating to Rank Math SEO → Dashboard, as shown below.
Next, navigate to Rank Math SEO → Titles & Meta and click on the Local SEO section. In the Local SEO section, select Organization, as shown below.

Fill in your business details like name, address, logo, and contact info. These help search engines understand your business better and display it in local search results. For more details, refer to our comprehensive guide on configuring your organization details.
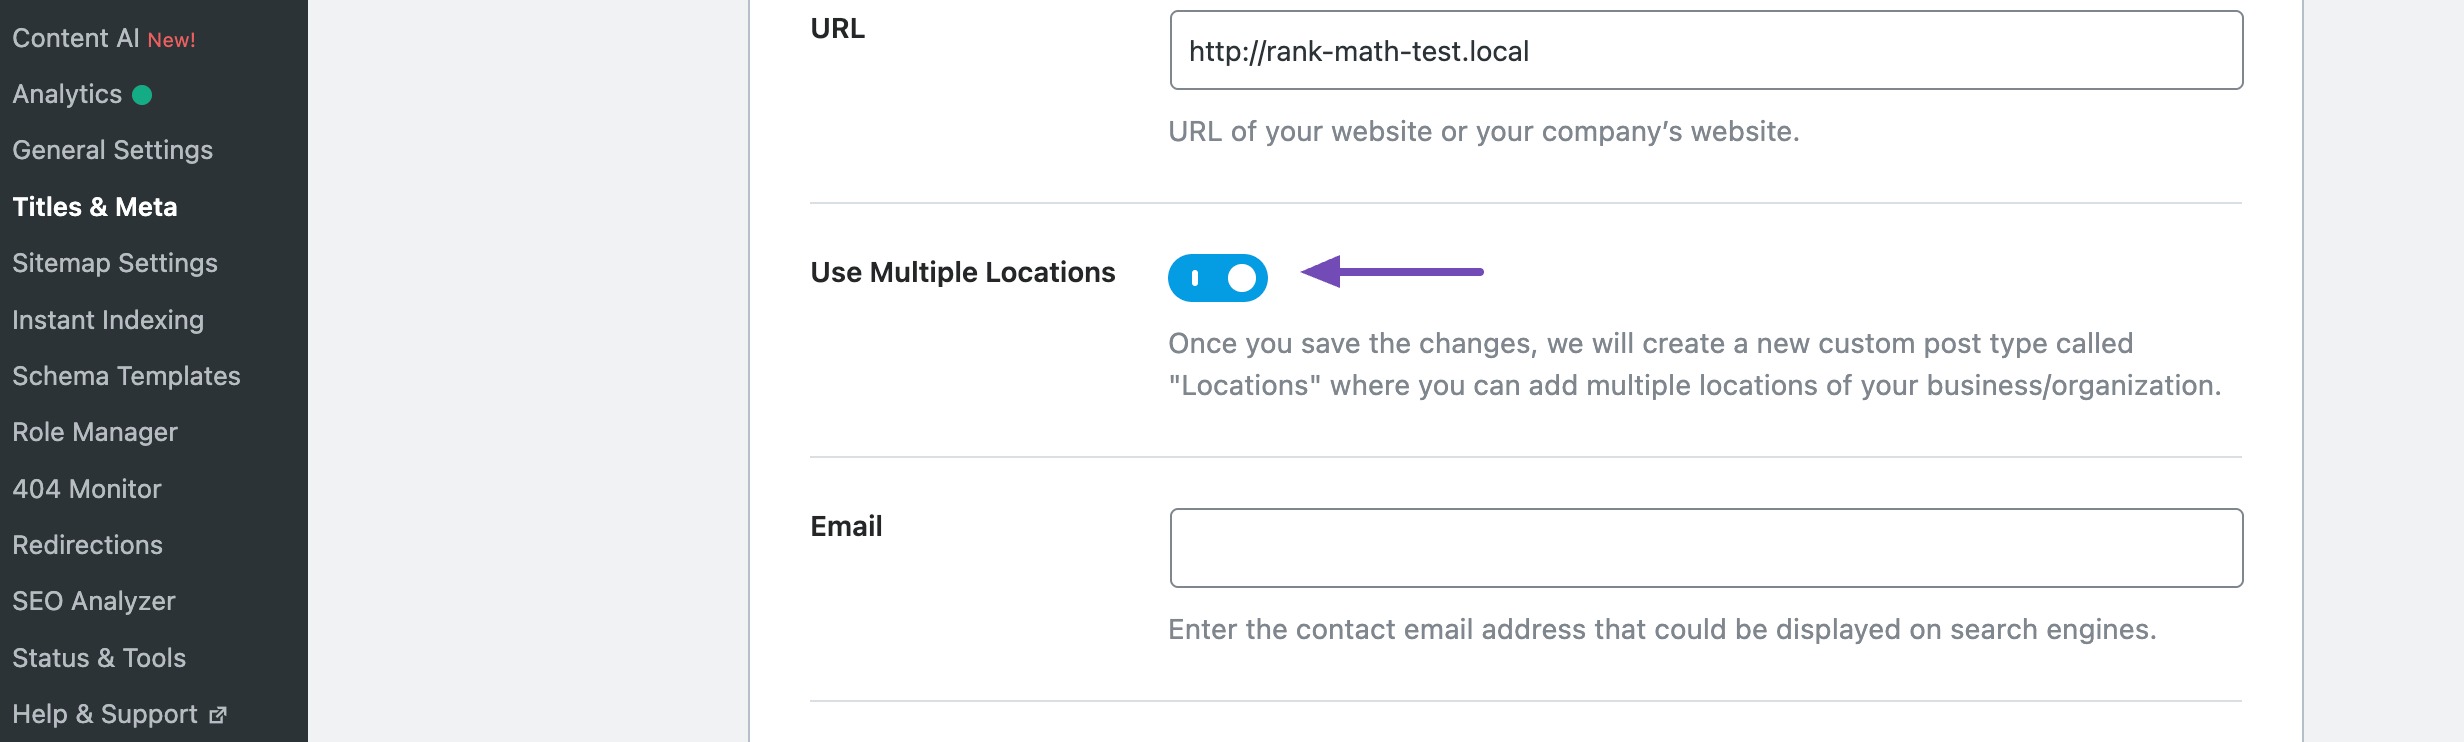
If your business operates in multiple locations, scroll down to find the Use Multiple Locations option. Enable this field to ensure seamless functionality of the Google map on your website.
Before moving on, we recommend you read our guide on how Multiple Locations work and follow the step-by-step setup instructions.
You’ll then see fields for setting the Map Style, Measurement System, Primary Country, and more.
These options play a key role in guiding the map’s display on your website.
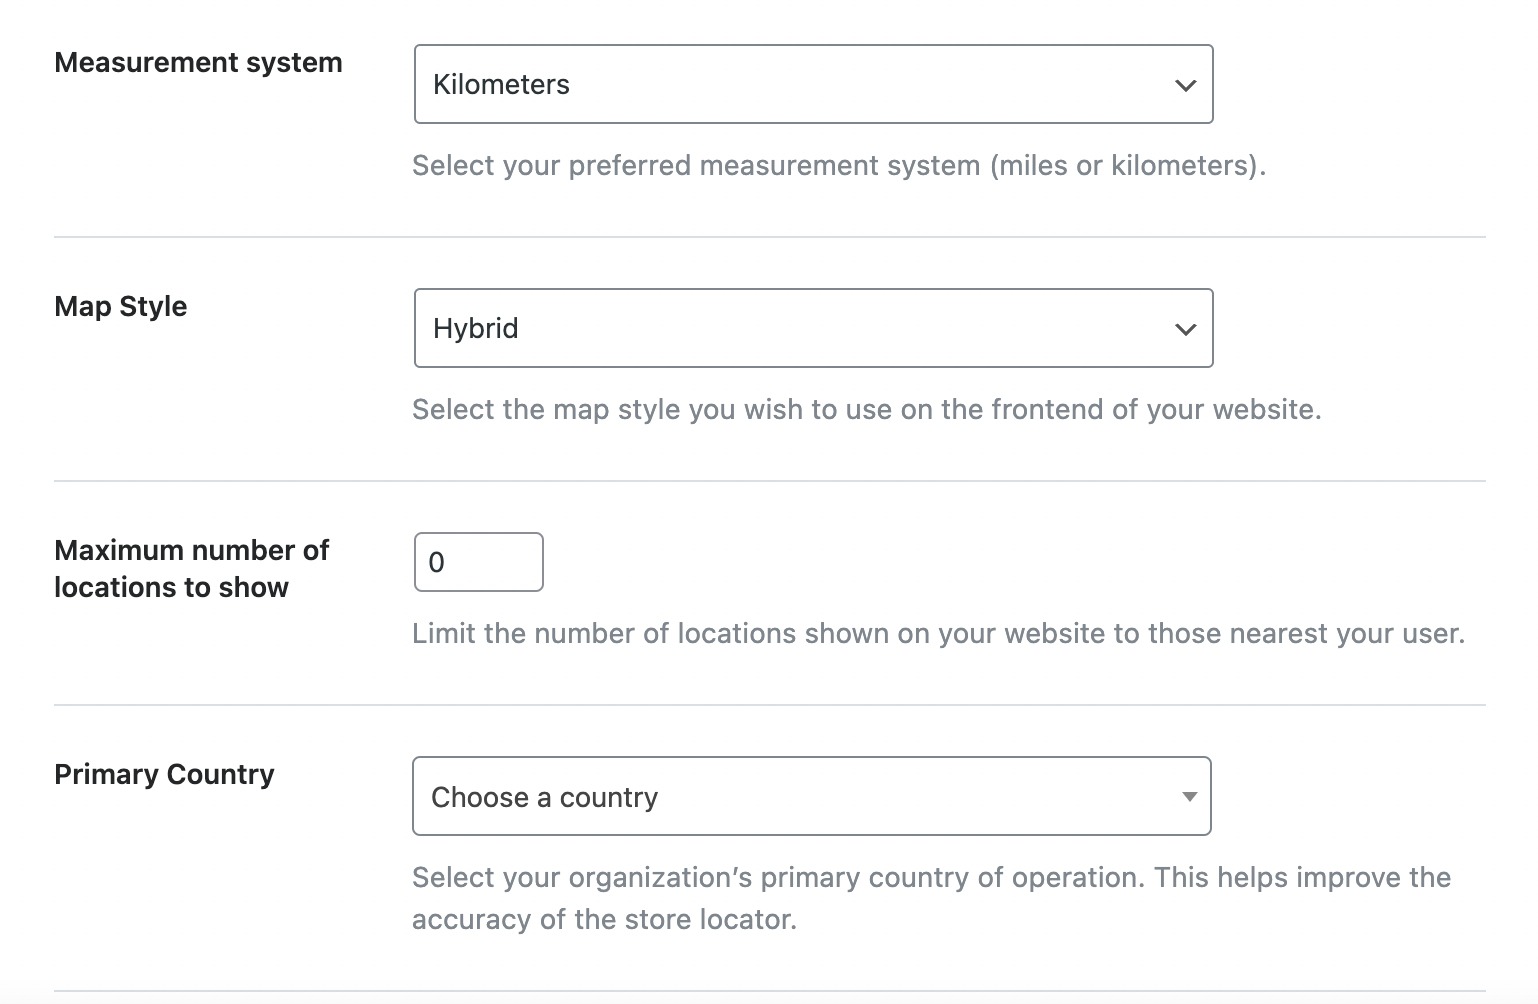
Once you’ve set them up according to your preferences, simply scroll down to configure other similar settings, as shown below.
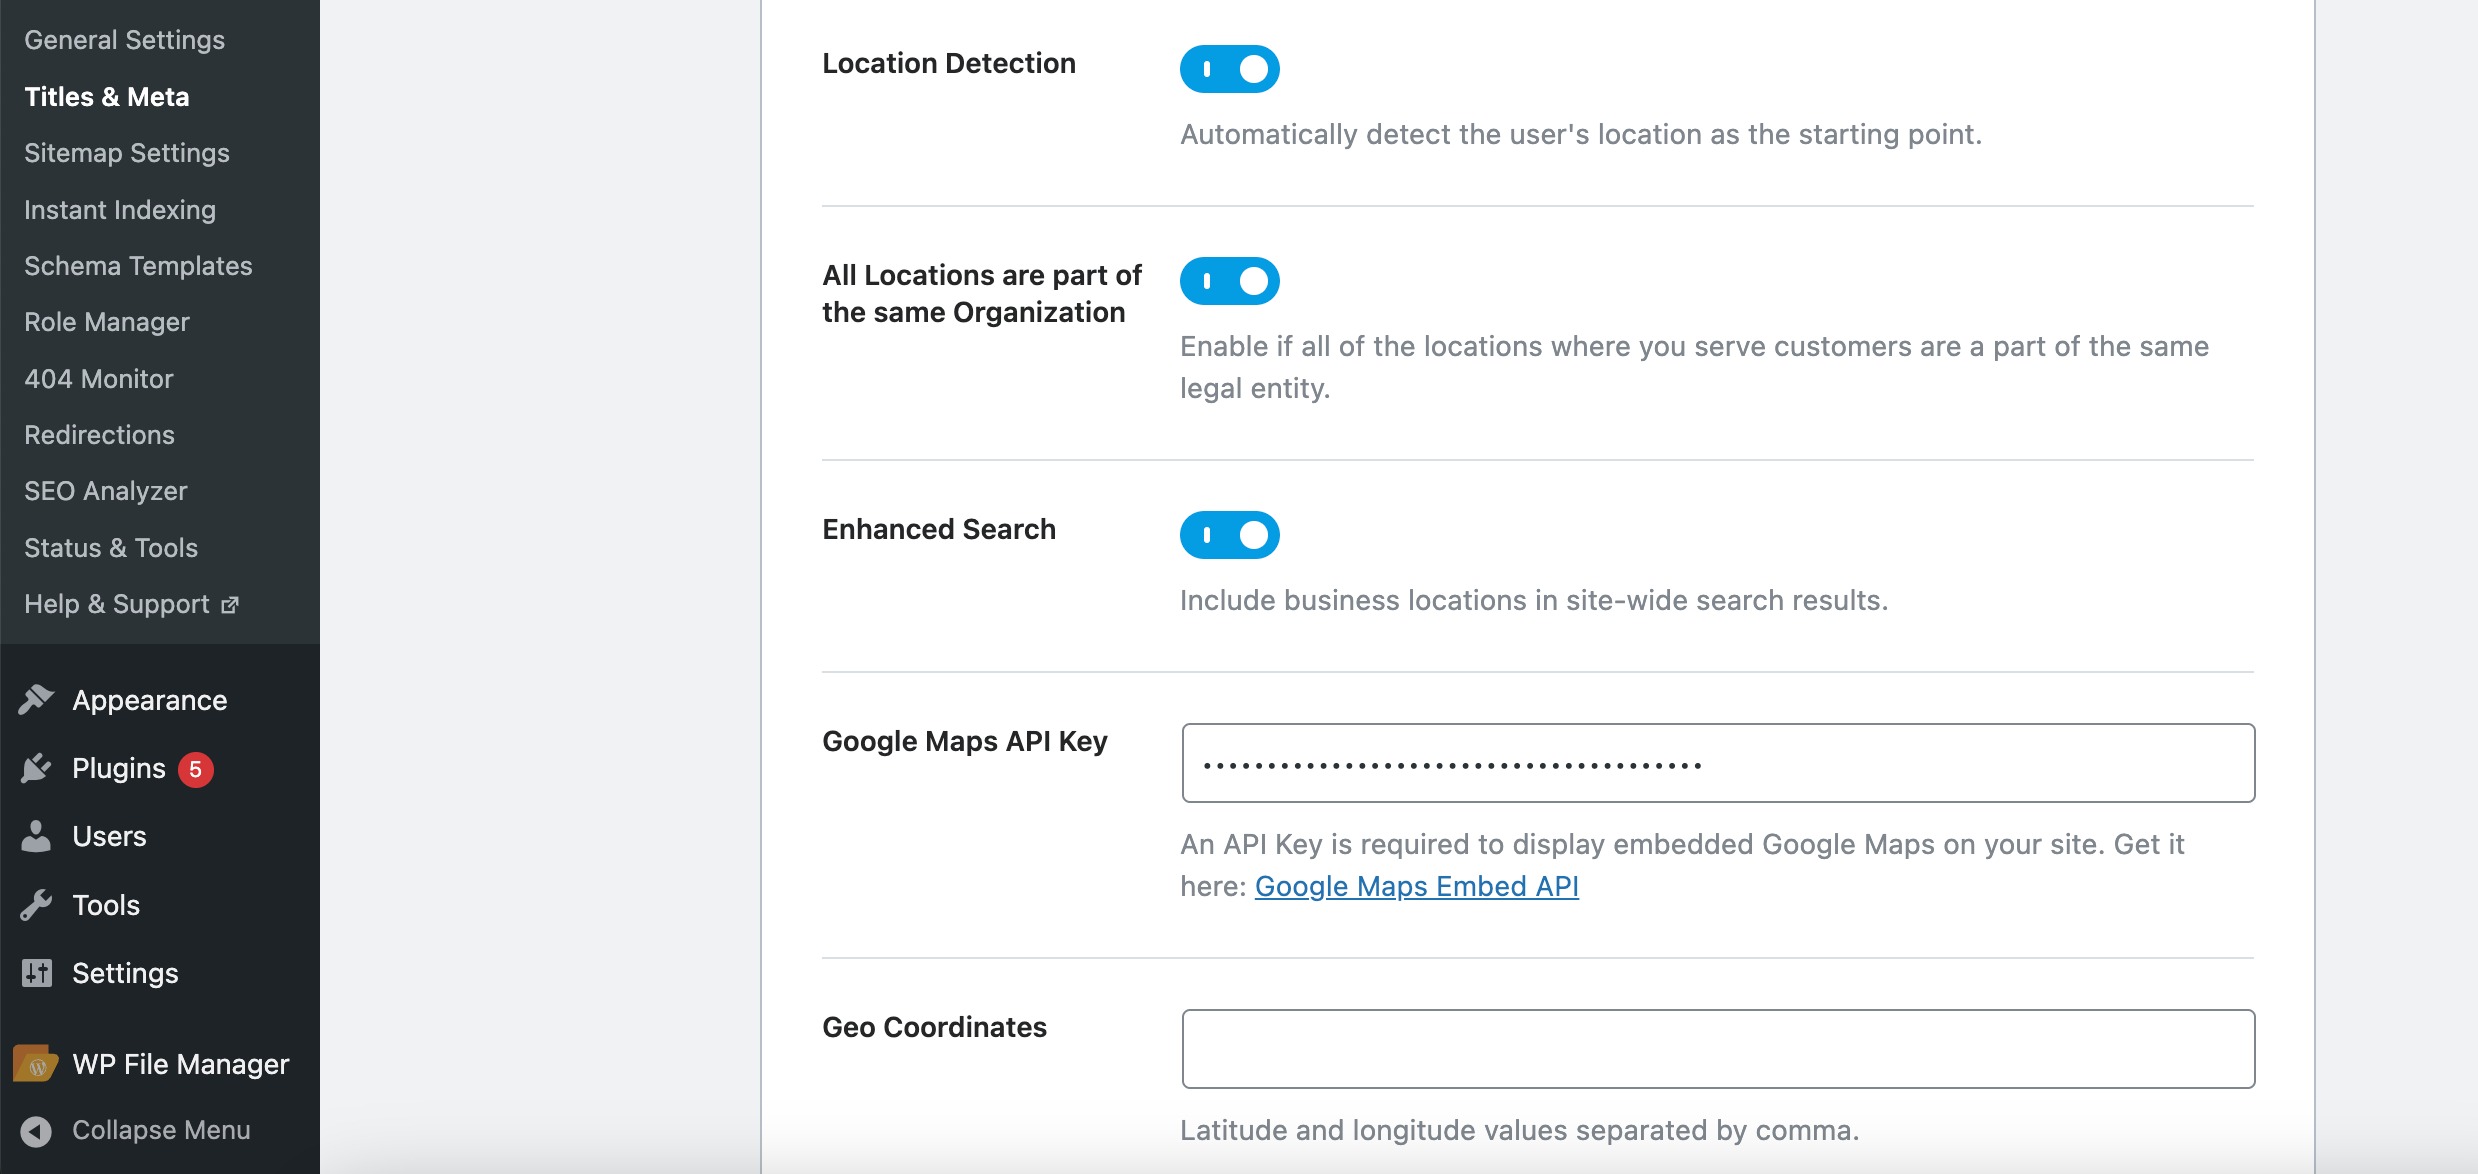
In that section, you’ll find the next setting dedicated to the Google Maps API Key. To enable Google Maps on your website, inserting the Google Maps API key into this field is essential.
Acquiring Google Maps API Key
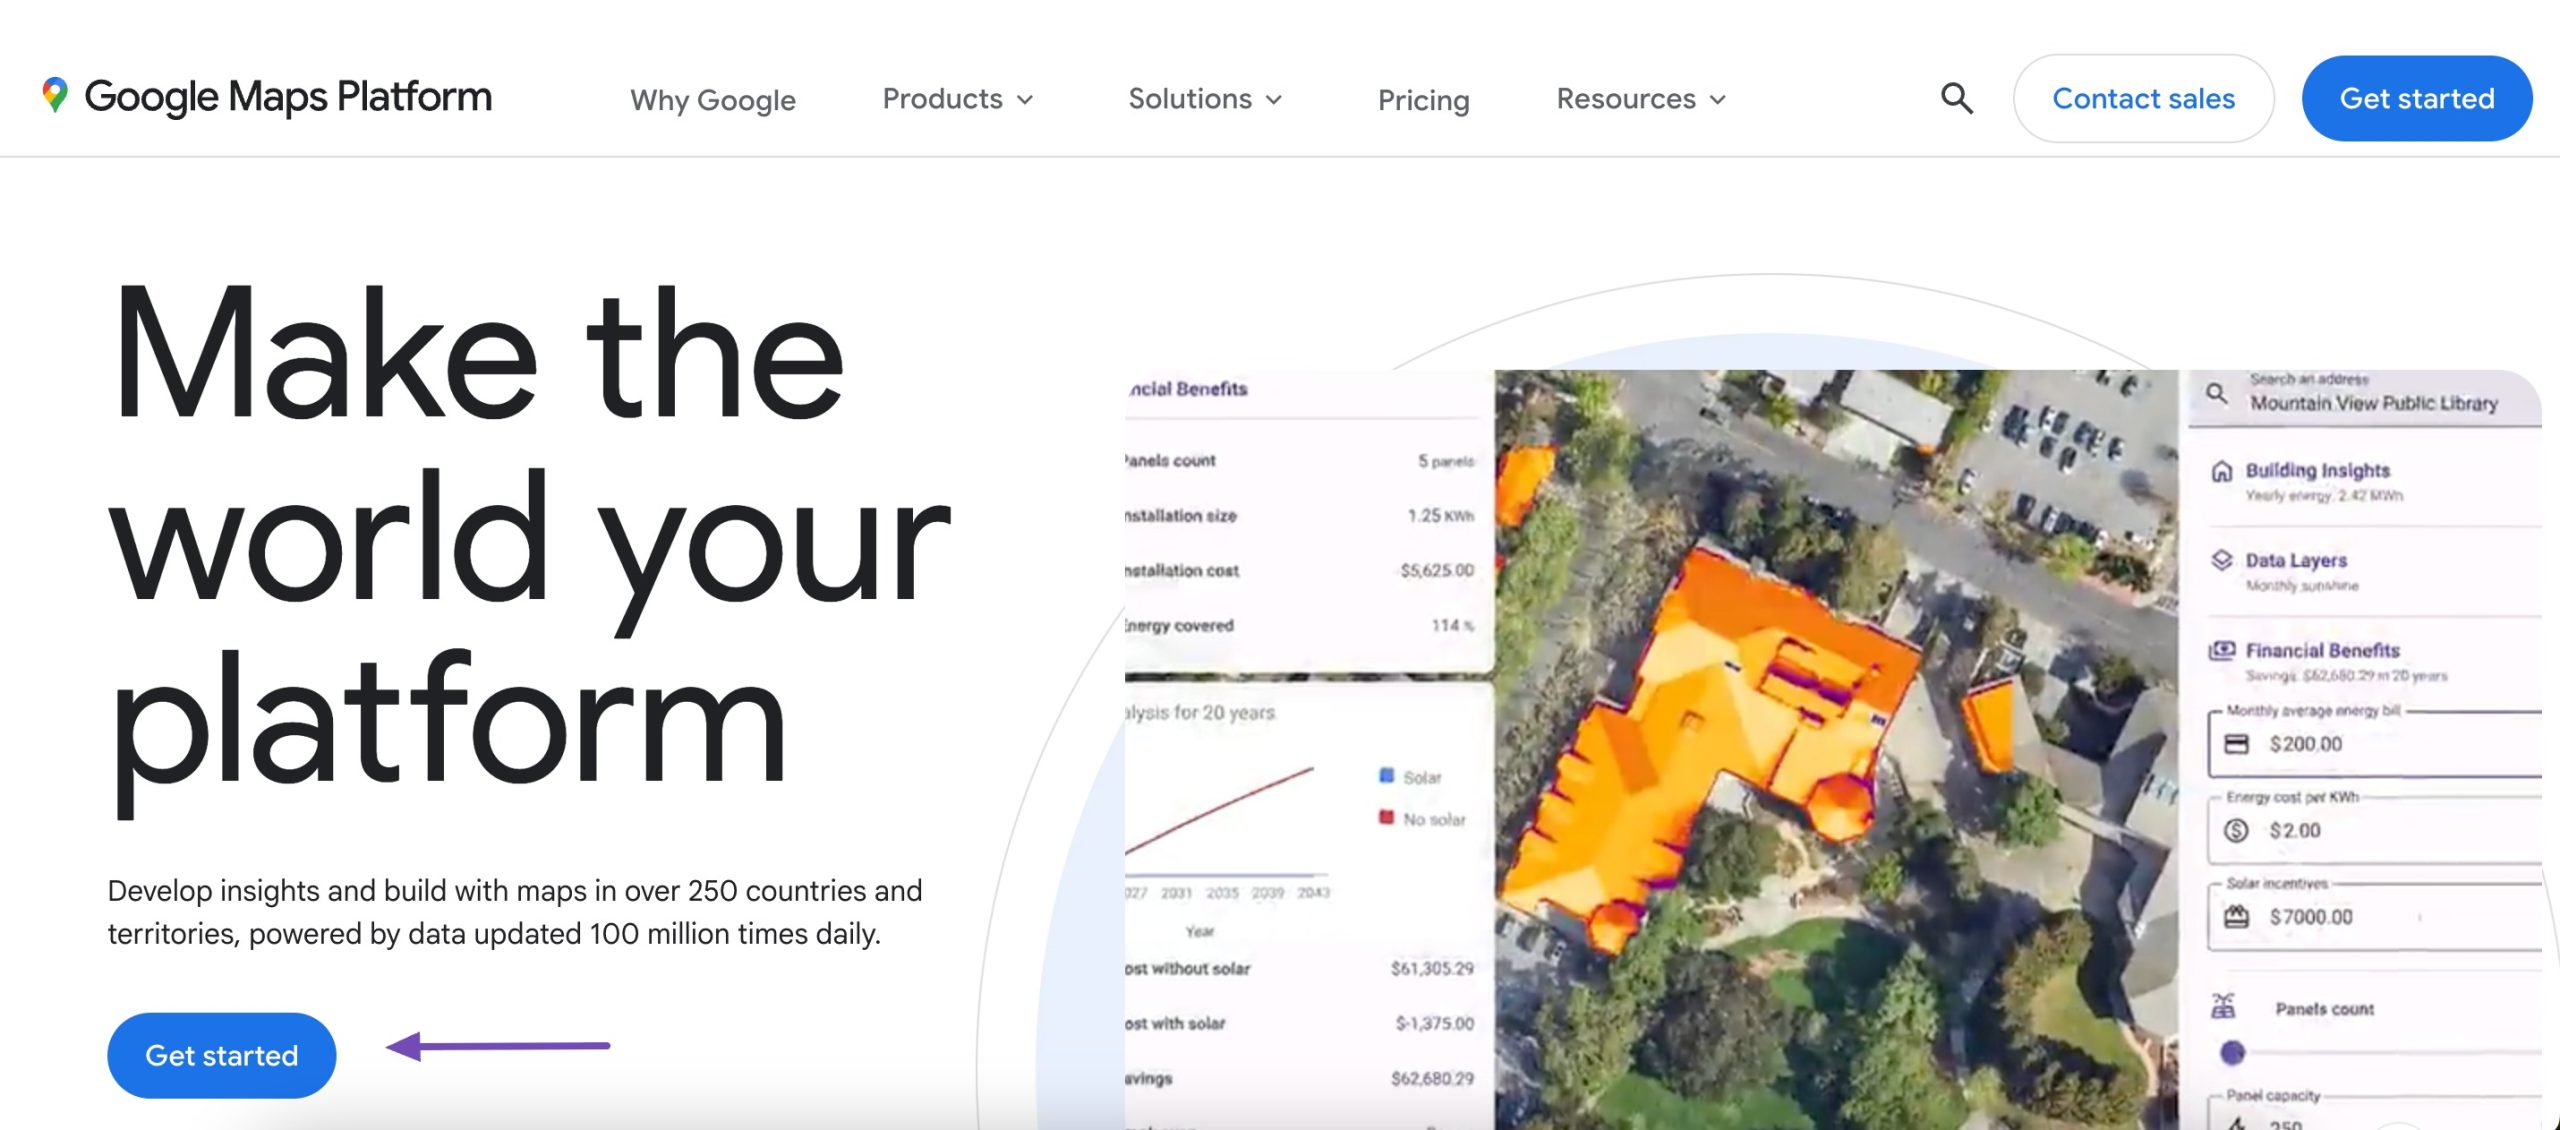
The Google Maps API Key is a distinctive alphanumeric identifier that Google employs to monitor your project usage and billing account. To integrate Google Maps, visit the Google Maps Platform and click the Get started button.
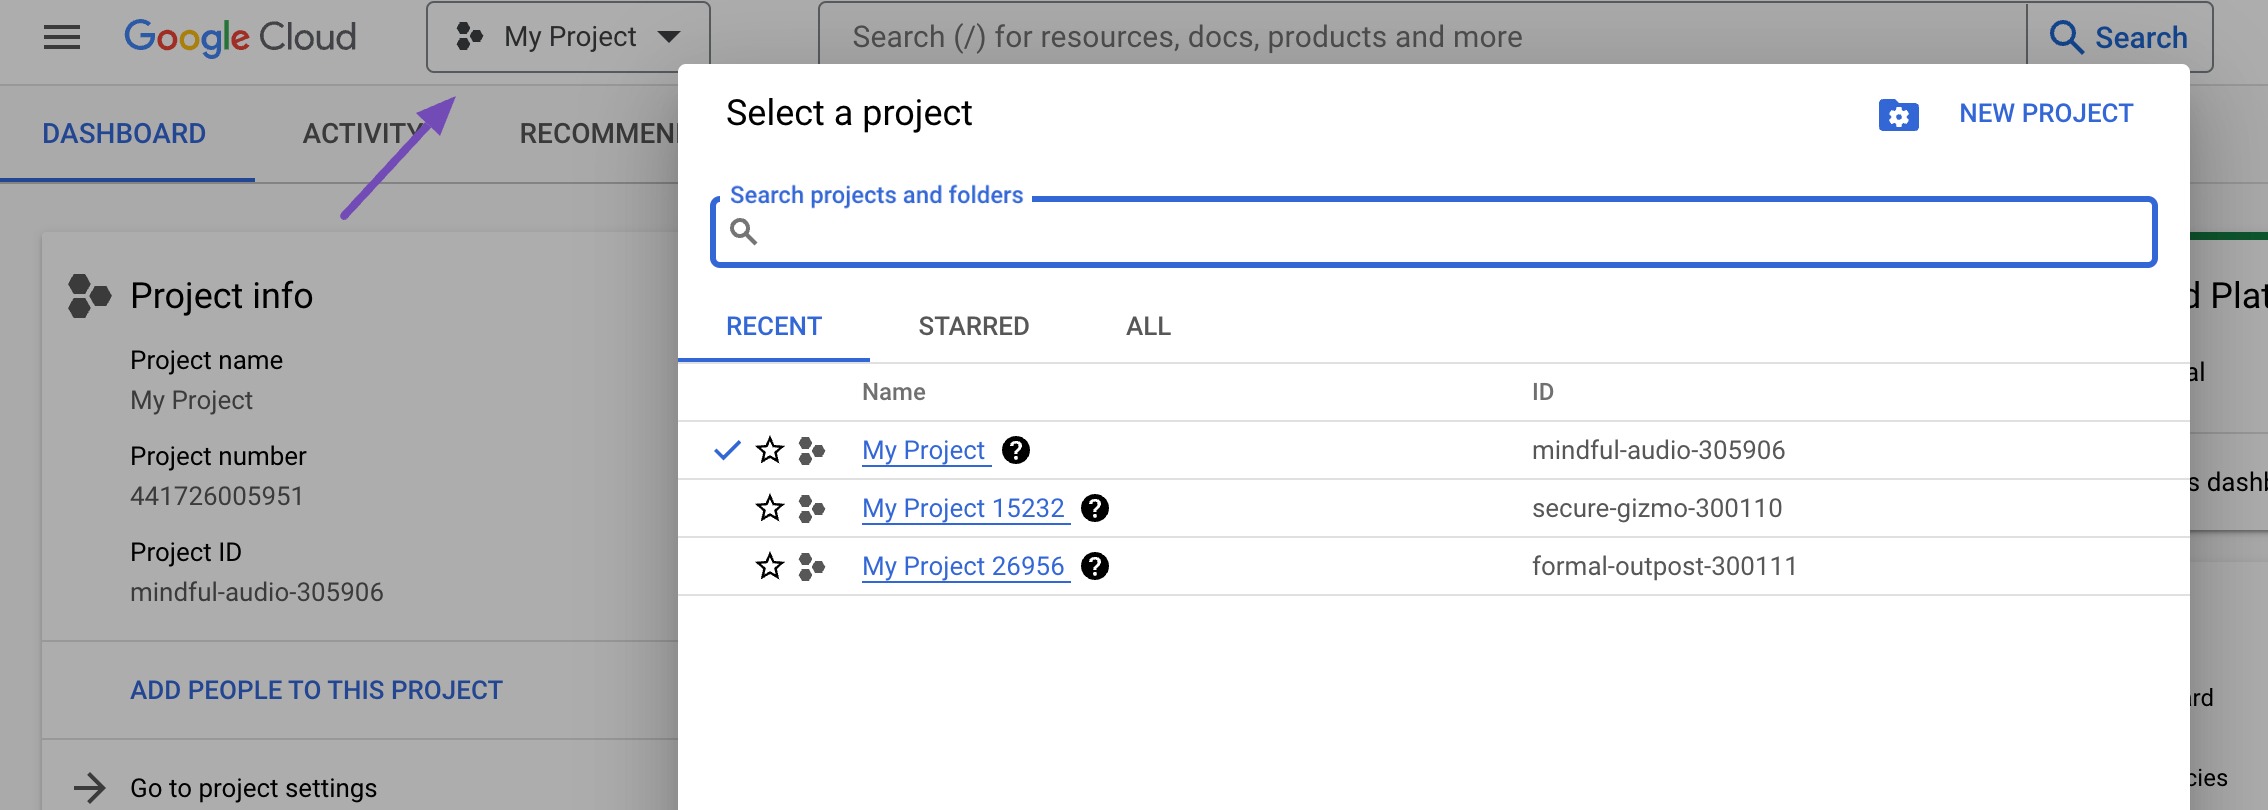
By clicking on the button, you’ll be directed to the dashboard. Here, you’ll either create a new project if you don’t have one or select from the existing ones you have.
Once you’ve successfully created or selected a project, click the Keys & Credentials option, as shown below. This selection will guide you through setting up a billing account.
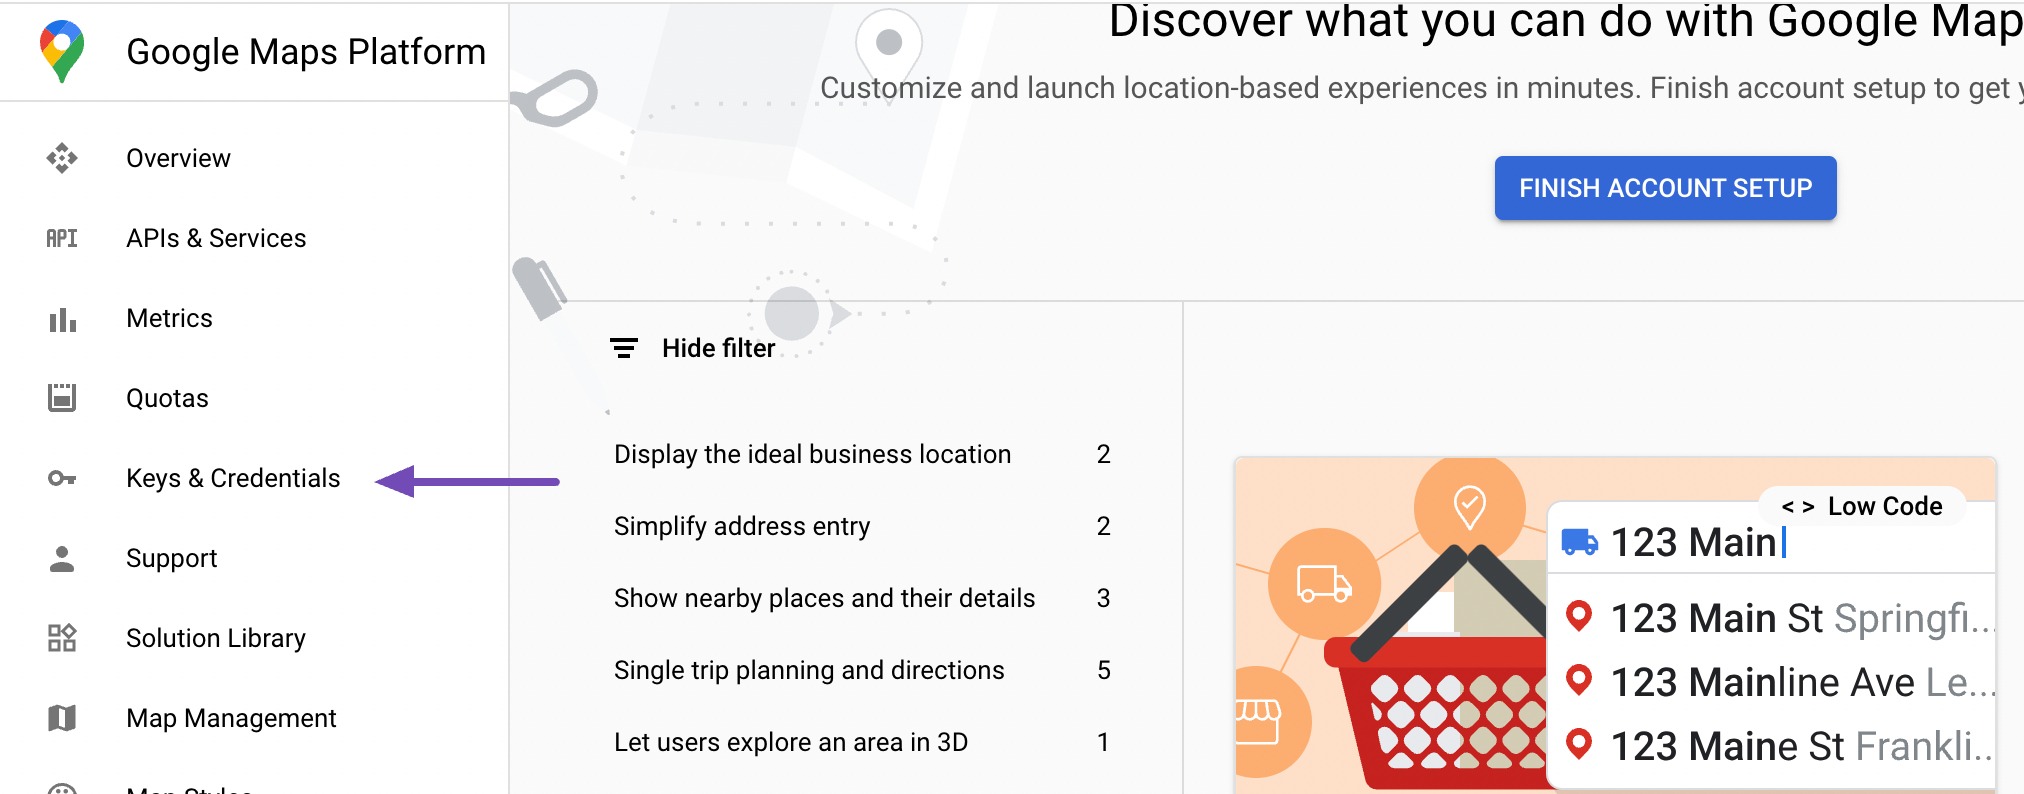
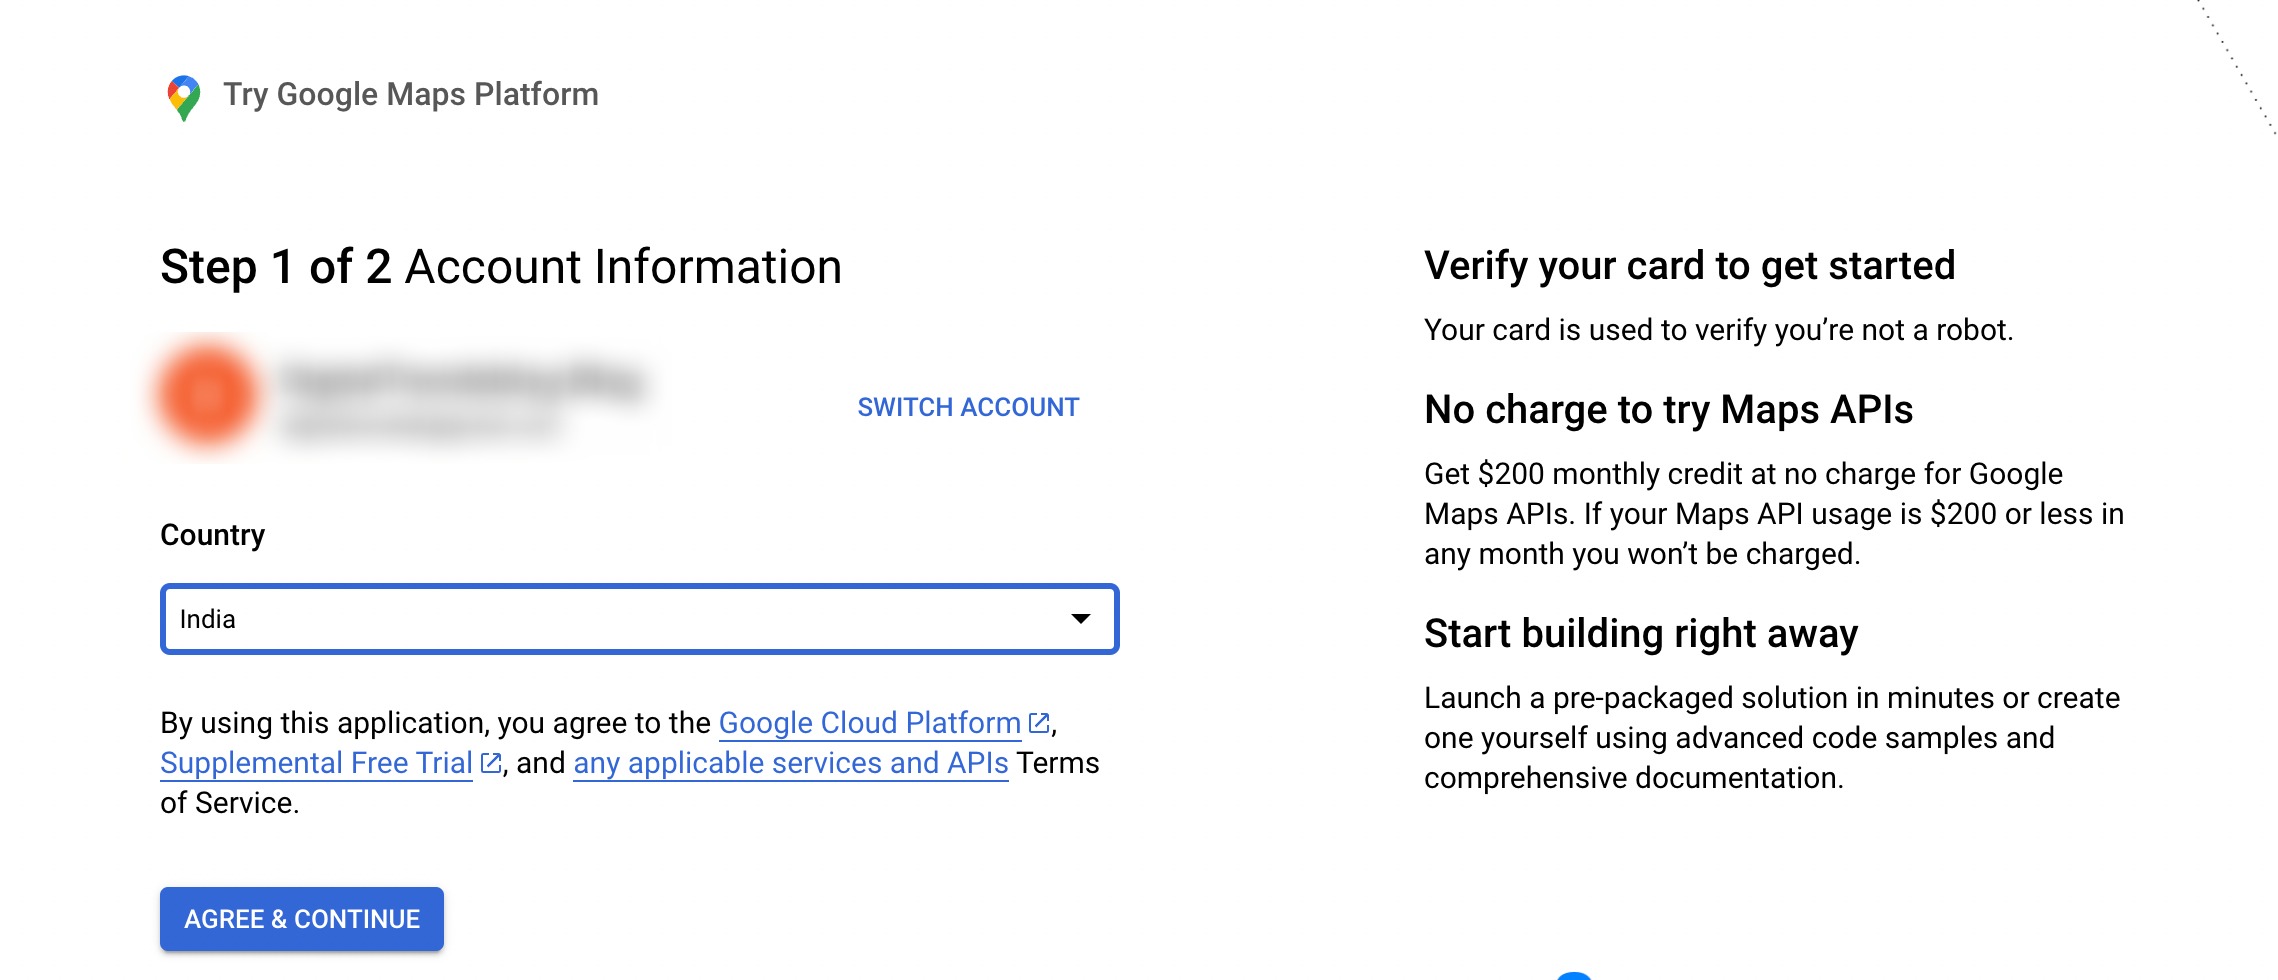
Google Maps Platform follows a pay-as-you-go pricing model, providing the first $200 monthly usage free for all users. This is particularly beneficial for small websites employing the straightforward embed method.
In the initial step, input your country’s name. Following this, click the AGREE & CONTINUE button to proceed to the next step.
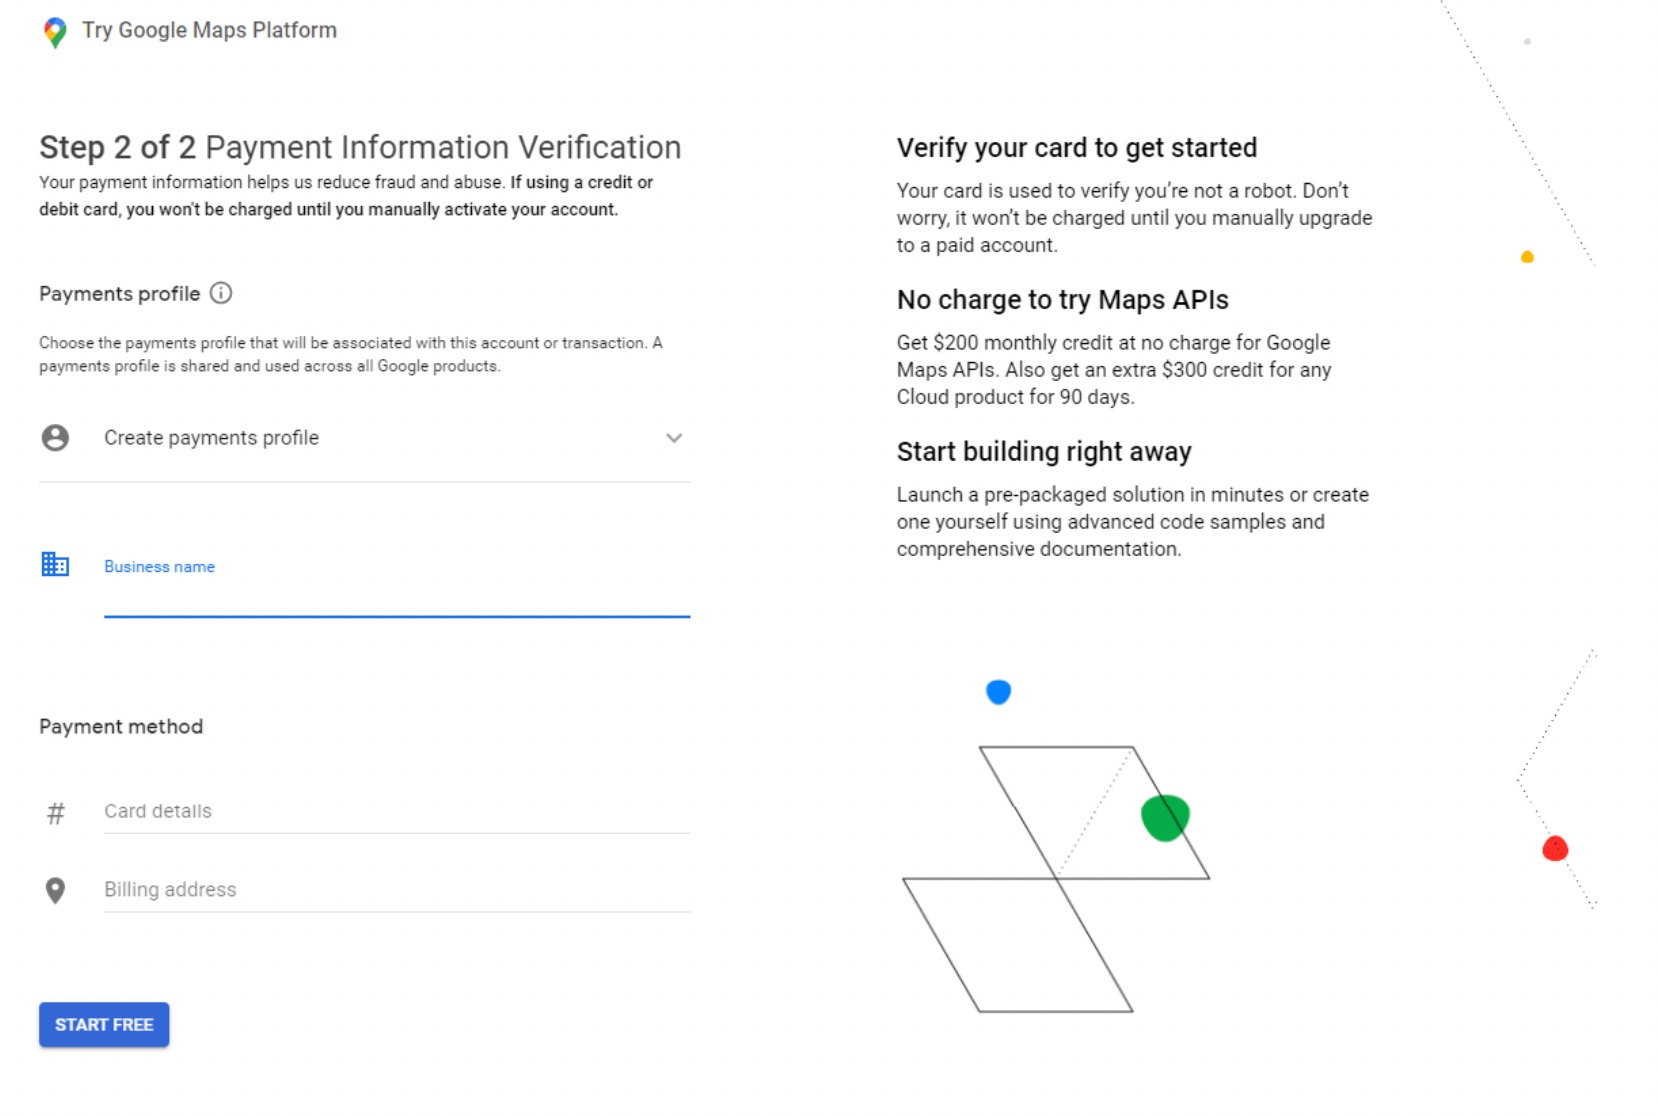
The subsequent step will require your business name, payment method, and card details.
However, rest assured that no charges will be applied unless you choose to upgrade to a paid account. This information is solely needed for verification to ensure you’re not a robot.
In the upcoming step, you’ll be presented with four questions concerning your organization and the purpose of utilizing the Google Maps Platform.
Once you’ve provided answers to these questions, simply proceed by clicking the Submit button.
A pop-up will appear, revealing your API key. Copy and save this key in a text file for future reference.
After successfully copying the API Key, go back to your WordPress website and enter it into the Rank Math Local SEO settings.
Embed Google Maps API Key to WordPress
In the Local SEO settings, scroll down to the Google Maps API Key option and paste the copied API Key.
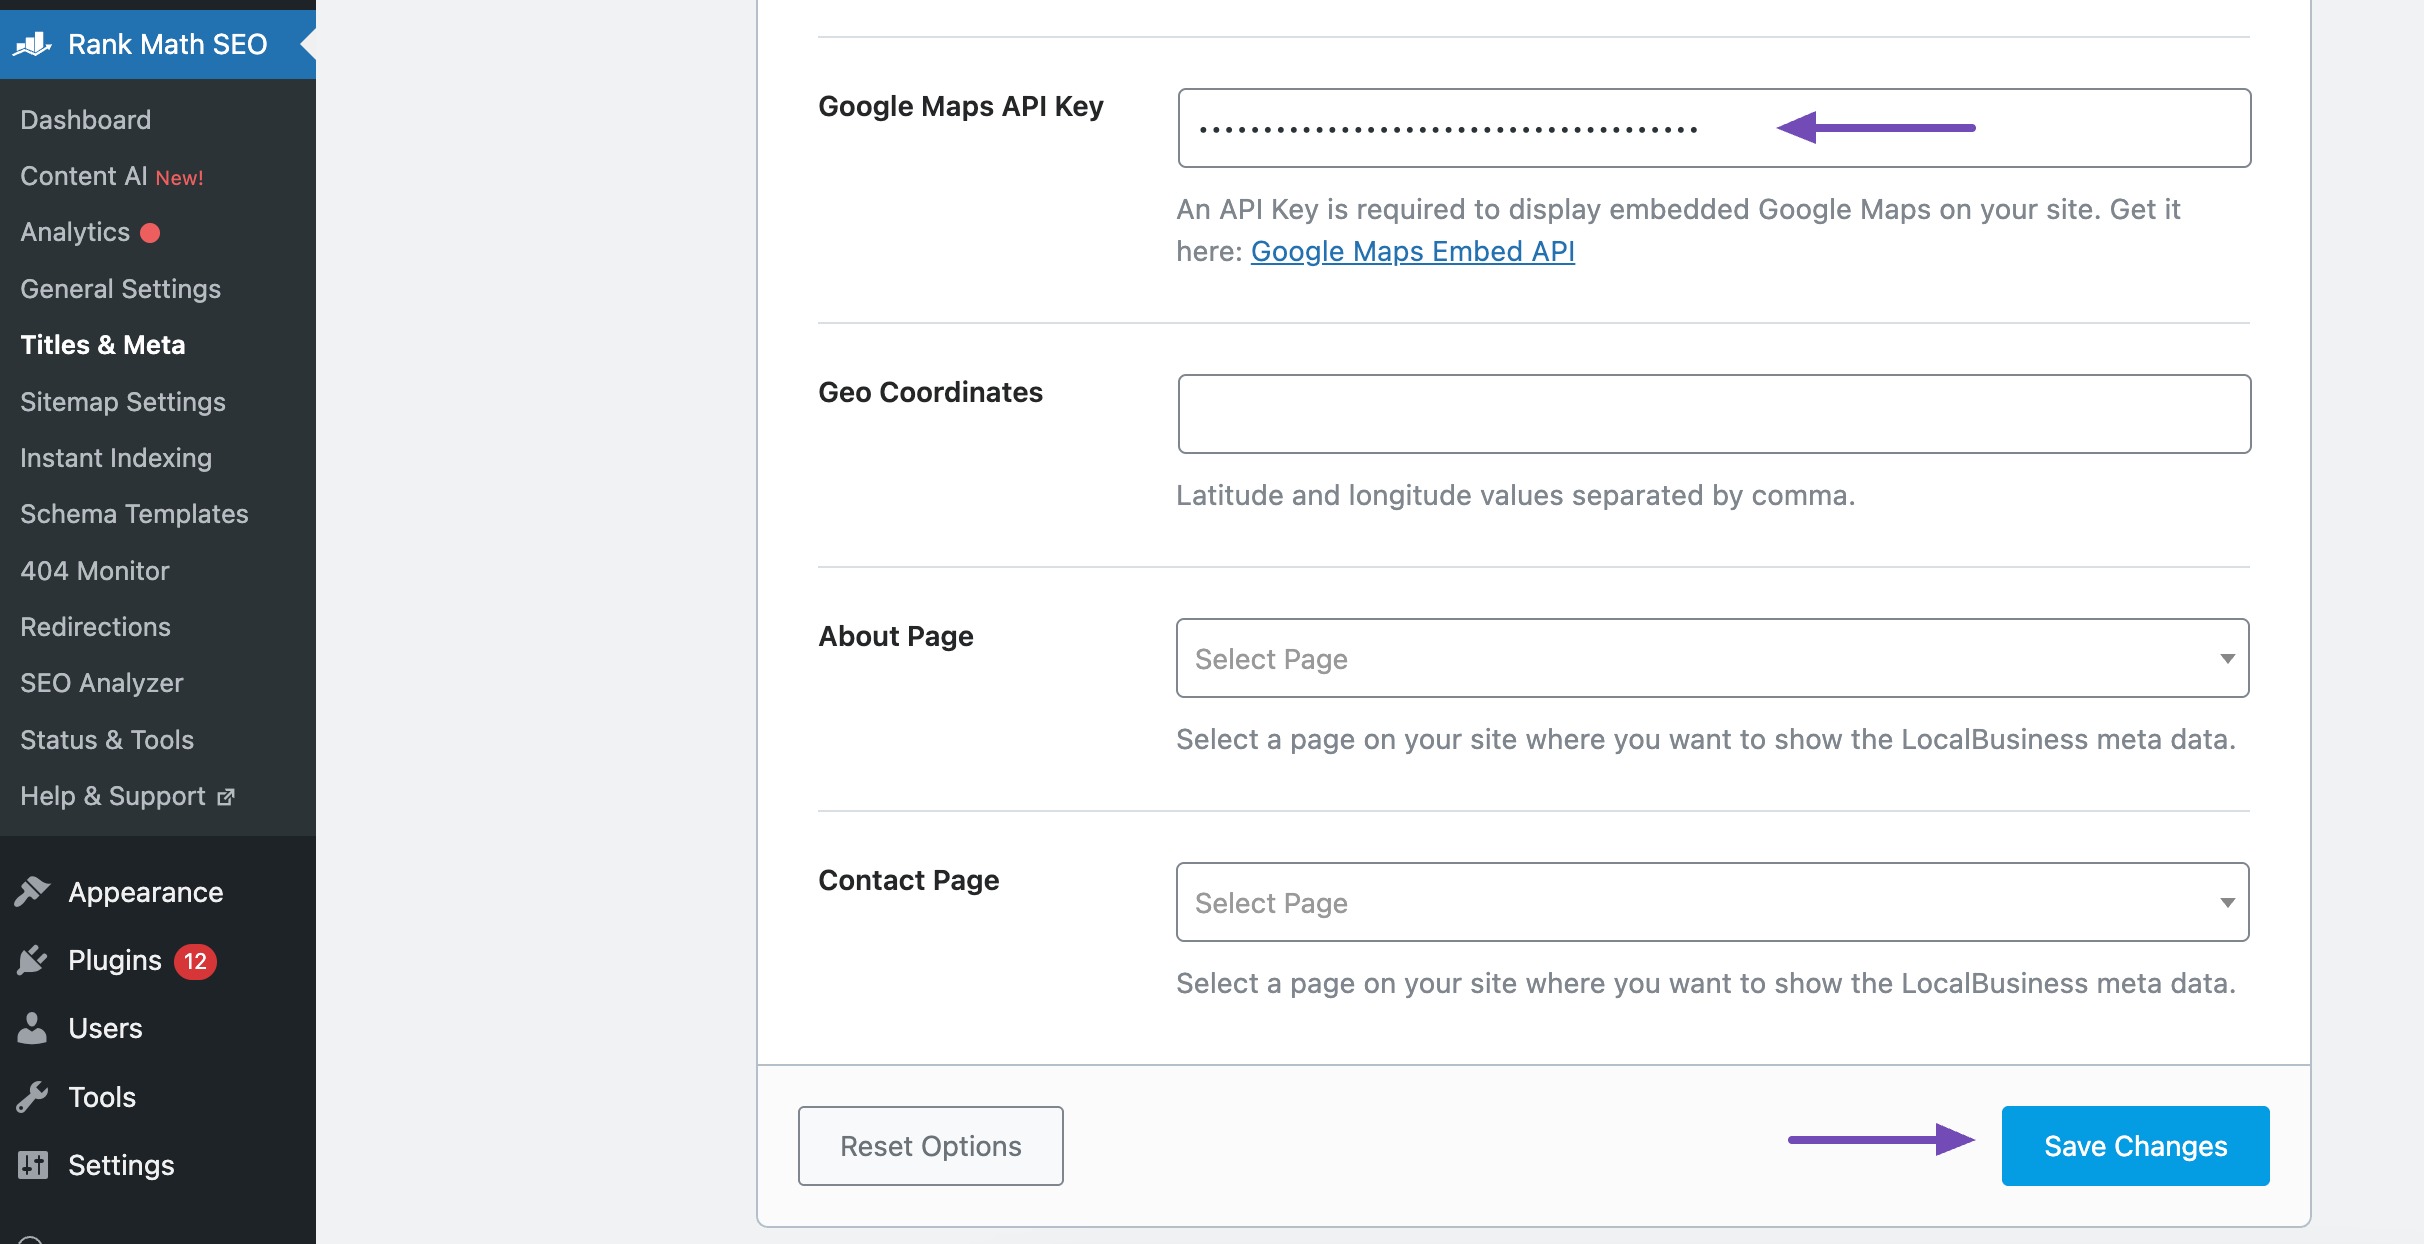
After that, scroll down to the bottom of the page and click the Save Changes button to save your settings.
Once you’ve saved your changes, it’s time to add Google Maps to your website post/page.
Display Google Maps in Your WordPress Content
You can now incorporate Google Maps into your existing posts/pages or widgets, or create a new one.
On the editing page, switch to the block editor, search, and add the Local Business by Rank Math, as shown below.
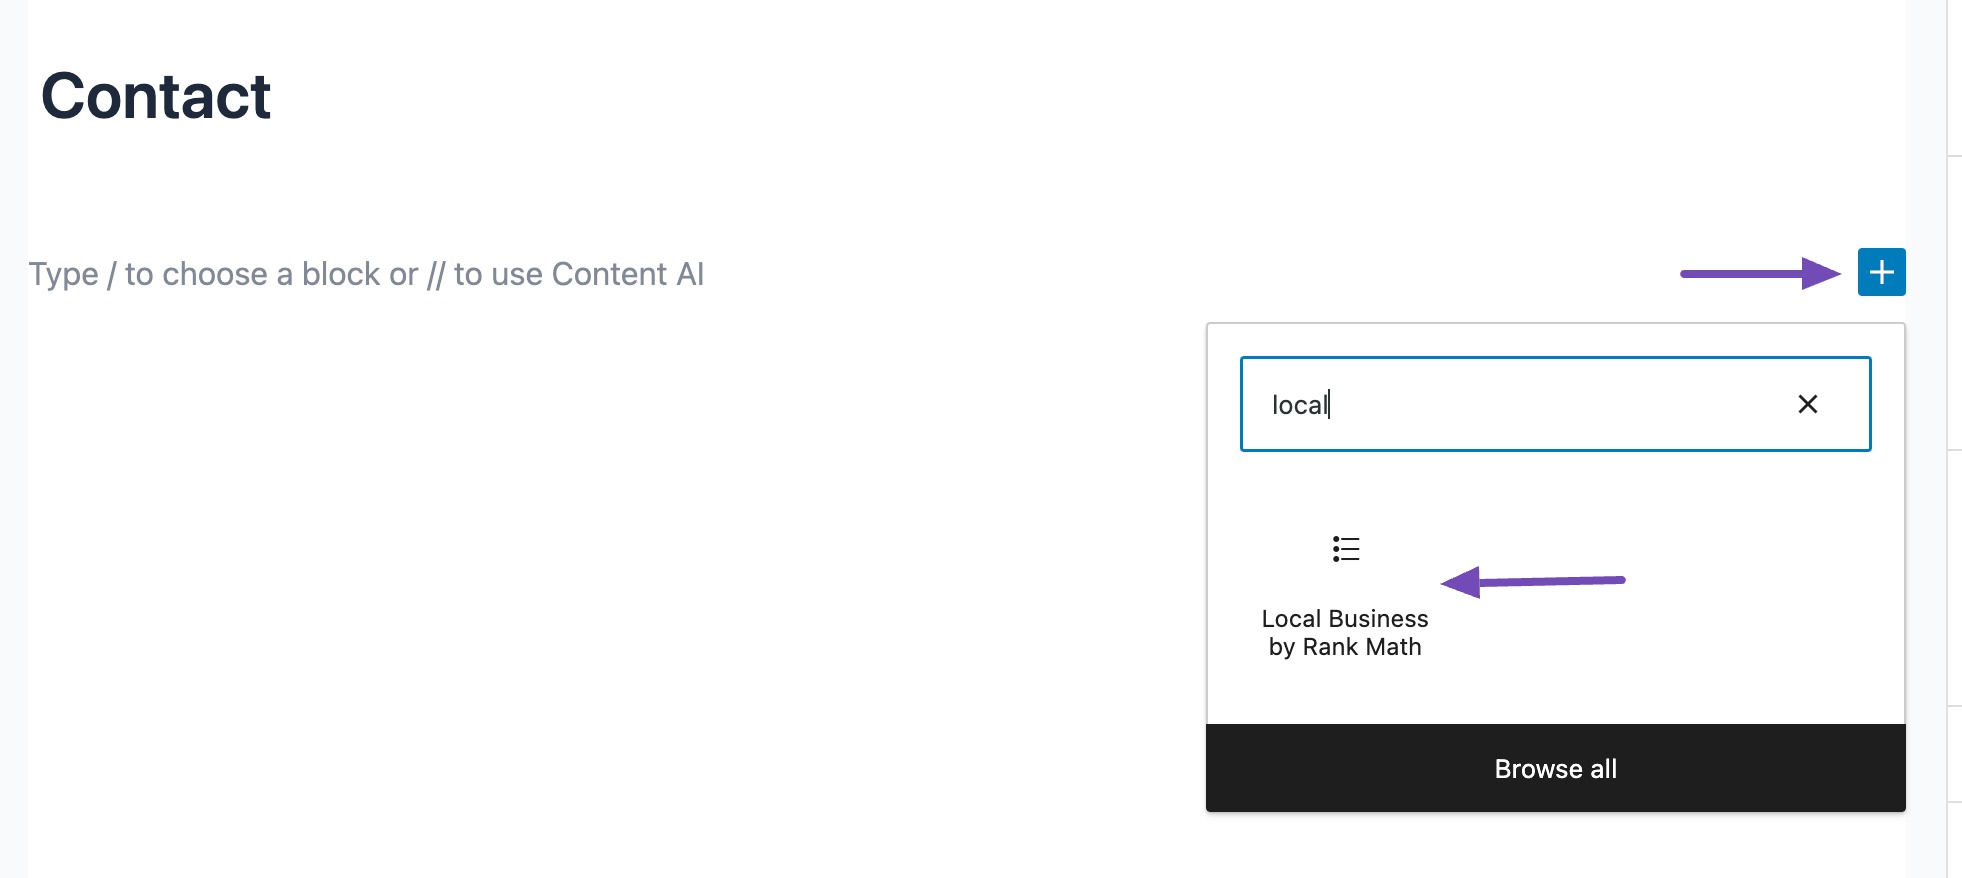
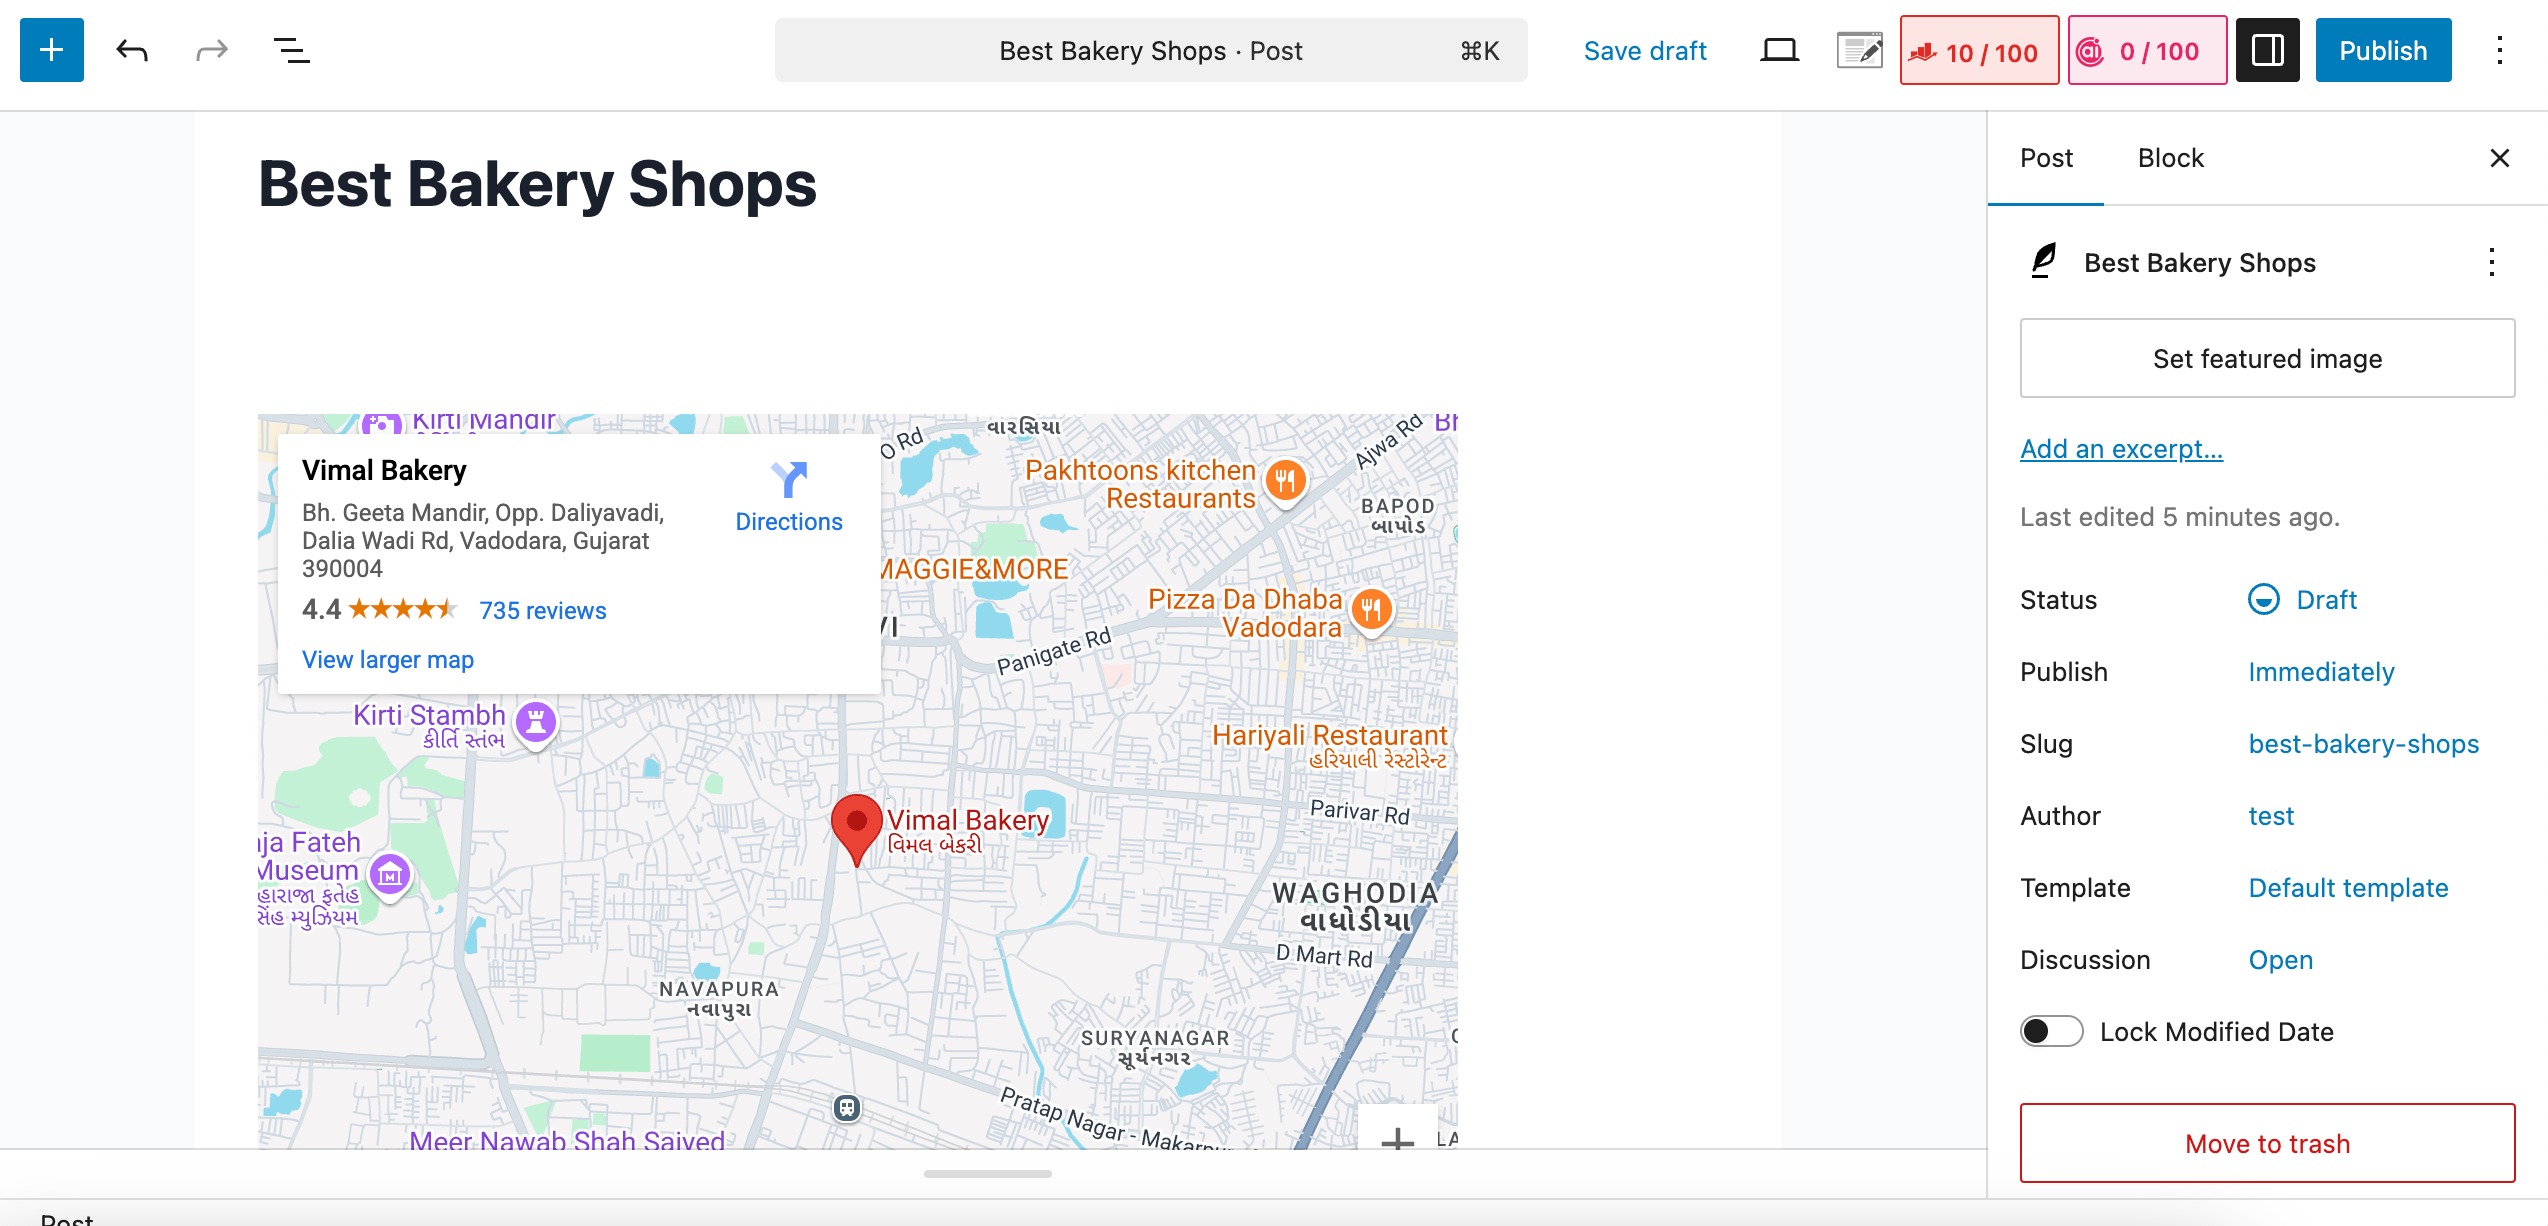
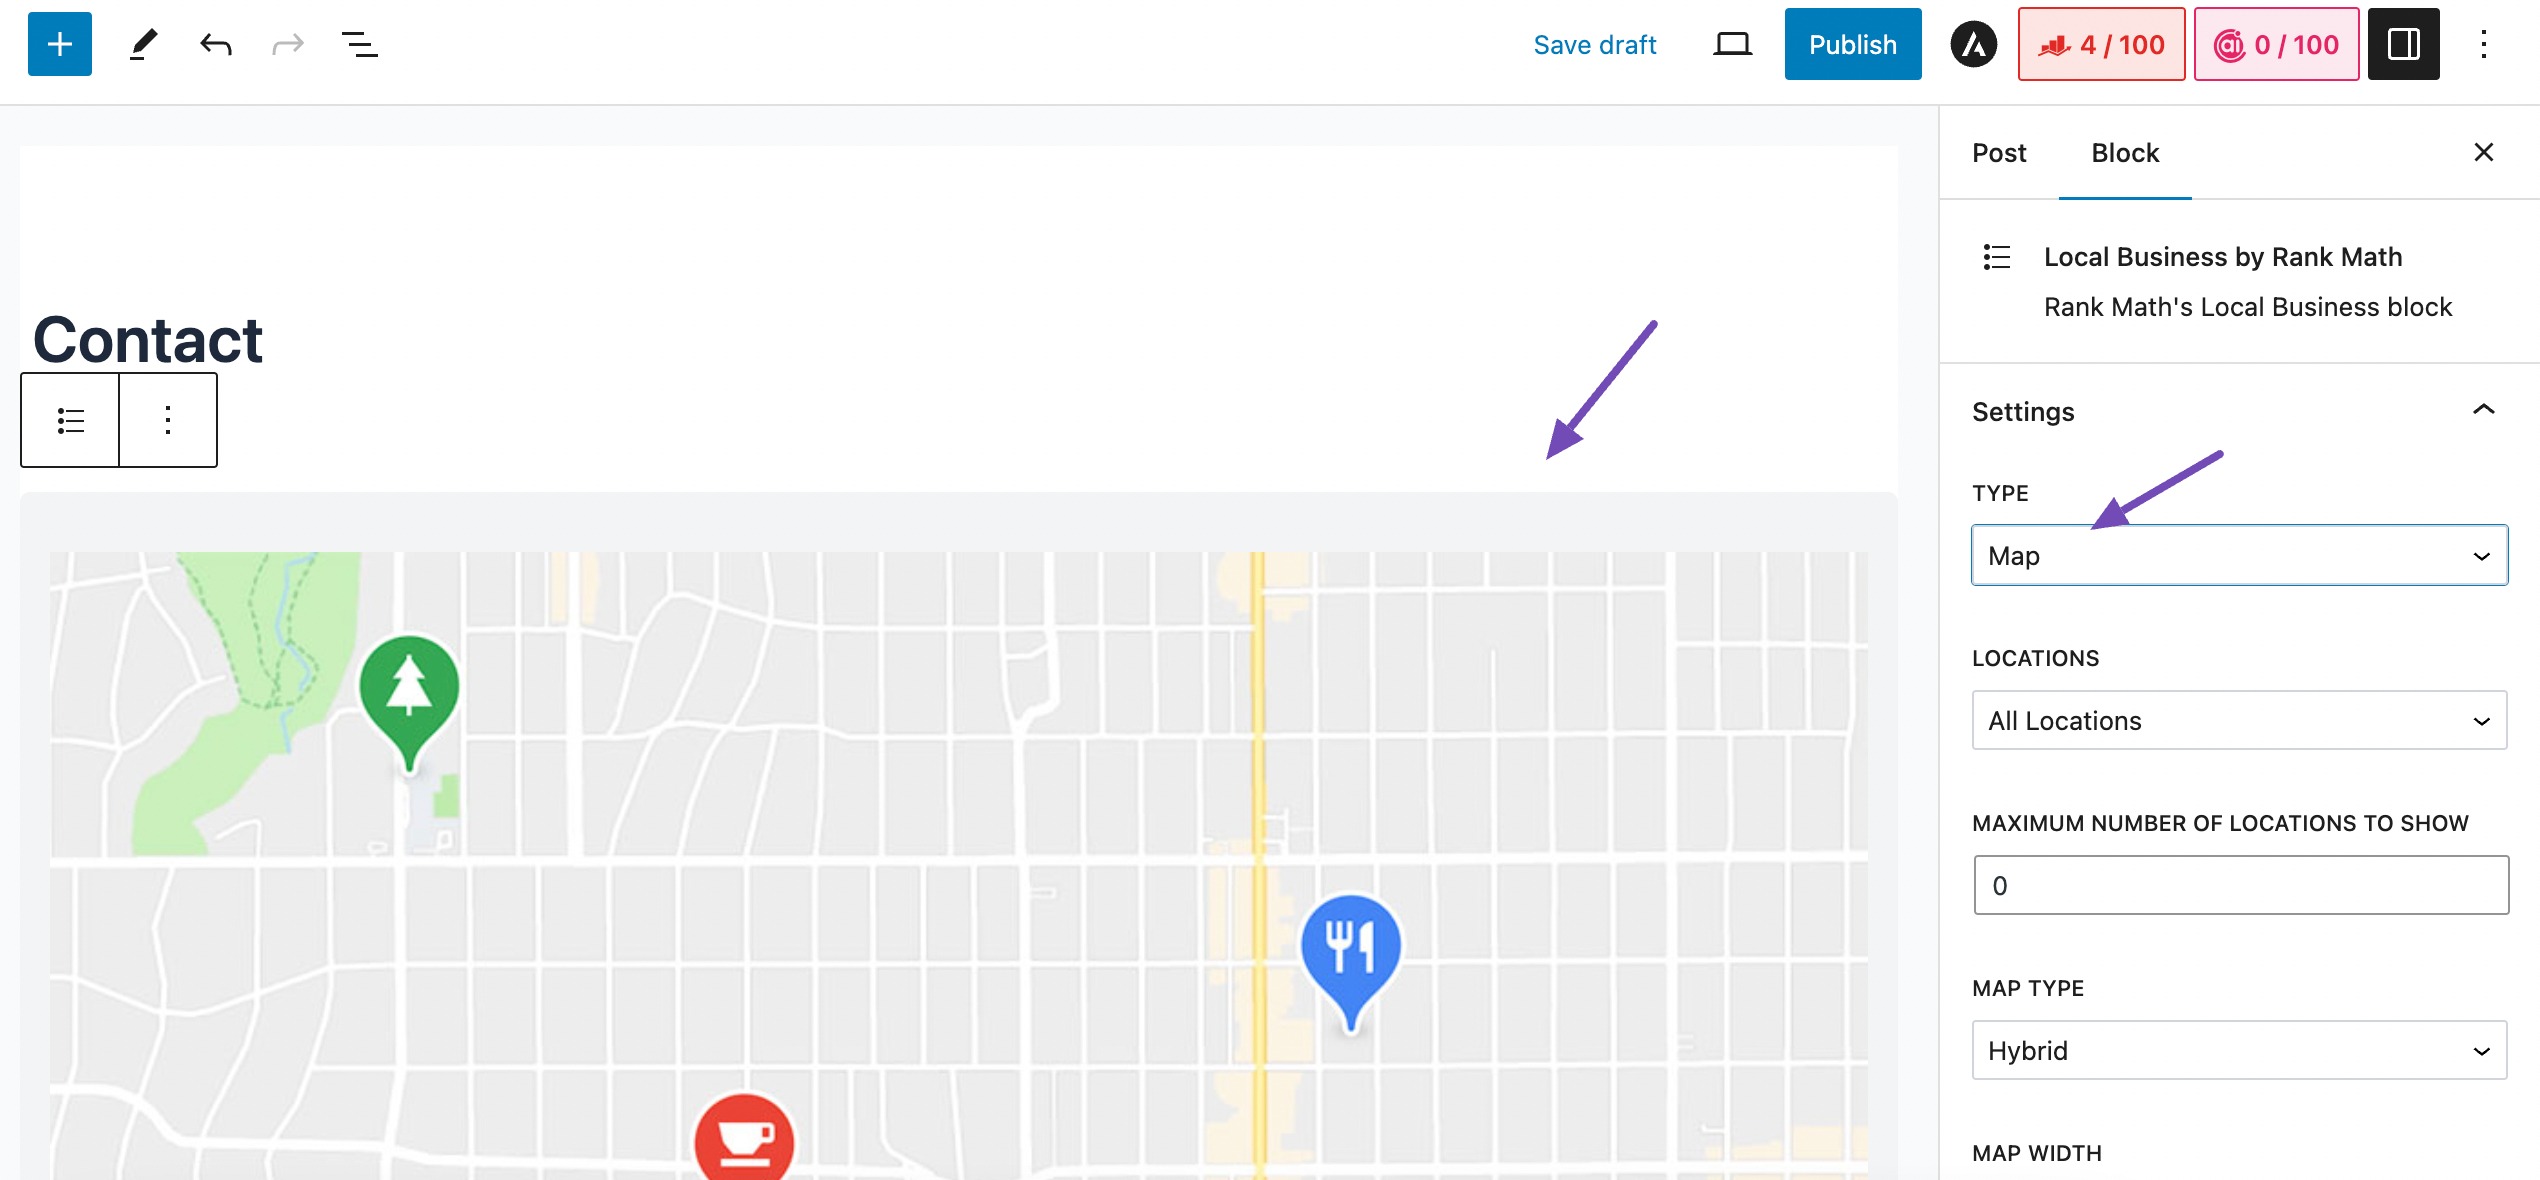
When you add the local business block editor to the content area, it initially displays the address.
However, you can change it to a map by navigating to the Settings panel and selecting the type Map, as shown below.
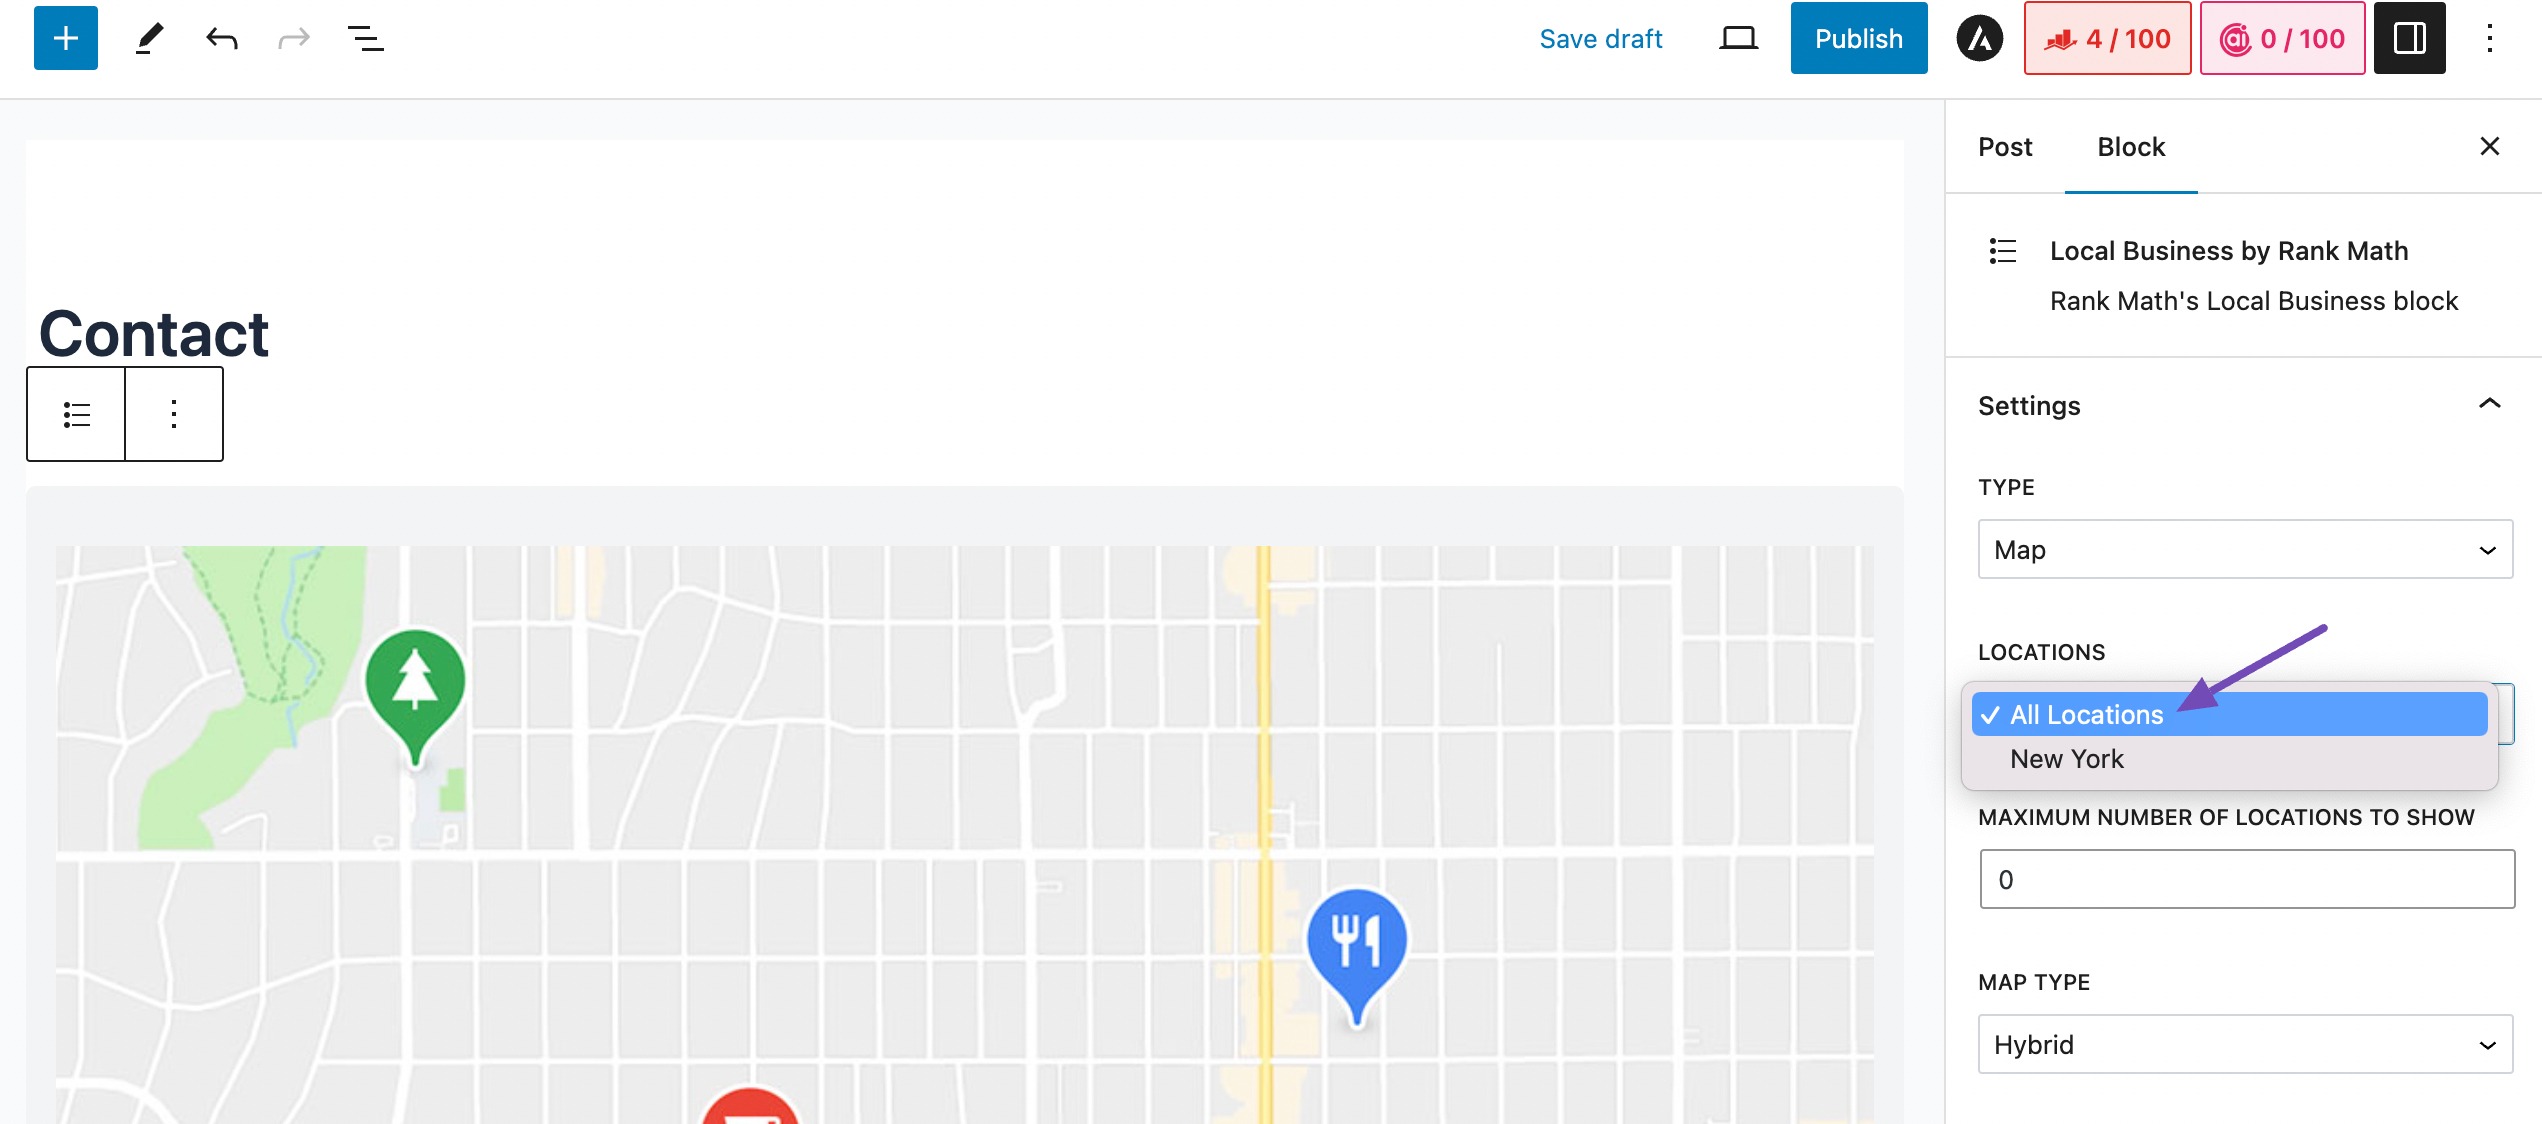
In the LOCATIONS settings, if you have multiple locations, you can choose one of them or select the All Locations option.
After that, scroll down through the settings to configure other relevant options per your preferences.
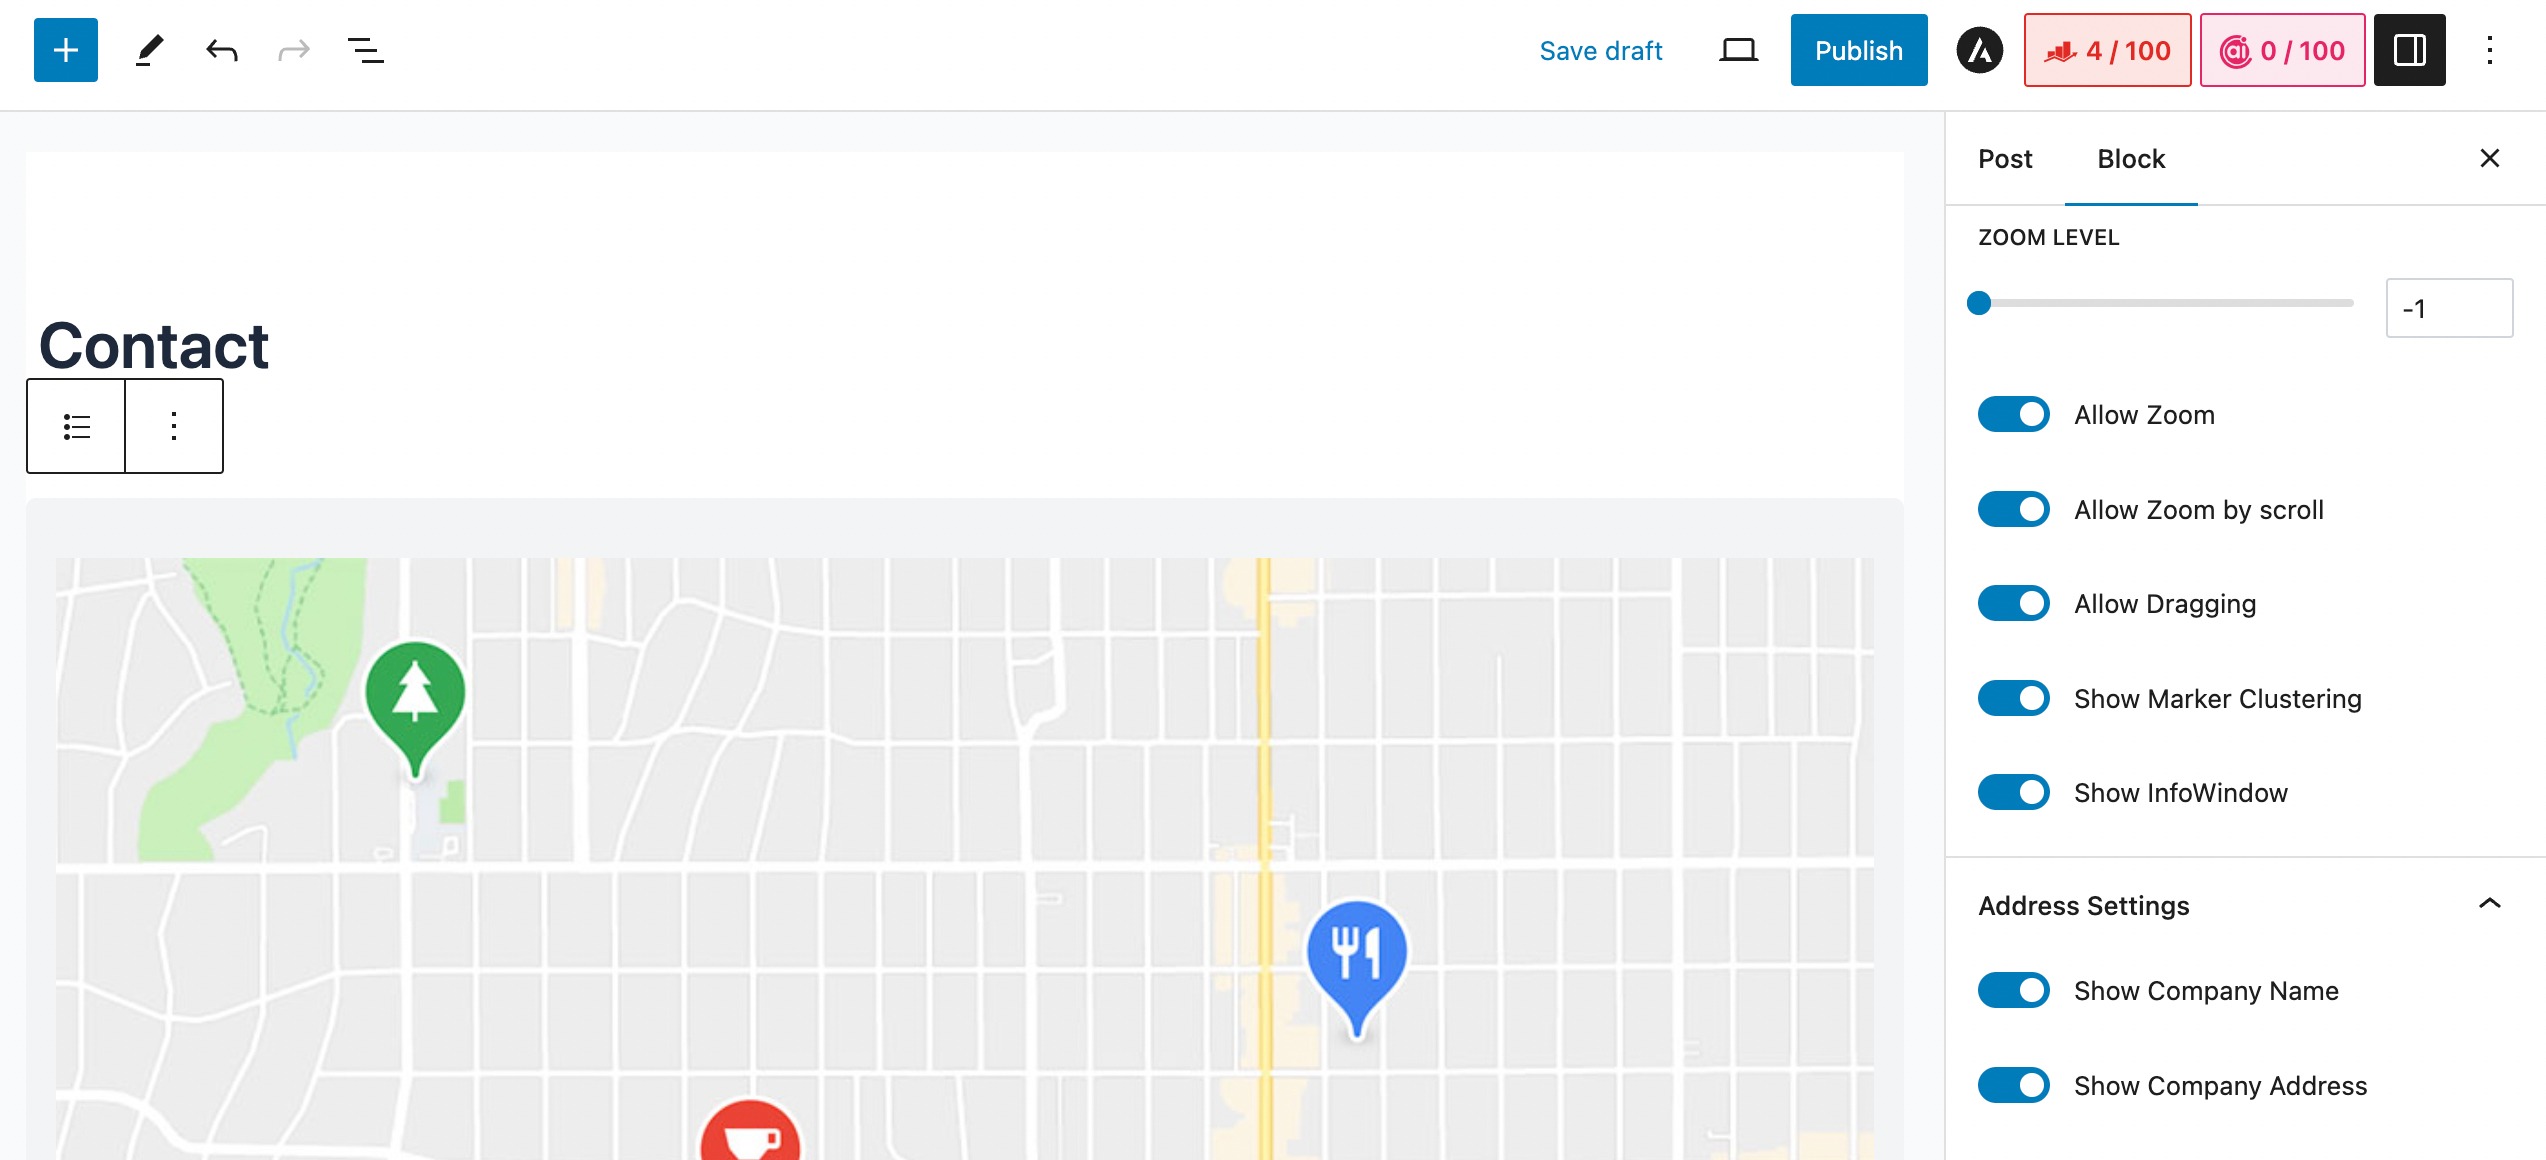
After completing all the configurations successfully, save your changes by clicking the Publish/Update button.
3 Conclusion
Adding Google Maps to your business website is a simple yet powerful way to enhance user experience, boost local SEO, and help visitors easily locate your business.
Whether you choose to embed a map manually or use SEO tools like Rank Math, there’s a way that suits every need and skill level.
So, go ahead and embed your map today and make it easier for your audience to connect with you!
If you like this post, let us know by Tweeting @rankmathseo.