
Broken links aren’t just annoying for your visitors—they can also hurt your SEO and damage your site’s credibility.
If you’re anything like me, you want your WordPress site to run smoothly and offer a great user experience. That’s why keeping your links in check is so important.
Fortunately, there are free tools you can use to find and fix these broken links.
In this post, we’ll explore a few easy methods for identifying and resolving broken links in WordPress. You’ll also learn some tips for preventing links from breaking in the first place.
So, let’s get started and clean up those dead ends.
Table Of Contents
1 What is a Broken Link?
A broken link (also known as a dead link) is a hyperlink on a webpage that no longer works as intended. When someone clicks on it, instead of taking them to the correct destination, it leads to an error page—usually a 404 Not Found message.
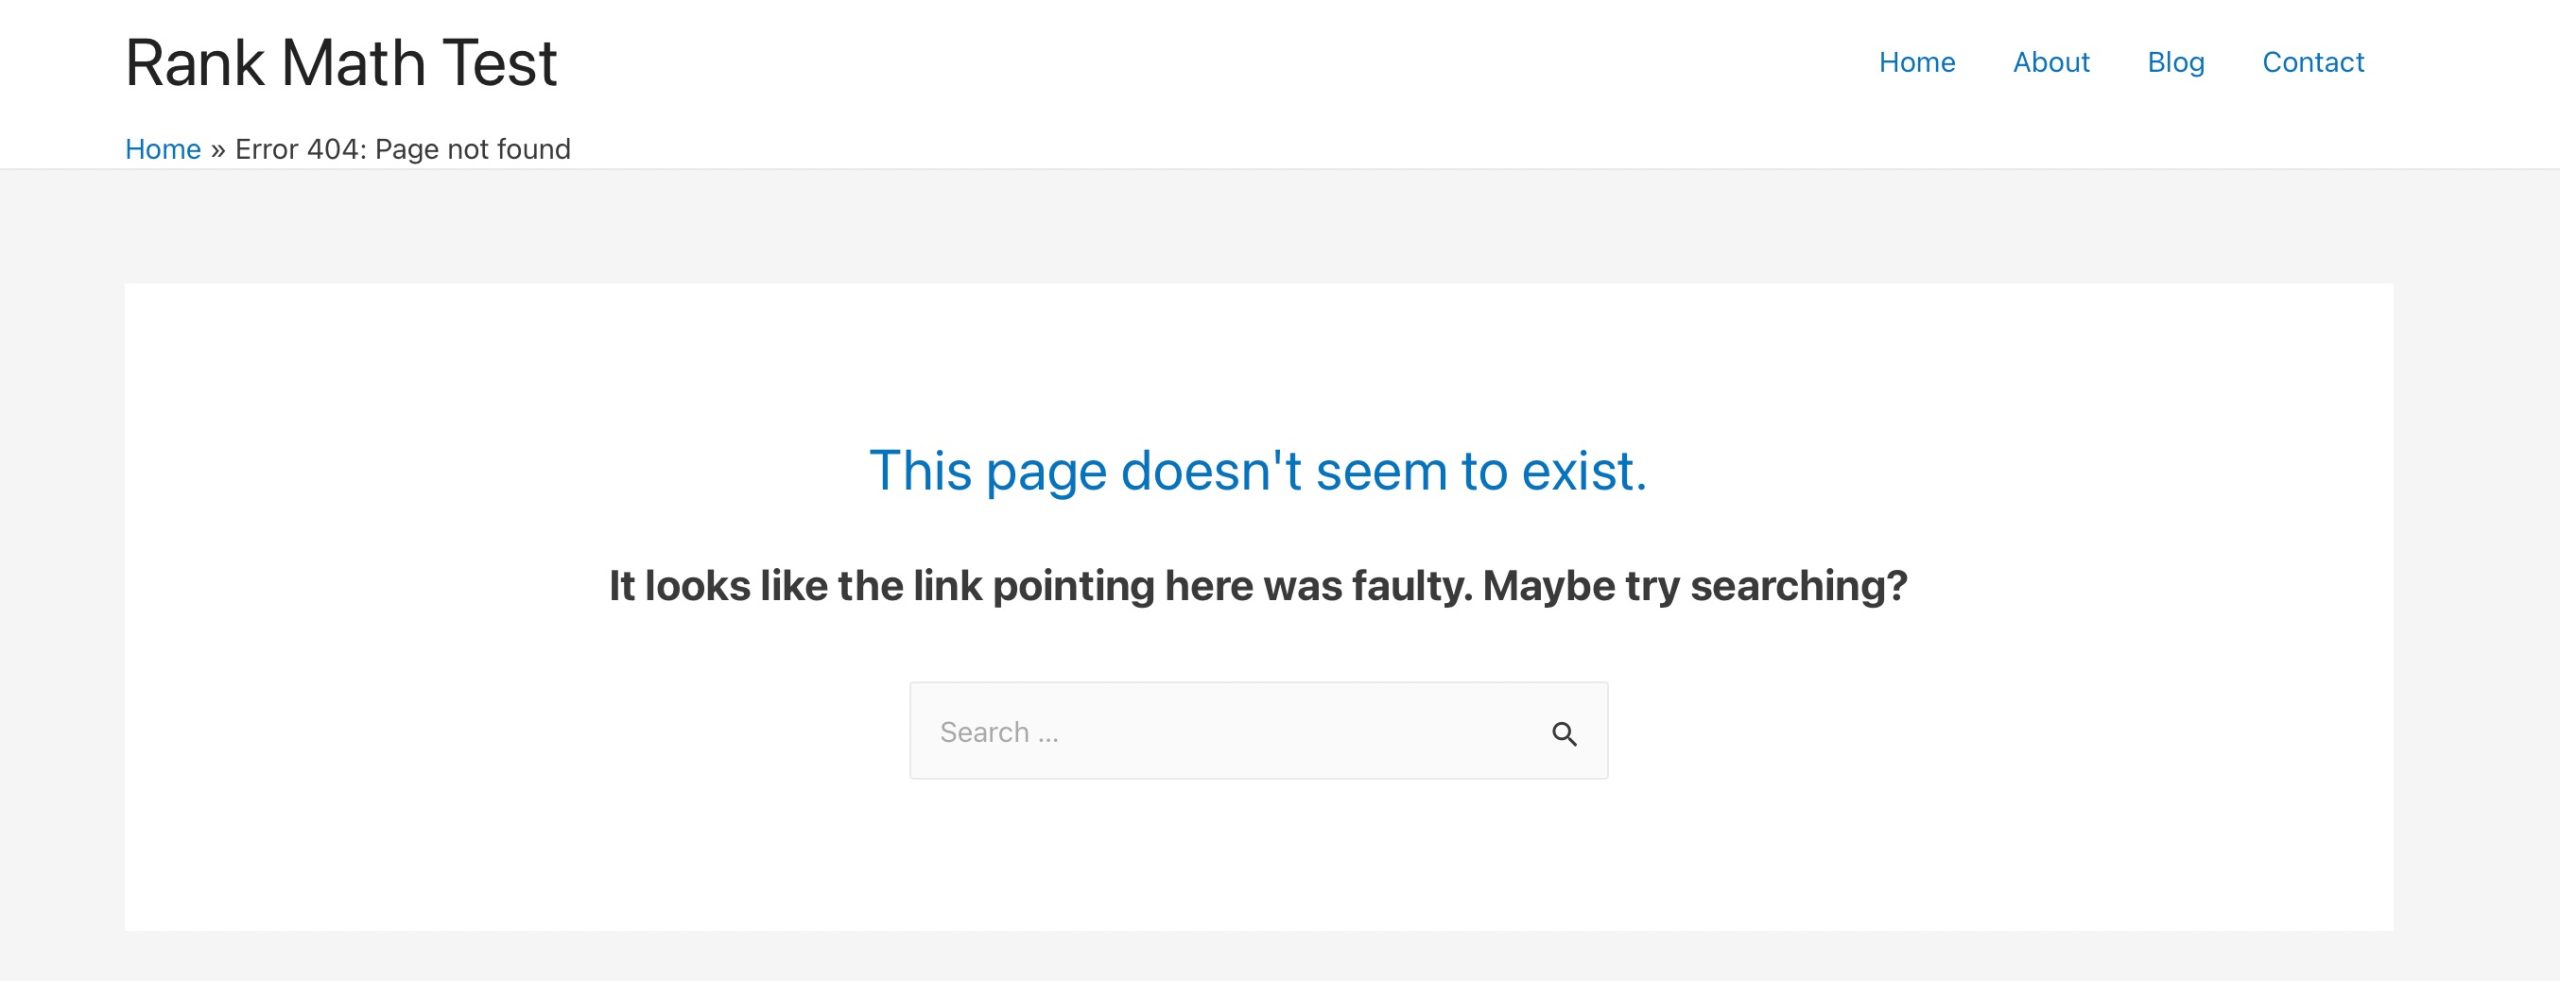
This can happen for several reasons:
- The linked page has been deleted or moved without updating the URL
- There’s a typo or mistake in the link
- The website you’re linking to has shut down
- The link points to content that is now restricted or unpublished
Broken links hurt the user experience because visitors can’t access the content they were expecting. They also negatively impact SEO, as search engines consider broken links a sign of poor website maintenance. That’s why it’s important to regularly check your site and fix or remove broken links.
2 Finding and Fixing Broken Links in WordPress
When it comes to maintaining your WordPress site, finding and fixing broken links is essential, not just for SEO, but also to provide a smooth experience for your visitors.
Luckily, there are several effective ways to identify and fix broken links, and one of the best tools you can use is the Rank Math SEO plugin.
2.1 Using Rank Math’s AI Link Genius
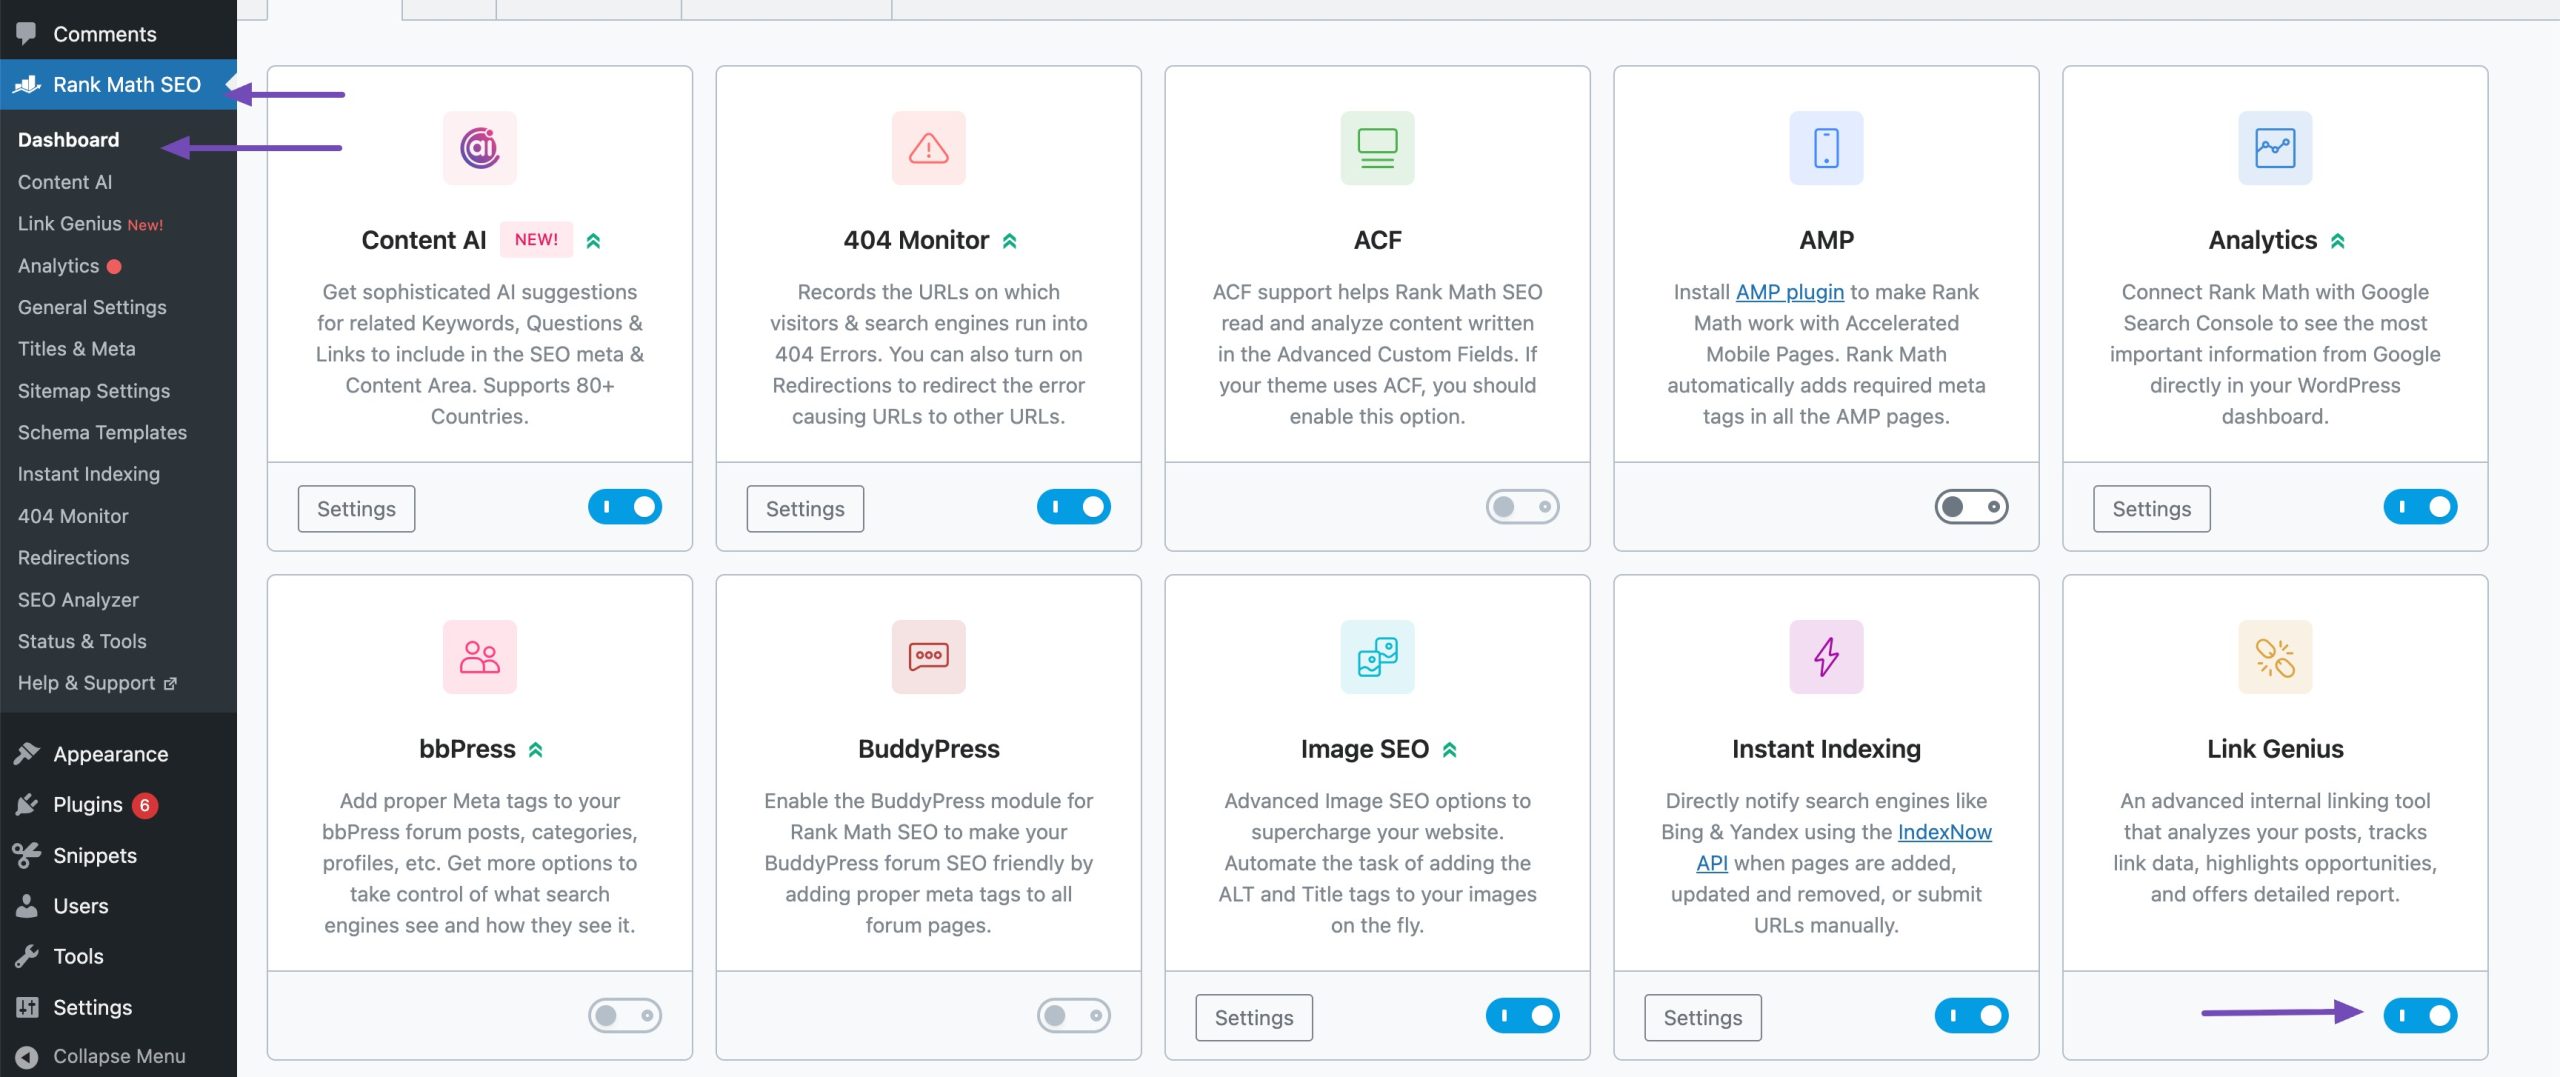
To identify the broken links, enable the AI Link Genius module from your WordPress dashboard, as shown below.
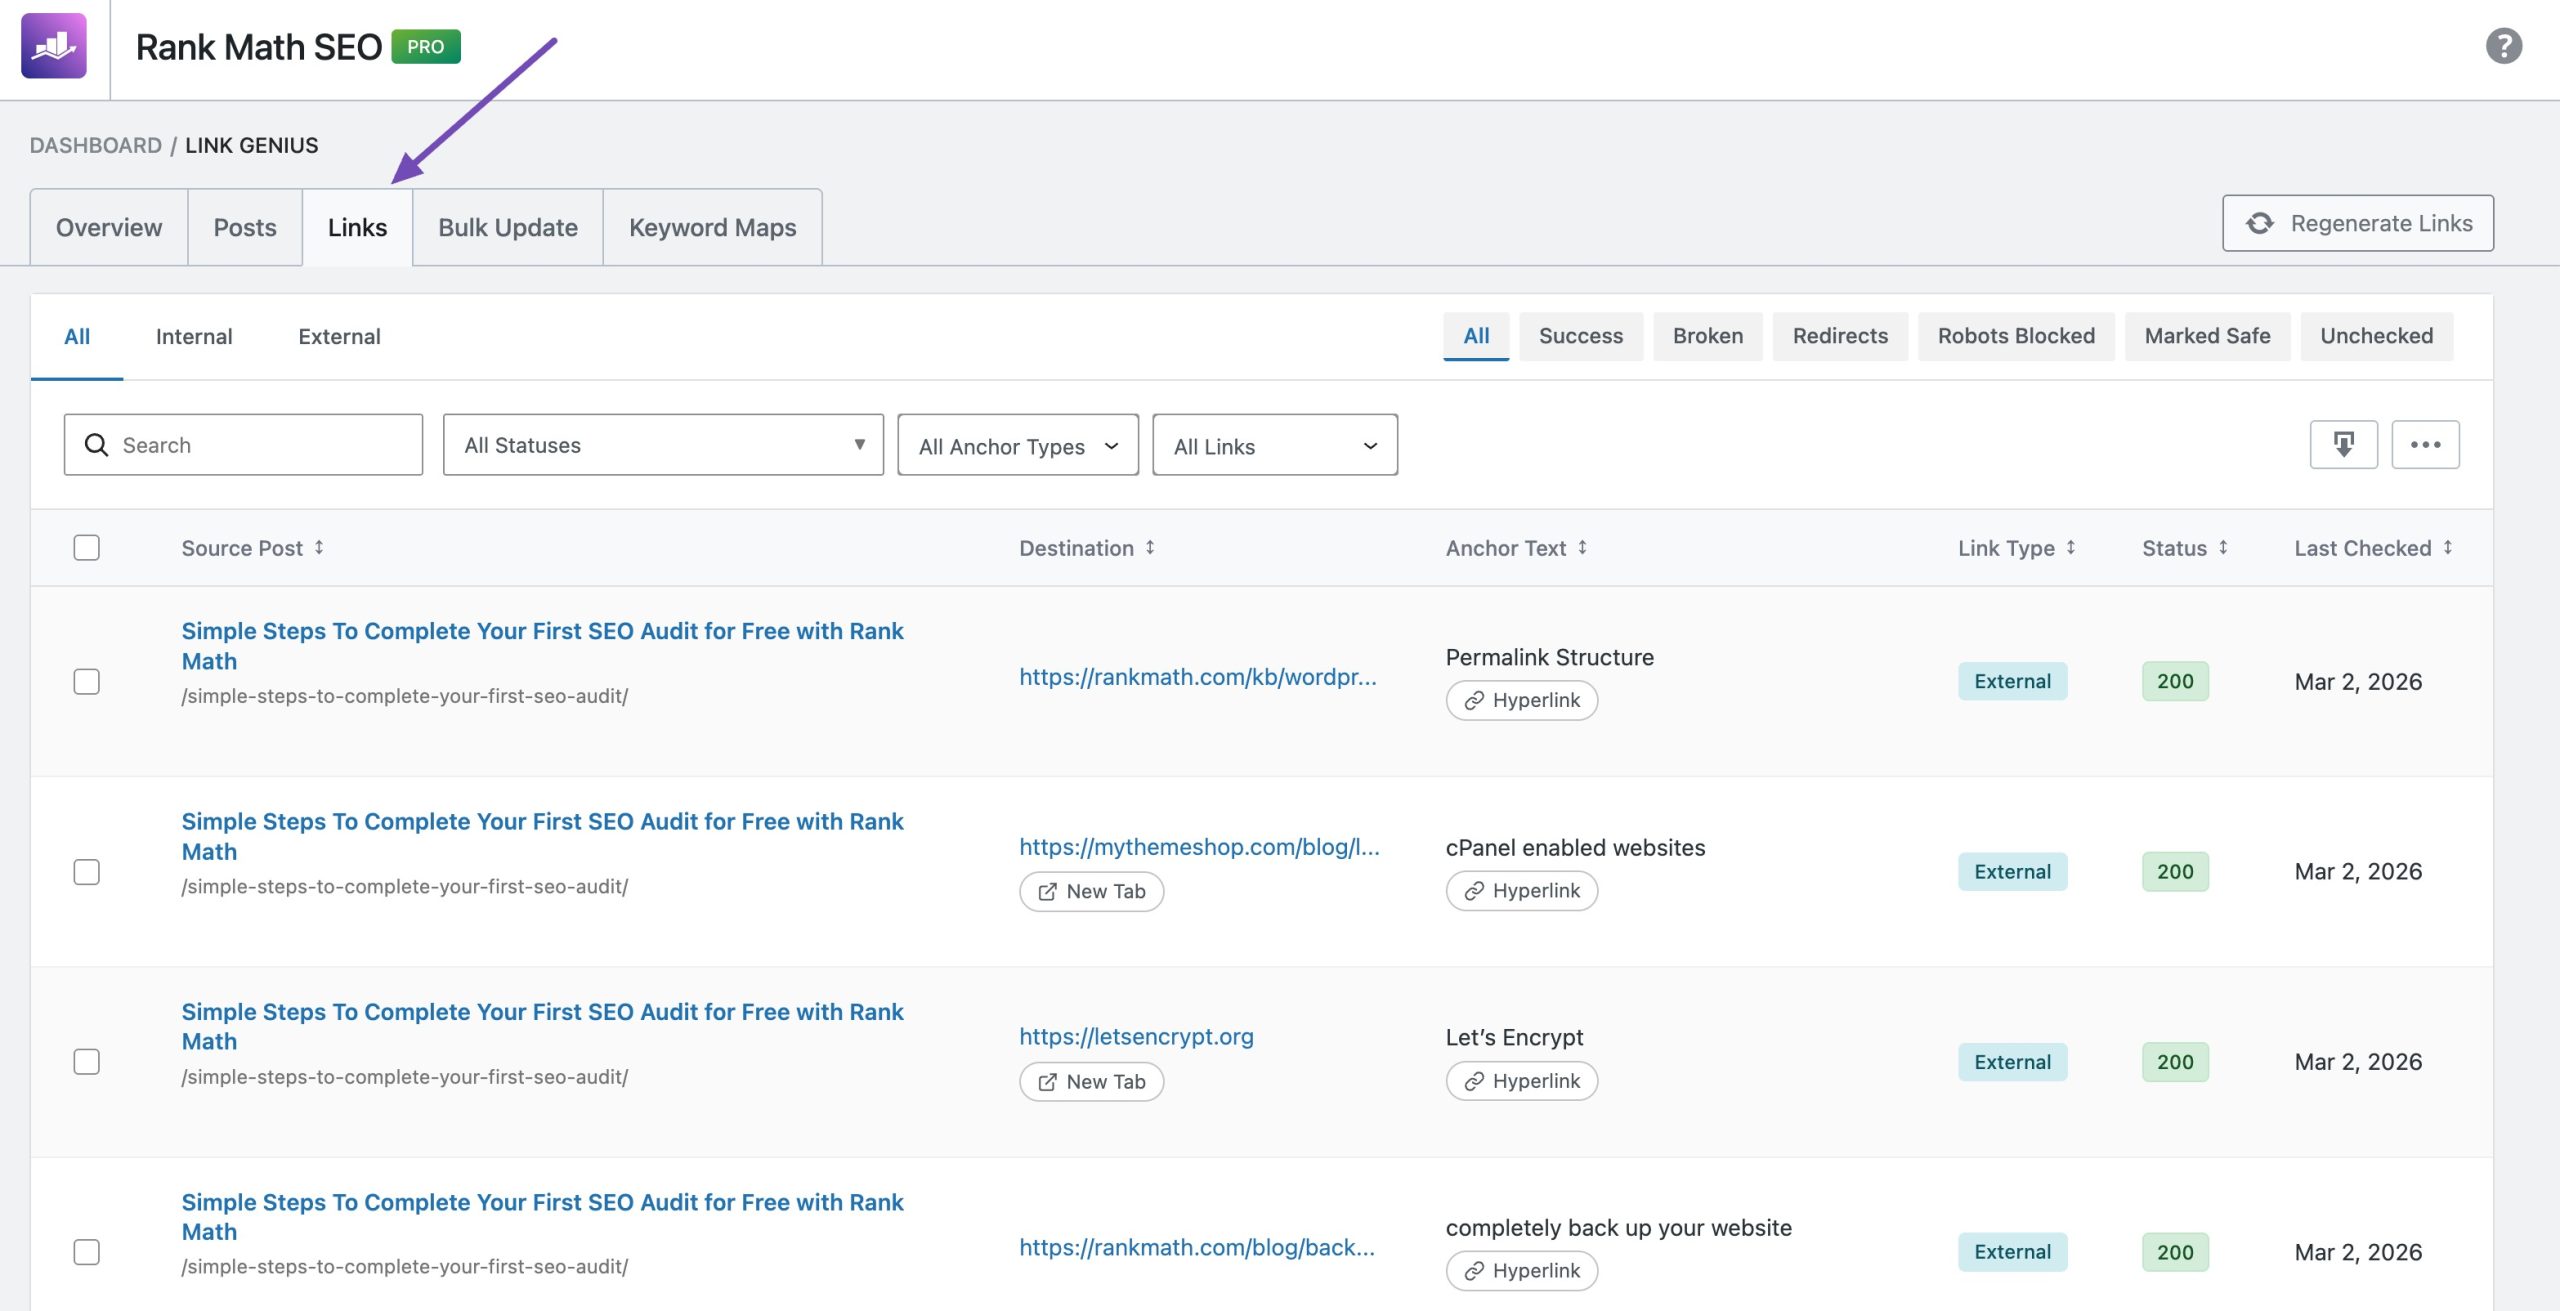
Navigate to the Rank Math SEO → Links section from your WordPress dashboard. You’ll get an overview of all the links on your website.
Once you click on the Broken Links tab, all the broken links on your website will be listed, as shown below.
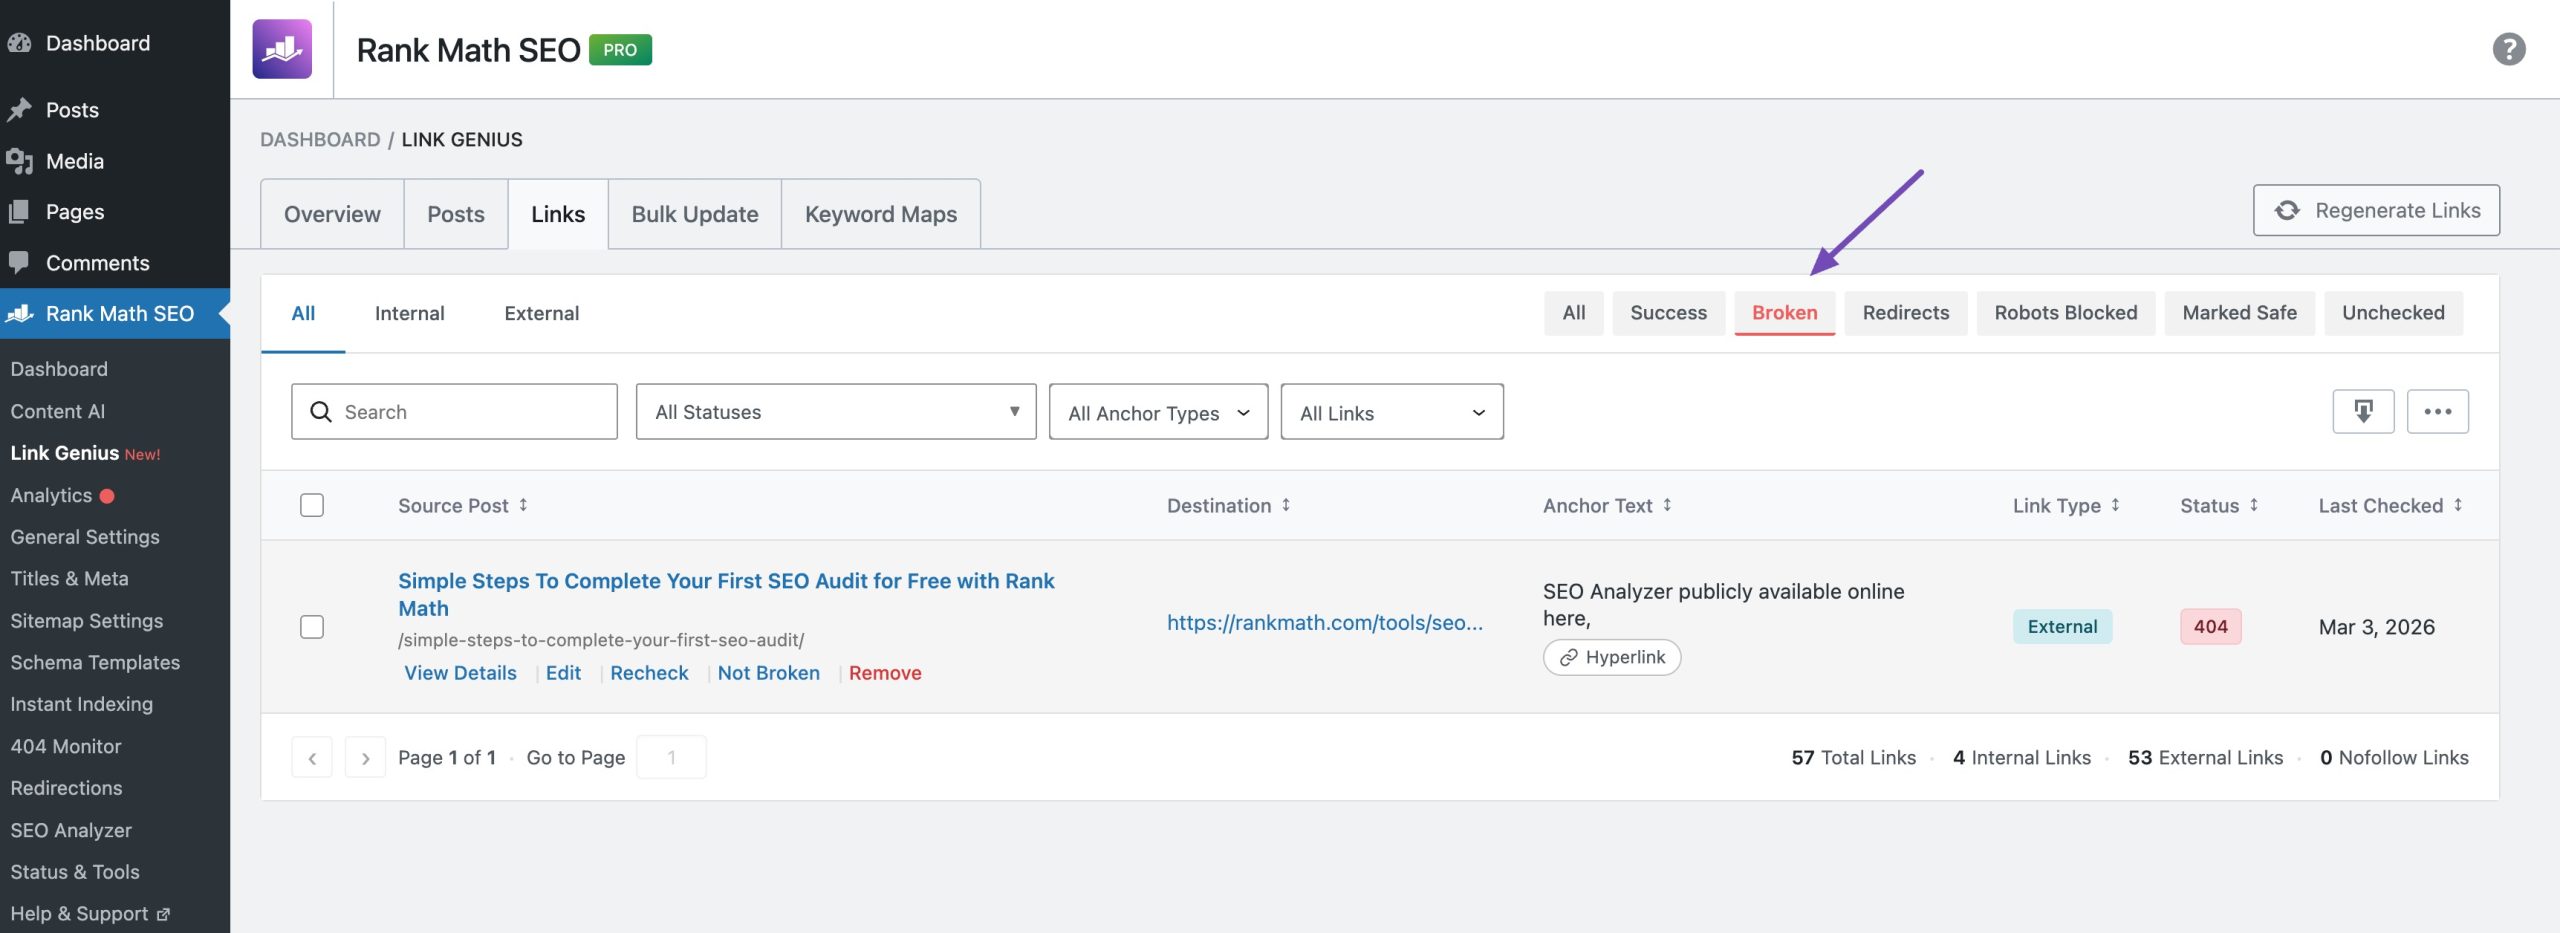
The actions you can take when hovering over the URL are: view, edit, recheck, delete or mark the link as not broken.
- View: You’ll see all the link details below, including target URL, anchor text, anchor type, link type, opens in new tab, is nofollow and date.
- Edit: A new dialogue box will pop up, as shown below. Add the URL and anchor text of the link. You can also check the ” Add rel=”nofollow” attribute and open link in new tab option, if you want to add a nofollow attribute and open the link in a new tab, respectively.
- Recheck: Recheck the broken link
- Delete: Delete the broken link
Not broken: Mark the link as not broken
You can then check your broken link and fix it right away!
2.1 Using Rank Math’s 404 Monitor and Redirections
One of the easiest ways to find and fix broken links is by using Rank Math’s 404 Monitor and Redirections features. These tools work together to track every URL that returns a 404 error and help you redirect broken links to the right pages.
To start, install and activate the Rank Math SEO plugin on your WordPress site.
Once the plugin is activated, configure the plugin and enable the 404 Module for your site by navigating to Rank Math SEO → Dashboard → Modules section, as shown below.
Note: Ensure you’re in Advanced Mode to enable the 404 Monitor module from Rank Math’s dashboard.
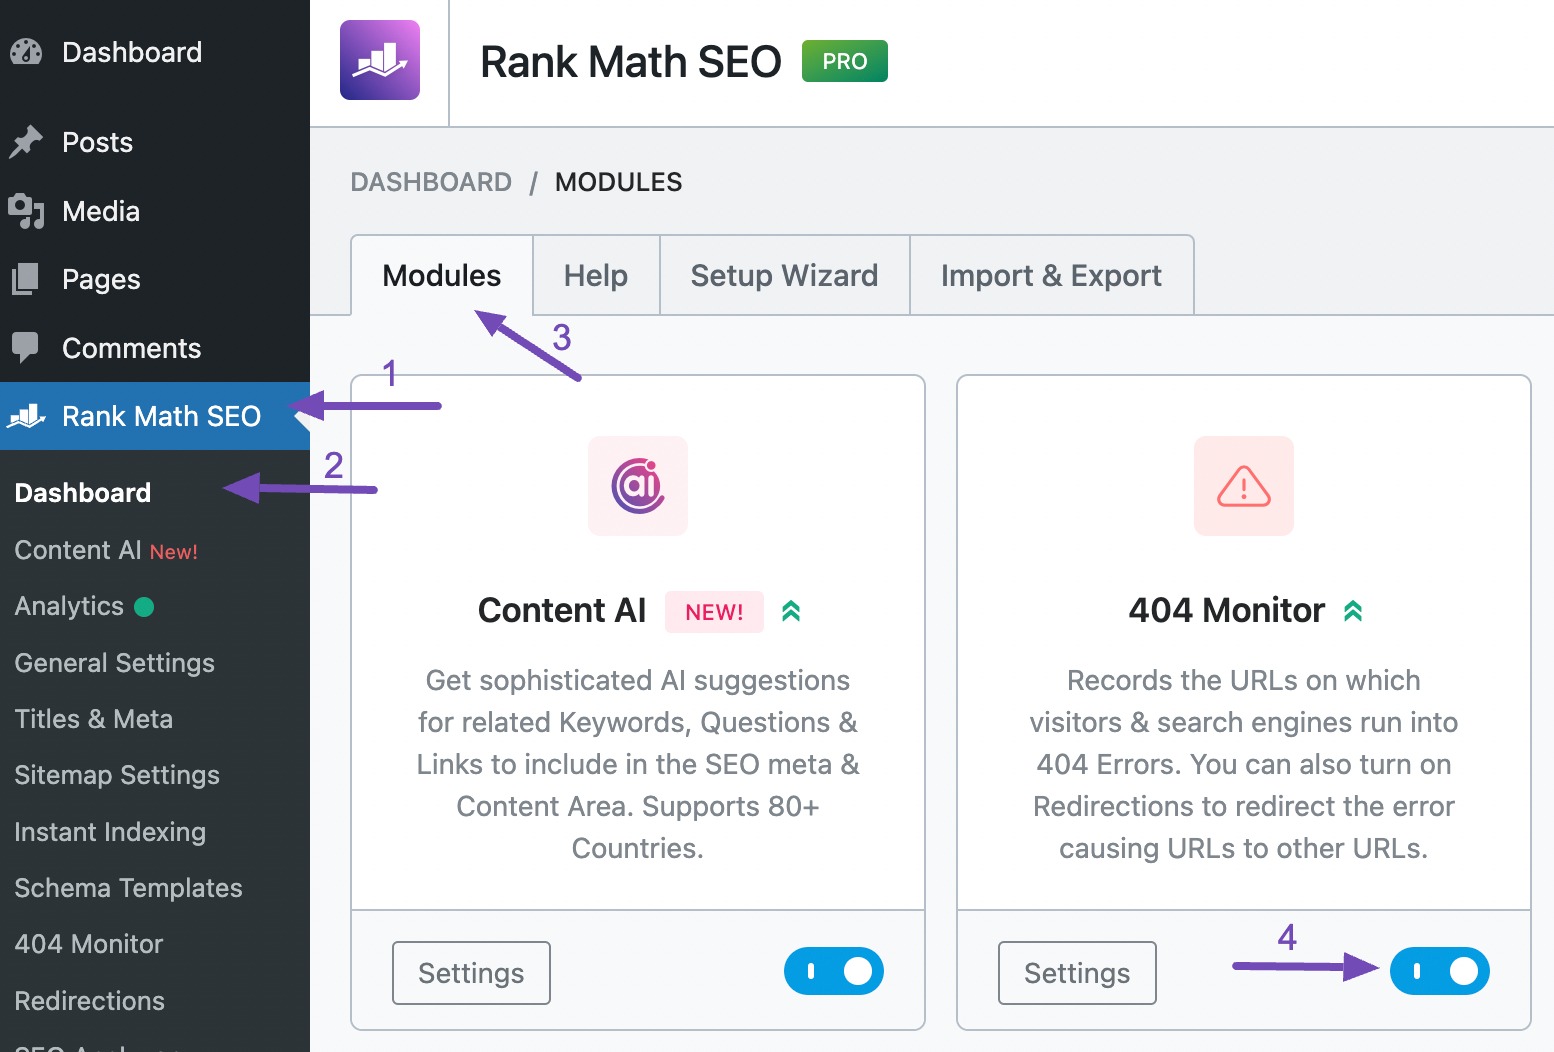
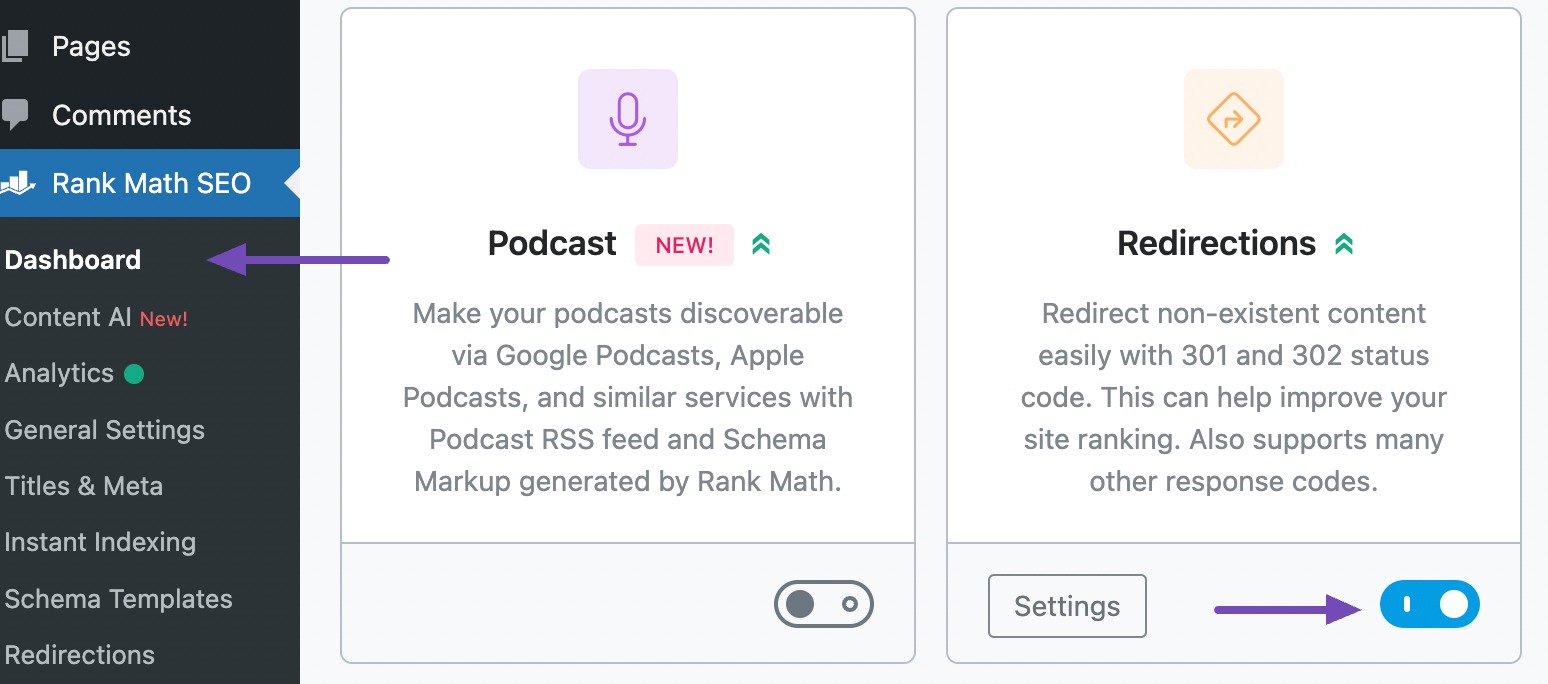
Also, enable the Redirections module, as shown below.
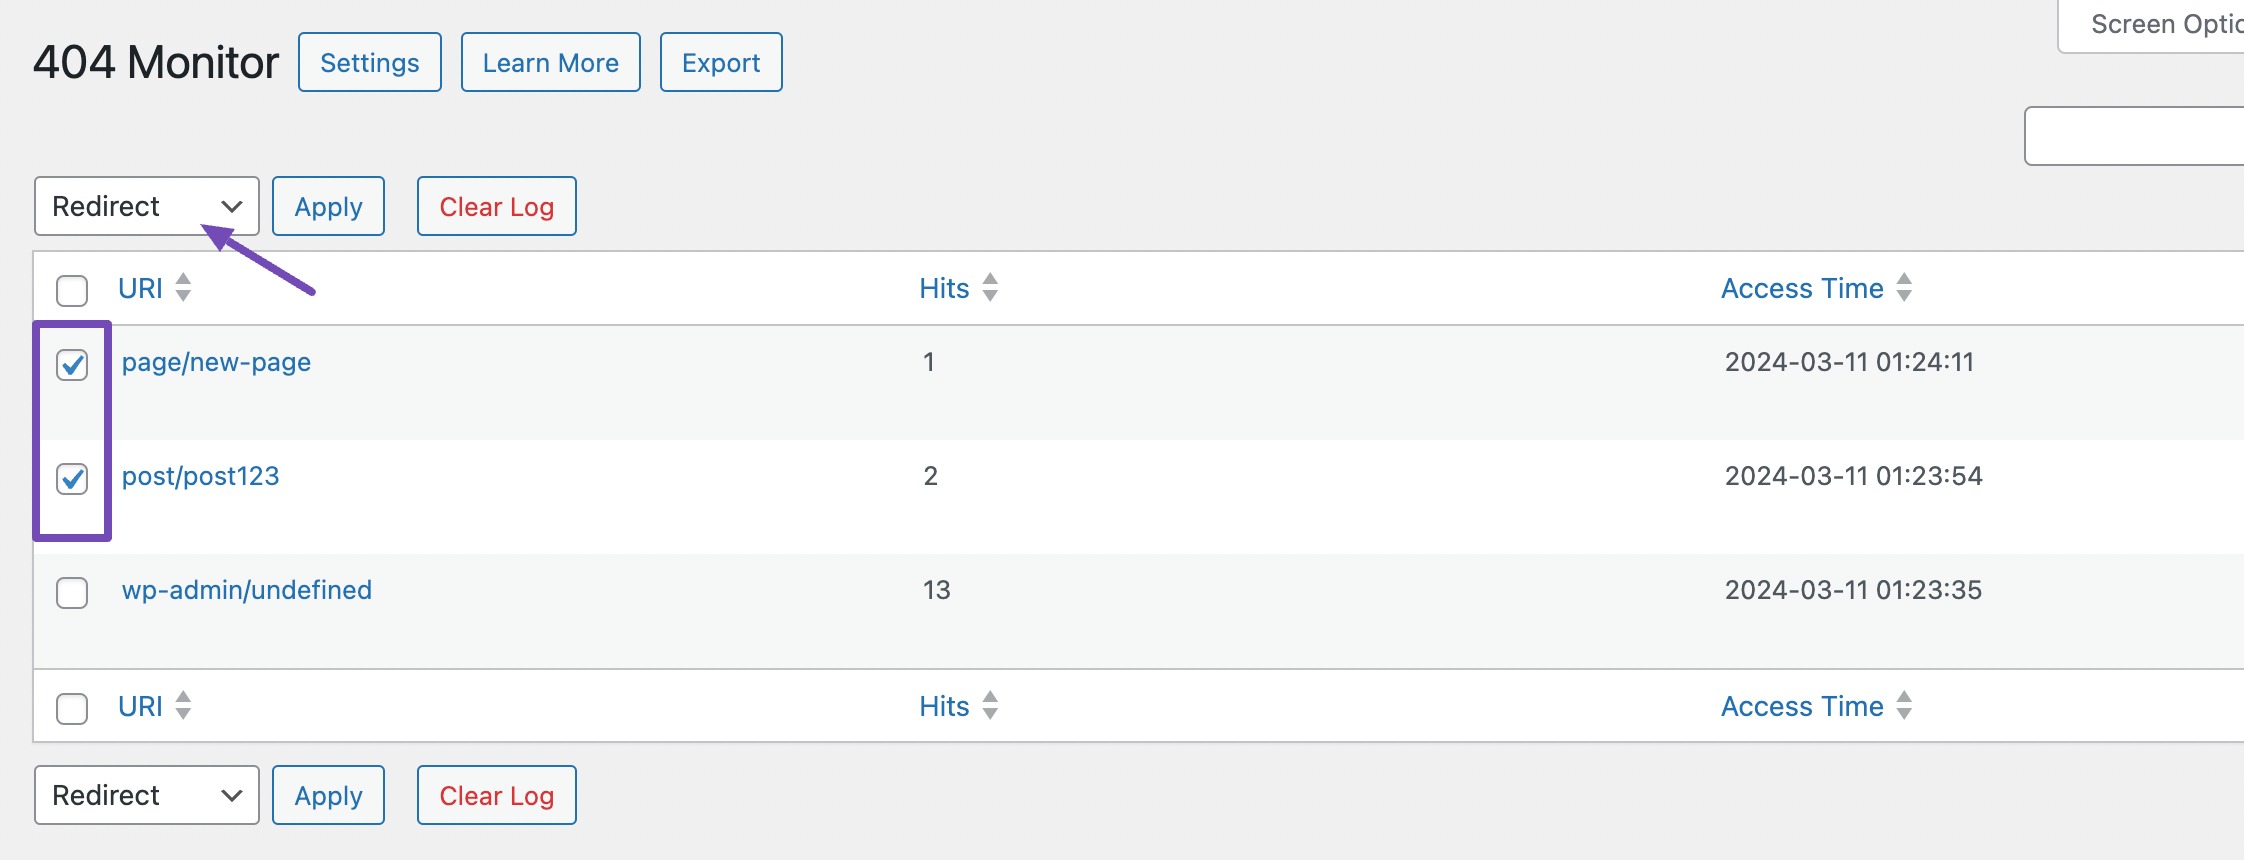
Now, navigate to Rank Math SEO → 404 Monitor in your WordPress dashboard. Here, you’ll see a list of all the URLs on your site that are generating 404 errors. These are your broken links.
To fix these broken links, you need to redirect them to another relevant page or post. To do so, hover over the broken link and select the Redirect option, as shown below.

However, if you wish to redirect all the broken links to one destination, select the URLs and choose Redirect as the bulk action, as shown below.
You will be taken to the Redirections page. On this page, you will need to specify the Destination URL, which is the location where you want to redirect the broken link.
Enter the appropriate URL in this field to ensure your audience is directed to the correct page or post.
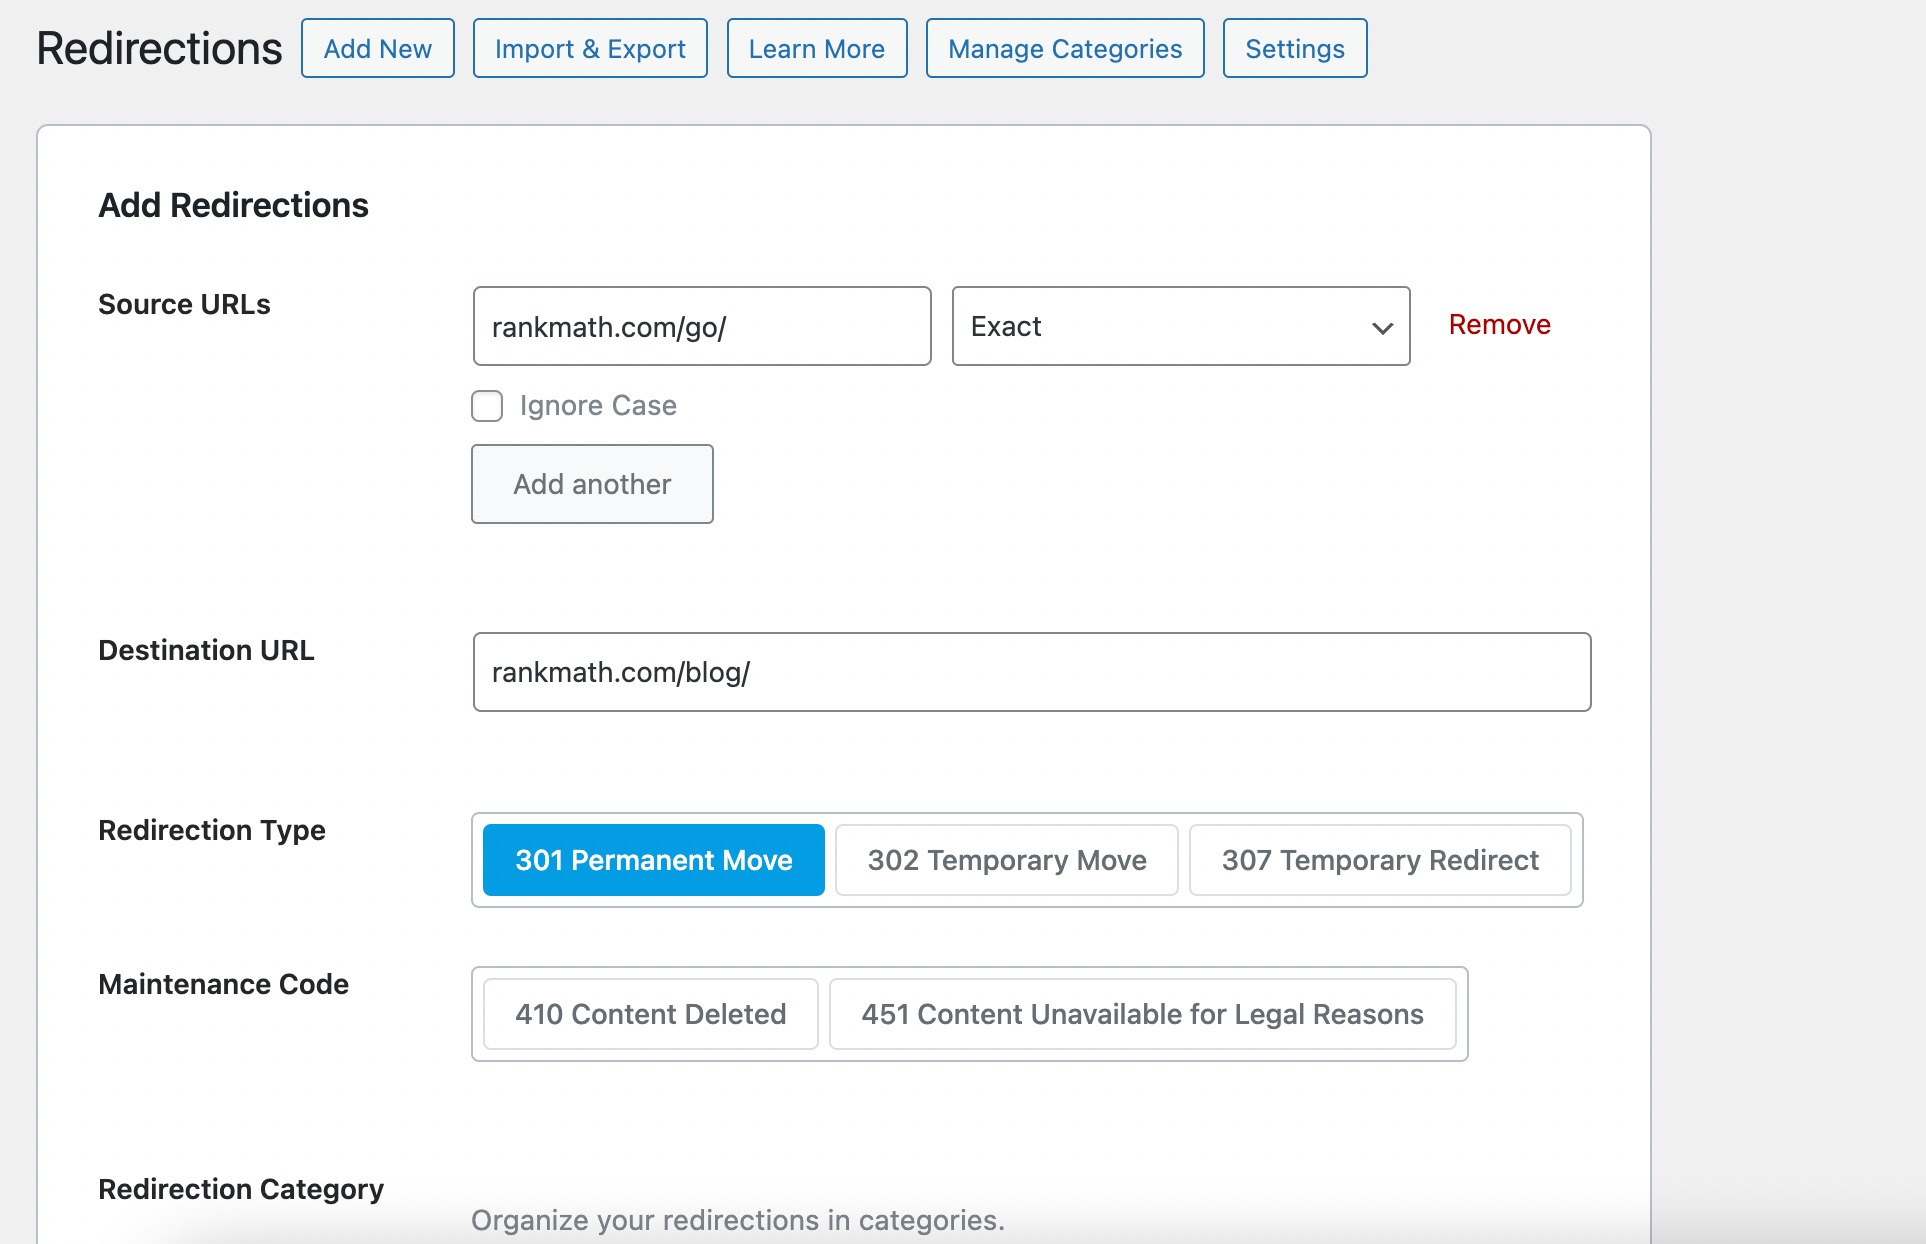
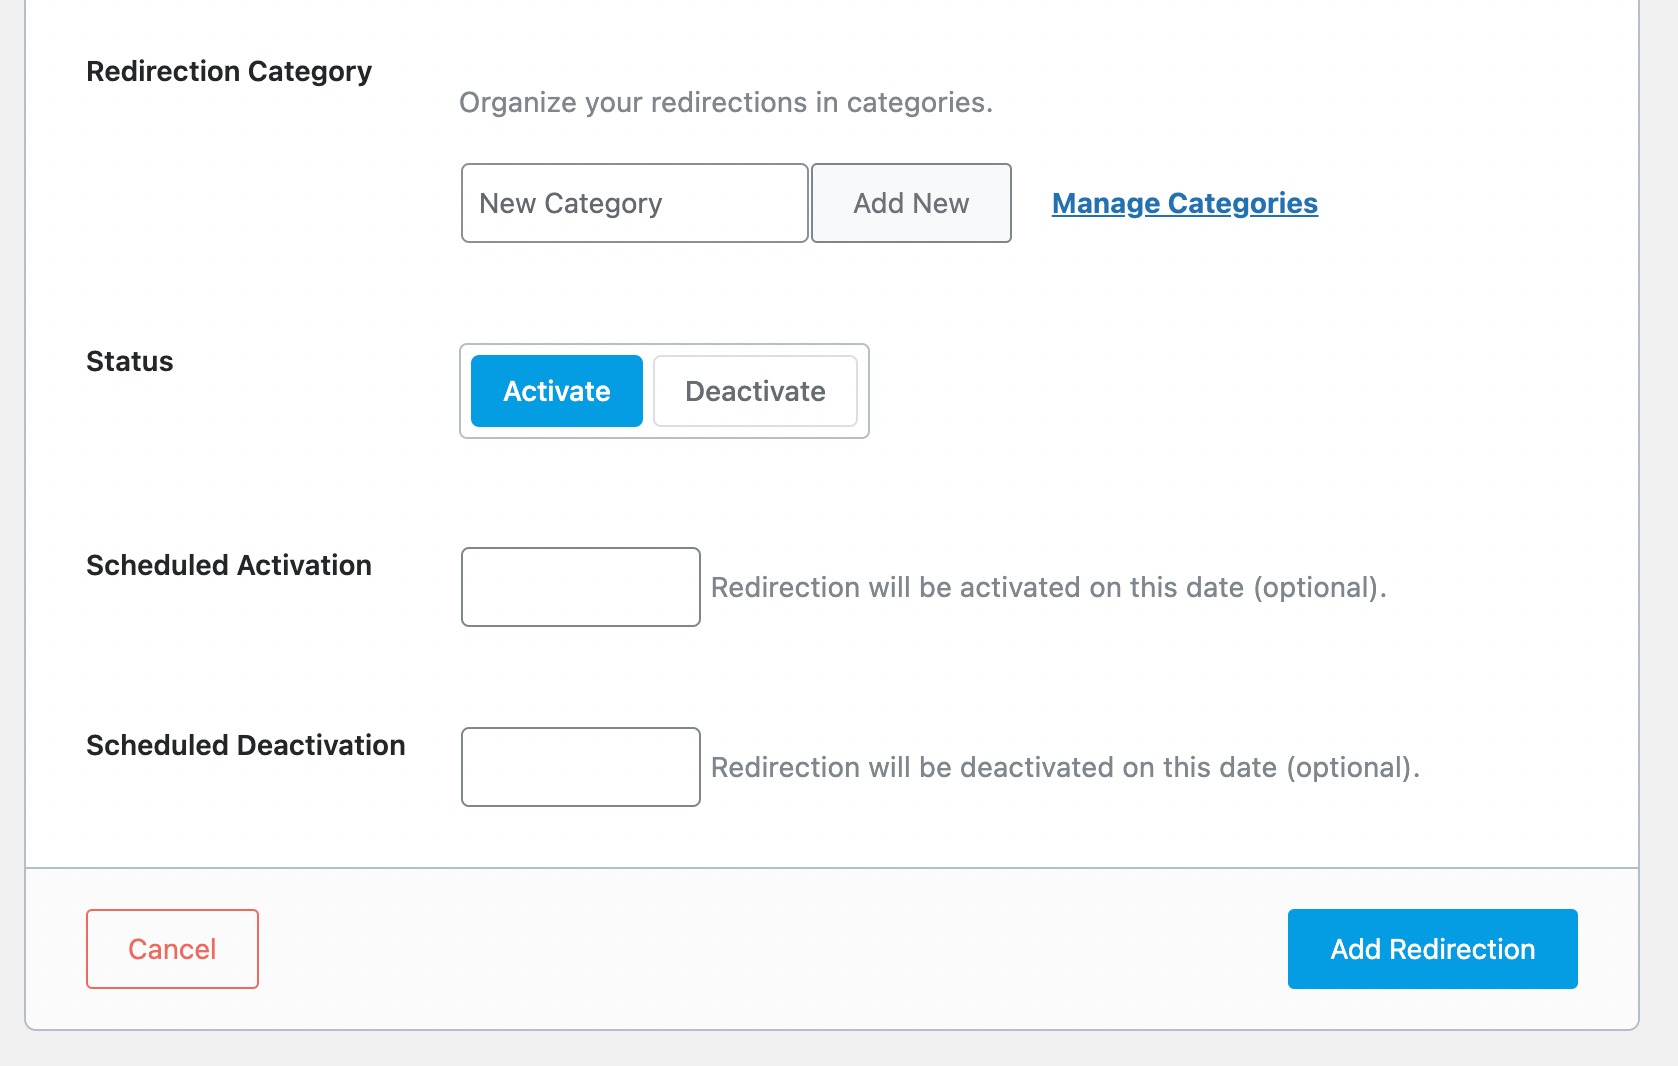
On the Redirection page:
- Enter the correct Destination URL
- Leave the redirection type as 301 Permanent Move (this is the best option for SEO)
- Optionally, assign a category, activate it immediately, or schedule it for later
Once everything looks good, click Add Redirection to save it.
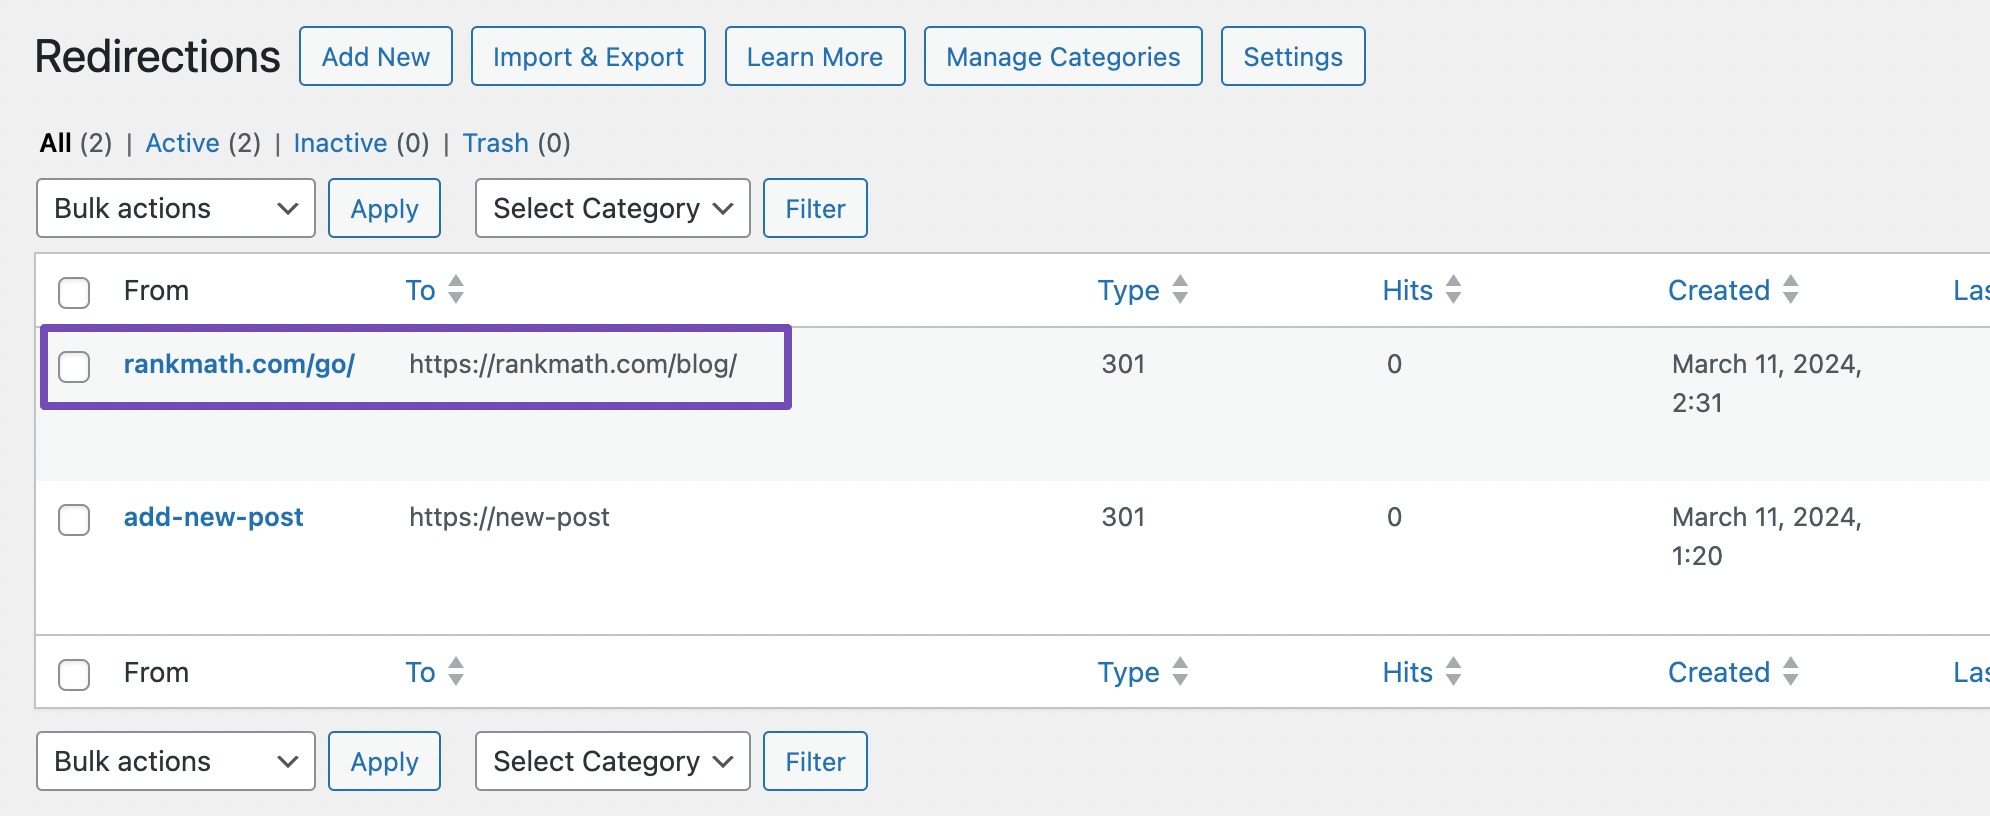
You can view and manage all your redirections at Rank Math SEO → Redirections. This is helpful if you ever want to update, disable, or remove any of them later.
Redirecting isn’t your only option. You can also:
- Update the broken URL to point to the correct page
- Remove the link entirely if it’s no longer relevant
- Fix any typos or issues in the original URL
The goal is to make sure no visitor hits a dead end—and with Rank Math, keeping your links healthy becomes much easier.
2.2 Using the Google Search Console
Another reliable way to find and fix broken links in WordPress is through Google Search Console. It’s a free tool from Google that gives you detailed insights into how your site is performing in search, and it’s incredibly useful for spotting broken links.
If you haven’t already, start by setting up Google Search Console for your website. Once it’s connected and your site is verified, log in to your account.
Then, log in and access the Pages section, as shown below. Here, you’ll find a report on your indexed and non-indexed pages. Ensure to check the box next to Not indexed to review those pages.

Scroll down to the section titled Why pages aren’t indexed. Google will list several reasons, and one of them will be Not found (404). This is exactly what you’re looking for.
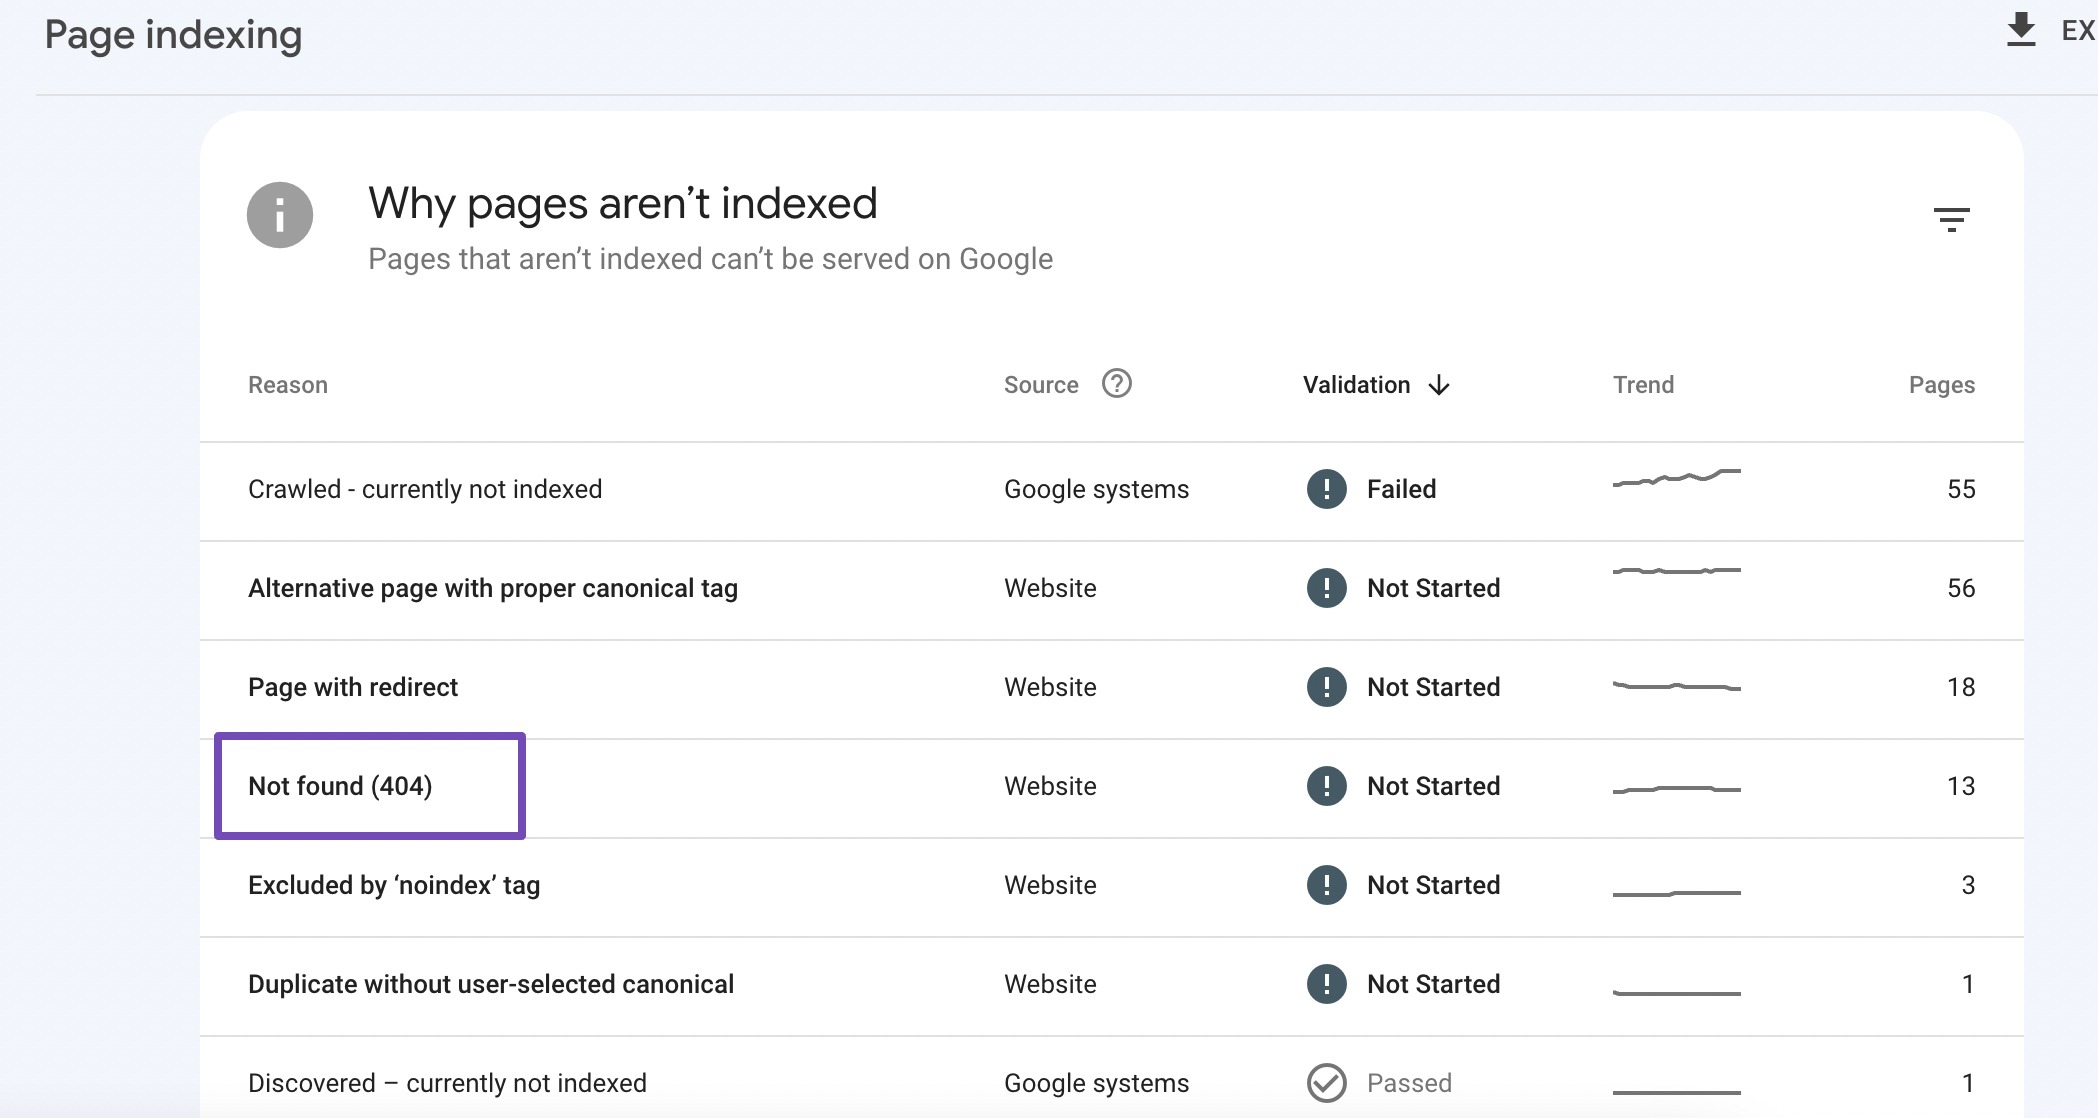
Click on Not found (404) to view more details. You’ll now see a list of URLs on your site that returned a 404 error, these are the broken links that visitors or crawlers have tried to access.
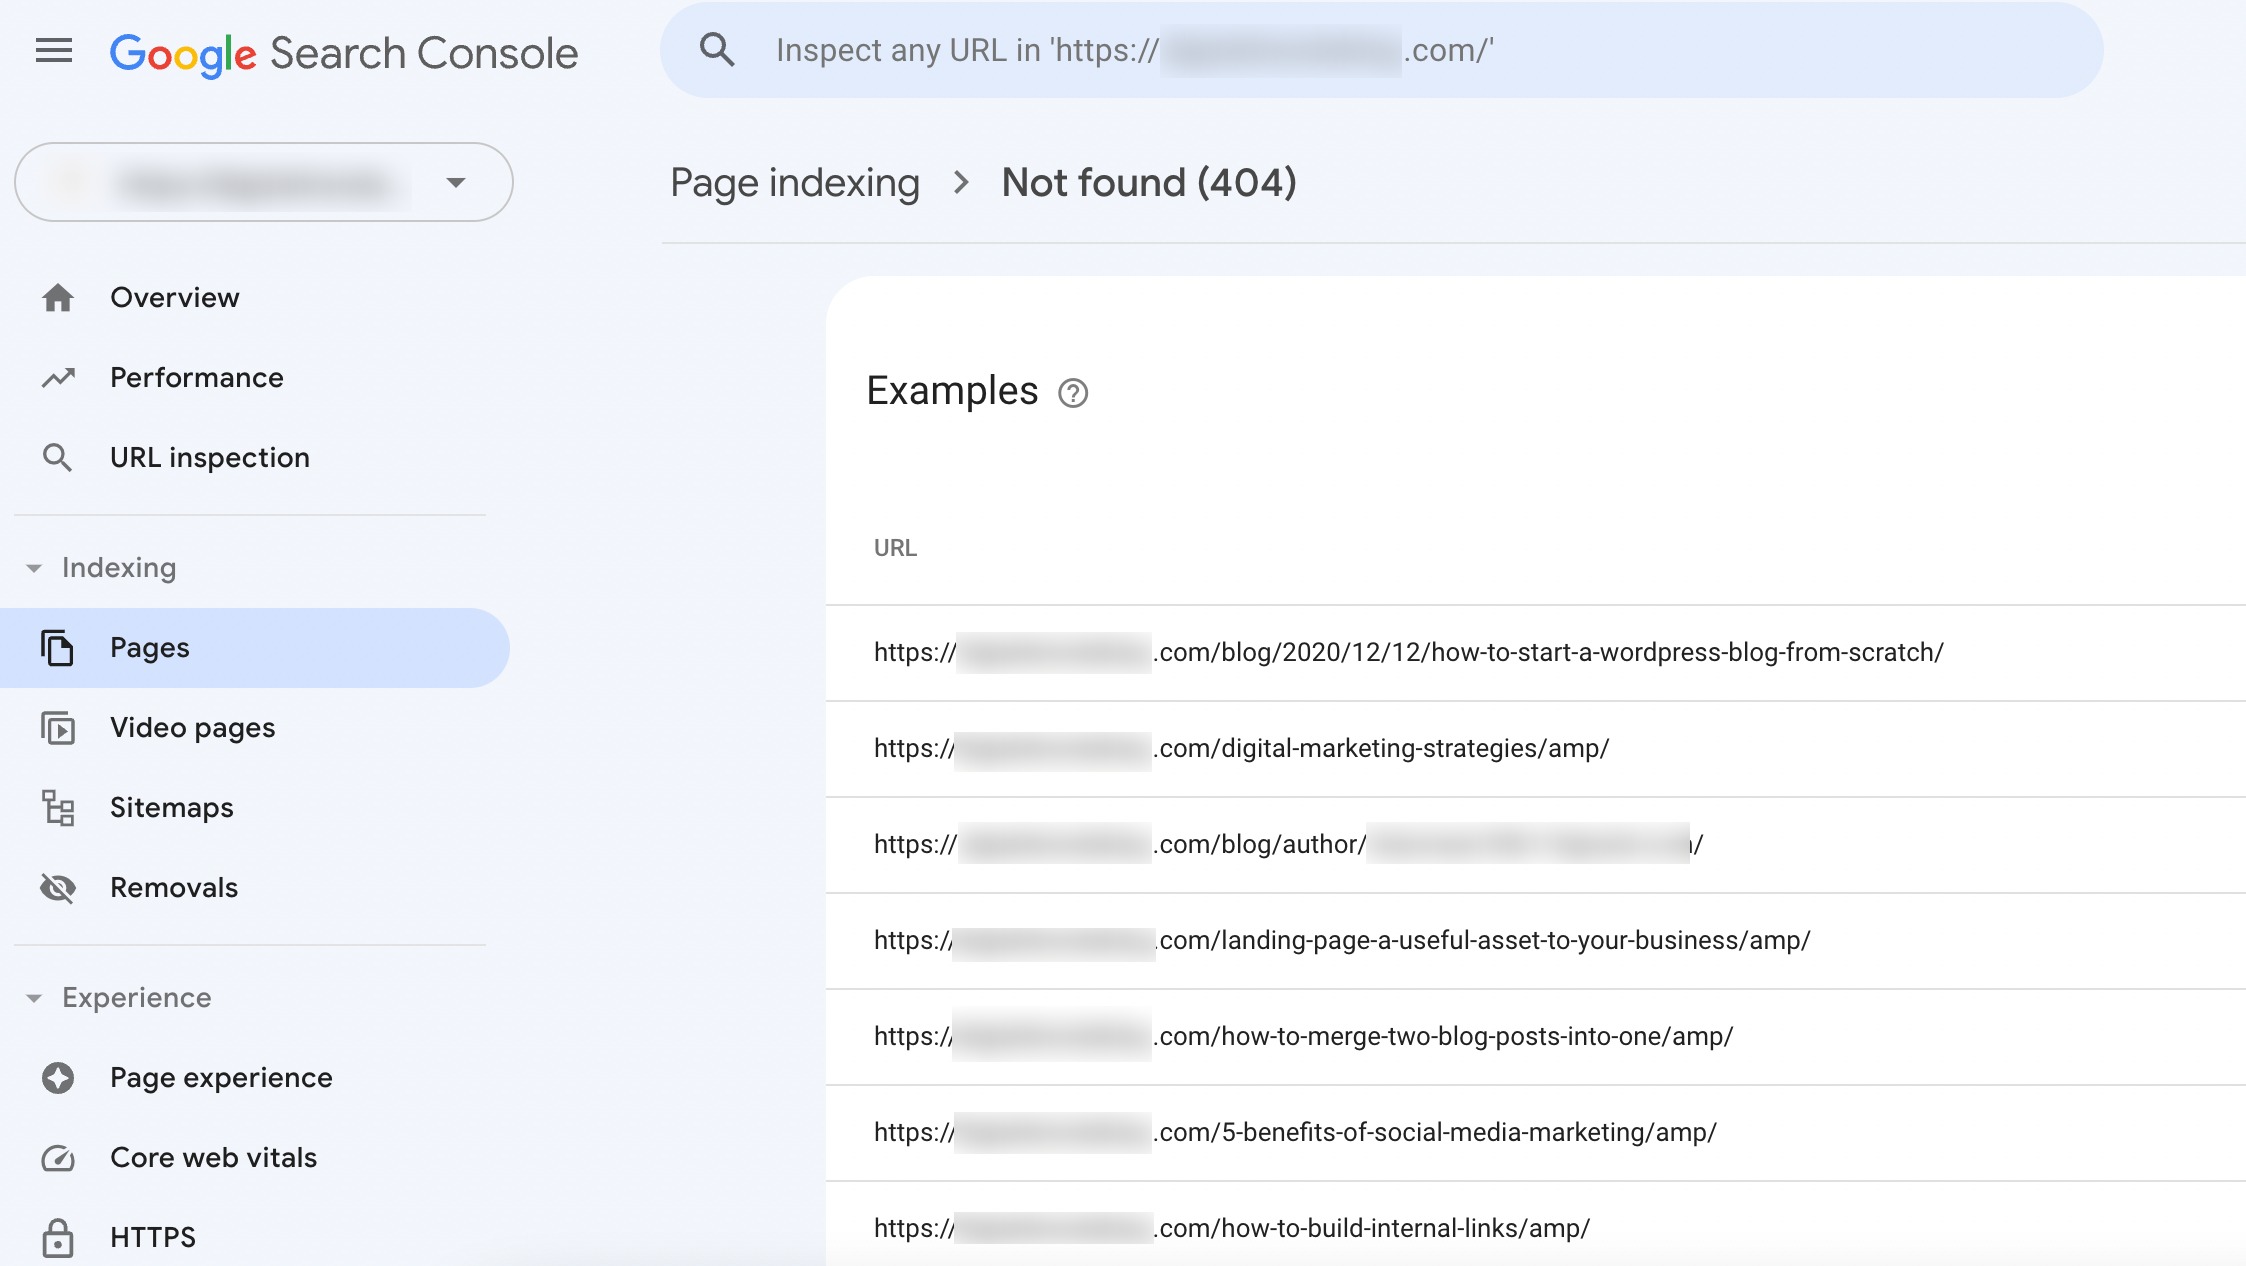
From here, you can either:
- Update the links that point to these URLs
- Redirect them to a relevant page (using Rank Math or another redirection plugin)
- Or fix the source page if it was removed by mistake
2.3 Using the Broken Link Checker Plugin
Another effective method for finding and fixing broken links in WordPress is using the Broken Link Checker plugin. It automatically scans all the internal and external links on your site and flags any that aren’t working.
What’s great is that it gives you a detailed report for each broken link, including the link’s location, status code, and anchor text, so you know exactly where the issue is.
To get started, install and activate the plugin on your WordPress website. Once it’s activated, go to Link Checker → Local [old] in your sidebar menu.
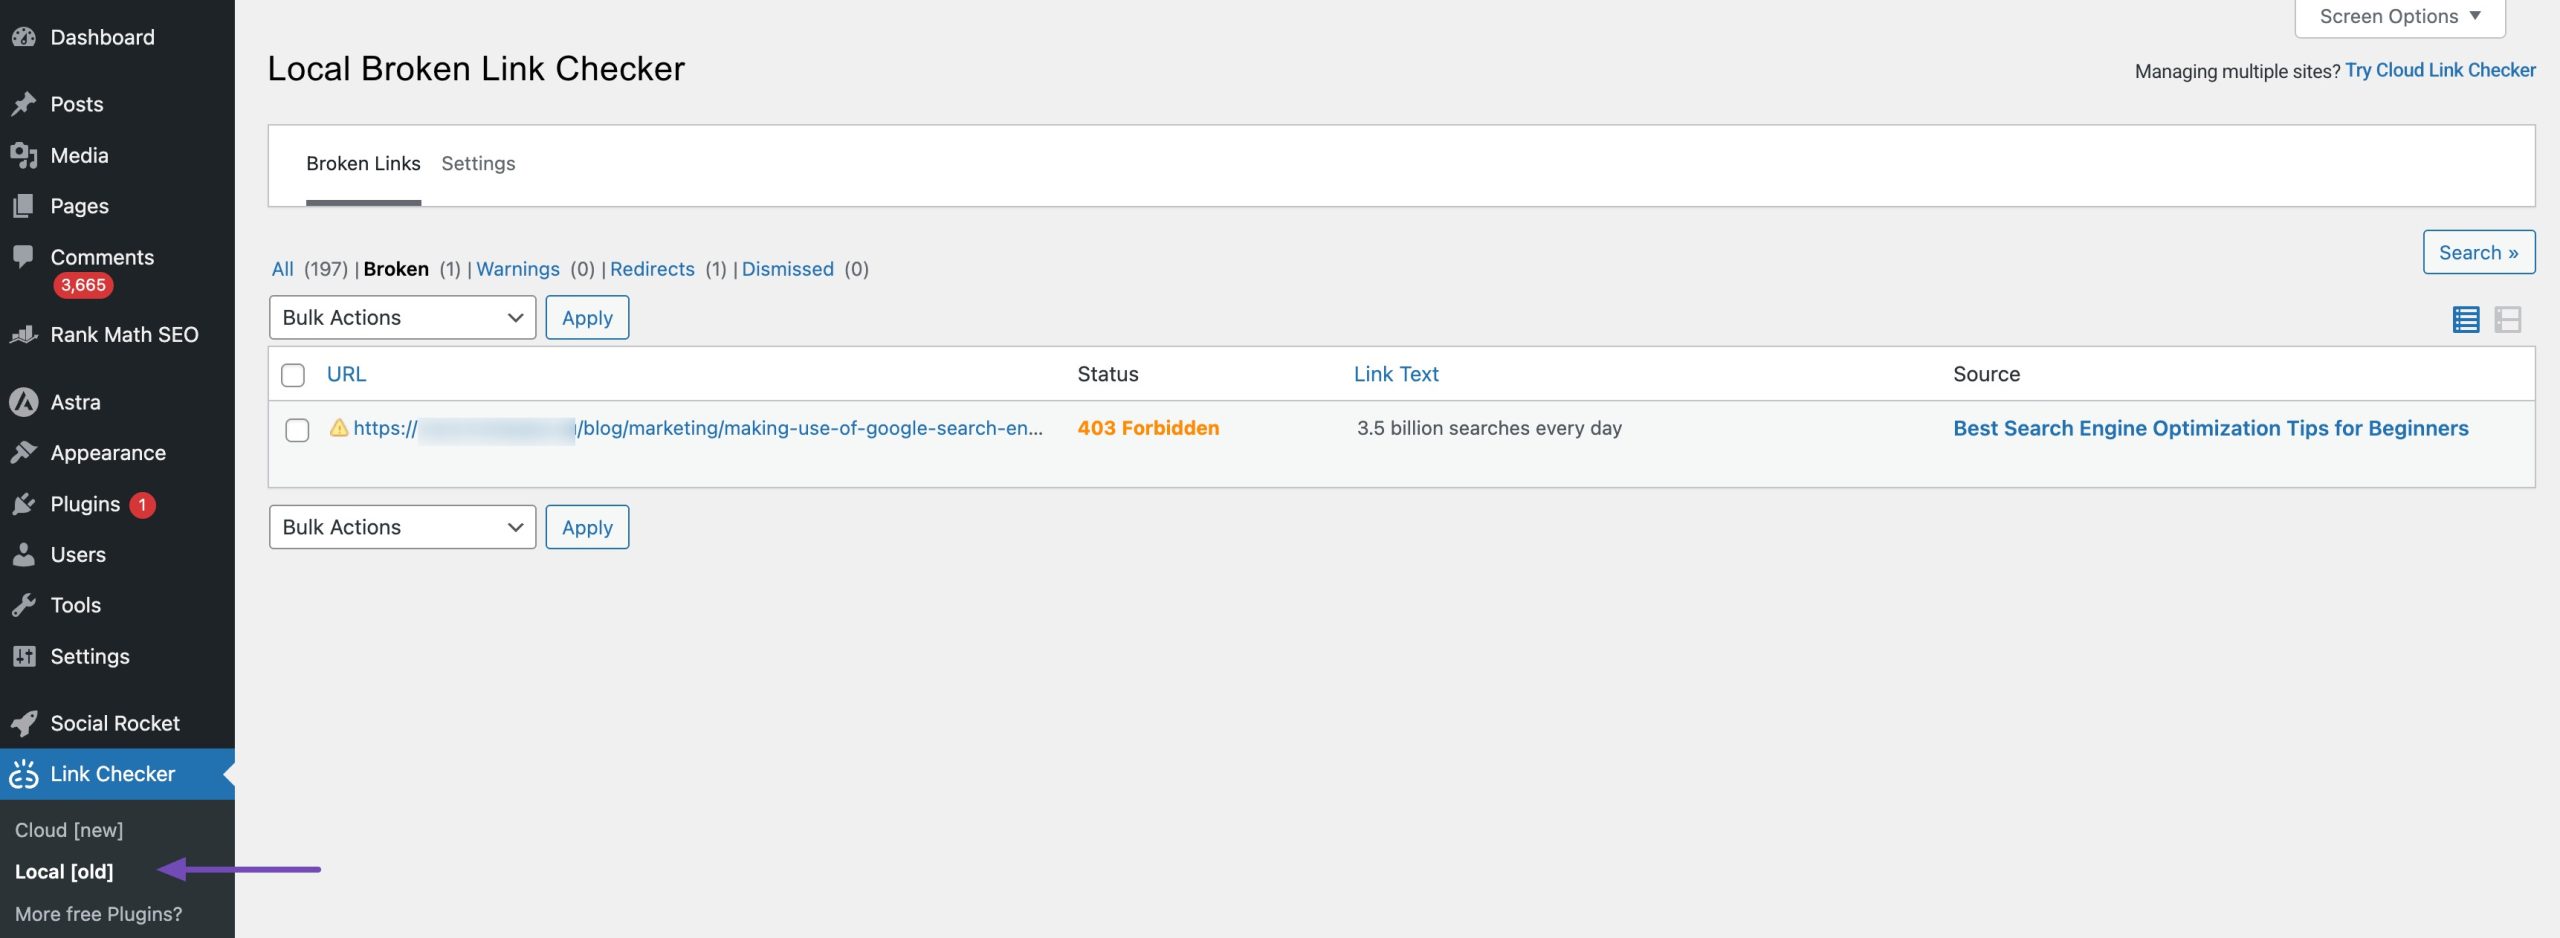
Here, you’ll land on the Broken section, which shows you a list of all the non-functioning links on your site.
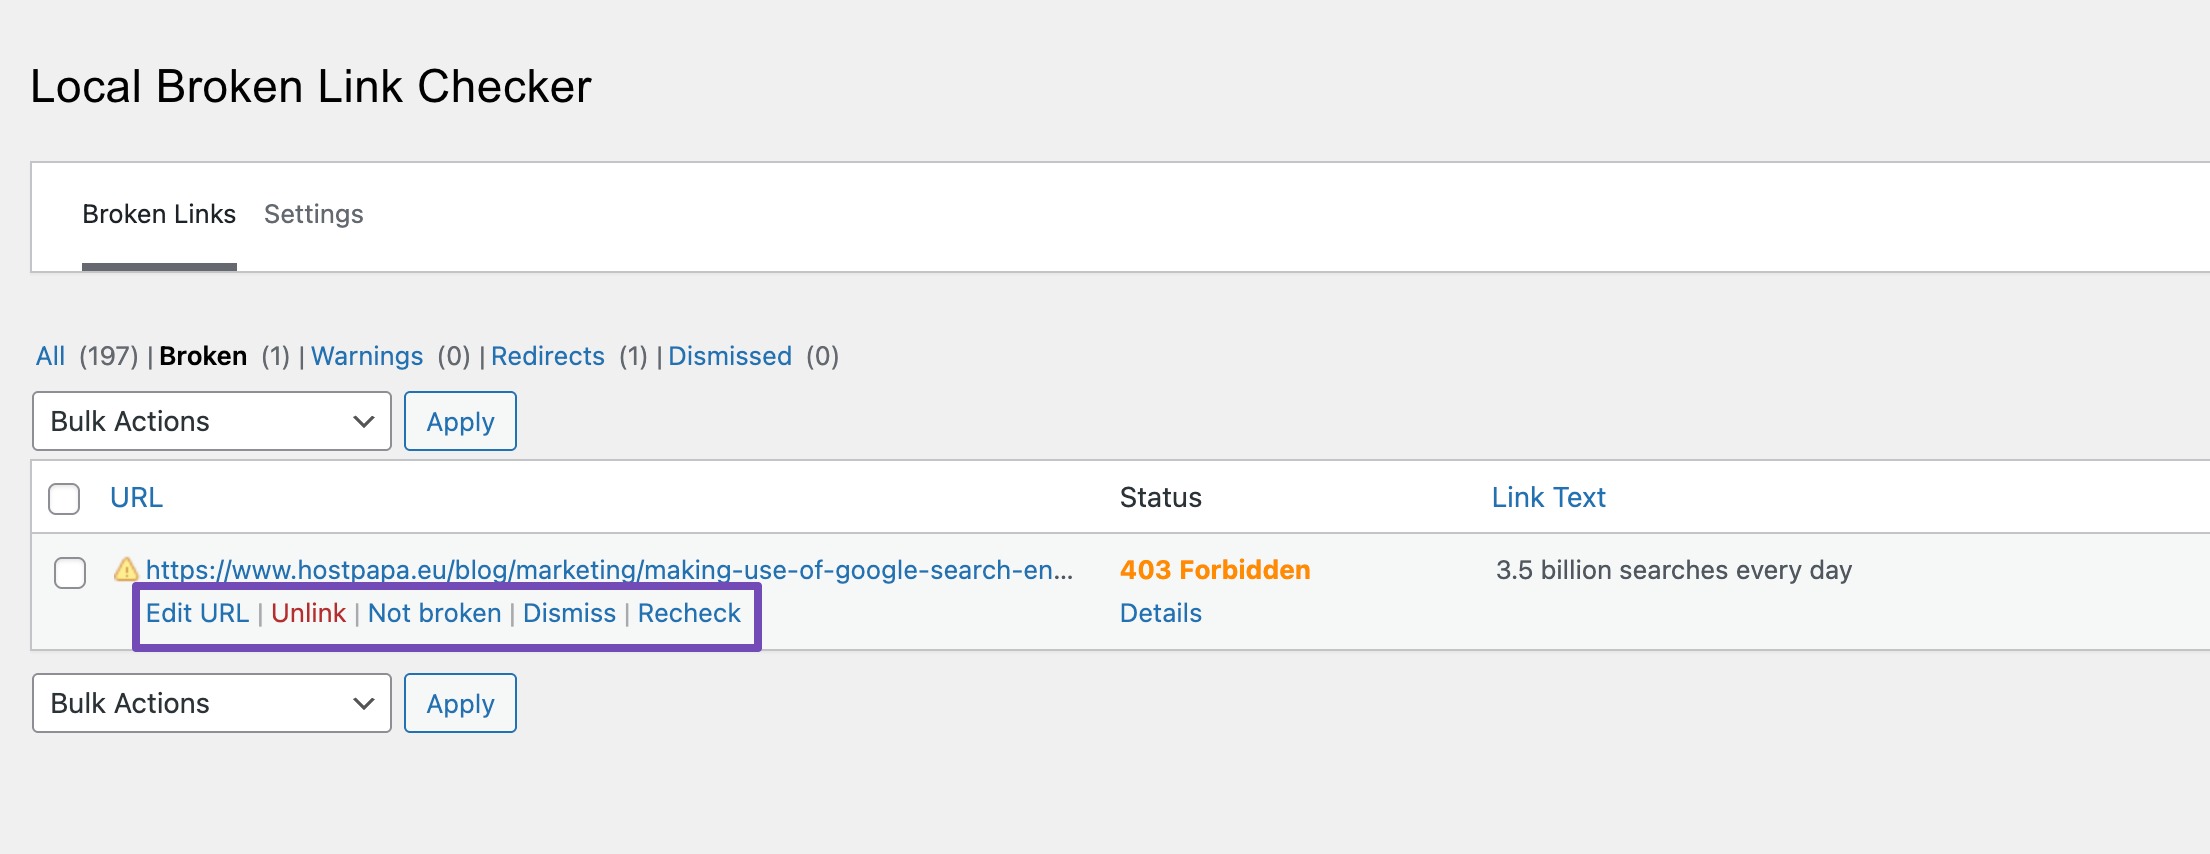
Just hover over any broken link to reveal options like:
- Edit URL – Replace the broken link with a working one. The plugin may even suggest alternatives for you.
- Unlink – Remove the link entirely from your content if it’s no longer needed.
- Recheck – Ask the plugin to verify the link again, in case the issue was temporary.
Besides the Broken tab, you can check:
- All – To view all links scanned by the plugin
- Redirects – To see which links are redirecting
- Dismissed – To revisit links you’ve already reviewed or ignored
2.4 Leveraging Google Analytics
While Google Analytics isn’t specifically designed to detect broken links, you can use it to create a custom Exploration report that highlights pages triggering 404 errors, making it a helpful tool in your link-cleanup process.
To get started, make sure you have connected your website to Google Analytics and that it is actively collecting reports from your site.
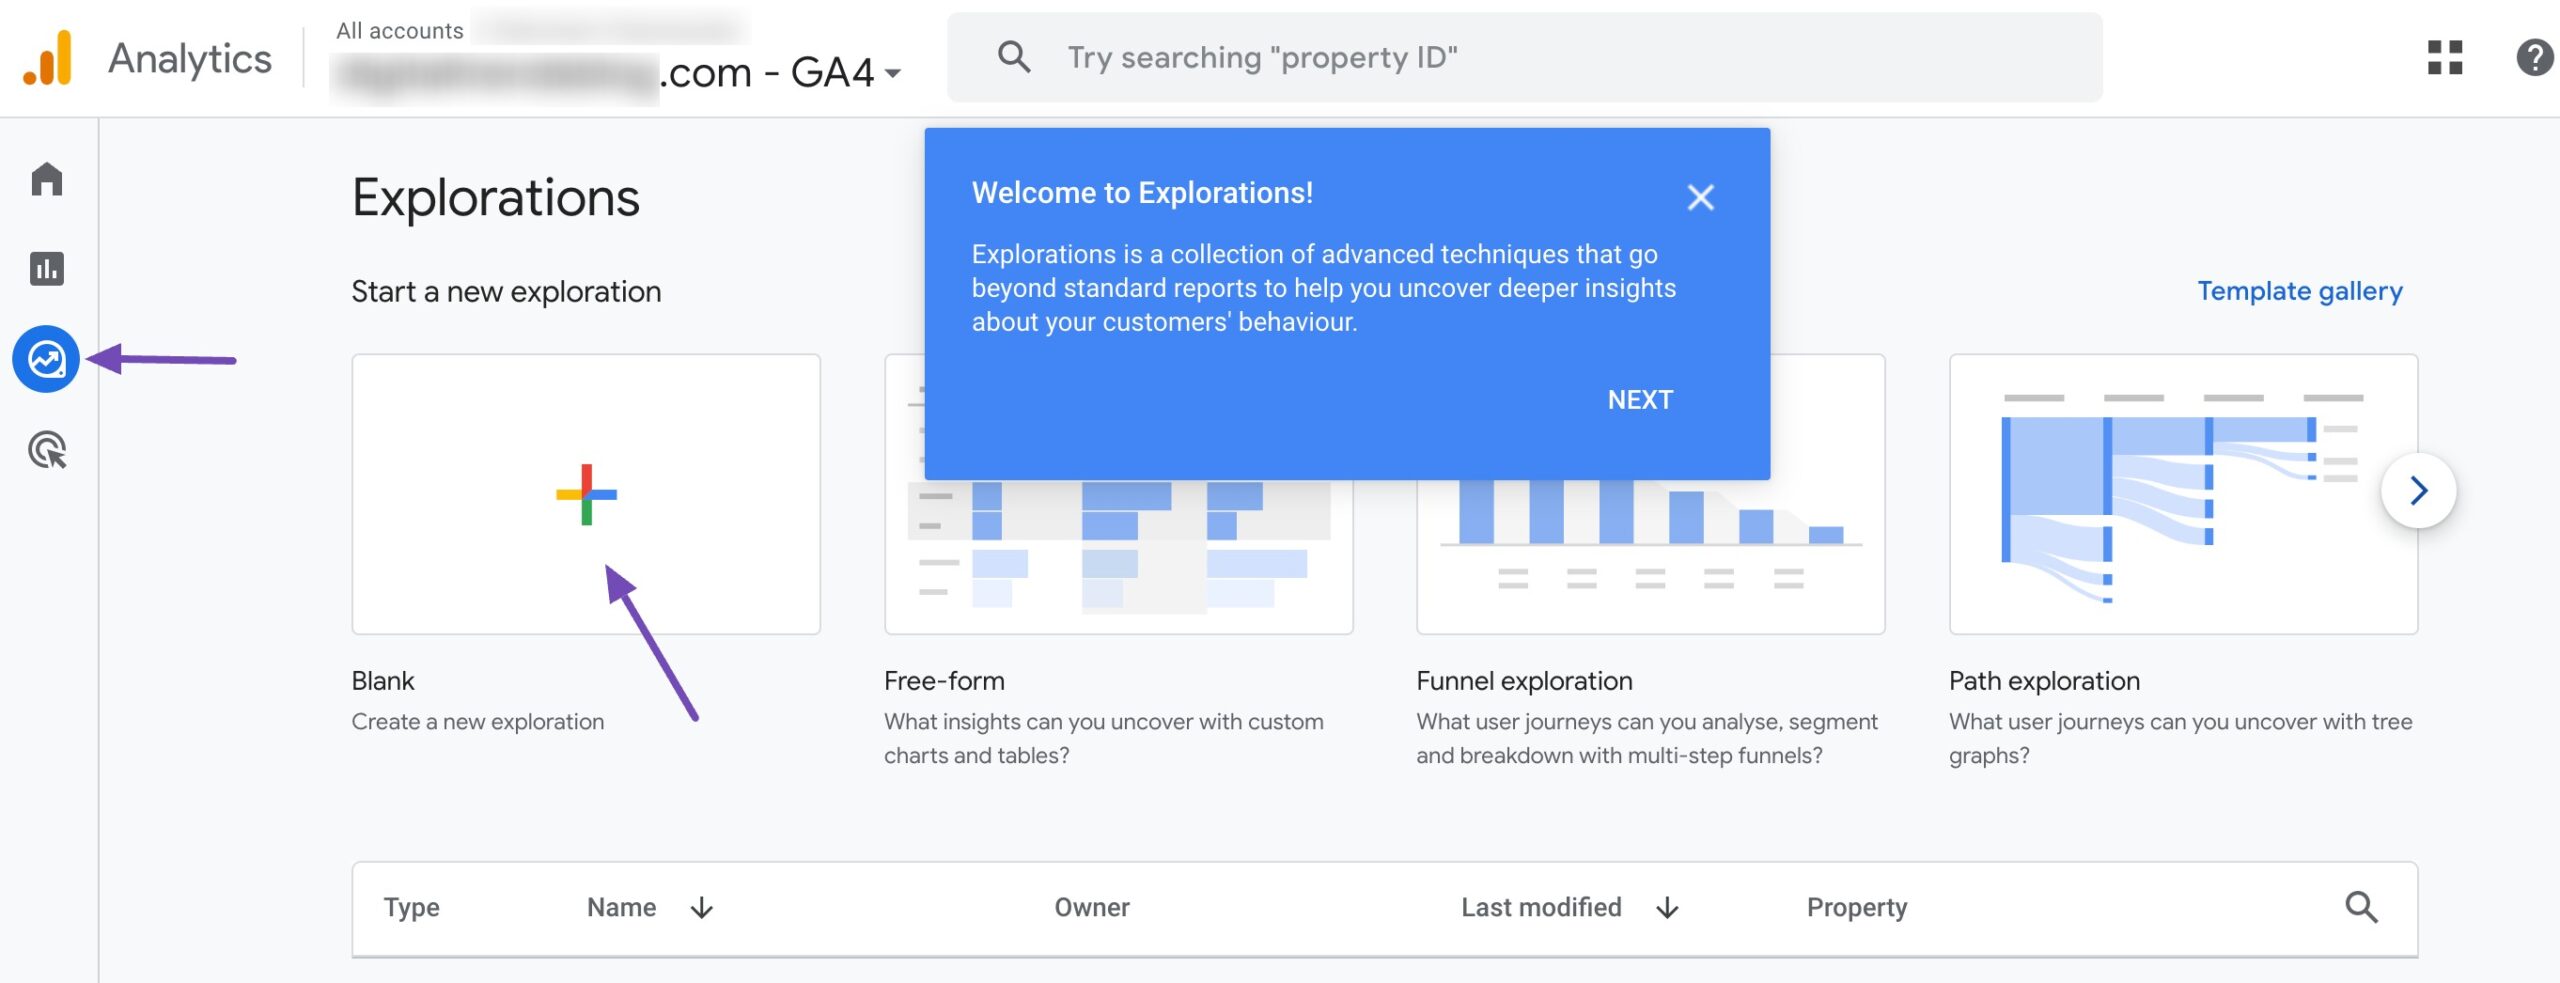
Once that’s done, log in to your Google Analytics account and go to the Explore tab. Select the Blank exploration option, as shown below.
Give your report a name, for example, something like ‘Broken Links’—so it’s easy to find later.
Next, go to the DIMENSIONS section and click the + icon to proceed.
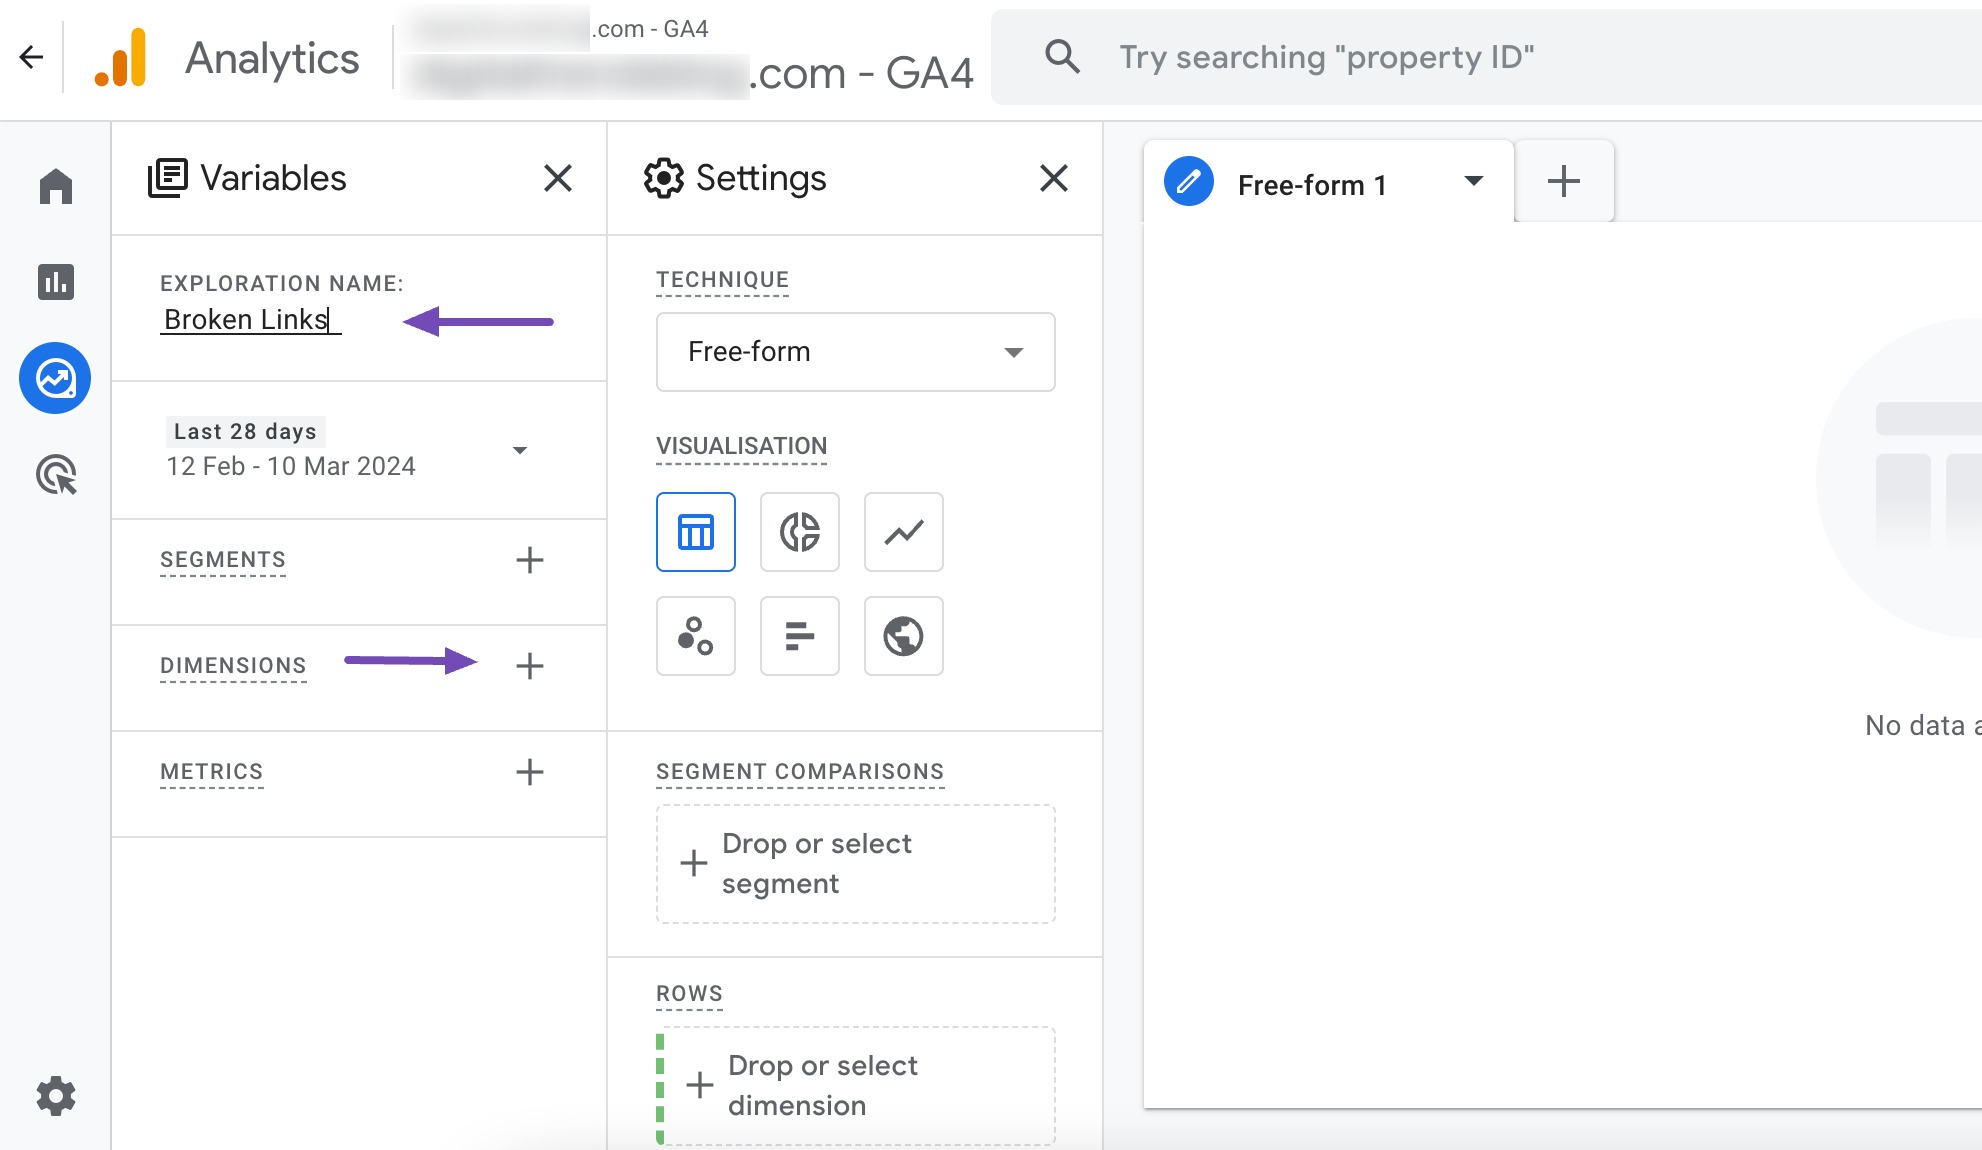
A list of available Dimensions will be displayed.
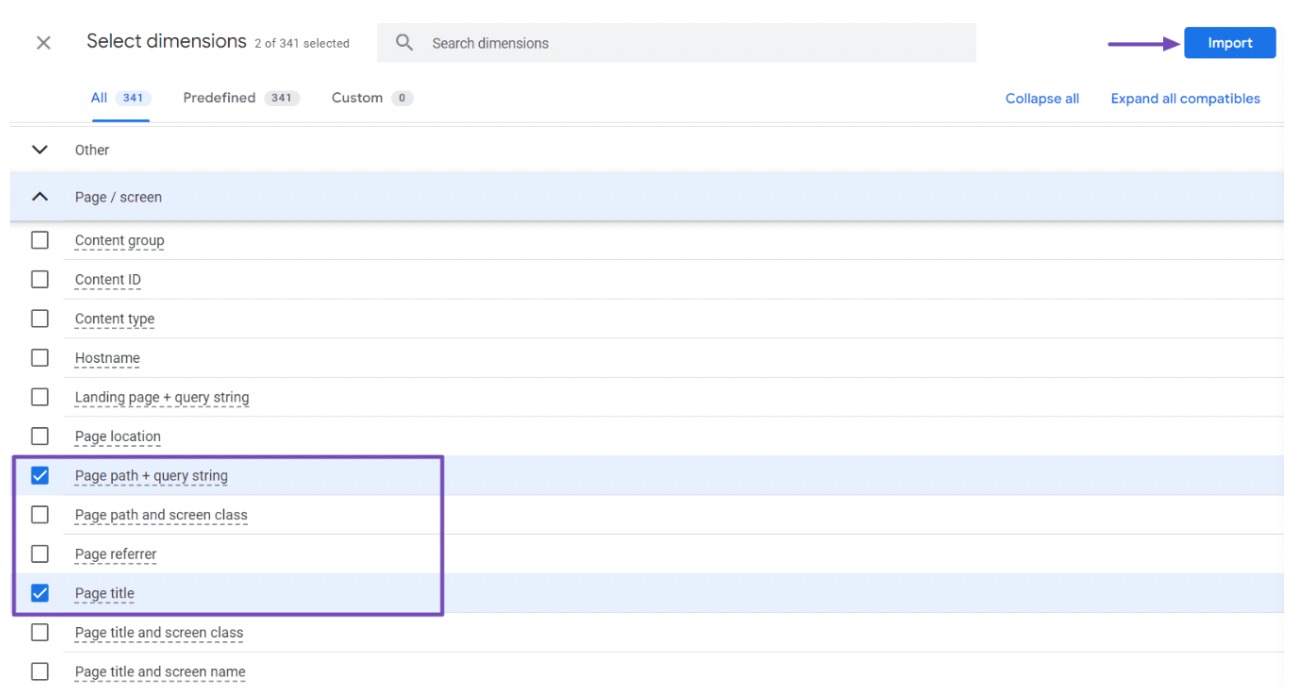
Now, search for the ‘page title’ dimension by either using the search bar or navigating to the ‘Page/screen’ option and expanding the dropdown menu.
Carefully scan through the dimensions and locate the page title dimension. Check the box next to it.
Repeat the same process for the Page path + query string dimension.
Once you have checked the boxes for both dimensions, click the Import button above, as shown below.
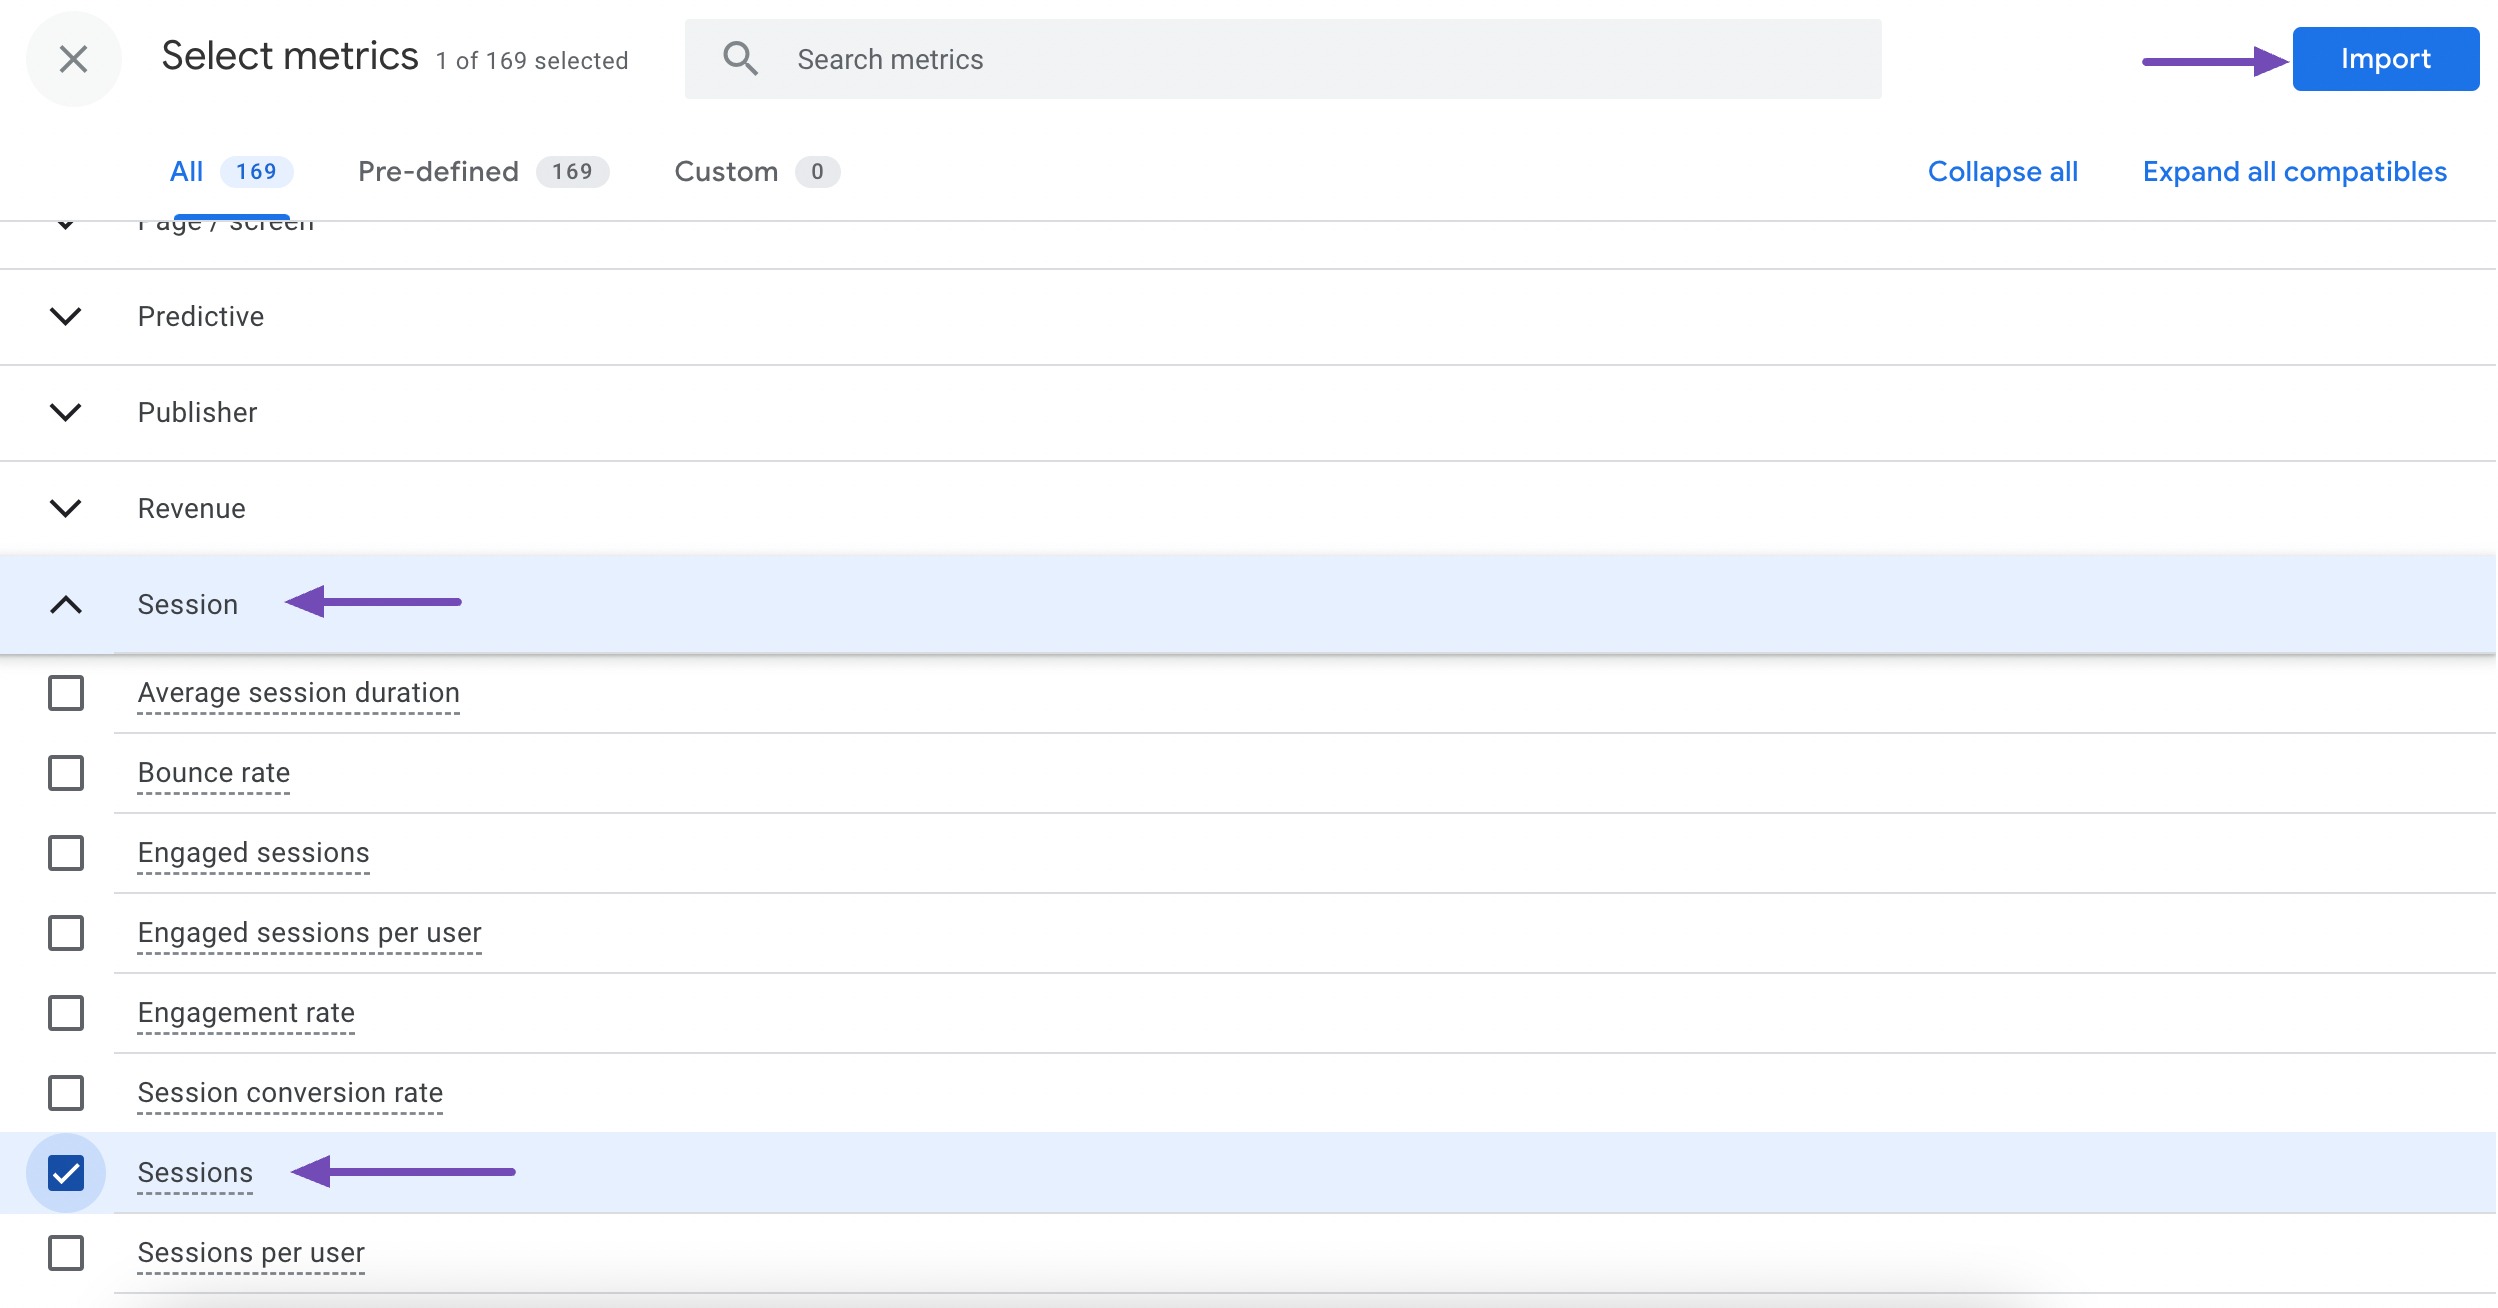
Now, let’s import a metric. Click on the ‘+‘ icon next to the METRICS section. This will display a list of available metrics. Navigate to the Session section and click the drop-down menu.
Among the options, select Sessions, as shown below. Once you have done so, click the Import button to proceed.
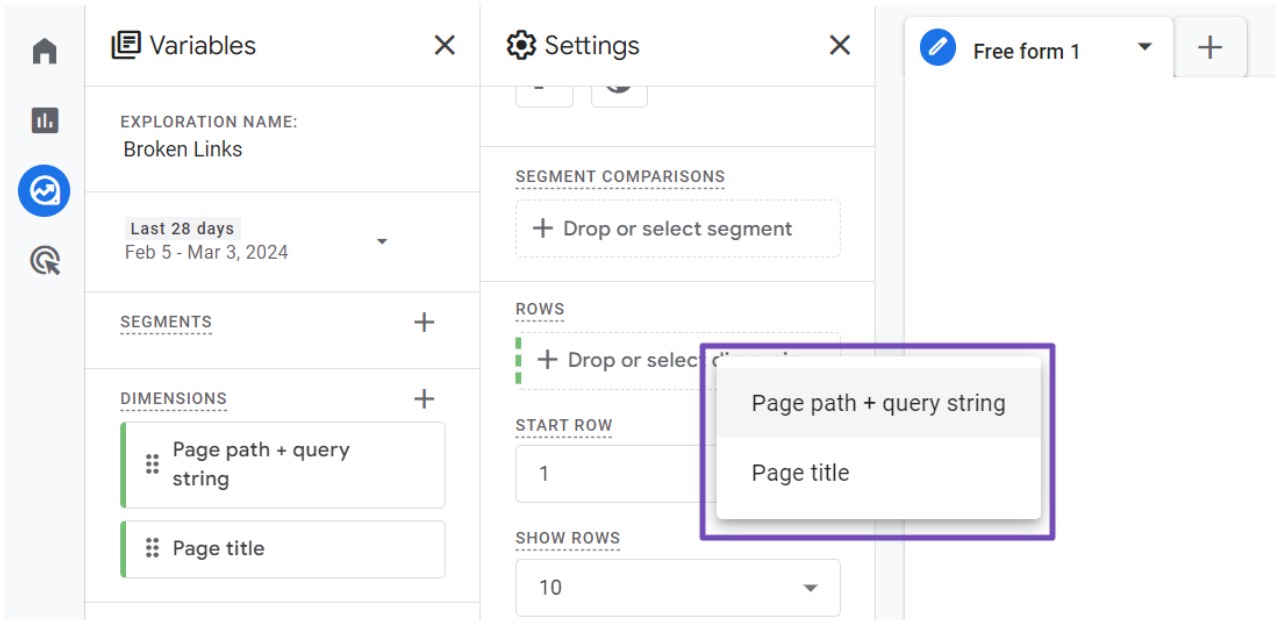
Now, let’s add the imported items to your report.
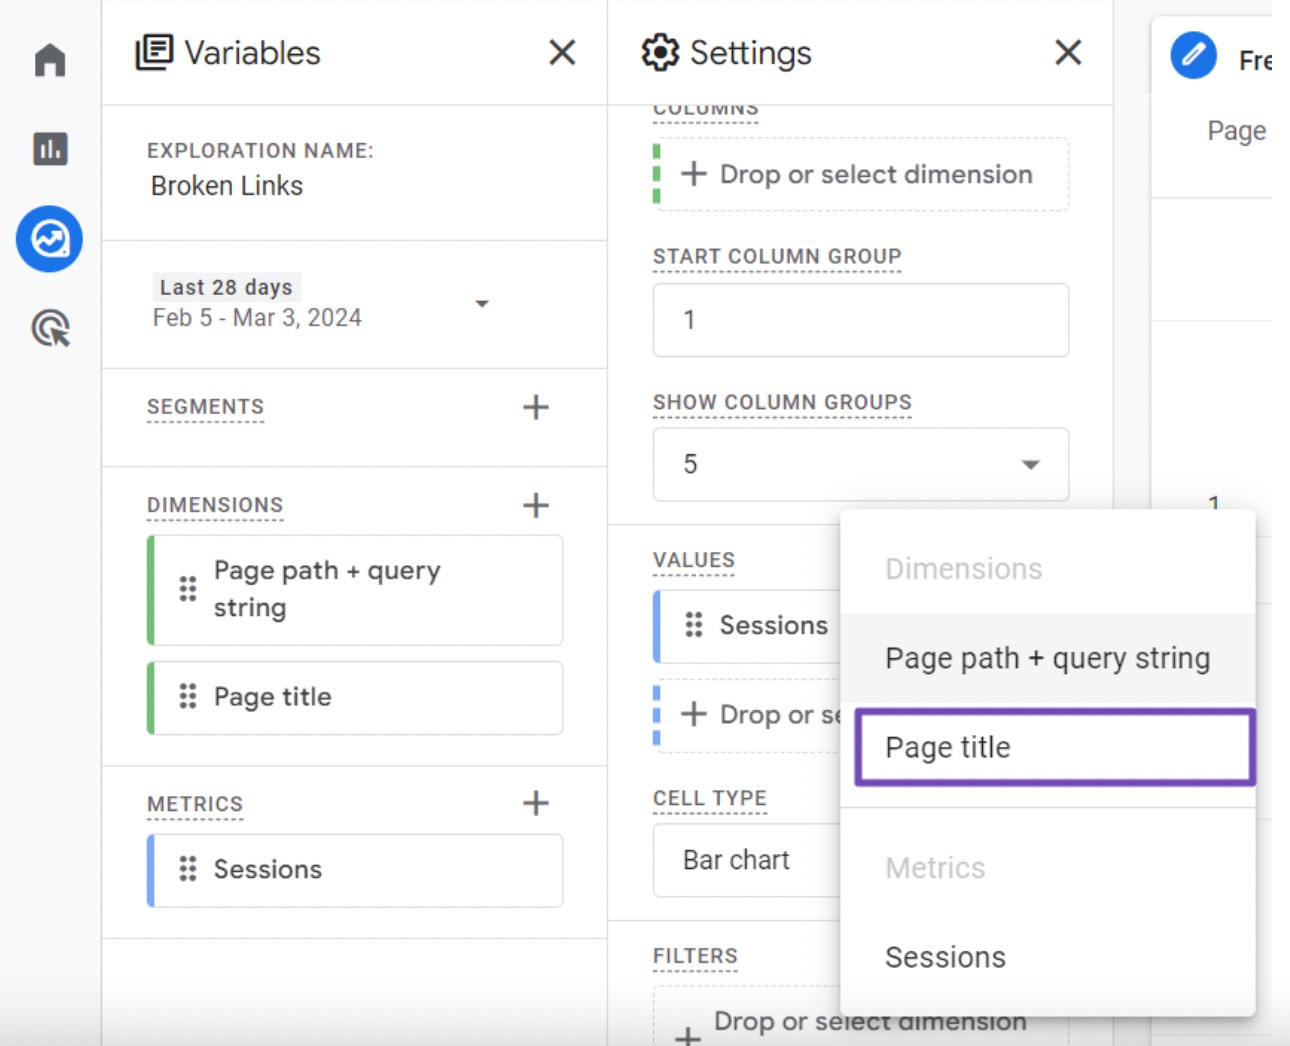
First, drag both Dimensions to the ROWS box in the second column. You can start with the Page title dimension, followed by the Page path + query string dimension. Alternatively, you can click on the ROWS box and select the dimensions.
After that, drag the Sessions metric to the VALUES box. Alternatively, you can click on the metric in the VALUES box to select it.
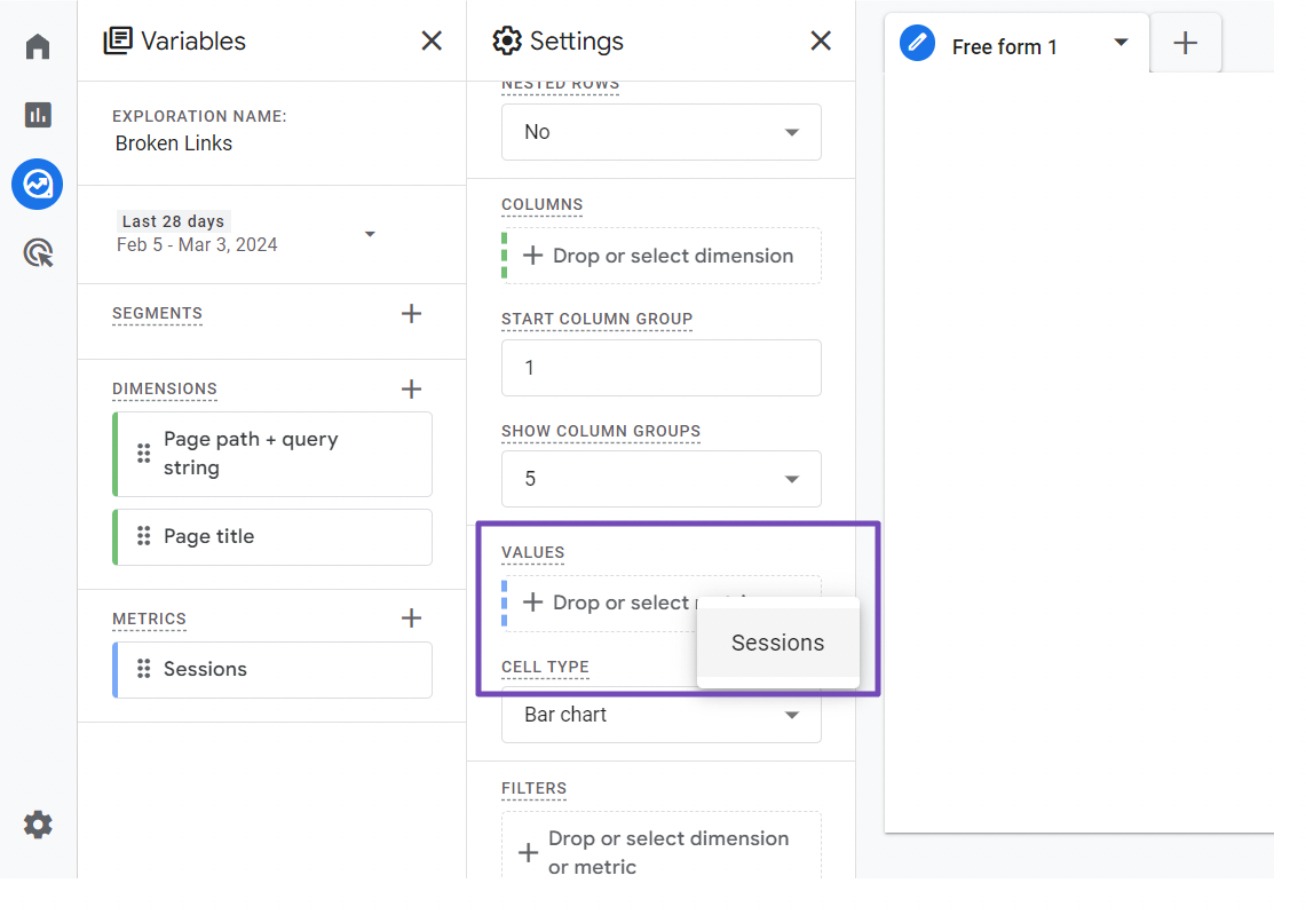
Next, scroll down the second column to the FILTERS section.
Click on the box that says Drop or select dimension or metric. Then, select Page title from the menu.
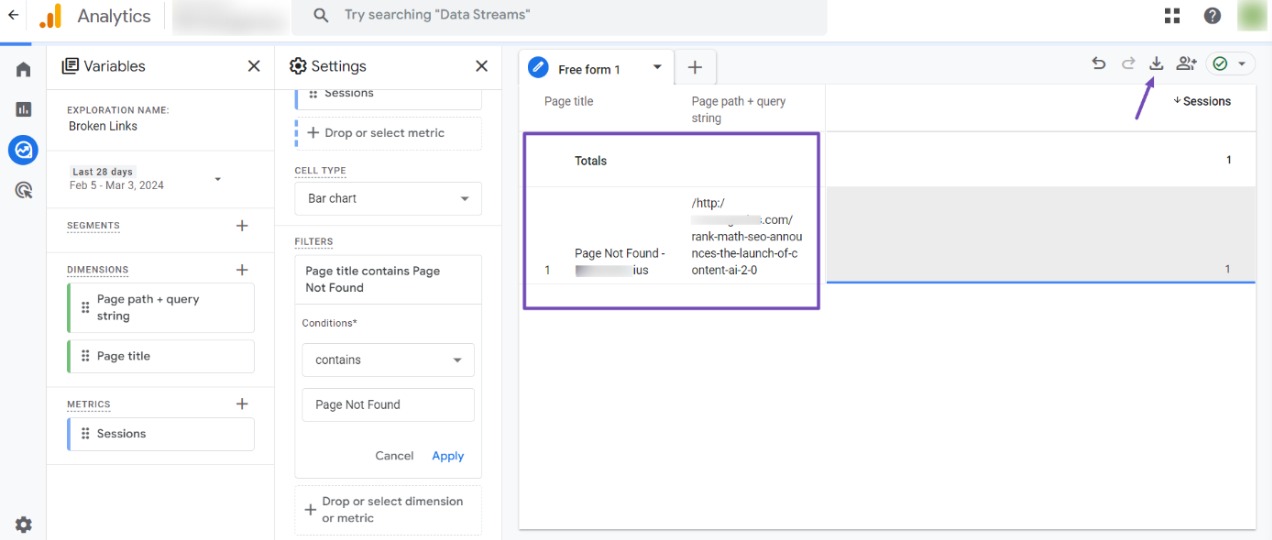
Now, in the Conditions section, select contains from the dropdown menu. Type in the page title for your website’s 404 page, such as ‘Page Not Found’.
Once you’ve done that, click the Apply button to apply the filter.

On the right side of the page, you will now see a report displaying all the 404 errors that occurred on your website within the selected time frame.
If there are many errors and you want to view the full list, you can export the data using the download icon.
3 How to Prevent Broken Links and Maintain Site Health in WordPress
Fixing broken links is important, but preventing them in the first place is even better. Over time, outdated URLs (also known as link rot) can creep in and affect your user experience and SEO. That’s why I recommend following a few simple best practices to keep your site healthy and your links in top shape:
- Use absolute URLs instead of relative links when linking internally or externally. Absolute links contain the full URL path and will still work if pages are moved. E.g., https://www.example.com/sample-page/.
- Link intelligently. Only link to high-quality, relevant resources that are likely to remain online. Avoid link schemes or excessive linking just for SEO value.
- Check links before publishing new content. Verify that all inserted URLs work and avoid broken links from day one.
- Review all links regularly. Check site-wide for broken links at least quarterly using the methods discussed above.
- Update internal links if you restructure your site or change your permalink settings.
- You can use the Rank Math SEO plugin to scan your site periodically for broken links and set up a 301 redirect to the most relevant existing page on your site.
- Monitor your site with uptime monitoring tools to be alerted of any downtime that could lead to broken links.
- When notified of broken links, address them promptly by updating the URL, removing the link, or setting up a redirect.
- Keep your WordPress plugins and themes up-to-date, as they may contain bug fixes and improvements related to link handling.
- Regularly back up your website to create a restore point in case of accidental link issues or other problems.
4 Frequently Asked Questions
How do broken links hurt SEO?
Broken links can disrupt site crawlability, spoil user experience, increase bounce rates, and waste crawl budget, all of which can hurt your site’s search performance.
Can broken links affect user experience?
Yes, visitors who encounter broken pages can get frustrated, leave your site, or lose trust in your content, which can reduce engagement and conversions.
Are broken links more common on large sites?
Yes. Large sites with many pages tend to accumulate broken links over time due to content updates, structural changes, and external dependencies.
5 Conclusion: Fix Broken Links for Better UX and SEO
Broken links can frustrate visitors, hurt your SEO, and damage your site’s credibility—but the good news is, they’re completely manageable.
By regularly checking for broken links and using tools like Rank Math, Google Search Console, Broken Link Checker, and even Google Analytics, you can quickly spot and fix issues before they become a problem.
Taking the time to maintain a clean, healthy link structure not only improves your site’s performance but also creates a better experience for your audience. So stay proactive, make link monitoring a regular habit, and keep your WordPress site running smoothly.
If you like this post, let us know by Tweeting @rankmathseo.