Are you trying to figure out how to put your most significant blog entries at the top of the page so readers can see them first?
Sticky posts come to your rescue!
A sticky post will be pinned at the top of your posts. Simply put, these posts will not be moved down as you add new posts to your site.
Sticky posts have many benefits and are widely used to promote your website’s most important and informative posts.
Now the question is how do you make sticky posts in WordPress?
This post will walk you through the best practices for using sticky posts on your WordPress website so that you can begin to enjoy the benefits of this powerful feature.
But before we begin, let’s first understand why and where you should use sticky posts in WordPress.
Table Of Contents
1 Why Should You Use Sticky Posts in WordPress?
You’ve heard the buzz and maybe even have a few of your own: content is king. But what does that mean for your website?
It means you need to invest more time and energy into your blog posts, pages, and other content to build a strong presence and increase your visitors’ time on your site.
It might seem strange if you’ve never used sticky posts in WordPress. But in reality, using sticky posts in WordPress is a handy way of driving extra traffic to your site, especially if you have a lot of content on your website.
This is because it allows people to pin a content block to the top of your website’s page so that it’s always visible and keeps people on your website longer. This means that you can get a lot of extra traffic from people who were ready to leave your website but were stuck when they first arrived on your page.
Apart from showcasing your best and most important posts, you can make big announcements for your website to be sticky. For instance, it is prevalent to have affiliate deals that benefit you and your website’s visitors. You can create a post outlining the deal and what your visitors can benefit from it by making it a sticky post.
2 Examples of Posts That You Can Mark Sticky
2.1 Promotional or Giveaway Posts
If your site is hosting a week-long giveaway and you write one post every day, your giveaway post will become completely invisible after 4/5 days of going live because your most recent postings will push it down many levels.
There’s a potential that your participation may decline because it won’t be easy to find. Making this post sticky is a quick fix.
To guarantee that your promotional post receives the most visibility and the offer is active, you can choose to make it sticky when establishing promotional sales campaigns.
2.2 Critical News, Announcement or Update Posts
Place a post at the top of your blog, and visitors will be sure to notice if you’re launching any important updates to your products or modifying your conditions of use.
This also applies to posts with general announcements.
2.3 Pillar Content Posts
A blog’s pillar content is the most relevant and shared content of any blog.
But as newer posts are published, this pillar content gets somewhat bogged down.
Sure, you can create a page that compiles some of your best posts, but there’s no way to be sure that readers will browse through this page and pick posts to read.
Sticky posts in WordPress give you a handy way to do this. Your pillar content can stay evergreen this way.
3 How to Make Sticky Posts in WordPress
The sticky post feature is a standard part of WordPress, though it’s tucked away. WordPress has a built-in feature to stick any post to the front page.
To make sticky posts in WordPress, edit the post that you wish to be sticky or create a new one.
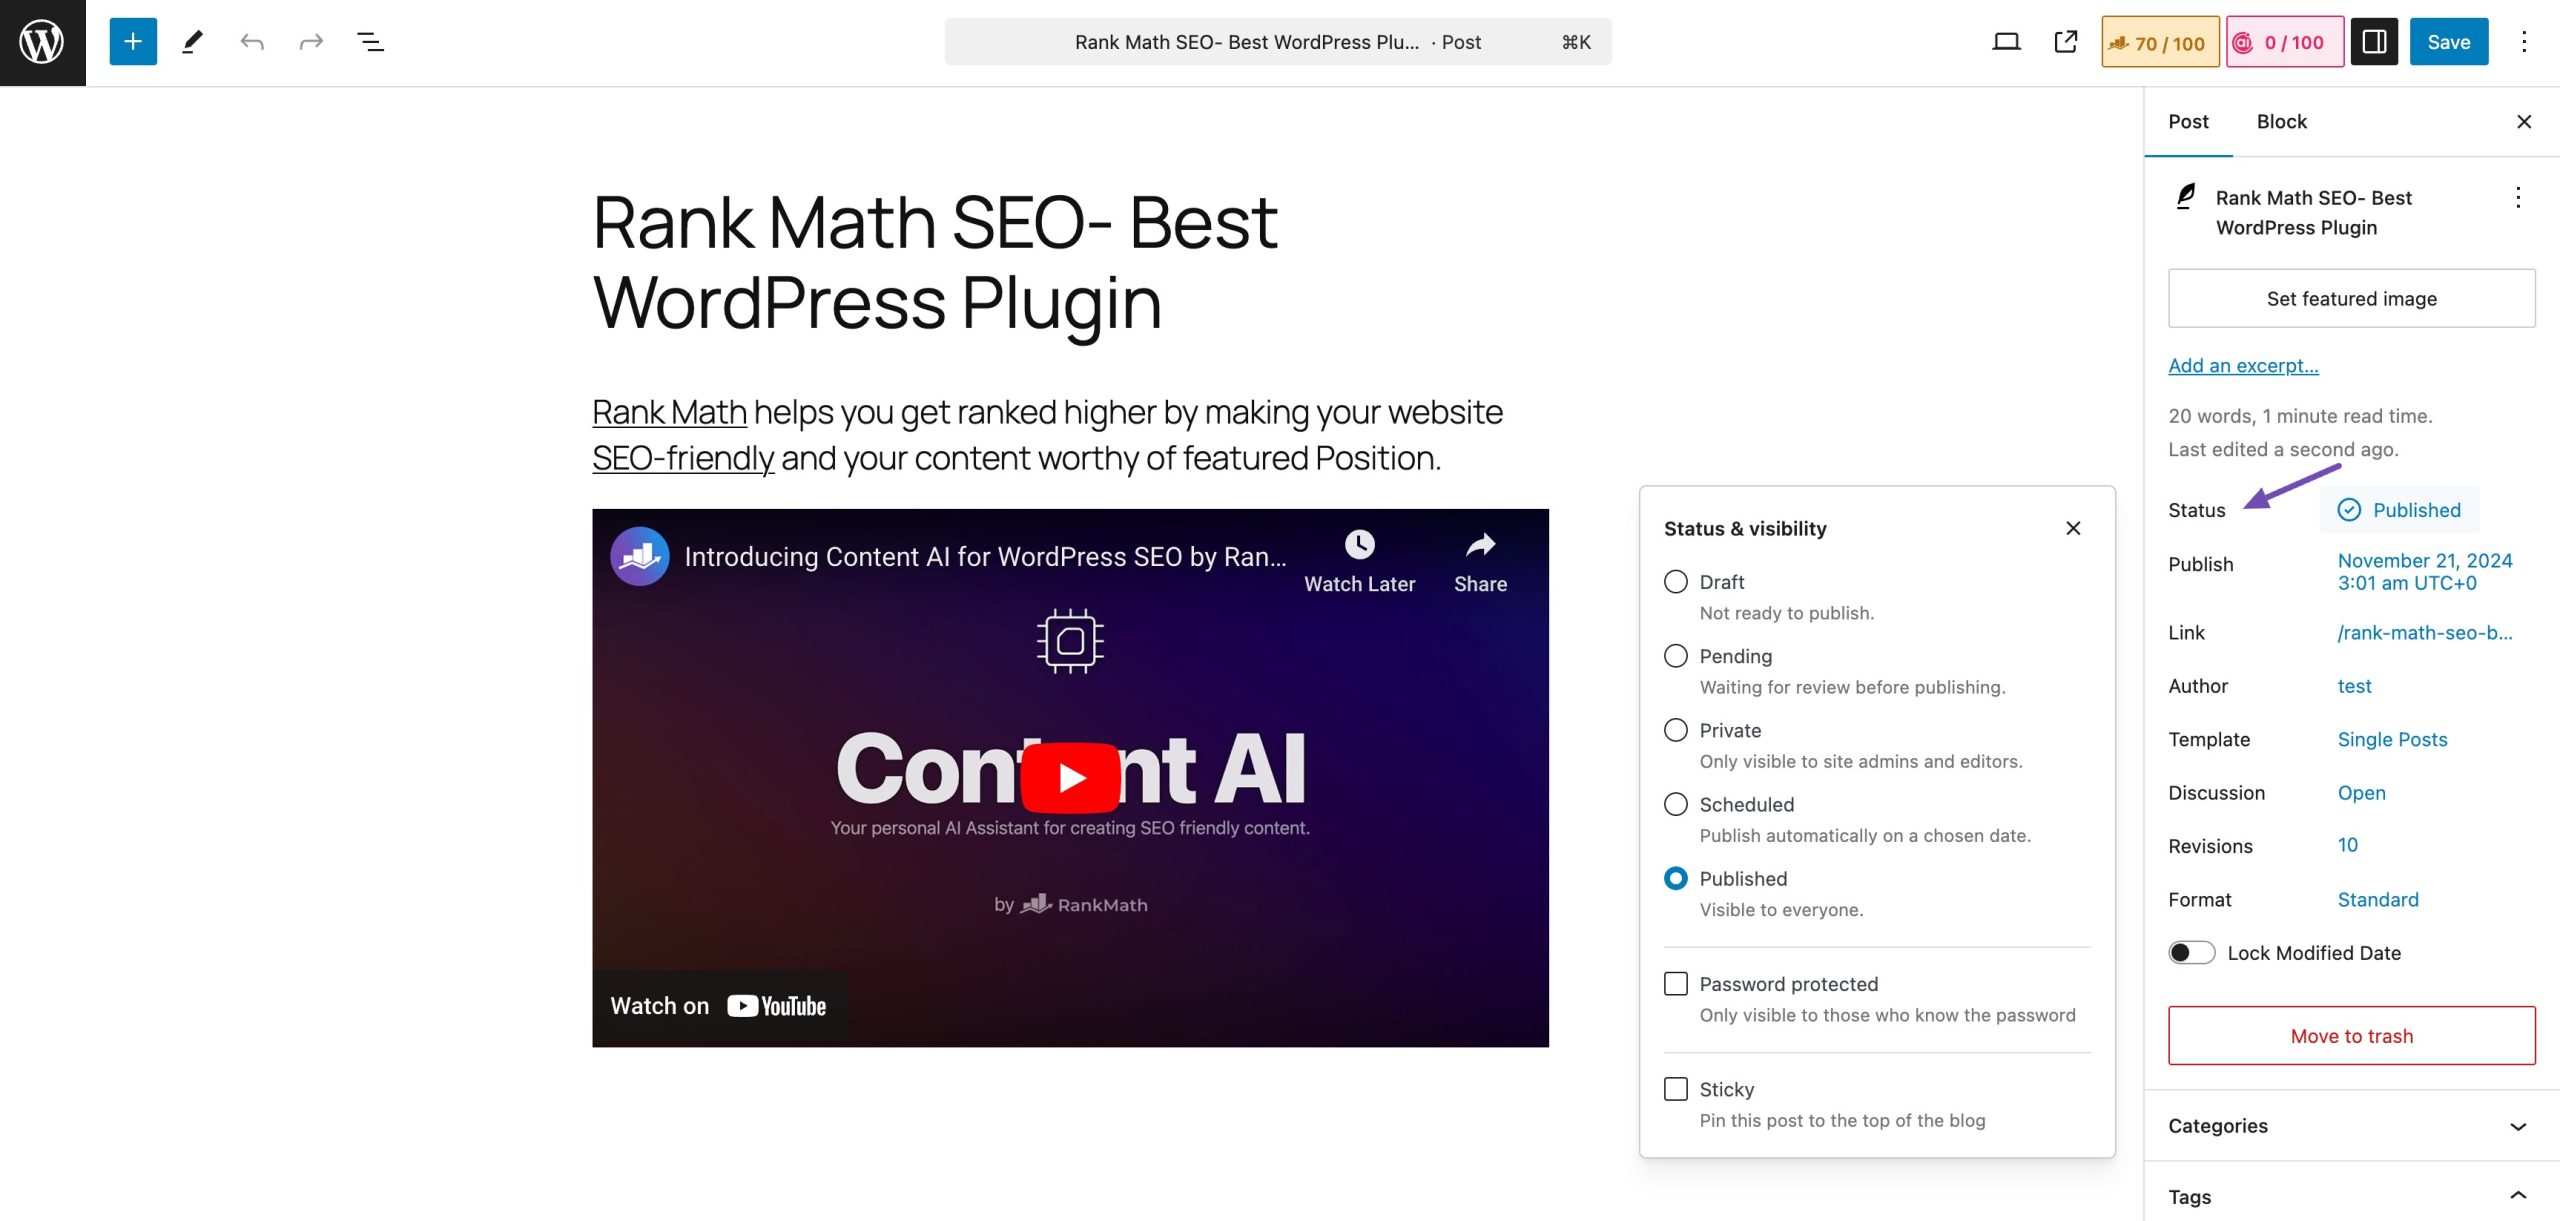
On the post-editing screen, you’ll see your Post settings towards the right-hand sidebar. Click on the Status section as shown below.
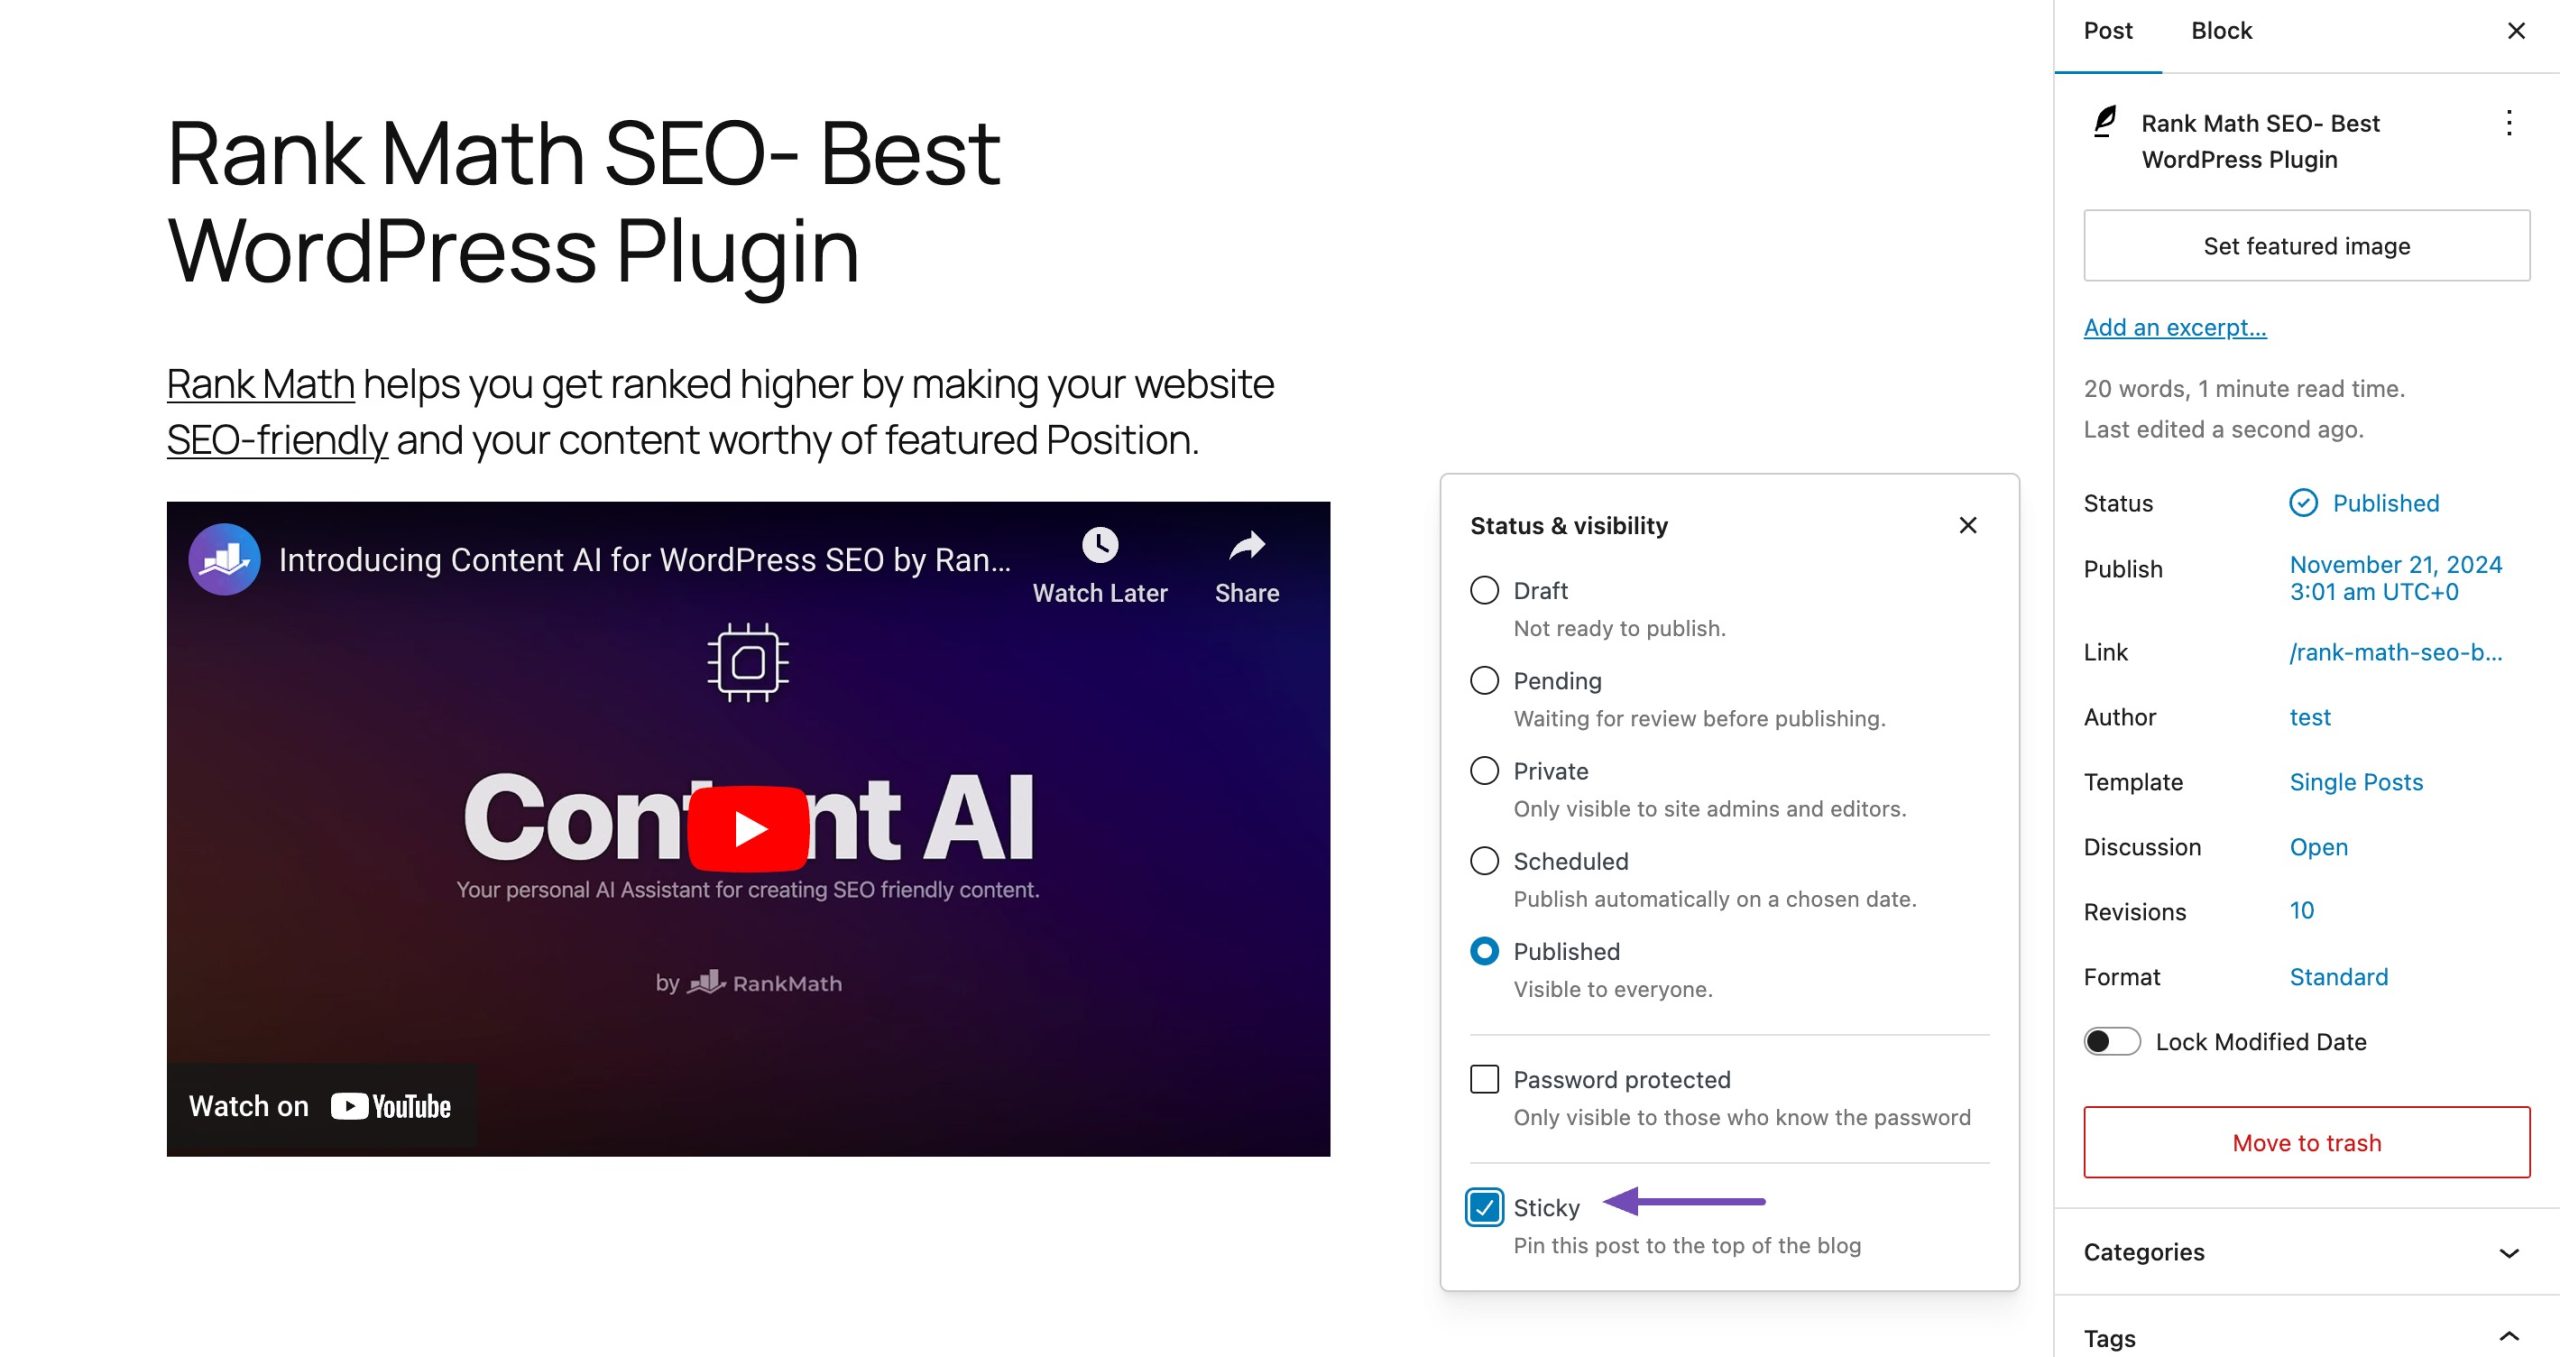
Now, you will see a checkbox option for Sticky. Check the box to make the post sticky. Once you’ve checked the box, you may Update or Publish your post.
That’s it! Your post will stick to your blog’s front page until you remove the check.
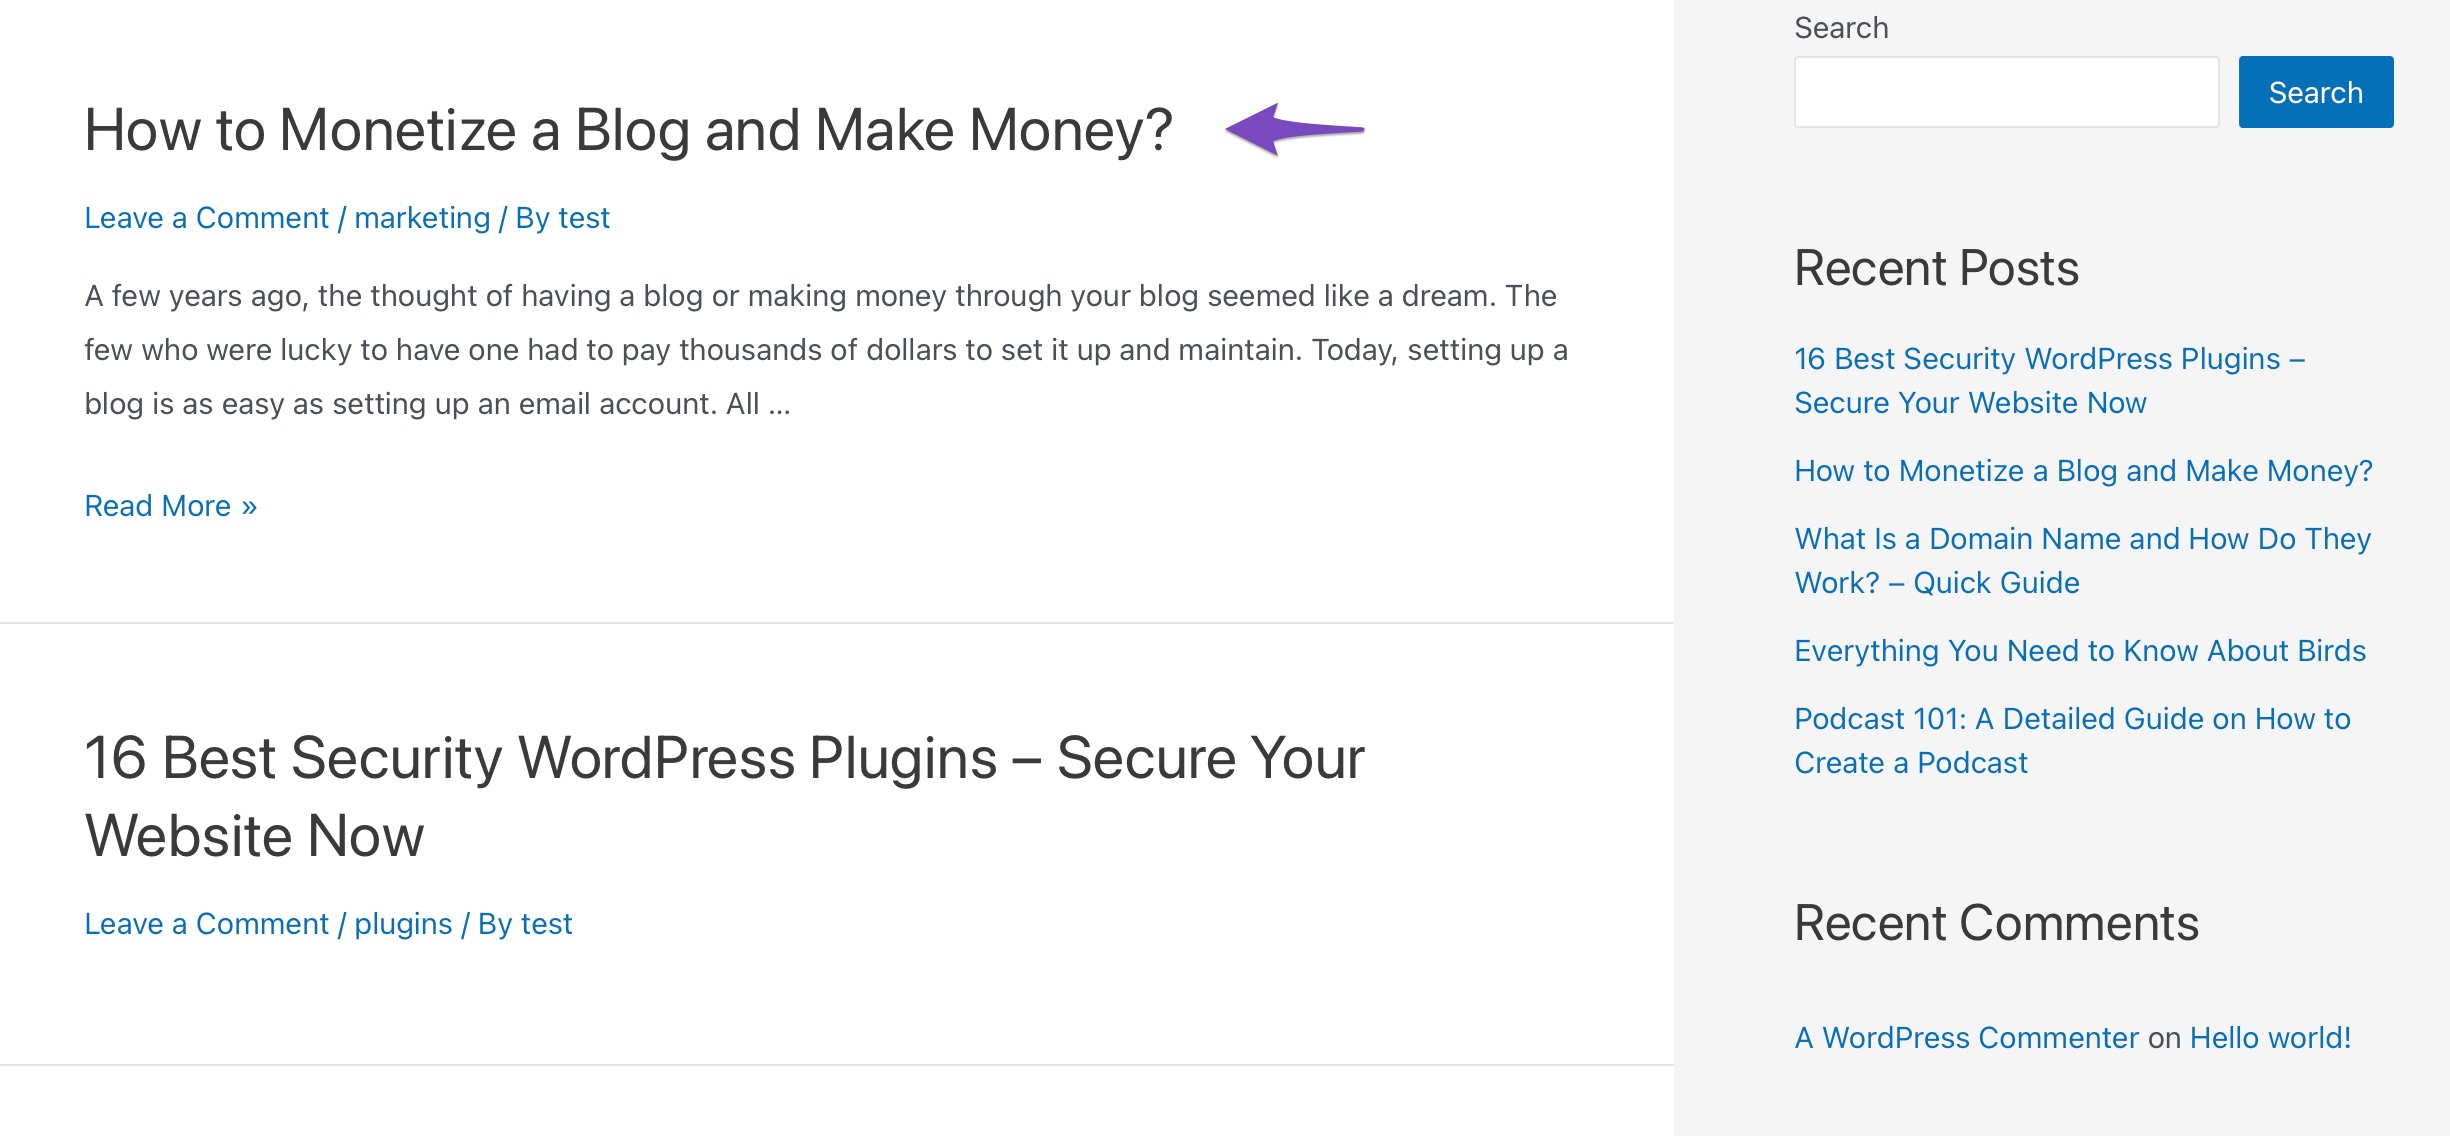
Easy peasy, right? But what if you want to make an older post as a sticky post on your website? Let’s find out in the next section.
3.1 Make an Older Post Sticky
You can make your older posts sticky with the Quick Edit feature.
Navigate to the Posts → All Posts page from your WordPress dashboard and search for the specific post title. Next, click on the Quick Edit option below it.
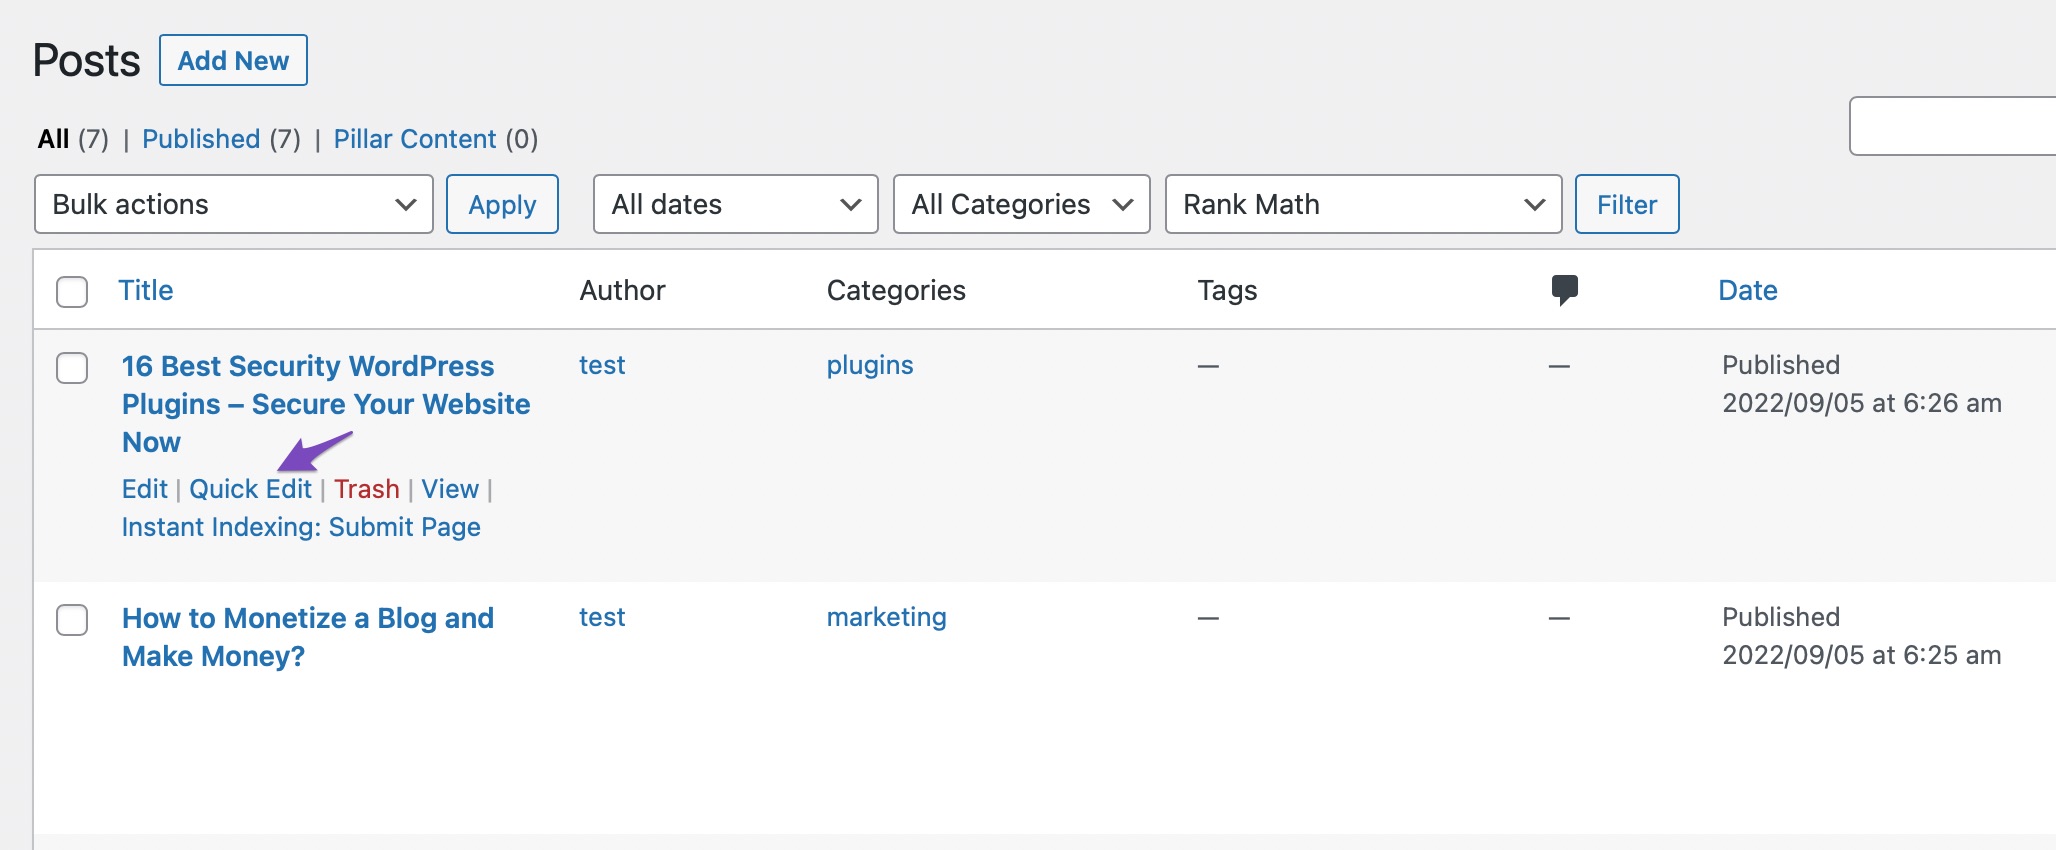
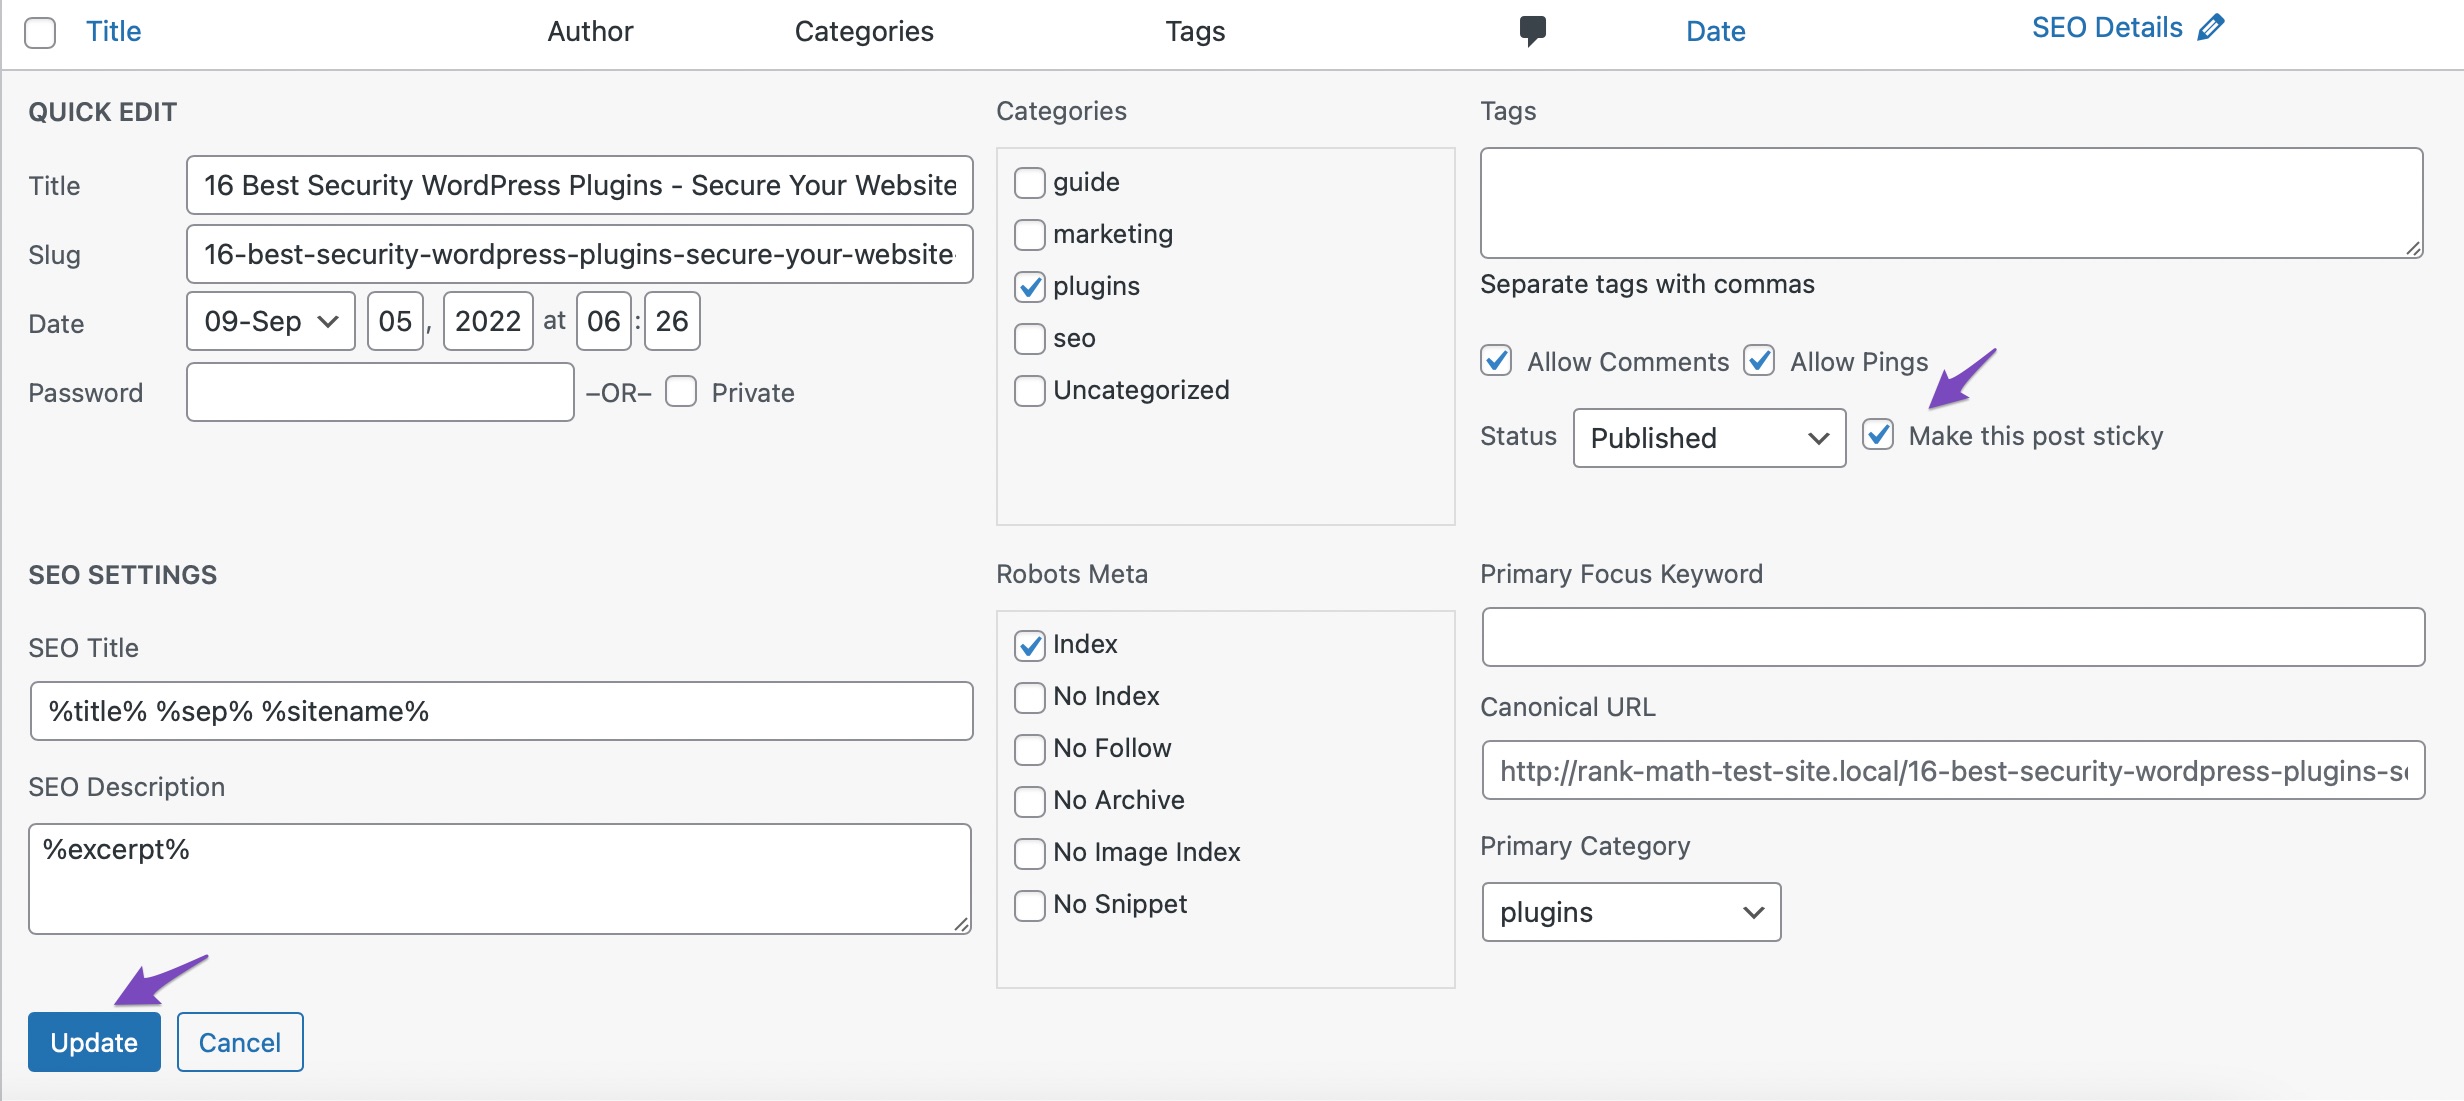
After that, you will see the quick edit options, including a sticky post checkbox on the right. You must check the box and click the Update button, as shown below.
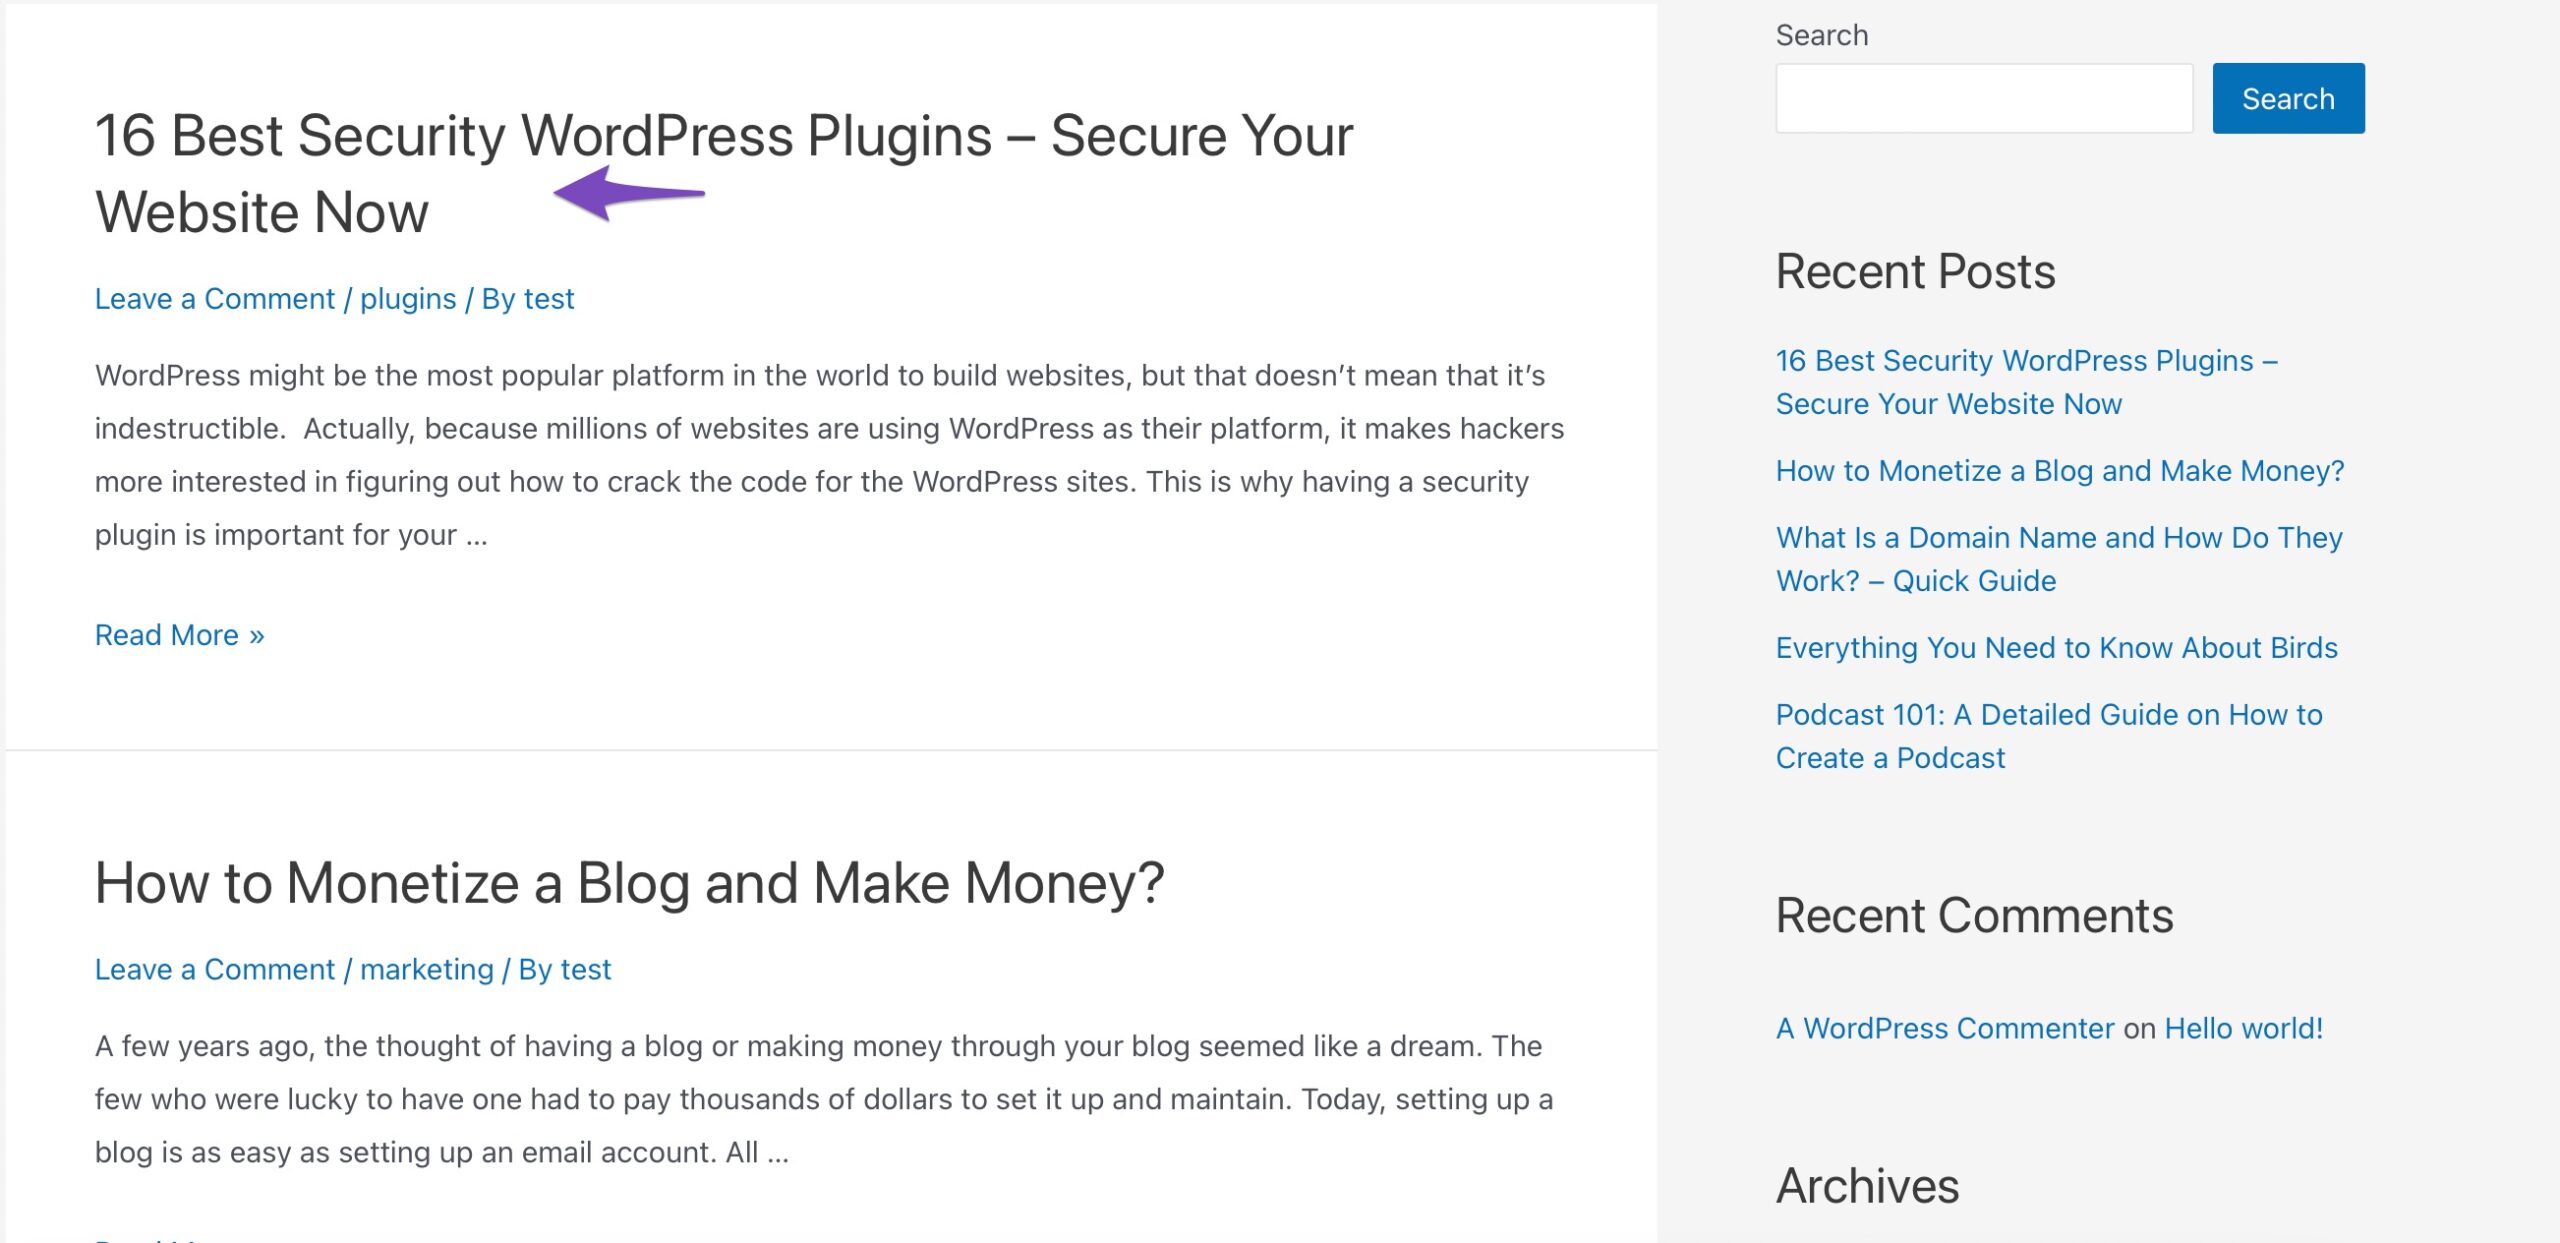
Your post will now be shown at the top of the blog as a sticky post.
3.2 Alternative Plugins
Remember that the sticky treatment is not reserved only for posts. You can use it on your website for forums, menus, and sidebars.
Have you ever scrolled down a page and had a menu or sidebar follow you down a page? If so, you already have seen a sticky menu and a sticky sidebar.
You will, of course, need a different plugin to achieve this. We’ve listed a few plugins that can help you with sticky postings.
3.2.1 Sticky Menu (or Anything!) on Scroll
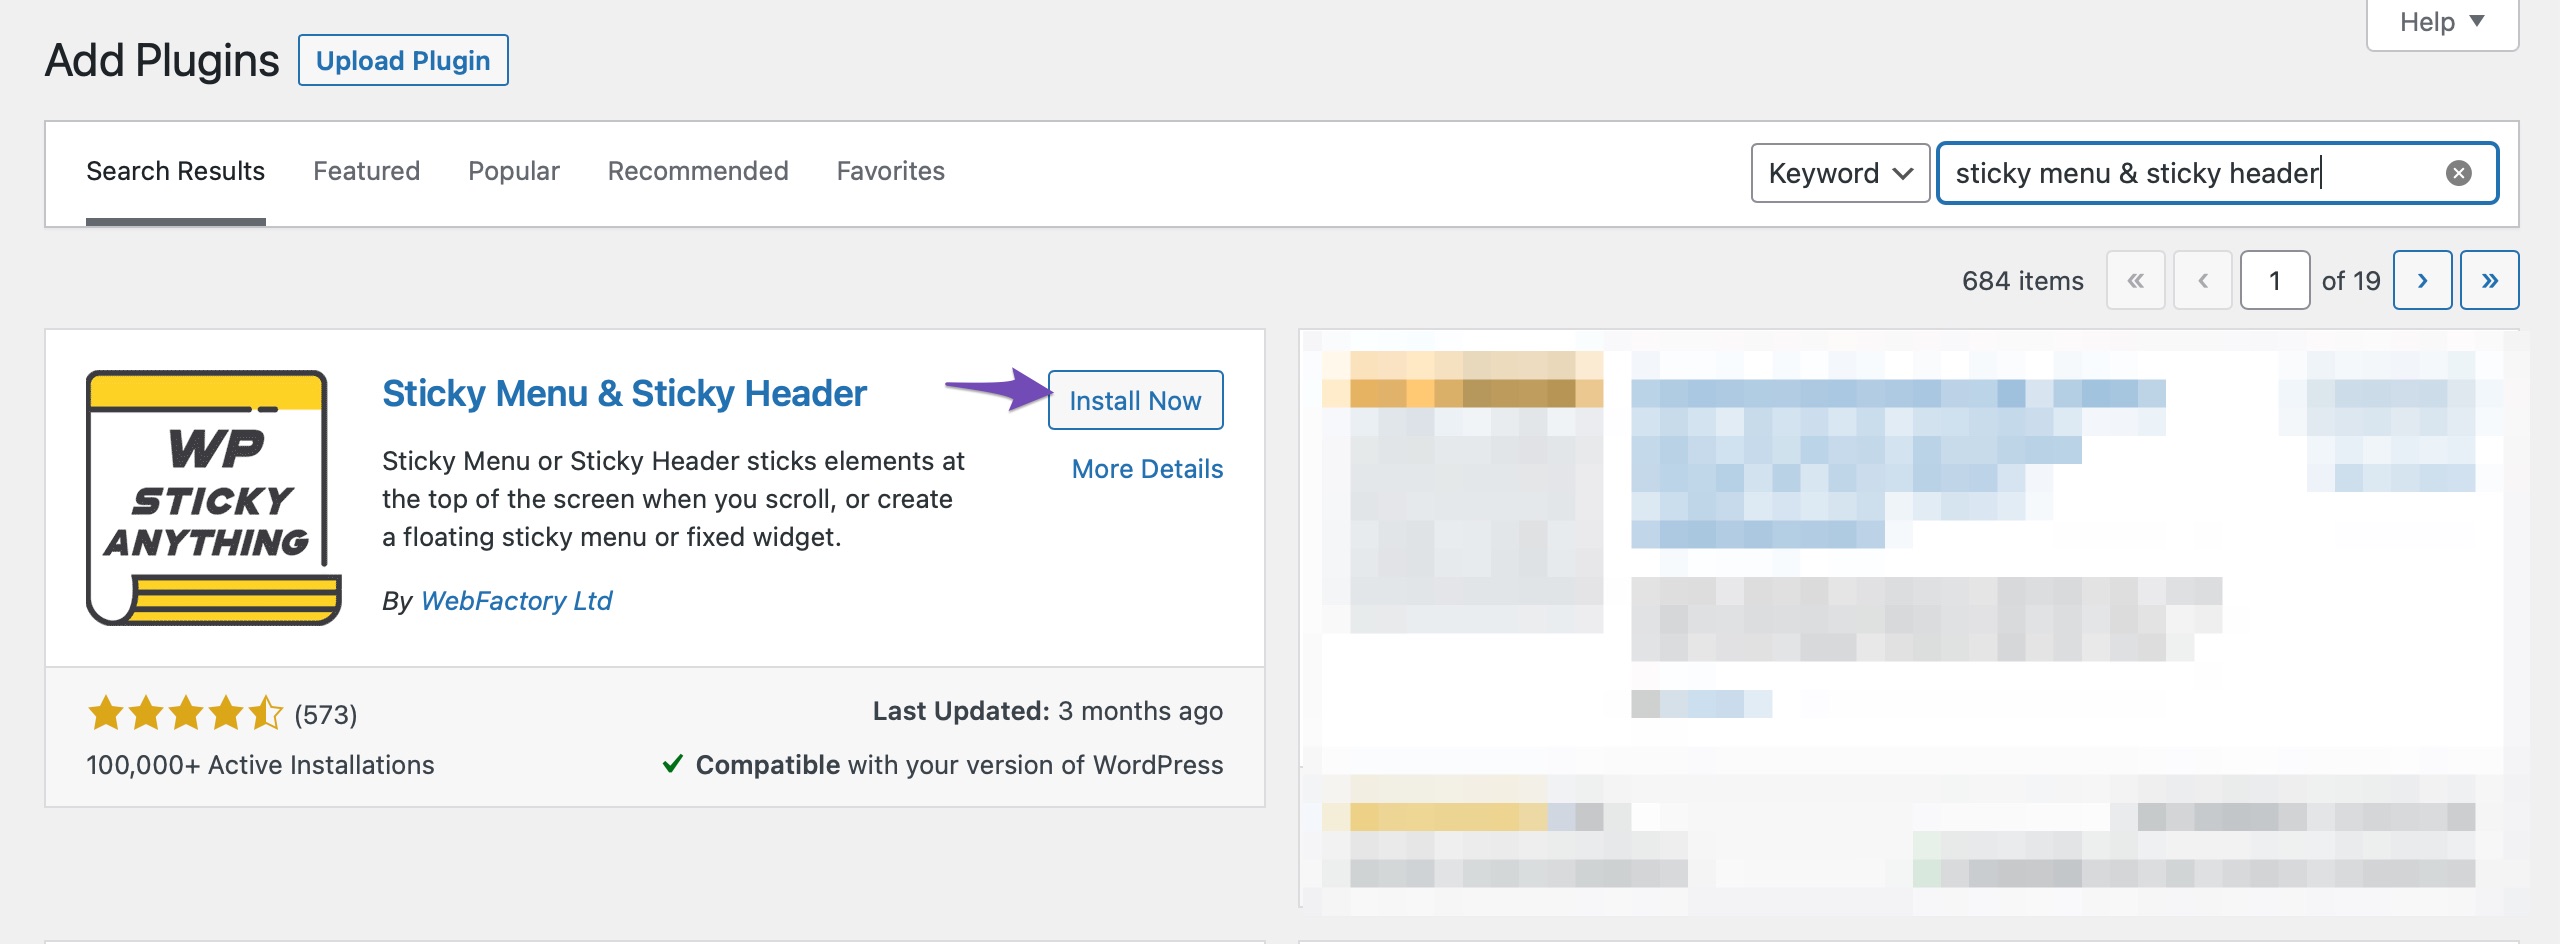
Sticky Menu (or Anything!) on Scroll is a more comprehensive sticky plugin focusing on menu items. This is a great way always to keep the menu on your visitor’s screen. This saves them valuable time if they don’t have to scroll back up a page to get to the menu.
To install the plugin, navigate to Plugins → Add New section of your WordPress dashboard. Search for Sticky Menu & Sticky Header plugin and install and activate it. It is effortless to use the plugin, and it’s all done in the widgets section of WordPress. Refer to our dedicated tutorial on installing WordPress plugins.
3.2.2 Simple Sticky Header on Scroll
With the free Simple Sticky Header on Scroll plugin, you can easily add a sticky header to any WordPress theme. The plugin offers simple options for your logo, colors, a “next post button,” drop-downs, and more.
You can similarly install and activate the plugin from your WordPress dashboard.

4 Conclusion
Sticky posts are a powerful yet often overlooked feature in WordPress that can help you highlight important content and keep it in front of your audience.
They offer a simple way to boost engagement and improve user experience.
By strategically using them, you can guide visitors to the content that matters most while maintaining an organized and dynamic blog.
So, if you haven’t used sticky posts yet, now is the perfect time to start making your key content stand out!
If you like this post, let us know by Tweeting @rankmathseo.
