
Have you ever come across a suggestion like “add expires headers”? You are not alone if you have. It’s one of the most typical website performance advice you’ll hear when you first start optimizing your site.
If you manage a WordPress website, you’re probably always looking for new methods to make your site faster. Adding expires headers is one such option.
Expires headers are rules that tell web browsers whether to load images from the visitor’s browser cache or your server. These can help your website run more smoothly. You can either add expires headers manually or with the help of a plugin.
This post will explain what expires headers are and how they affect your site. Also, we’ll show you step-by-step methods on how to add expires headers in WordPress.
Table Of Contents
1 What Are Expires Headers?
To understand expires headers and how to use them in WordPress, you must first understand the browser cache. HTML, JavaScript, and CSS are examples of static files that make up a web page. Because these files do not change regularly, the identical files will be retrieved both times if you request the page yesterday and request it again today.
What if you saved those files on your browser when you requested them yesterday? When you make today’s requests, those files will be swiftly loaded from your browser rather than from the web server, decreasing resource use and increasing page loading times.
That would be significantly faster, and caching accomplishes this.
On the other hand, the browser cache can’t keep a website’s files (images, CSS, Javascript, and so on) indefinitely; it needs to be instructed when to delete old ones and request new ones.
This is where the expires header comes in. They are rules specified in a website’s header section that advise the browser to discard cached files and fetch new copies.
You can use a plugin or edit your server files to add expires headers to WordPress. The former is best for advanced users since making a mistake when modifying your server files can break something on your site. A plugin is better if you don’t have a lot of technical knowledge.
2 How to Add Expires Headers to Your WordPress Website
Let us now discuss different methods to add expires headers to your website.
2.1 Using a WordPress Plugin
To enable expires headers on your site, you can use WordPress plugins like WP Rocket or W3 Total Cache. While there are many plugins to choose from, caching plugins is an excellent choice.
Using WP Rocket
To add expires headers using the WP Rocket plugin, start by installing and activating the plugin on your WordPress site.
You can refer to our dedicated tutorial on installing and activating the plugin on your website.
WP Rocket streamlines the process, making it a user-friendly solution for optimizing browser caching and enhancing your website’s overall performance.

WP Rocket enables browser caching and automatically expires headers when you activate the plugin. It sets up optimal expiration times for different types of data, so you need not worry.
Using W3 Total Cache
On W3 Total Cache, this is a setting you have to activate yourself. Let’s have a look at the steps to follow.
First, install and activate the plugin from Plugins → Add New section of your WordPress dashboard.

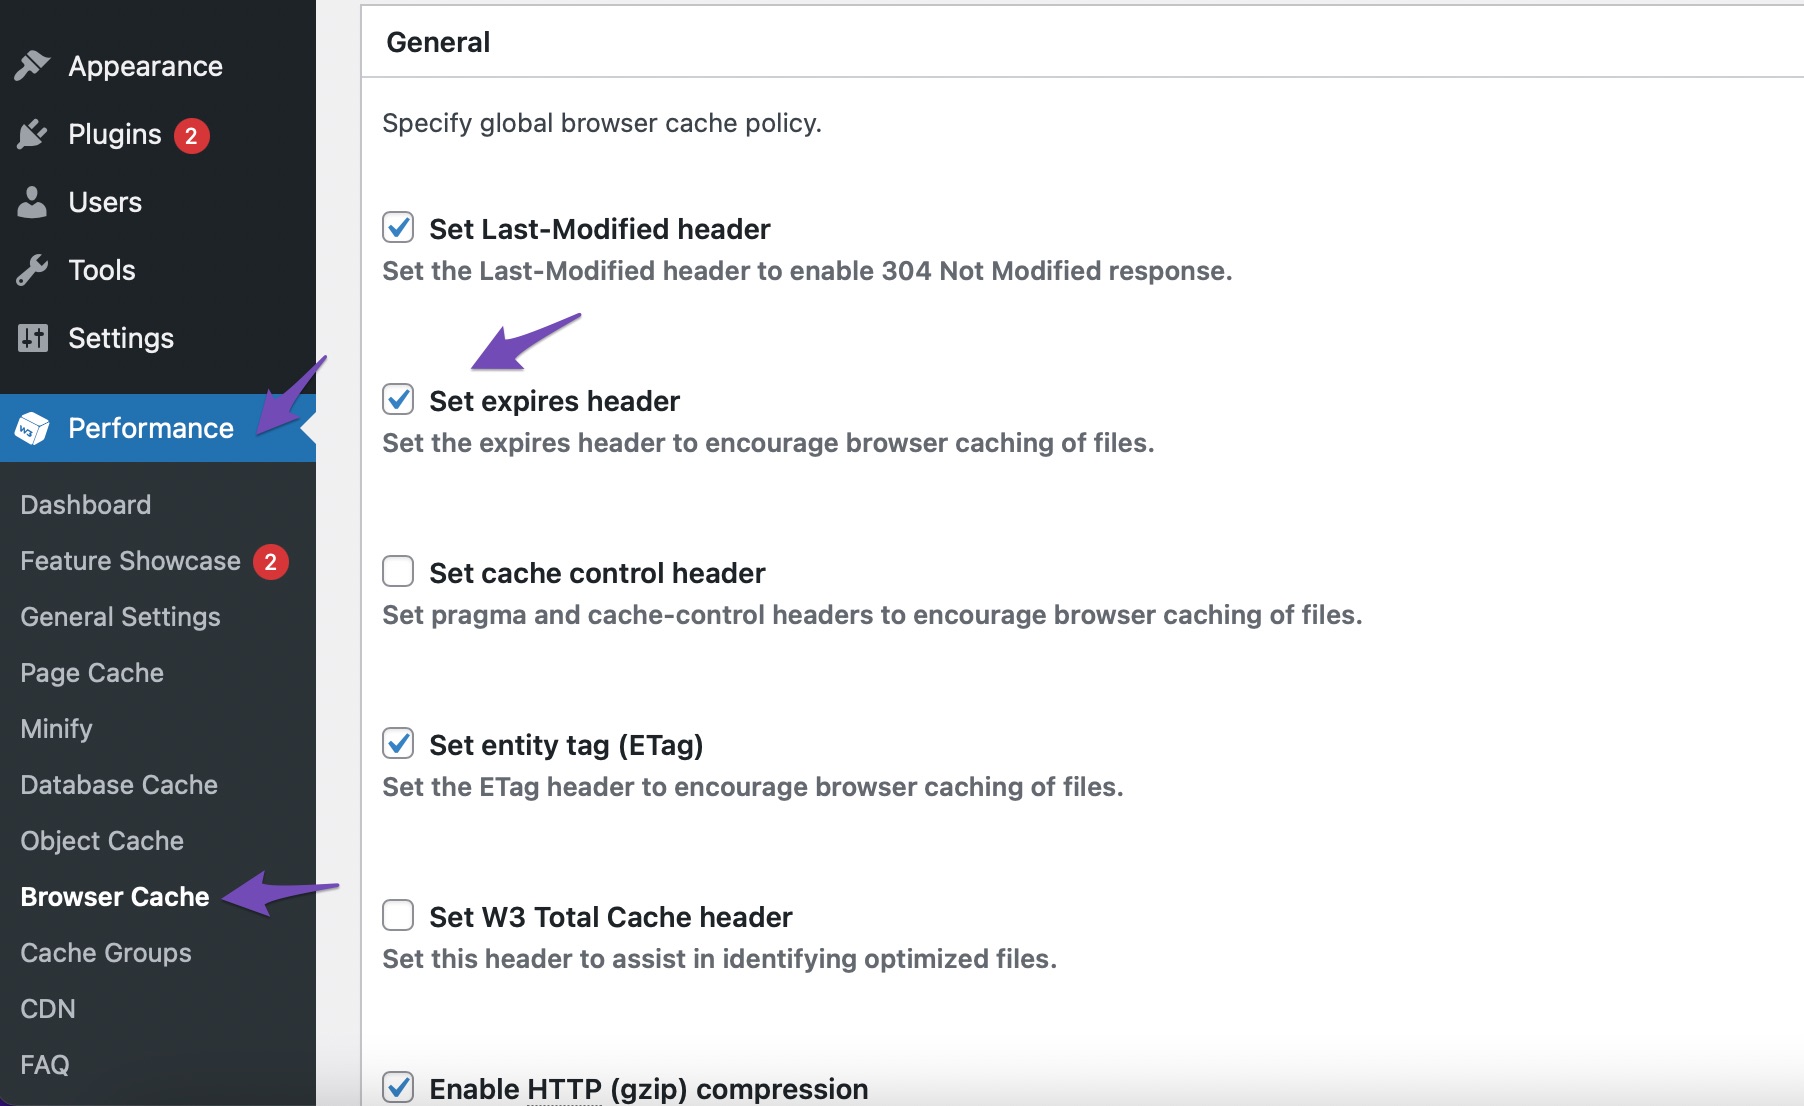
Once you’ve activated the plugin, navigate to Performance → Browser Cache. In the General sub-box, Check the option Set expires headers as shown below.
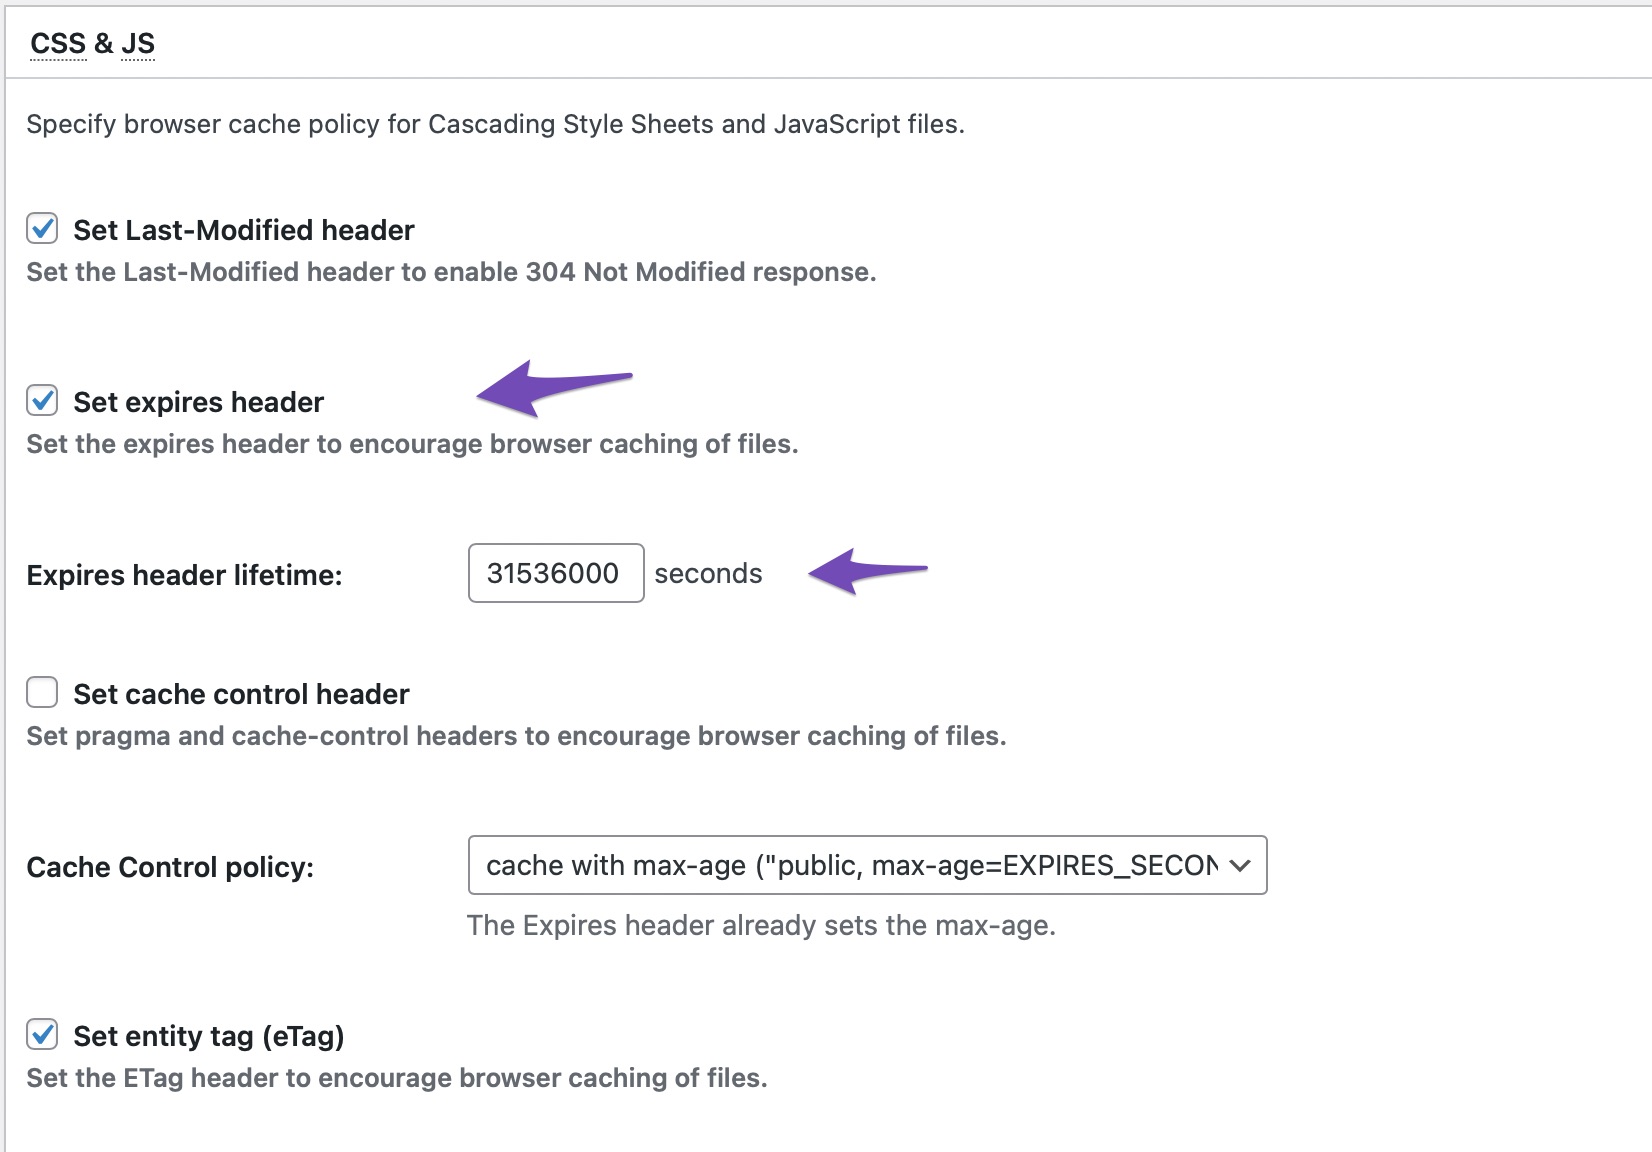
Now go to the CSS & JS section and select the box next to the Set expires header, then input your Expires header lifespan value in seconds. By default, this number is set to 31536000 seconds or 365 days. This can be changed as needed.
Repeat the above step for the HTML & XML and Media & Other Files sections. Once done, click on Save all settings button.
2.2 Add Expires Headers on an Apache Server
If your site host utilizes the Apache web server, you can use the .htaccess file in the root folder of your server to add expires headers.
Rank Math makes it extremely easy for you to edit your .htacess file right inside your WordPress dashboard. You can edit your .htaccess file by navigating to Rank Math SEO → General Settings → Edit .htaccess.
You can also edit the .htaccess file by connecting your server through your hosting panel with the help of an FTP or cPanel. For simplicity, we will use the cPanel to establish the connection.
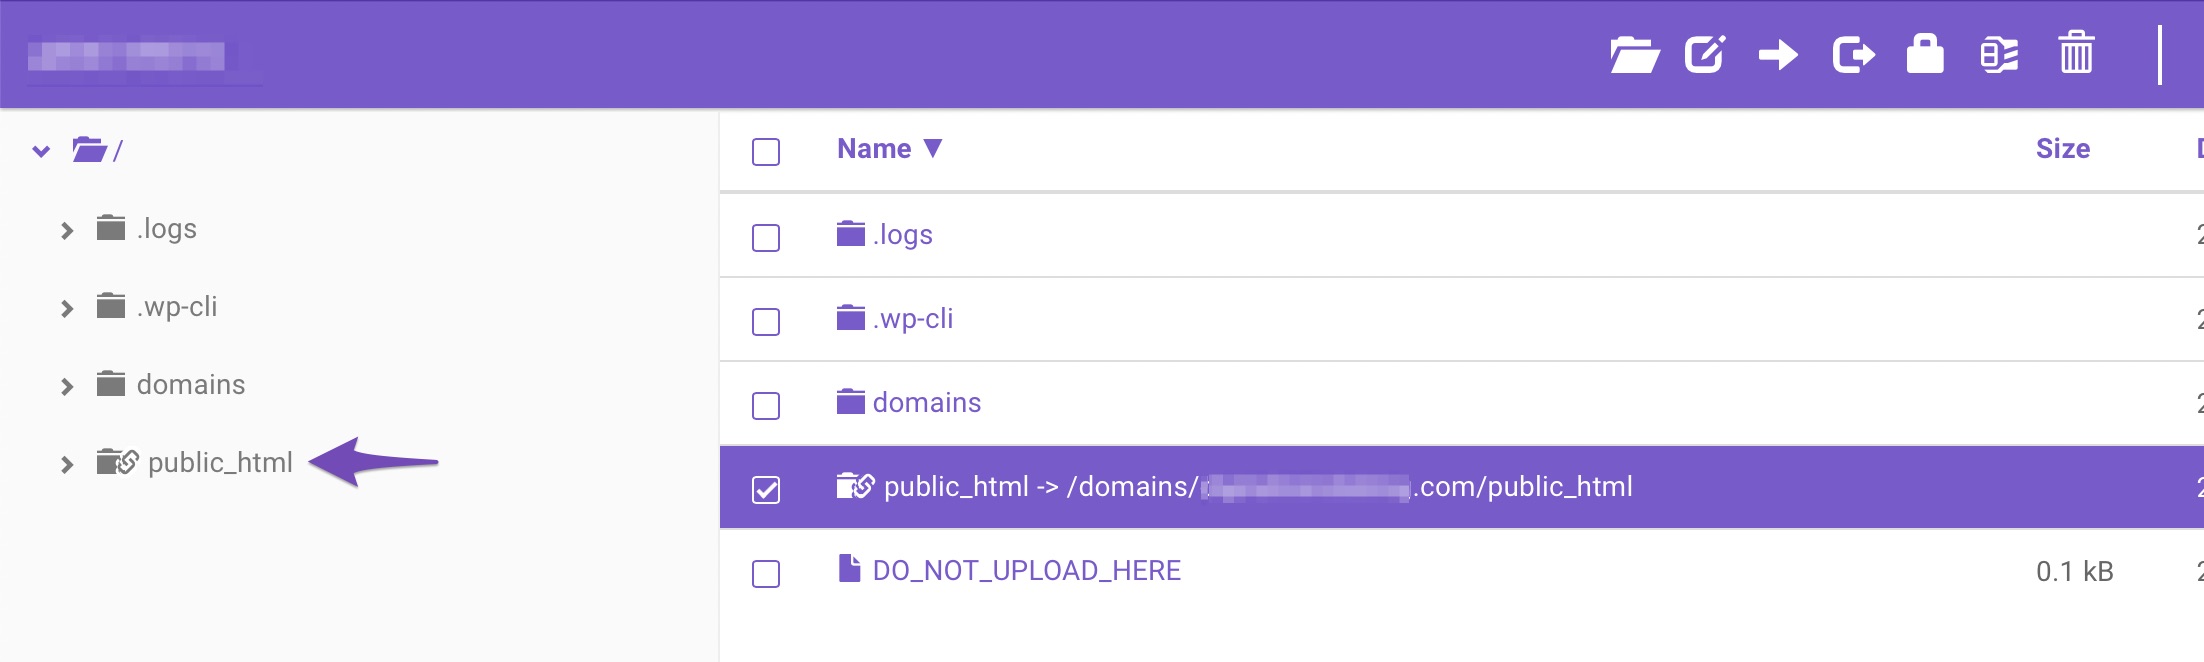
First, you need to log in to your cPanel. Once the connection is established, navigate to File Manager and click on the public_html folder.
Once you’ve entered the folder, look for the .htaccess file. If you still can’t find it, make sure the hidden files option is set to show.
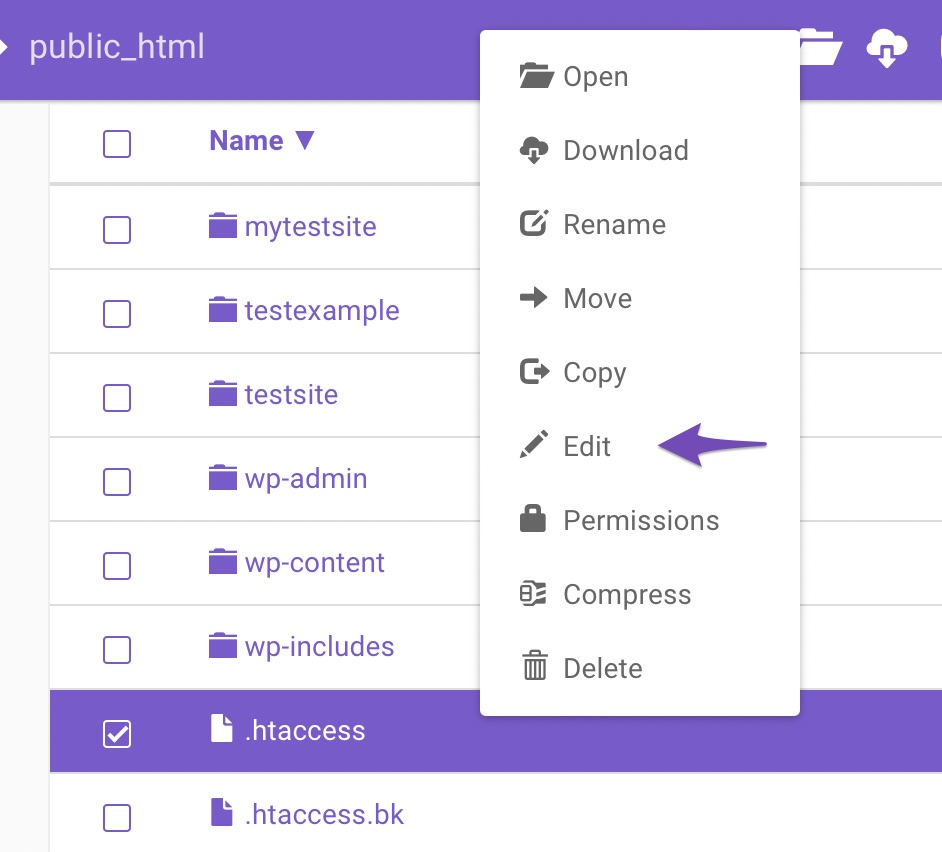
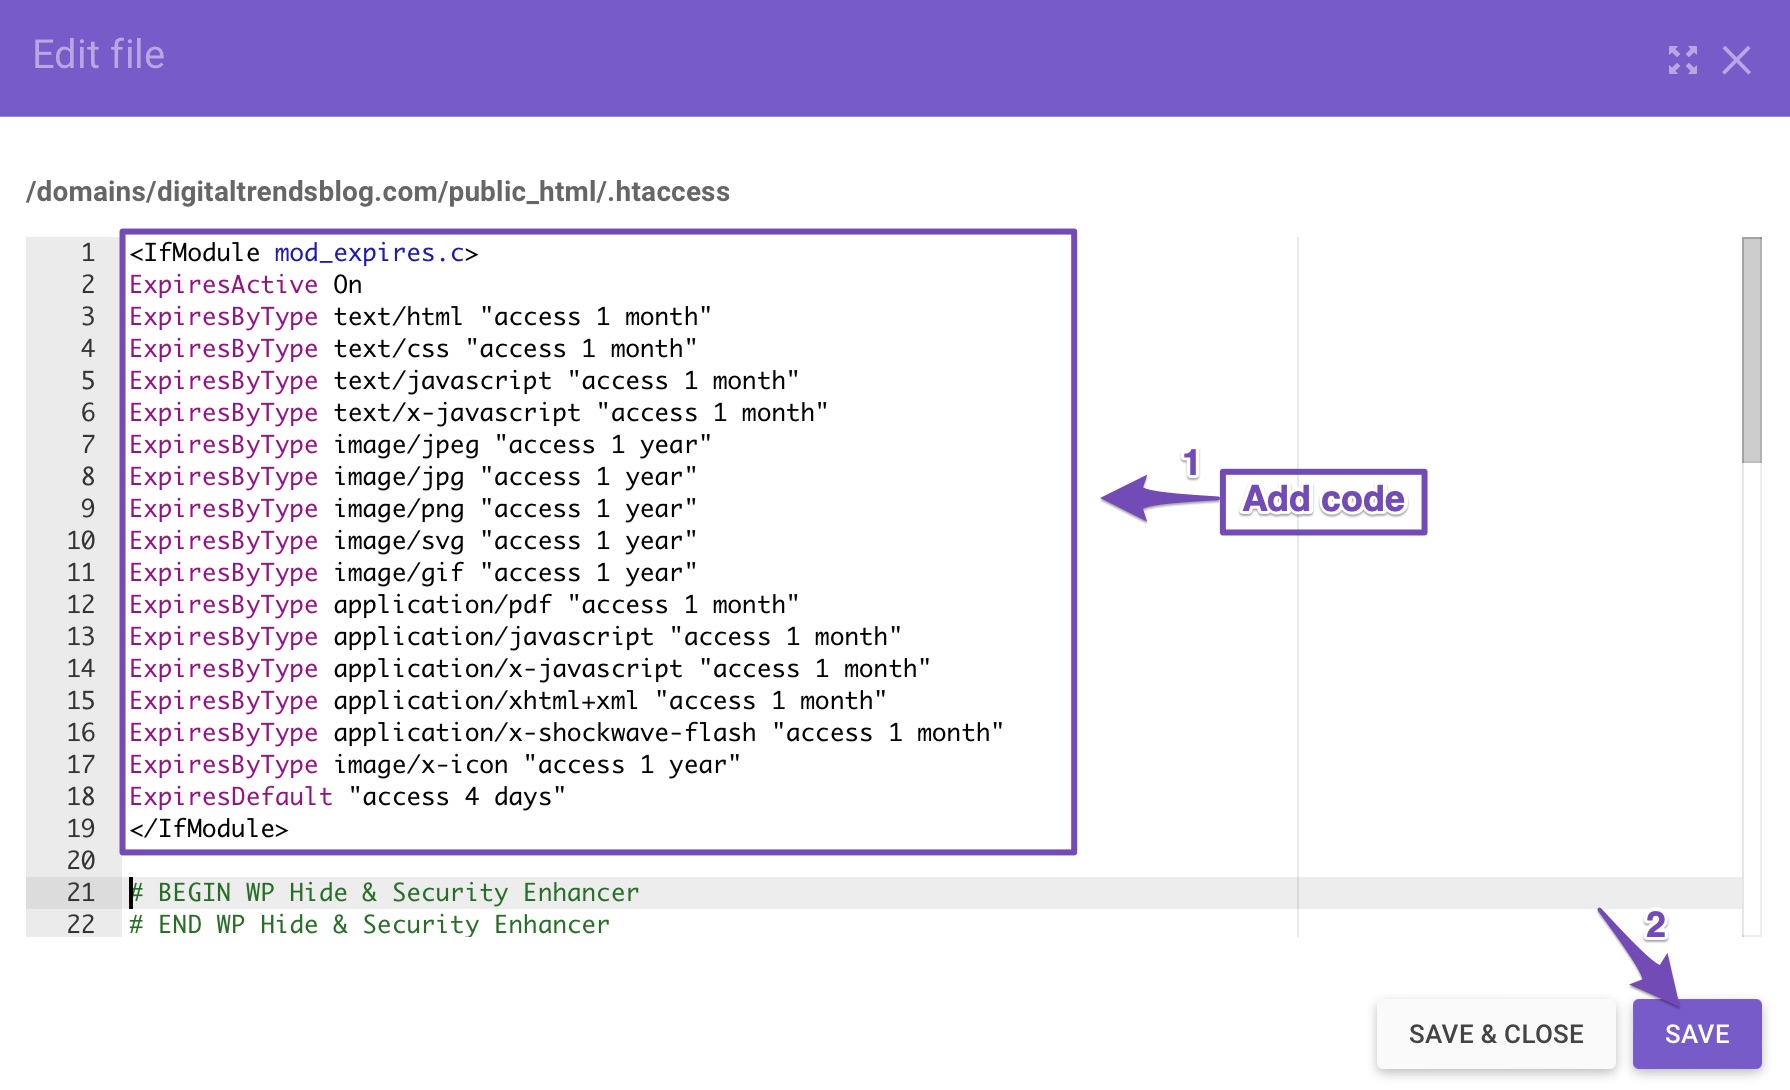
Now, add the following code and place it near the top of your .htaccess file to add expire headers.
<IfModule mod_expires.c>
ExpiresActive On
ExpiresByType text/html "access 1 month"
ExpiresByType text/css "access 1 month"
ExpiresByType text/javascript "access 1 month"
ExpiresByType text/x-javascript "access 1 month"
ExpiresByType image/jpeg "access 1 year"
ExpiresByType image/jpg "access 1 year"
ExpiresByType image/png "access 1 year"
ExpiresByType image/svg "access 1 year"
ExpiresByType image/gif "access 1 year"
ExpiresByType application/pdf "access 1 month"
ExpiresByType application/javascript "access 1 month"
ExpiresByType application/x-javascript "access 1 month"
ExpiresByType application/xhtml+xml "access 1 month"
ExpiresByType application/x-shockwave-flash "access 1 month"
ExpiresByType image/x-icon "access 1 year"
ExpiresDefault "access 4 days"
</IfModule>
As you can see, the above code implements expires headers for various resource types, including images, video, CSS, JavaSCript, and more. The various file formats have varying expiration dates. You can customize these and the ExpiresDefault header to best suit your needs.
2.3 Add Expires Headers on a NGINX Server
NGINX is not the same as the Apache web server. That is why you will be unable to locate the .htaccess file. So, how do you include expires headers in NGINX?
You’ll need to edit your server’s configuration file. How you access and edit this file varies by the host – you can always reach out to your host’s support team for any assistance.
Next, add the following code snippet to your server block.
location ~* \.(jpg|jpeg|gif|png)$ {
   expires 365d;
}

location ~* \.(pdf|css|html|js|swf)$ {
   expires 2d;
}
You can adjust the expiration times for different types of files as per your need. Once you’ve made these changes, save your configuration file and restart Nginx.
3 Conclusion
Expires headers clearly enhance website loading performance. Even though it won’t significantly improve your site’s speed, the strategy will undoubtedly improve the user experience.
You can use expires headers to manage how different file types are cached and served to your visitors. They can help improve load times for regular visitors while also ensuring that they only view fresh content. That’s why they’re crucial to website performance and overall user satisfaction.
With that said, it’s important to understand how to implement expires headers properly. It will slow down your site if you do it incorrectly. This is particularly true for more dynamic and functioning sites, such as eCommerce sites.
We hope this post successfully armed you with the knowledge to add expires headers to your site. if you like this post let us know by Tweeting @rankmathseo. 💬