
Expanding your WordPress plugin to support multiple languages isn’t just a nice-to-have—it’s a smart move that opens the door to a global user base.
As the internet becomes increasingly multilingual, users expect software that speaks their language—literally.
By translating your plugin, you’re not only enhancing usability but also showing respect for your users’ cultural contexts.
In this post, we’ll guide you through how to translate a WordPress plugin into your language, providing step-by-step instructions and valuable tips along the way.
Let’s dive in and learn how to translate a WordPress plugin into your language.
Table Of Contents
1 Why Translate WordPress Plugins?
You’ve probably heard the phrase, communication is key. In today’s multilingual world, offering your WordPress plugin in only one language—especially English—limits its potential reach.
Surprisingly, less than half of all WordPress websites use English as their primary language (source). That means more than 50% of your potential users may struggle to understand or use your plugin effectively if it’s not available in their language.
Translating your plugin isn’t just about words; it’s about creating a more inclusive, accessible, and trusted user experience

So, why not go the extra mile to translate your favourite WordPress plugin?
We’ve listed a few reasons to help you understand the need to translate a WordPress plugin.
1. Reach a Global Audience
Millions of users speak languages like Spanish, Mandarin, French, and more. By localizing your plugin, you expand your reach and make your tool useful to a far larger audience.
2. Build Trust and Credibility
Imagine shopping online and coming across a product description written in an unfamiliar language. You might hesitate, right? Translating your favourite WordPress plugin demonstrates that you care about your users’ preferences. It adds an air of professionalism and trust, making users more likely to rely on your plugin.
3. Comply with Regulations
Some regions have regulations that require software to be available in the local language. By translating the plugin, you’re not only meeting legal requirements but also showing respect for regional norms.
4. Contribute to the WordPress Community
WordPress thrives on global collaboration. By translating your plugin, you’re supporting the wider community and helping fellow developers and users around the world benefit from your work.
Translating WordPress plugins bridges the gap between technology and people’s diverse languages. It’s about making your creation accessible to anyone, anywhere.
2 How to Translate a WordPress Plugin
The methods discussed below allow you to translate not just your WordPress plugin, but any plugin in the open-source WordPress repository.
2.1 Translate a WordPress Plugin Into Your Language for Everyone
If you’re eager to facilitate the translation of a WordPress plugin, ensuring it’s accessible to your users in various languages, then this method is best for you.
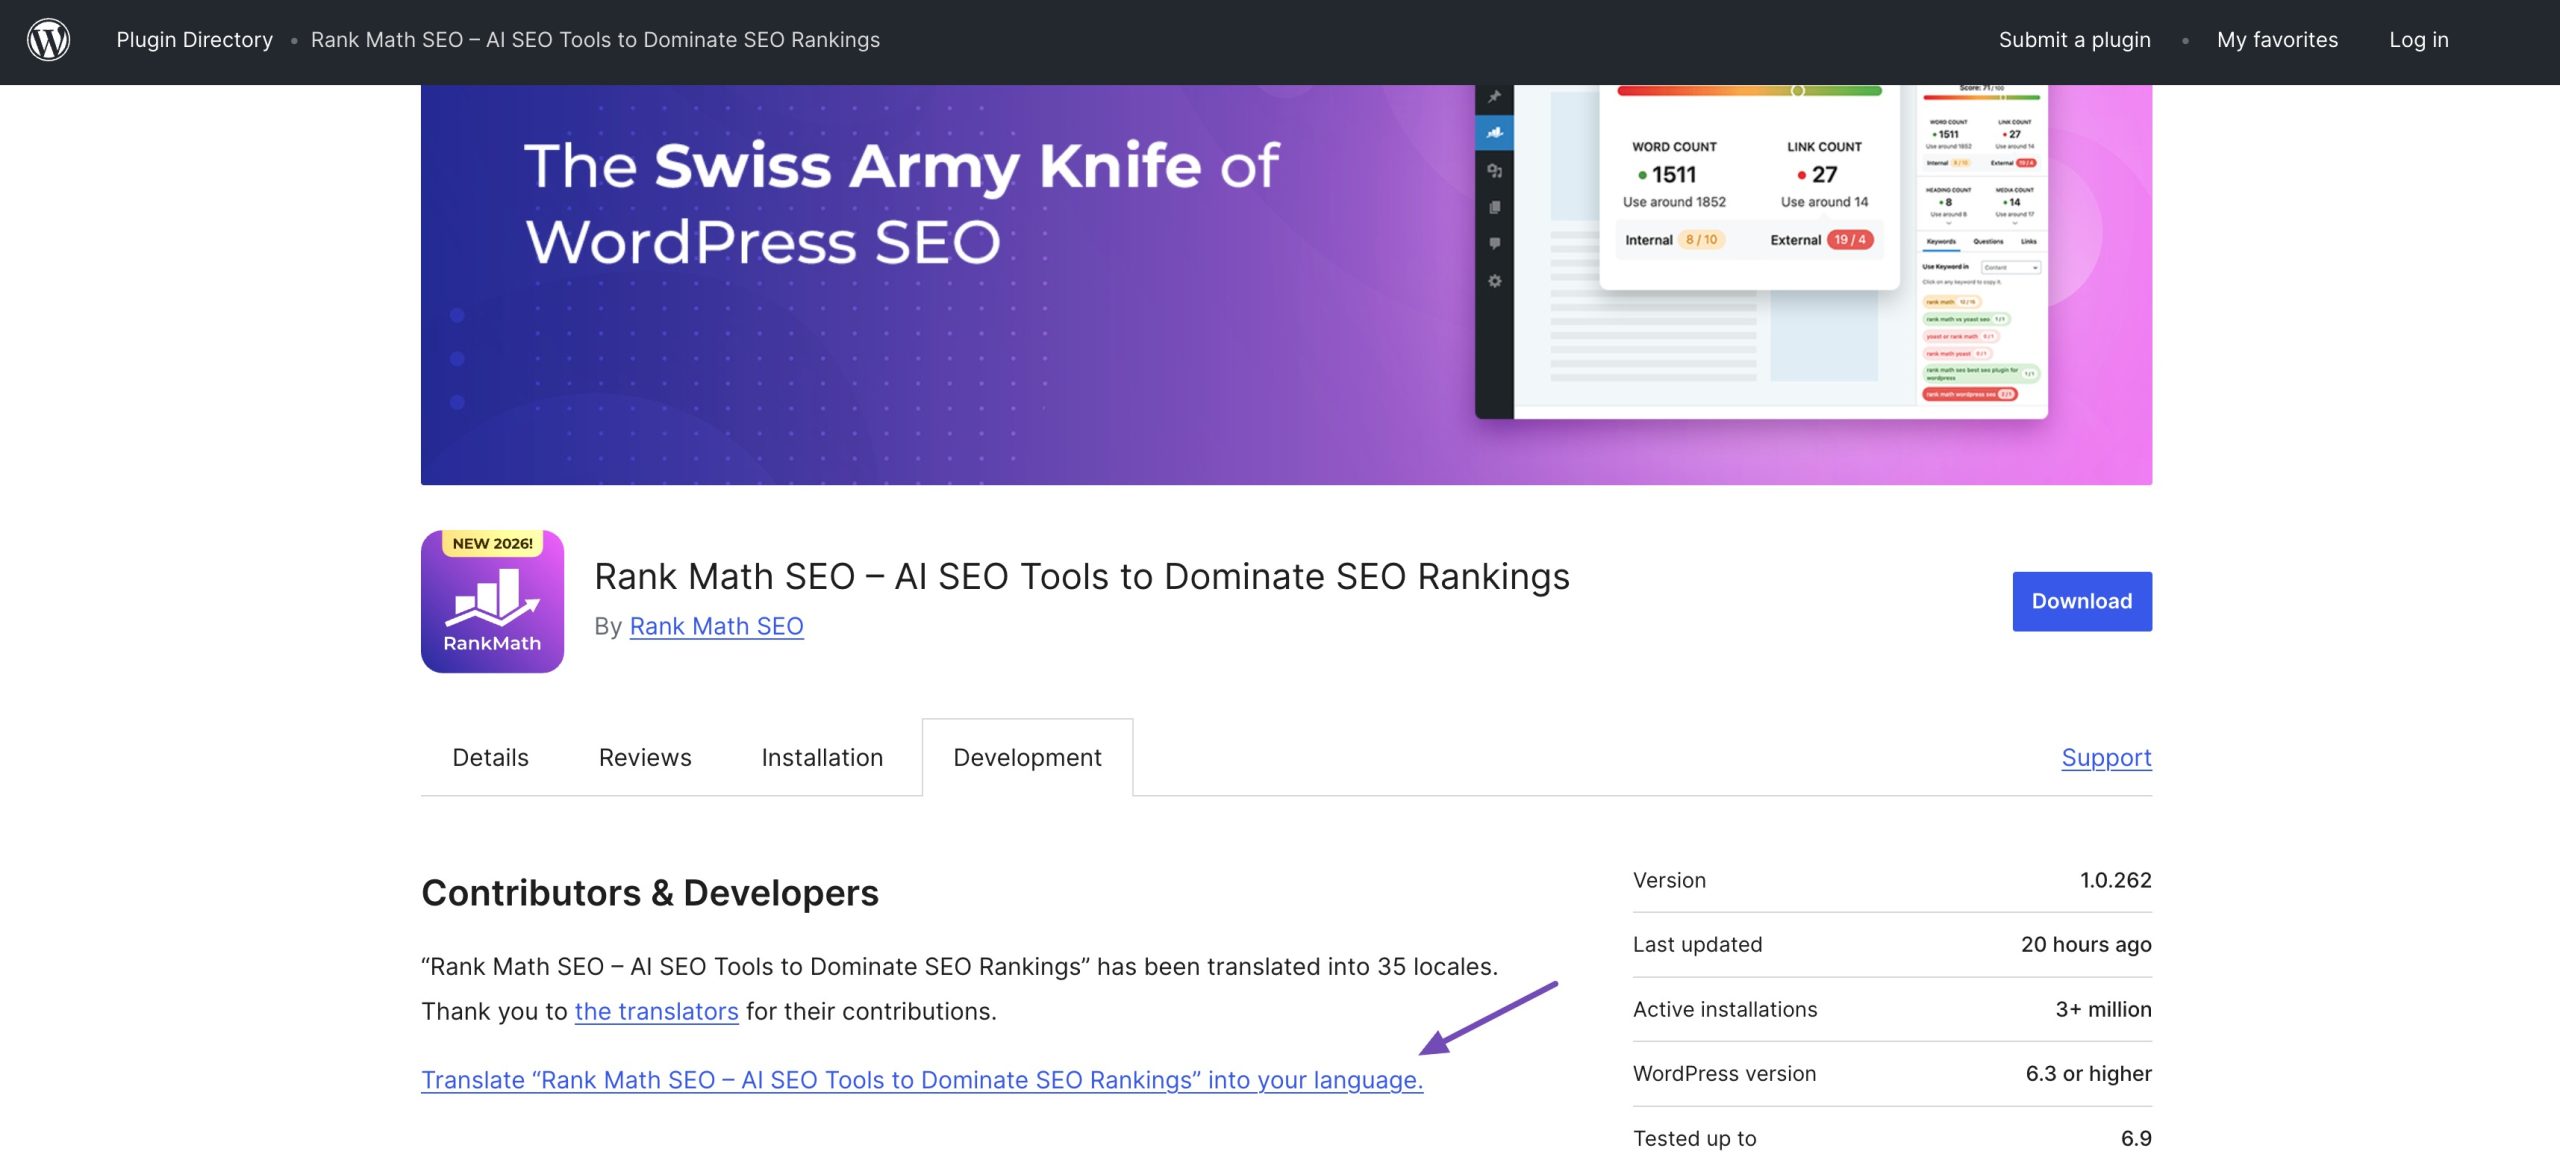
To do so, start by navigating to the respective plugin’s page, for instance, Rank Math, on the WordPress.org site. Once you’re on the page, navigate to the Development tab at the top, as shown below.
You’ll notice a link asking you to contribute to translating the plugin into your language here. You can click on it to start contributing to the plugin translation.
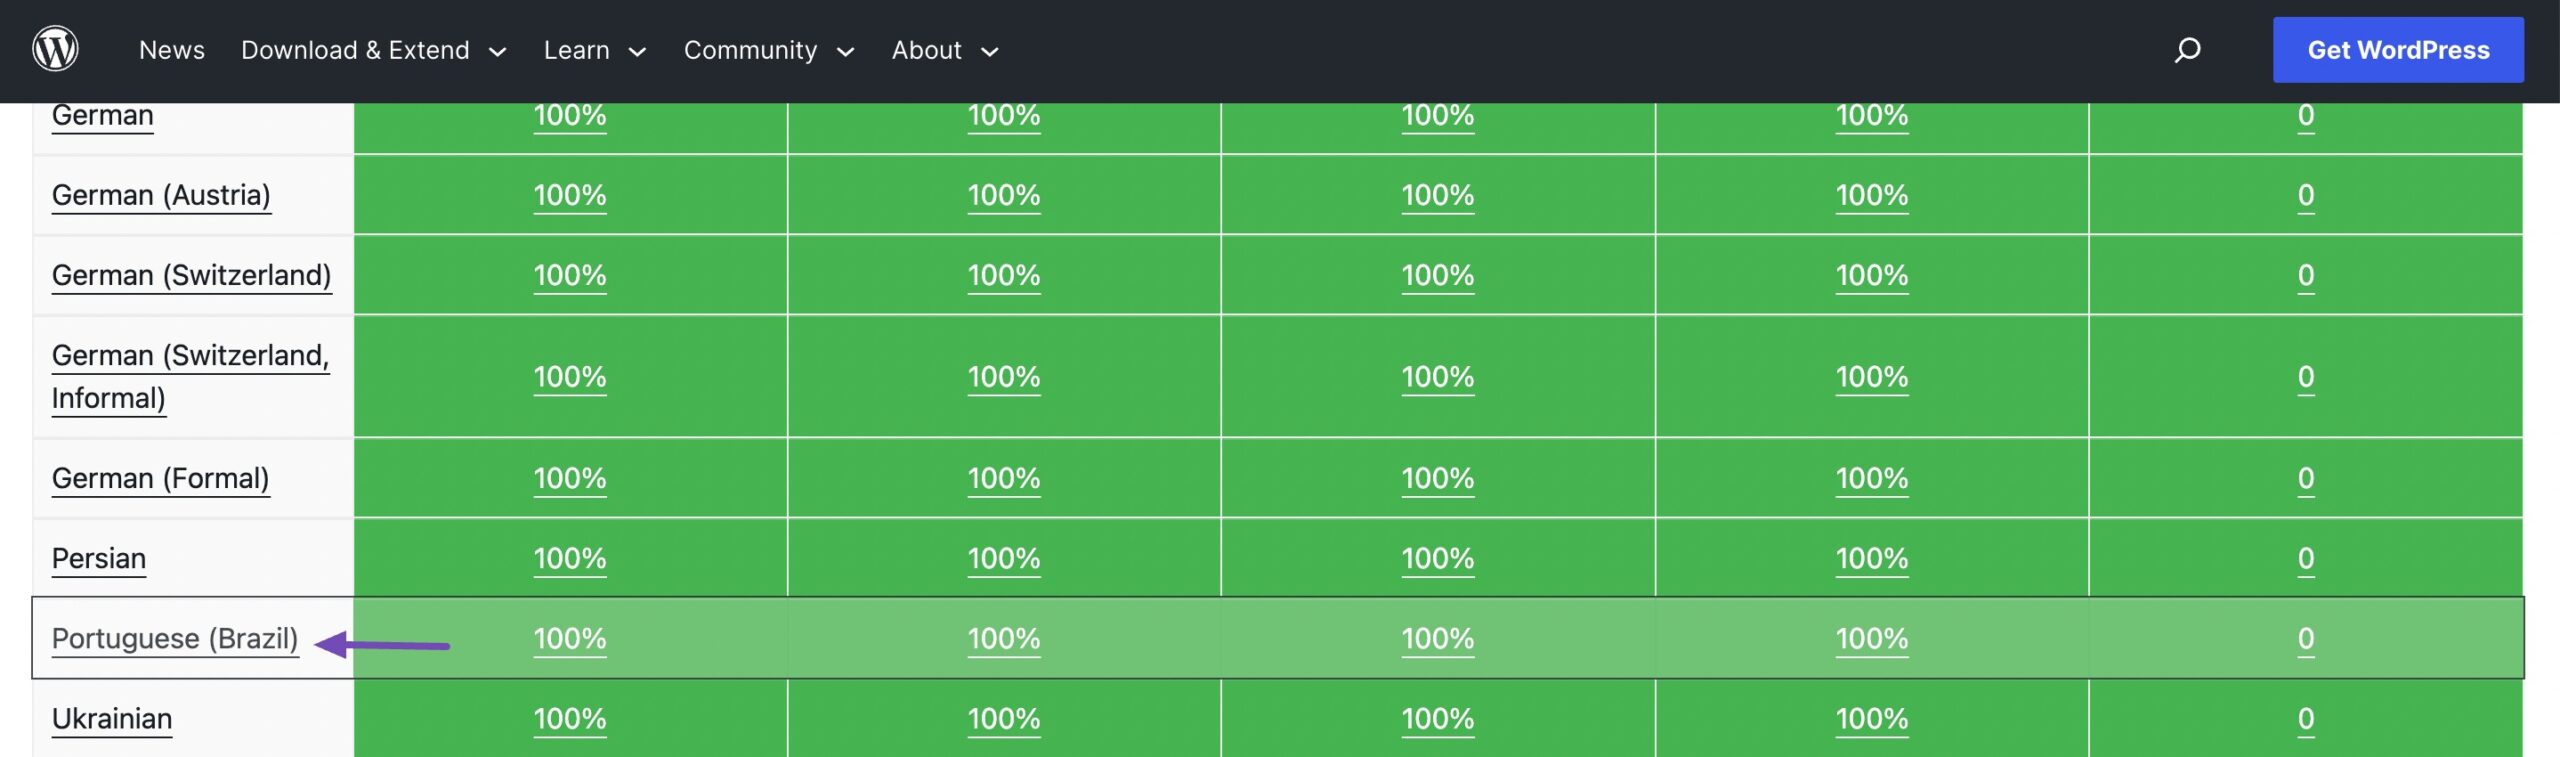
Once there, you’ll see a list of languages on the screen. From here, find your language and click on it.
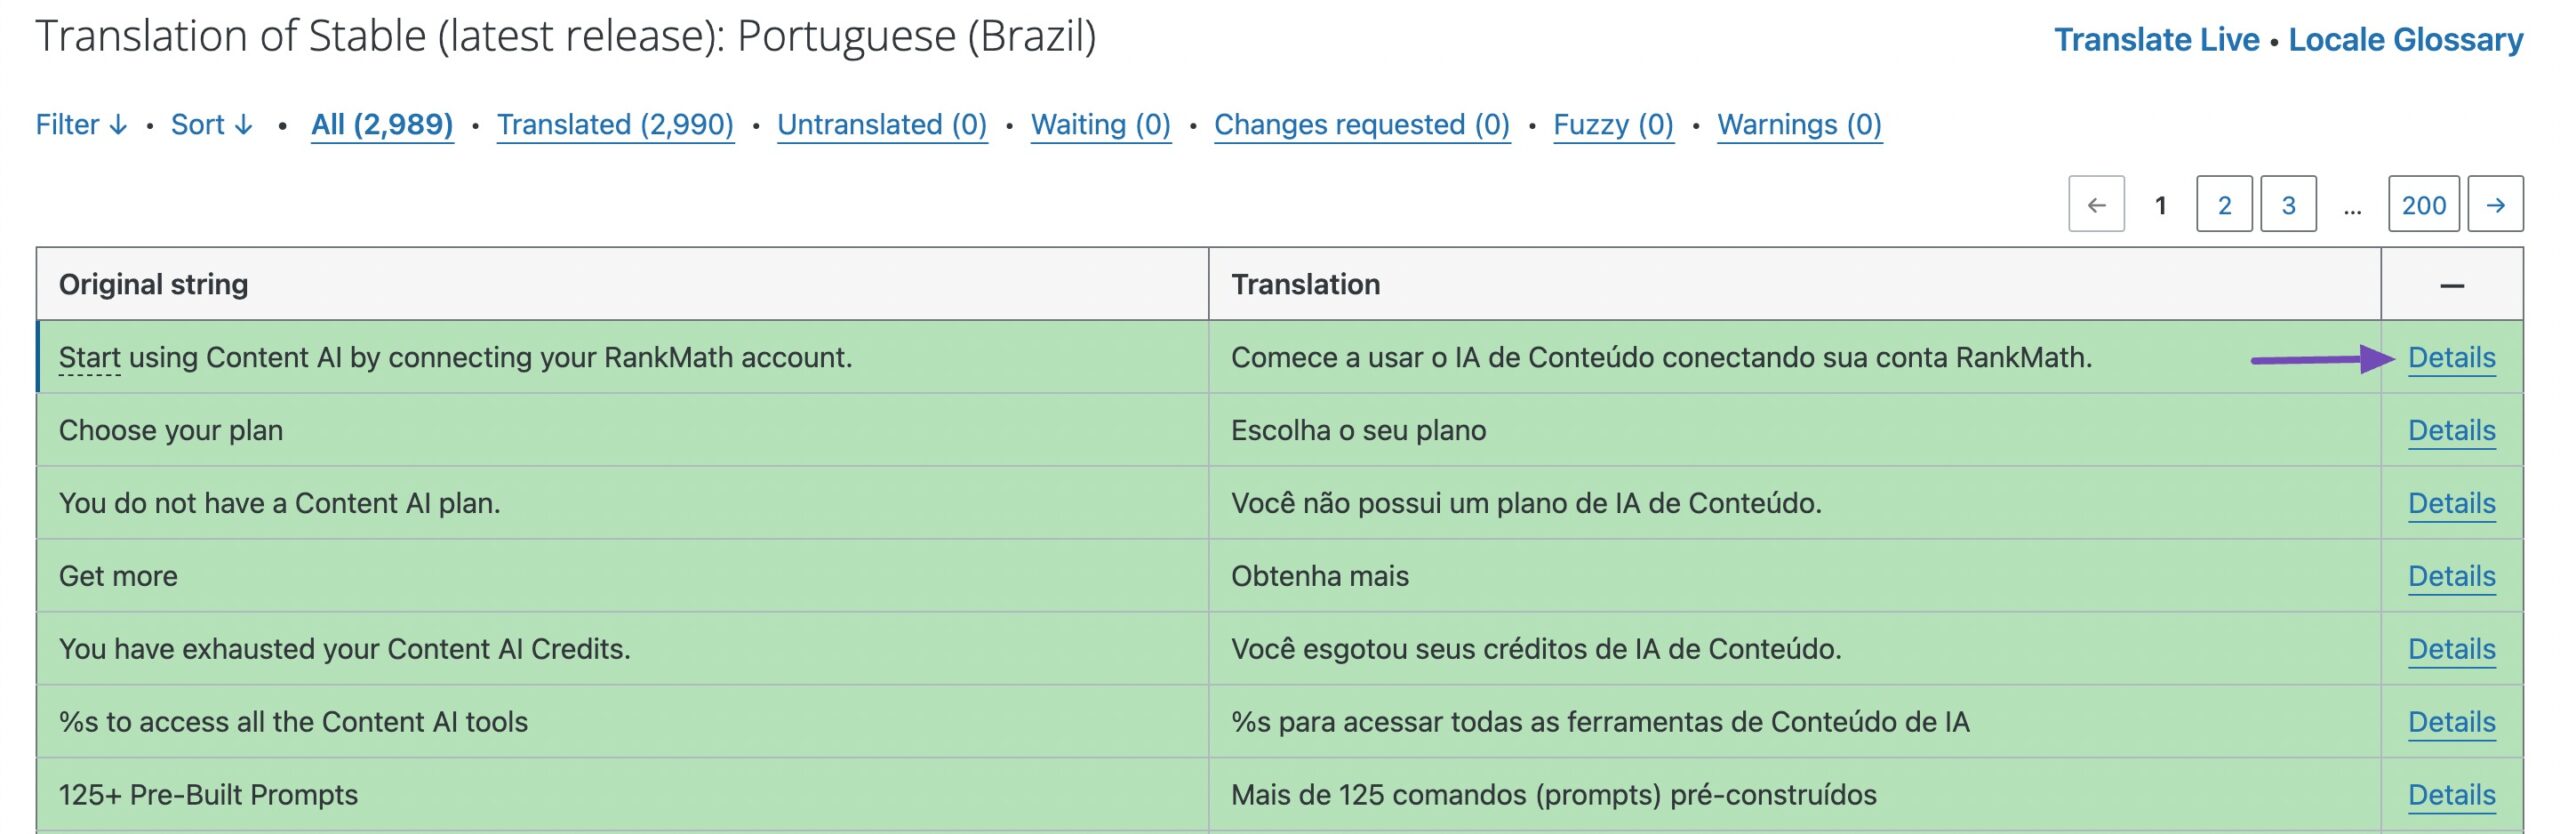
You’ll now be directed to Rank Math’s translation page, where you must select the Stable (latest release) sub-project, as shown below.

If you’re looking to translate the plugin’s development or readme files, you can choose those sub-projects from the list instead.
You’ll now be directed to a new page where you’ll see the original strings in one column and the translations in another. Click the Details link in the right column to open up the string you wish to translate.
Note that you’ll have to log in to your WordPress.org account to contribute translations.
Once done, you’ll see a text box where you can enter the translation for the original text. When you’re finished, click the Suggest button to submit your translations.

2.2 Translate Using the Loco Translate Plugin
Loco Translate is your go-to tool for effortlessly translating plugins only on your individual WordPress website. It simplifies the process, ensures up-to-date translations, and lets you collaborate seamlessly within your team.
So, if you’re ready to break language barriers and create a multilingual online heaven, Loco Translate is your trusty sidekick.
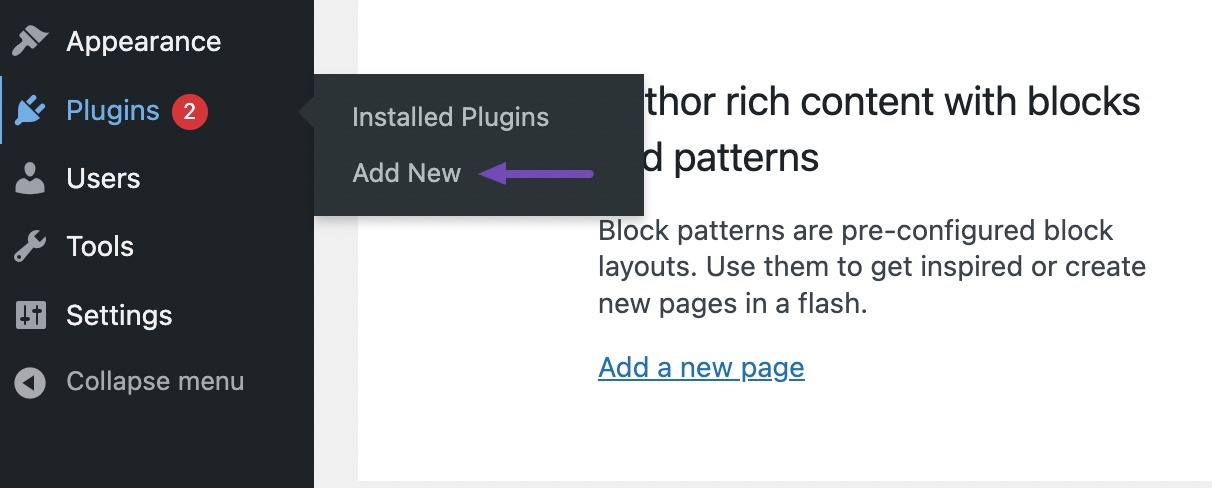
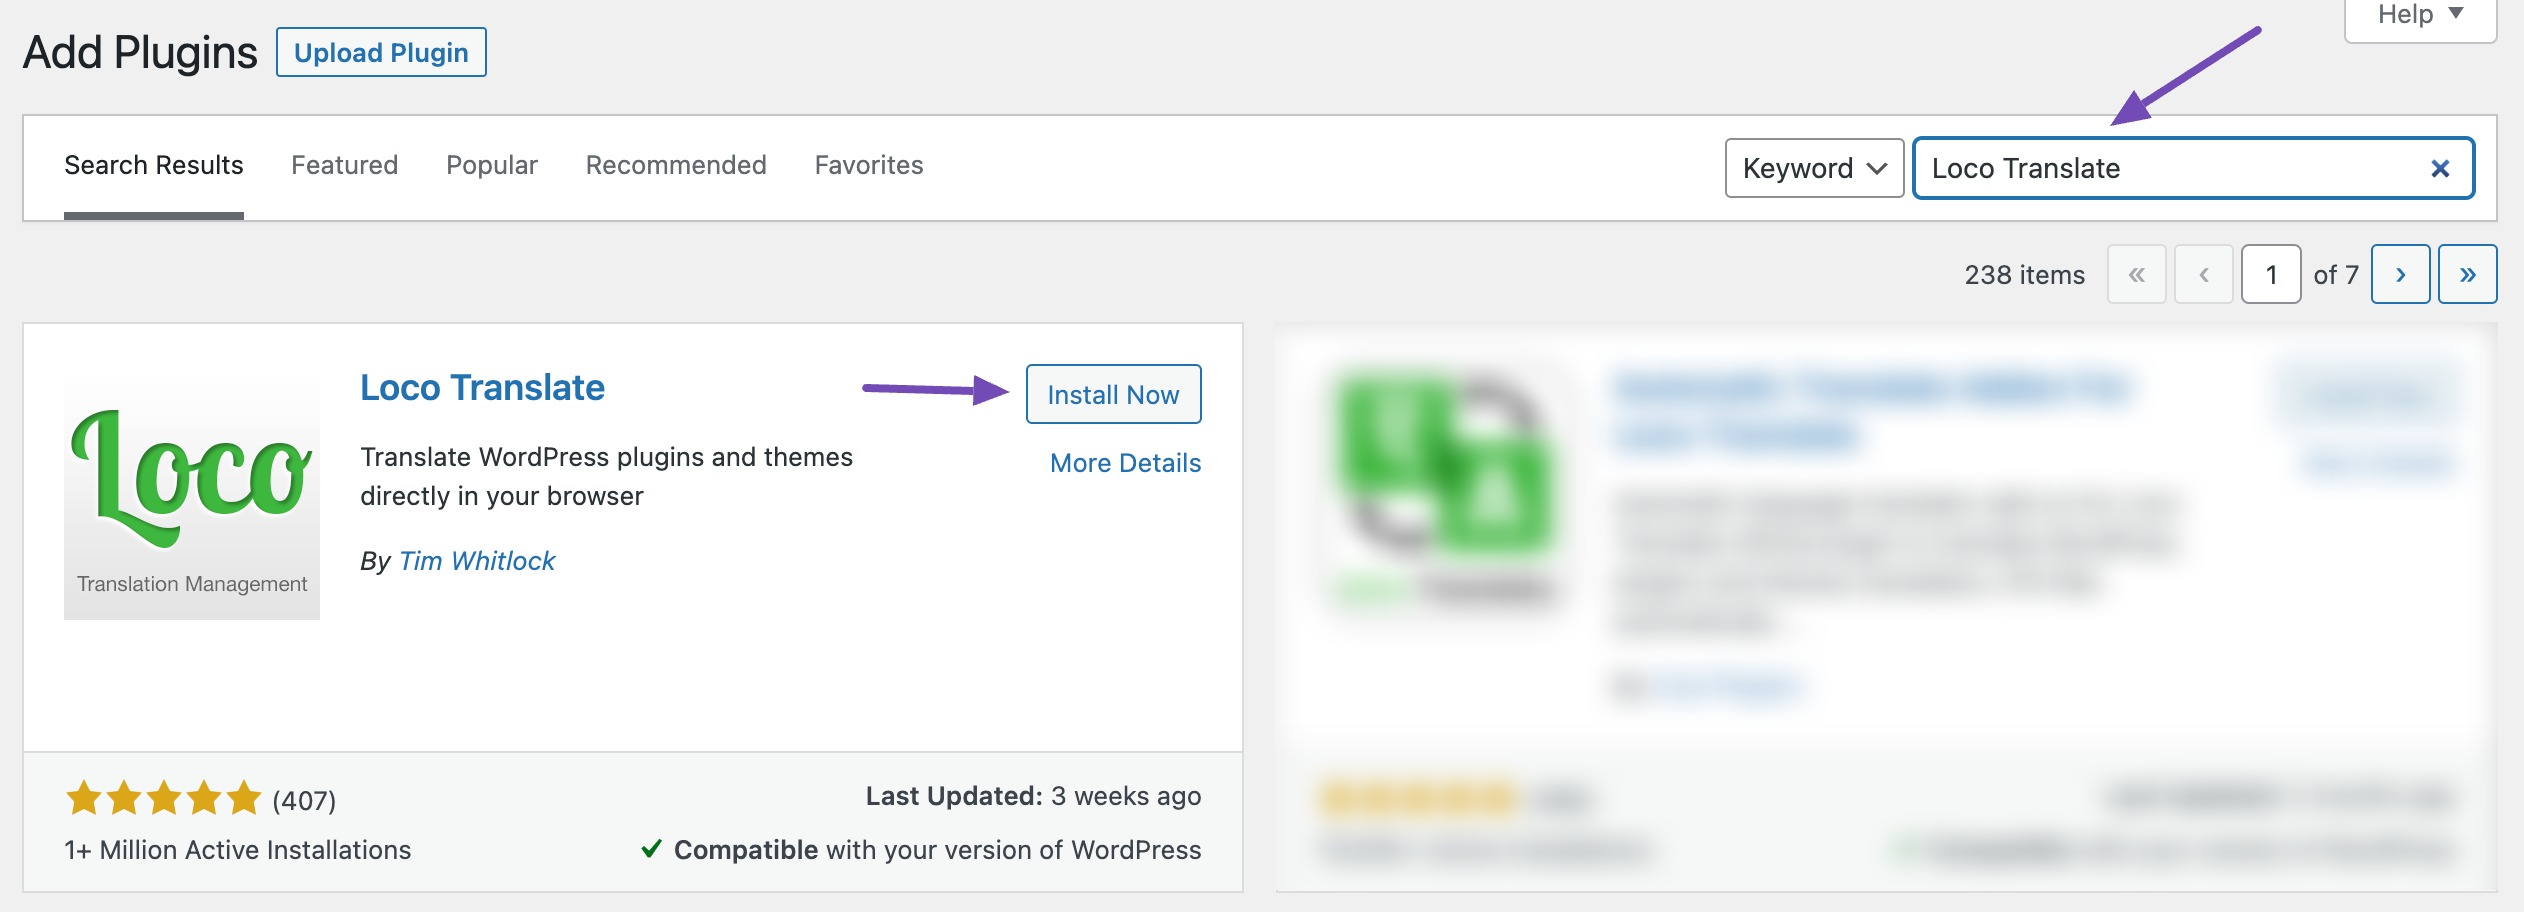
First, install and activate the Loco Translate plugin on your website. To do so, navigate to Plugins → Add New section from your WordPress dashboard. Refer to our dedicated tutorial on installing WordPress plugins.
Next, look for the Loco Translate plugin in the search bar, and install and activate the plugin.
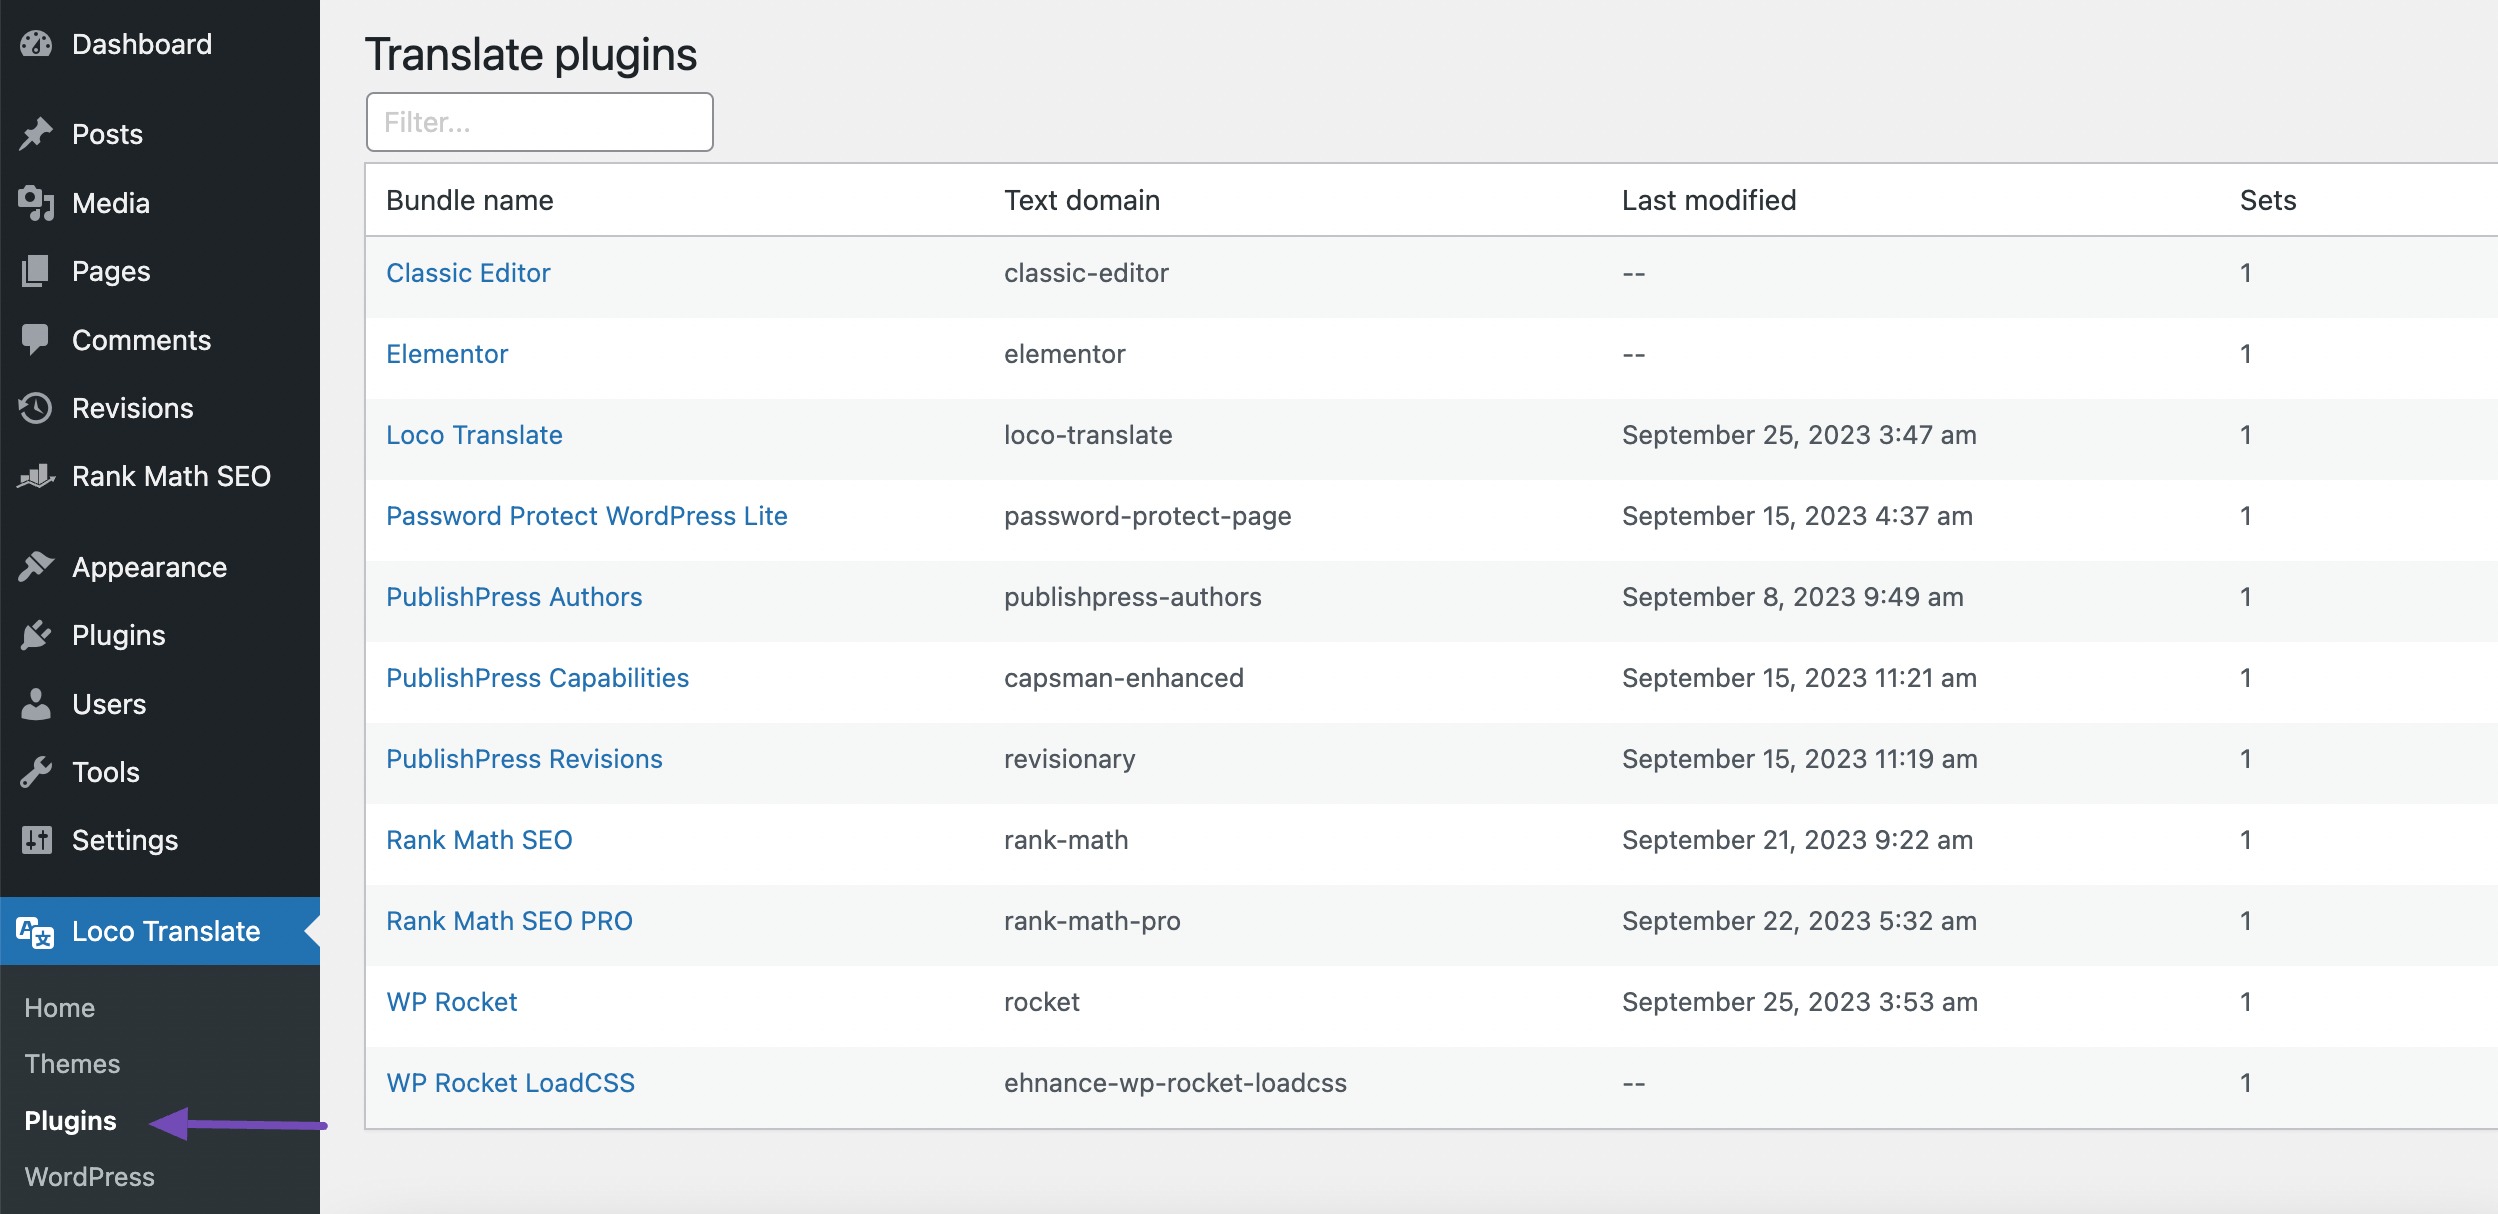
Upon activation, navigate to the WordPress dashboard’s Loco Translate → Plugins page. Here, you’ll see a list of plugins installed on your website. Next, select the plugin you wish to translate.
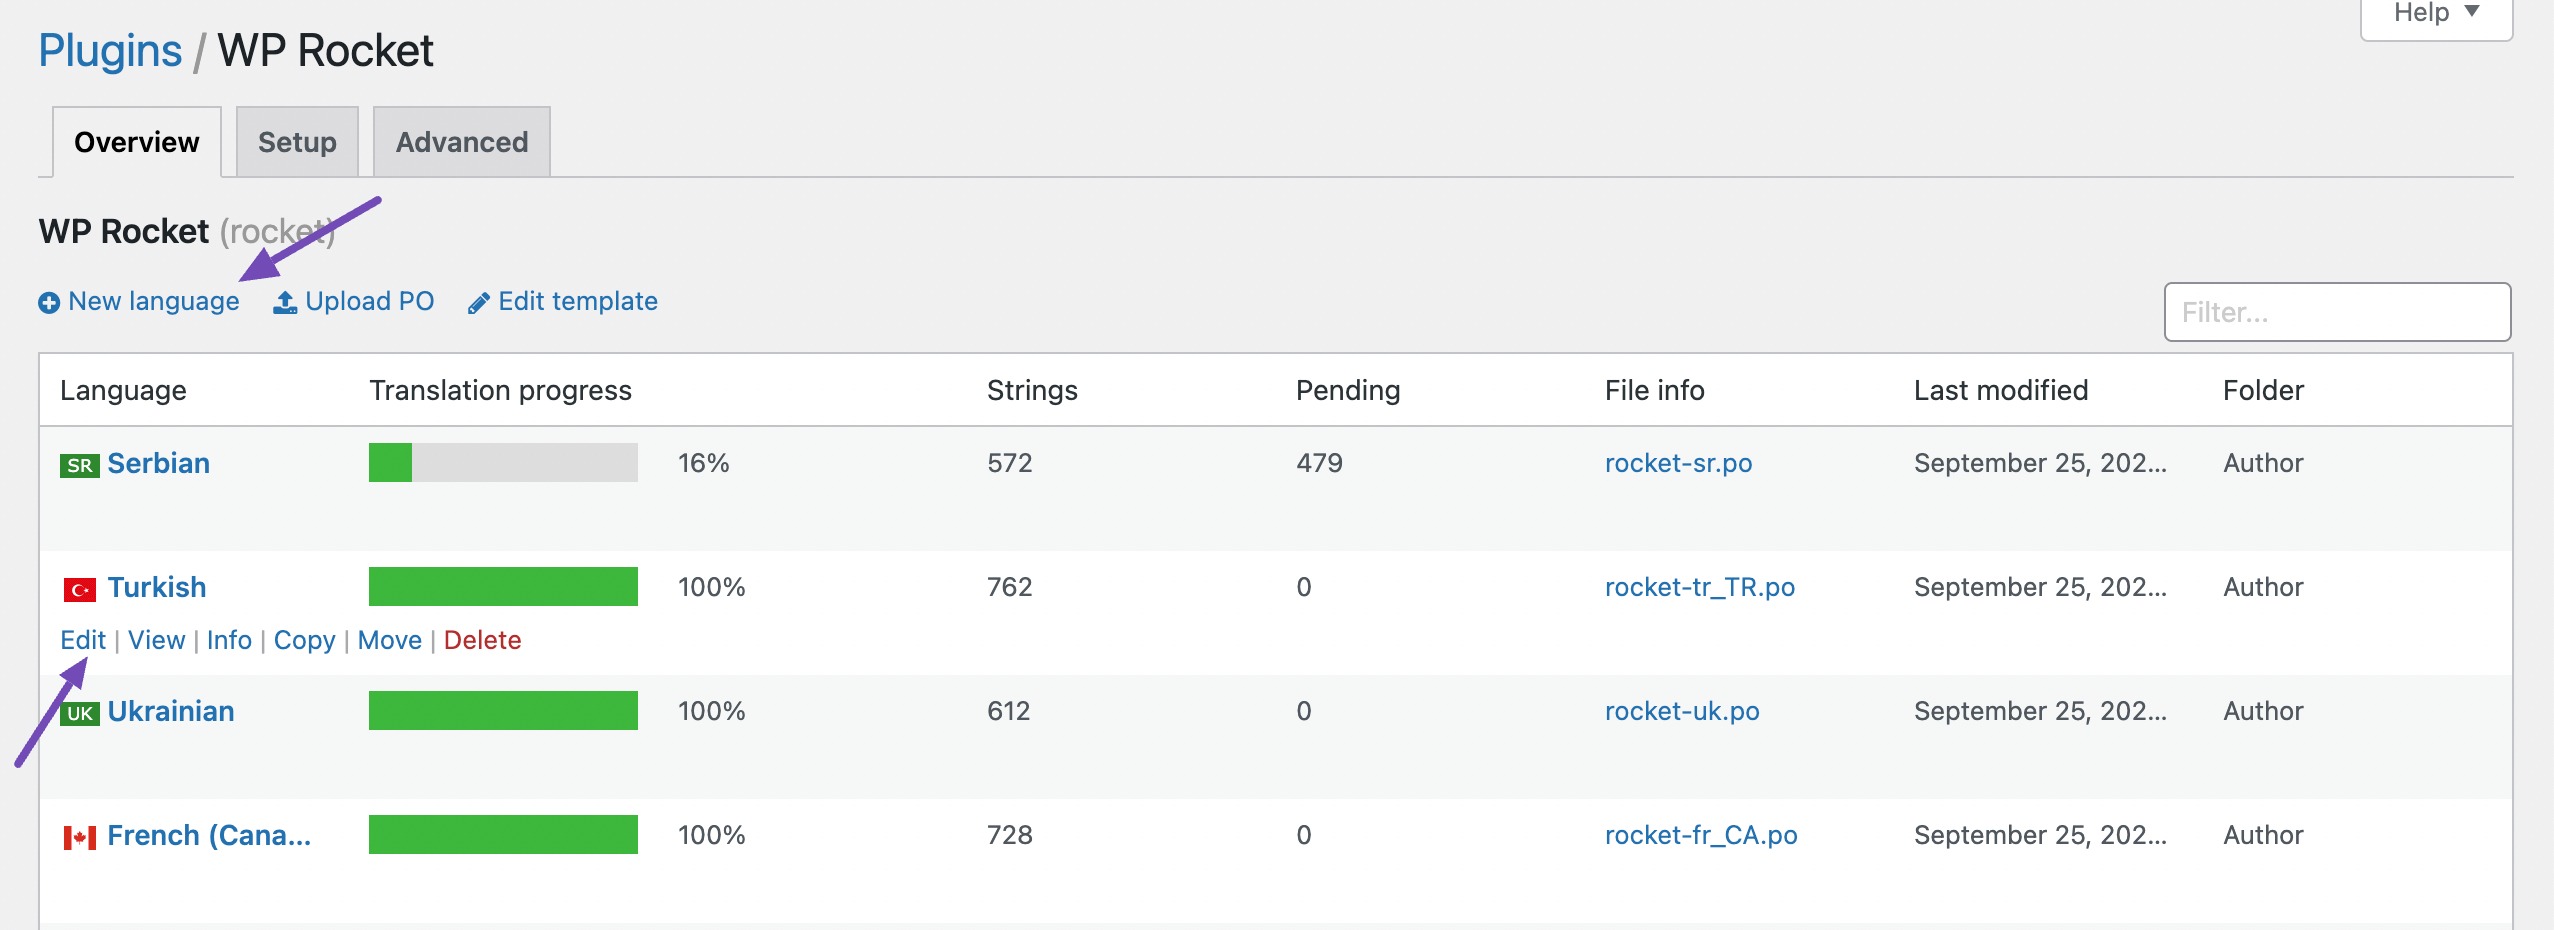
You’ll see a list of languages available for the plugin and the translation progress status for each language. If the language you want to translate the plugin into is listed there, click the Edit link under it.
If not, then click the New language option at the top.
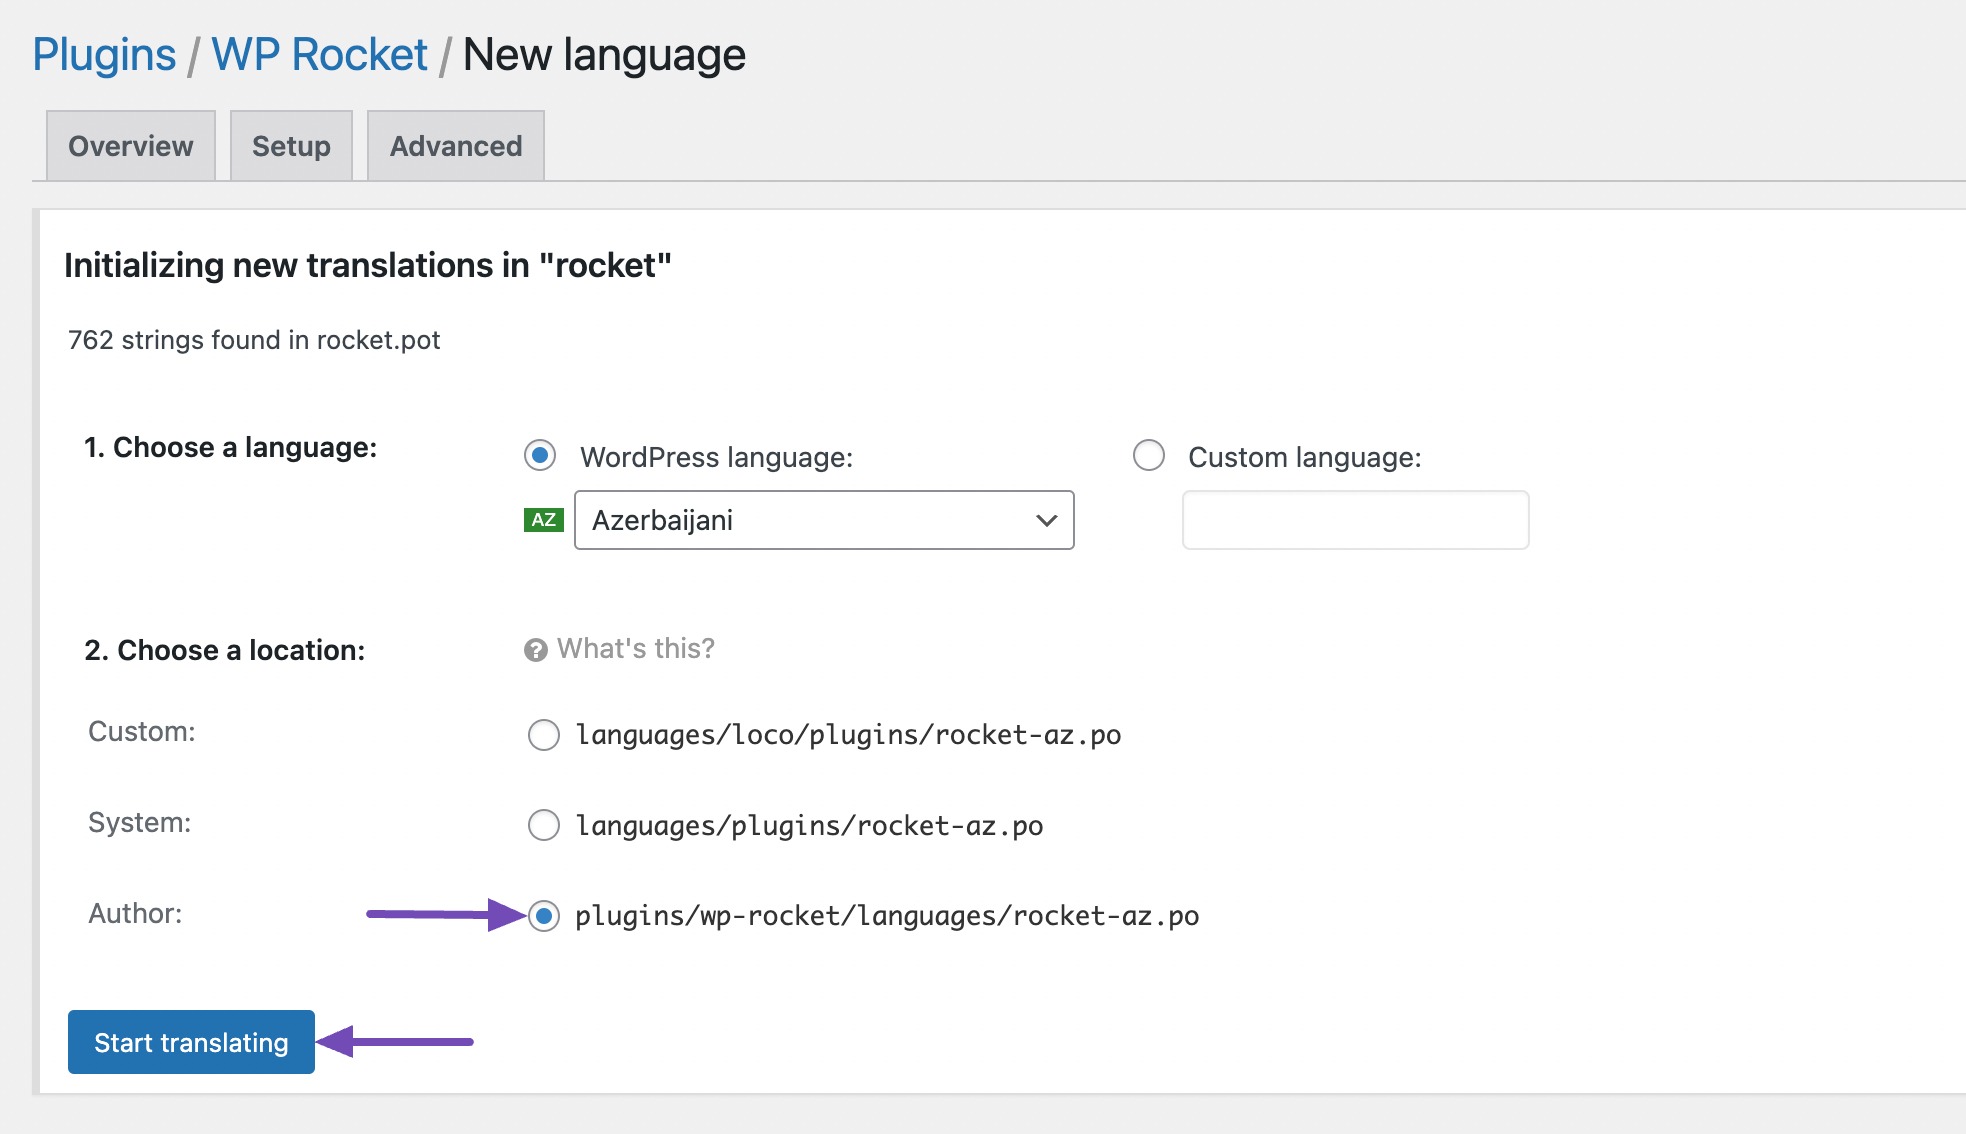
You’ll be directed to a new page where you can start by selecting a language. In the Choose a language option, select the WordPress language and choose your language from the dropdown menu under it, as shown below.
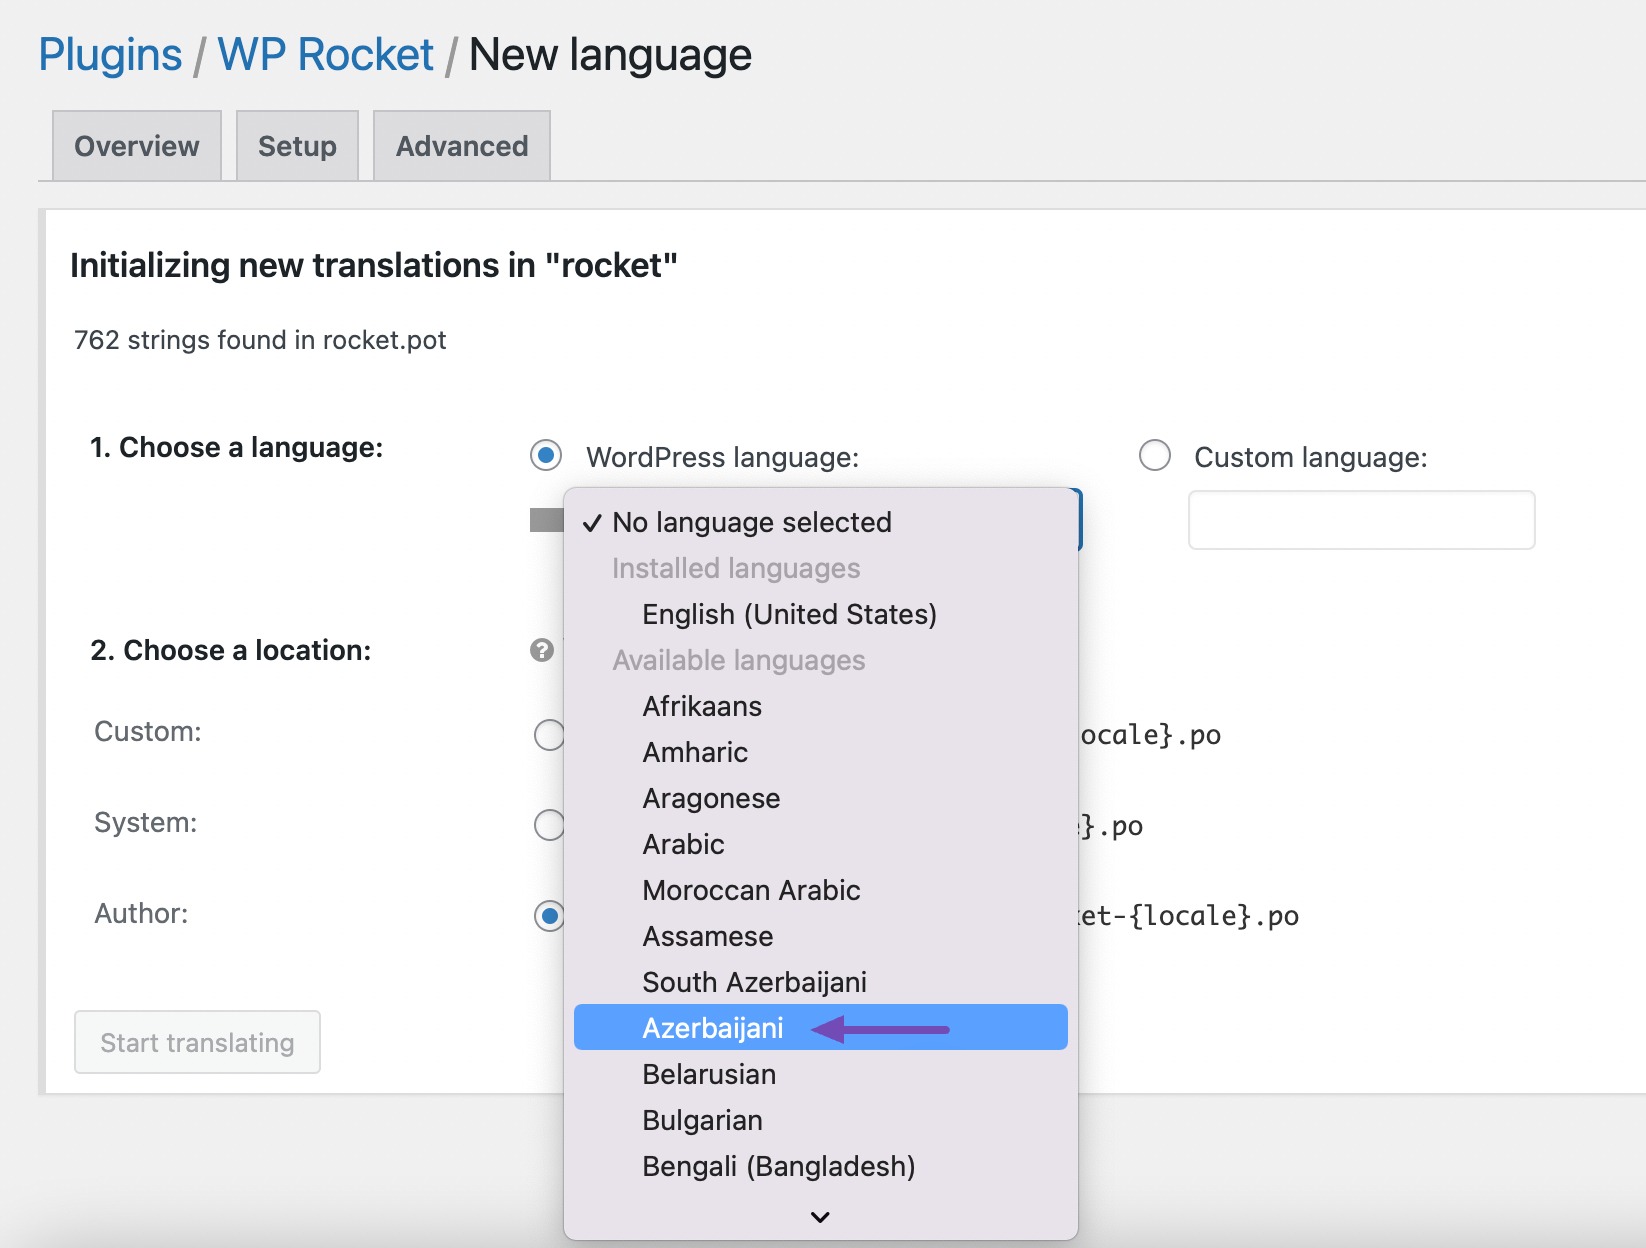
If you do not wish to use a WordPress language, select the Custom Language option.
Next, choose where you wish to store the translation files. Loco Translate will recommend saving the translation files in its own folder by default.
However, you can easily change this to save the files in WordPress or the plugin’s languages folder. Once done, click the Start translating button to continue.
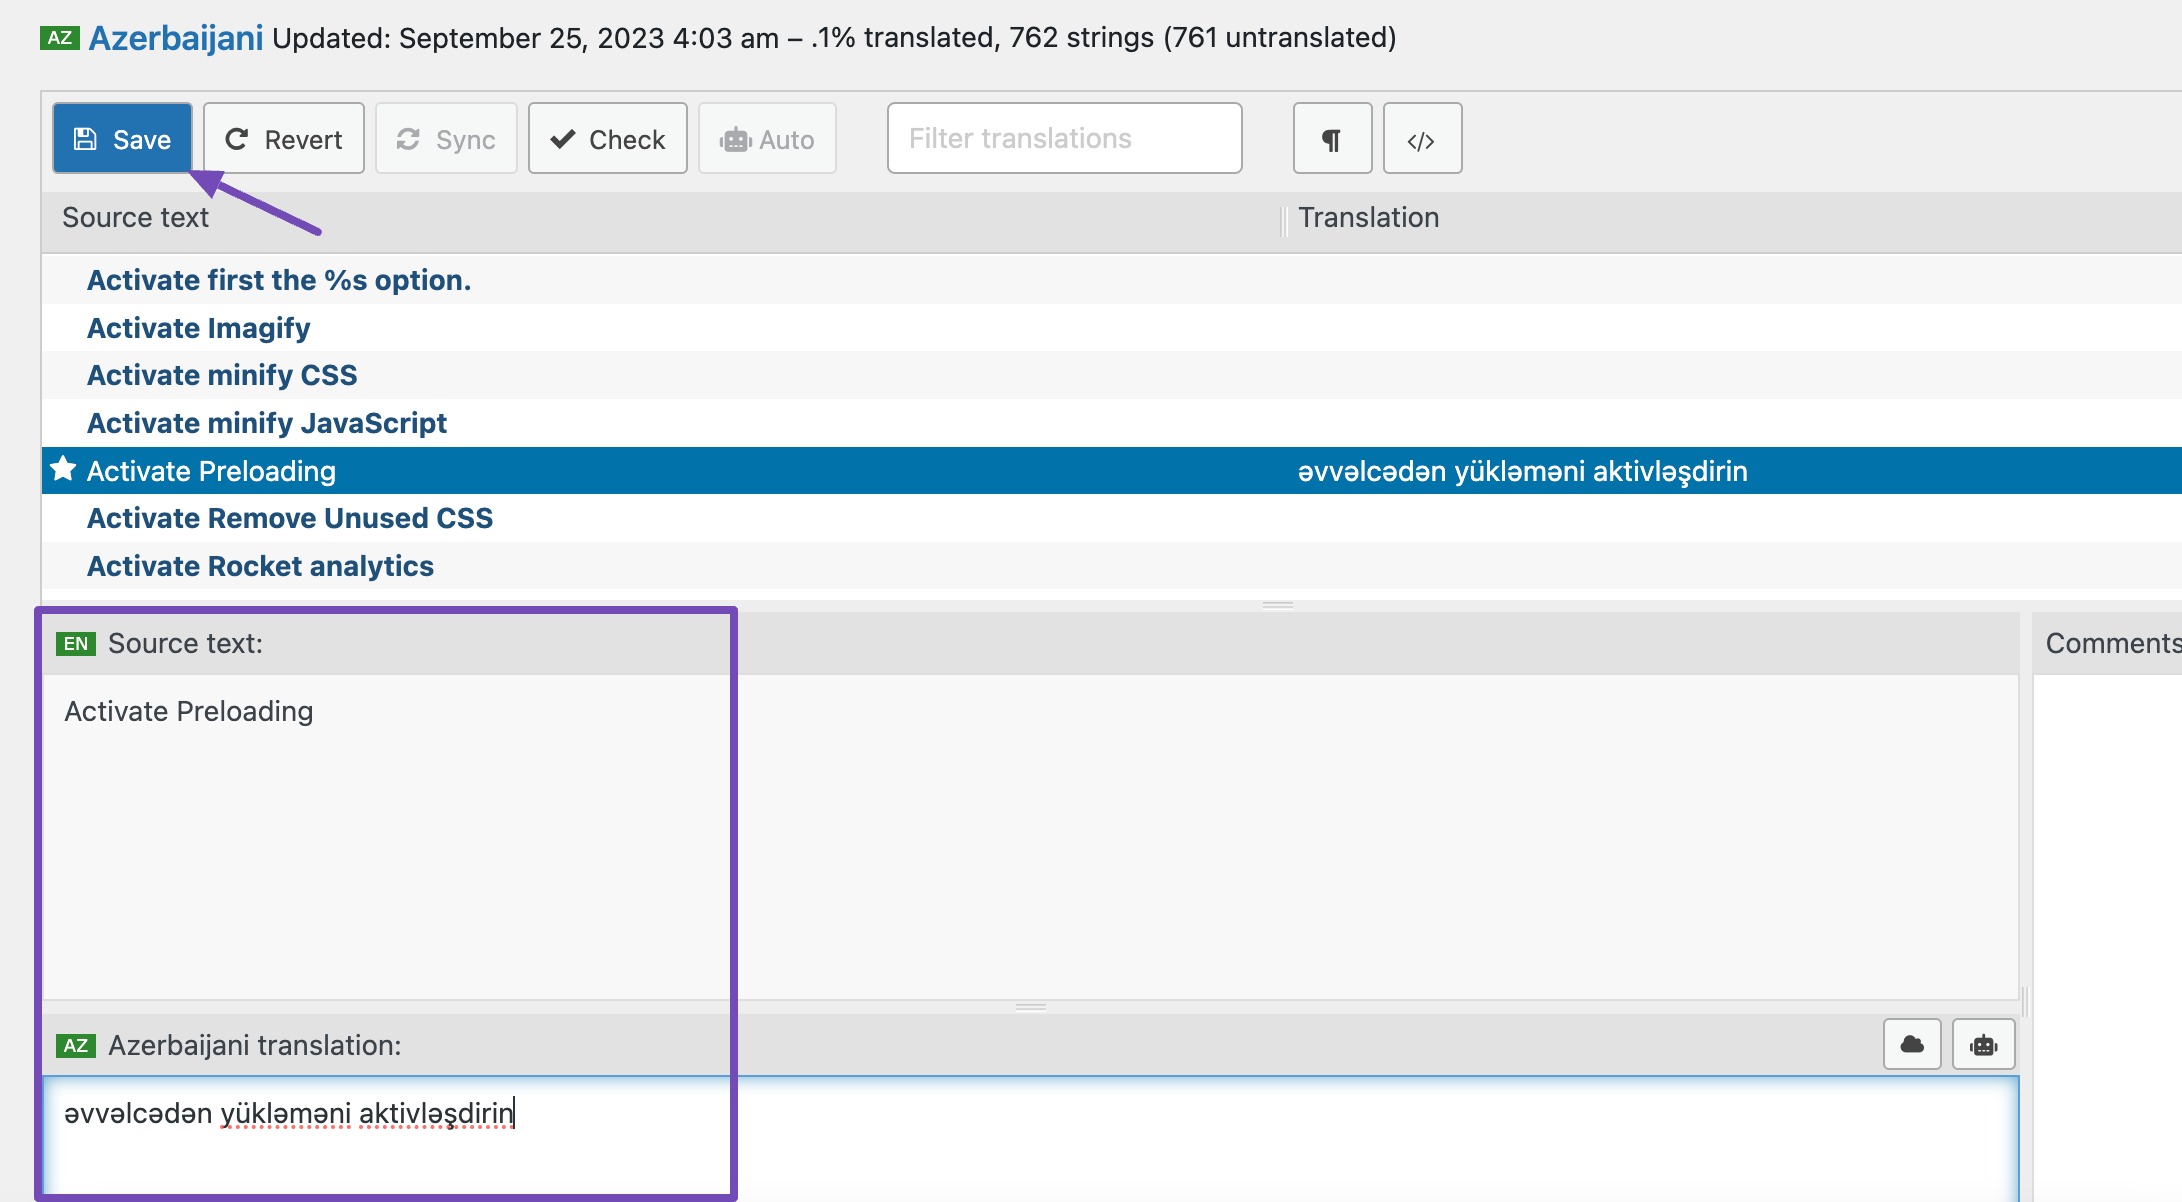
You can start by adding a translation for the source string and then select the next one to translate.
Once done, click the Save button to save your settings.
2.3 Translate WordPress Plugins Using Poedit
Ever heard of Poedit? It’s like a secret language decoder for your WordPress plugins.
For instance, if you have a restaurant website with a plugin that displays customer reviews. Using Poedit, you can translate “Leave a Review” to “Dejar un comentario” for your Spanish-speaking customers. No coding hassle – just smooth translation.
Before you begin with the translation, you must have the following:
- .POT file.
- A free version of Poedit software.
To begin with, download the plugin you want to translate on your computer. Next, to extract the zip file, double-click on it.
Once done, open the plugin’s folder and click on the languages folder.
You’ll find a .pot file in this folder. This file is the template for translation that you’ll use to translate the plugin.
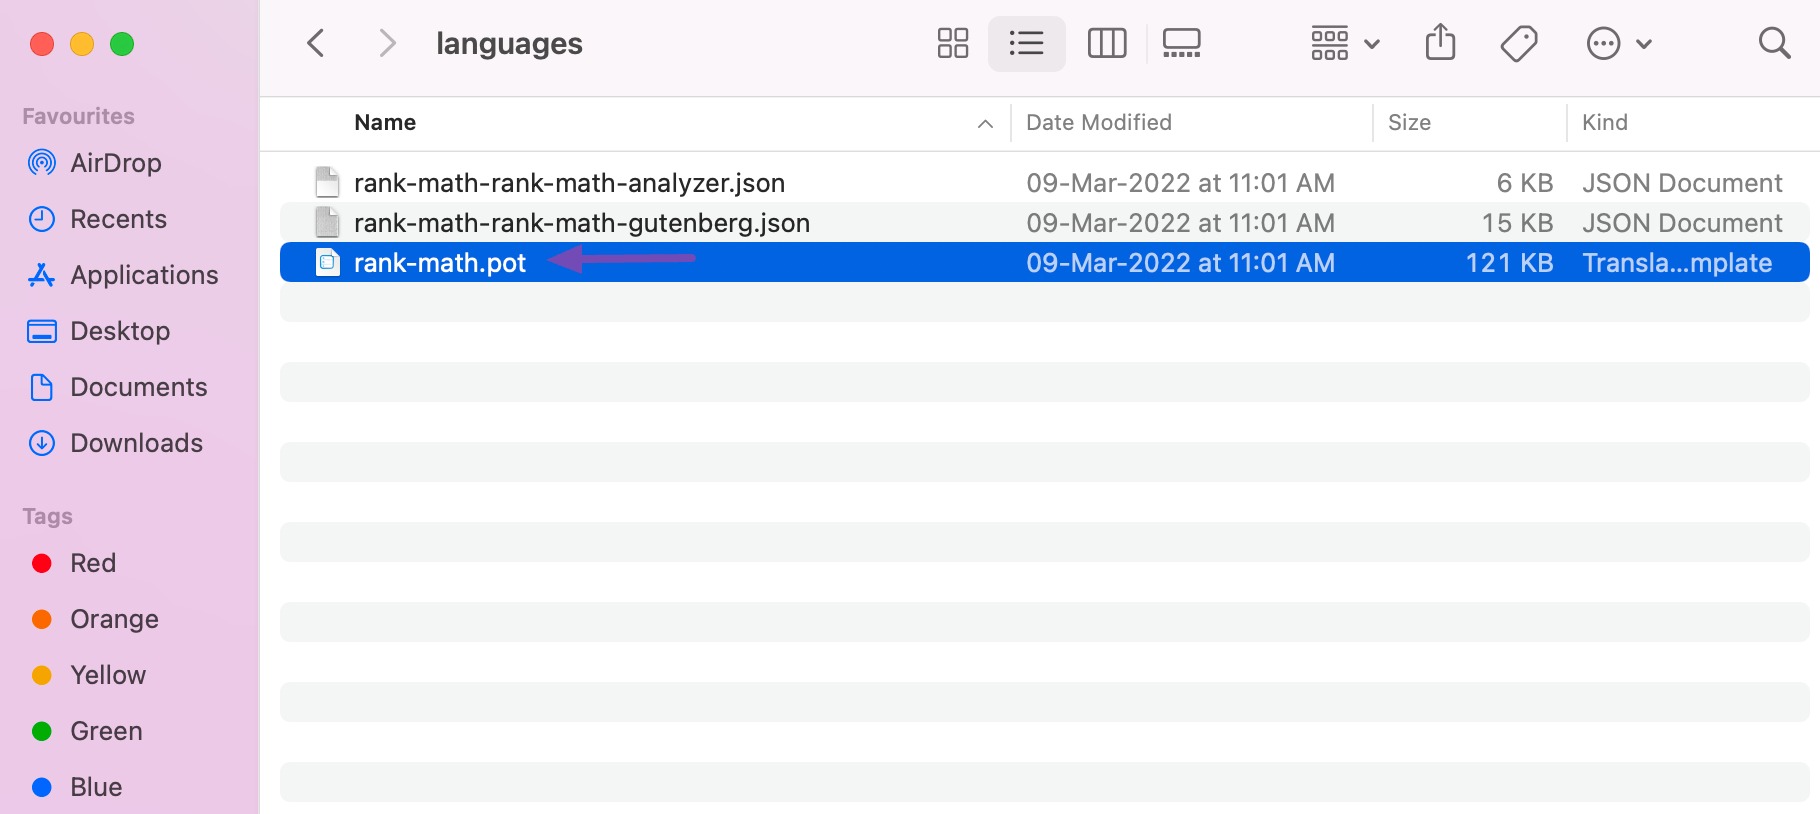
If you can’t find a .pot file or a languages folder within the plugin, chances are it’s not set up for translation.
If this is the case, consider contacting the plugin author and checking if they have any plans for their plugin translation. Once you obtain the .pot file, you can translate the plugin into any preferred language.
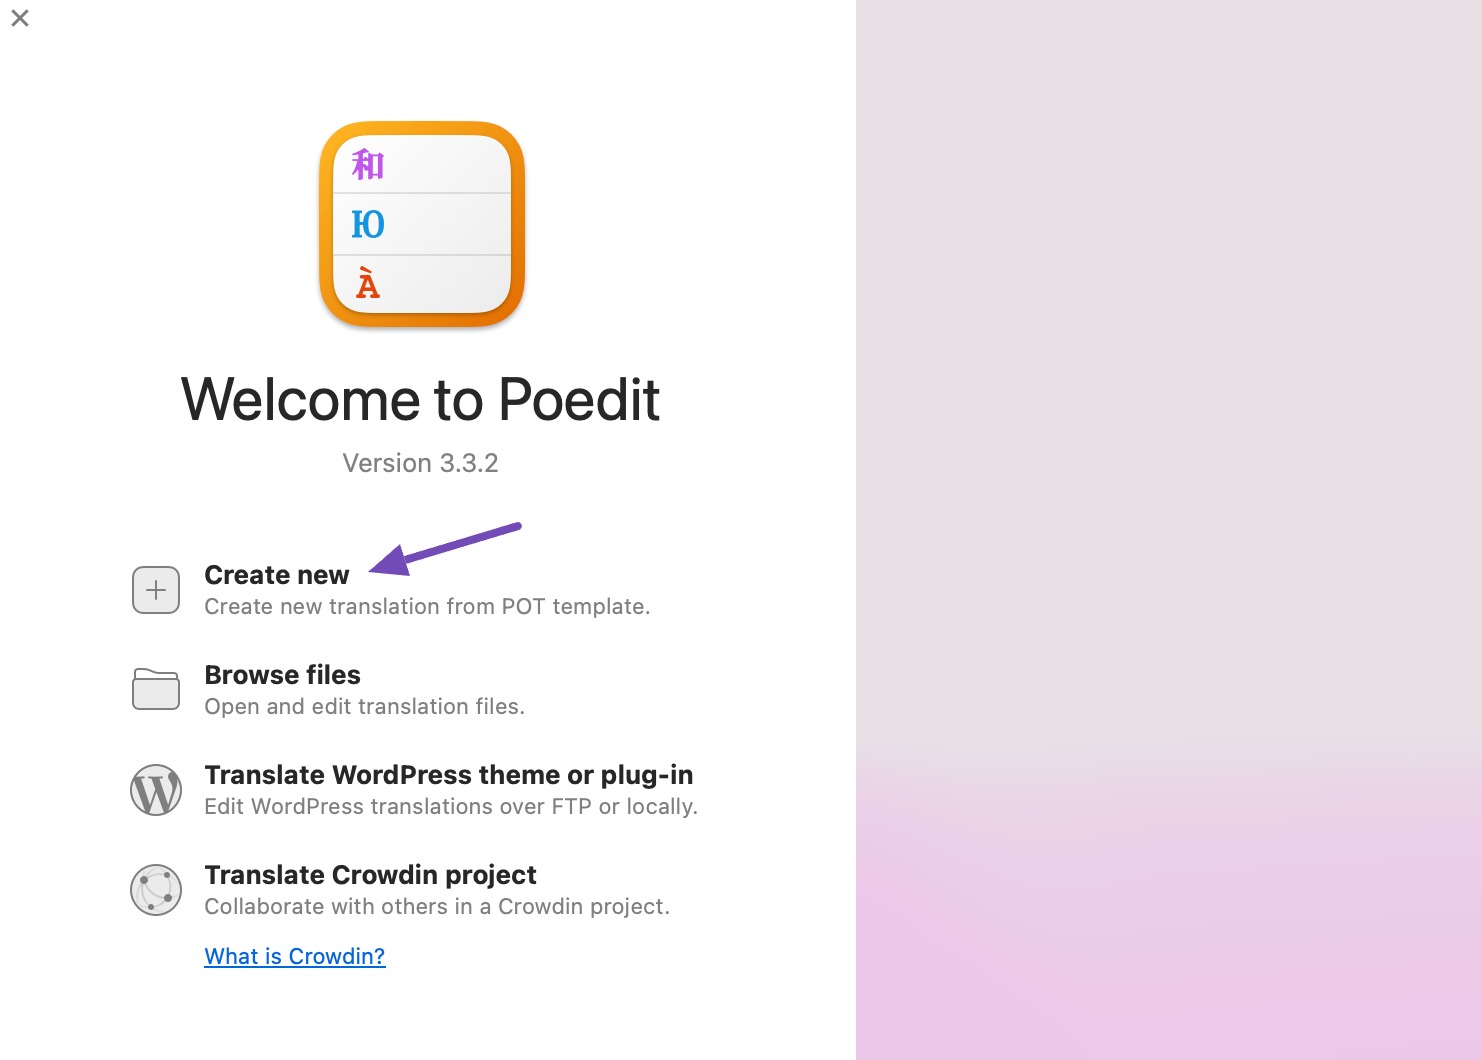
Next, download and install the Poedit app on your computer, a free translation app for Mac and Windows.
Once the app is installed on your computer, launch the app and click the Create new option, as shown below.
Select the .pot file for the plugin you want to translate from your computer’s File Manager.
Once done, choose a language for translation from the dropdown menu in the Poedit app, as shown below.
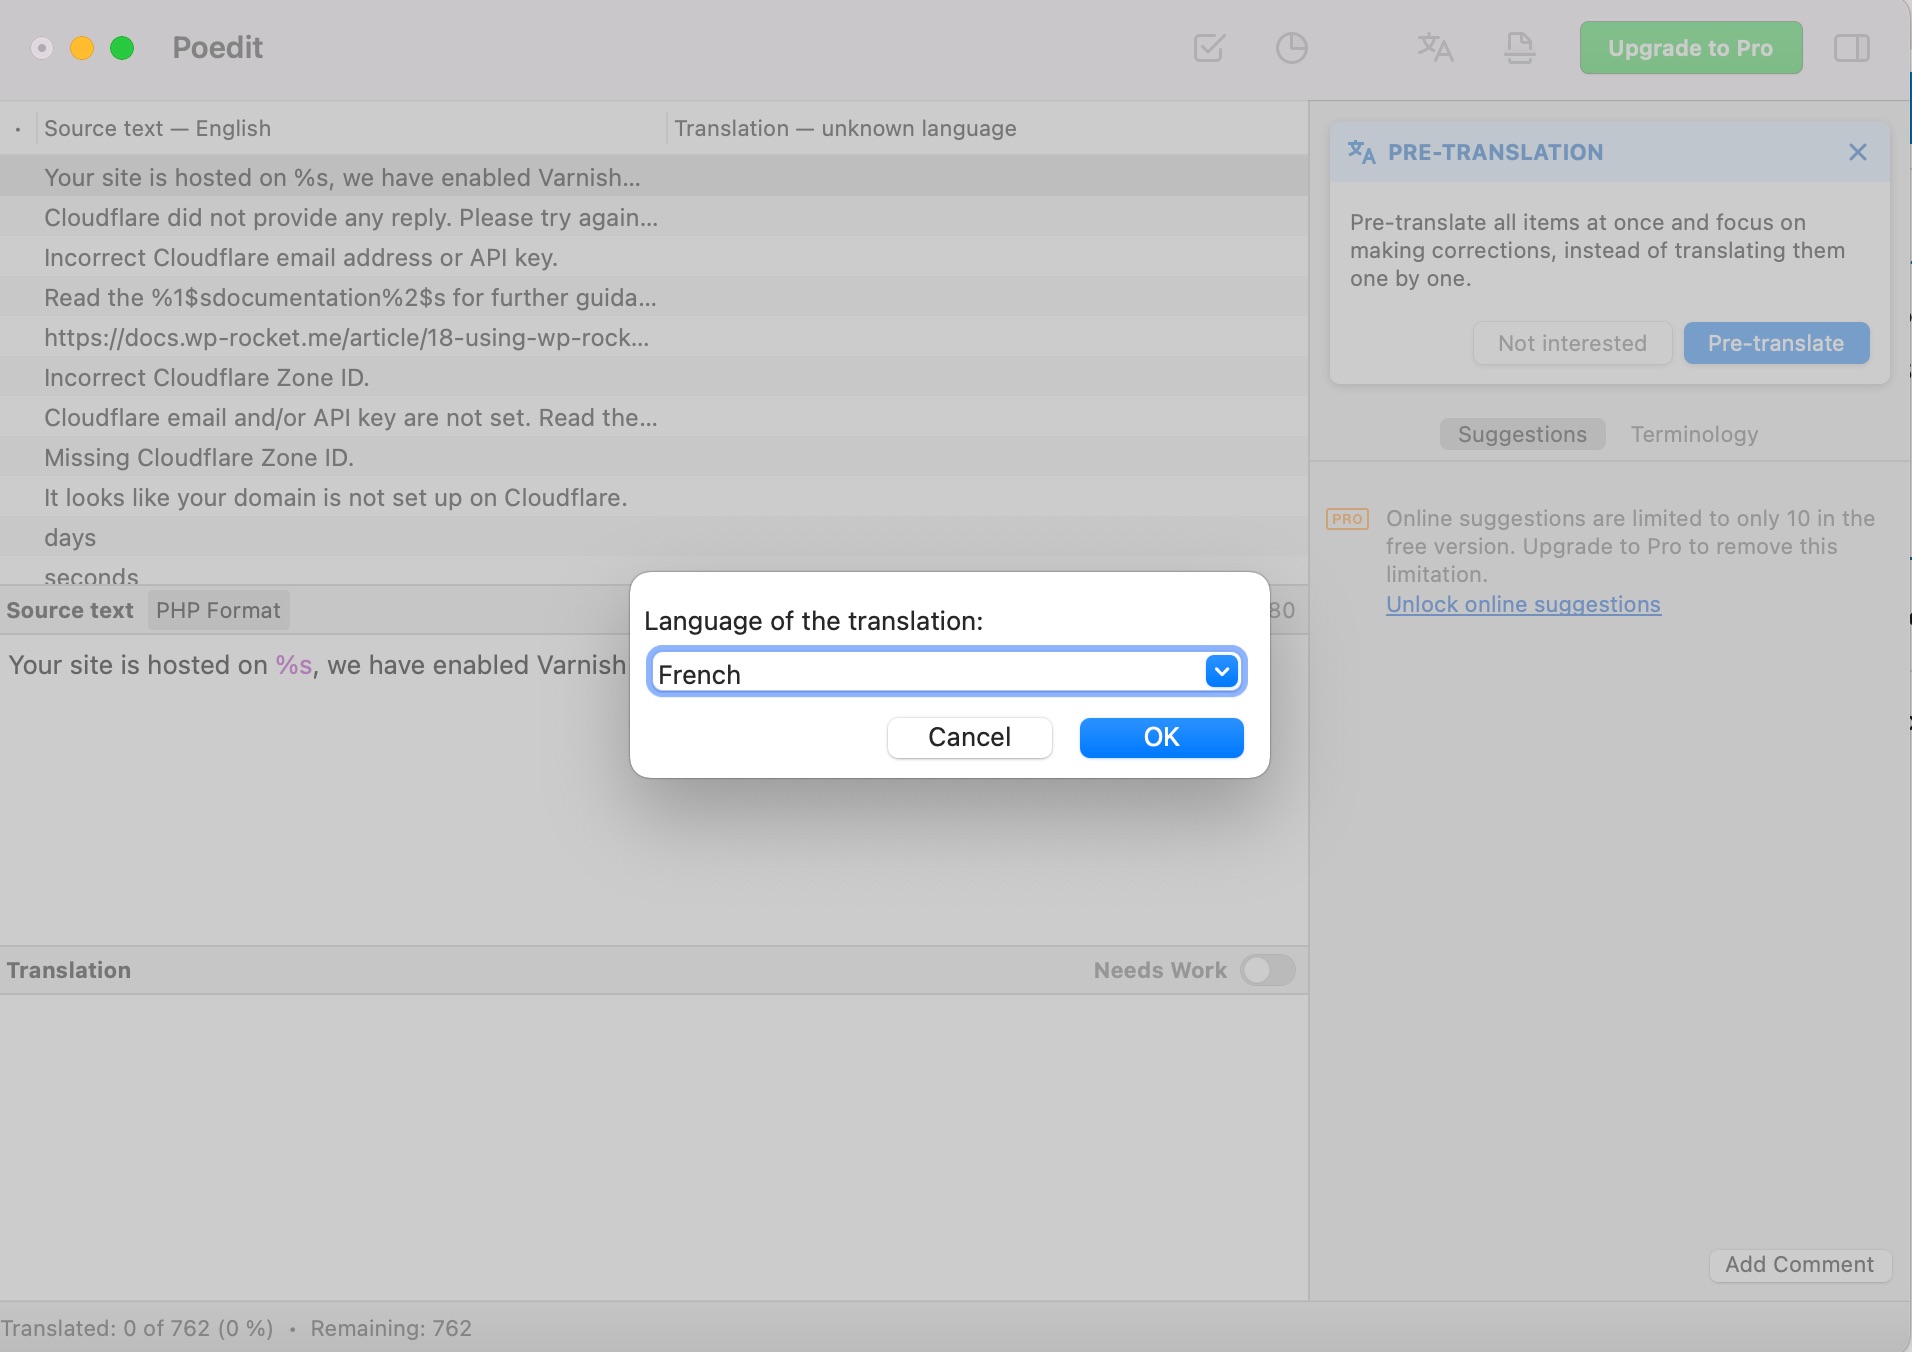
Click the OK button to continue.
In the translation interface, click on a string and provide a translation in the Translation field. Once you’re done with the translation, click File → Save from the top menu bar of your computer.
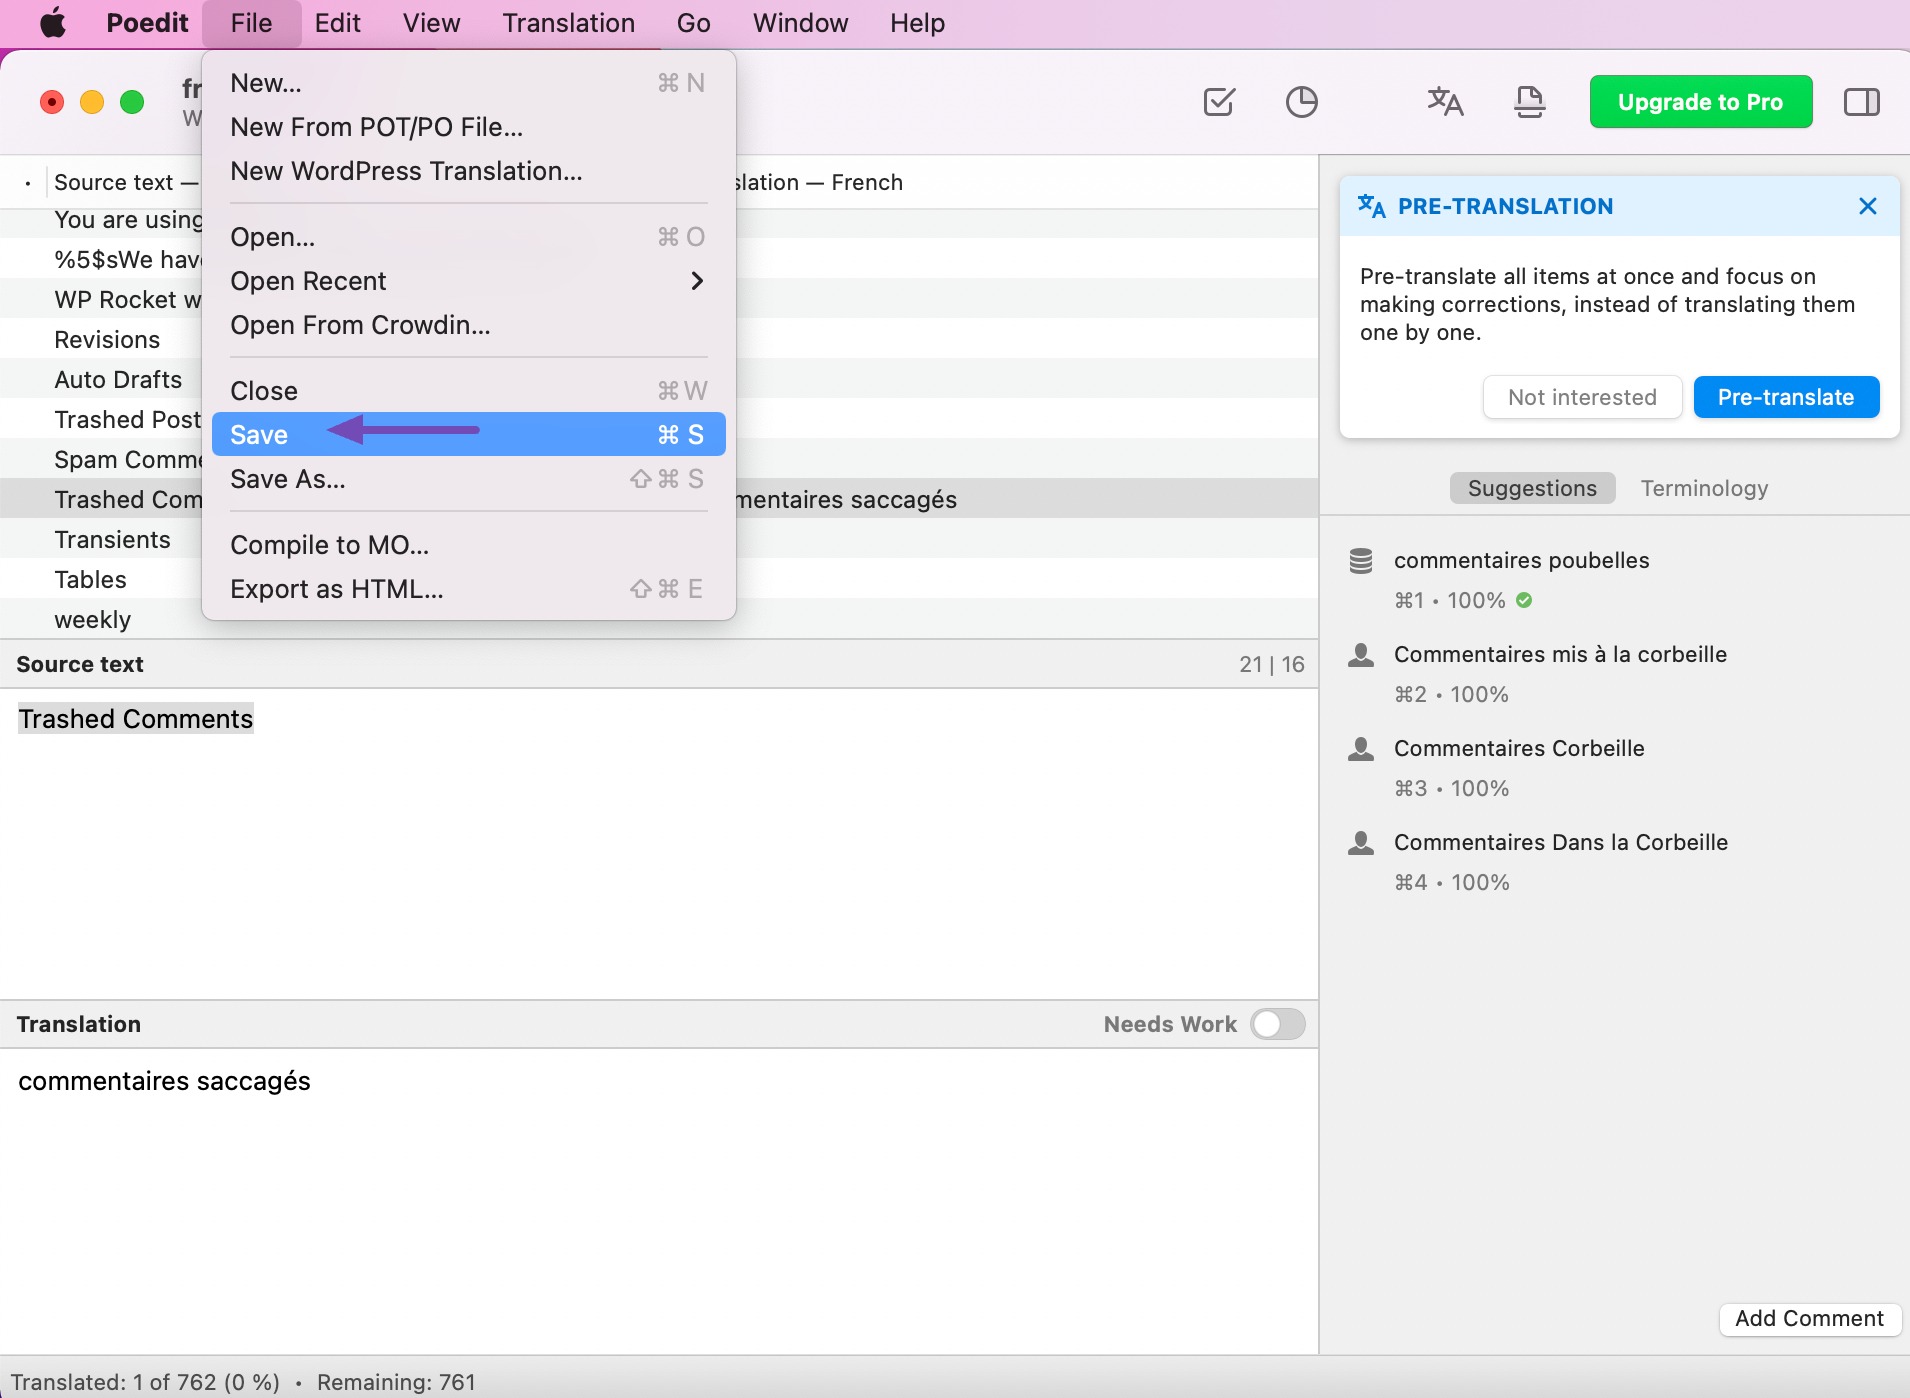
Your translations will be saved as .po and .mo files by Poedit.
To use the translated plugin on your website, you have to put these files into the languages folder of your plugin.
3 Conclusion: Go Multilingual, Go Global
Translating your WordPress plugin isn’t just about converting words—it’s about creating a user experience that welcomes people from all corners of the world. Every translation helps your plugin connect with a broader audience, breaking down language barriers and building trust.
By localizing your plugin, you’re not only increasing its reach but also contributing to a more inclusive web. Your efforts help make WordPress—and the internet—a better, more accessible place for everyone.
Do you have questions or want to share your multilingual journey? Let us know by Tweeting @rankmathseo.