
You can access Rank Math’s SEO and AI tools directly within GitHub Copilot. To get started, you’ll first need to connect your WordPress site to GitHub Copilot using the Model Context Protocol (MCP).
Once connected, you can retrieve SEO reports, access AI-powered insights, and perform SEO tasks on your WordPress site without leaving your development environment.
In this knowledgebase article, we’ll show you how to connect Rank Math with GitHub Copilot using MCP, step by step.
In this article, we’ll cover:
1 Getting Started With MCP
You need to put a few things in place to get started. They include:
- Get your username and application password
- Install Visual Studio Code (VS Code)
- Install the GitHub Copilot chat extension
- Enable the MCP servers marketplace
1.1 Get Your Username and Application Password
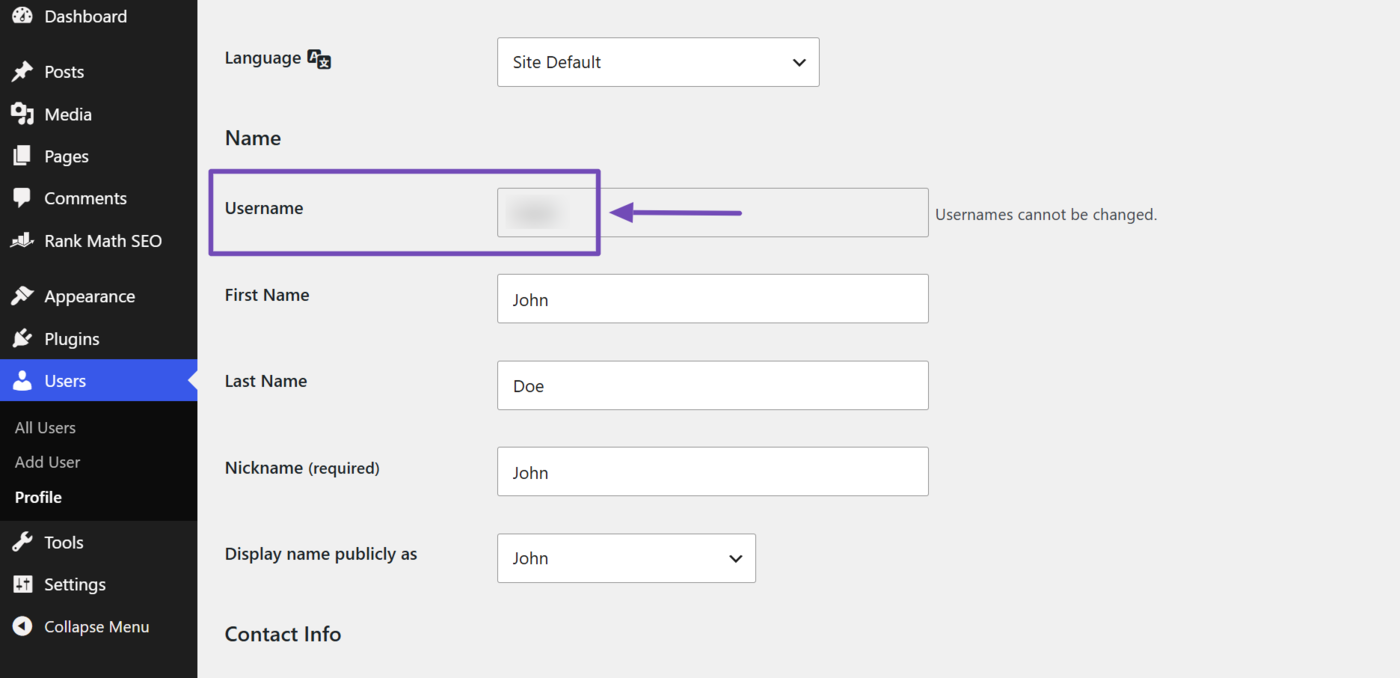
Head to Users → Profile in your WordPress dashboard. Then, scroll to the ‘Username’ field. Your username will be displayed, as shown below. Copy it.
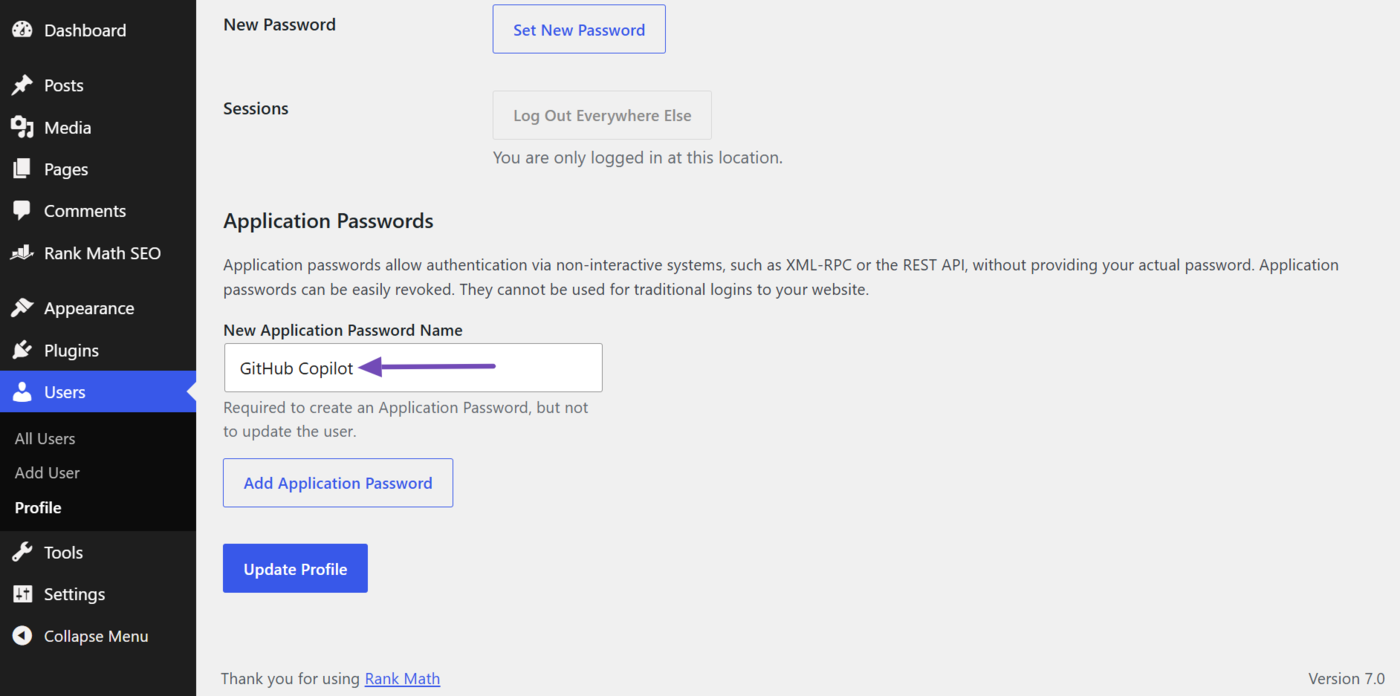
Once done, scroll down to the Application Passwords section. In the New Application Password Name field, enter a name for the application password you are about to create. Let us name it GitHub Copilot for this example.
Note: Ensure you use a memorable name so you can easily identify the password when you need to review or delete it later.
Once done, click Add Application Password.
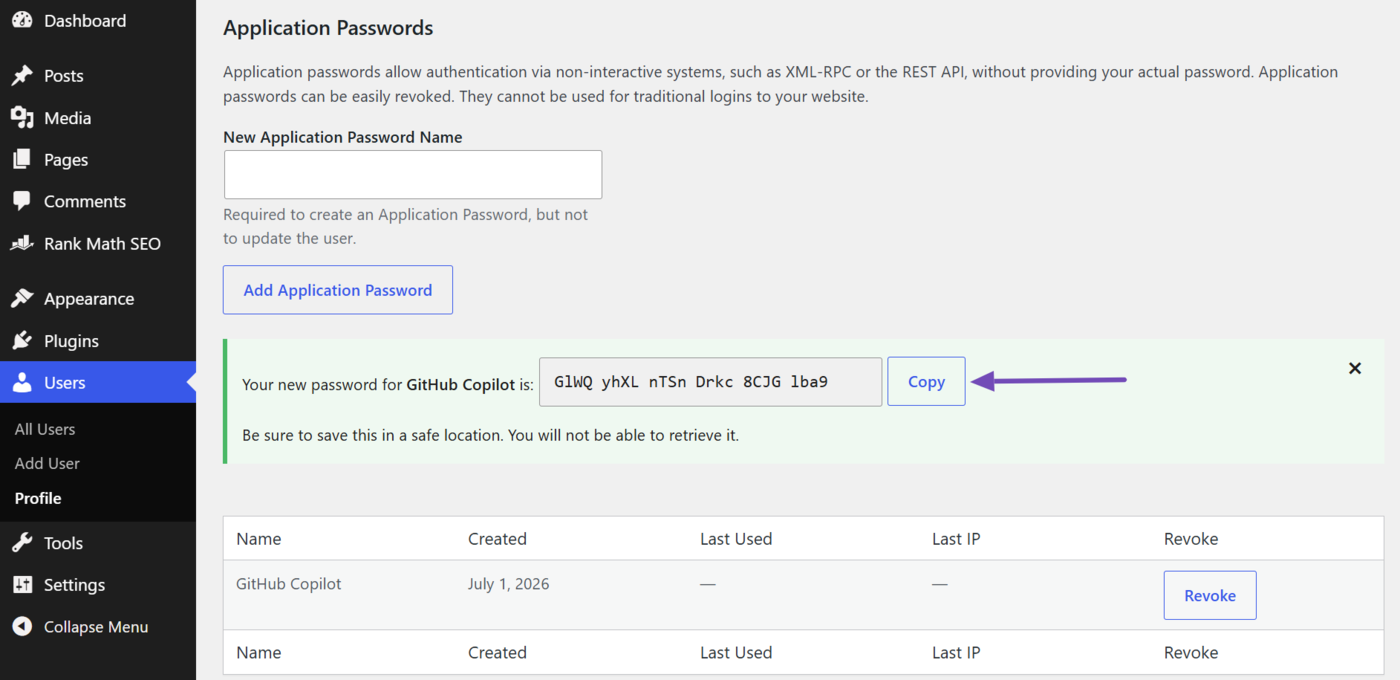
WordPress will generate an application password. Make sure to copy and save it somewhere safe, as WordPress will not show it to you again.
1.2 Install the GitHub Copilot Chat Extension
You will also need to sign up for a GitHub Copilot account if you have not done so already. You can select the free plan to get started. Make sure to select Open in VS Code. This ensures the extension is added to your Visual Studio Code editor.
Note: The page may display a pop-up requesting to open Visual Studio Code. Let it. If you do not have Visual Studio Code, you can download it here.
Now, let us confirm the extension has been installed in Visual Studio Code. To do that, click on the Extensions icon in Visual Studio Code.
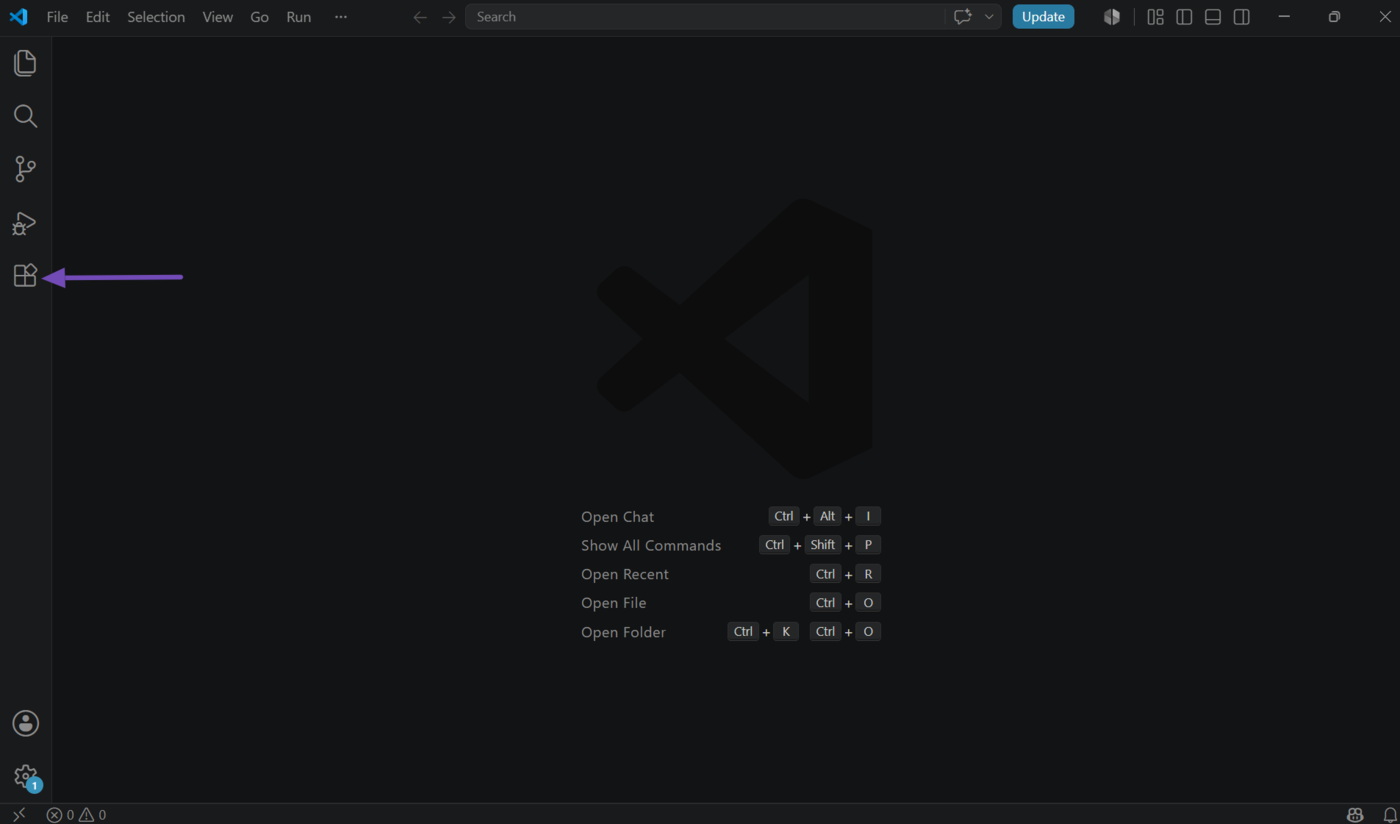
Once done, enter “GitHub Copilot Chat” in the search bar. The GitHub Copilot Chat extension will display, as shown below. Click on it.
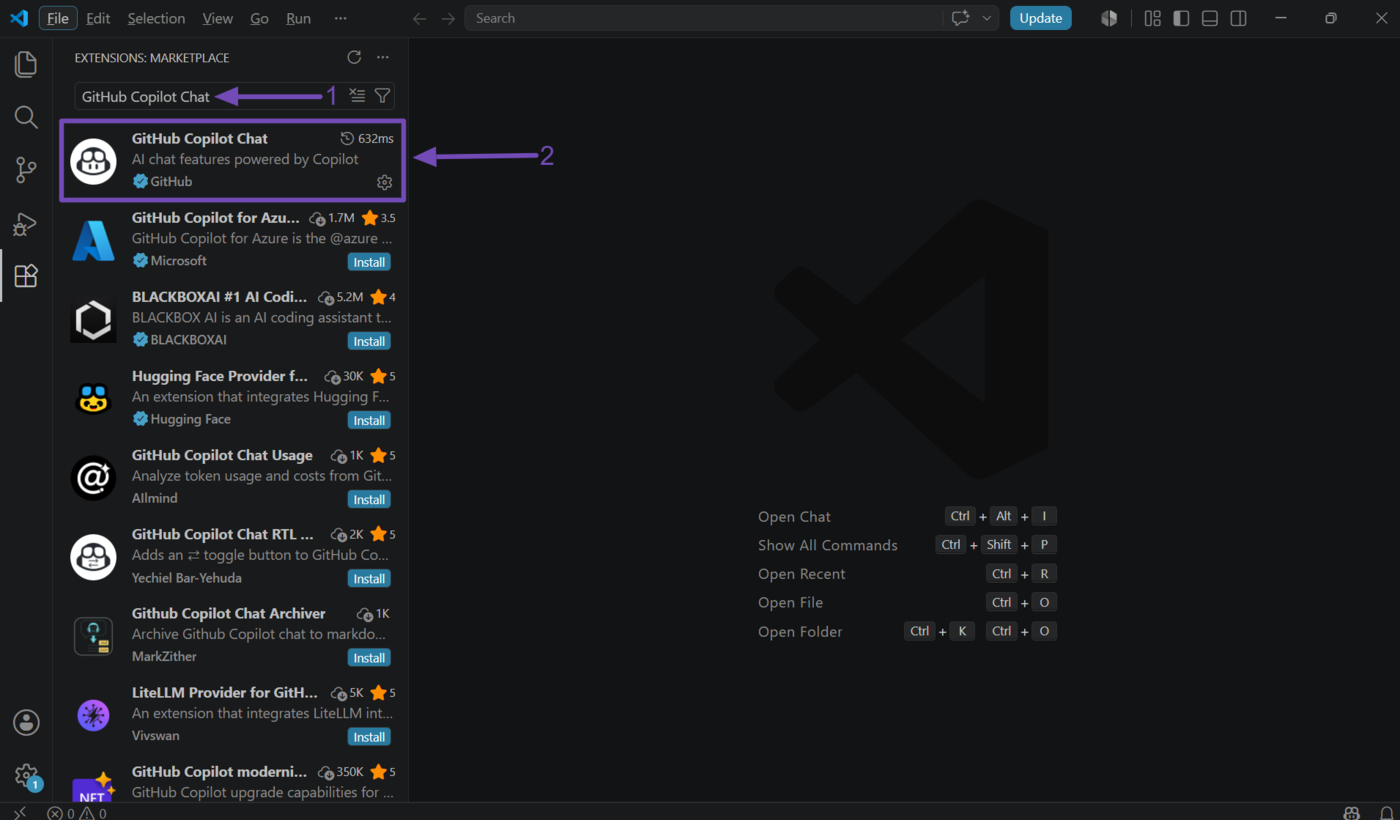
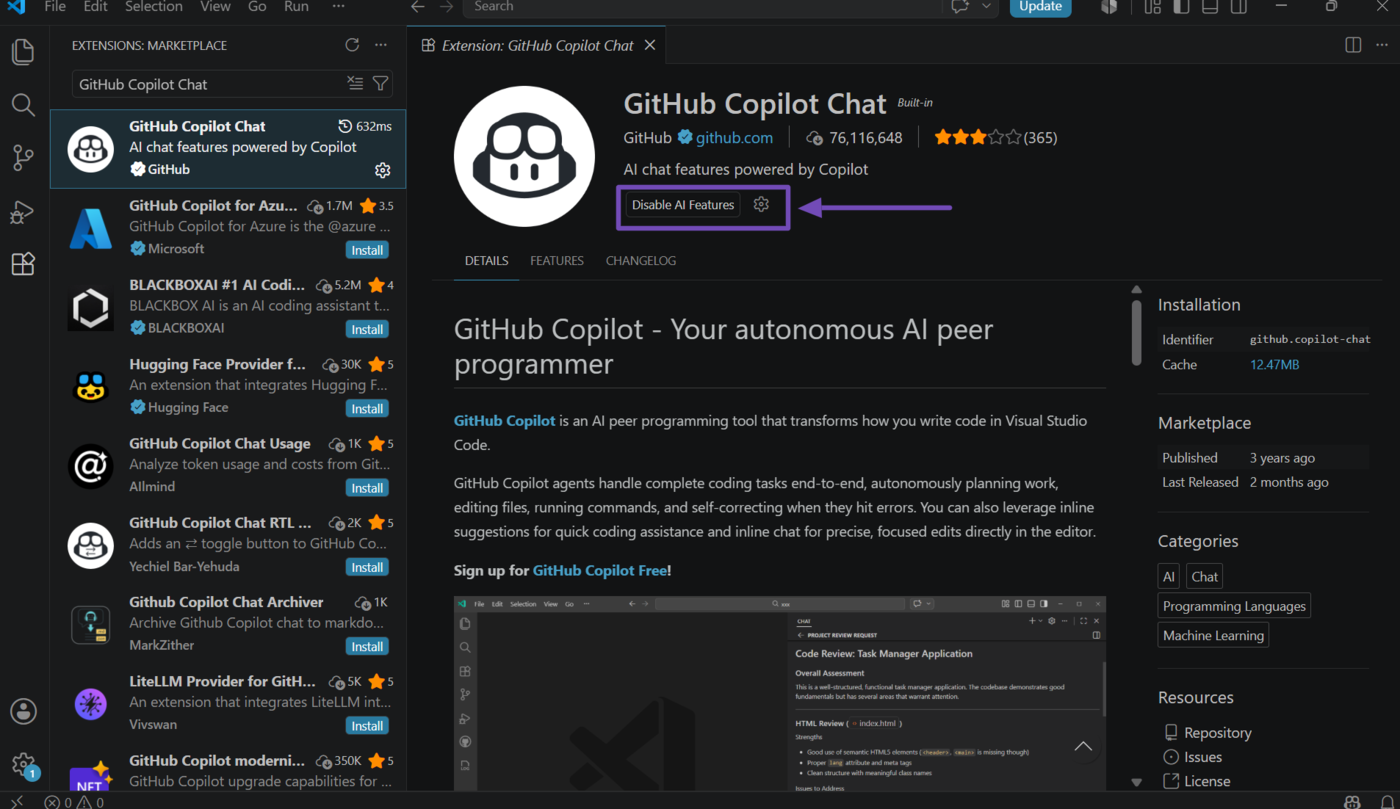
GitHub Copilot Chat does not include an Install button, which indicates it has already been installed. You should also ensure it has been enabled, as shown below.
1.3 Enable the MCP Servers Marketplace
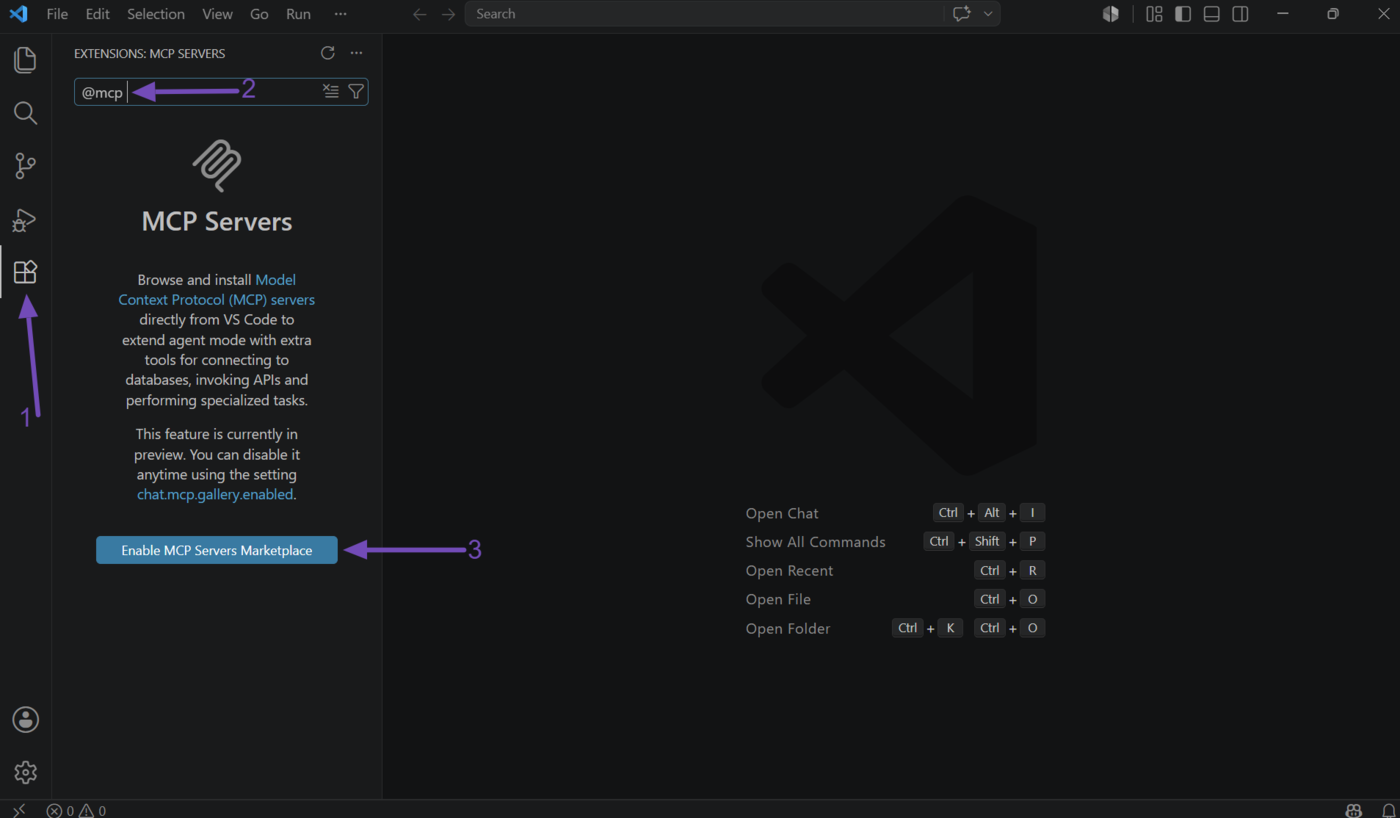
Click the Extensions icon in Visual Studio Code. Then enter @mcp into the search bar. An MCP Servers setting will be displayed. Click on Enable MCP Servers Marketplace.
2 Open the mcp.json File
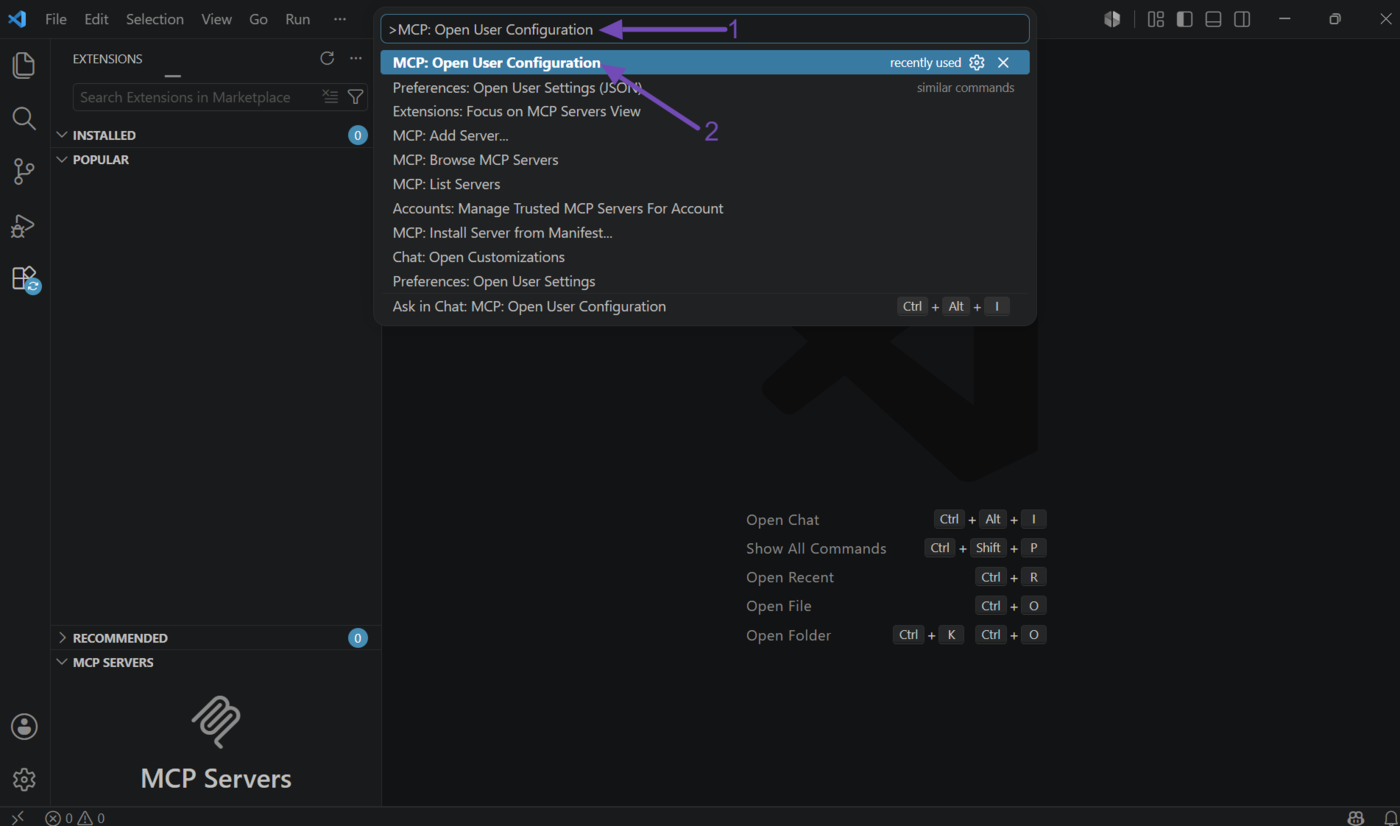
Now, click the Command palette and enter >MCP: Open User Configuration into it. (Ensure you include the angle bracket >).
The MCP: Open User Configuration option will appear, as shown below. Click on it. The mcp.json file will open.
3 Update the mcp.json File
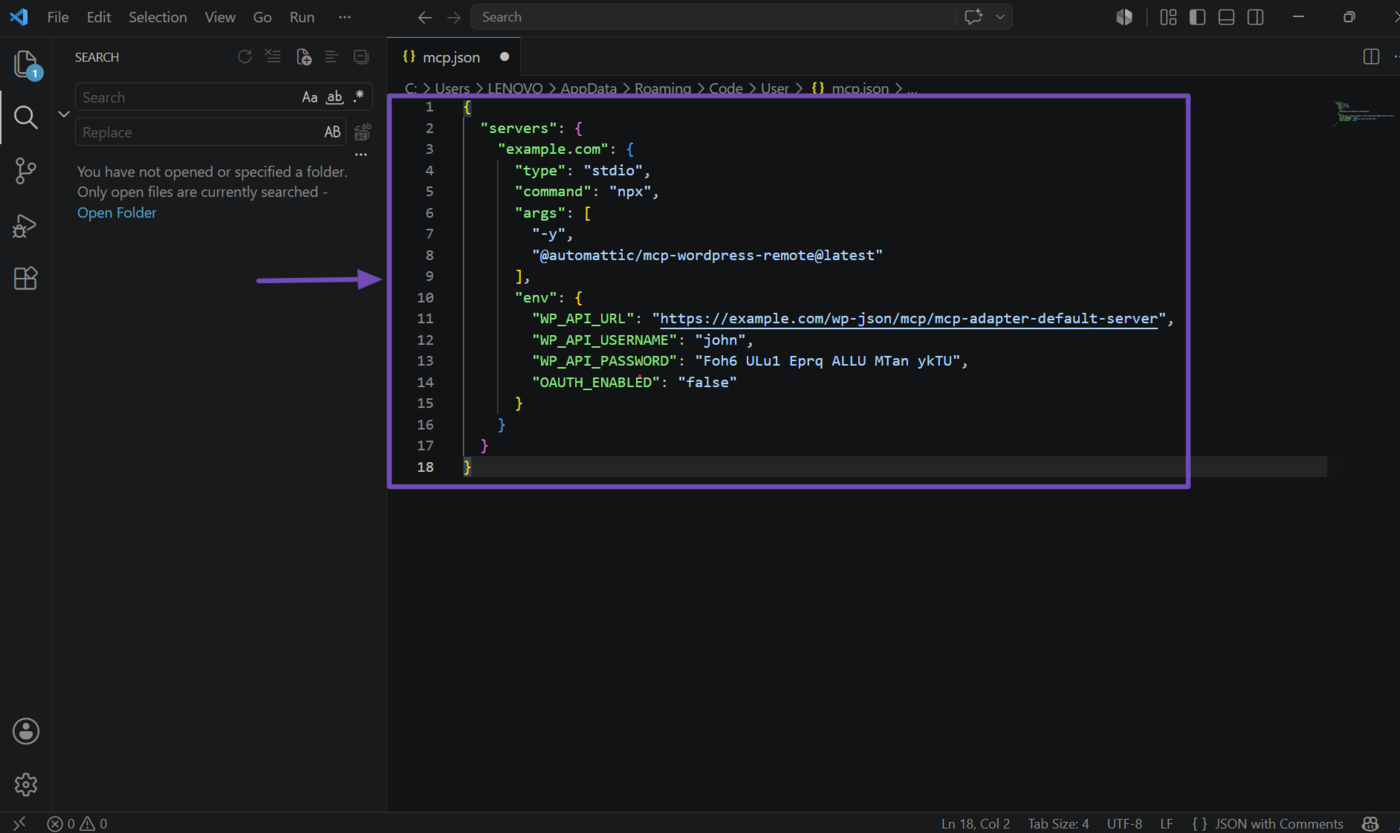
Now, copy the MCP server configuration below and add it to the configuration in the mcp.json file. If the file already contains some configuration, do not delete it. Just add your MCP server configuration to it.
However, ensure you replace the placeholders below with your details.
your-site-url– Replace with your site URL, e.g., example.comyour-wordpress-username– Replace with your WordPress usernameyour-application-password– Replace with the application password you created
Note: The your-site-url placeholder appears twice in the configuration. Ensure you replace both. Do not include https:// in your URL, as the configuration already includes it where required.
{
  "servers": {
    "your-site-url": {
      "type": "stdio",
      "command": "npx",
      "args": [
        "-y",
        "@automattic/mcp-wordpress-remote@latest"
      ],
      "env": {
        "WP_API_URL": "https://your-site-url/wp-json/mcp/mcp-adapter-default-server",
        "WP_API_USERNAME": "your-wordpress-username",
        "WP_API_PASSWORD": "your-application-password",
        "OAUTH_ENABLED": "false"
      }
    }
  }
}
Once done, the mcp.json configuration should look like this. Click Ctrl + S on your device to save the updated file.
4 Reload the Window
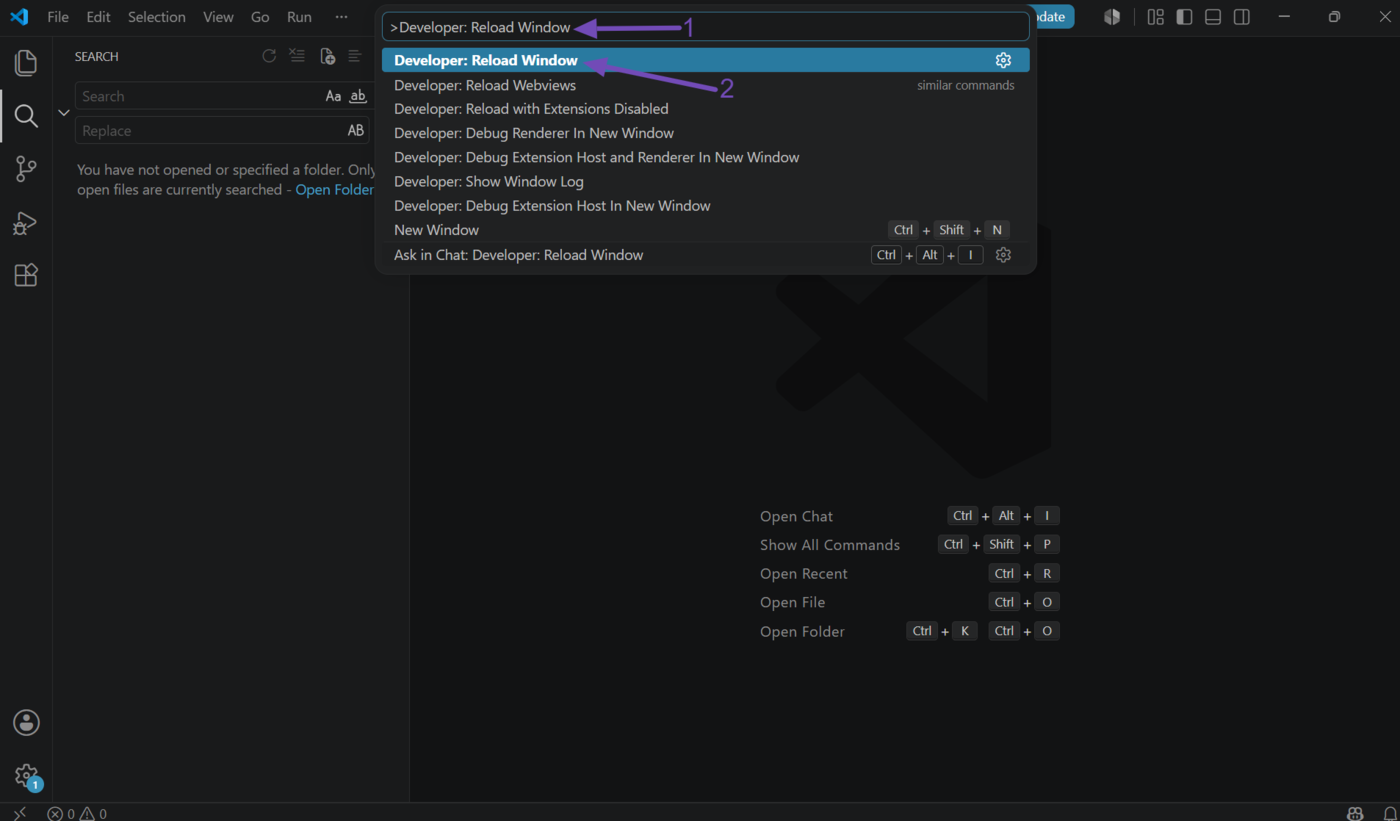
Now, click the command palette and type >Developer: Reload Window. (Make sure to include the angle bracket >). Then click on it.
Visual Studio Code will reload, and GitHub Copilot should now detect your WordPress MCP server.
That is how to connect Rank Math with GitHub Copilot using MCP. Rank Math provides multiple MCP tools to help you monitor, improve, and optimize your SEO and AI Visibility. You can refer to this guide for the full list of the MCP tools available in Rank Math.
If you have any questions, you’re always more than welcome to contact our dedicated support team, who are available 24/7, 365 days a year.