If you’ve ever changed your site’s structure, removed old pages, or moved to a new domain, you know how important it is to make sure visitors (and search engines) don’t hit dead ends. That’s where 301 redirects come in; they help you guide traffic from outdated URLs to the right pages while preserving your SEO.
But what if you have dozens or even hundreds of URLs to redirect? You need not worry. You don’t need to update each one manually. In this post, we’ll show you how to set up bulk 301 redirects in WordPress, so you can avoid broken links and keep your SEO intact.
In this guide, we’ll take a look at:
1 What is a 301 Redirect?
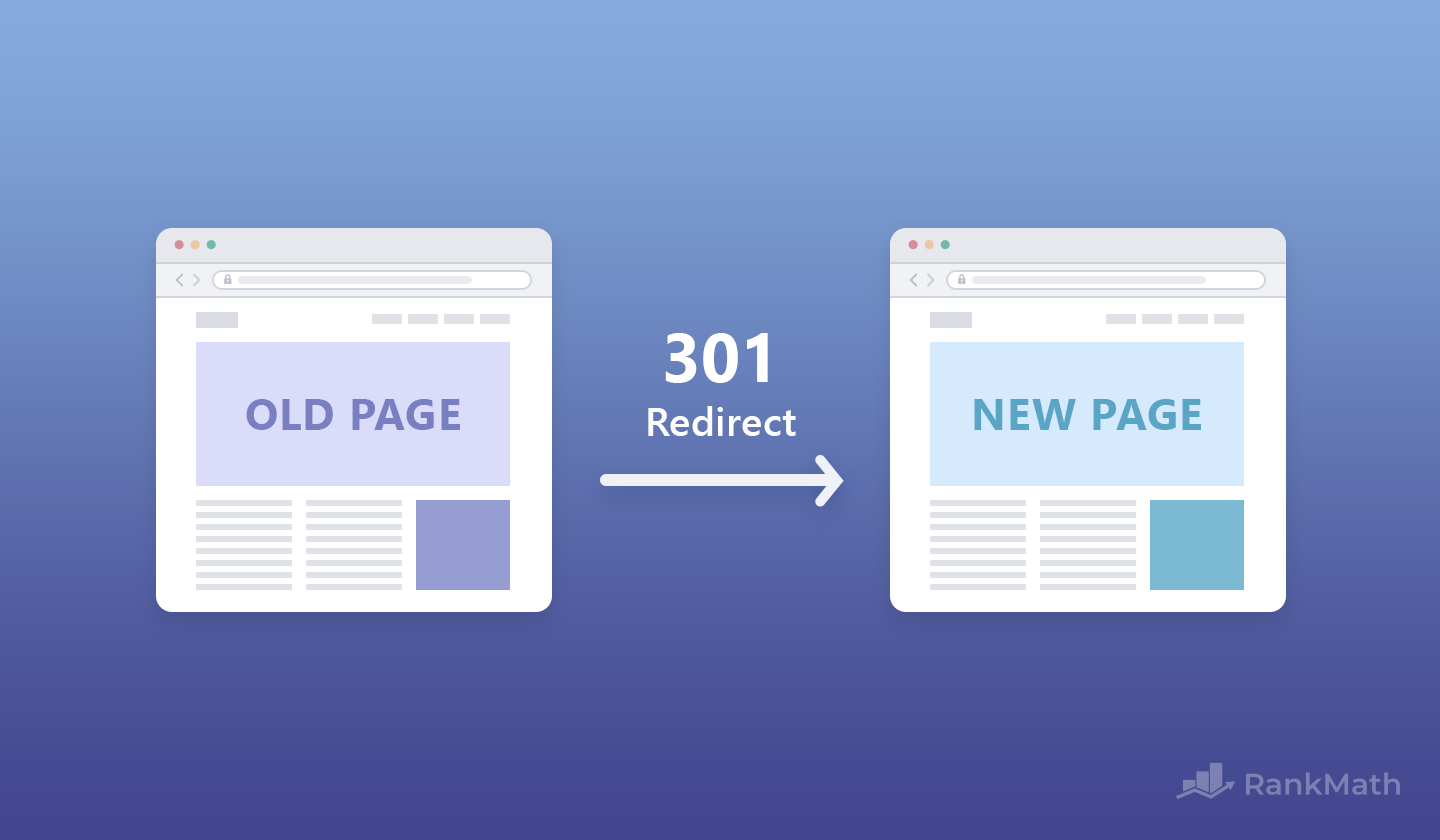
A 301 redirect is a way to permanently send visitors and search engines from one URL to another. You’ll use it when you move a page on your site and want to make sure users still land on the right content, even if they click an old link or bookmark.
If you’ve already published a page (especially one that’s ranking in search results) and need to update its URL, a 301 redirect is the best solution. It tells search engines that the page has moved for good and helps preserve your SEO.
You might use a 301 redirect if:
- A page is no longer useful or relevant.
- You’ve changed your permalink structure.
- You’ve rebuilt or reorganized your site and URLs have changed.
Note: A 301 redirect is different from a canonical URL. Canonical tags are used when the same content is available at multiple URLs, not when a page is moved. Learn more about canonical URLs here.
2 The Difference Between 301 Redirects & Other Redirects
A 301 redirect is used when you want to permanently move a page. It tells browsers and search engines, “This page has moved for good.”
On the other hand, 302 and 307 redirects are for temporary changes. If you’re just sending visitors to a different page for a short time — maybe during a redesign or while updating content — and plan to bring back the original URL later, a 302 redirect is what you need.
So, if the change is permanent, go with a 301. If it’s only temporary, use a 302 or 307 redirect instead.
Here’s a brief overview of the different redirect types:
| Redirect Type | Description / Usage |
| 301 (Permanent) | A permanent redirect is used in a number of scenarios, such as when deleting a page (to redirect traffic to the next logical location) or when the original location of a resource is altered. |
| 302 (Temporary) | A 302 redirect lets search engines know that a website or page has been moved temporarily. |
| 303 (See Other) | The 303 redirect status response code indicates that the redirects refer to another page (such as a confirmation page or an upload progress page). This response code is usually sent back as a result of PUT or POST |
| 307 (Temporary) | A temporary redirect – as above, is often used in more complex development environments, such as when processing credit card payments and redirecting visitors to ensure that them refreshing their page doesn’t resubmit the checkout form. |
| 308 (Permanent) | There is no real difference in implementation with the use of the 308 redirect except that a 301 redirect does not allow changing the request method from POST to GET while a 308 does (since it repeats the request using the new URL). |
Learn more about the different types of redirects here.
3 The Effects of 301 Redirects on SEO (and Traffic)
When you permanently move a page or change your domain, using a 301 redirect is the SEO-friendly way to go. In fact, Google officially recommends 301 redirects in cases like domain migrations and permalink changes.
Since 301 redirects are permanent, they help preserve your PageRank, which means the SEO value from the old page can be passed on to the new one. Search engines understand that the content still exists, just at a new address, so they’ll crawl and index the new URL without starting from scratch.
Back in 2013, Google’s Matt Cutts mentioned that using redirects might cause a small loss in PageRank. But don’t worry, Google has since confirmed that this is no longer true. You can confidently use 301 redirects without fearing SEO damage.
4 When to Use a 301 Redirect
You’ll want to use a 301 redirect when you permanently remove or move a page, but still want to keep the traffic, search rankings, and backlinks pointing to it.
Here are some common scenarios where a 301 redirect is the right choice:
You’re moving to a new domain permanently
From: https://www.yoursite.com/
To: https://www.yournewsite.com/
You’ve changed the URL of a page
From: https://www.yoursite.com/about-us/
To: https://www.yoursite.com/about/
You’ve restructured your site
From: https://www.yoursite.com/2021/07/post-name/
To: https://www.yoursite.com/post-name/
However, you shouldn’t use a 301 redirect in cases like:
- Geotargeting (redirecting users based on location)
- A/B testing (temporary redirect for experimentation)
- Device targeting (redirecting based on mobile or desktop)
In these situations, you’ll want to use a temporary redirect like a 302 or 307 instead.
5 How to Setup 301 Redirects in Bulk
Now, let’s get onto the best ways to implement 301 redirects in bulk:
Method #1 – Using Rank Math’s Built-In Redirect Manager
With Rank Math’s Built-in Redirection Manager, managing 301 redirects couldn’t be easier. So without further ado, let’s help you set up your bulk 301 redirects.
[step 1] Install & Activate Rank Math
Every WordPress website needs a WordPress SEO plugin, ideally, one that lets you take complete control of your website’s technical & on-page SEO. Fortunately, that’s exactly what we do here at Rank Math.
So, as you might’ve guessed, the first step – if you haven’t already – is to go ahead and install the Rank Math WordPress SEO plugin:
- Download Rank Math
- Follow Rank Math’s Setup Guide
- And that’s it! Keep reading…
Note: Bulk redirections are possible in the free version of Rank Math, but if you’re interested in learning why the best SEOs on the planet choose Rank Math PRO & Business to get a competitive edge, see how our plans compare here.
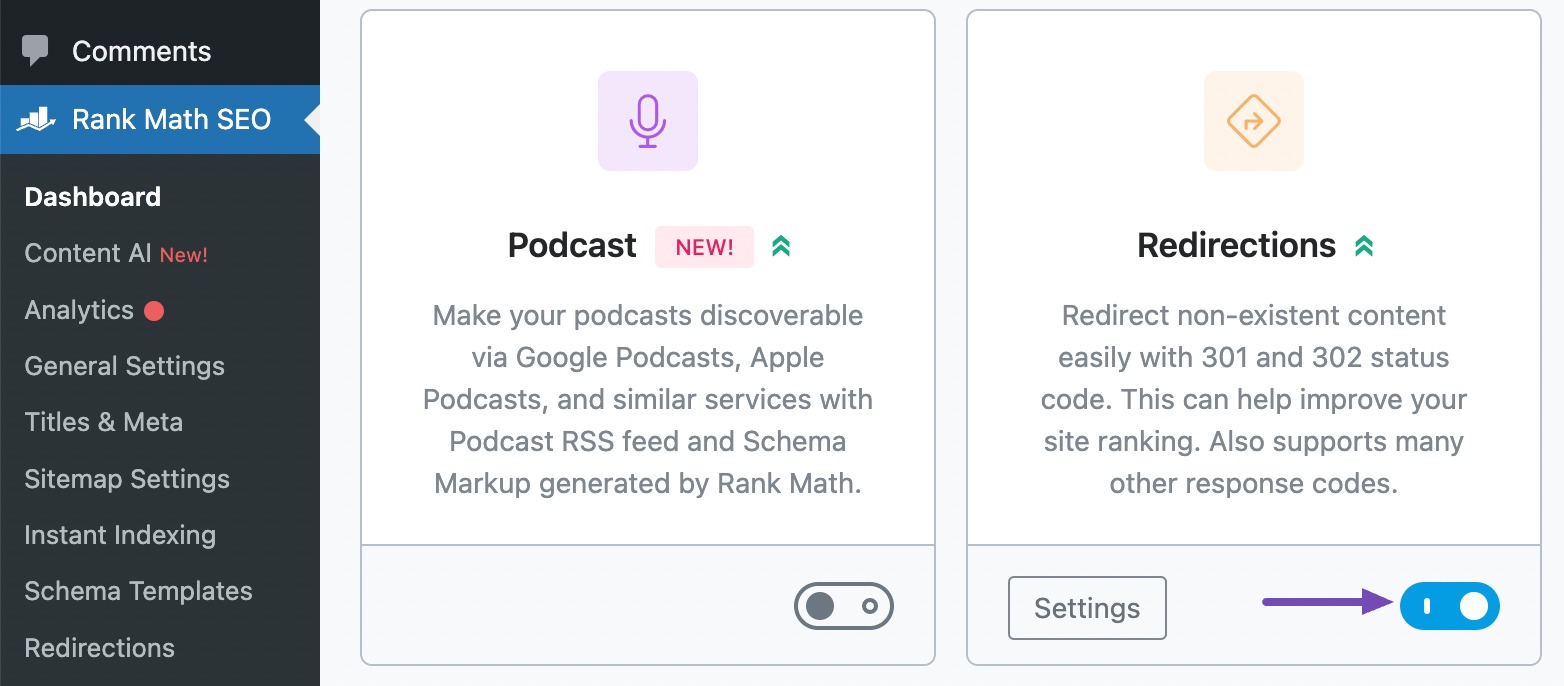
[step 2] Enable the Redirections Module
Next, since you’ve now installed Rank Math – while there’s nothing extra to install, you just need to head on over to Rank Math SEO→ Dashboard in your WordPress admin area in order to confirm that the Redirections module is enabled.
[step 3] Add a Single Redirect
Now that Rank Math is installed and the Redirections module is enabled, you’ll be able to navigate to Rank Math’s Built-In Redirection Manager by navigating to Rank Math SEO → Redirections in your WordPress admin dashboard, as shown below:
And then, you can go ahead and create a 301 redirect by simply entering the URL you wish to redirect as your Source URL and the location of the new resource (i.e. where you’d like to redirect the source URL to) as the Destination URL.

And once ready to activate, simply click Add Redirection.
Learn more about creating redirects in our documentation or in our detailed video tutorial below:
[step 4] Adding Multiple Redirects / Bulk Redirects
But that’s not all! You’re here to find out how to add 301 redirects in bulk. So that’s what we’re here for and let’s see how easy Rank Math makes this for you.
Option #1: Copy & Paste Multiple Source URLs
Depending on the scenario in which you are trying to create redirects in bulk – the first way to do this in Rank Math is simply creating a single redirect with multiple source URLs. Meaning that this would, of course, only work if each of these source URLs has the same intended, new location & destination URL.
Option #2: Updating, Editing & Importing Redirects via CSV PRO
Fortunately, we built Rank Math to make everyday, tedious and repetitive SEO work as easy as possible. So, in addition to being able to create 301 redirects in bulk by creating a redirect with multiple sources, you can also easily manage (add or modify) hundreds of 301 redirects, all of which have different sources and destinations in a matter of minutes.
Here’s exactly how to get started:
1. Export Your Existing Redirect(s) to a CSV
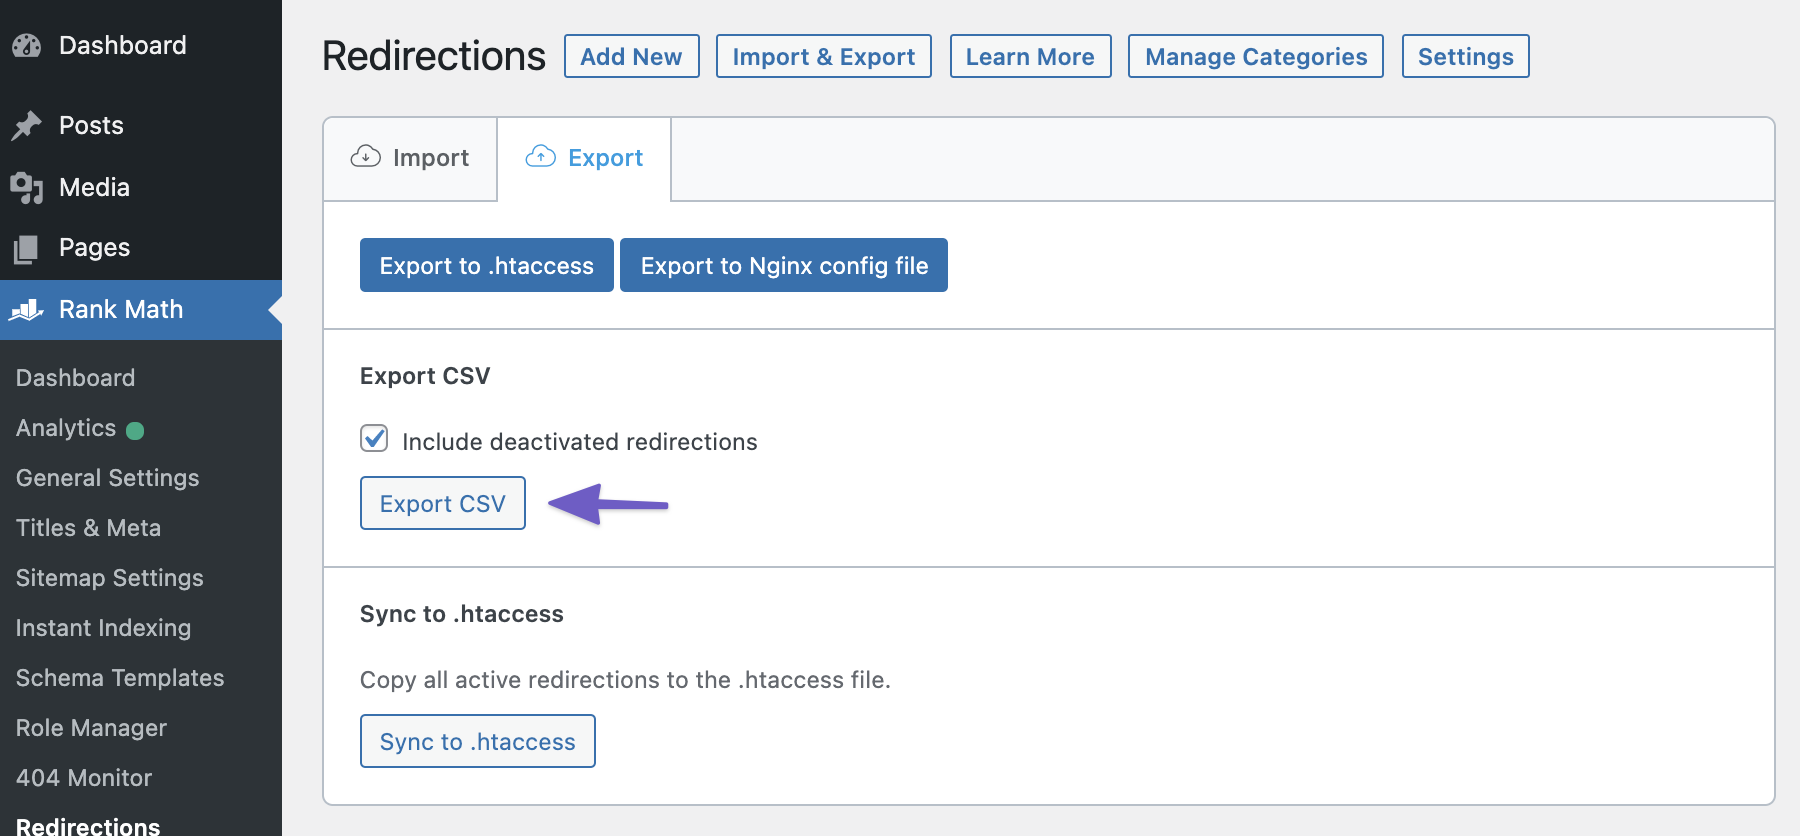
To do so, navigate to Rank Math SEO → Redirections and then select Import/Export – as shown below:
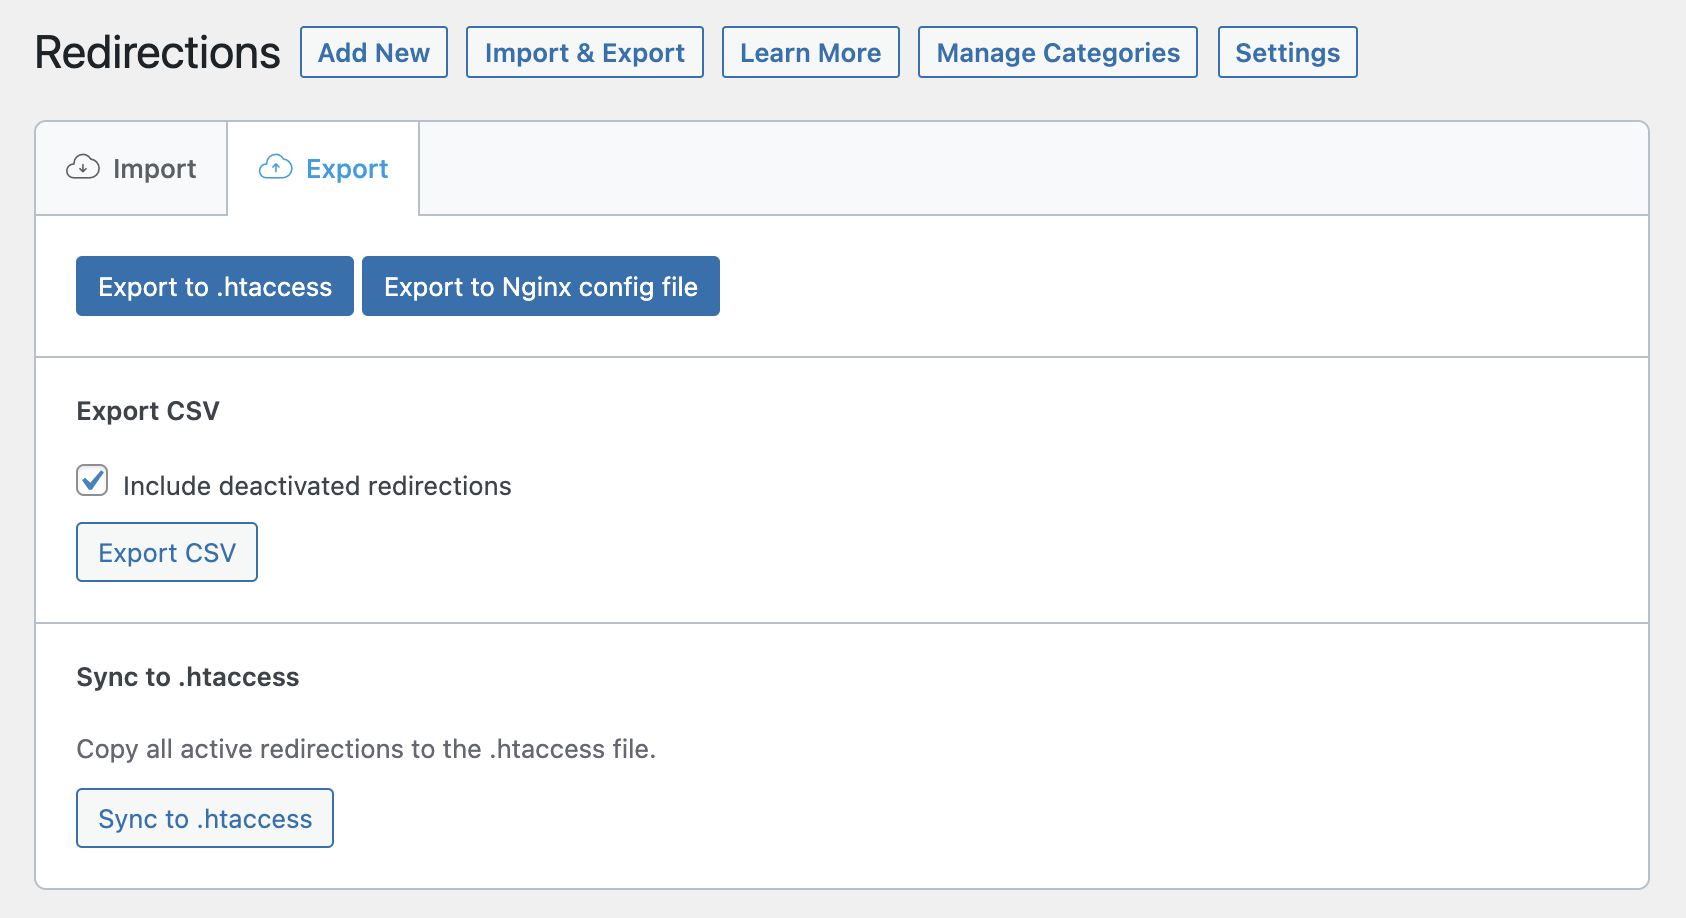
Of course, in this scenario, we want to export the redirects first, this can be done by clicking the Export tab & then the Export CSV button:
2. Open the CSV file in Google Sheets (or Excel)
Now that you have your CSV file, it’s time to open it up in Google Sheets (if you want to collaborate with your team) or Microsoft Excel.
3. Edit the CSV file to update redirects, create new ones
Edit the CSV file to update the existing redirects, create new ones, or remove redirects that you no longer wish to have on your site.
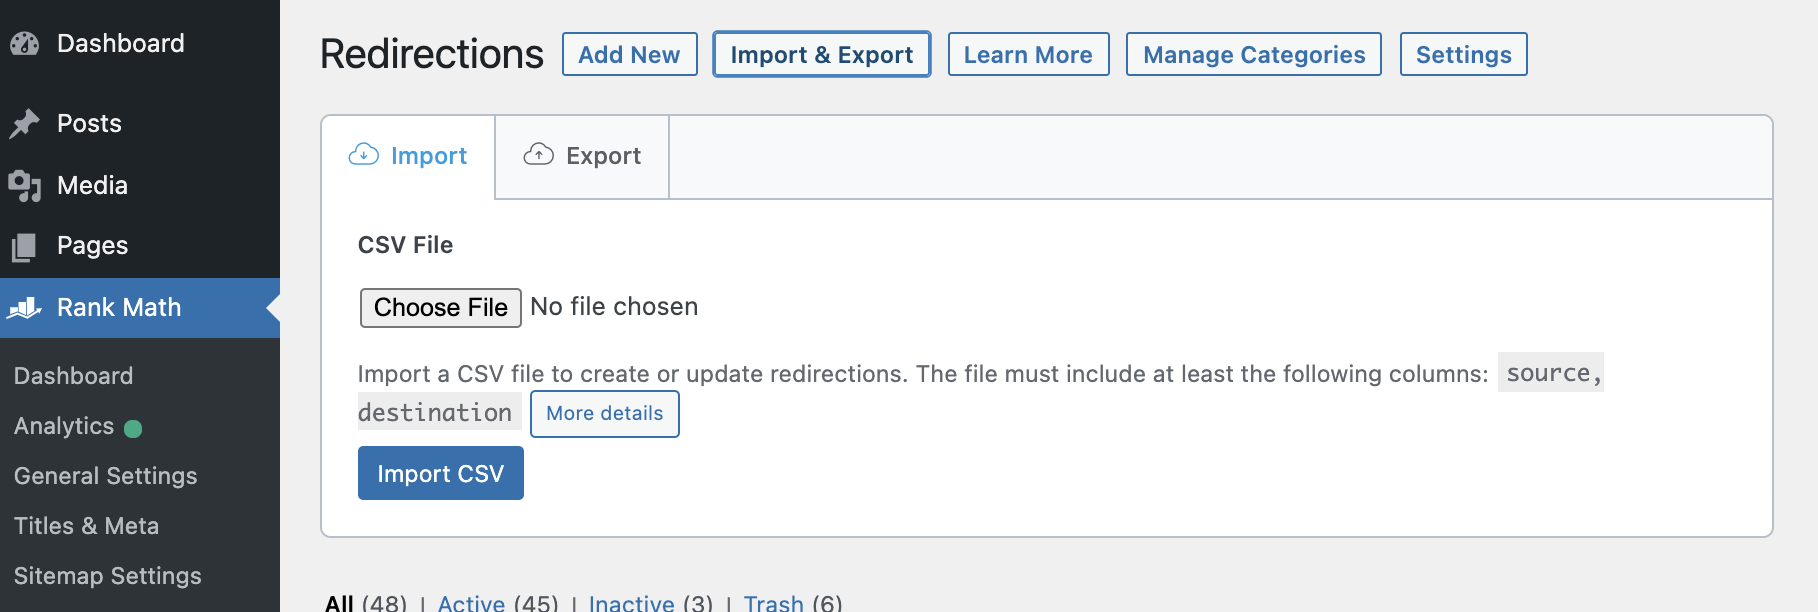
4. Import the CSV file using Rank Math’s Redirections Module
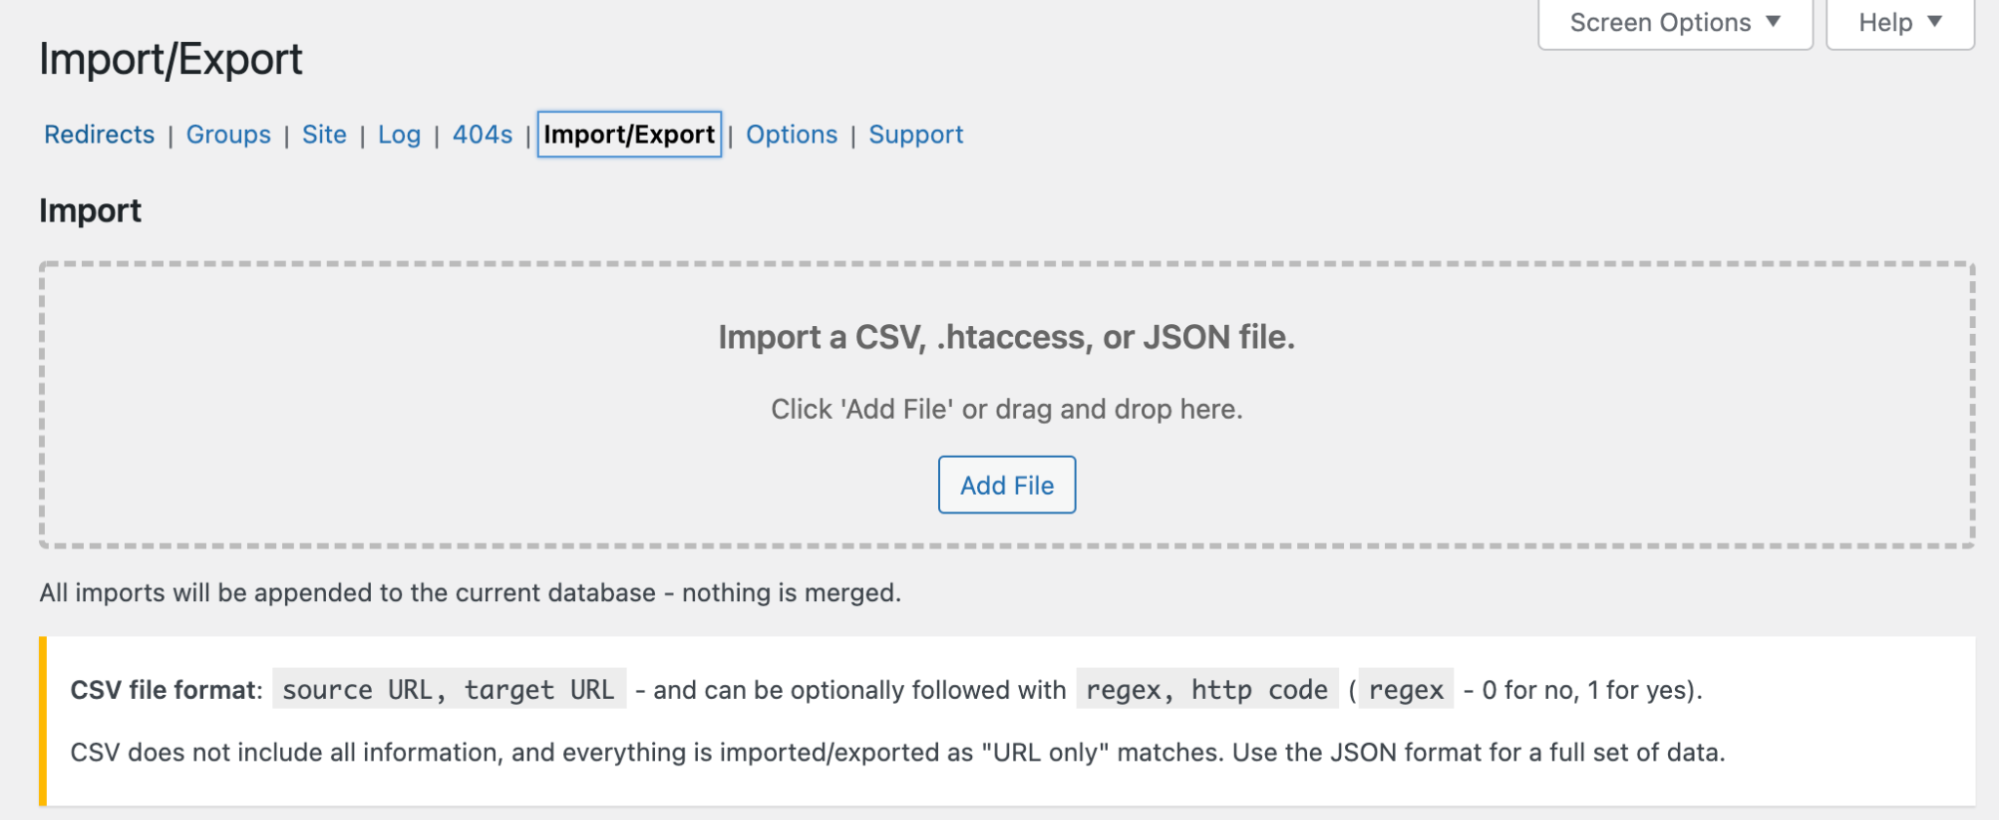
And once you’re ready to apply your changes, simply navigate back to the Import tab in Rank Math’s Redirections Manager & upload your CSV file:
Note: Please proceed with caution as changes cannot be reversed. If you wish to have the option to undo all the changes made to redirects, we recommend taking a backup of your WordPress website before re-importing the CSV.
Option #3 – Using Regex (Advanced)
Regex – short for regular expression – is a string of text/syntax that allows you to create expressions that match certain text (i.e. ones that adhere to specific patterns). In the context of 301 redirects, this is incredibly useful as it means that you can create redirects in bulk simply by matching all URLs that fit into a certain pattern.
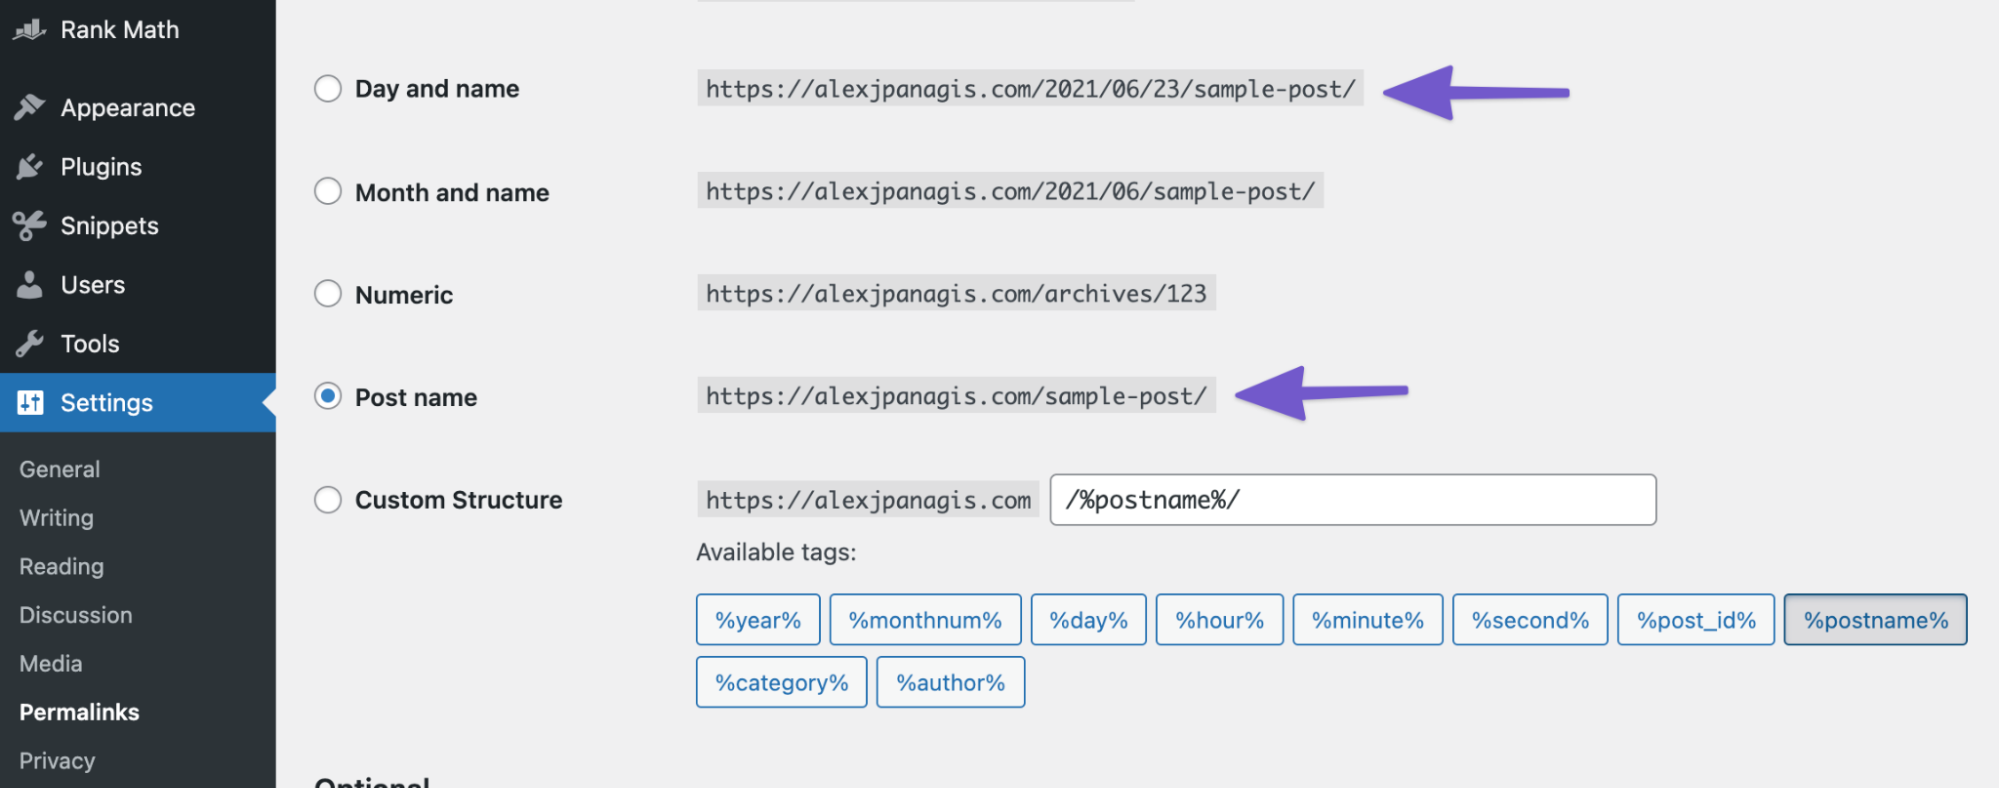
For example, if you change your WordPress website’s permalink structure from Day and Name to a recommended structure such as /%postname%/ – you could add 301 redirects in bulk by using Excel & Google Sheets formulas along with Rank Math’s import/export options.
Or, you could alternatively use a simple regular expression. For example, here are some of the most common regular expression characters.
| Character | Interpretation | Example |
| * | Zero or more occurrences of the preceding element. | ab*cd matches “acd”, “abcd”, “abbcd”, “abbbcd”, and so on. |
| ? | Zero or one occurrence of the preceding element. | abc? matches “abc” and “ab” |
| + | One or more occurrences of the preceding element. | ab+cd matches “abcd”, “abbcd”, “abbbcd”, and so on, but not “acd”. |
The important thing to note here is that Rank Math supports Regex right out of the box. However, we highly advise you to proceed with caution especially if you are inexperienced with regular expressions and changes that can break your site. So before making changes, the very least you could do is test a pattern and finetune it to ensure it matches only what you want it to using Regex101.
A great use-case of a Regex redirect is when you used AMP on your site previously but want to disable it. When doing this you’ll need to redirect all AMP URLs back to the original, normal URLs. This can easily be done with regular expressions adding the following as source & destination URLs in Rank Math:
Regex Source URL: /(.*)/amp
Destination URL: /$1
Method #2 – Alternative, Single-Use Third-Party Plugins
Now, if you don’t wish to use Rank Math’s Built-in Redirections Manager – there are of course a whole range of single-use plugins (i.e. ones focused on only a single feature) that are alternatives that we can recommend.
Here are some alternative redirection plugins worth checking out:
All of the above plugins make it incredibly easy to create 301 redirects similar to how Rank Math’s built-in Redirections module works:
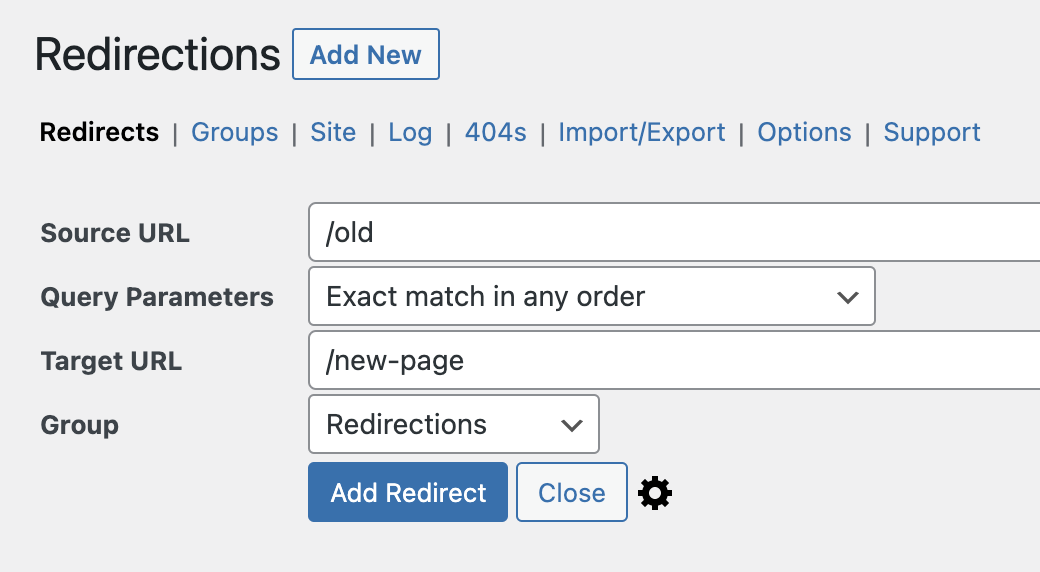
And, the Redirections plugin (which is free) in particular also has the ability to import & export your redirects to create bulk 301 redirects – as shown below:
Method #3 – Creating 301 Redirects in Bulk By Editing Your .htaccess File
A .htaccess file is a file that sits in the root directory of a website that controls Apache (a web server stack) which your web host may use – allowing you to easily enable or disable certain functionality, including creating redirects. For this method to work, you will need to be able to make changes to your website’s .htaccess file and your web host’s server configuration must support the use of .htaccess configuration files.
Here’s what the code to add a .htaccess redirect looks like:
“redirect 301 /old https://rankmath.com/new”
The beginning “redirect 301” simply indicates to Apache that the information that follows is a redirect (in particular a 301 redirect) to forward one URL to another. And, in the case above “/old” is the original location (i.e. redirect source) of the page. And the “https://rankmath.com/new” URL is the destination for this redirect.
Please note: this part of the code requires the full URL to be entered in its entirety including “http://” or “https://”, for a .htaccess server-level redirect.
If you already use WordPress, of course, Rank Math makes this very easy as it even offers the ability to sync redirects to your .htaccess file so that they’re performed on the server level.
But, even if your website isn’t powered by WordPress, you can still benefit from using Rank Math to manage your redirects since all redirects created can easily be exported to .htaccess files or NGINX config files.
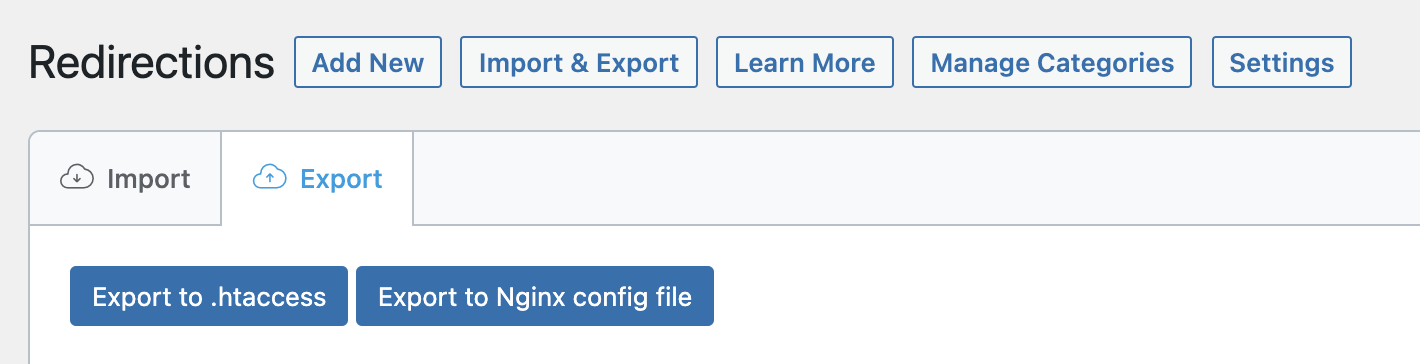
Meaning that you can create and modify redirects in bulk using Rank Math’s Export to CSV option and then re-import the redirects into a WordPress installation so that you can export them to a .htaccess file and add the redirect rules directly to your website’s .htaccess file.
Note: Redirectly is a useful tool that helps take the guesswork out of generating more complicated redirect rules.
Method #4 – Creating 301 Redirects in Bulk By Editing Your NGINX .conf File
Depending on your web hosting environment, you may not be able to create 301 redirects by editing your .htaccess file – in which case, an alternative would be to use the NGINX config (.conf) file to do so instead…
Similar to how the .htaccess file functions, you can create a 301 permanent redirect in NGINX by adding the following line:
“rewrite ^/old$ https://rankmath.com/new permanent;”
The “rewrite” matches regular expression patterns in parentheses.
The “/old” provides the original location of the page
The “https://rankmath.com/new” is the new URL of the page and is where the server should redirect visitors to.
The “permanent” tells NGINX that this is a permanent redirect so it’ll use the 301 (moved permanently) response code.
Once complete, you will need to restart/reload NGINX for newly created redirects to start working as expected. As mentioned above, for .htaccess files – even if your website isn’t powered by WordPress – you can still manage your redirects with Rank Math as all redirects created can easily be exported to .htaccess files or, in this case, NGINX config files.
Meaning that all you need to do is:
- Export the CSV redirects using Rank Math
- Modify the file to create, edit and delete redirects as you see fit
- Re-import the CSV using Rank Math
- Export your redirects to your NGINX config file
- Add the rules to your server (specifically to this web applications) NGINX .conf file.
- Restart NGINX to ensure that the changes made take effect.
5 After Action Report – Test Your Redirects
Now that you know exactly how to set up & deploy 301 redirects in bulk, it’s important to note that you should thoroughly test your redirects as you implement them, especially if you used one of the advanced implementations or chose to use regular expressions. Test edge cases, variations of your domain (i.e. www and non-www) to ensure that the redirects do in fact work as intended.
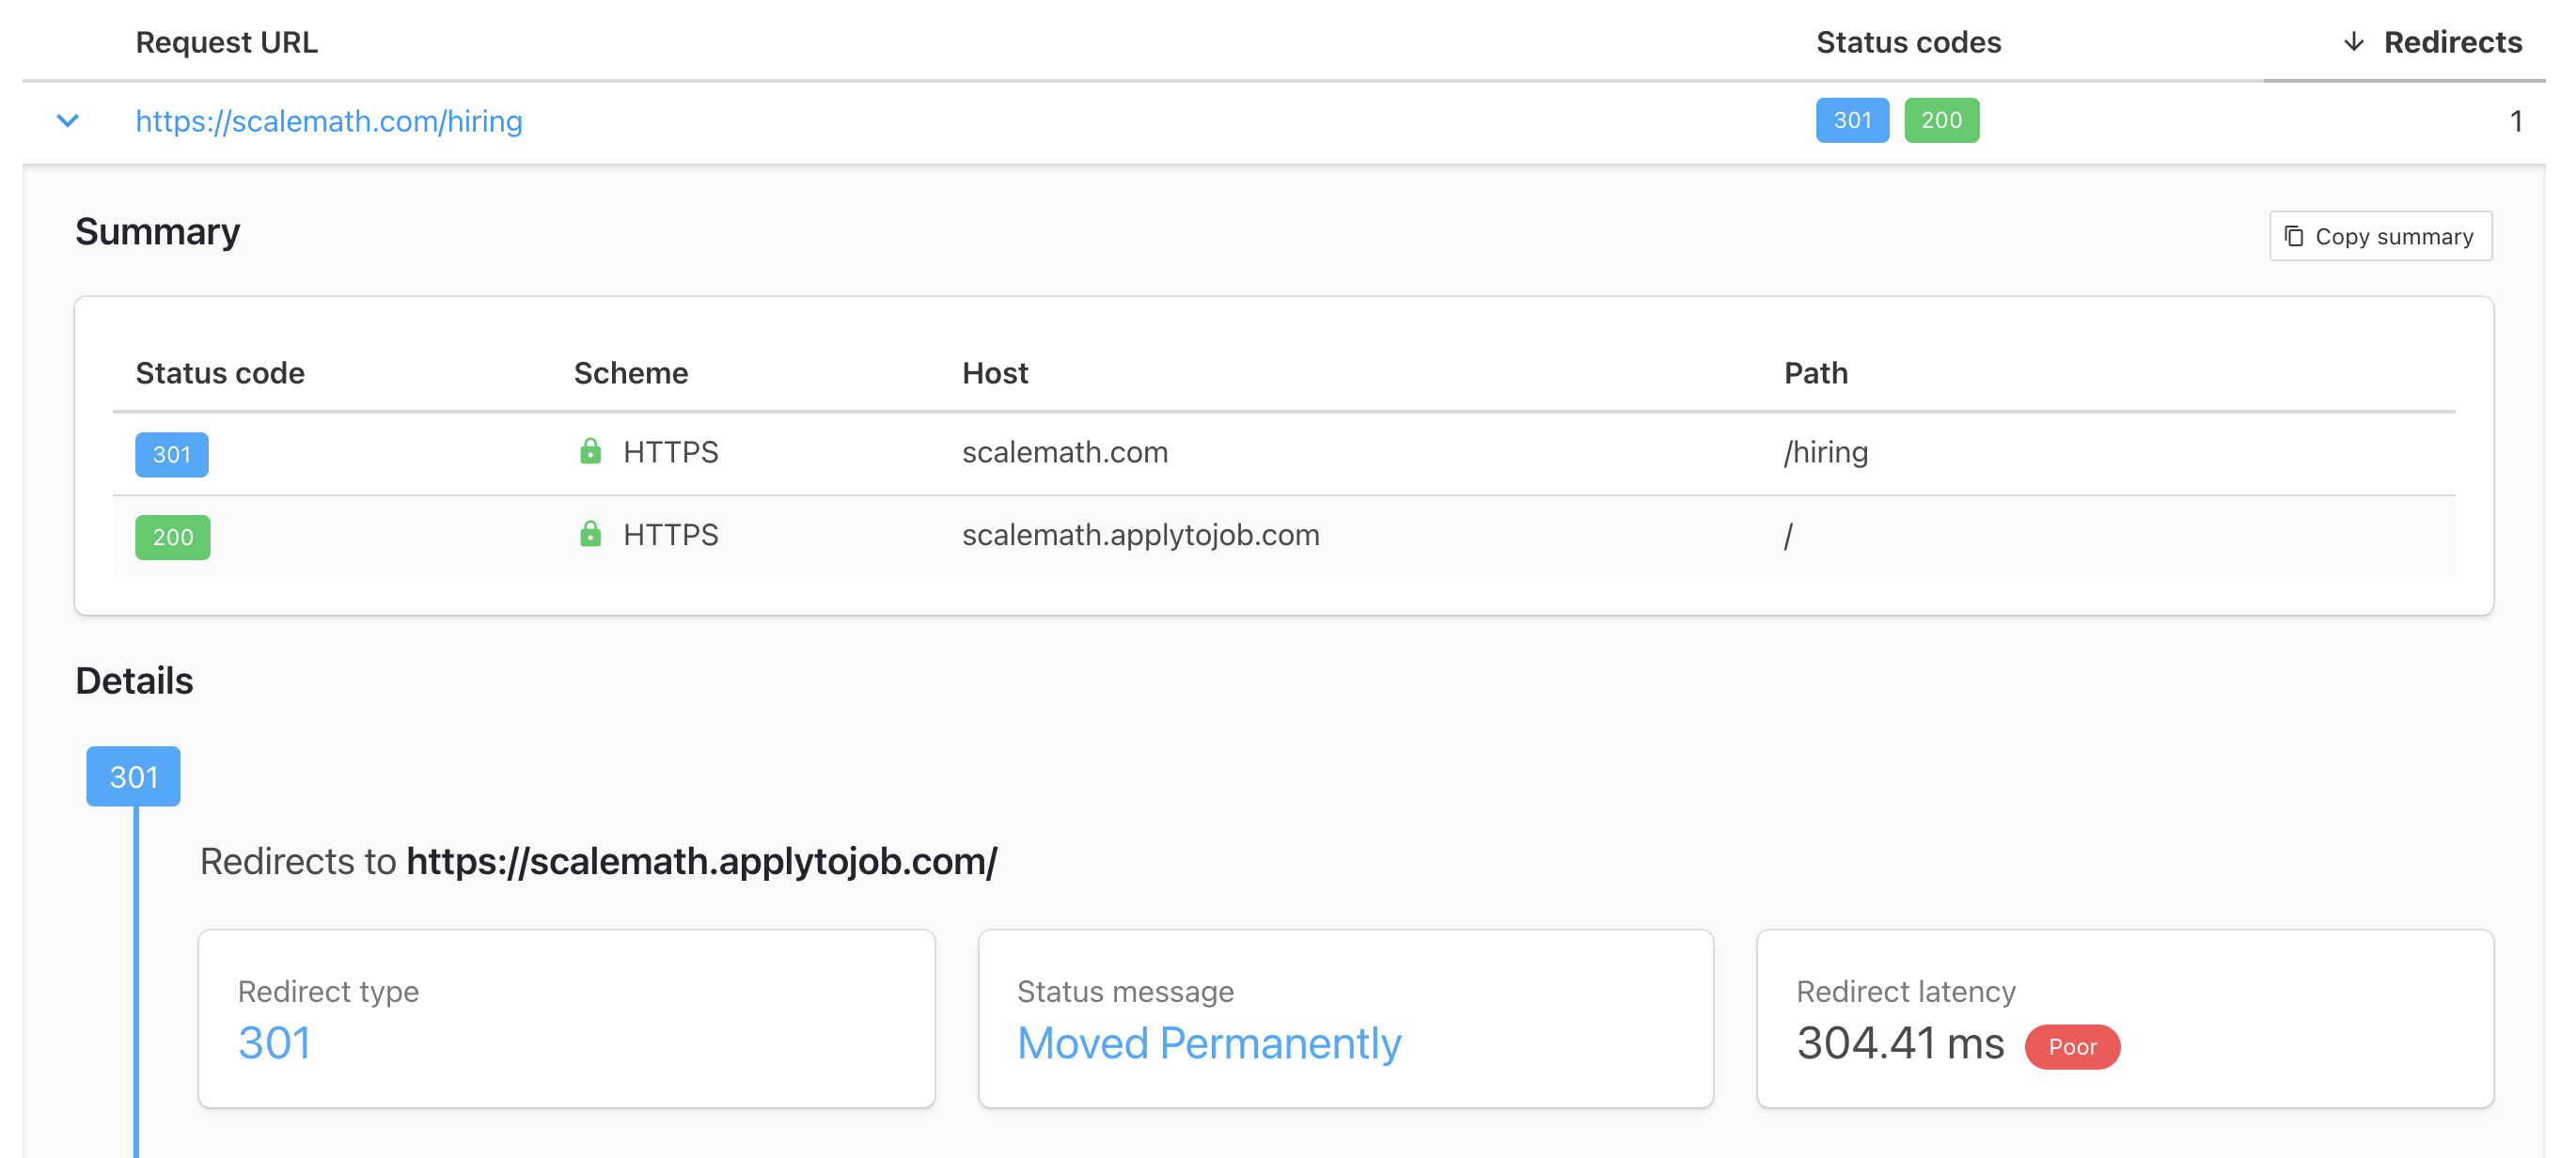
A great simple tool for this which makes it super simple to bulk test URL HTTP status codes, response headers, and redirect chains is HTTPstatus.io.
If you have absolutely any questions or want to join the conversation – Tweet @rankmathseo! 💬