
Content AI offers several AI Tools to help you with your writing tasks. To ease your workflow and save you from the burden of switching tabs while writing, we’ve integrated all these AI features into Block Editor, so you can focus on creating quality content for your readers.
Before we discuss the various Content AI features available in the Block Editor, please ensure that you’ve enabled the Content AI and Link Genius modules. To do that, head to Rank Math SEO from your WordPress dashboard. Then, enable the Content AI module, as shown below.
Note: If you ever reach your usage limits, you can easily subscribe to a Content AI plan that aligns with your requirements.
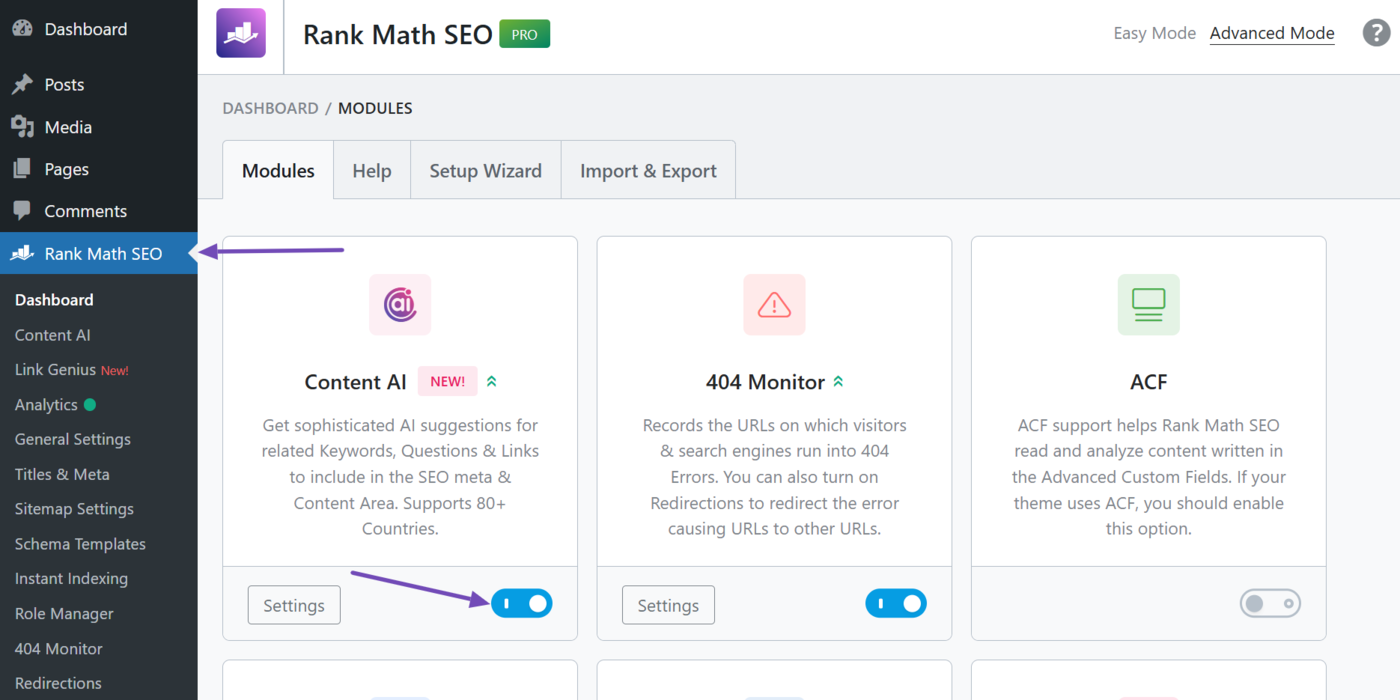
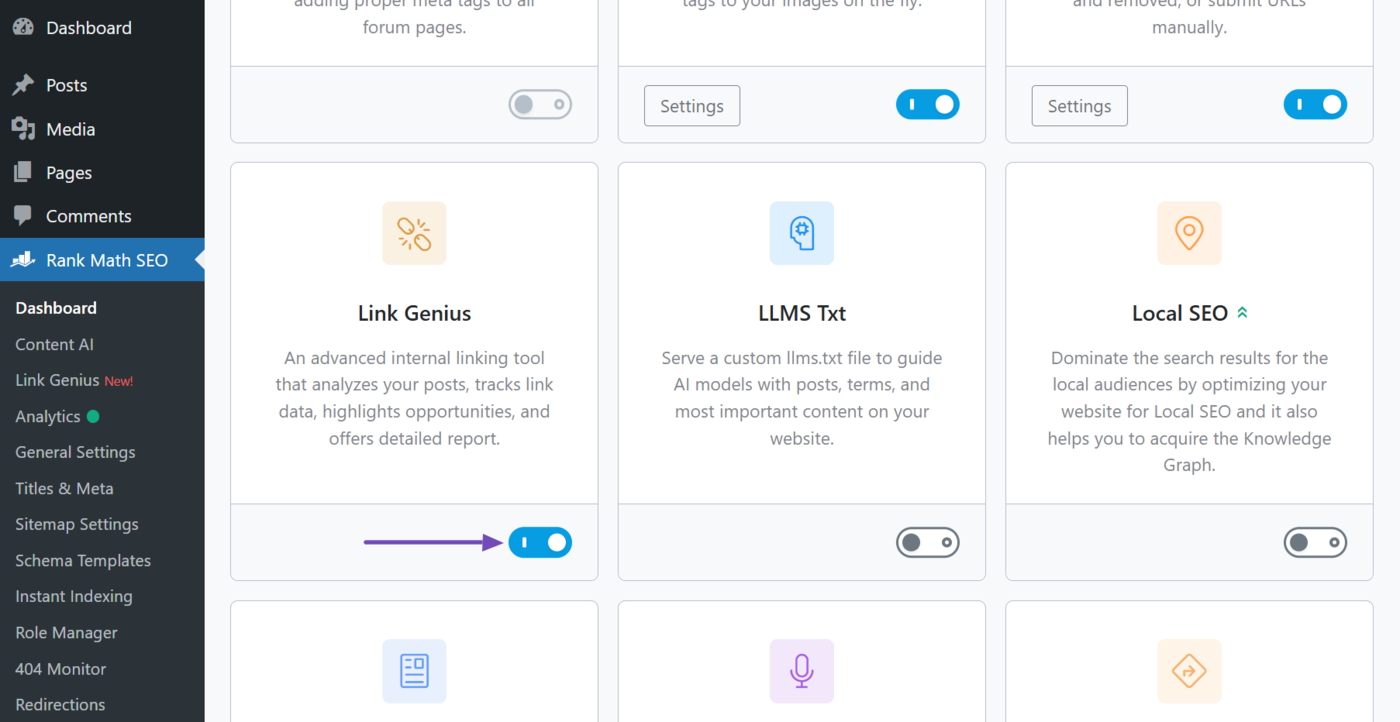
Once done, enable the Link Genius module, as shown below.
In this knowledgebase article, we’ll walk you through how to use Content AI in Block Editor.
Table of Contents
1 // Shortcut
Content AI can be used anywhere with the Block Editor using the // shortcut. To use this shortcut, simply follow the below steps.
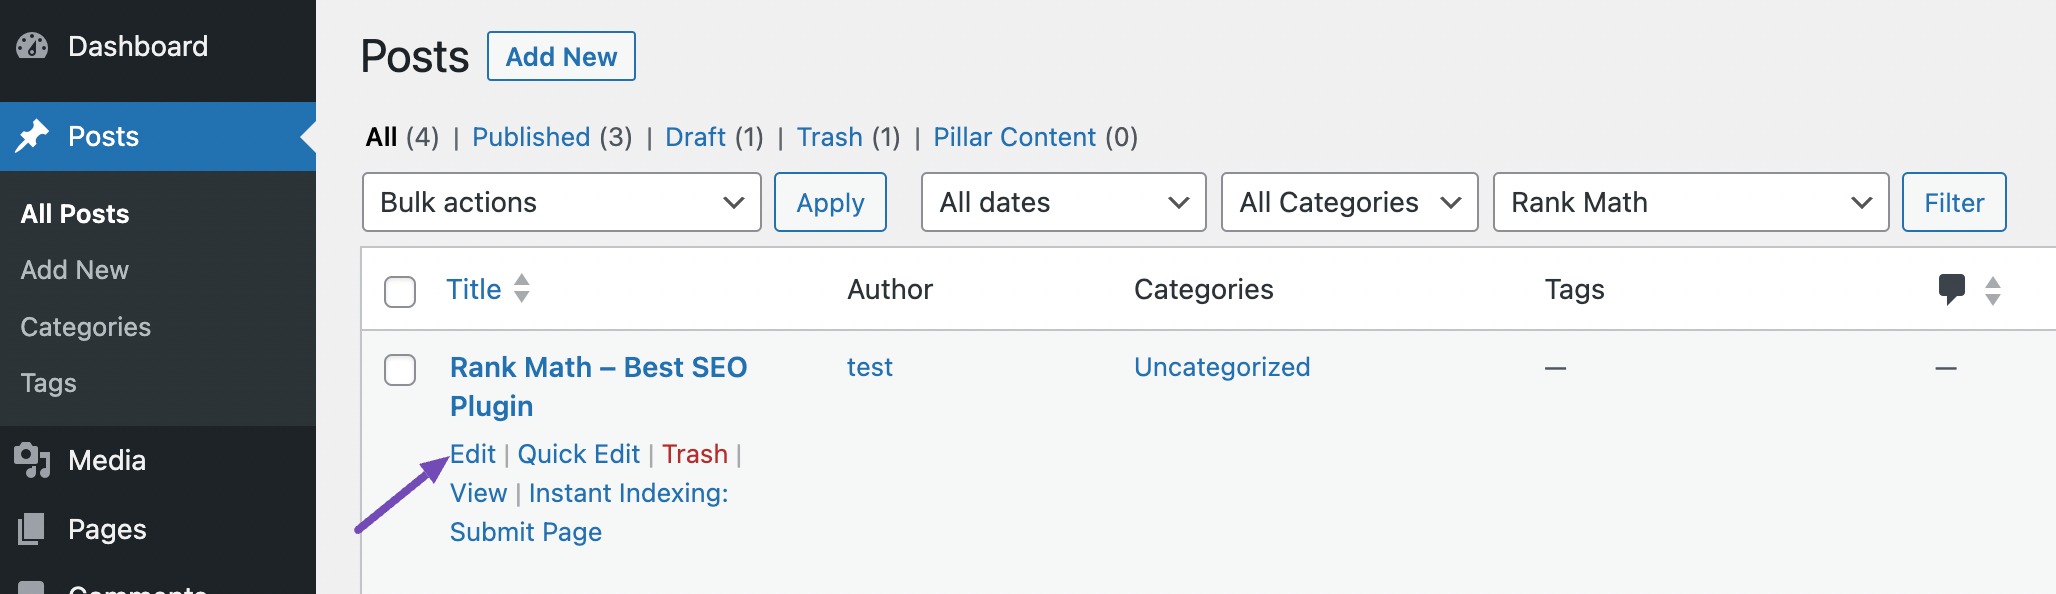
1.1 Edit the Post in Block Editor
Open the post that you want to edit in the Block Editor.
1.2 Open Content AI by Rank Math Block
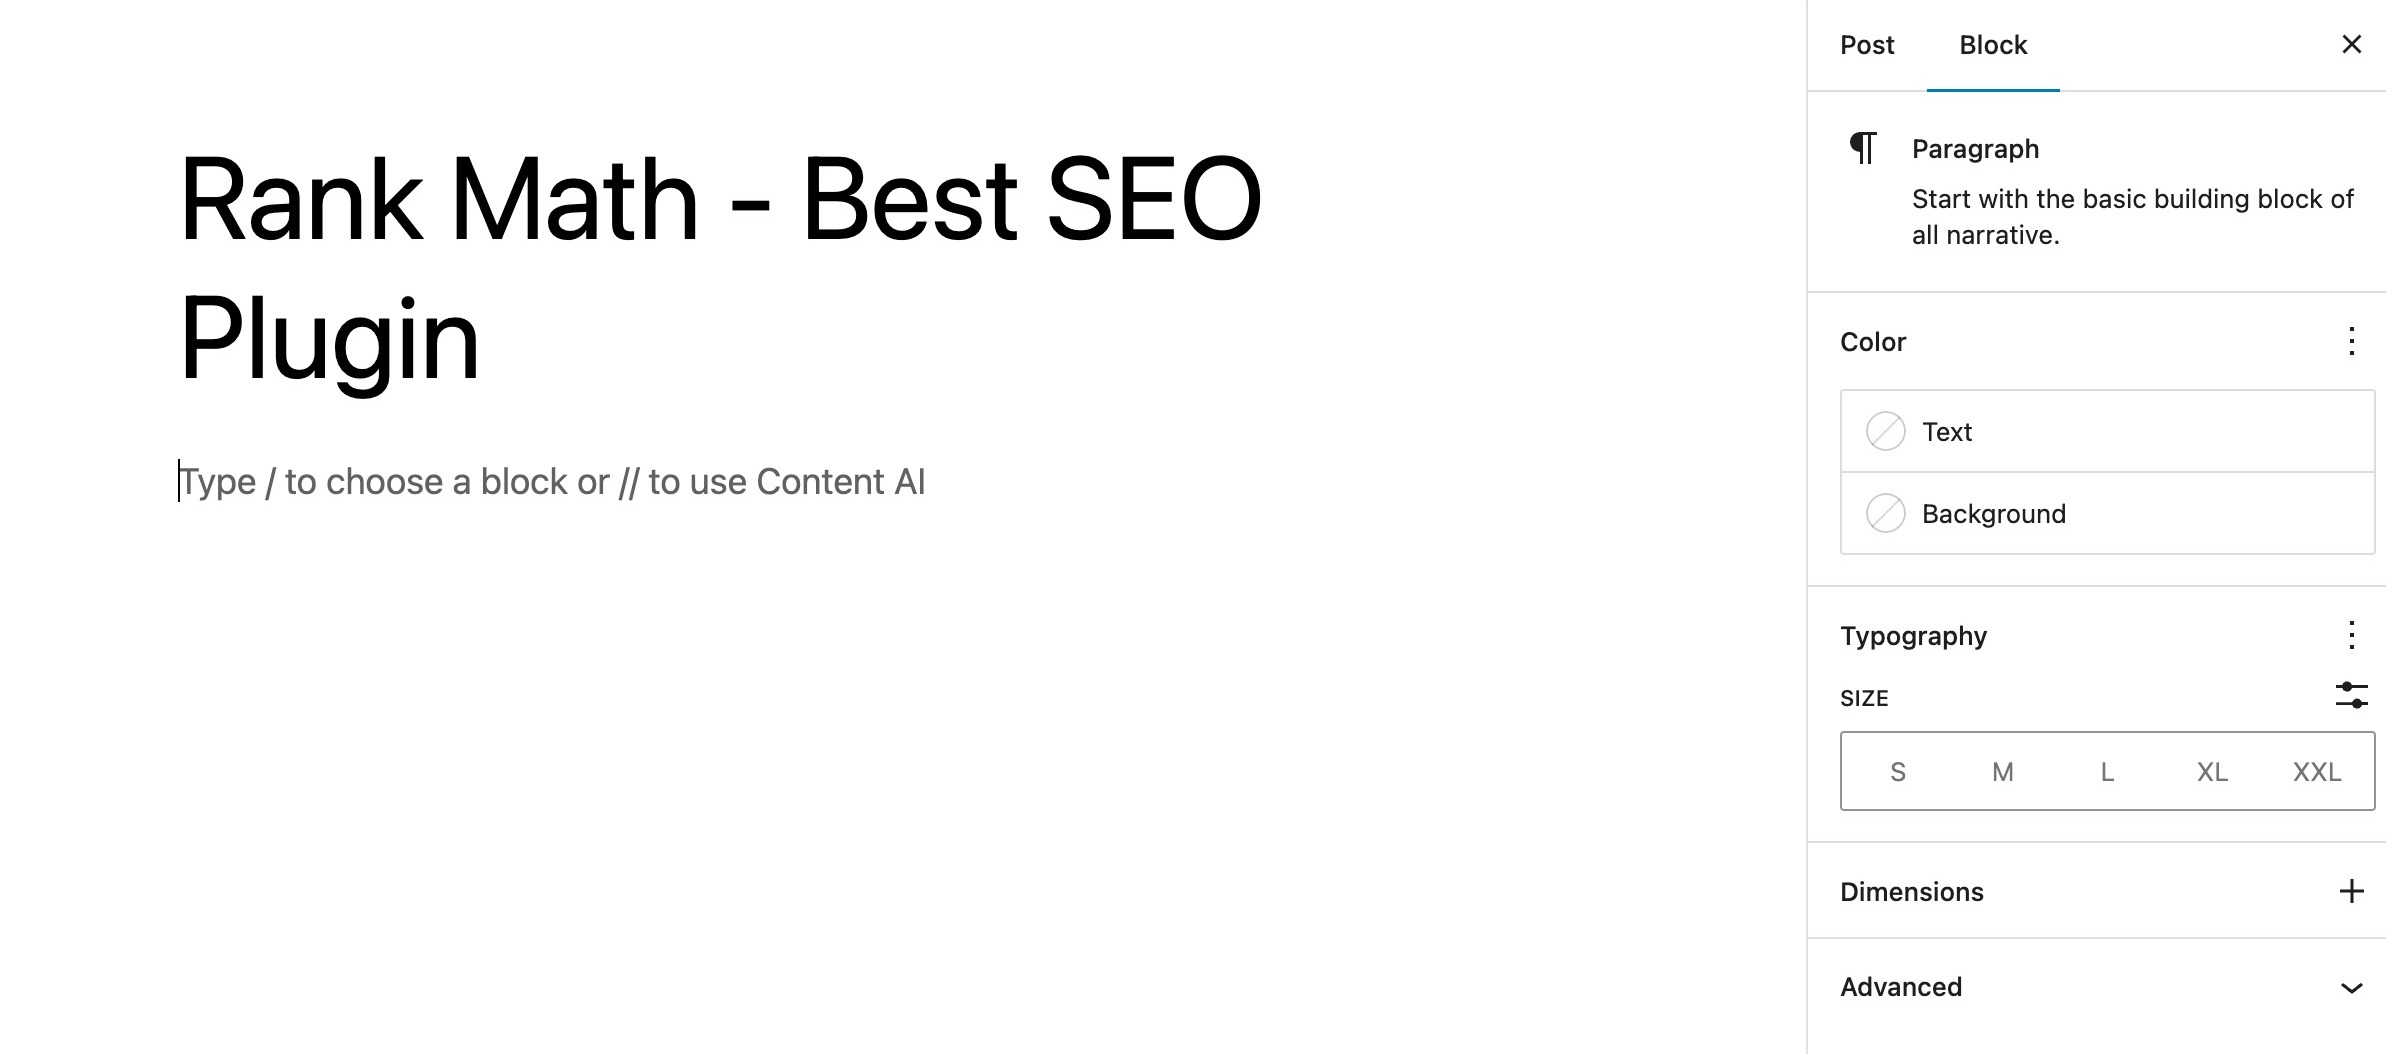
In the Block Editor, press // to add the AI Assistant Block instantly, as shown below.
1.3 Write a Prompt or Select the AI tool
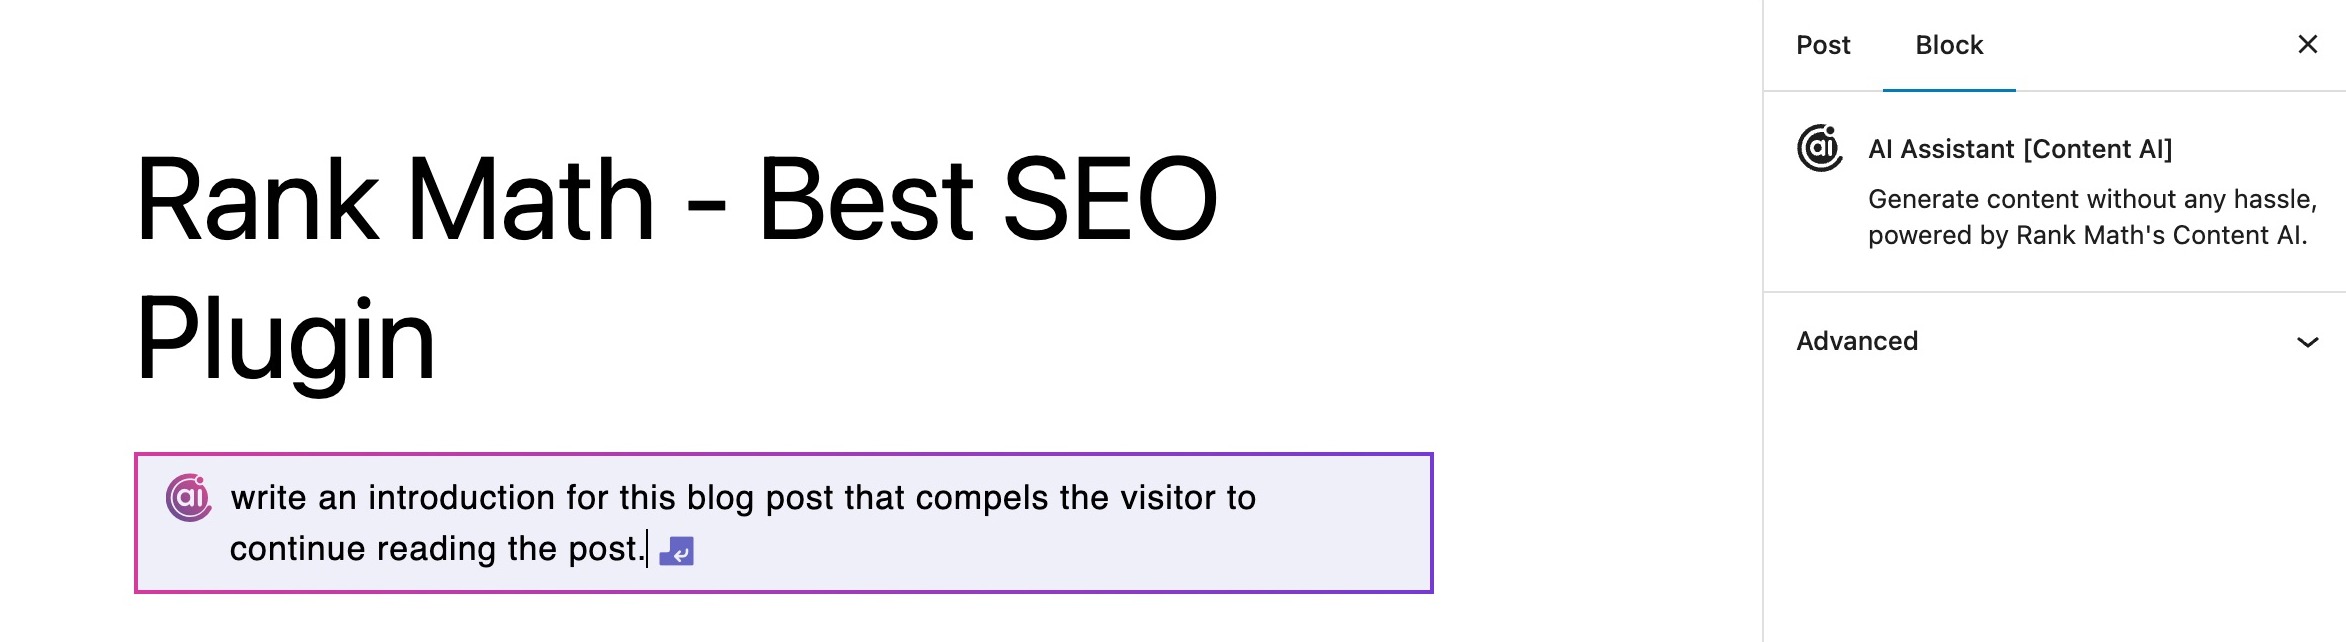
In the AI Assistant Block, enter your prompt and hit Enter to let Content AI start generating the output.
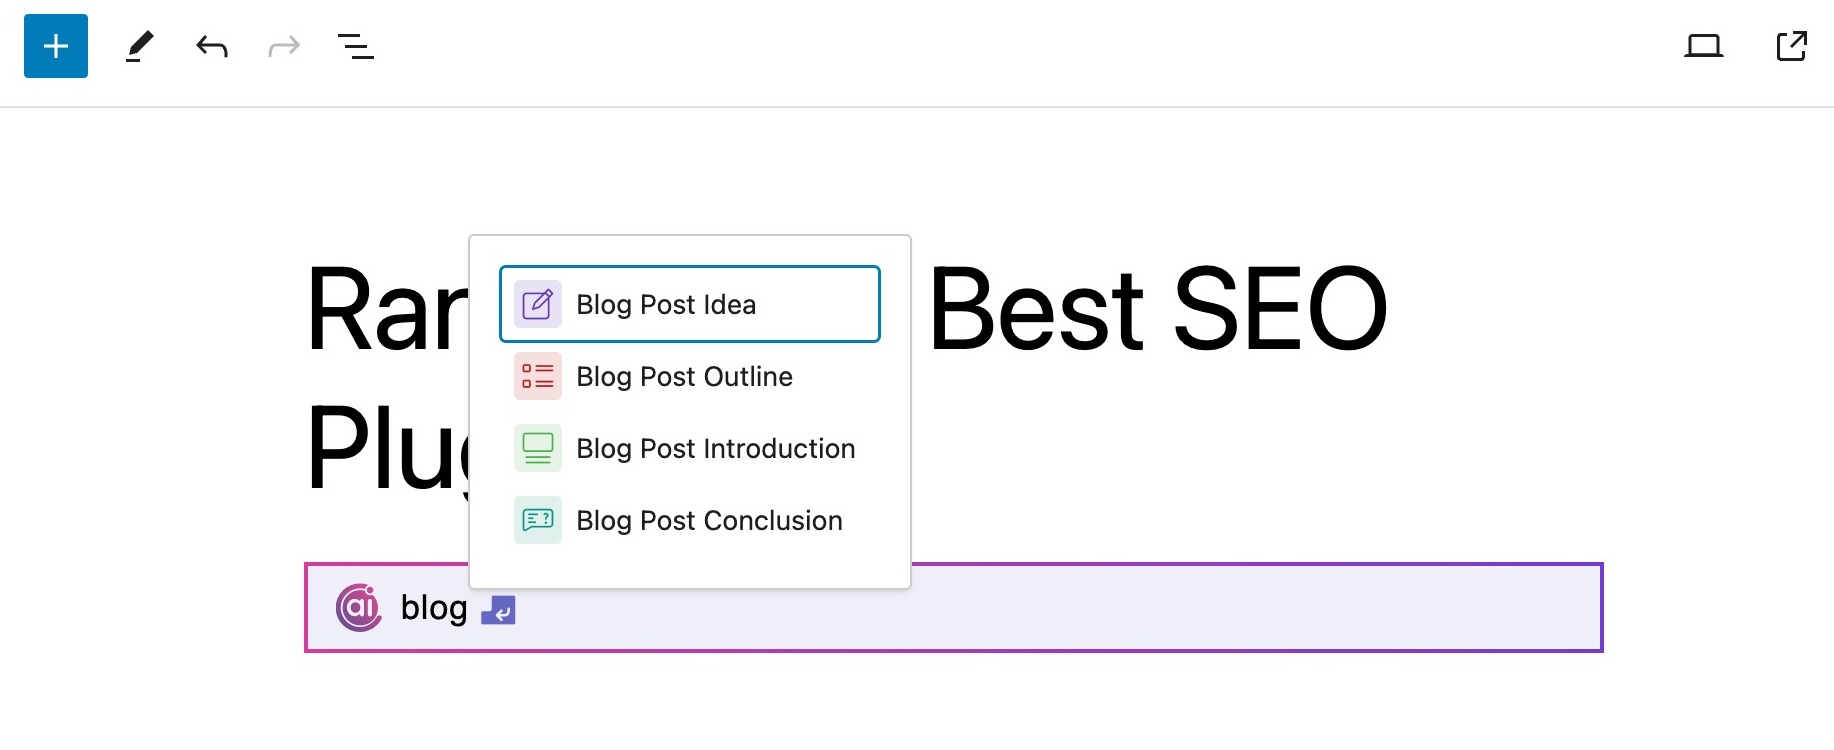
Alternatively, you can type the Content AI tool that you want to use and select it from the dropdown list.
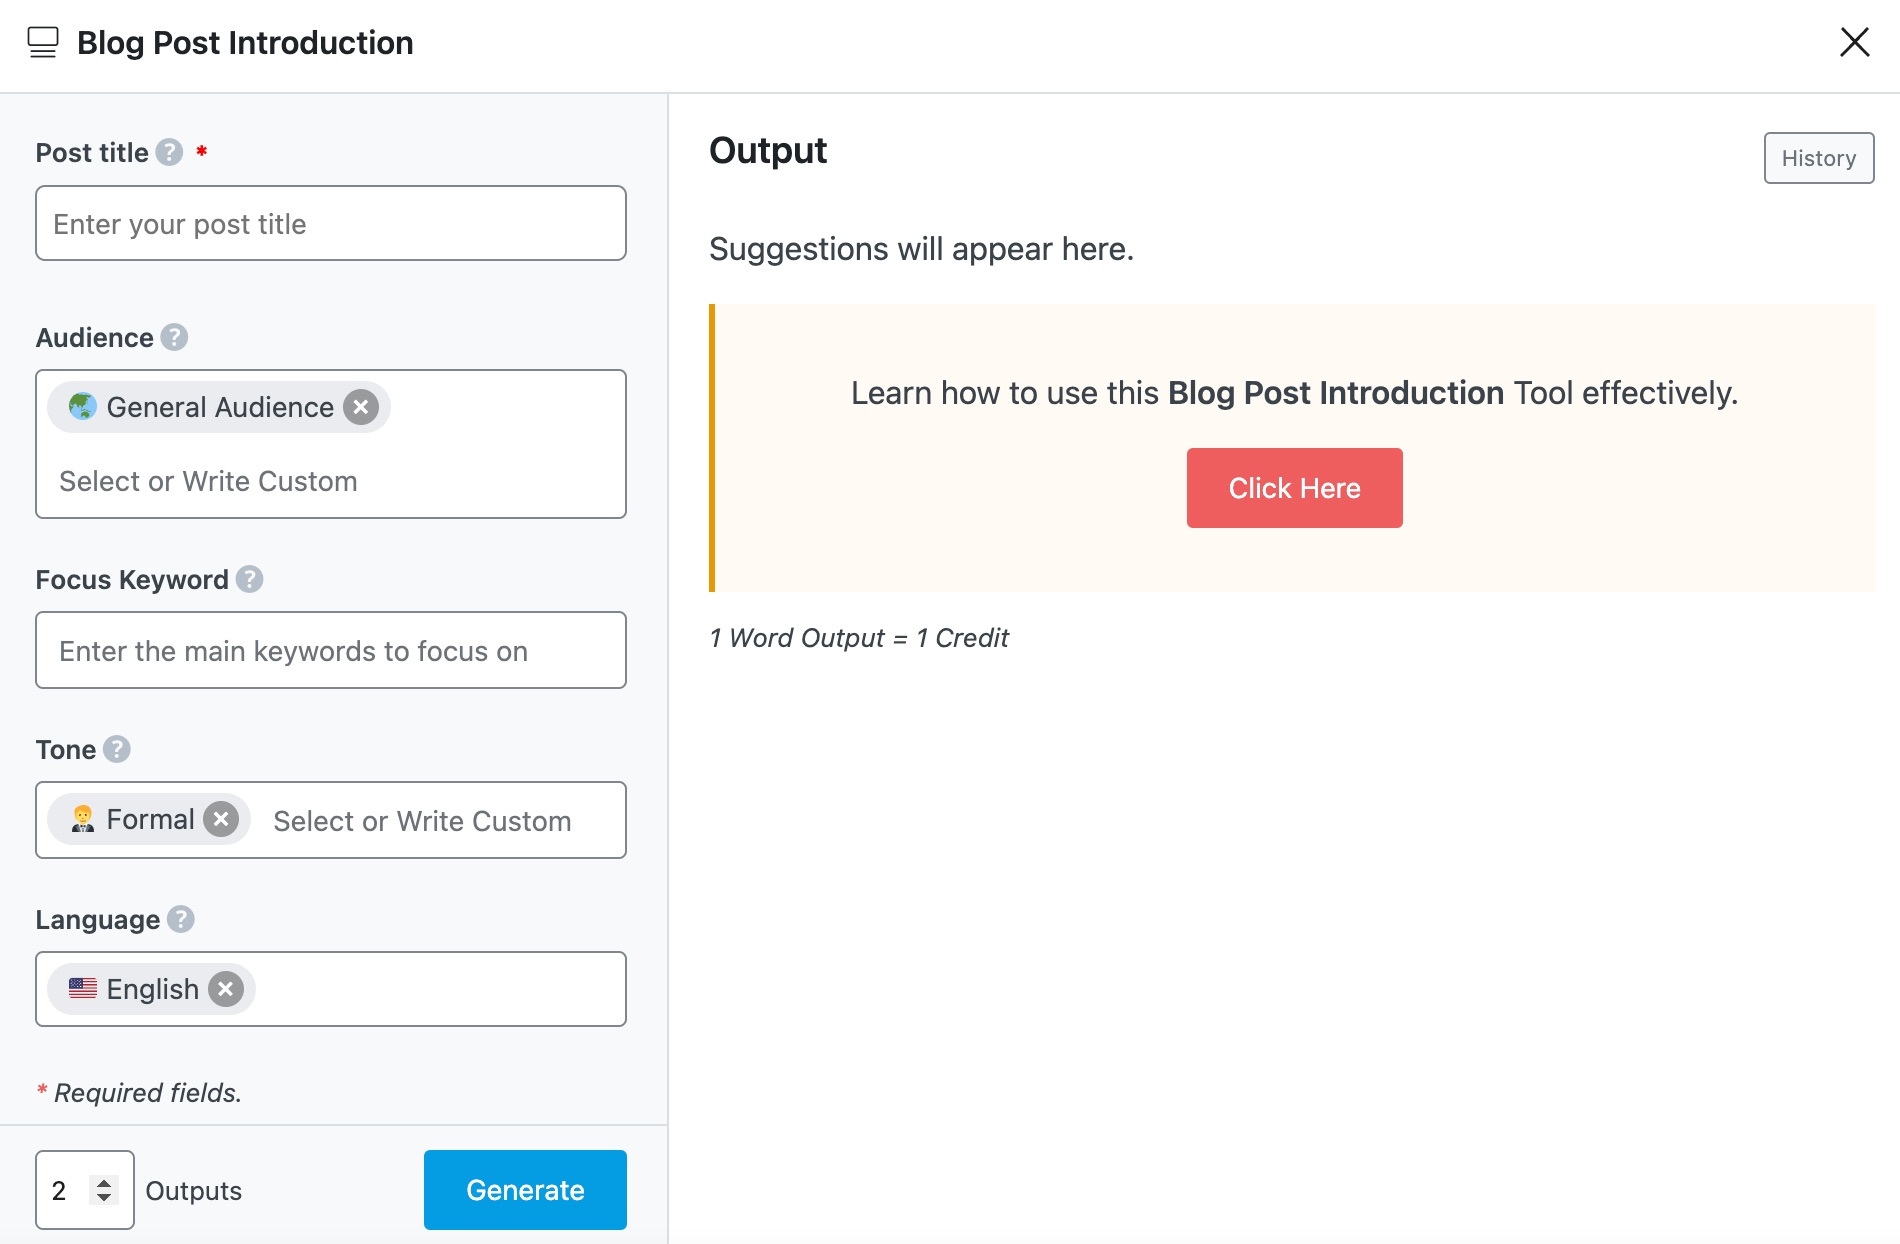
Now, the corresponding Content AI tool will pop up on the screen, where you can fill in the relevant fields and hit the Generate button.
Now, the Content AI will start generating the output on the right side of the screen. As you hover over the generated output, you will notice two options, namely, Copy and Insert.
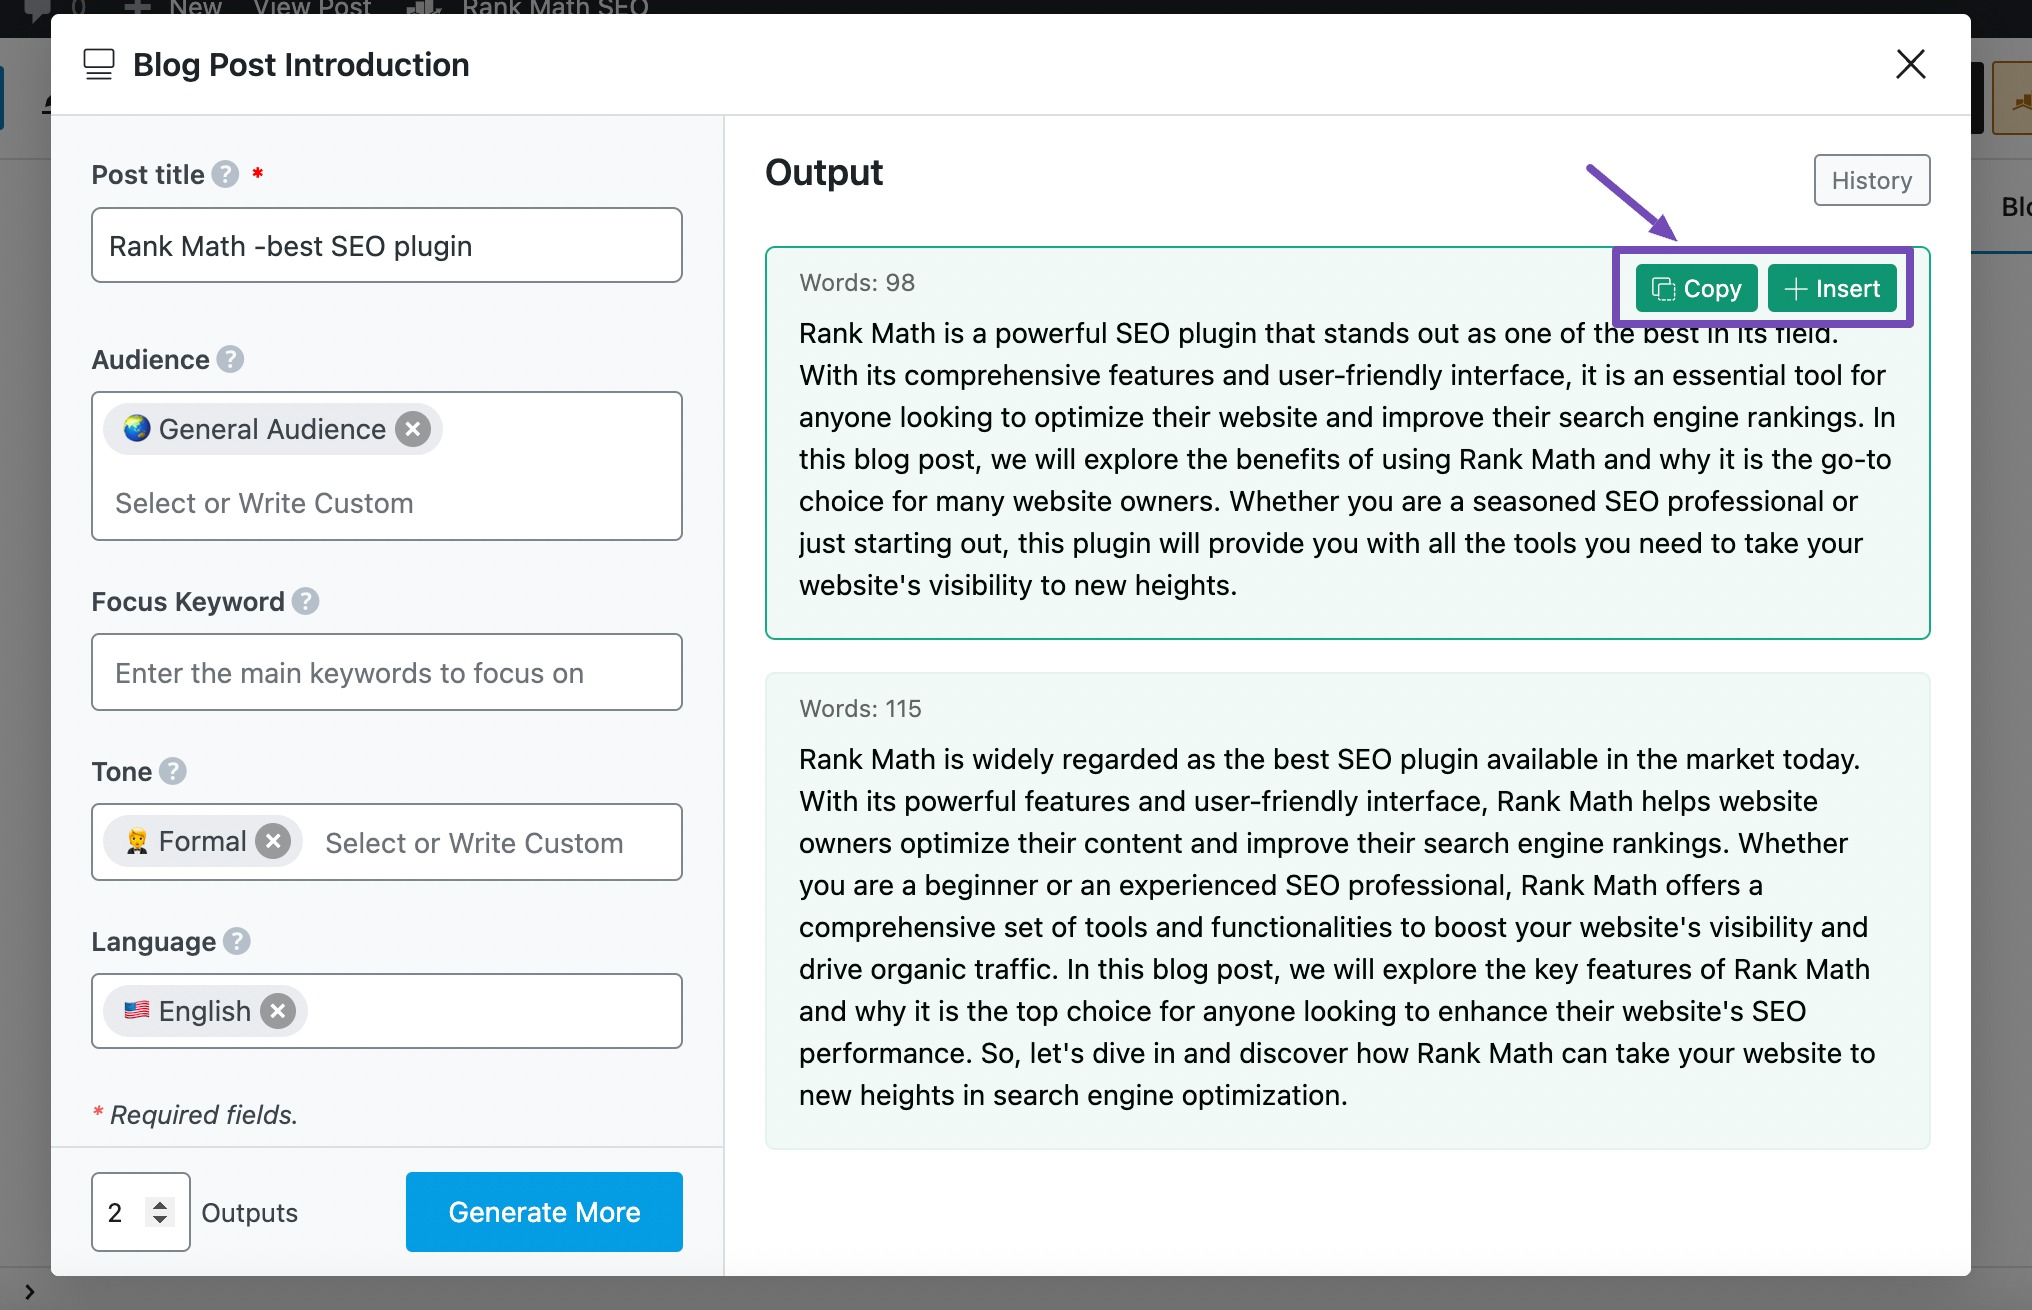
The Copy option allows you to copy the output of your choice to your clipboard, so you can paste it anywhere you prefer to use it.
The Insert option will insert the output directly into the Block Editor.
2 Content AI Blocks
You can also access the Content AI blocks while you write within your block editor, using the:
- AI assistant block
- Related posts block
Here’s how to access both Content AI blocks.
2.1 Edit the Post in Block Editor
Open the post that you want to edit in the Block Editor.
2.2 Open Block Library
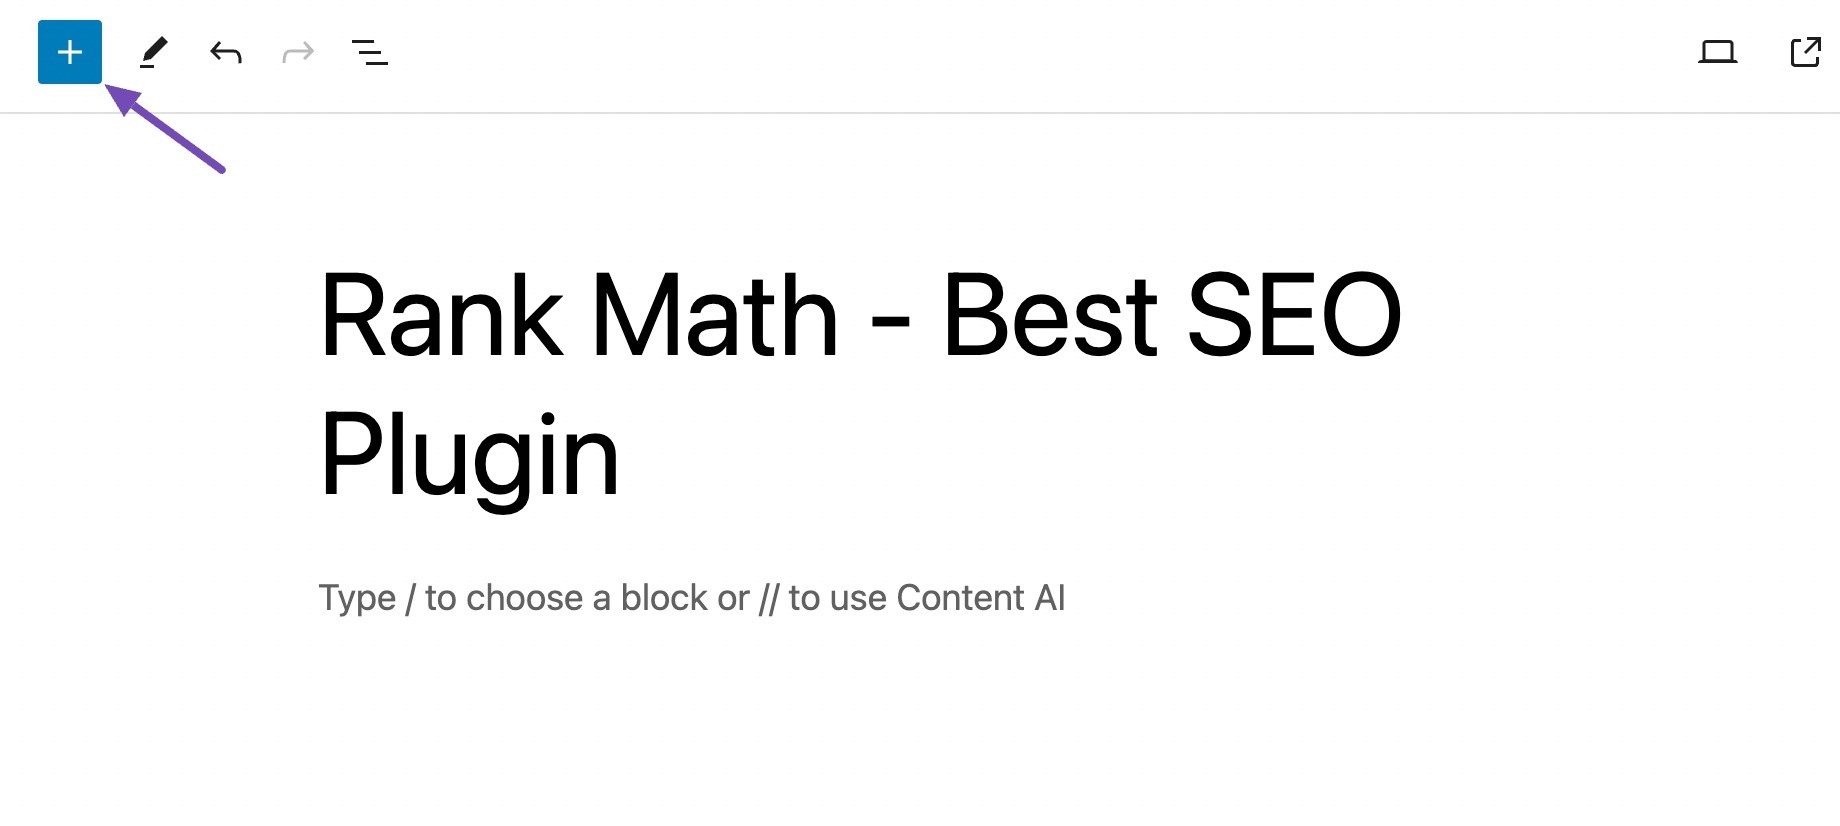
In the Editor window, you can add a new block by clicking the + icon that appears on the left sidebar as well as on the right end of a new line. Alternatively, you can type / in a new line to open the block library.
2.3 Open Content AI Block
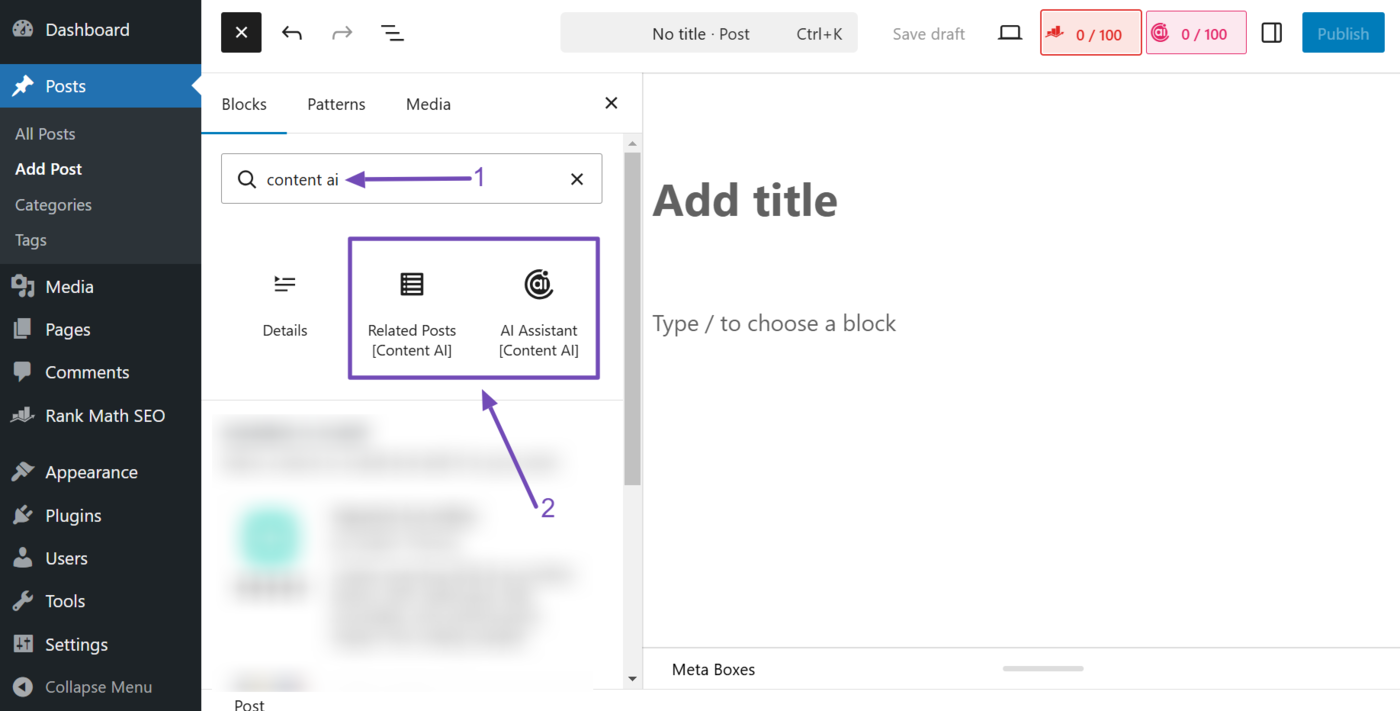
Once done, type Content AI into the block inserter’s search bar. You will see two Content AI blocks:
- AI assistant [Content AI]: Inserts the Content AI assistant into your editor
- Related posts [Content AI]: Inserts the related posts block into your editor
Click on the block you want to add to your article.
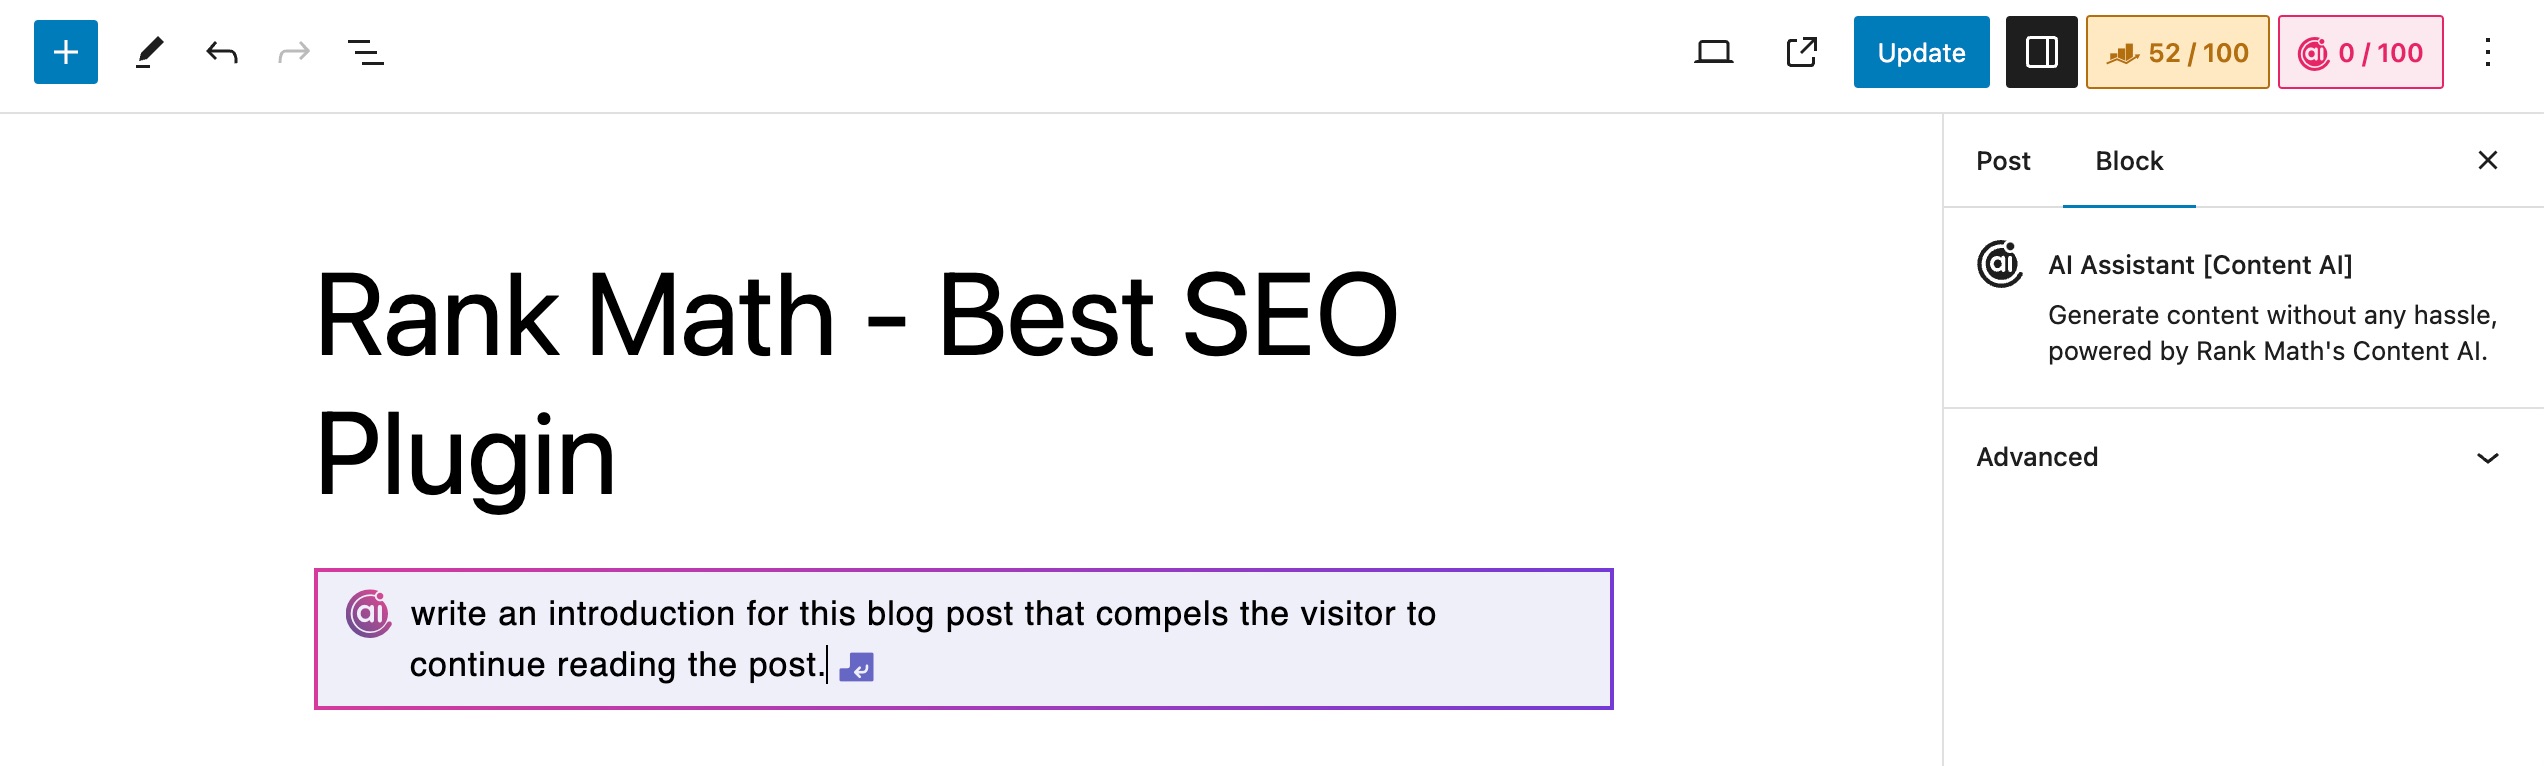
If you selected the AI assistant [Content AI] block, you can proceed to write a prompt and let the AI assistant generate the output. You can also use the AI assistant to open any AI tool, as we walked through earlier.
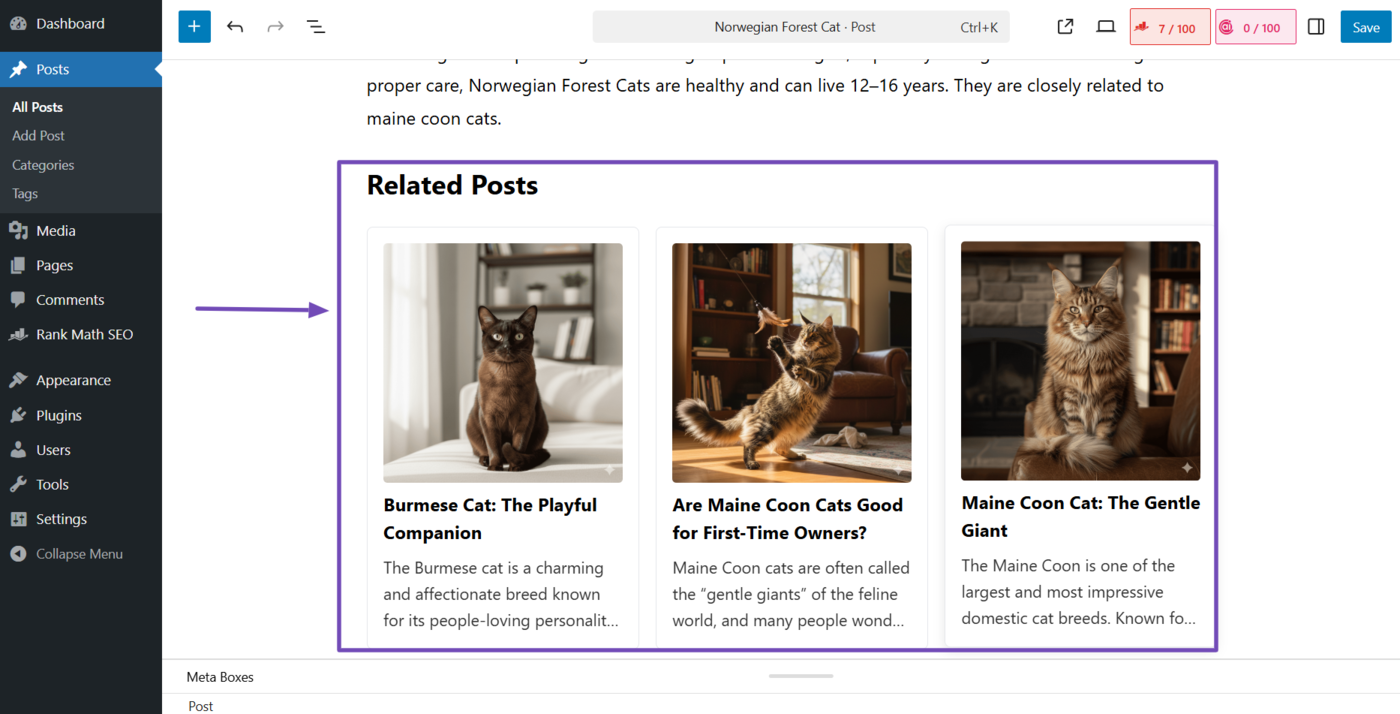
If you selected the Related posts [Content AI] block, a related posts block will be inserted into your content. If you want to customize it, you can refer to this guide on customizing the related posts block so it meets your needs.
3 Content AI Panel
Apart from these methods, you can also access Content AI features from the dedicated Content AI panel. To access it, click the Content AI icon that appears at the top-right corner of the Block Editor screen.
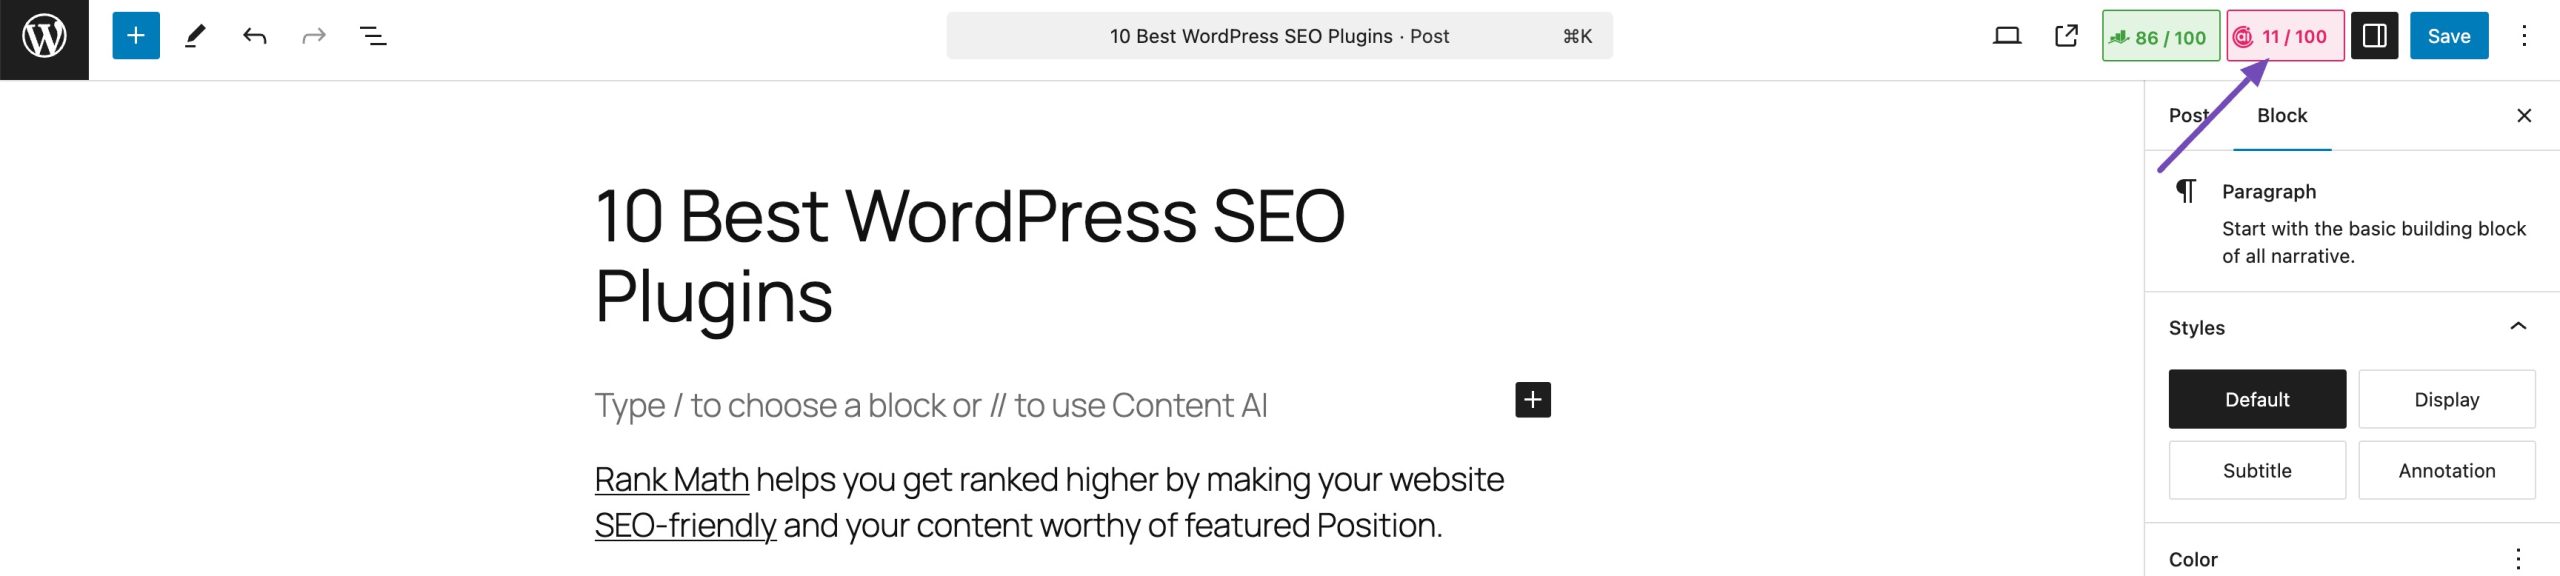
Alternatively, you can access the Content AI Panel from the familiar Rank Math Meta Box.
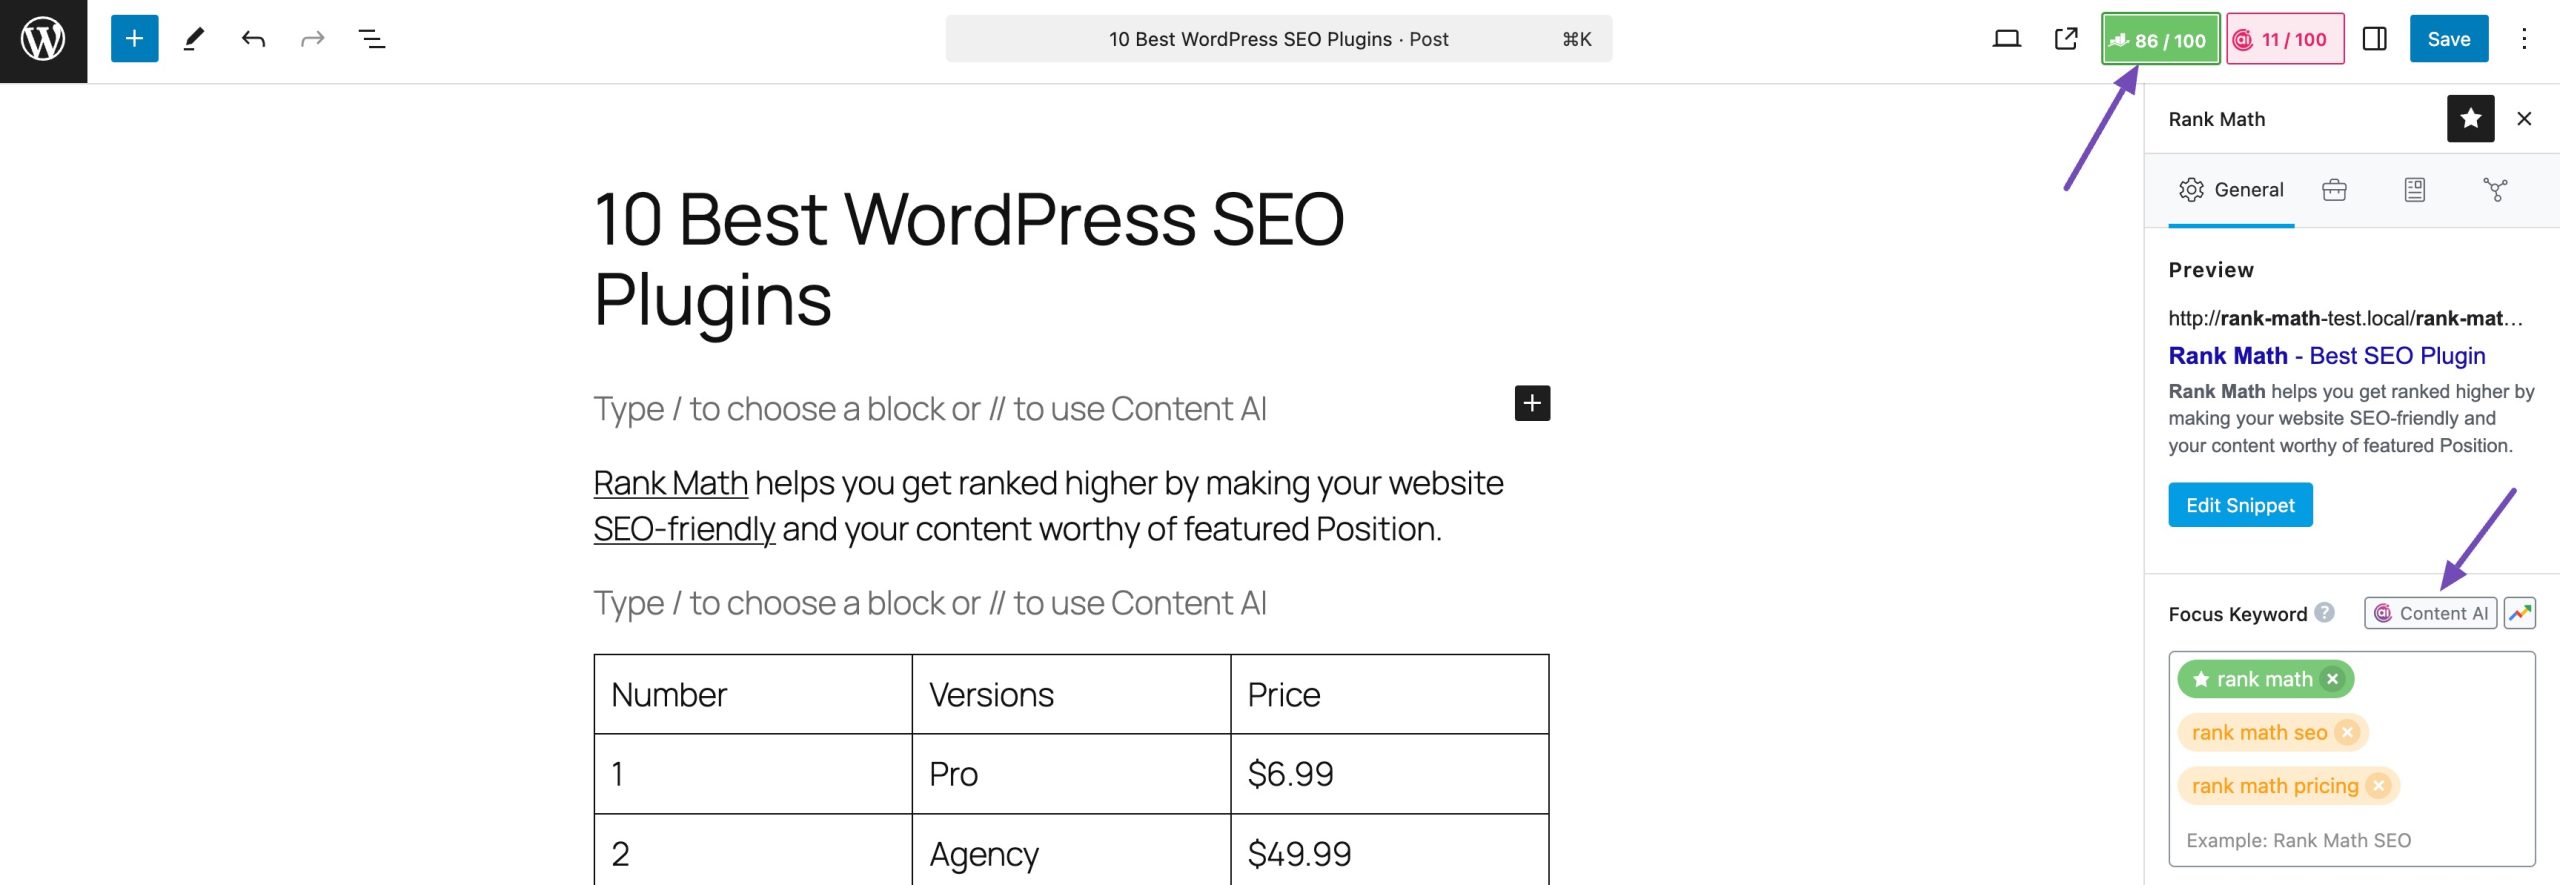
Here’s how the Content AI Panel would look like, where you can access the Research tool, Writing tool, AI Tools, and RankBot.
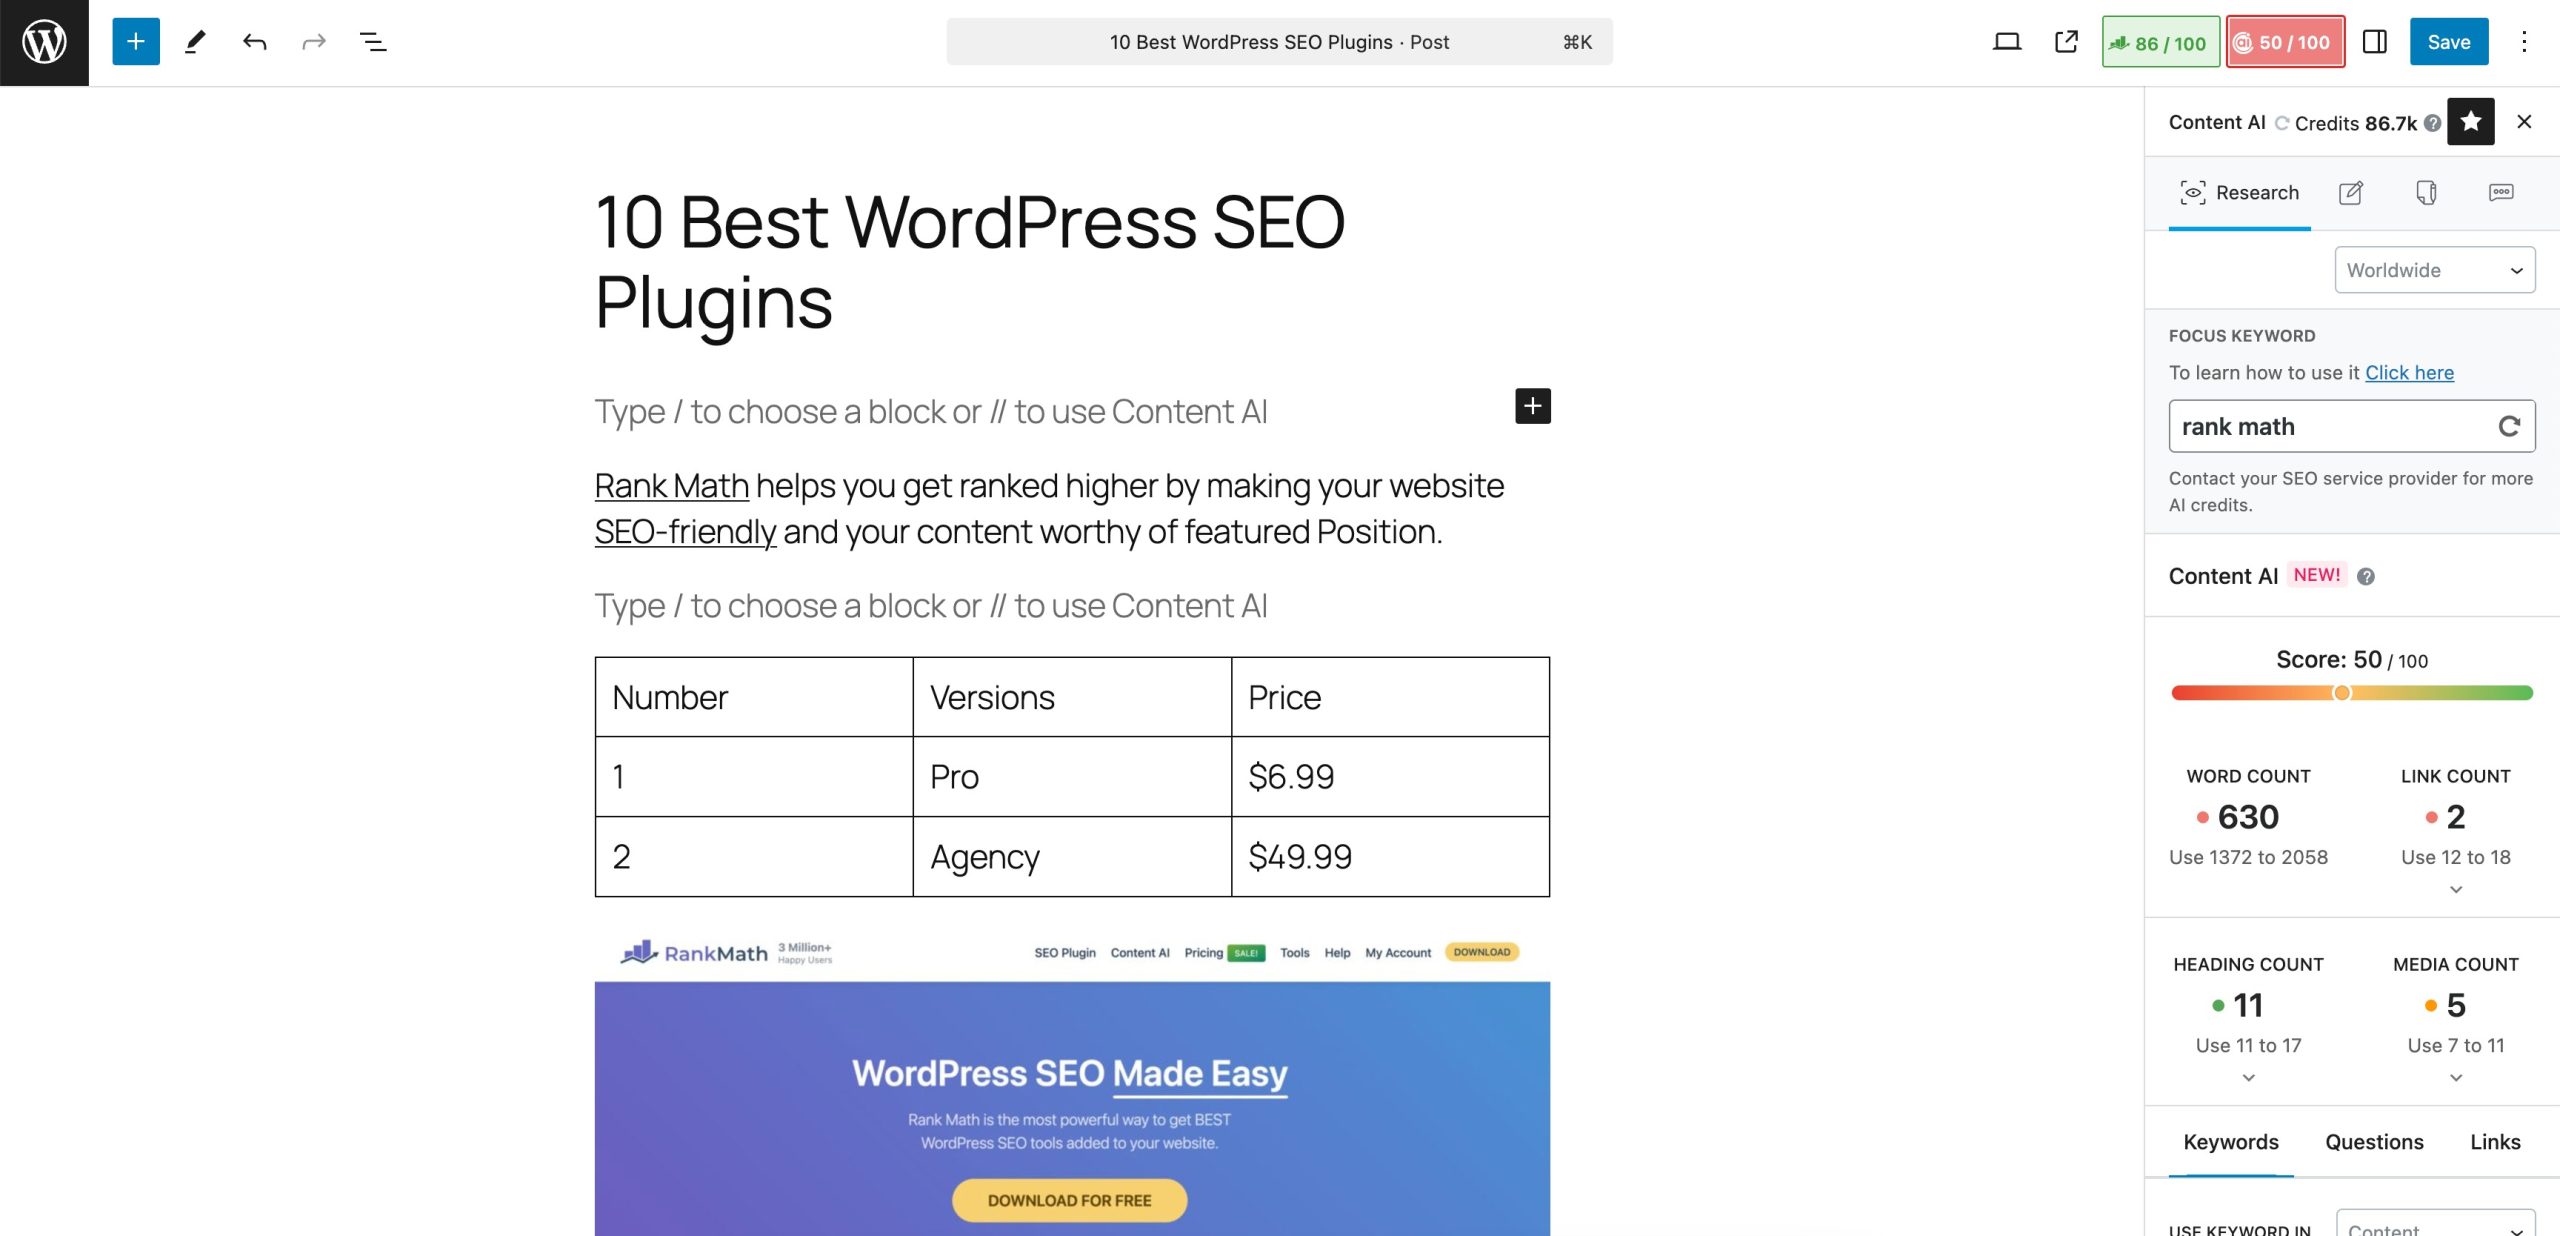
3.1 Research
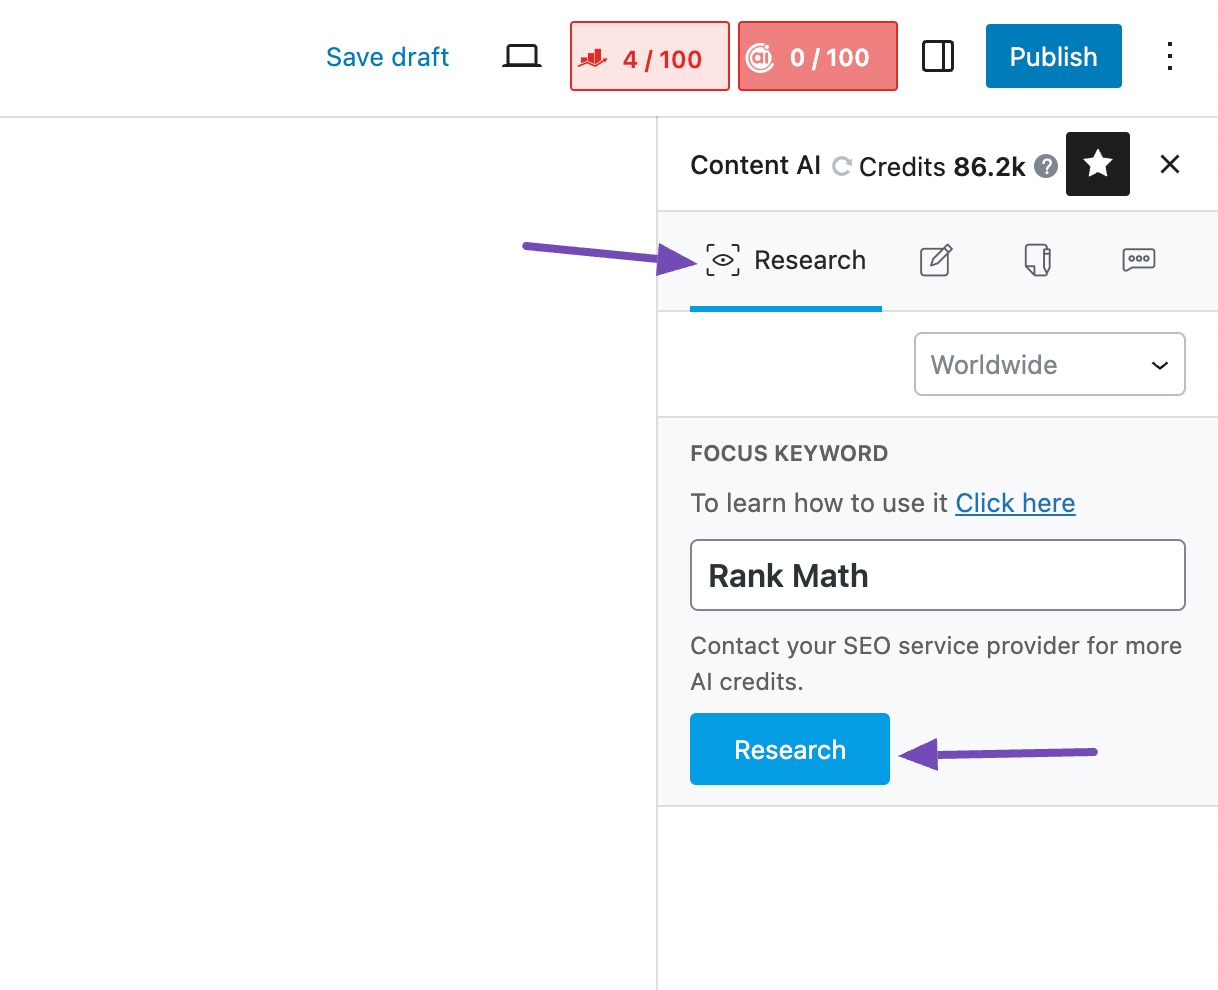
In the Research section, you can research your desired target keyword and receive insightful recommendations from our Content AI. Enter the keyword in the FOCUS KEYWORD field, click the Research button, and wait for the magic.
3.2 Write
In the Write section, add the relevant details, and our Content AI will start generating the output in the Block editor, as shown below.
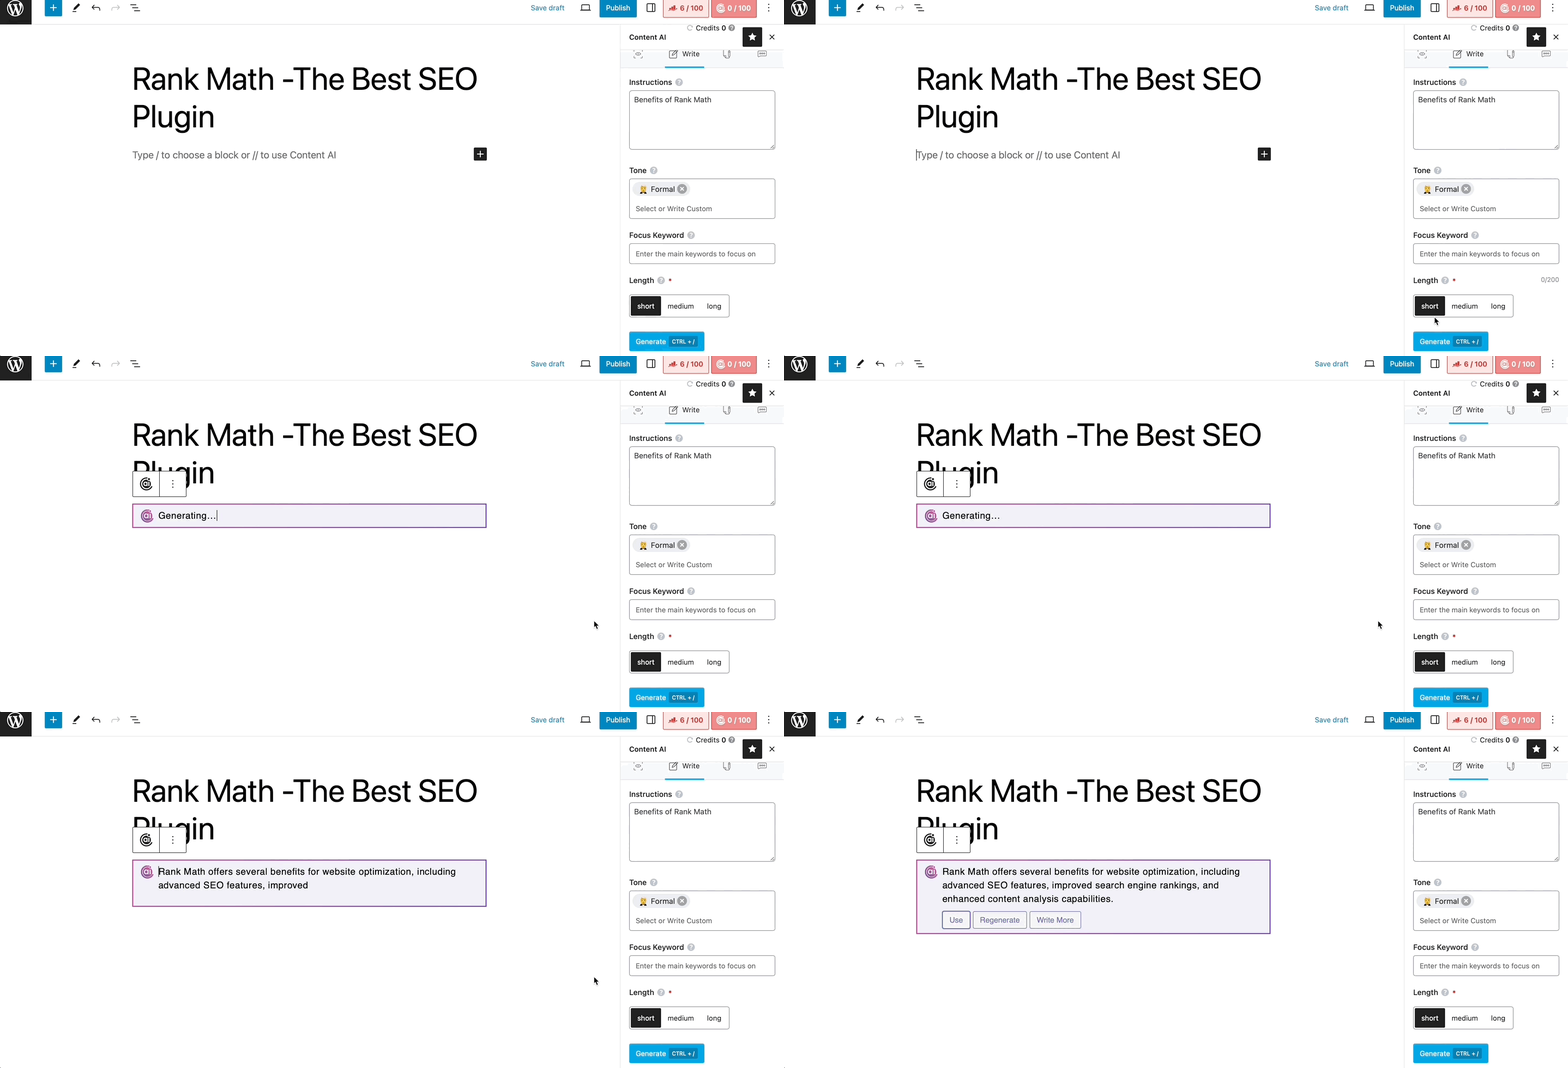
You can also use Ctrl + / to generate the output. This keyboard shortcut works only when the Write tab is active in the block editor. This sends the tone and instructions as well.
3.3 AI Tools
In the AI Tools section, you can find 40+ Content AI tools that you can use right within the Block Editor.
You can use any of the listed AI tools of your choice. The corresponding Content AI tool will pop up on the screen, where you can fill in the relevant fields and click the Generate button.
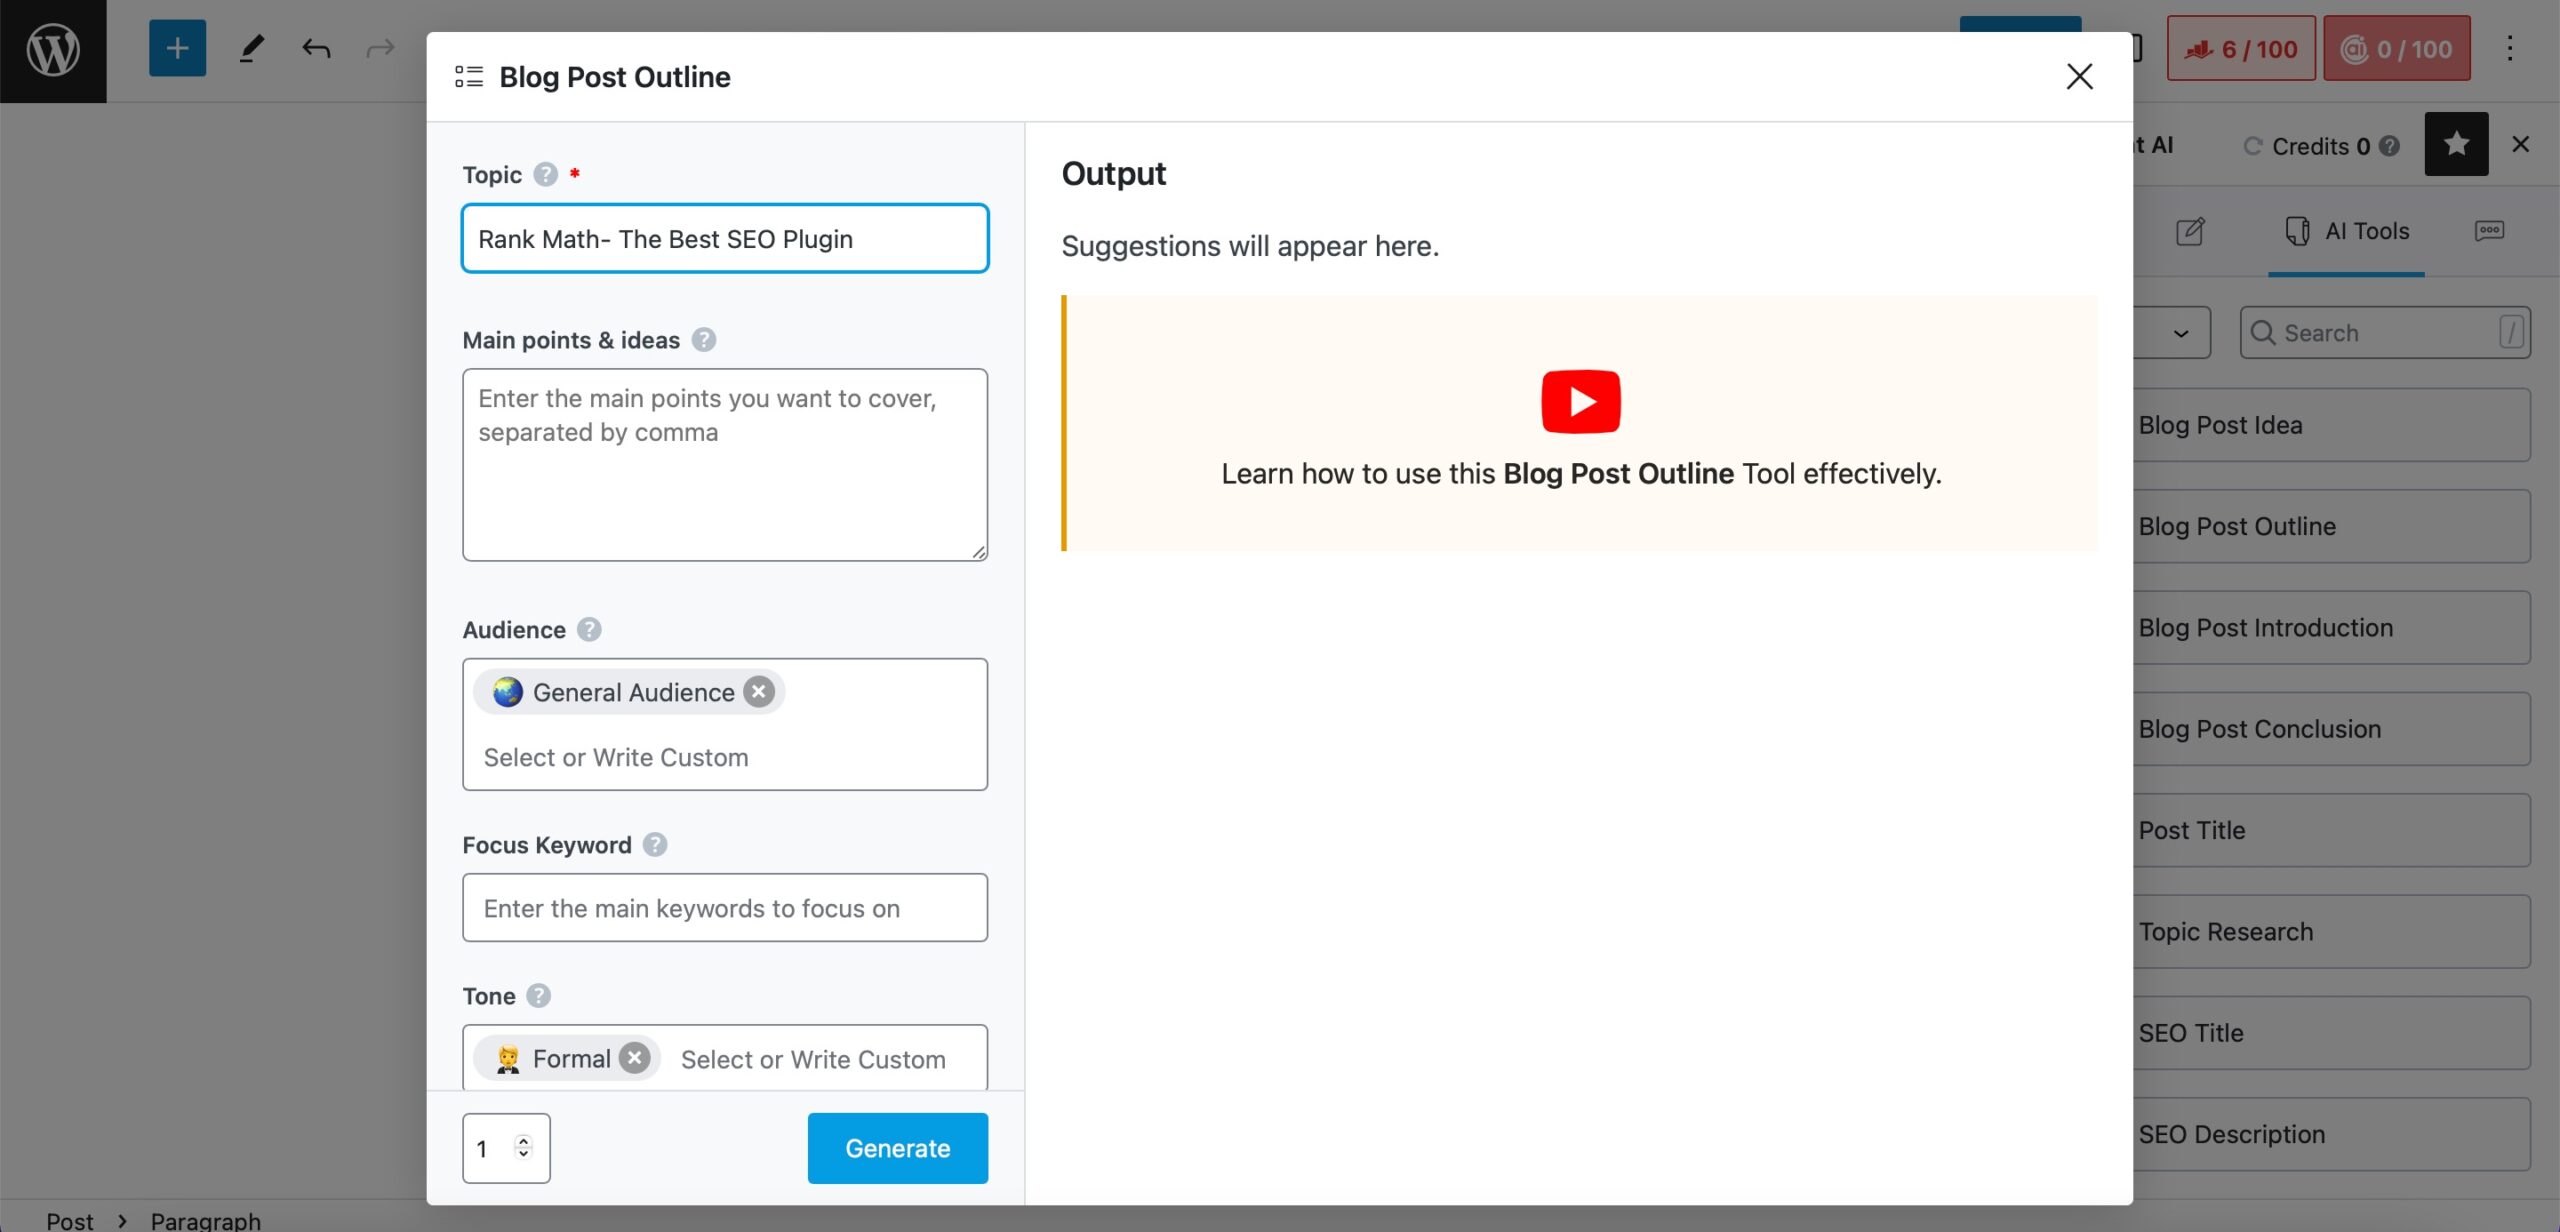
Once the content is generated, click the Copy/Insert option to either copy the content or insert it in the Block Editor.
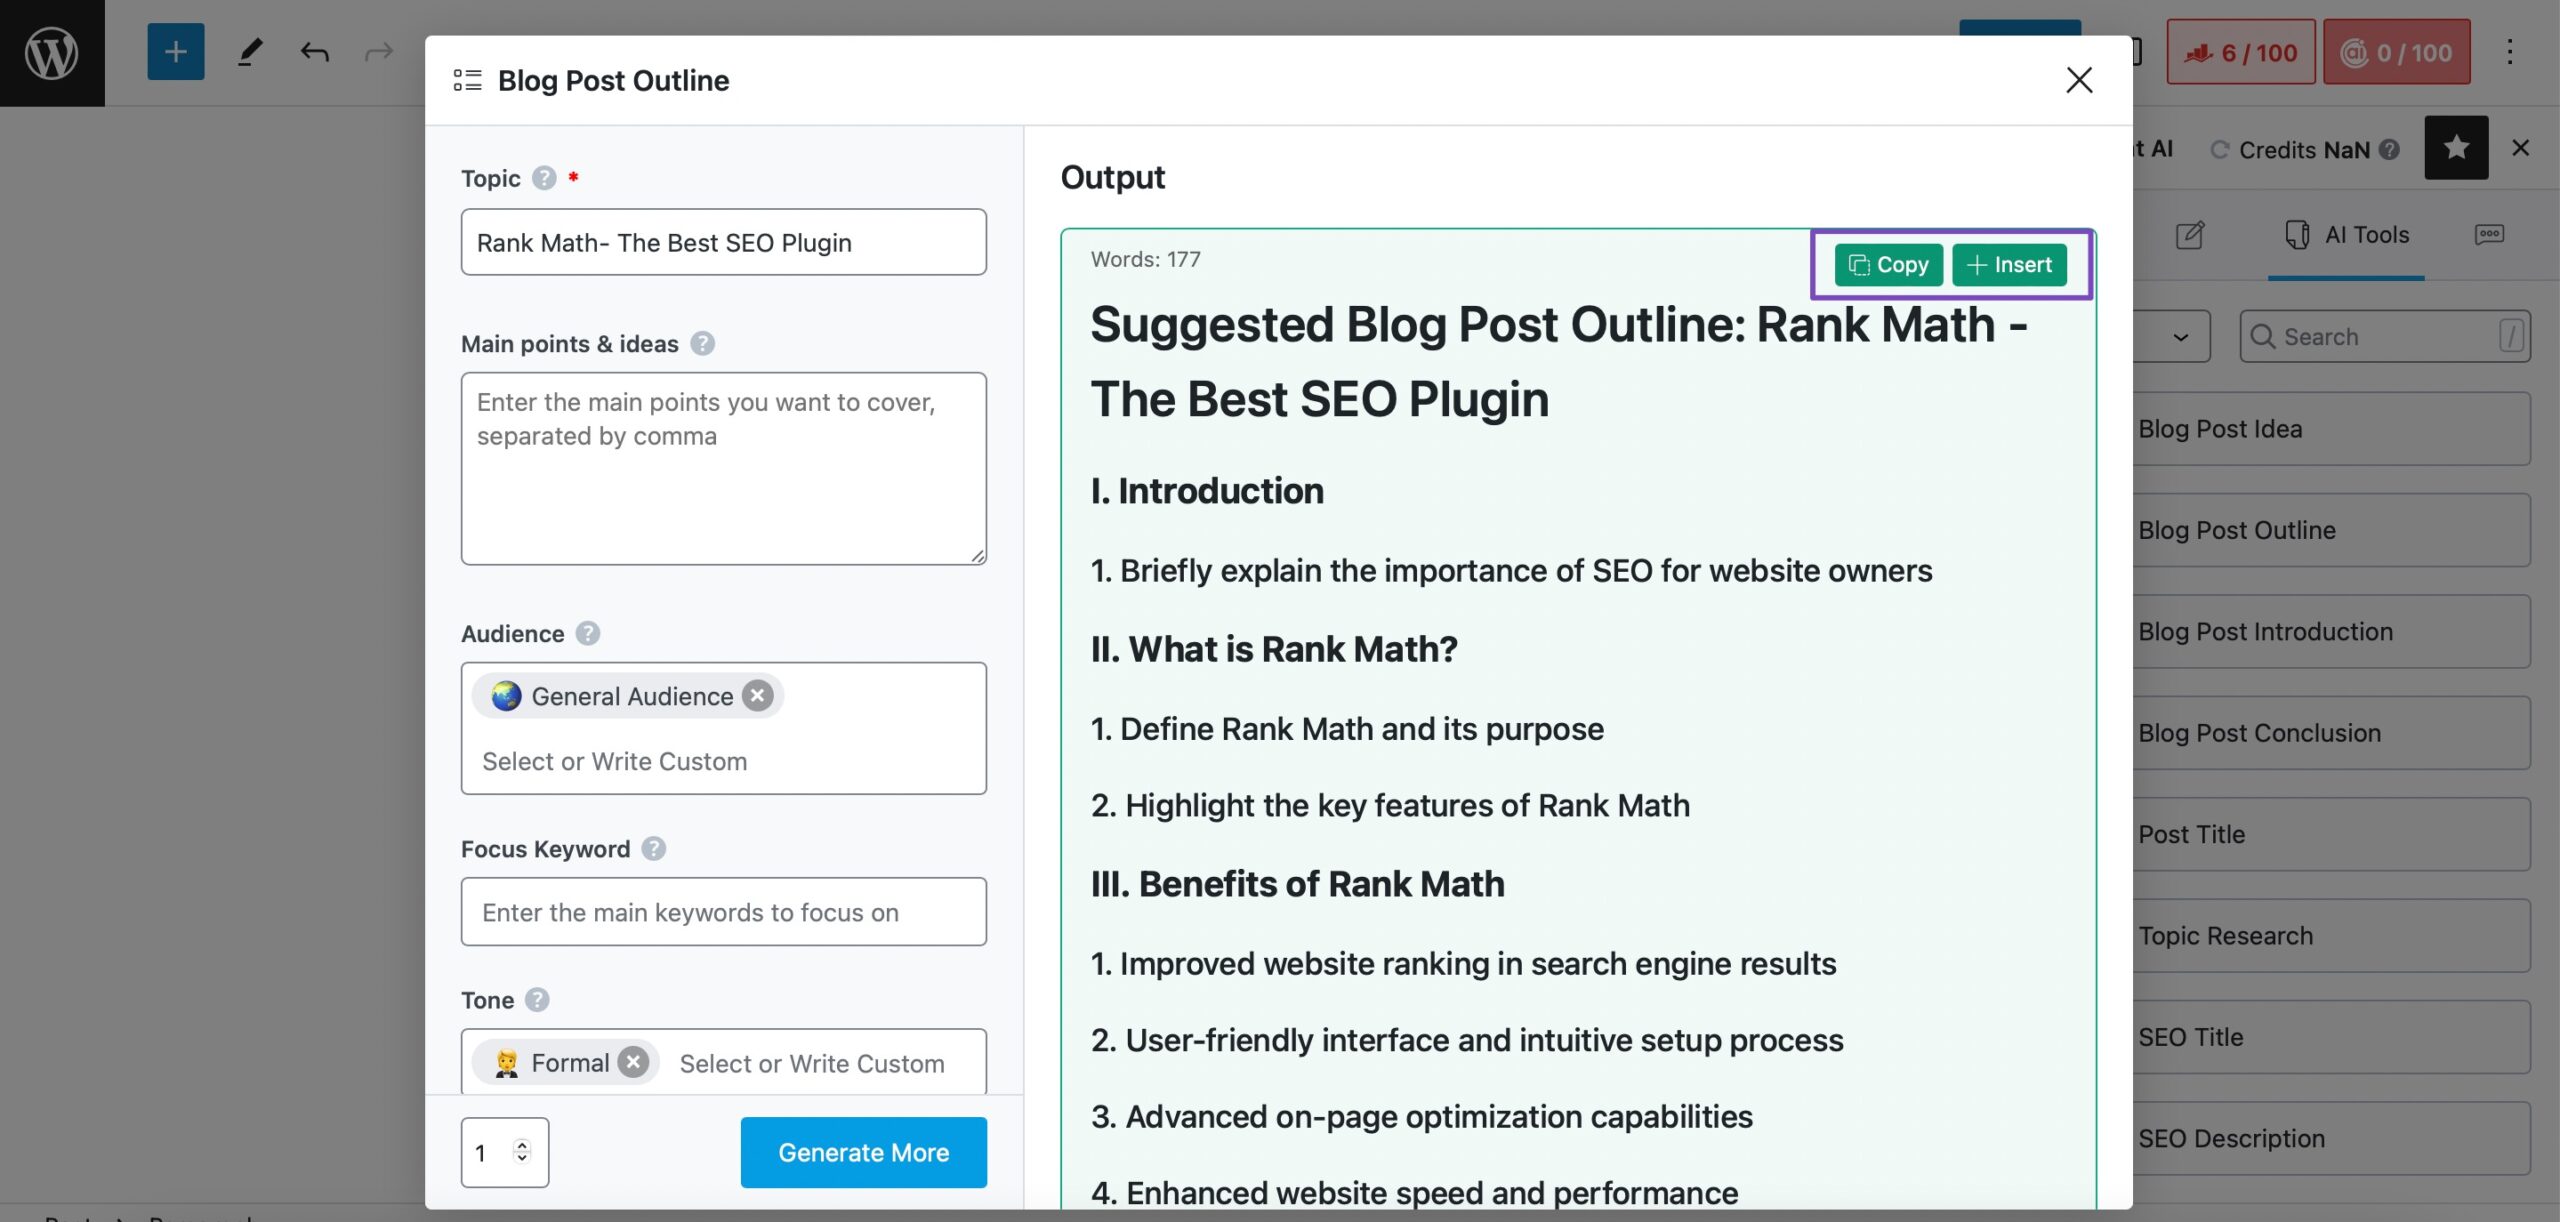
3.4 Chat
You can ask questions about your subject or regarding SEO, as Rankbot is effectively integrated into your Block Editor.
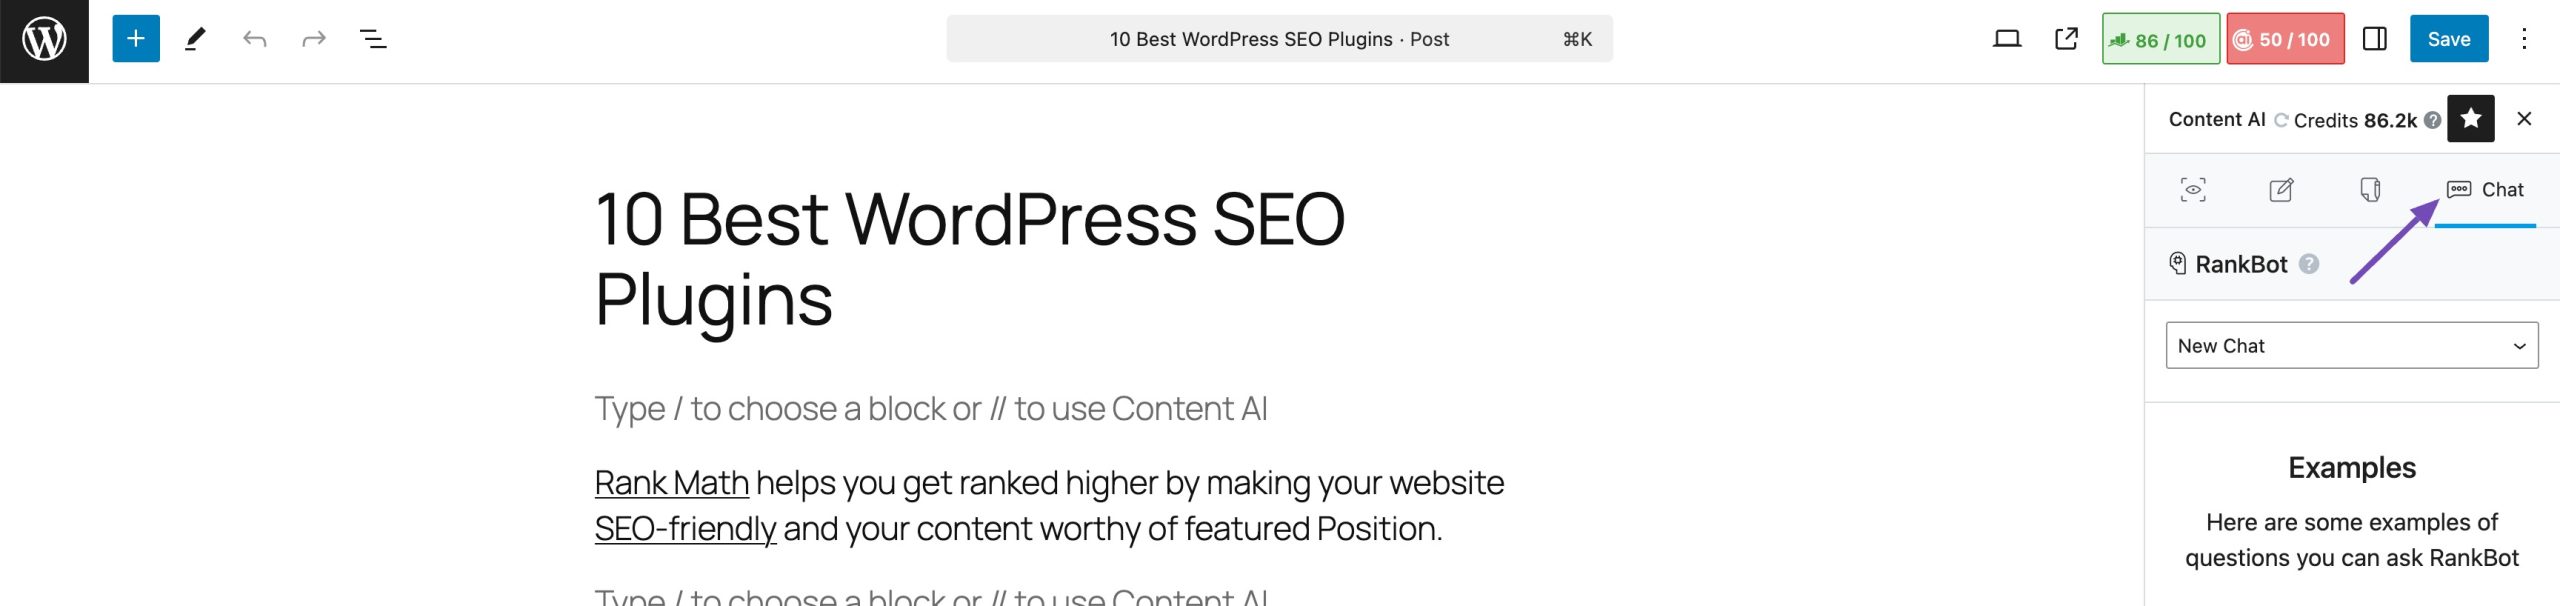
4 Command Center
Content AI is available for every use case, and we understand that you’ll need these AI tools not just for writing new content but also for editing and improving your existing content. Hence, we have a dedicated Command Center that is available to access within your Block Editor.
To use it, place your cursor over a block, and in the Block Toolbar that appears at the top, click the Content AI icon. The Command Center will appear with all the available features.
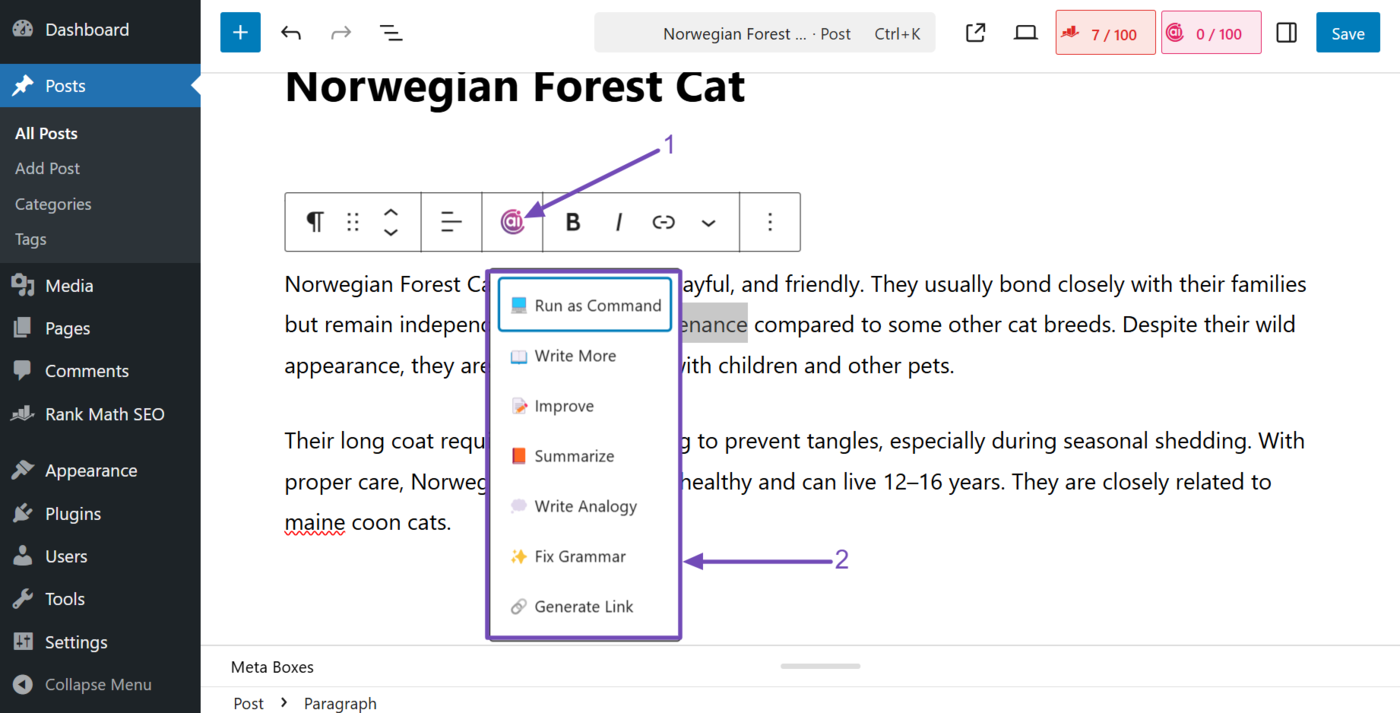
You can also use the keyboard shortcut // to enable the Command box in the Block Editor.
4.1 Run as Command
This option lets you convert a block of text into a prompt and generate output on the fly.
4.2 Write More
Do you want to continue writing content? Click the Write More option and watch the Content AI write the article for you.
4.3 Improve
Not happy with the existing content? Simply click the Improve option to rewrite the existing paragraphs.
4.4 Summarize
Have a long block of text? Click the Summarize option to let Content AI read them and generate a brief summary for you.
4.5 Write Analogy
Are you unsure how to explain a difficult concept to your readers? Choose this option, and Content AI will write analogies for your audience to understand them with a familiar example.
4.6 Fix Grammar
Do you want to proofread your block of text? Choose the Fix Grammar option, and Content AI will check your paragraph and ensure your text is free from Grammatical errors.
4.7 Generate Link
This option lets you add a relevant internal link to your content. Highlight the relevant text, and Content AI will suggest internal links to include. The highlighted text will serve as the anchor text of the link.
5 Generate Alt Texts
Content AI also allows you to generate alt texts for your images right from your Block Editor. To generate one, follow the below steps
5.1 Edit the Post in Block Editor
Open the post that you want to edit in the Block Editor.
5.2 Upload an Image to Block Editor
You can use the Content AI to generate alt texts for your images while uploading them from your Block Editor.
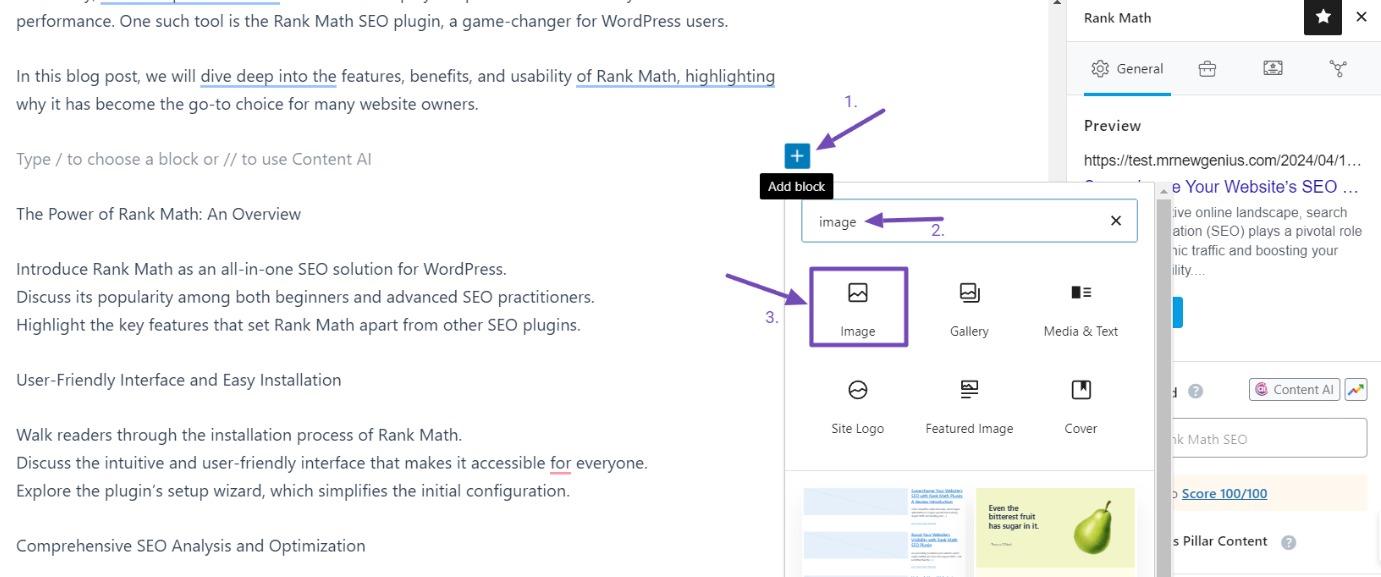
To do this, simply click on the ‘Add block’ icon and type ‘image’ in the search bar. Then, select the Image block when it appears, as shown below.
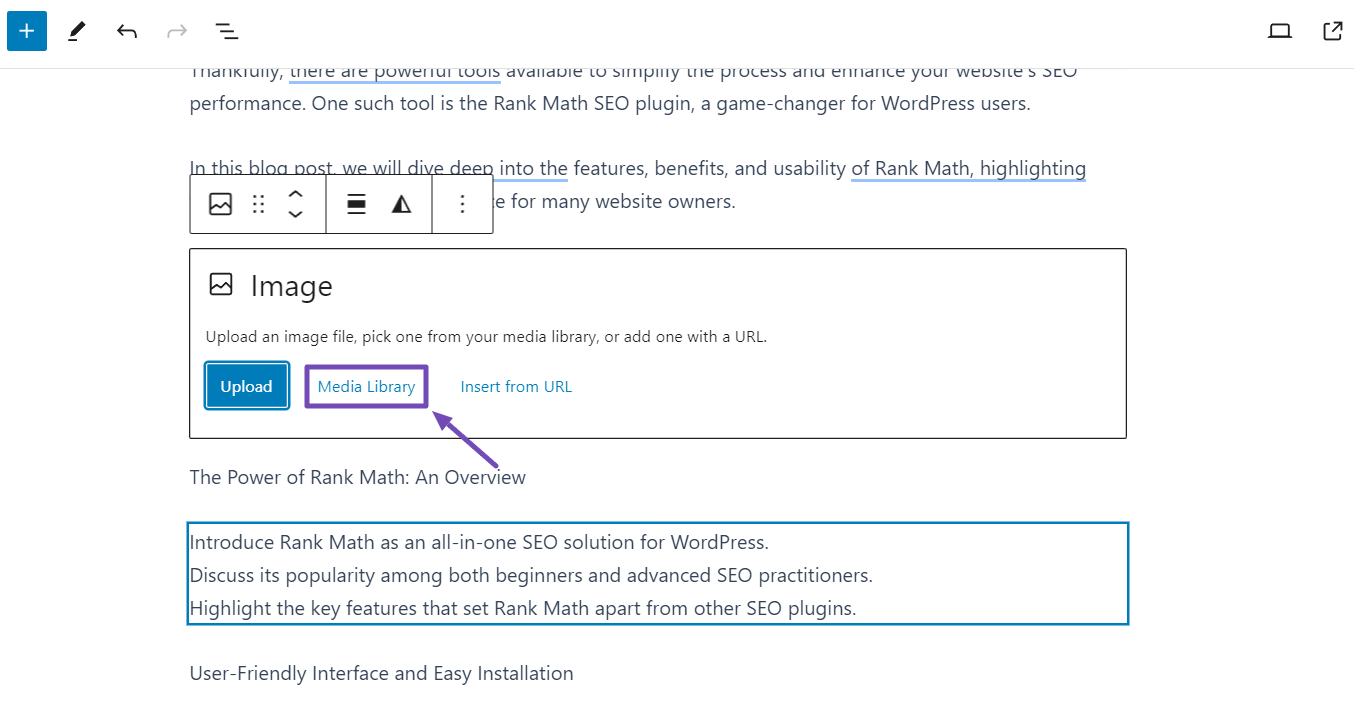
This will insert the Image block into your content, providing options to add images. Next, choose the ‘Media Library’ option to upload or insert your desired image.
Once you’ve uploaded the image, click on it and navigate to the right side. You will see the Generate Alt button next to the Alt text field. Click on it, and the AI will swiftly generate an alt text for your image, as illustrated below.
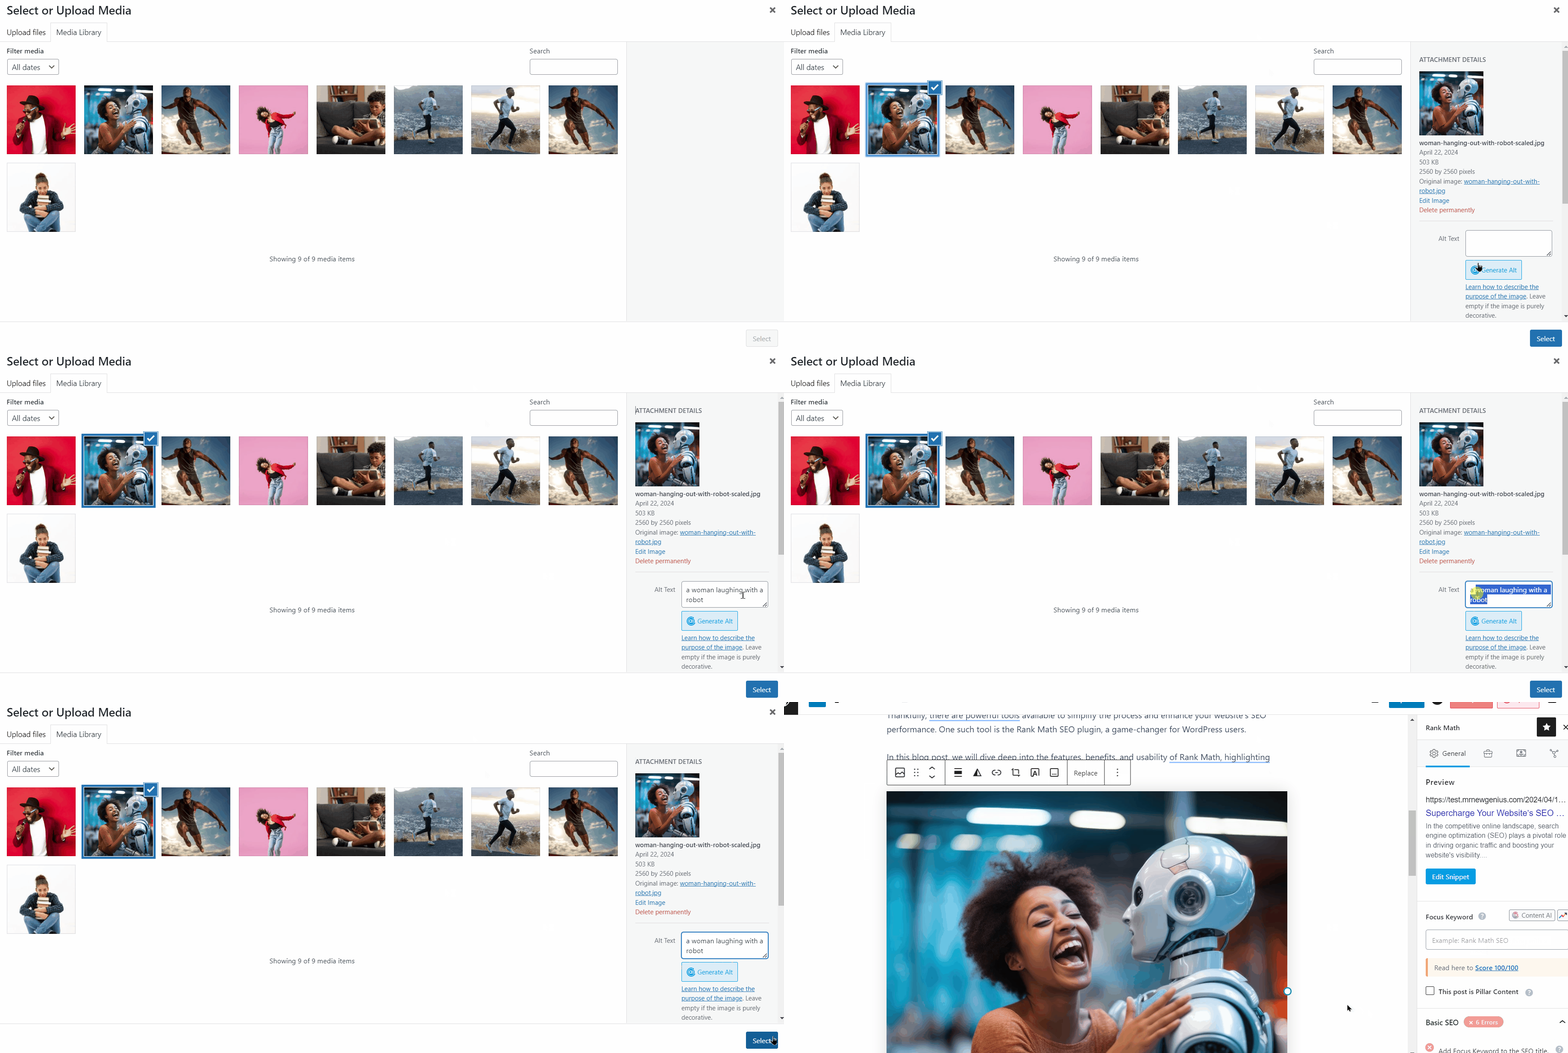
5.3 Generate Alt Text for Inserted Images
If you have already inserted images into your content, you can still generate alt texts for them using Content AI.
To do this, click on the image and access the image settings from the Settings panel. Here, you will find the ‘Generate Alt’ option next to the ALTERNATIVE TEXT field. Click on it, and the AI will immediately generate the alt text for the image, as illustrated below.
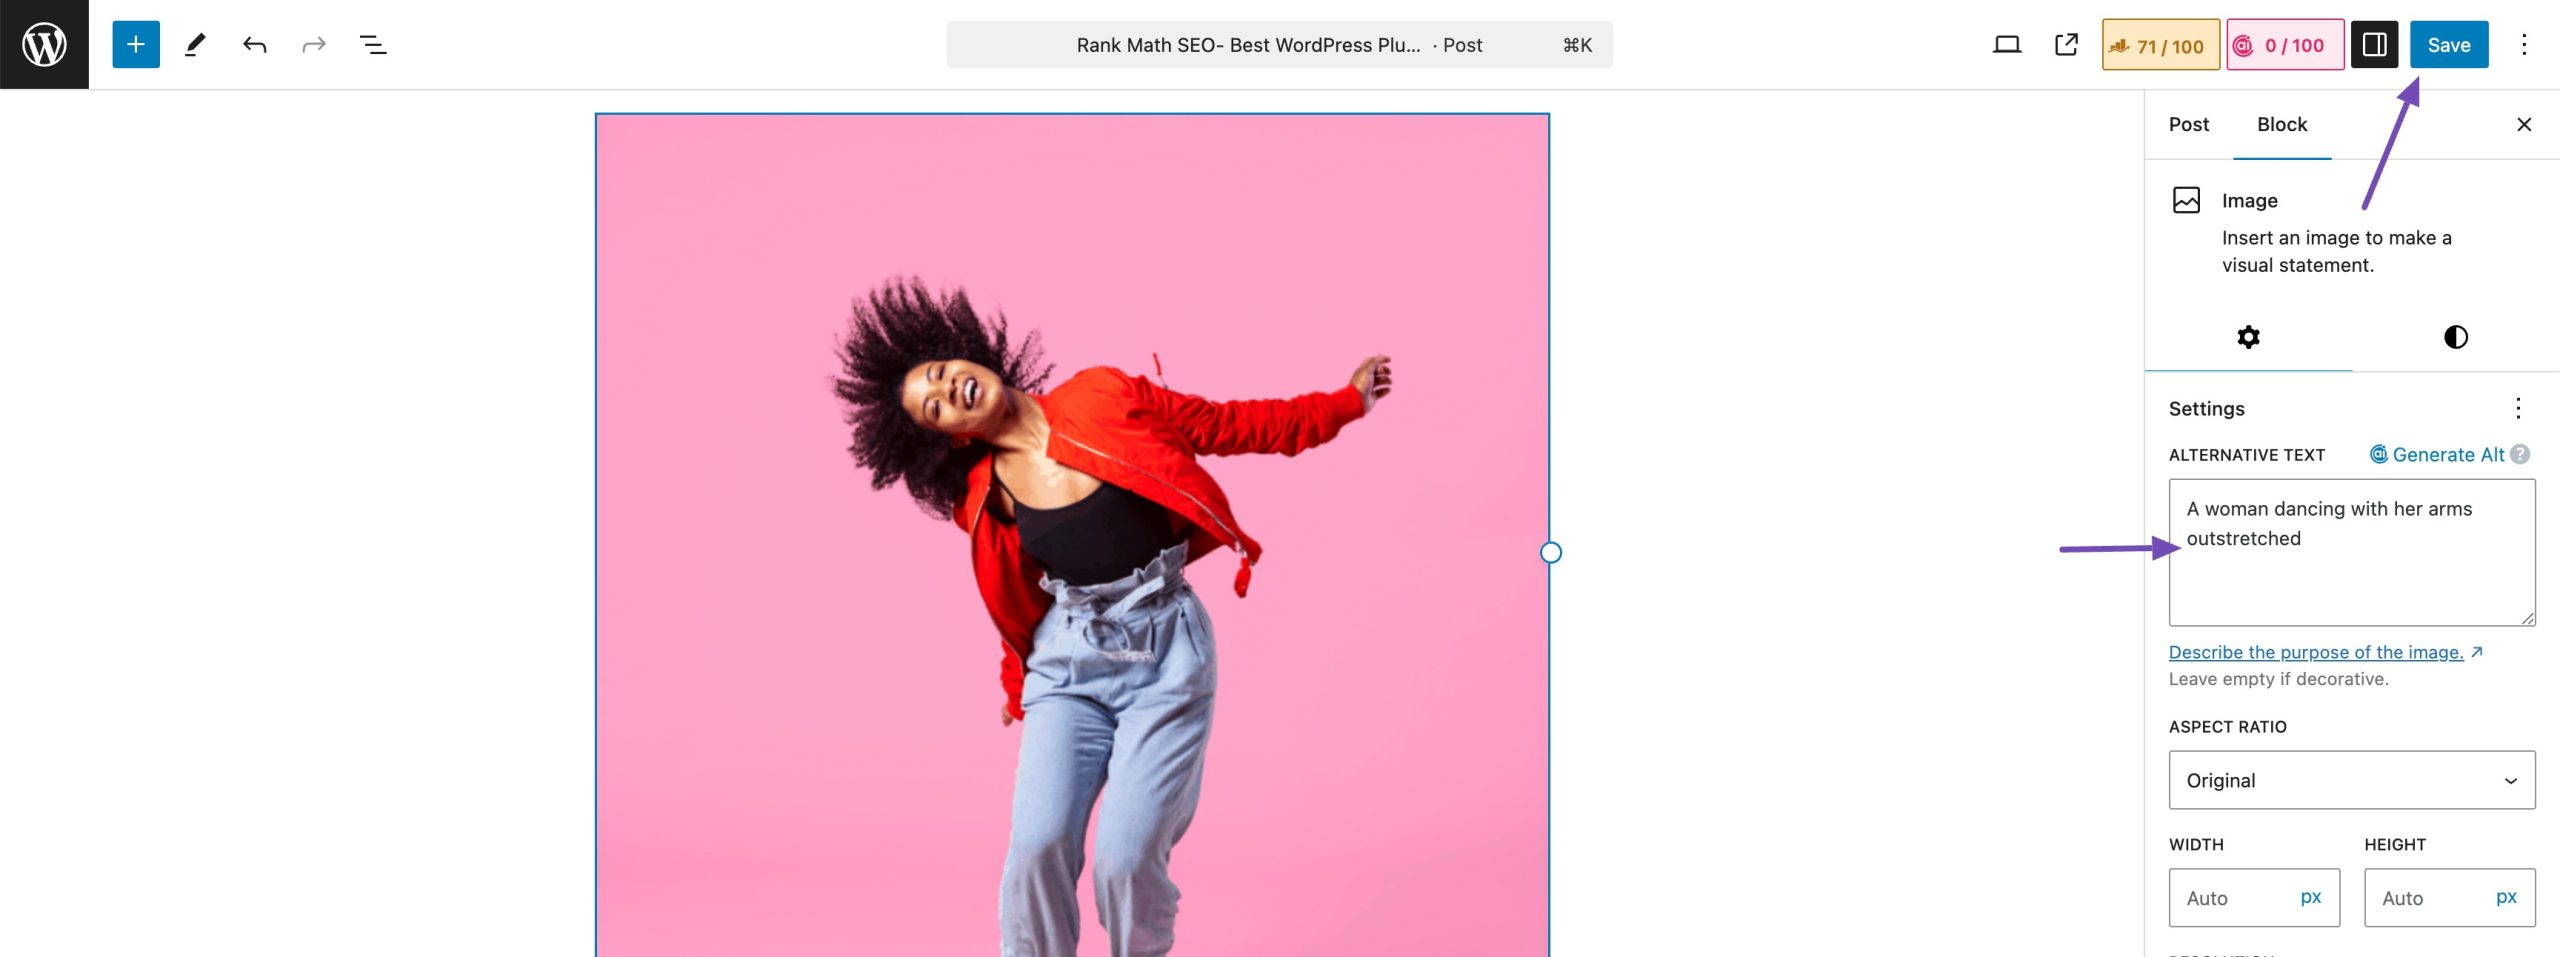
Once you’re done editing your content, click the Publish/Save button above to save your changes.
Please note that the Alt Text generation feature is currently available only in English. Support for more languages will be added in the future.
6 Generate Internal Links
Together, Content AI and AI Link Genius let you generate relevant internal links to include in your content. The process is automatic and requires no additional input from your end. Instead, Content AI and AI Link Genius will scan your content and site, and recommend internal links.
To get started, click the Rank Math SEO icon. Once done, scroll down to the Link opportunities panel and click on it.
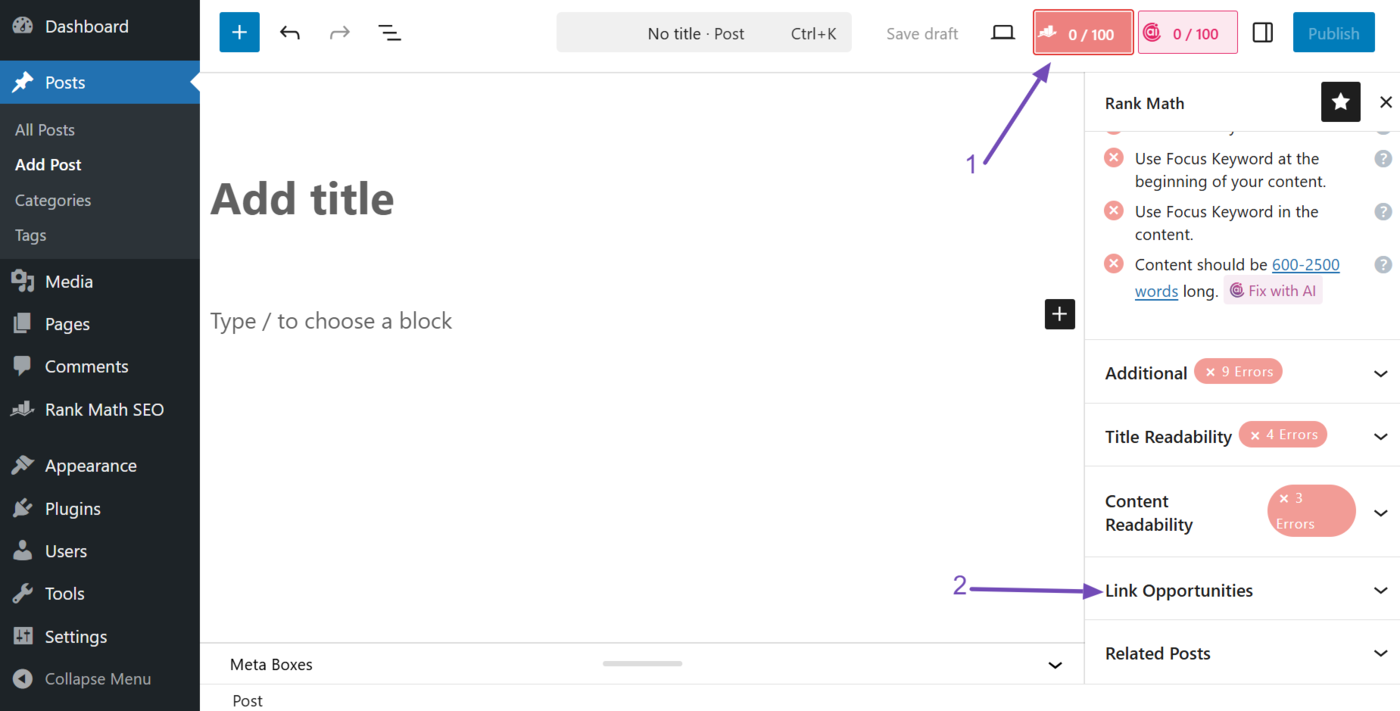
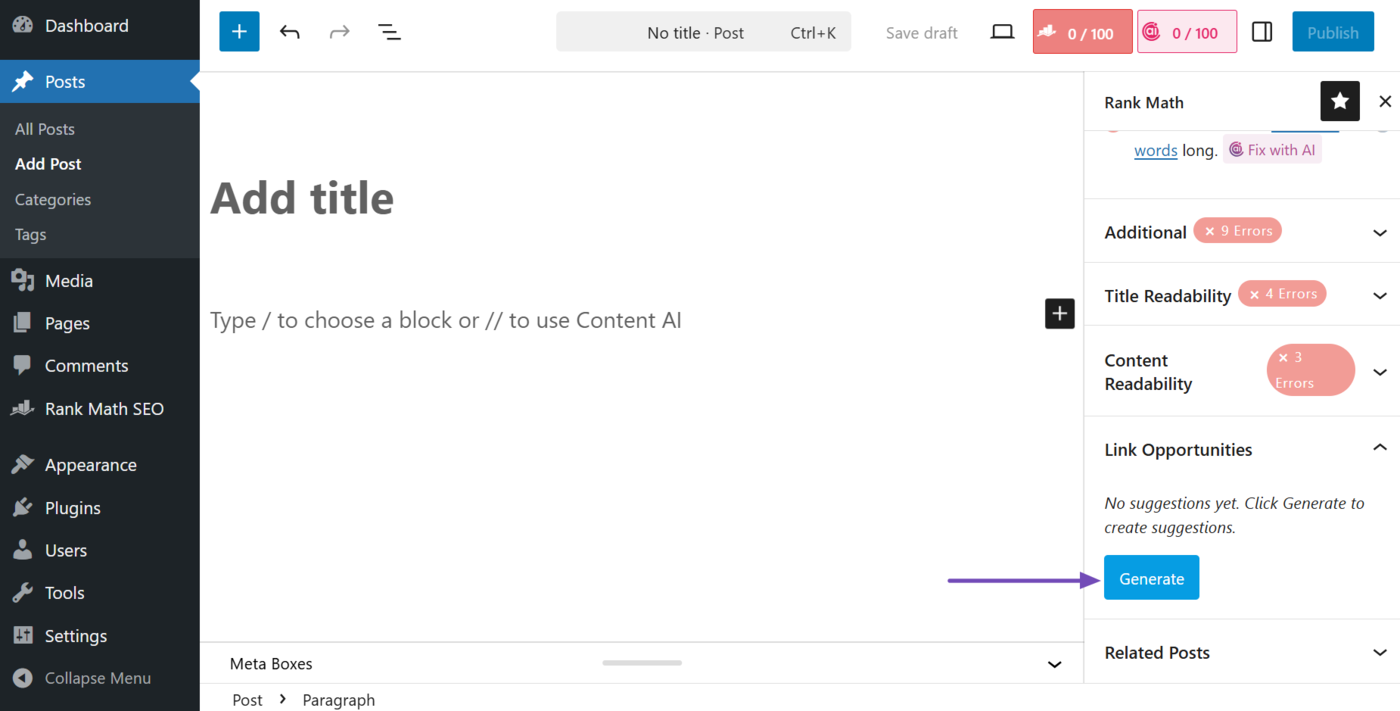
Then click Generate.
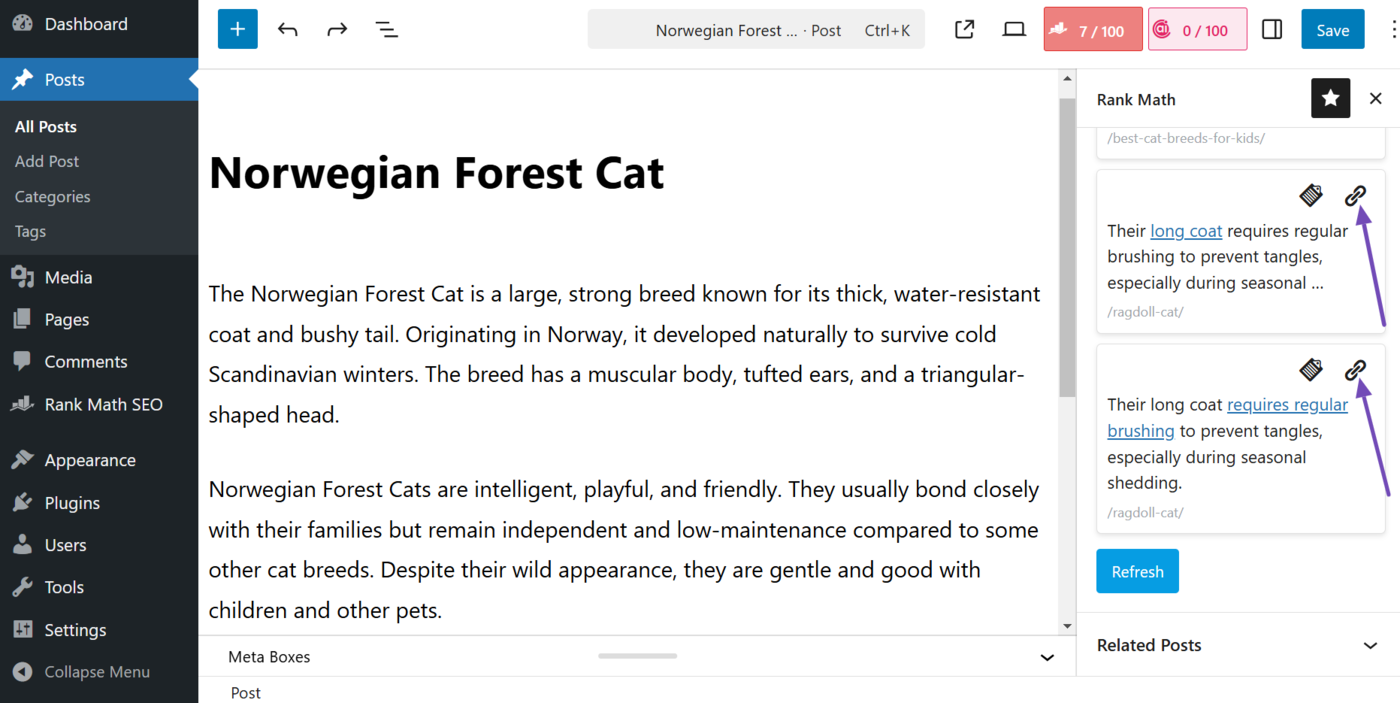
Content AI and AI Link Genius will generate some relevant internal links to include in your article, and show them to you. Each link includes two options. There is also a Refresh button at the bottom that lets you check for additional links.
The available options include:
- Insert link: Click to insert the link into your content
- Copy link URL: Click to copy the link’s URL to your clipboard
Click Insert link to add the link to your content. It will then be added to your content.
7 Generate Related Posts Block
The related posts block allows you to add a relevant related posts block to your content. To get started, click the Rank Math SEO icon, as shown below.
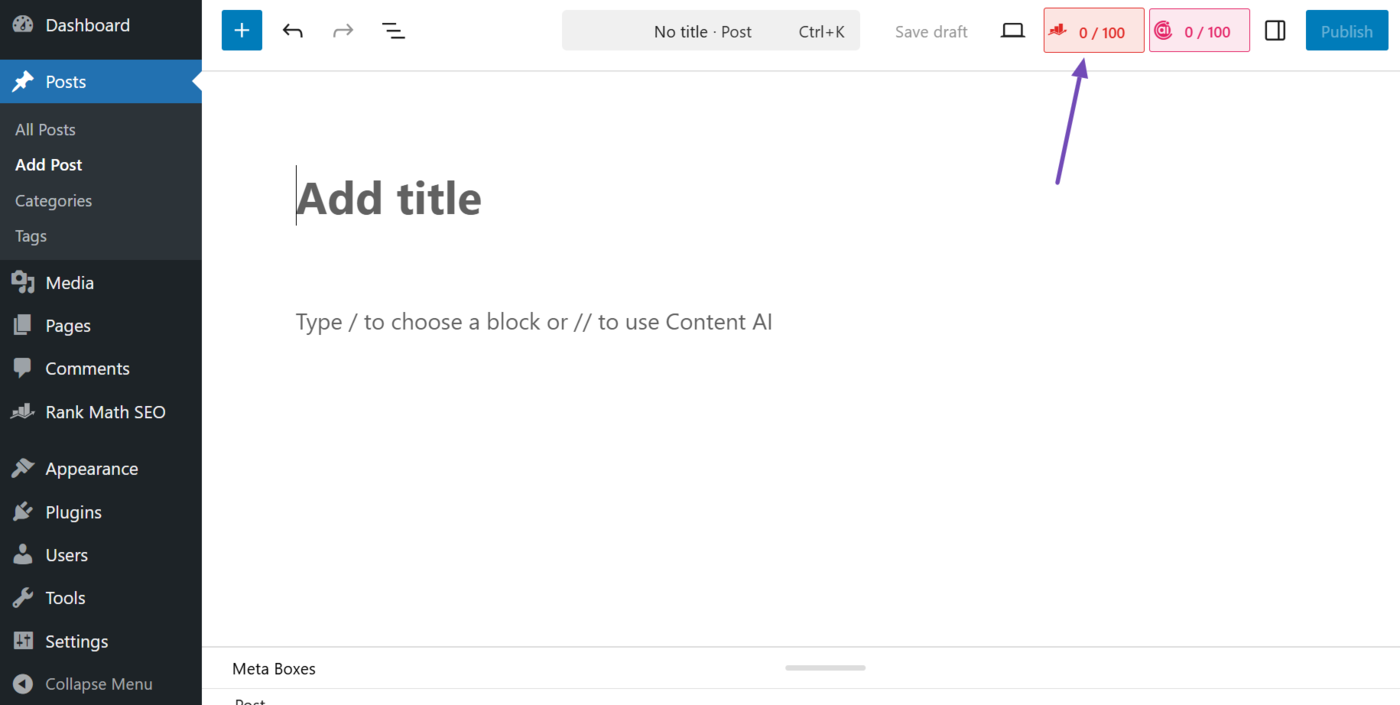
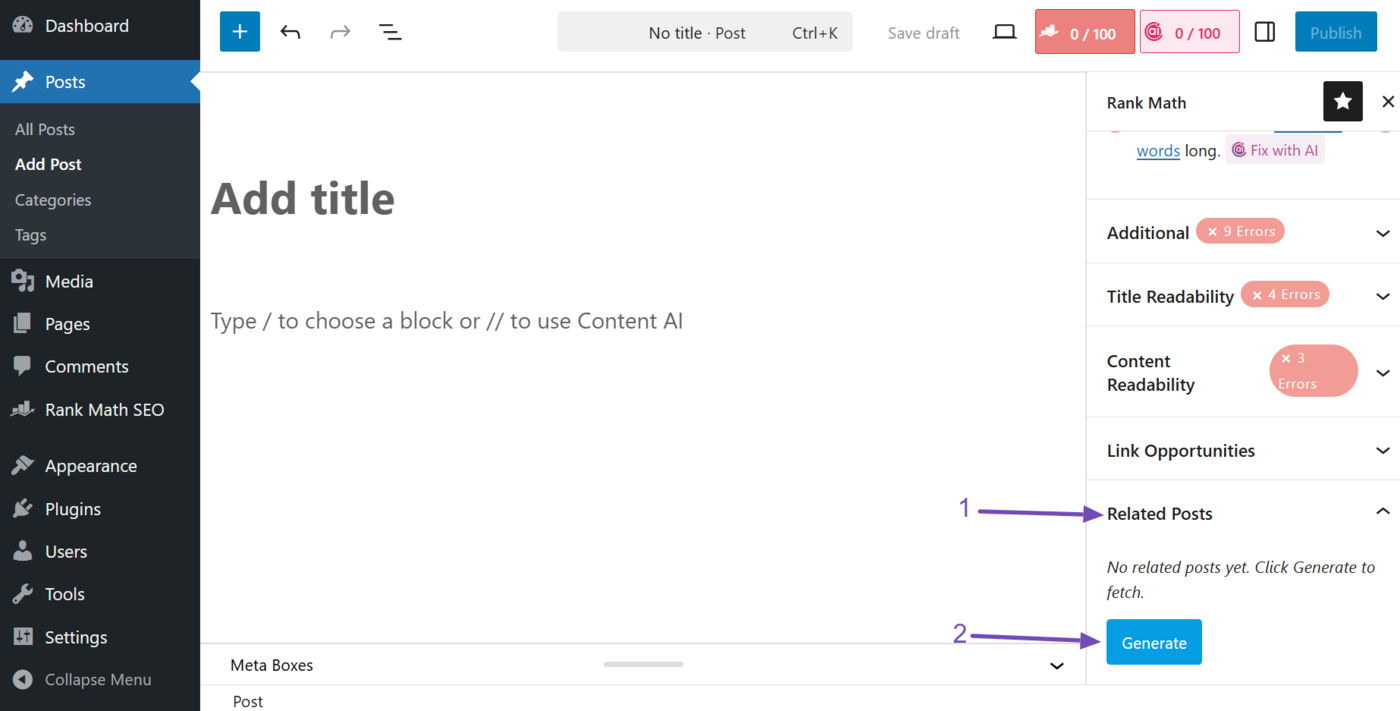
Once done, scroll down to the Related posts panel, and click on it. Then click Generate.
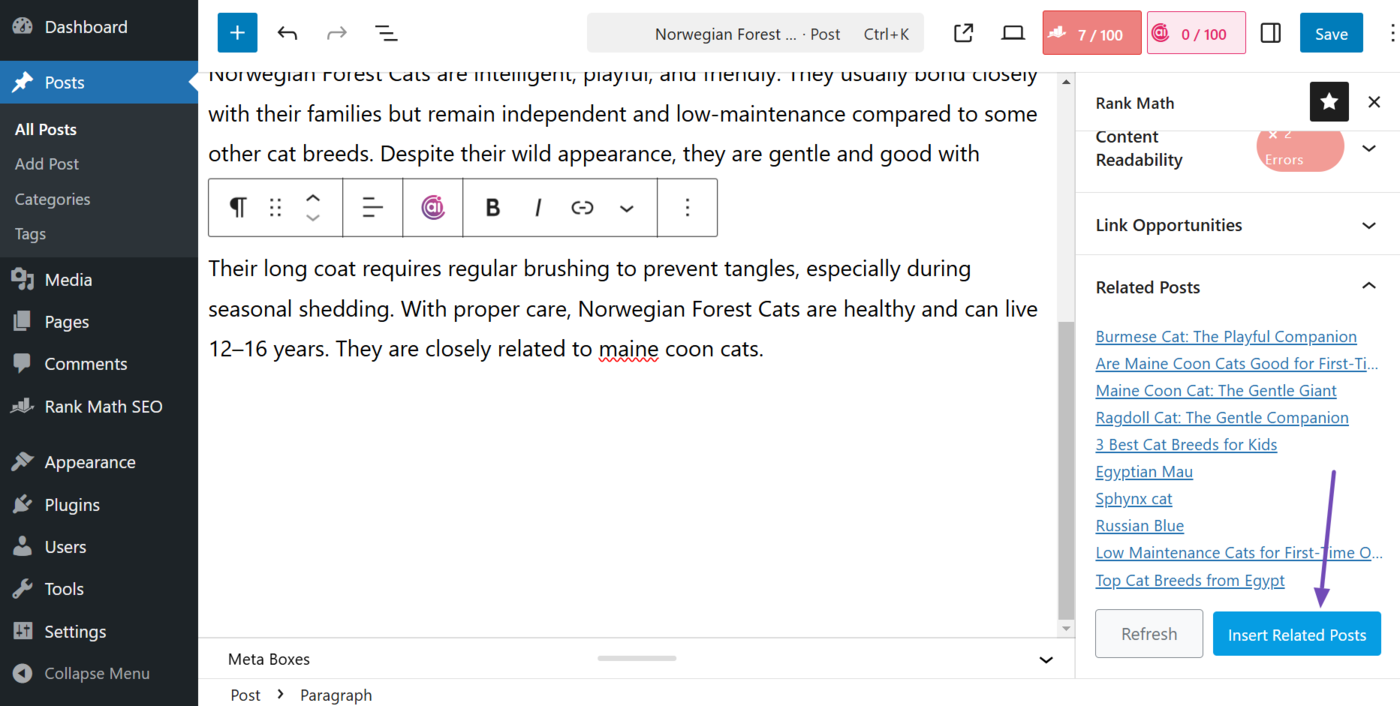
Some relevant internal links will be generated, as shown below. It also contains two buttons:
- Refresh: Check for additional related posts
- Insert related posts: Insert the related posts block into your content
Click Insert related posts to add the related posts block to your content. The related posts block will now be added to your content. If you want to customize it, head to this guide on customizing your related posts block.
And that’s it. We hope the article helped you familiarize yourself with Content AI in the Block Editor. If you still have any questions or are facing any issues with Content AI, please open a support ticket here, and our support experts will be more than happy to assist you.