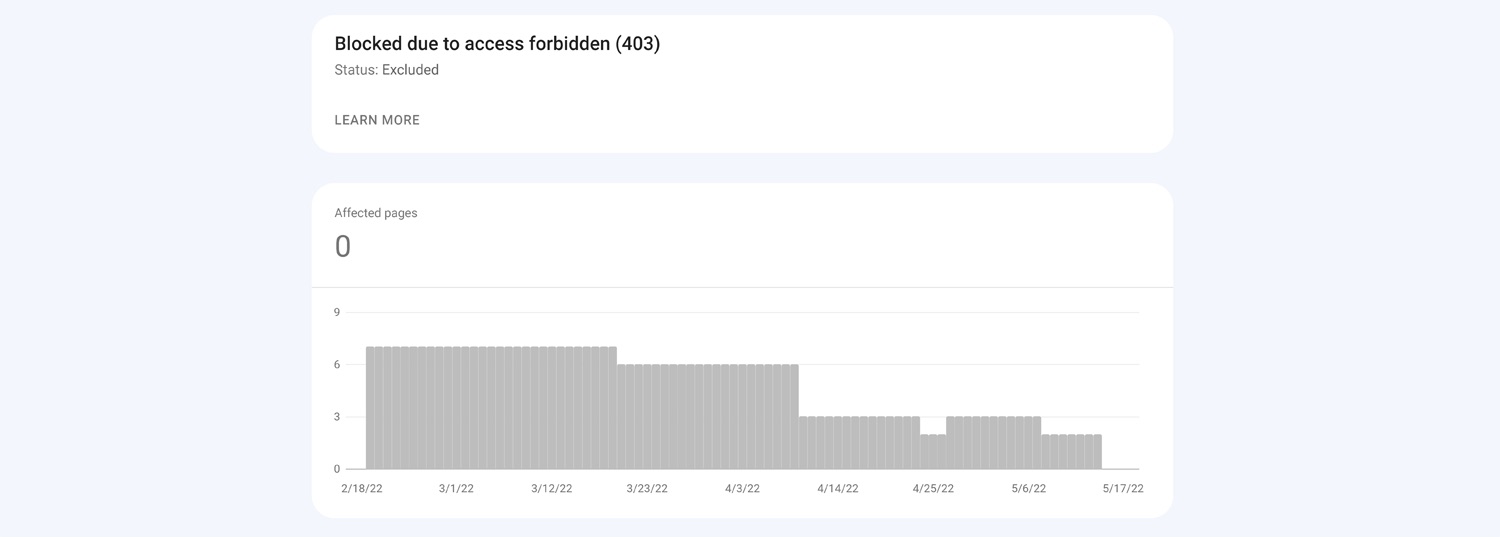
If you’re seeing Blocked due to access Forbidden (403) errors in your Google Search Console and in the Index Status report of Rank Math’s Analytics. Don’t worry – you’re not alone! This is a common issue that many website owners experience.
In this knowledge base article, we’ll explain what this message means and how to fix this error and get your website back up and running.
Table of Contents
1 What is the 403 Forbidden Error?
The 403 Forbidden Error is a common error that you can face when trying to allow Googlebot to crawl your site. This error means that Googlebot cannot access your site’s content due to a robotic exclusion protocol, which is a set of rules that you can use to prevent certain types of web crawlers from accessing your site.
In more human-friendly terms, the 403 Forbidden Error means that your website’s server is telling Googlebot that it does not have permission to access the page or resource you’re trying to crawl.
2 What Causes the 403 Forbidden Error on WordPress?
There are a number of potential causes for the 403 Forbidden error on WordPress. Below are some of the most common:
- Incorrect file permissions: If your WordPress site is hosted on a Linux server, then file permissions play a key role in how your site functions. Incorrect file permissions can cause the “Blocked due to access Forbidden (403)” error.
- Corrupt .htaccess file: The .htaccess file is a key part of your WordPress installation. This file controls many important aspects of how your WordPress site functions. A corrupt .htaccess file can cause the 403 Forbidden error.
- WordPress plugins: In some cases, a plugin can cause the 403 Forbidden error. This is usually because the plugin or theme is not compatible with the latest version of WordPress.
- WordPress themes: Like plugins, a WordPress theme can also cause the 403 Forbidden error. This is usually because the theme is not compatible with the latest version of WordPress.
- Accessing WordPress from a banned IP address: If the IP address of the Googlebot is banned on your WordPress site, you’ll see the 403 Forbidden error.
- Security Plugins: A security plugin can cause the 403 Forbidden error in some cases. This is usually because the plugin is blocking access to your WordPress site for some reason.
- Firewalls: It’s possible that you may have inadvertently blocked certain user agents through your firewall rules, including Googlebot, which could result in a 403 error.
3 403 Forbidden Error Variations
The 403 Forbidden error can appear in a number of different ways. The most common is the “403 Forbidden” error, which you can see in the screenshot below.
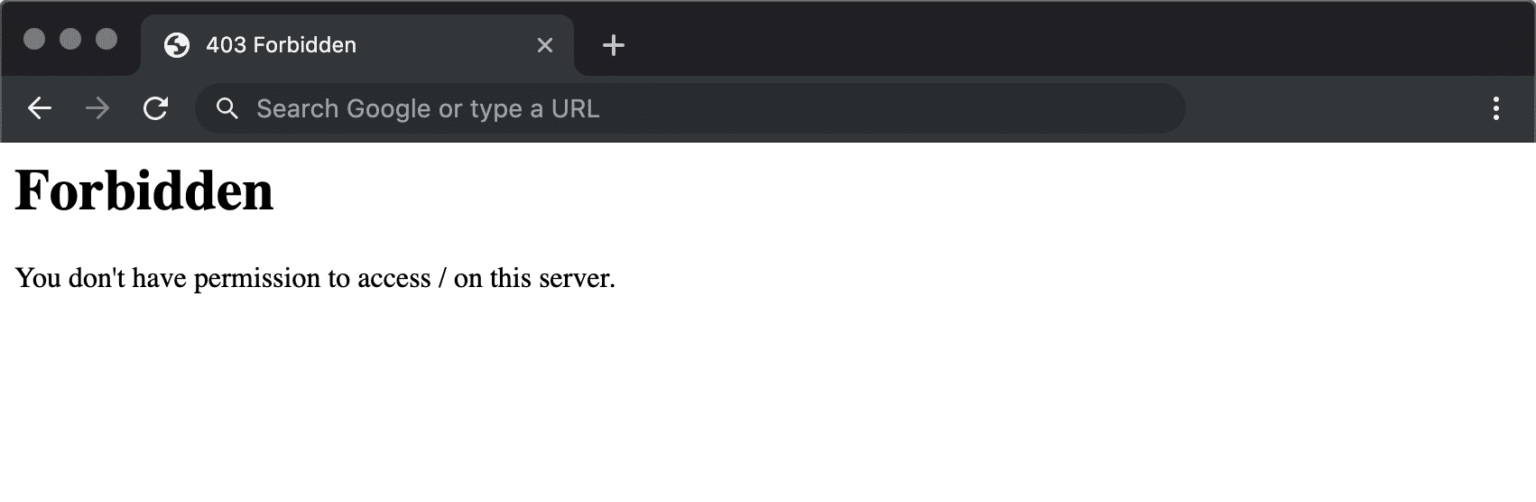
Other common variations of the 403 Forbidden error include:
- Forbidden – You don’t have permission to access the server.
- 403 – Forbidden – Access is denied.
- HTTP Error 403 – Forbidden – You do not have permission to access the document or program you requested.
- Error 403 – Forbidden
- 403 Forbidden – NGINX
- 403 – Forbidden Error – You are not allowed to access this address.
- 403 Forbidden – Access to this resource on the server is denied.
- 403. That’s an error. Your client does not have permission to get URL / from this server
- You are not authorized to view this page.
- It appears you don’t have permission to access this page.
If you’re still seeing the 403 Forbidden error on your WordPress site, it’s likely that one of these issues is the cause. Fortunately, all of these issues are the same and easy to fix. In the next section, we’ll walk you through each of the fixes in detail.
But before going further, let’s check out how to find the issue.
4 How to Find “Blocked Due to Access Forbidden (403)” Error
Luckily, the “Blocked due to Access Forbidden (403)” error is easy to find. You can use the Google search console or the Index Status report in Rank Math’s Analytics to find this error.
4.1 Use Google Search Console to Identify Pages
In order to do this, go to the Pages section of Google Search Console and click on the Not indexed tab.
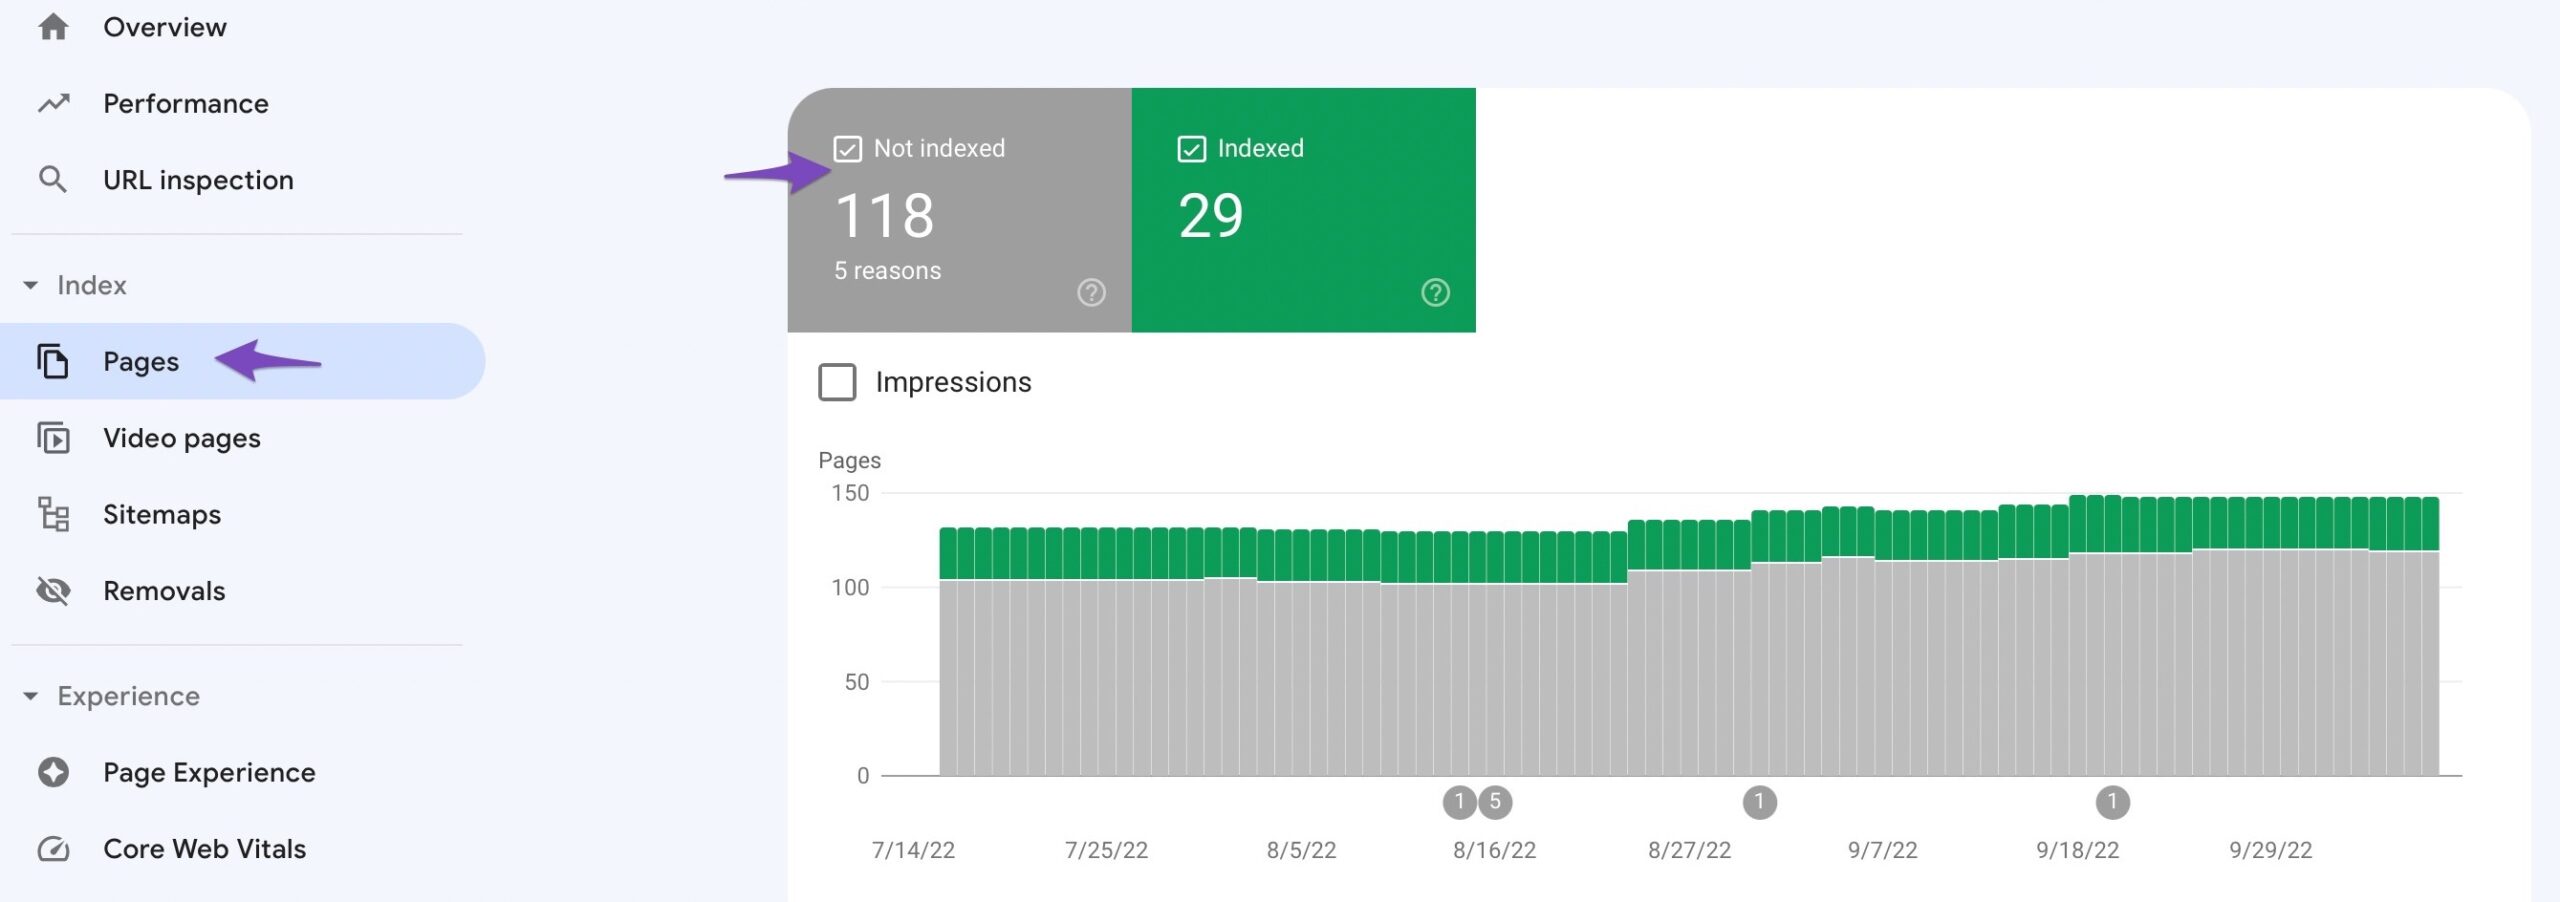
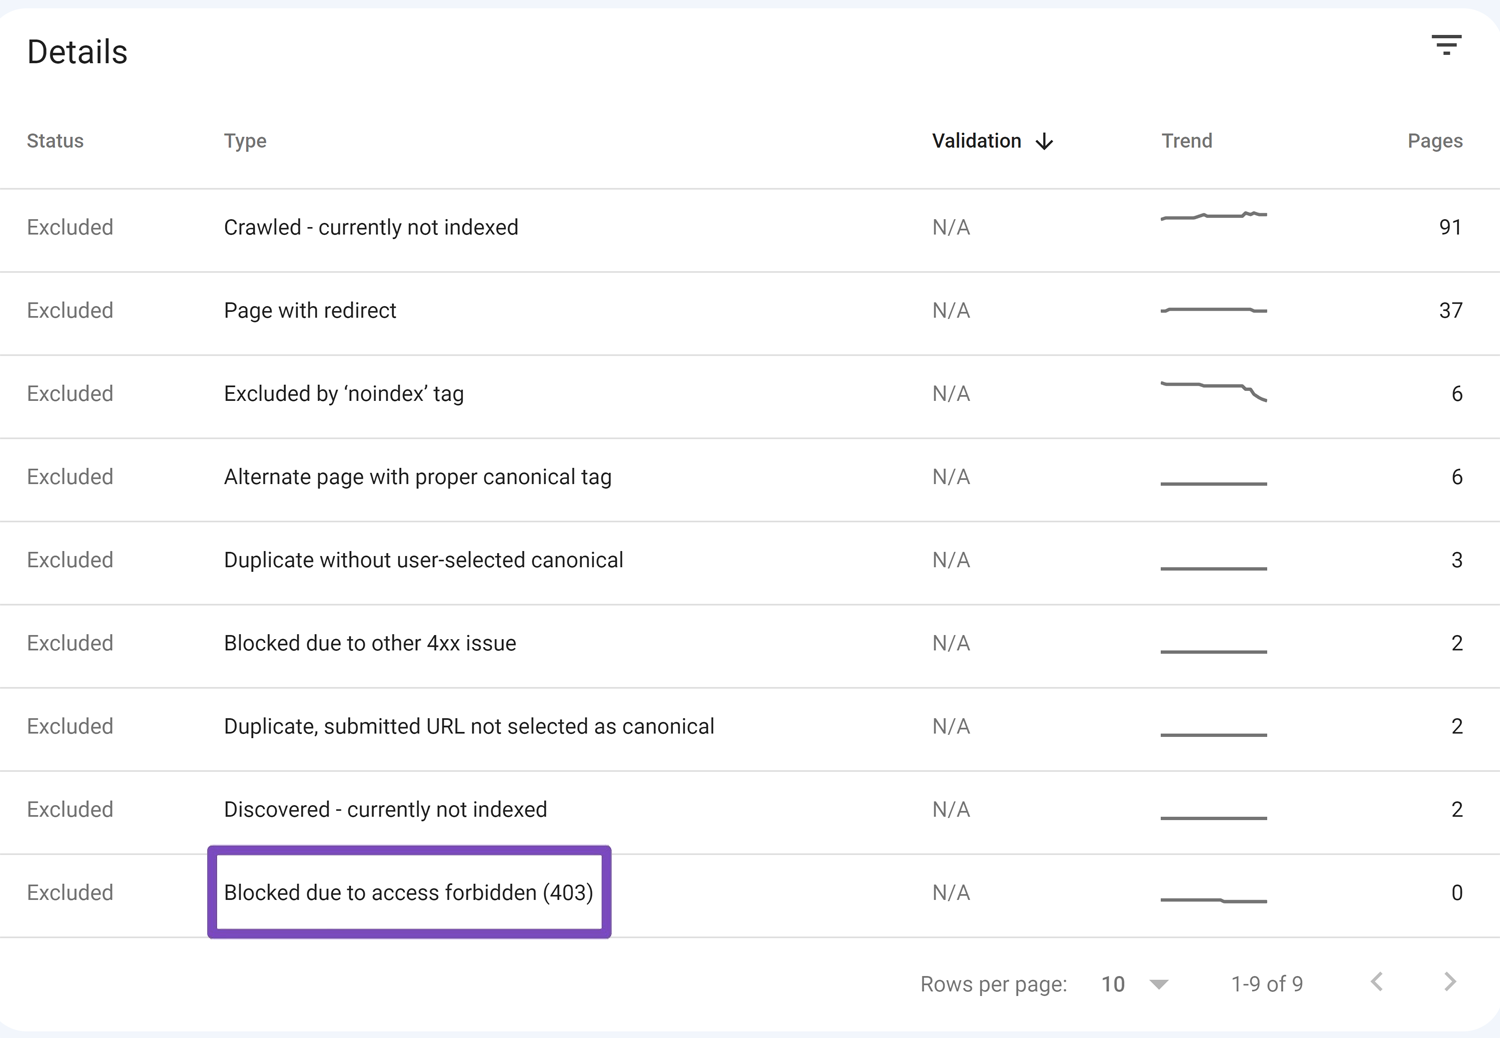
Then, click on the Blocked due to access Forbidden (403) status as shown below:
4.2 Use Rank Math’s Analytics to Identify Pages with the Problem PRO
You can also use the Index Status report in Rank Math’s Analytics to identify the pages with the problem.
To do so, navigate to Rank Math SEO → Analytics in the WordPress dashboard. Next, click on the Index Status tab. Under this tab, you’ll get the real data/status of your pages as well as their presence on Google.
5 How to Fix the 403 Forbidden Error on WordPress
To fix the 403 Forbidden error on your WordPress website, you can try one of the following methods:
5.1 Reset the File Permissions
If you are getting a 403 Forbidden error when trying to access your WordPress site, it might be due to file permissions. By default, in most hosting environments, the WordPress files are owned by the webserver process (e.g., www-data or apache), and the group is usually set to the same user. This means that only the webserver process can read and write to those files.
If you are trying to access your WordPress site and see a 403 Forbidden error, your web server does not have permission to access the files or directories in your WordPress directory.
According to WordPress Codex, the correct file permissions for WordPress are:
- For Directories: 755 or 750
- For Files: 644 or 640
Exception: wp-config.php should be 440 or 400 to prevent other users on the server from reading it.
You can easily set these permissions using an FTP client or your hosting control panel.
Let’s see how to fix the 403 Forbidden error by resetting the file permissions through FTP.
Step 1: Connect WordPress Site via FTP
First, you’ll need to connect to your WordPress site using an FTP client. If you don’t have an FTP client installed on your computer, you can download and install FileZilla.
Step 2: Change public_html Folder Permission
Once connected to your WordPress site, go to the root directory where WordPress is installed. For most cases, it is the public_html directory.
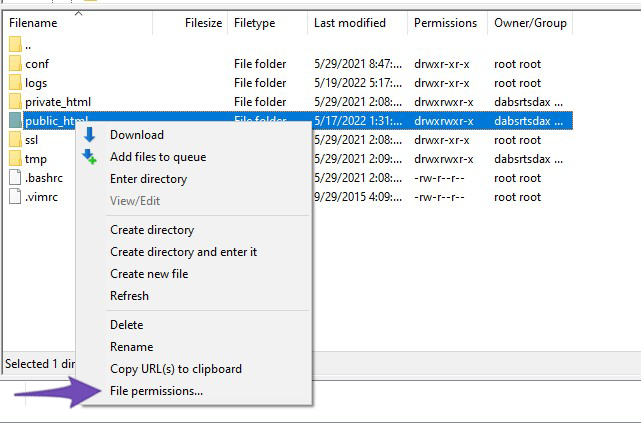
Now, right-click on the folder and select “File Permissions.”
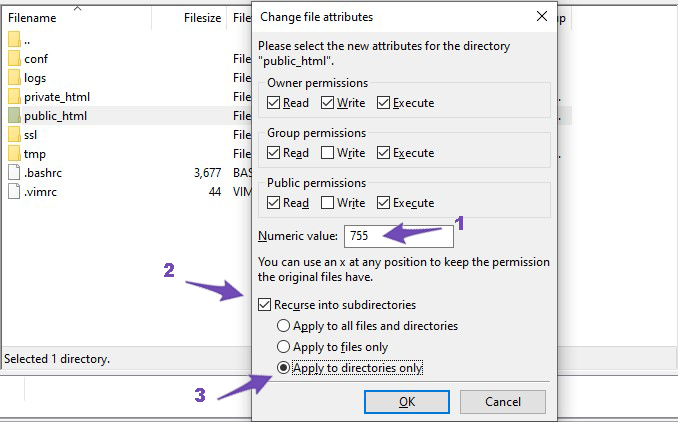
In the “Permissions” dialog box, if the file permissions are not set to “755 or 750” then you need to change them. In the “Numeric Value” field, enter “755” (or 750) and check the “Recurse into subdirectories” box. Then, check the “Apply to directories only” option.
Then, click on the “OK” button to save your changes as shown below:
Step 3: Change Files Permission
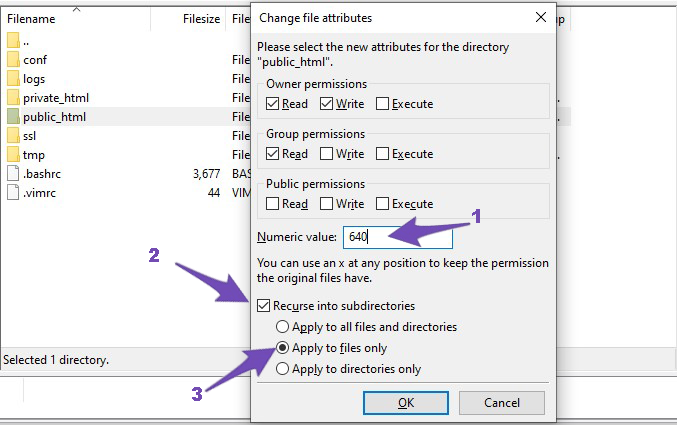
Once you’ve applied the correct permissions for directories, you’ll need to do the same process for files. Again, if the file permissions are not set to “644” or “640,” then you need to change the settings.
In the “Numeric Value” field, enter “644” or “640” and check the “Recurse into subdirectories” box.
Then, check the option that says “Apply to files only.”
Click on the “OK” button to save your changes.
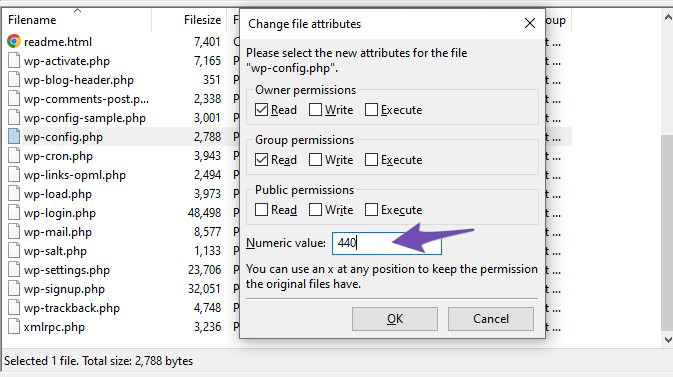
Step 4: Change wp-config.php File Permission
Next, you’ll need to repeat the same process for the wp-config.php file. But this time you need to enter 400 or 440 in the Numeric value box.
After you have reset the file permissions, try accessing your WordPress site to see if the 403 Forbidden error is fixed. If you’re still facing the issue, then move on to the next method.
5.2 Fix Corrupted .htaccess File
The next step is to check your .htaccess file. The .htaccess file is a WordPress core file that controls various functions of your WordPress site.
Sometimes, the .htaccess file gets corrupted due to a WordPress plugin or a theme function. When this happens, you need to regenerate or edit the .htaccess file.
5.2.1 Regenerate .htaccess File
To do this, you need to connect to your WordPress site using an FTP client. Once connected, go to the root directory of your WordPress site.
Inside the root directory, you’ll see the .htaccess file. Download this file to your computer and then Delete it from the server.
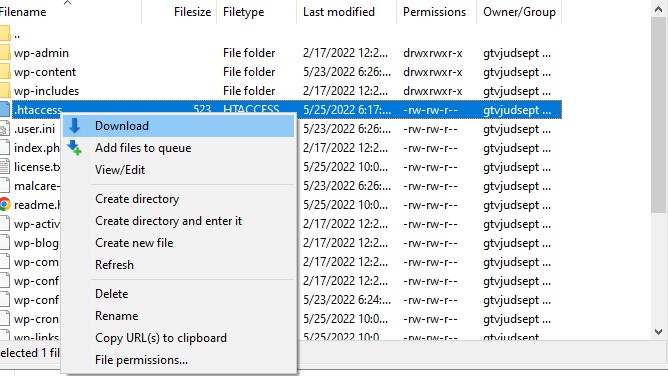
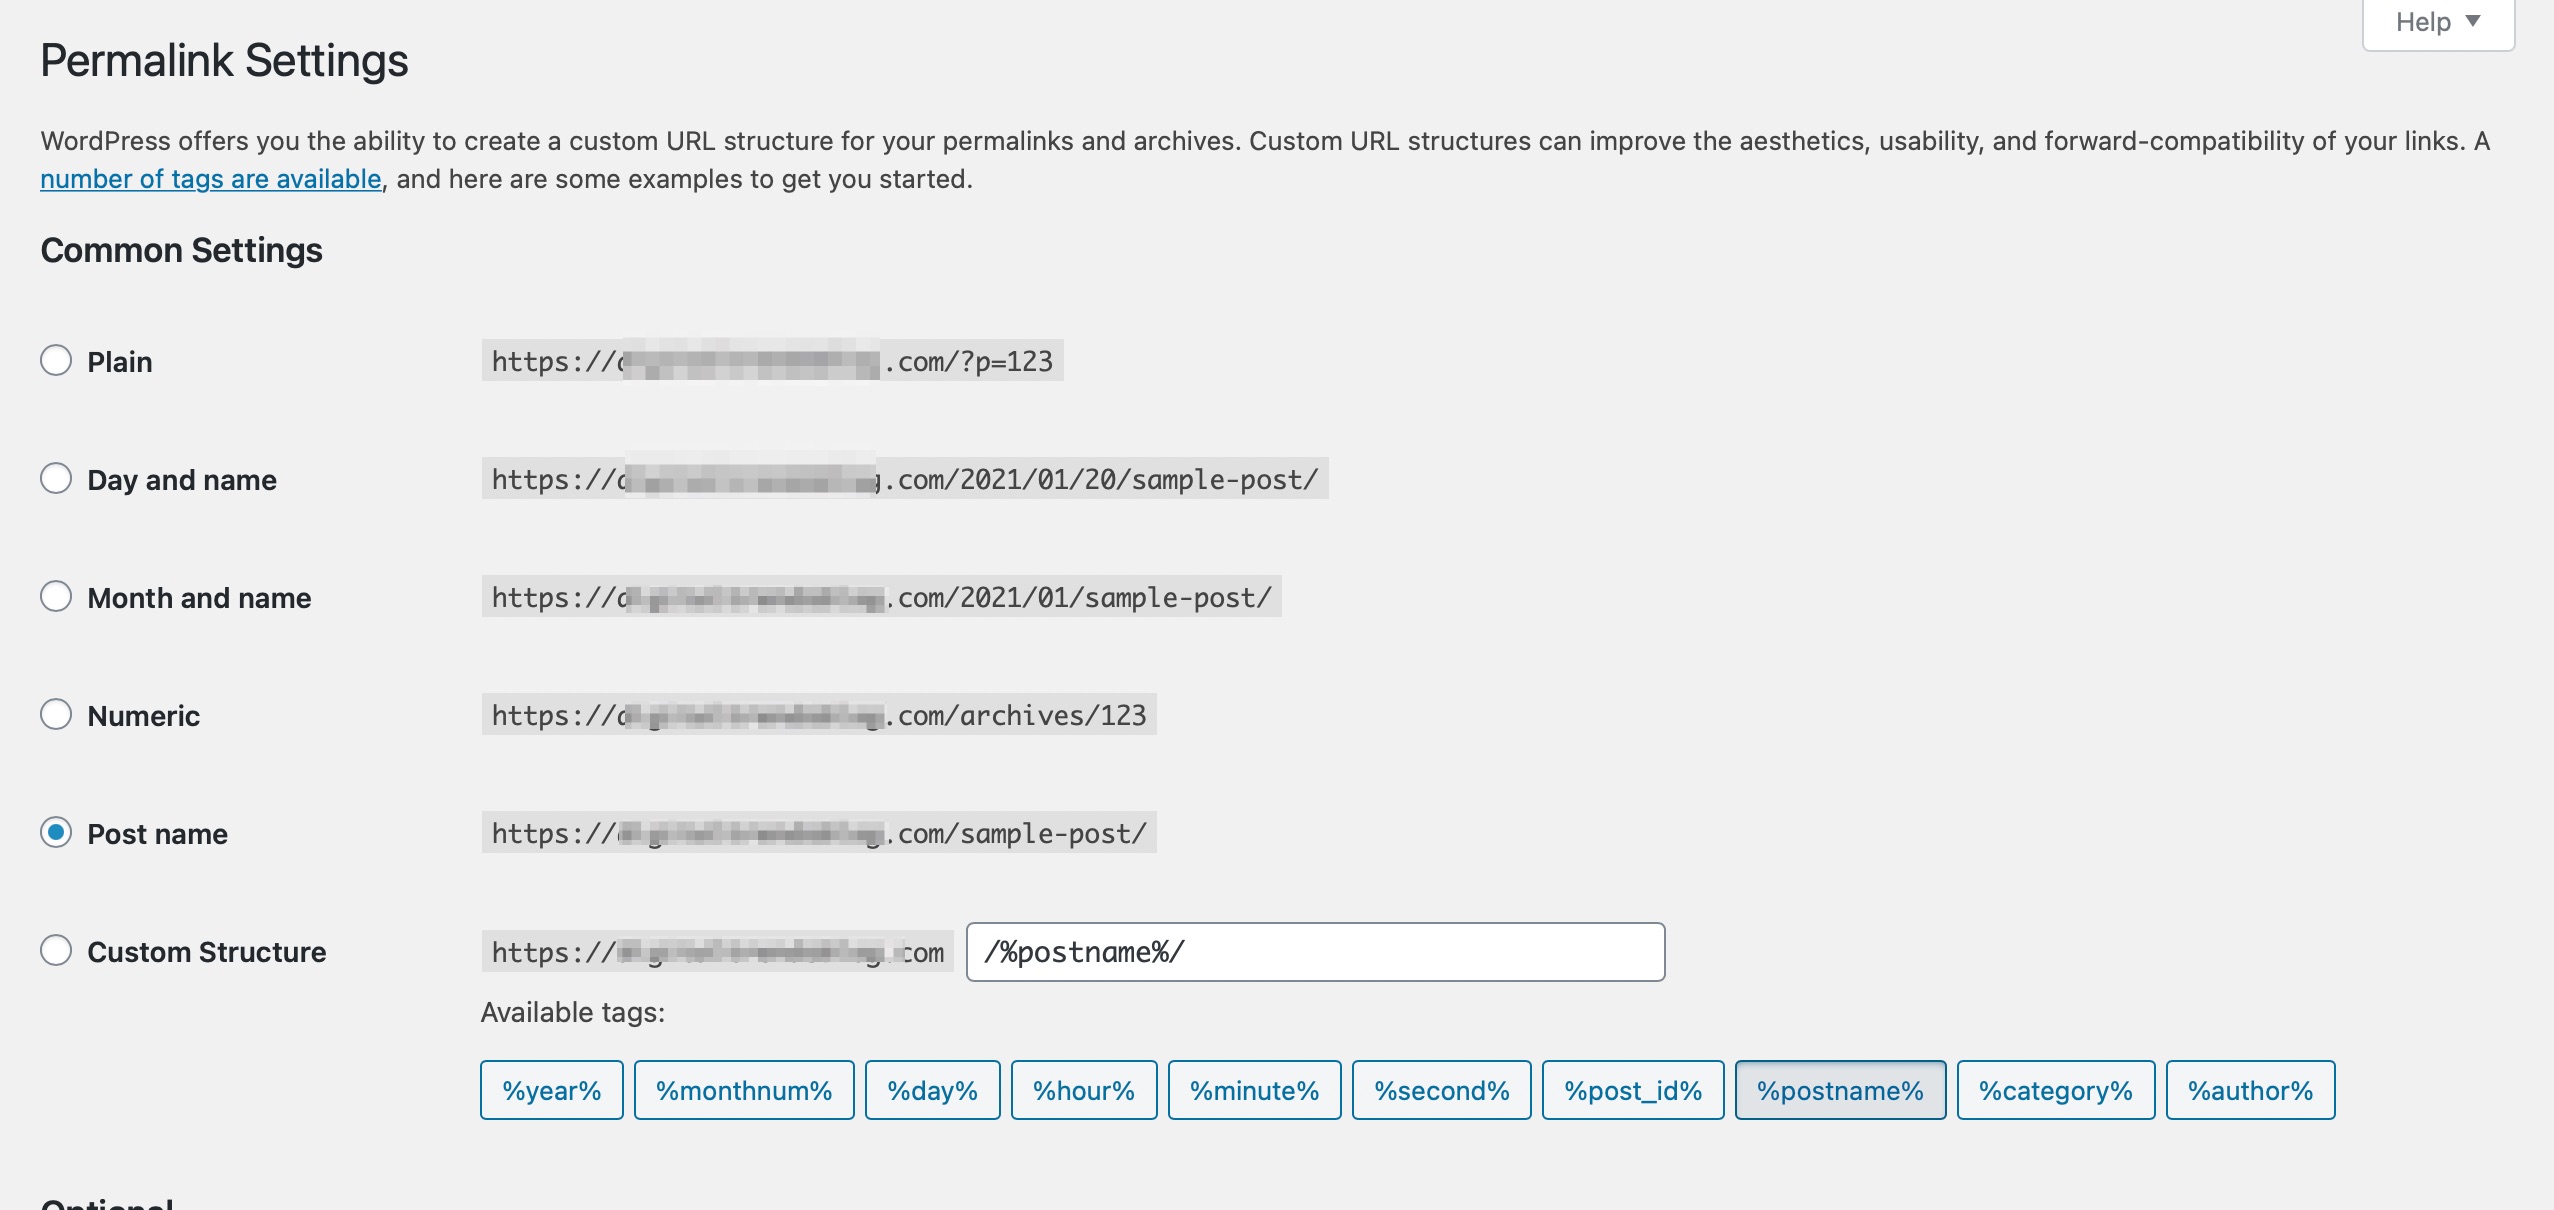
Next, go to your WordPress admin area and navigate to the Settings → Permalinks page. On this page, simply click on the Save button. WordPress will now generate a new .htaccess file for you and update the permalink settings.
You can learn more about WordPress Permalink Structure & Changing Individual URLs.
If this method doesn’t work, you’ll need to edit the .htaccess file manually.
5.2.2 Manually Edit .htaccess File
In Rank Math, there is an easy way to edit the .htaccess file. In order to edit your .htaccess file, go to Rank Math SEO → General Settings → Edit .htaccess. If this section is unavailable on your website, then ensure that you’ve switched to the Advanced Mode in Rank Math.
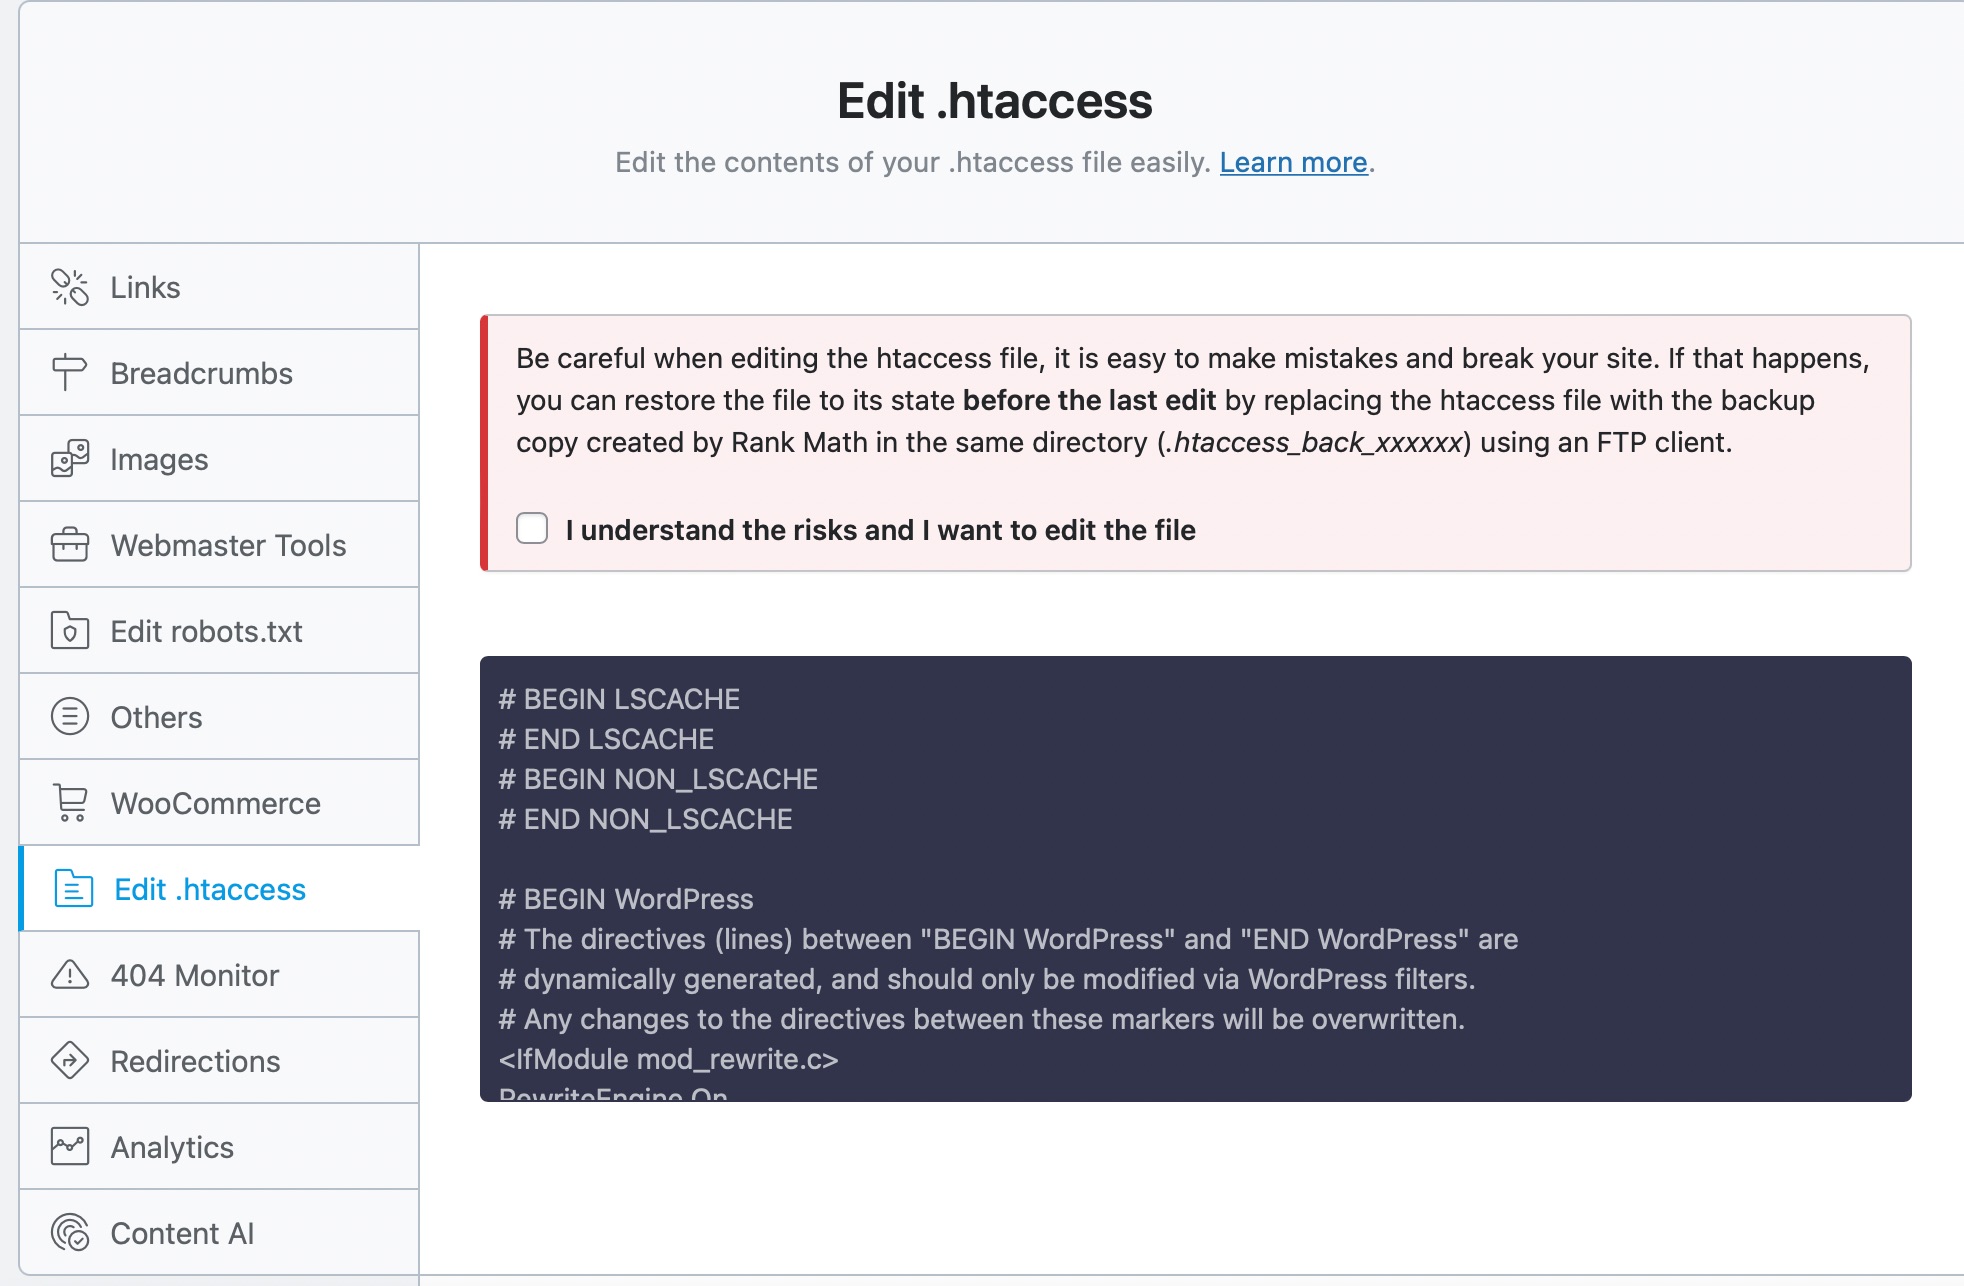
Make Changes to the .htaccess File
Inside this section, you’ll notice that there is a single text area that can be used to edit the .htaccess file. You must be careful and read the warning above the text area before editing the .htaccess file.
The notice clearly warns you that you’re about to edit your .htaccess file. This is a sensitive file, and you should take care before making any changes.
The best thing is that Rank Math automatically takes a backup of your .htacess before you modify it to prevent issues.
If you want to edit the .htacess file, click the checkbox below the text. The text area below will become active, and you can edit your .htacess file.
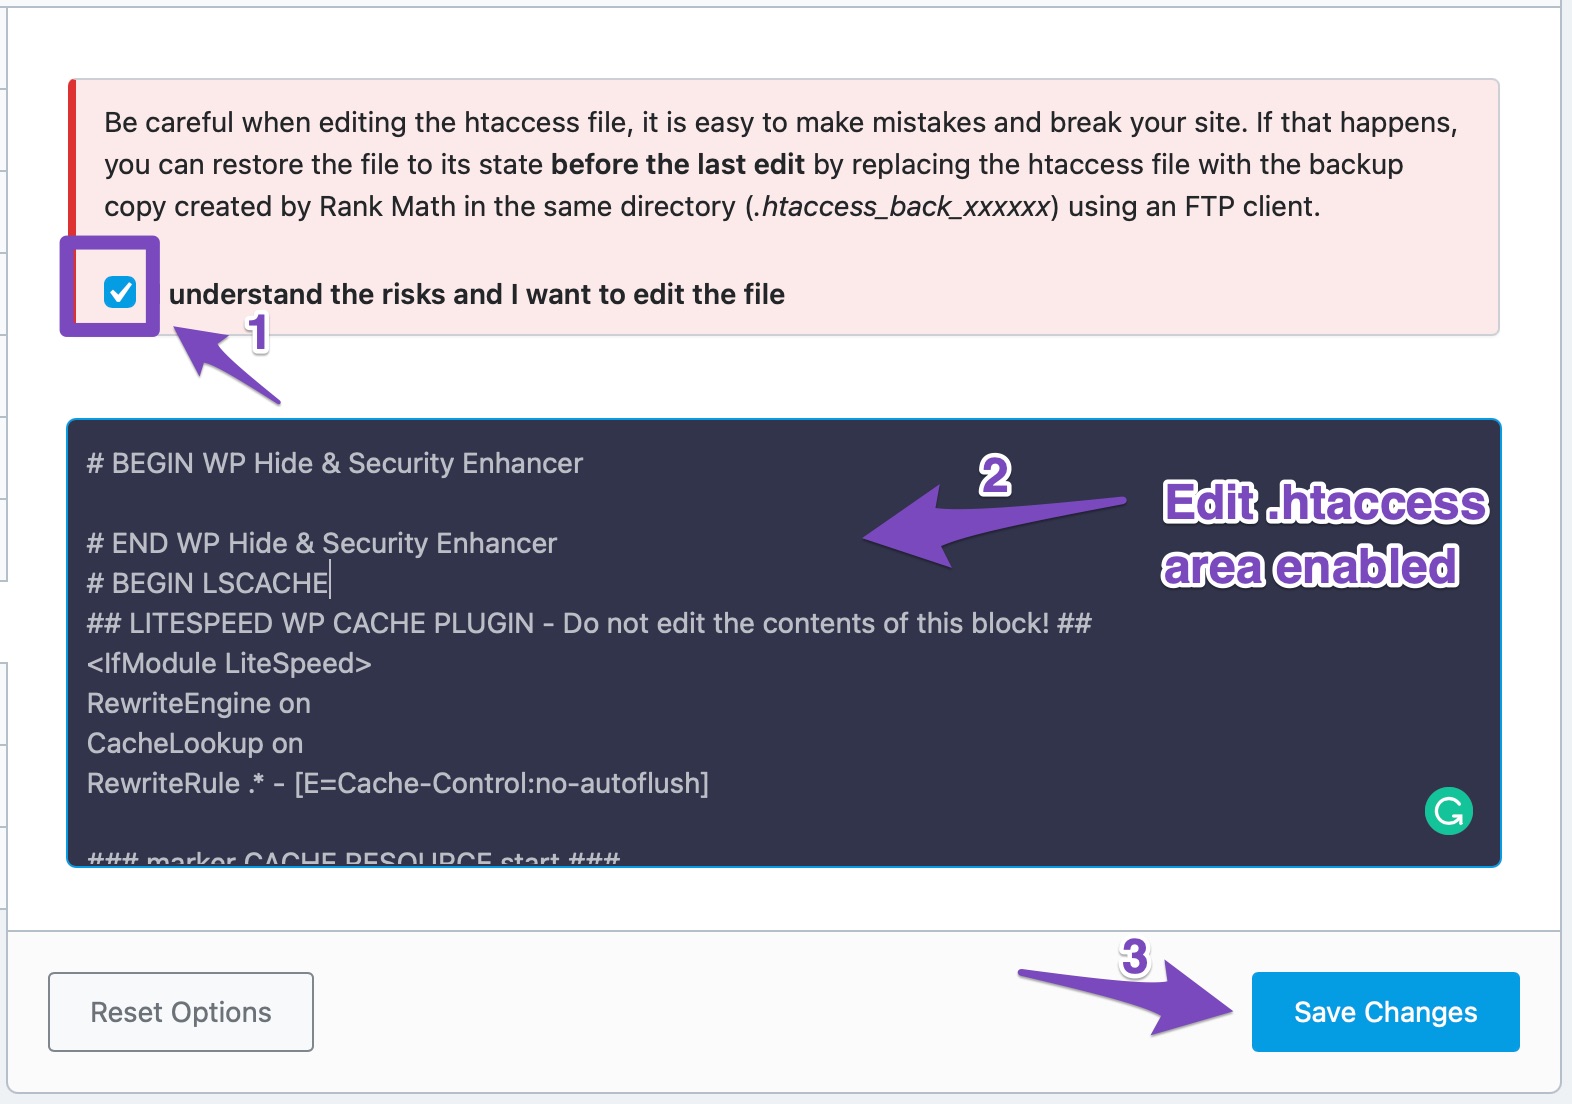
Once you’ve made your changes, click on the Update File button to save your changes.
After you have edited your .htaccess file, try accessing your WordPress site to see if the 403 Forbidden error is fixed.
If you’re still facing the issue, move on to the next method.
5.3 Site Health Check
The Site Health Check plugin is a great tool to help you troubleshoot your WordPress site. It will check your site for common problems and provide you with a report of what needs to be fixed. This plugin is great for troubleshooting common WordPress issues, such as plugin conflicts, theme issues, and database problems.
The plugin will also check your site for performance issues and provide you with a report of what needs to be improved. This plugin is great for troubleshooting common WordPress performance issues like slow page loading times and high CPU usage.
You can also follow these instructions on your live website, as running this conflict check does not affect your website visitors.
5.3.1 Installing the Health Check Plugin
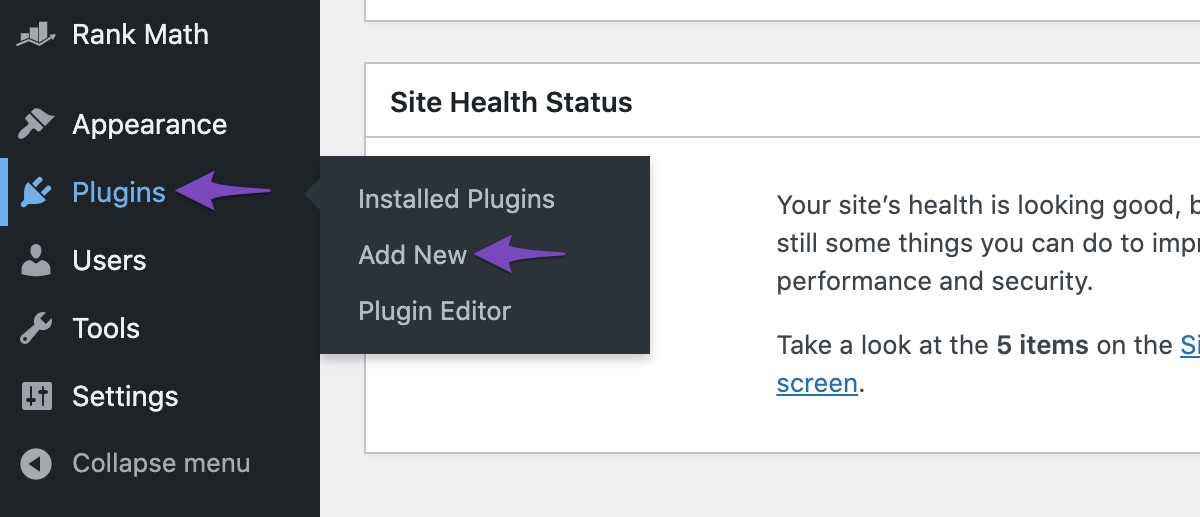
To do this, you first need to log into your WordPress site and go to the Plugins page. Next, click on the “Add New” button.
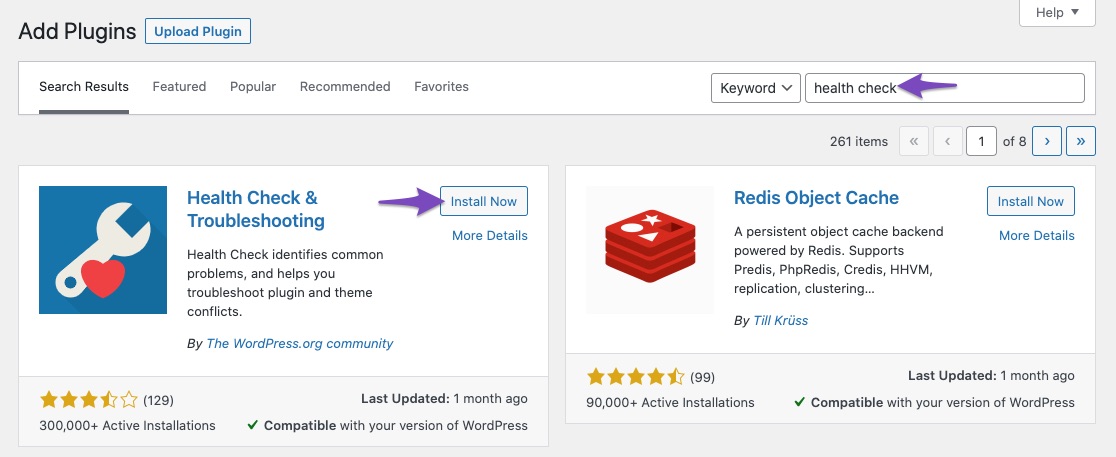
After that, search for “Site Health Check” in the plugin repository and then Click Install Now on Health Check & Troubleshooting plugin.
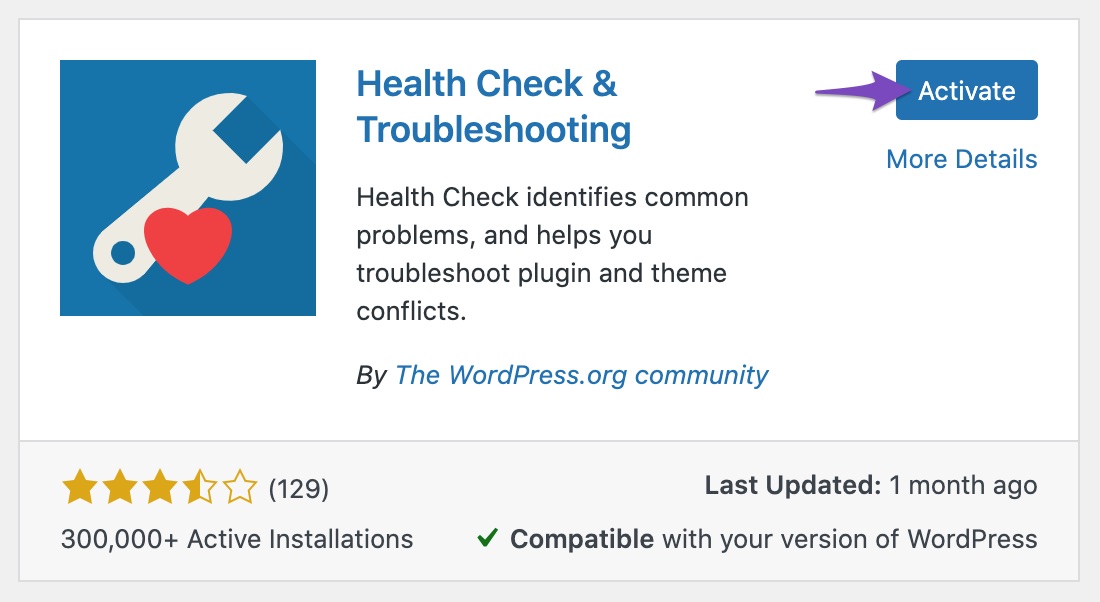
And then Activate the official Health Check plugin.
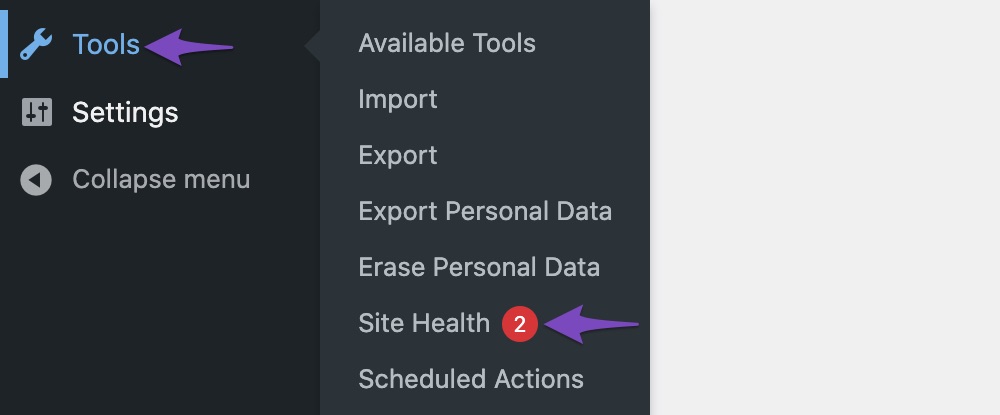
5.3.2 Finding the ‘Site Health’ Option
On the WordPress Menu on your left, Click on Tools and then select Site Health.
5.3.3 Troubleshoot Site Health
Now here, you need to navigate to the Troubleshooting tab and then press the Enable Troubleshooting Mode to start the troubleshooter as shown below:
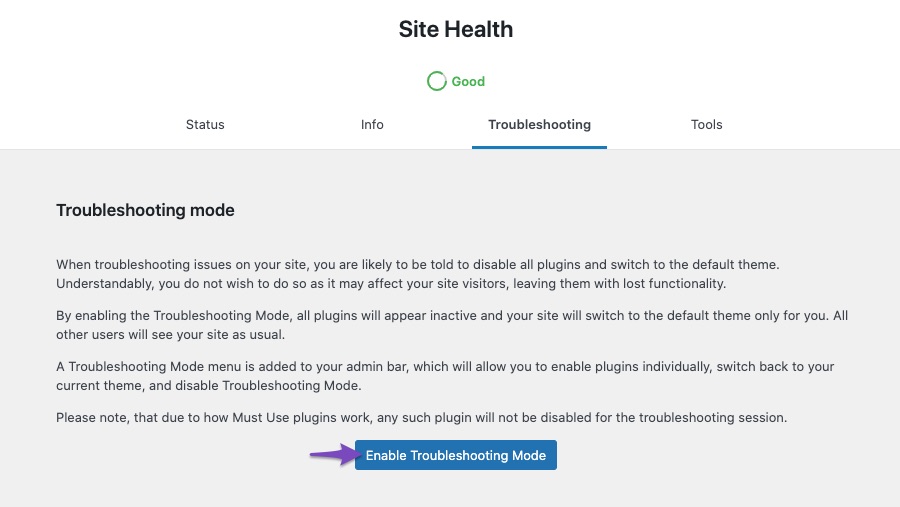
Once you complete these steps, you’re in troubleshooting mode.
Note: All the plugins and the theme on your website have been disabled only for you (the administrator). Your website visitors will not see any changes.
To diagnose the root cause of your problem, you’d need to enable Rank Math and keep it enabled at all times.
Then, enable your theme and each plugin one by one until the issue is found. The last plugin (or theme) that causes the issue will probably be the cause of the conflict.
If you’re still seeing the 403 Forbidden error, then you need to move on to the next method.
5.4 Accessing WordPress From a Banned IP Address
When a bot crawls or accesses your WordPress site from a disallowed IP address, then you’ll face the 403 Forbidden error.
In most cases, the IP addresses that are banned are those of the web crawlers or bots. To fix this error, you’ll need to add the IP address of Googlebot to the Allow list in your WordPress security plugin.
Or, if you don’t have a security plugin installed, you can contact your hosting provider and ask them to whitelist the IP address.
Once the IP address has been whitelisted, Googlebot will be able to crawl your website, and you should see this error getting resolved.
If you’re still facing the issue, you need to reach out to your Hosting Provider for further help.
These are some of the most common methods to help you fix the 403 Forbidden error on your WordPress site.
5.5 Check Your Cloudflare Firewall logs
If you’re using Cloudflare to protect your website, that’s great. However, it’s possible that your firewall rule settings might unintentionally block user agents like Googlebot from accessing your site, which could trigger the 403 error in Search Console.
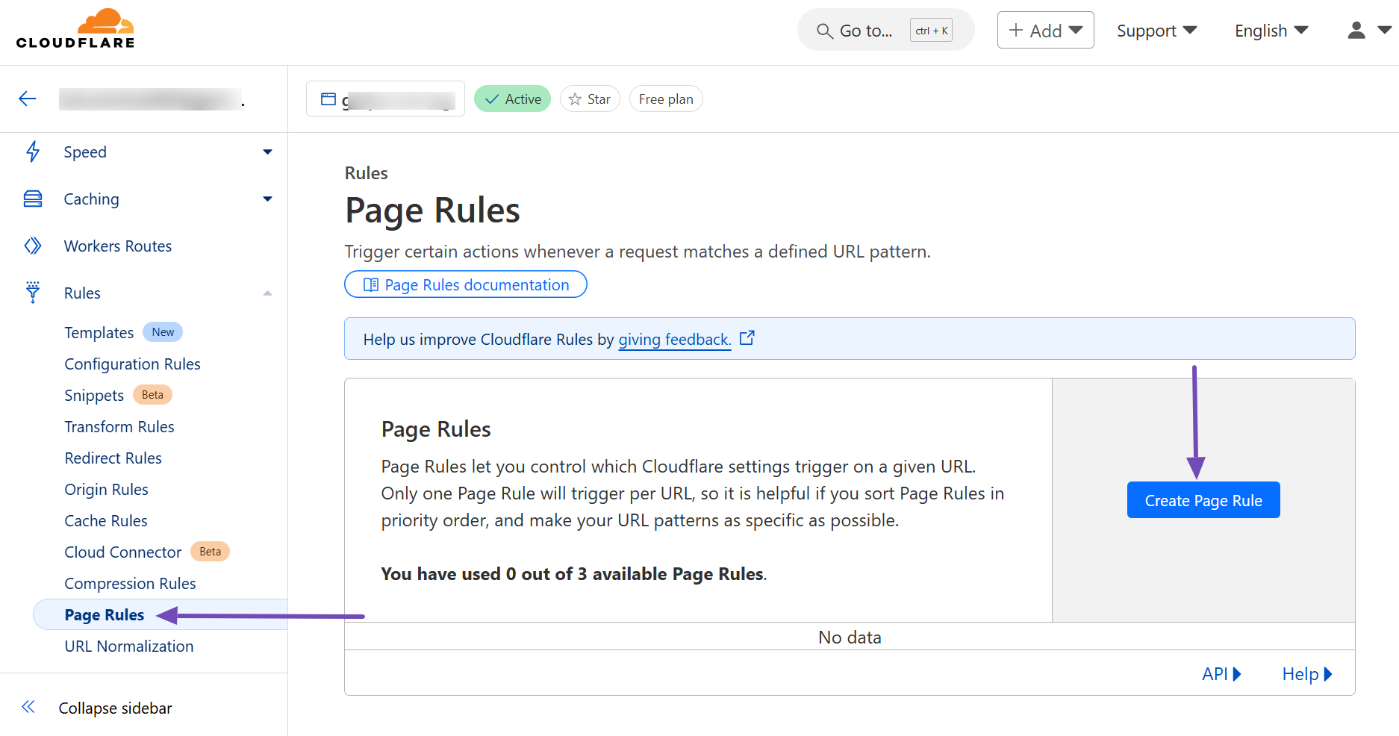
To fix this, log in to your Cloudflare account and check the settings to ensure they aren’t blocking Googlebot. After logging in and selecting the website in question, navigate to Rules → Page Rules from your dashboard.
Look at the rules you’ve set up, which define actions based on specific URL patterns, and verify none prevent Googlebot from crawling your site. If you haven’t set any rules, there’s nothing to worry about; otherwise, adjust the rules as necessary.
You should also check the firewall rules under Security → Events. Keep in mind that this feature might only be available for upgraded Cloudflare plans. If you’re a free user, skip this step. If you have access, ensure no configurations block user agents like Googlebot.
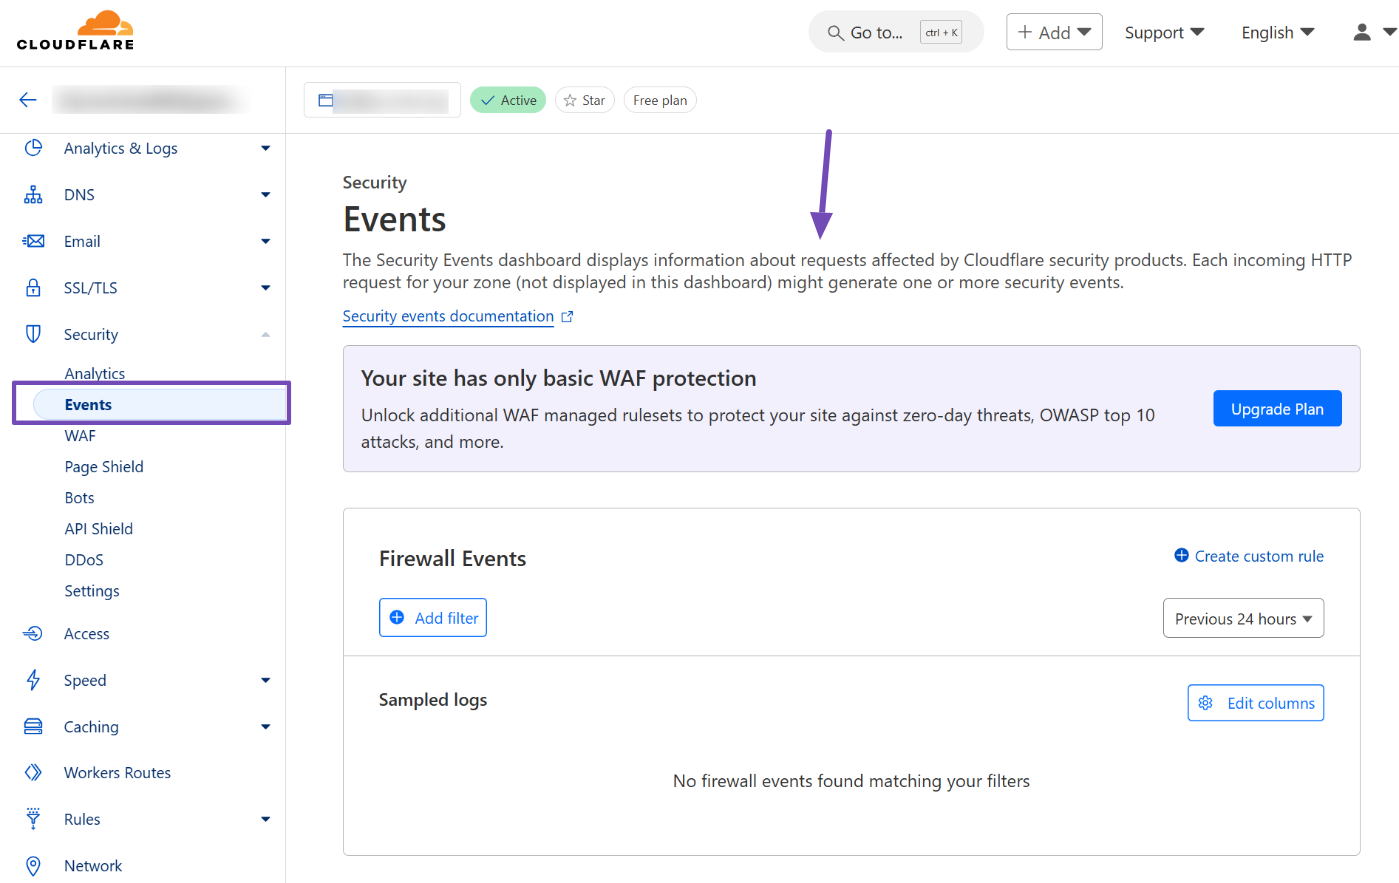
In the WAF section under Security, review any rules you’ve set. Avoid blocking all bots; instead, configure settings to block bots with a higher threat score. Make adjustments to lift any restrictions affecting Googlebot.

Once that’s done, check your server logs to confirm no 403 errors are being returned for Googlebot.
6 Final Words
We hope this article helped you learn how to fix the “blocked due to access Forbidden (403)” error on your WordPress site.
If you have any questions or doubts related to this matter, please don’t hesitate to contact our support team. We are available 24×7, 365 days a year, and are happy to help you with any issues you might face.