When I first started building my WordPress site, I quickly realized how important clear navigation is for visitors.
One of the best ways to keep things organized, especially if you have a lot of pages or categories, is by using a drop-down menu. It lets you group related content under main menu items, making it easier for people to find what they’re looking for without overwhelming them with too many options at once.
If you’re just getting started with WordPress, the idea of customizing menus might seem a bit intimidating. But don’t worry, it’s actually pretty simple, and you don’t need to touch a line of code.
In this post, we’ll walk you through exactly how to add a dropdown menu to your WordPress site, step by step.
So, without further ado, let’s get started.
Table Of Contents
1 What is a Dropdown Menu in WordPress?
When I first started building my WordPress site, I wasn’t sure what a dropdown menu was or why I might need one. But once I figured it out, it made a huge difference in how organized and user-friendly my site felt.
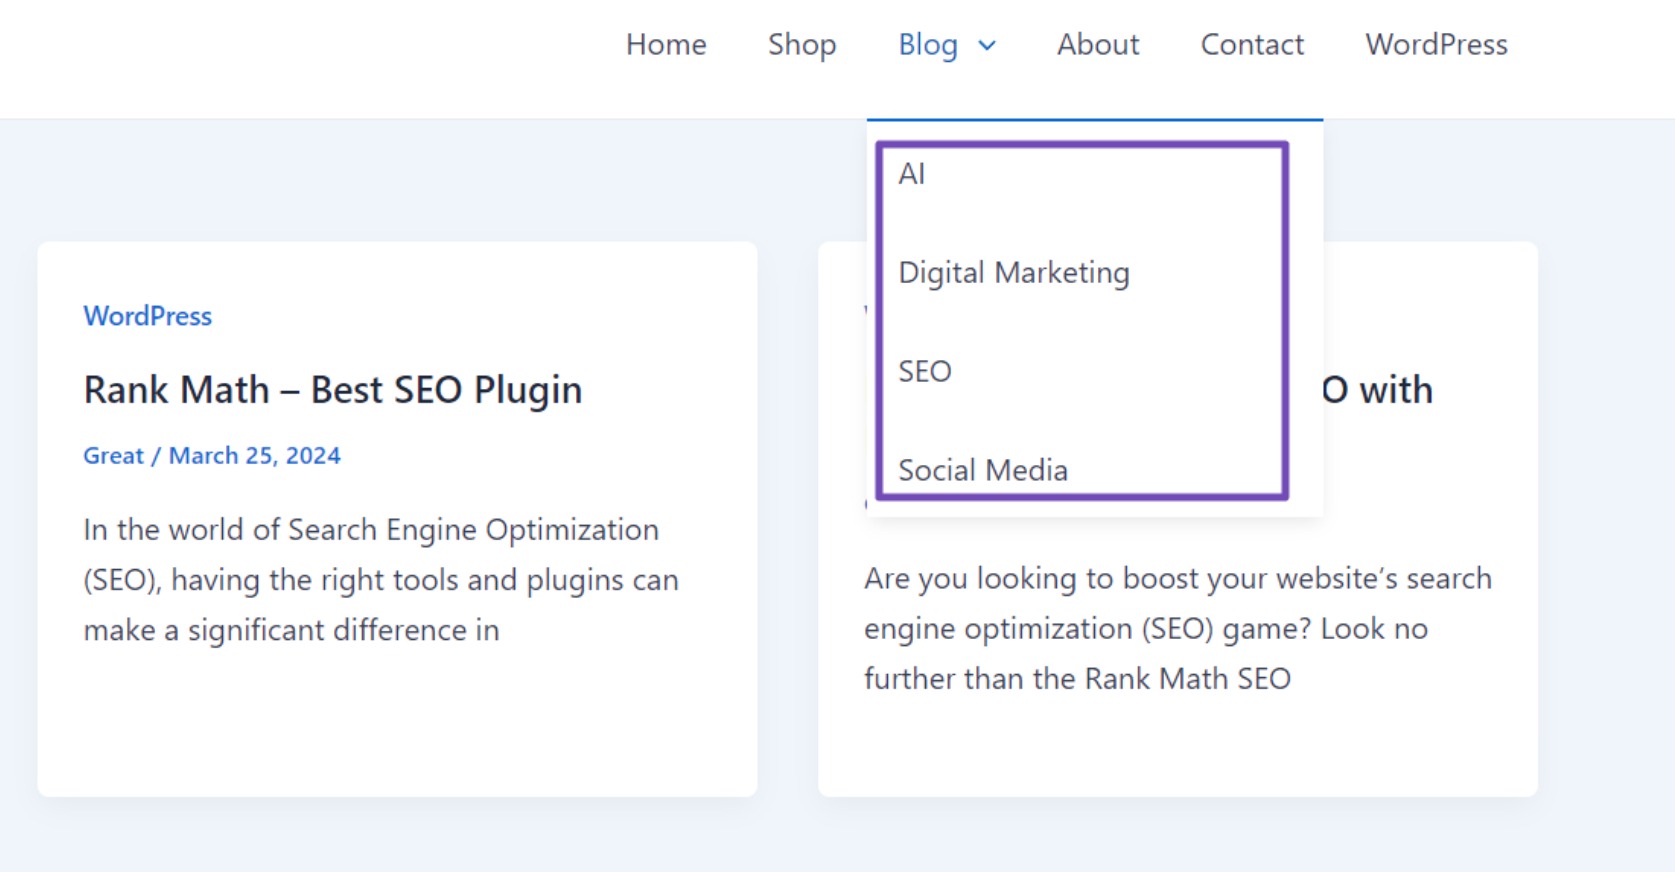
A dropdown menu in WordPress lets you create a main menu item, like Blog or Services, and then nest related items underneath it. When a visitor hovers over or clicks the main item, the additional links appear in a drop-down list. It’s a simple way to keep your navigation clean while still giving people quick access to more content.
For instance, I added a dropdown under Tools with categories like Meta Tag Analyzer, SEO Analyzer, and Robots.txt Tester. This helped me avoid cluttering the top navigation bar, and it made it easier for visitors to find what they’re looking for.

If you’re setting up your own WordPress site, adding a dropdown menu is something you’ll definitely want to consider. It’s easy to do, and you don’t need to know any code. In fact, once you get the hang of it, you’ll probably want to organize more of your menu this way too.
2 Why Add Dropdown Menus to Your Website?
Adding dropdown menus to your website is one of the easiest ways to improve navigation and user experience, especially if you have a lot of content. Instead of crowding your top menu with dozens of links, a dropdown lets you organize related pages or categories under a single main menu item. When visitors hover over or click that item, the related options appear in a neat, collapsible list.
This helps you:
- Keep your navigation clean and organized: Dropdowns prevent your menu from looking cluttered or overwhelming.
- Improve user experience: Visitors can quickly find what they’re looking for without having to dig through your site.
- Guide users through your content: You can group related services, product categories, or blog topics under relevant headings to help users explore more efficiently.
- Make your site look more professional: A well-structured dropdown menu shows that you’ve put thought into your site’s layout.
3 Methods to Create Dropdown Menus in WordPress
There are several ways to create a dropdown menu in WordPress. The most common method uses WordPress’s built-in menu system, but you can also create dropdowns using the Customizer, the Full Site Editor (FSE), a plugin, or the navigation block.
3.1 Creating a Dropdown Menu Using the Built-in WordPress Menu System
If you’re used to working with simple menus, creating a dropdown menu might seem a bit advanced, but WordPress makes it easier than you’d think with its default menu editor.
First, make sure you’ve created the pages, posts, categories, or custom links you want to include in your menu. These will be your main and dropdown items.
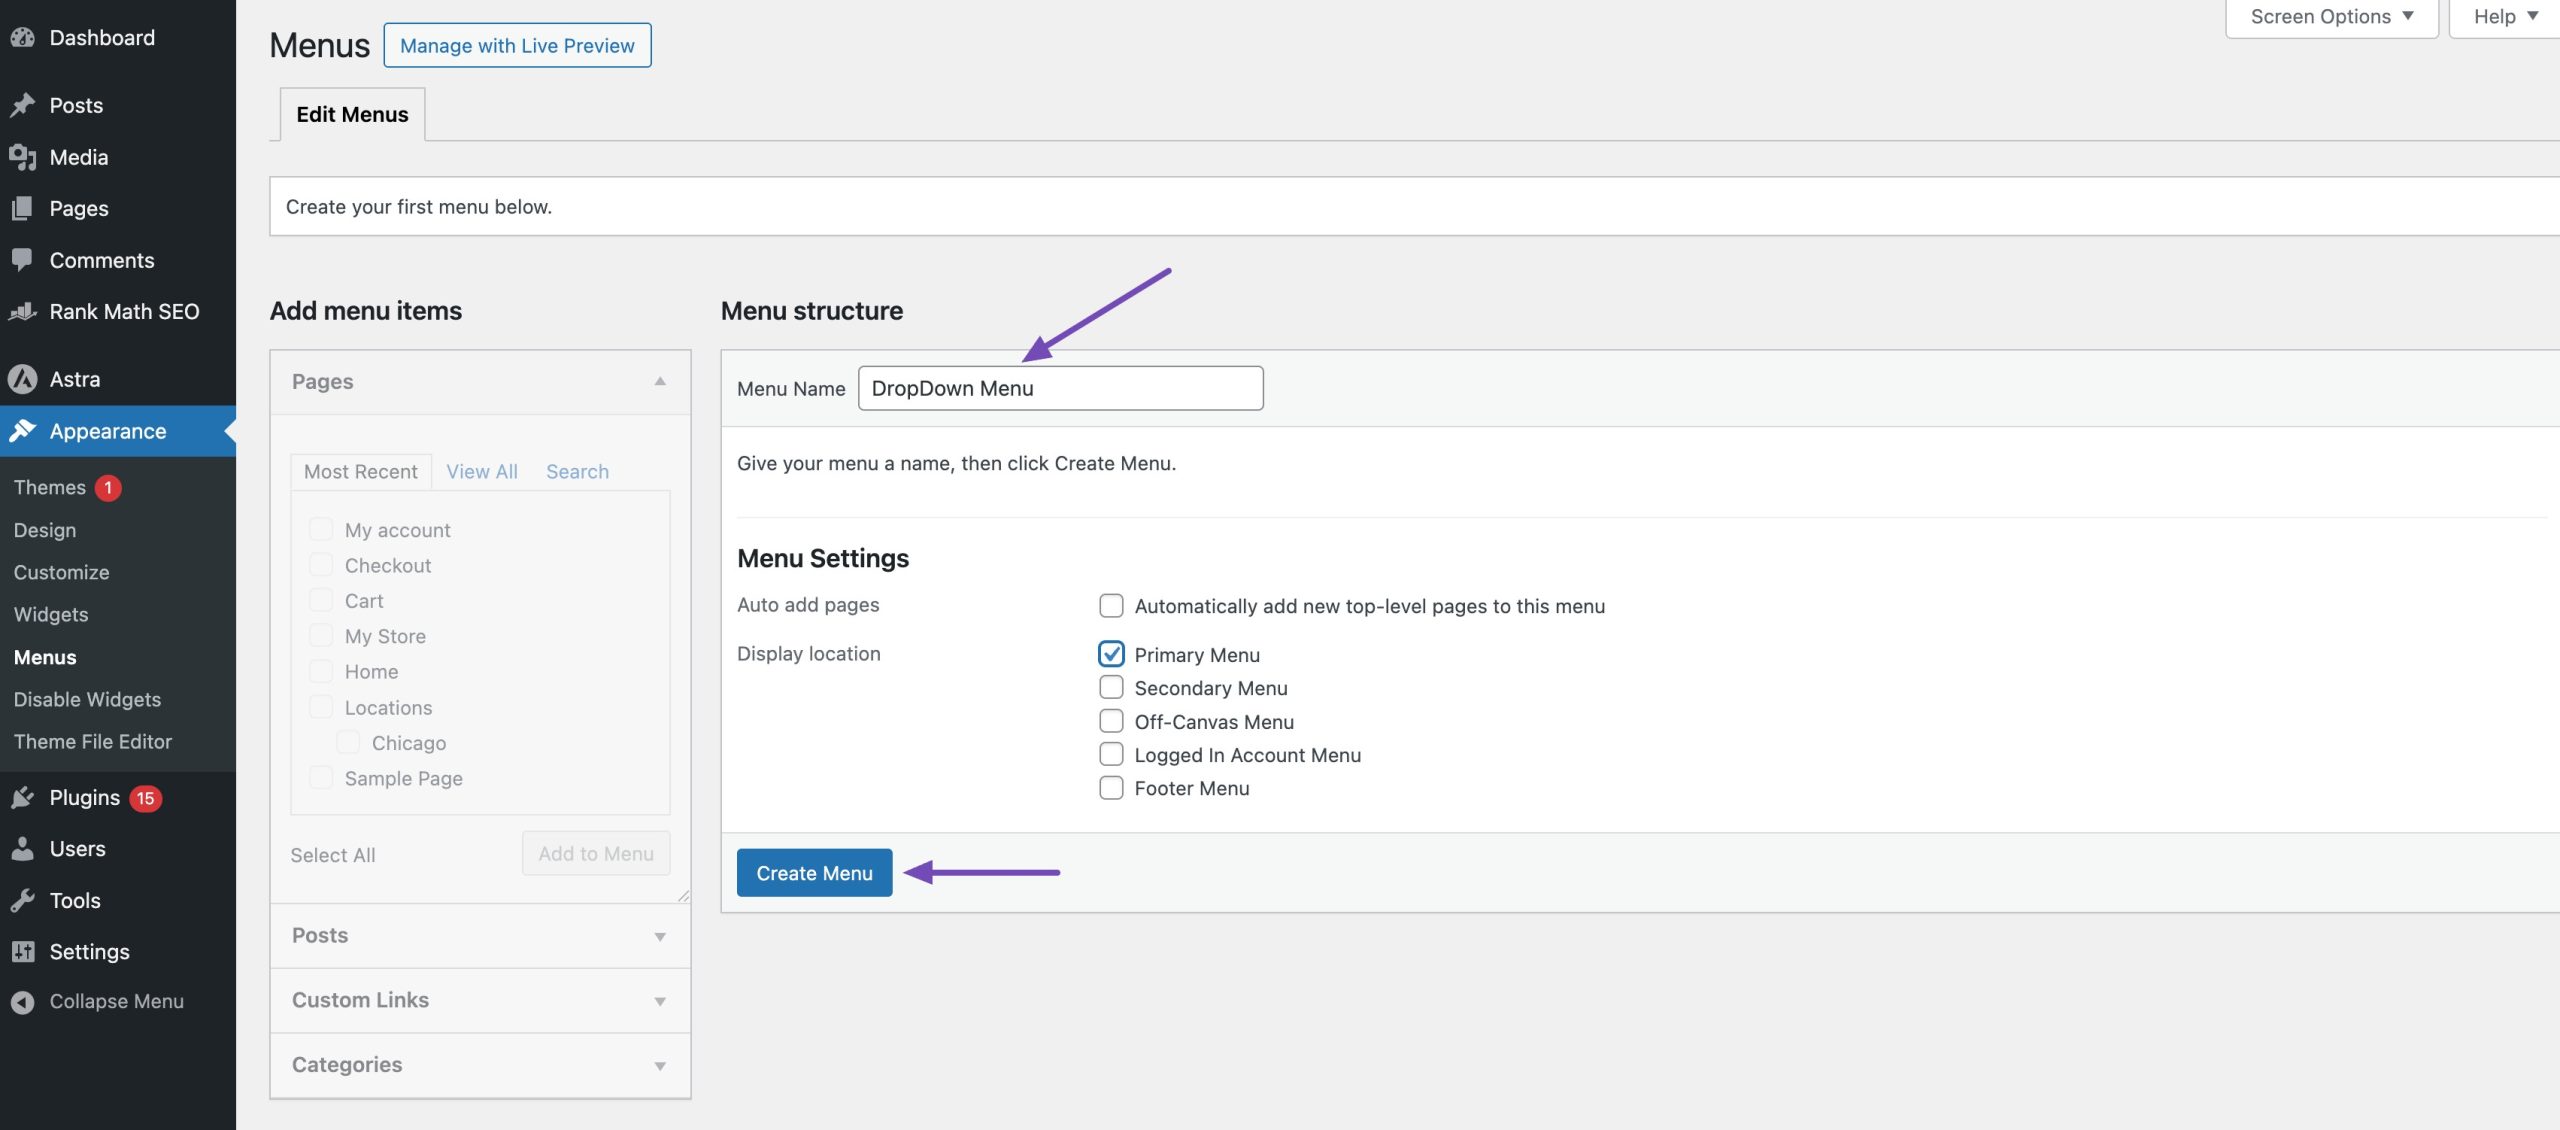
Next, from your WordPress dashboard, navigate to Appearance → Menus. Click on the create a new menu link if you don’t have one yet.
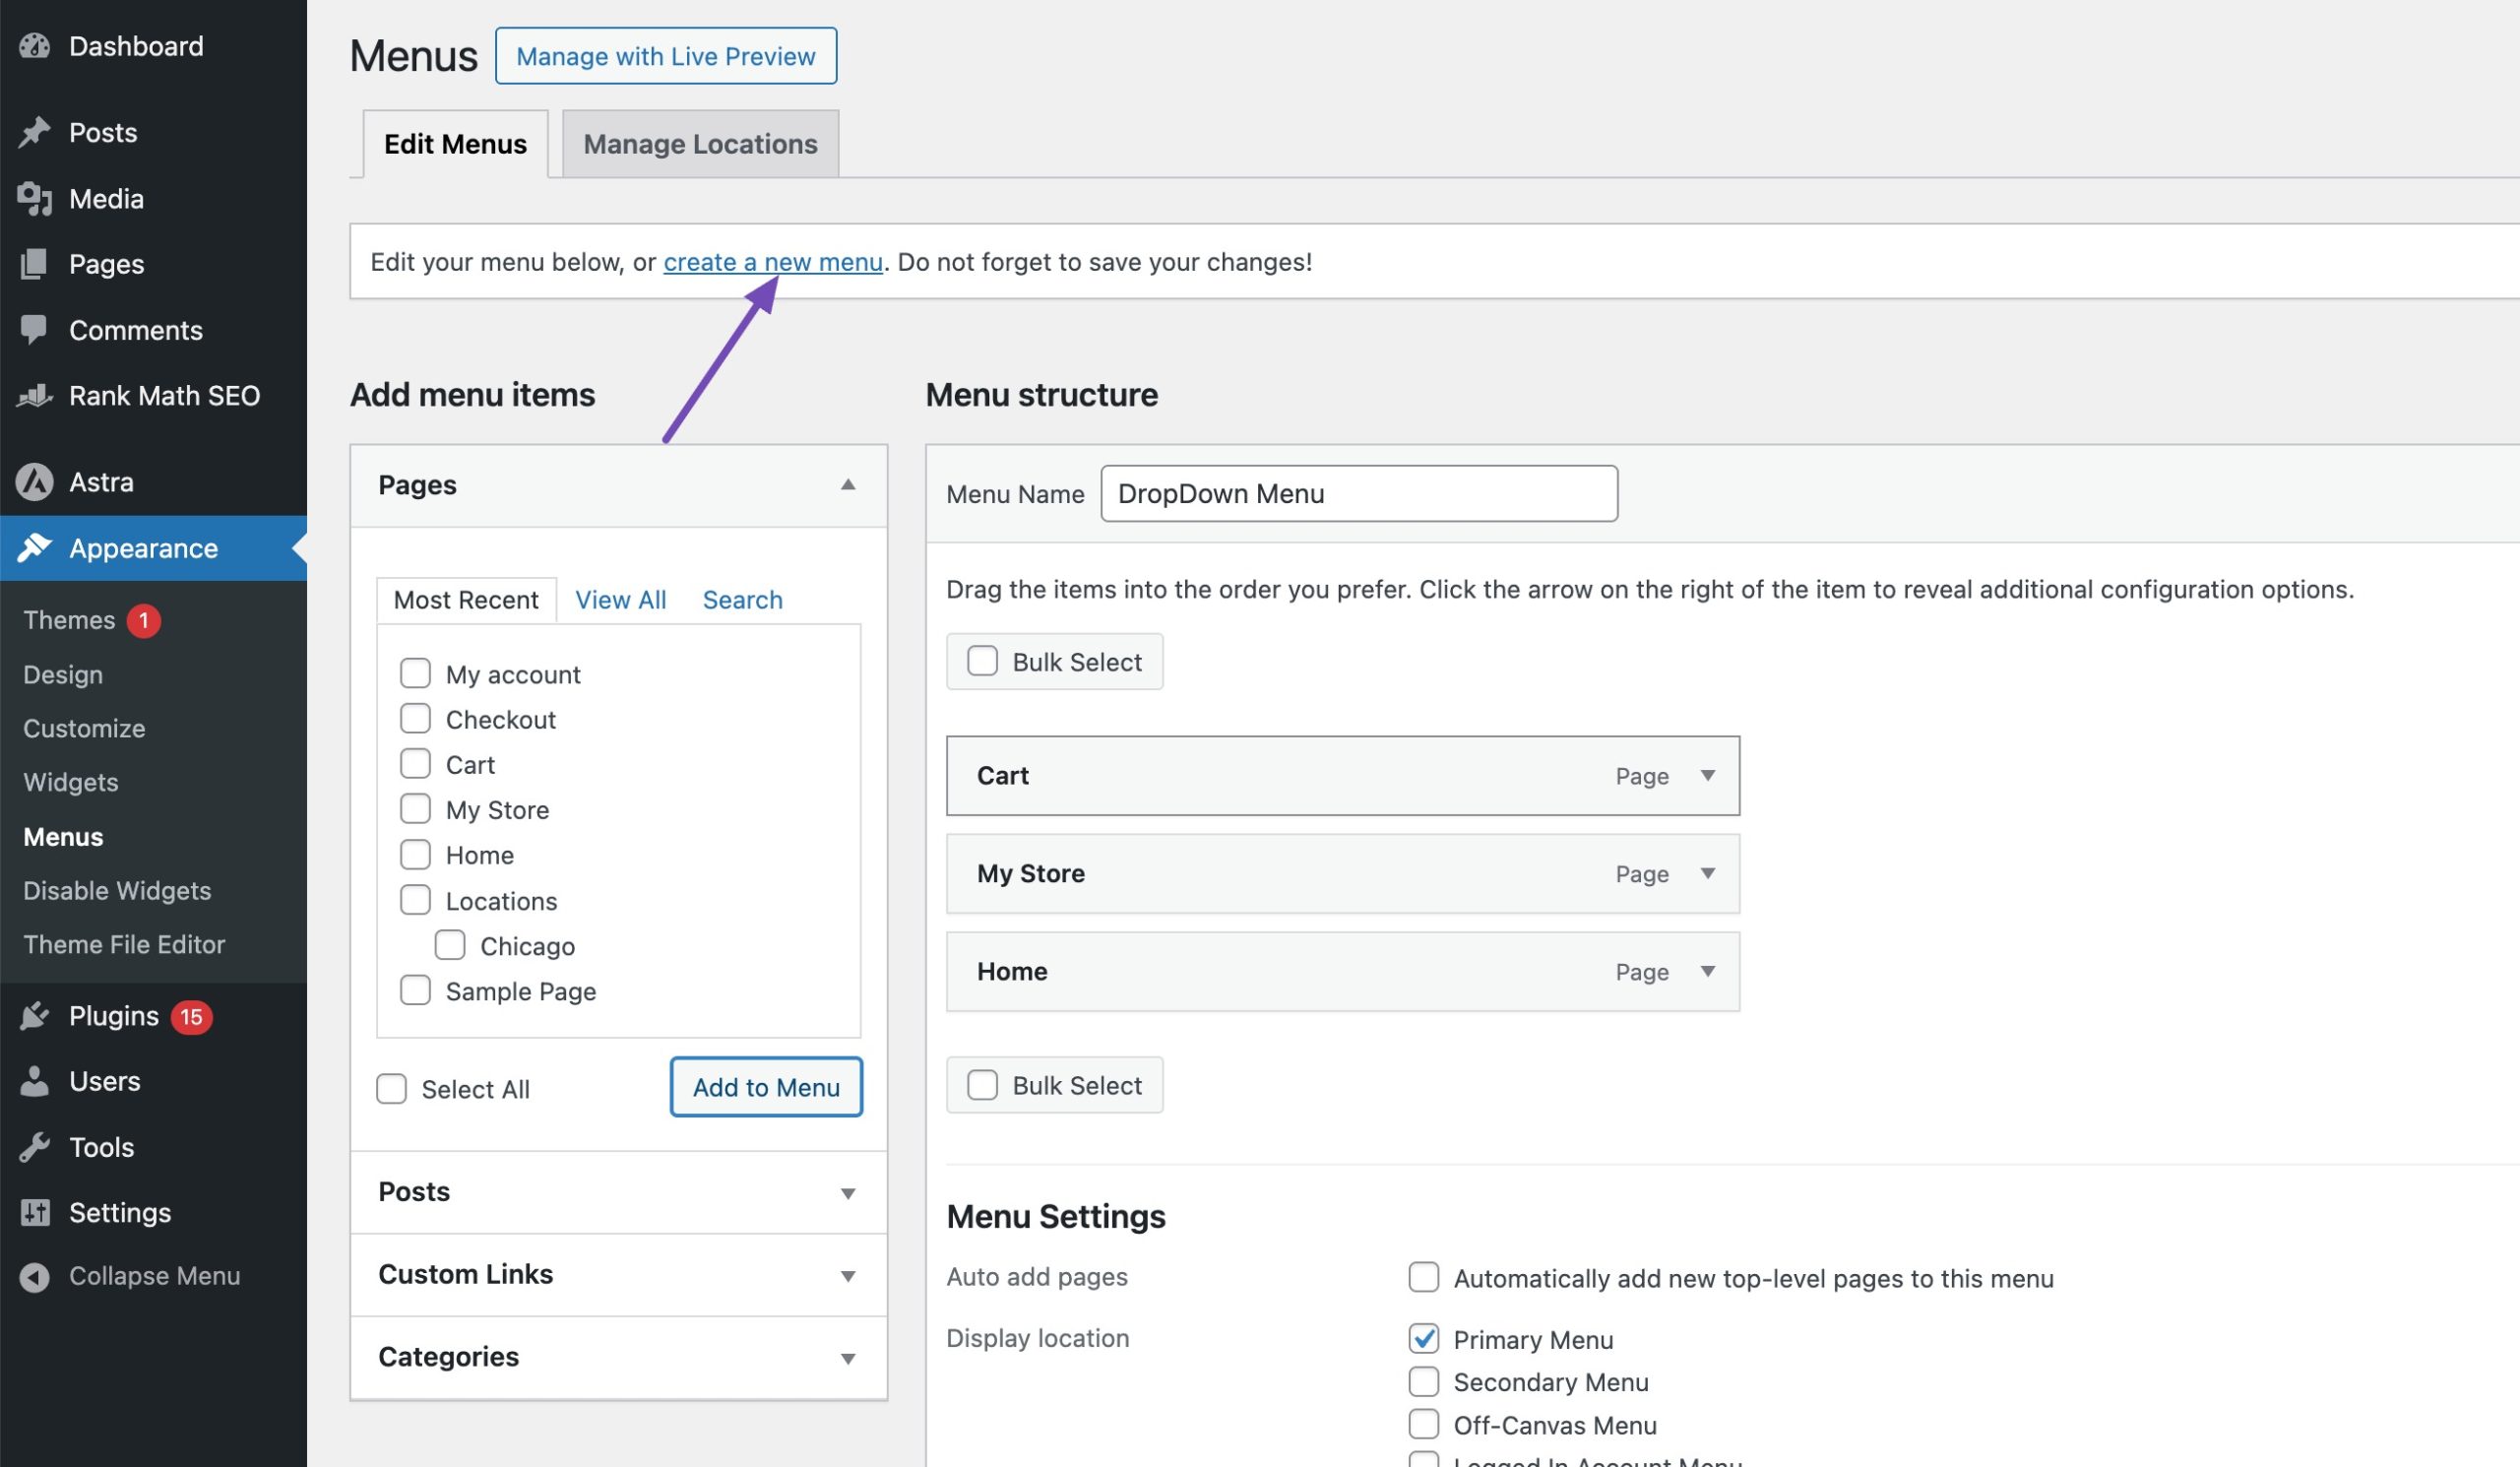
Note: If Appearance → Editor is visible, your theme has Full Site Editing (FSE) enabled. Skip ahead to the FSE method below. Name your menu and choose a display location (like Primary or Header), then click Create Menu.
Once your menu is created, you’ll see two sections:
- Left column: This is where you’ll find pages, categories, posts, and custom links.
- Right column: This is the menu structure, where your selected items will appear.
In the left column, expand any section (Pages, Categories, etc.), check the items you want to add, and click Add to Menu. These will now appear in the right column under Menu Structure. You can repeat this process to add as many items as you’d like.
Adding Sub-Items to a Menu
With the parent menu created, it’s time to add the dropdown menu items.
In the Menu Structure, drag the item you want to appear in the dropdown slightly to the right under its parent item. WordPress will automatically nest it as a sub-item (your dropdown).
Here’s how:
Repeat this step for every dropdown item you want to include.
Once you’re happy with the structure, click Save Menu. Your dropdown menu is now live on your site!
3.2 Creating a Dropdown Menu Using the WordPress Customizer
This method is similar to using the default WordPress menu editor but comes with one big advantage: you get a live preview of your changes as you make them. That means you can instantly see how your dropdown menu will look on your site before saving it.
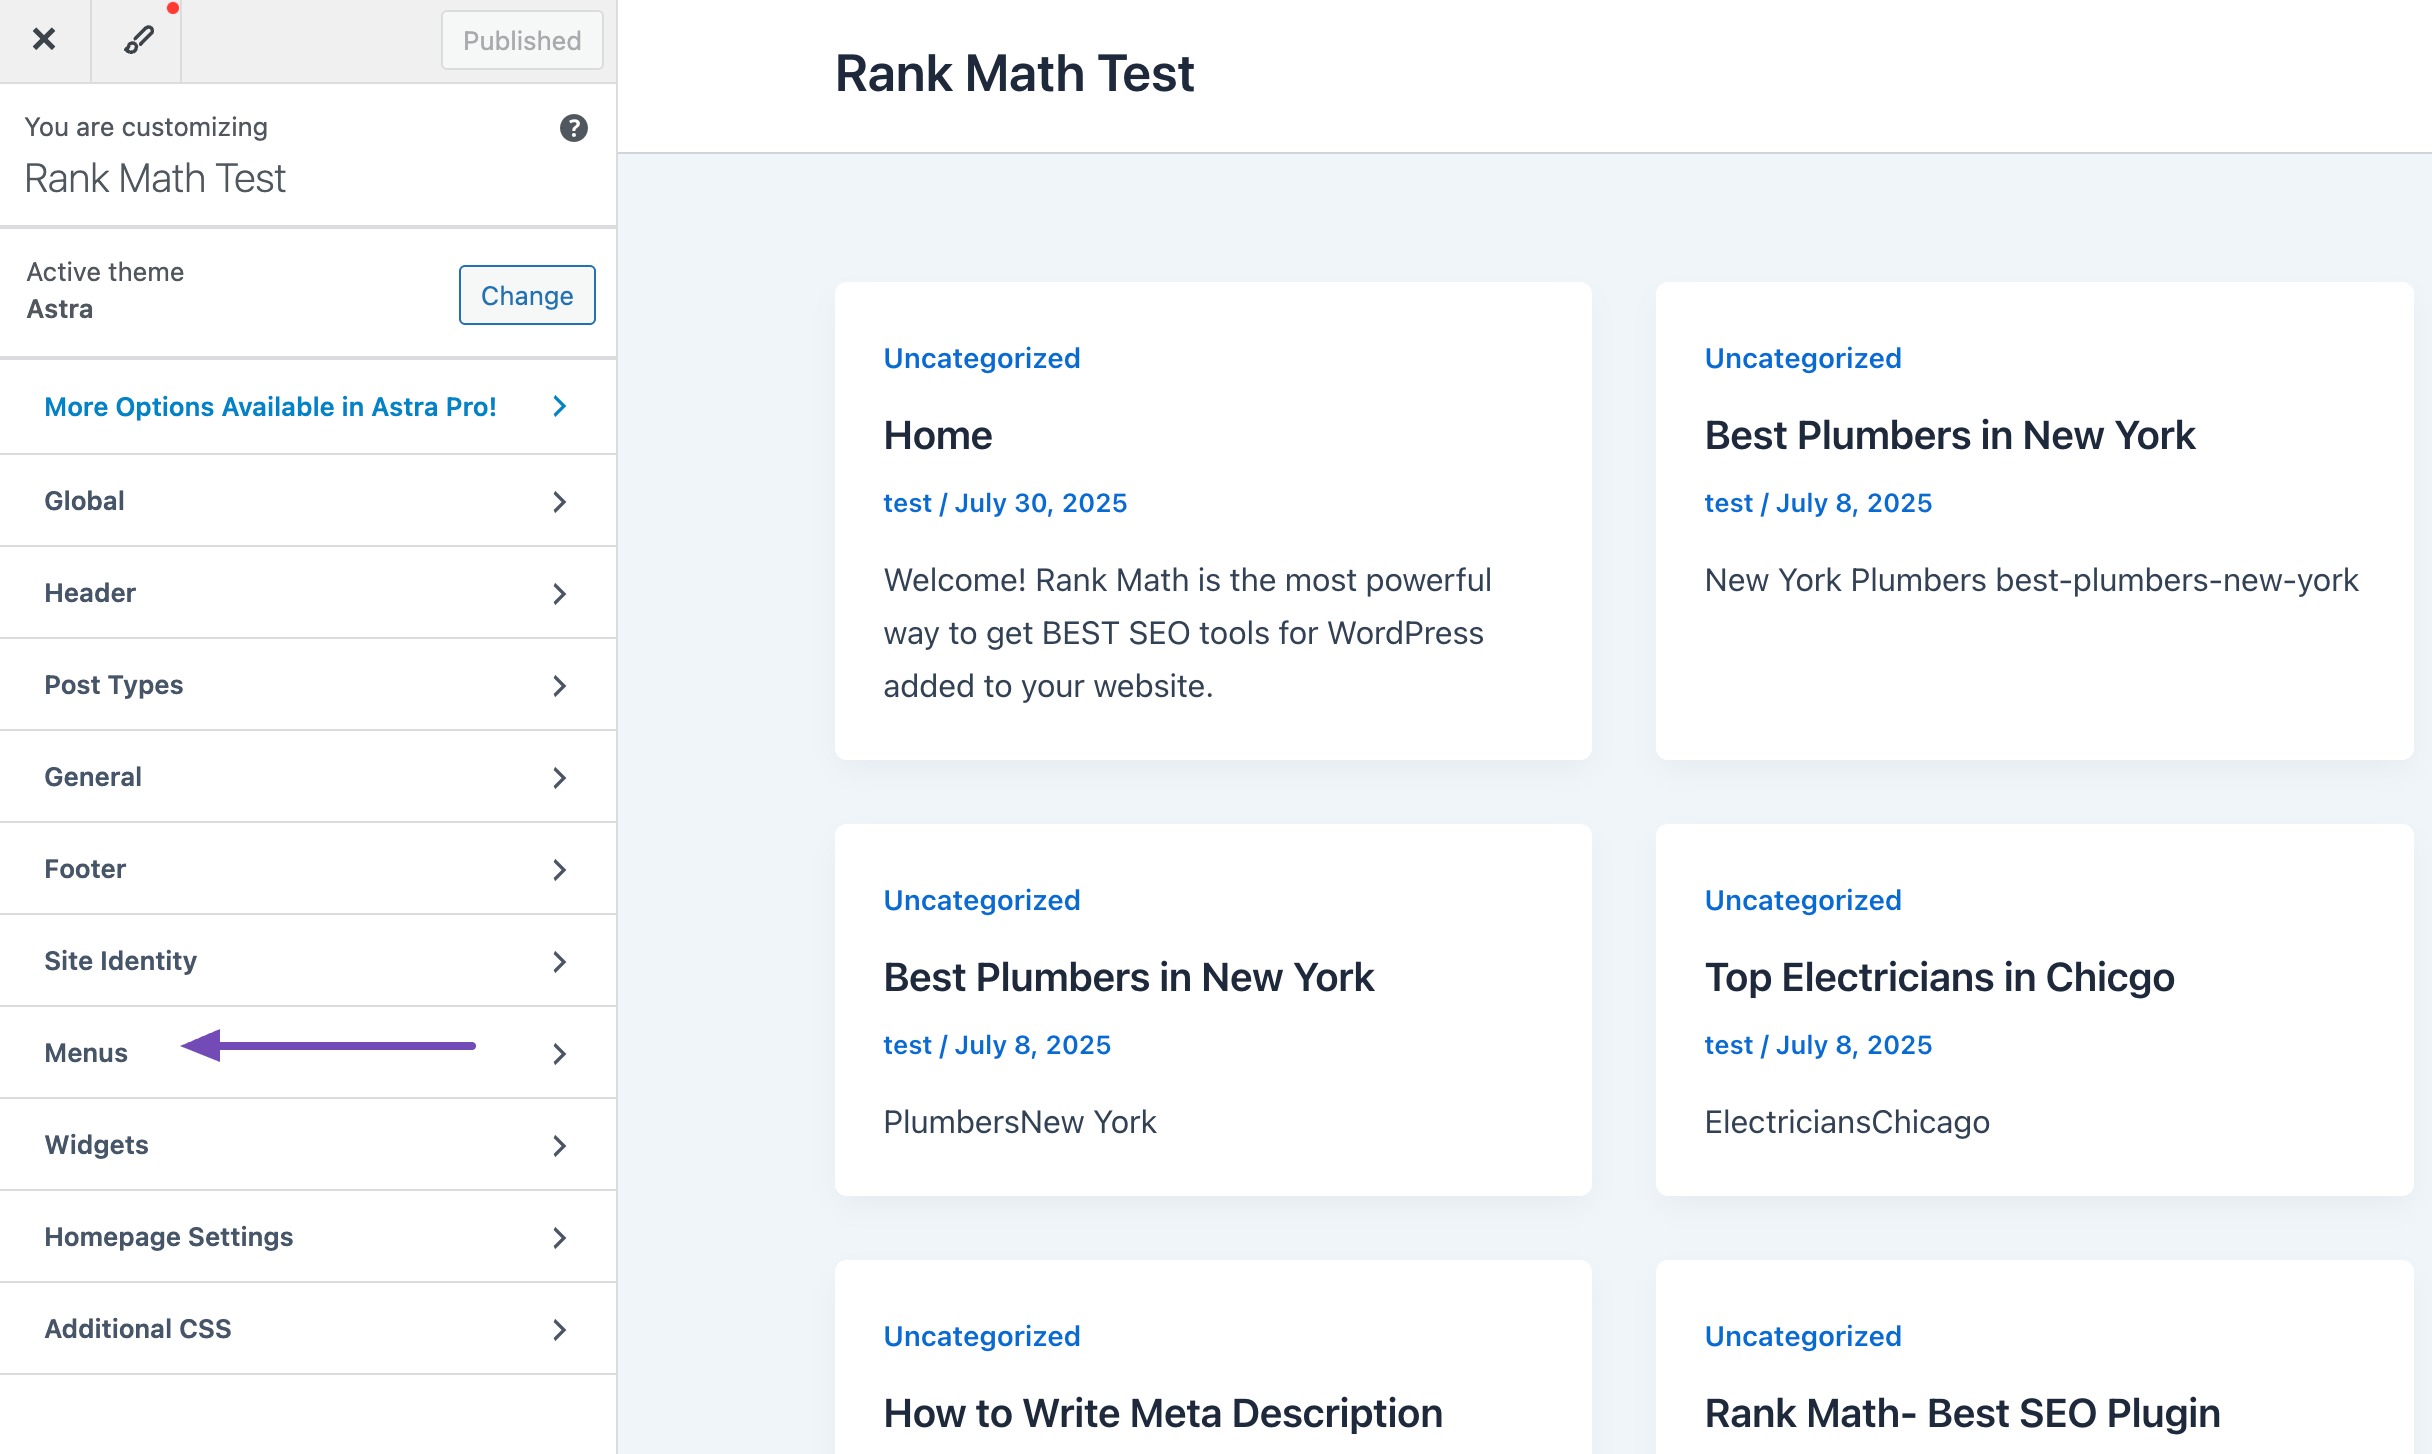
Log in to your WordPress dashboard and go to Appearance → Customize. This will open the live Customizer screen. Inside the Customizer, click on the Menus option. You’ll see a list of menus you’ve already created.
If you haven’t created a menu yet, click Create New Menu.
Give your menu a name and choose where it should appear, for your main site menu, select Primary Menu as the location. Then click Next.
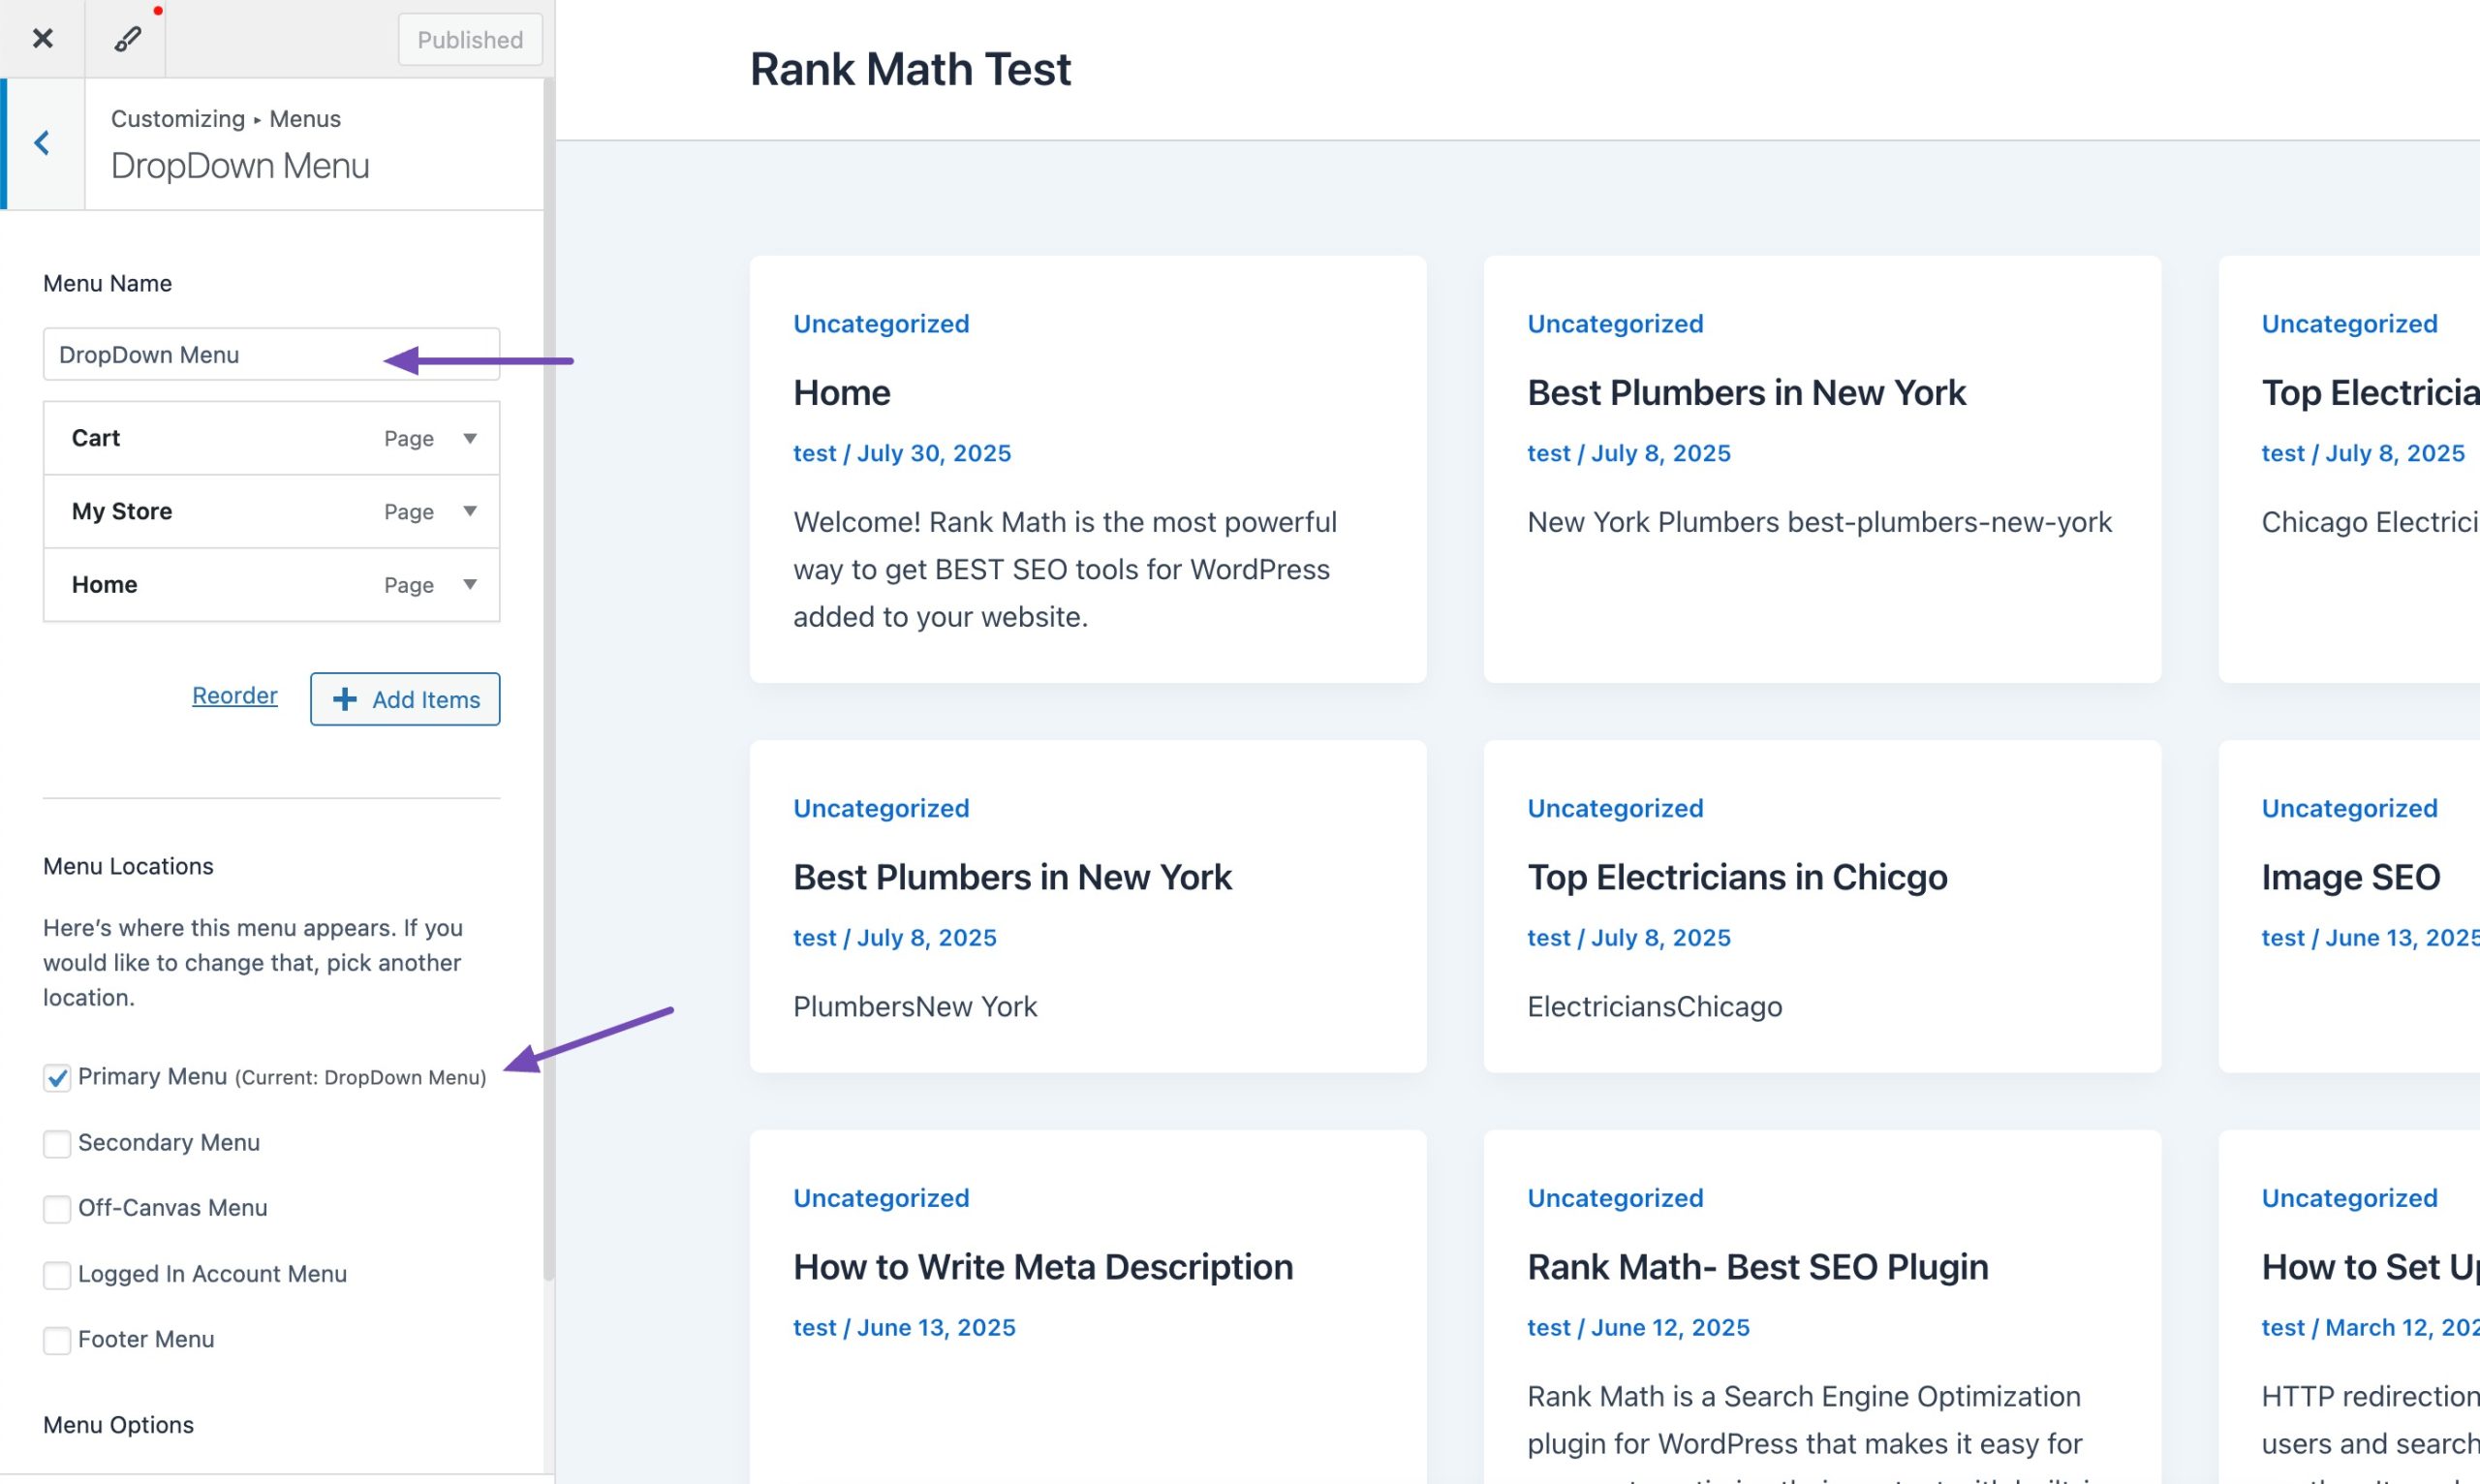
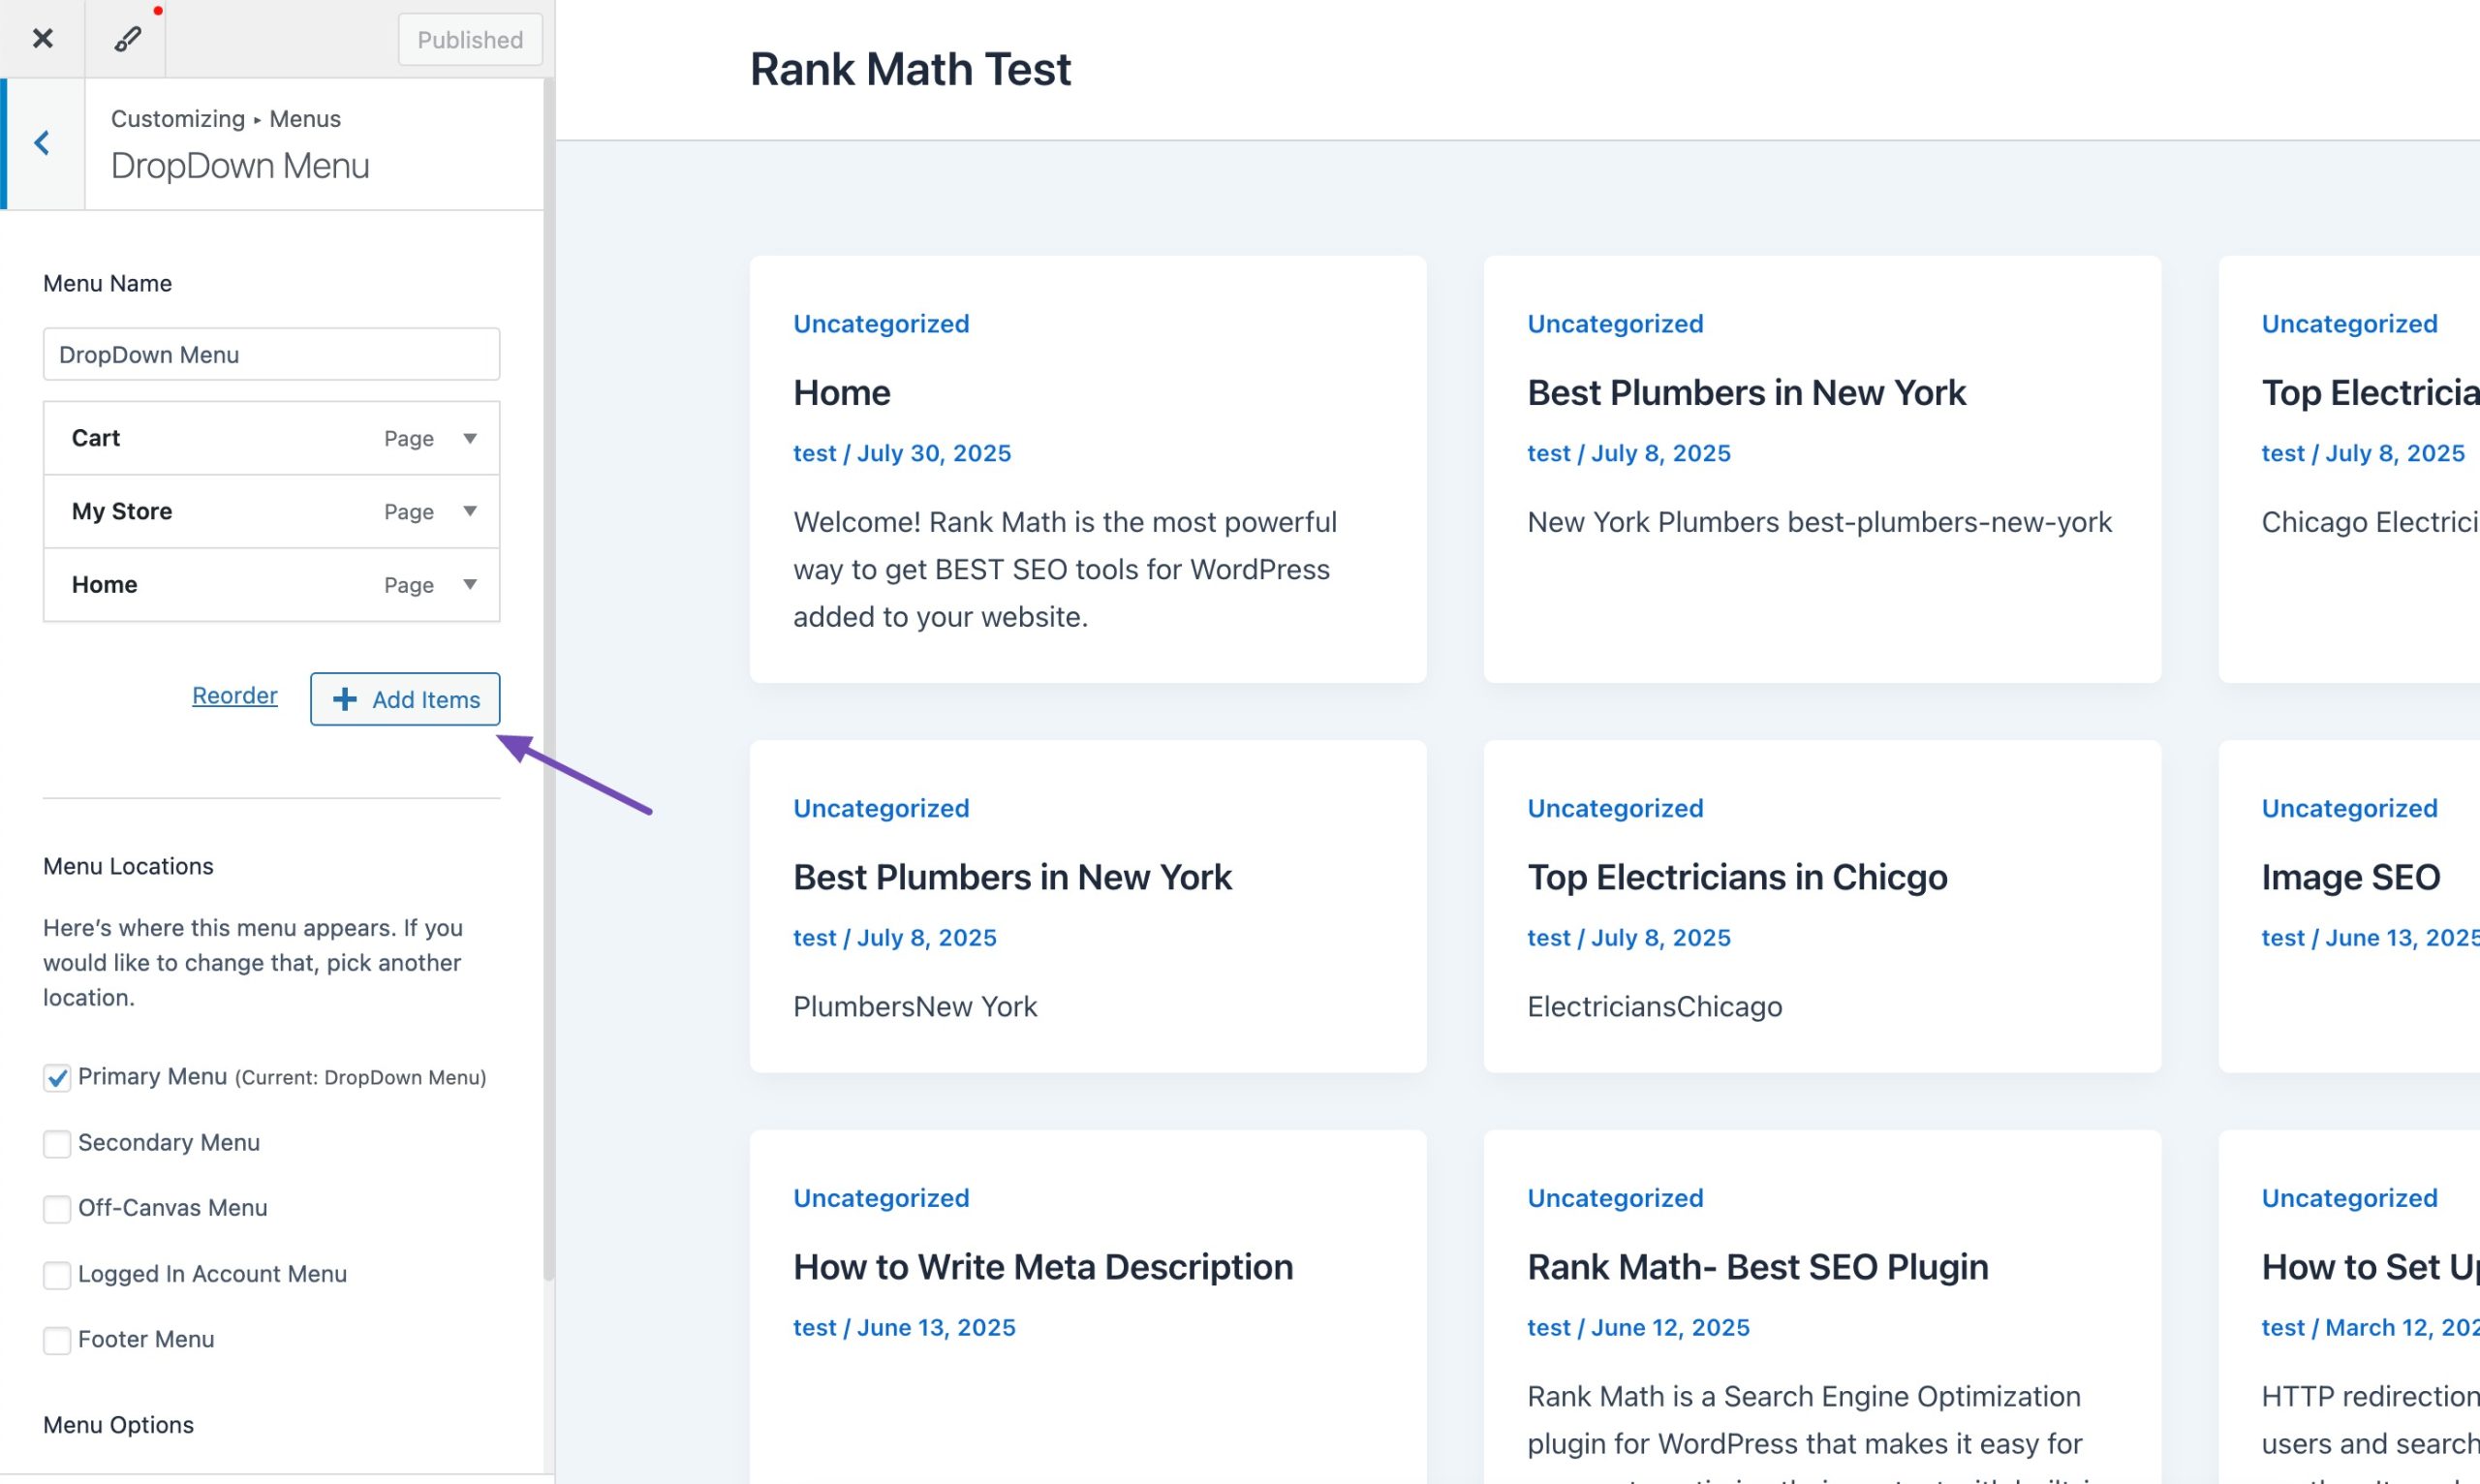
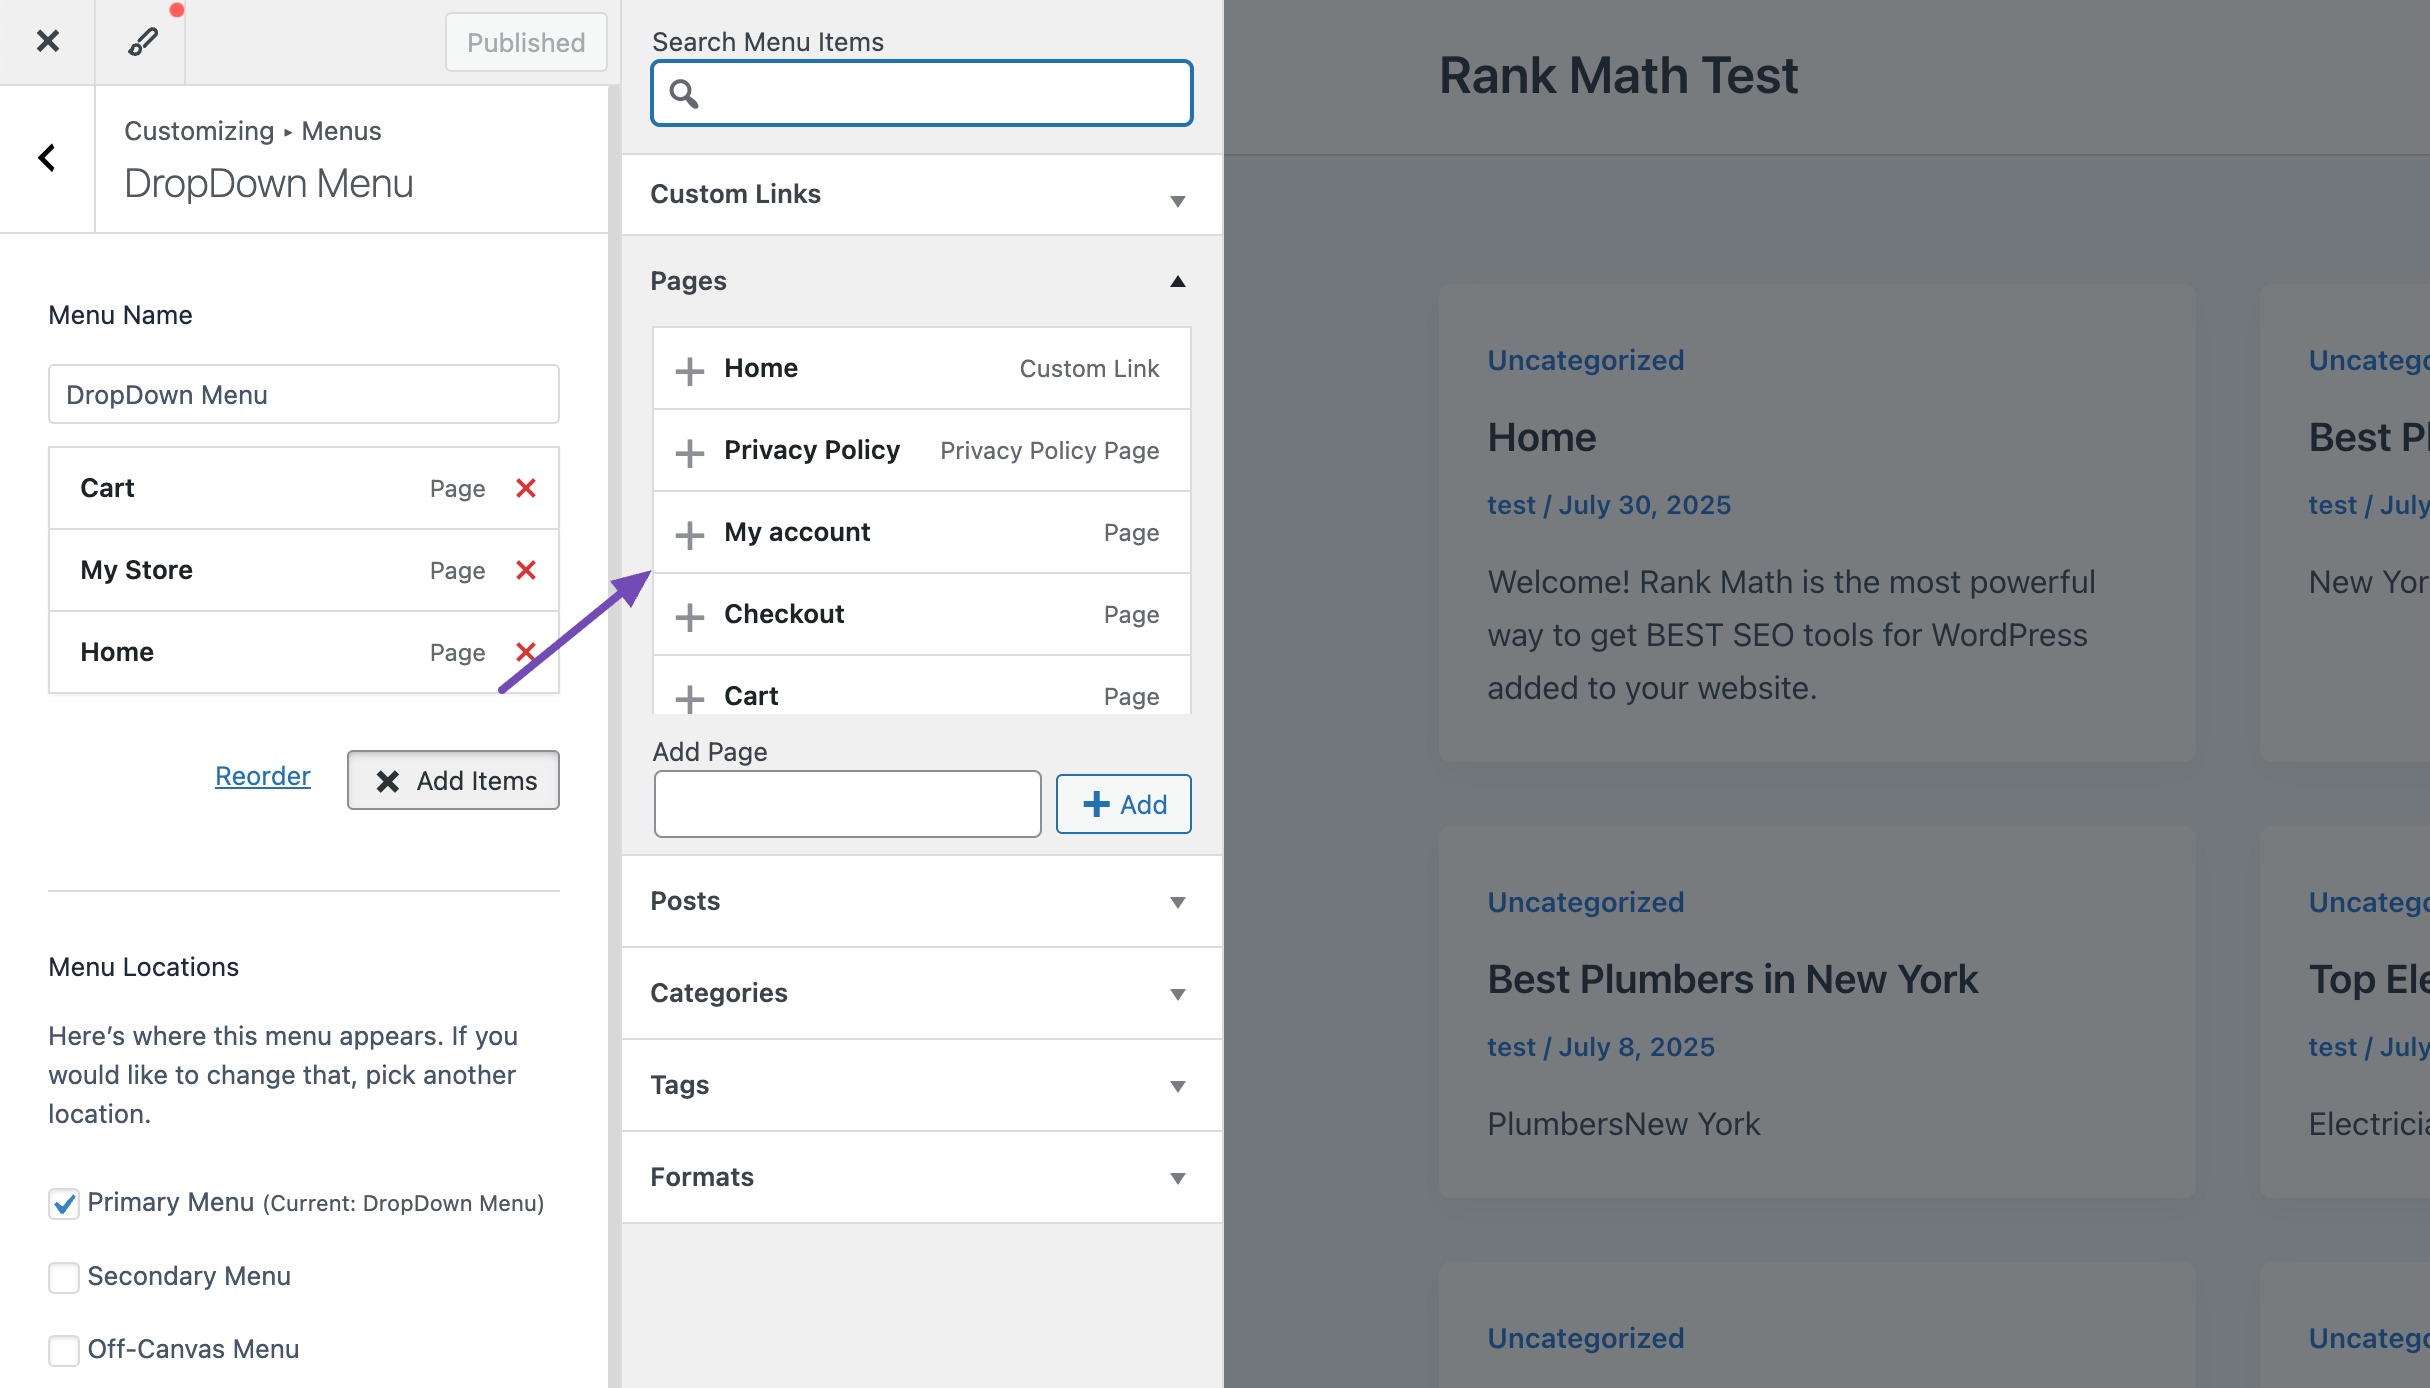
Click the + Add Items button to open the menu items panel on the right. From here, you can add:
- Pages
- Posts
- Categories
- Tags
- Custom Links
Just click the + icon next to each item you want to include.
To create a dropdown structure, drag and drop sub-items slightly to the right beneath their corresponding parent items. WordPress will automatically nest them as drop-downs.
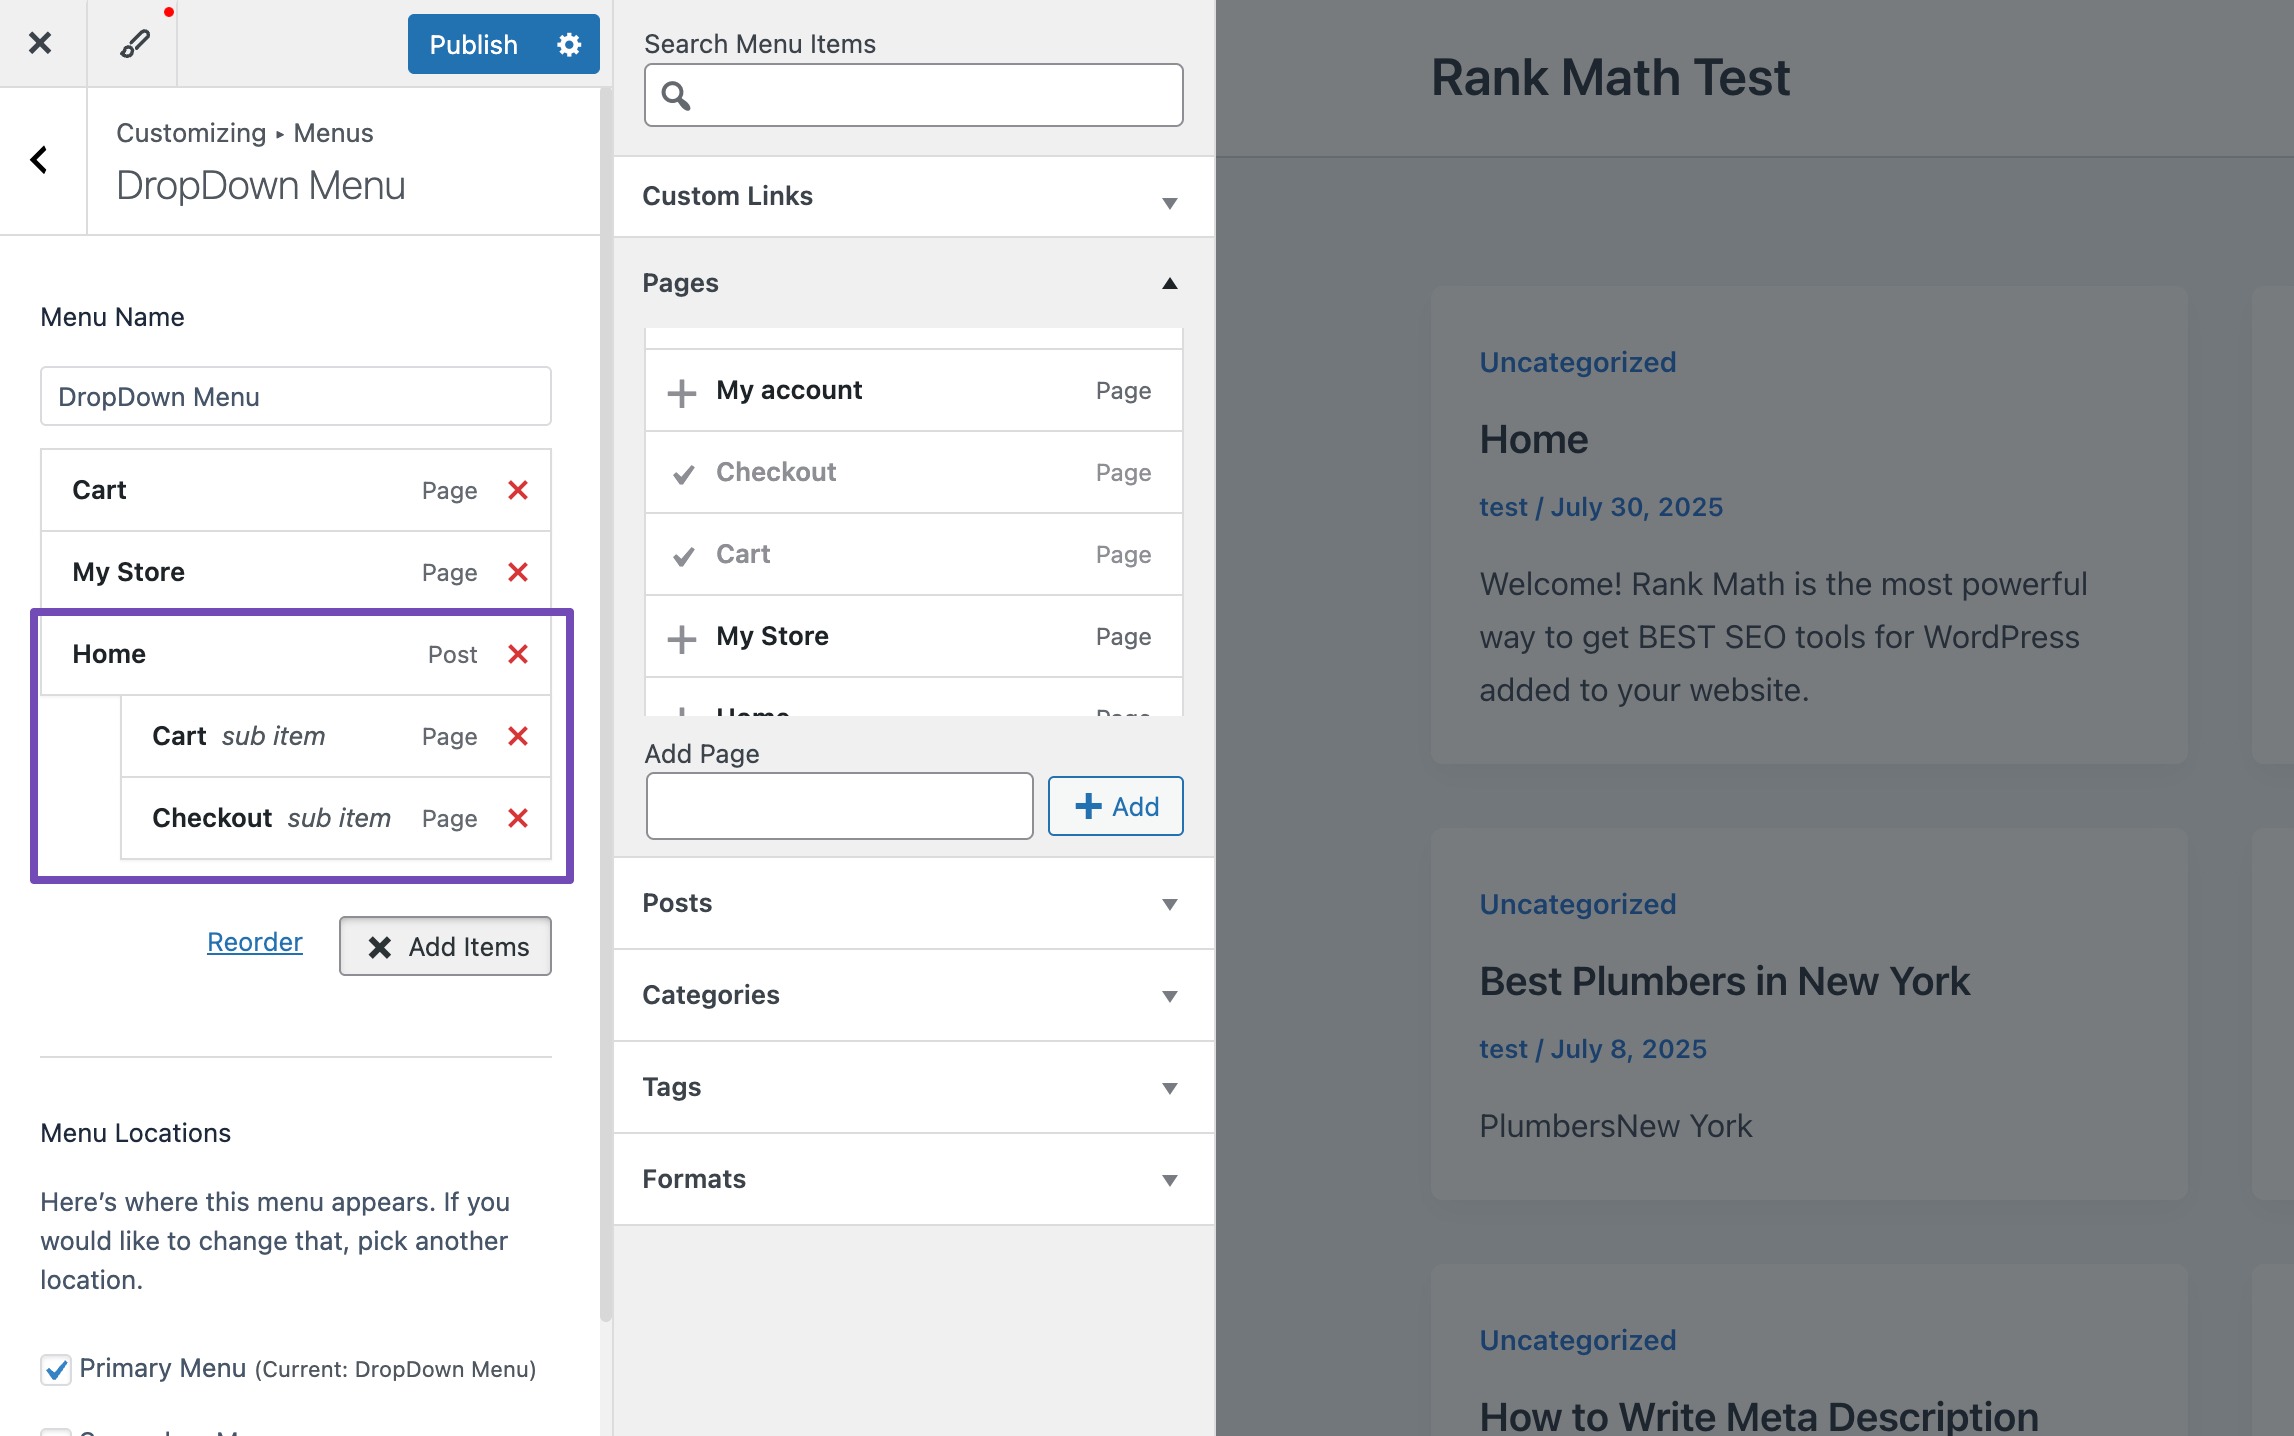
Once you’re happy with how your menu looks, click the Publish button at the top to make it live on your site.
3.3 Creating a Dropdown Menu Using the WordPress Full-Site Editor
If you’re using a block-based theme like the default Twenty Twenty-Five, you’ll create your dropdown menu using the Full-Site Editor (FSE).
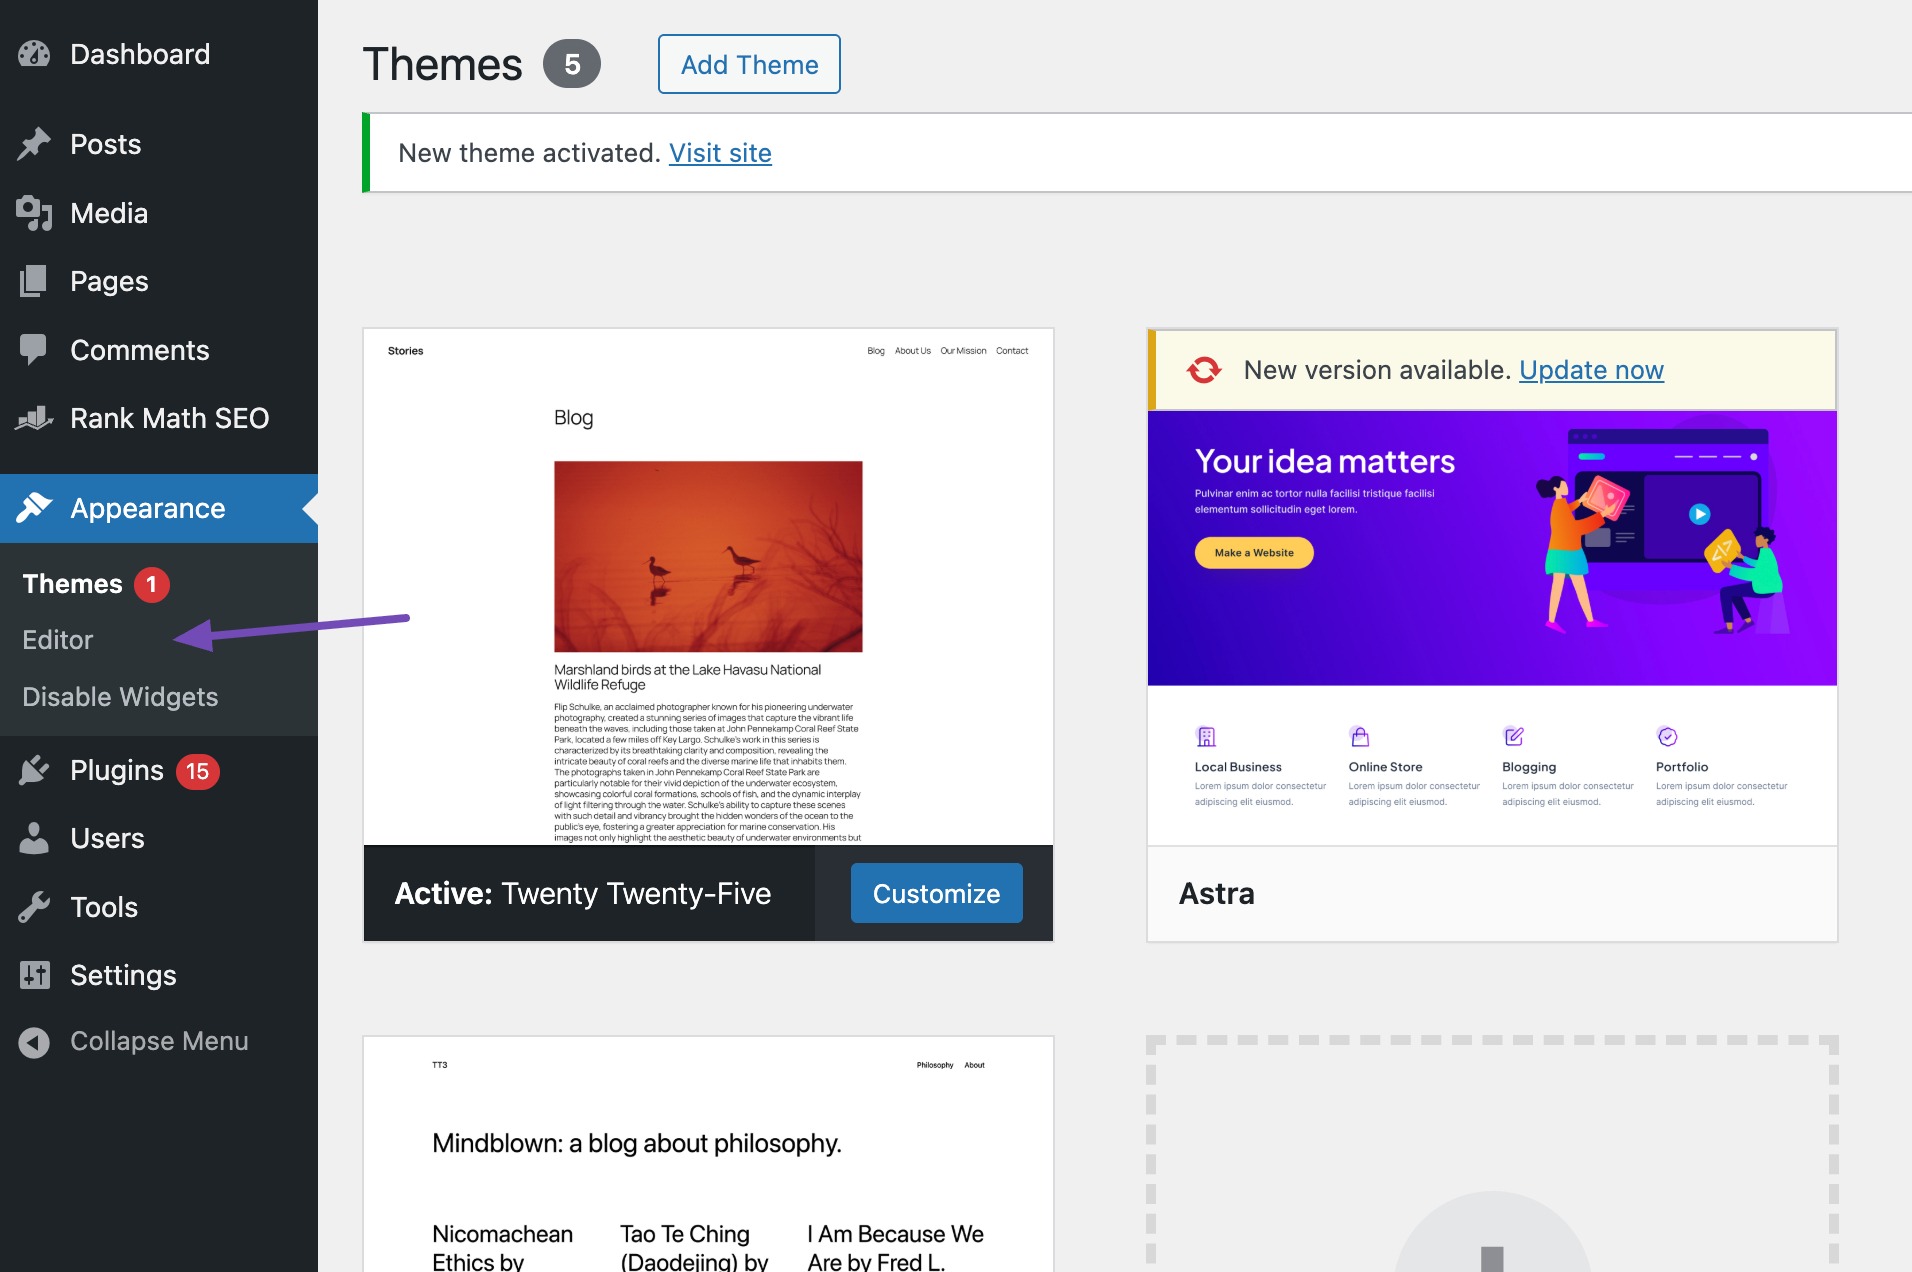
Log in to your WordPress dashboard and go to Appearance → Editor. This option only appears if your theme supports FSE.
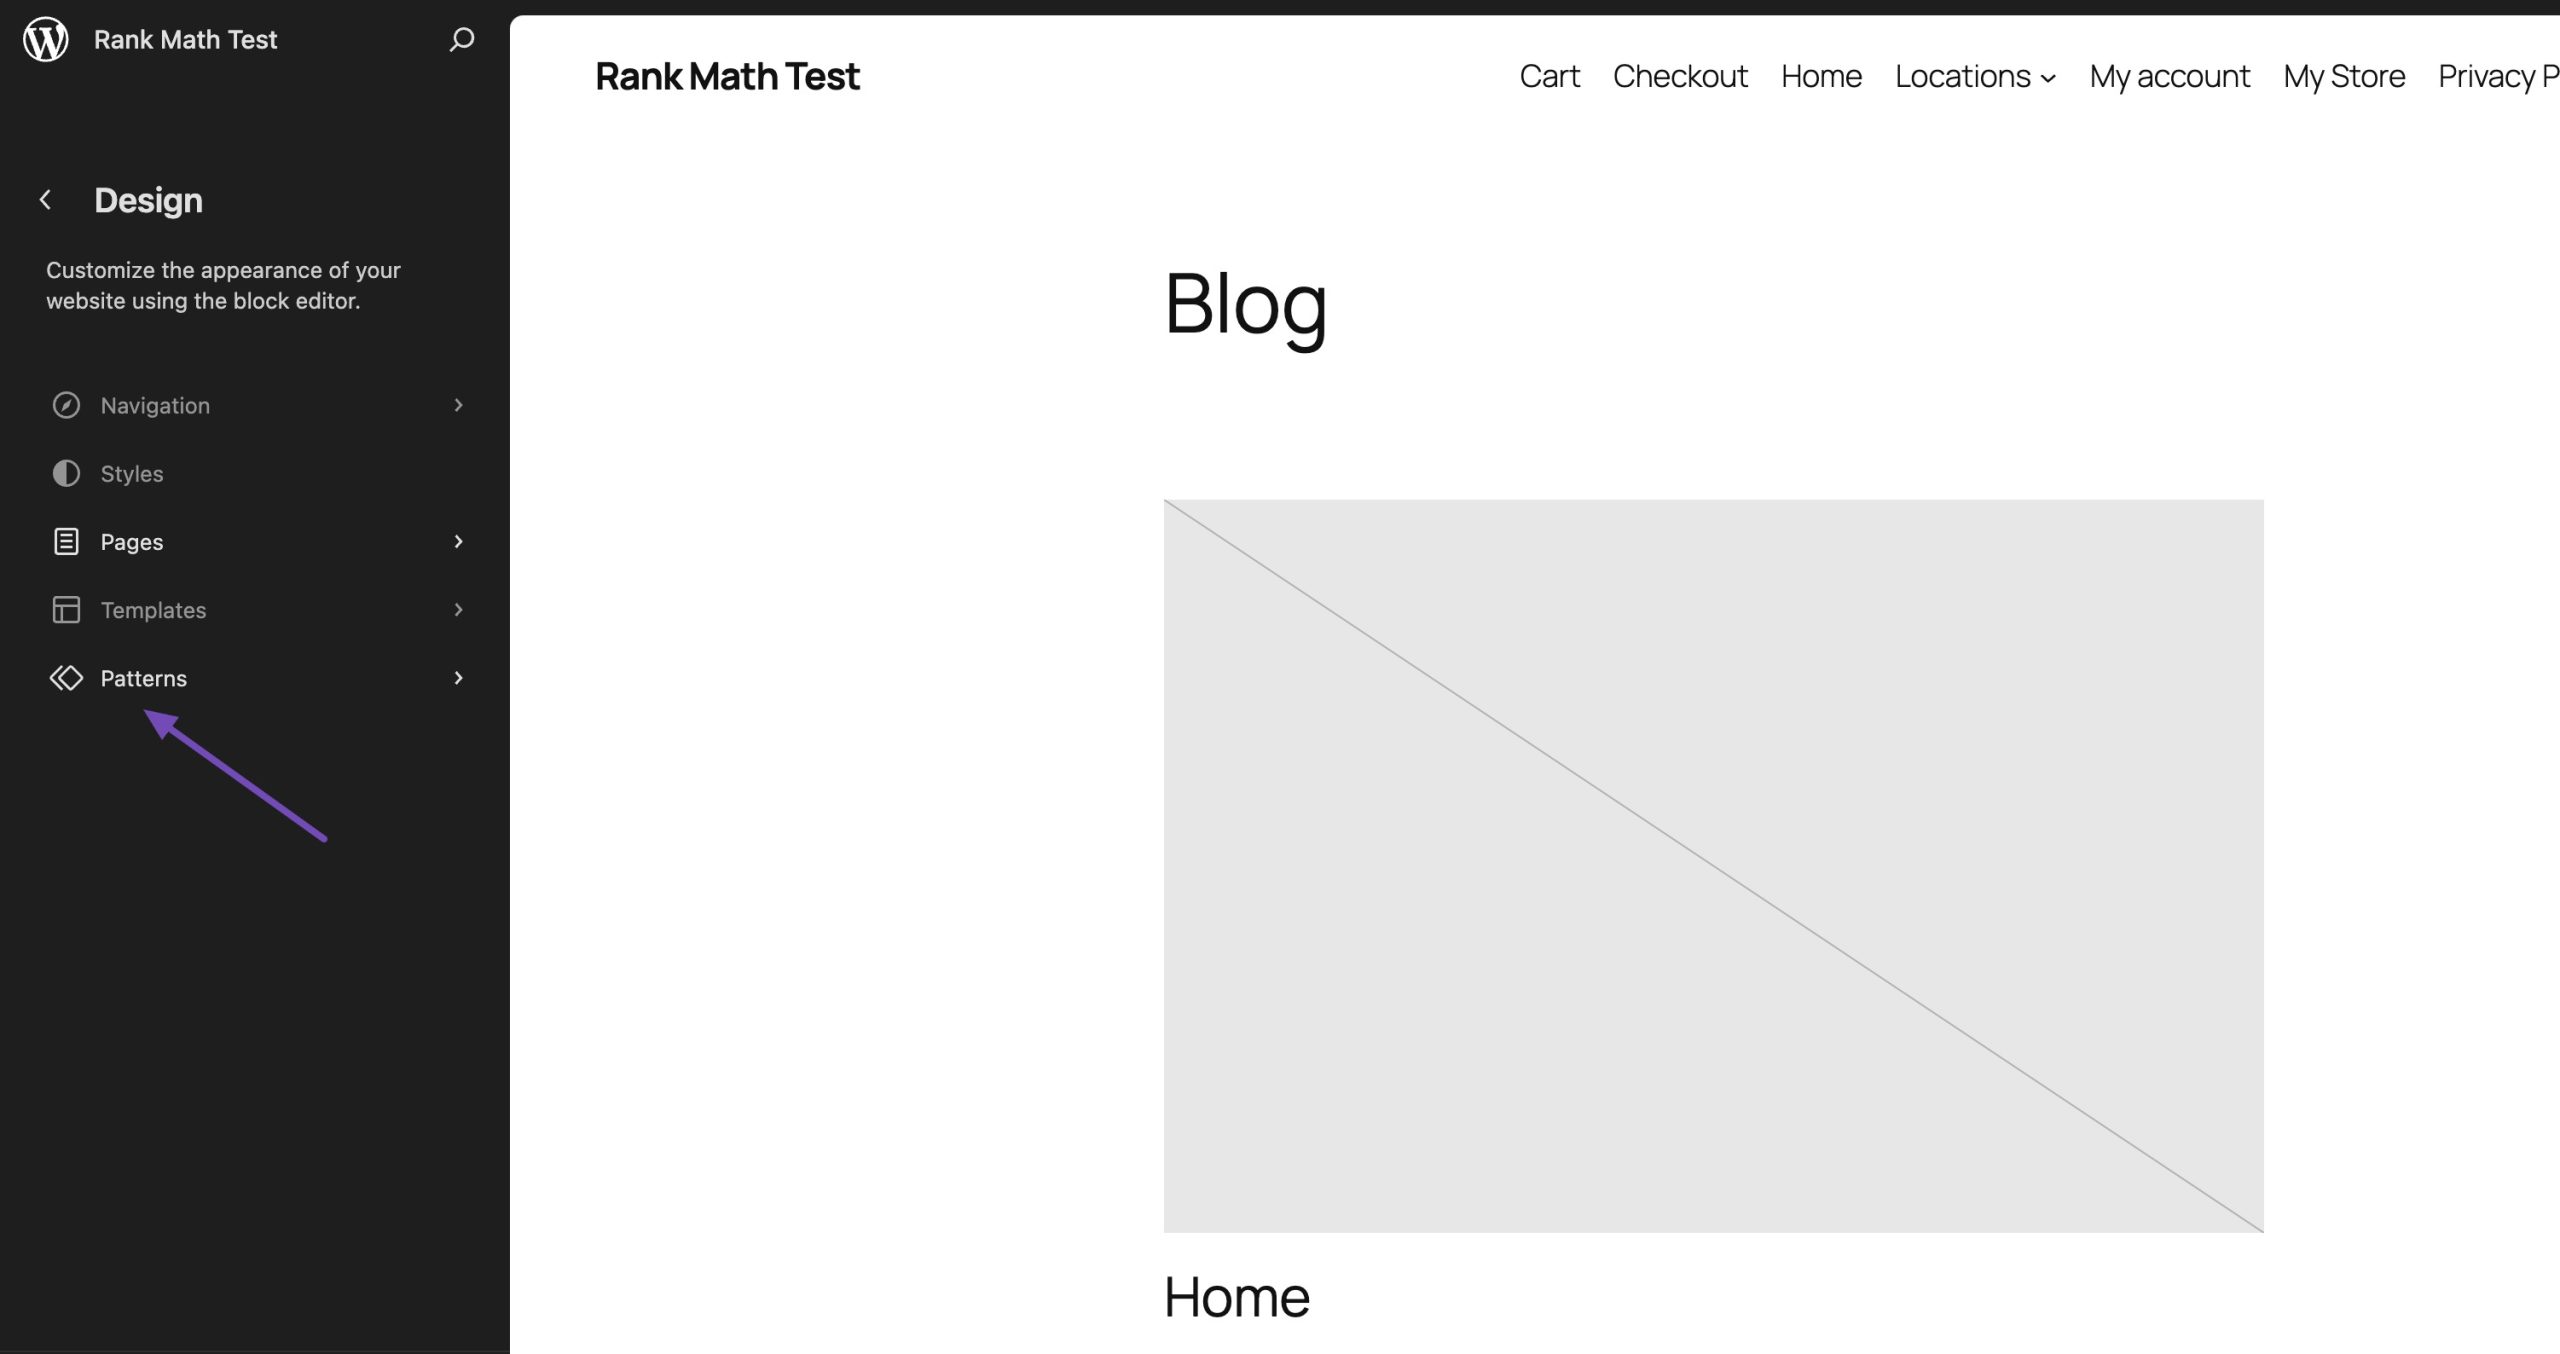
By default, you’ll land on your theme’s Home template.
To add a dropdown menu elsewhere, click the Patterns section.
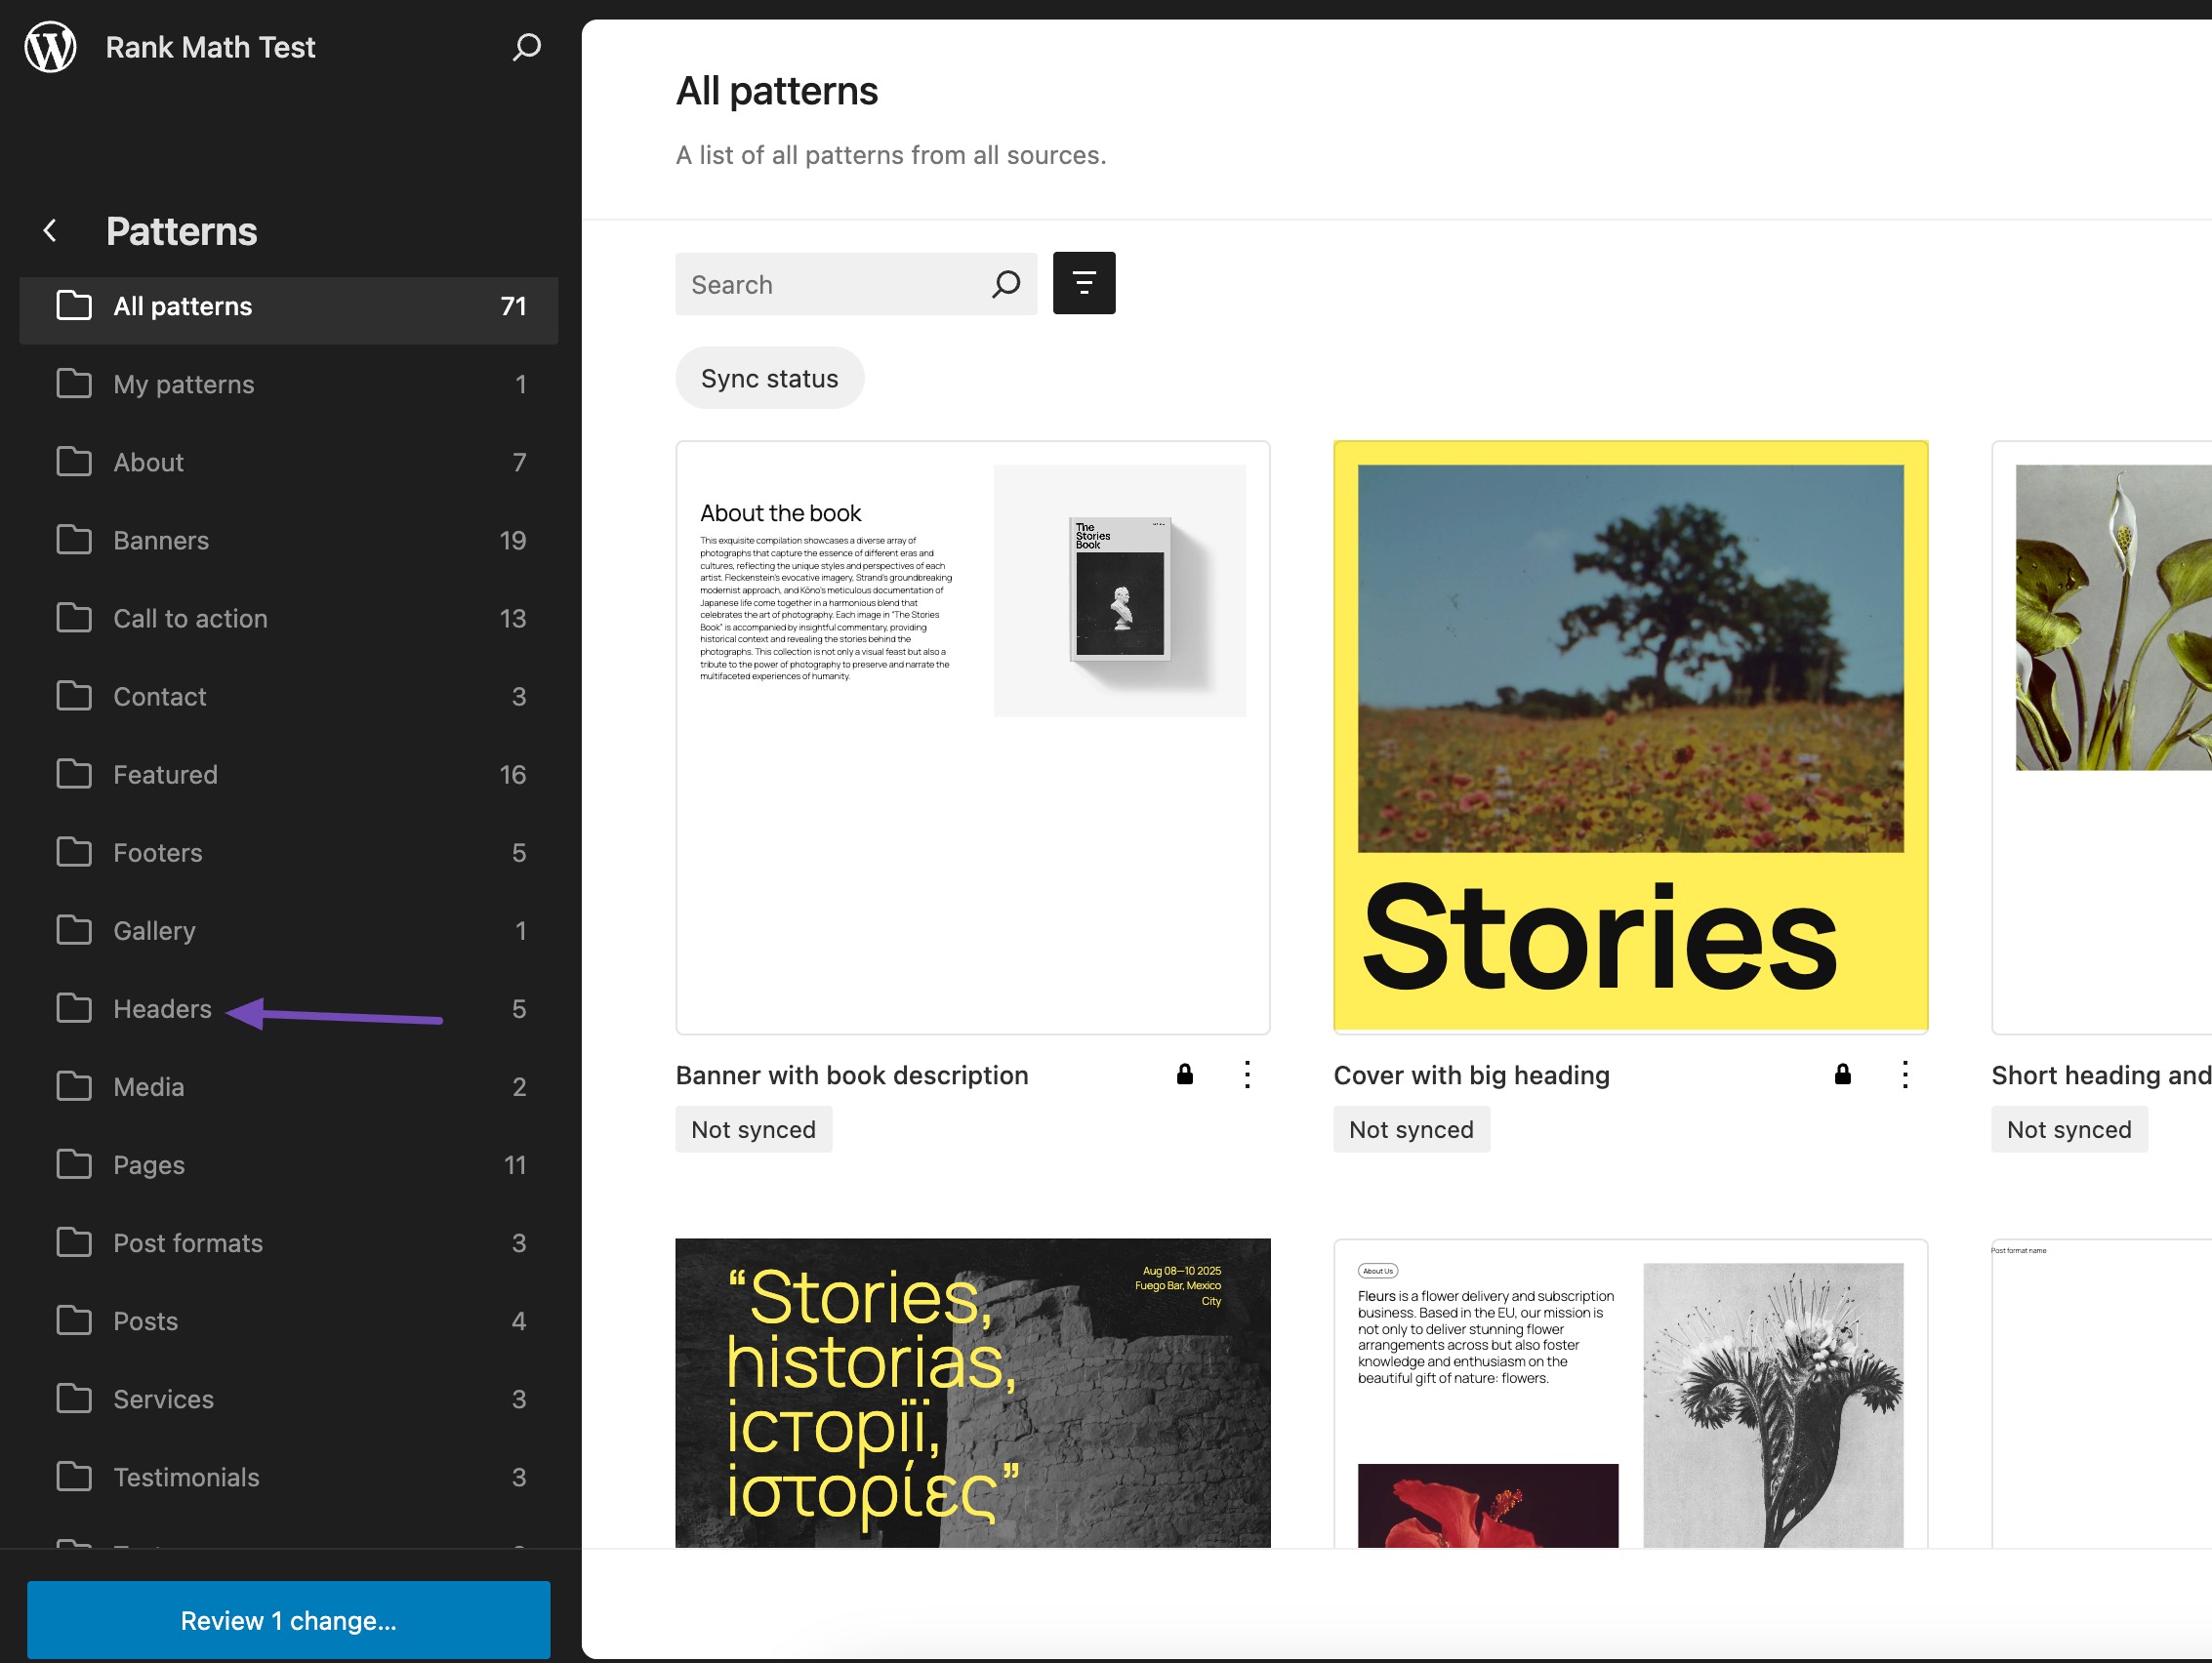
The editor will list all templates/template parts of your theme.
Simply click on the area where you want the dropdown menu. Find and select the Headers template part (since dropdown menus usually go in the header).
WordPress will now show the template or template part. To preview this template, click on it.
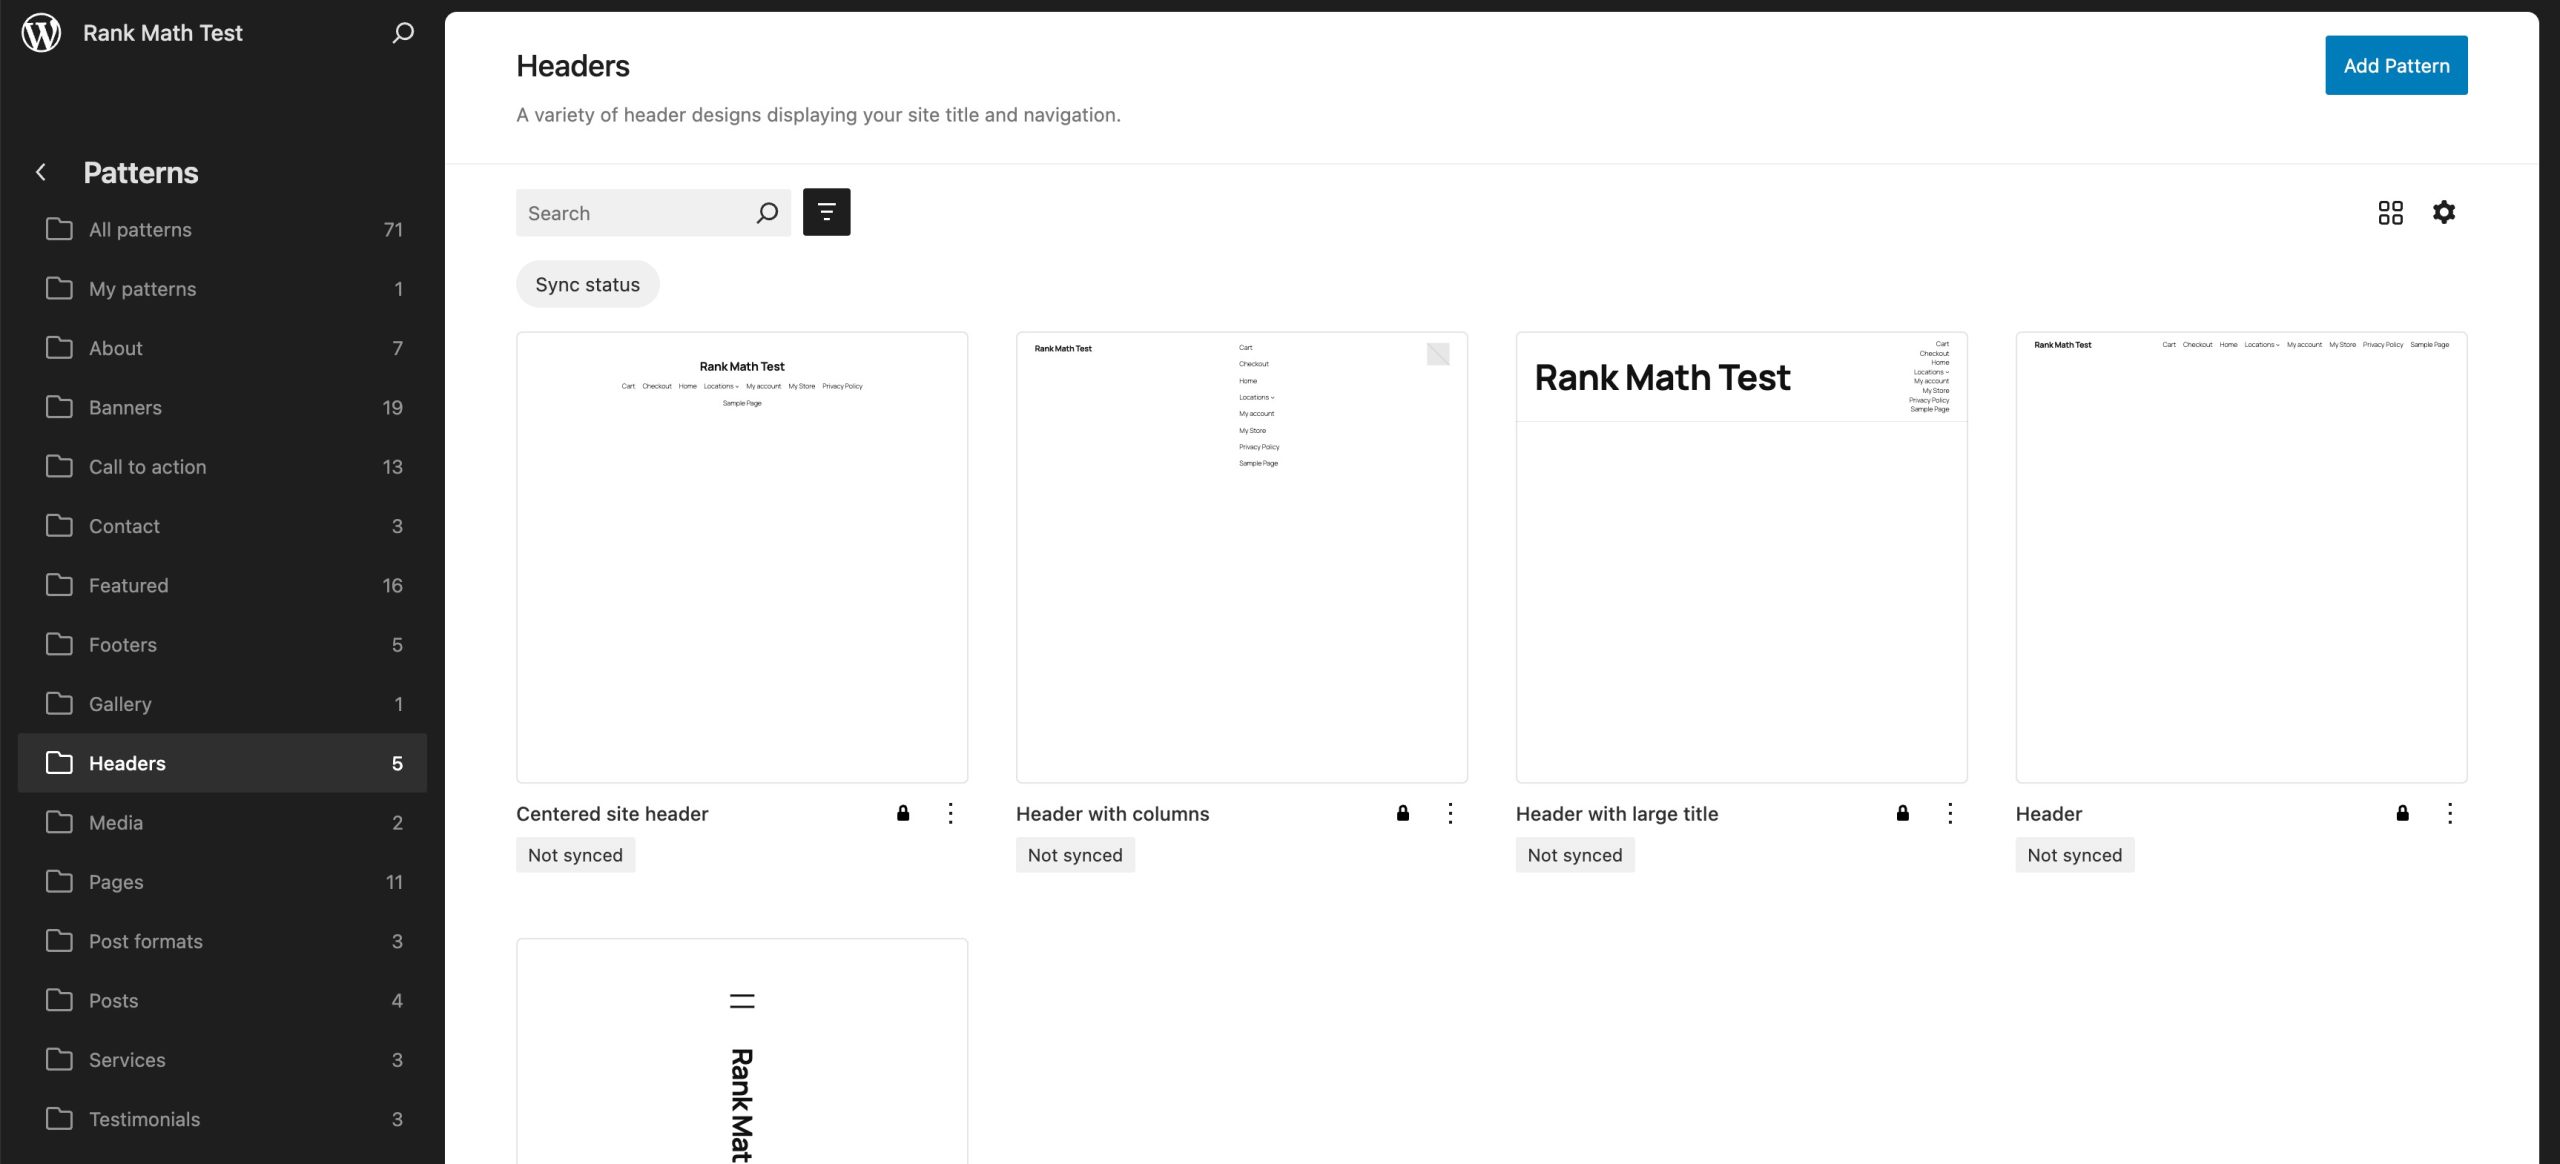
Select the template of your choice.
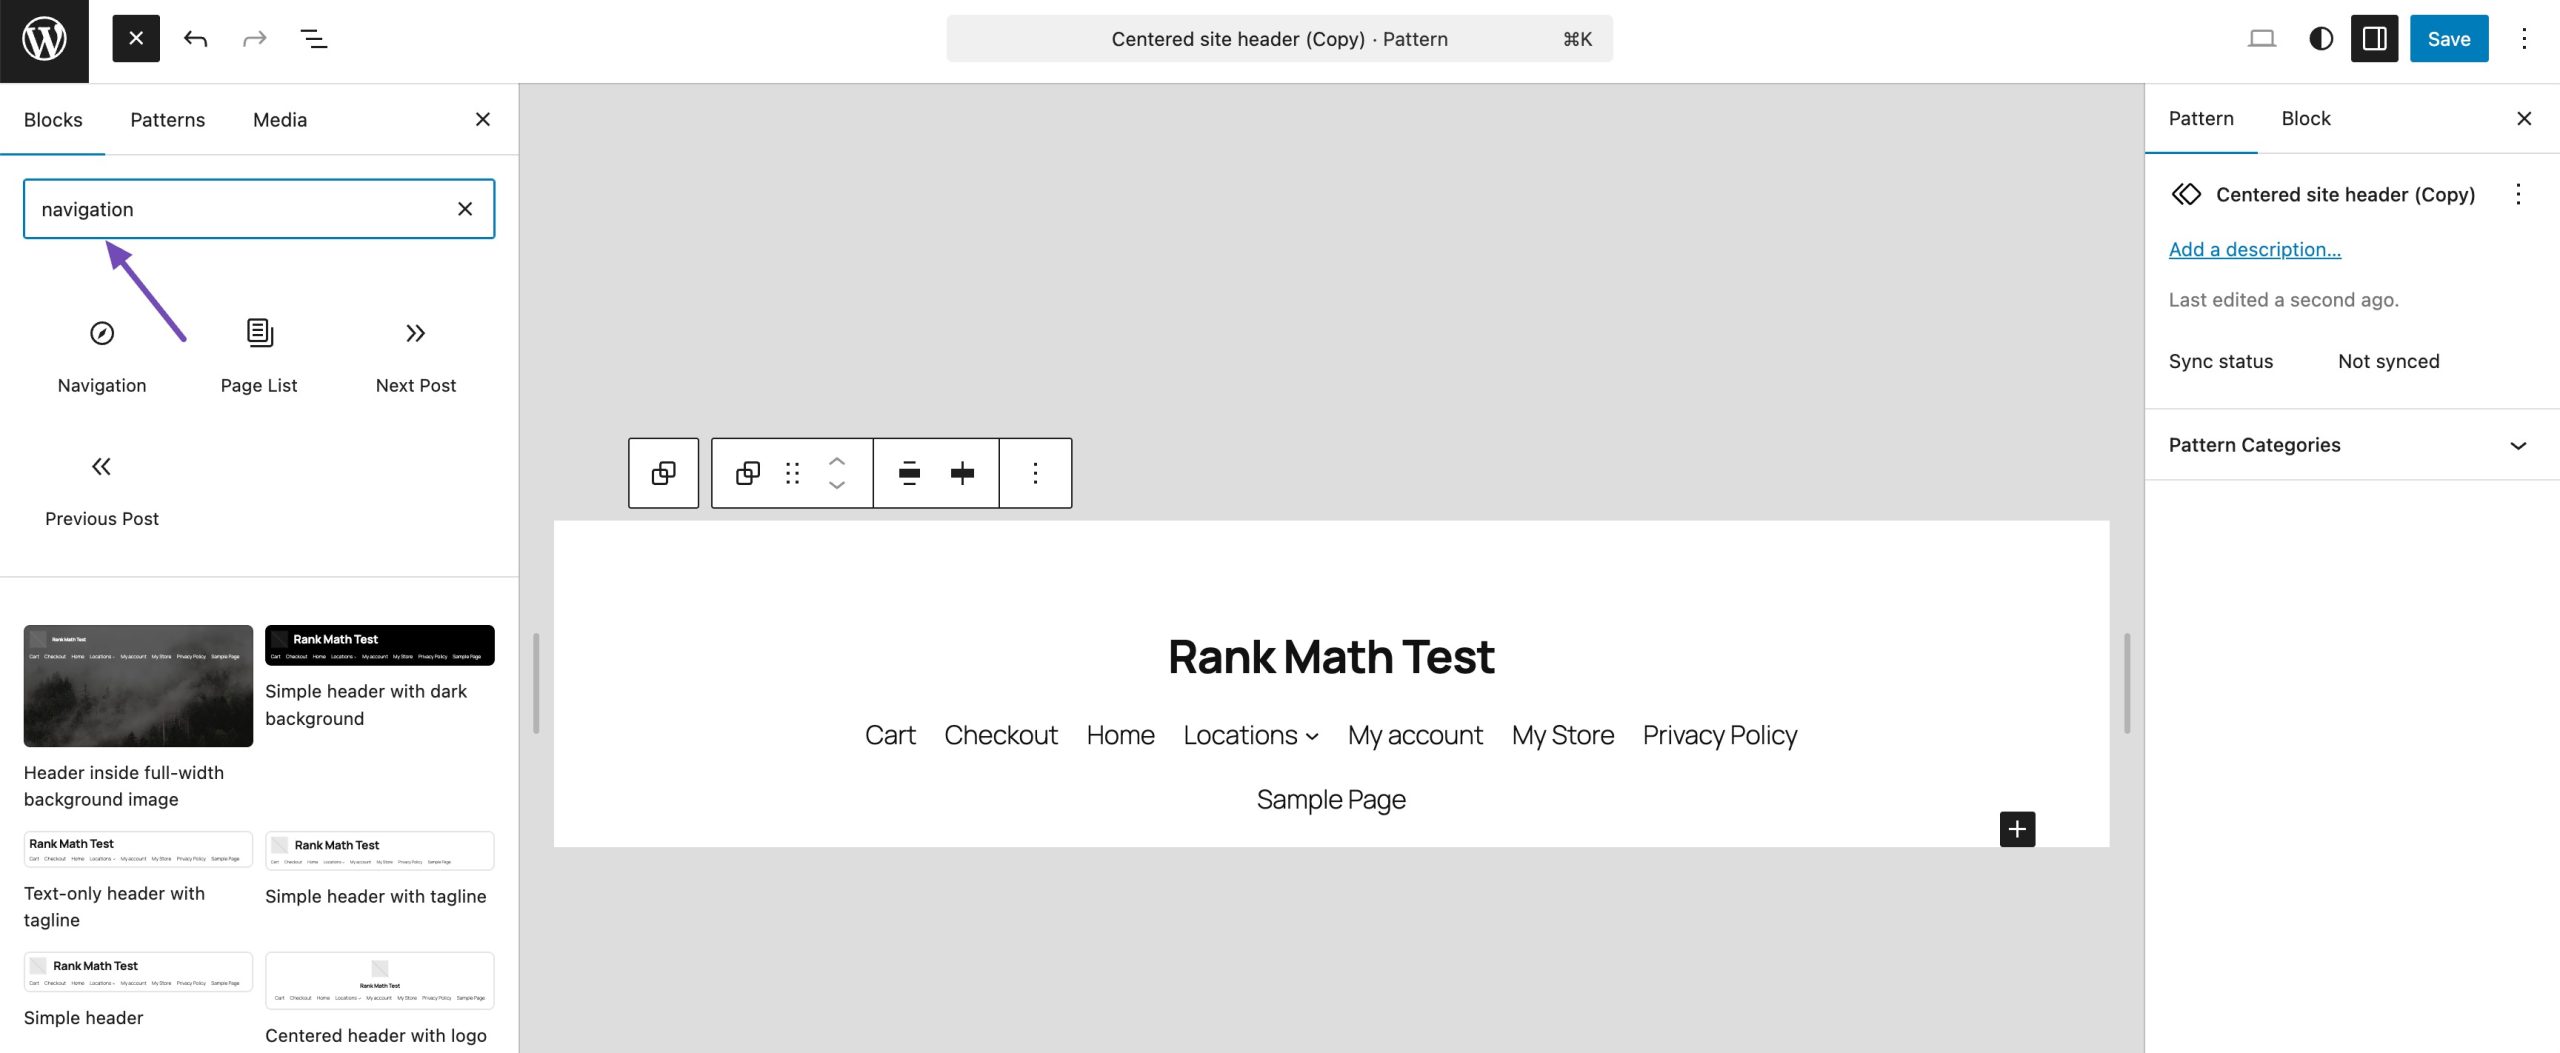
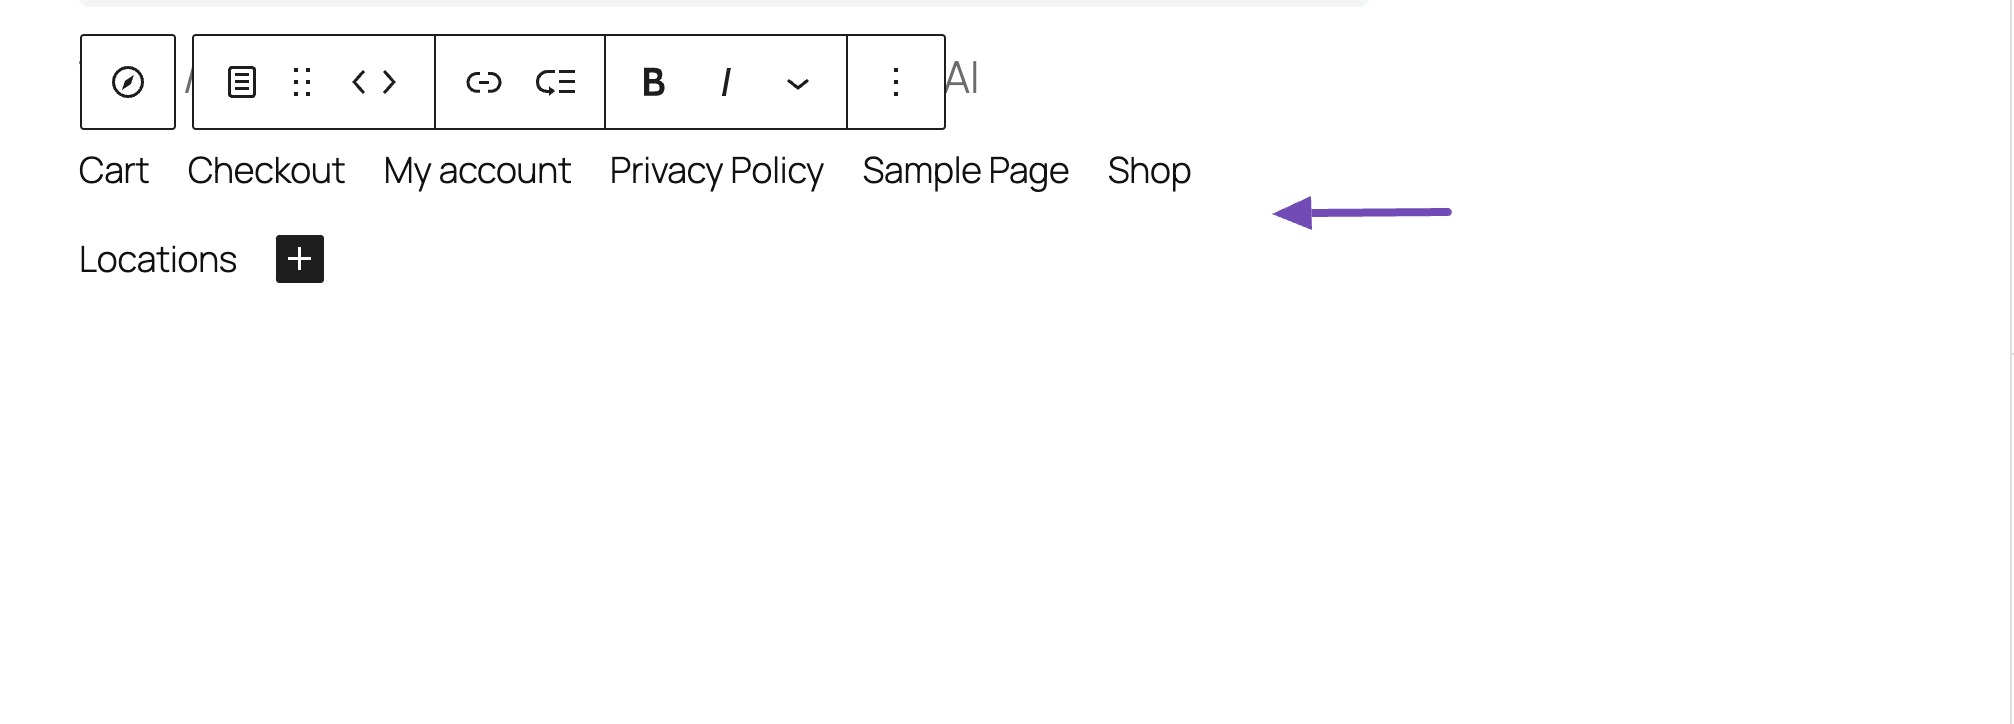
Now, click the blue ‘+’ icon in the top left and search for Navigation. Drag and drop the navigation block onto your design.
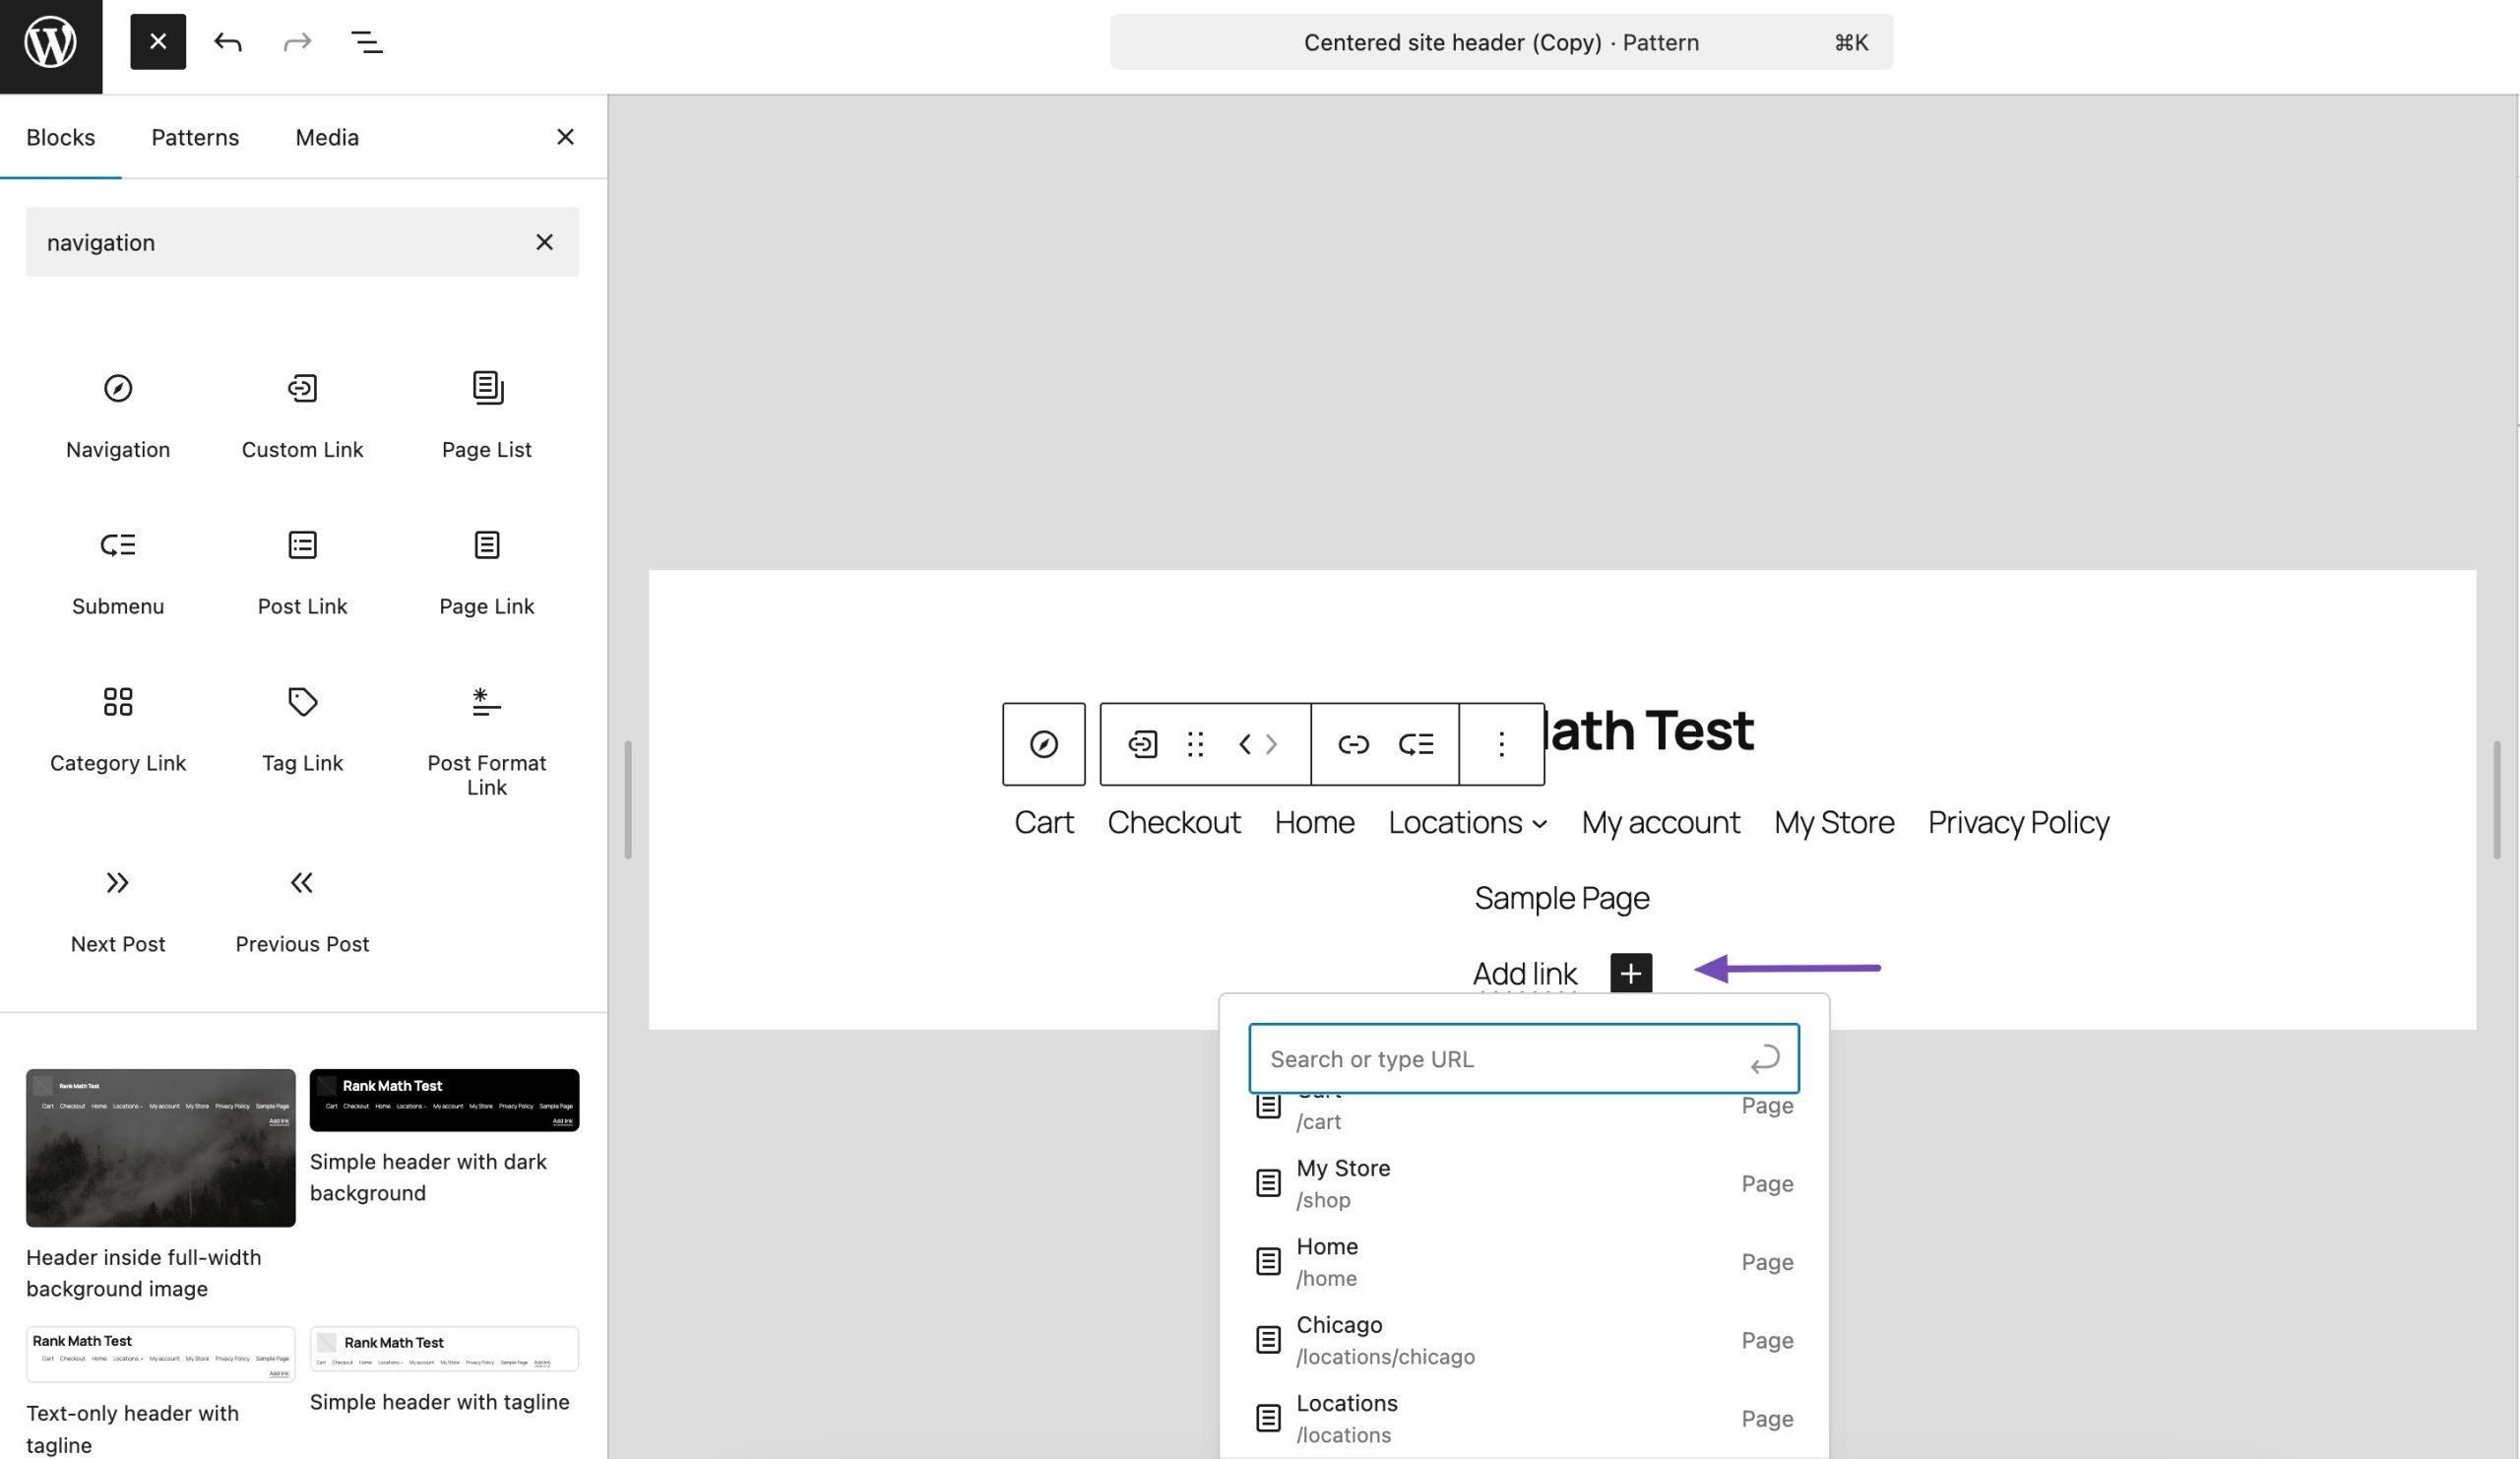
To add items to the navigation menu, click the ‘+‘ icon and choose from the available blocks, such as page links, custom links, home links, and category links.
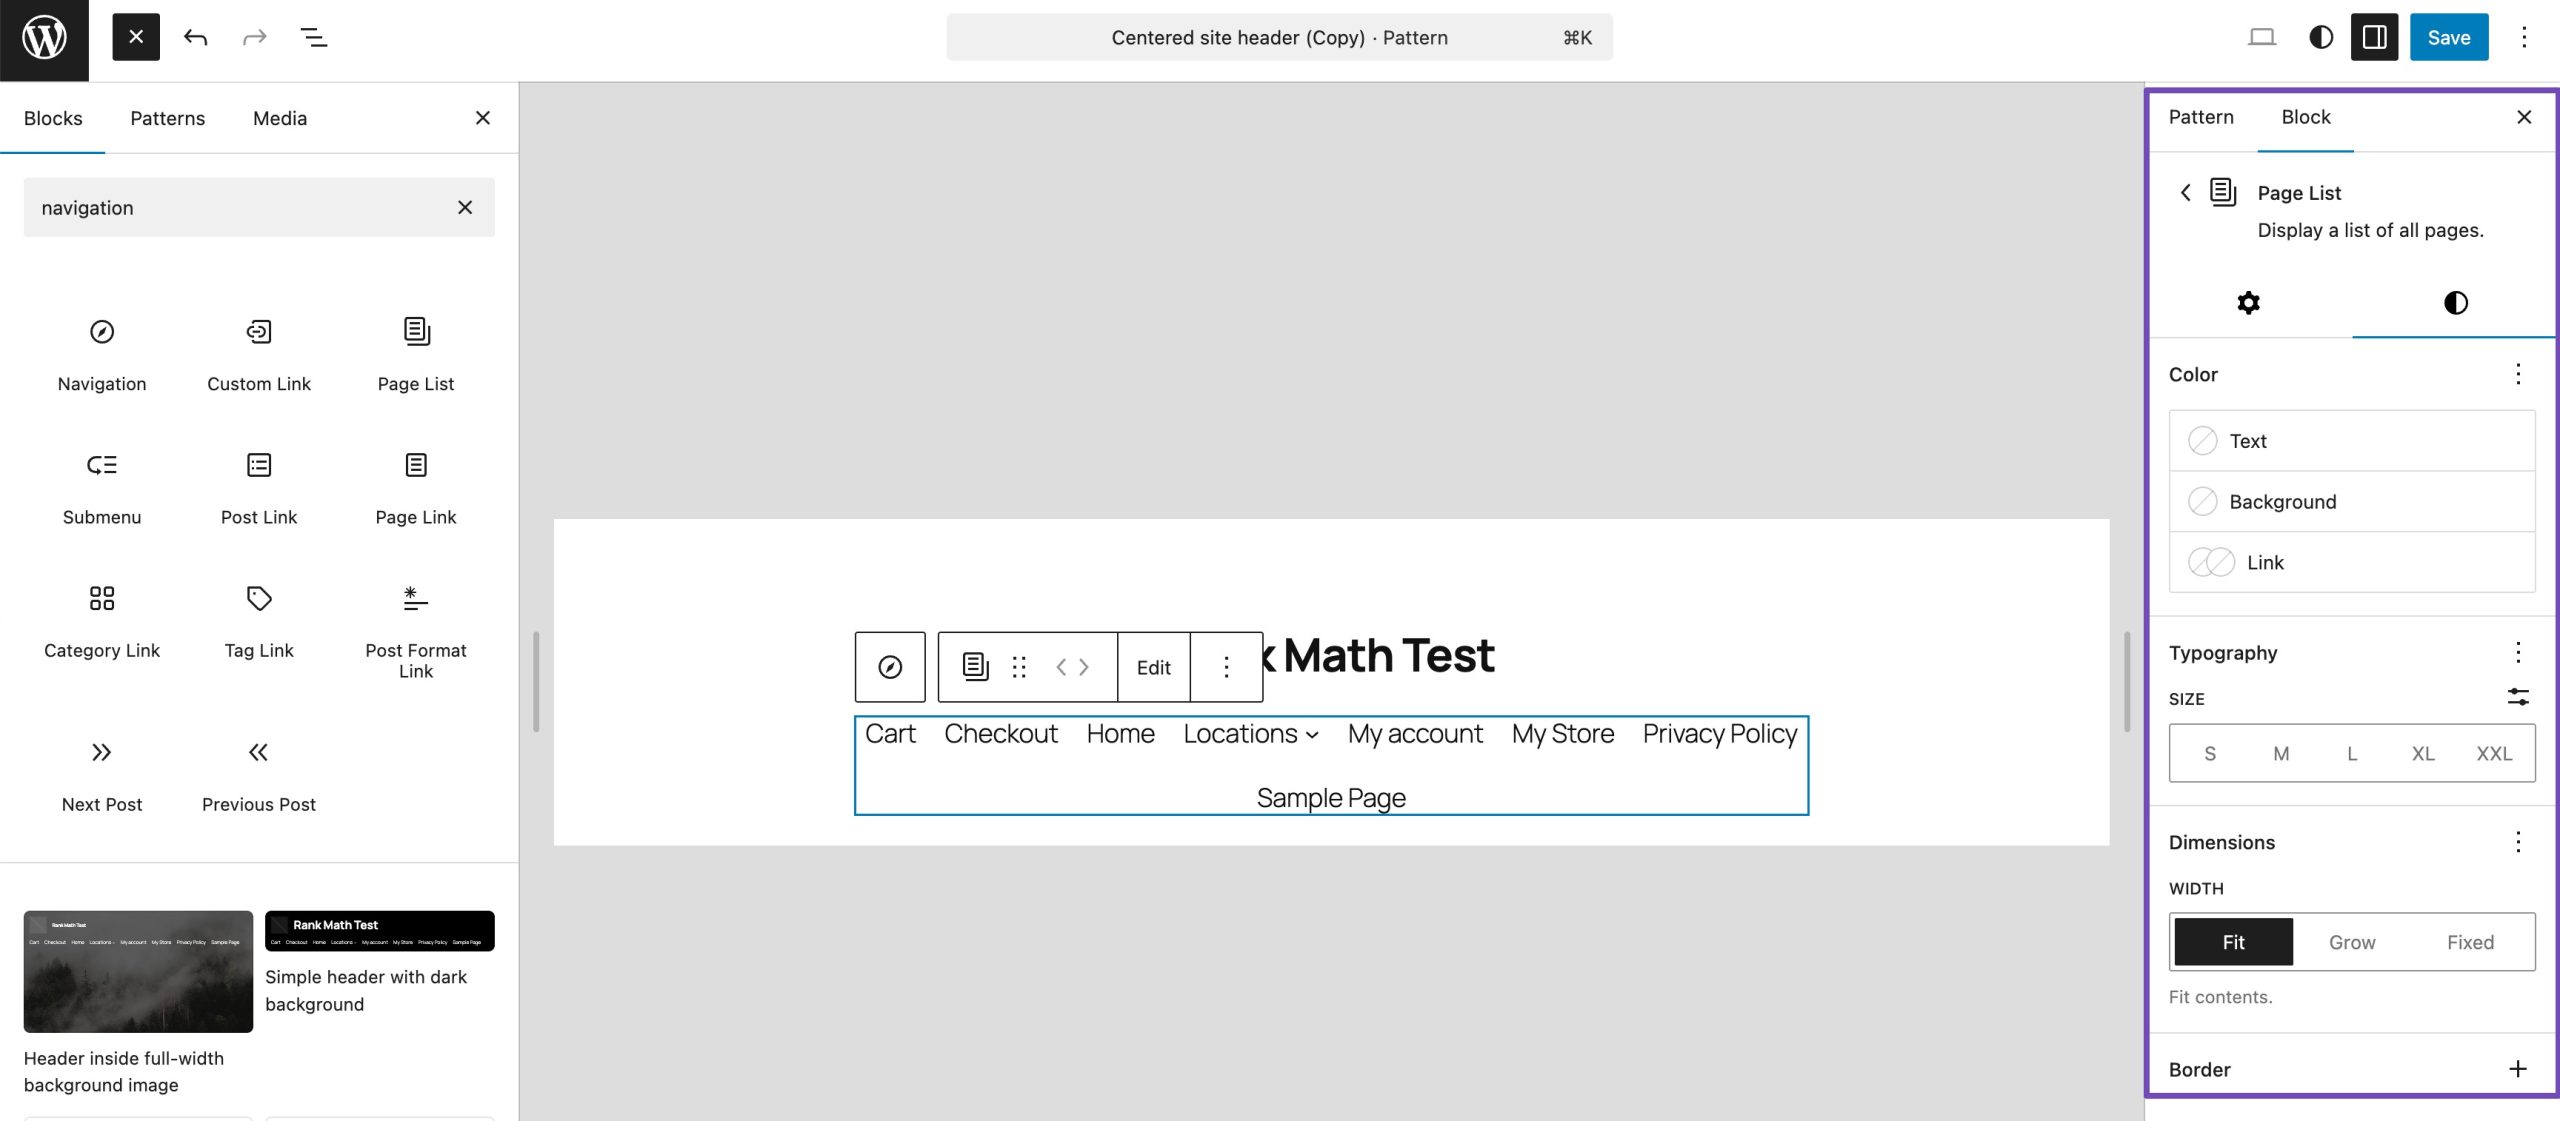
For easier editing, locate the right-side settings panel and click Block while on the Submenu block. There, you can set the label, URL, and more.
Clicking the Styles tab allows you to customize font color, background, and dimensions.
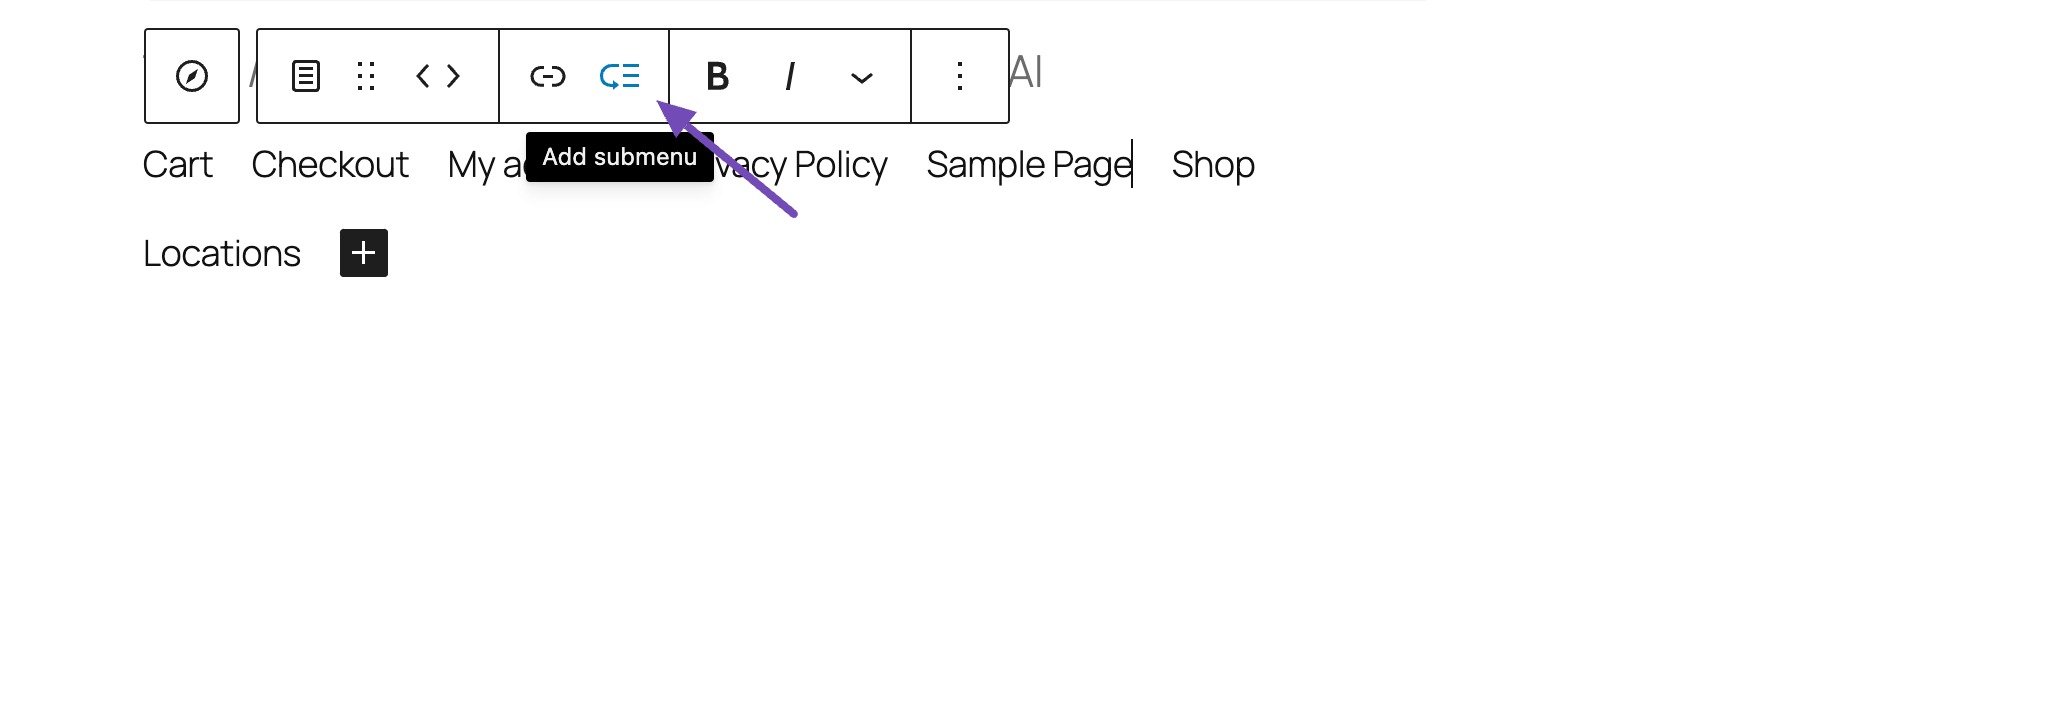
Go back and click the menu items block. In the Block settings, you’ll see a hierarchy interface.
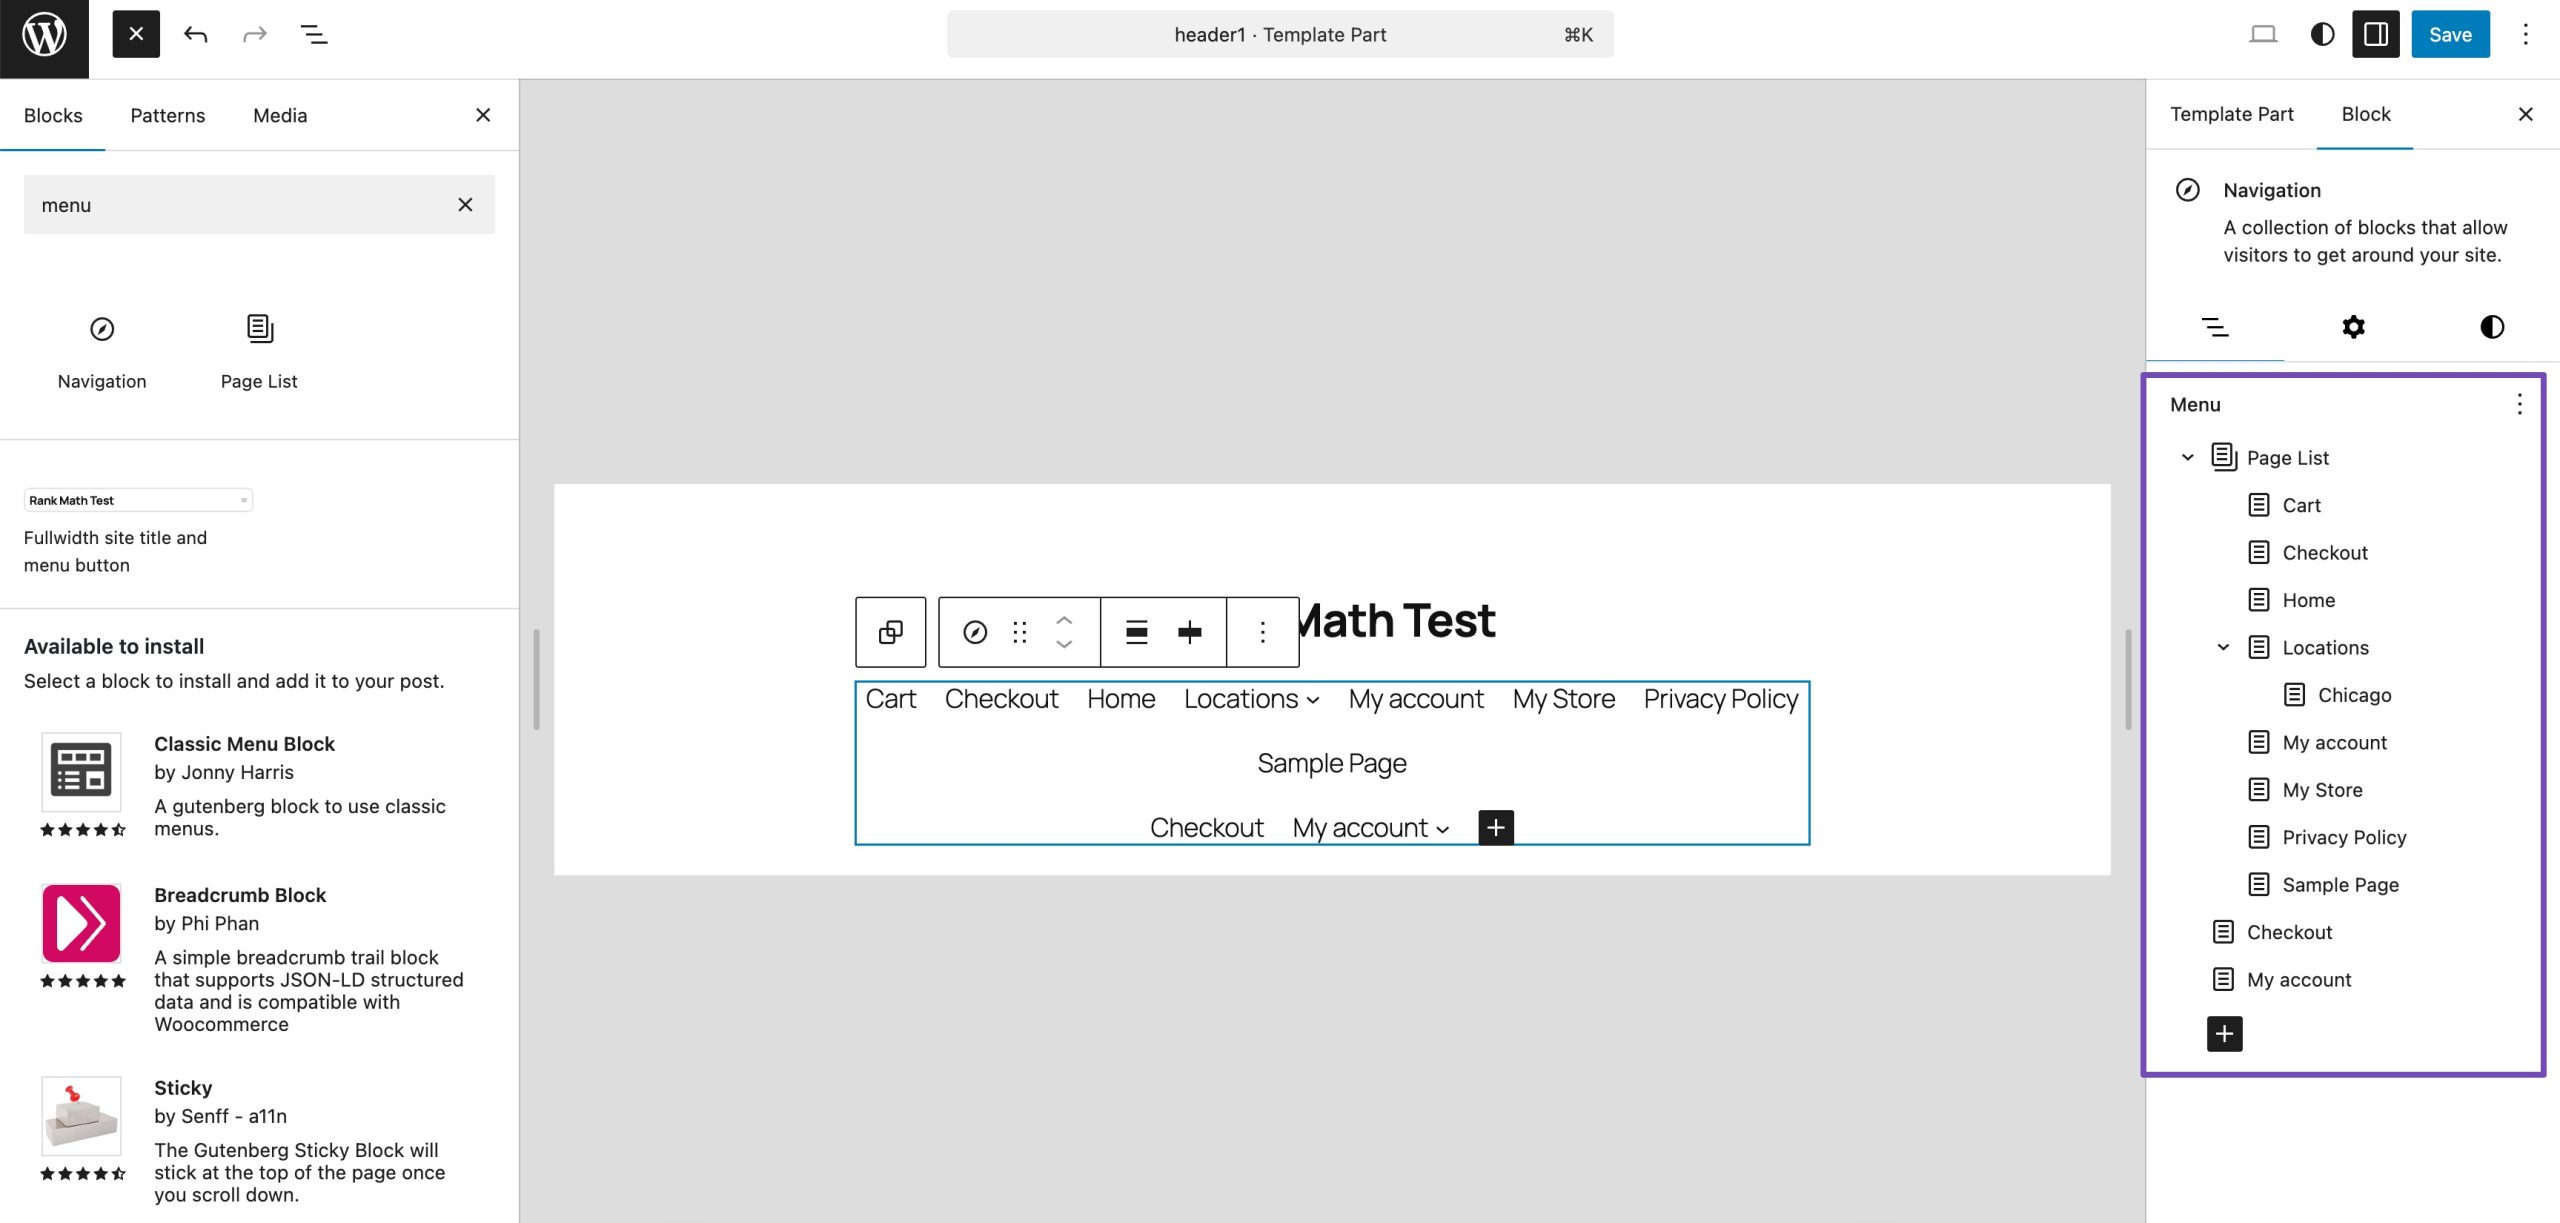
On that hierarchy with our parent ‘Checkout’ menu, click the three dots next to it and select the Add submenu link option.
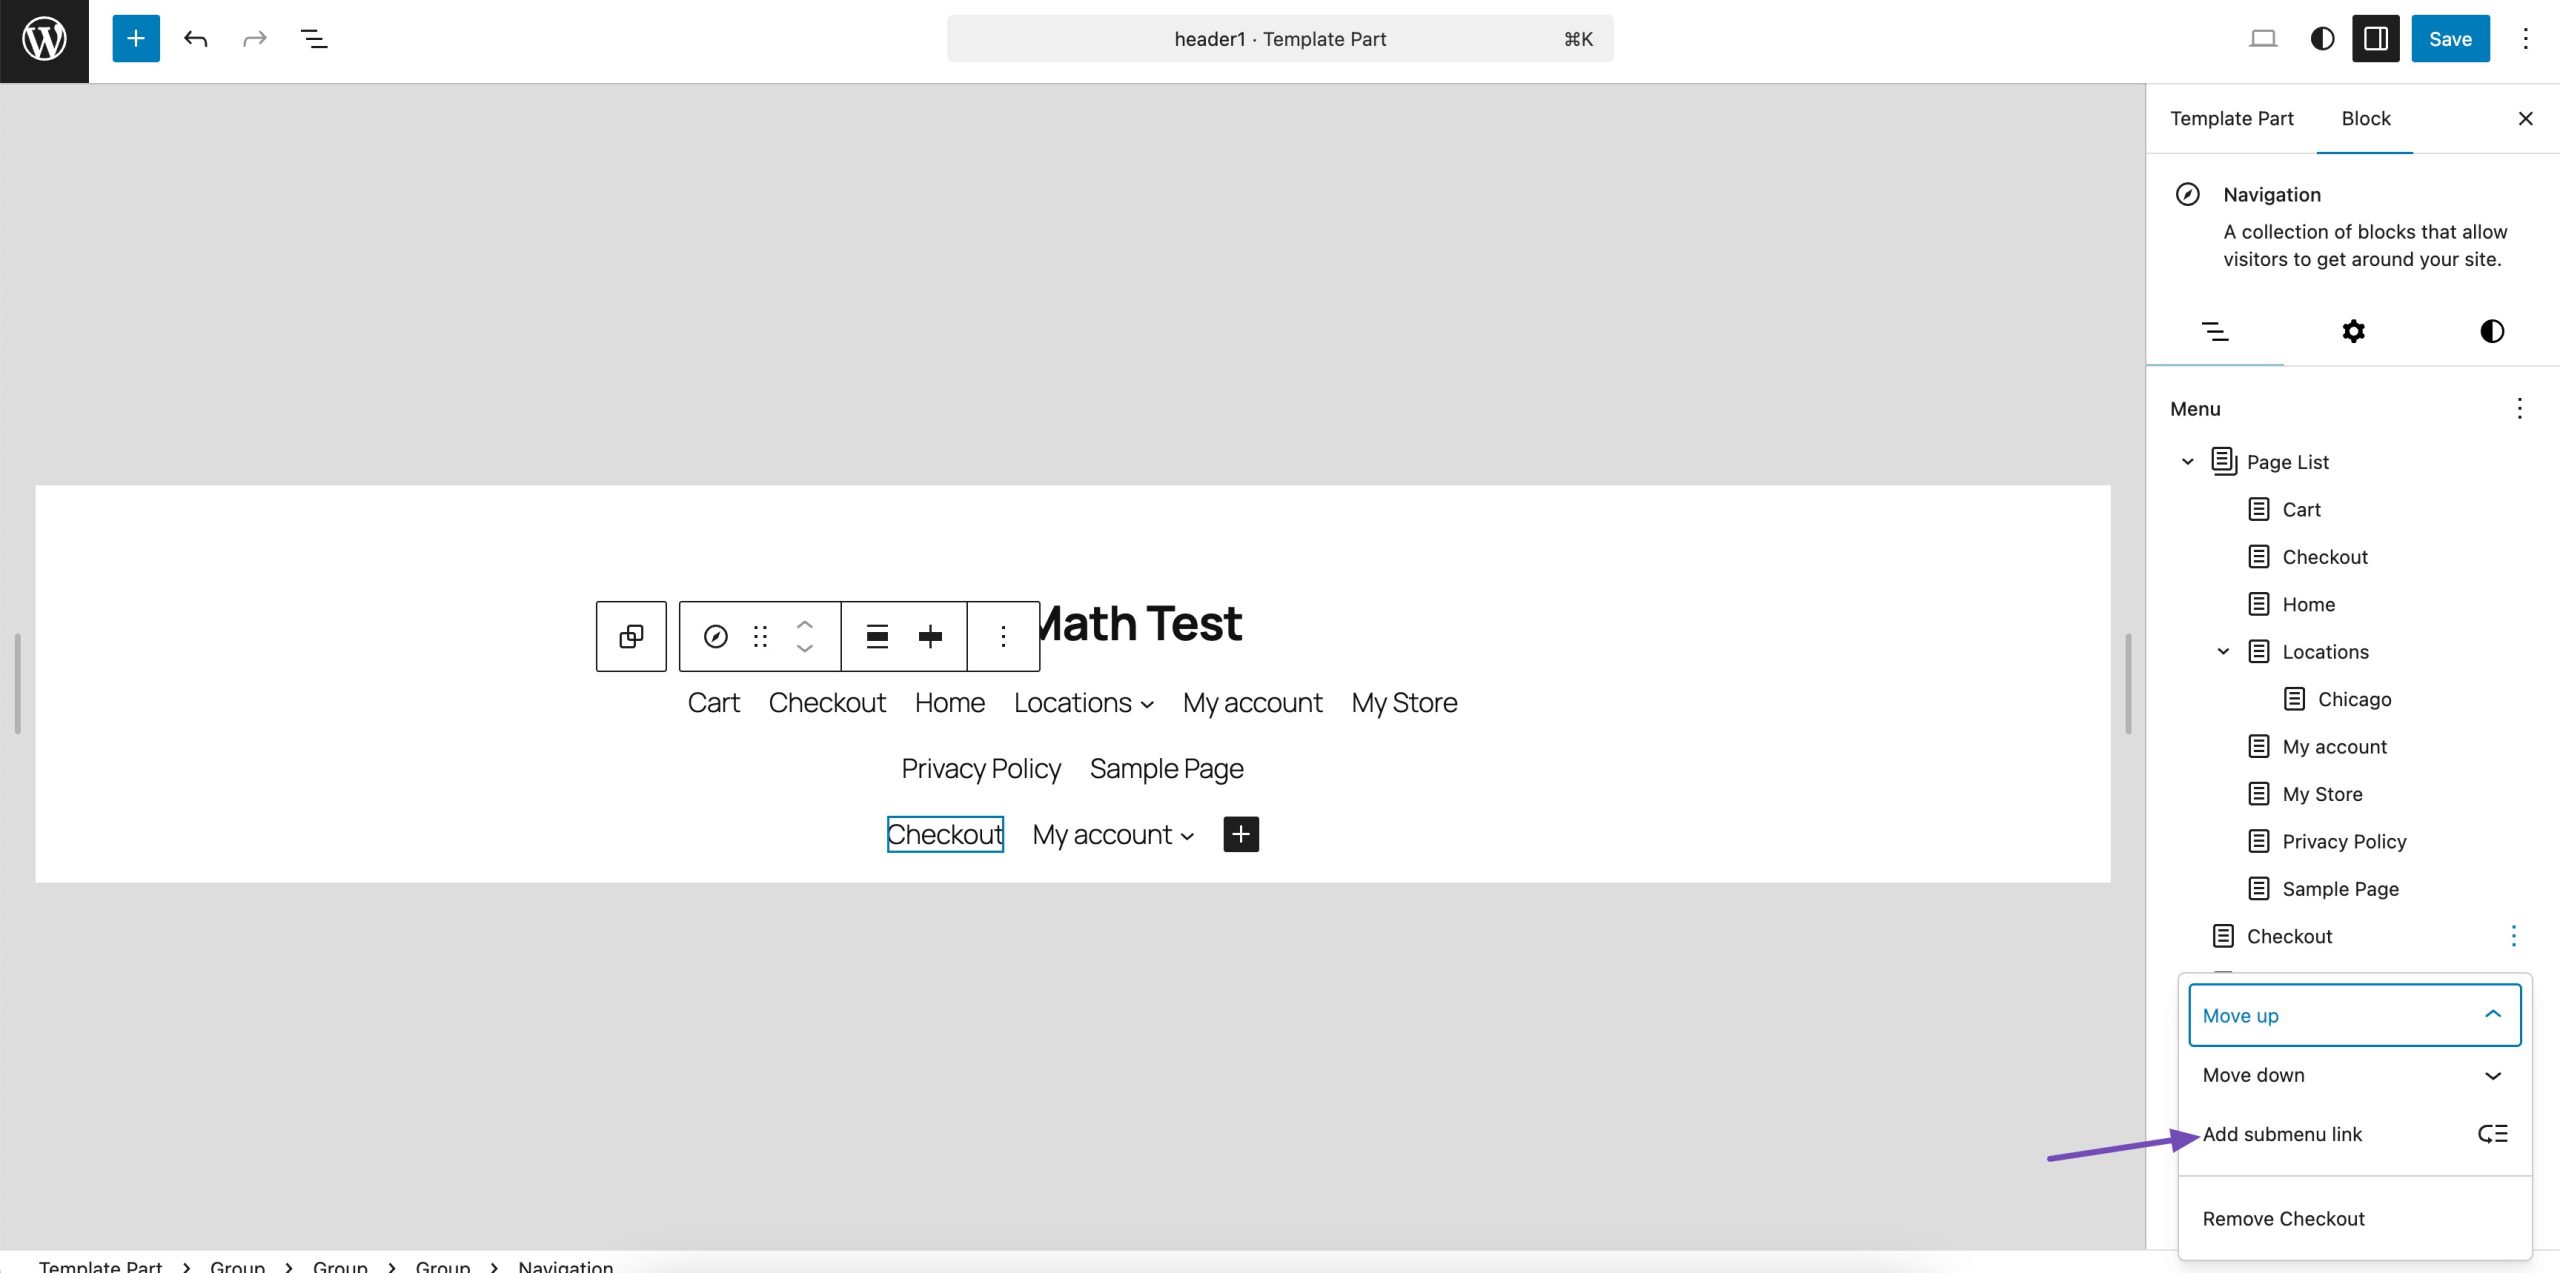
From there, you can either add the URL of the submenu or search for the page, post, or tag you want to use as the dropdown menu item.
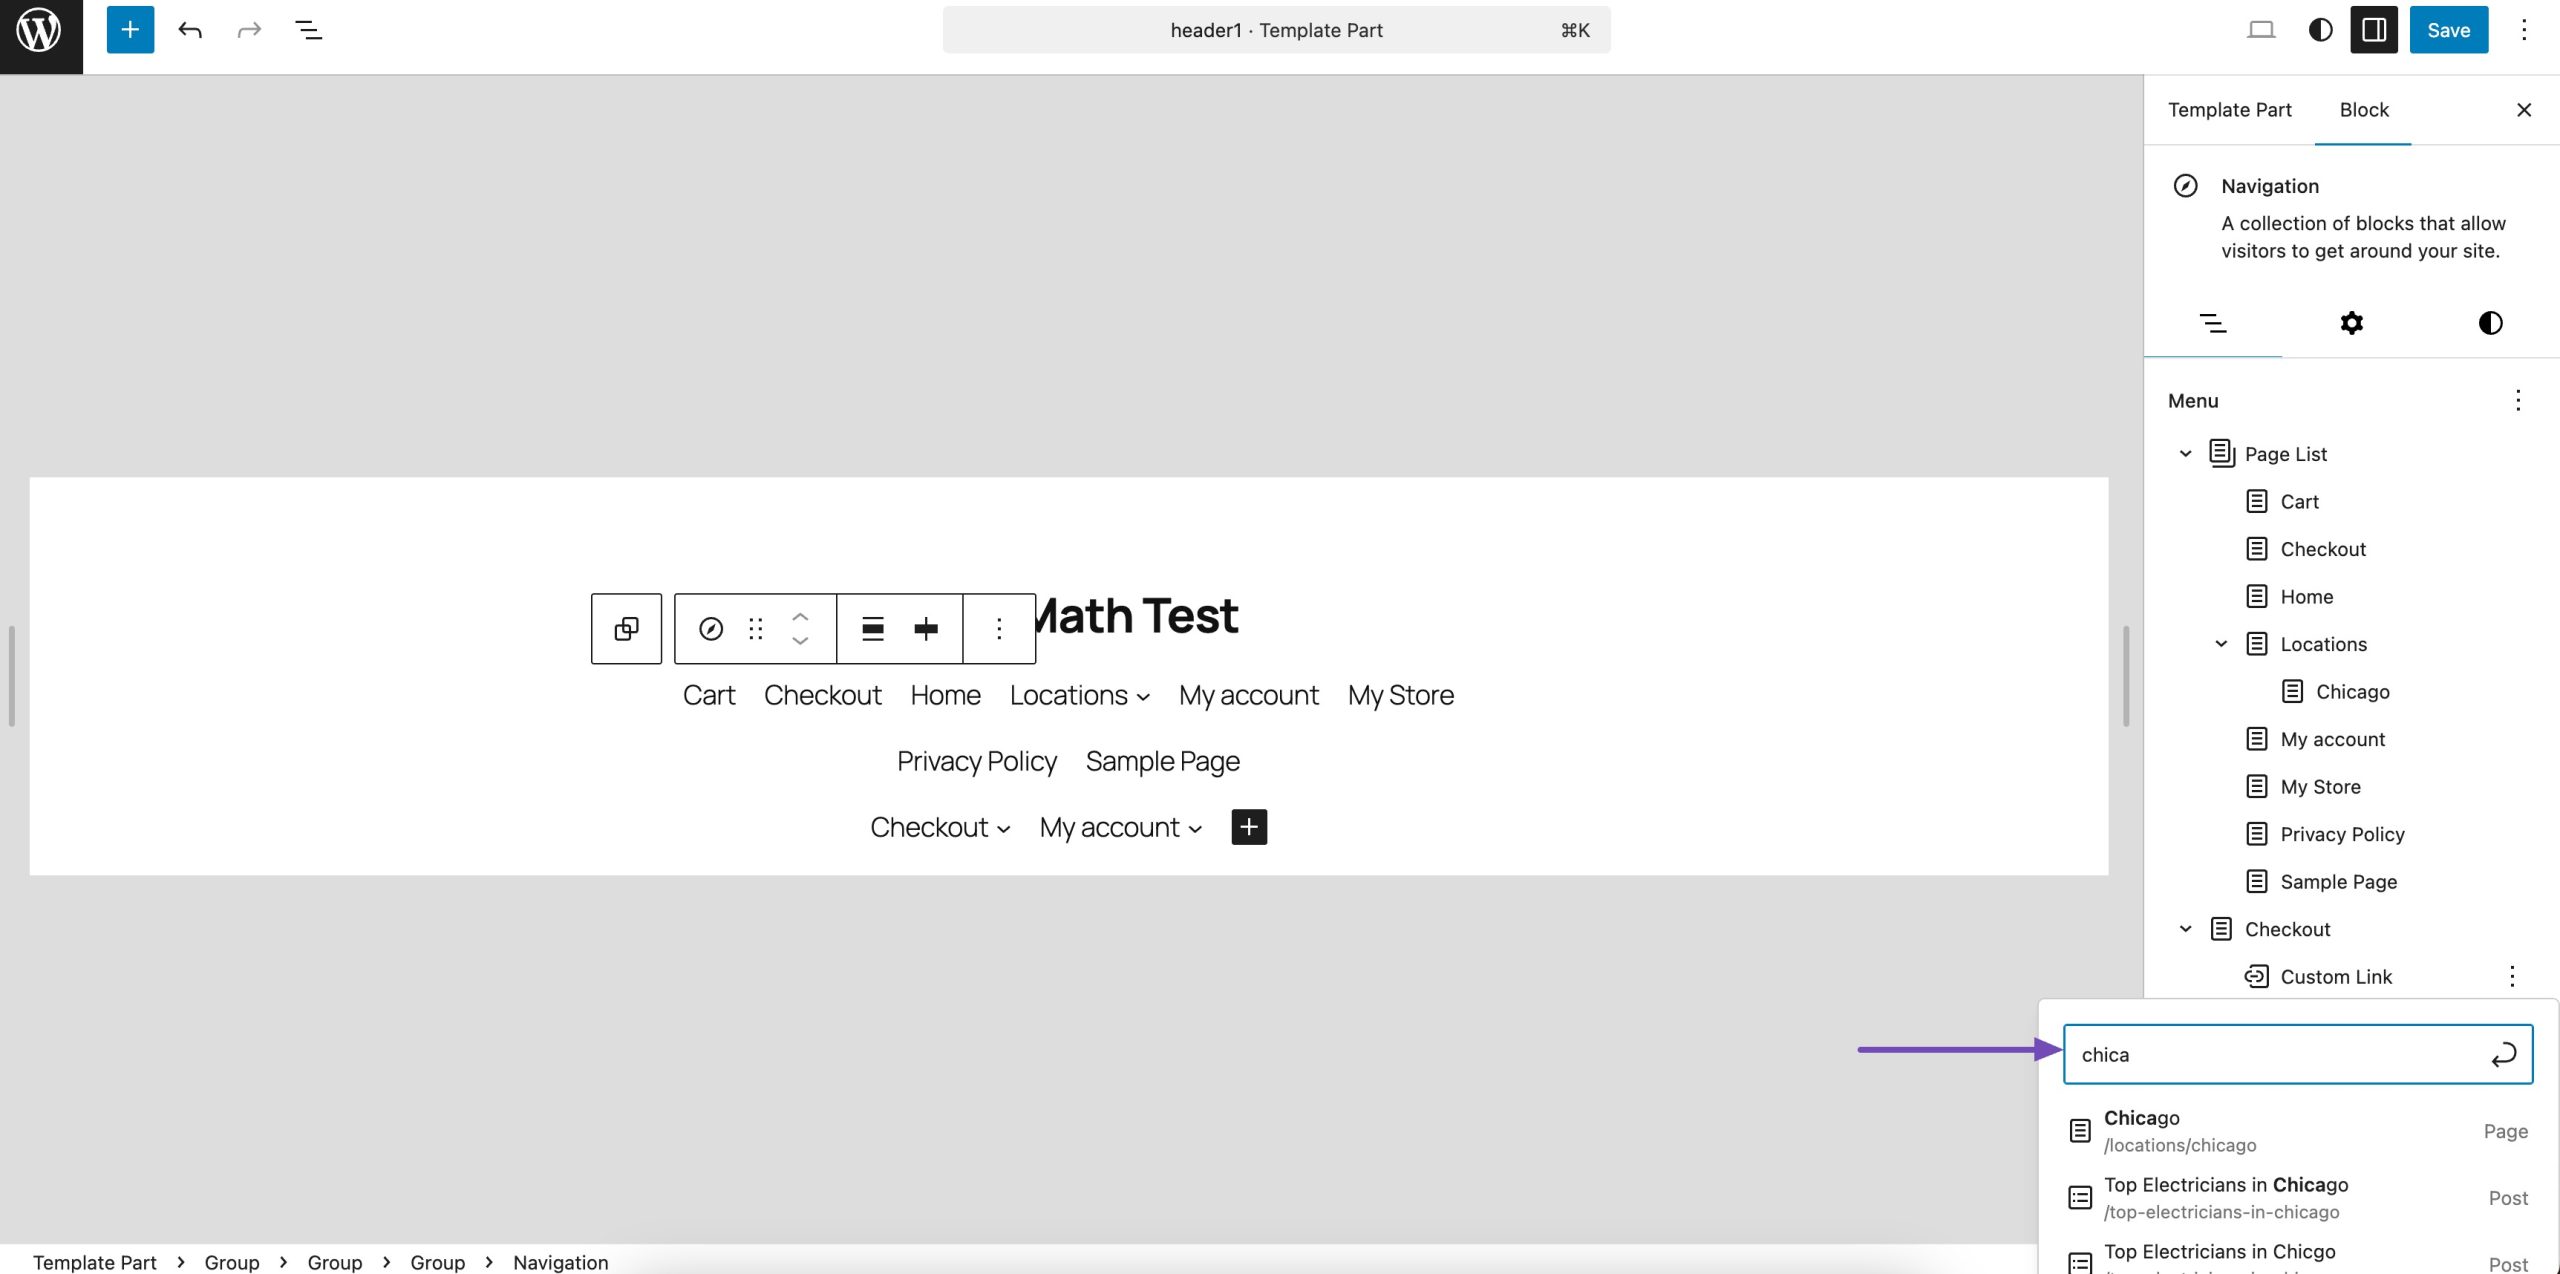
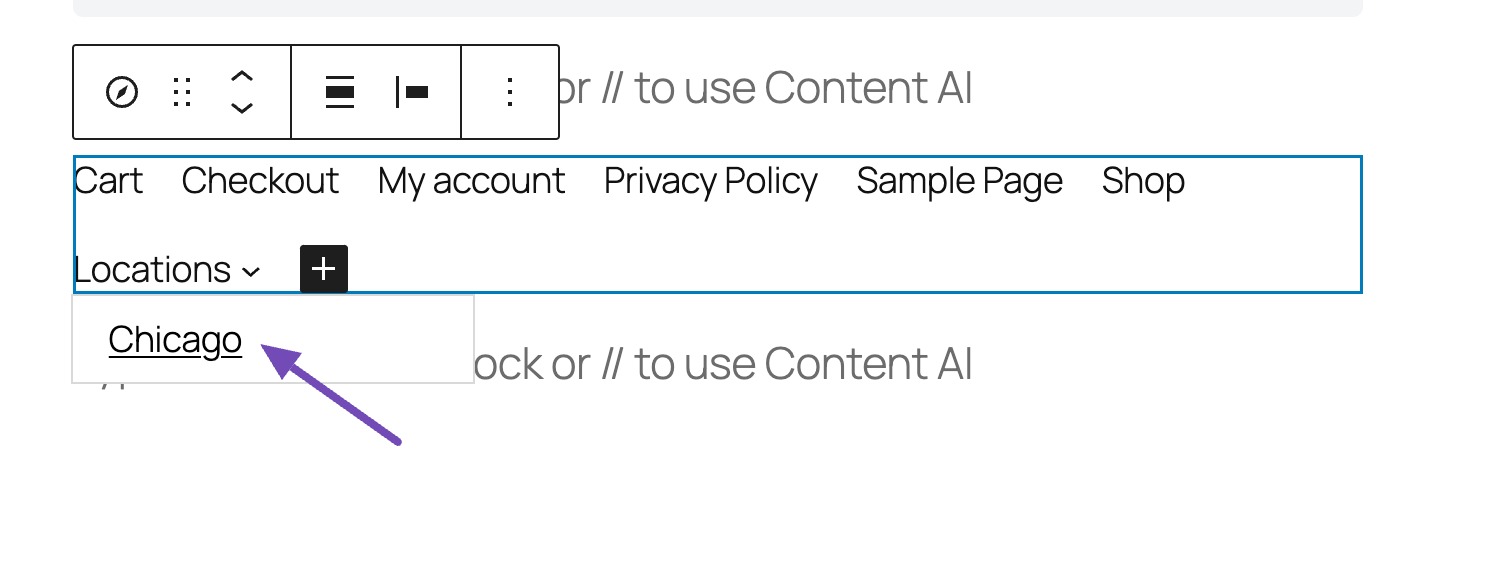
Repeat this process to add all desired dropdown menu items for each parent menu item. Once complete, rearrange the patterns by dragging and dropping the items to their desired locations.
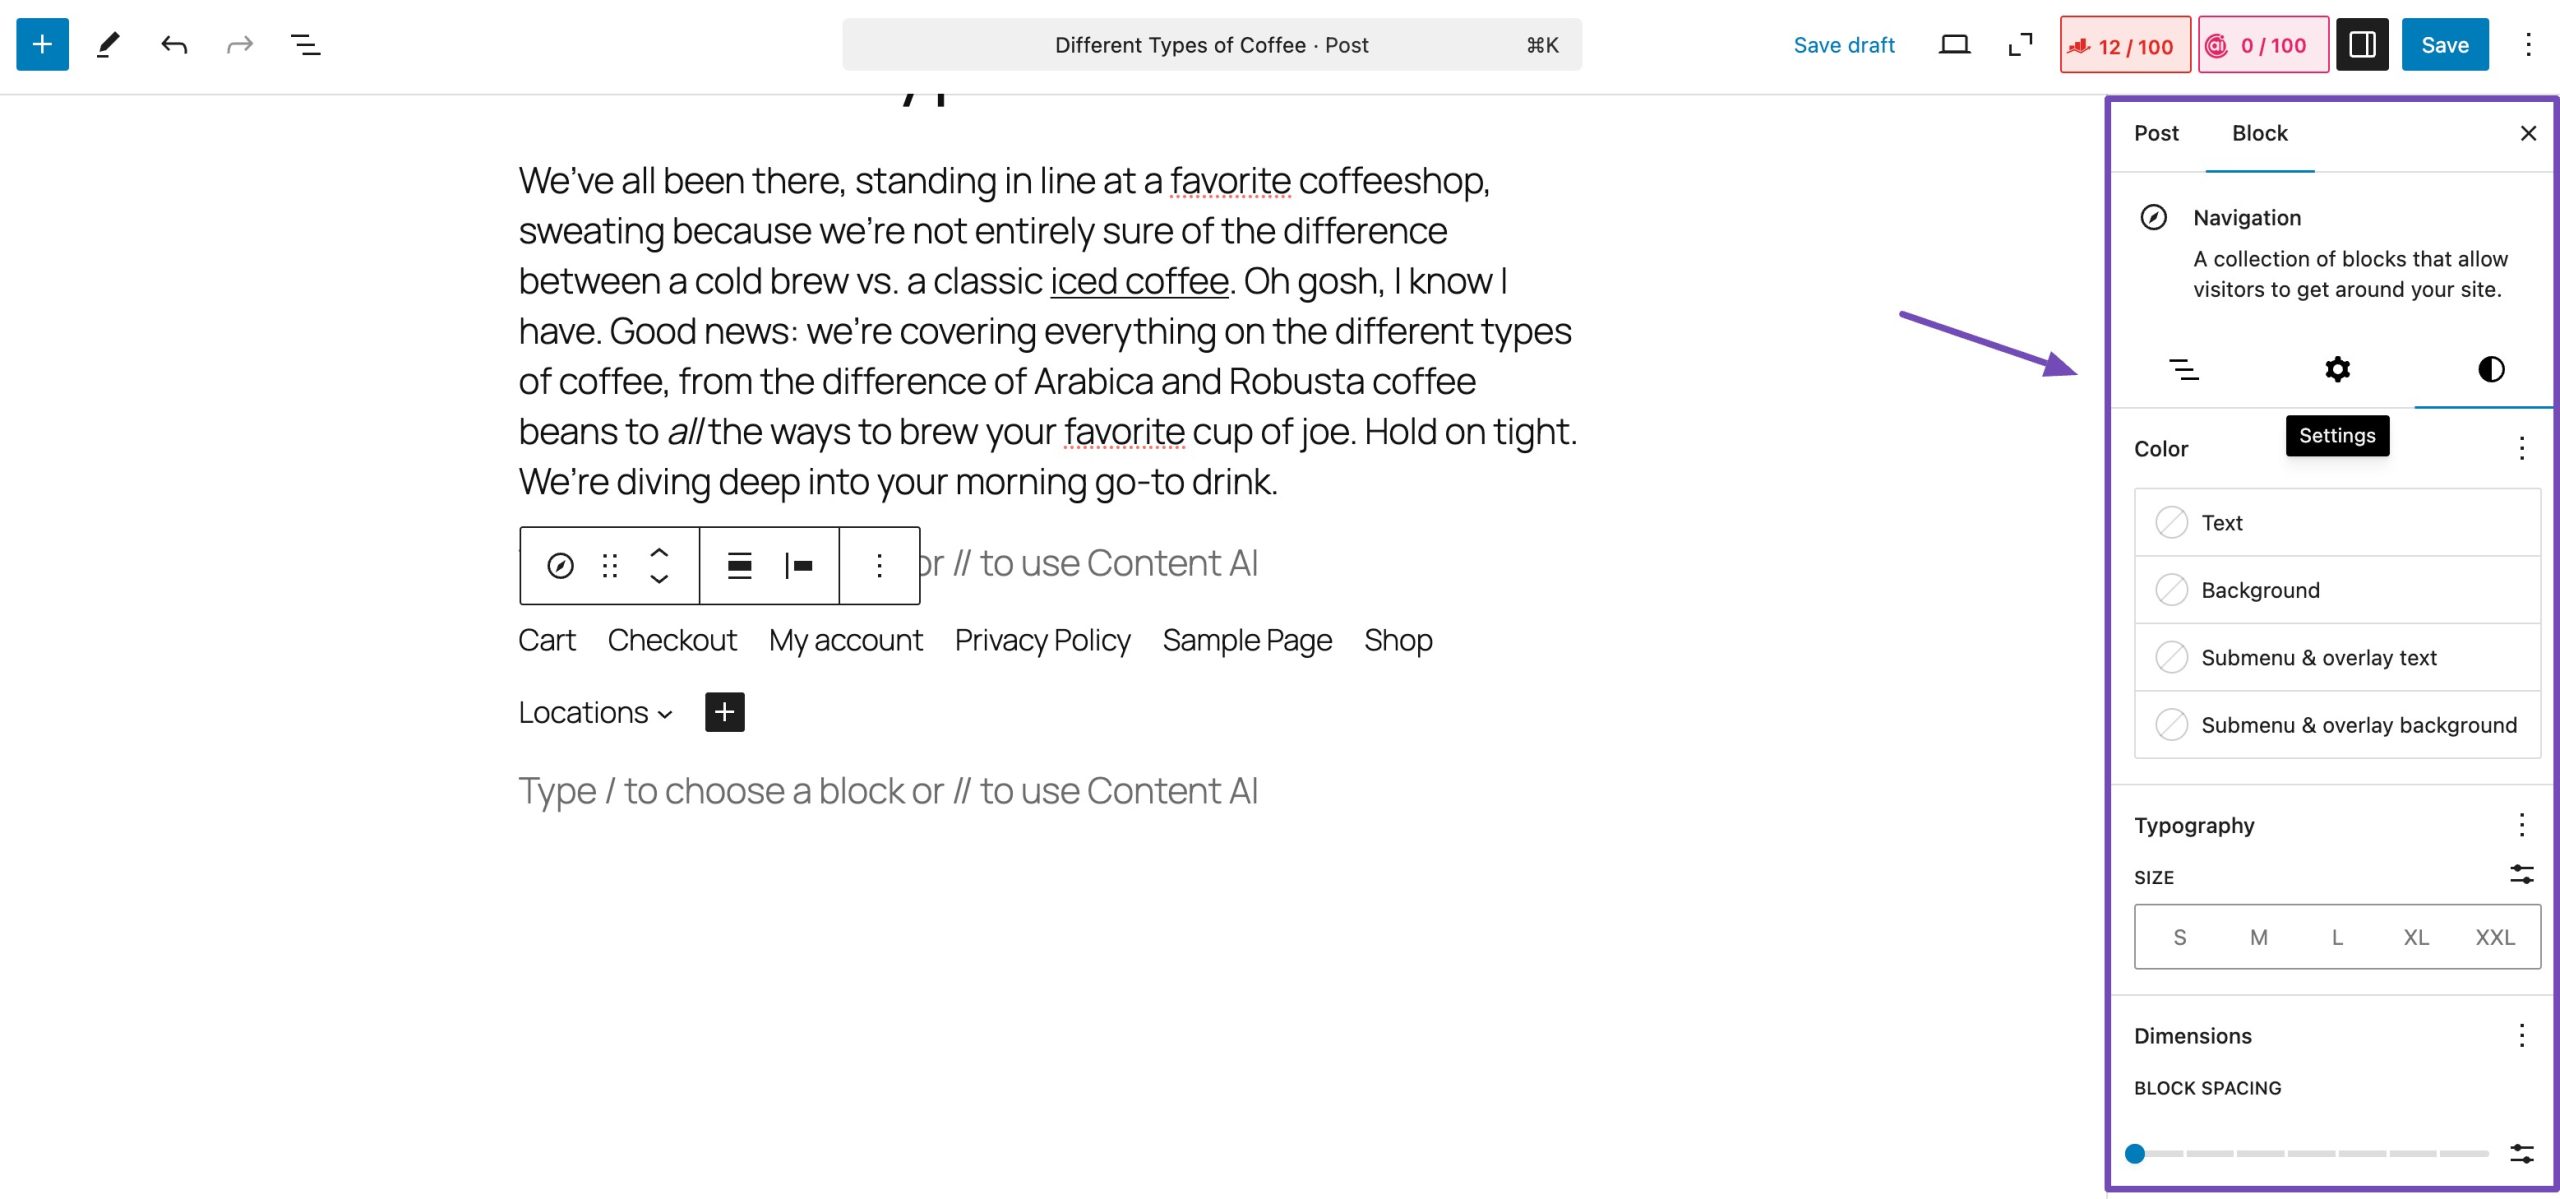
The Full-Site Editor provides additional styling options in those right-side settings panels, too.
So you can further customize things like text size, colors, backgrounds, justifications, and more, both for the overall menu and individual parent/submenu items.
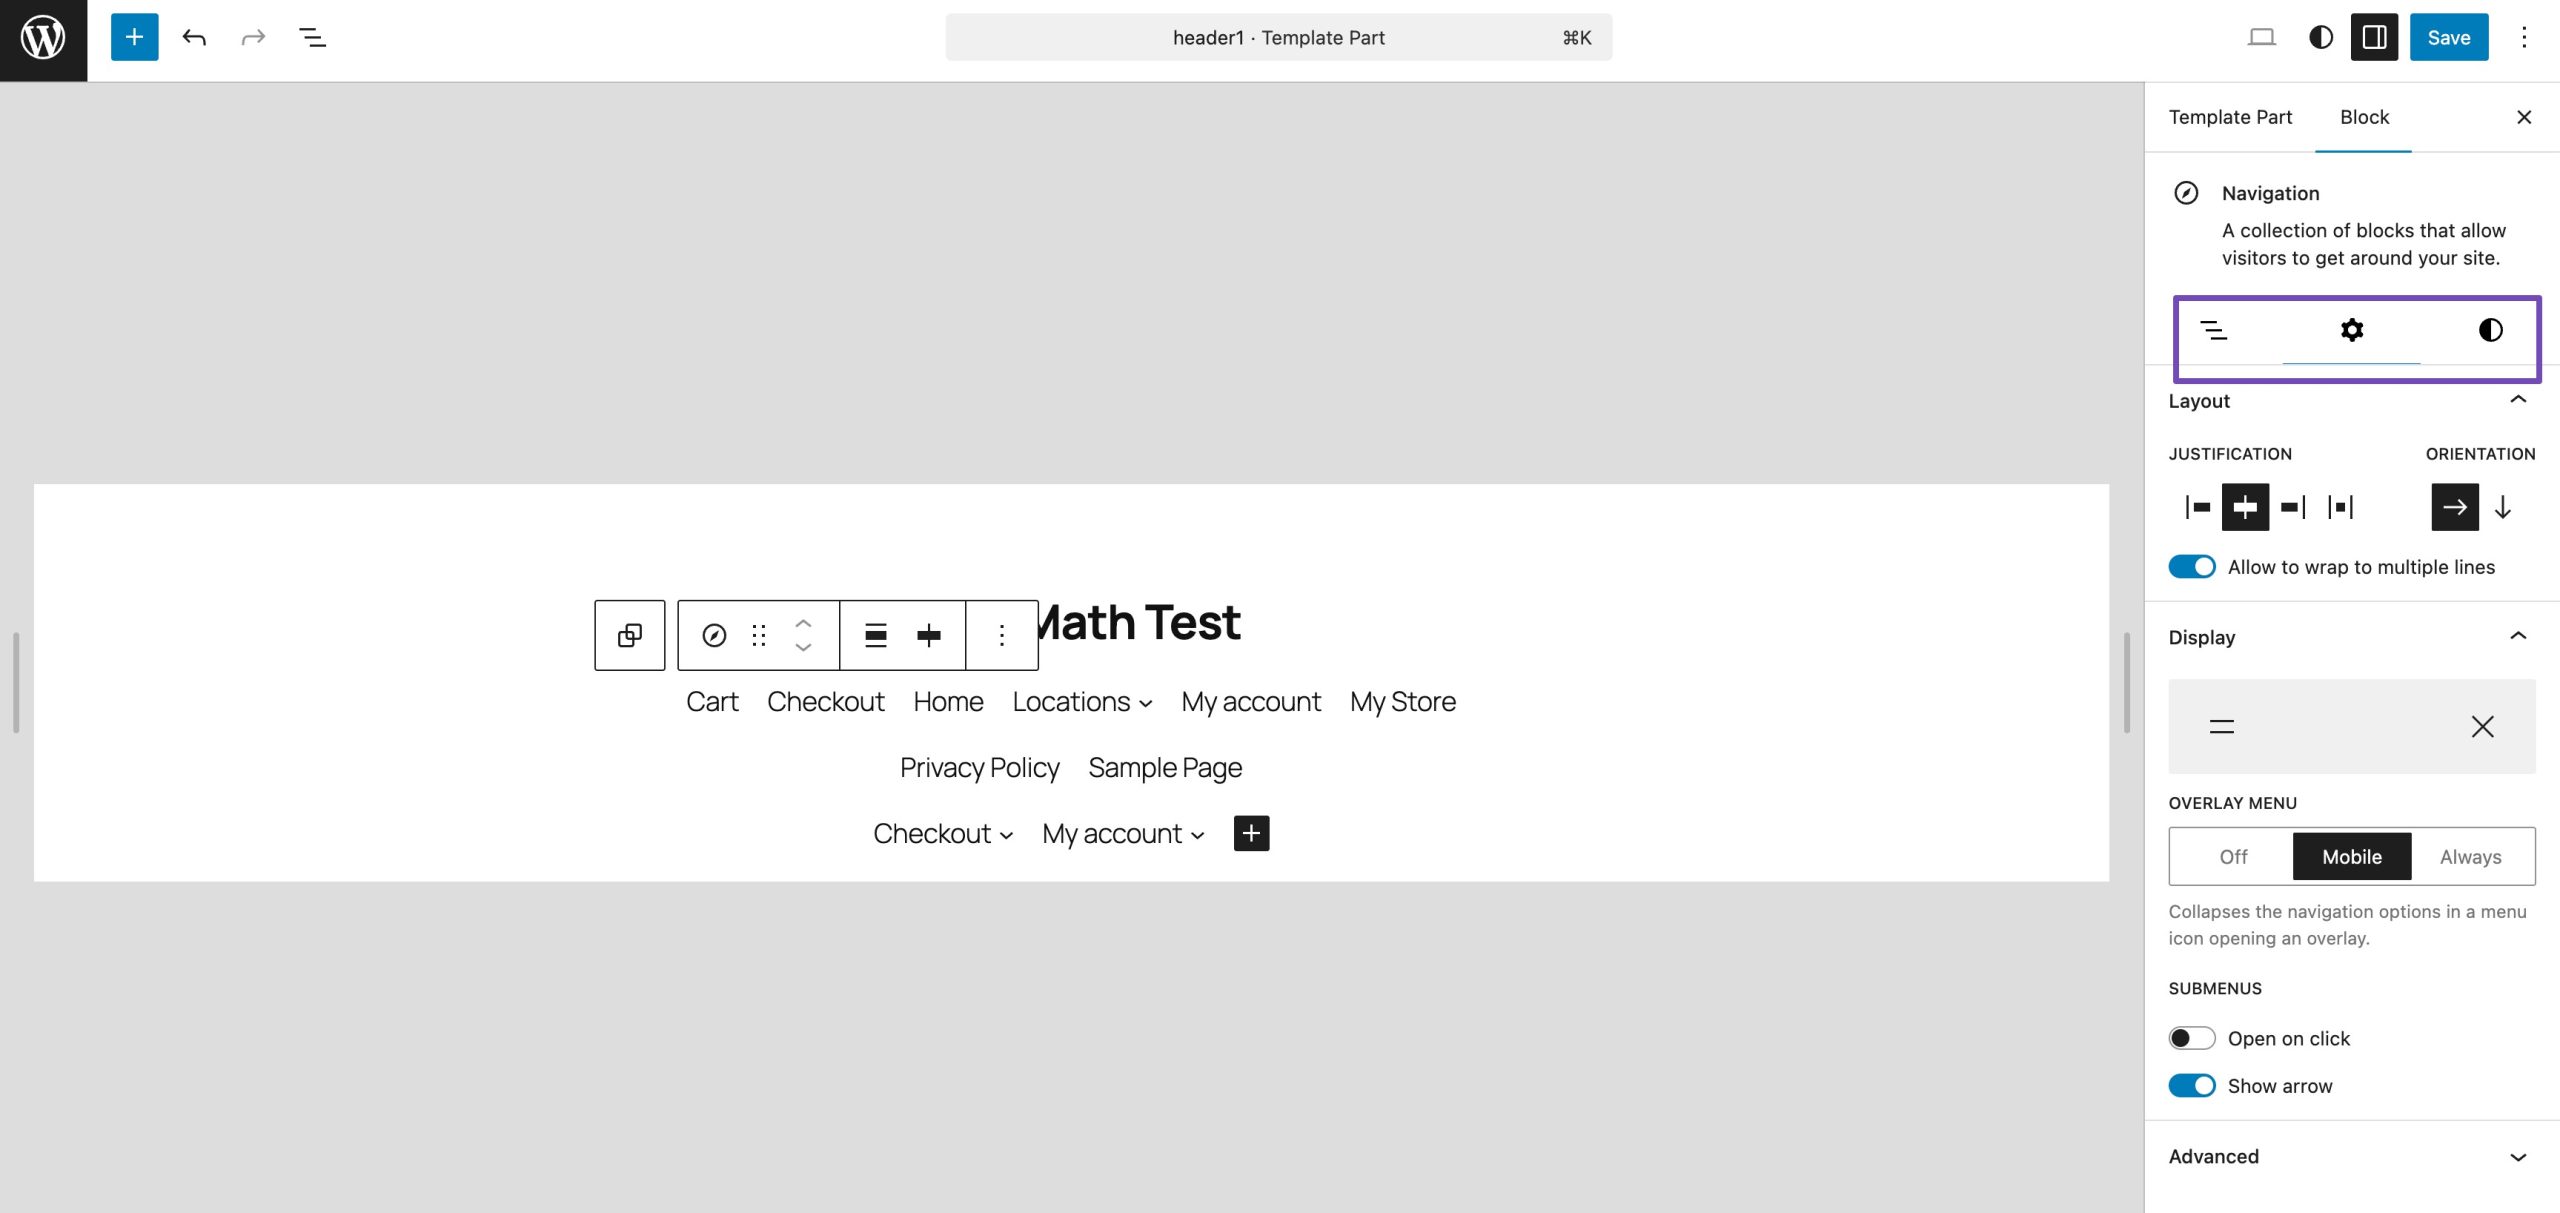
Once everything looks good, click the Save button in the top right corner to apply your new dropdown menu.
3.4 Creating a Dropdown Menu Using a Plugin
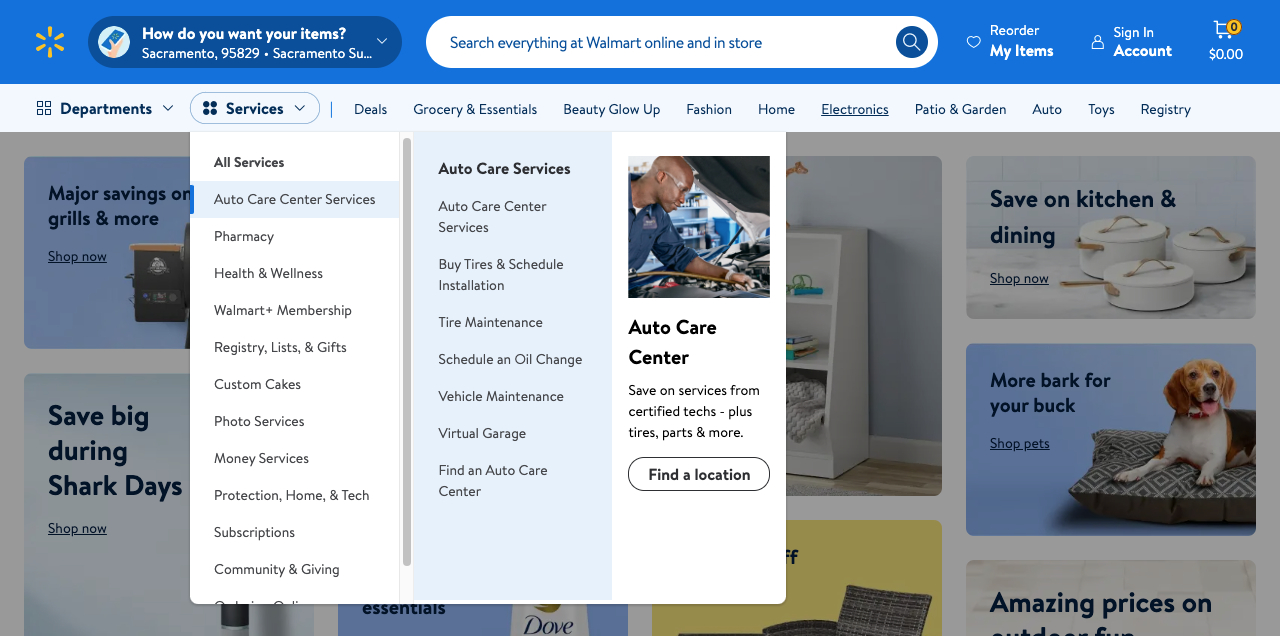
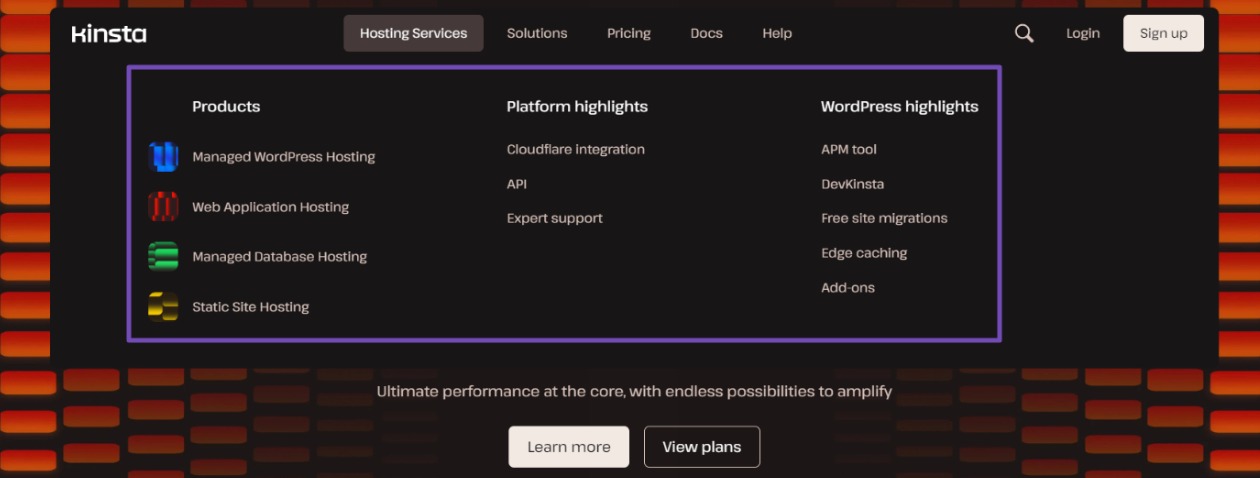
If you’re looking to create a more advanced dropdown menu, such as a mega menu, the Max Mega Menu plugin is a great option. Mega menus are large, multi-column dropdowns that can include images, widgets, product links, and more for a highly engaging navigation experience.
Before getting started, make sure the Max Mega Menu plugin is installed and activated. If you need help, refer to our dedicated guide on how to install WordPress plugins.
A mega menu is a prominent, multi-column dropdown with additional sections and content.
It usually looks like this:
Also, ensure that your pages are published and you’ve already created a navigation menu with an assigned location.
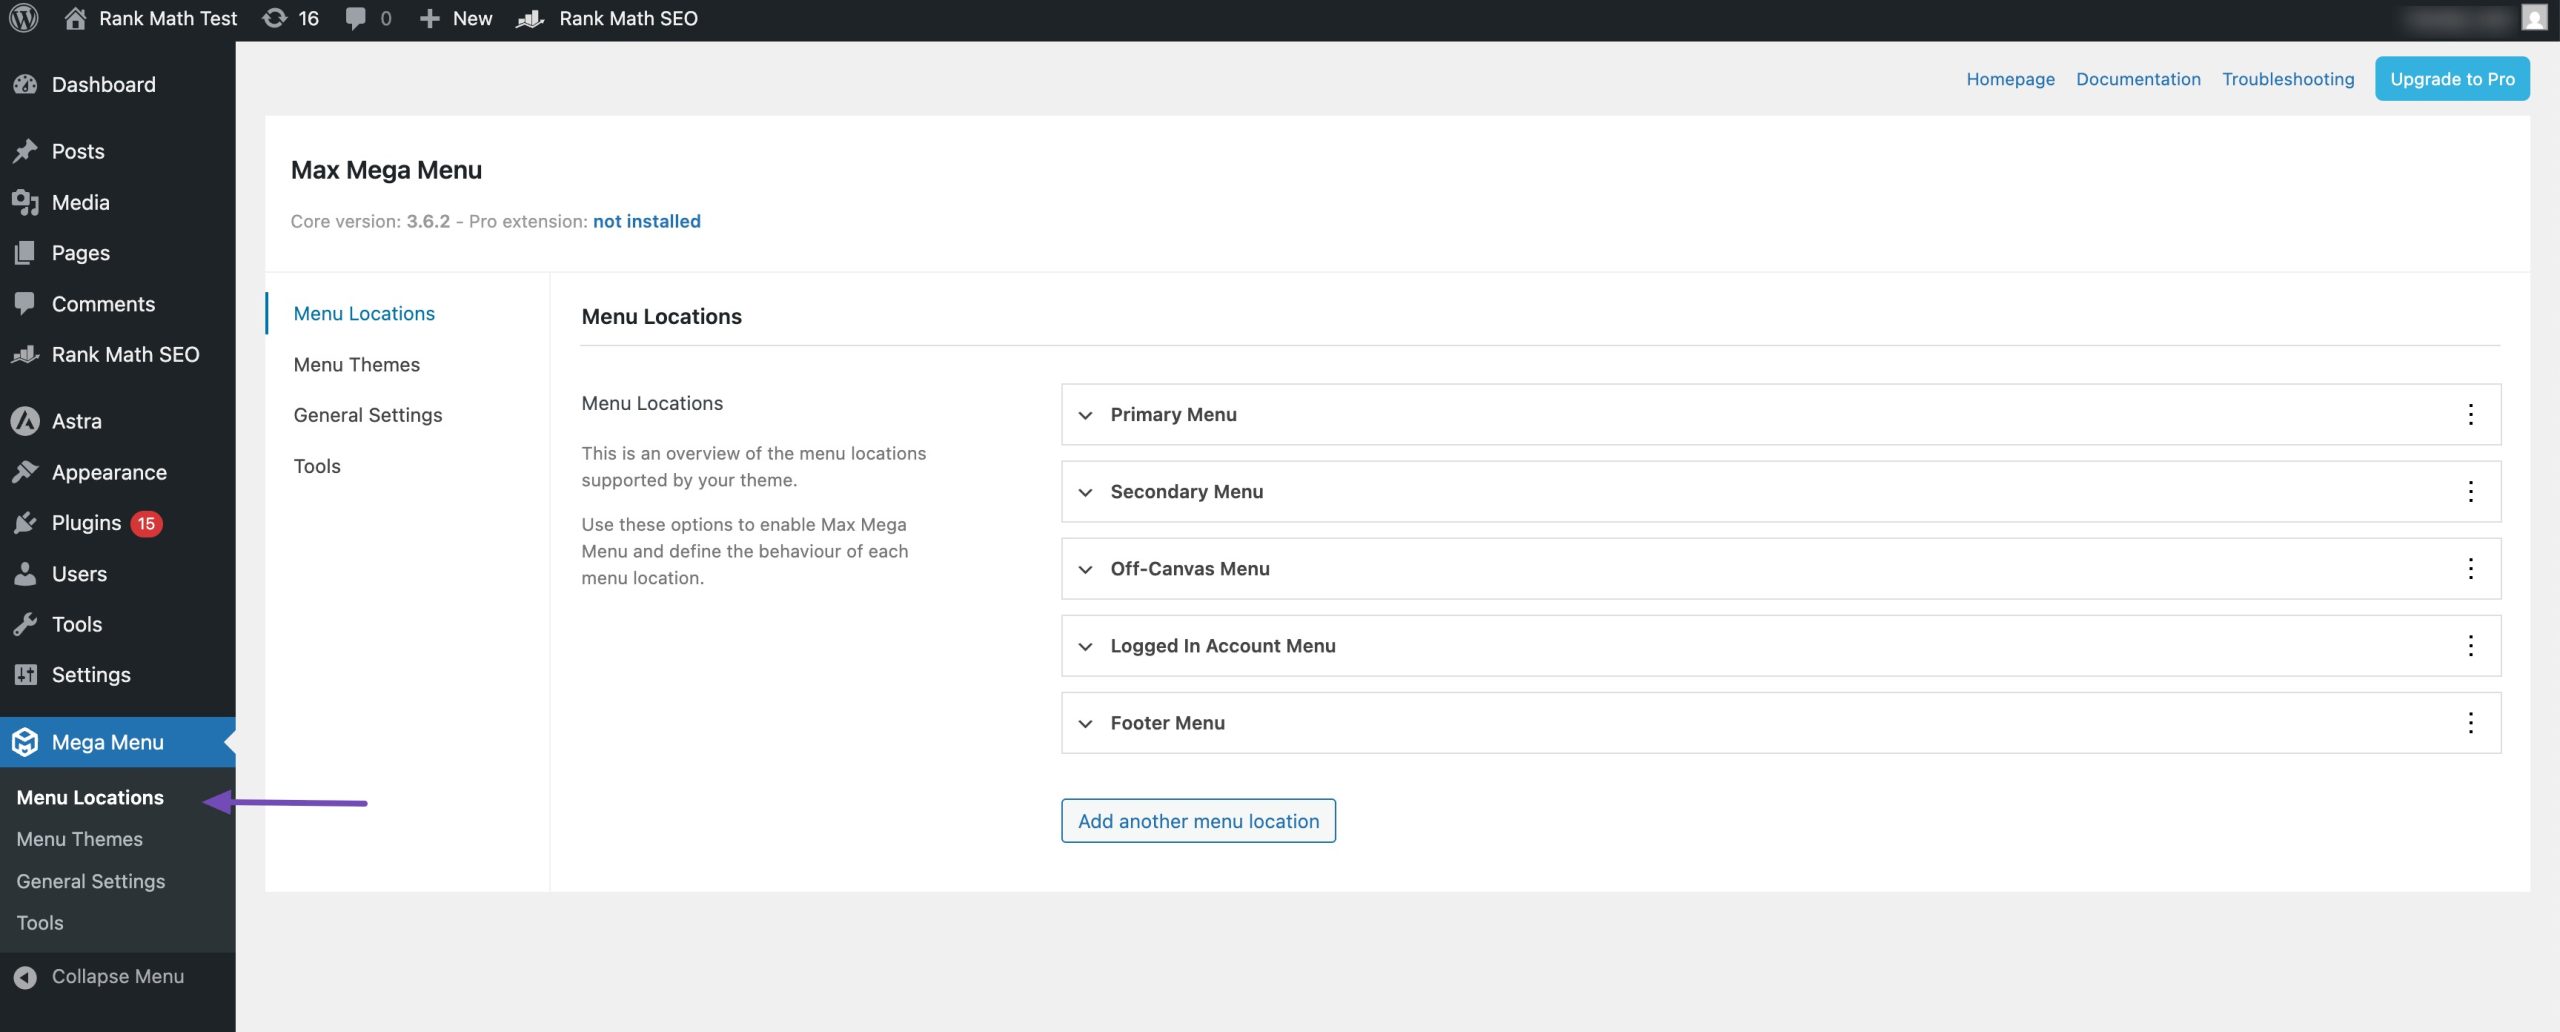
To configure the behaviour and appearance of your menu locations, go to Mega Menu → Menu Locations. Toggle the arrows next to each location and make adjustments as needed.
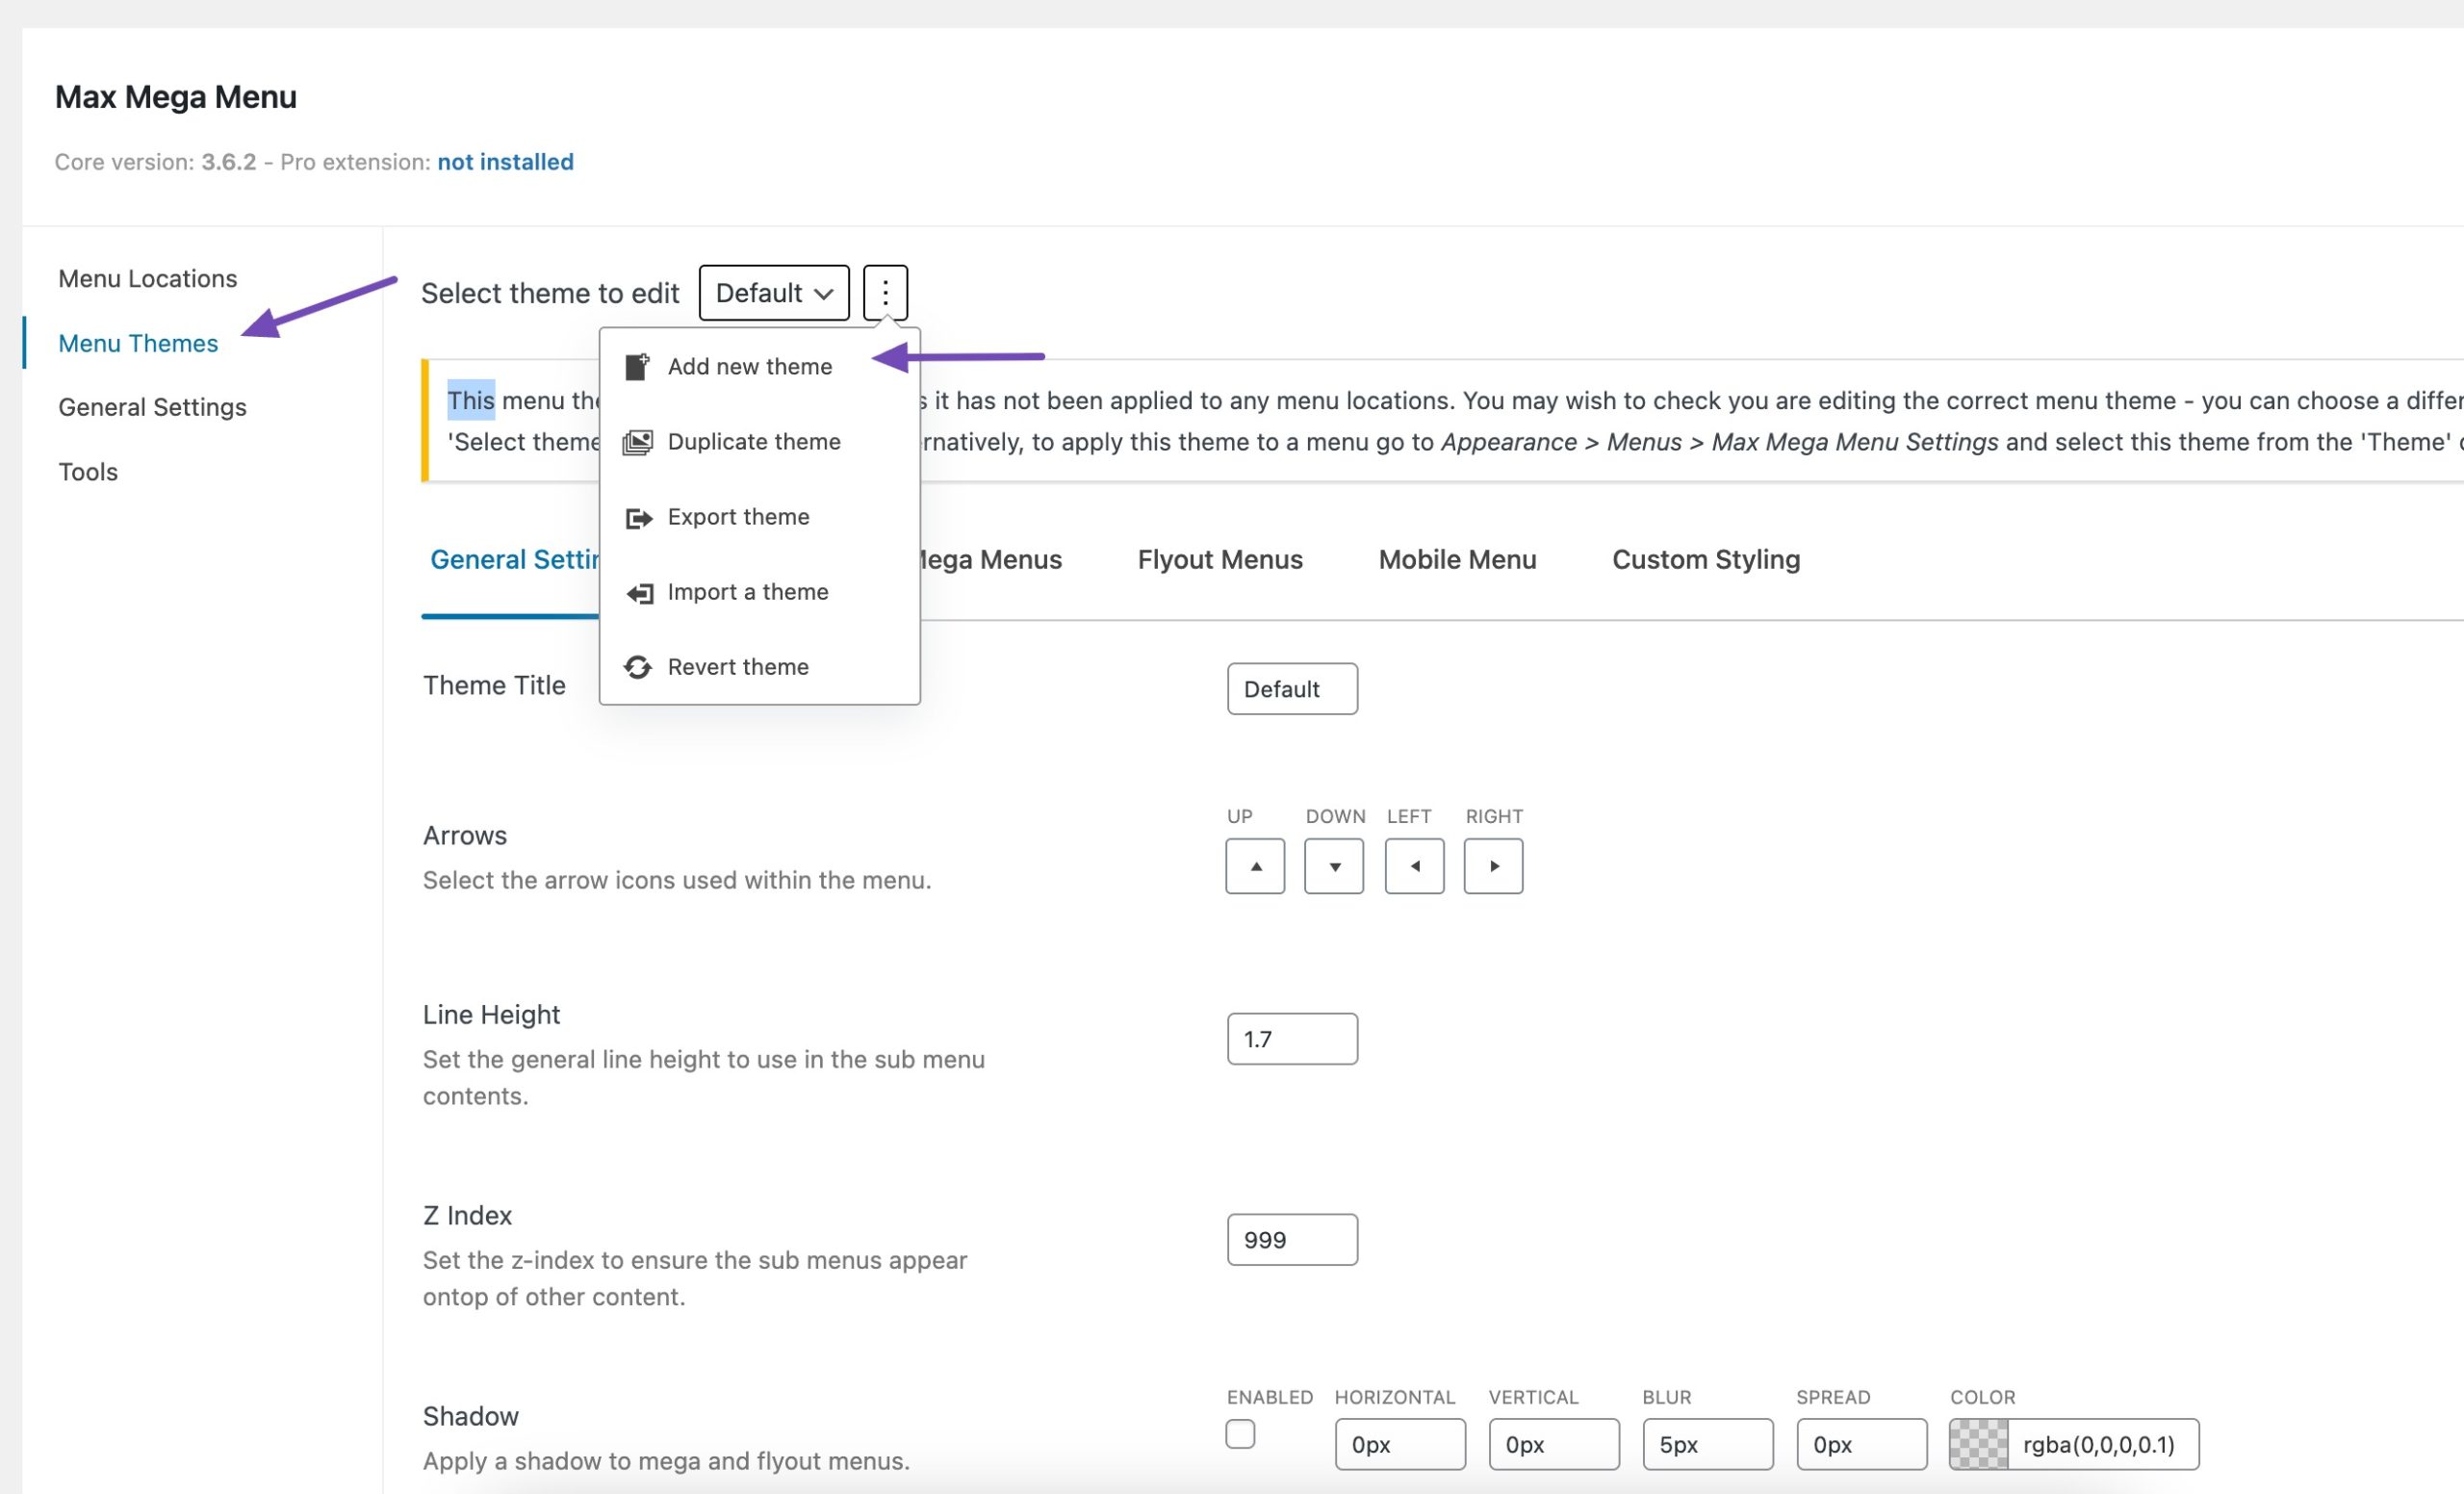
While the plugin provides a default menu theme, you can also create a custom theme to personalize the appearance of your mega menu.
Access the Menu Themes tab, click the three-dot icon next to Default, and select Add new theme.
In the General Settings tab, you can:
- Change the menu title
- Select an arrow style
- Adjust line height and shadows for submenu items
To further style your menu:
- Use the Menu Bar tab to adjust height, background colour, padding, borders, and alignment of top-level menu items.
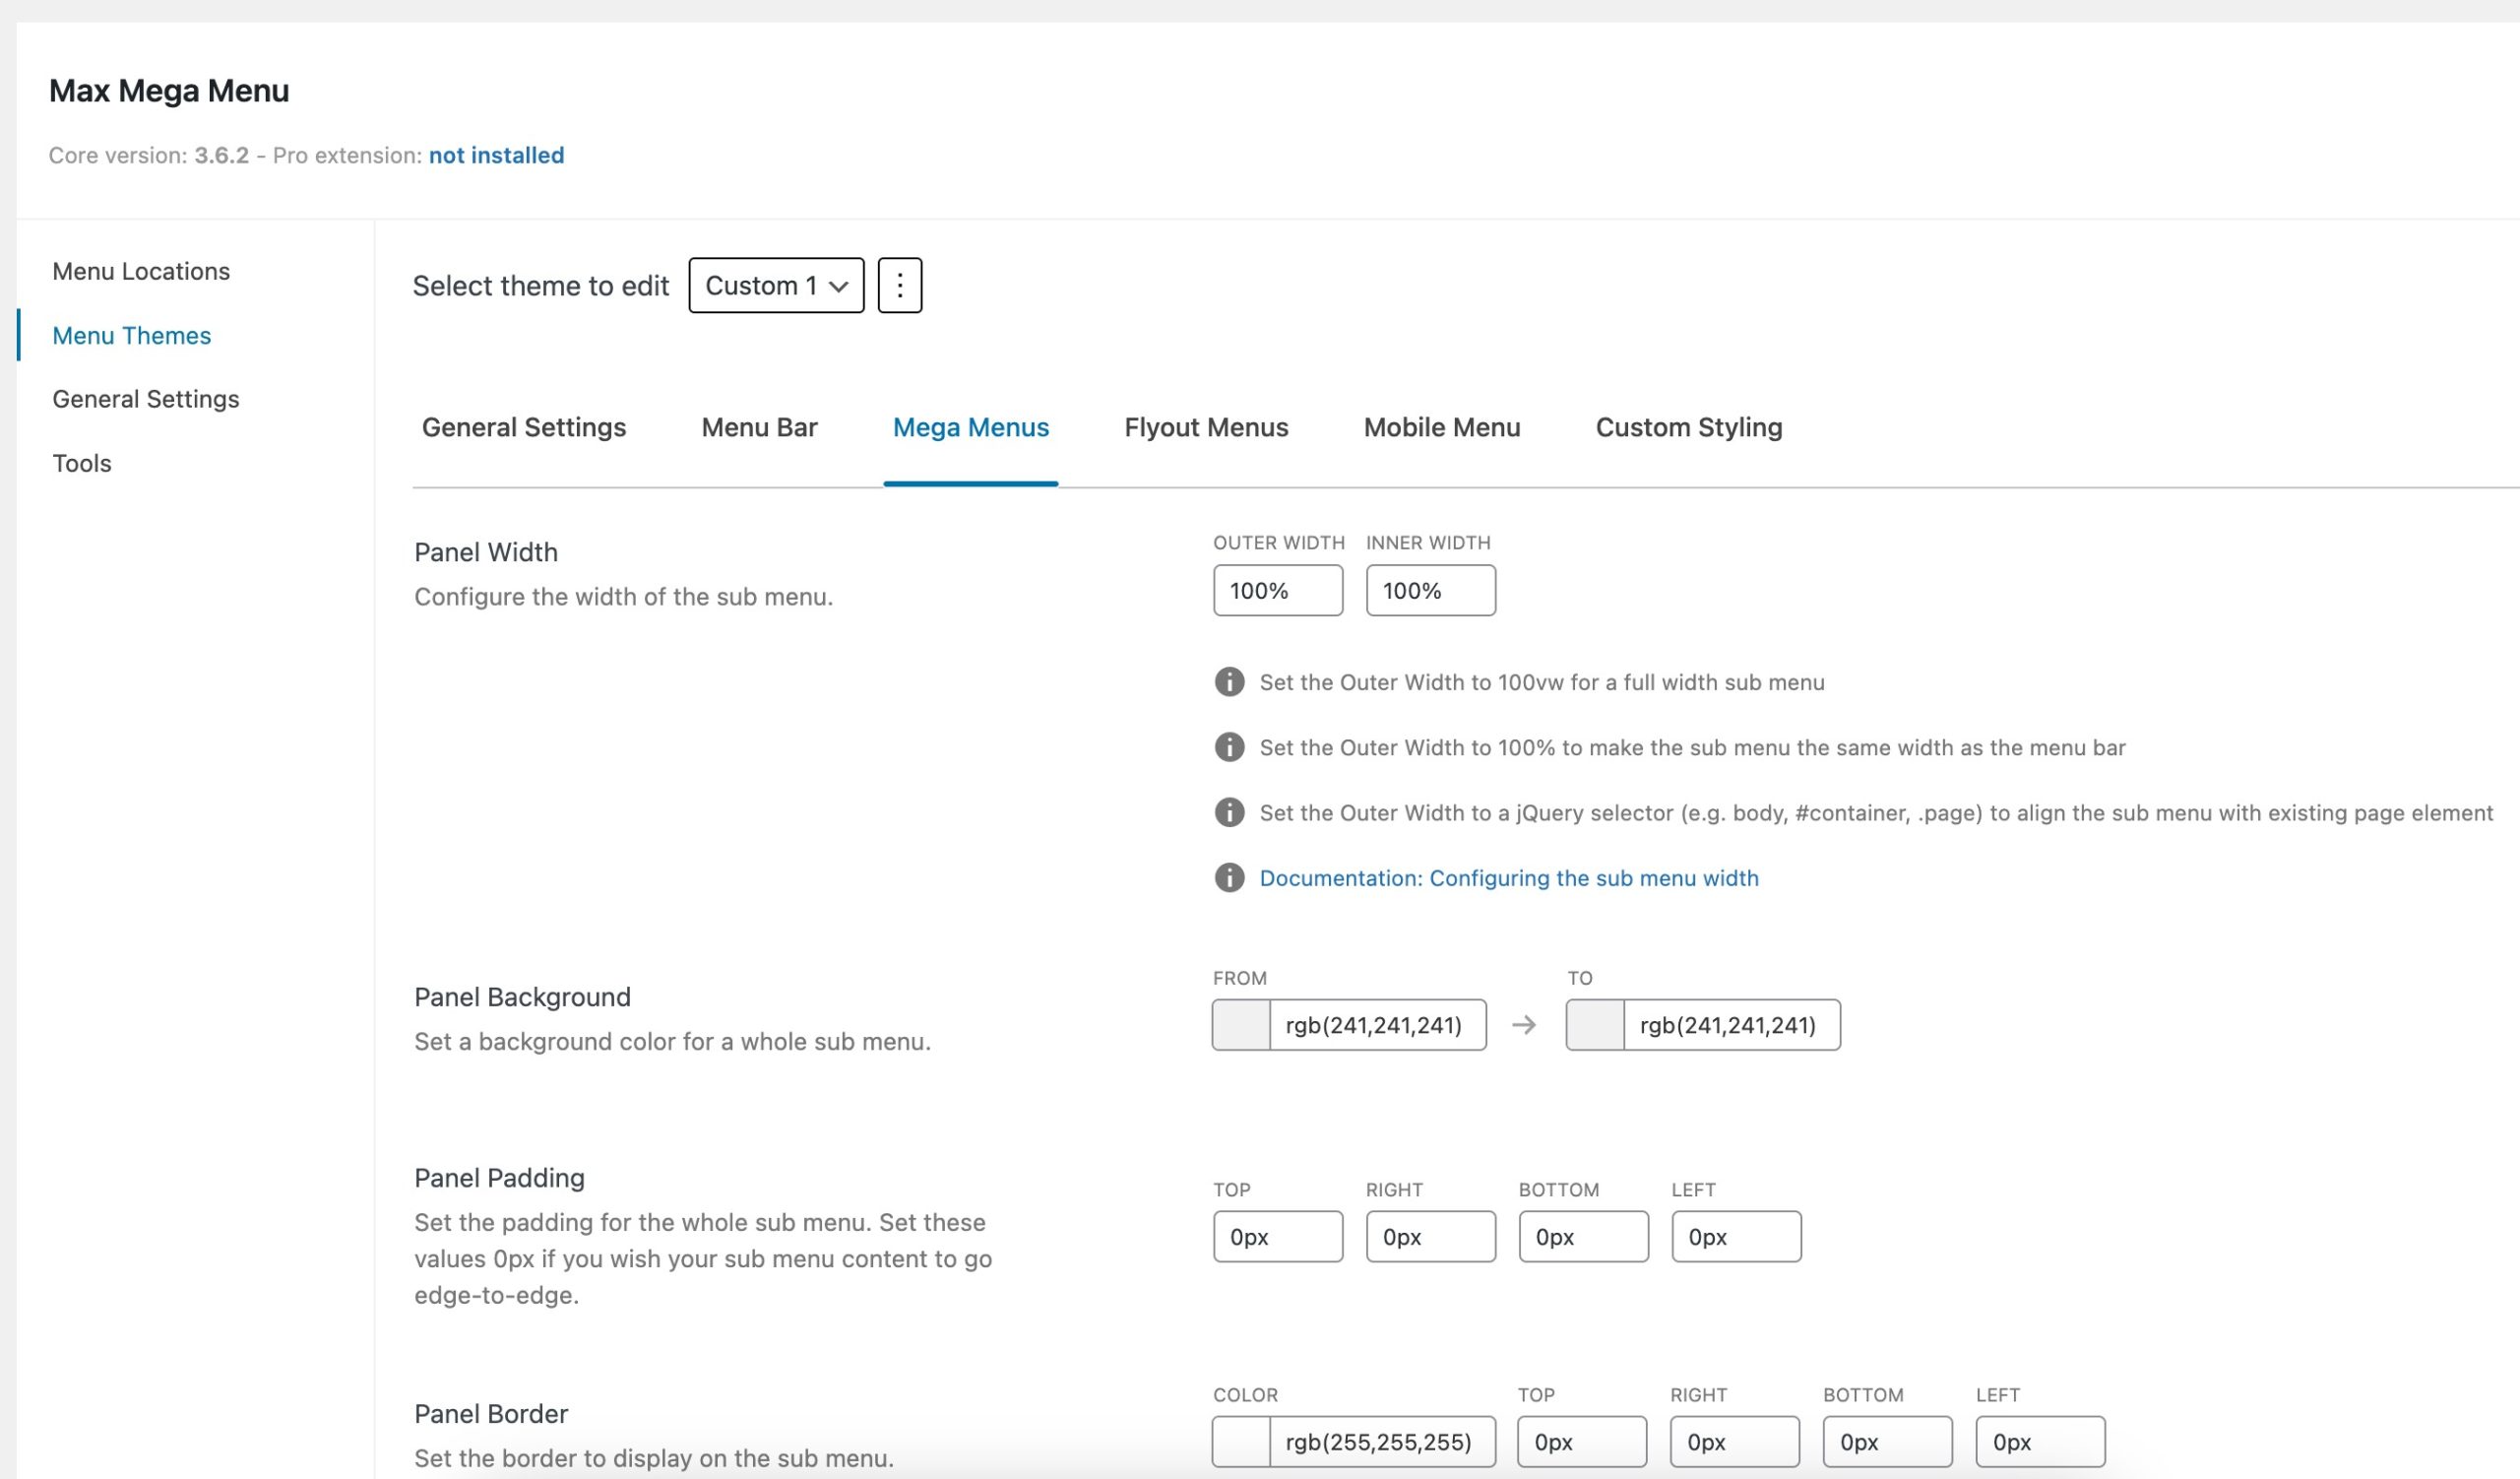
- Under the Mega Menus section, style second-level and third-level items by modifying font, colours, spacing, and borders.
Tip: Use a contrasting color scheme for sub-menus, but keep typography consistent with the parent menu.
Don’t forget to save your changes once you’re done customizing the theme.
Adding Content to Your WordPress Mega Menu
One of the best features of Max Mega Menu is its drag-and-drop builder, which lets you insert rich content like images, WooCommerce products, search filters, and widgets directly into your dropdown menus.
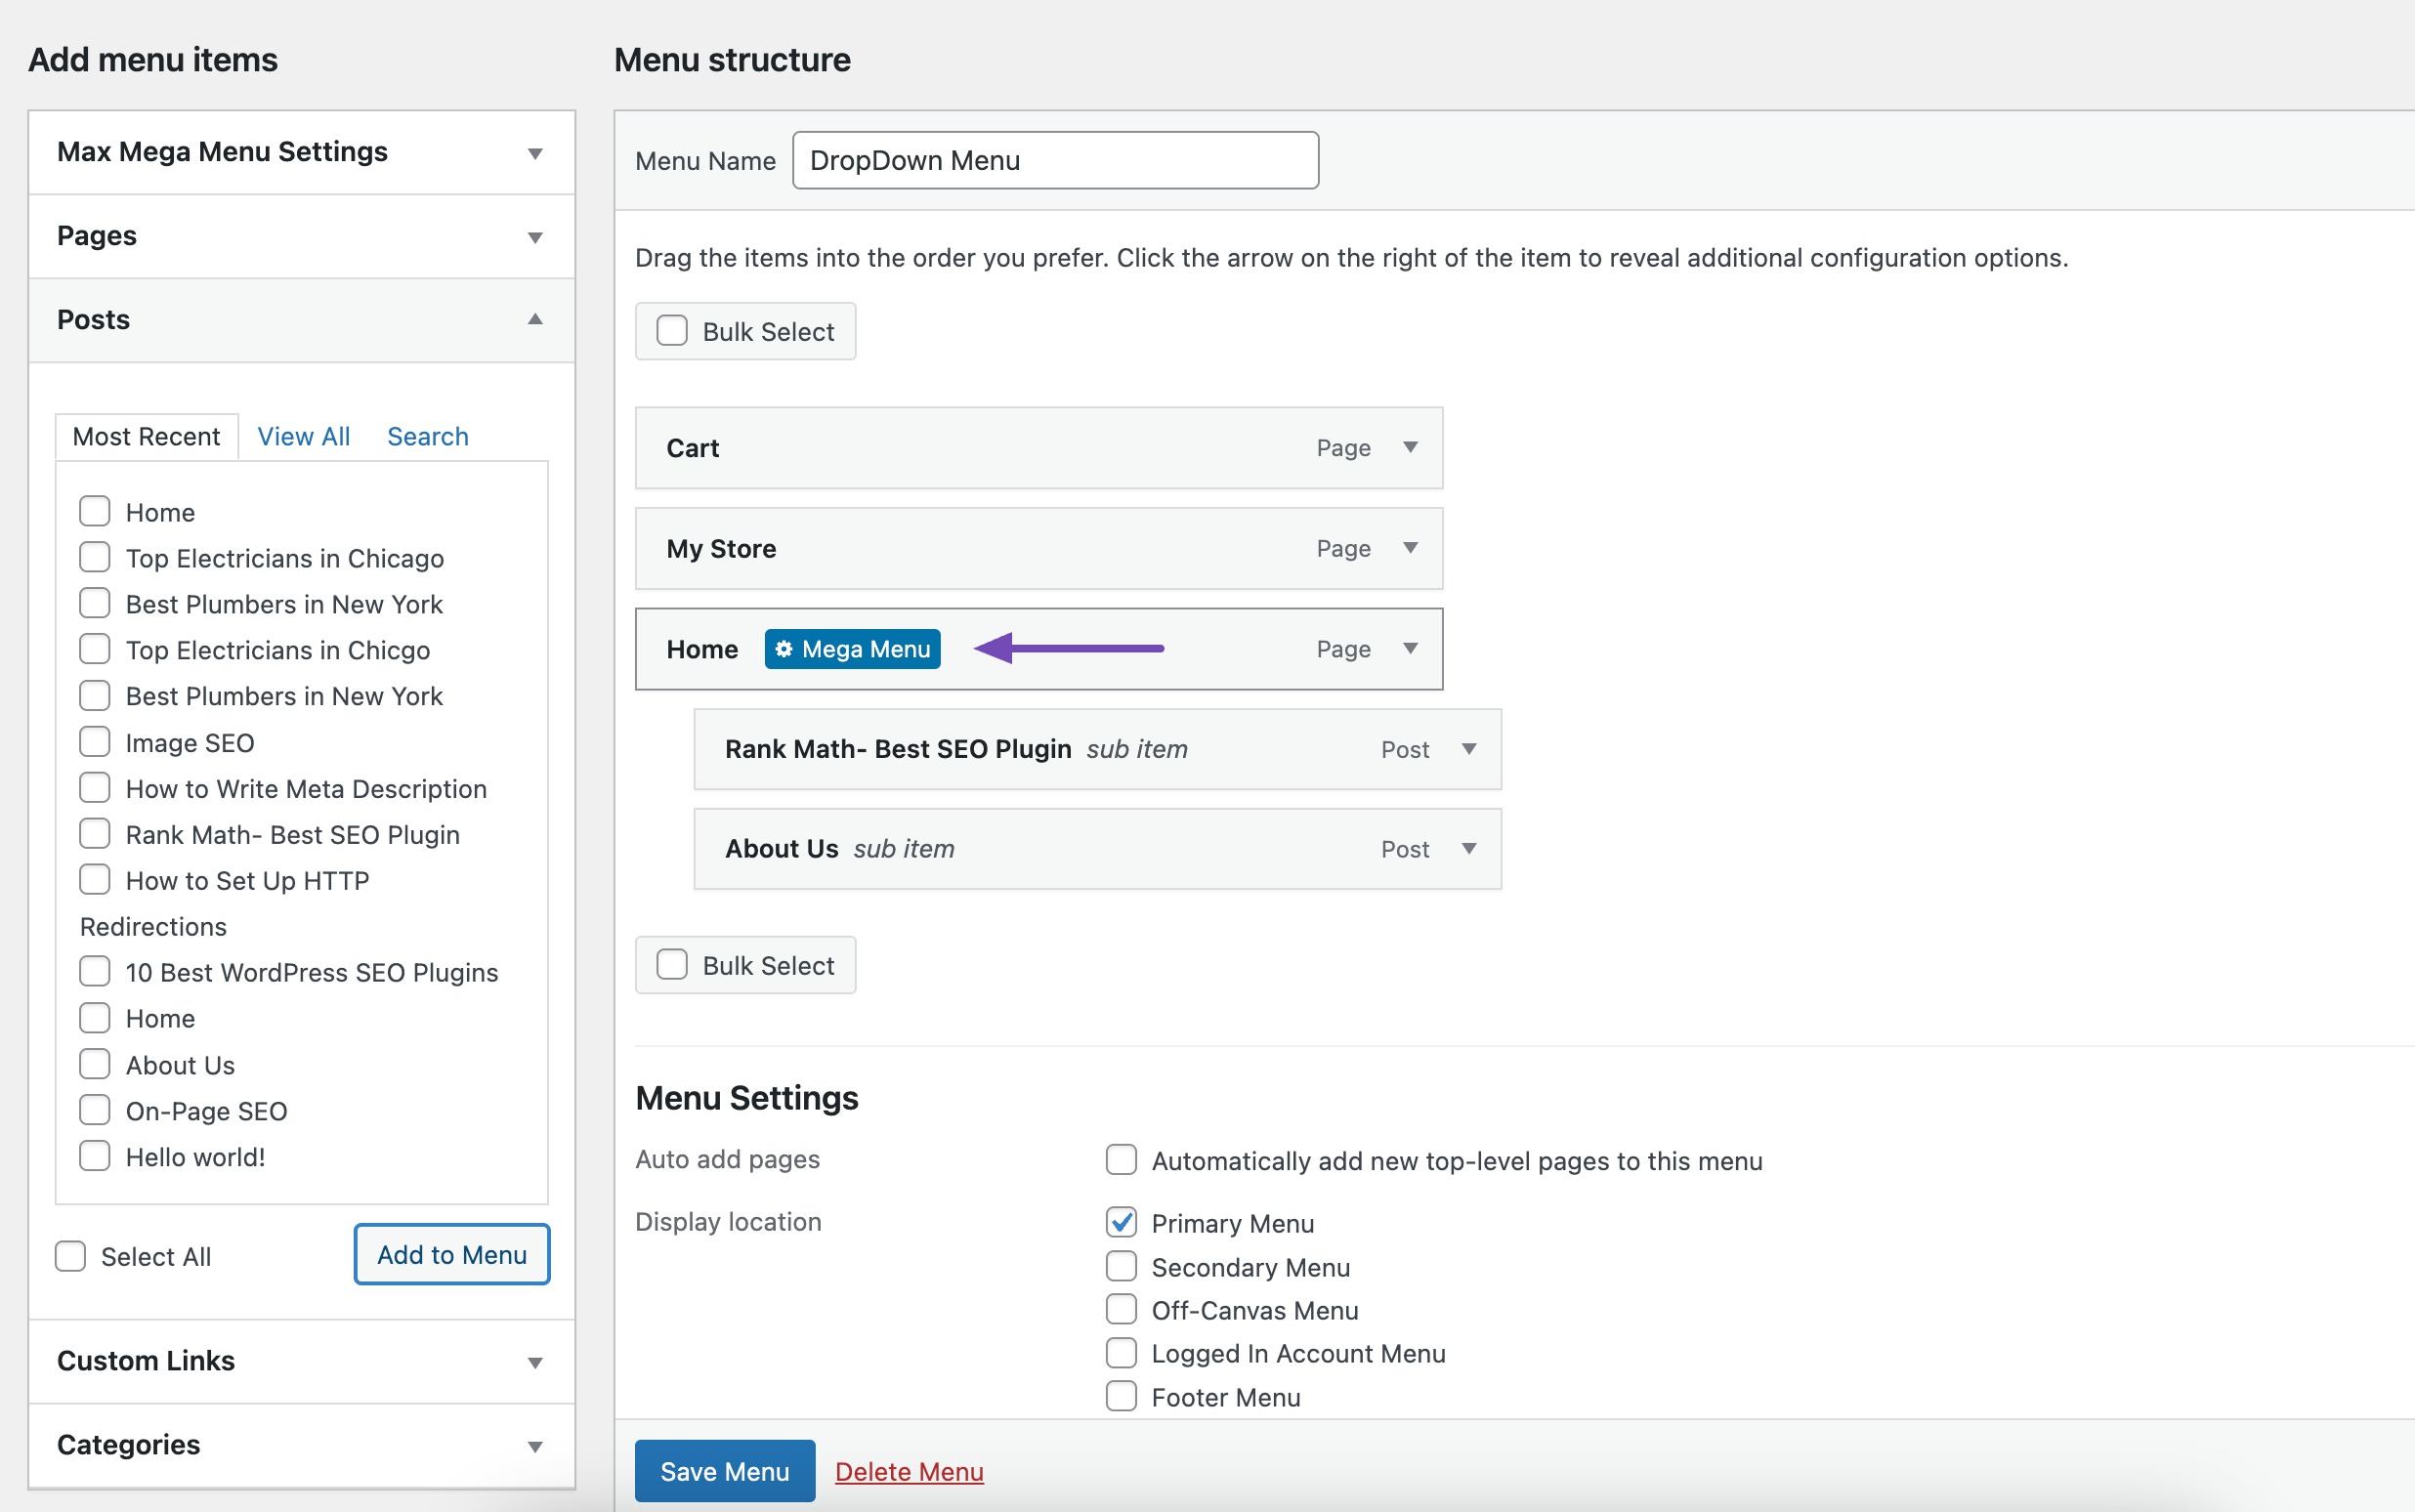
To begin, navigate to Appearance → Menus in your WordPress dashboard. If creating a new menu, enable Max Mega Menu Settings and click the Save button.

Then, add the desired pages, posts, categories, and product categories to the menu and drag and drop sub-categories under the main categories.
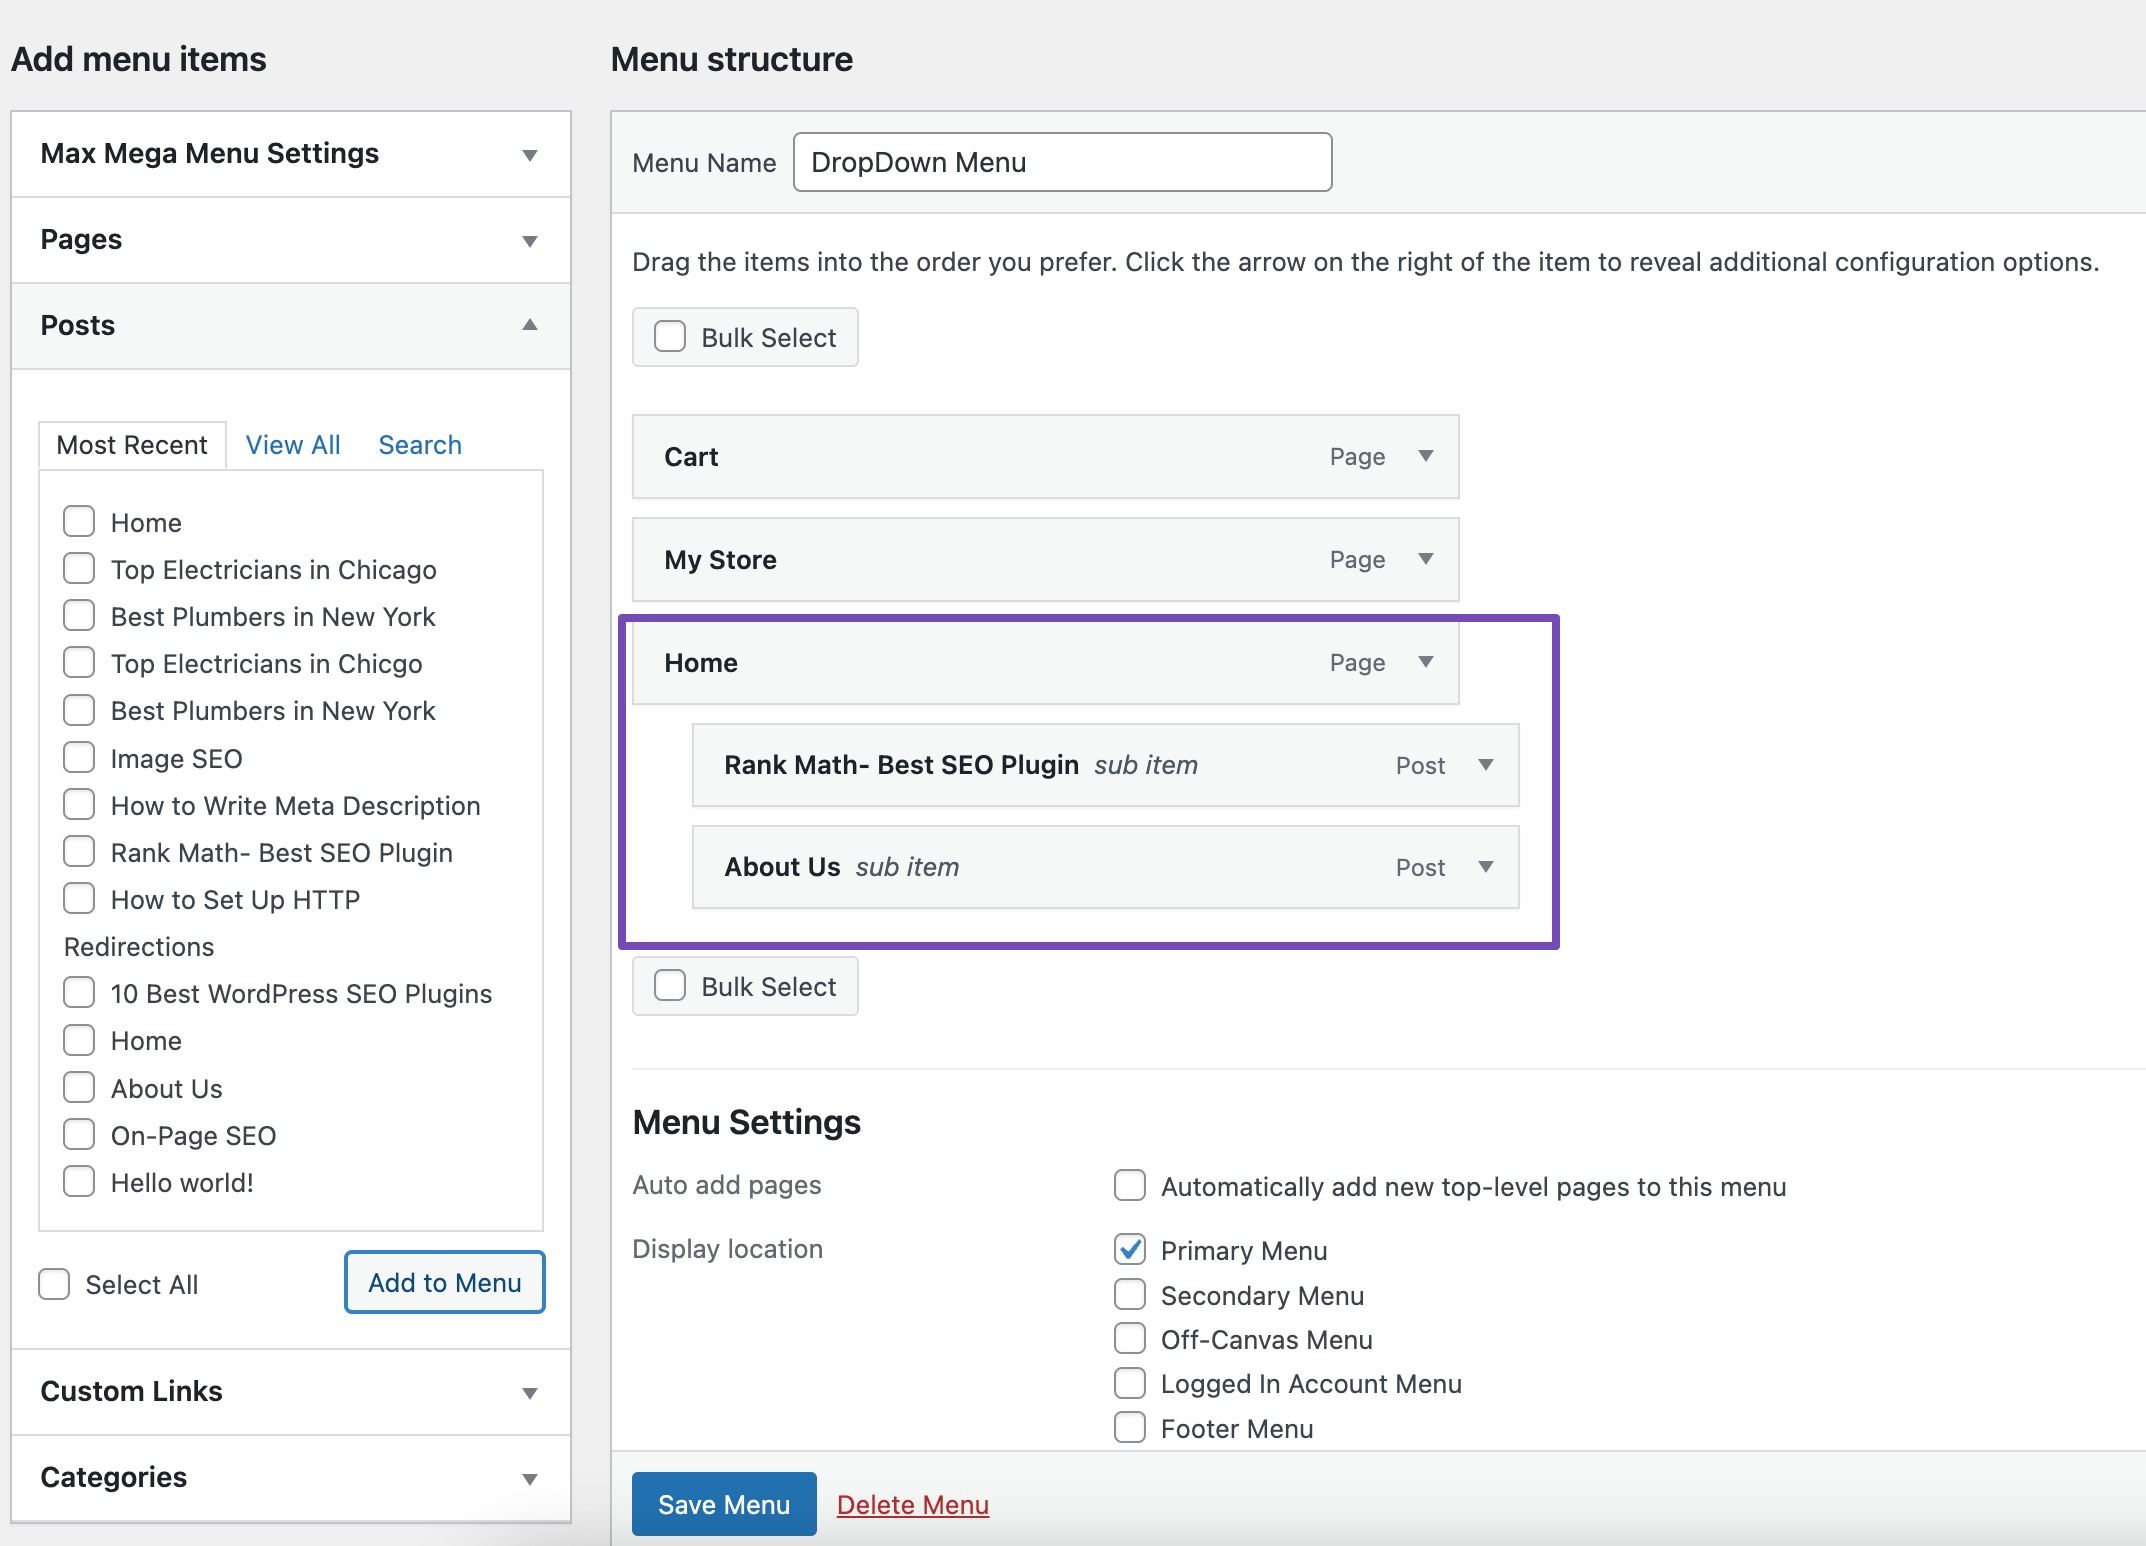
By default, the Max Mega Menu uses a flyout or dropdown menu style. To create a mega menu, hover over one of your pages and click the Mega Menu button.
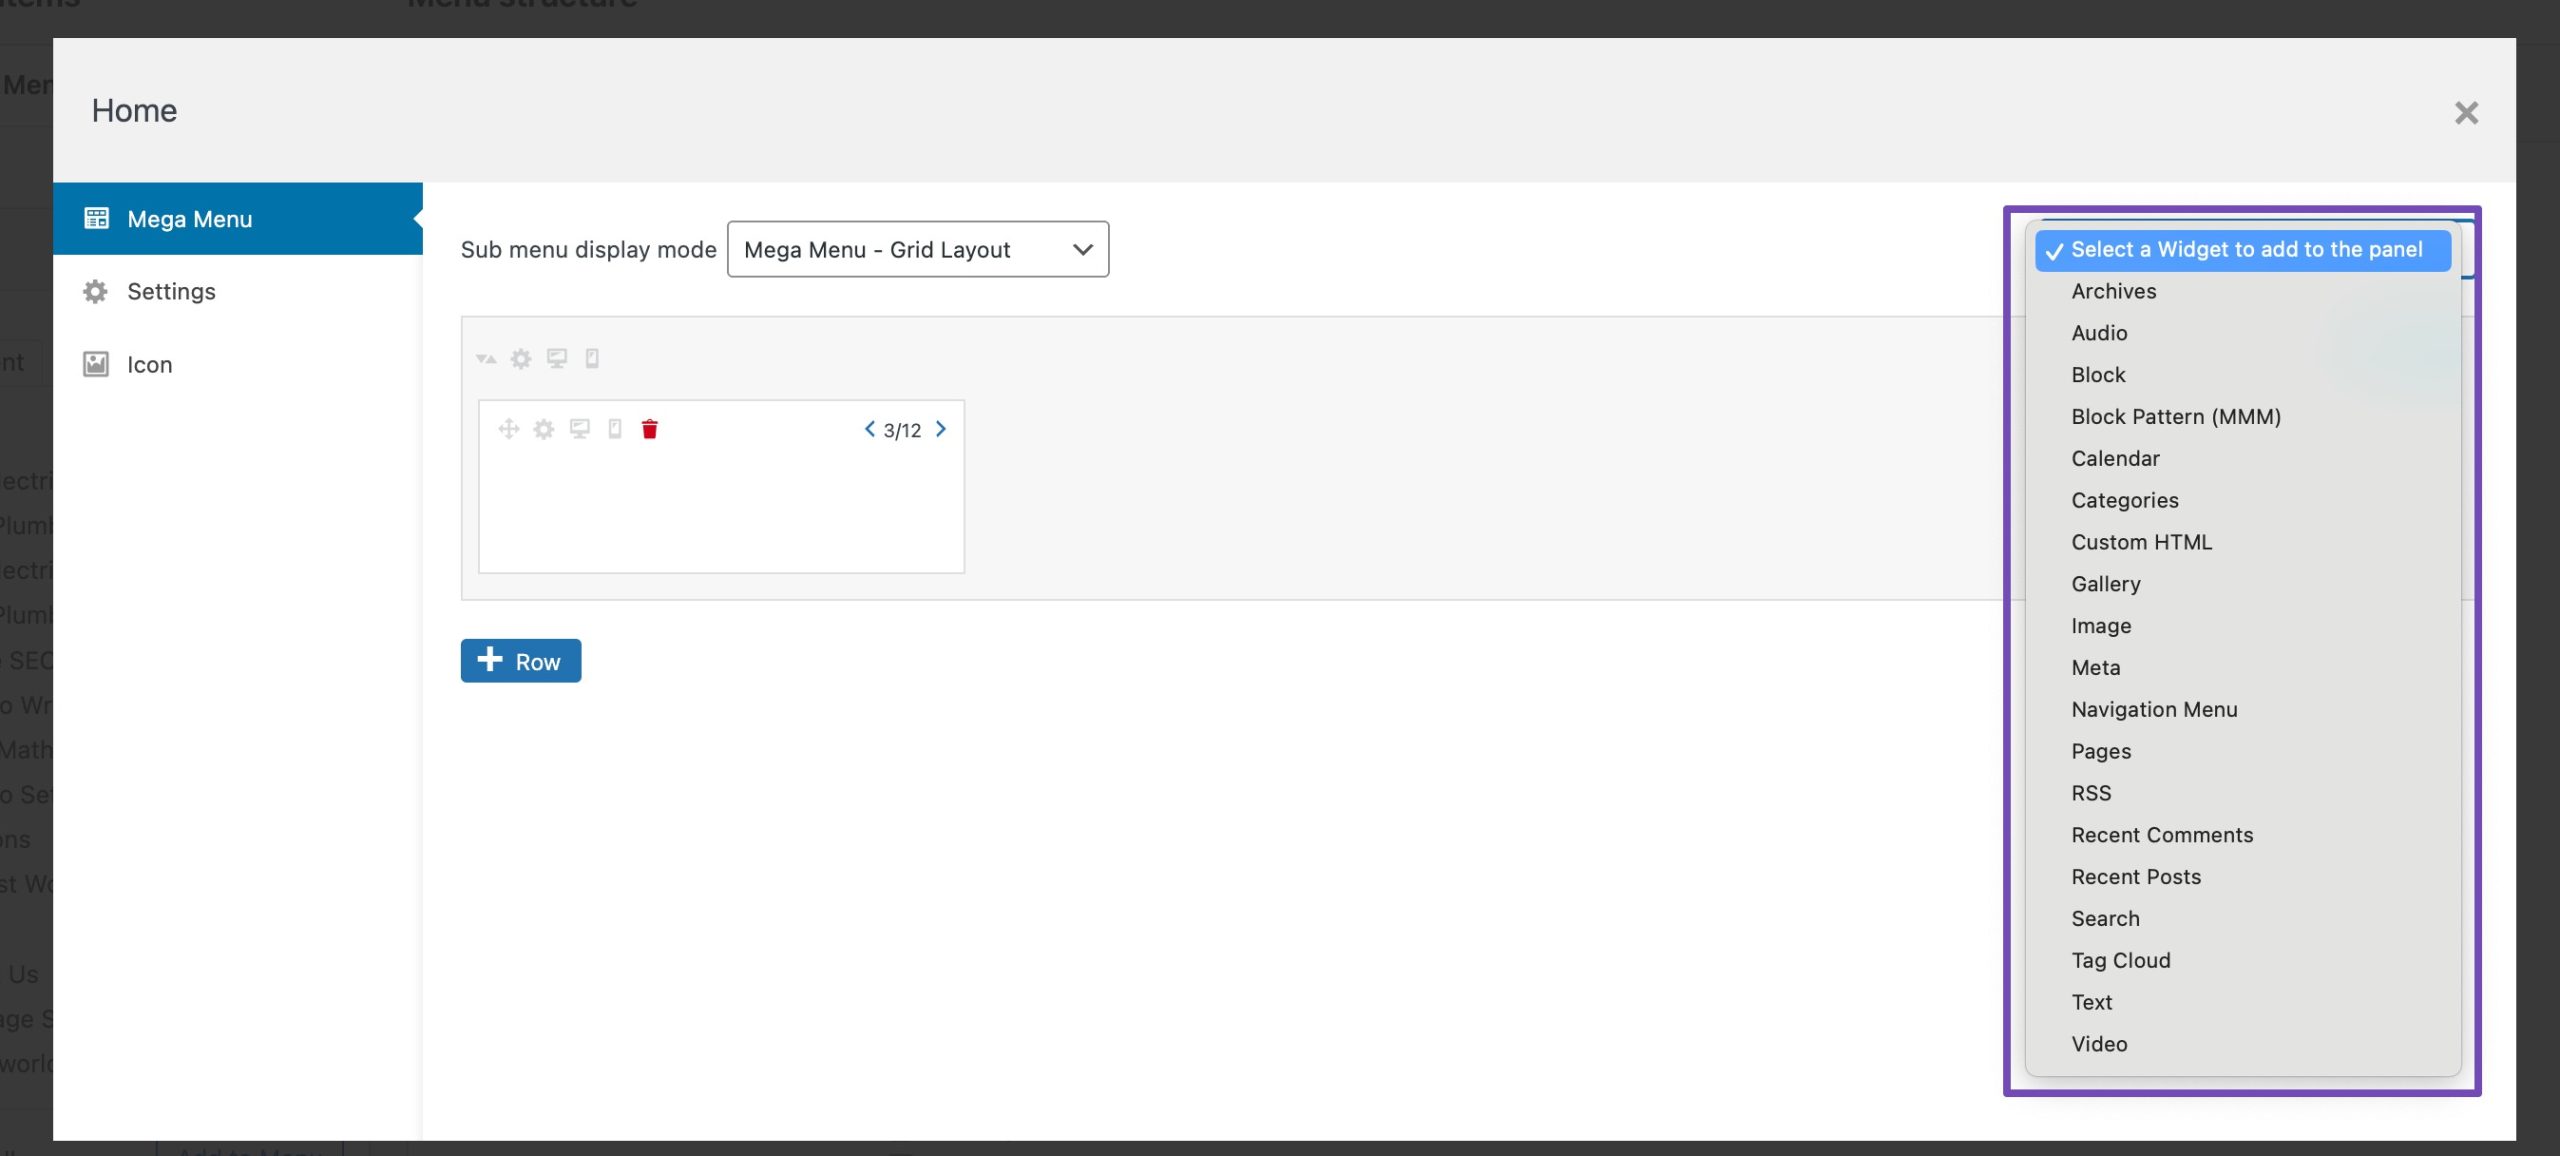
Choose between:
- Grid layout – for multi-column, multi-row structures
- Standard layout – for simpler but customizable dropdowns

Inside the Mega Menu editor, you can add a variety of widgets such as:
- Search bars
- Image galleries
- Calendars
- Videos and audio players
- Product filters
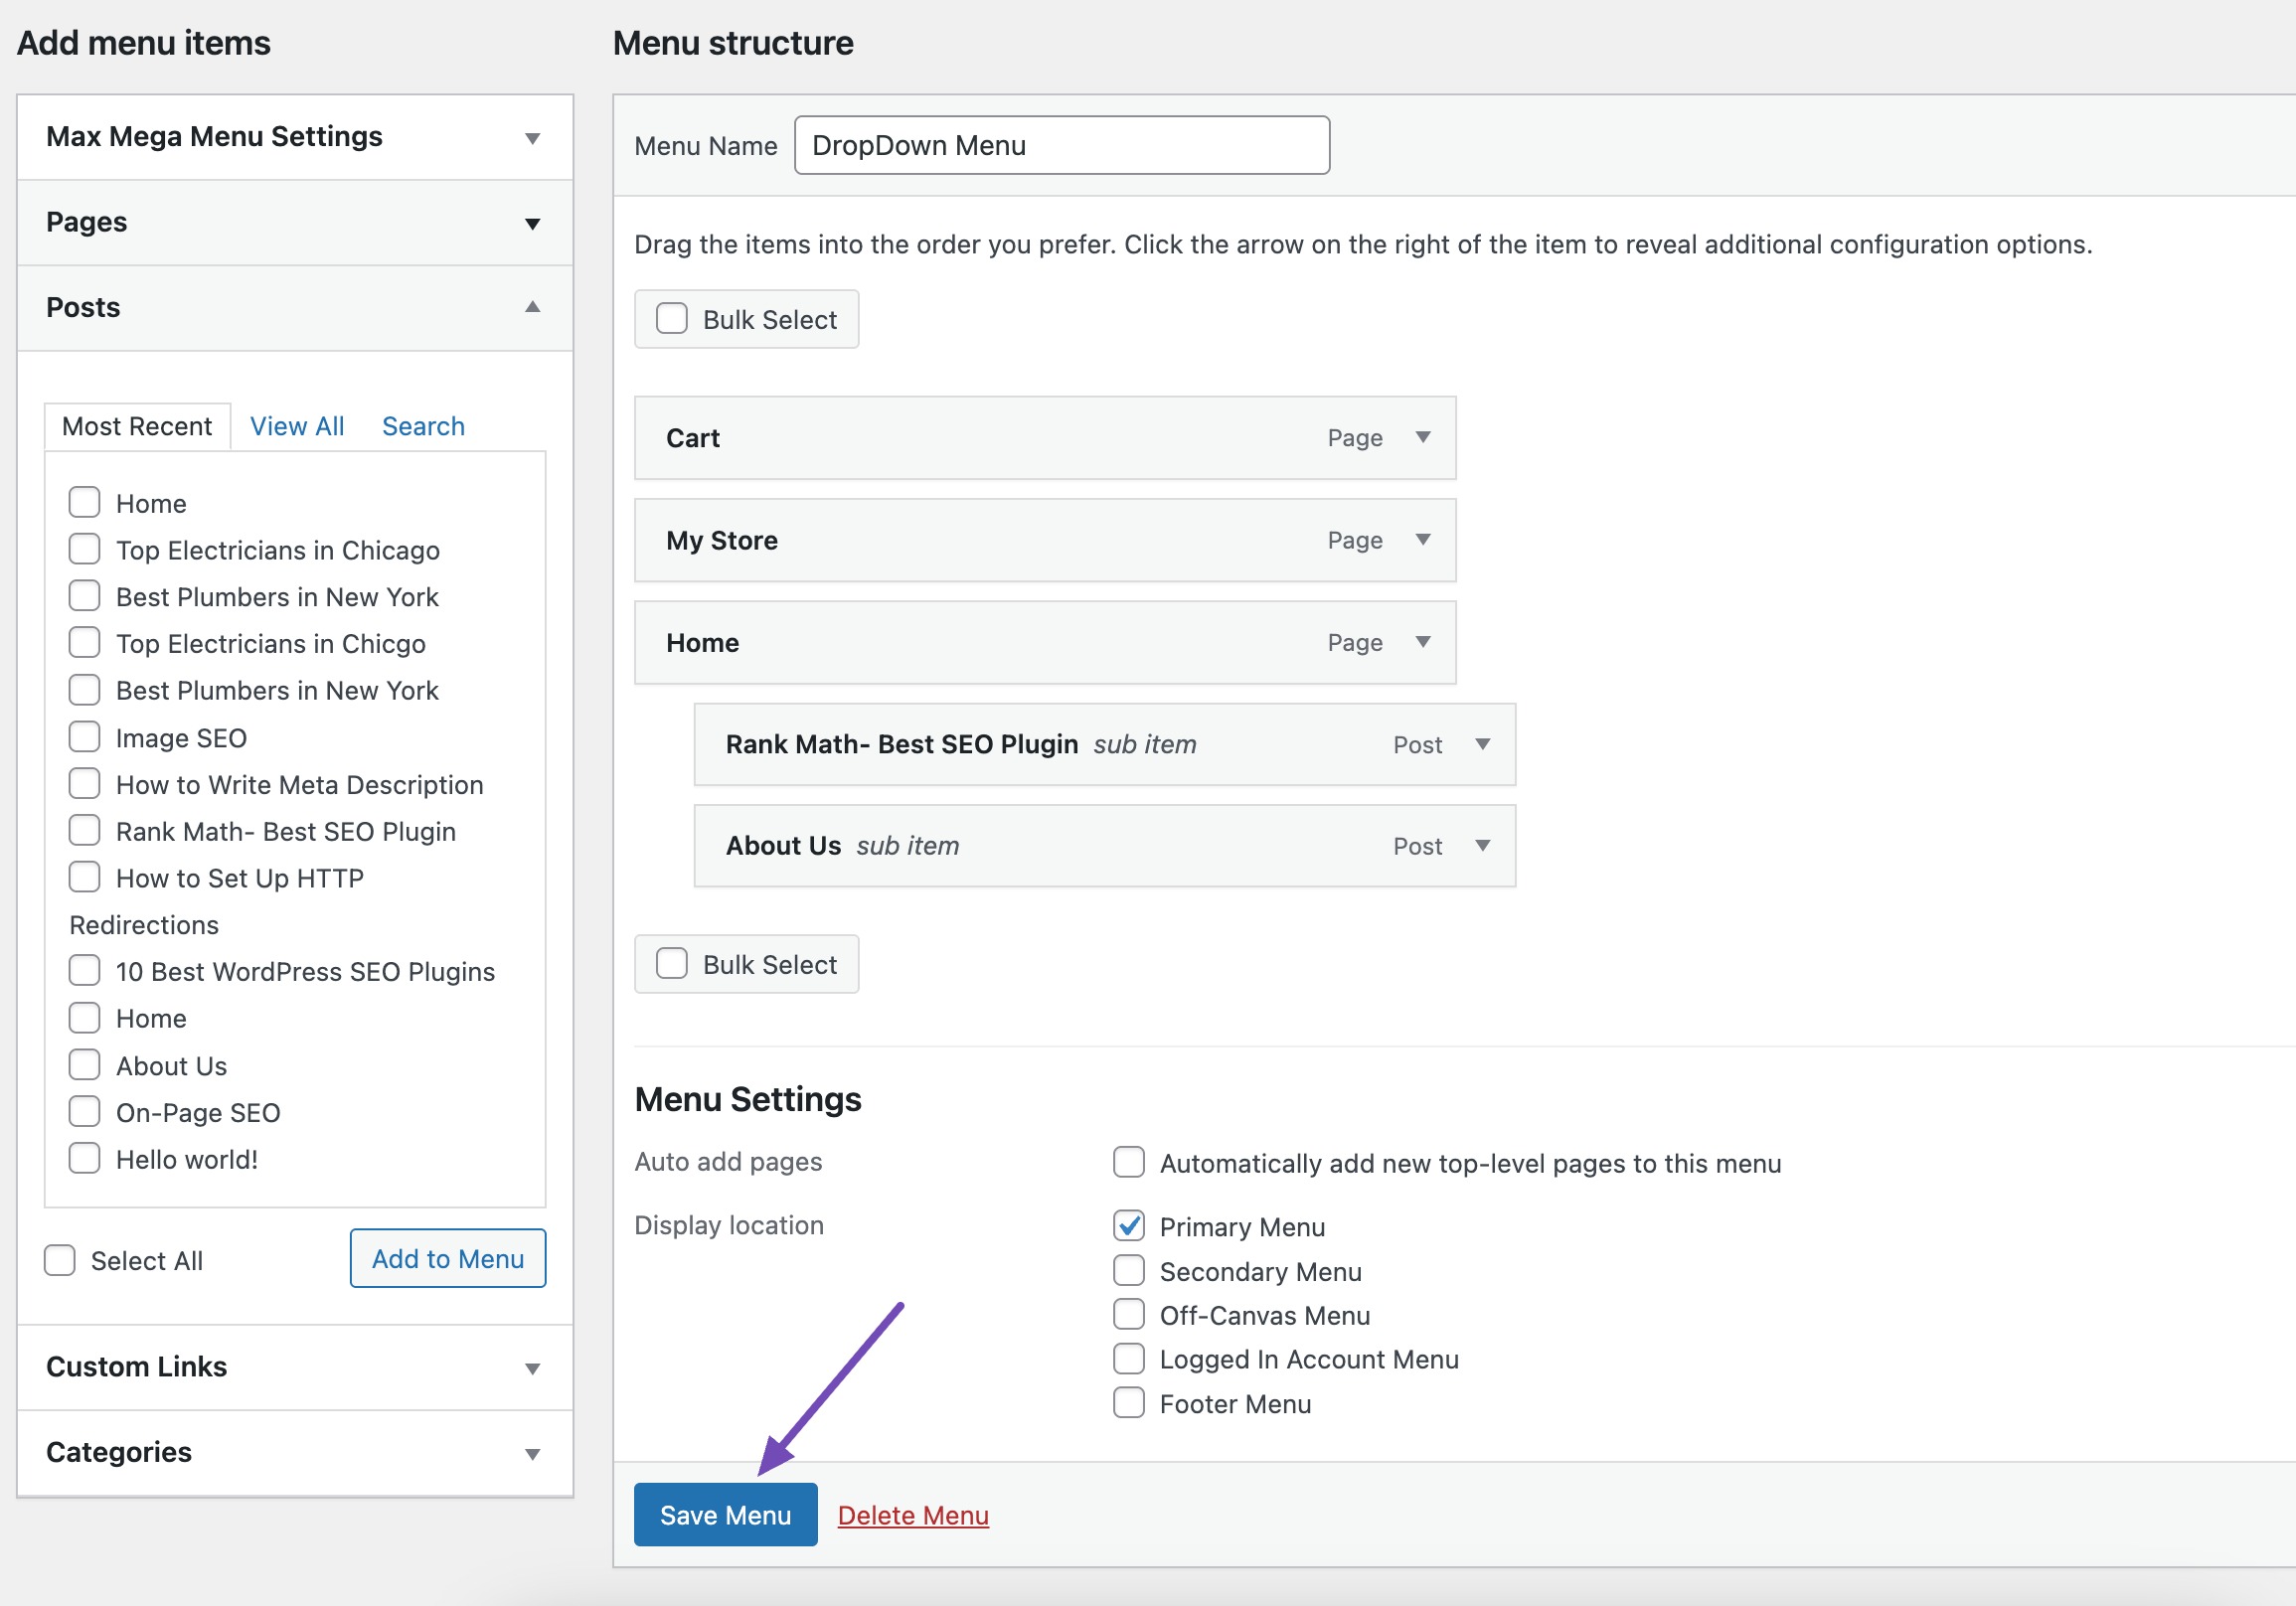
For better usability and visual interest, you can also assign icons to each menu item by visiting the Icon tab.
After configuring your content, styling, and layout, click the Save Menu button. Your mega menu will now be live on your site!
Take your time to explore the plugin’s settings. Starting with the theme and layout options will help you build a dropdown or mega menu that’s not only functional but also visually appealing to your visitors.
3.5 Using the Navigation Block in the Block Editor
The Navigation Block in the WordPress Block Editor offers a simple and flexible way to create and manage dropdown menus directly within your content.
Start by opening the page or post where you want to place your menu. Click the + button in the editor and search for Navigation. Select the Navigation Block to add it to your layout.
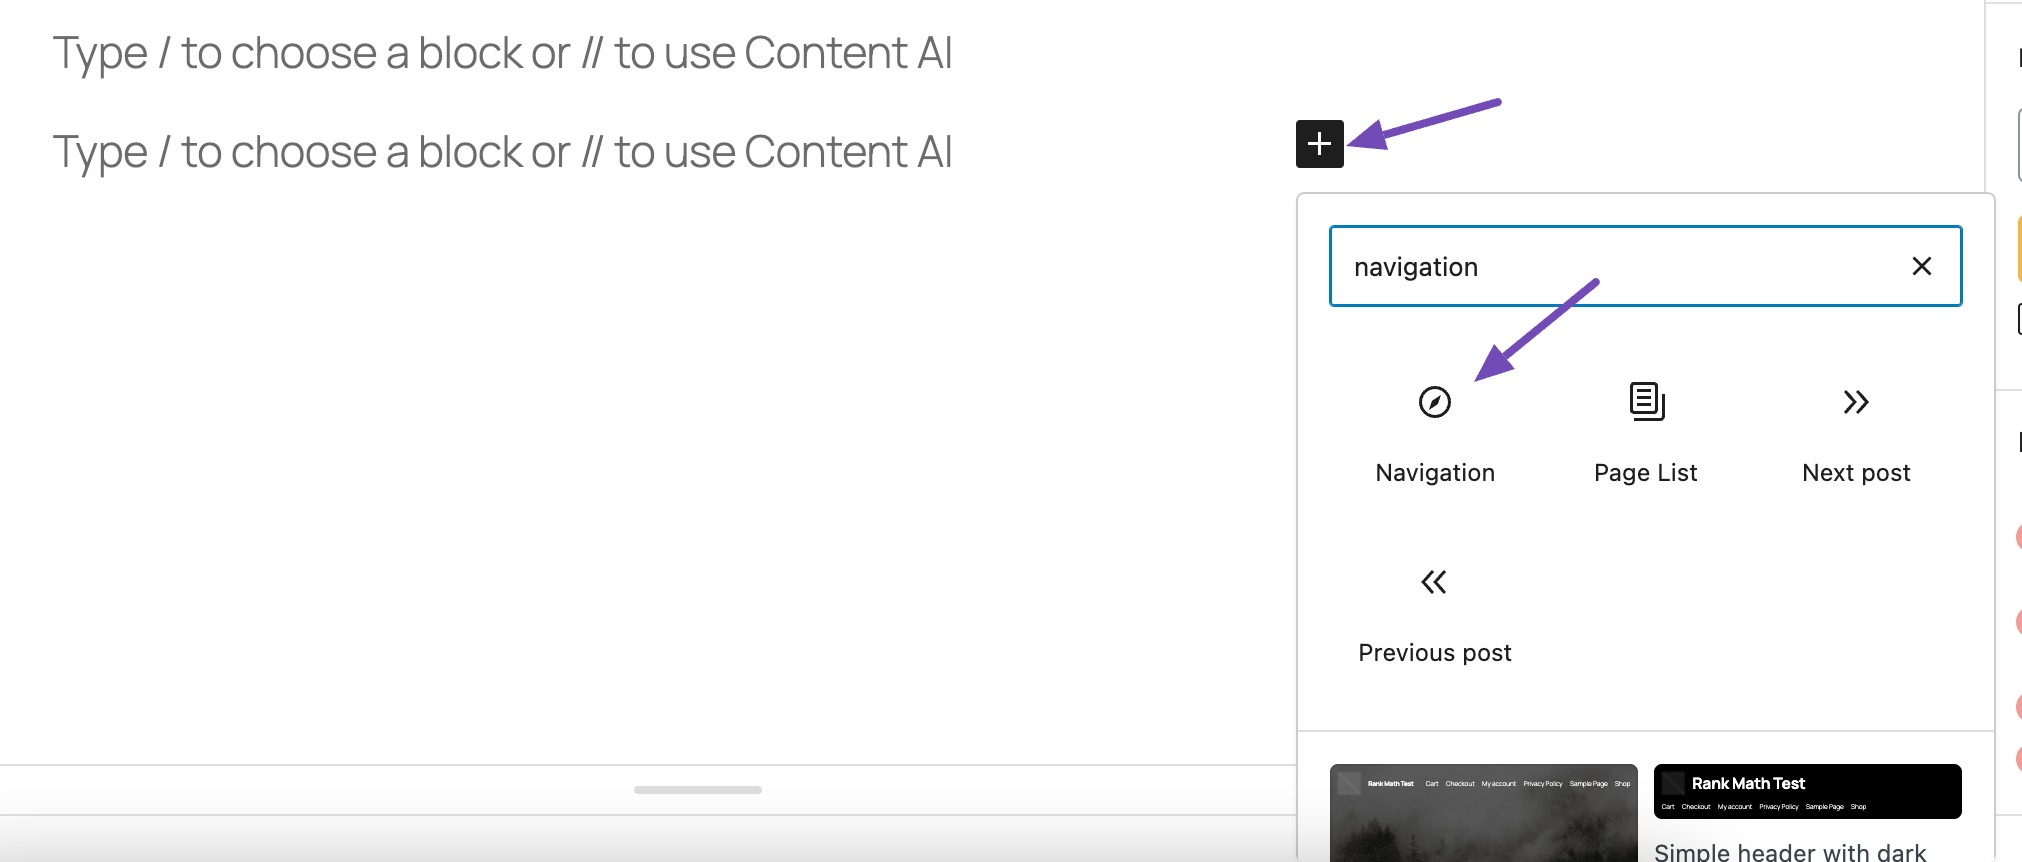
Once the block is added, you can begin adding menu items. These can include:
- Pages
- Posts
- Categories
- Custom links
Just click the + icon within the block to start adding items.
To create a dropdown menu, first add a primary menu item that will serve as the parent. Then, click on the menu item and select the option to add a sub-item.
This automatically nests the new item under the parent, forming a dropdown structure. You can easily rearrange or re-nest items using the drag-and-drop functionality built into the block.
In the block settings (usually on the right sidebar), you’ll find various styling options. You can:
- Adjust font style and size
- Change colours (text, background, hover)
- Modify spacing and alignment
- Choose horizontal or vertical layout options
These options make it easy to match the menu with your site’s overall design.
Once you’re happy with the structure and appearance, save your changes. Then, preview your page on both desktop and mobile devices to make sure the dropdown behaves correctly and looks great across screen sizes.
4 SEO Best Practices for Creating Dropdown Menus
1. Use Text-Based Menus Instead of JavaScript-Only Menus:
Search engines struggle to crawl menus that rely entirely on JavaScript or AJAX. Use standard HTML (which WordPress generates by default) to ensure your dropdown links are crawlable. If search engines can’t read your menu structure, important pages may not get indexed.
2. Ensure All Links Are Clickable and Crawlable
Each link in your dropdown menu should lead to a real, live page, no broken or placeholder links. Also, avoid using # for parent items unless necessary. Even if a parent menu item doesn’t lead to a full page, consider linking it to a category archive or landing page instead.
3. Organize Menus Based on Site Hierarchy
Structure your dropdown menus to reflect your site’s content architecture. Use parent items for broader categories and child items for more specific topics. A clear structure helps both users and search engines understand how your content is organized.
4. Include Important Pages in the Menu
Make sure your most valuable pages, such as services, top-performing blog categories, or product collections, are included in the dropdown menu. This improves internal linking, which can boost rankings for those pages.
5. Don’t Overload with Links
While dropdowns are great for organizing content, avoid stuffing them with too many links. It can overwhelm users and dilute SEO value. Limit to 5–7 items per drop-down where possible.
6. Monitor Crawl and Indexing
After adding or updating menus, check your site in Google Search Console to ensure your dropdown-linked pages are being crawled and indexed. Look for crawl errors or coverage issues related to your navigation structure.
7. Make It Mobile-Friendly
Ensure your dropdown menus are easy to navigate on mobile devices. Use touch-friendly spacing, and consider using collapsible menus on smaller screens.
5 Frequently Asked Questions
Can I add dropdown menus to any WordPress theme?
Yes, most WordPress themes support dropdown menus. However, it is essential to choose a theme explicitly mentions dropdown menu support in its features or documentation.
How can I create mega menus in WordPress?
To create mega menus, you can use plugins like Max Mega Menu. Install and activate the plugin, then customize your menu to enable the mega menu feature.
What are some best practices for creating dropdown menus?
Best practices include keeping the menu structure simple and intuitive, using descriptive labels for menu items, ensuring accessibility for all users, and regularly testing menu functionality across different devices and screen sizes.
Is it possible to create multi-level dropdown menus?
WordPress allows you to create multi-level dropdown menus by setting parent and child menu items. This hierarchical structure lets you organize your menu items into multiple levels for improved navigation.
Do I need any coding skills to add drop-down menus to WordPress?
No, you don’t need coding skills. WordPress provides a user-friendly interface for adding and customizing menus, making it accessible to beginners.
How do I ensure my dropdown menu is mobile-friendly?
Most modern WordPress themes are responsive, automatically adjusting to different screen sizes, including mobile devices. When creating your dropdown menu, ensure it displays correctly on mobile devices by testing it across various screen sizes.
What if my dropdown menu doesn’t appear as expected?
If your dropdown menu doesn’t appear correctly, double-check the menu settings. Ensure you’ve correctly assigned items as parent and child items and that your theme supports dropdown menus. If issues persist, consult your theme documentation or contact the theme’s support team for assistance.
Can I add animations and effects to dropdown menus?
Yes, you can add animations and effects to dropdown menus by checking your theme options or customization settings. Some themes offer built-in features for adding animations, while others may require additional plugins or custom CSS.
Can I add an image or icon to a dropdown menu item?
Yes, you can add images or icons to dropdown menu items using custom CSS or plugins that support this feature. Some themes may also provide built-in options for adding images or icons to menu items.
How can I optimize dropdown menus for SEO?
To optimize dropdown menus for SEO, ensure that menu items use descriptive and relevant keywords. Keep the menu structure logical and easy for users and search engines to navigate.
6 Conclusion
Dropdown menus are a powerful and user-friendly addition to any WordPress website.
If you’re just getting started, I recommend beginning with the default menu editor or the Customizer for a simple and visual approach. As you get more confident, you can explore more advanced options like mega menus or navigation blocks.
Remember, your dropdown menu isn’t just about looks; it plays a key role in user experience and SEO. So take your time, structure it thoughtfully, and make sure it works well on both desktop and mobile.
Now it’s your turn. Choose the method that works best for you, start building, and give your visitors a smooth and organized navigation experience. You’ve got this!
If you like this post, let us know by Tweeting @rankmathseo.