Your website’s logo is one of the most important elements of your brand identity; it’s often the first thing visitors notice.
If you’re running a WordPress site, changing your logo is simple and doesn’t require advanced technical skills.
You might want to update your existing design, rebrand with a fresh look, or make small adjustments, and WordPress gives you several easy options to upload and customize your logo.
So, are you ready to change the logo and make a long-lasting impression? Let’s get started.
Table Of Contents
1 Why is a Website Logo Important?
Your logo is more than just a graphic; it’s the face of your brand online.
When visitors land on your website, your logo is often one of the first things they notice, and it instantly communicates who you are and what your brand represents.
A well-designed logo helps you:
- Build trust: A professional logo makes your website look credible and reliable.
- Create recognition: When visitors see your logo, they immediately connect it with your business, products, or services.
- Stand out from competitors: A unique logo helps you differentiate your brand in a crowded market.
- Strengthen consistency: Displaying your logo across your site and other platforms builds your brand identity.
By giving your website a clear and memorable logo, you make it easier for visitors to remember you and come back in the future.
2 How to Change the Logo in WordPress
You can easily change the logo in WordPress, which gives your site a fresh, professional look. You can do this using the default WordPress theme or through the Customizer if you’re using a different theme.
2.1 Adding a Logo to WordPress Default Theme
WordPress has a default theme, the one you’ll see once you’ve installed WordPress.
To add a logo to the default block based theme, navigate to Appearance → Editor from your WordPress dashboard, as shown below.

The editor will redirect you to your website homepage. It’ll also display the design templates you can customize on the left side of the screen.
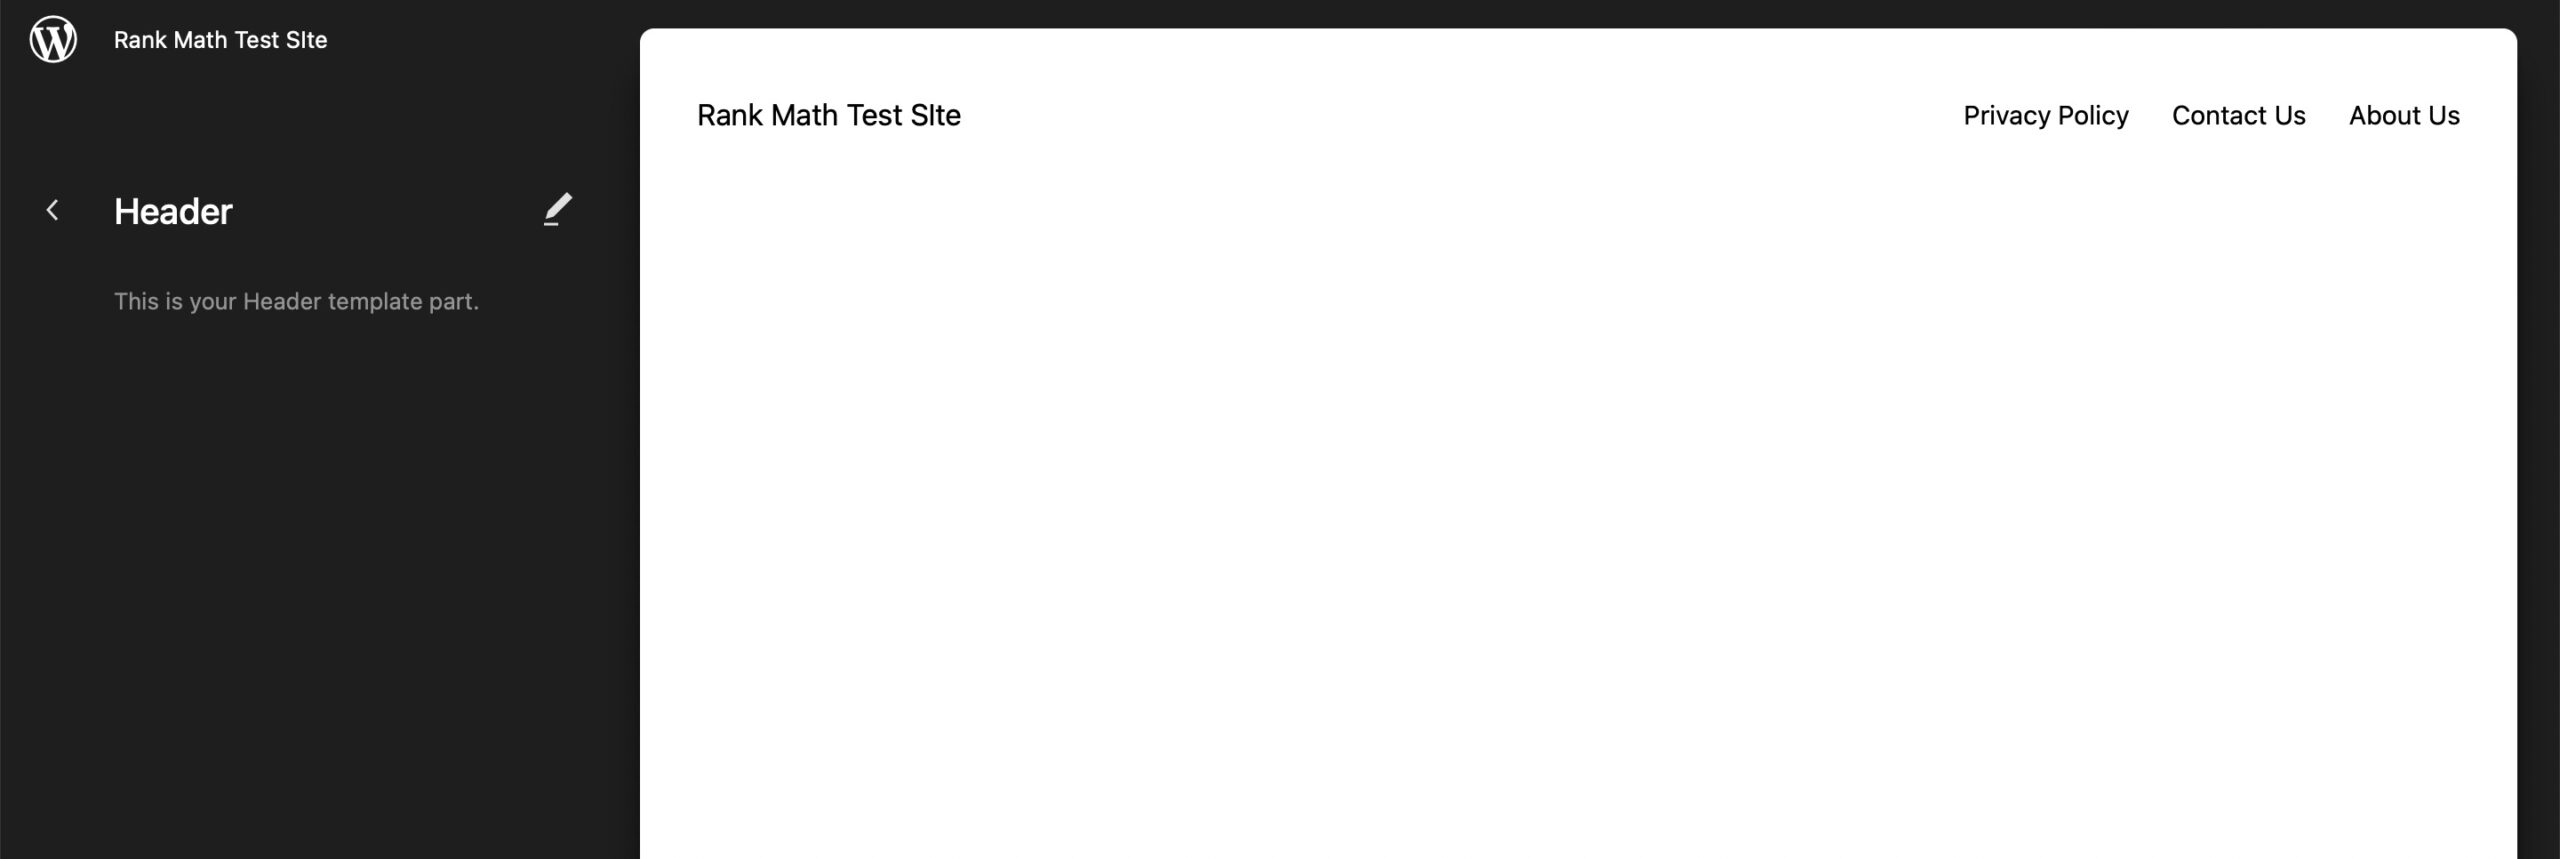
Next, navigate to Patterns → Header, as shown below.
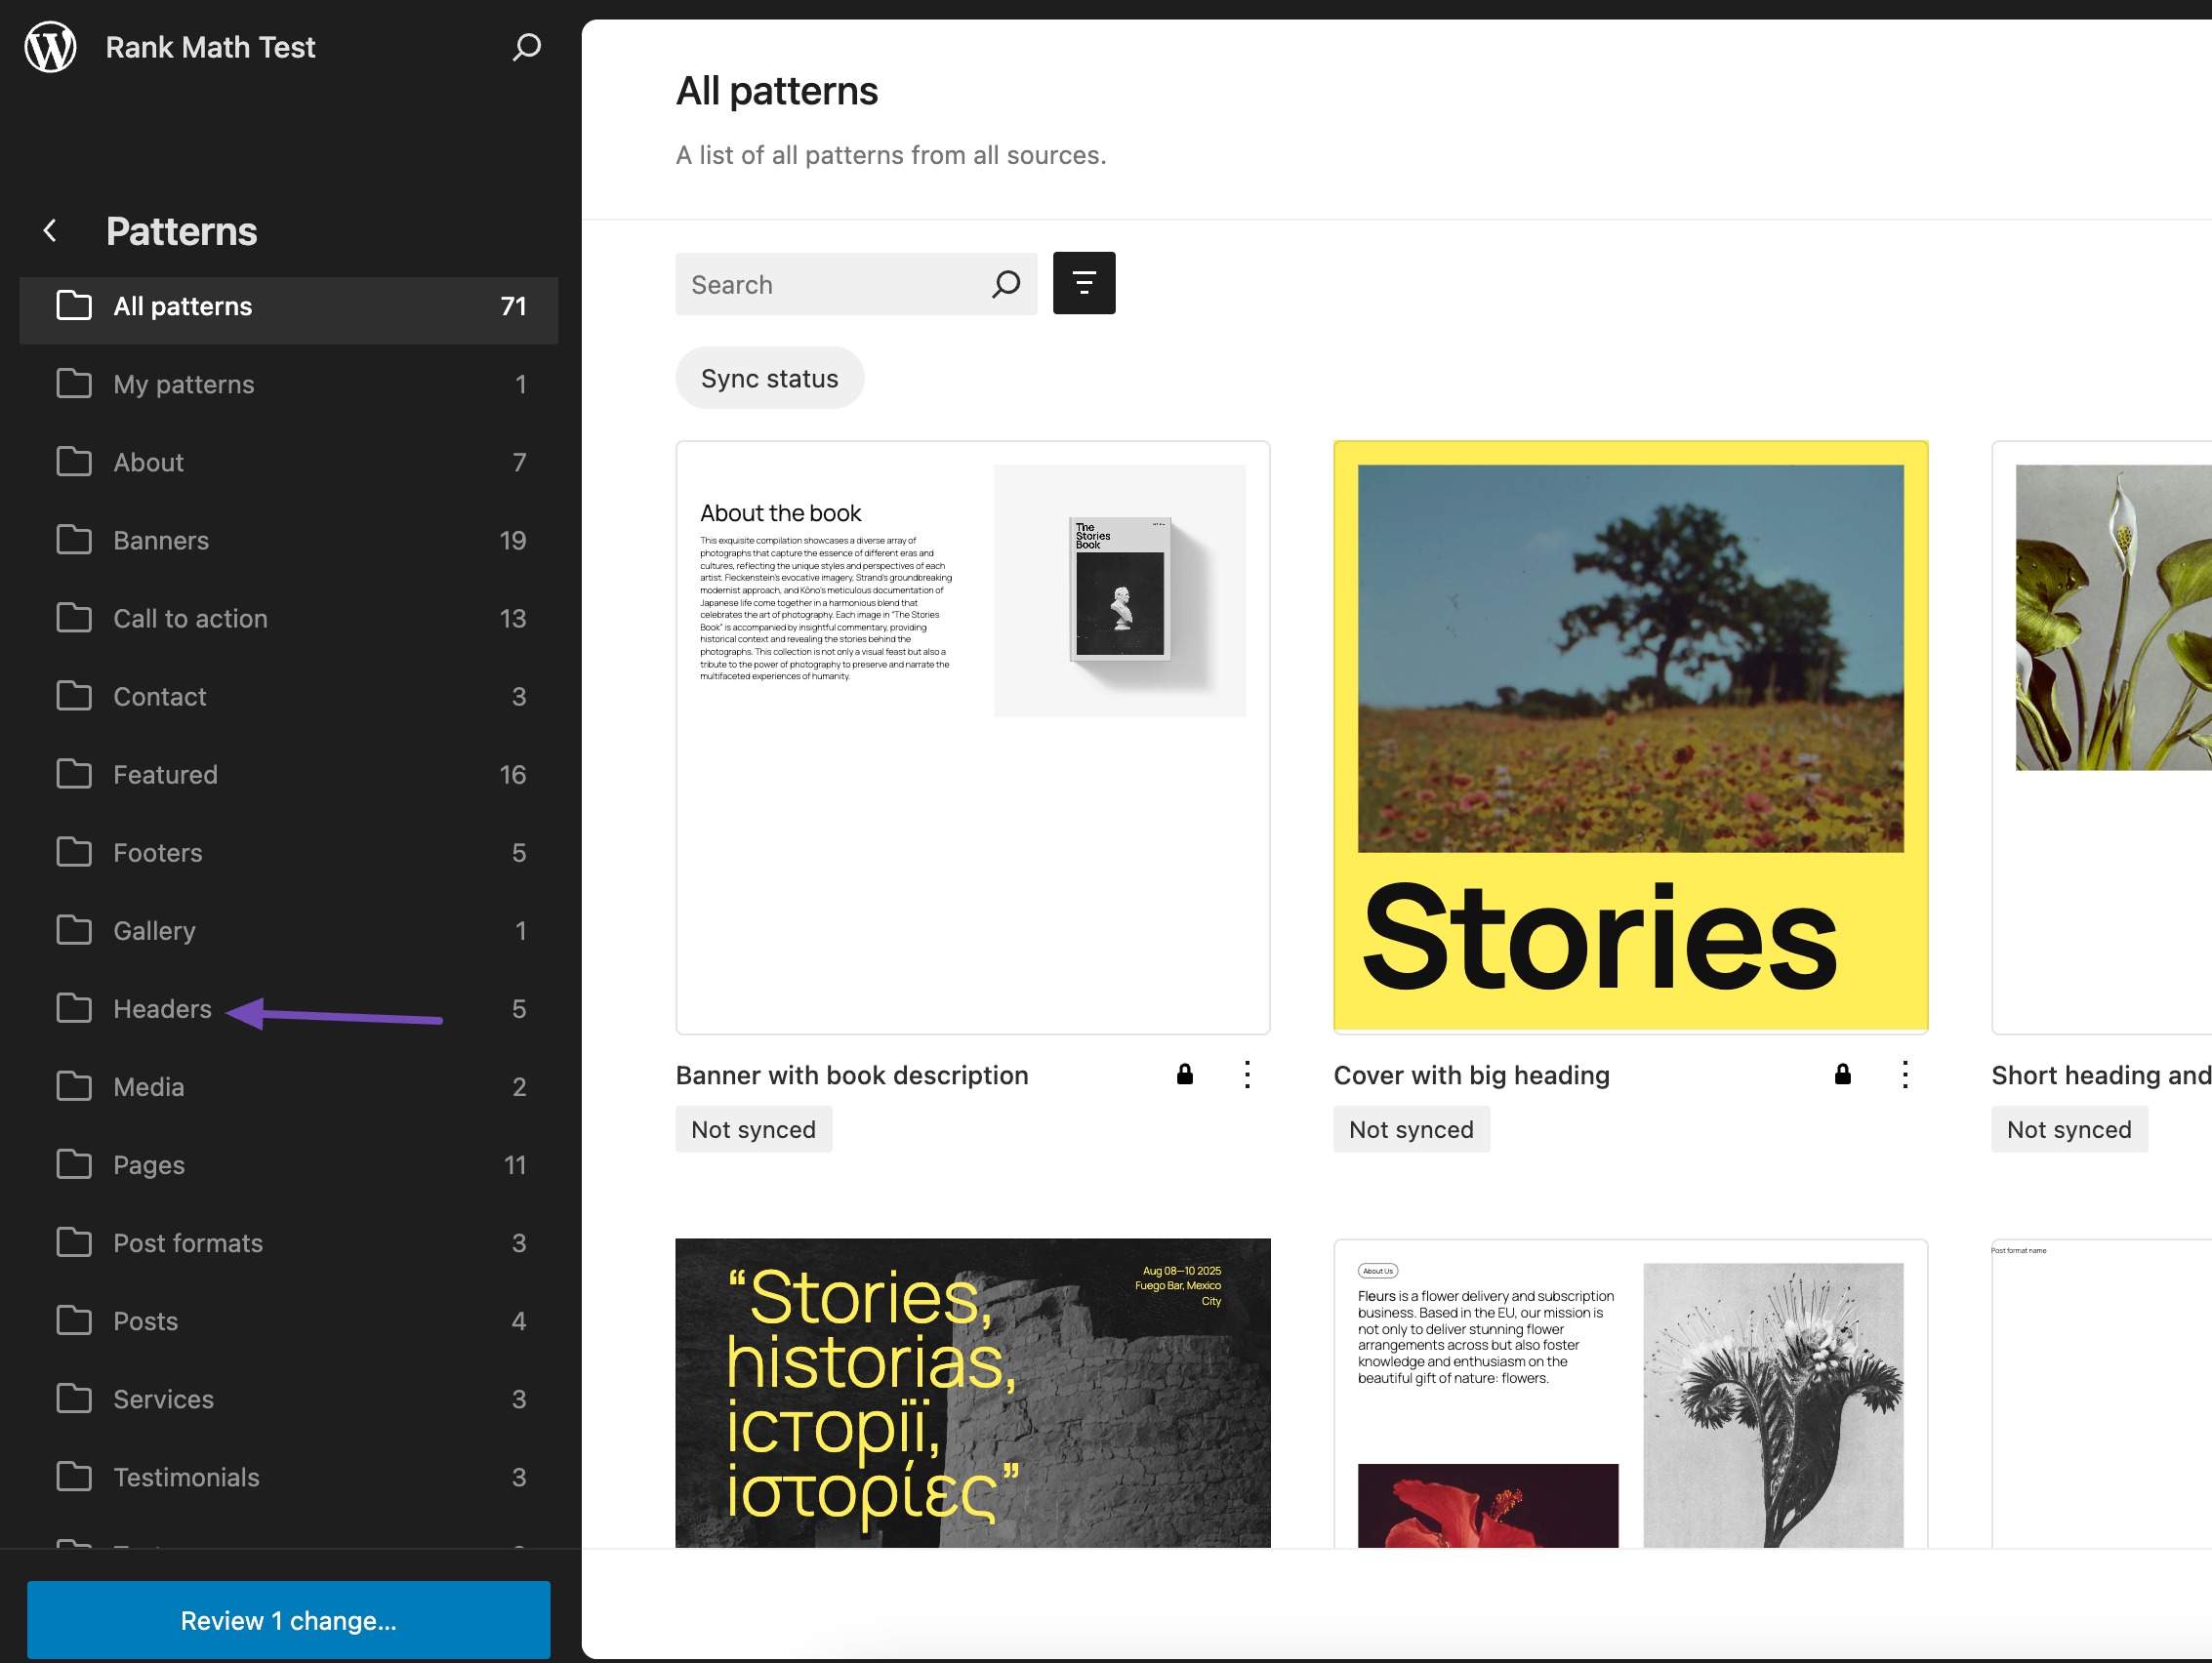
It will open your header as a standalone element in the block editor.
To add a logo, click on your site title and click on the location icon, as shown below.

Proceed and select the Site Logo block.
Next, click the upload icon to upload your site logo from your media or local computer files. By default, the WordPress editor will crop your logo if it is not square and link it to your home page.
Once done, click on the Save button to update the changes.
2.2 Change the Logo Using WordPress Customizer
If you do not wish to use the default WordPress themes, install and activate a WordPress theme that supports Customizer via the WordPress dashboard.
Next, navigate to Appearance → Customize from your WordPress dashboard, as shown below.
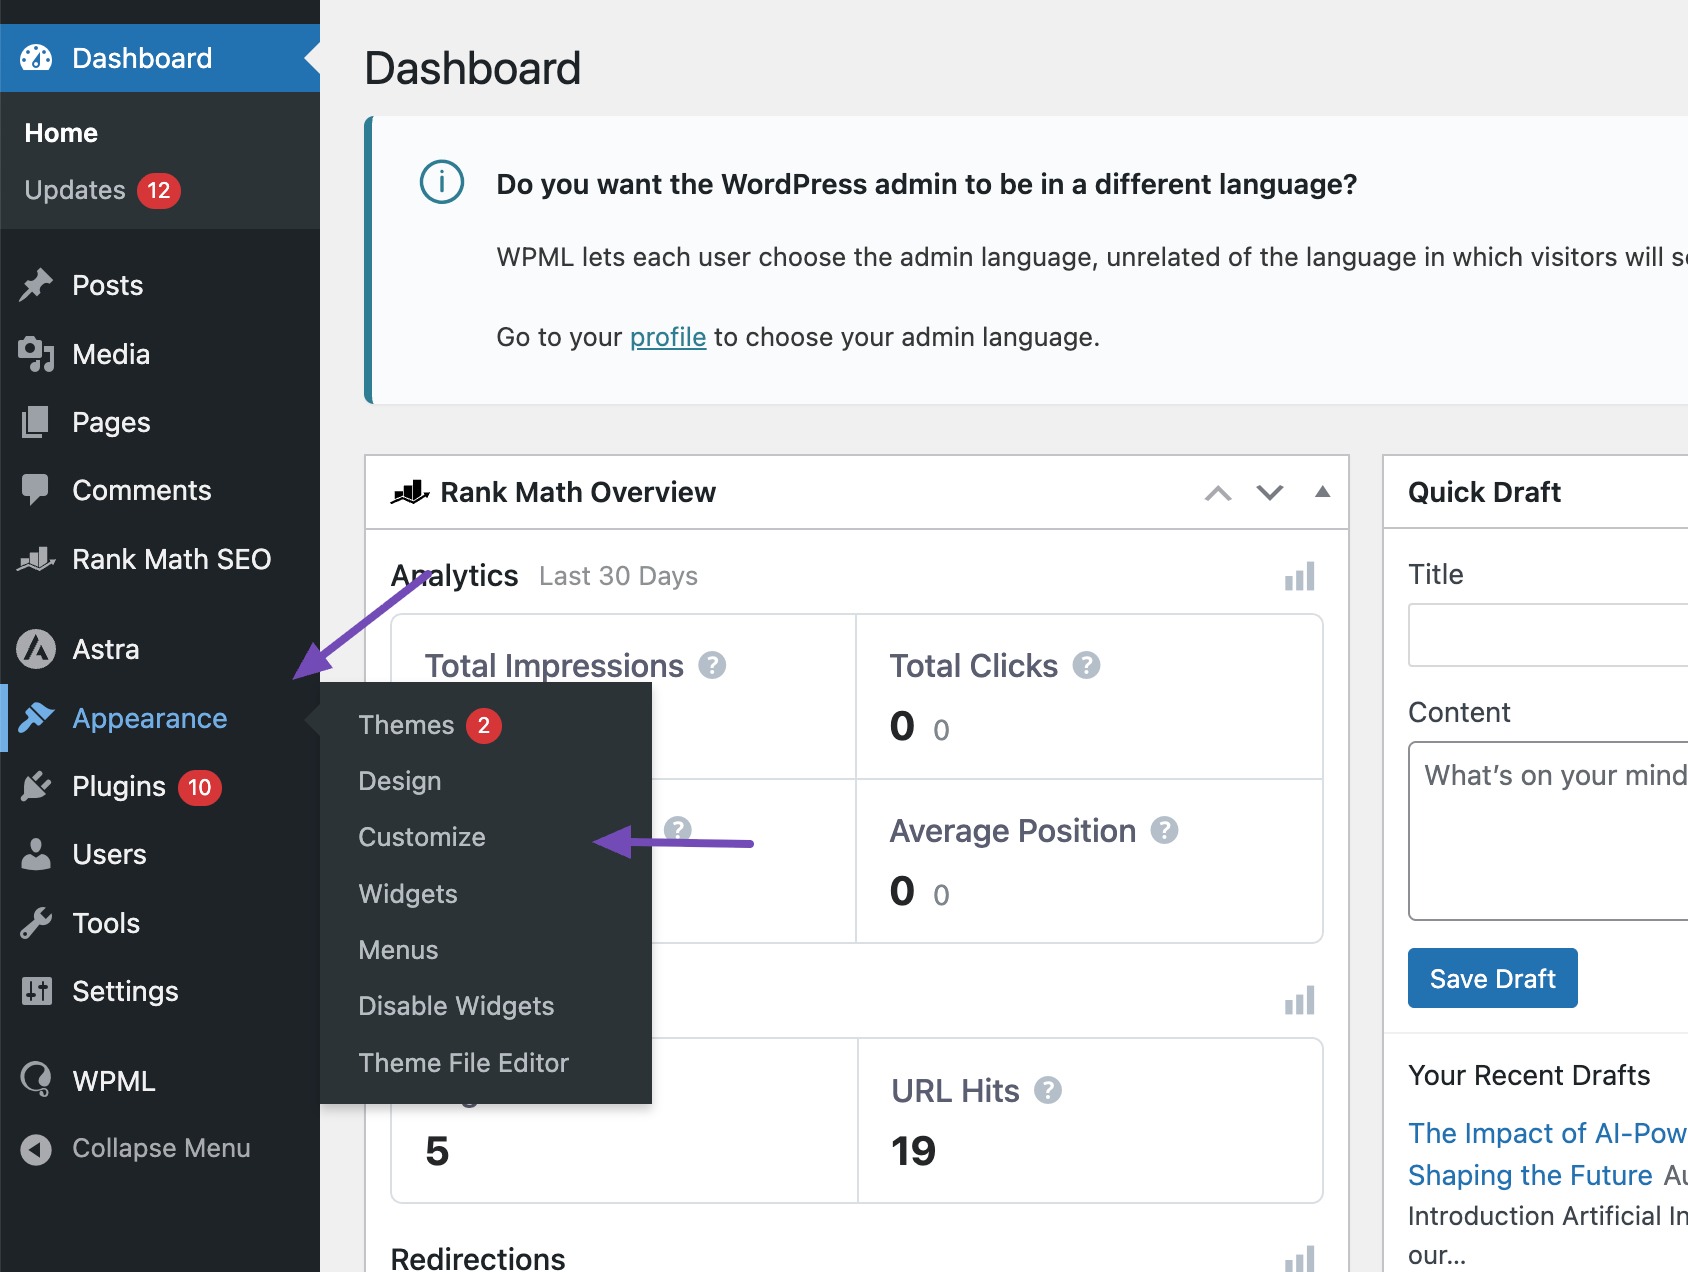
This will launch the WordPress Customizer.
Next, look for the Site Identity or the Logo option in the Customizer menu. This may vary depending on your theme.
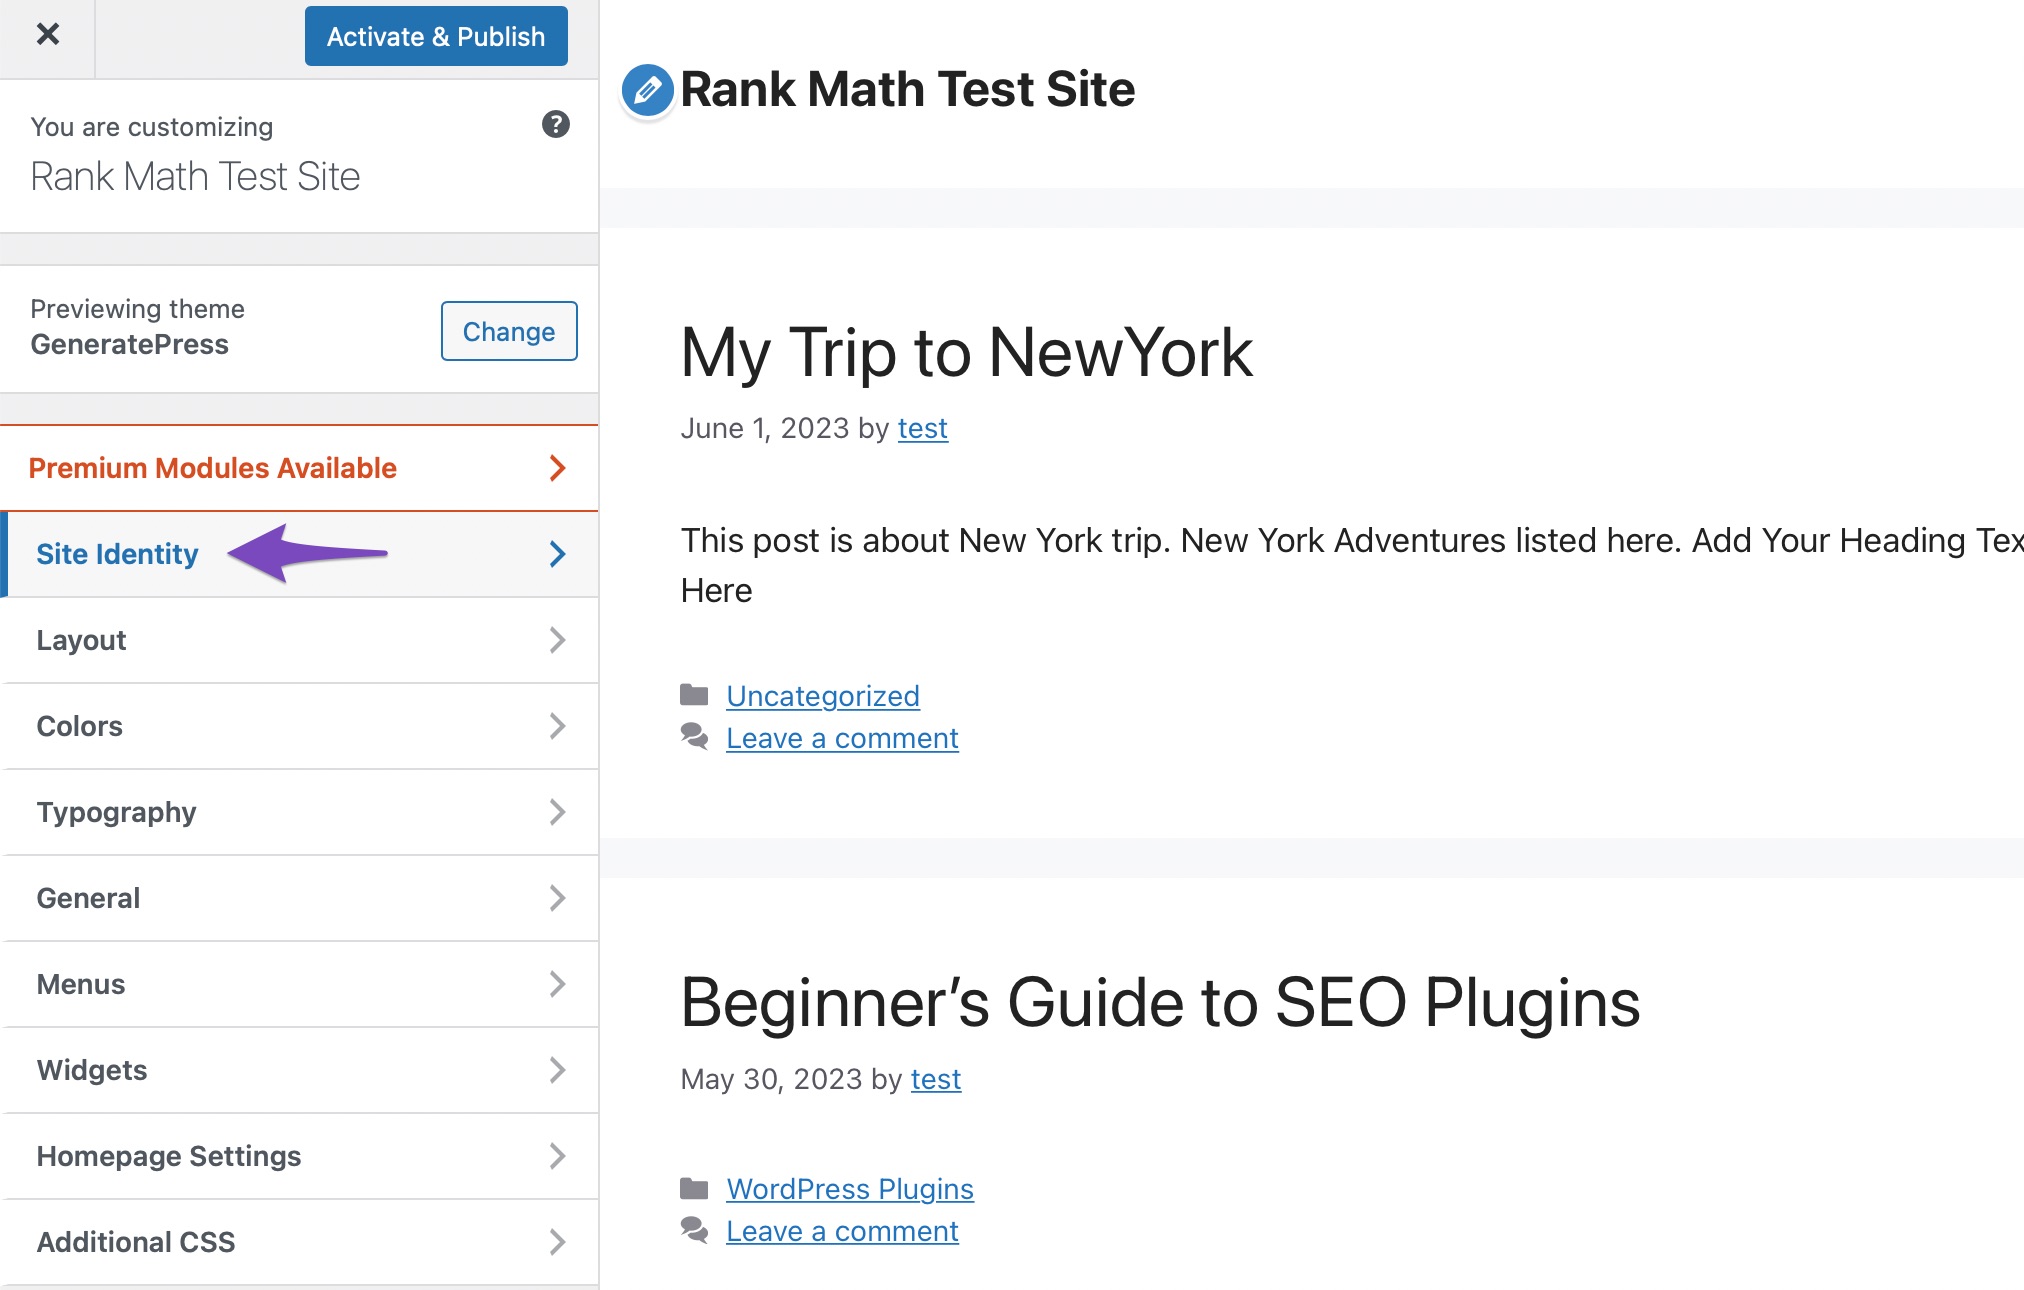
Click on the Logo section, and you’ll be presented with an option to upload a new logo image.
Choose the logo from your computer and click on the Select button, as shown below.
Once the logo is uploaded, you may have additional customization options, such as adjusting your logo size or placement depending on your theme.
Preview the changes and click on the Activate & Publish button if you’re satisfied with the logo for your site. The logo should now be predominantly displayed, enhancing your site’s visual branding.
To further strengthen your WordPress site’s identity, you can use the logo as the site’s favicon.
2.3 Change the Logo by Adding Custom HTML/CSS Snippets
WordPress logo styles can further be customized or altered using additional CSS.
Note: It’s recommended to create a backup of your website before making any changes so that you can restore it if something goes wrong. Refer to our dedicated tutorial on backing up the WordPress site.
To change the logo as per your needs, navigate to Appearance → Customize from the WordPress dashboard. Right-click on your logo image and select the Inspect/ Inspect Element option, as shown below.
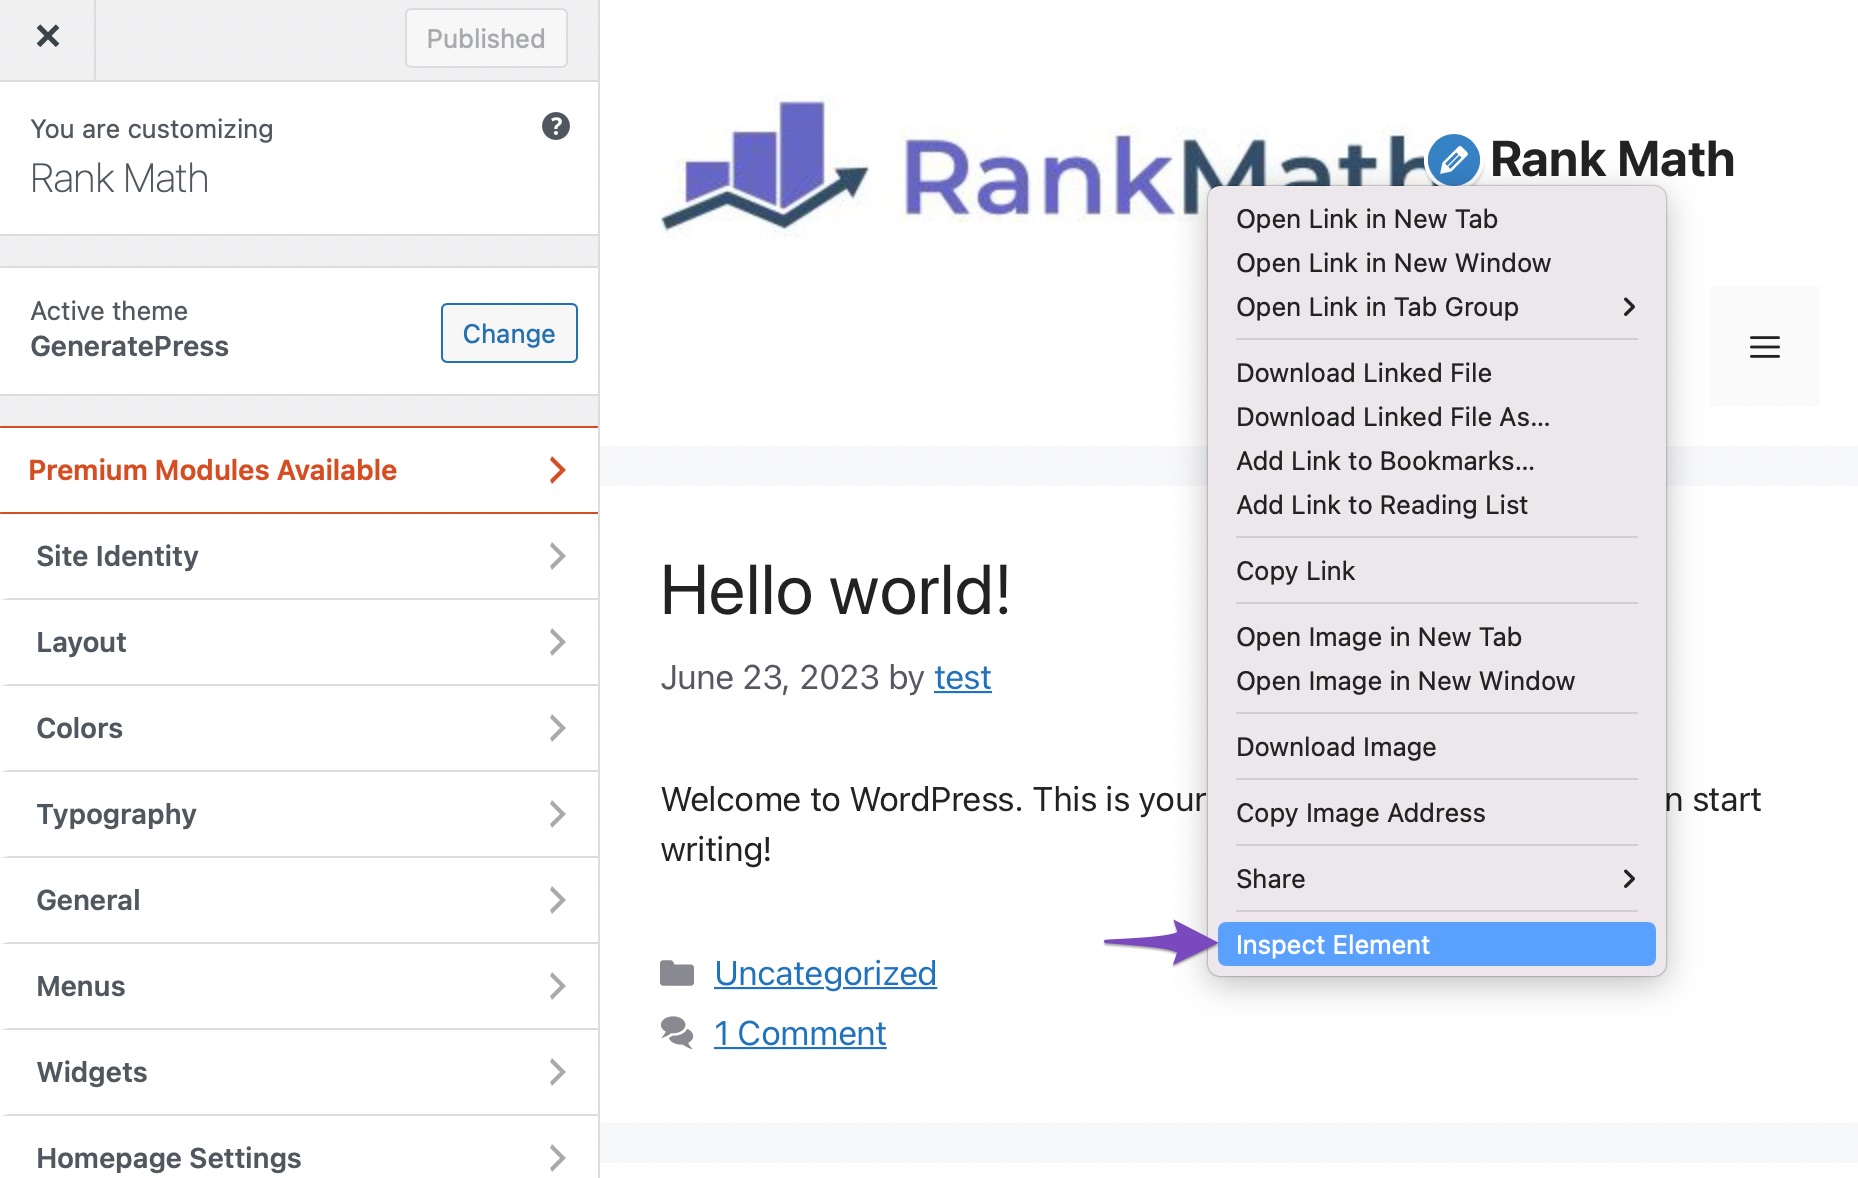
Hover over the highlighted HTML tag and locate the CSS class, as shown below. In our case, it is img.header-image.is-logo-image.

Next, add your own CSS properties to customize your logo. Here’s an example:
img.header-image.is-logo-image
{
  border: 5px solid black;
  border-radius: 10px 20px;
  height: 130px;
  width: auto;
}
Do not forget to change your CSS class name. And this is how the logo will look:
Once you’ve changed the logo as per your requirements, click on the Publish button to save the changes.
3 Conclusion
Changing the logo in WordPress is a simple yet powerful way to strengthen your brand identity and give your site a professional look.
By using the default block editor or the WordPress Customizer, you can quickly upload, adjust, and save your logo without needing technical skills.
Once updated, your logo will appear across your site, making it easier for visitors to recognize and remember your brand.
Take a few minutes to update your logo, and you’ll instantly make your website feel more polished and aligned with your business.
So have you added a logo to your WordPress site? Let us know by tweeting @rankmathseo.