In this knowledgebase article, we’re going to walk you through how to change your website’s favicon in WordPress.
What is Favicon?
A favicon is generally just thought to be the small icon that appears next to website names in browser tabs. However, while that’s certainly the most familiar place we see them – they have also appeared in Google Search, also appear in bookmarks, mobile device home screen buttons, and more. All in all, they’re a vital part of your brand recognition & thankfully, setting one up for your site is very easy to do.
Below, we have listed some of the ways in which you can change your website’s favicon without any hassle.
How to Change Your Website’s Favicon in WordPress?
WordPress provides several methods for changing your website’s favicon. You can modify your WordPress settings or theme or install a third-party favicon plugin from the WordPress plugin directory.
Change Your Website’s Favicon in the WordPress Customizer
You can change your favicon by customizing the appearance of your WordPress site and then uploading a logo to serve as your site icon. This icon will be your favicon.
1.1 Navigate to Customize
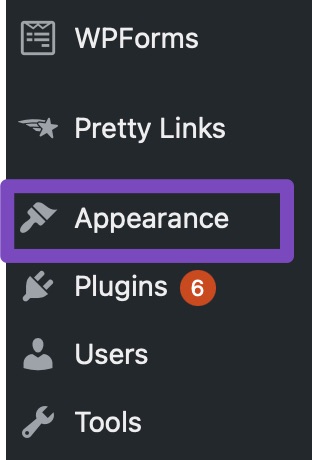
Log into your WordPress site. Once you have logged in navigate to the WordPress Dashboard → Appearance as shown below:
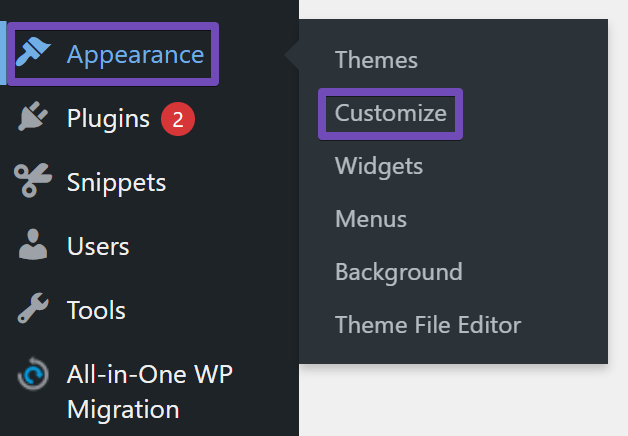
In the Appearance settings, click on Customize.
1.2 Select a Site Icon
Click on Site Identity. Here, you can specify your site name, tagline, logo, and icon. The image that you set in Site Icon will be used as your site’s favicon.
Simply click on the Select Image button and upload the image you want to use as a site icon.
2 Change Your Website’s Favicon Using Site Logo Block
You can also change your favicon by using the Site Logo Block on one of your pages. Depending on your settings, this image may serve as your favicon, site logo, or favicon and site logo.
Note: This method is more suitable for sites using full-site editing themes.
2.1 Create a New Page
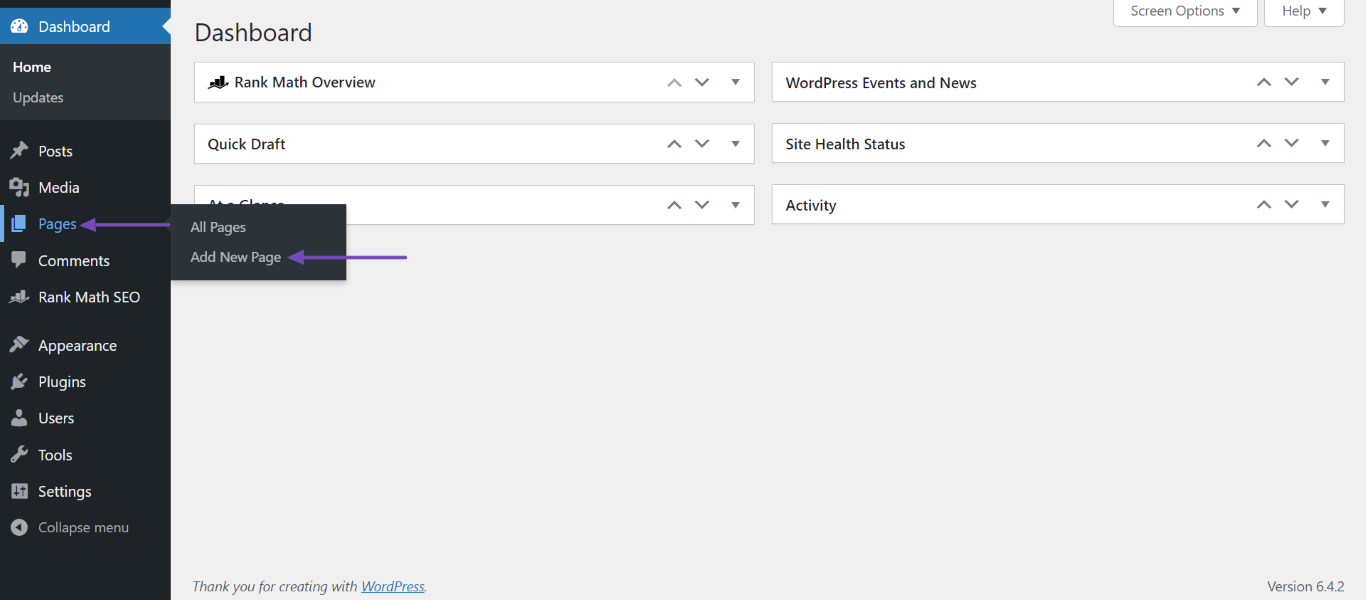
Head to WordPress Dashboard → Pages → Add New Page.
2.2 Select the Site Logo Block
Next, type a forward slash / followed by site logo into the WordPress editor. Once done, select the Site Logo block, as shown below.
2.3 Upload a Site Logo
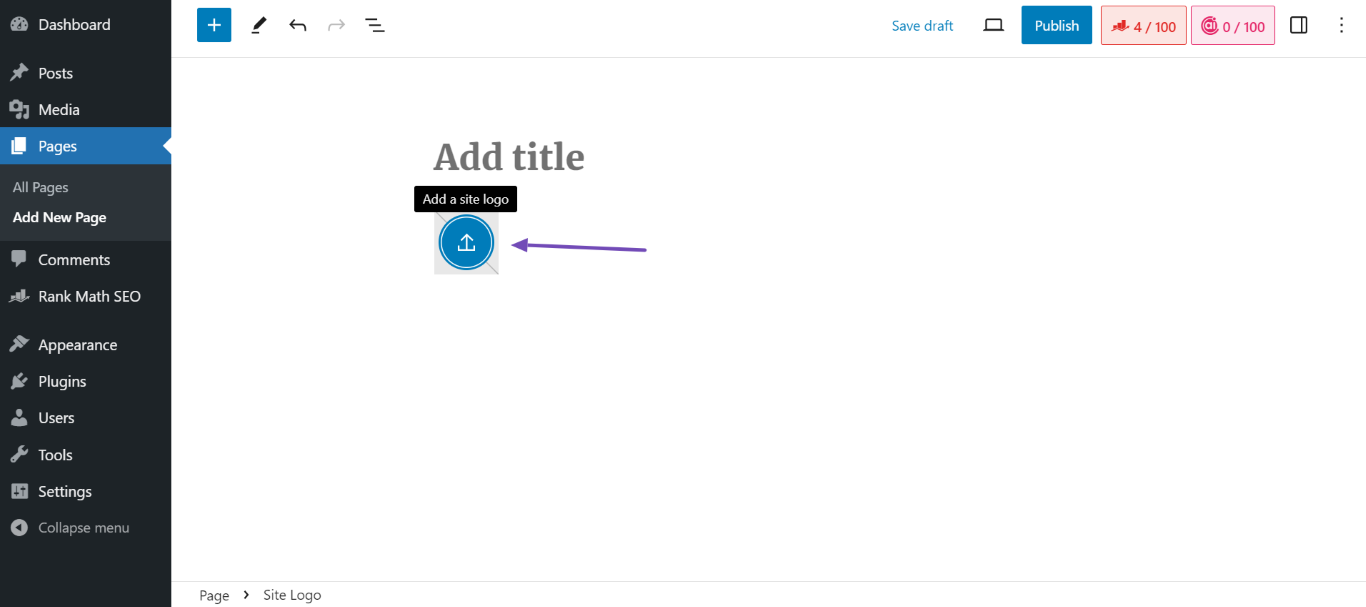
Now, click the Site Logo block to upload a site logo. You can select an image from your media library or upload one from your device.
Next, click on the logo you just uploaded. Once done, click the Settings icon, as shown below.
In the Block menu, scroll down and enable Use as site icon. Once done, click Publish.
You will be presented with the option to use the image as your favicon (Icon) and site logo (Logo). If you don’t want to use the image as your site logo, uncheck Logo. Once done, click Save.

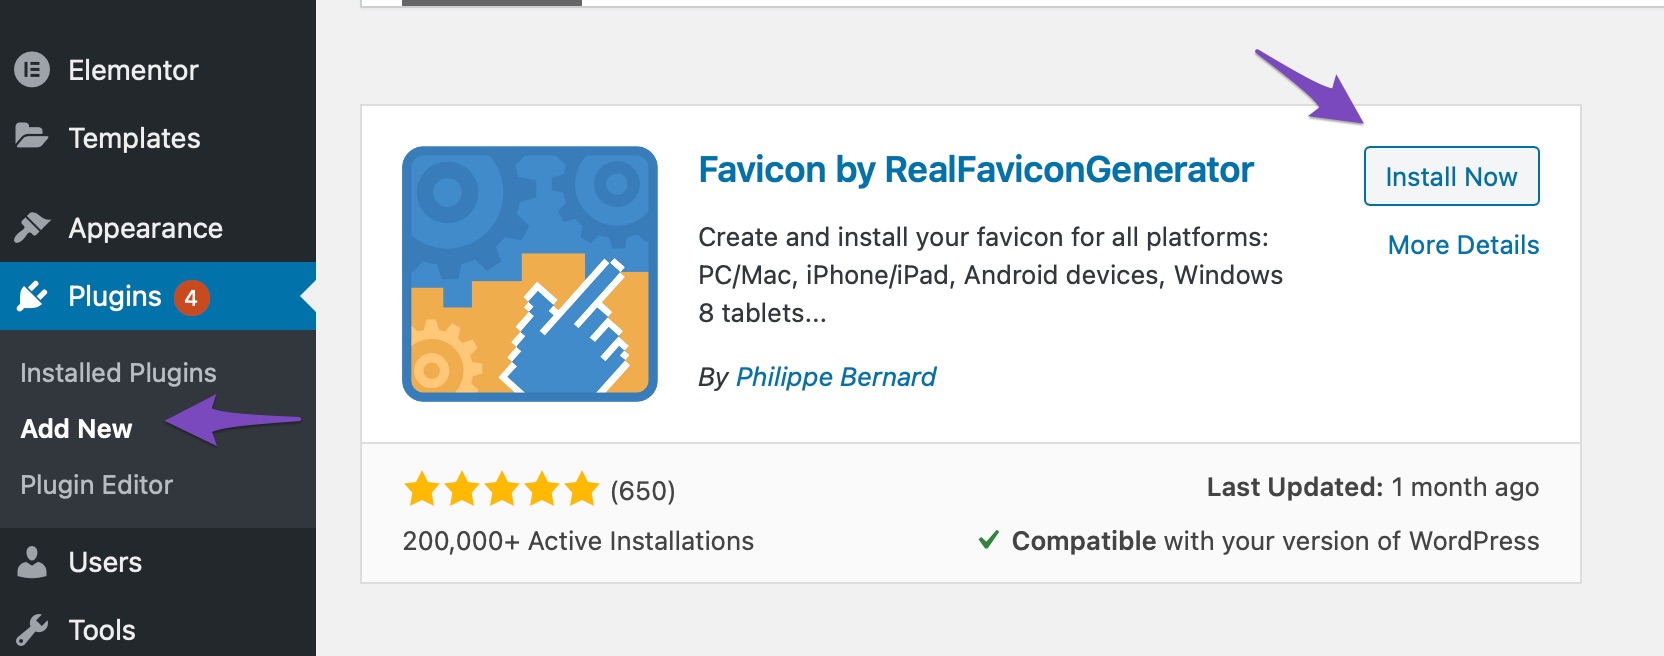
3 Use the Plugin RealFaviconGenerator
You can make use of the RealFaviconGenerator plugin to add the favicon to your WordPress website. You can set up a favicon in a matter of seconds with the help of this plugin.
RealFaviconGenerator generates all the icons you need for desktop browsers, iPhone/iPad, Android devices, Windows 8 devices, and more. To use the plugin install and activate the plugin from your WordPress Dashboard → Plugins section.
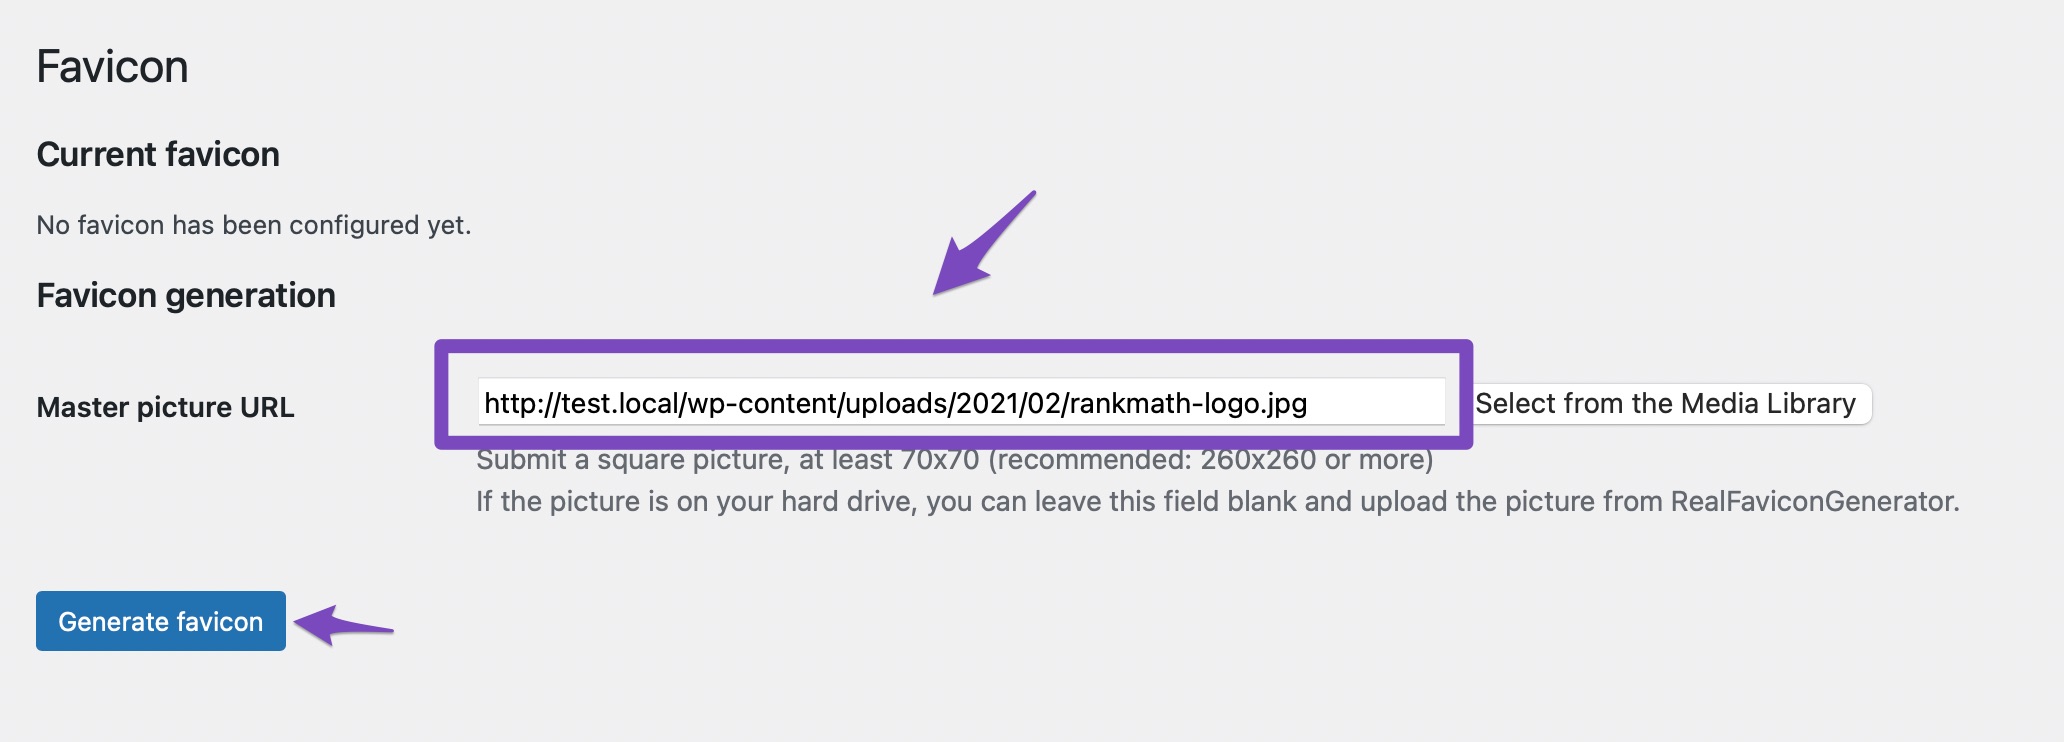
Once you’ve installed and activated the plugin, navigate to the ‘Favicon’ entry in the Appearance menu as shown below:
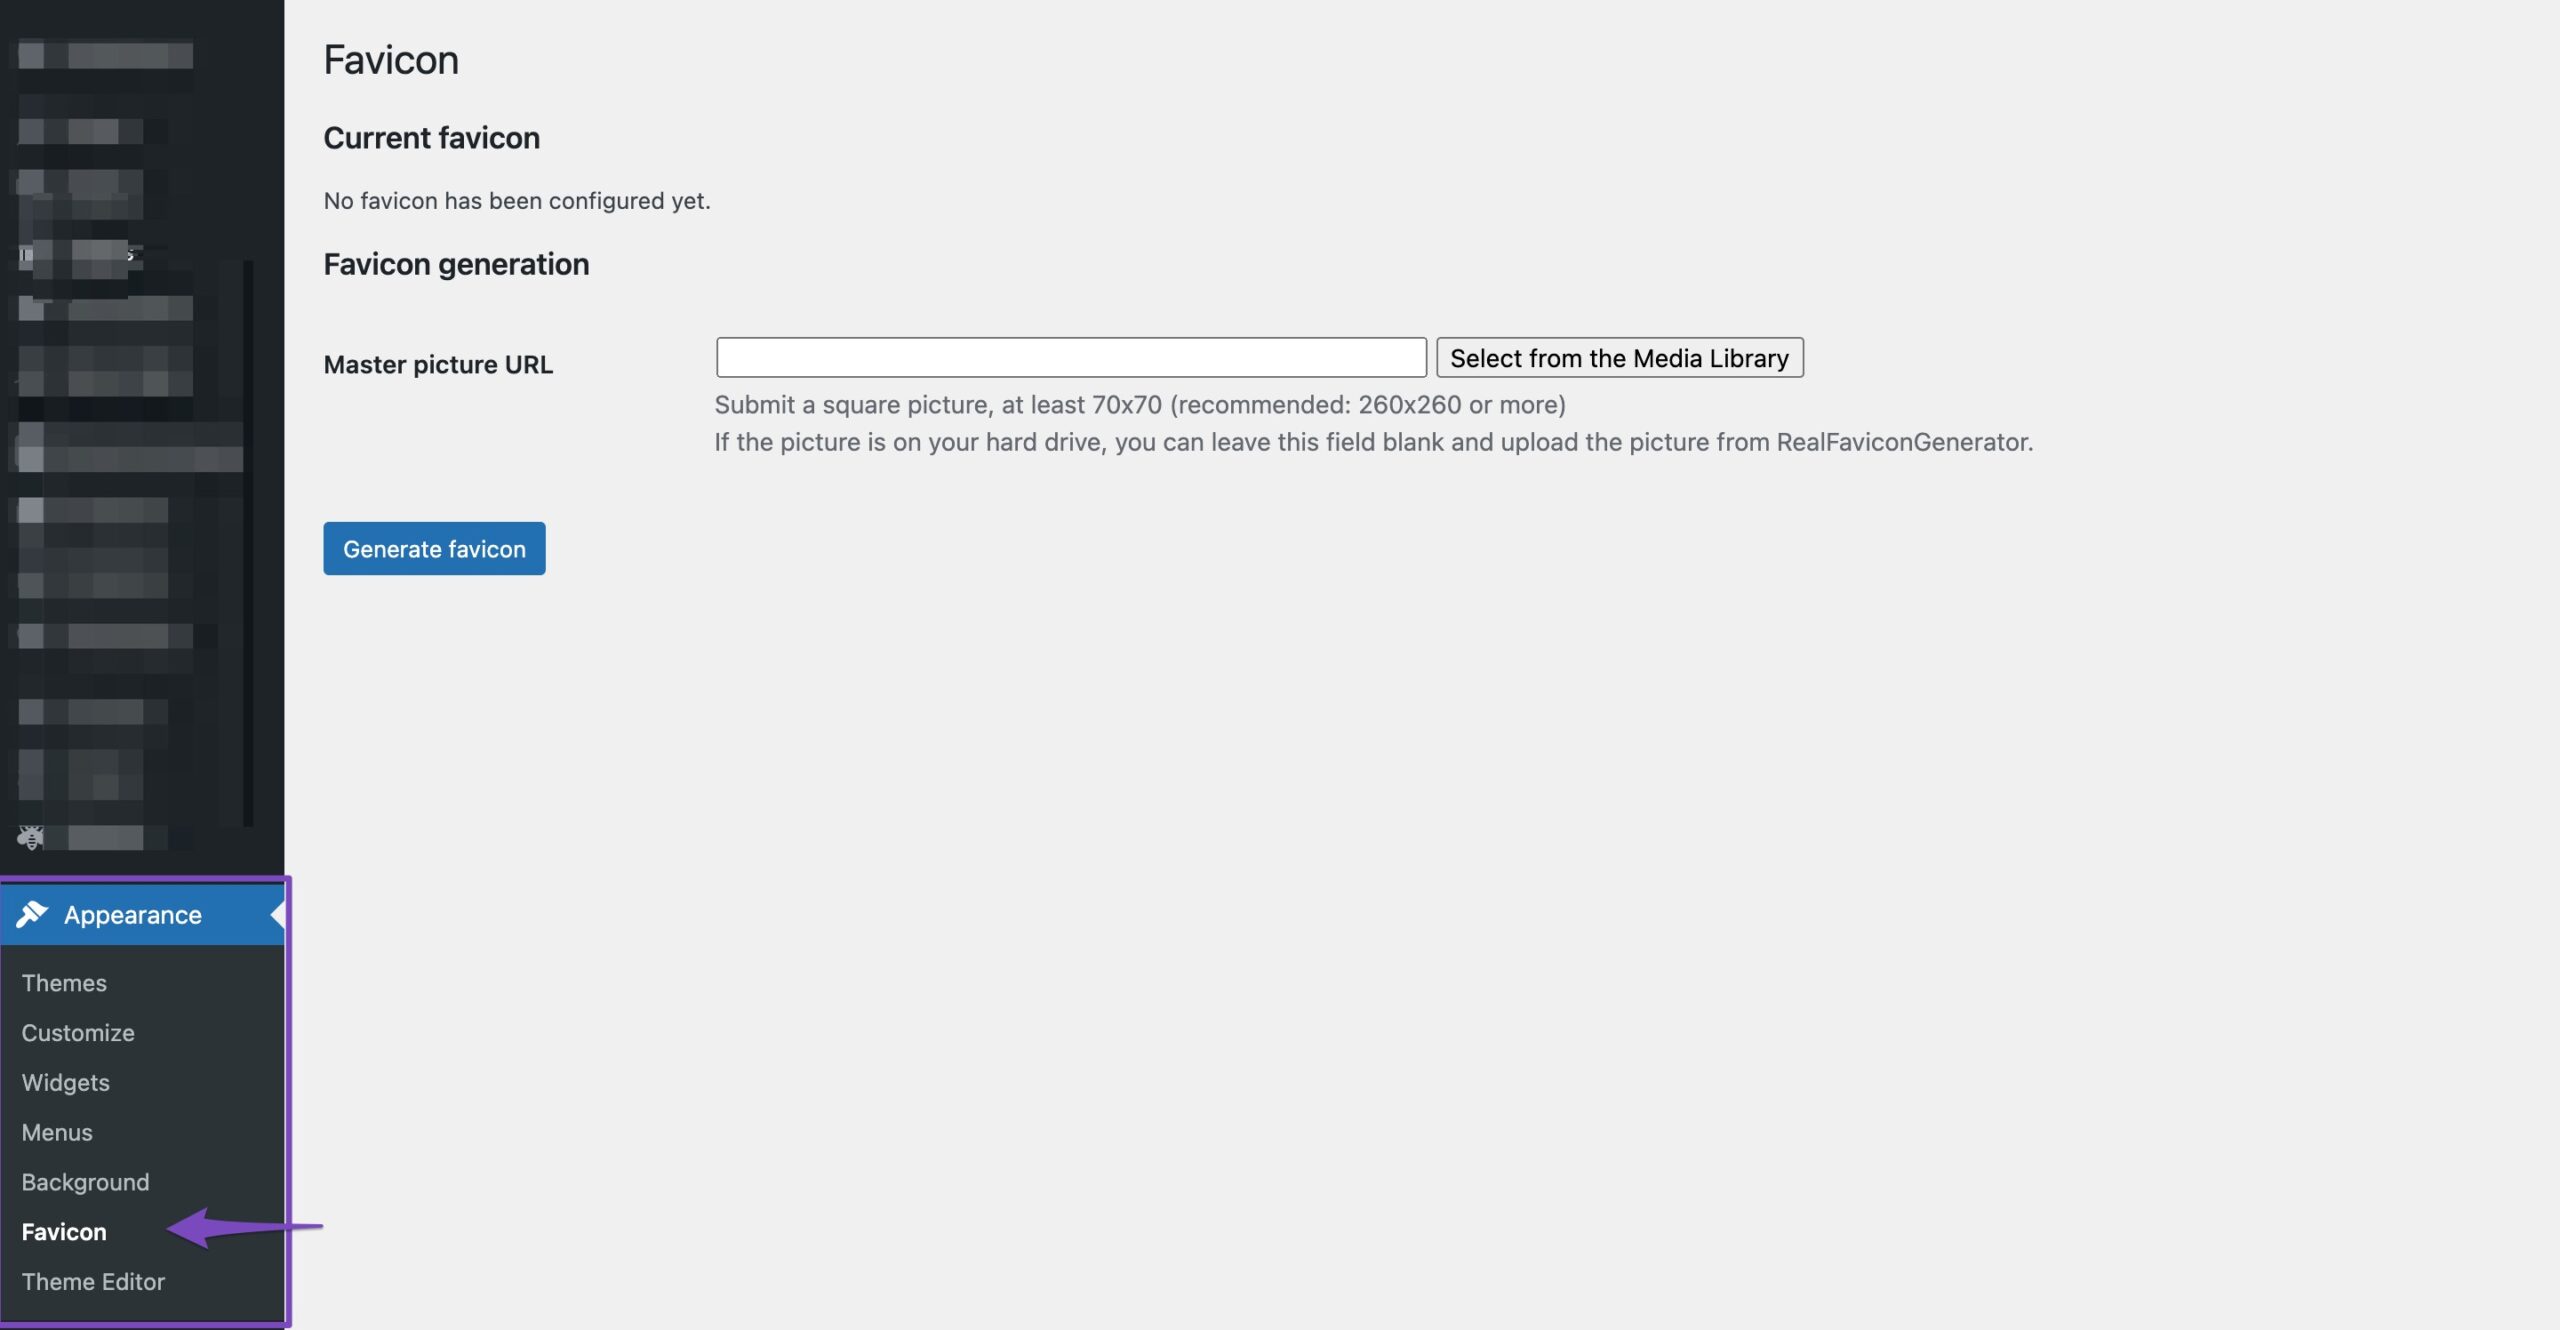
Select a master picture from the Media Library, click the ‘Generate favicon’ button, and follow the on-screen instructions.
And that’s it! Your favicon will be set up and ready to go.
4 Add Code to Theme’s header.php
You can also add code like shown below in the <head> section of the theme’s header.php.
<link rel=“shortcut icon” href=“https://example.com/favicon.ico” />
Replacing the URL with the location of your favicon file. This code can be easily inserted by editing your header.php file (ideally in a Child Theme) or using the Code Snippets plugin.
Frequently Asked Questions
How to Change the Website icon in SERP?
The website icon in SERP indicates that you haven’t set a favicon for your site. You can set your website’s favicon at WordPress Dashboard → Appearance → Customize → Site Identity.
If you’re facing the issue setting up the favicon for your site, you should get in touch with your theme provider instead since this is related to your theme. We suggest clearing your site, plugin, or any server-level cache.
Please follow the guidelines by Google to make your favicon appear on SERPs. Note that the Google Favicon crawler occasionally crawls your site, and this can take a while to update your favicon on SERPS.
A WordPress favicon can help accelerate your brand recognition and improve the UX for your website’s visitors. Fortunately, as we’ve discussed, you have multiple options to choose from that make it easy to add a favicon to your WordPress site.
If you still have any questions about changing your website’s favicon in WordPress, please feel free to contact our dedicated support team. They are available 24/7, 365 days a year…