![How to Clear Cache in WordPress [4 Easy Ways]](https://rankmath.com/wp-content/uploads/2024/01/Clear-Cache-in-WordPress.png)
Have you ever updated your WordPress site, changed some text, swapped an image, or tweaked the design, only to find the old version still staring back at you even after refreshing the page? Frustrating, right? Most of the time, the problem is your site’s cache.
Your cache works like a temporary storage space. It saves copies of your site’s files to help pages load faster for you and your visitors.
While this usually makes browsing smoother, it can sometimes cause problems. When cached files don’t refresh, they serve up outdated content, which means visitors (and even you) may not see the latest changes.
In this post, I’ll walk you through four easy ways to clear the cache in WordPress, including browser cache, web hosting cache, and caching plugins. So, let’s get started.
Table Of Contents
1 What is Caching in WordPress and Why is It Important?
Have you ever noticed how your website loads faster the second time you visit it? That’s caching at work.
In WordPress, caching simply means storing copies of your site’s files, like pages, images, styles, and scripts, in a temporary storage area called a cache. Instead of recreating everything from scratch each time someone visits your site, WordPress serves up the cached version.
But here’s the catch: cached data doesn’t always update automatically. If you make changes to your site, like editing a page, updating images, or tweaking the design, your visitors might still see the old version. That’s when clearing your cache becomes important.
Here’s why you may need to clear your WordPress cache:
- To make sure any recent changes you’ve made show up right away
- To fix display problems or errors caused by outdated cache files
- To troubleshoot performance or functionality issues
- To free up storage space and keep your site running efficiently
In short, caching is essential for speed, but clearing it ensures your visitors always see the latest and best version of your site.
2 Methods to Clear the Cache in WordPress
Let us now discuss the ways to clear the cache in WordPress.
2.1 Use a Cache Plugin
You can use a caching plugin like WP Rocket to clear the cache on your site.
WP Rocket enhances the speed and performance of your WordPress site. It offers a wide range of features to optimize your site and clear your cache efficiently.
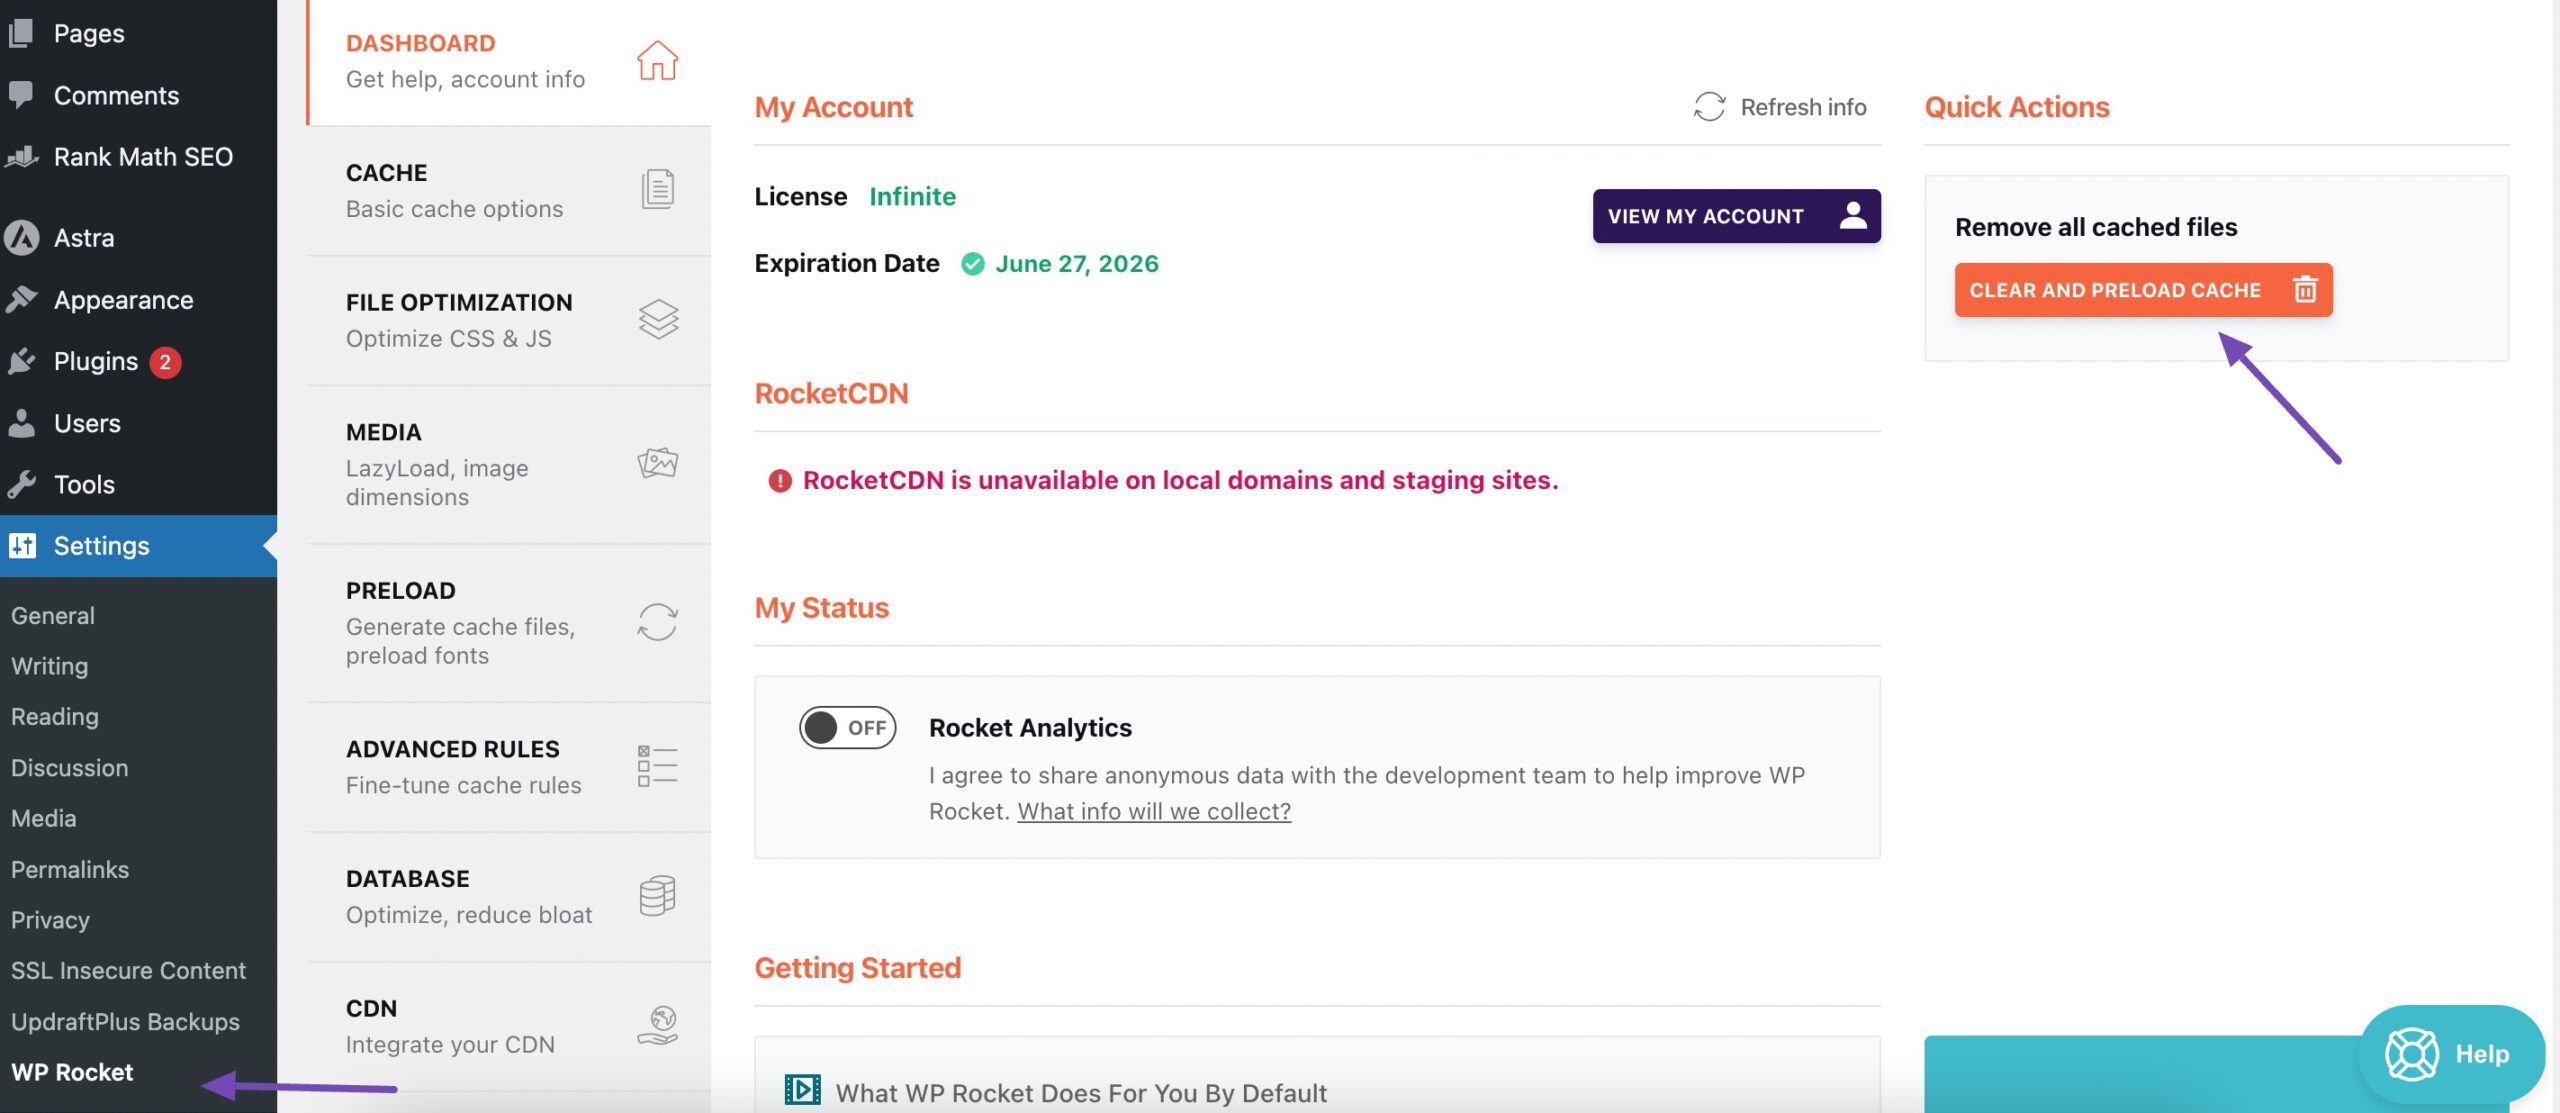
To clear your cache using WP Rocket, install and activate the plugin. Once activated, navigate to Settings → WP Rocket from your WordPress dashboard.
Next, locate and click on the CLEAR AND PRELOAD CACHE button. This will remove all cached files from your site, ensuring the audience will always view the most up-to-date version.
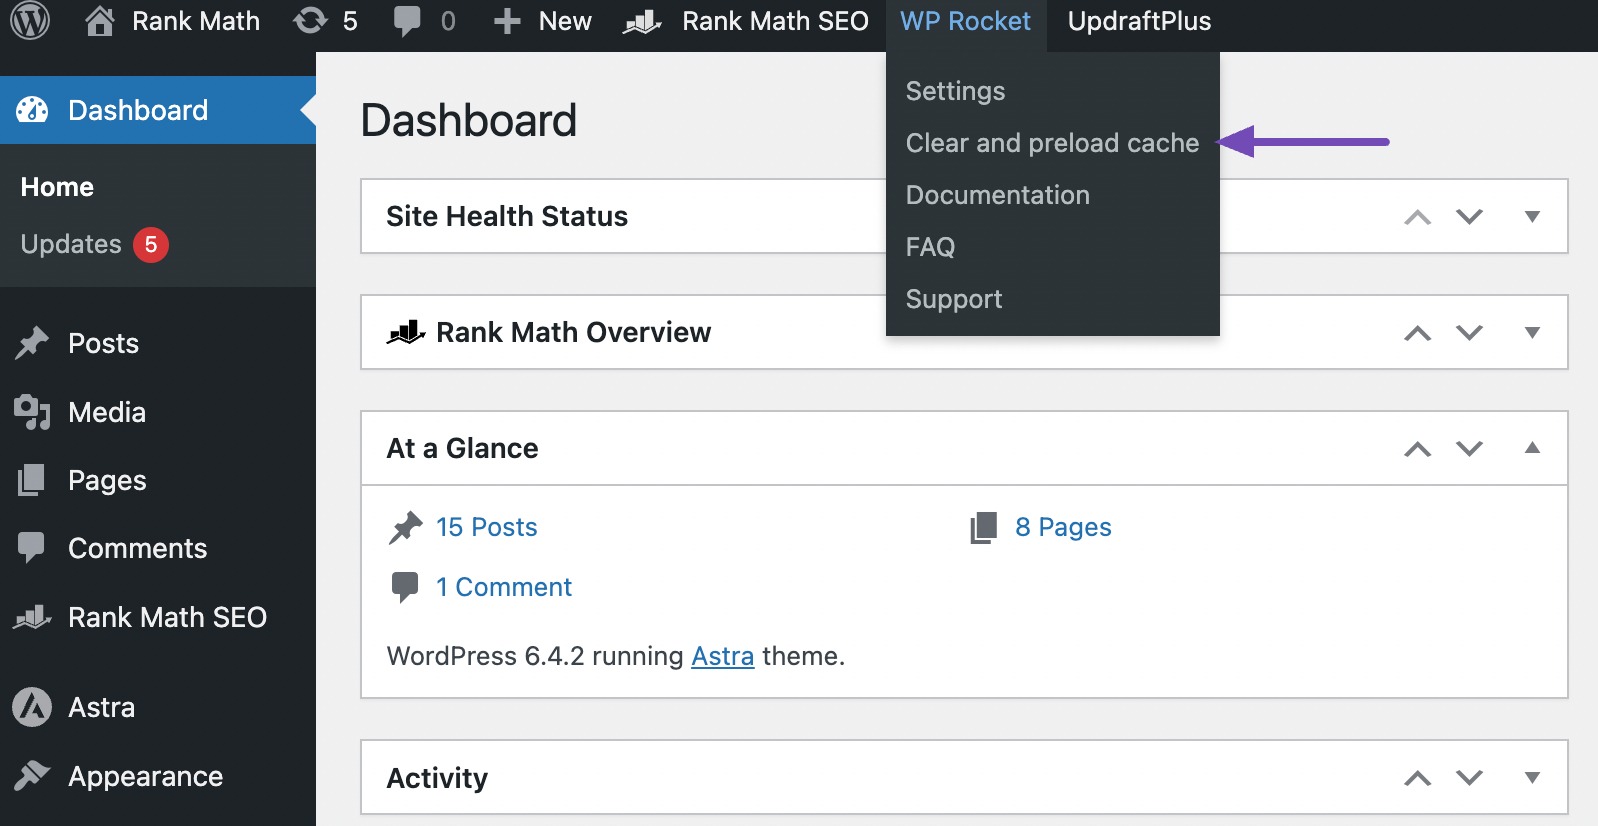
To access the Clear and preload Cache option from anywhere on your website, hover over WP Rocket in the toolbar, and you’ll find the option, as shown below.
2.2 Clear Your Web Browser Cache
Another common method to clear the cache in WordPress is by clearing your web browser cache.
When you visit a website, your browser stores some data, including images, JavaScript, and CSS files, to speed up your next visit to the site. Over time, this cached data can accumulate and may not load updated versions of the pages for you.
To clear your web browser cache, navigate to your browser settings and locate the option for clearing the cache. The specific steps may vary depending on the browser you’re using.
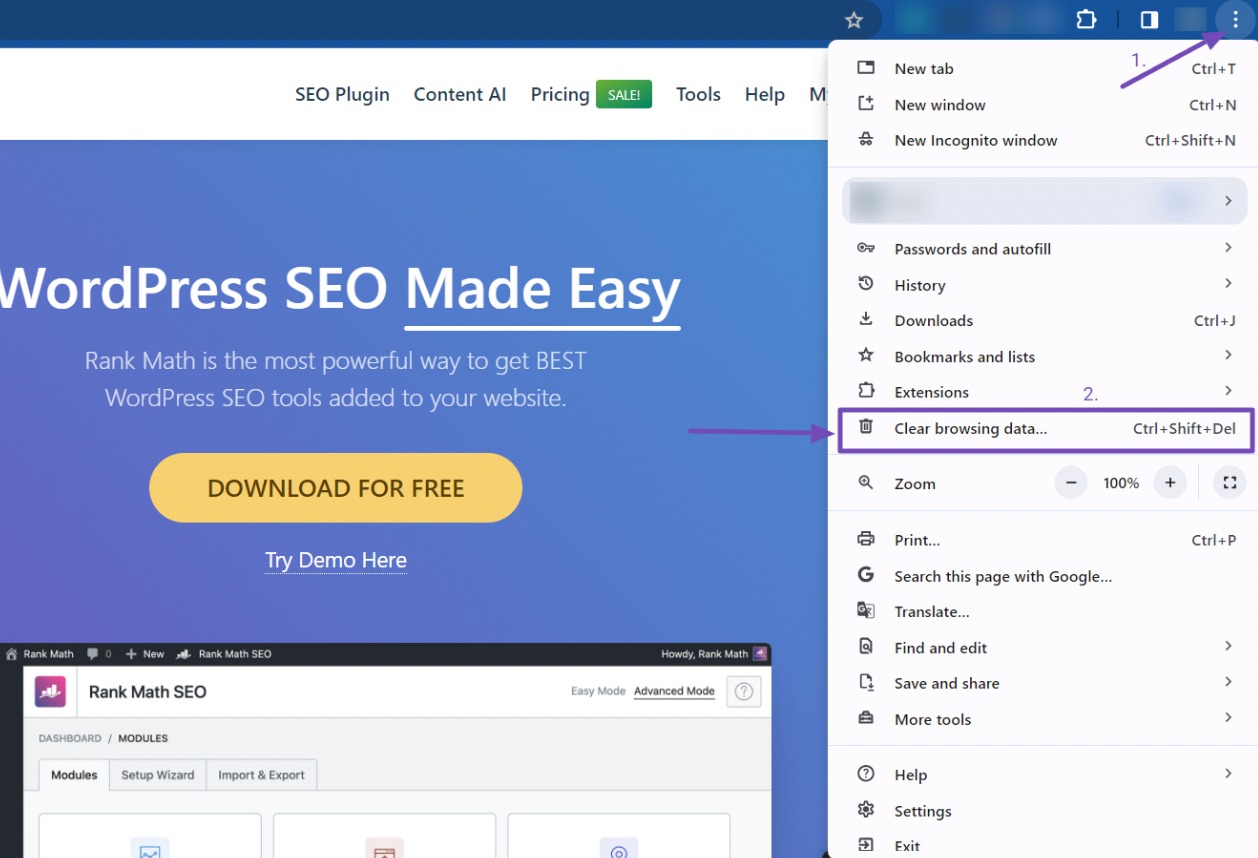
In Google Chrome, clear your cache by clicking the three dots in the top-right corner, then select Clear browsing data from the menu, as shown below.
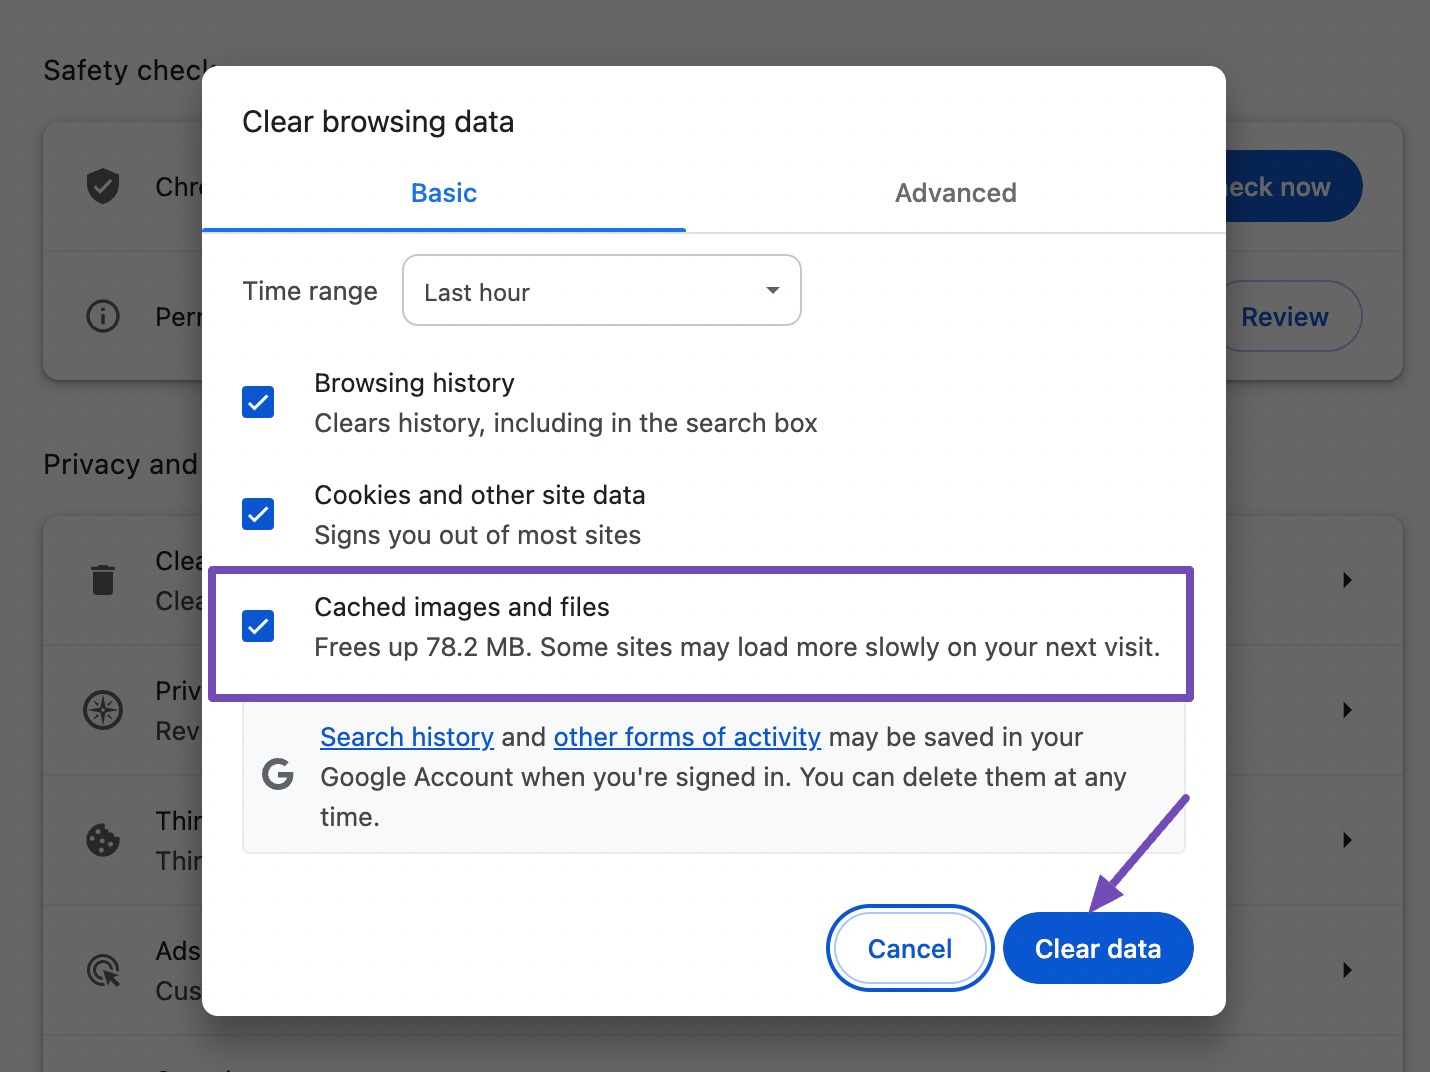
A popup will appear, allowing you the option to choose the content you wish to remove from the cache. Tick the Cached images and files box, then click the Clear data button to clear the cache.
After clearing your web browser cache, return to your WordPress site to confirm the changes.
It’s important to note that the browser caching method won’t remove the cached version that is visible to other users. To ensure that everyone sees the updates you’ve made to your website, explore alternative methods discussed in this tutorial.
2.3 Clear Cache From WordPress Hosting
Hosting providers usually offer their own cache plugins or tools to help improve website performance. You only need to host your website on their server and install WordPress.
Once you have done that, navigate to the hosting section in your WordPress dashboard and look for the cache plugin offered by the hosting provider. Install and activate the plugin, and you can then access it through the toolbar in your WordPress dashboard.
For instance, if you are using one.com hosting, you can use the ‘Purge Performance Cache’ option on your WordPress toolbar to clear your website’s cache.
2.4 Clear Your WordPress CDN Cache
CDN, or Content Delivery Network, plays an important role in improving your WordPress site’s performance by distributing your content efficiently across multiple servers.
However, sometimes, it becomes necessary to clear the CDN cache to ensure visitors see your website’s most up-to-date version.
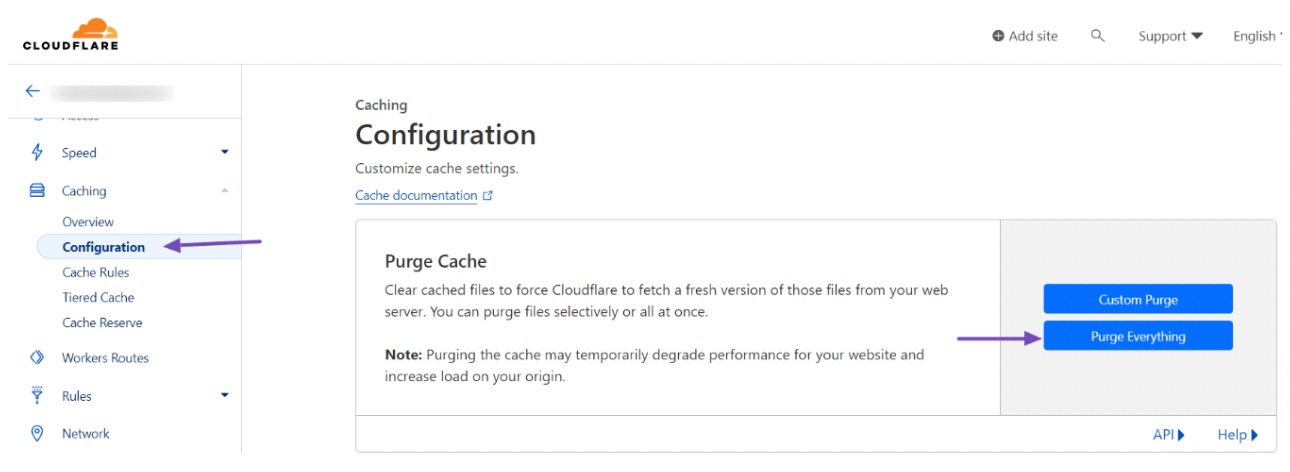
If you are using a CDN service like Cloudflare, you can easily clear the cache by logging into your Cloudflare account. Navigate to the Caching section and then go to Configuration.
There, you will find the option Purge Everything. By clicking on it, you can clear all cached content on your website.
3 Conclusion
Clearing your WordPress cache is one of those small but powerful steps that keep your site running smoothly. While caching speeds things up, outdated files can get in the way of your updates, and that’s when a quick cache clear makes all the difference.
Now that you’ve seen how to do it, you can confidently clear your cache whenever needed, whether through plugins, your browser, or hosting tools. Making this a regular part of your site maintenance ensures your visitors always see the latest version of your content.
Think of it as a simple habit that boosts speed, keeps your site fresh, and helps you deliver the best experience to your audience.
If you like this post, please let us know by tweeting @rankmathseo.