Search engine algorithms have become increasingly sophisticated and can now recognize images and present them alongside text results.
It can help businesses show off the product or service offered and visually represent what the user is looking for. This can help increase their visibility on the web and drive more potential traffic to their websites.

Although displaying images in search results may seem daunting initially, it is pretty simple. In this knowledgebase article, we’ll explain how to show images in the search results.
Here’s How You Can Show Images in Search Results:
- Use High-Quality Images
- Ensure the Image is at the Top of the Page
- Add Focus Keyword to ALT Text Naturally
- Set a Featured Image
- Use Descriptive File Names
- Add SEO Meta Title and Meta Description Using Rank Math
- Check Schema Tab Settings
- Optimize Image ALT Text, Title & Caption
- Submit the Page to Google
We have listed a few ways to help you get your images in the search results. So let’s dive in!
1 Use High-Quality Images
Using high-quality images that are properly sized and optimized, can ensure that your images look great and will be more likely to be featured in Google’s image search results.
You should also ensure that your images are relevant to the content on the page, as this will help Google’s algorithm determine how to rank your images.
2 Ensure the Image is at the Top of the Page
You can place the images at the top of a page to increase their prominence. This will help Google identify the images as more relevant to a query and, thus, more likely to be included in its search results.
If the images are placed in prominent locations on the web page, such as at the top of the page, it is easier for Google’s algorithms to identify and process your images, thus making them more likely to appear in search results.
For instance, we always place images at the top of the page, as shown below.
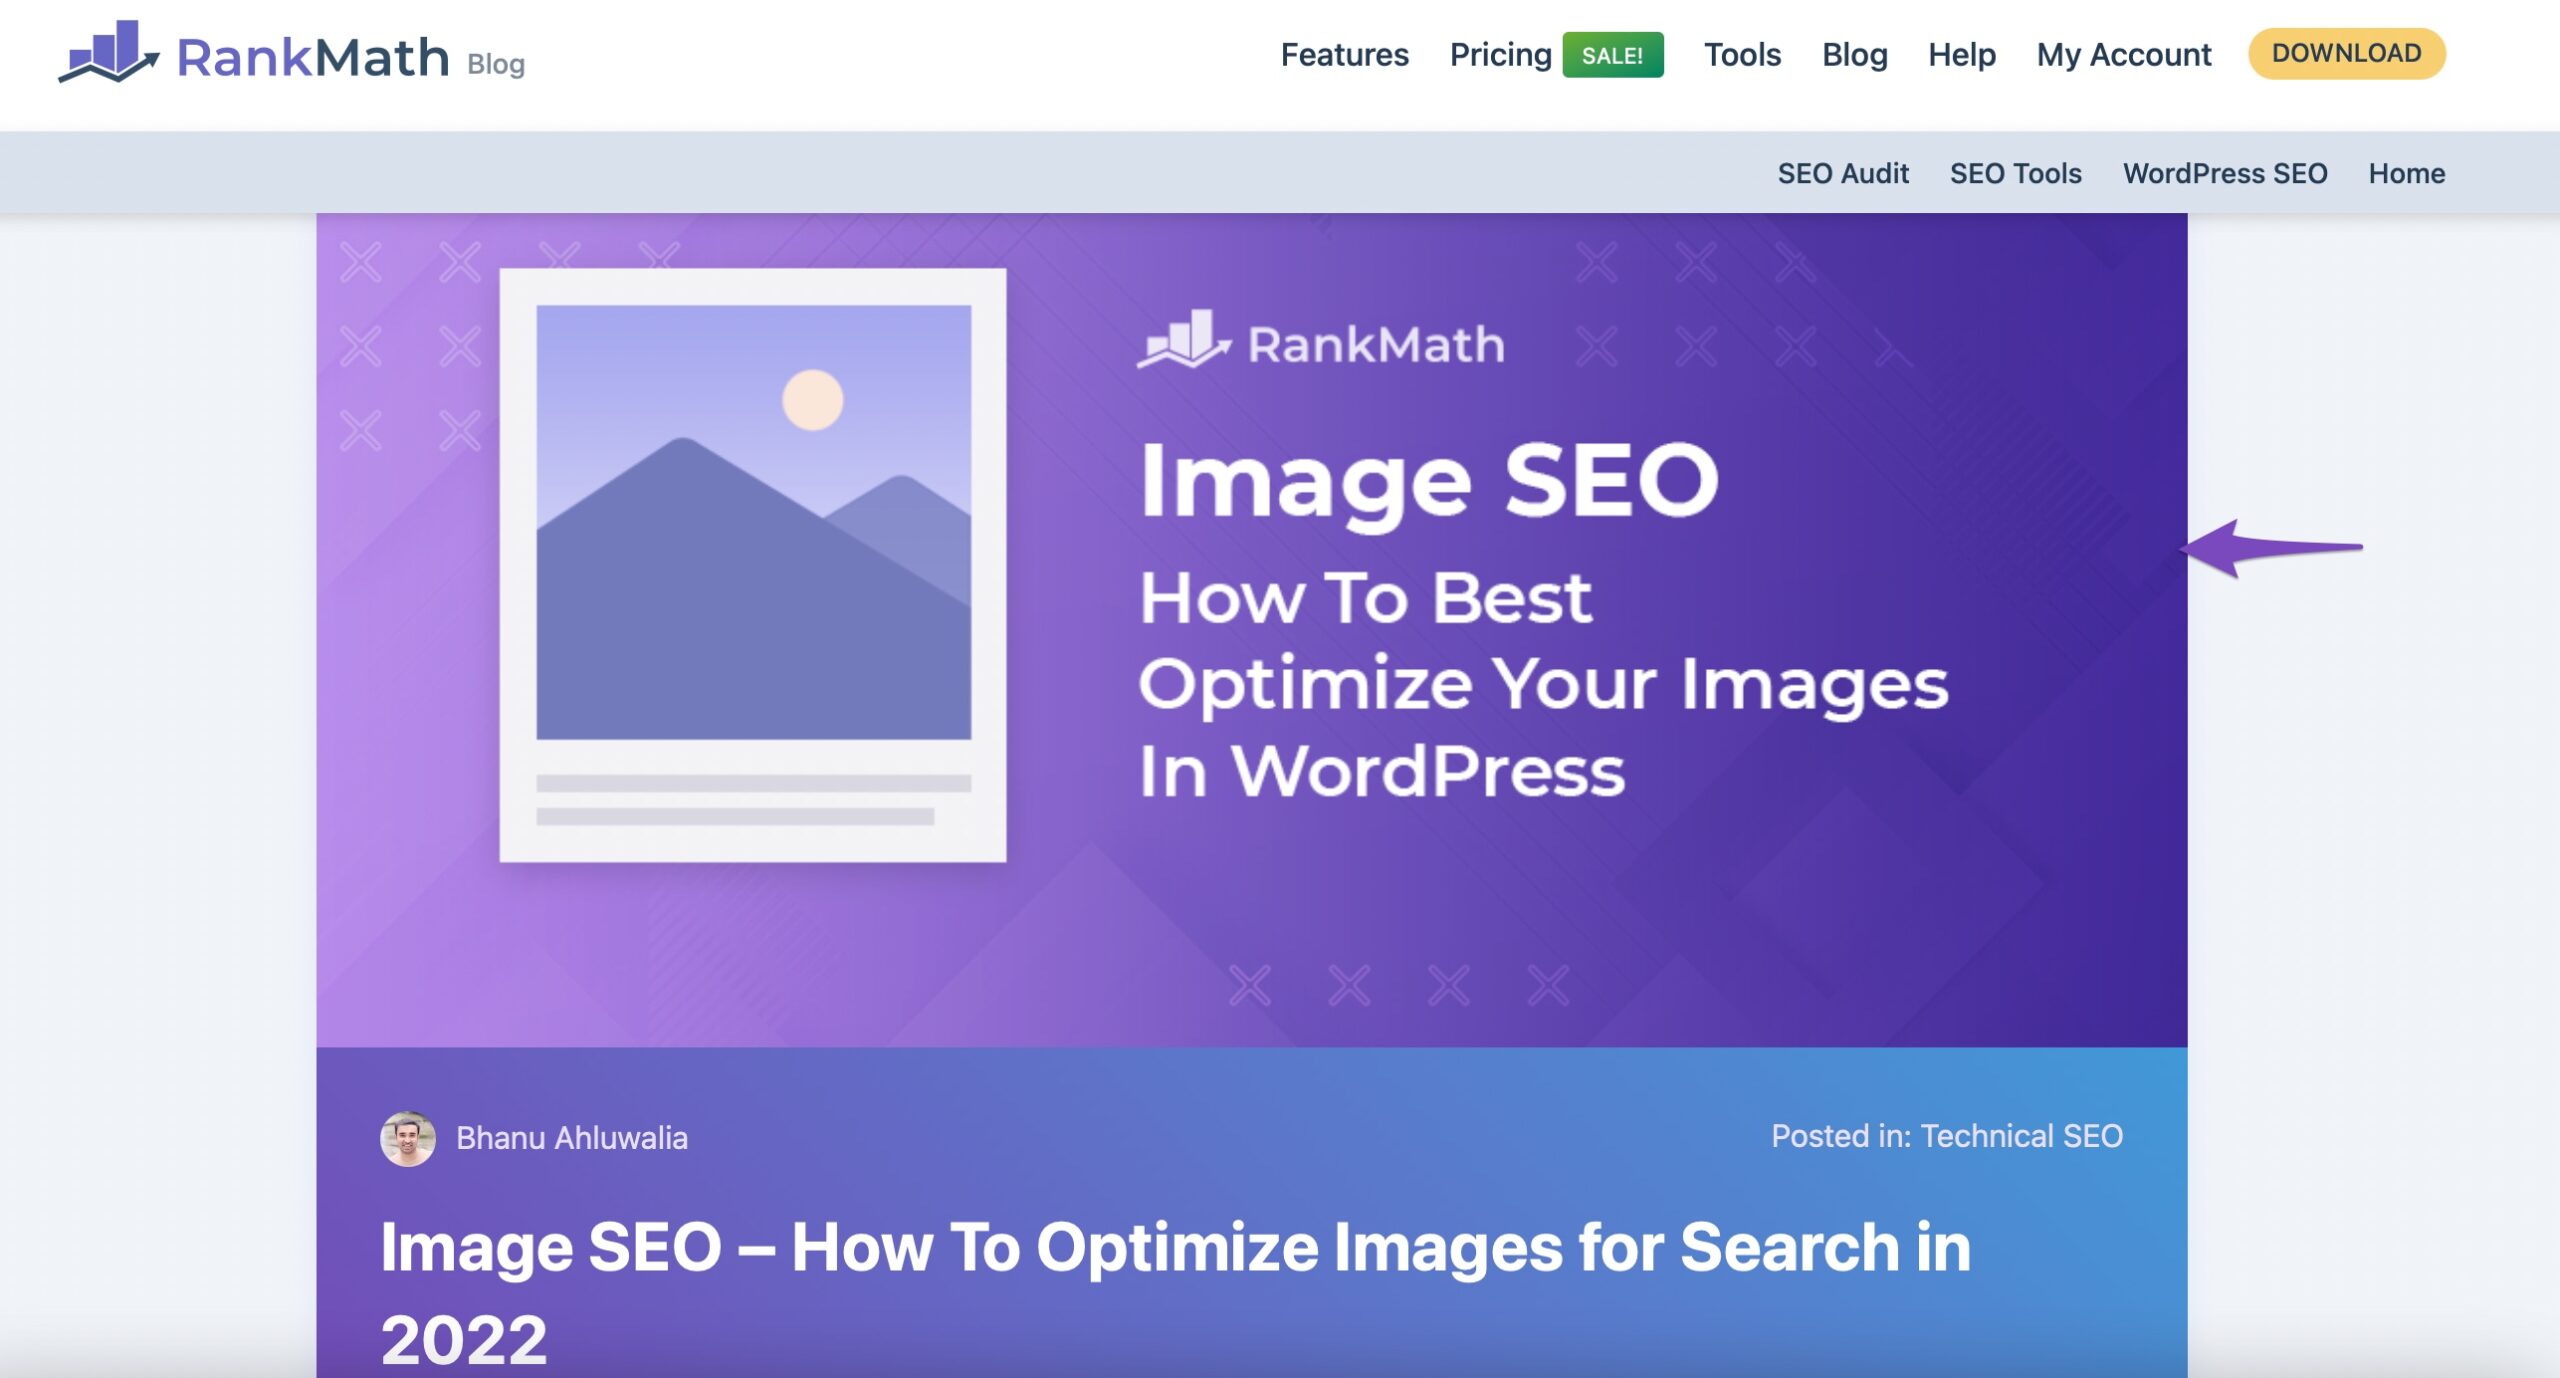
And here’s how it appears in the search results:

Also, use keywords and phrases in the text surrounding the images on your website, as it can help search engines understand the content and context of the images.
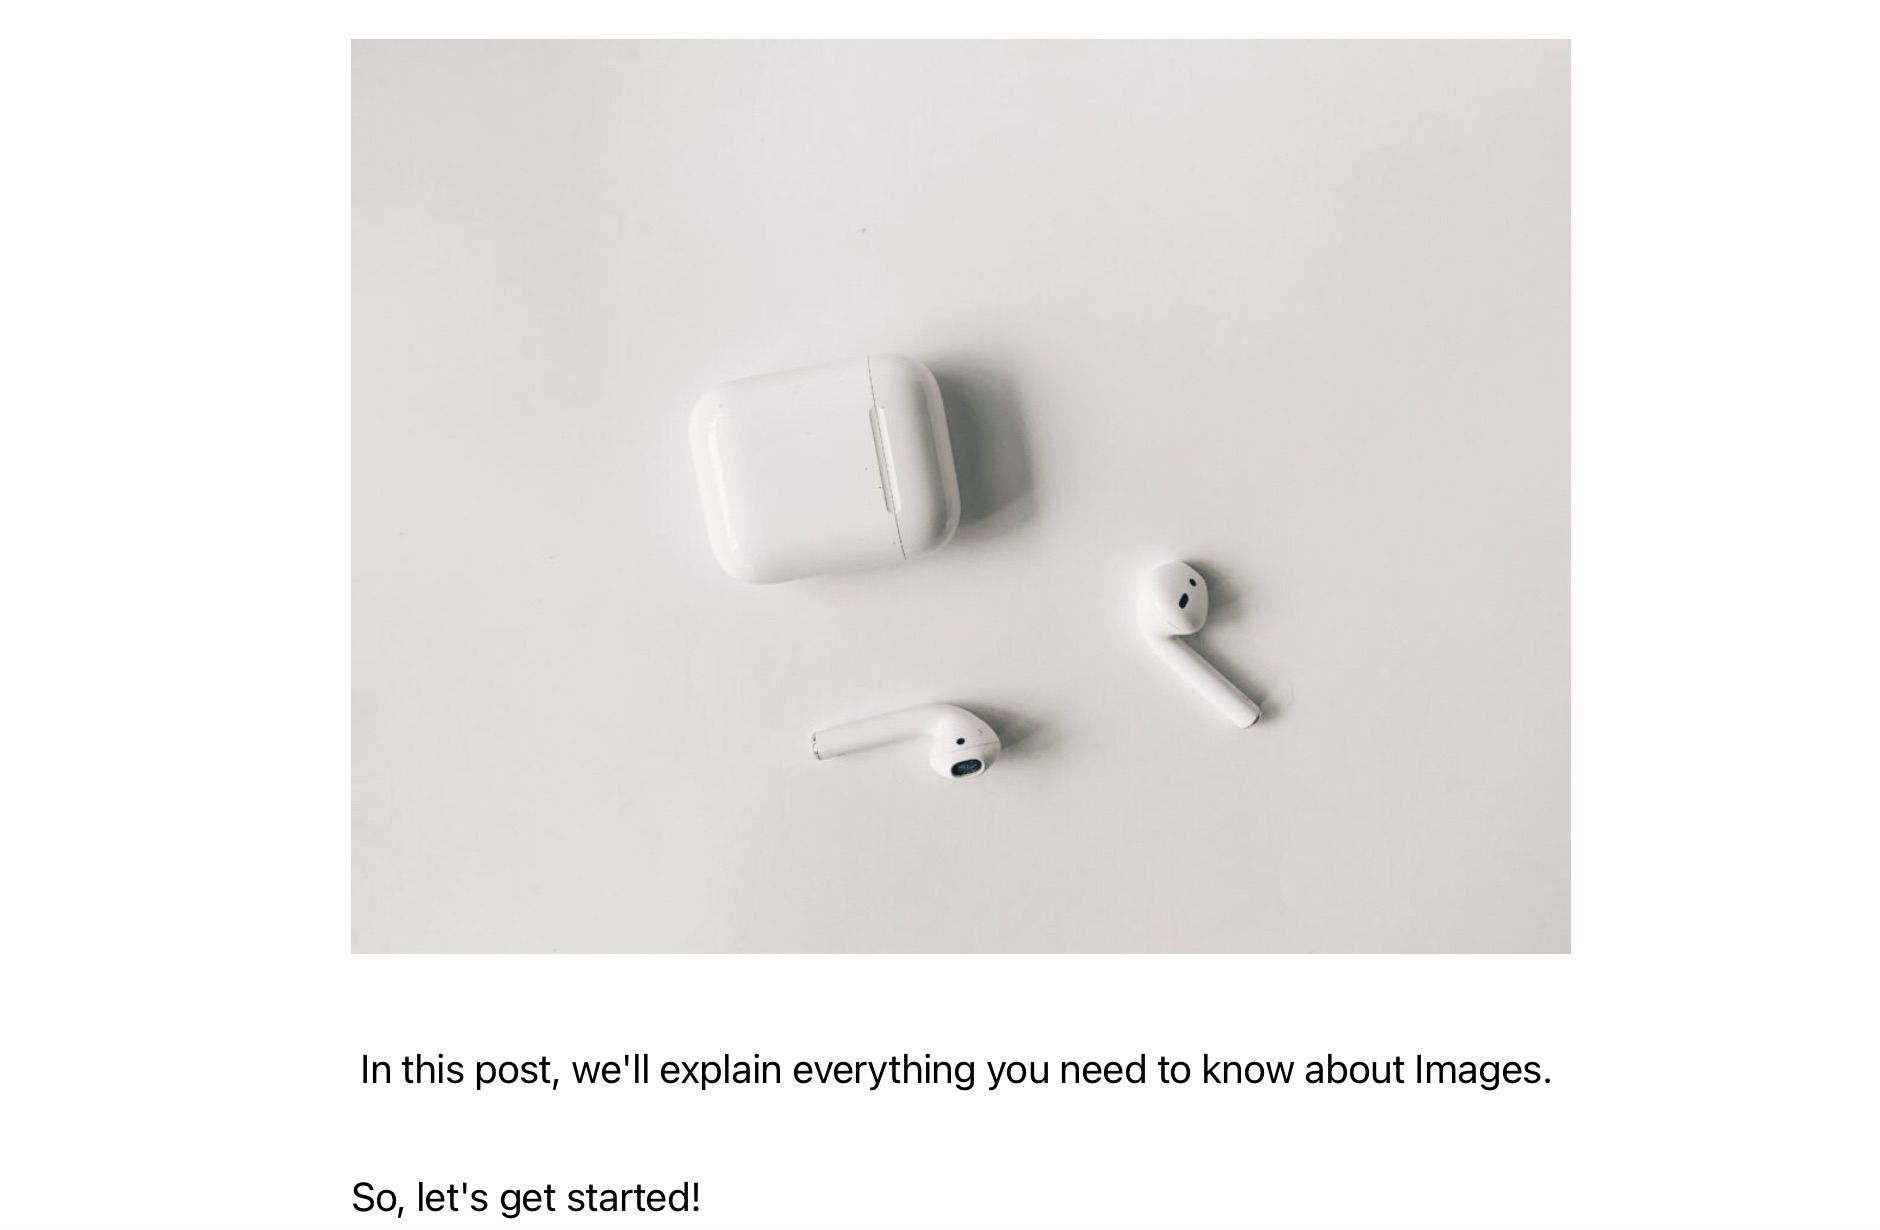
Here’s how the image will look if placed at the center of the content:
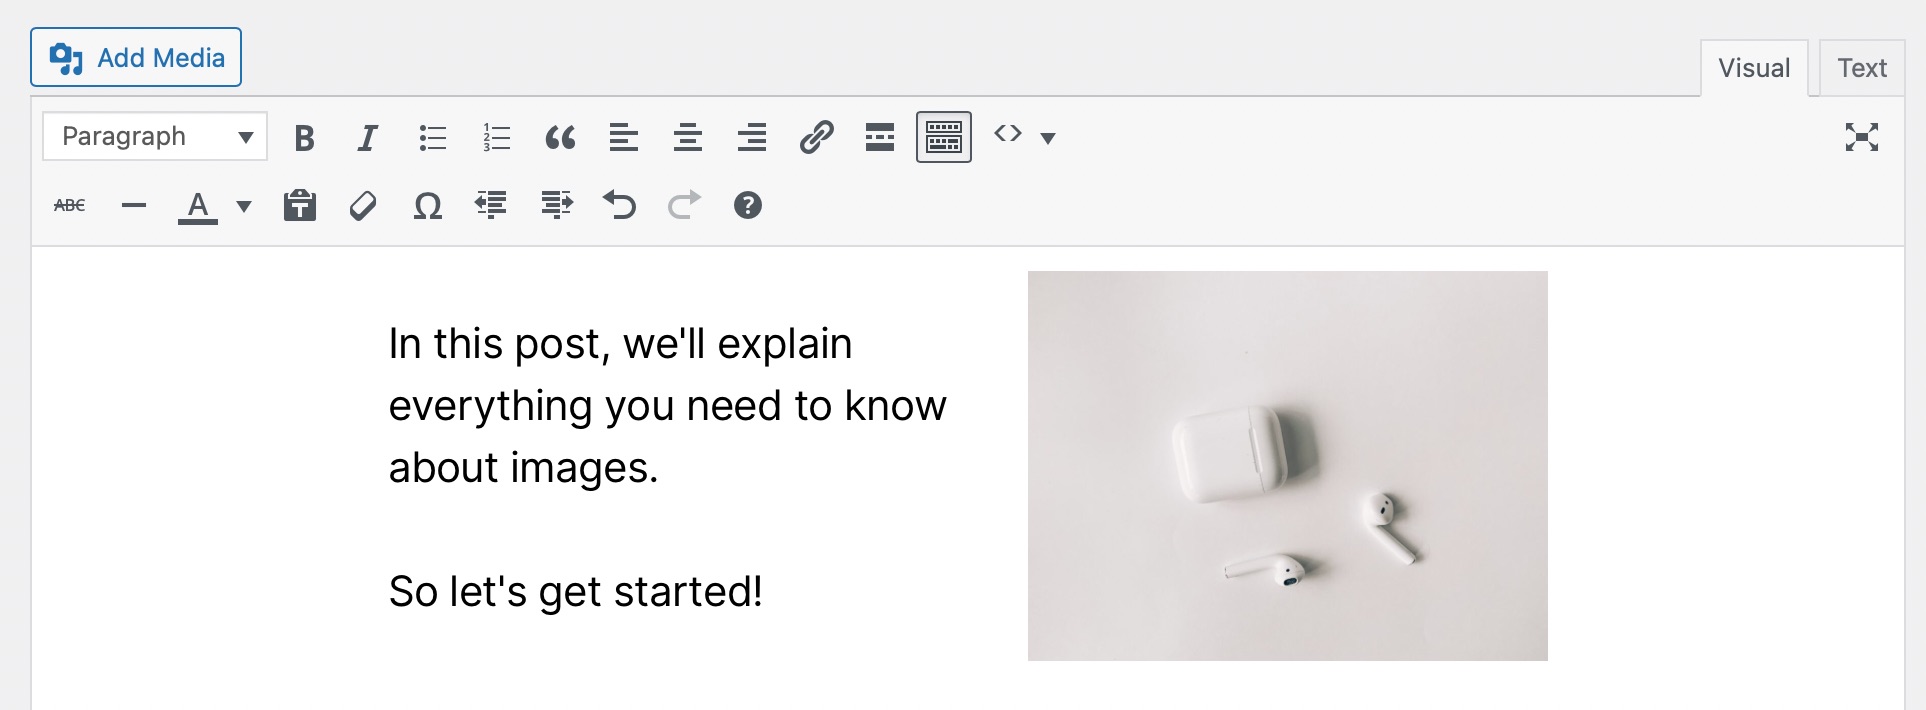
Similarly, here’s how the image will look if placed on the right side of the content in Classic Editor.
3 Add Focus Keyword to ALT Text Naturally
You can provide screen reader users and search engines a textual explanation of what’s on an image by adding ALT Text to it.
Make sure to add images that can include the focus keyword naturally and add that in the ALT tag. This improves accessibility, and if you include your keywords naturally, you stand a chance of ranking in image searches, too.
To add the ALT field in Gutenberg Editor, navigate to your post-editing screen, click on the image, and the ALT TEXT field will appear in the Block section on the right-hand side, as shown below.

Click on the Publish/Save button to save your changes.
To add ALT Text in the Classic Editor, navigate to your post-editing screen, click the image, and click on the Pen Icon to edit the image, as shown below.
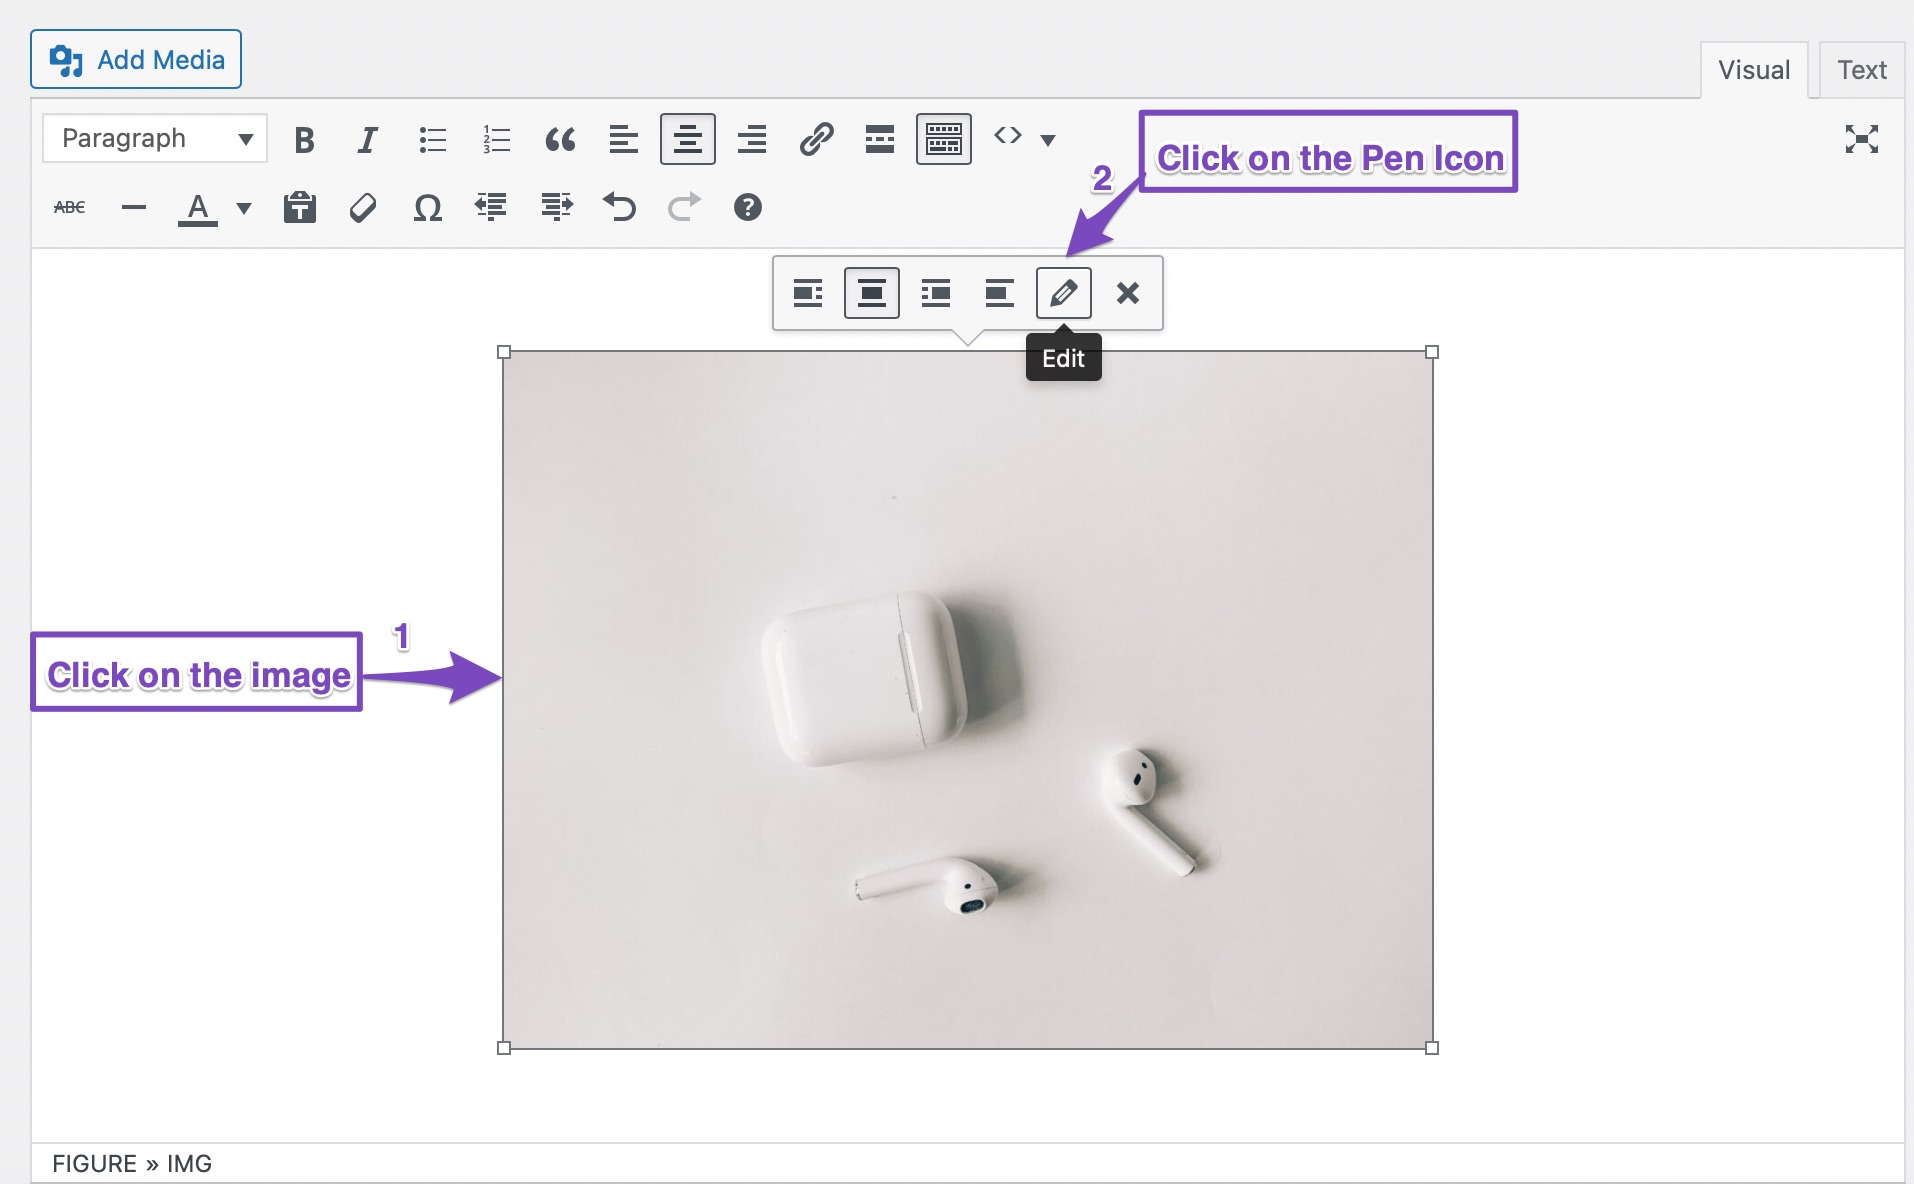
Next, type the Alt Text you want into the Image details of your image and click on the Update button.
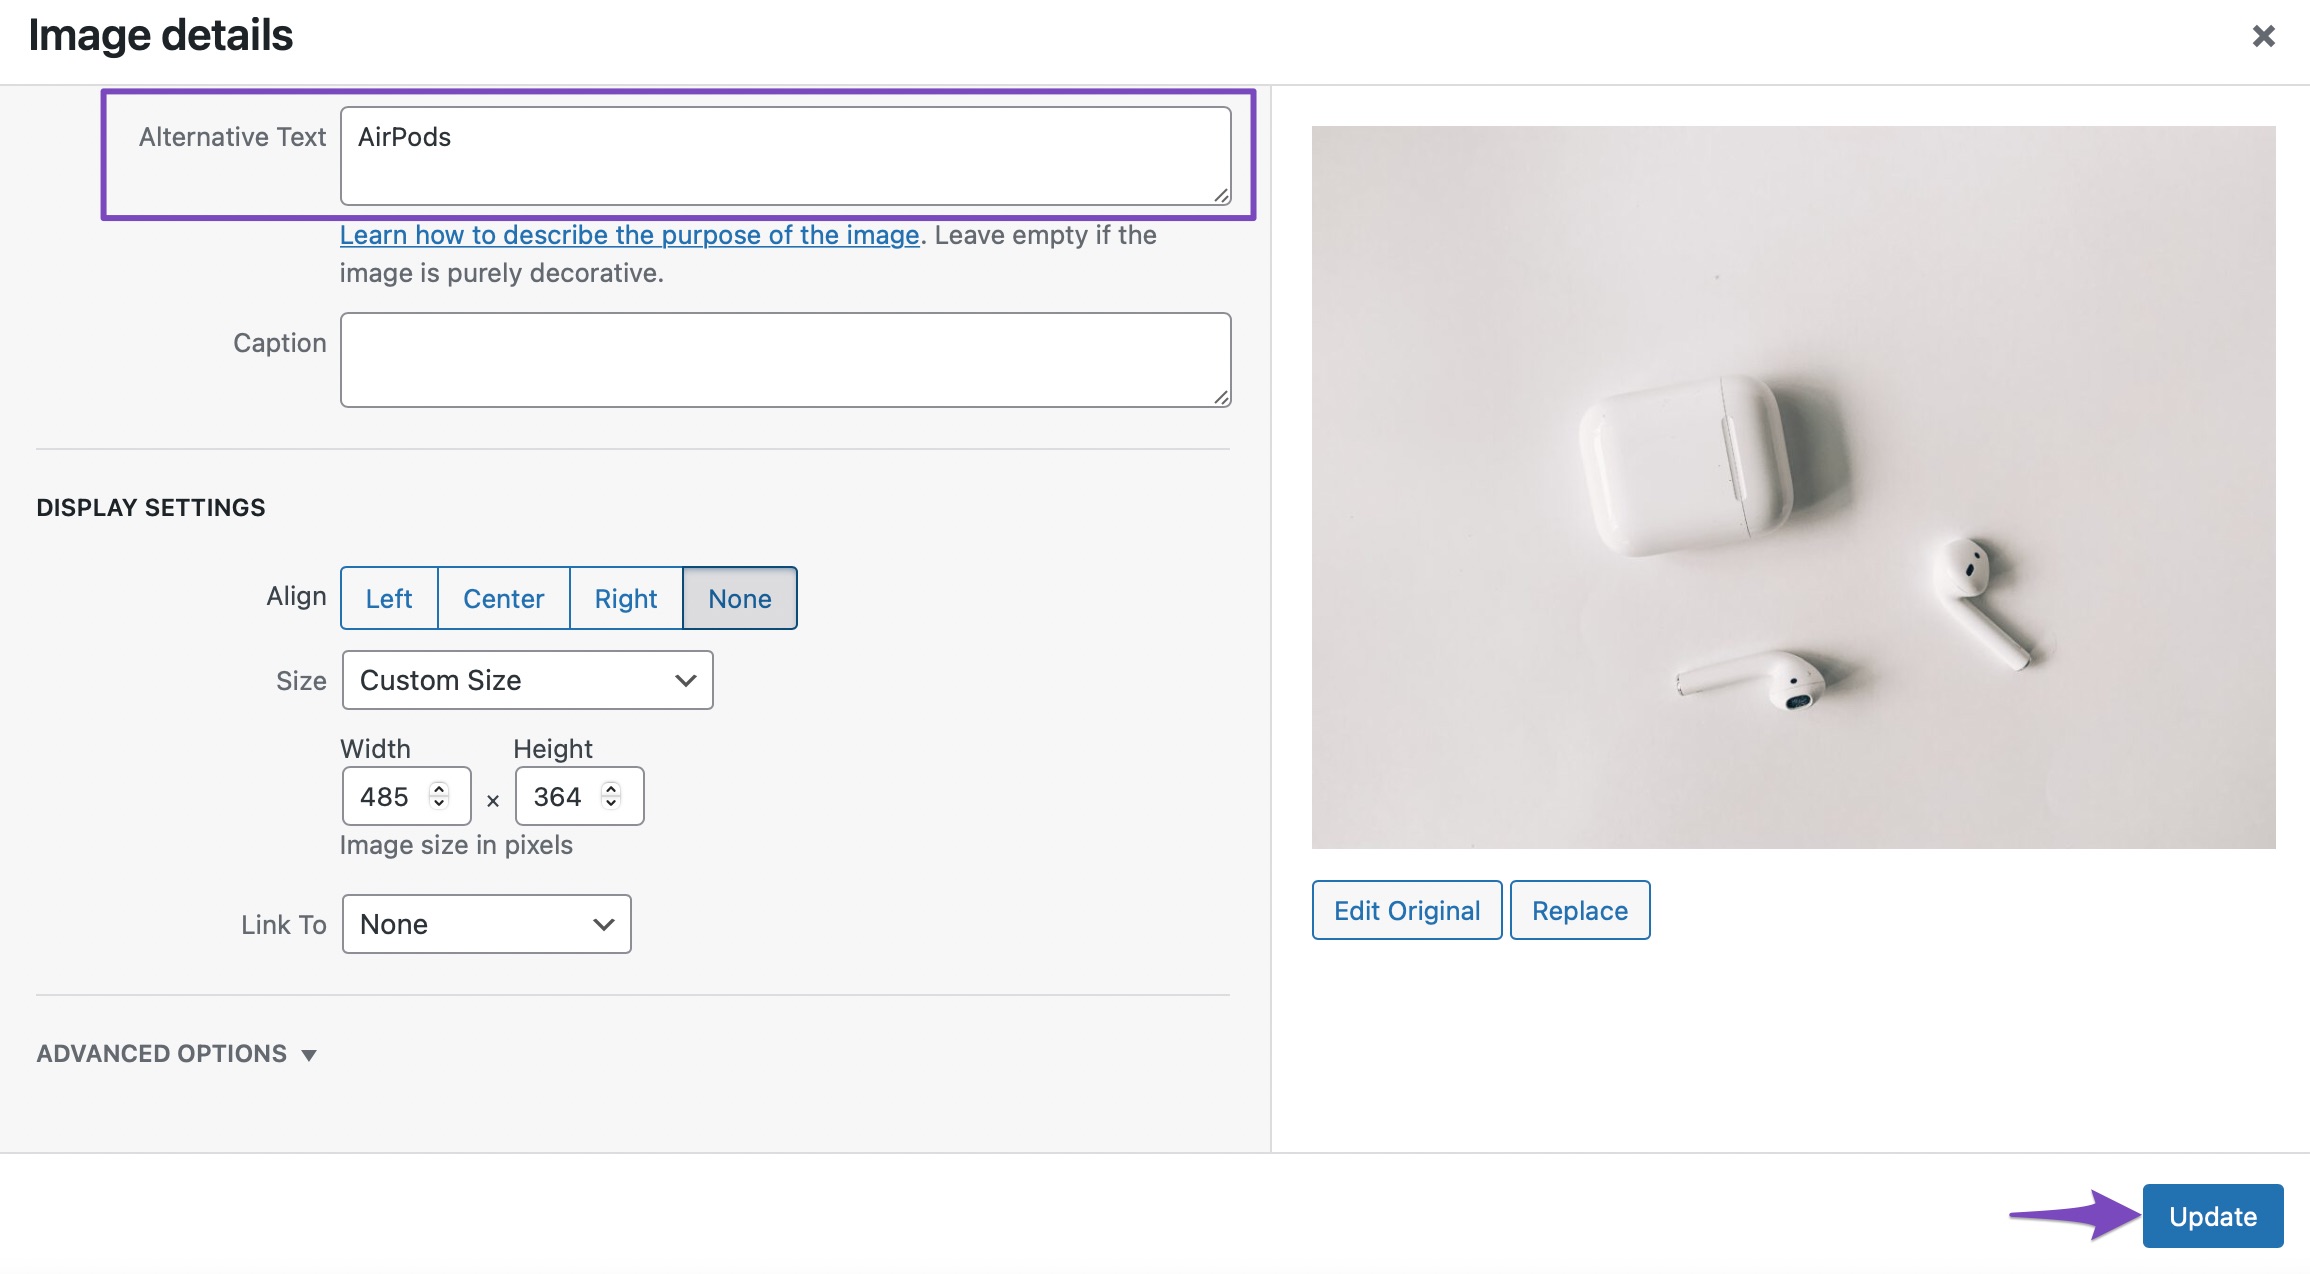
You can even add the ALT text automatically to your images using our Content AI tool. Refer to this guide to learn how to do that.
4 Set a Featured Image
So you have created high-quality images for your site and uploaded them to WordPress Media Library. But you don’t see them in Google search results? Sounds familiar.
Google doesn’t index an image based on the standalone image URL but instead, based on the page from where it is inserted. So we recommend you to include your images on the relevant pages on your website.
If it is a primary image for your post or page, you can easily set it as a Featured Image in WordPress. To set a featured image, navigate to your Post settings and click on the Featured image section to add an image.
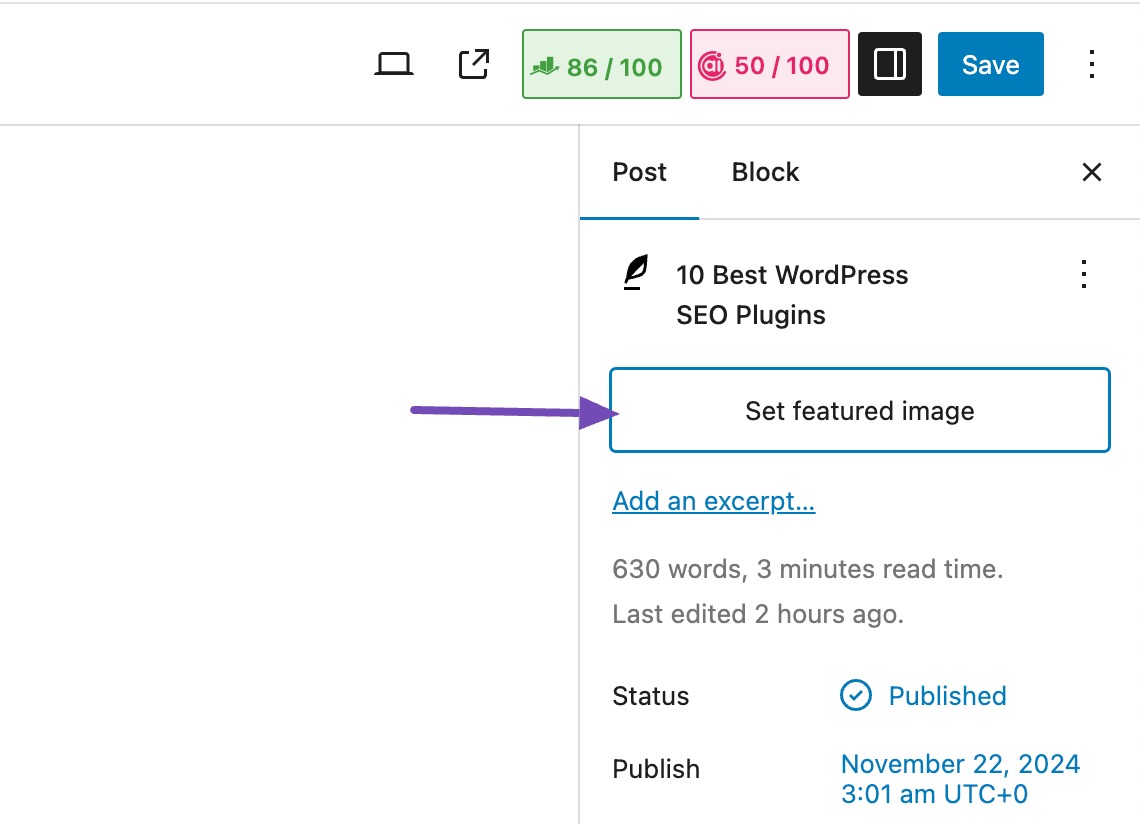
Click on the Set featured image, select the image, and your featured image will be set for your post.

If possible, the featured image of the post should match the first image but at the same time, ensure that the image gets displayed only once inside the article.
5 Use Descriptive File Names
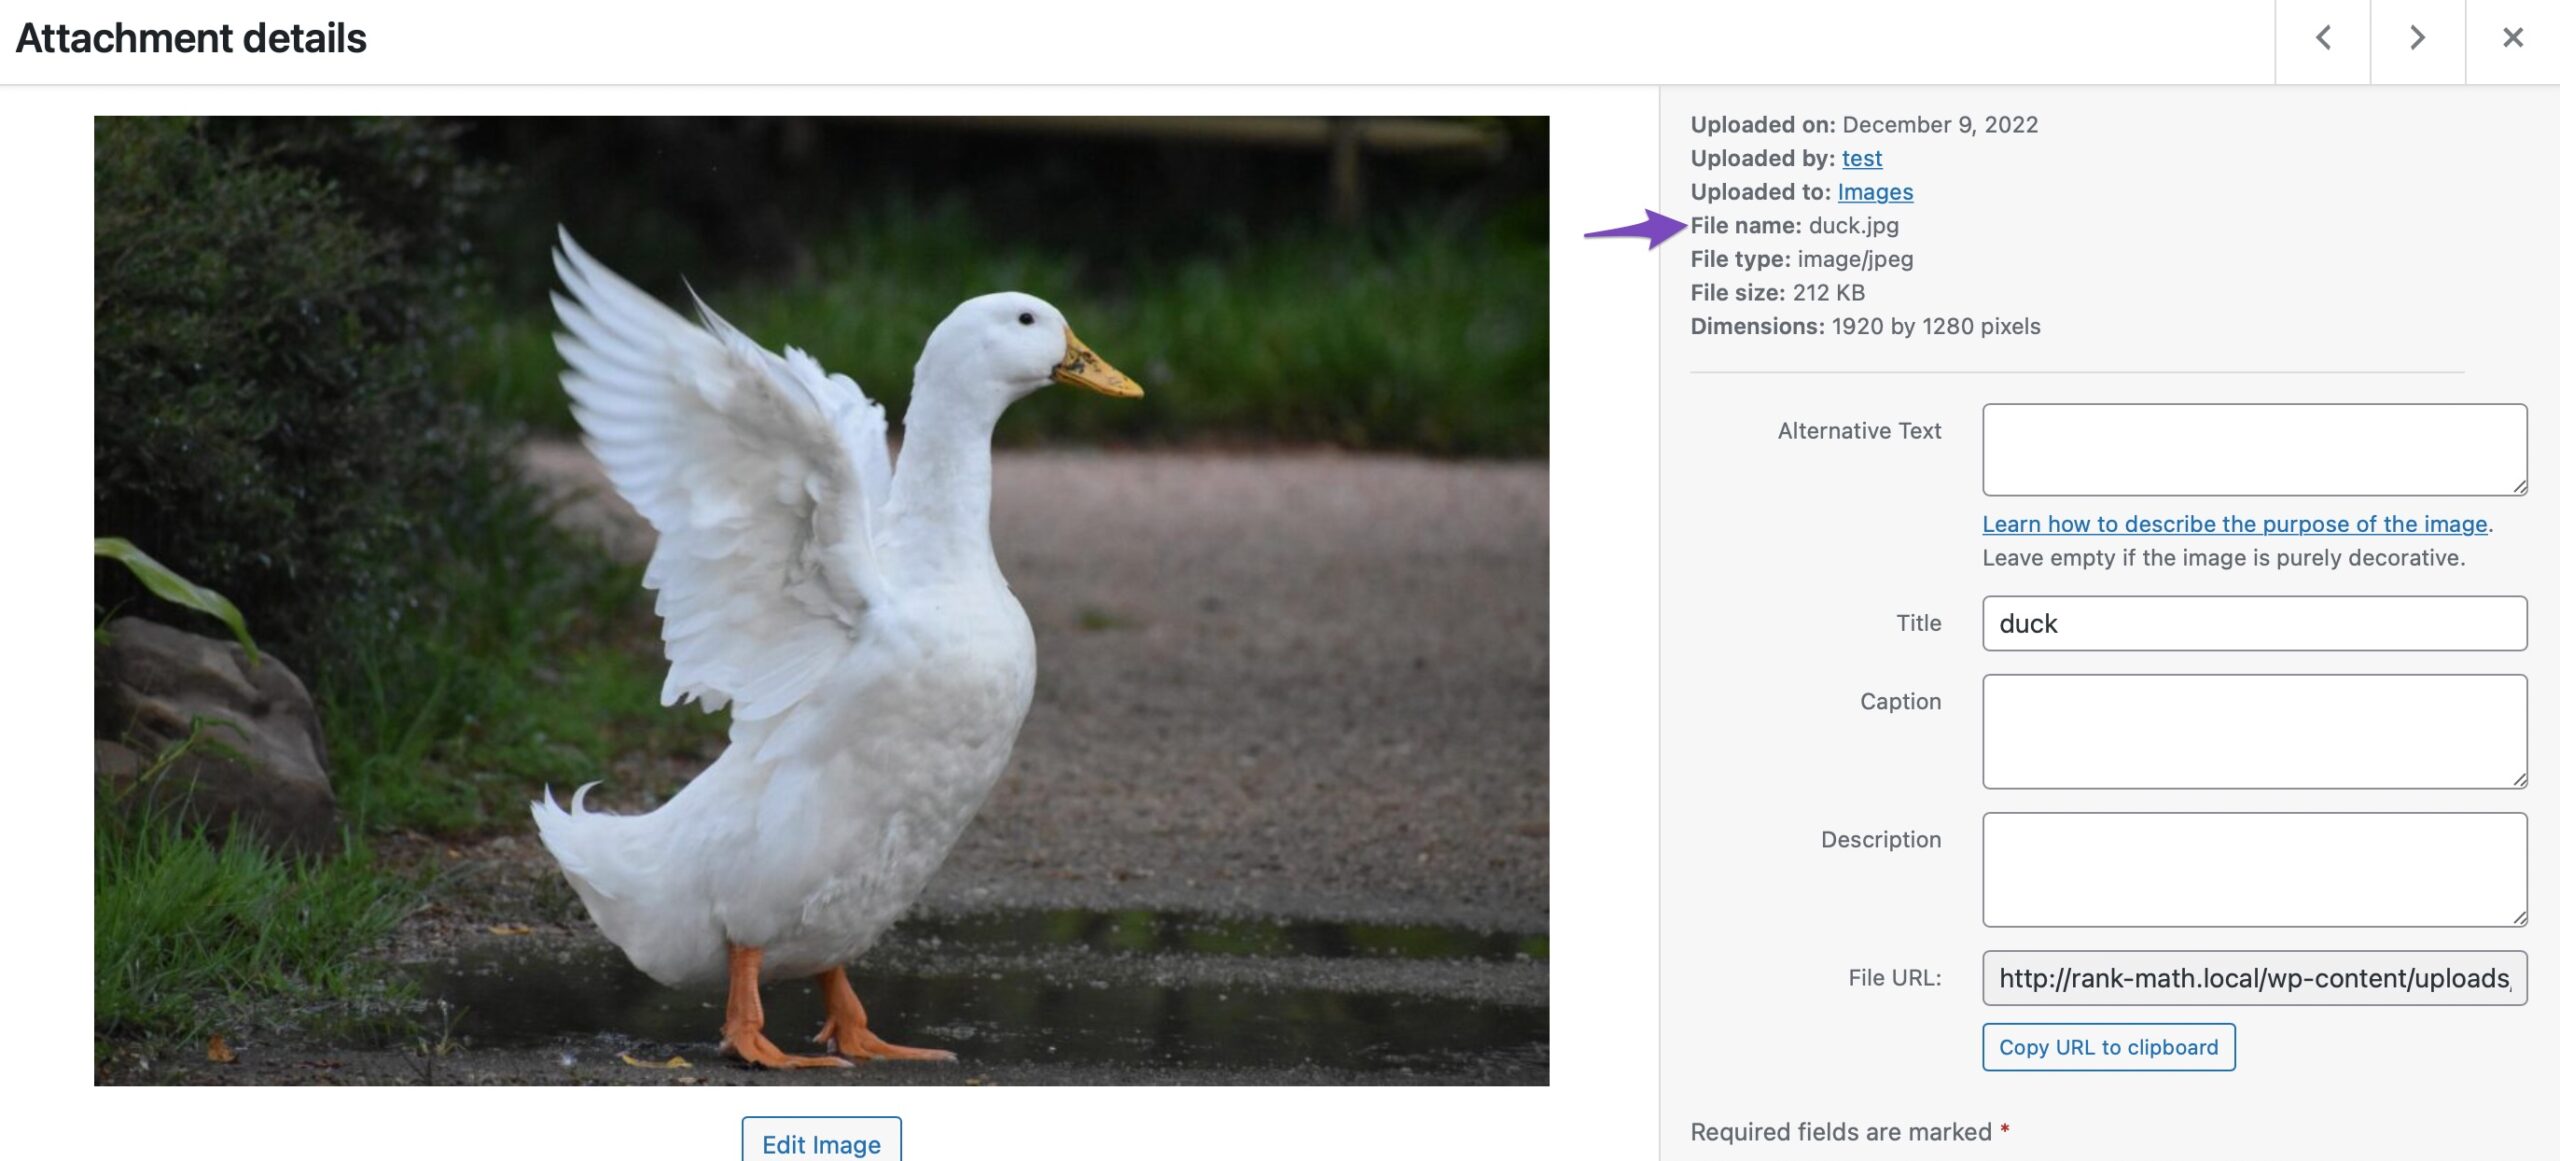
One of the best ways to optimize your images for Google image search is to use descriptive file names. The file names should accurately describe what is in the image, as search engines use this information to understand the content better.
For example, if the image is of a duck, you should use a file name such as “duck.jpg” instead of “image1.jpg”. This will help the search engine know the image’s content and result in better visibility in search results. As a best practice, you should always use unique and descriptive file names for your images.
6 Add SEO Meta Title and Meta Description Using Rank Math
Now with the help of Rank Math, you can add the SEO Title and Description.
To add an SEO Title and Meta Description in the Gutenberg Editor, navigate to the post/page where you want to add the SEO metadata and click on the Rank Math icon at the top right corner of the WordPress menu.
Next, in the General tab, you can add your title and description, as shown below.
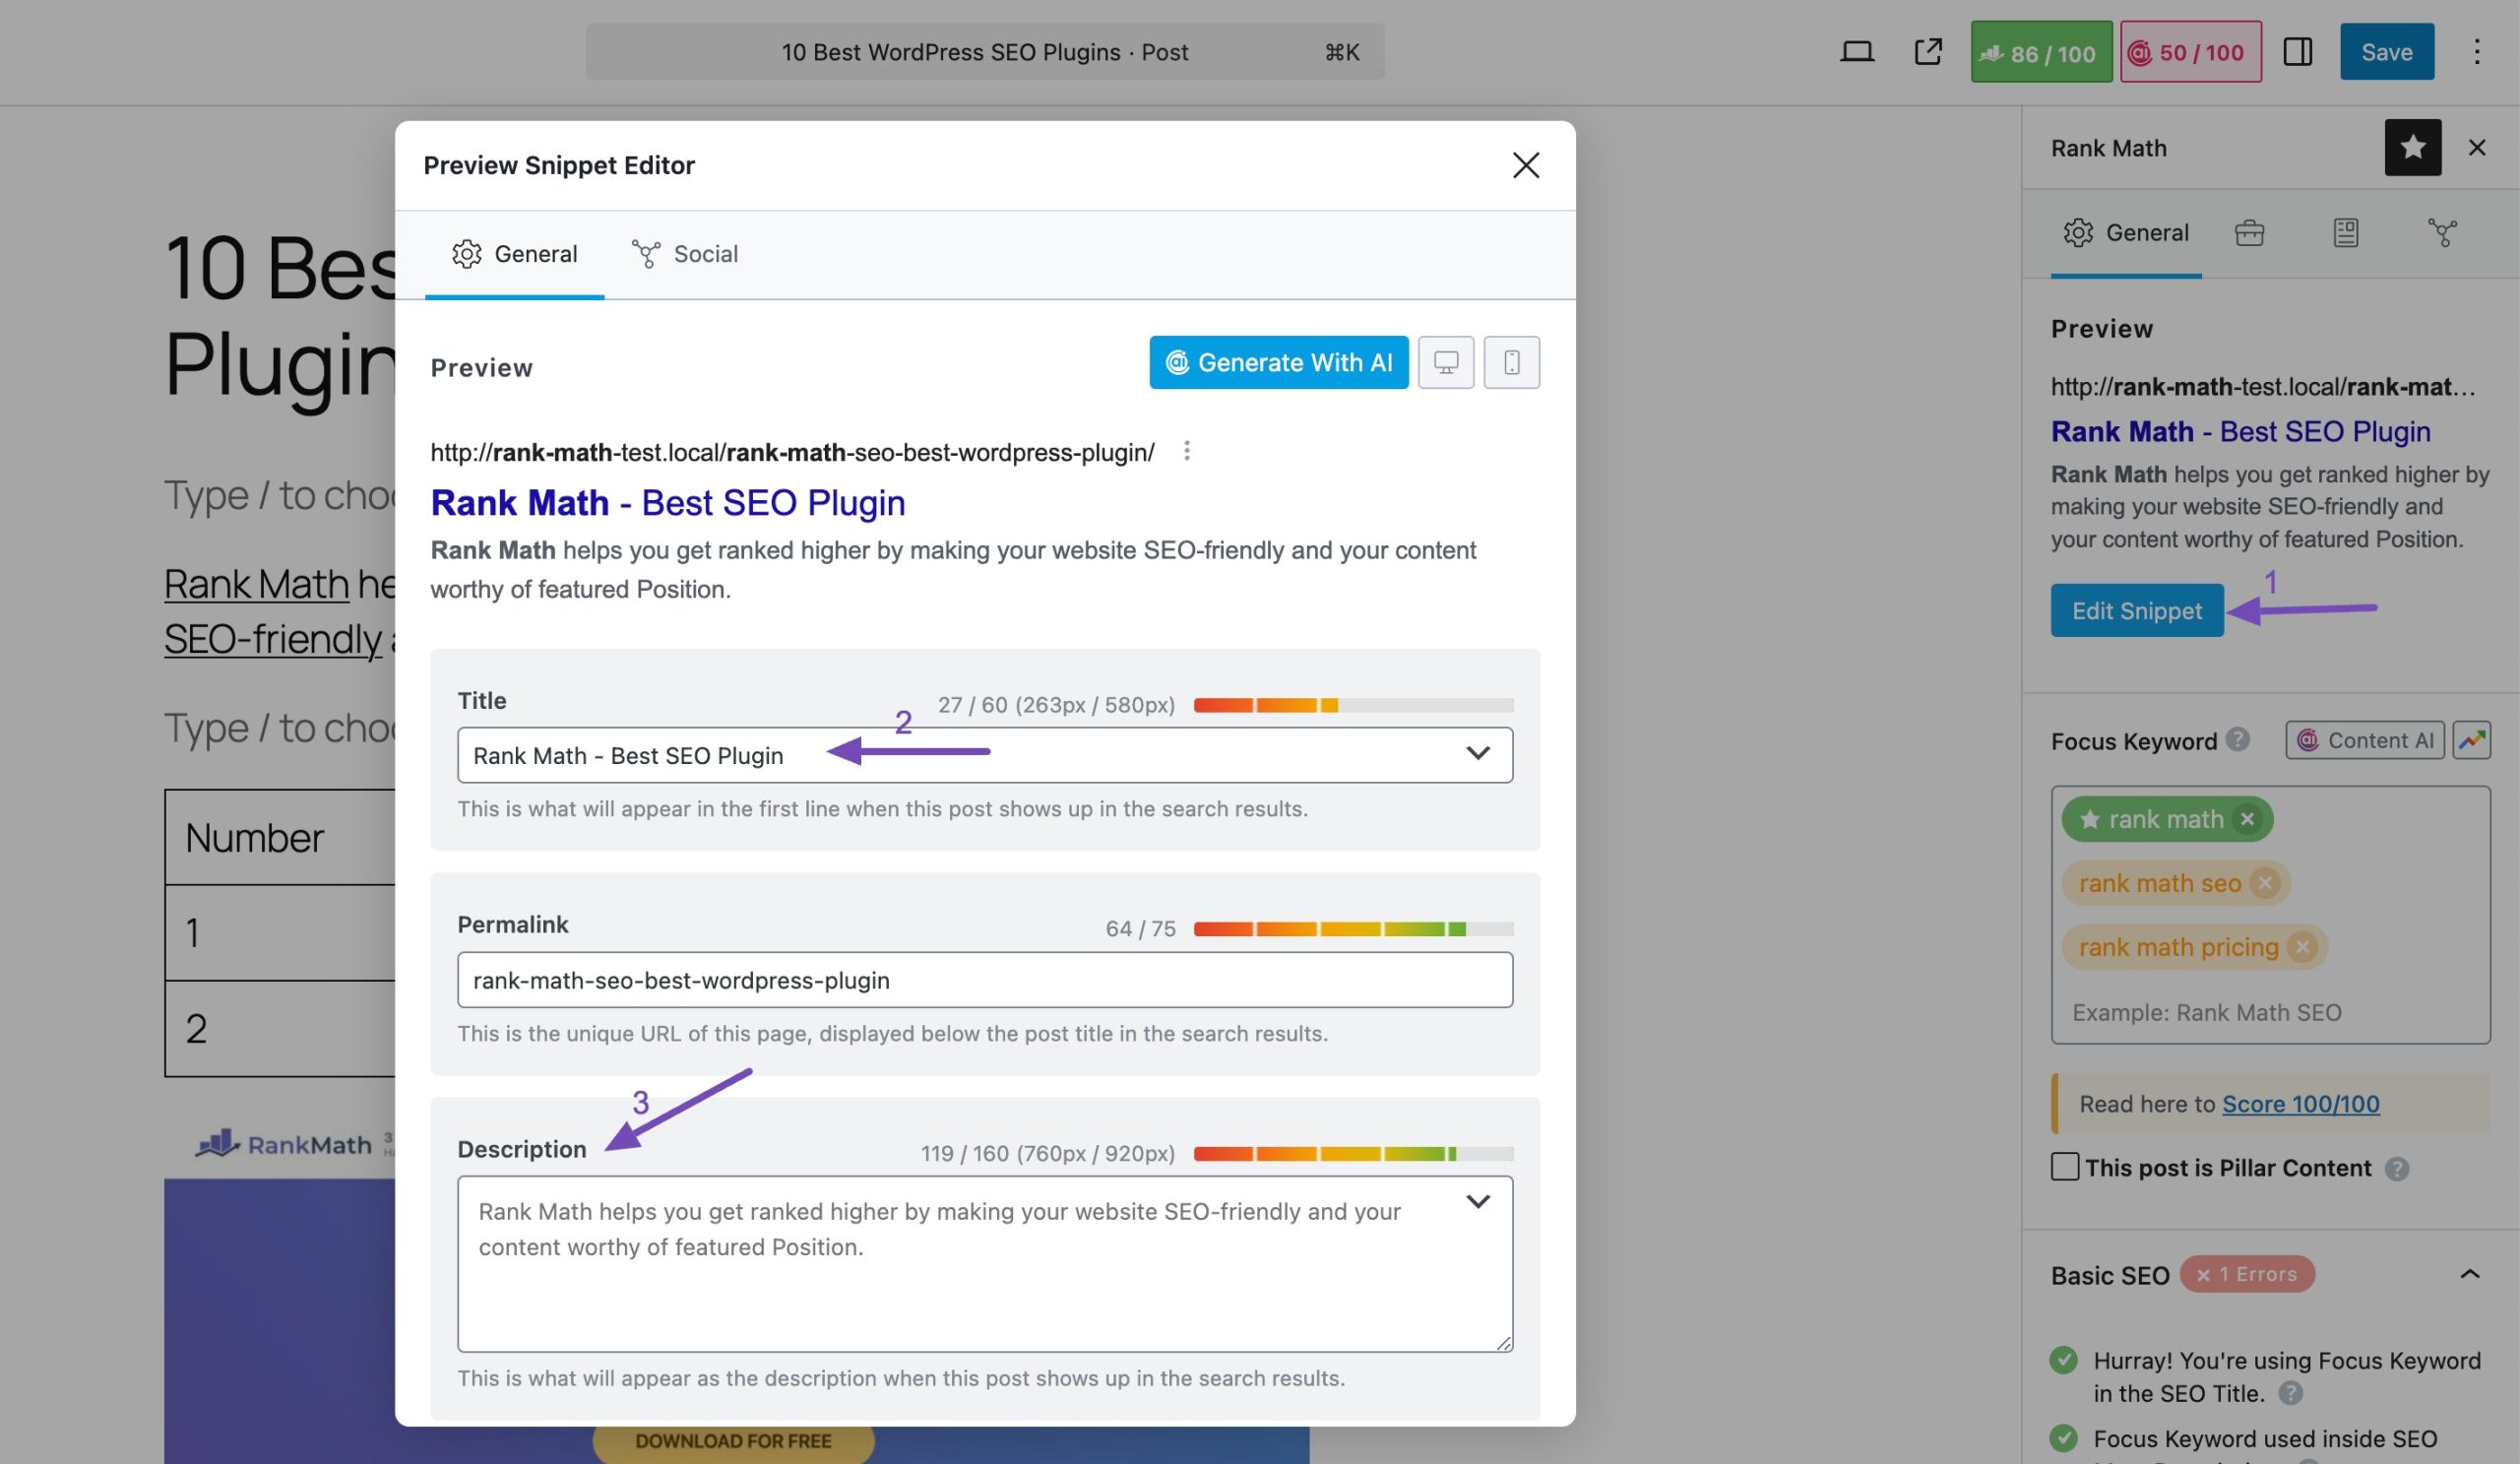
In Classic Editor, navigate to your post/page editing screen, and scroll down a bit to locate the Rank Math SEO Meta Box. In the Rank Math SEO General tab, you can add your SEO title in the Title section and SEO description in the Description section, respectively.
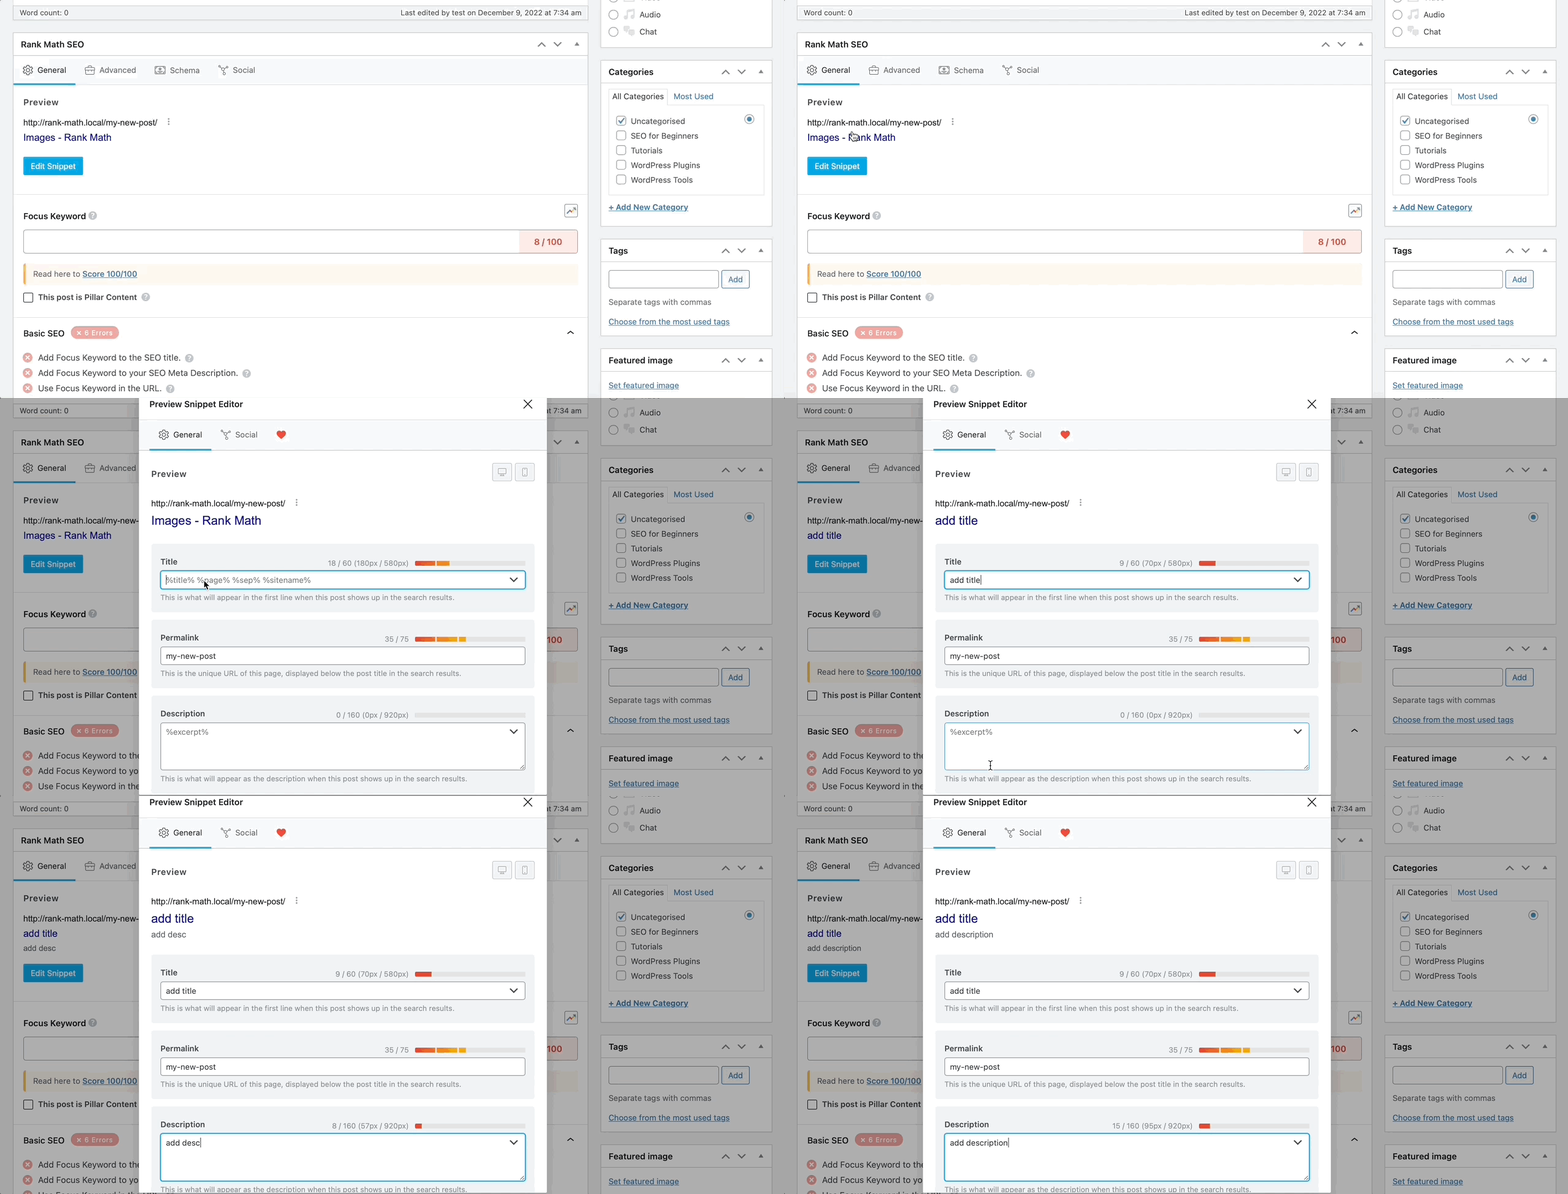
You can then check if your title/description is properly set up in the page source.

7 Check Schema Tab Settings
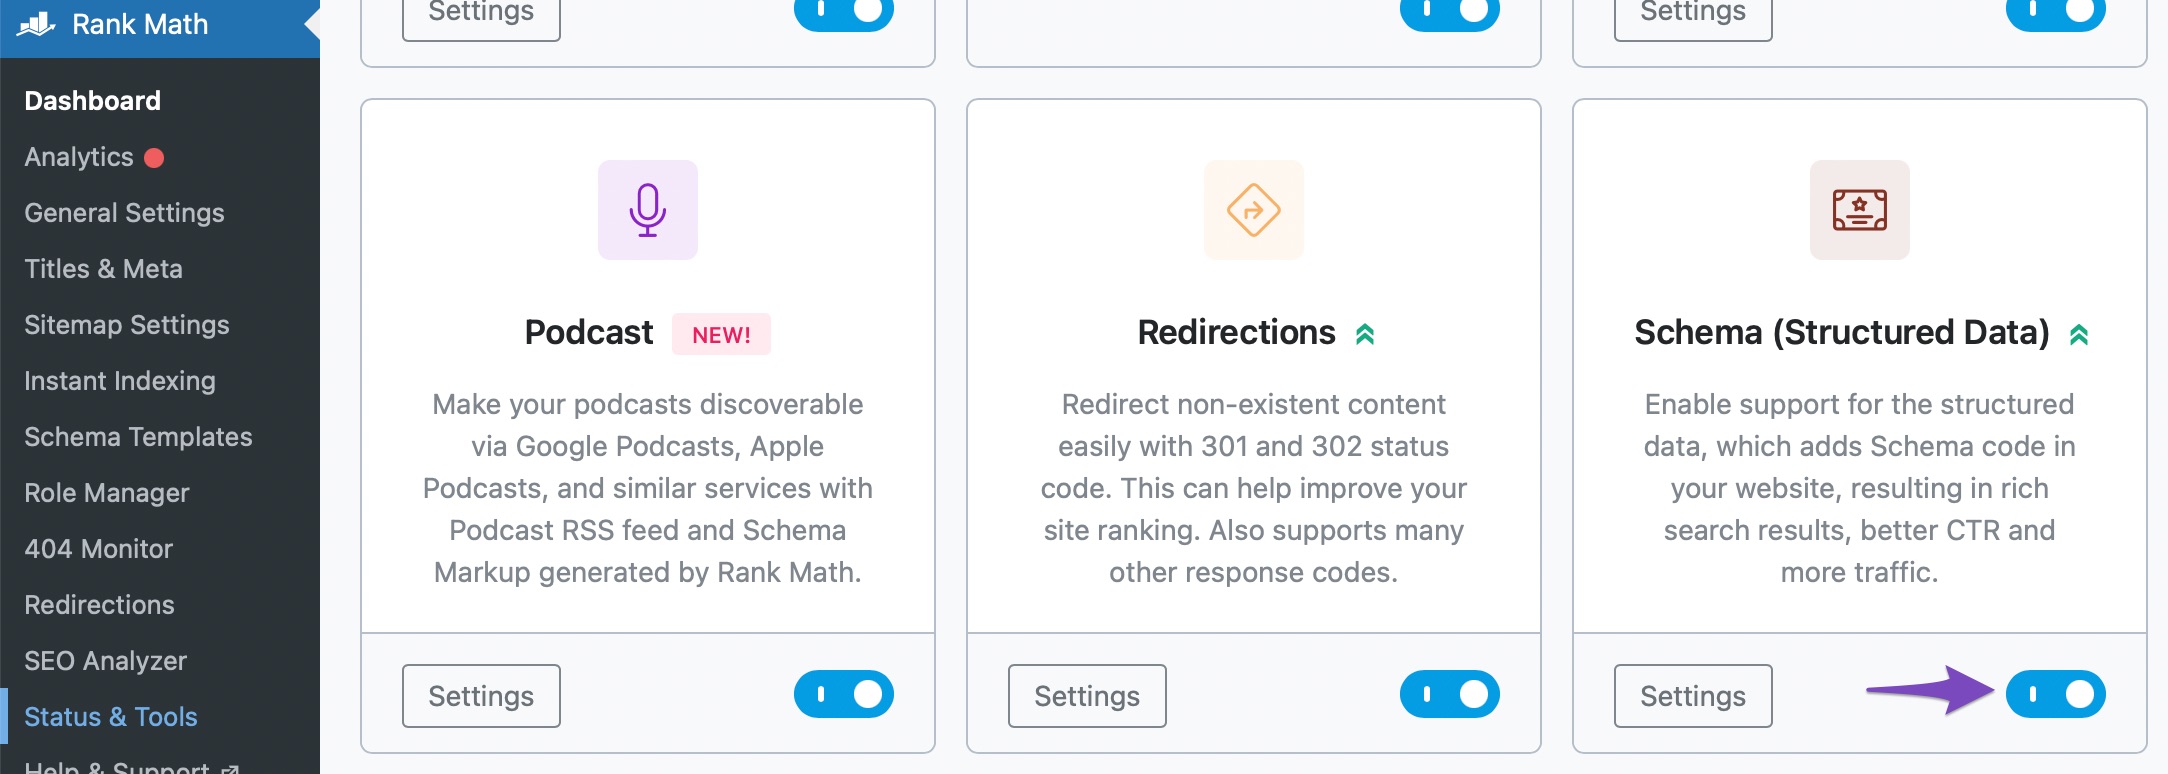
Make sure that the Schema Module is enabled on your site by navigating to the Rank Math SEO → Dashboard section from your WordPress dashboard.
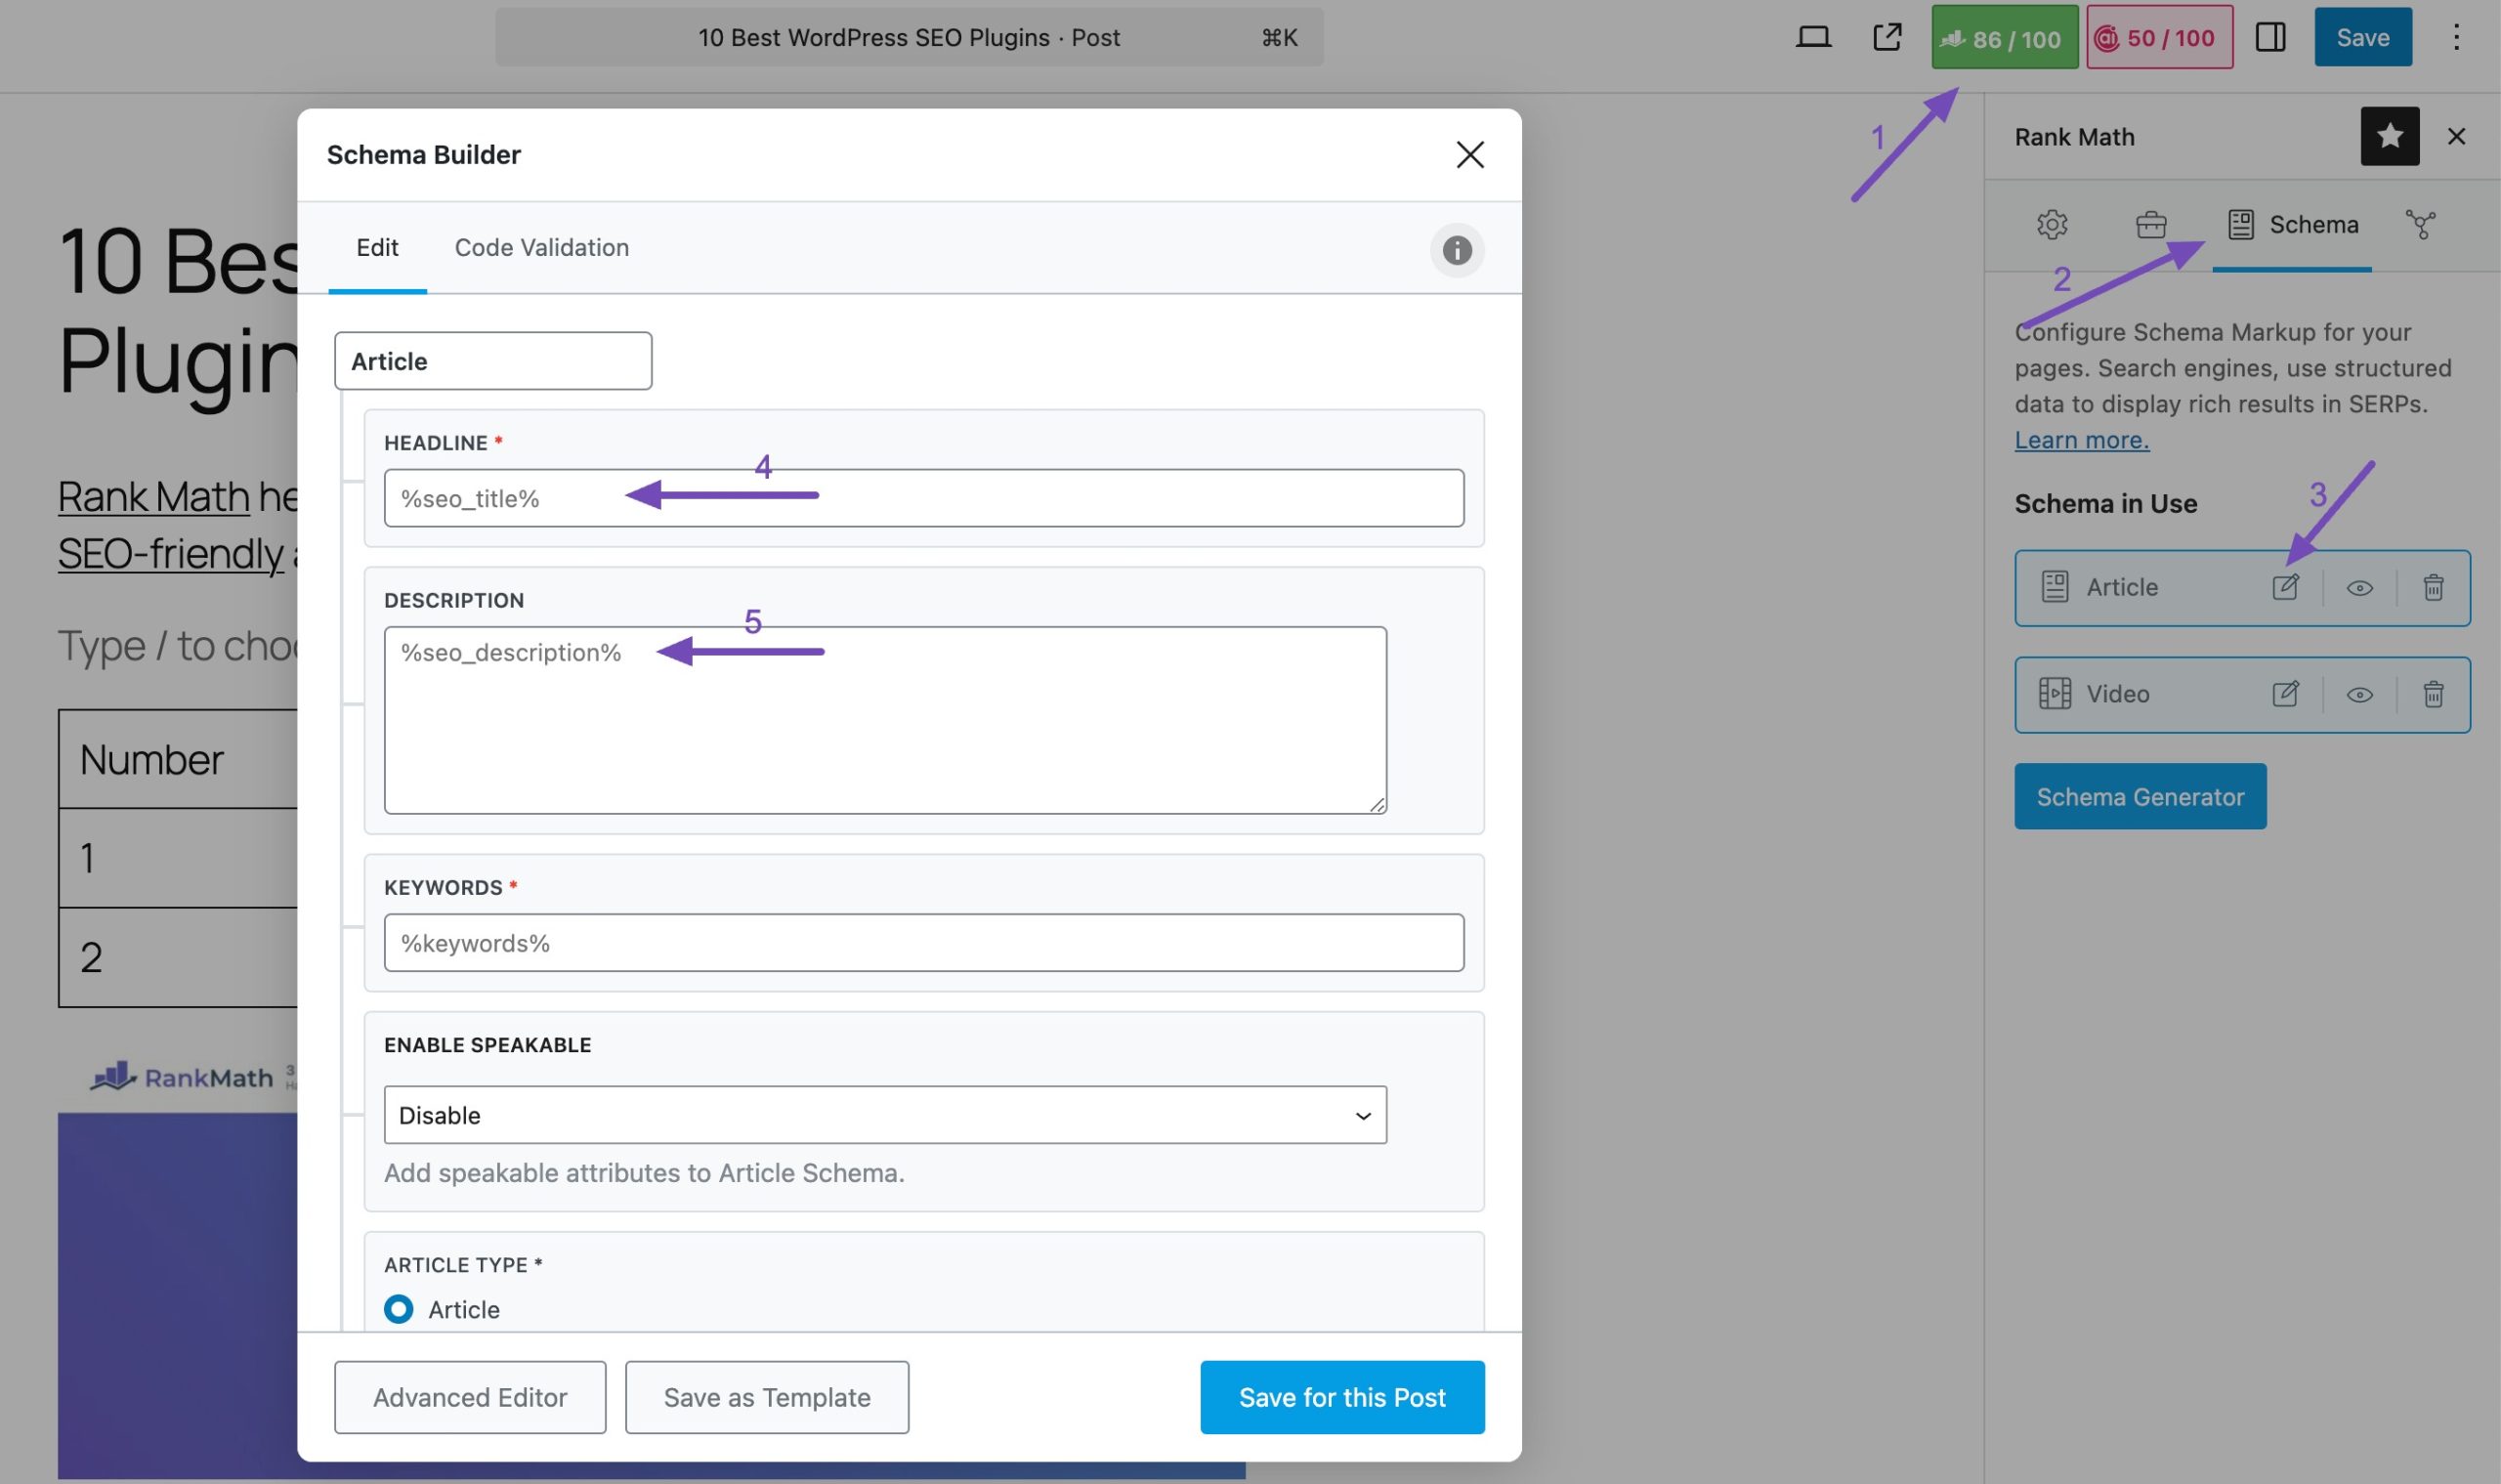
Next, in the post editor, navigate to the Schema Builder and ensure that the Schema Headline and Description are set to SEO Title and Description variables, as shown below.
8 Optimize Image ALT Text, Title & Caption
To ensure that your images are properly indexed and displayed, it’s important that your images are properly tagged with relevant keywords and titles.
For example, you can add context to which your images appear by using proper ALT text, Title attribute, and captioning. It’s best to keep them concisely descriptive and don’t fill them with too many keywords but explain the image in the best way possible.
If you feel this entire process is going to be time-consuming, Rank Math is here to help you automate this process. So, if you have already labeled your images with the correct file name, you can automatically repurpose them for your ALT Text, Title, and Captions.
To use this feature, ensure you’ve enabled the Image SEO module by navigating to Rank Math SEO from your WordPress dashboard.
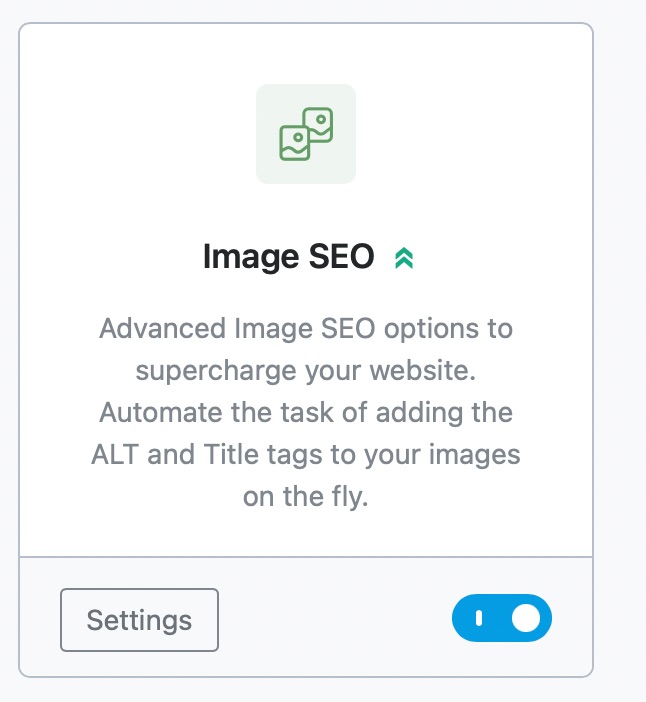
Once enabled, navigate to Rank Math SEO → General Settings → Images, and toggle the Add missing ALT attributes to add the filename of your images as the ALT attribute automatically.
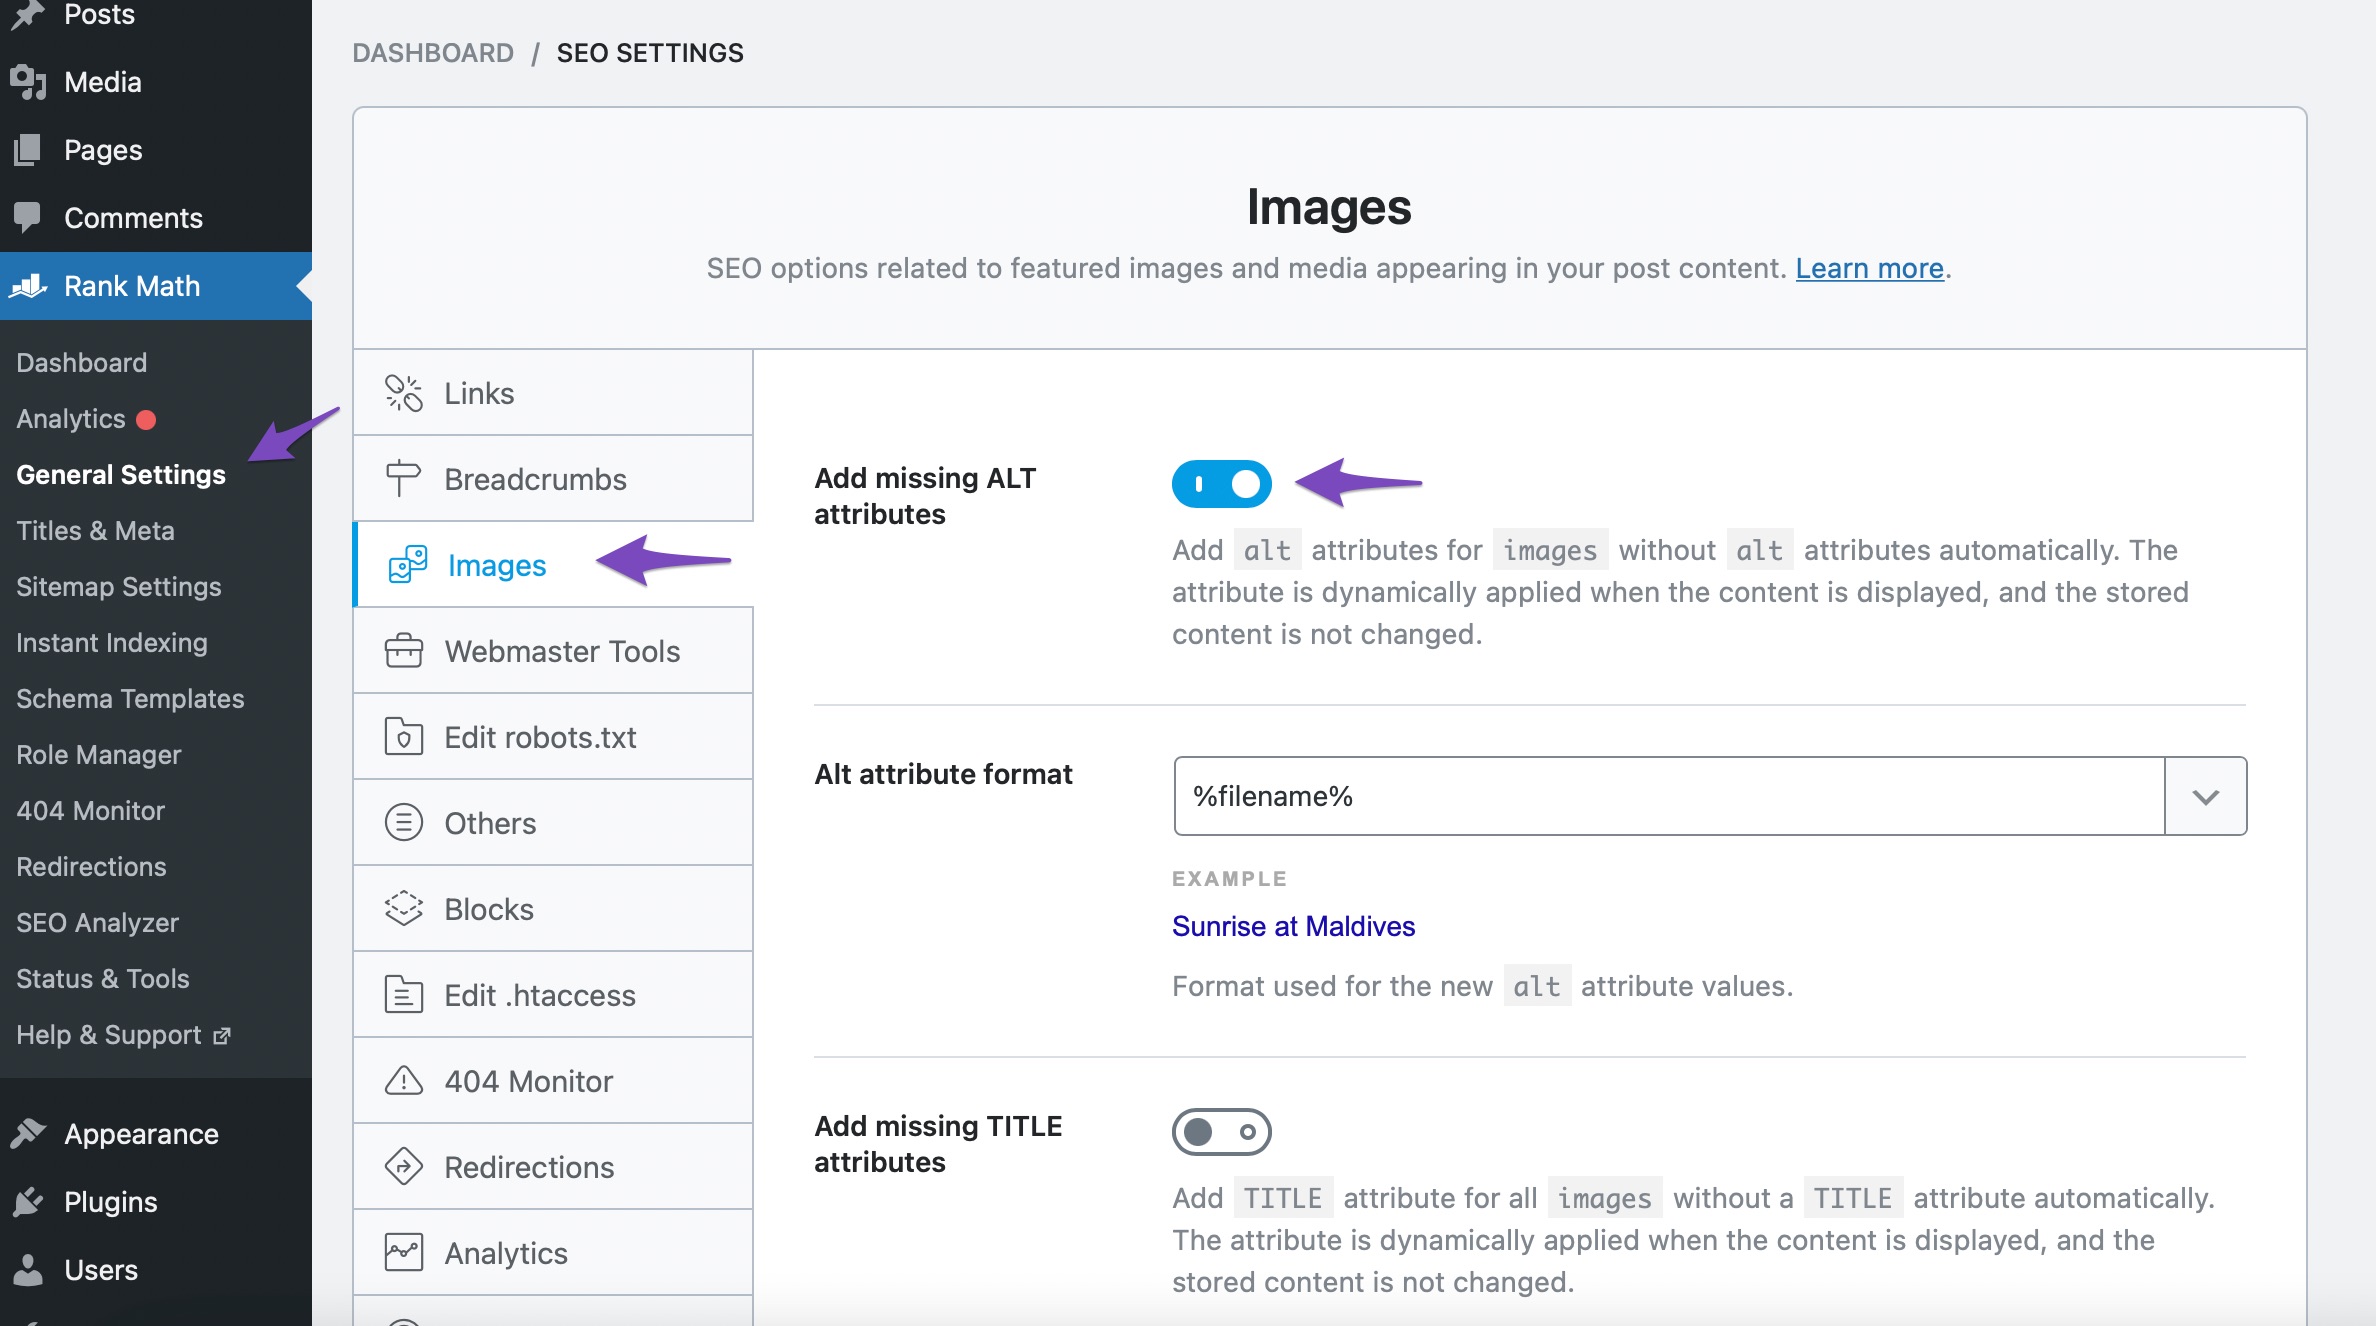
For instance, if you choose %filename% as the ALT attribute format, Rank Math changes the image alt text value on the front end of your website, as shown below.

Similarly, you can add the TITLE attribute and captions to your images automatically.
9 Submit the Page to Google
Now, it’s time to submit your page to Google. To do so, navigate to your Google Search Console account, copy the Page URL you wish to submit, and paste it into the Inspection tool located at the top, as shown below.

Check if the URL is indexable by clicking the TEST LIVE URL button. If the page is not on Google, click on REQUEST INDEXING to submit the indexing request.

After sending the request to Google, you might have to wait a few days (or longer) for indexing to complete.
Note that if everything’s fine and Google still decides not to show an image next to your article, there is nothing you can do, as Google sometimes ignores the custom meta information altogether and shows something from the page’s content that matches the search intent better.
Here are some of the common reasons Google might not display your image in search:
- Google may consider images less relevant for a web-specific search query and could prefer to show other types of results
- The image could be considered duplicate when several instances of the same image are found across the internet. In that case, Google would try to feature only one version (original version) of the image in search results. This is very often the case when you use stock photos.
- Google would consider factors such as authority and context to determine whether to display an image or not.
You can read a detailed article on what patents Google uses to determine which images to show in the search results.
Here’s an example of Google removing the images from the search depending on the keyword used. If we search for mythemeshop black friday keyword, Google picks the first image found on the sales page and displays it in the search results.

However, if we search for, say, mythemeshop product sale, the image is no longer available in the search results.

Conclusion
It is ultimately up to Google to determine which images are most relevant to a given query and display those images in the search results. While you can’t control which image Google chooses to display in search results, you can improve the chances that your images will be displayed in Google image search results by implementing the above-mentioned steps and following our dedicated guide on Image SEO.
If you still have questions – you’re always more than welcome to contact our dedicated support team. We’re available 24/7, 365 days a year…