The NoIndex tag tells Google not to index a certain page on your website. This can be useful if you have a page you don’t want people to find in search results.
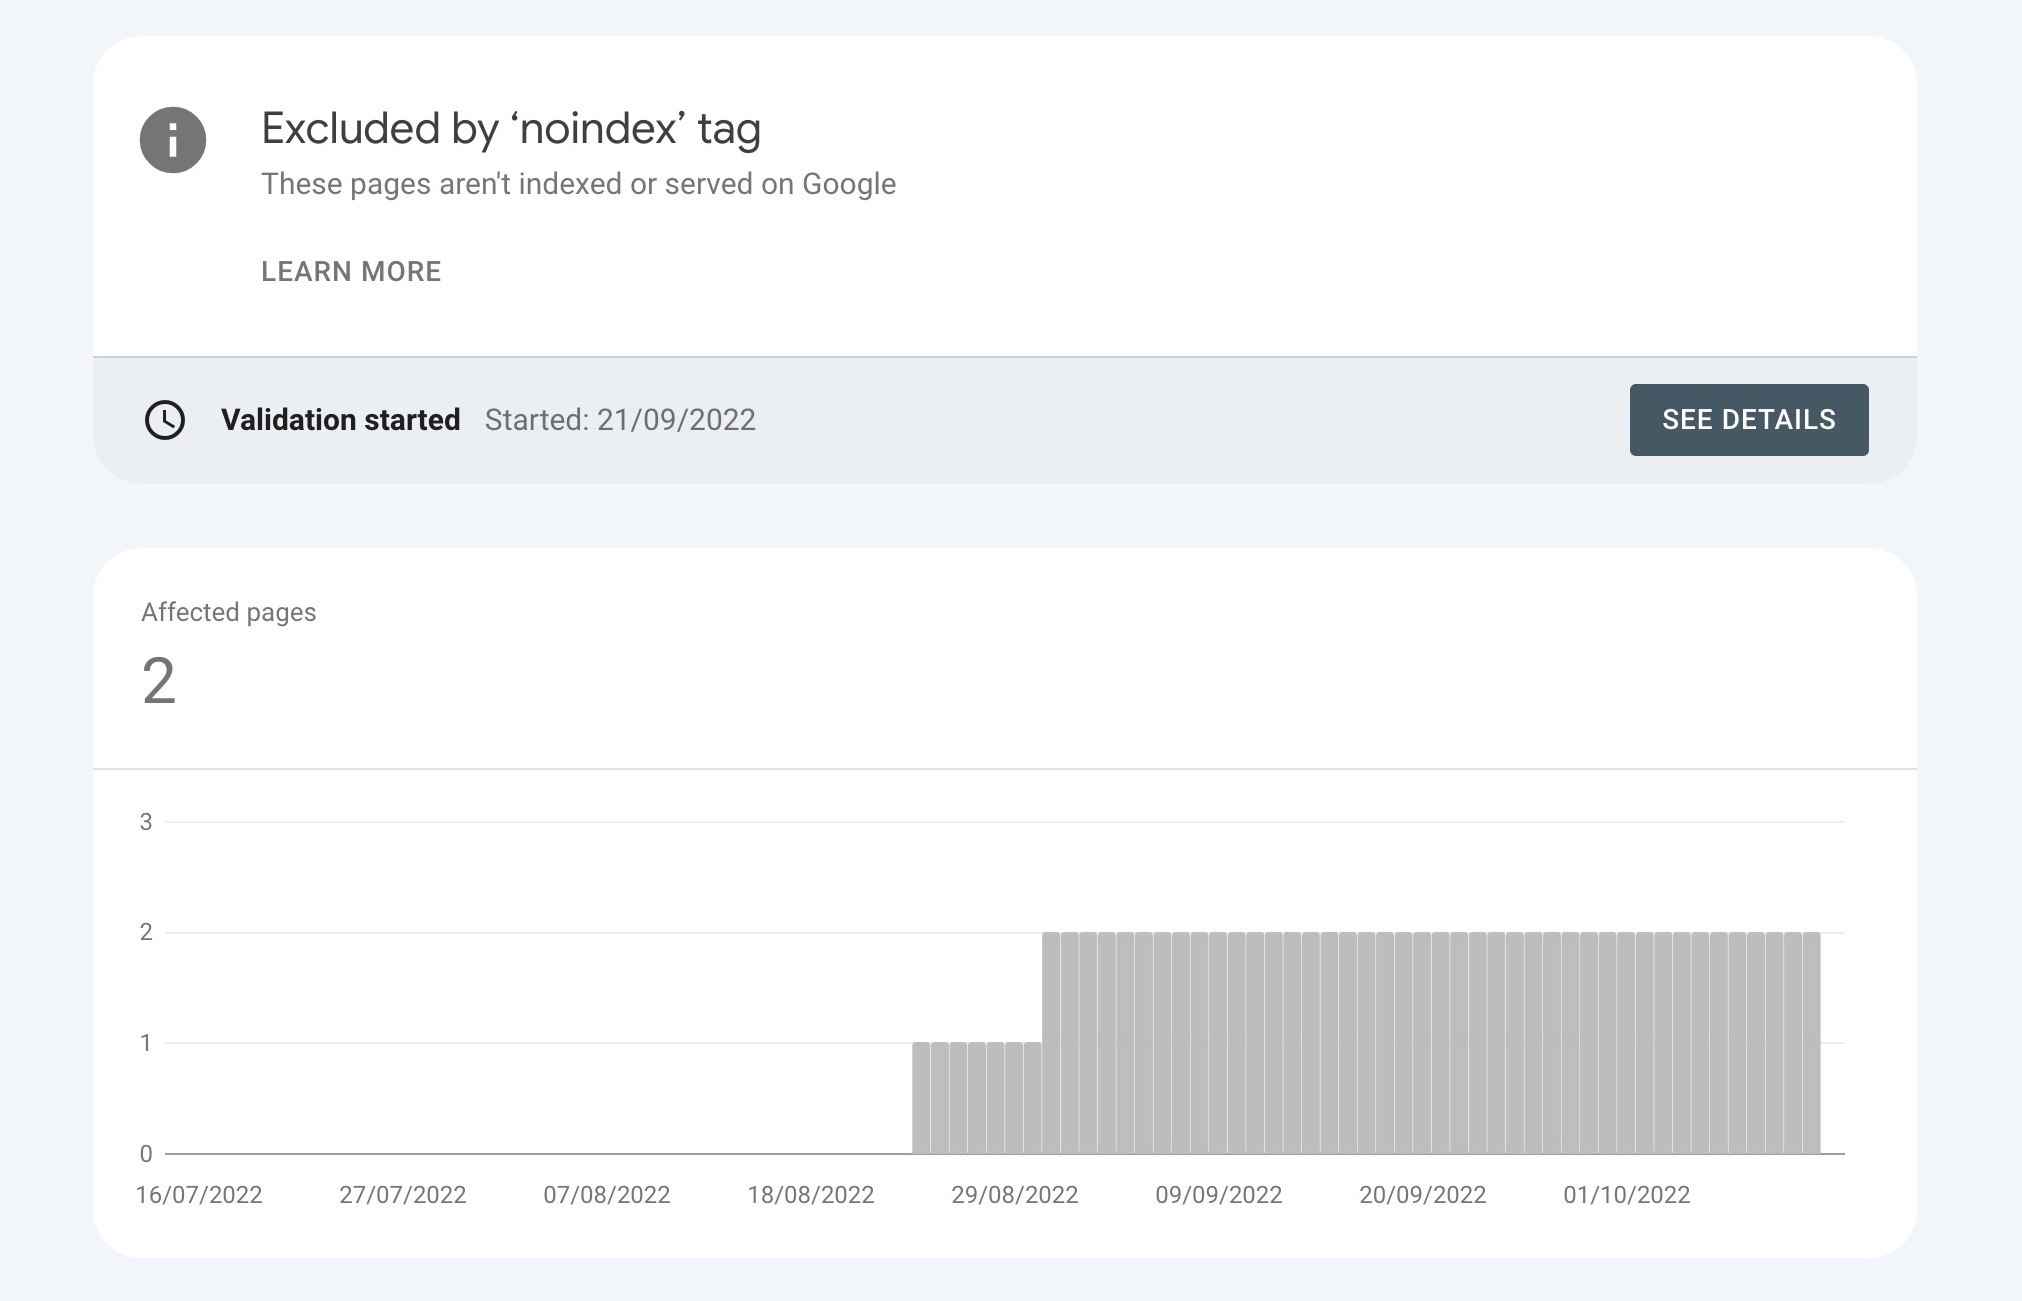
A NoIndex tag on a page will show up as “Excluded by NoIndex Tag” in the Google Search Console Status report and in the Index Status report of Rank Math’s Analytics.
If you want people to be able to find this page, you’ll need to remove the noindex tag. However, if the pages are intentionally set to noindex, you can ignore this status.
Don’t worry, though! In this knowledgebase article, we’ll explain what this message means and give you tips on how to fix it.
1 What Does “Excluded by NoIndex Tag” Status Mean?
The excluded by noindex tag status means that Google has found a noindex tag on your page. This could be due to a number of reasons:
- You might have accidentally added a noindex tag to your page.
- You might have accidentally checked the discourage search engine option in WordPress settings.
- A site plugin or script might add a noindex tag to your pages.
- Your site might have been hacked, and a hacker might have added a noindex tag to your pages.
If you want people to be able to find this page, you’ll need to remove the noindex tag. We’ll show you how to do that in the next section.
2 How to Fix the Excluded by NoIndex Tag Status PRO
The first step is to identify all of the pages on your website that are affected by this status message.
To do this, navigate to the Pages section of Google Search Console and click on Not indexed, as shown below.
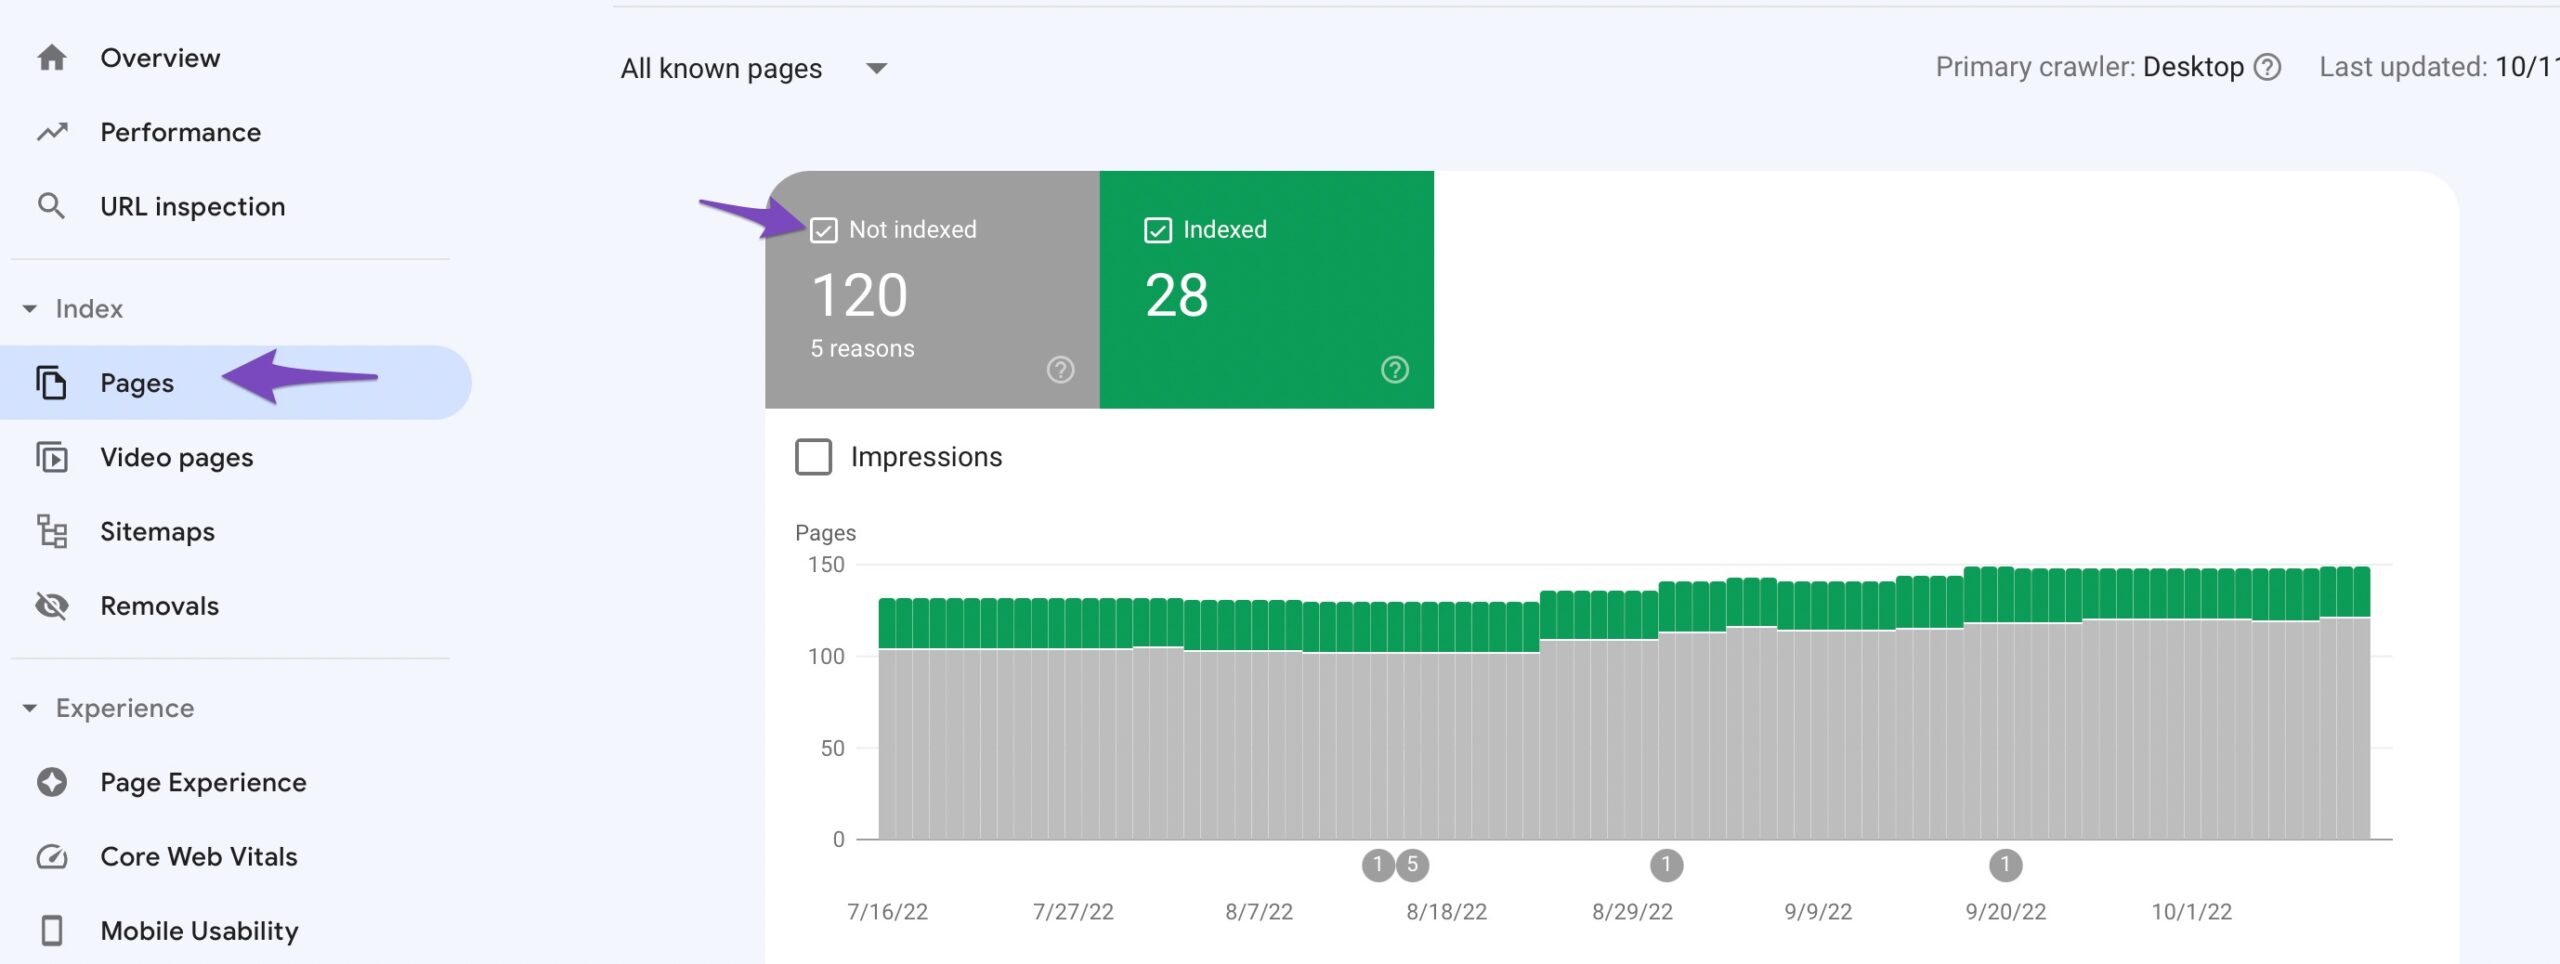
Then, click on the “Excluded by ‘noindex’ tag” status.
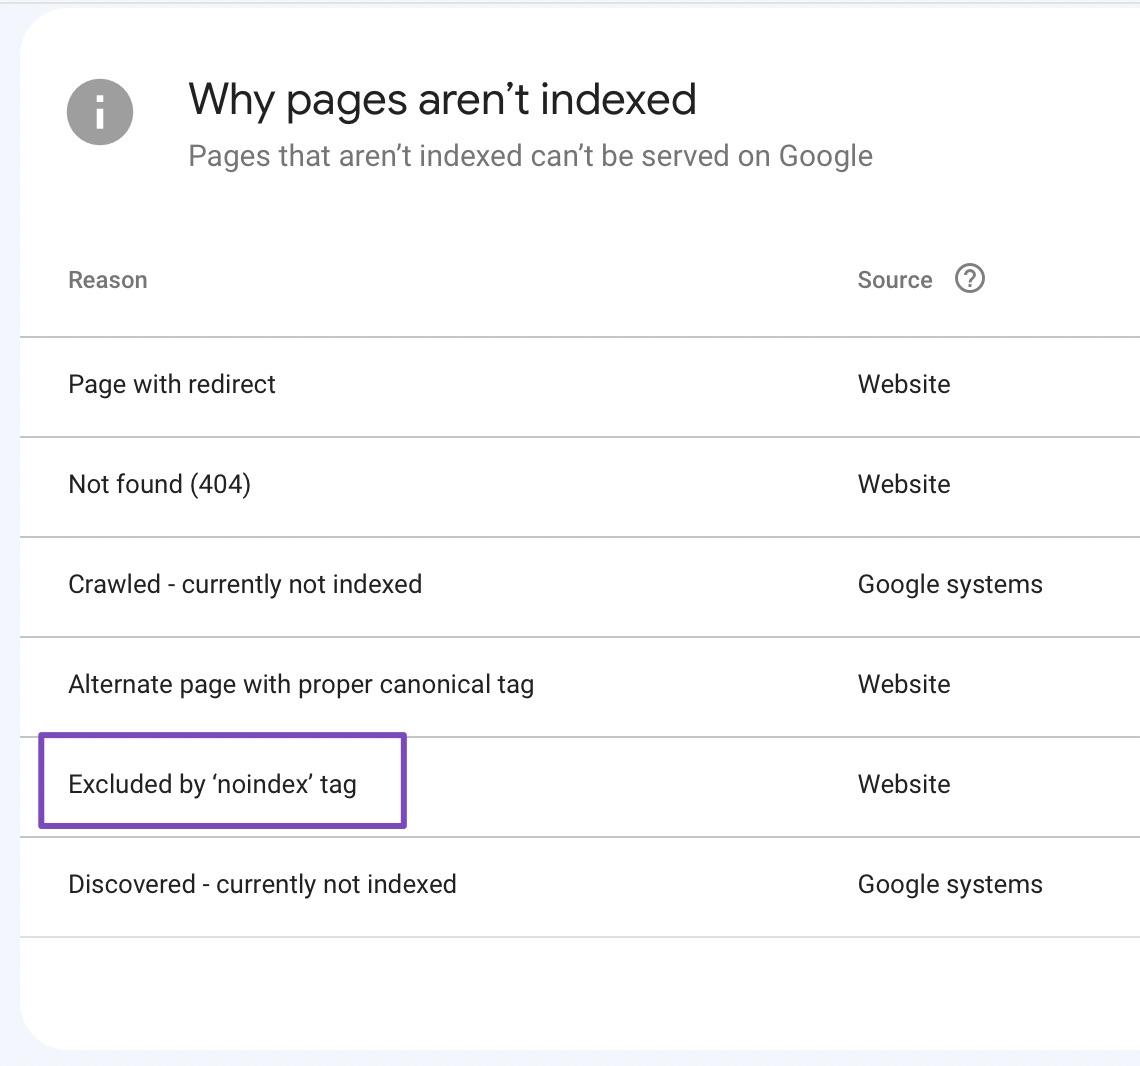
This will show you a list of all the pages on your website that are affected by this issue.
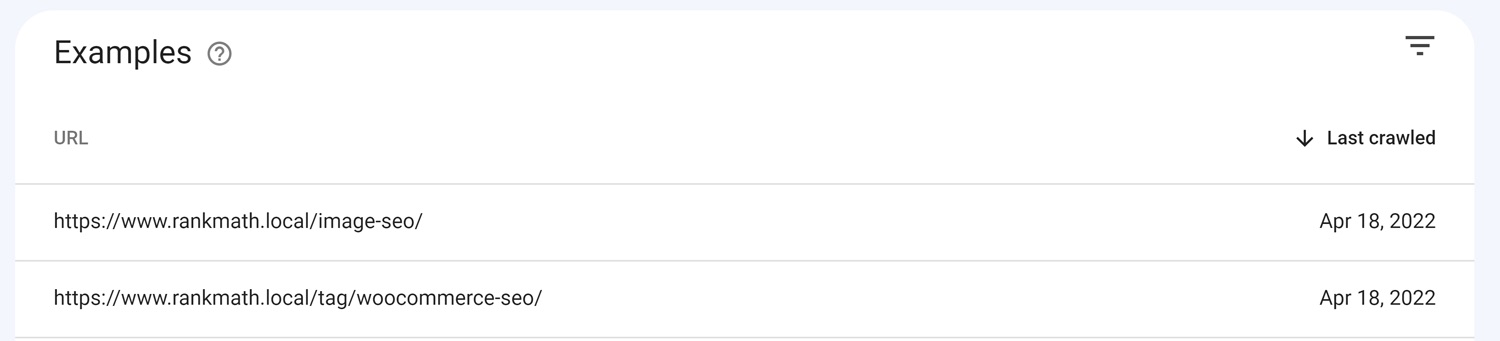
Once you have identified the pages that you want to be indexed, you need to remove the NoIndex tag from those pages.

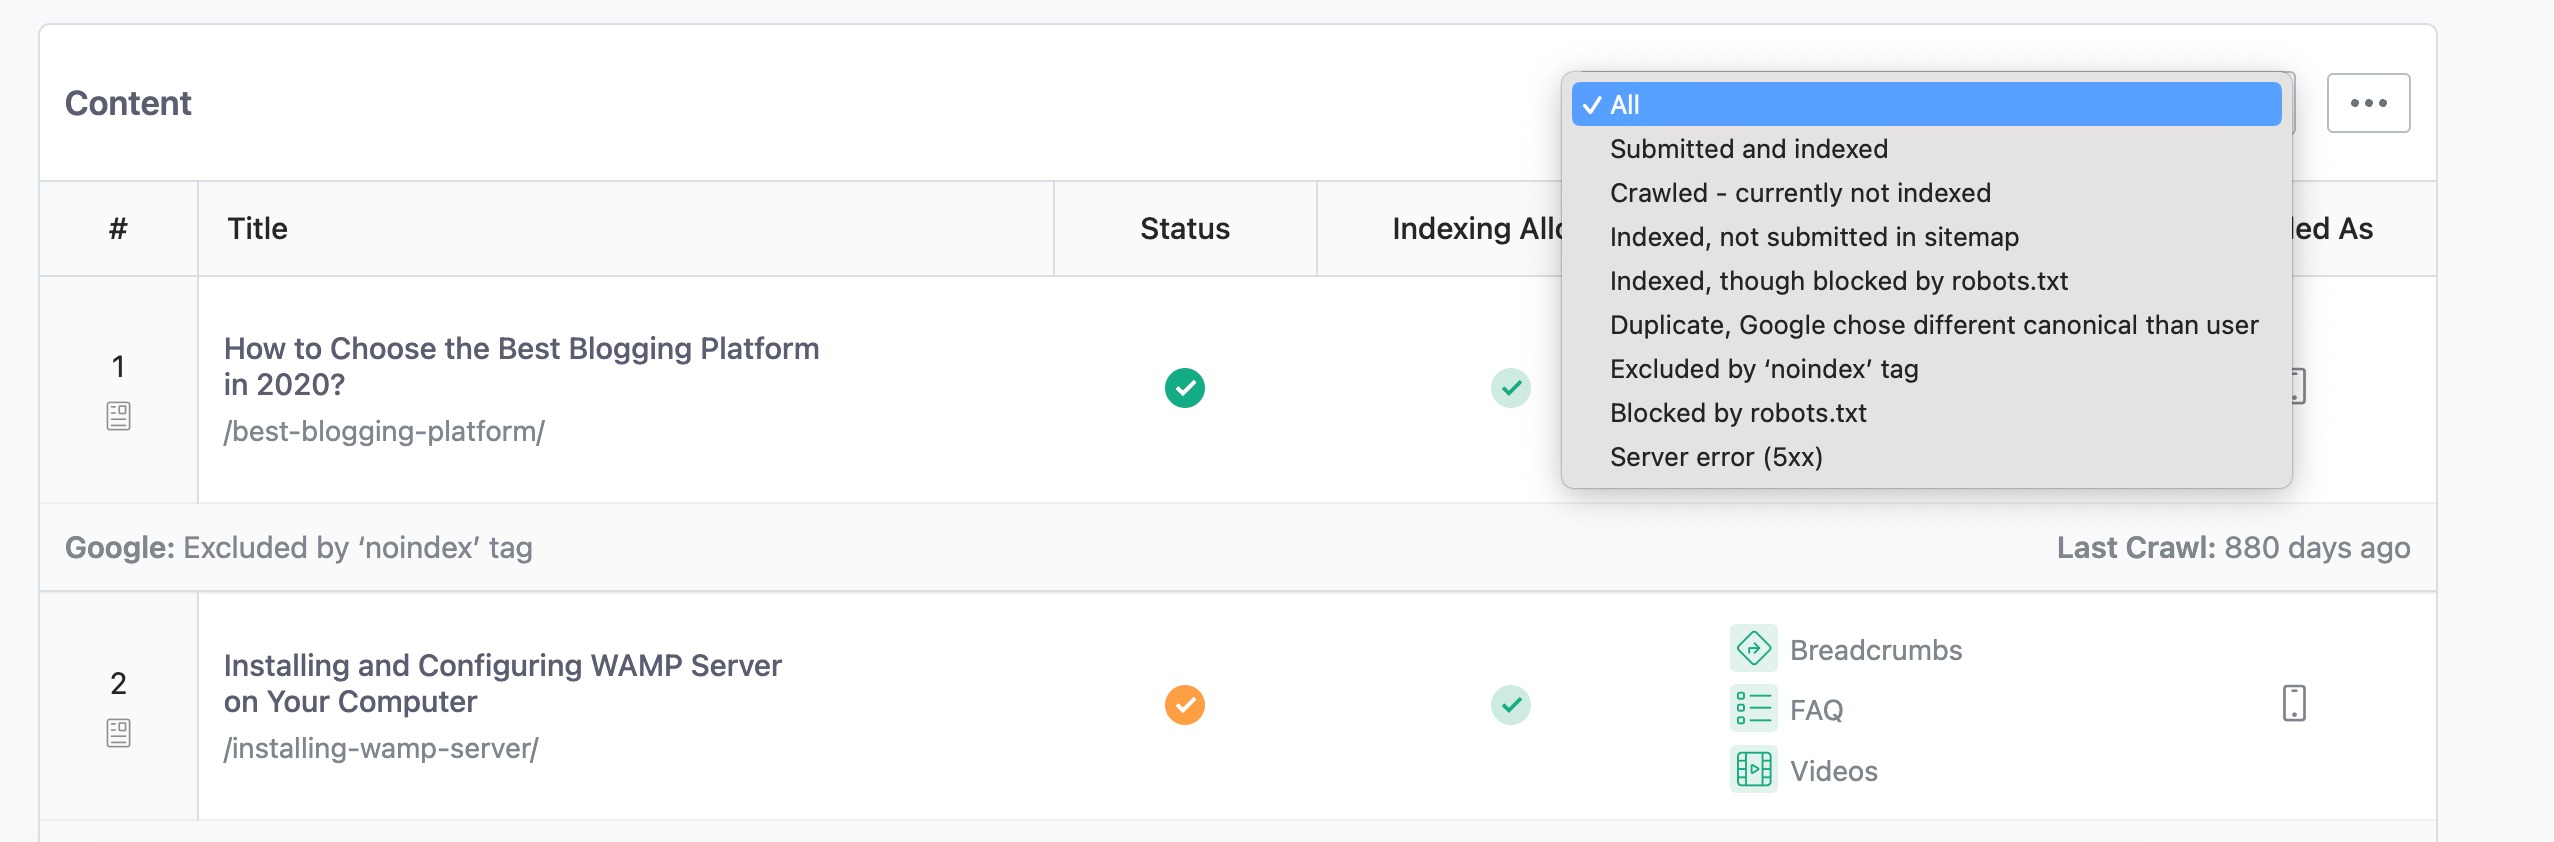
Alternatively, you can check Index Status under Rank Math SEO → Analytics → Index Status tab. Under this tab, you’ll get the real data/status of your pages and their presence on Google.
Moreover, if you are using Rank Math PRO, you can filter the post’s index status using the drop-down menu. When you select a specific status, say Excluded by ‘noindex’ tag, you’ll be able to see all posts that share the same index status.
In order to fix this status, you can follow the relevant steps discussed below.
1 Check Rank Math Metabox
Start by opening the post/page/taxonomy term in the WordPress Editor. In the case of Gutenberg Editor, click the Rank Math SEO icon in the top-right corner of the page to open the Rank Math Metabox.
For Classic Editor and taxonomy terms, scroll down to the bottom of the page to find the Rank Math Metabox.
If the Rank Math Metabox is unavailable for you, you need to ensure that you’ve enabled Add SEO Controls from Rank Math SEO → Titles & Meta Settings → Pages (or other relevant sections).

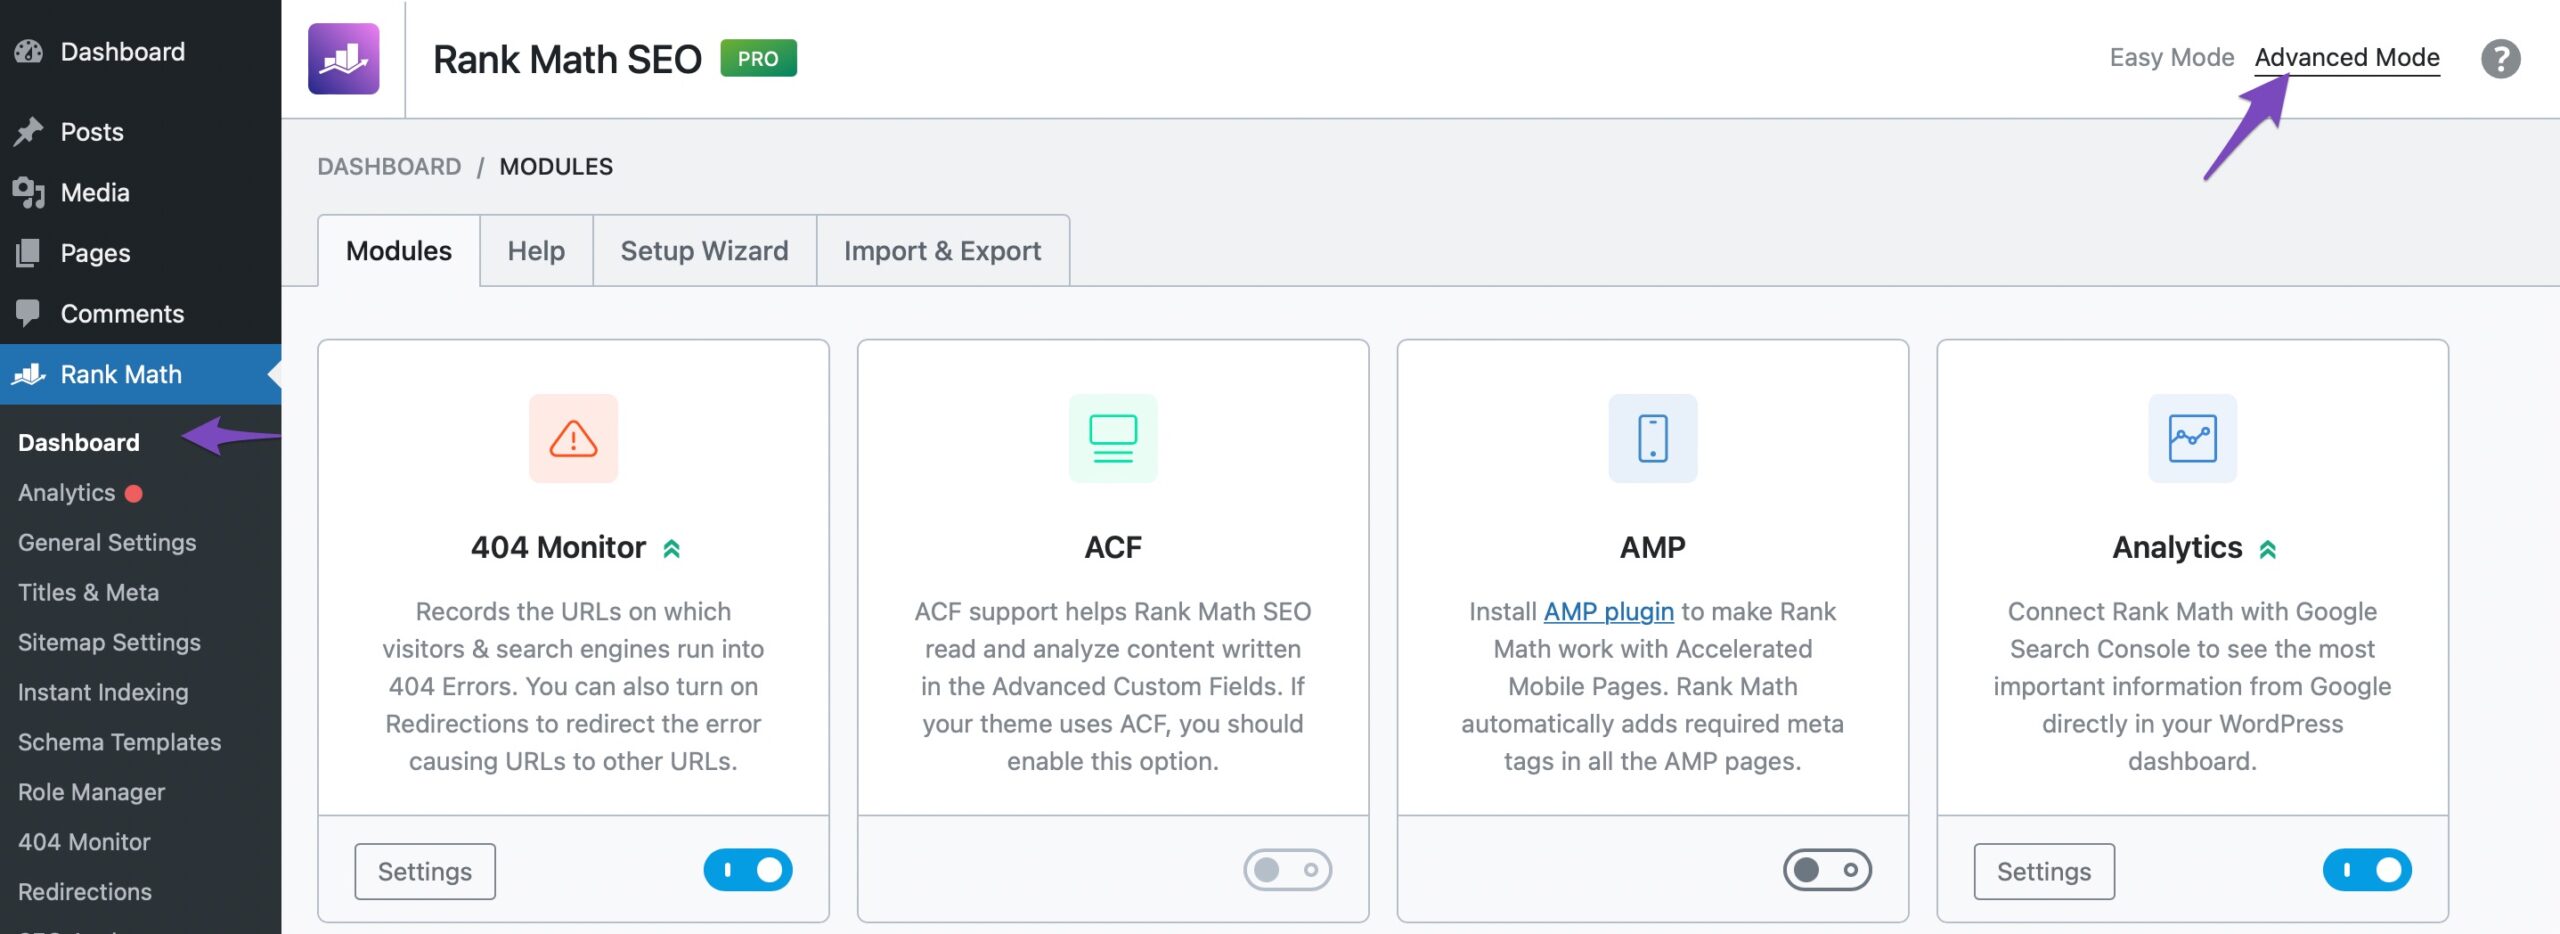
Next, In the Rank Math Metabox that appears on the screen, choose Advanced Tab. If you cannot find the Advanced tab, please enable the advanced mode from Rank Math SEO → Dashboard.
Next, you need to check if the Robots Meta is set to No Index, then simply select the Index checkbox, as shown below, and update the page/post.
2 Check Rank Math’s Titles & Meta Settings
While the previous step lets you modify the noindex meta tag for the specific posts/pages, you should still confirm the noindex wasn’t set as a default value in your Titles & Meta settings.
To do this, head over to Rank Math SEO → Titles & Meta tab and double-check each section to ensure that the settings are as per your preference.
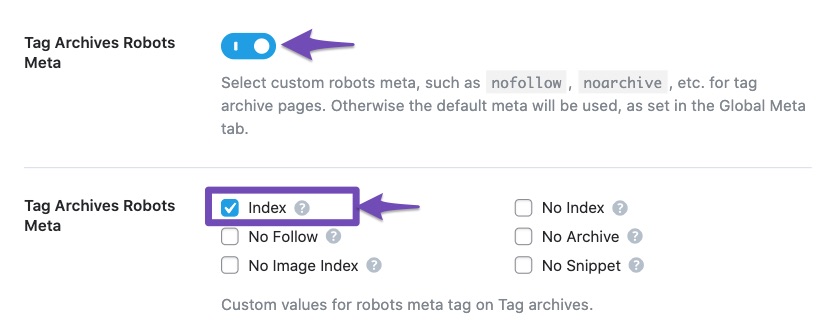
If the posts and pages set as “noindex” are as per your preference, you can ignore them. Or, if you consider these pages add more value to your visitors and need to be indexed, then you can index these pages by selecting the respective “Index” Robots Meta tag as shown below.
Note: It’s still a good choice to have certain links set to noindex, especially for “Misc. Pages”, “Authors”, “Tags”, and empty archive pages. Ideally, you don’t want them to be indexable because it might create duplicate or thin content issues and dilute your website’s authority.
Once you have made the changes, click the Save Changes button at the bottom of the page.
With that said, these changes will only reflect in your upcoming posts, not the existing ones. So if you have old posts set with noindex incorrectly- don’t worry! Just change it to Index using Metabox, as discussed earlier or use bulk actions for a number of different posts at once, so they are all updated together.
3 Removing NoIndex With Bulk Actions PRO
If you want to quickly change the NoIndex value for a number of different posts at once, you can use bulk actions. This is a convenient way to make changes to many posts without having to edit each one individually.
In order to do this, go to the WordPress Posts menu, and from the Rank Math filter that appears on the top-right of the screen, select Articles Noindexed. And then click the Filter option as shown below.
You will now see all of the posts that have been set with a NoIndex value. To quickly change this for all of the posts, select the checkbox next to the title of each post.
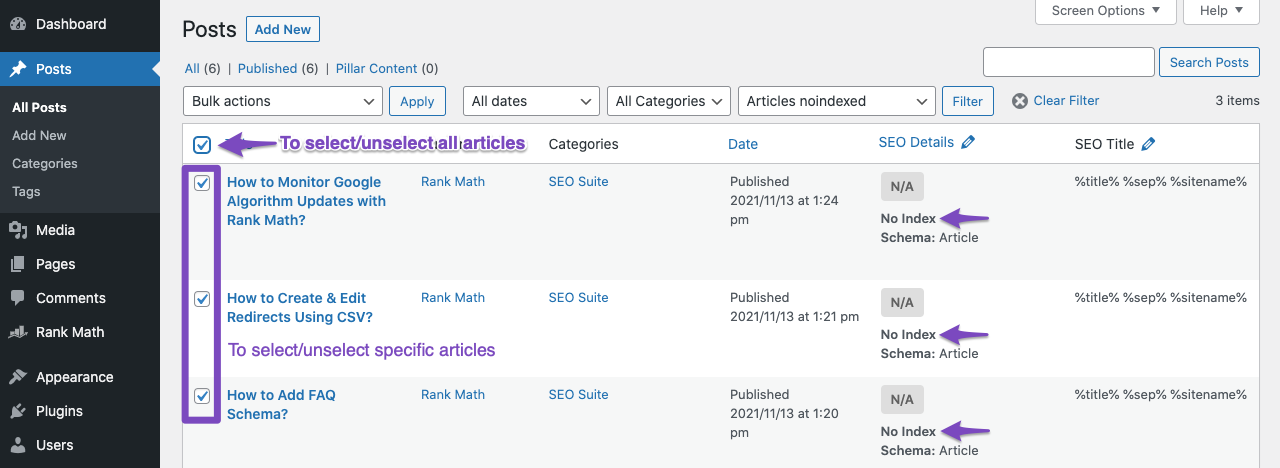
Next, from the Bulk Actions drop-down menu, select Set to Index and click the Apply button.
This will now change the noindex value for all of those posts to Index, and you can check this using Metabox as before.
4 Search Engine Visibility
The final place to set the noindex value for your WordPress posts is in the Search Engine Visibility settings. This is a useful feature as it allows you to quickly and easily change the visibility of your entire website with just a few clicks.
To access this, go to Settings → Reading in your WordPress dashboard. On this page, you will see a section called Search Engine Visibility with a checkbox labeled Discourage search engines from indexing this site.
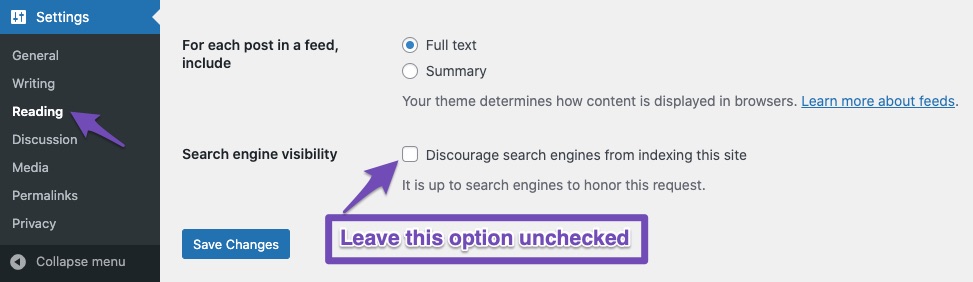
If this checkbox is checked, it means that your website is set to noindex, and this will apply to all of your posts and pages. To change this, simply uncheck the box and click the Save Changes button at the bottom of the screen.
Even if noindex is removed from a page, but if the page is blocked from crawling, Google may not know that this noindex tag is removed. Hence, ensure the page is not blocked from crawling through robots.txt.
And that’s it! We hope this article helped you learn how to fix the Excluded by NoIndex Tag status in Google Search Console. If that doesn’t help, you can ping our support team, and we are always more than happy to answer all your queries and concerns.