In our last few tutorials, we introduced you to Rank Math’s Meta Box, and also discussed the General Tab in the Meta Box. This tutorial, however, is about the Advanced Tab and all the goodness it has to offer.
The Meta Box’s Advanced Tab is home to, well, advanced options. This is where you address the technical side of SEO–stuff people usually refer to as “technical SEO.” —often while rolling their eyes.
Lucky for you, we created Rank Math to take the pain out of the process. Thanks to Rank Math, you don’t have to look at raw HTML, meta tags, Schema JSON, open graph tags, and the other hundred things that make up a page. Instead, you can tick a few boxes and move on.
First things first, here are all the settings that you will find in the Advanced Tab of the Meta Box.

As you see, there are many options, but not as many as there were in the General Tab. The difference should also be clear; the Advanced Tab has nothing to do with the content but affects the page from a higher perspective.
Before We Begin
Before we explain the settings inside the Advanced Tab, you should understand the chronology of how these settings work. The settings you see in the post are local settings, i.e., they apply only to the current post. Now you might be thinking if you have to configure these settings on each post. The answer is no. Instead, you have to configure the global settings inside the Title and Meta Settings, and those settings will become the default settings for all your posts. Then, if any of your posts require different settings, then you can configure them from inside the post itself.
Now that you understand how the settings affect your post, let us begin.
Table of Contents
1 Robots Meta
When Google visits a page on your website, there are many things that Google-bot does, including:
- Indexing the page
- Cache the page (or save the page on their servers)
- Follows all the links on the page
- Indexes the images on the page
- Analyzes the JavaScript on your page and executes it
And many more.
These are the things that Google does automatically; you don’t have to tell Google to do it. In fact, all the other search engines also probably perform the same activities on your website.
But what if you want to restrict the search engines from accessing some pages of your website?
Think about it, not all of your pages are meant to be indexed and/or appear in the search results. A prime example of this is your admin page—which is technically a page on your website. You wouldn’t want all your admin pages to show up in Google search, would you?
Similar to your admin pages, there are plenty of other pages that you’d want search engines to ignore. Your category archive pages, date archives, tag archives, and author archives are just some of the examples of pages you should avoid.
This is where the robot meta tags help you. They are options that you can enable to tell search engines what not to do on your website. There are many robot meta-tags, but Rank Math supports 6 of the most important ones, which you can see in the Robots Meta section.
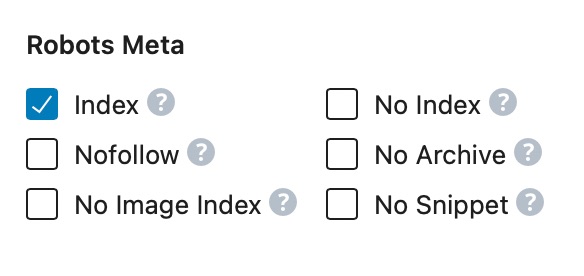
To understand the Robots Meta, you have to understand how each of the options affects search engines. So let us explain each of the options.
1.1 Index
Index is the tag that tells Google to index the page. Although Google and other search engines index pages by default, in some cases, it becomes necessary to tell the search engines to index a page specifically.
If you’d like your page to be indexed, then simply check the Index option. It is probable that option would have been checked already as it is the default setting, so you can leave it at that.
1.2 No Index
No Index is the opposite is of Index, and enabling it means that you want search engines to not index the page. There are many reasons to No Index a page, and we will discuss some practical examples after discussing all the robot meta tags.
Now, an obvious thing to understand is that you cannot enable Index and No Index at the same time, as it will be contradictory. We’ve set up the Robots Meta in a way that once you enable Index or No Index, the other option will be disabled automatically.
1.3 No Follow
No Follow tag is an interesting tag, as it instructs search engines to index the page, but not follow the links on the page. Let us explain.
As you’re probably aware of, links can be followed or no-followed. A followed link passes authority (link juice) to the page being linked to, and helps it improve its ranking. A no-followed link looks exactly like a followed link, but it does not pass any authority to the page being linked to.
When you enable the No Follow option on a page, search engines will not pass any link juice from your page to the websites you link to.
The “No Follow” meta tag is very similar to the rel= “nofollow” attribute you can add to links. But, here’s the difference: the rel= “nofollow” attribute only affects one link—the one you add the attribute to. But, the Robots No Follow meta-tag affects every single link on the page.
As always, we will discuss some practical examples of each Robots Meta tag after we’ve discussed them.
1.4 No Archive
Search engines save a copy of every page they visit on their servers to analyze the content and add it to their index. Some (excluding Google and Bing) even allow users to view a cached version of these pages from the search results.
While this can be useful, it has its drawbacks. If you prefer not to have your pages accessible this way, you can opt-out using the No Archive Meta Robots directive.
Enabling the No Archive option means your page will still be indexed and ranked normally, but these search engines will not show a cached version. Additionally, the No Archive setting prevents Microsoft from using your content in Bing Chat and from training its Generative AI models.
1.5 No Image Index
Most pages you visit on the Internet, including your own pages, will have images on them, and search engines will index them as they index their page.
If you want to prevent search engines from indexing the images on your page, you can enable the No Image Index Meta Robots option.
1.6 No Snippet
This option allows you to restrict search engines from showing snippets from your posts.
For most search engines, snippets just mean your meta description, the little piece of text that appears below the URL of the ranking result.

You can see the snippet of your page from the General Tab.
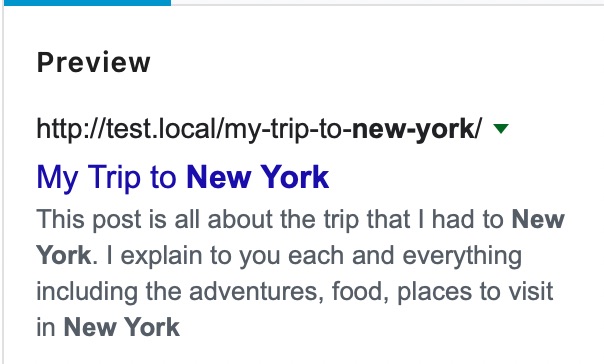
But for Google, Snippets have now extended to answer boxes, FAQs, video snippets, and many other forms of rich results. If you enable the No Snippet Robots Meta, then Google will not show your page in any of its snippets. But, Google may include an image thumbnail if it thinks it could result in a better user experience.
1.7 Overview of Robots Meta in Rank Math
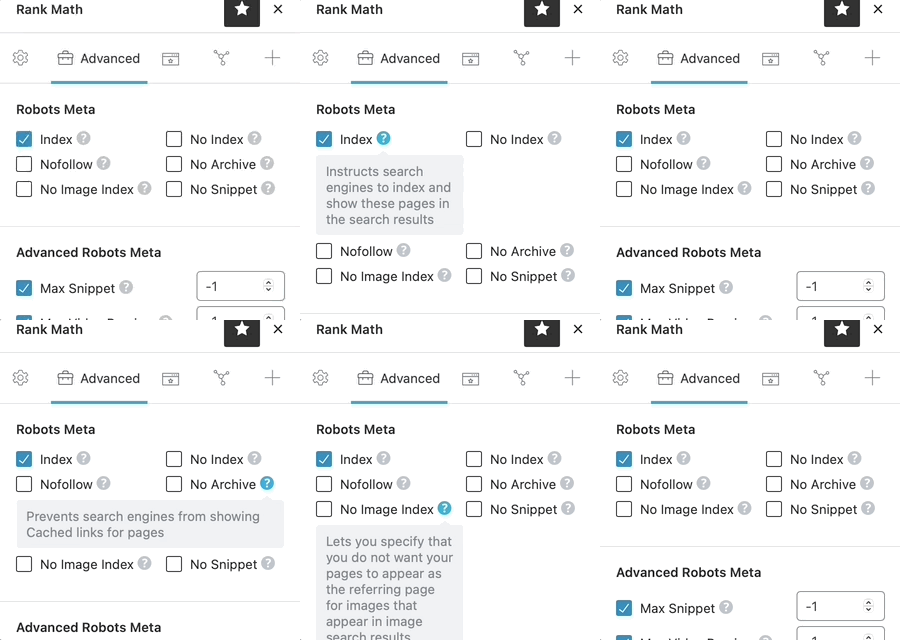
For a quick reminder of what each of the Robots Meta does, just click on the “?” next to the Robots Meta option, and a short description of the Robots Meta will be shown alongside the option. It is a quick way to verify that you’re configuring the settings correctly.
2 Some Use Cases of Robots Meta
Now that we’ve discussed what the Meta Robots do, let us take some practical examples of when you would use these directives.
2.1 Usage of Index
The Index directive should be used on all the regular posts on your website and the content you want to be indexed. There is no special use case for this.
2.2 Usage of No Index
A practical example of the usage of No Index is WordPress Archive Pages. WordPress supports many types of archives, and all of those archive types create a specific page on your website — author archives, category archives, tag archives, date archives, etc. In addition, if you create custom taxonomies, then they will have archives as well. Since all these pages only show a collection of the content in that taxonomy, there is no value addition from these pages for search engines, as they can discover the actual content through your sitemap.
If a search engine starts indexing these pages, not only can it create duplicate content issues (if you haven’t set canonical URLs correctly), but it can also waste your crawl budget—you wouldn’t want that, right?
Our first recommendation is to disable these pages entirely. But, if you have a specific need to keep your archive pages active, then you should definitely No Index them—which you can do directly in Rank Math.
Another great example of No Index is Amazon Wishlists. You probably know that you can create public and private wishlists on Amazon. But, it is not commonly known that you can add products from other websites to your Amazon Wishlist too. In any other scenario, this would be a breeding ground for spam, but here, the page has a No Index and No Follow.
2.3 Usage of No Follow
The most popular use of the No Follow directive is user-generated content. Whether it be a forum, a discussion board, or a social media page, the No Follow directive can help instantly curb spam.
2.4 Usage of No Archive
The No Archive Tag is particularly useful when you have pages on which the content changes often, or with pages with content you want to protect. Let us take an example of both.
Suppose that you are running an eCommerce website and have a page specifically for coupons. Obviously, coupon codes change often, and your customers can access a cached version of the page and find outdated coupons—which will be a less-than-ideal experience for them.
The same example can be extended to coupon sites (affiliate sites). If your pages are cached by some search engines (excluding Google and Bing), then your users might be presented with old coupons that do not work for your customers.
The examples are real concerns, but not all users are tech-savvy that they would try to access a cached version of your website, and the only reason they would need to do that would be if your website was down—which often won’t be the case. So, let us take another example.
Suppose that you run a membership-based website and have tons of content available only for paying members. If you don’t add a No Archive to those pages, then savvy customers can simply access everything from your website for free. And don’t think that this does not happen in the real world. Many people use this technique to circumvent websites with paywalls, like news websites.
2.5 Usage of No Image Index
There are many practical examples where you’d need to use No Image, but a few main reasons you’d use No Image is for are:
- When you want users to consume content from your website only
- When you want to preserve your crawl budget
- When you want to prevent plagiarism
The first reason is quite simple. If Google does not have your images indexed, your users have to come to your website to consume your content. Be careful with this reasoning, as many times, having your images indexed can lead to more traffic through Google Image Search. Test both the options and then make a decision.
If you have a ton of images on your website, then Google might slow down the indexing of your website in many cases. This happens with eCommerce websites, stock photo websites, and even wallpaper websites. By disabling the image indexing, you can speed your content crawling, and then you can have the images indexed slowly at a later date.
The last practical reason why you would want to prevent your images from being indexed is to avoid them being stolen. Sadly, there are still many people who don’t understand basic copyright laws and think that they can download any image they found on Google without breaking any laws. If the problem is quite severe, then you can stop your images from being indexed at the cost of some traffic. Obviously, someone can steal an image from your website too, but then you know that the user’s intent was malicious. If they stole it from Google, you might give them the benefit of doubt.
2.6 Usage of No Snippet
As the No Snippet prevents your content from appearing in the snippet, it is useful anytime you’d want the content to be accessible only through your website. A practical example would be a coupon affiliate website.
Coupon websites make money when someone uses a coupon from their website. But, most often, these websites make money when a user clicks a link on their website to reach the destination website. If Google shows its most popular coupon codes in the snippet itself, users can directly go to the shopping website, stripping the coupon website of its commissions.
Another example would be a news website. Most news can be summarized into a few lines, and the short-form news is becoming more popular than long-form news. If your page was available as a snippet, most people would consume the news from the snippet directly, and never come to your website.
3 Limitations of Robots Meta
An important thing to remember is that Robots Meta is simply a suggestion to the search engines and not a complete command. Keeping that in mind, you should be prepared for the scenario where the search engines do not honor your request. Before you freak out, let us clarify.
Most popular search engines will not do this; they will honor your requests. But, there are hundreds of other malicious bots (not necessarily search engines) who will not honor your request and index the content anyway.
In most of these cases, you won’t have to do anything as search engines like this have barely any traffic volume, to begin with. But, if you have something important on your website that you absolutely don’t want to be indexed, then you should not rely only on Meta Robot Directives.
4 Alternatives of Robots Meta
Although the Robots Meta is a powerful way to direct the search engines, it can work only on a page to page basis, which is inefficient and does not offer any way to manage directives in bulk.
An effective solution to that problem is using the robots.txt file. In a nutshell, it is an implementation of The Robots Exclusion Protocol by the search engines. How it works is that webmasters place a file on their server called robots.txt, which contains instructions for the search engines to follow.
The advantage of using robots.txt is that it allows you to manage your pages in bulk with the help of regular expressions. You can also use it to manage categories, tags, even subdirectories on your server.
Rank Math has a built-in option to manage your robots.txt file, so you don’t have to fiddle around with FTP. The tool is located in Rank Math SEO → General Settings → Edit Robots.txt inside your WordPress dashboard.
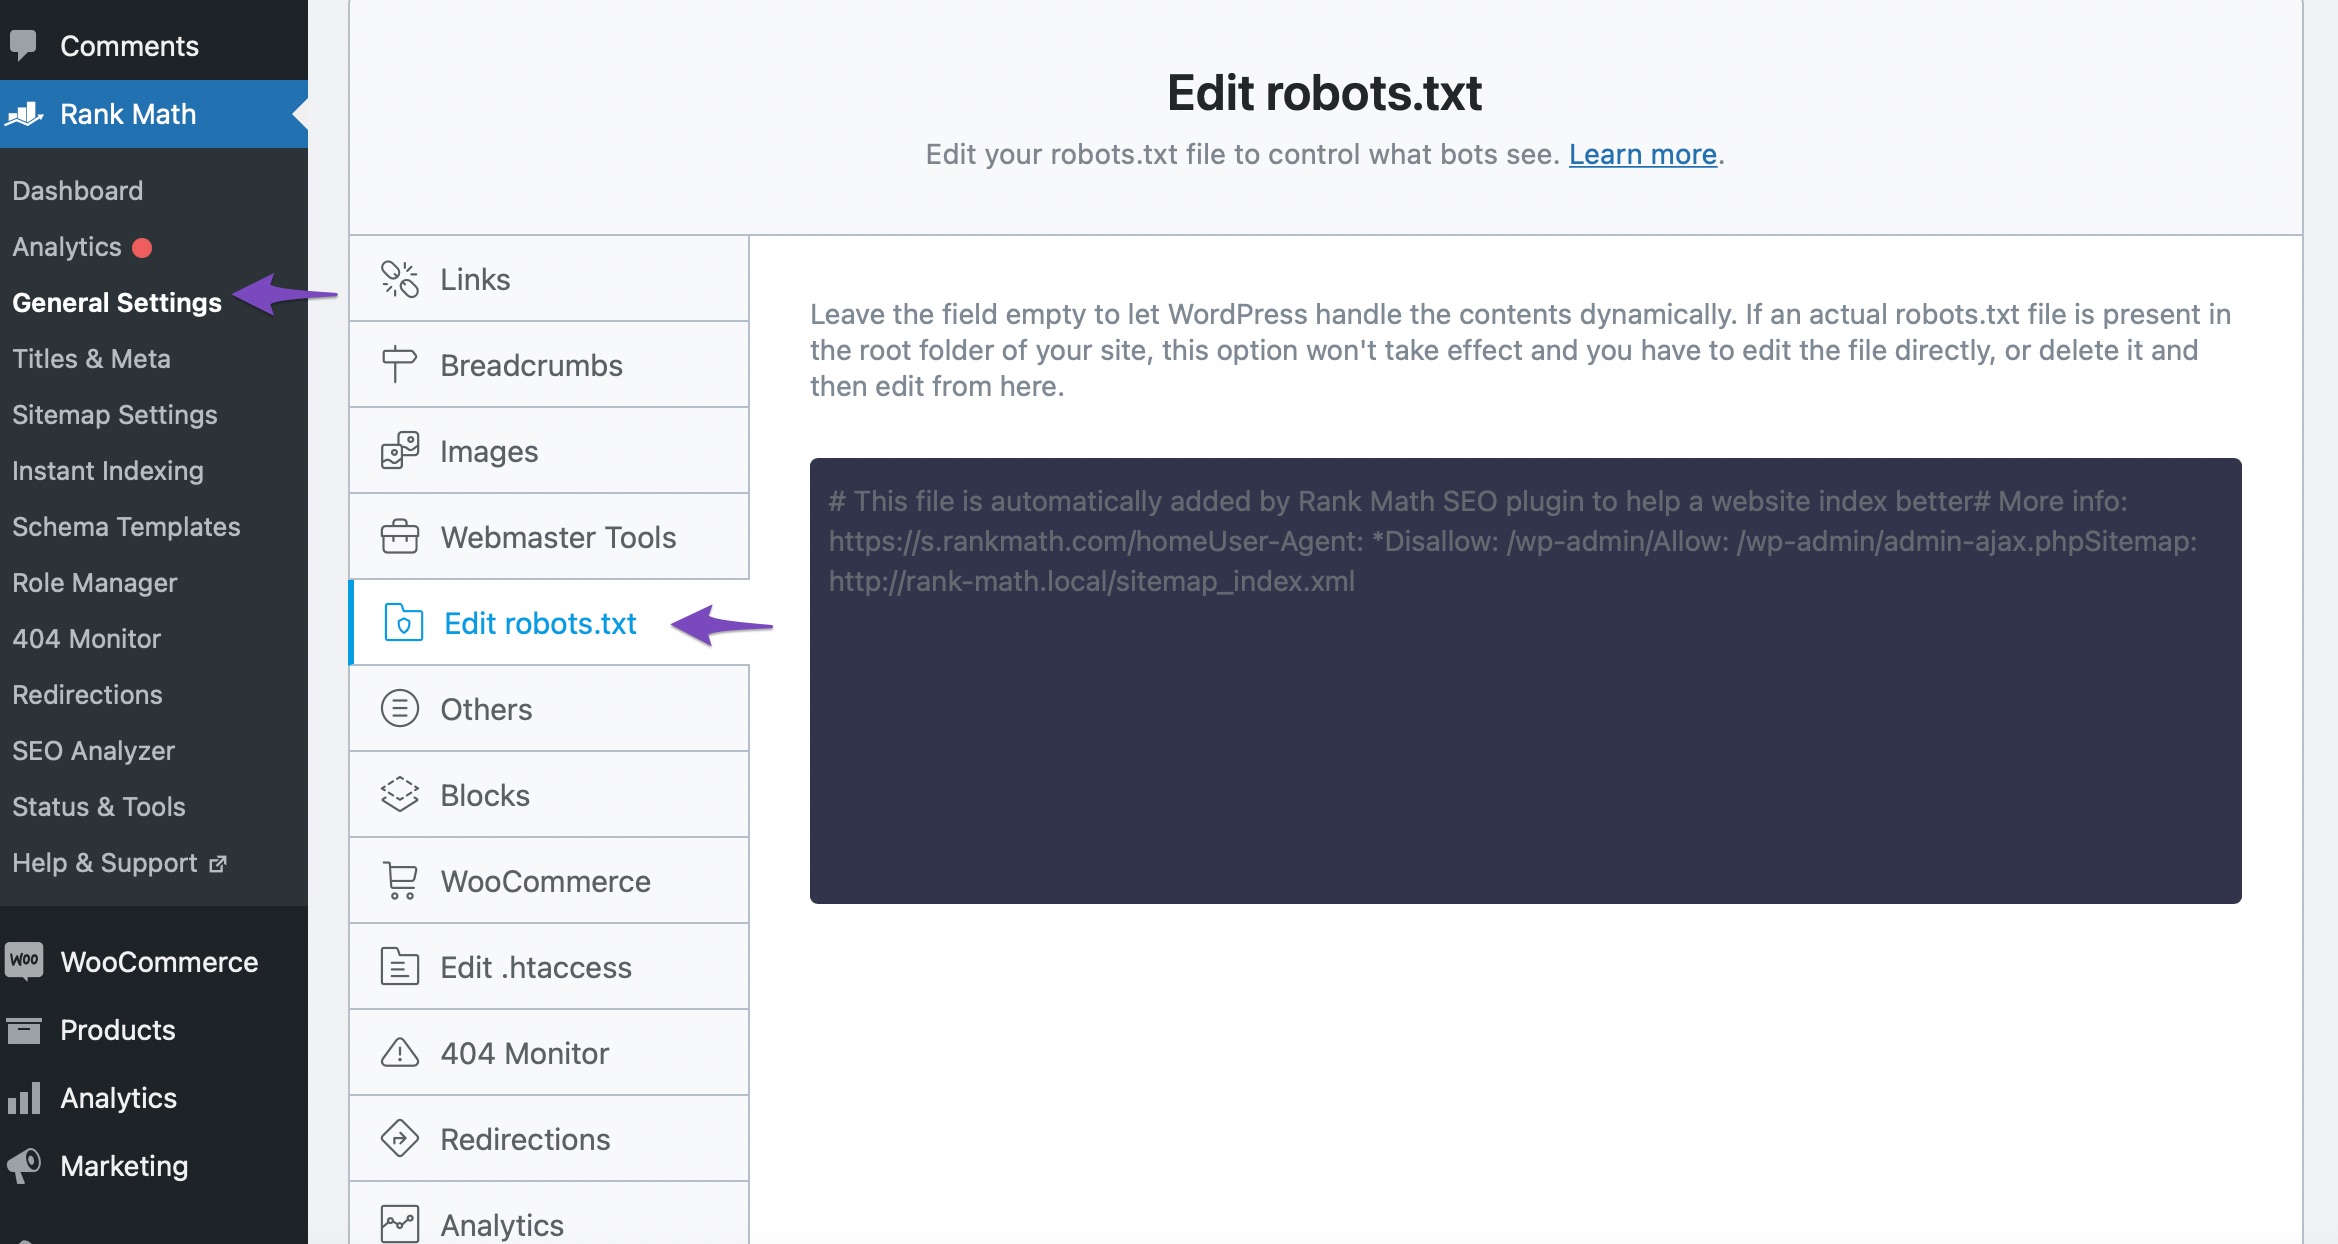
If you try to read the text in the file, then you might have guessed that it is instructing all the search engines not to index your /wp-admin/ directory, while allowing the /wp-admin/admin-ajax.php file. This is the level of control that you would not get with Meta Robots directives.
5 Robots.txt versus Meta Directives
An important question that can cross your mind after reading the information we mentioned above is what exactly the difference between using the Robots.txt and using Meta Robots is, apart from the bulk operations? Is there a technical advantage, or are they 2 ways to achieve the same thing.
Actually, there is. The most important difference being how good search engines treat these directives. Remember, both the robots.txt and Robots Meta are suggestions to search engines, and notorious bots might ignore your instructions anyway.
Let us take Google’s example. If you restrict the indexing of a page using robots.txt, then Google will follow your instructions. But, if the same page is linked to from another website, then Google might still index the page. But, if your page has a Meta Robots tag that says No Index, then Google will definitely not index it.
There are many other technical differences, but this one is the most important for you to understand and remember.
6 Advanced Robots Meta
The Advanced Robots Meta is the new type of robots meta that Google introduced and started supporting in. The reason why Advanced Robots Meta was created was that search is changing.
Think about it. For years, a Google search has been producing a list of text links on the screen. But, is text-based content the only form of content available? Also, are desktops and mobiles the only devices that people use to perform searches anymore? The answer to both the questions is no.
Since the web is changing, the users are changing, and the devices that people use are changing, Google has to change too. We’re sure that you’ve already seen many of the changes, whether you realize it or not. The most notable change amongst is the prominence of rich results, and rich snippets.
Today, almost all searches return snippets or rich results. Many times, you Google a question, and the answer is already present in the snippets. Or Google just displays a video in the search with the exact time you should start the video.
Rich results are quite helpful for users, but not so much for website owners. If people can get answers on Google search, then there is no reason for people to visit their website, right? That is the reason why many webmasters criticized Google for using snippets for a large number of queries—because they were losing traffic.
The Robots Meta tag lets you utilize a granular, page-specific approach
Your webpage’s Robots meta tag lets you control (on a page-specific level) how an individual page should be indexed and served to users in Google Search. Let’s take a close look at what each of the options available in Rank Math let you control:
6.1 Max Snippet
This Meta Robot generally applies to text snippets that you see in Google. Here is an example.
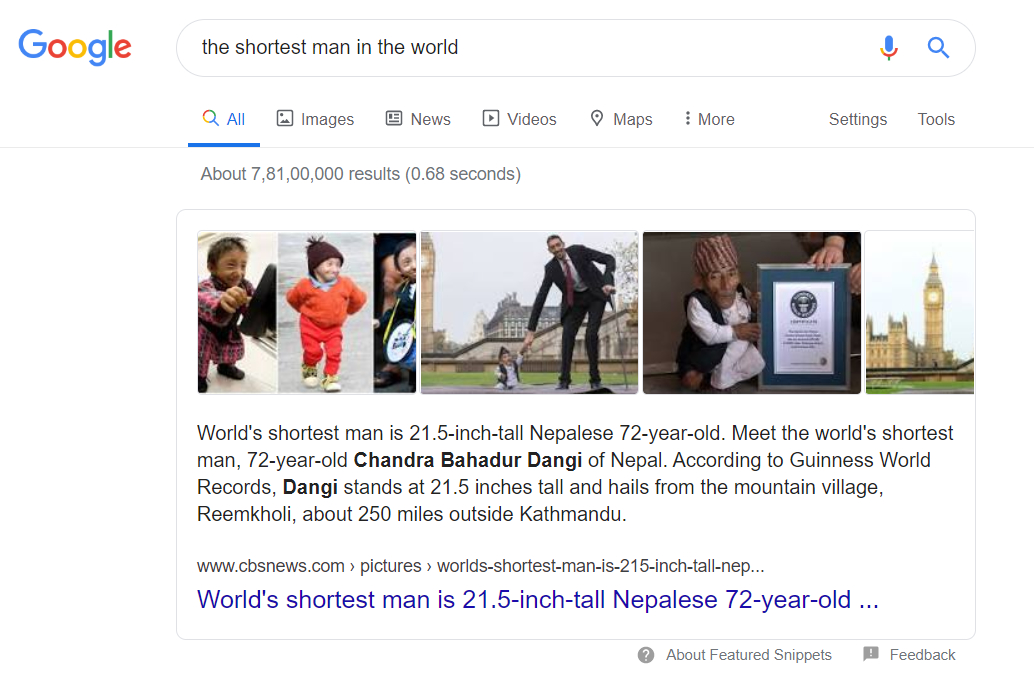
For this query, we never have to leave Google to find the answer to the question. If you were the owner of the website, you might not like that. The Max Snippet Robots Meta lets you define the maximum number of characters you are willing to let Google use for a snippet from your page. It is not the perfect solution, but it is a start. Configuring this option is pretty simple. The default option is set to “-1”, which means “unlimited”, that means Google can use any number of characters from your page for the snippet.
To configure the option, just change the number of characters in the option. Here is an example.

In this example, we are restricting Google to use a maximum of 250 characters from our page for the snippet.
The benefit, or use case of using the Max Snippet property is that by restricting the number of snippet characters, you can hide enough information from the user that they are inclined to click through to your website and then read the rest of the information there. However, this can be counter-productive too. Google has said that they have a minimum character requirement for the snippet of each query. If you end up setting up a limit that is too low according to Google, then your website might not be eligible for a lot of snippets, or your pages might drop the snippet if they already ranked for it. That is why we recommend that you use this option on a per-page basis, not a global basis, and test the changes gradually before rolling them out.
6.2 Max Video Preview
A lot of times, text-based snippets can’t fulfill the user intent, and other forms of content have to be used for snippets. Video is one such content format that is rising in the SERPs.
A peculiar behavior that you might have noticed with video snippets is that they animate if you hover over them. Here is an example.
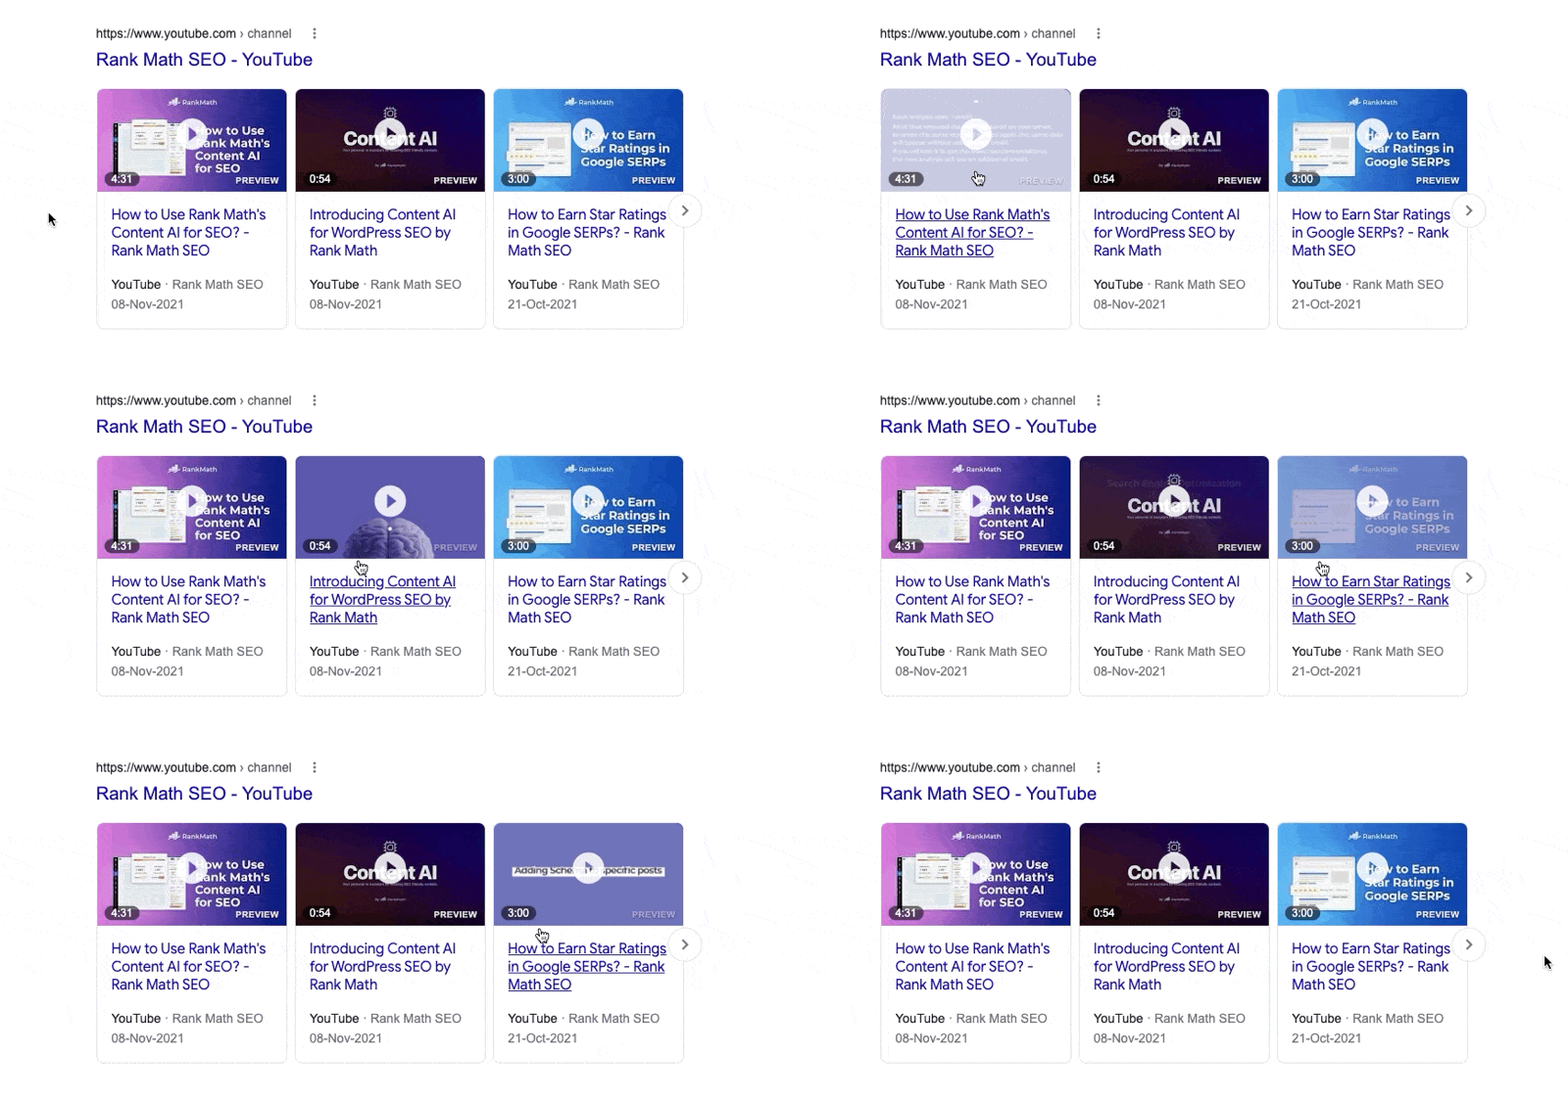
This works on mobile too, but with the hover action, not with the mouse, obviously.
The Max Video Preview Advanced Robots Meta tag lets you configure the maximum duration (in seconds) the video preview should be. If you notice the snippet above, the first result does not animate, the second does for a few seconds, while the third does just for a second. That is the exact behavior you can control with this setting.
Similar to the Max Snippet setting, the Max Video Preview is also set to “-1”, which signifies “no limit”. To change it, all you have to do is change the setting to the number of seconds you prefer. Here is an example.

This will limit the video animated snippet to a maximum of 6 seconds.
For now, the Max Video Preview snippet isn’t that powerful. You can choose the duration of the animated snippet, but you can’t choose which frames, or what duration will the animated preview be taken from. Currently, the animated snippets are also limited to small video snippets, not large ones, so we don’t know how much of a difference they are actually going to make if you choose to limit the duration of the animated snippet. All these might change, but for now, their impact is minimal. But, it is a step in the right direction.
6.3 Max Image Preview
Images are also a huge part of snippets. Sometimes they are presented in isolation, and other times, they are combined with text-based snippets, similar to our example in Max Snippet.

As you see, there are many images that were included in the snippet. The Max Image Preview Advanced Robots Meta lets you configure what size of images should Google be using from the page, or if they should be using any image at all.
Unlike other settings, you don’t configure this with a number. Instead, you choose from 3 pre-defined options. Here they are.

The options need no explanation. For reference, the images in the snippet above are of standard size.
6.4 Important Things to Know About Advanced Robots Meta
While Robots meta tags control the amount of content that Google is able to read/use from webpages in search results – many Rank Math users also use our Schema Markup module to make other information available in search (and earn rich snippets). Robots meta tag limitations do not affect the use of that structured data, with the exception of article.description and the description values for structured data specified for other creative works.
7 Googlebot-News Index PRO
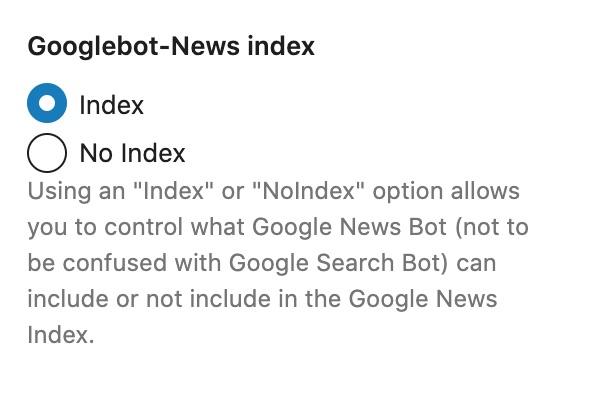
The Googlebot-News Index would be seen only if you’ve enabled the News Sitemap and then configured to add this post type to the News Sitemap.
You can only find two options available here:
- Index – this option will let you add the post to the News Sitemap
- No Index – this option will exclude your post from being added to the News Sitemap
The Index and No Index options available here are only to control what Google News Bot sees and shall not be confused with Google Search Bot.
8 Canonical URL
The canonical URL is an absolute must to understand to avoid duplicate content issues. Here is how it works.
For search engines, including Google, different URLs mean different pages. For example:
https://www.yourwebsite.com/category/product-1/
http://www.yourwebsite.com/category/product-1/
https://yourwebsite.com/category/product-1/
http://yourwebsite.com/category/product-1/
Google will consider all of these as separate pages.
Without getting into why this happens, it is better to accept that this is how it is. Thankfully, there is a solution called canonical tag.
The canonical tag helps you specify a canonical URL for a page, which should be the actual version of the page you want Google to consider. Let us take an example.
If you run a WooCommerce store, then you might have noticed that a single product can be accessed in multiple ways. For example, https://www.yourwebsite.com/tag/product-1/ and https://www.yourwebsite.com/category/product-1/ will point to the same product while the real URL for the product could be https://www.yourwebsite.com/product-1/.
So, how do you communicate to Google which URL should it consider a master copy for the product? By using the canonical tag. All you have to do is add the actual version of the URL, which in this case is https://www.yourwebsite.com/product-1/, to the canonical tag URL.
Since the actual page loaded from your server will be the same, no matter which URL is used to access it, all URL versions of the page will carry the canonical URL with them. By reading the canonical URL, Google and other search engines can figure out the actual page URL and index only that URL.
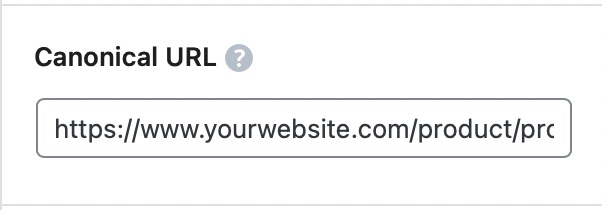
As you can see in the field inside Rank Math, a default canonical URL is already set for you. But, this is just a placeholder, and it lists the URL of the post. That is Rank Math’s default behavior.
Even if you don’t set a canonical URL inside Rank Math, Rank Math will set the post’s current URL as the canonical URL of the page. Depending on your permalink settings, you might want to set a canonical URL yourself or change your permalink settings so that the default canonical URL is the one that works for you.
9 Breadcrumb Title
You’ll see this option in the Advanced tab if you have enabled the Breadcrumbs option from WordPress Dashboard → Rank Math SEO → General Settings → Breadcrumbs.
Once you’ve enabled the breadcrumbs settings, on the advanced tab in Rank Math SEO Meta Box, you’ll find a field called ‘Breadcrumbs Title’ as shown below:
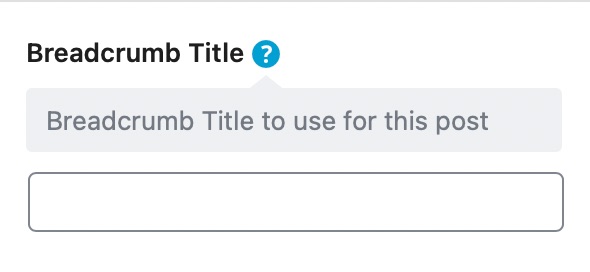
You can change the breadcrumb title by adding your custom title in this field.
10 Redirect
A redirect is a pretty magical thing that web servers can do. Let’s say you type a URL into your browser – something like http://www.example.com/123
As you would expect, a web page loads. But when you look at the address bar, you see:
http://www.anothersite.com/a-totally-different-url.html
What happened?
When you reached the URL http://www.example.com/123, the server instructed the user-agent (your browser) to redirect you to the new URL.
Redirects have many important uses. They are used to manage errors on your website, help manage deleted content, update your URLs, permalinks, and a bunch of other stuff.
Rank Math has a built-in Redirection Manager, which helps you manage redirects with ease. But, the redirect option here is specific to this page, and it allows you to redirect this specific post or page to the URL of your choice.
The redirection is disabled by default, and you can see that with the grey, inactive bar next to the Redirect option. If you want to enable the redirection, click to toggle the setting.
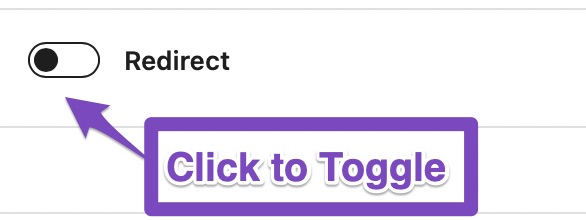
Once you do, you will see 2 options. Here is what they mean.
When setting up a redirect with Rank Math, you have to set up 2 things.
- Redirection Type
- Destination URL
The redirection type is as important as the destination URL, as there are temporary and permanent redirections. Setting a temporary redirection will direct the search engines to keep the original URL in their index and check if the redirection is in place every time the URL is accessed. If a redirect is permanent, that won’t happen.
There are a couple more options for the redirection type as well. Here is the complete list.
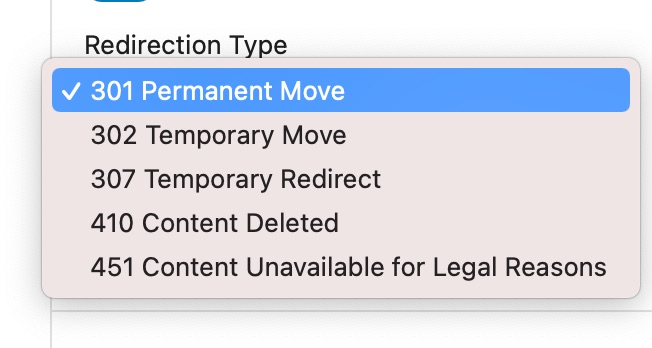
- 301 Permanent Move: The redirect is permanent, and future request to the URL should directly be taken to the destination URL
- 302 Temporary Move: The resource has been moved temporarily to the destination address. Future requests should be made to the original URL
- 307 Temporary Redirect: A 307 is quite similar to a 302 with some technical differences
- 410 Content Deleted: Use this redirect if the content on the original URL has been deleted. Useful for pillar content and in-depth guides which can be updated over time on different URLs
- 451 Content Unavailable for Legal Reasons: If you write about a topic that could be temporarily banned (religion, politics, or other sensitive topics), then this redirect could come in handy.
To save the redirect, just save your post (as a draft or update it). Your redirect will be saved. If, in the future, you want to delete a redirect, all you have to do is delete the URL in the destination field and save your post again. The redirect will be deleted.
We understand that deleting redirects individually from the post can become time-consuming and inefficient when you have many redirects set up. But, you do not need to worry about that, as all the redirects you create inside the post will show up in Rank Math’s Redirect Manager as well. There you can use all the powerful redirect management features that we’ve designed. Here is a demonstration. We set up the redirection in the post.
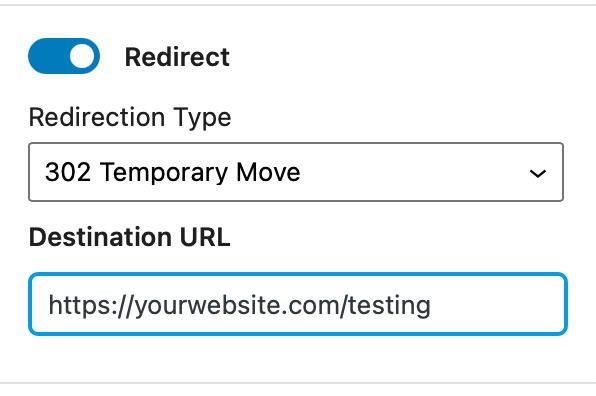
And the redirect shows up in the Redirections Manager as follows.

If you disable or delete the redirect here, then the redirect will disappear from the post as well.
If you wish to learn more about Redirections, we’ve created an entire guide that covers just the Redirection Manager in Rank Math. We highly recommend that you read it.
11 Show SEO Score on Frontend
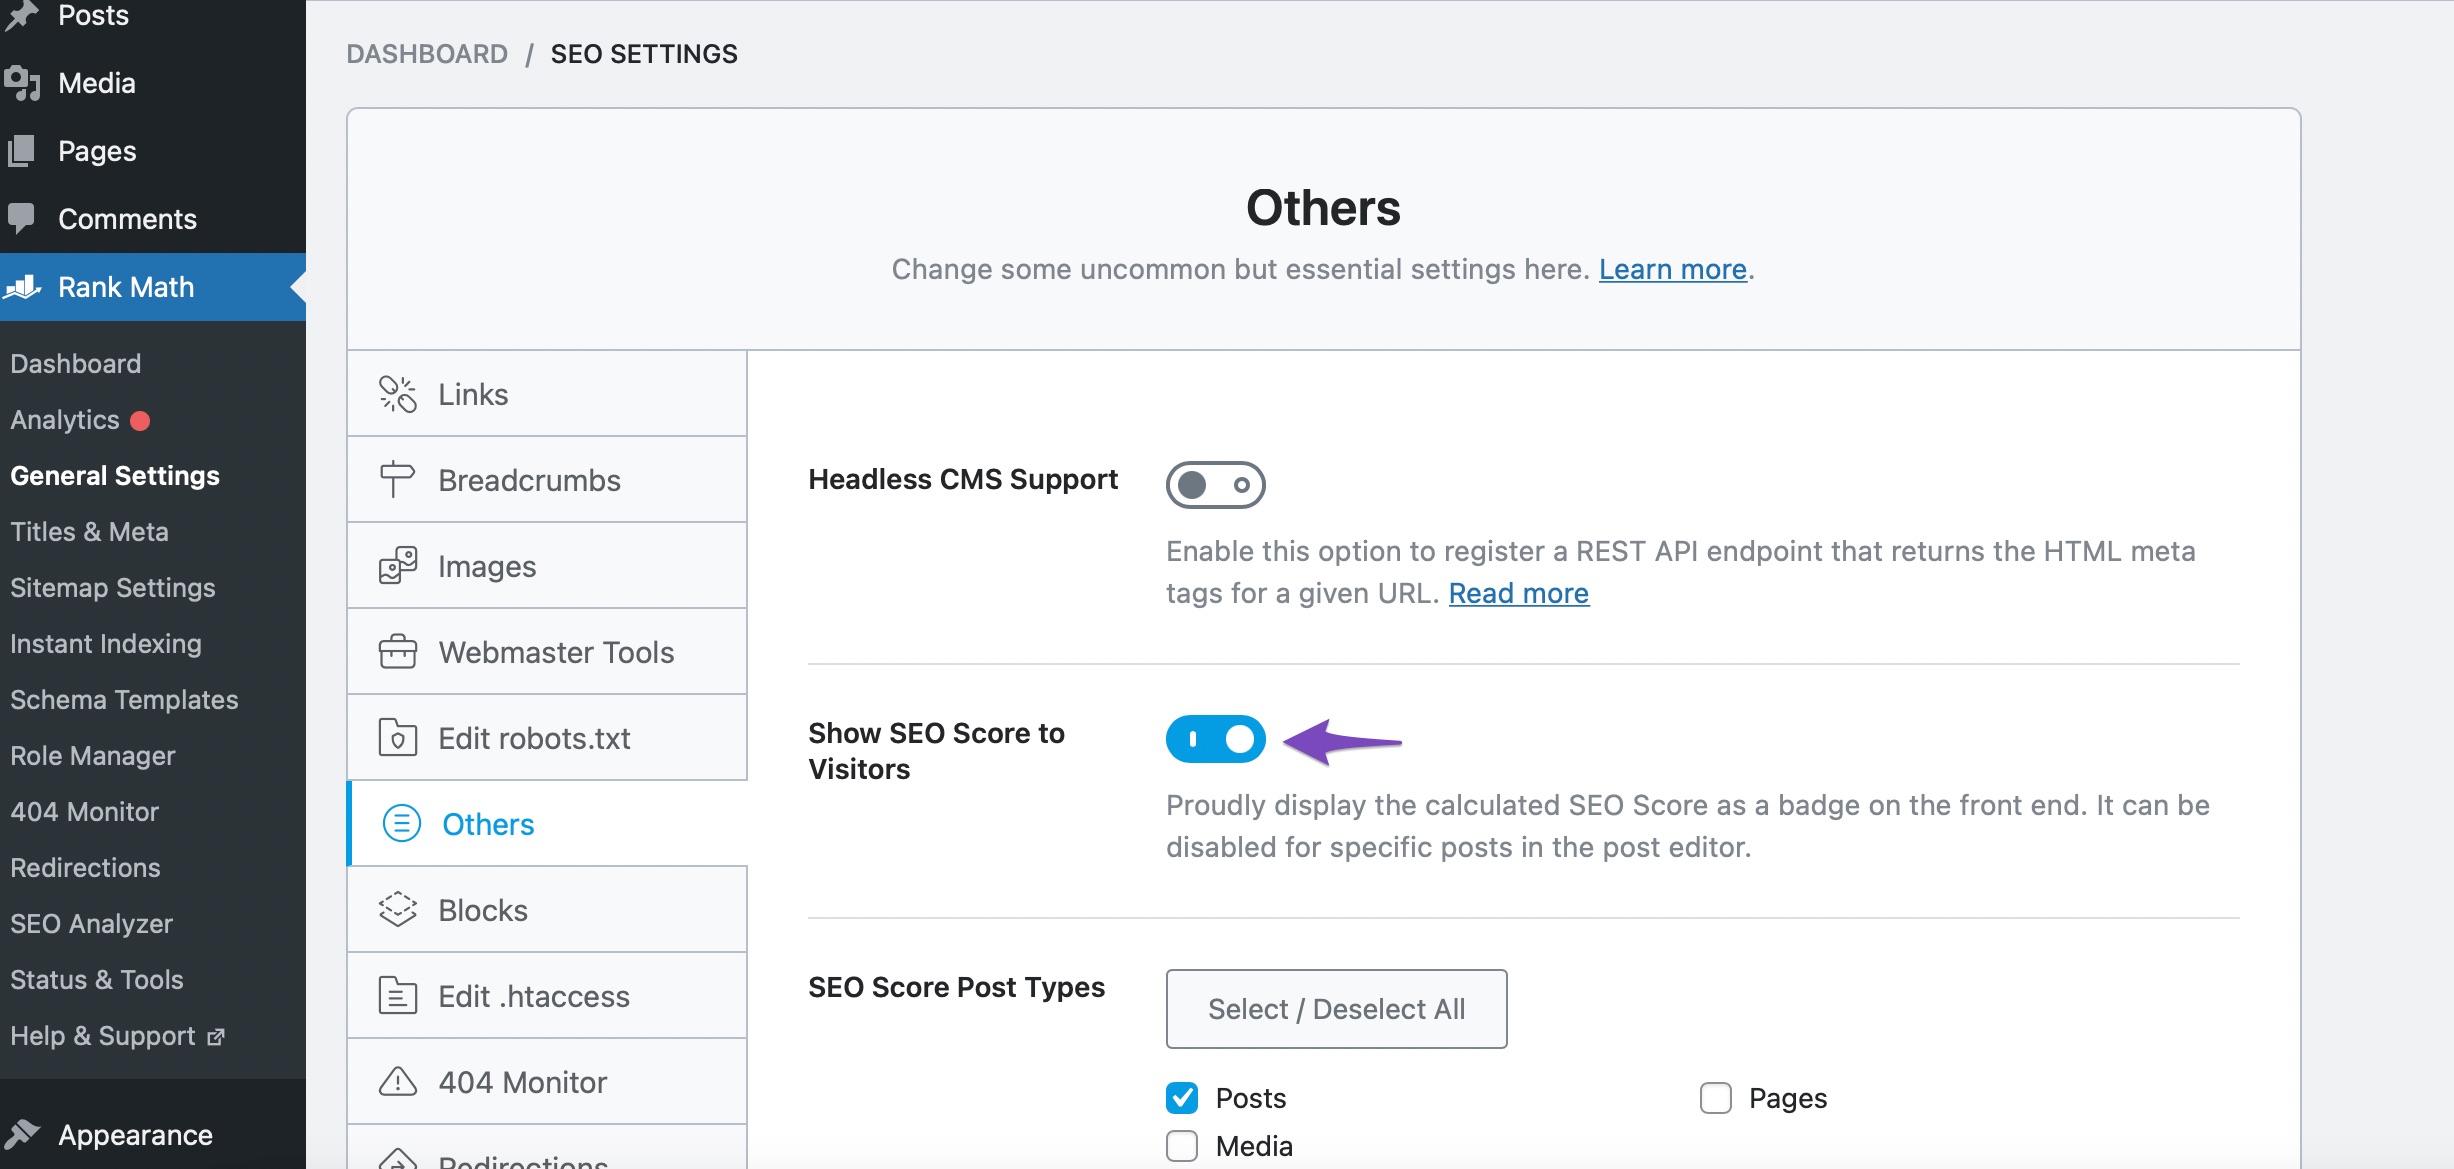
You’ll notice this option if you’ve enabled the Show SEO Score to Visitors option from WordPress Dashboard → Rank Math SEO → General → Others.
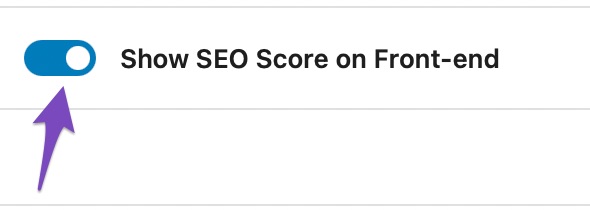
In the advanced tab of Rank Math SEO, you can then see this option as enabled.
Your SEO Score will then be displayed on the frontend as shown below:

12 Conclusion
This covers all the options present in the Advanced Tab of Rank Math’s Meta Tab. There are plenty of powerful options in the tab that can help you manage your website’s presence in the search engines in pristine detail. They might take some getting used to, but as soon as you master them, you won’t be able to live without them.
As always, if you have any doubts, questions, or queries, feel free to open a support ticket directly from here. To learn more tips and tricks and to see how others are utilizing the power of Rank Math, join our Facebook Group—don’t forget to say hello.