
Adding a slideshow is a simple and effective way to make your WordPress site more visually appealing. It lets you display multiple images or pieces of content in an engaging format that captures attention and encourages visitors to stay longer.
You don’t need any advanced technical skills to set it up. In this post, I’ll show you exactly how to add a slideshow to WordPress site step by step, so you can present your content in a clean, eye-catching way.
Let’s get started!
Table Of Contents
1 Why Add a Slideshow to Your WordPress Websites?
There are several good reasons to add a slideshow to your WordPress site, and I’ll walk you through the most important ones below.
1.1 Increase Engagement and Capture Users’ Attention
A slideshow is a great way to highlight your key content, whether it’s products, videos, or featured blog posts. It adds movement and visual interest that grabs your visitors’ attention right away.
Think about popular online stores, especially in electronics, fashion, or groceries. Their homepages often have slideshows showcasing bestsellers or deals. It’s not just for show, it keeps visitors exploring longer.

When you add slideshows to your site, you can do the same: keep people on your page longer and increase interaction.
1.2 Increase Conversions
Showcasing your products or services in a slideshow can encourage visitors to take action, like making a purchase, signing up, or clicking through to learn more.
When you see something you like in a rotating banner, you’re more likely to check it out. You can even add call-to-action buttons or link to your social media to drive more engagement and conversions.
1.3 Highlighting Testimonials and Reviews
Slideshows are perfect for displaying reviews from your happy customers. If you’ve got a lot of great feedback, use a slideshow to present it all in a clean and engaging format.
Sharing testimonials this way helps build trust and credibility, especially with new visitors who are still getting to know your brand.
1.4 Showcasing Promotions and Events
Got a sale, launch, or event coming up?
A slideshow can help spread the word fast. Use eye-catching visuals and smooth transitions to promote limited-time offers or upcoming events right on your homepage.
You can even include countdowns in your slideshows to build urgency and encourage faster action from your audience.
2 How to Add a Slideshow to Your WordPress Website
Now that you understand the benefits of adding a slideshow, let me show you how you can add one to your WordPress site.
2.1 Add a Slideshow in WordPress Using Slideshare
First, head over to SlideShare and create an account if you don’t already have one. Once you’re logged in, upload your slideshow or presentation.
After the upload is complete, go to your SlideShare dashboard and find the presentation you want to embed. Click the three dots under it, then select Share.

You’ll see a URL for your presentation, copy this link.

Now, go back to your WordPress dashboard and open the post or page where you want to add the slideshow.
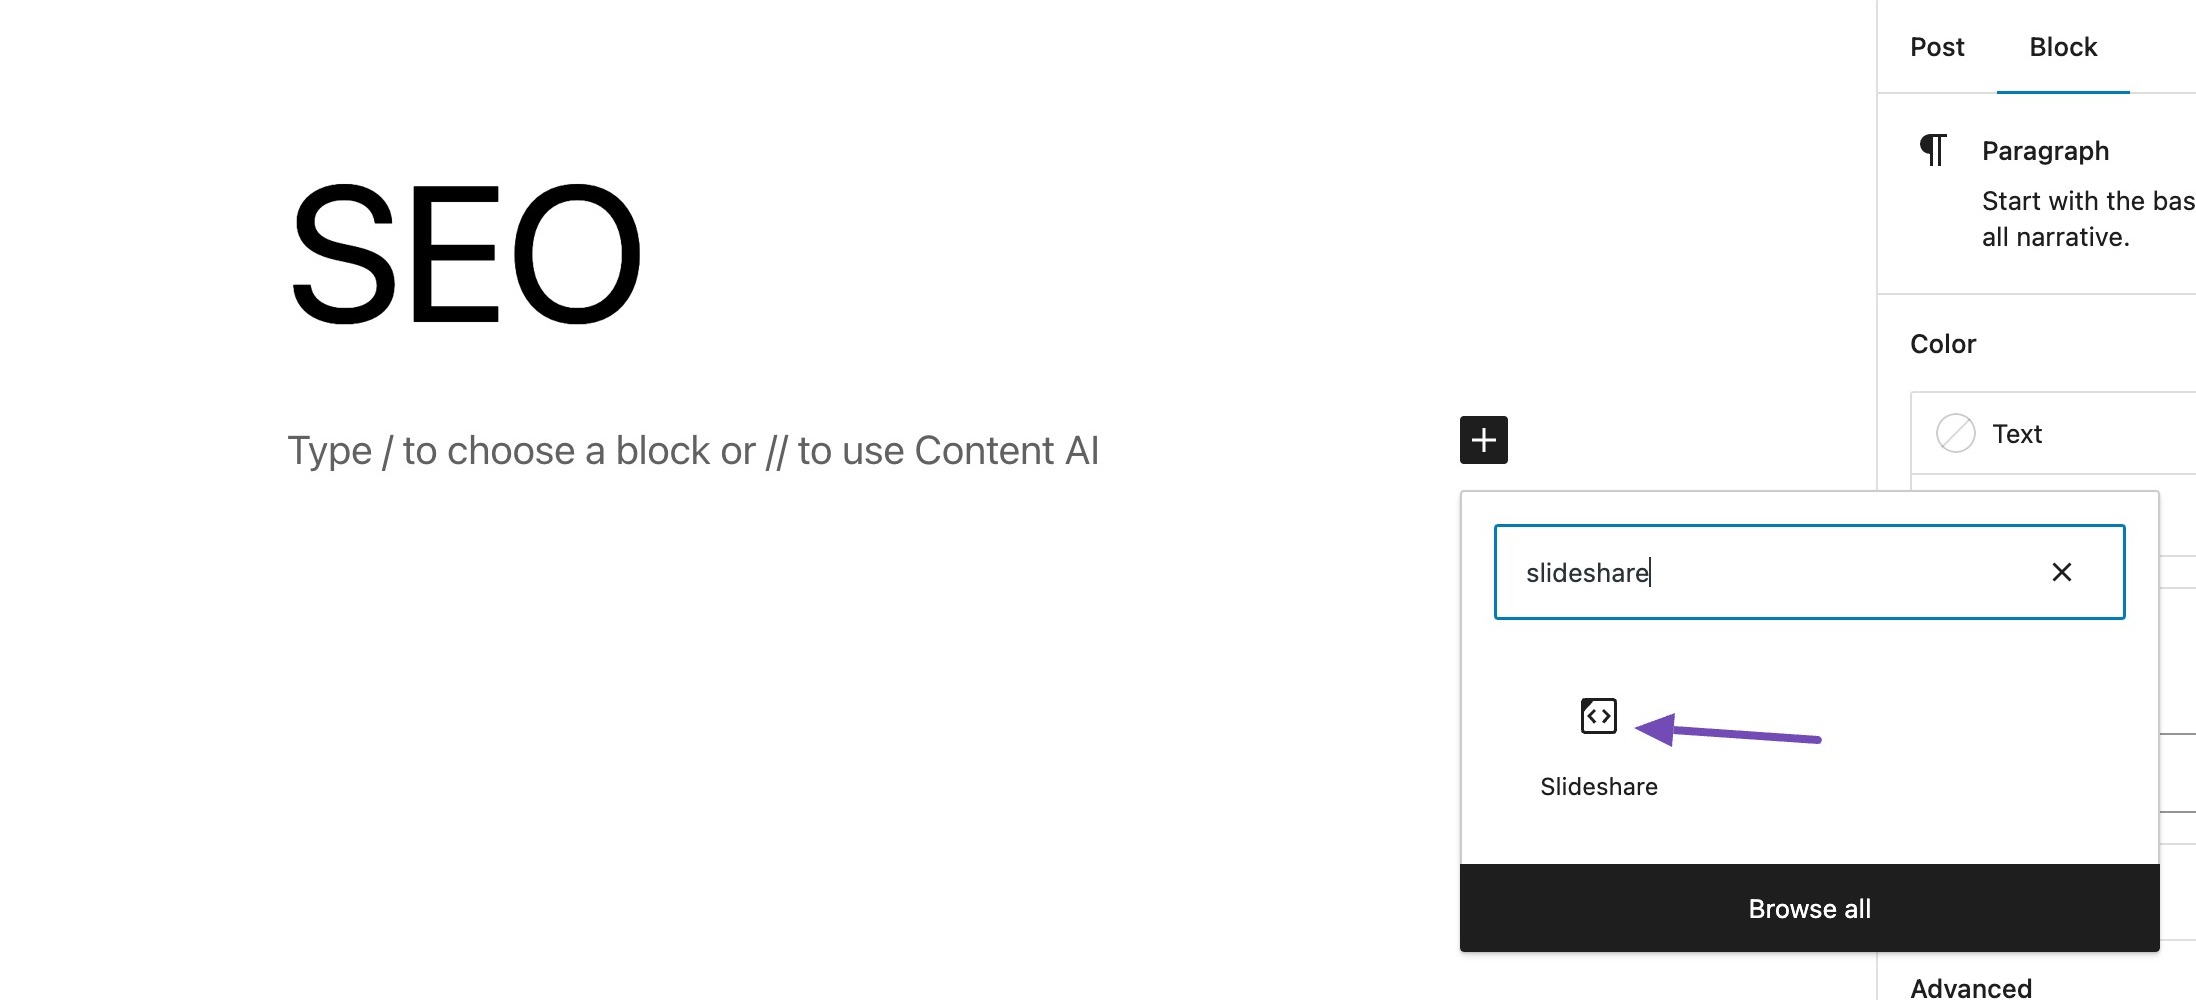
In the editor, click the + button and search for the Slideshare block.
Once you add it, paste the link you copied into the block, then click Embed.

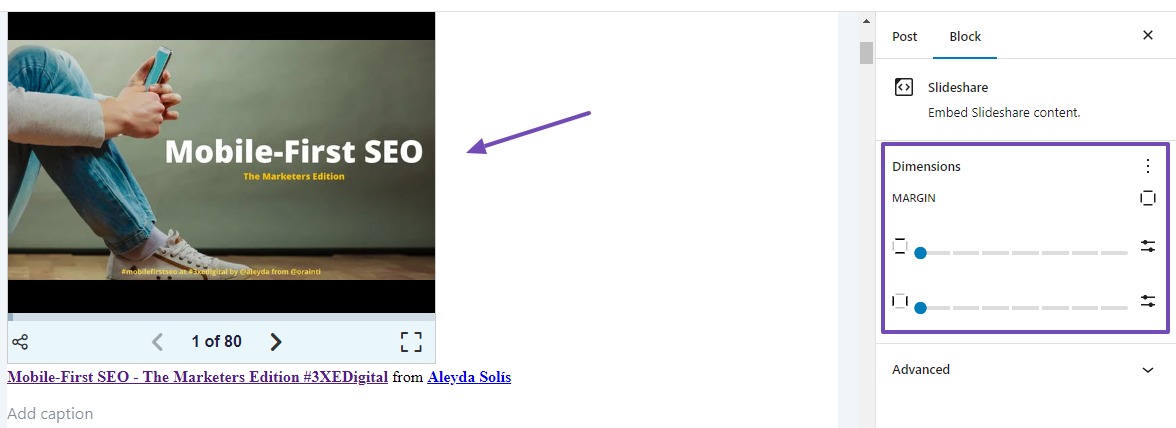
Your slideshow should now appear right in your content!
To further customize it, click on the slideshow to access its settings in the Block tab. From here, you can adjust the margins to make sure it fits nicely with the rest of your content.
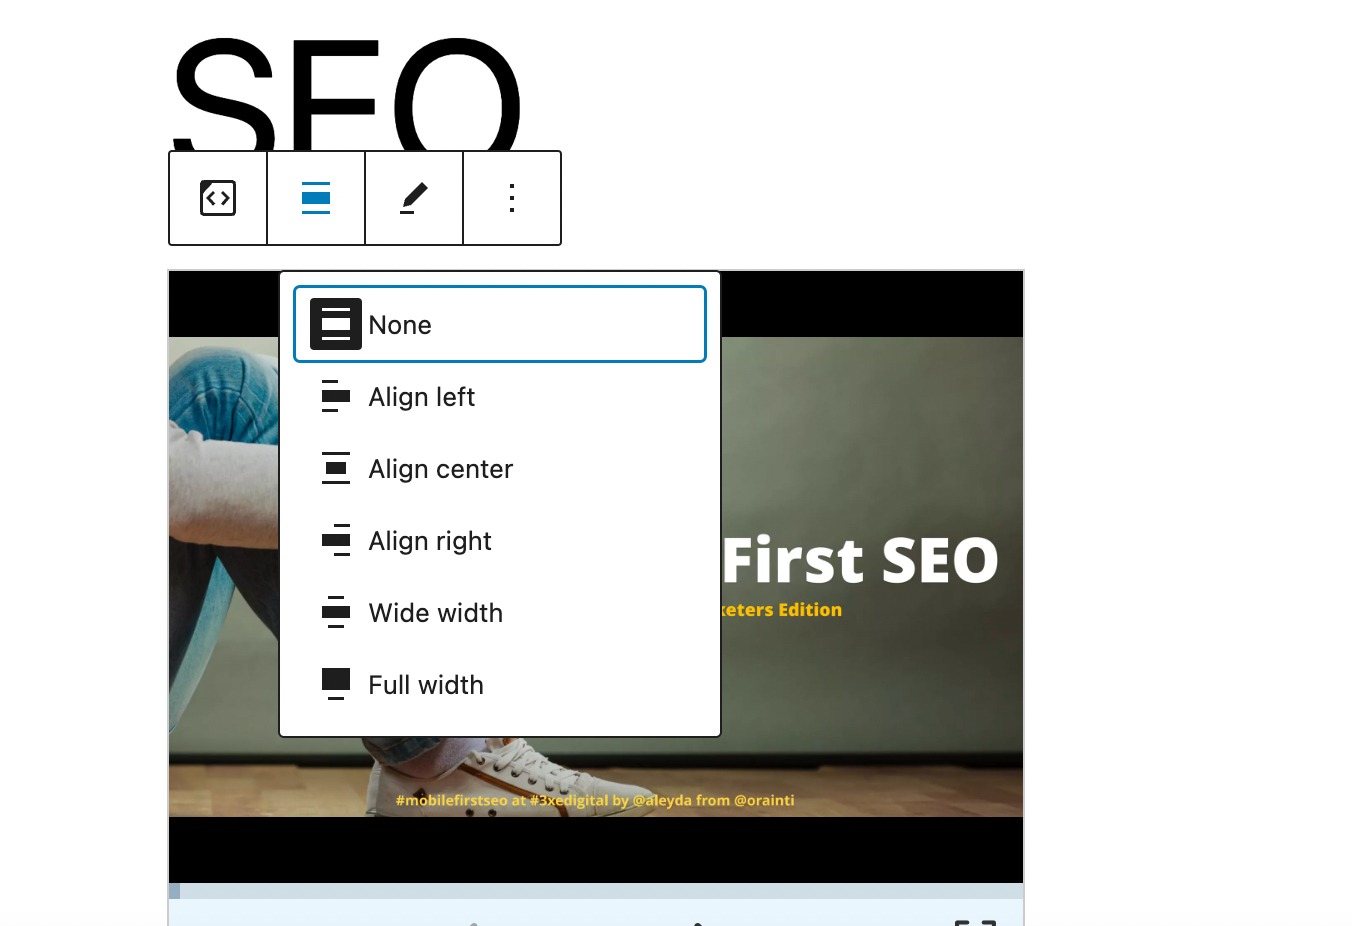
You can also modify the alignment of the Slideshow, as shown below.
Once you’re happy with how it looks, click Publish or Save to save your changes.
2.2 Create a Slideshow in WordPress Using a Plugin
If you want to create beautiful, responsive slideshows that work on desktops, tablets, and mobile devices, using a plugin is the easiest way to go. I recommend two popular options based on what you’re looking for:
- Depicter Slider – packed with advanced features and templates
- Jetpack – great for quick, basic slideshows
Add a Slideshow Using the Jetpack Plugin
Jetpack wasn’t originally built just for slideshows, but it now includes a Slideshow block that works right inside the WordPress editor, no extra setup needed.
To create slideshows using Jetpack, follow our guide on installing and activating WordPress plugins.
To use the Jetpack slideshow, search for Slideshow on the post-editing screen, as shown below.
You’ll find the Jetpack Slideshow block, drag and drop it into your post.
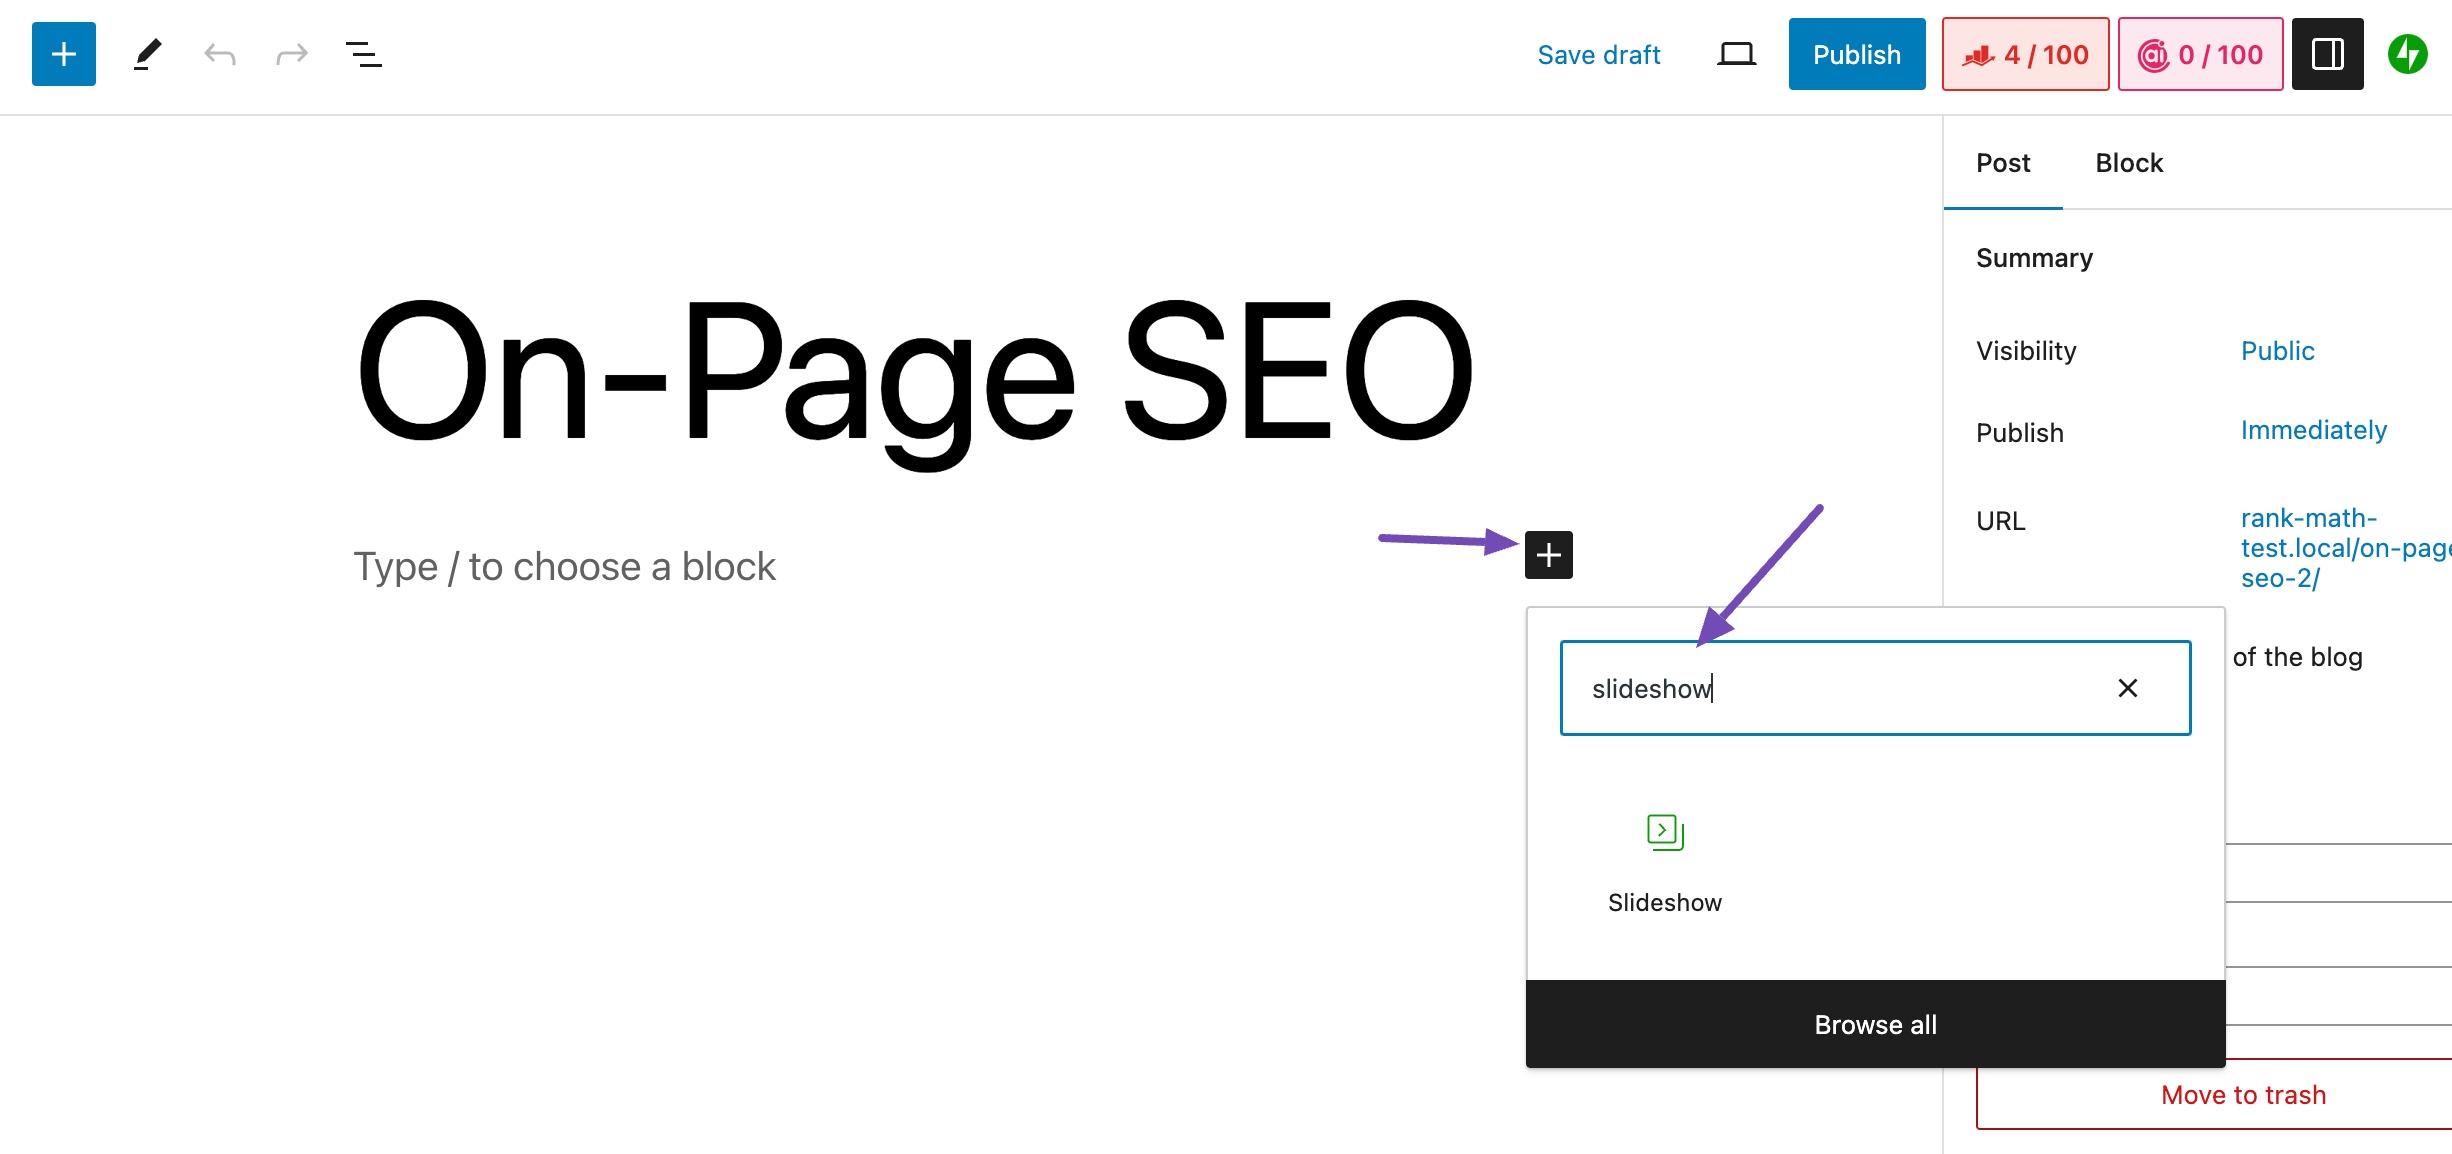
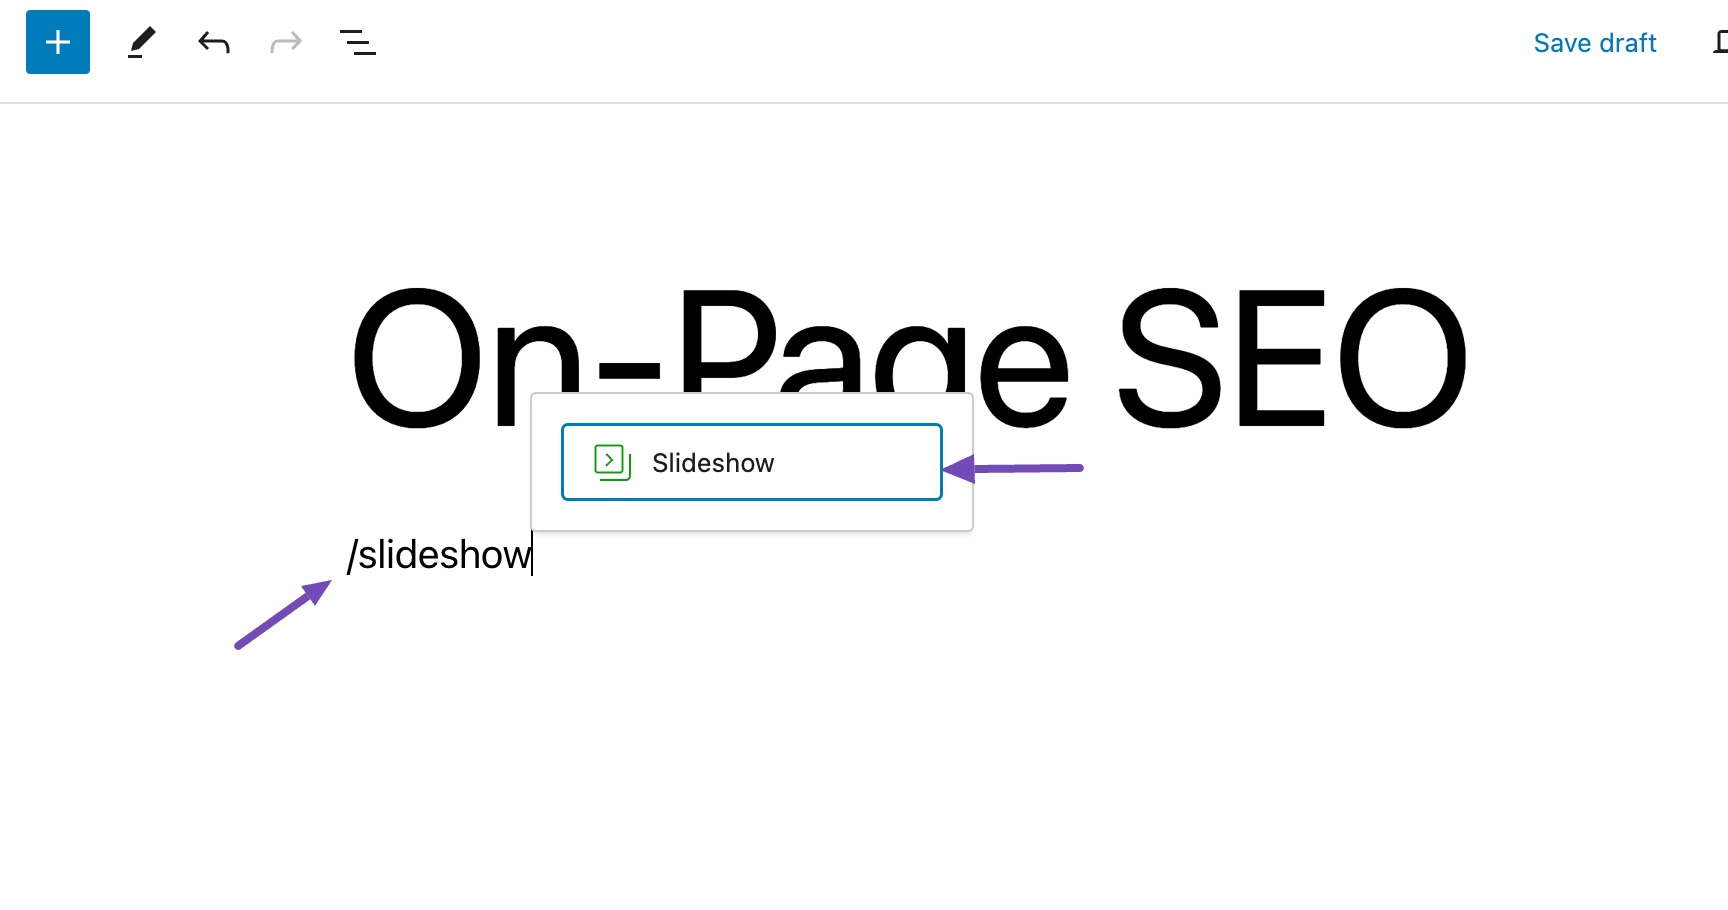
Alternatively, you can type “/slideshow” in your post editor, and the Slideshow block will appear immediately. Next, click on it as shown below.
You can add images to the Slideshow by selecting the Upload button to access your local files on the computer.
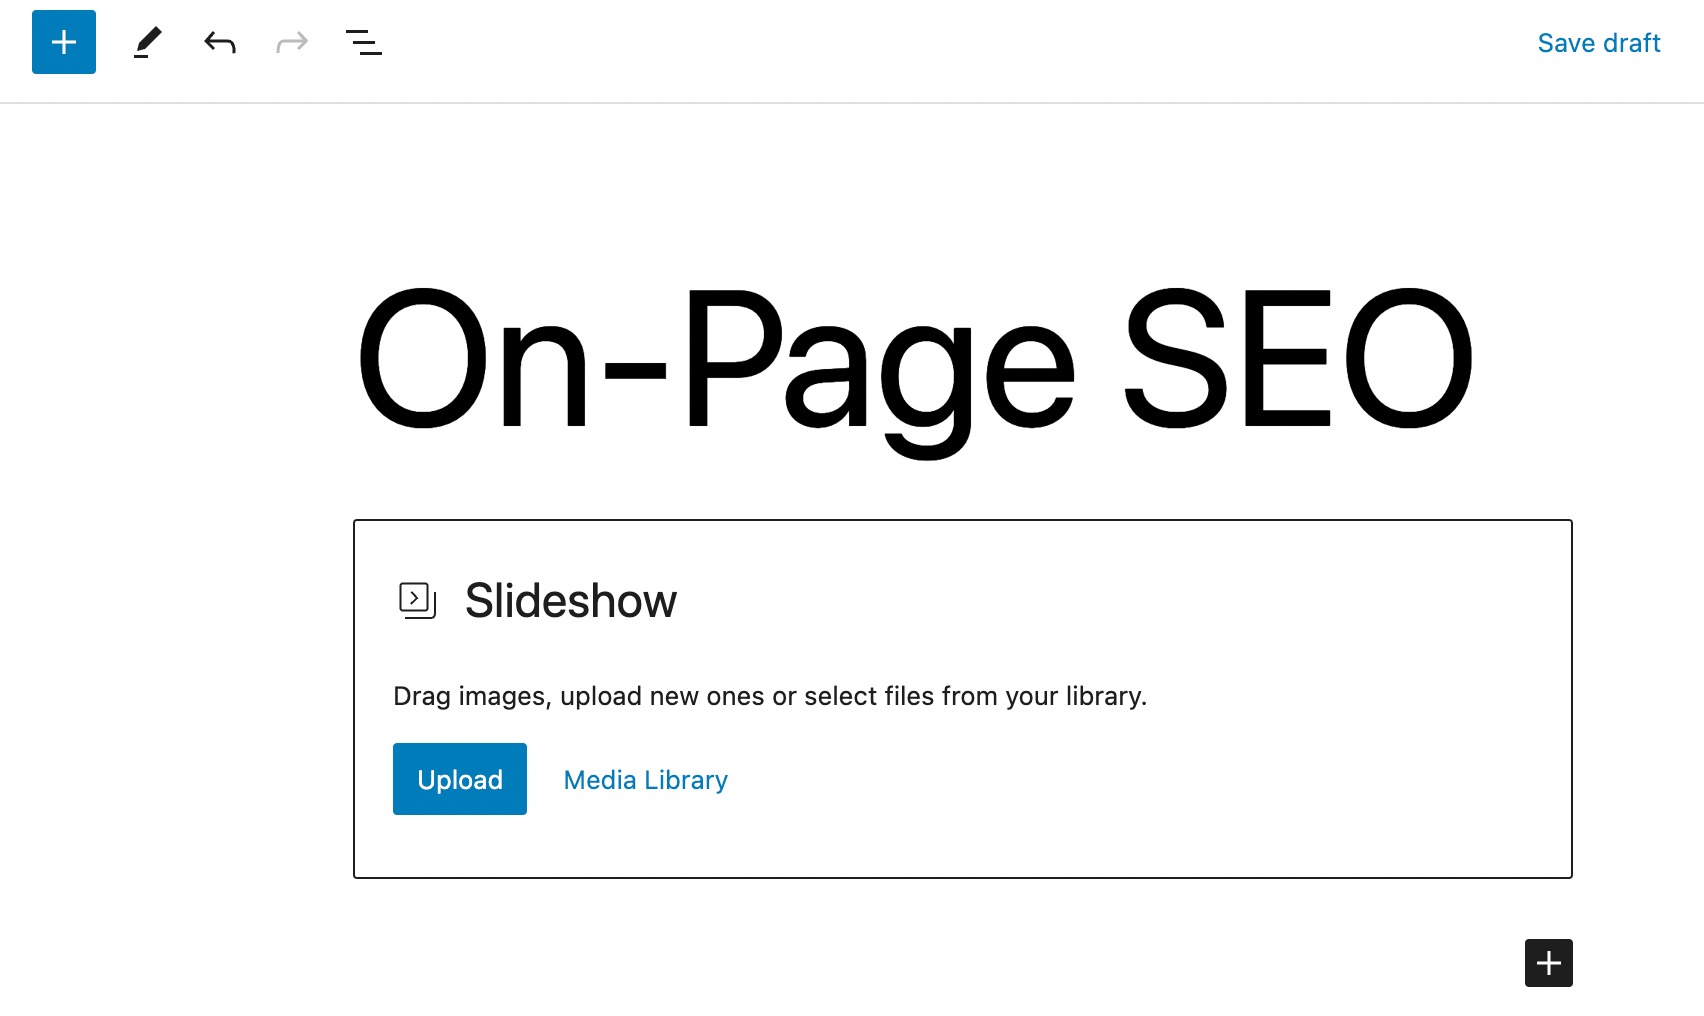
If you’ve already uploaded images, select them from the Media Library option.
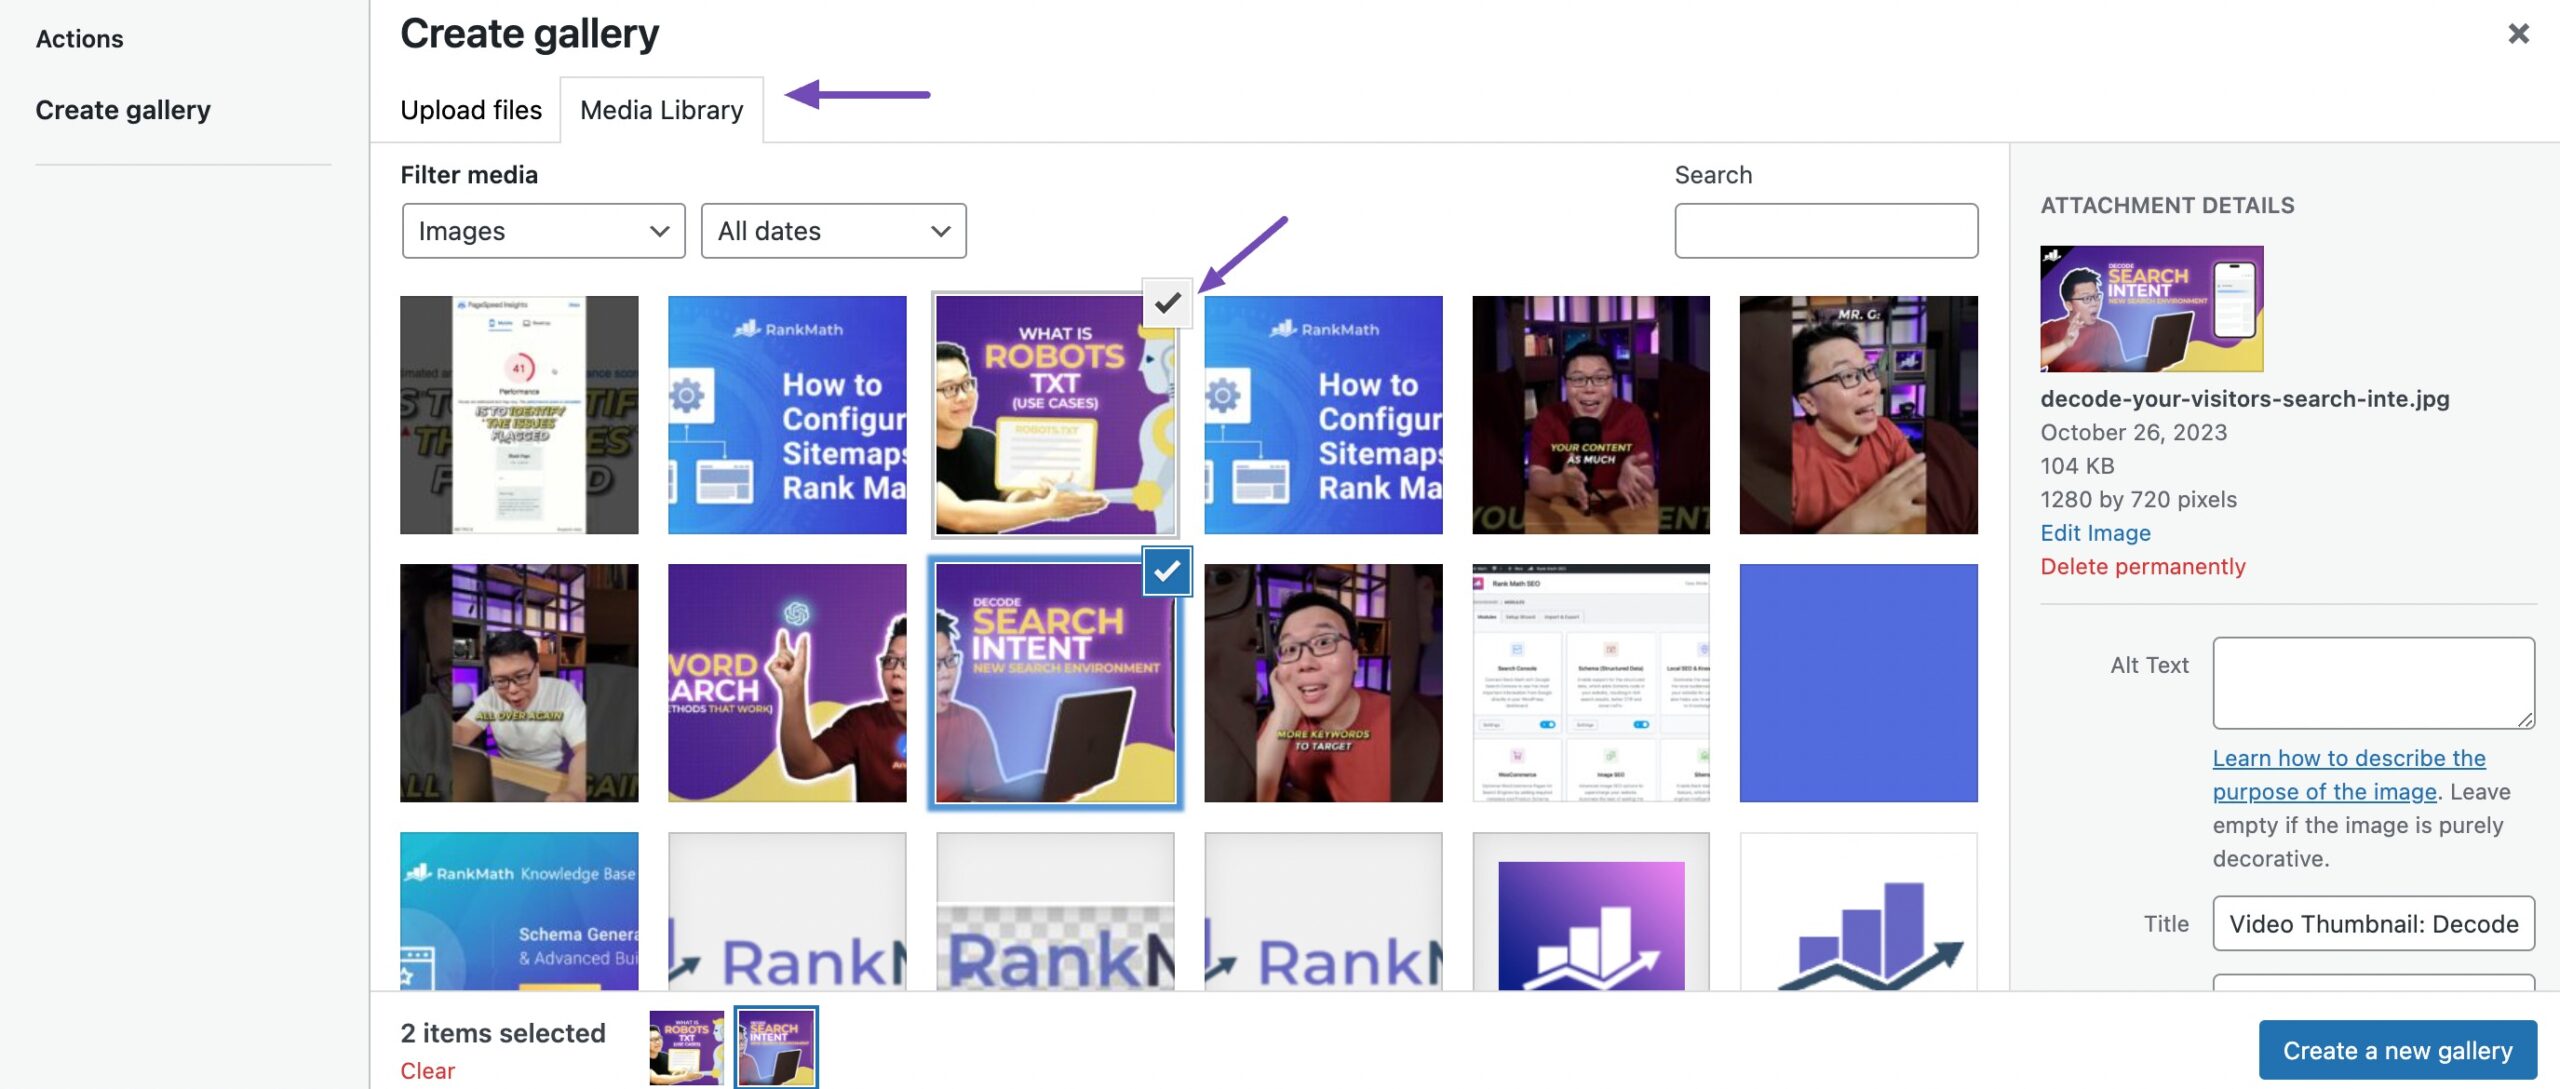
A check icon will appear over your chosen image files, and you can click on the icon to deselect any image.
However, optimize each image’s alt text, title, caption, and description for search engine optimization, as shown below.
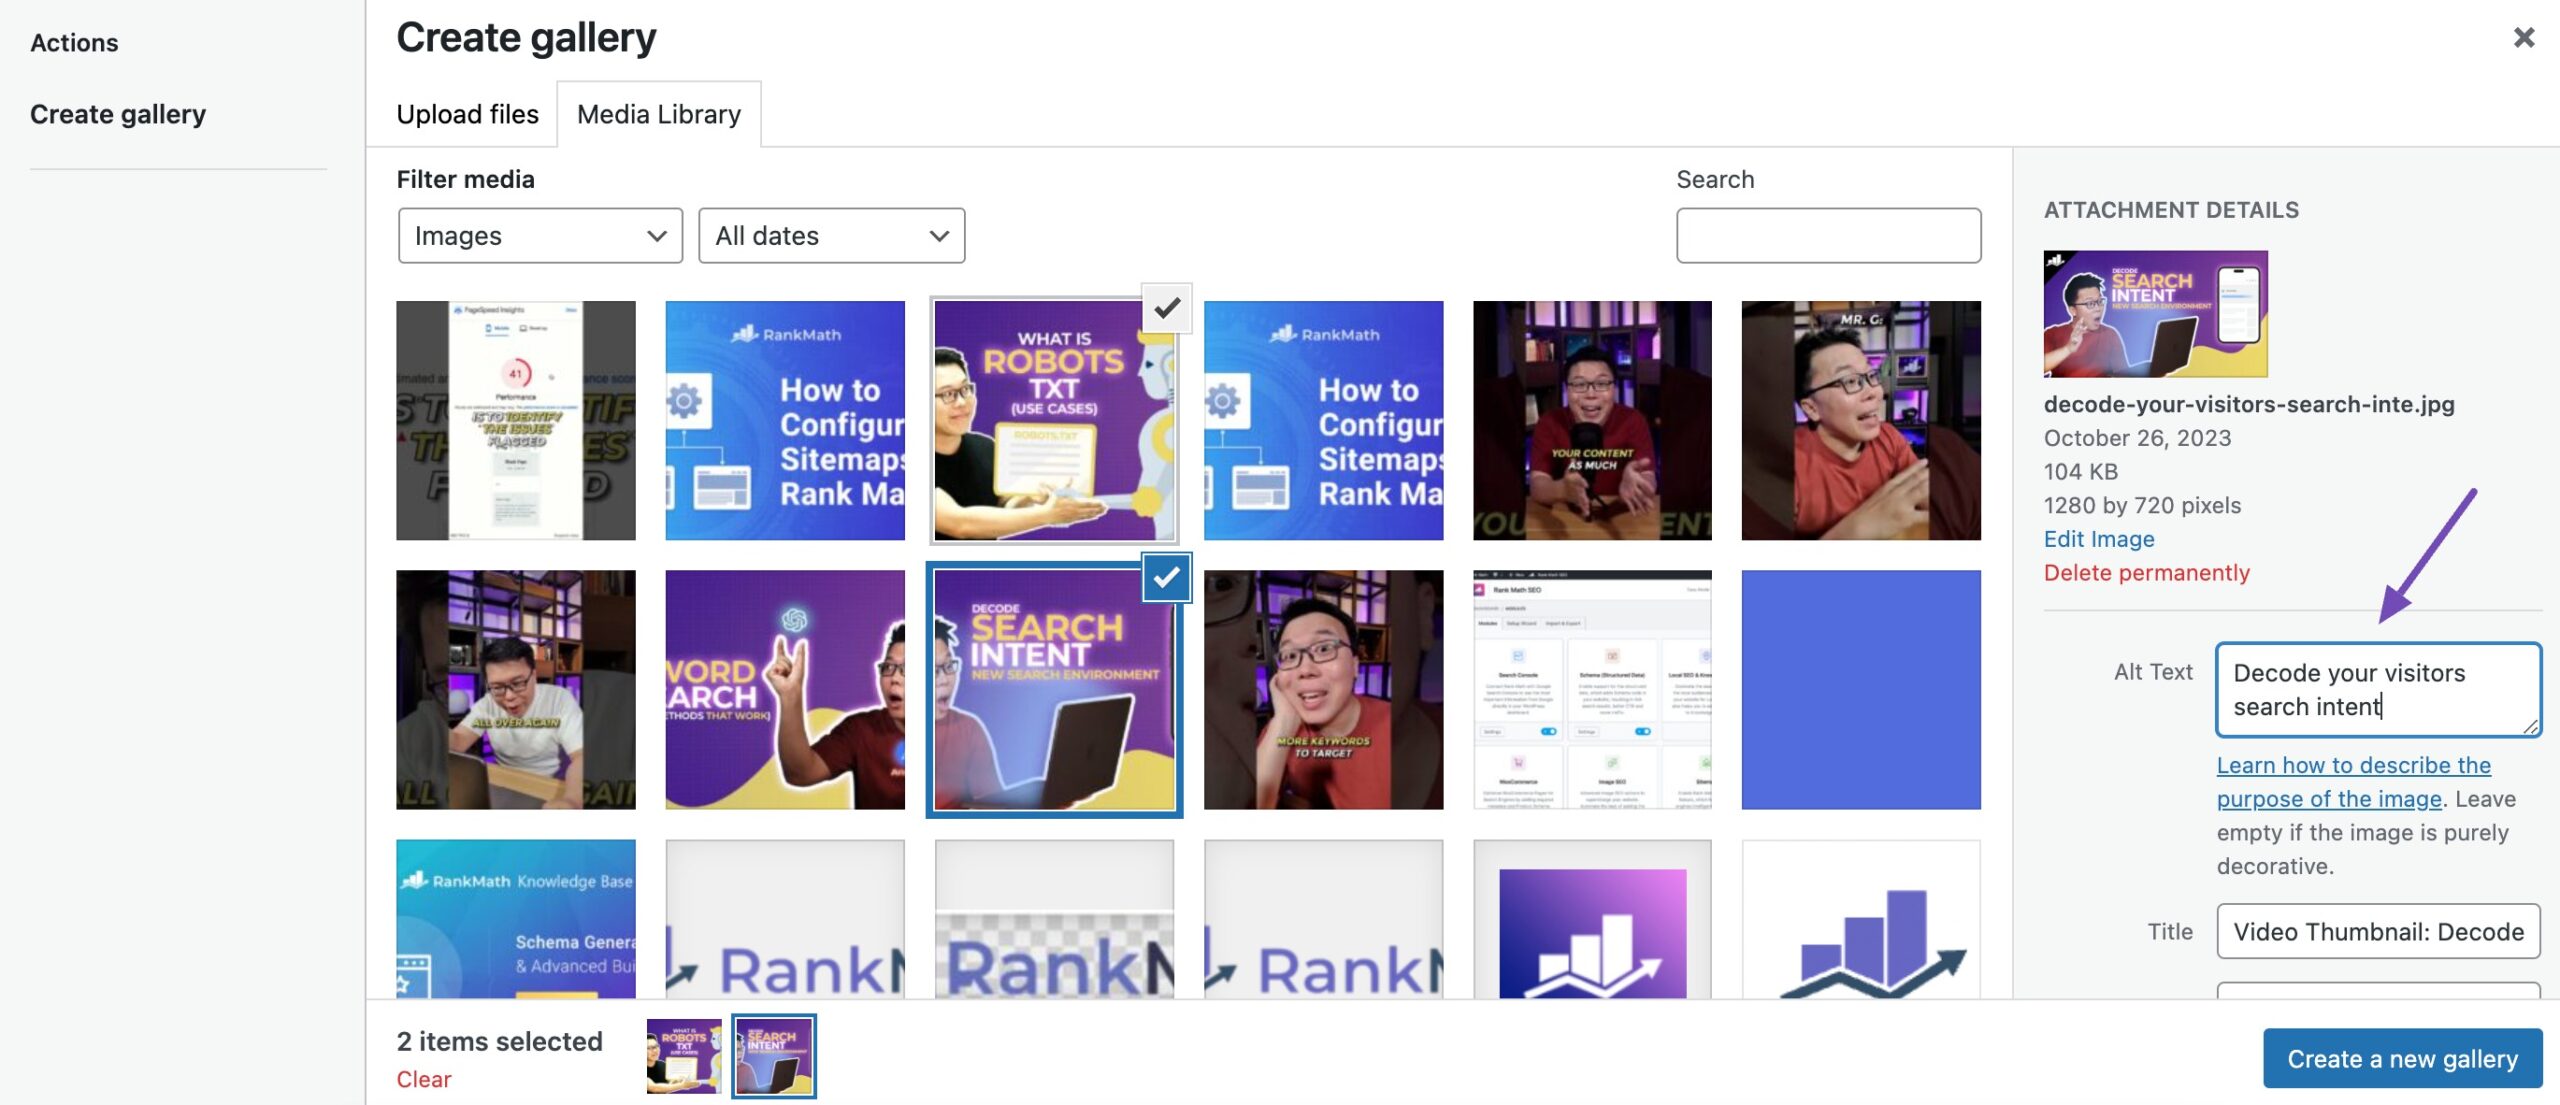
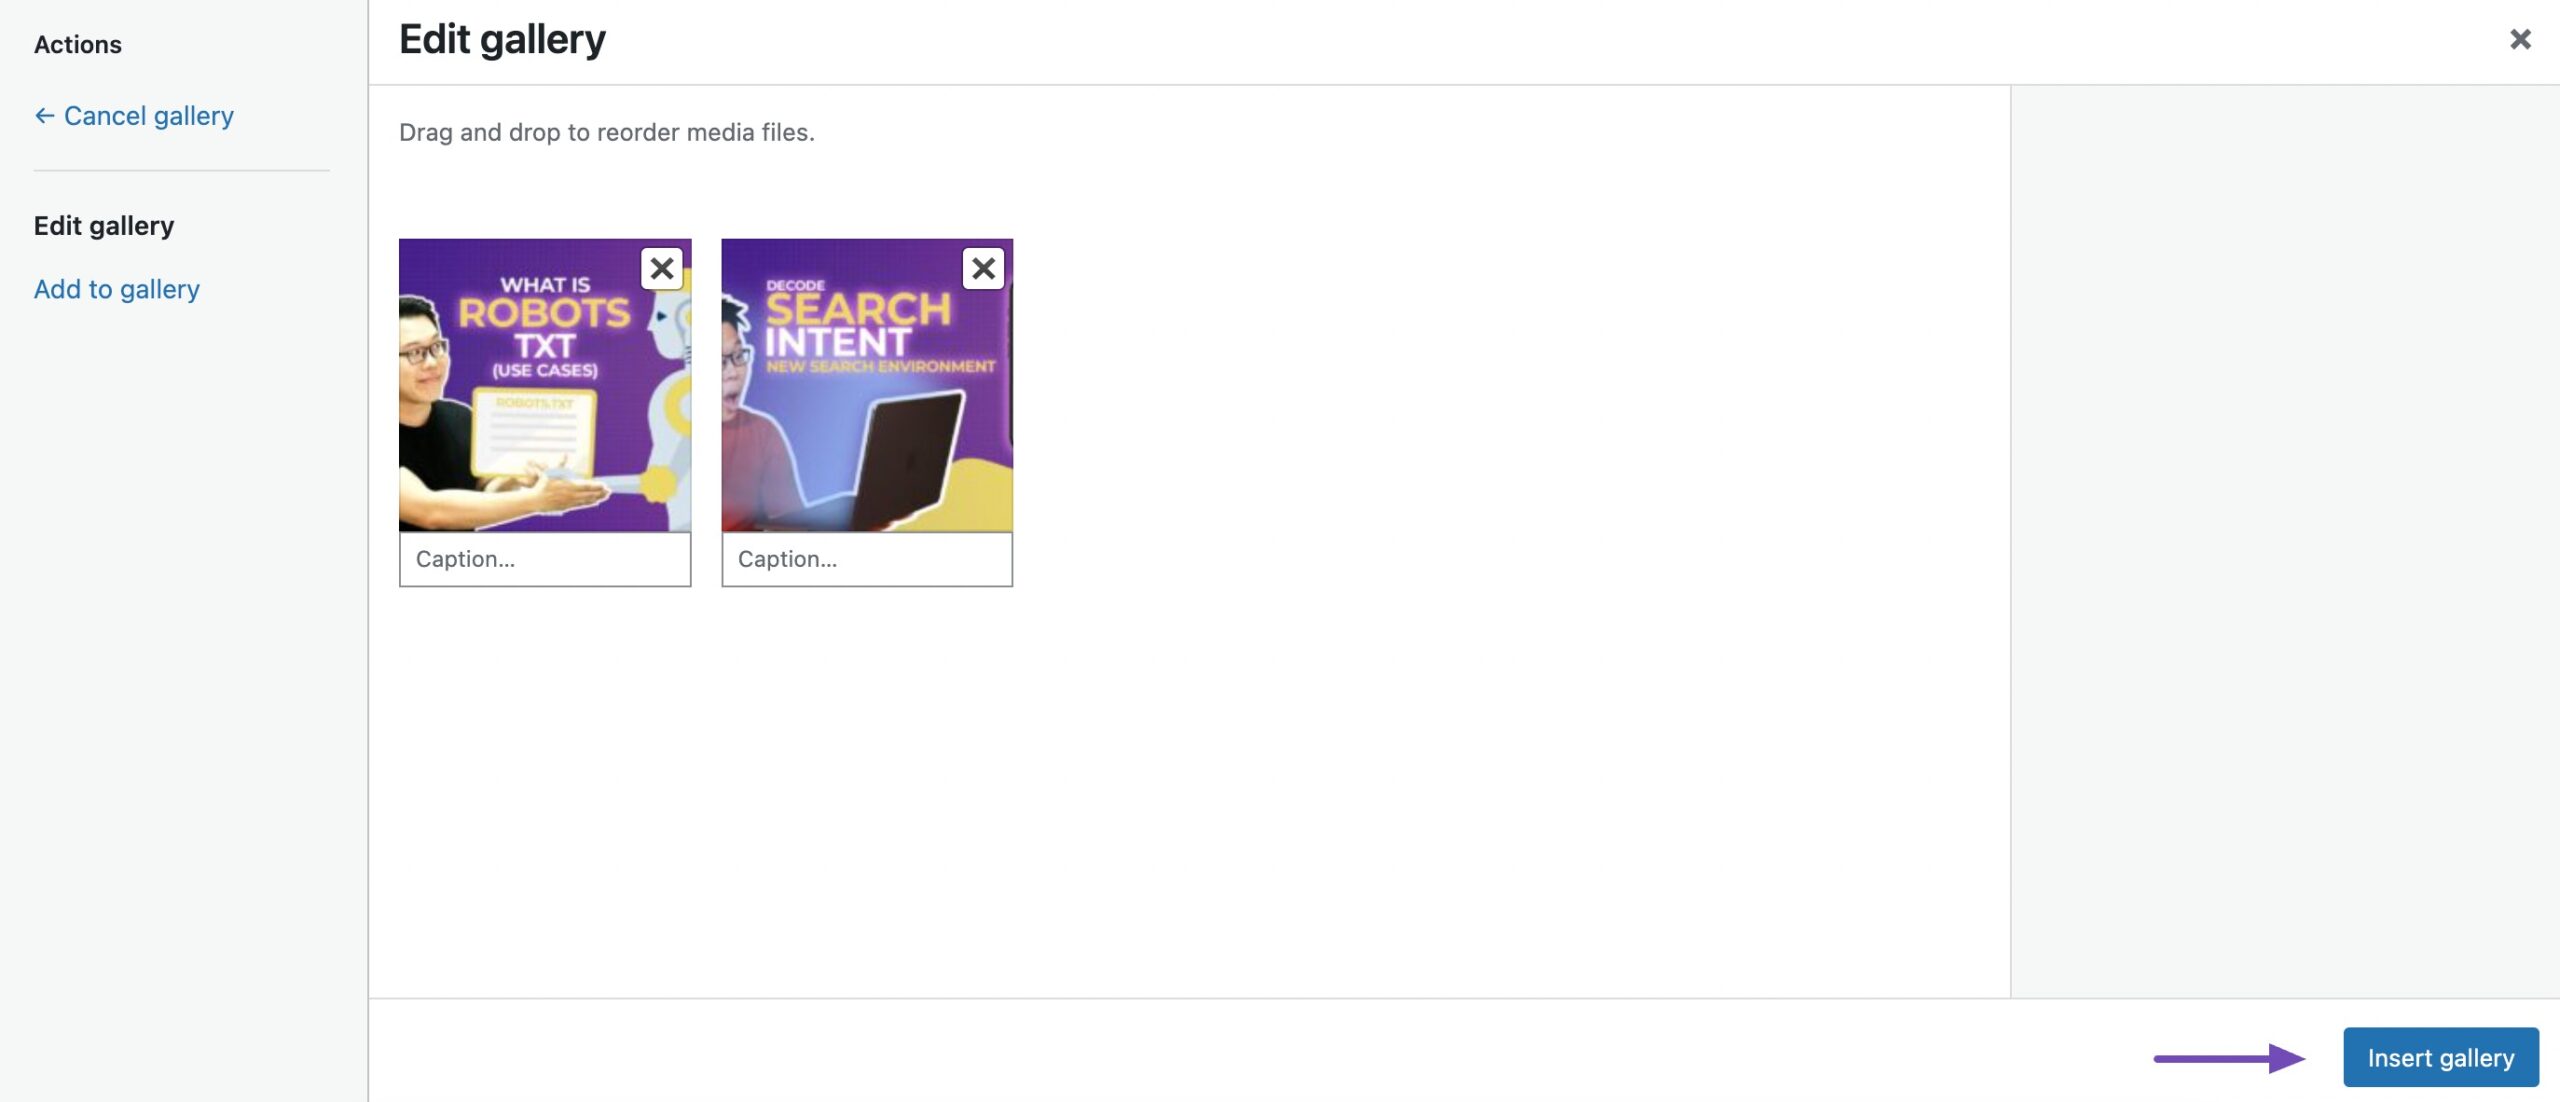
After finalizing your selections, preview your edits by clicking the Create a new gallery button. On the preview page, you can further refine the selected gallery before clicking the Insert gallery button to integrate the slideshow into your post.
Once added to your post, the slideshow adopts the appearance defined by your selected images.
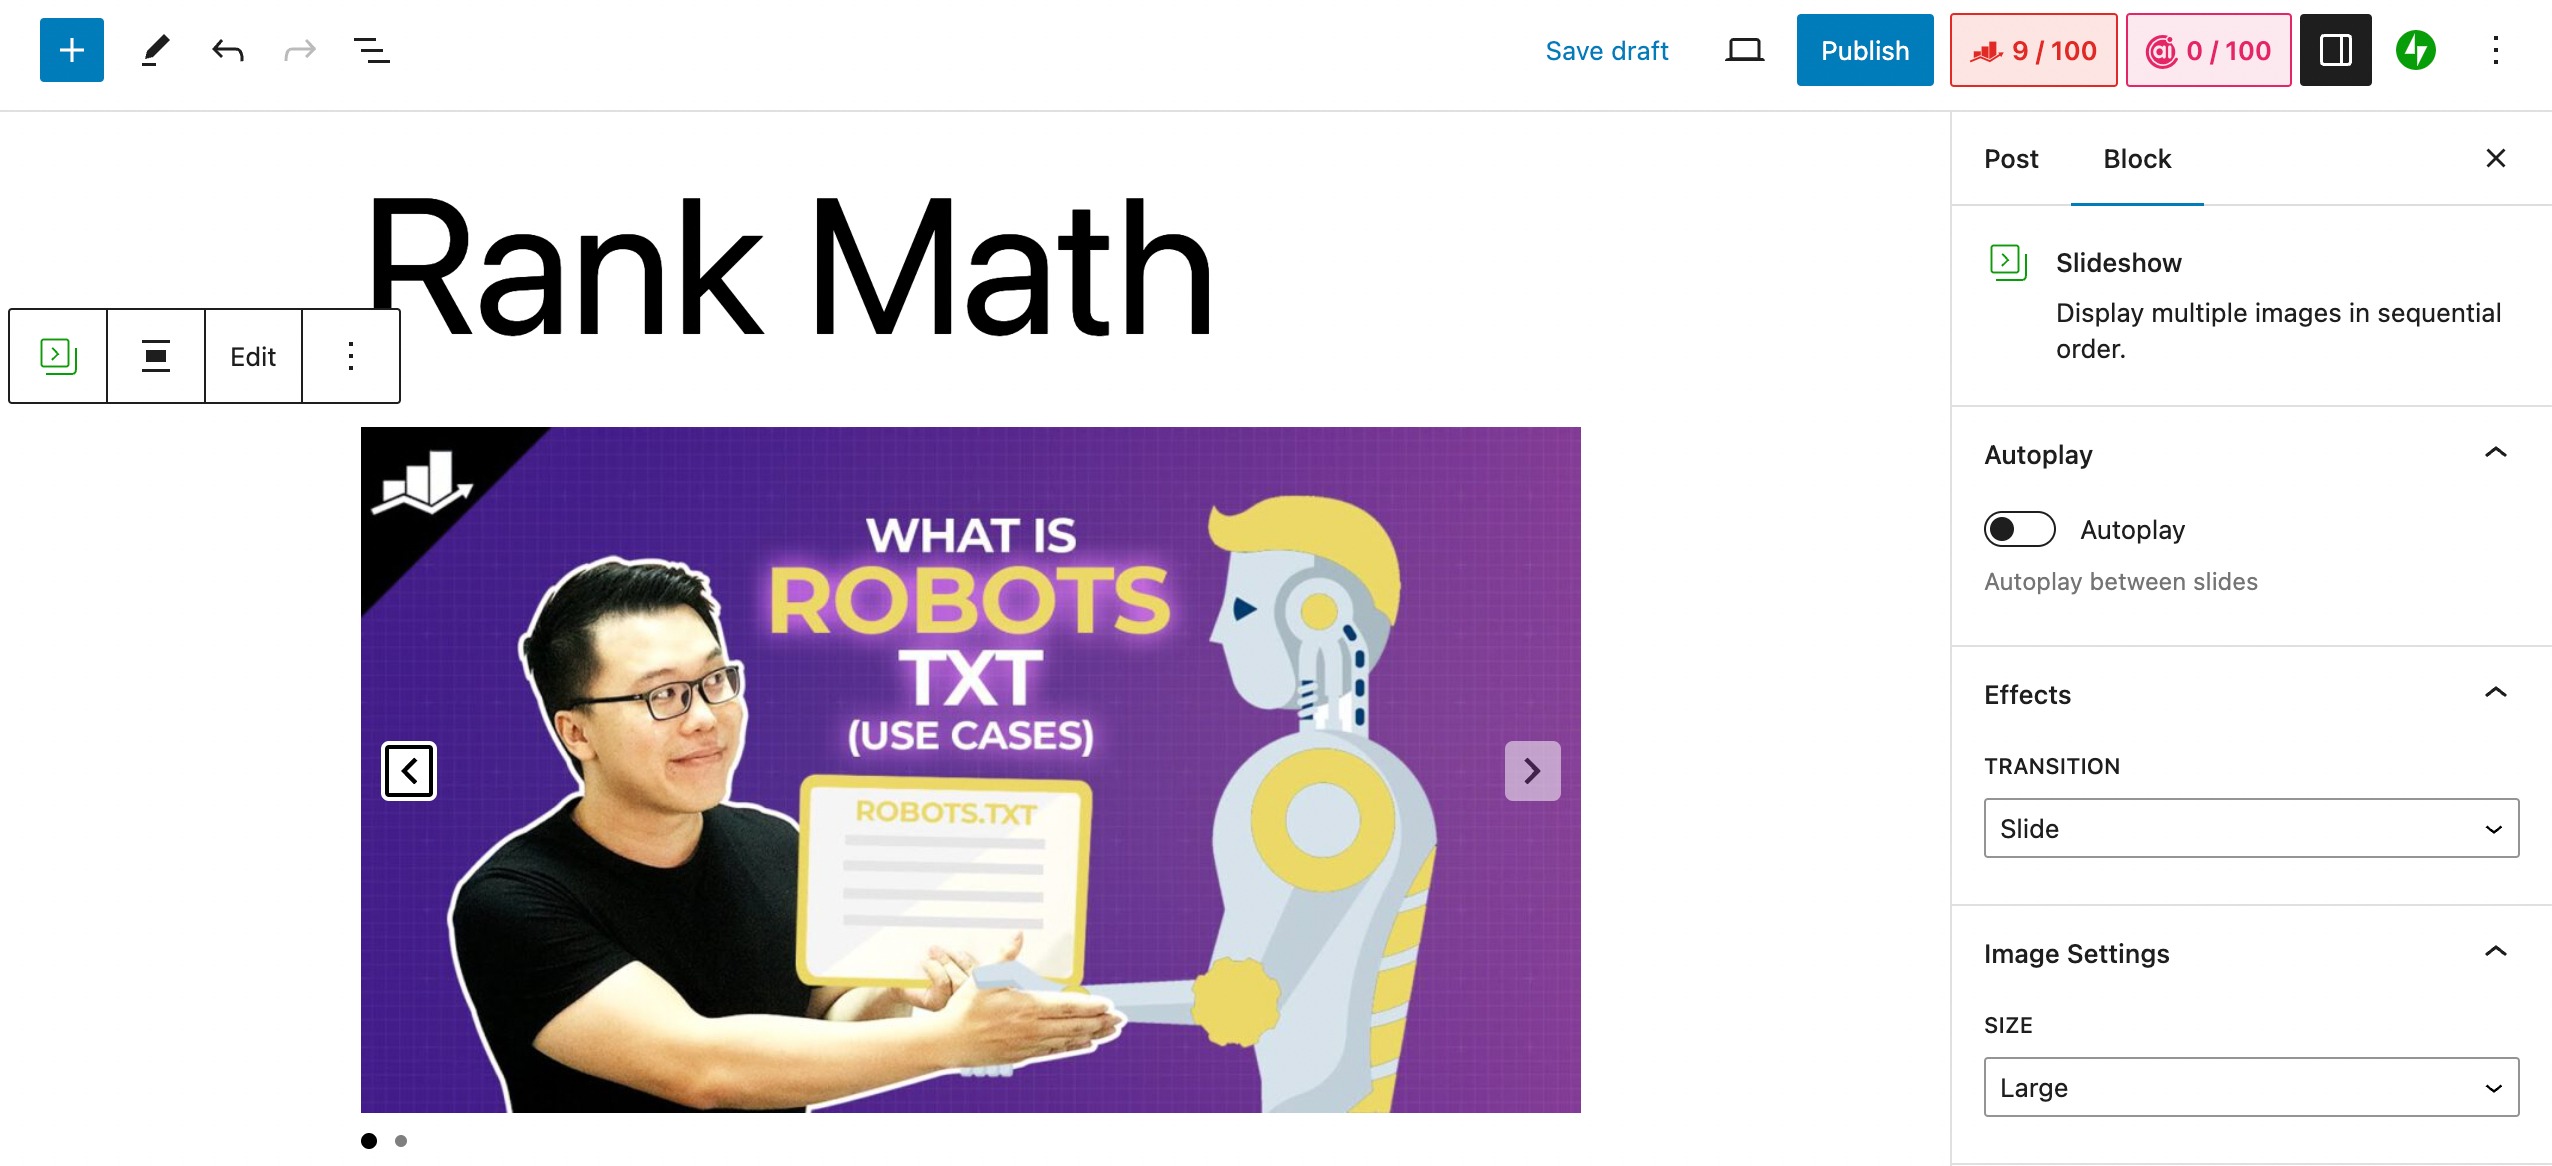
For additional edits to the slideshow, simply click on it and access the Settings panel, as shown below.
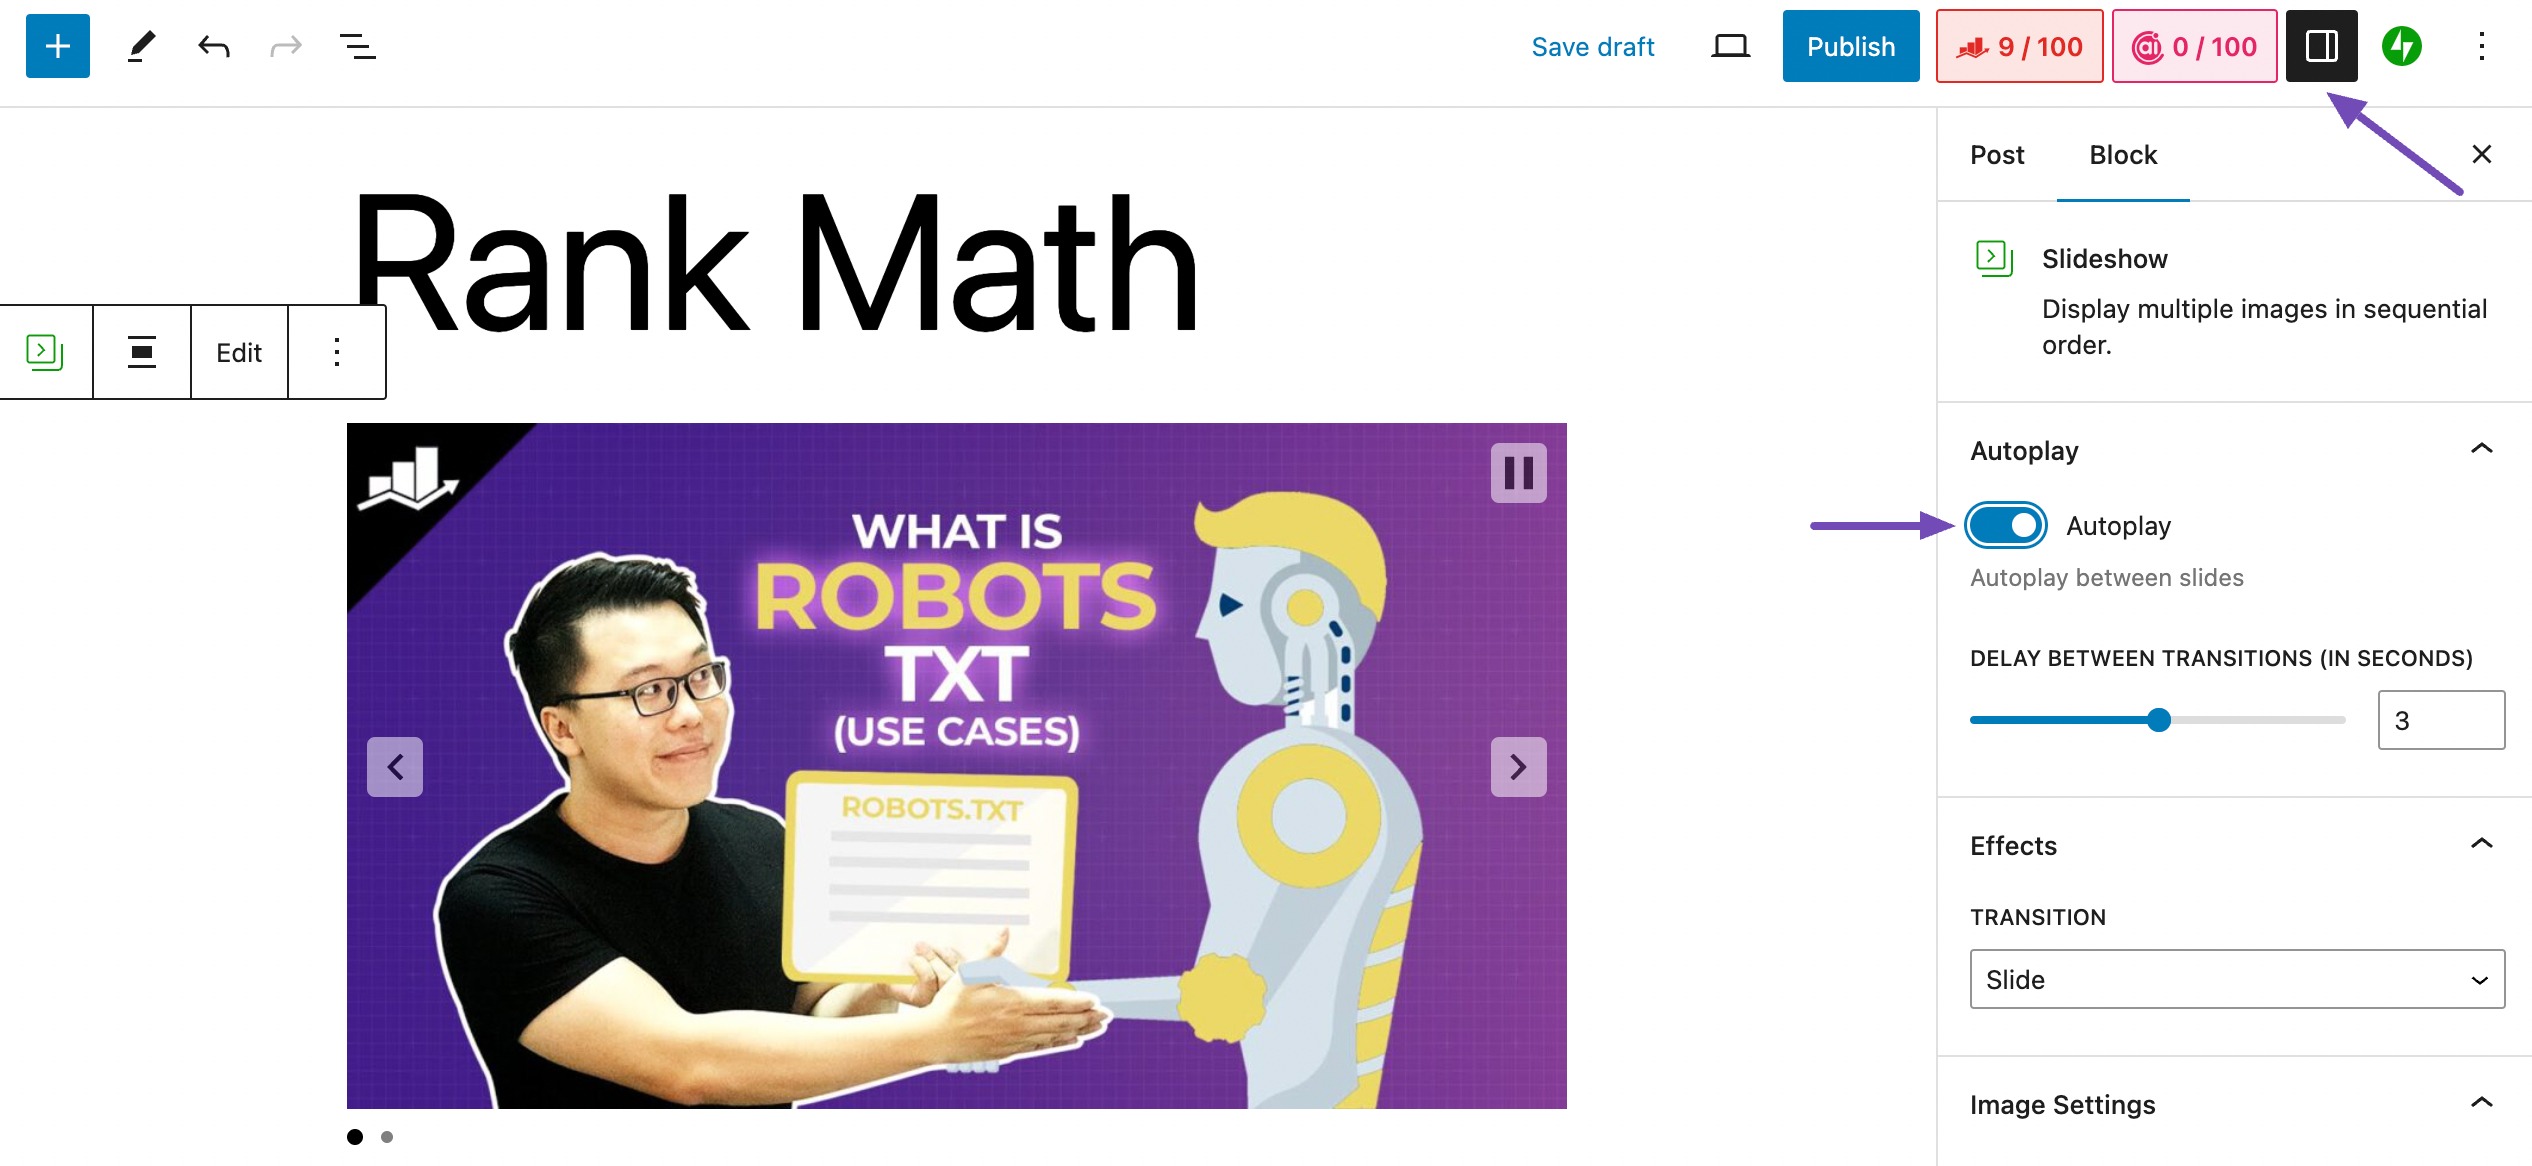
To enable automatic playback between slides, go to the Block tab in the Settings panel and select Autoplay.
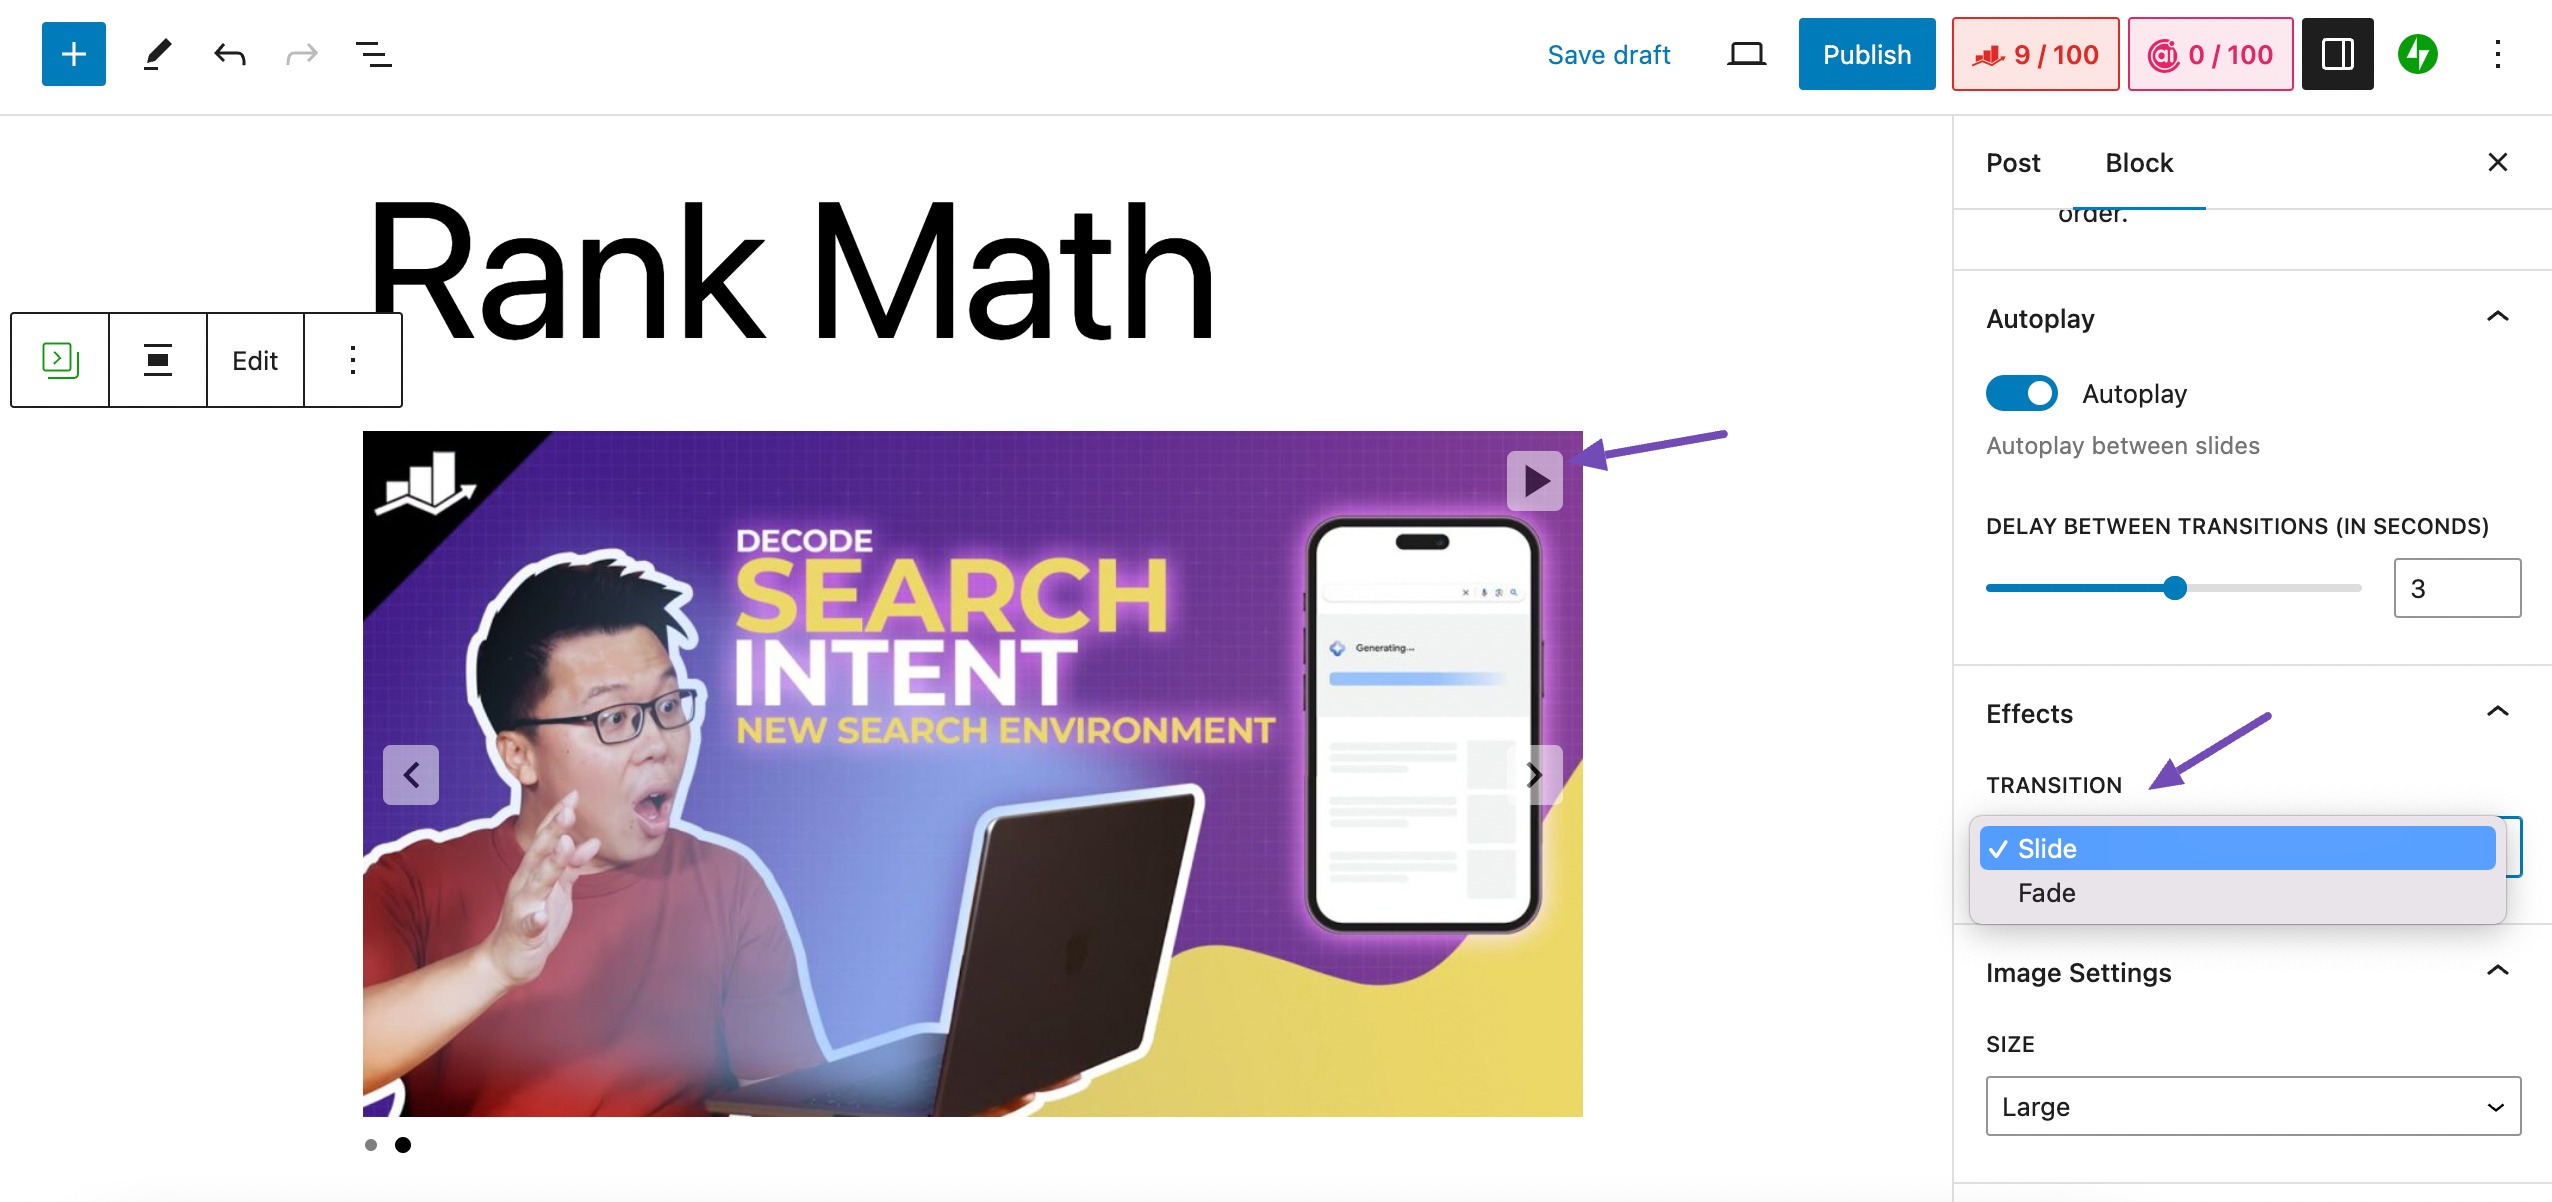
In the Settings panel, you can adjust the image size and choose between a slide or fade transition. Preview the autoplay feature by clicking the play button at the top of the slideshow, as shown in the image.
Once done, click Publish to showcase your article with the visually appealing slideshow, as shown below.

Jetpack typically generates portable slideshows that are suitable for direct embedding into blog articles and particularly useful for product reviews.
Add a Slideshow Using the Depicter Plugin
If you want more advanced control, animations, and templates, go with Depicter Slider. It’s ideal for WooCommerce stores, landing pages, testimonials, and even videos.
With advanced features for 404-page customization, it easily integrates with popular page builders such as Elementor and Gutenberg.
If you’re not using a page builder, you can use a shortcode to place the slideshow anywhere on the website.
To use the Depicter plugin, install and activate it on your WordPress dashboard and navigate to Depicter → Dashboard, as shown below.
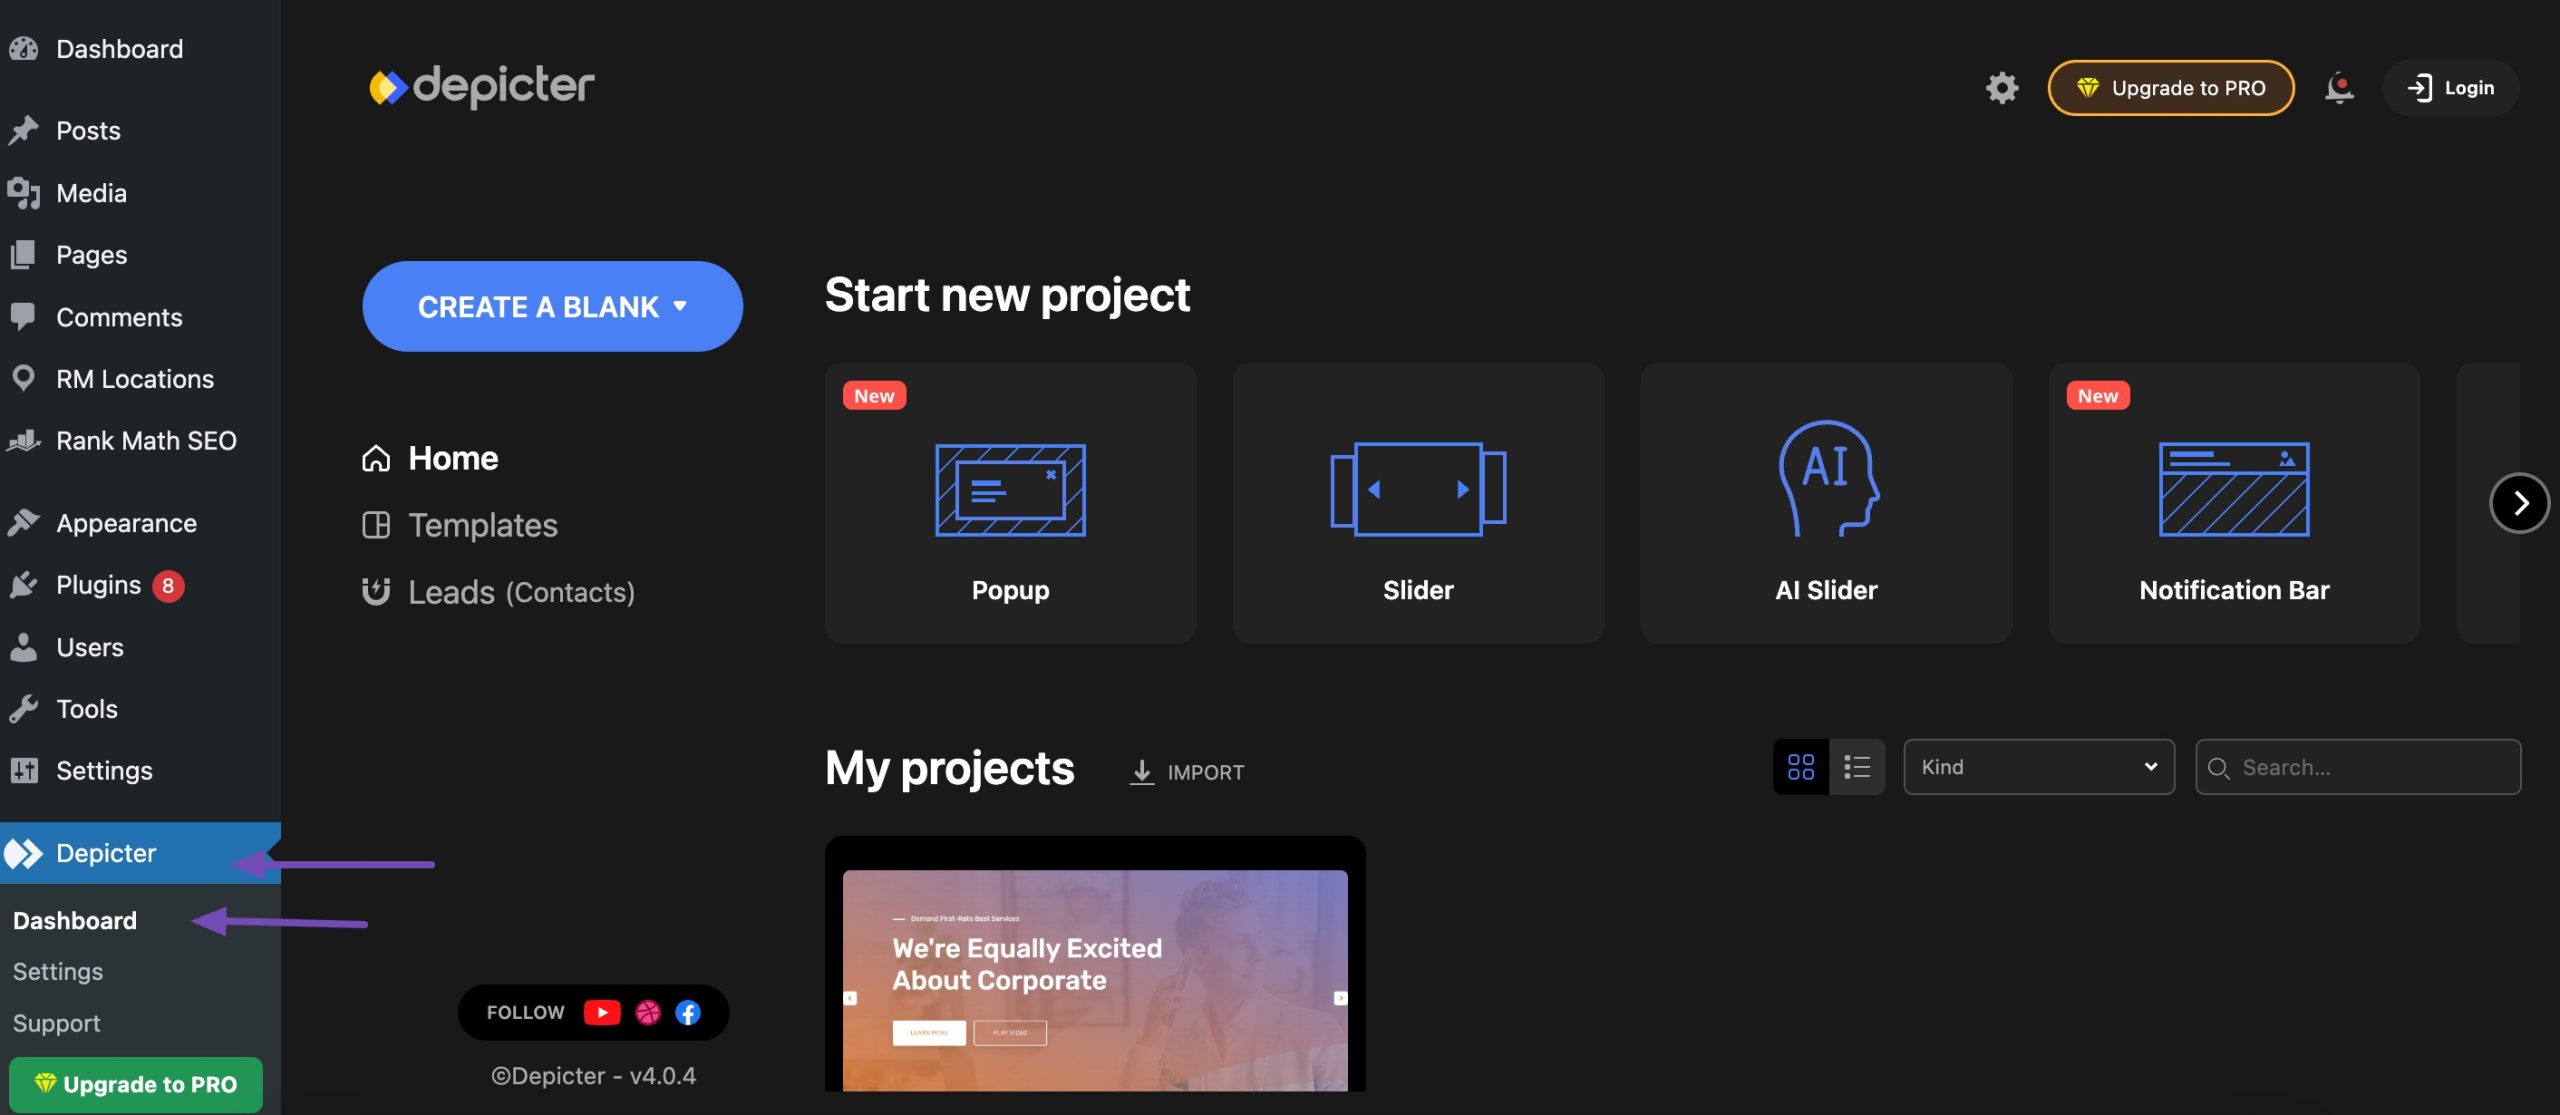
You’ll find various options to begin your project on the Depicter plugin page.
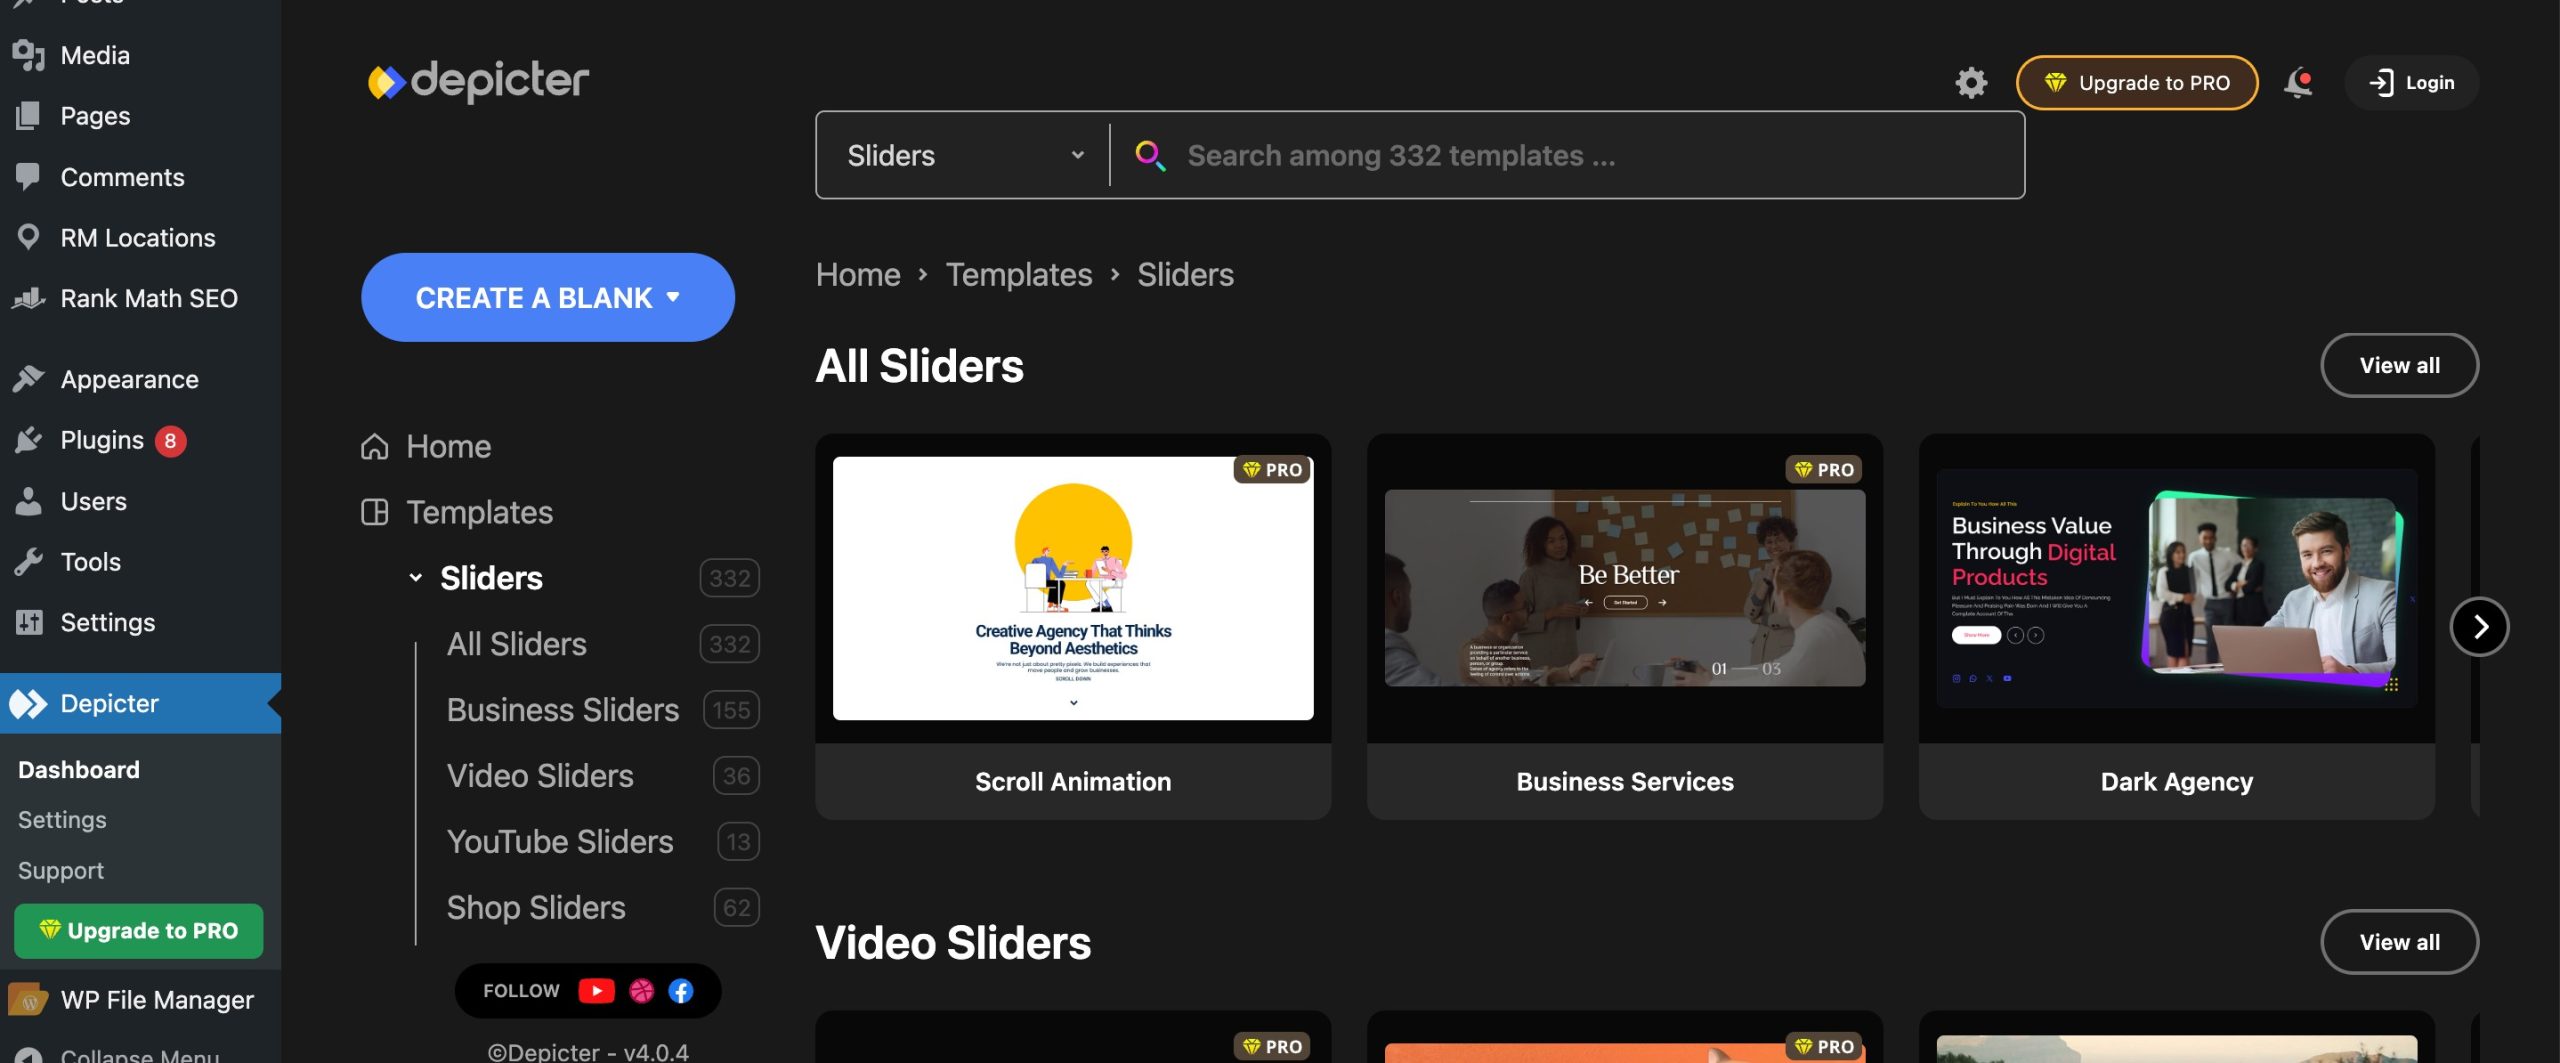
Choose to start from scratch or pick a template. Templates are grouped under categories like:
- Slider
- AI-Aided Slider
- Hero Section
- Others
For example, choosing the Slider category directs you to the appropriate templates.

The sliders section is subcategorized for easier navigation. Choose a shop template for your WooCommerce store, a YouTube video template for showcasing videos, or explore other options.
To customize a template, hover over it and click the IMPORT button, which will redirect you to the customization page.
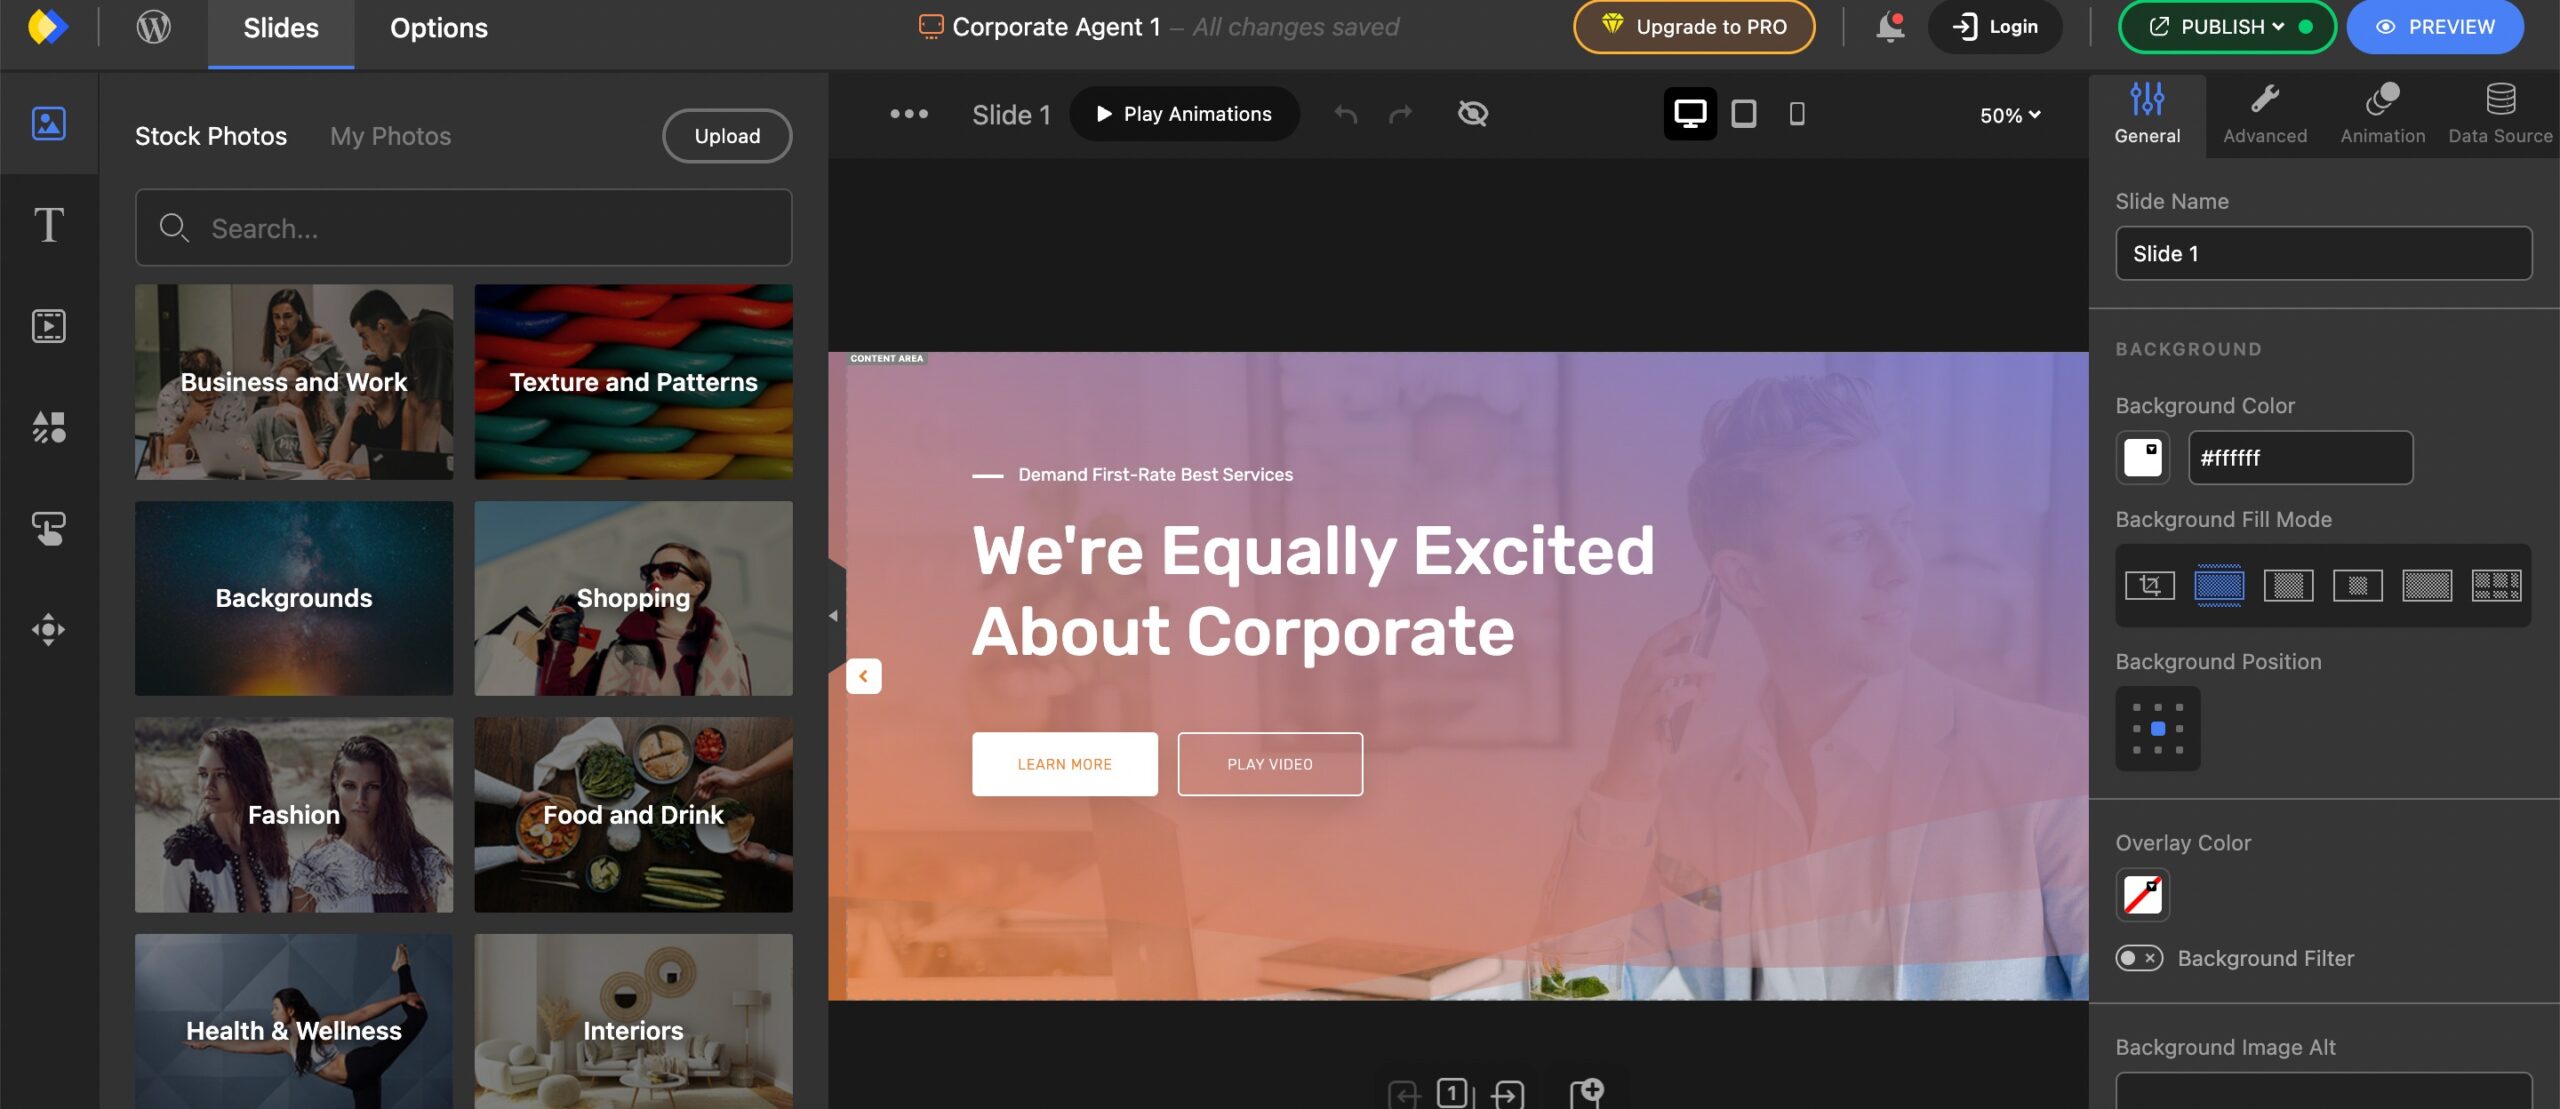
Use the feature-rich customization dashboard to personalize your slideshow template. Customize your slideshow on the dashboard by adding essential elements such as text, images, slides, shapes, and animations.
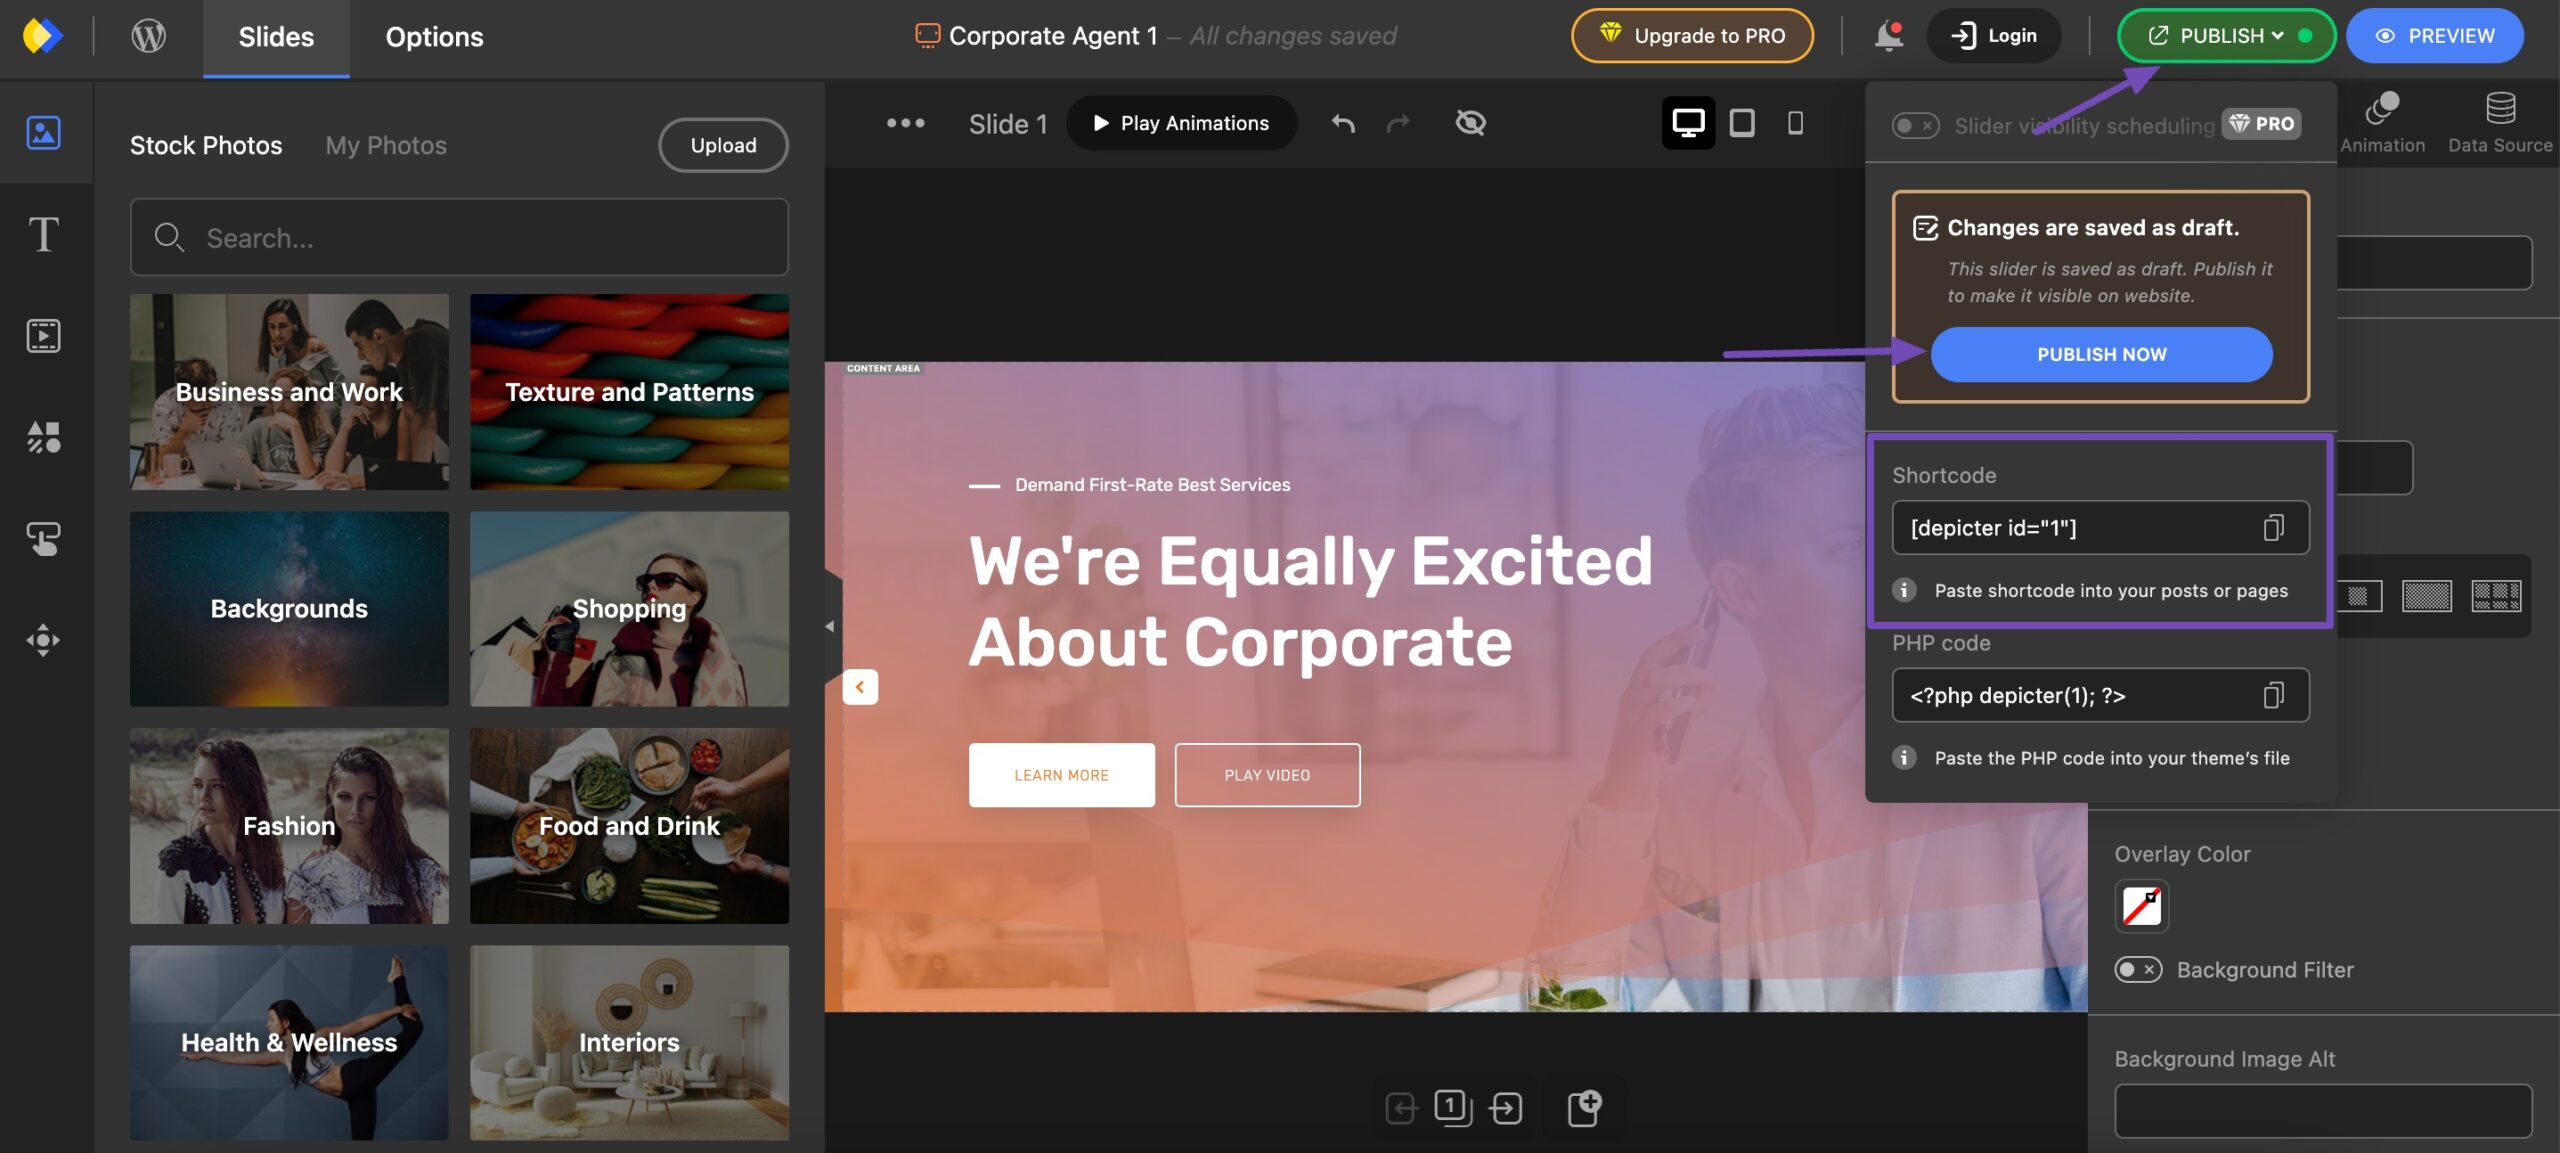
Once done, click the PUBLISH button in the upper right corner of the page.
Copy the generated slideshow shortcode and press the PUBLISH NOW button to launch the slideshow.
Add the Slideshow to a Page
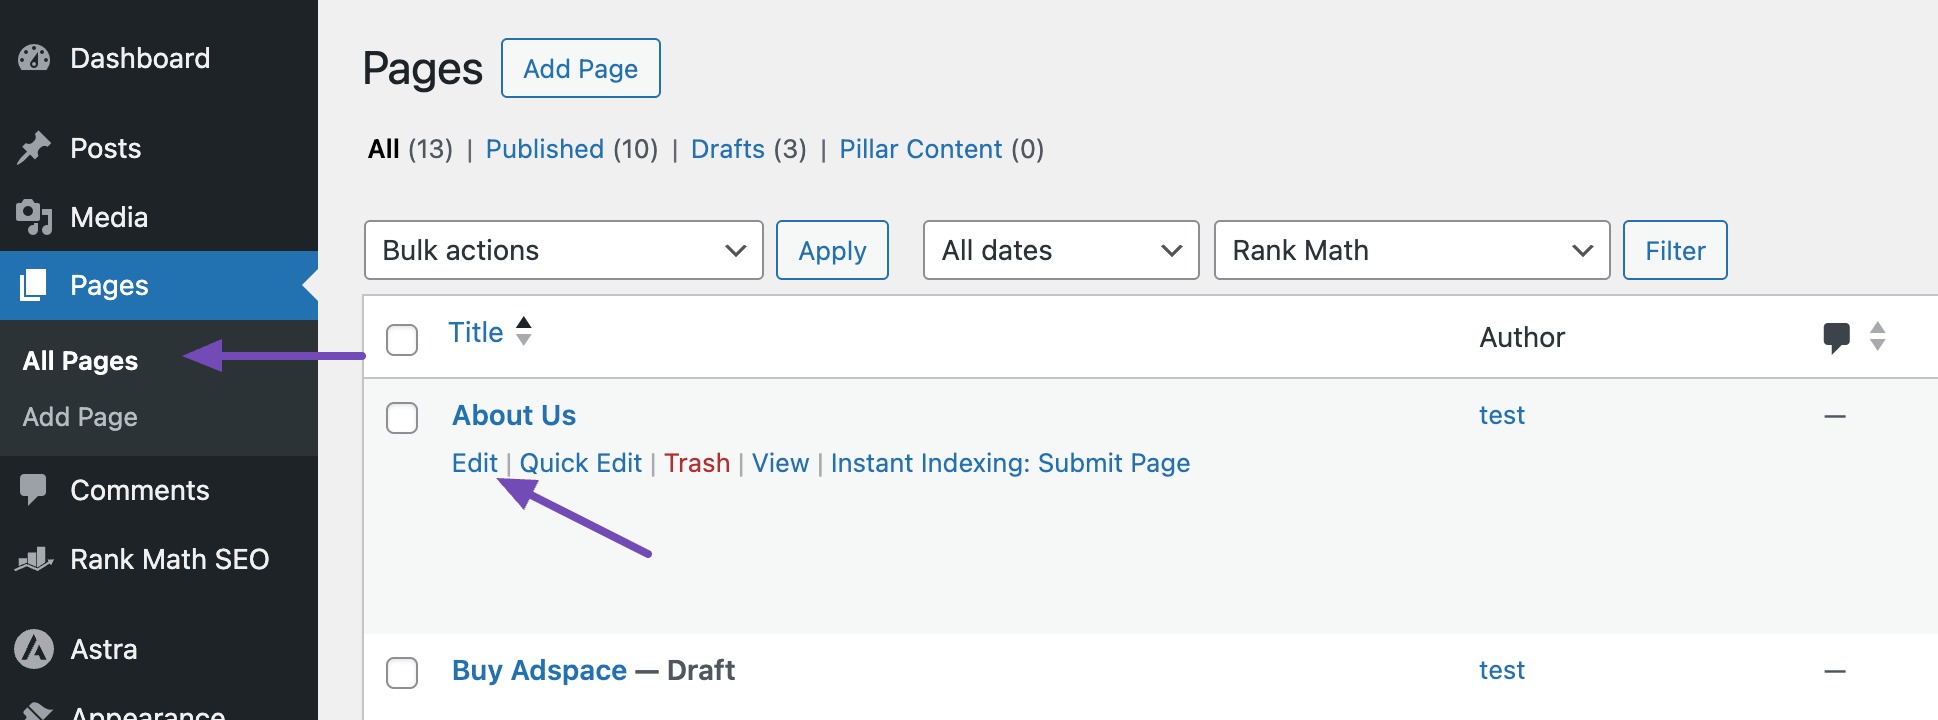
In order to add a slideshow on a specific website page, navigate to the Pages → All Pages section from your WordPress dashboard.
Choose the page where you want to add a slideshow by clicking Edit, as shown below. Alternatively, click Add New Page to create a new page.
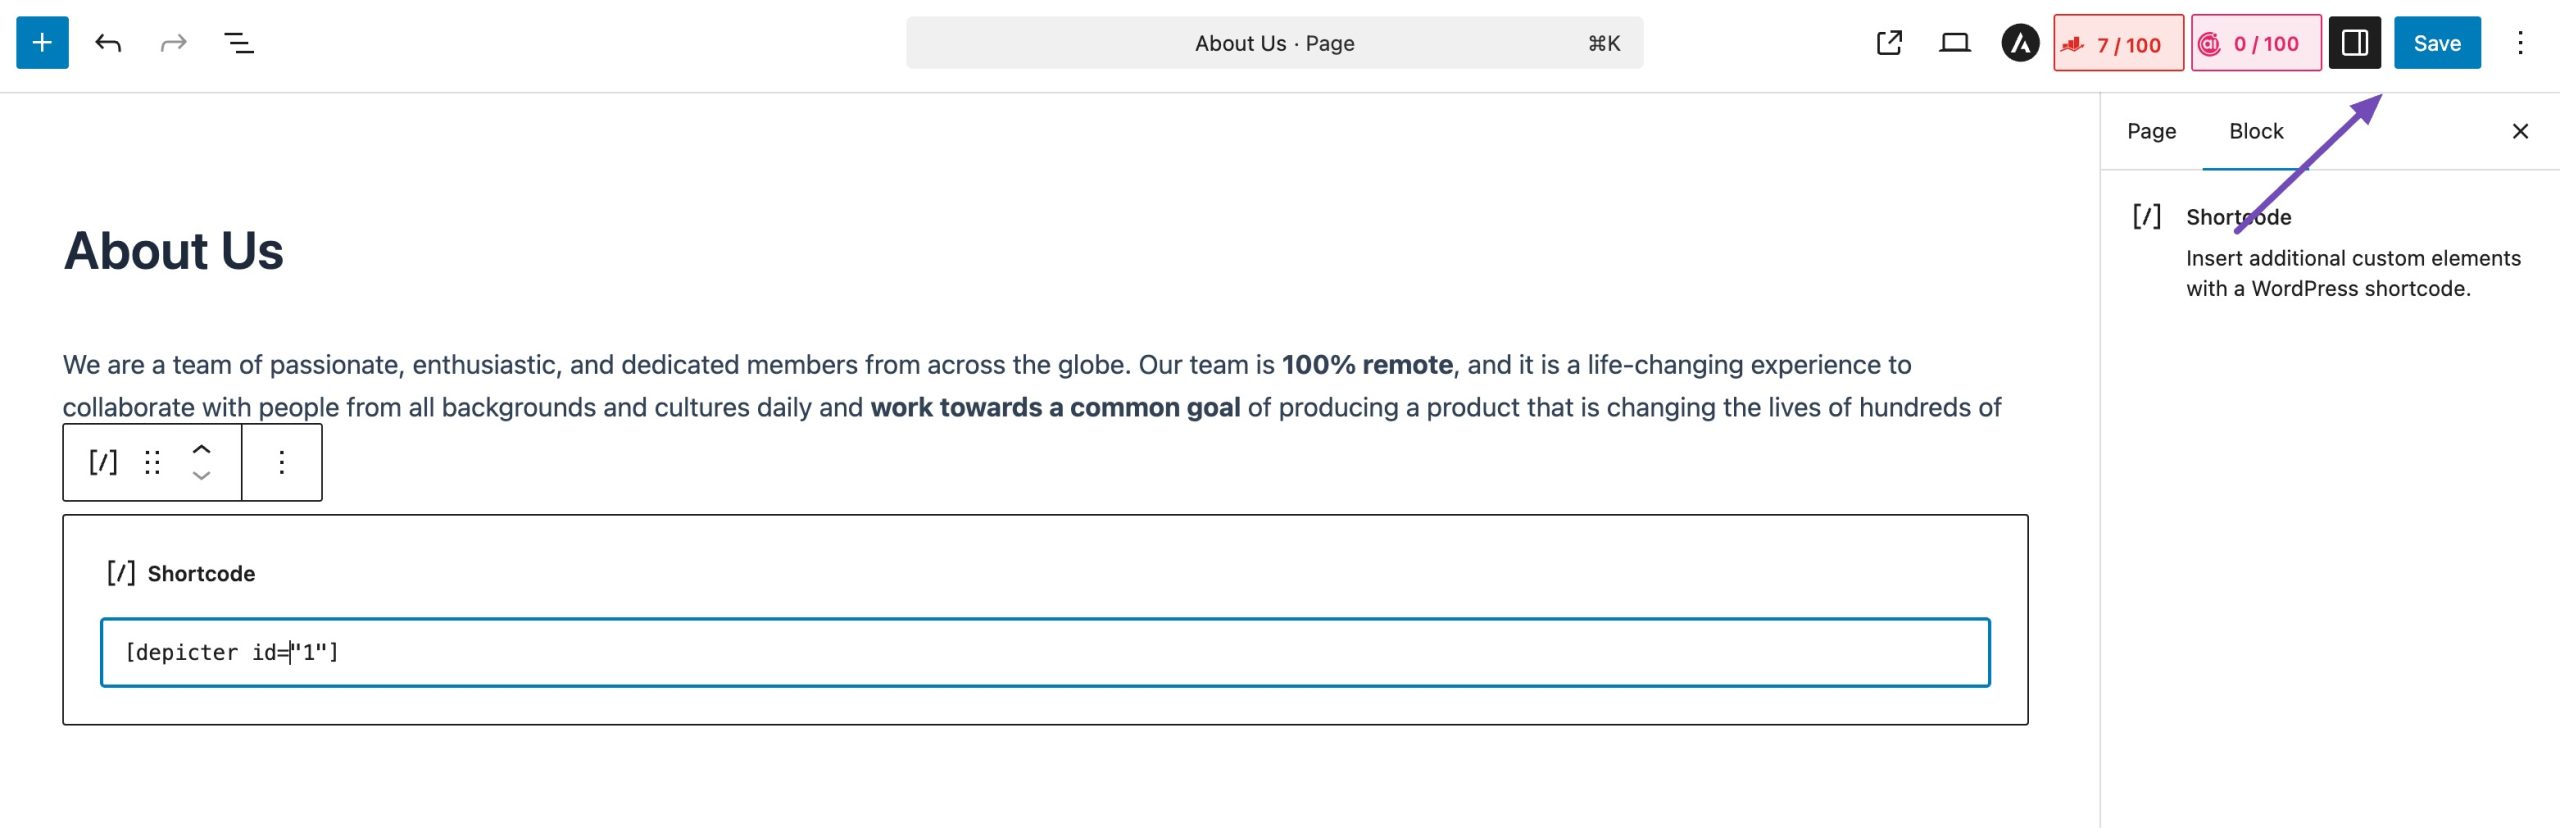
Once you’ve copied the slideshow shortcode, locate the Shortcode block, as shown below.

Paste the copied shortcode and click on the Save button, as shown below.
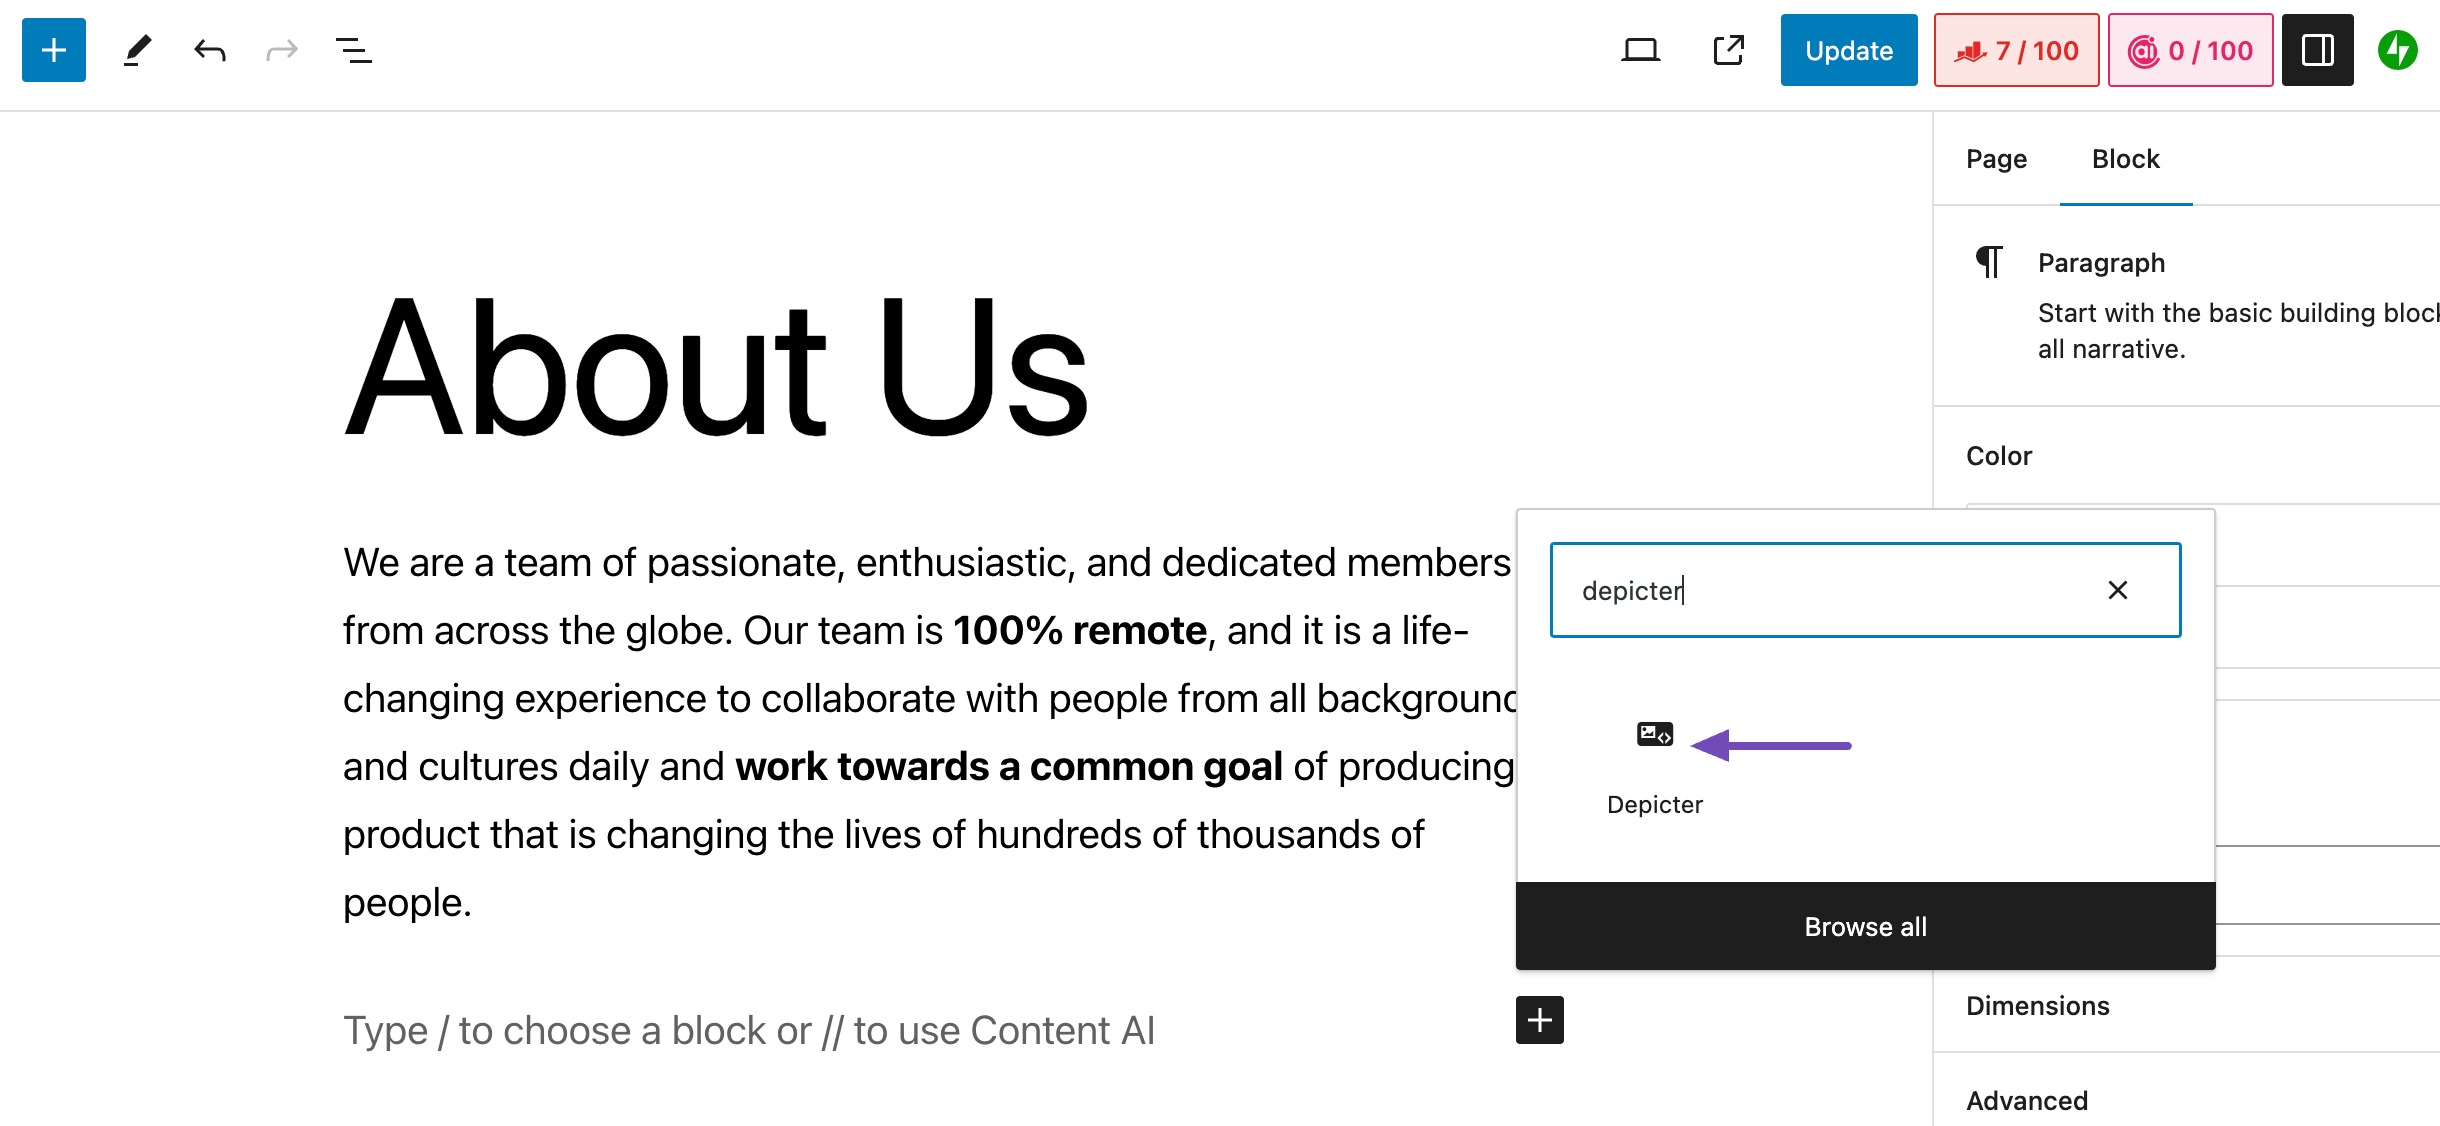
You can also use the plugin widget by searching for Depicter in the block inserter. Once located, select it as shown below.
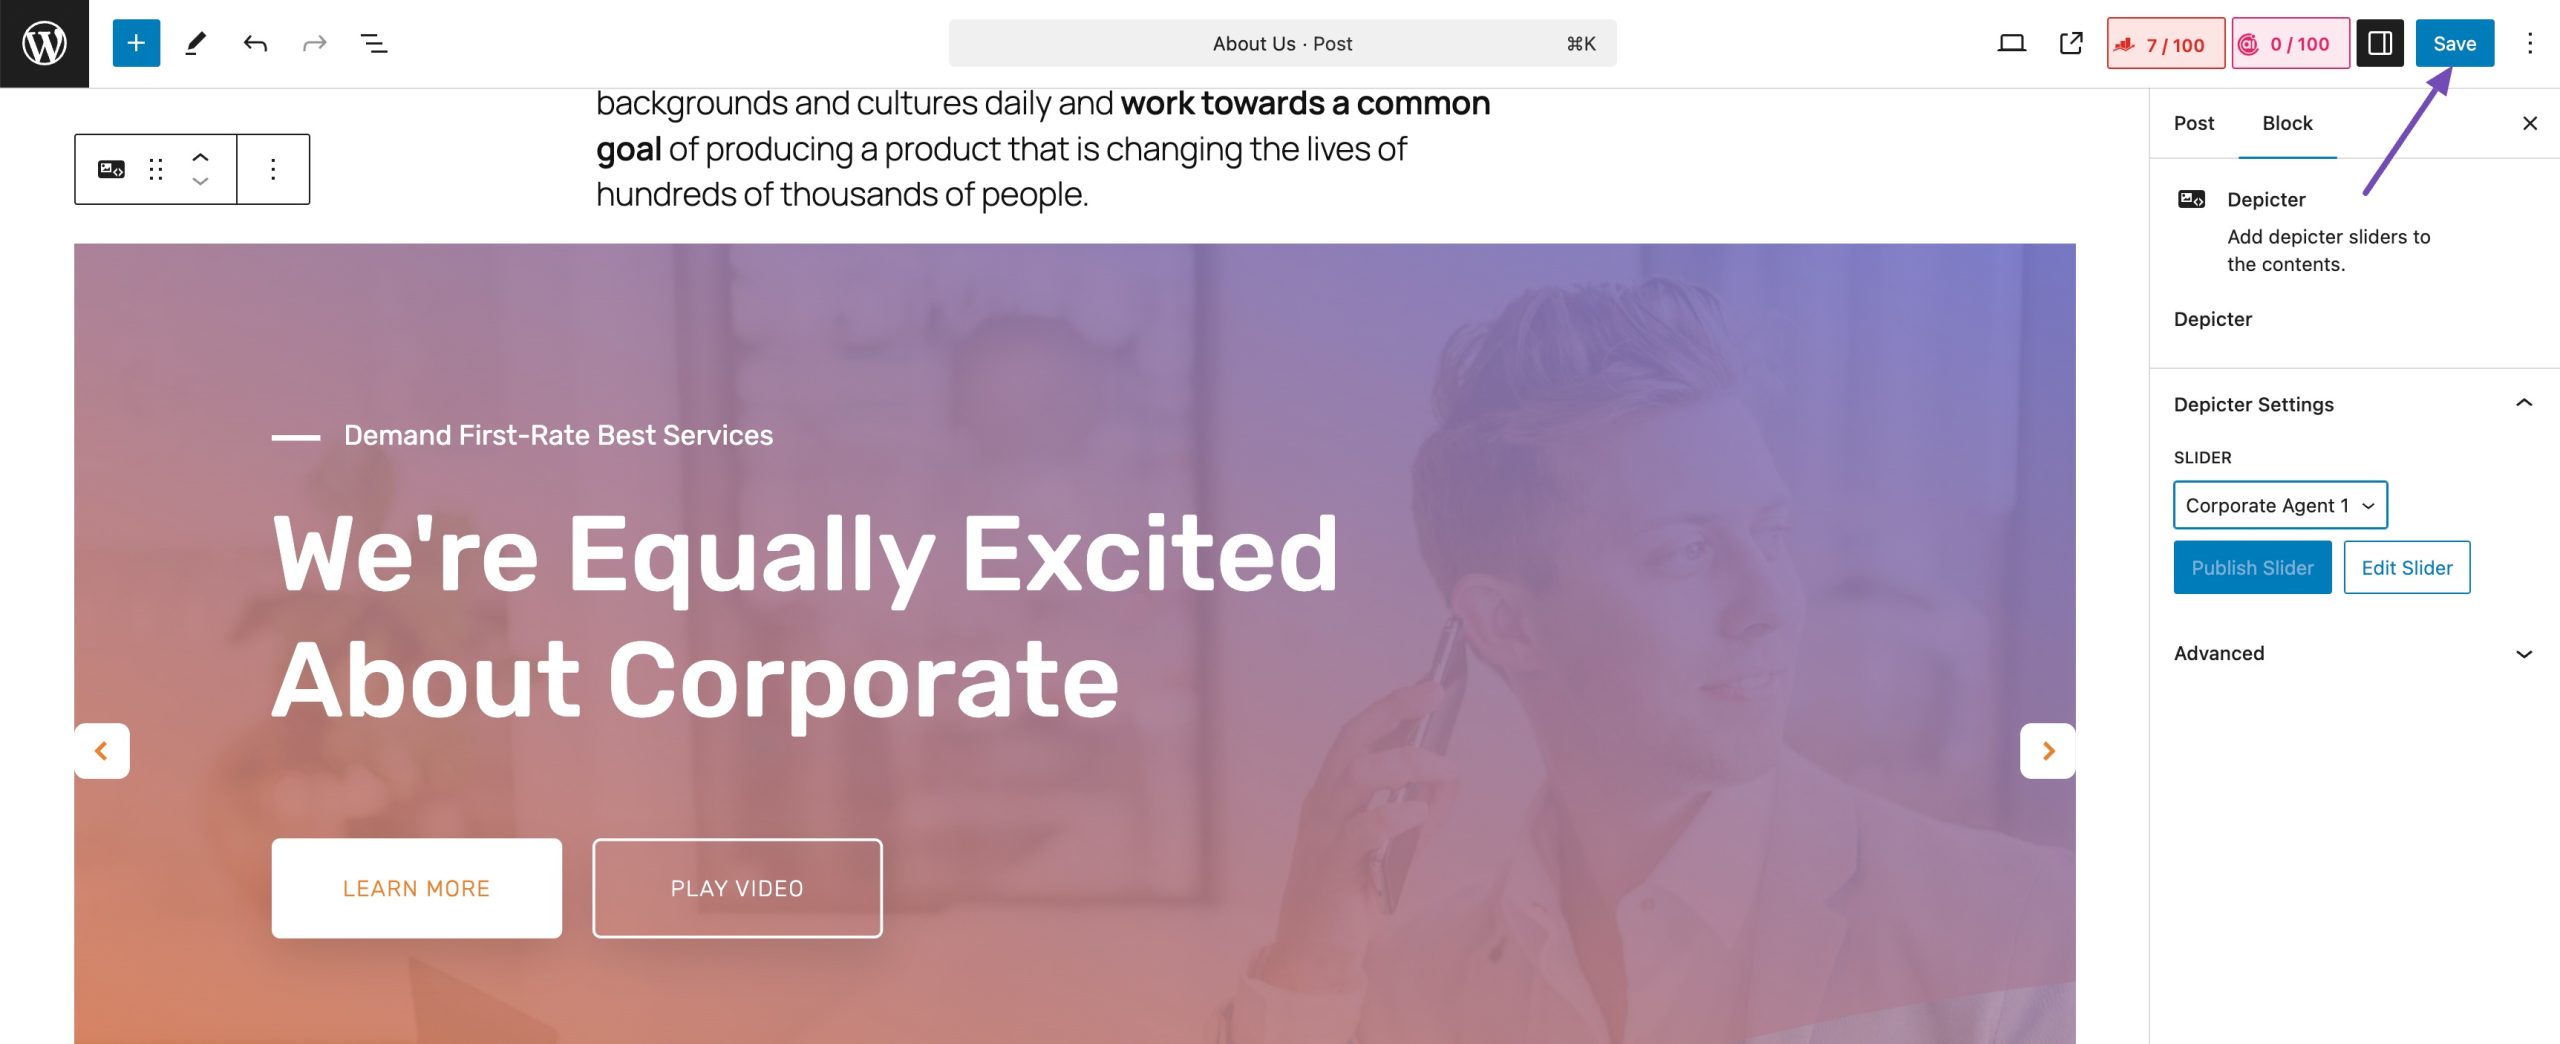
Navigate to the Depicter Settings section in the Block tab and select the desired slideshow, as shown below.
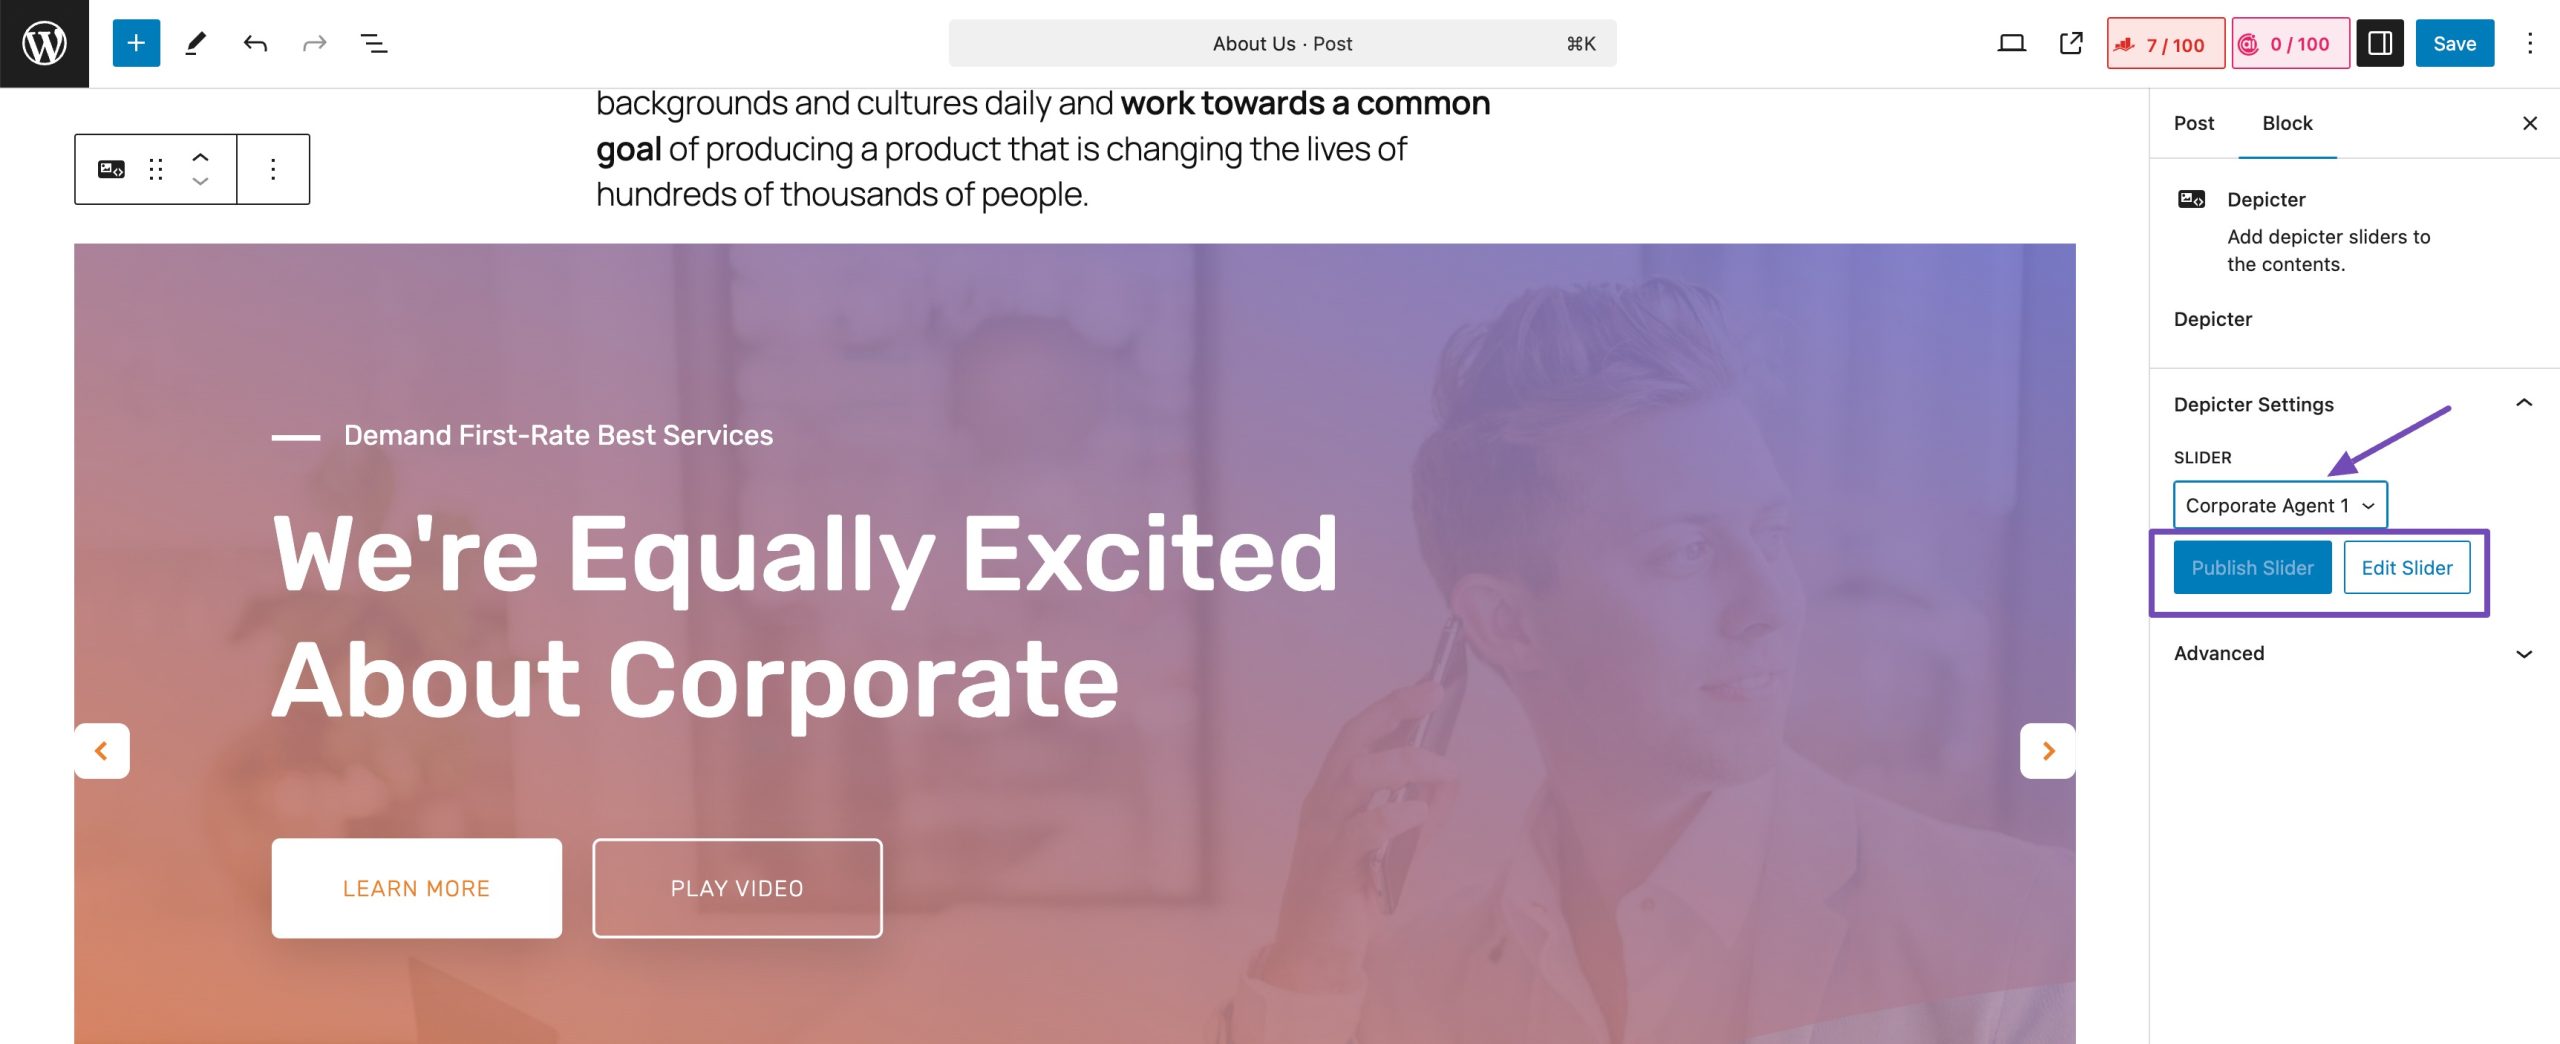
You’ll see the Publish Slider button if the selected slideshow hasn’t been published. If it’s already published, the Publish Slider button will be inactive, as shown above.
For additional slider edits, click the Edit Slider button.
Once you’ve made the changes, click the Publish/Save, as shown below.
3 Frequently Asked Questions
Can I use more than one slideshow on a single WordPress page?
Absolutely! You can add as many slideshows as you want to a single WordPress page. Just make sure you’re not overwhelming your visitors with too much visual content. The key is to use them strategically, each slideshow should serve a clear purpose and add value to the page.
What are the best practices for using slideshows on WordPress websites?
To get the most out of your slideshows, here are a few best practices I recommend you follow:
Stick to 10 slides or fewer per slideshow to keep things focused and engaging.
Use high-quality images that are clear, relevant, and visually appealing.
Write short and engaging captions that support the slide content without distracting.
Smooth out your transitions so the slides flow naturally.
Adjust timing for comfort, don’t make your visitors rush or wait too long.
Make sure your slideshows are mobile-friendly, so they look great on any device.
Test your slideshow on different browsers and screen sizes to ensure everything works as expected.
What are some popular WordPress slideshow plugins?
Some popular WordPress Slideshow plugins include Jetpack, MetaSlider, Depicter, and Slider Revolution.
4 Conclusion
Adding a slider to your WordPress site is a simple yet powerful way to make your content more dynamic and visually engaging. Whether you’re showcasing products, highlighting testimonials, or just making your homepage pop, sliders can help you do it in style.
You’ve got a few different ways to add one, from using built-in blocks to installing feature-rich plugins. Just choose the method that works best for your goals and your level of comfort with WordPress.
Now it’s your turn, go ahead and add that slider to your site. And if this post helped you out, feel free to tweet your success with us @rankmathseo!