
WordPress symbolizes creativity and functionality, enabling millions of users to bring their digital ideas to fruition.
However, even well-crafted WordPress sites face technical hurdles, with one common issue being the “Mixed Content Error.”
If you’ve ever seen a warning about insecure parts of a webpage while browsing a site, you’ve likely encountered this error. It occurs when a website contains secure (HTTPS) and non-secure (HTTP) elements, posing a potential security risk for users.
Don’t worry! In this post, we’ll discuss the Mixed Content Error and provide actionable steps to fix it on your WordPress site.
Are you ready? Let’s dive in.
Table Of Contents
1 What is the Mixed Content Error in WordPress?
The Mixed Content error in WordPress occurs when a website is served over HTTPS but also contains elements that are not secure (HTTP).
For instance, a webpage might be loaded securely over HTTPS, but its images, scripts, or stylesheets could still be fetched via HTTP. This inconsistency can trigger browser warnings and compromise user trust.
HTTP stands for Hypertext Transfer Protocol. It’s a protocol that allows your visitors’ browsers to communicate with your WordPress website, while HTTPS, Hypertext Transfer Protocol Secure, is a secure version of HTTP that encrypts the communication.
The HTTPS/SSL helps protect sensitive information from hackers and assures you that your website is safe.
Search engines such as Google strongly advise website owners to include HTTPS/SSL on their sites.

Having a Secure Sockets Layer (SSL) certificate is important for your website because it serves as a ranking factor and indicates that websites using HTTP are considered insecure.
Obtaining an SSL Certificate for a website is simple, as most of the best hosting providers include free certificates as part of their packages.
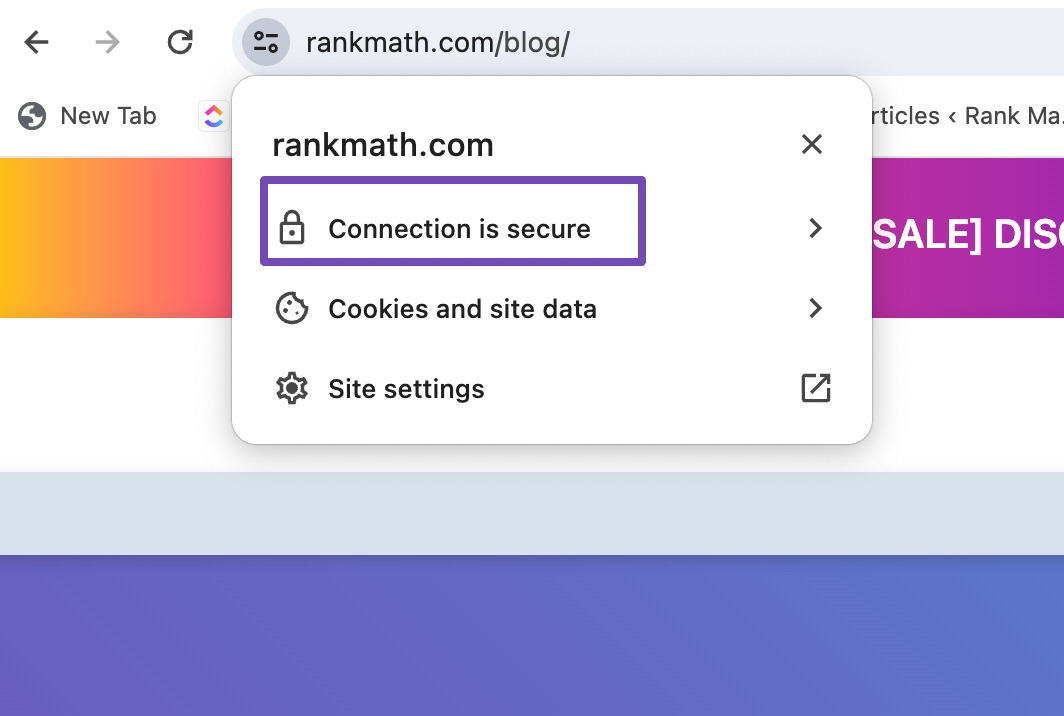
If you successfully installed an SSL certificate for your website, you will likely notice a padlock next to the URL of your website in the browser address bar.
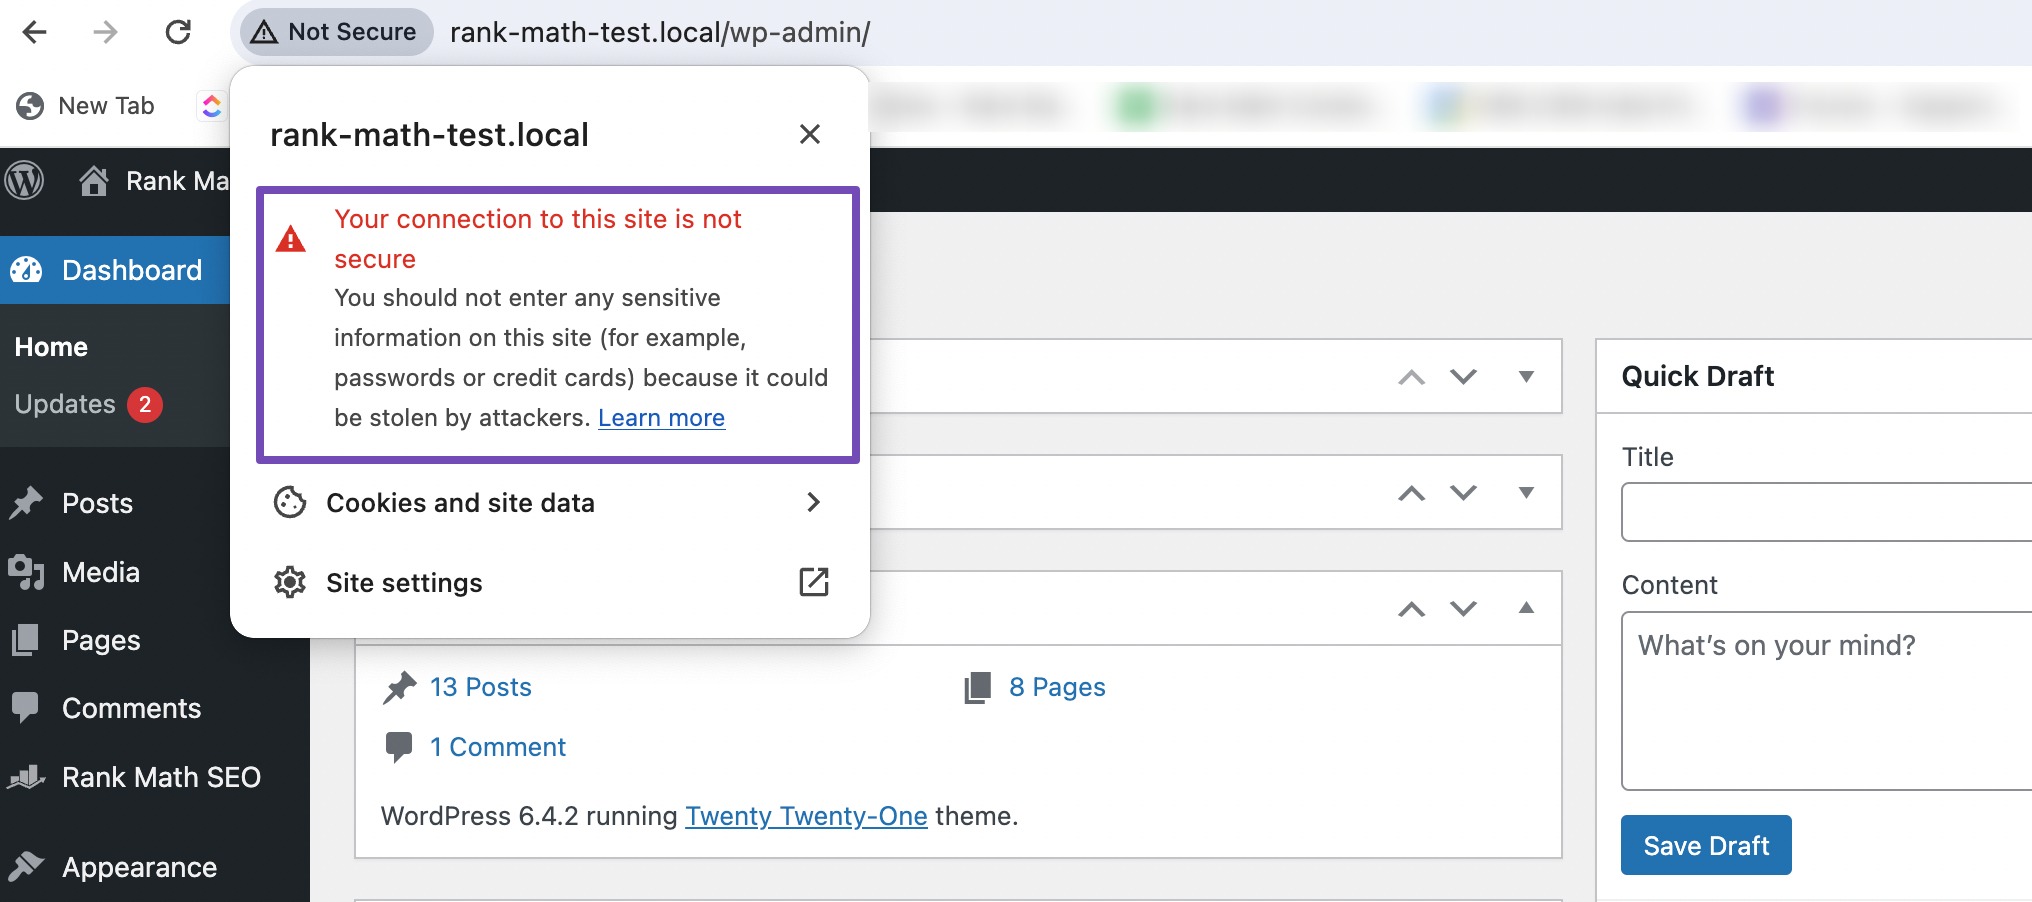
On the other hand, if your HTTPS/SSL settings are not correctly configured, you’ll see an info sign or a broken padlock icon in the address bar. This specific warning message can vary depending on the browser.
You will also see a message: ‘Your connection to this site is not secure’.
So, if some resources like images, scripts, and stylesheets on your website continue to load over an insecure connection (HTTP) after installing HTTPS/SSL, you should expect the Mixed Content error.
2 How to Identify Mixed Content Error in WordPress
Before you begin fixing the error, it’s essential to confirm that it’s actually a mixed content issue and not an SSL certificate problem. A quick way to check is by looking at your website’s URL in the browser.
- If the URL begins with
https://, your site already has an SSL certificate installed, and the warning is likely due to mixed content. - If the URL shows
http://or your browser displays a “Not Secure” warning with no HTTPS, then your site likely does not have an SSL certificate and will require one before resolving any mixed content issues.
Once you’ve confirmed that your site uses HTTPS, you can proceed with fixing the mixed content error using the steps below.
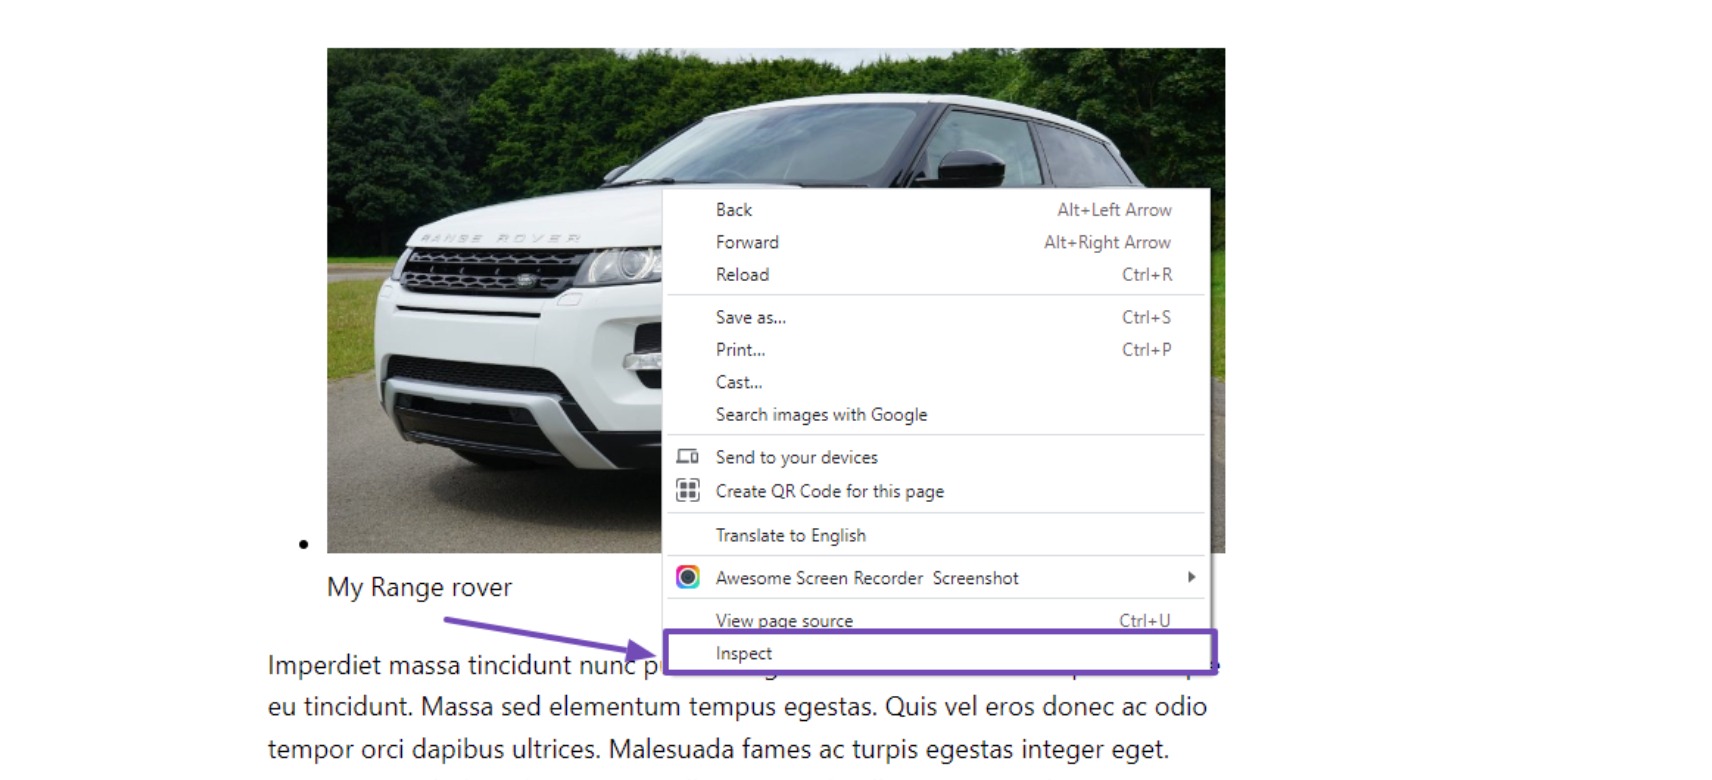
Using your browser’s Inspect tool, you can identify which content is served using an insecure protocol. You can inspect your website by right-clicking on a page with content such as images and selecting Inspect.
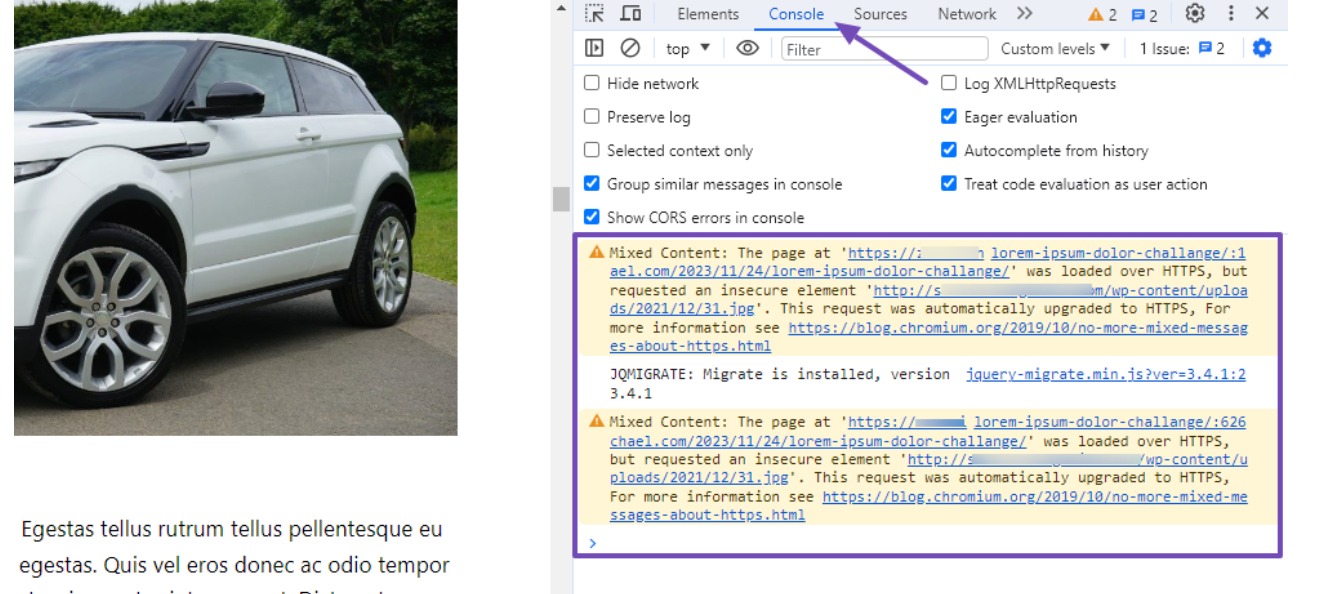
When you click Inspect, your browser’s Inspect tool will launch. Next, navigate to the Console tab.
The Mixed Content error will be presented as a warning in the Console, as shown below.
If there is only one error on the Console, you can manually fix it by editing the post, page, or theme file where it is found.
Looking closely at the highlighted section in the image, you’ll see a URL provided after this statement, “but requested an insecure element“. Click on the URL.
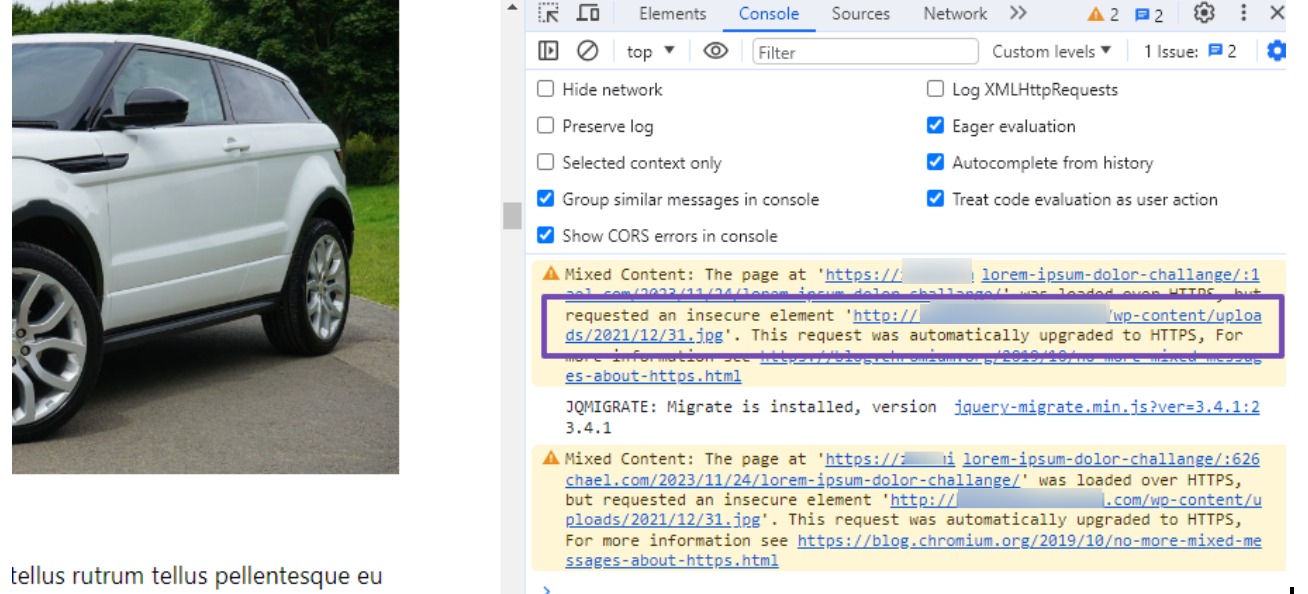
Clicking on that URL will take you to the primary resource, triggering the Mixed Content error.
For example,
Normally the URL of an image on your website should look like this: https://example.com/images/image.jpg.
As you can see, the image URL format above begins with HTTPS.
However, if you directly insert an image into your website using the following format:
http://example.com/images/image.jpg.
It will almost certainly result in a Mixed Content error because the image URL begins with an insecure protocol, HTTP.
This means that a Mixed Content issue will occur whenever your website’s resource URLs begin with HTTP. So, when you find the resource, look for it on your website’s pages and manually remove or update the URL.
However, in most circumstances, WordPress will add these elements dynamically or store them in your database. In that situation, it will be difficult to detect and repair all of them manually.
Now, let’s examine fixes for the Mixed Content error in WordPress.
3 Fixing the Mixed Content Error in WordPress
Here are the methods you can follow to fix the mixed content error in WordPress.
3.1 Using a Plugin
The simplest method to fix this error is to use a plugin.
All you have to do is install and activate the SSL Insecure Content Fixer plugin.
You can refer to our dedicated tutorial on installing a WordPress plugin.
After activating the plugin, go to Settings → SSL Insecure Content from your WordPress dashboard.
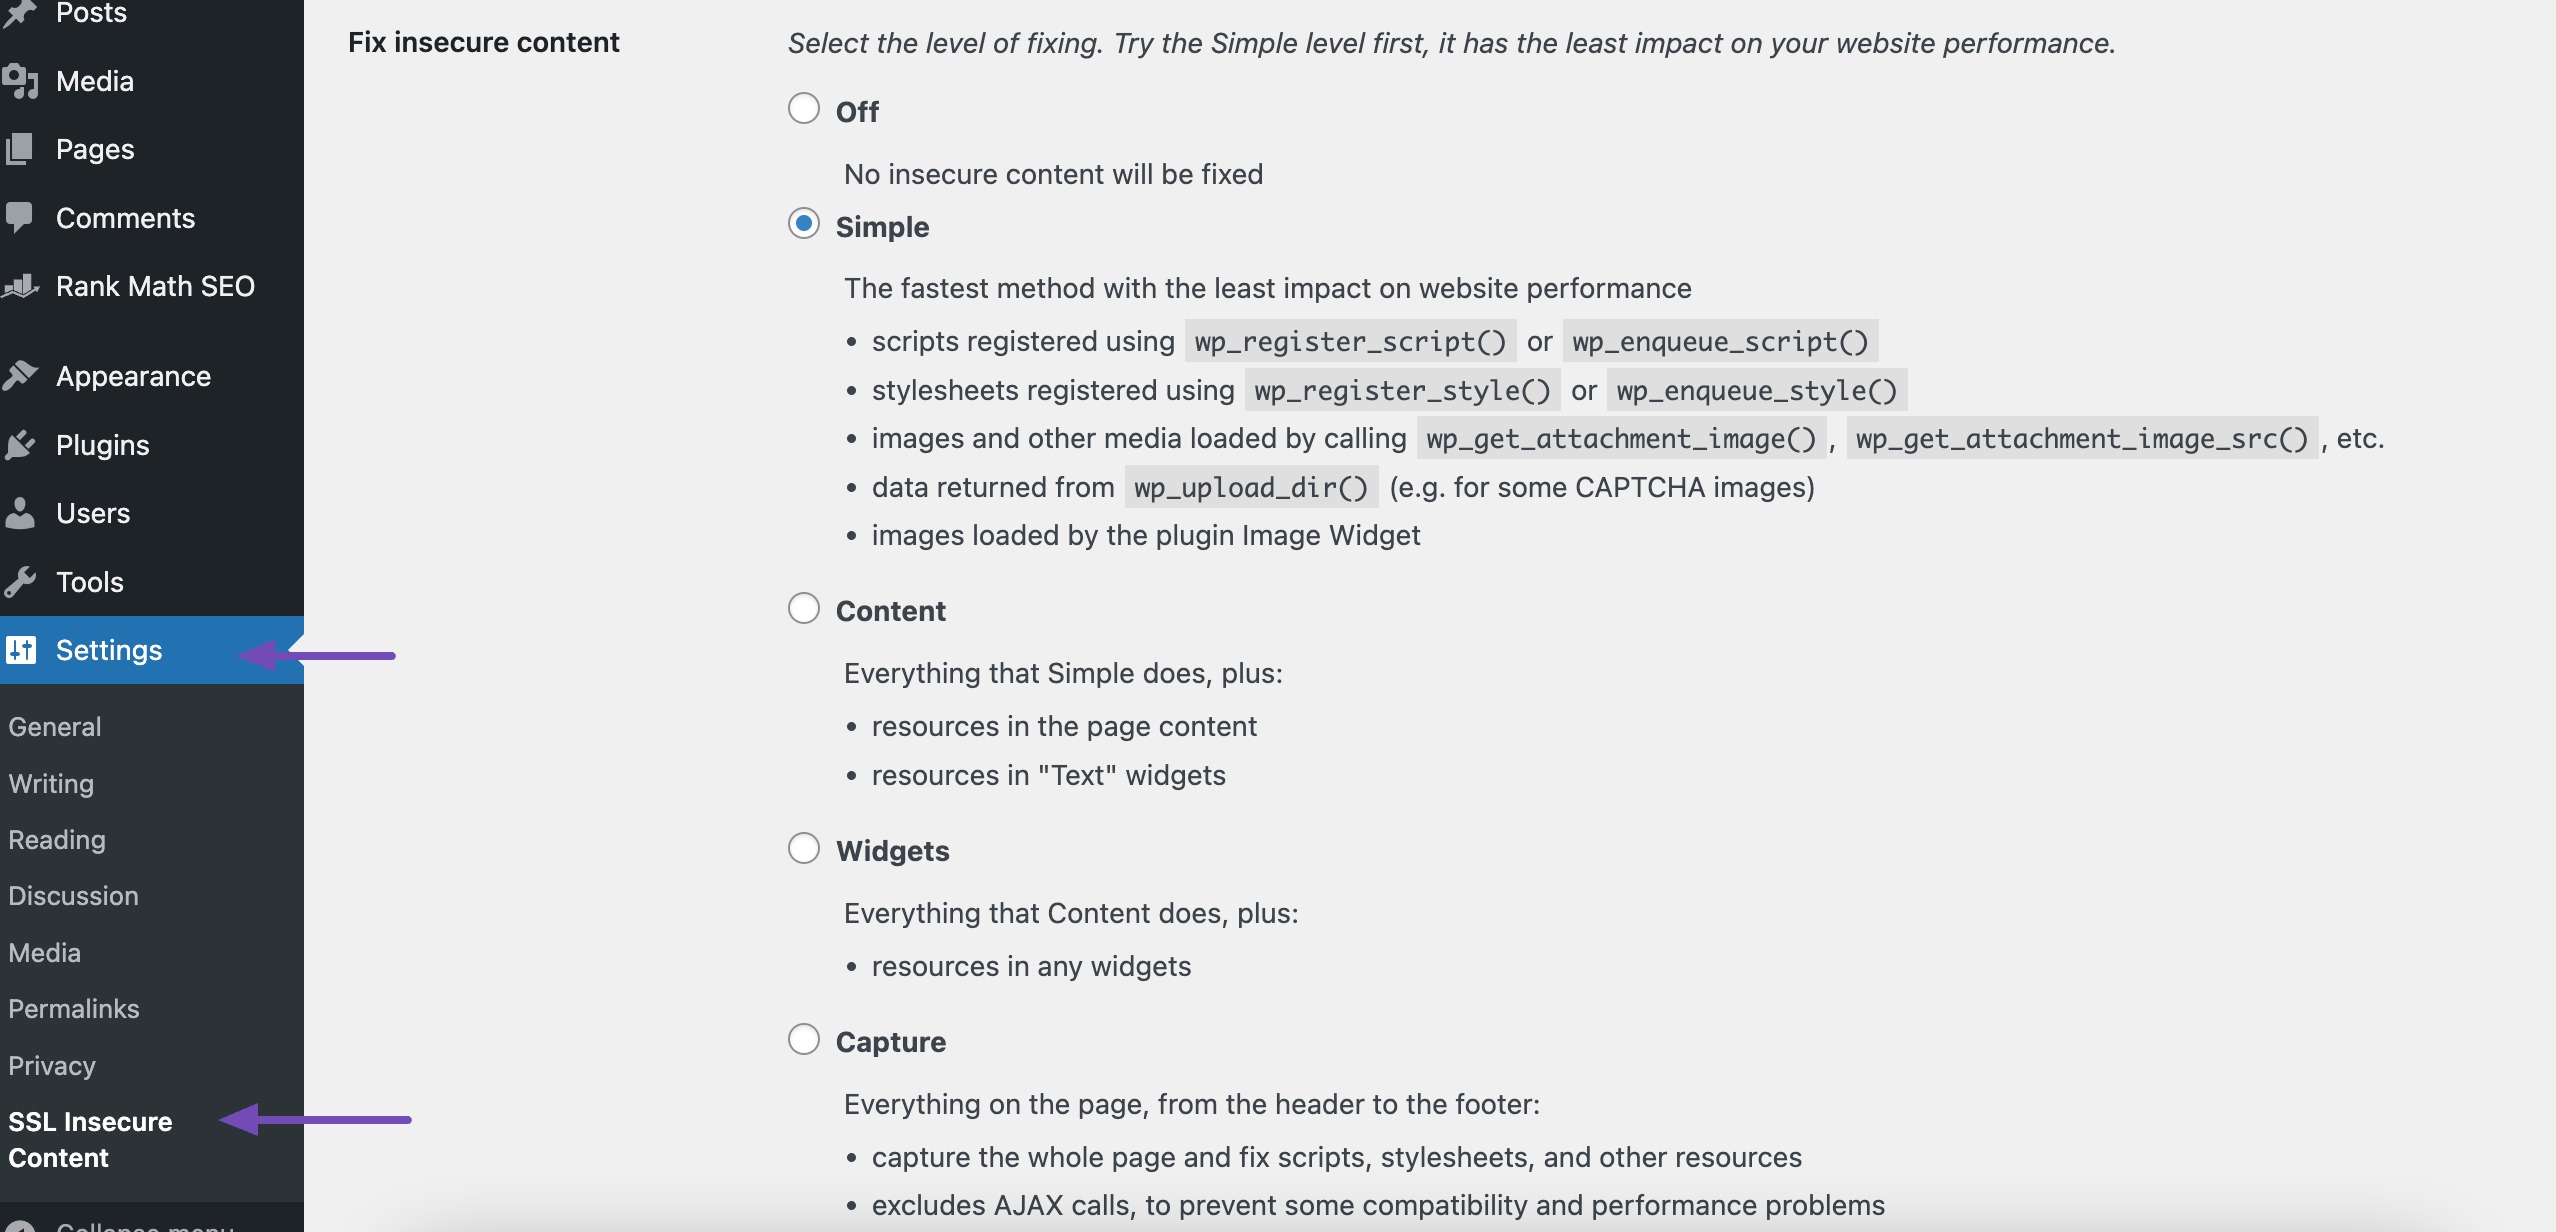
This plugin offers a variety of fixes for the Mixed Content error. We’ll go through each option, explaining how it works and helping you determine the most suitable one for your situation.
Starting with the Off option, it’s not required if you’re currently facing the Mixed Content error, so feel free to skip it. Let’s discuss the other options.
1. Simple
For beginners, this is the fastest and highly recommended choice. It automatically addresses the WordPress Mixed Content error related to stylesheets, scripts, and media library images. Opting for this solution should promptly resolve the error.
2. Content
If the Simple level doesn’t fix the Mixed Content error on your website, try the Content setting. It will use all of Simple’s features and check for fixes to the resources in your WordPress page content and text widgets.
3. Widgets
This level includes all fixes applied in the Content level, plus an additional fix for resources loaded on any widgets on your website.
4. Capture
This method captures everything on every WordPress website page, from header to footer, such as the scripts, stylesheets, and other resources, and replaces them with HTTPS URLs. It excludes the Ajax calls to prevent some compatibility and performance problems.
5. Capture All
If none of the earlier options work, you can try this advanced setting. Similar to the Capture option, it scans the entire page to fix scripts, stylesheets, and other elements.
However, in this case, it does not exclude Ajax calls but includes them, which will most likely cause compatibility and performance issues on your website.
We recommend starting with the first option and using your browser’s Inspect tool to check if the mixed content error is resolved. If not, proceed to the next option and repeat the process until the issue is resolved.
There are also some additional settings related to your website’s theme and plugins, and an option to choose whether external content should remain on HTTP. You can leave these settings at their default values and continue to the final option.
In the final step, you’ll need to choose how WordPress should detect if a page is loaded over HTTPS.
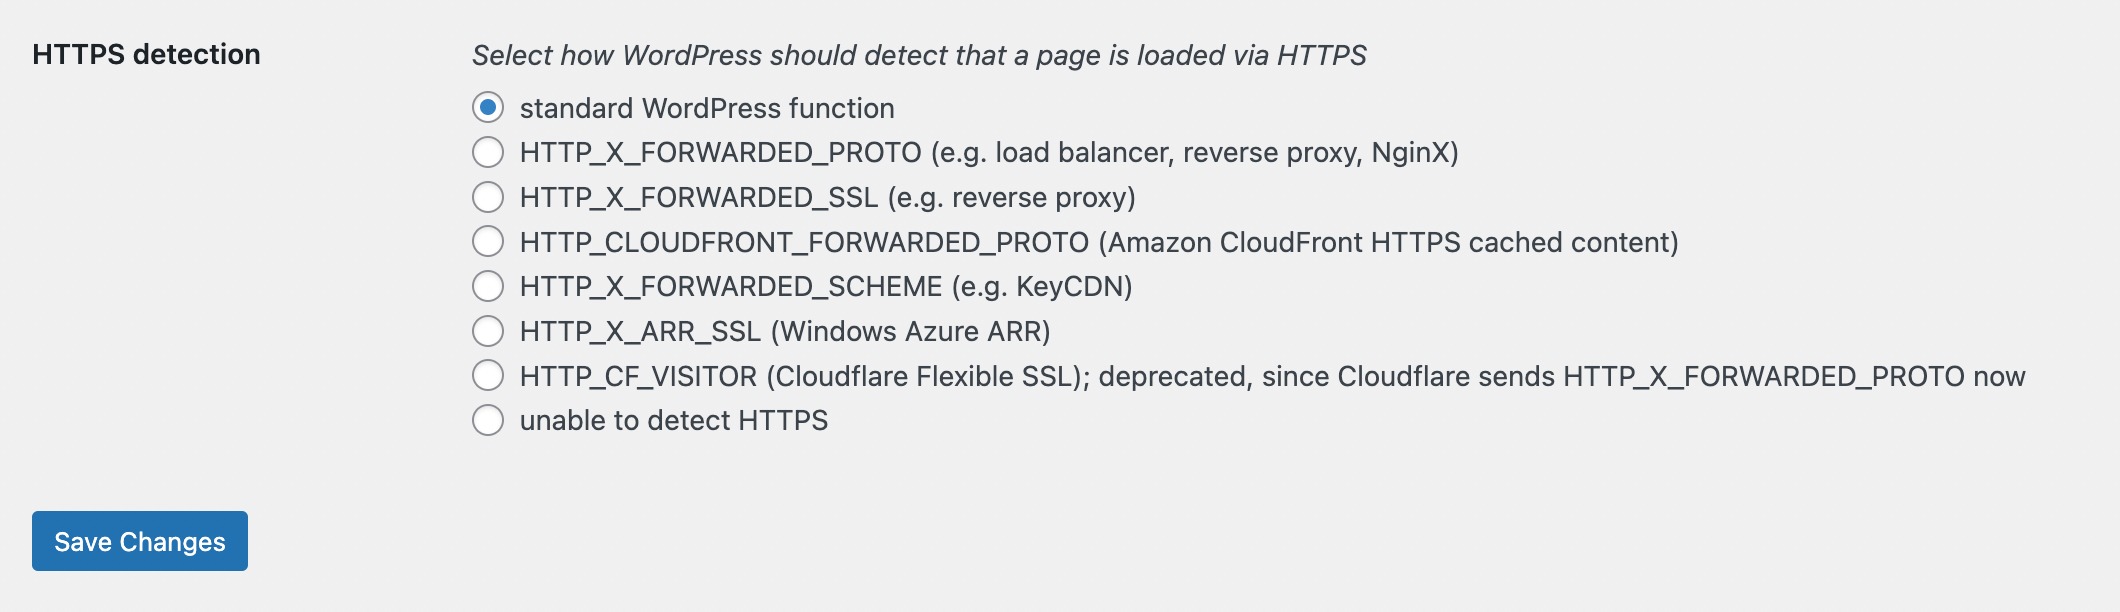
Once you’re happy with your configuration, click the Save Changes button.
Finally, clear your website cache and use the Inspect tool again to confirm that the mixed content error has been resolved.
3.2 Update URLs Manually
Although we previously discussed updating URLs manually on your website, this method specifically focuses on replacing hardcoded HTTP URLs in your WordPress database, typically found in images, files, or links to external resources.
For safety reasons, we recommend using the Better Search Replace plugin to streamline this process.
But first, back up your entire website, including the database, in case anything goes wrong and you need to restore it.
To begin, install and activate the Better Search Replace plugin. Once activated, navigate to Tools → Better Search Replace.
In the plugin interface, enter the URL to be replaced in the Search for field and the replacement URL in the Replace with field.

Next, select the database tables to search—by default, all are selected, but you can choose specific tables or use the Ctrl+Click (Windows) or Cmd+Click (Mac) shortcuts.
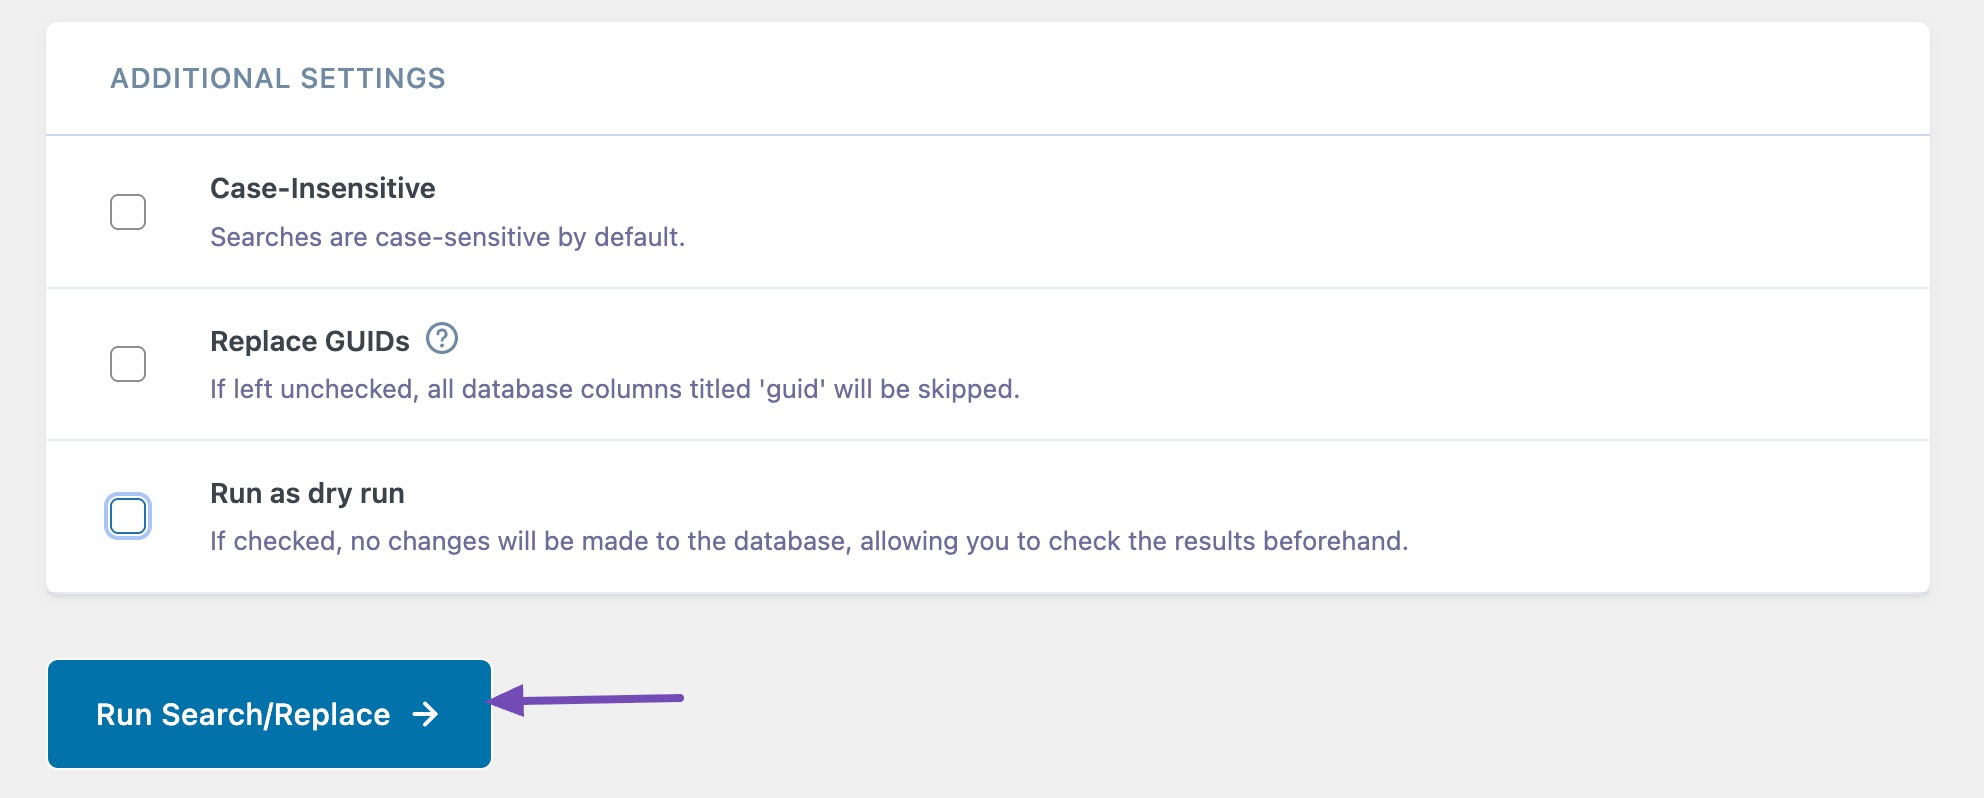
Then, scroll down to the ADDITIONAL SETTINGS section and enable the Run as dry run option. This allows you to review changes before applying them. Next, click the Run Search/Replace section.
Next, review the changes by clicking the link on the DRY RUN notice.
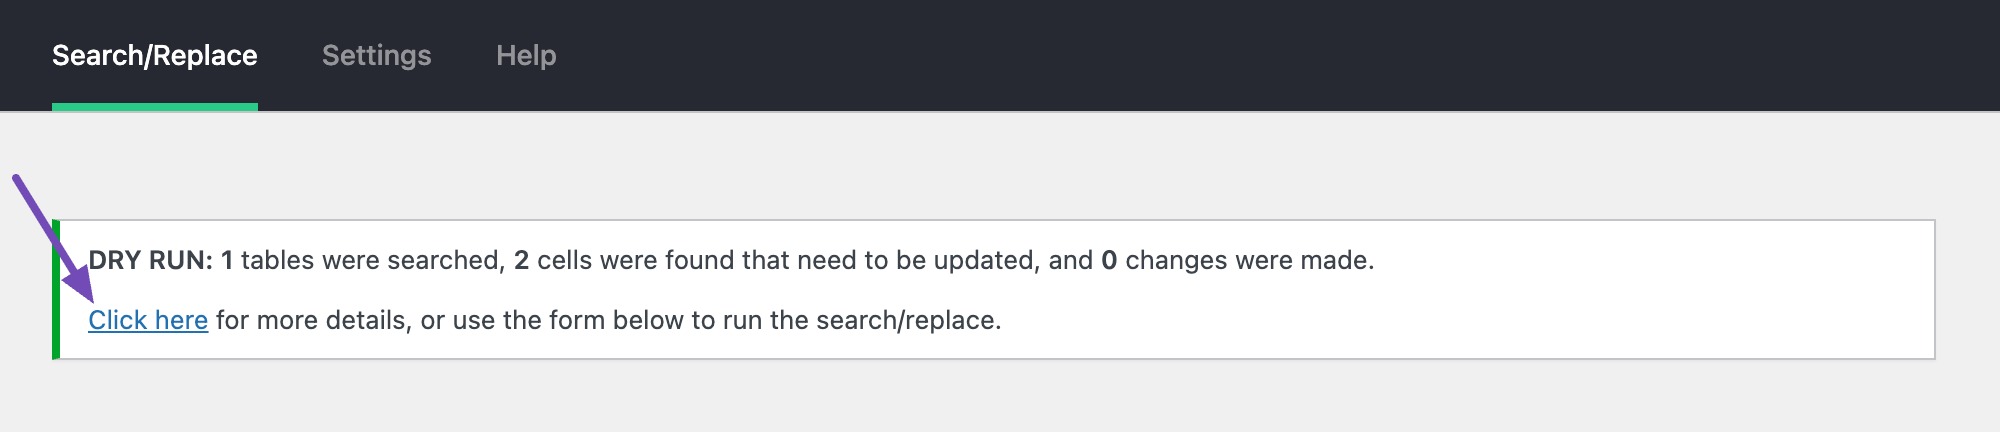
If you’re satisfied with the changes, uncheck the Run as dry run option and click on the Run Search/Replace button again to make the URL updates permanent. Once you’ve completed the replacements, you can remove the plugin from your site.
3.3 Modify Your .htaccess File
This method involves adding code to a core WordPress file to enforce HTTPS and fix mixed content issues.
Add the following code to your .htaccess file before the # END WordPress line:
RewriteEngine On
RewriteCond %{HTTPS} !=on
RewriteRule ^(.*)$ https://%{HTTP_HOST}%{REQUEST_URI} [L,R=301,NE]
Header always set Content-Security-Policy "upgrade-insecure-requests;"
You can easily edit .htaccess file using Rank Math. The code instructs the browser to upgrade insecure requests to secure ones (HTTPS) automatically. It’s recommended to back up the website before applying this code.
To edit your .htaccess file, navigate to Rank Math SEO → General Settings → Edit .htaccess. If this section is not available on your website, then ensure that you’ve switched to the Advanced Mode in Rank Math.
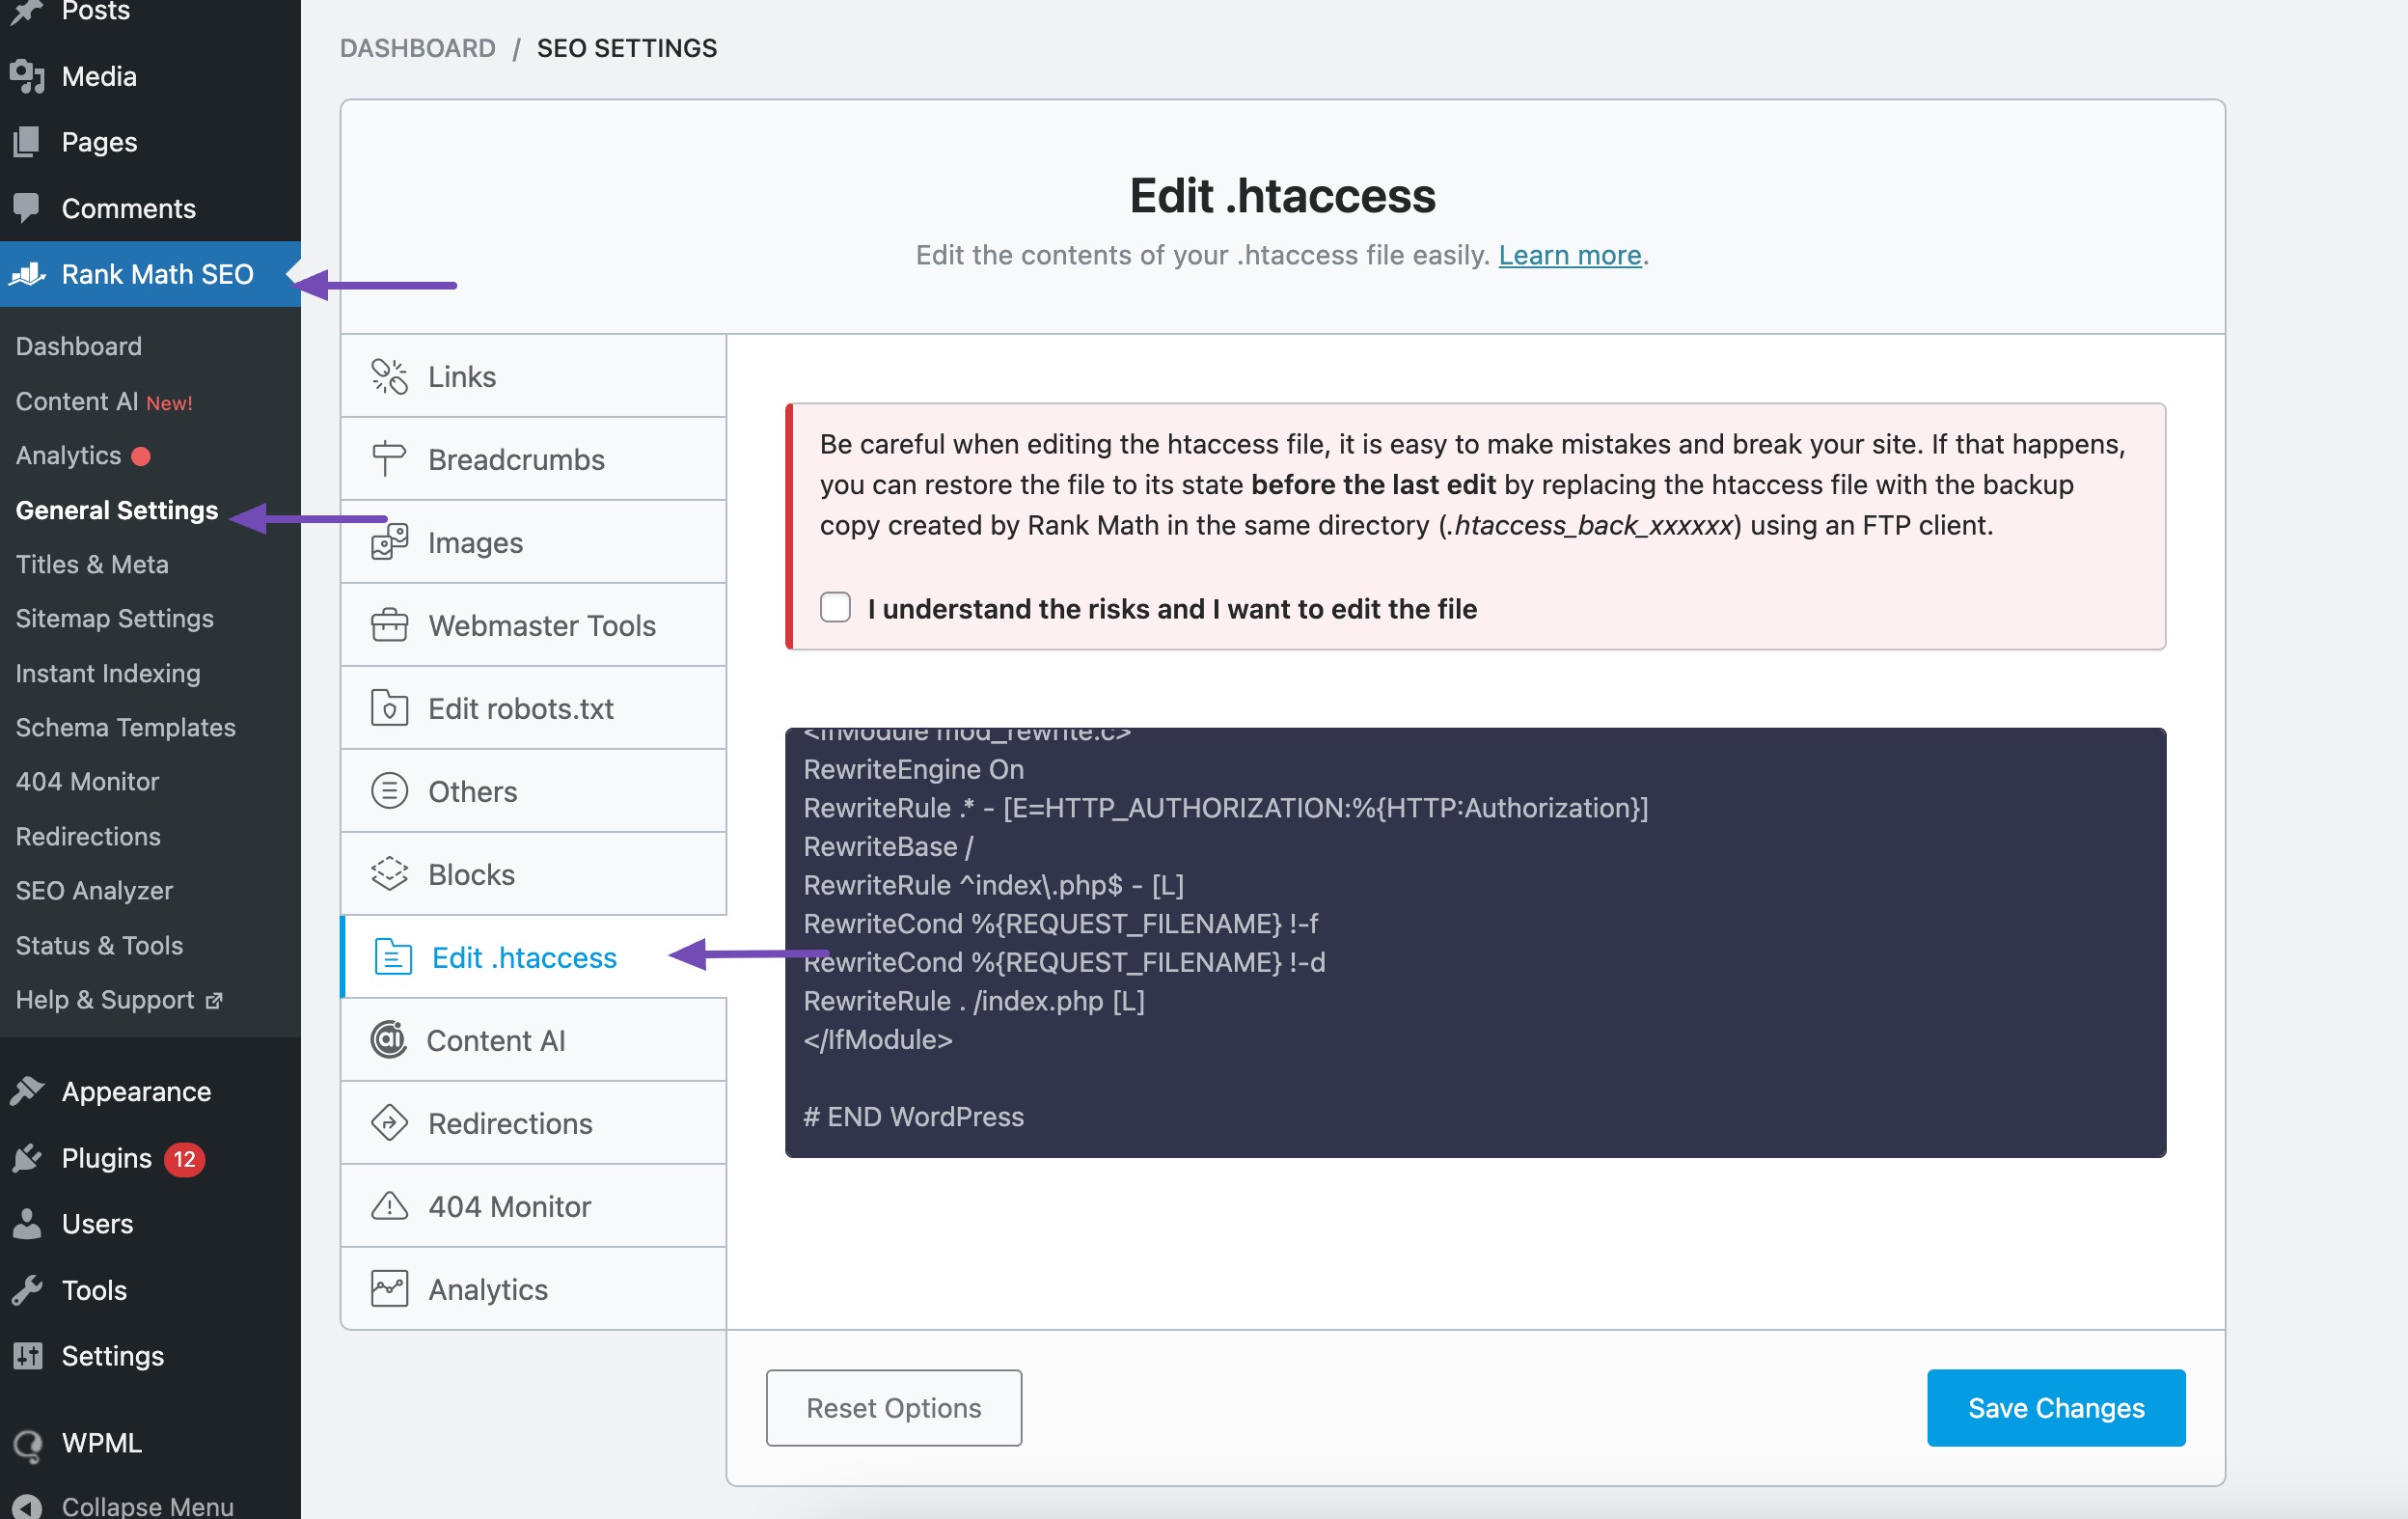
If you want to edit the .htaccess file, click the checkbox below the text. The text area below will become active, and you can edit your .htaccess file and add the code as shown below.
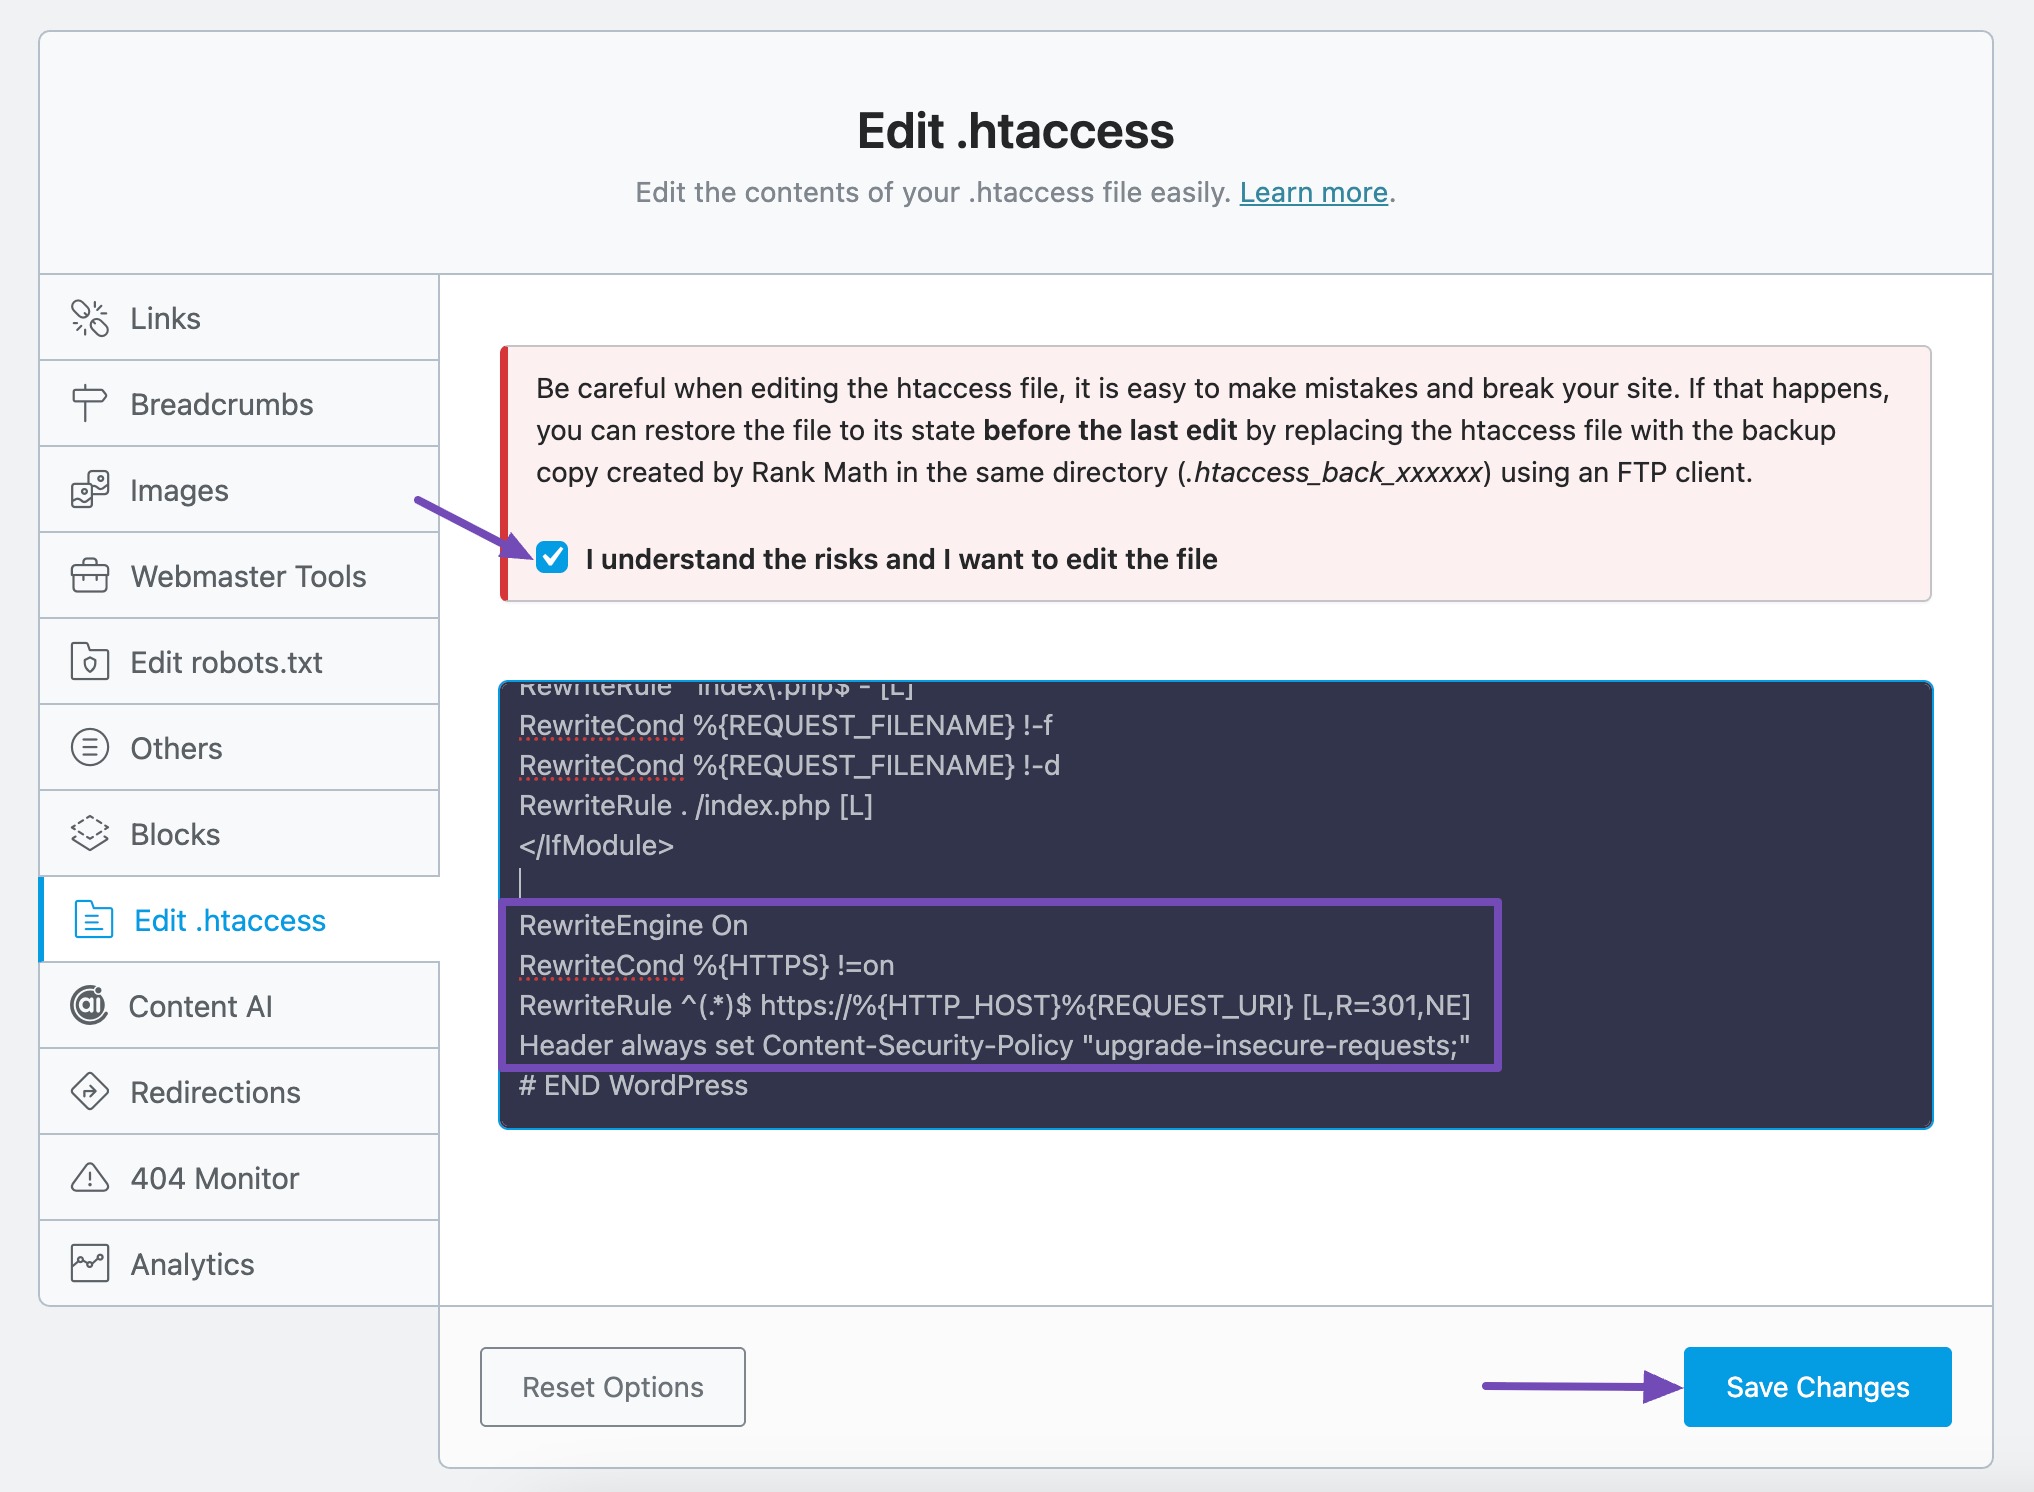
Once done, click on the Save Changes button and clear your site cache. You can use the htaccess tester tool to debug and ensure that the rewrites are correct before adding them to the .htaccess file.
We still recommend using the plugin or manual method to fix the mixed content error, as this method is advanced and only recommended for those who are comfortable editing core files.
4 Frequently Asked Questions
How can I fix Mixed Content errors in WordPress?
The simplest method is to use a WordPress plugin.
You can manually update all of your website’s URLs.
You can still modify your .htaccess file (coding experience needed).
How can I prevent Mixed Content errors from occurring in the future?
Make sure you Install an SSL Certificate on your website. Avoid using third-party images with Insecure URLs (HTTP) on your website pages.
Be careful when installing new plugins or themes, and make sure they’re compatible with HTTPS.
What if I can’t fix the Mixed Content errors on my website myself?
If you cannot resolve the Mixed Content errors independently, don’t hesitate to contact your web hosting provider’s support or hire a professional developer.
Can themes and plugins cause Mixed Content errors?
Yes. If your theme or plugins use hardcoded HTTP URLs (e.g., for images, scripts, or fonts), they can trigger mixed content warnings. Consider updating or replacing outdated plugins or themes.
5 Conclusion
Addressing Mixed Content errors on your WordPress website is necessary for maintaining a secure and seamless browsing experience.
When choosing a hosting provider, be sure that they offer free SSL certificates and that you install an SSL certificate from your hosting panel or cPanel while installing your WordPress website.
Secondly, ensure you do not paste URLs that don’t use a secure protocol, such as HTTPS, on your web pages, as these might also trigger this error.
However, if you have already encountered the problem, you can use the recommended plugin mentioned in this blog article to fix the error, or you can manually update the links when you detect them.
If you like this post, let us know by Tweeting @rankmathseo.