When you’re running a WordPress site, there will be times when you need to update or replace an image, PDF, or other media file.
Maybe you’ve spotted a mistake in a graphic, improved your product photos, or simply want to refresh outdated visuals.
Instead of manually deleting the old file and uploading a new one, which can break links across your site, you can easily replace images and media files with the help of the Enable Media Replace plugin.
In this post, you’ll learn exactly how to replace images and media files without losing your existing links or disrupting your content. So, without any further ado, let’s get started.
Table of Contents
1 Why Replace Images and Media Files in WordPress?
There are several situations where replacing media files on your WordPress site makes sense:
- Keep your site fresh: Outdated or low-quality visuals can make your content look old. Updating them ensures your visitors always see relevant, professional images.
- Improve performance: Replacing large, unoptimized files with lighter versions helps your site load faster, improves user experience, and can boost your SEO.
- Maintain brand consistency: If you’ve rebranded or updated your design style, swapping out old logos, banners, and product images keeps your site aligned with your new identity.
- Ensure compatibility and security: Some older formats may not display correctly on modern browsers, and compromised files should be replaced to keep your site secure.
- Support content updates: When you refresh or repurpose a blog post, product page, or service listing, updating the visuals ensures everything stays accurate and engaging.
Instead of deleting and re-uploading files, which can break links, you can replace them directly. This way, you save time, keep your site consistent, and avoid missing images in your posts and pages.
2 How to Replace Images and Media Files in WordPress?
The easiest way to replace media files in WordPress is by using the Enable Media Replace plugin. It lets you swap out images, PDFs, and other files in just a few clicks, without breaking links on your site. Let’s walk through the process together.
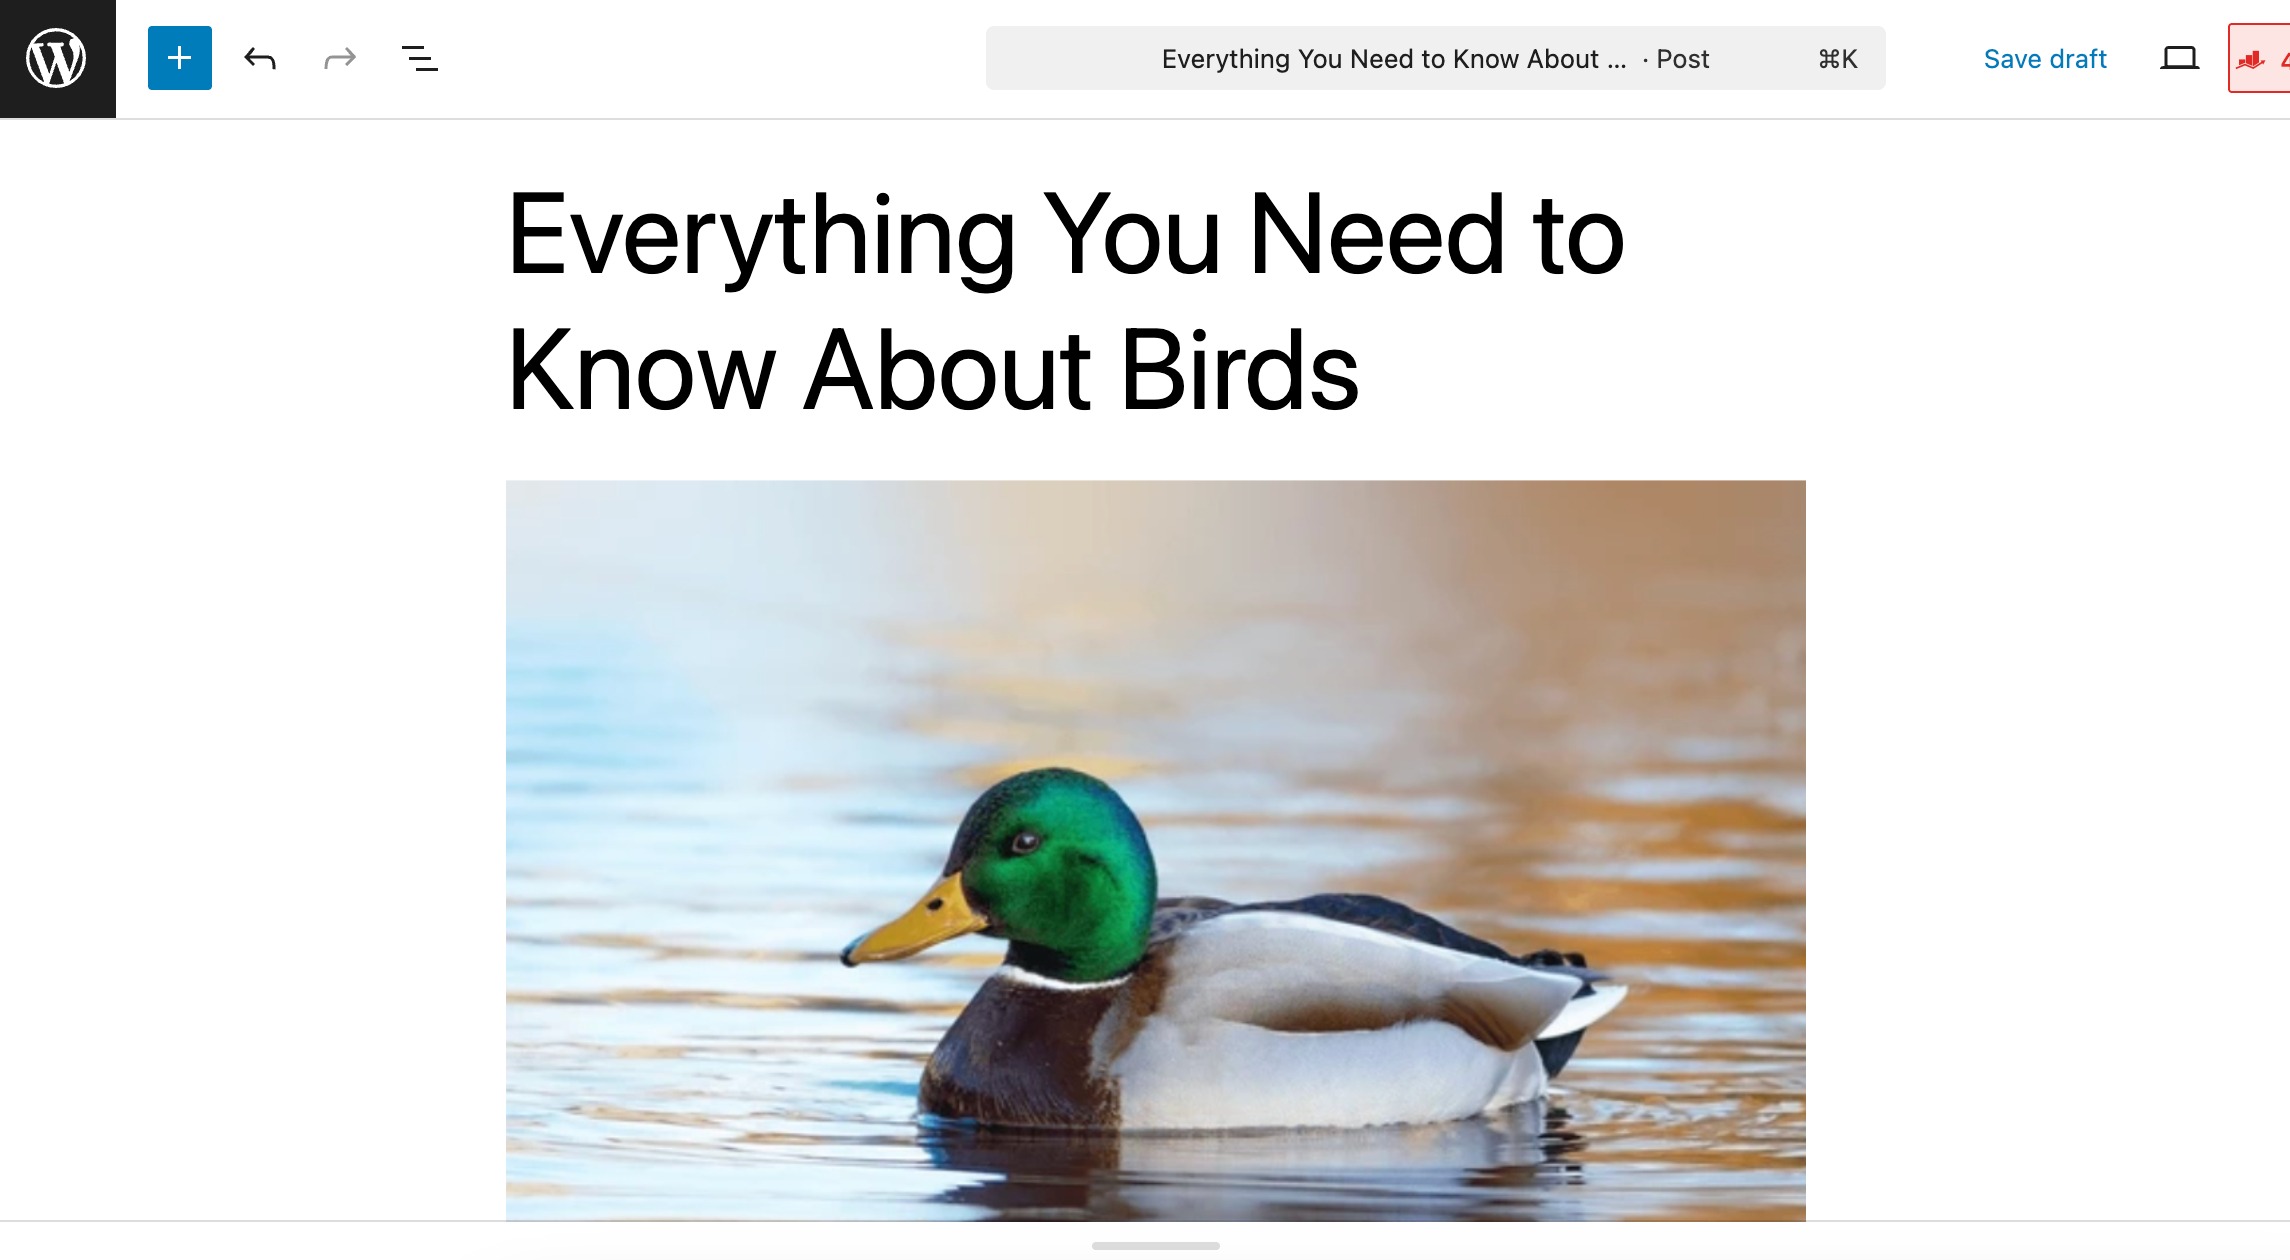
For instance, we’ll replace the image below with another image with the help of this plugin.
2.1 Install and Activate Enable Media Replace Plugin
To begin with, install and activate the plugin by navigating to Plugins → Add Plugin section of your WordPress dashboard.
Search for the Enable Media Replace plugin in the search bar, and install and activate it as shown below.
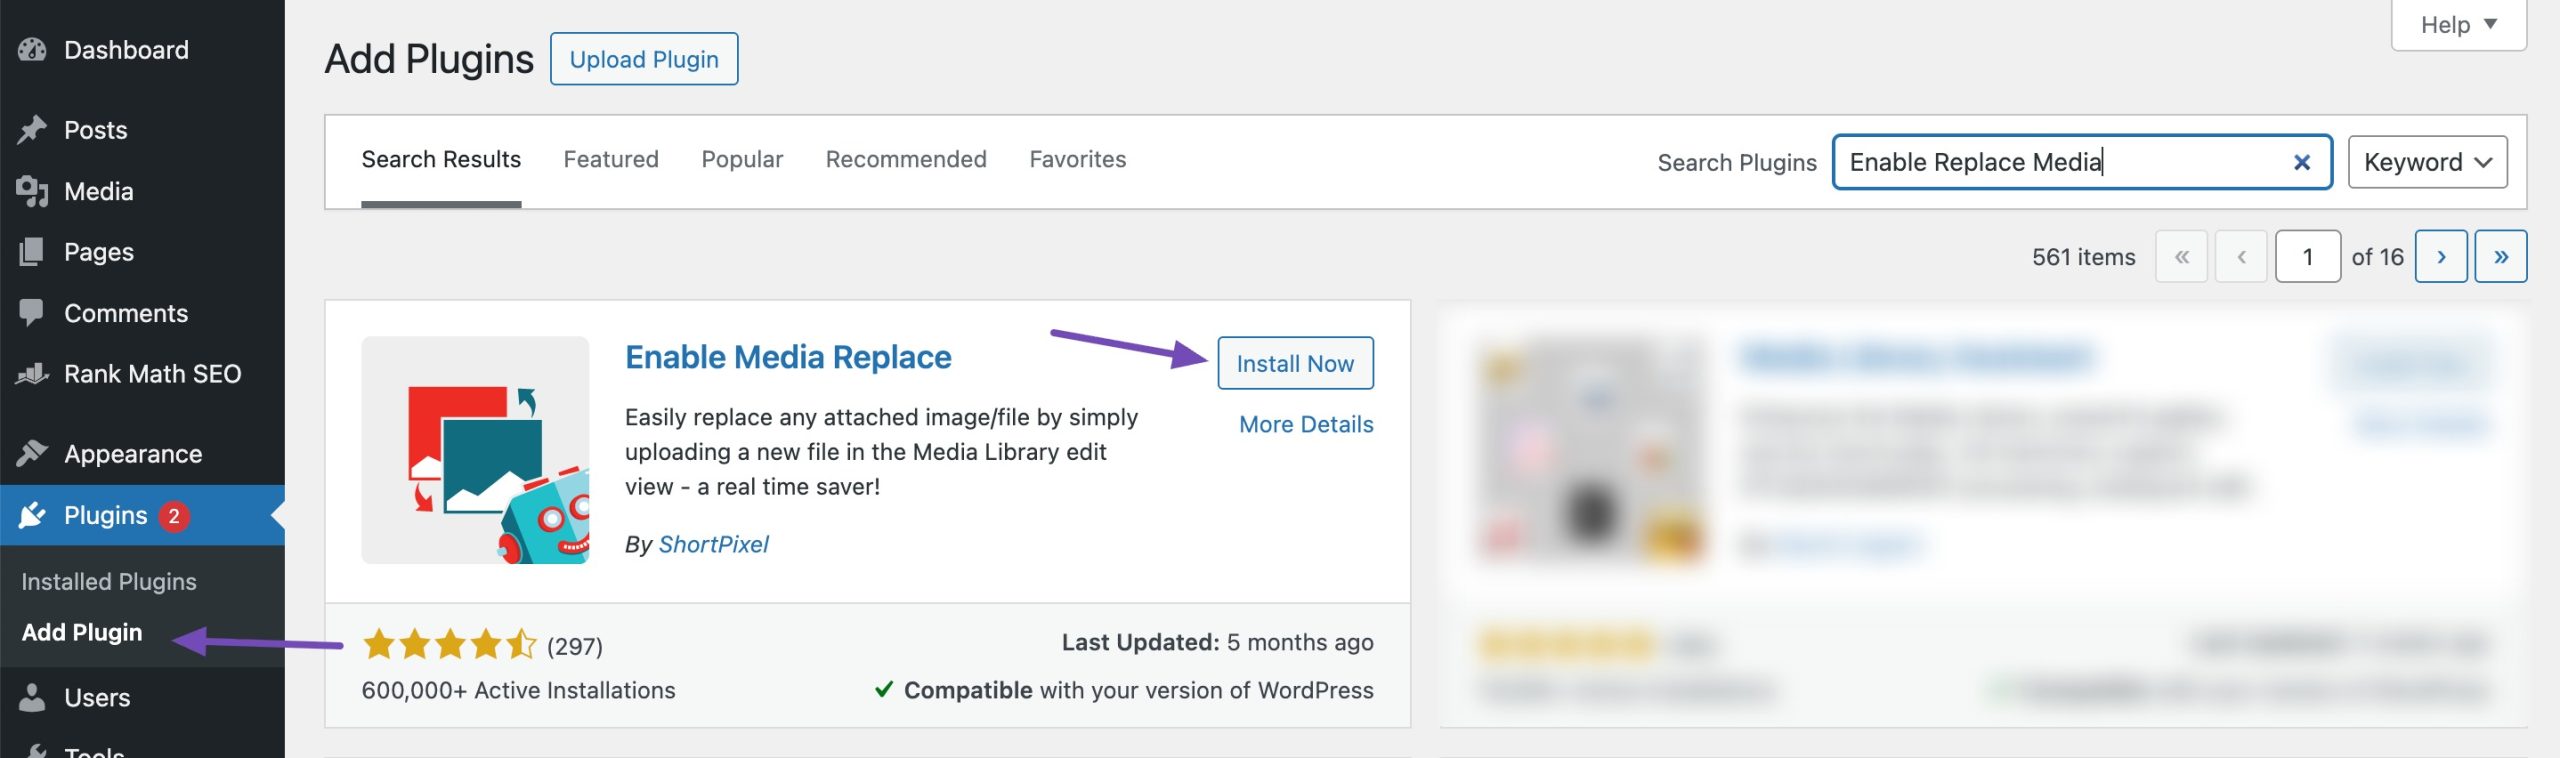
Once activated, it works wonders, and there are no settings for you to configure. Refer to our dedicated tutorial on installing and activating plugins in WordPress.
2.2 Replace WordPress Media Files
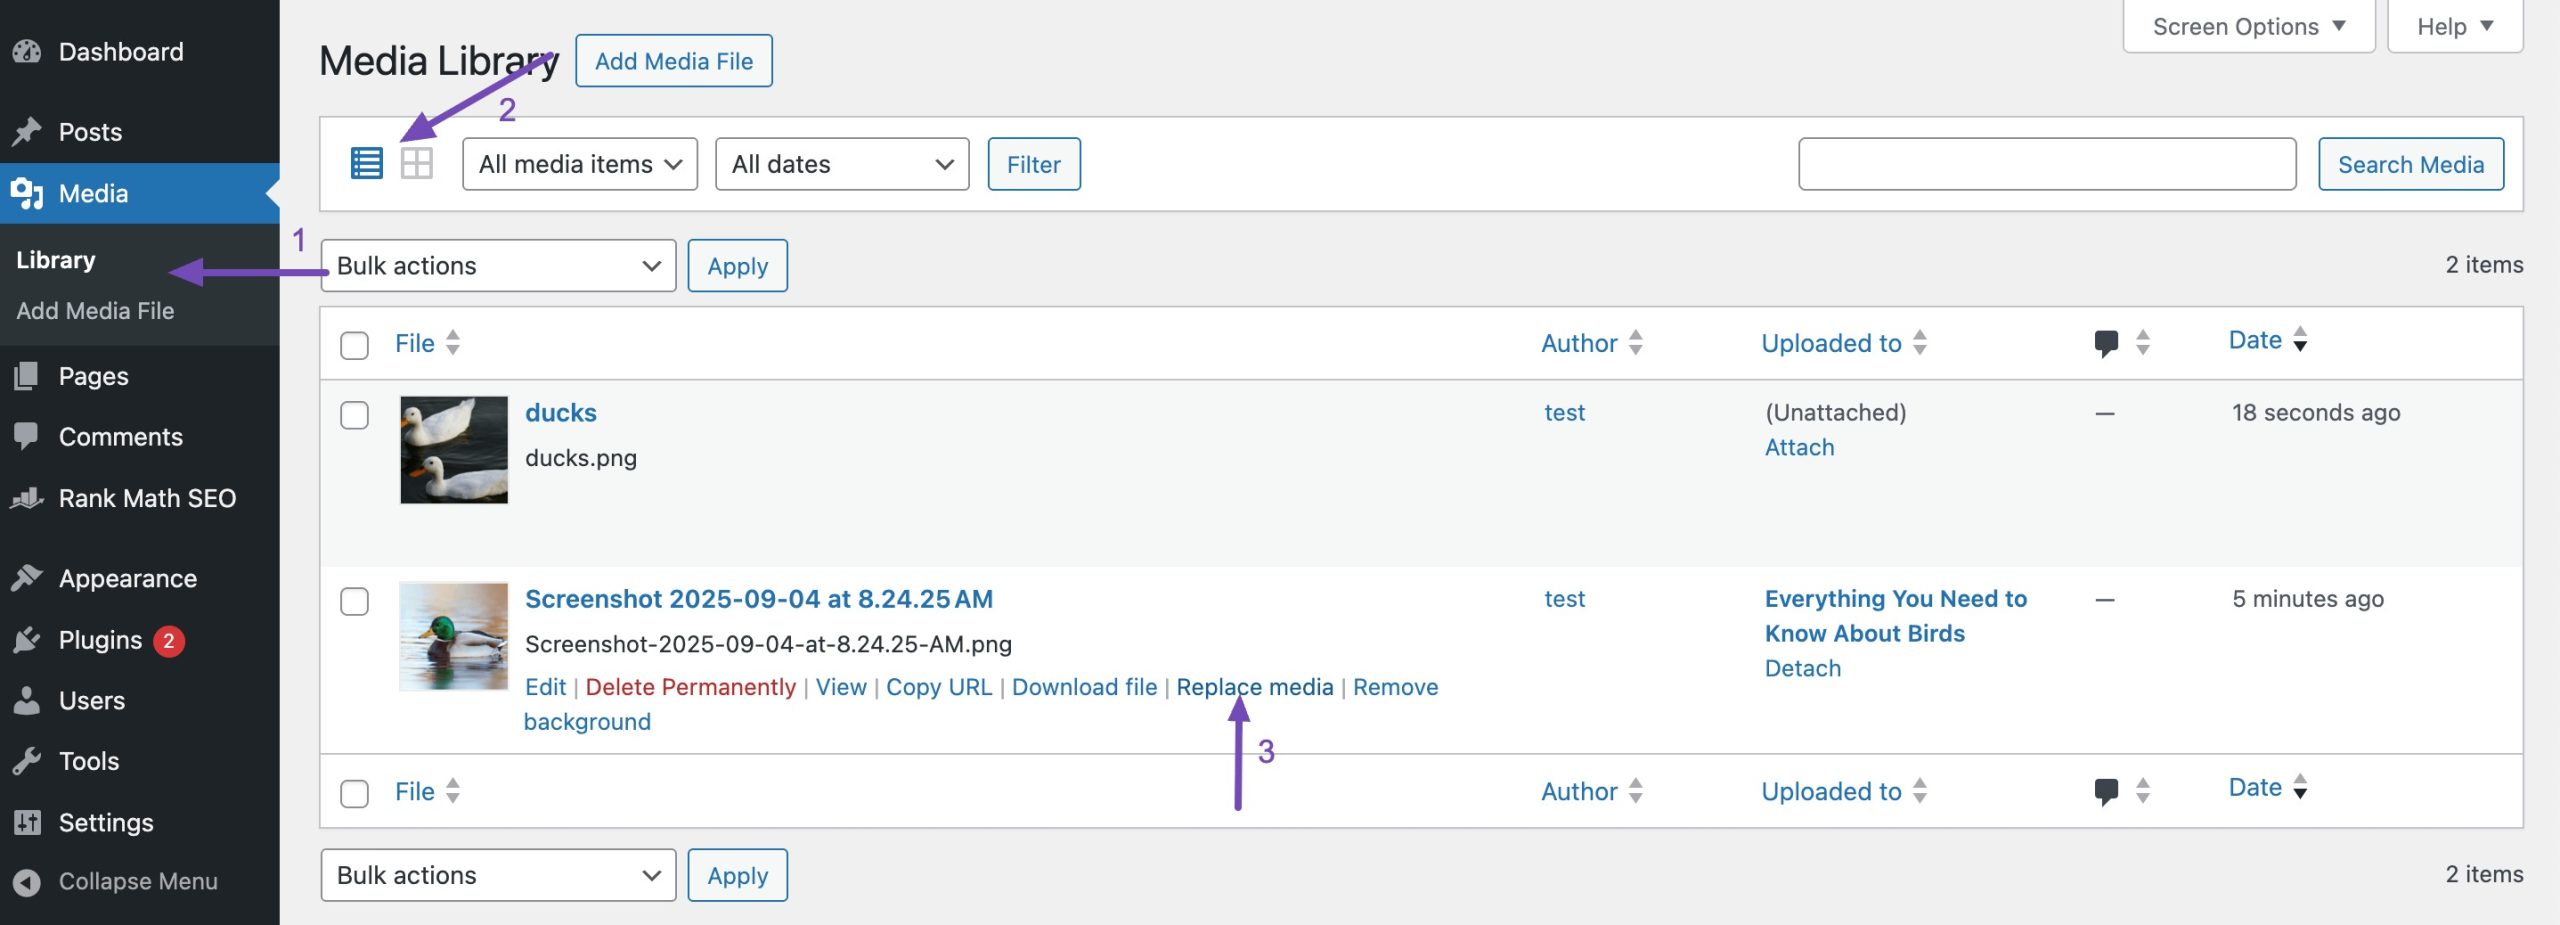
To replace your media files, navigate to Media → Library from your WordPress dashboard. You’ll have to switch to the list view if you’re using the grid view.
Now, locate the file that you wish to replace. Once you have found the file, hover your mouse near the file name, and you’ll notice a link labelled Replace media, as shown below.
You’ll be navigated to the replace media page when clicking the link. You need to upload your new file by clicking the Choose File button.
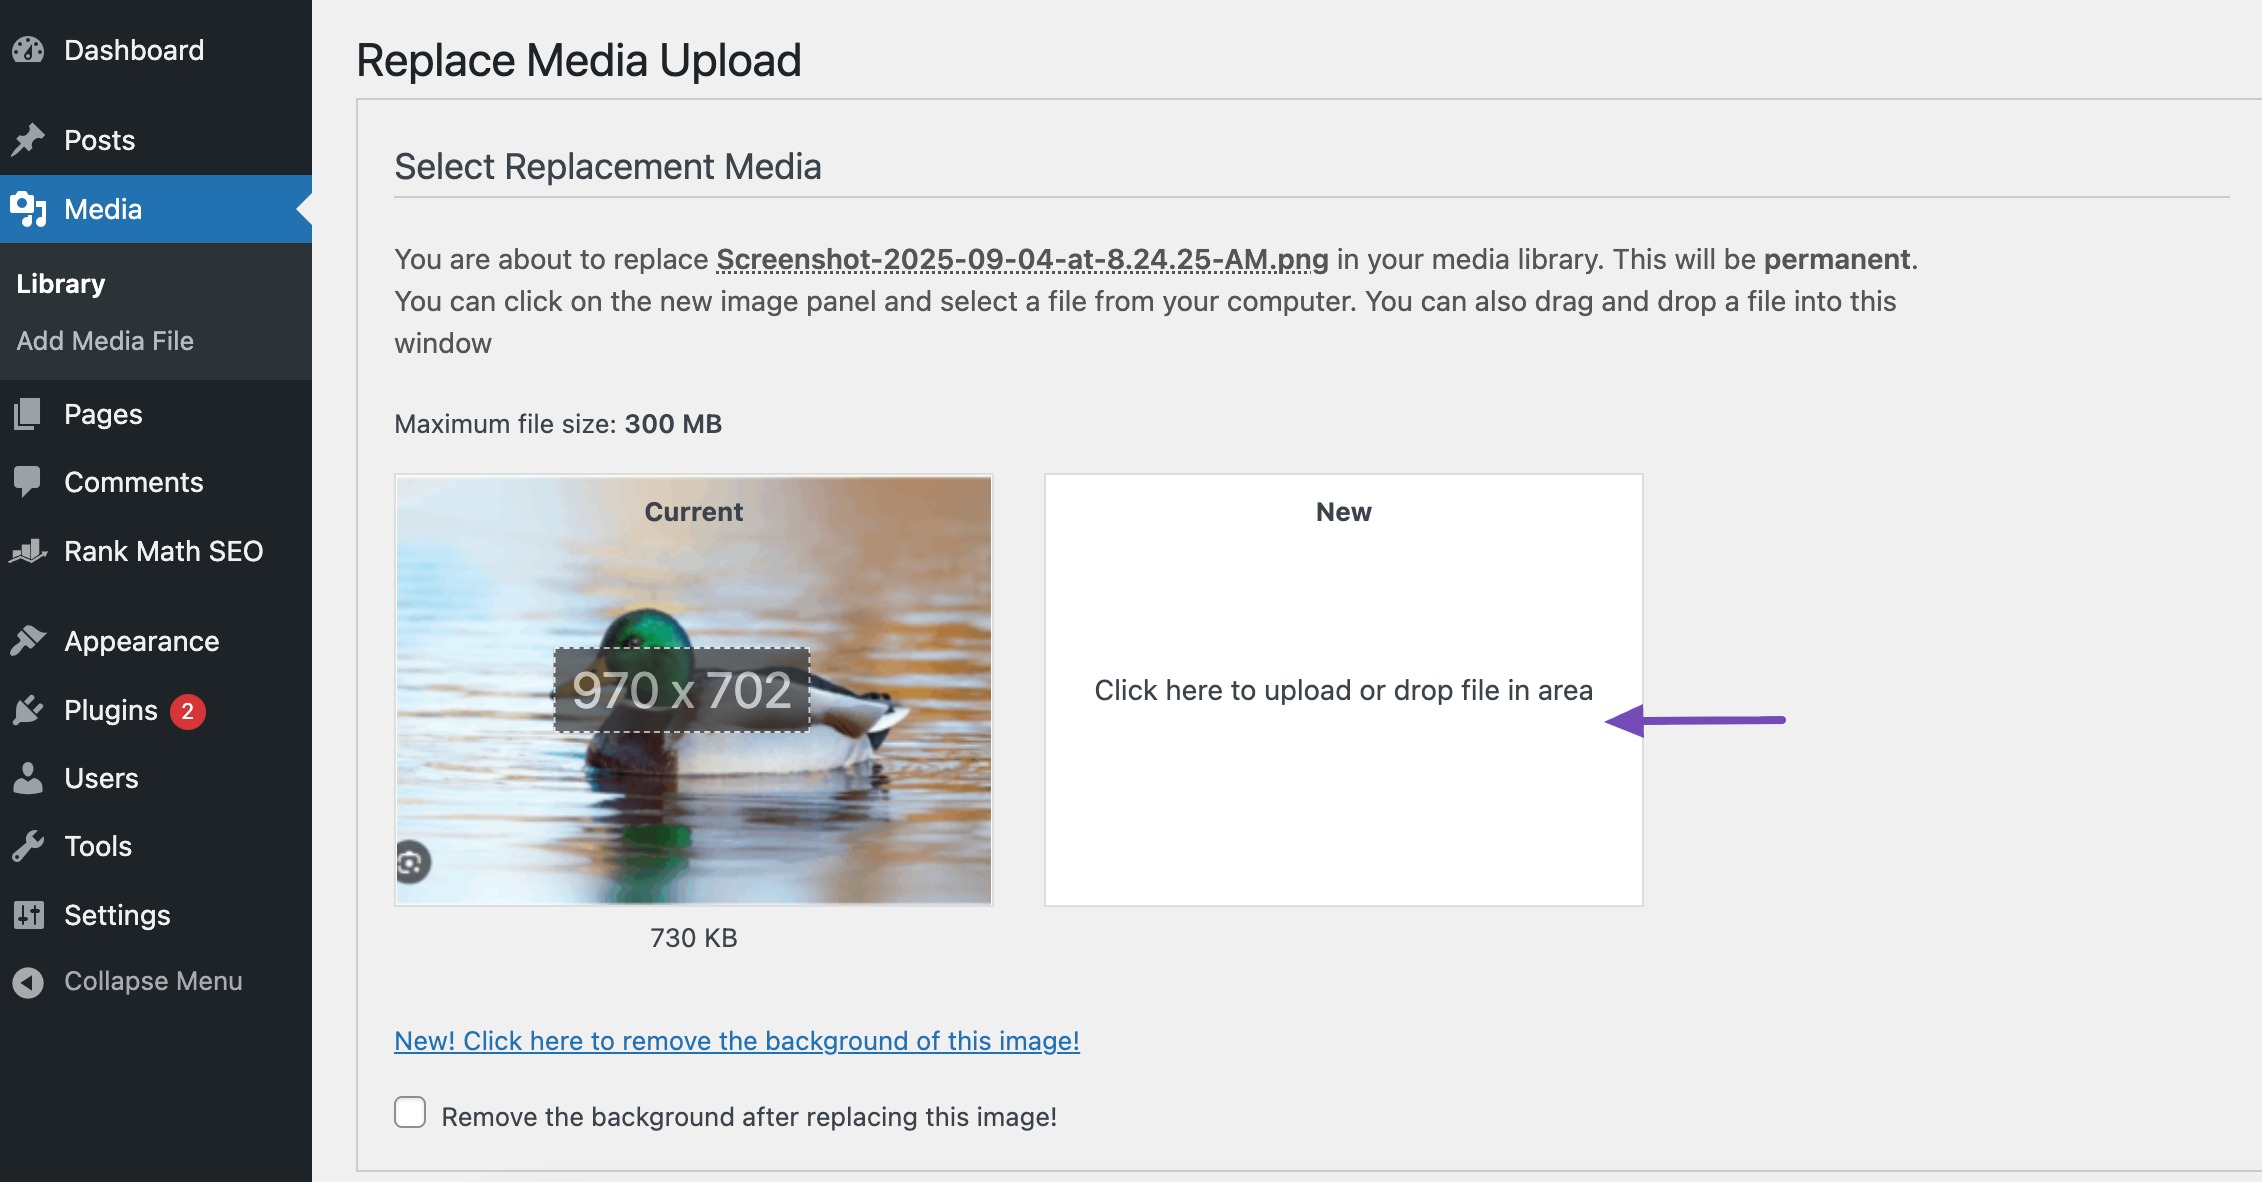
Once you choose the file, you have two replacement options. You can choose only to
- Replace the file or
- Replace the file, use a new filename, and update all links pointing to the old file.
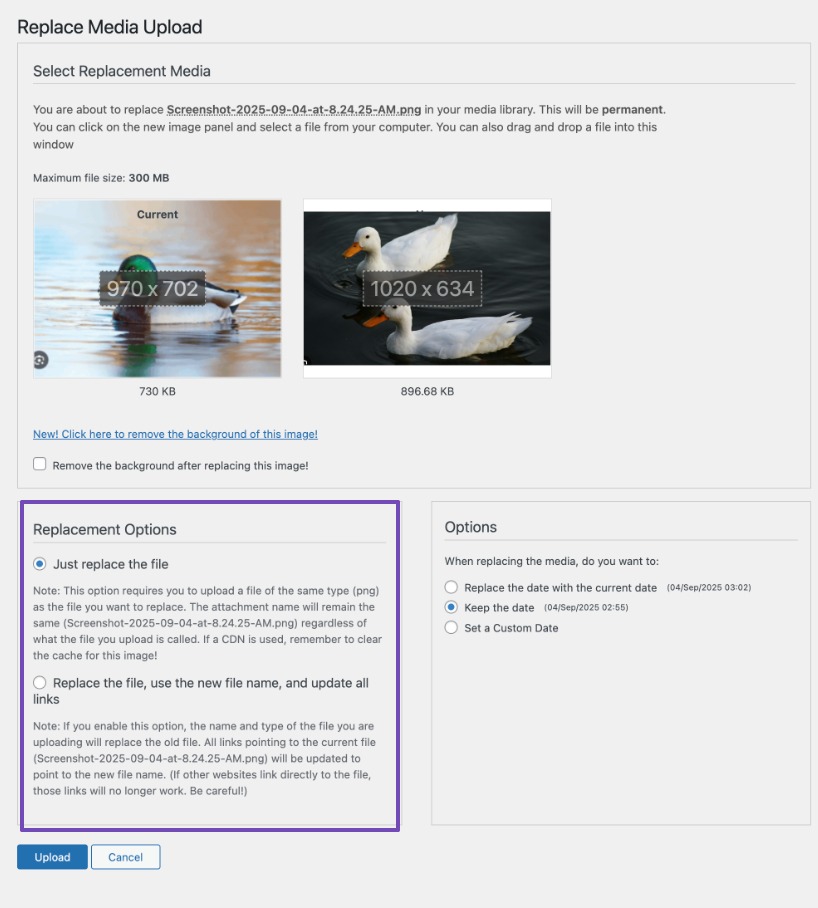
Once you’ve selected any one of the options, click on the Upload button. The plugin also provides Date Options, and you can choose any one of the options that best suits your needs.
WordPress will now upload your media file, and the plugin will replace the previous one. The plugin will also use new filenames and update links if you choose to do so.
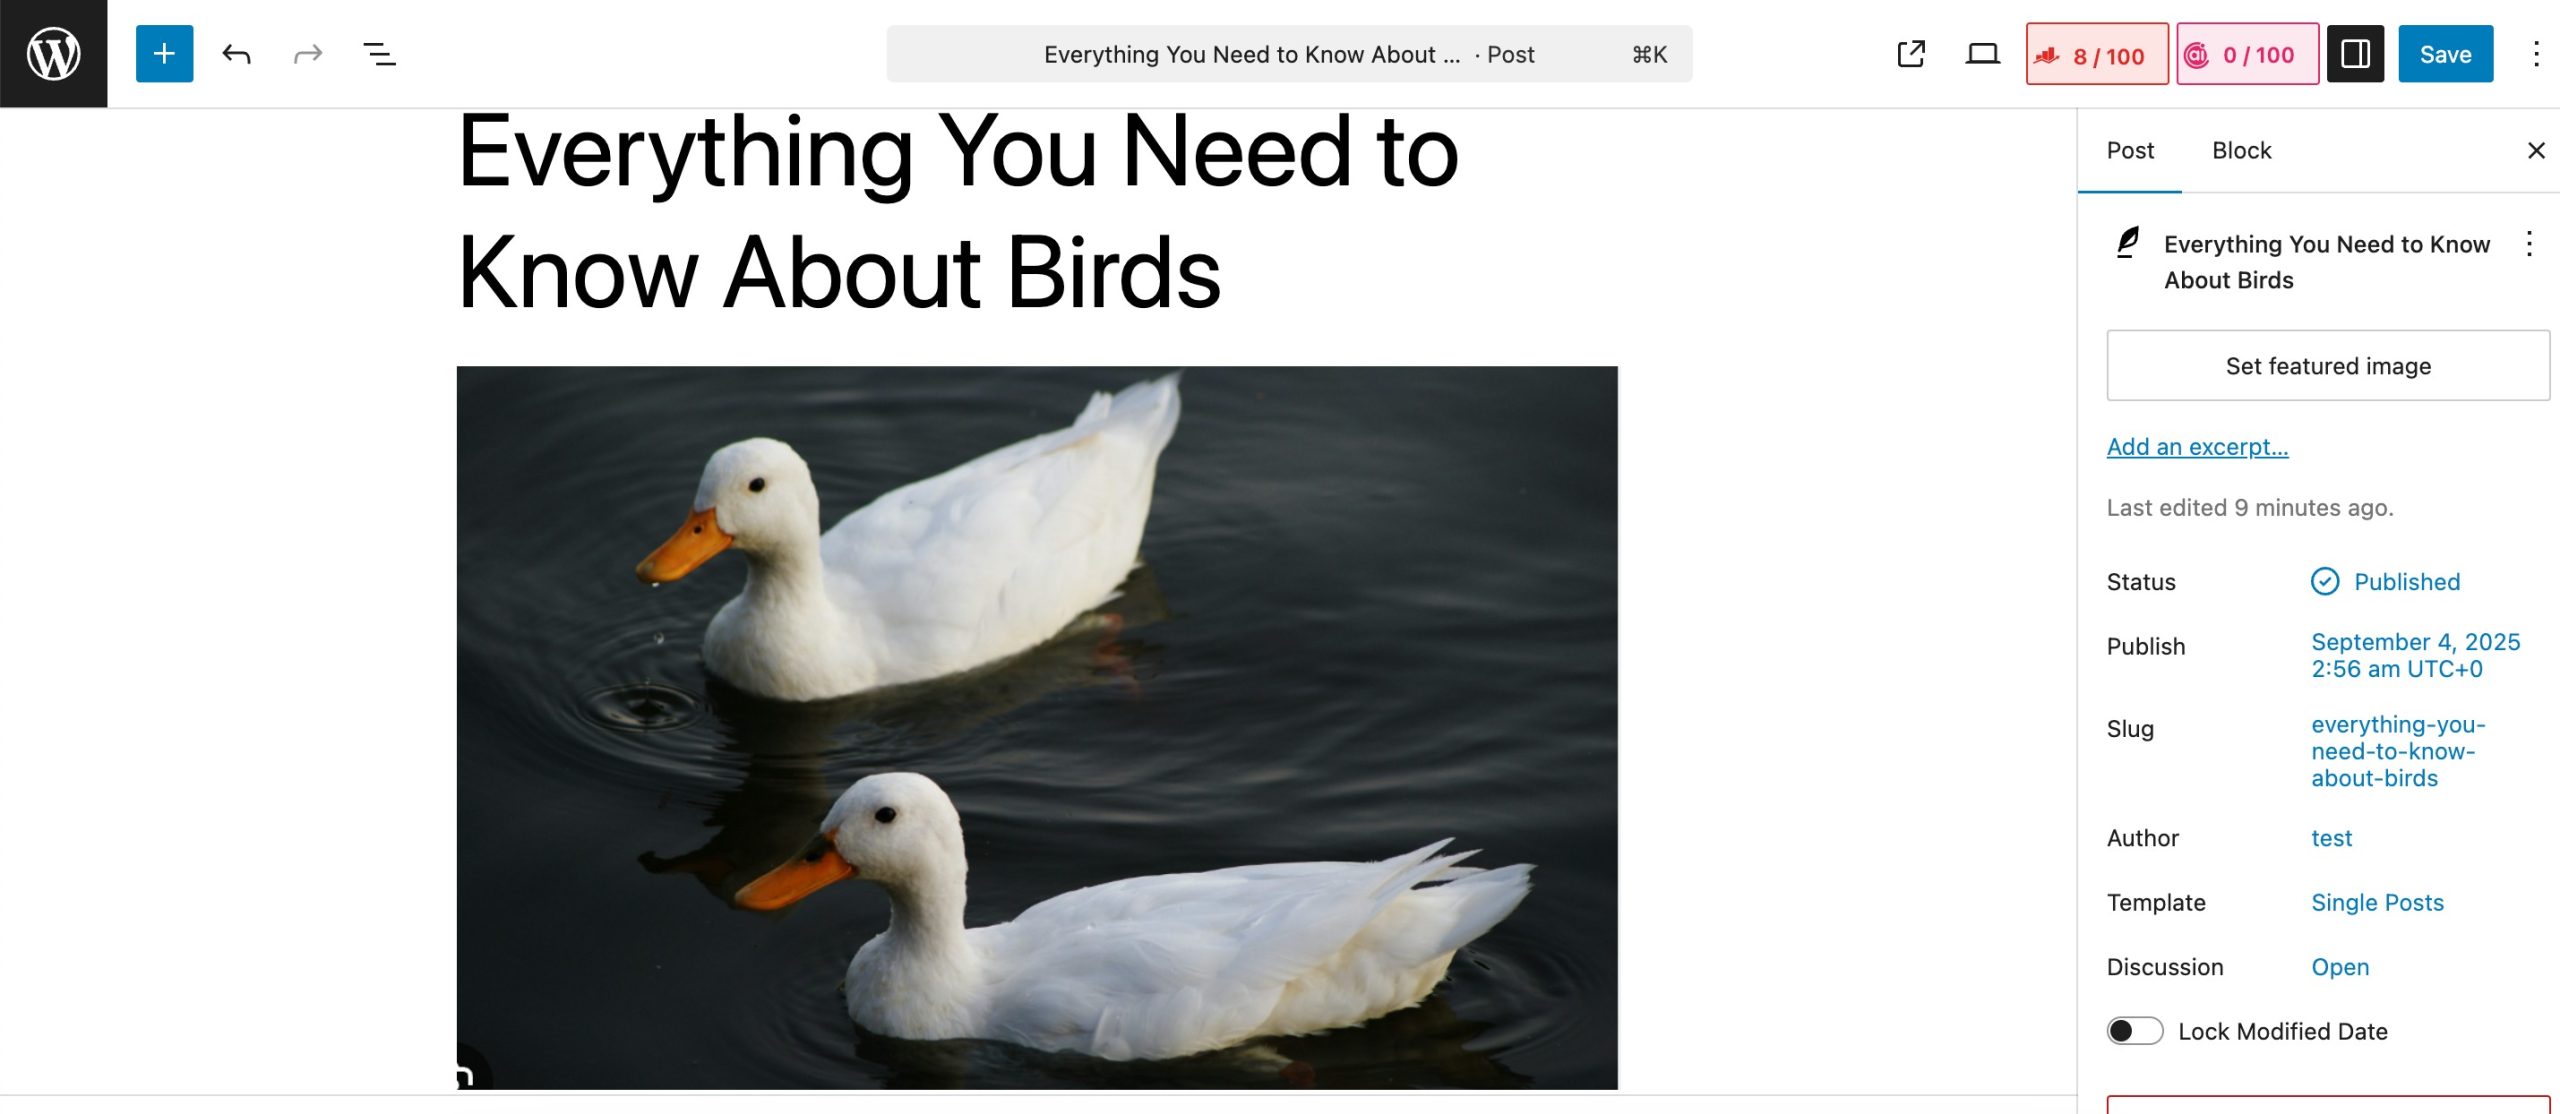
Now that the new file has been uploaded, you may visit the posts or pages where you previously attached the media file to see how it has been replaced.
3 Conclusion
You never really know how many times a single image or media file on your website will be viewed. That’s why replacing them manually can feel exhausting.
With the Enable Media Replace plugin, you can swap out any file in just a few clicks, and it will automatically update everywhere that file appears on your site. No broken links, no empty spaces, and no wasted time hunting down files one by one.
Just remember: if you want to keep your site fast, user-friendly, and SEO-friendly, you should optimize the new media files just like the old ones.
Have you ever needed to replace images or media files on your site? Let us know by tweeting @rankmathseo.💬