In this tutorial, we’ll walk you through how to use the Product Schema type on products you create using WooCommerce – let’s get started.
WooCommerce Products are easier to optimize for SEO with Rank Math. Hence we recommend using the WooCommerce Product Schema Type for your products. However, note that the WooCommerce Product Schema Type is only available for WooCommerce Products.
Table of Contents
1 How to Add WooCommerce Product Schema Type?
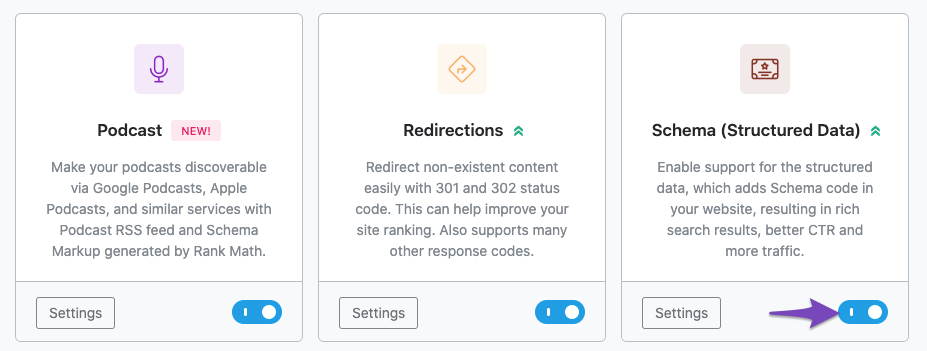
Before we begin, you’ll need to ensure that Rank Math’s Schema Module has been enabled on your website by navigating to Rank Math SEO → Dashboard in your WordPress admin area.
1.1 Edit Your Product
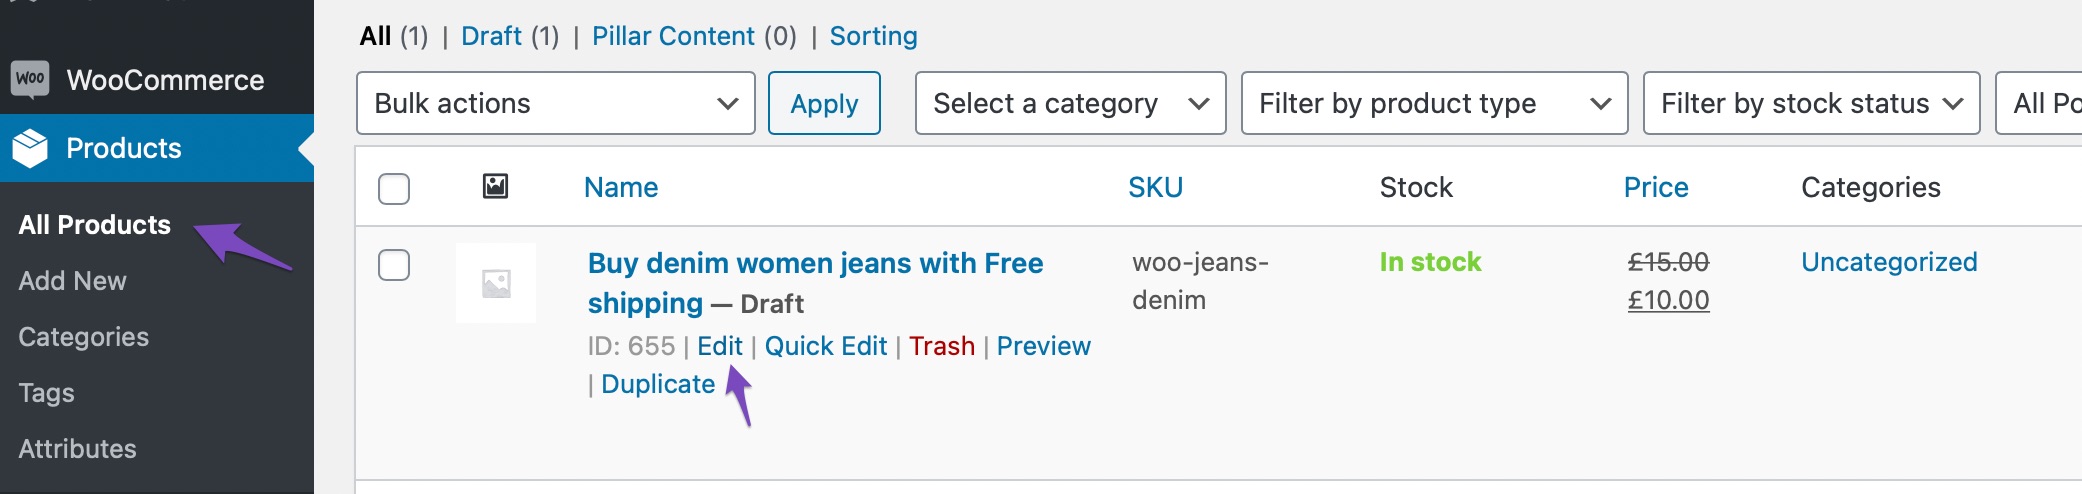
To add the WooCommerce Product Schema Type, first head over to your Product and click on Edit, as shown below.
1.2 Navigate to the Schema Settings for the Product
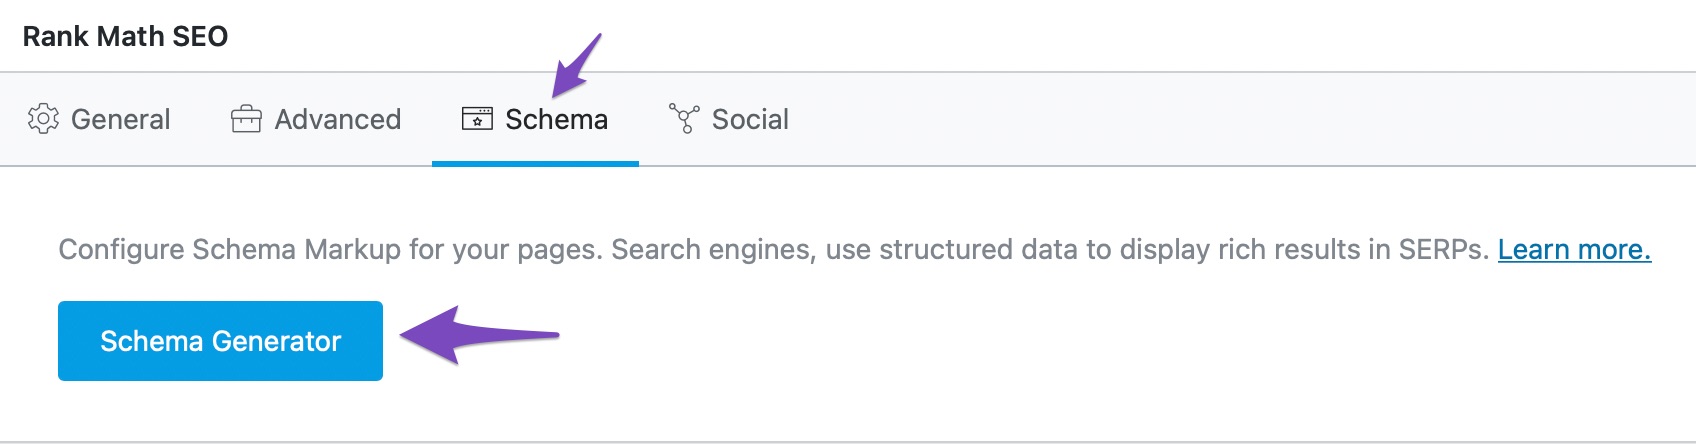
Go to the Schema Settings by clicking on the Schema tab and then click on Schema Generator.
1.3 Navigate to the Schema Builder
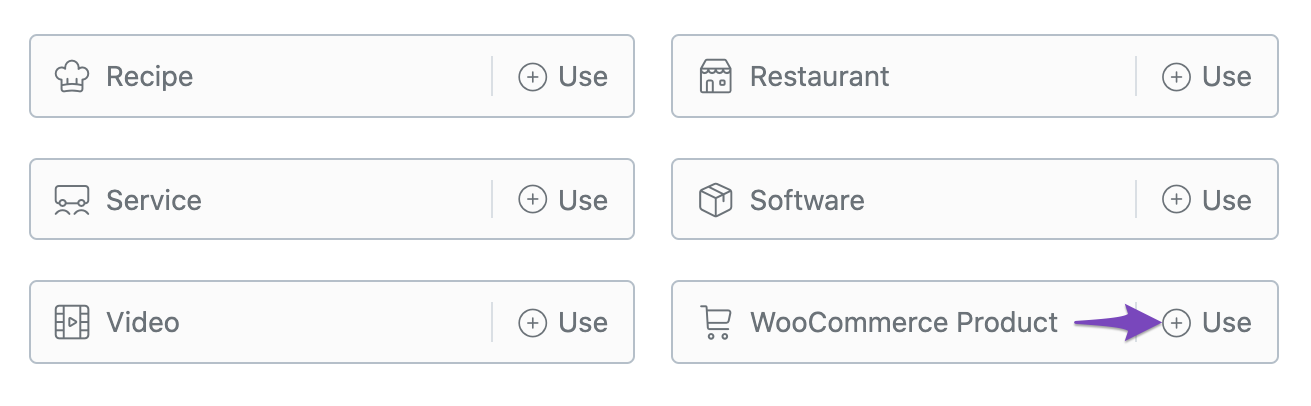
Find the WooCommerce Product Schema from the list and click on Use to open the Schema Builder.
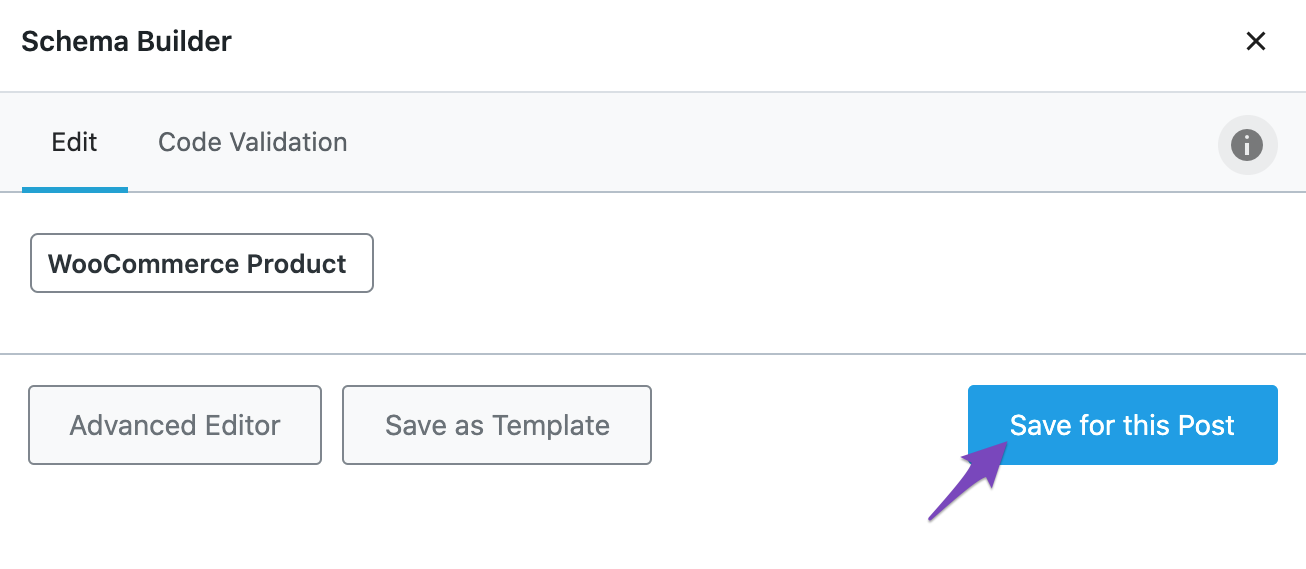
1.4 Save the Schema Type
In the Schema Builder, click on Save for this Post.
2 Configuring WooCommerce Product Schema
Rank Math’s WooCommerce integration automatically pulls the product data that has been entered in the WooCommerce Product created in the WordPress admin area. This makes the entire process easier and even faster.
Here are the various WooCommerce options that you need to configure to be included in the Product Schema.
2.1 Name
Enter the Product Name for your WooCommerce product as shown below.

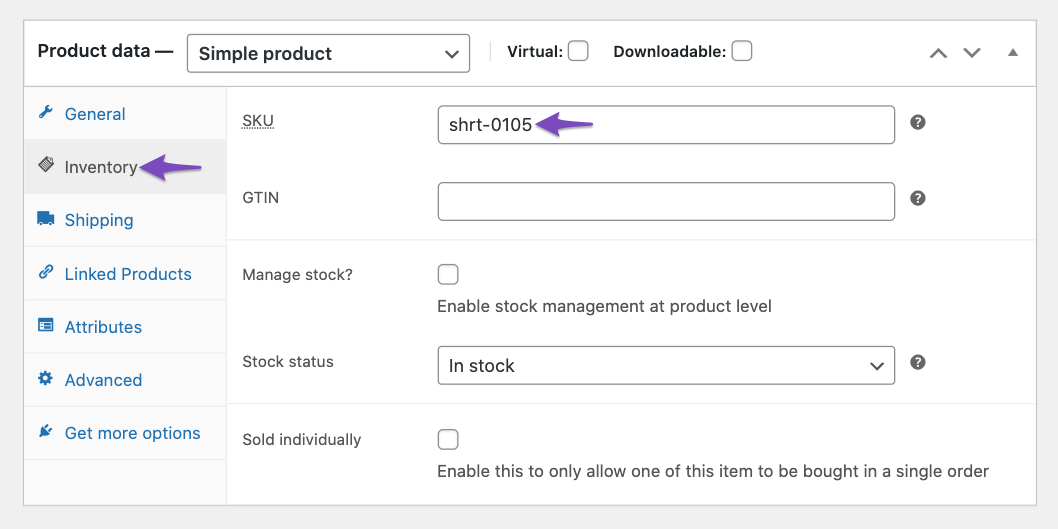
2.2 SKU
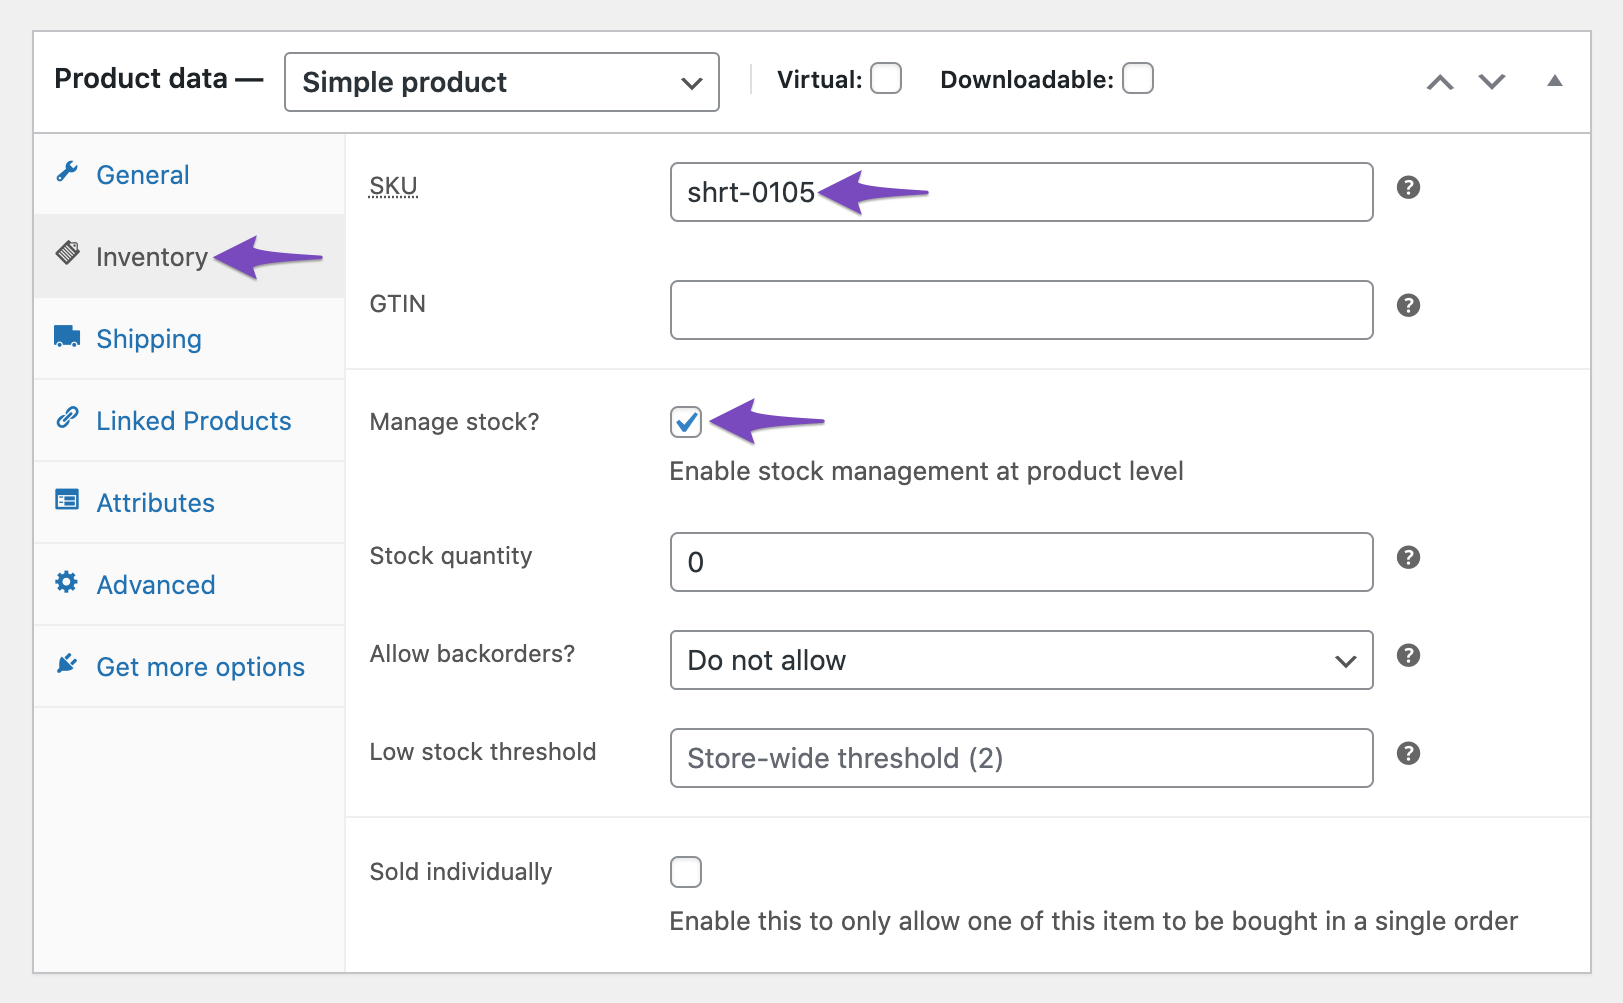
SKU (Stock Keeping Unit) is a unique identifier with reference to your product. It helps you keep track of this item in your inventory. You can add an SKU in your WooCommerce Product in the Inventory tab as you head over to the Product data section.
2.3 URL
The permalink of the WooCommerce Product is added as the URL. When you click the Edit option, you can change the permalink of the product.

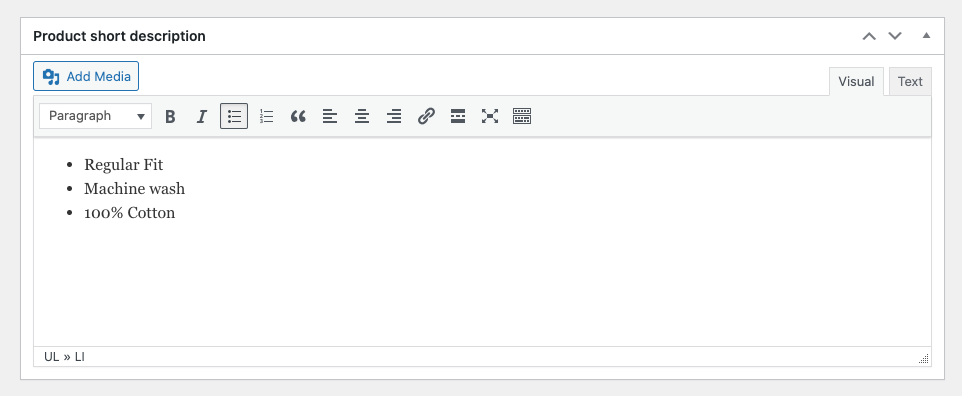
2.4 Description
You can add more details of the product in the Product short description field in WooCommerce. This will be added as a description to the Product Schema.
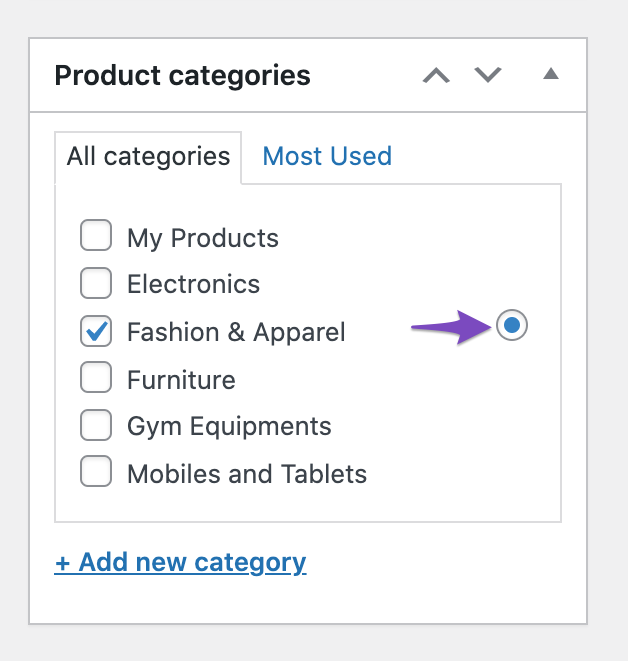
2.5 Category
For category, you can select the Product Category from the right sidebar in your WooCommerce Product editor. In case, if multiple product categories are chosen, then you can choose the primary term from the radio button displayed on the right side of the product categories, as shown below.
2.6 Image
To include the image in the Product Schema, Rank Math considers the product image as well as product gallery images that can be added from the right sidebar in your WooCommerce Product Editor.
Note: The images in your product gallery will only be added to your Product Schema if you upload a product image.

2.7 Offers → Price
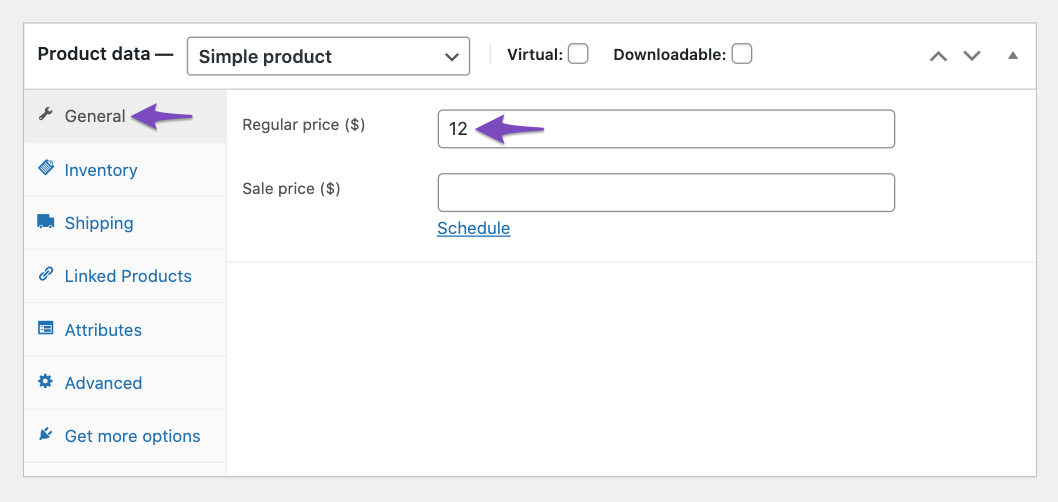
The price at which your customers can buy your product or service. The price can be configured for the WooCommerce product under the Product data section.
In the General tab, you can notice a few options for pricing. The regular price is the price at which your products can be purchased when there is no sale.
When there is no sale price set, then Rank Math will consider the Regular price for the price in the Product Schema.
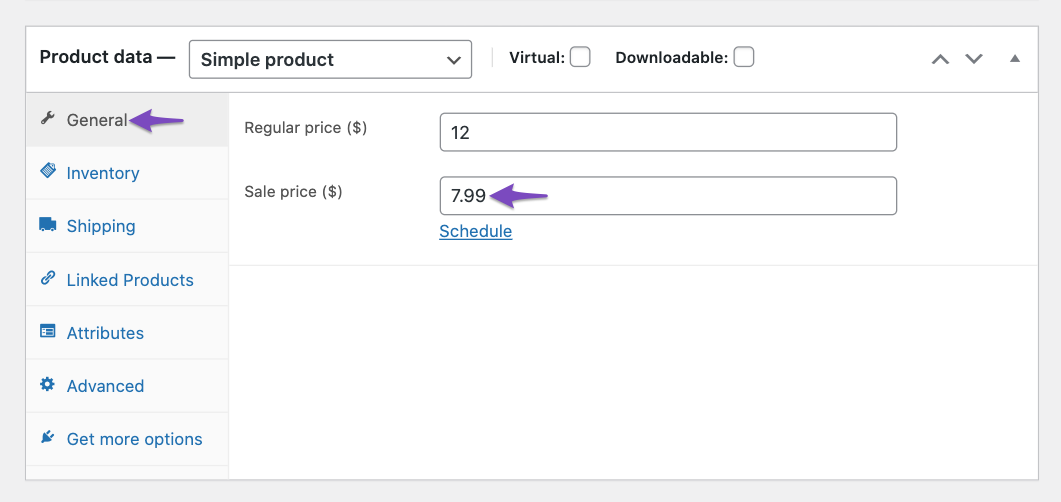
When a sale is live for the product, then Rank Math will include the Sale Price as the price for the Product Schema. As you can see from the image below, both the regular and sale prices are provided. In this case, Rank Math will use the Sale price as the price.
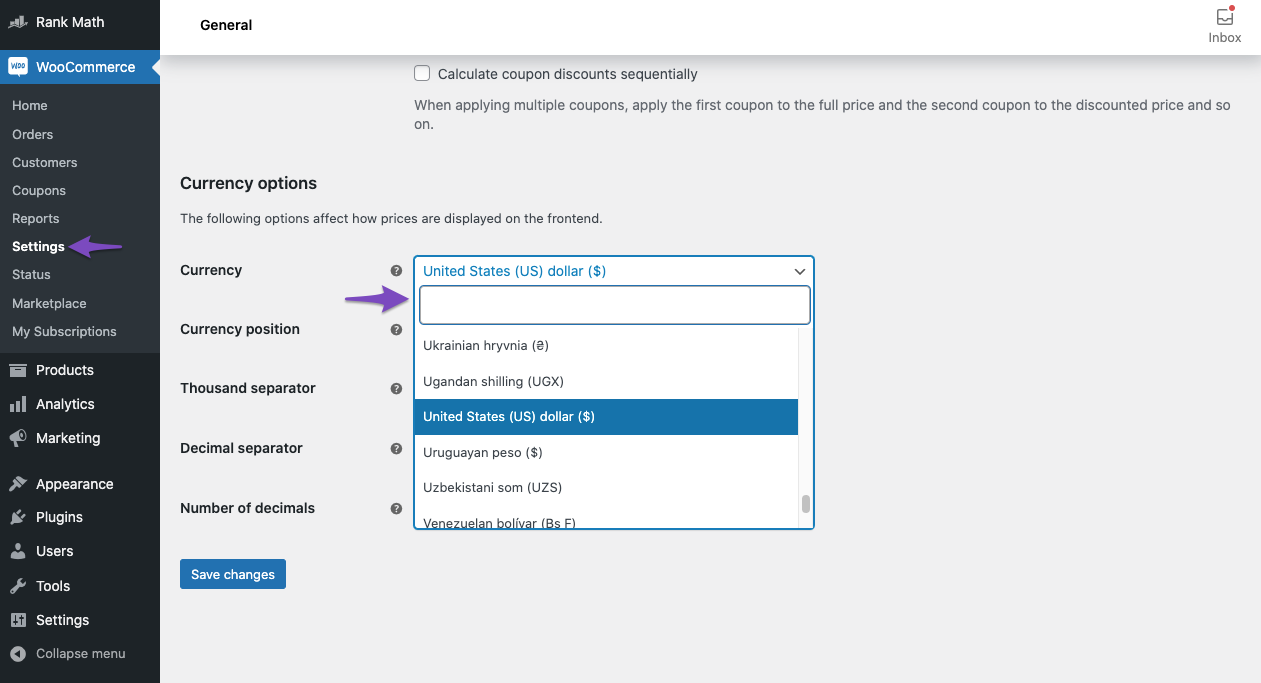
2.8 Offers → Price Currency
The price currency is the same as the one that you have configured for your WooCommerce store under WooCommerce → Settings → General. Here under the Currency options, you can change the Currency.
The Price Currency is added to the Product Schema only if you have set a price for the product.
2.9 Offers → Price Valid Until
The Price Valid Until describes the last date beyond which the sale price is no longer valid. Once you have set a Sale price for your product, you can click the Schedule option and set an end date for the sale price.
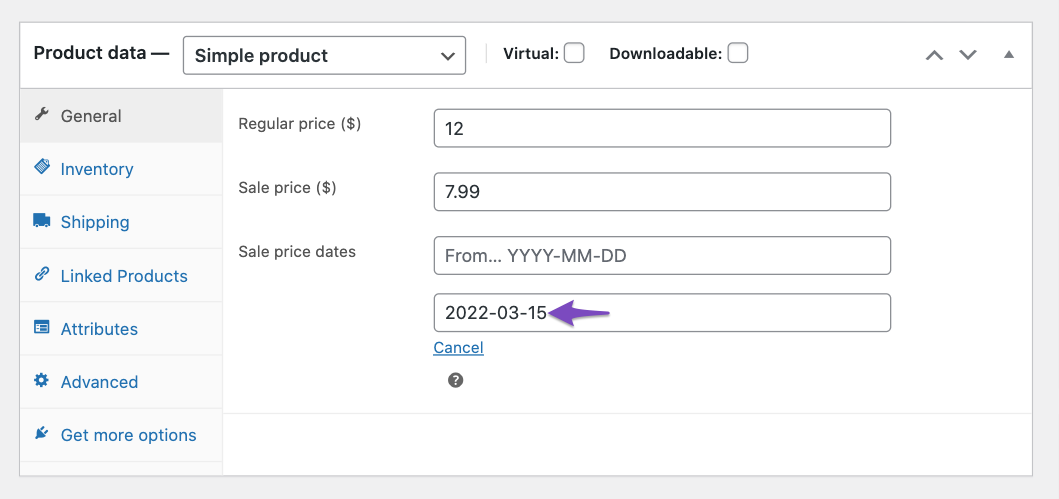
Since the Price Valid Until is Google’s recommended property for Product Schema, you will see a warning in your search console and Google’s rich results testing tool, if not set. To prevent the warnings, Rank Math adds a Price Valid Until date automatically if no date is added. The last date of the following year will be set as the default value for Price Valid Until.
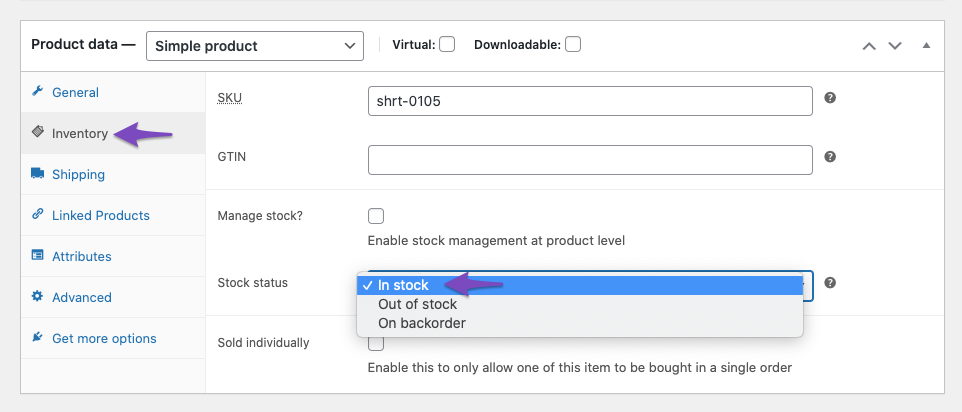
2.10 Availability
The Availability of the product can be set under the Product data. In the Inventory tab, you can set the Stock Status, and Rank Math will include the appropriate value for the Availability Schema property.
InStock: This value is set for the Schema property when you choose either In Stock or On backorder.
OutStock: This value is set for the Schema property when you choose the Stock Status is Out of Stock.
2.11 Item Condition
NewCondition is the default value that is added by Rank Math for the Item Condition property.
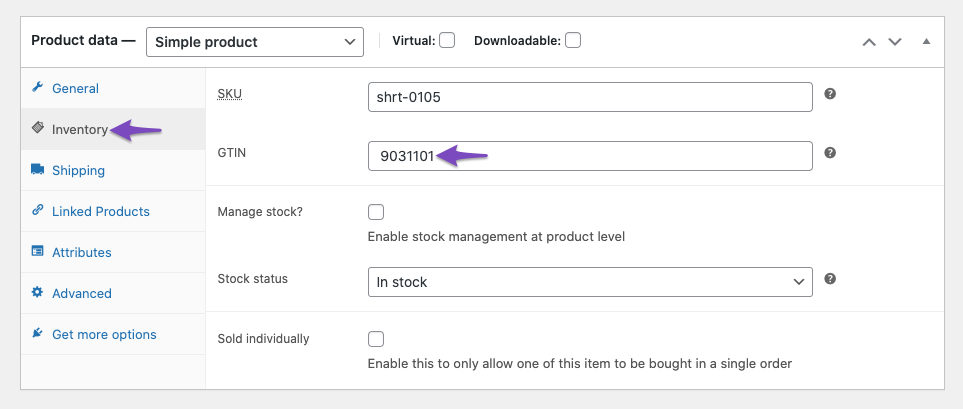
2.12 GTIN PRO
Rank Math PRO users will have the option to add GTIN value to the Product Schema. At first, the GTIN key is configured under Rank Math SEO → General Settings → WooCommerce → Global Identifier.
PRO users will see an additional option under the Product data section of WooCommerce when they navigate to the Inventory tab. The GTIN option here lets users add the GTIN value for the GTIN key they’ve configured earlier in the Rank Math Settings.
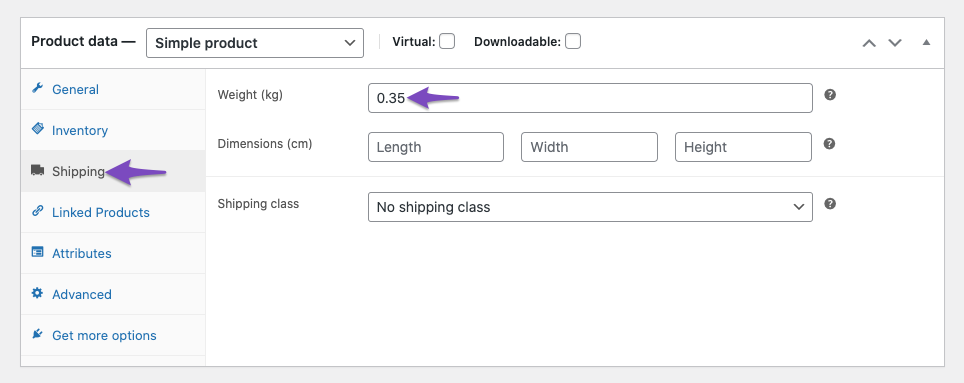
2.13 Weight → Value
If your product is a physical product, then you can add its weight. Under the Product data, you can switch to the Shipping tab and enter the Weight here.
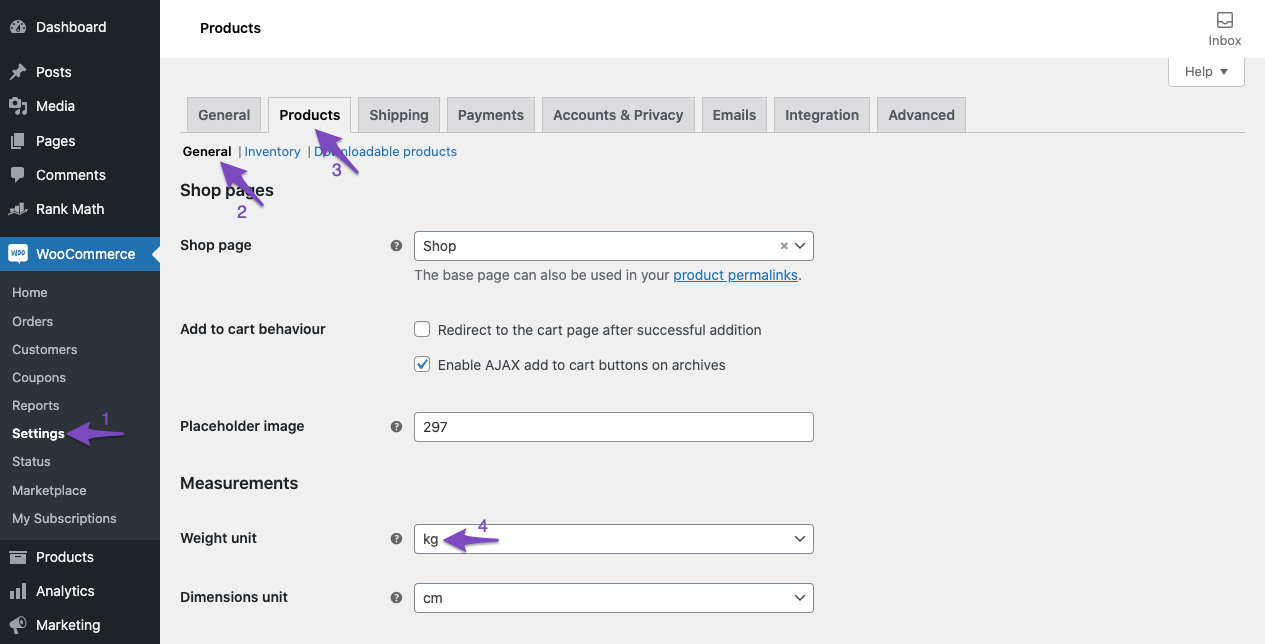
2.14 Weight → Unitcode
The unit at which the weight is being measured. This setting is configured under WooCommerce → Settings → Products → General. Here you can change the Weight Unit option under the Measurements section.
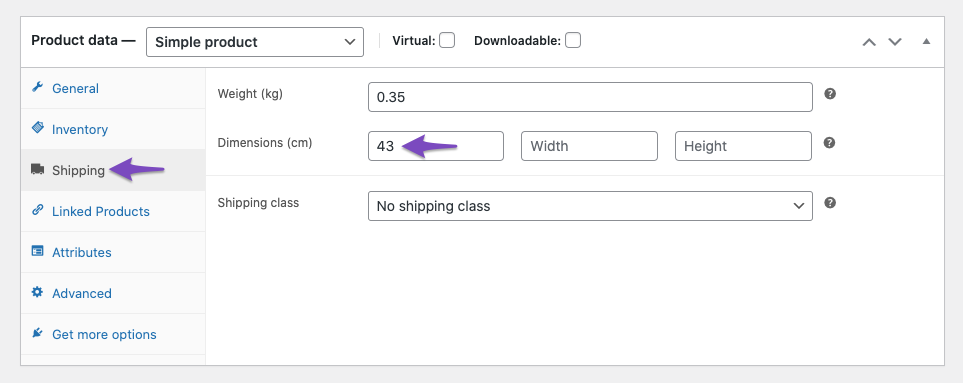
2.15 Depth
For physical goods, you can enter the length (or depth) of the product. In the Product data, switch to the Shipping tab. Here you can add find various Dimensions fields. Add the value in the Length field.
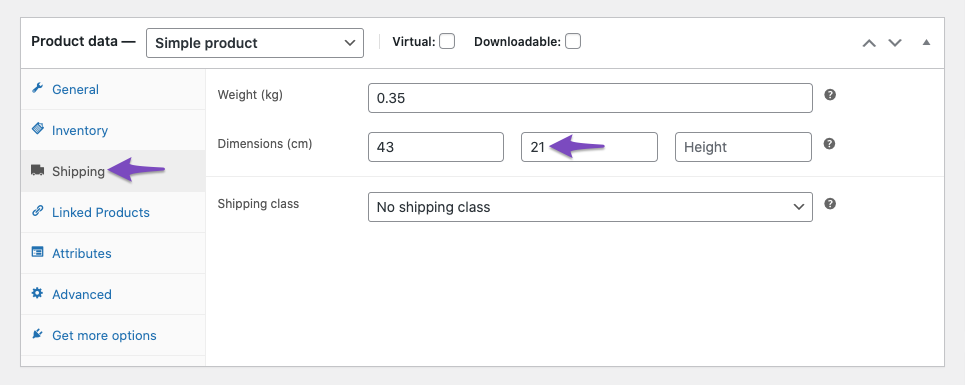
2.16 Width
Similar to the Length, you can enter the Width of the product in its respective Dimensions field.
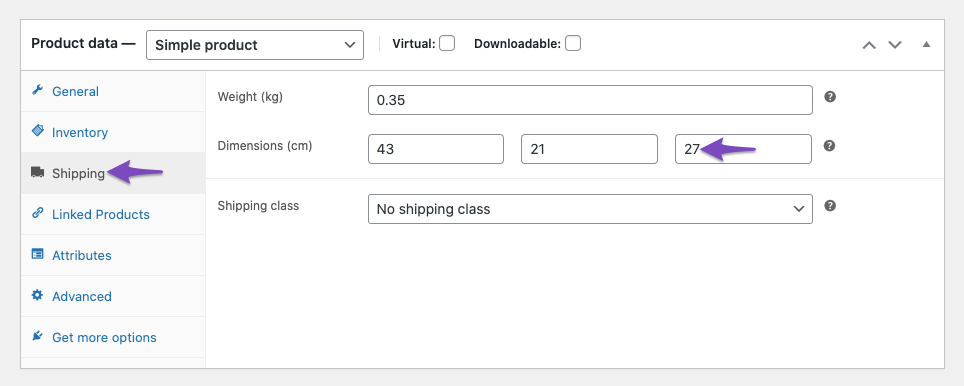
2.17 Height
Similar to the length and breadth, you can also add the Height in the dimensions field for the physical goods.
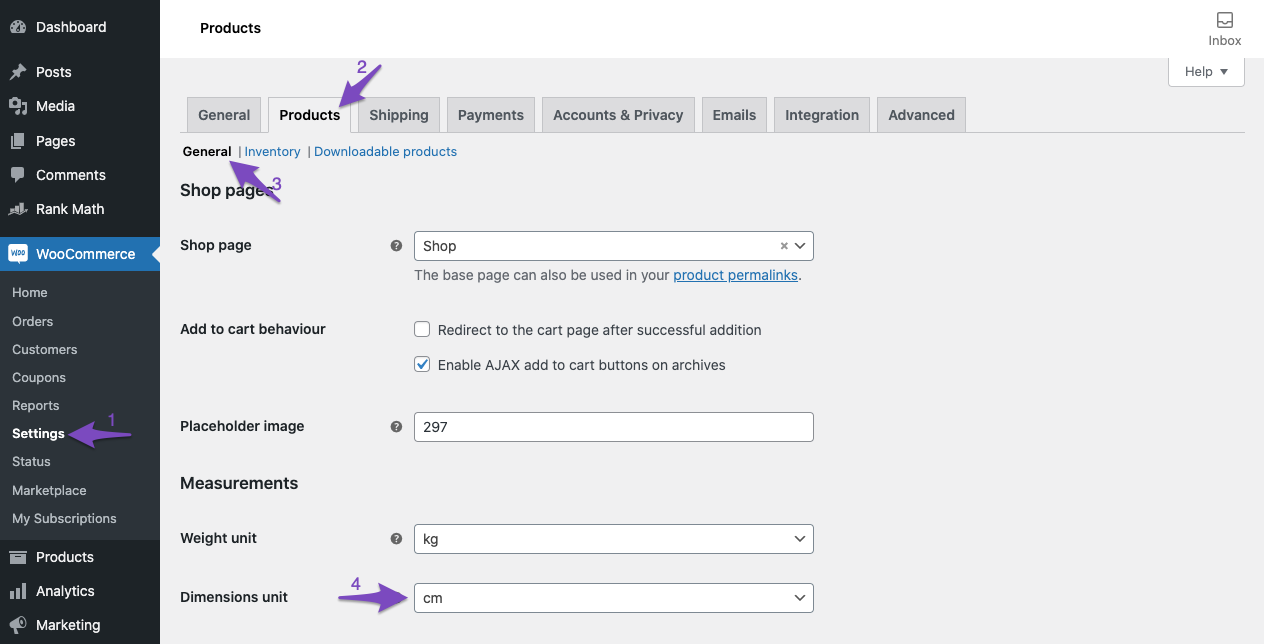
2.18 Unitcode for Height, Width and Depth
The unit code for Height, Width, and Depth are all configured from the WooCommerce settings. To set the dimensions unit, head over to WooCommerce → Settings → Products → General. Under the Measurements section, change the Dimensions unit.
2.19 AggregateRating
AggregateRating is automatically added by Rank Math when your customers leave reviews for your product.
- Rating Value: Indicates the aggregate rating value
- Rating Count: Total number of ratings
- Review Count: Total number of reviews
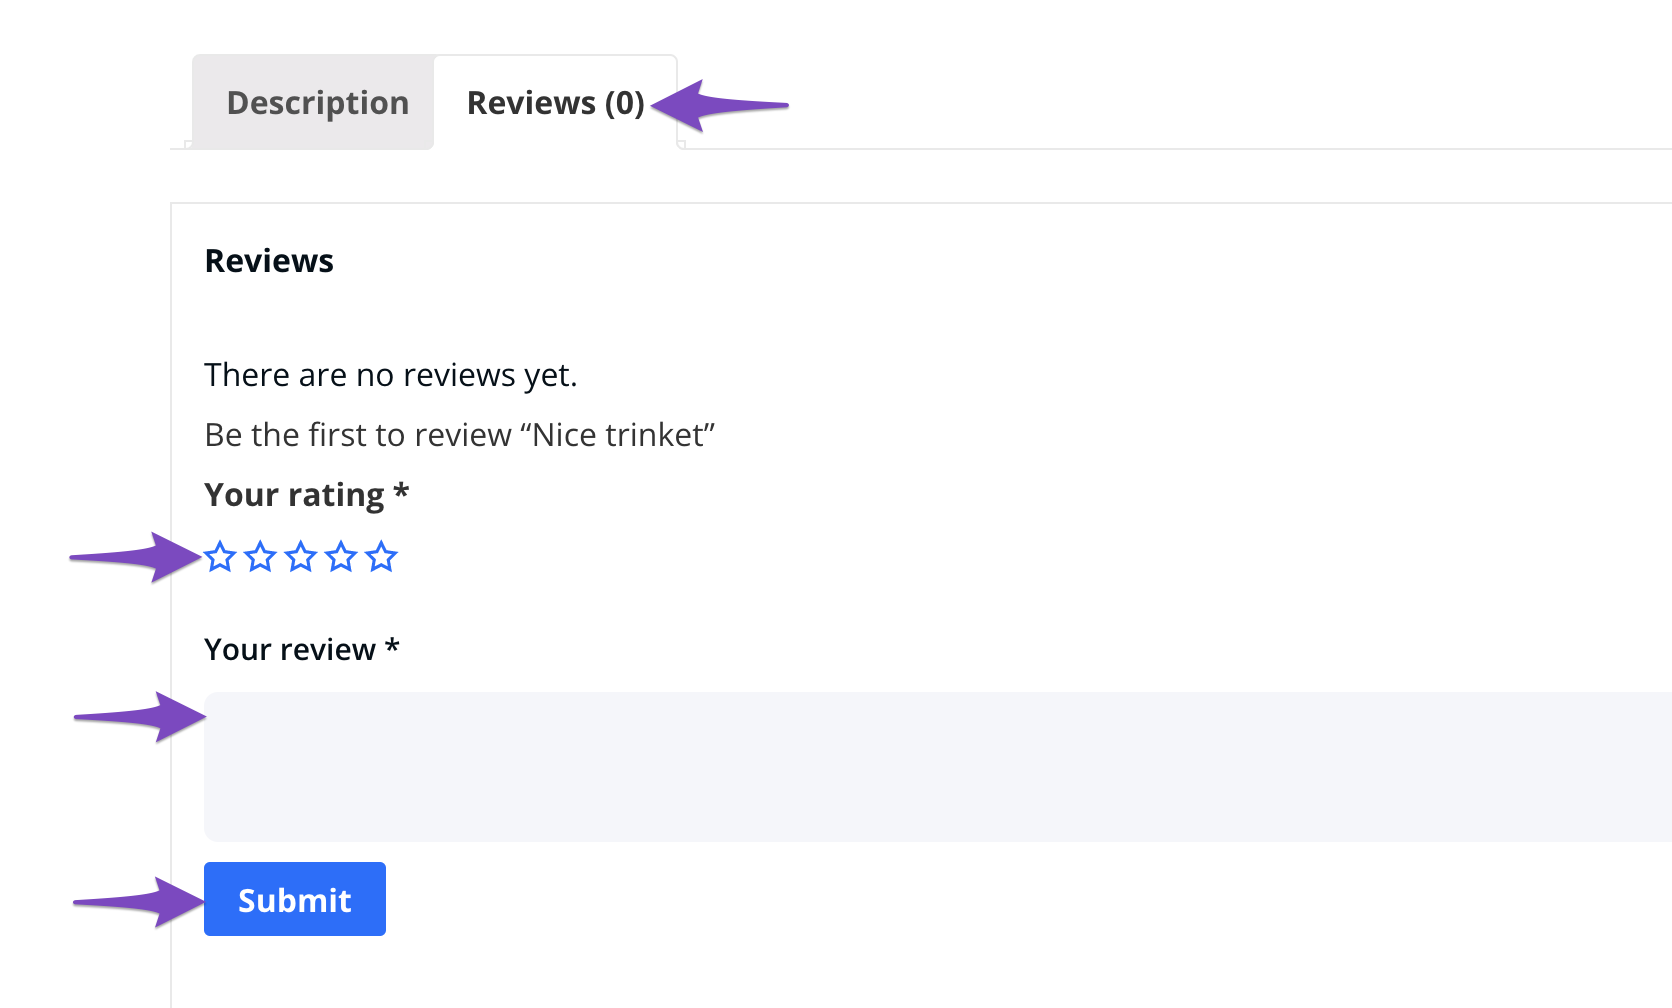
2.20 Reviews
Rank Math will automatically include the individual reviews left by the customers. For each approved review, the Schema will include,
- ID: Link to the review comment
- Description: Review left by the customers
- Date Published: Date at which the customer has left the review
- Review Rating → Rating Value: The rating left by the customer for the product
- Review Rating → Best Rating: Rank Math sets it to a default value of 5
- Review Rating → Worst Rating: Rank Math sets it to default value of 1
- Author Name: Name of the customer who has left the review
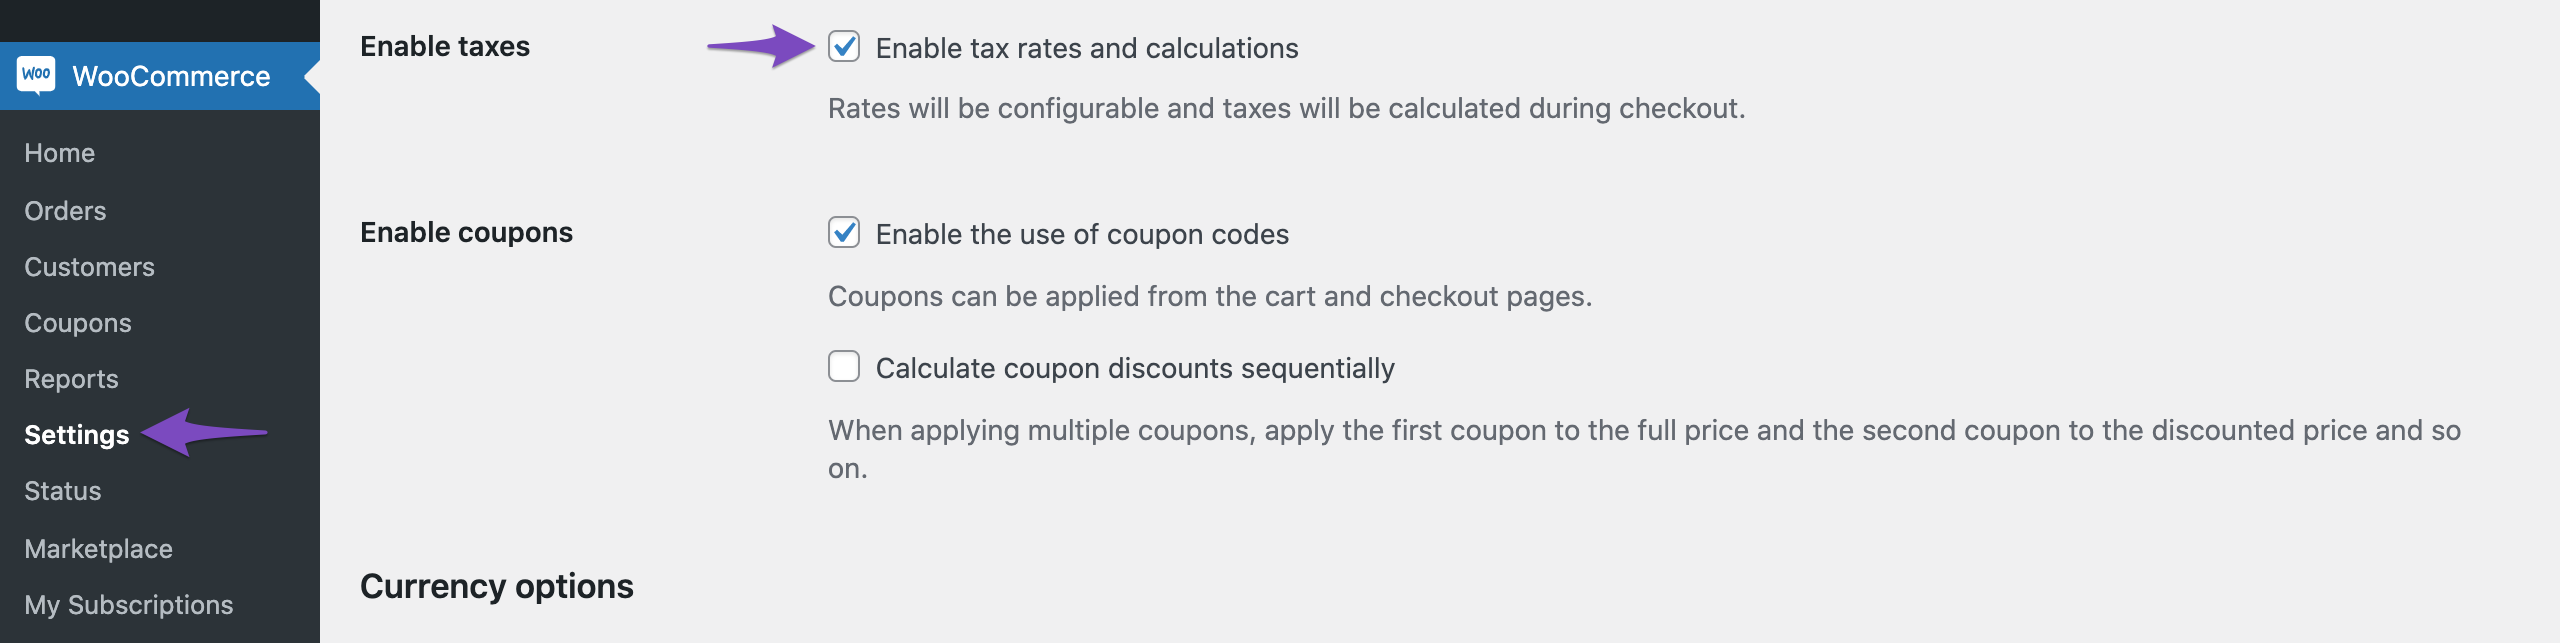
2.21 Value Added Tax (VAT) Included
Is your product price inclusive or exclusive of VAT? This can be configured as you navigate to WooCommerce → Settings → General. On this page, under the General Options, you can choose to Enable Tax rates and Calculations option.
Now you can configure the Tax options in your WooCommerce store with this detailed guide.
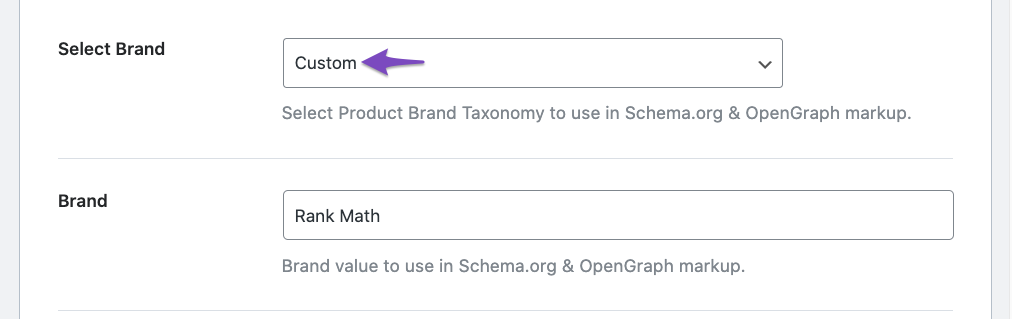
2.22 Brand
You can choose to include the Brand for your products under Rank Math SEO → General Settings → WooCommerce. In the Select Brand option here, you can choose to use a product taxonomy for adding the Brand to your Product Schema.
Rank Math PRO users will have the option to add Custom Brand value here. When the Custom option is selected, users will see an option to add the custom Brand name below.
That’s it! Then, simply update the page as you normally would after making a change or click Publish if this is a newly created page. You can then check your Schema with the help of Google’s Rich Results Testing Tool.
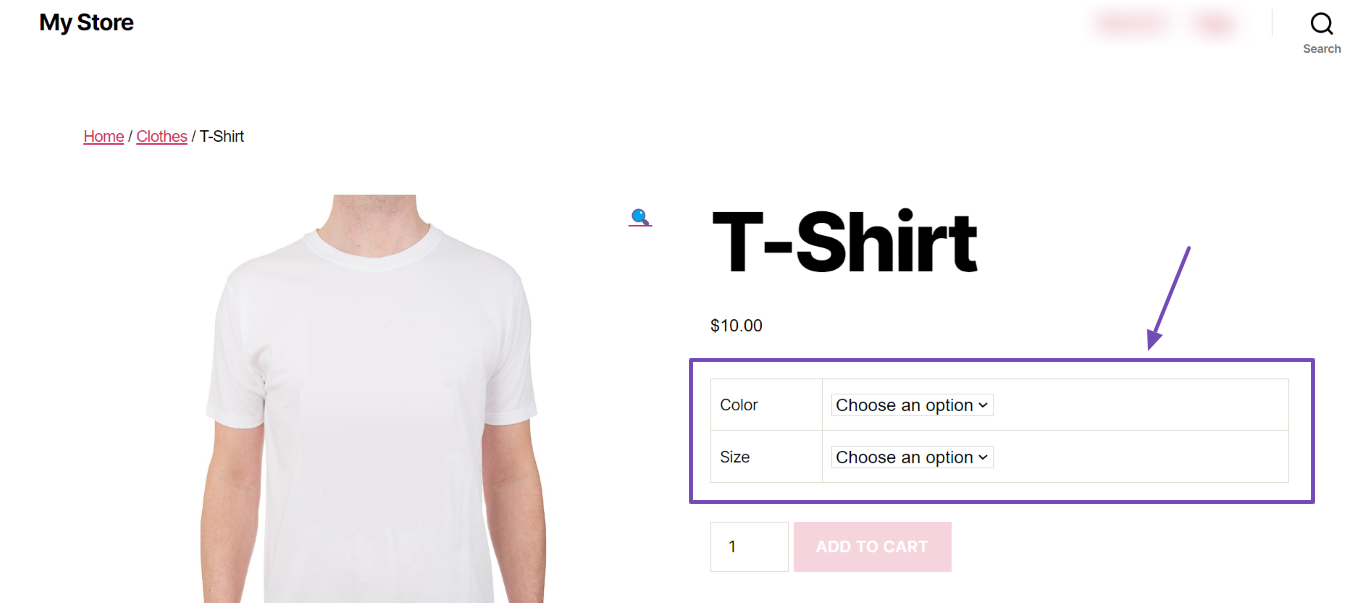
2.23 Variations PRO
If your product is available in multiple variations, for example, if you sell a t-shirt available in different colors and sizes, you can create a dropdown menu to allow your customers choose the colors and sizes they want.
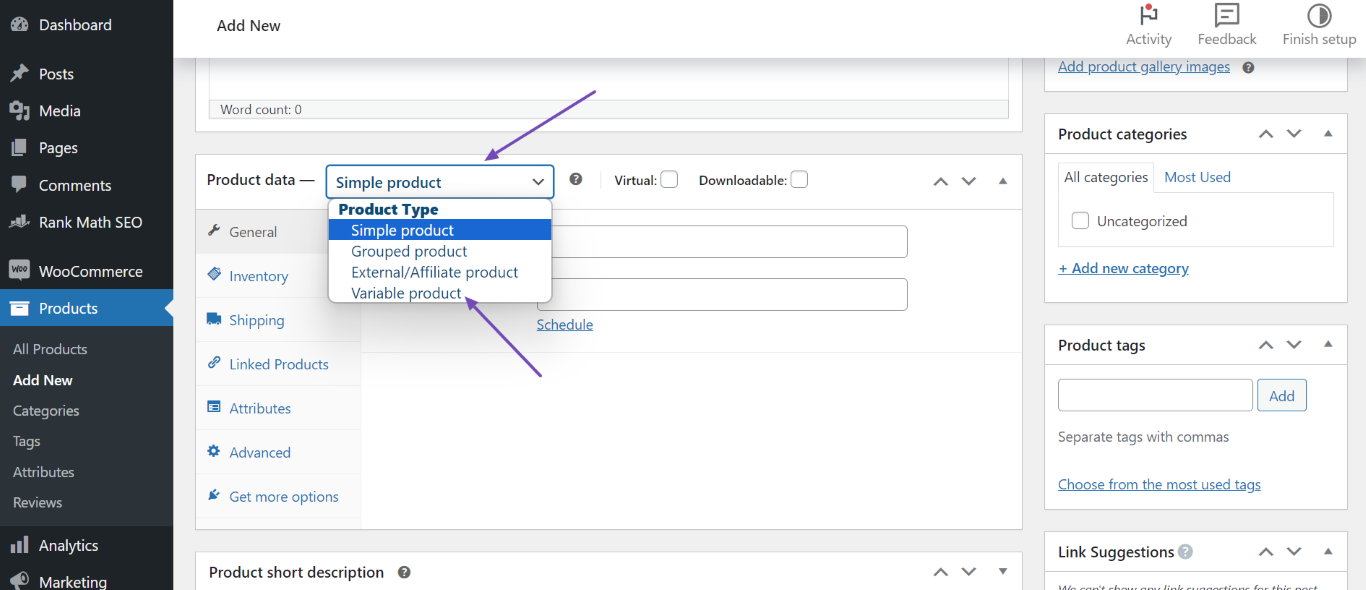
To get started, head to the Product data metabox and click the Variable product dropdown, as shown below.
Next, click Variations.

Note: If you haven’t previously created attributes for your product, you will be required to create them to proceed.
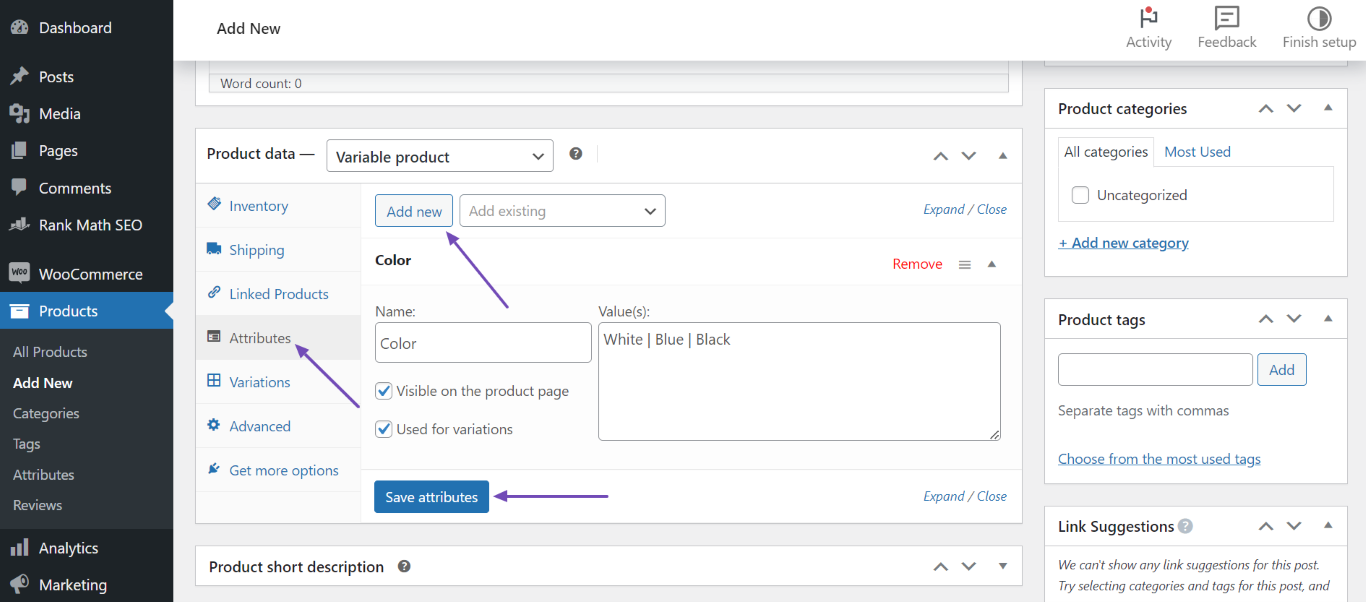
To create your attributes, click the Attributes tab and enter the details of your attribute into the Name and Value(s) fields. You can create multiple attributes by clicking Add new. Once done, click Save attributes.
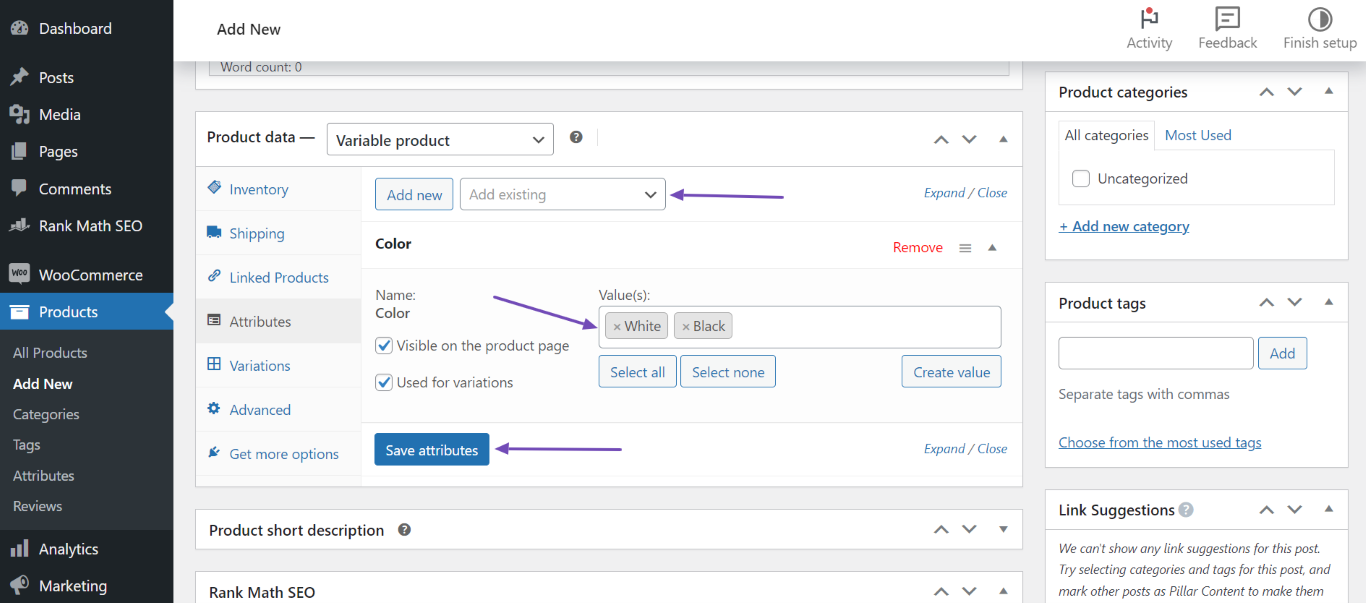
Optionally, if you prefer using your existing attributes, click the Add existing dropdown to select the existing attribute. Once done, click the Value(s) dropdown and select the values to include in the attribute. Then, click Save attributes, as shown below.
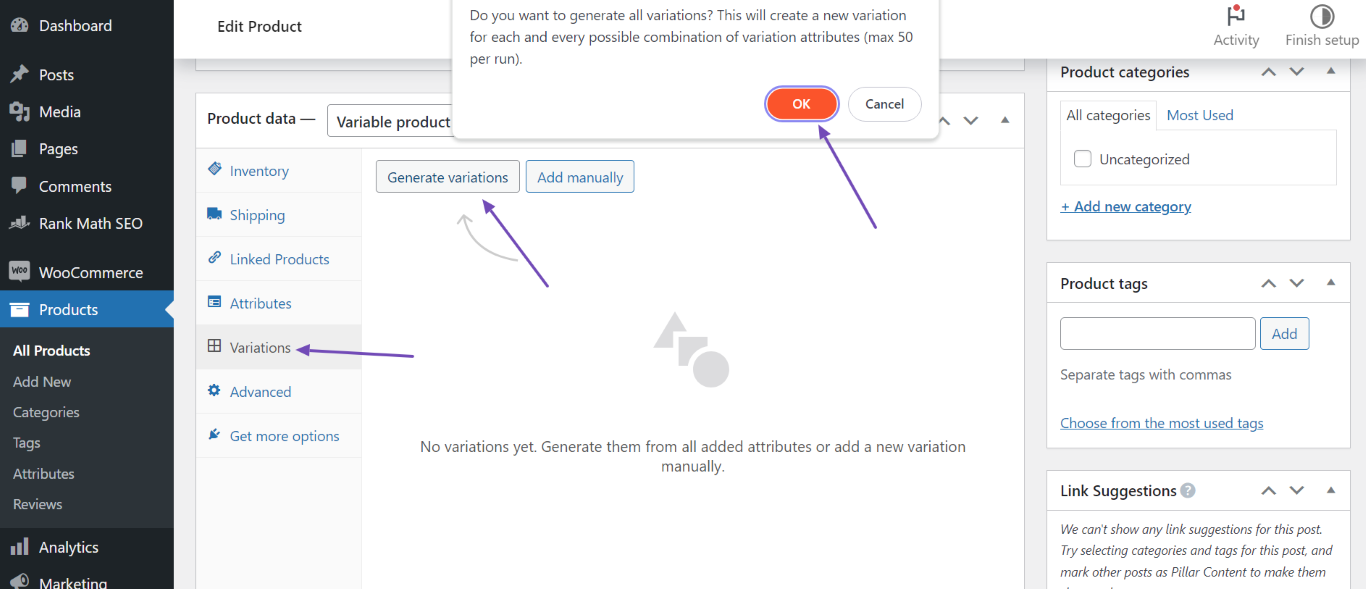
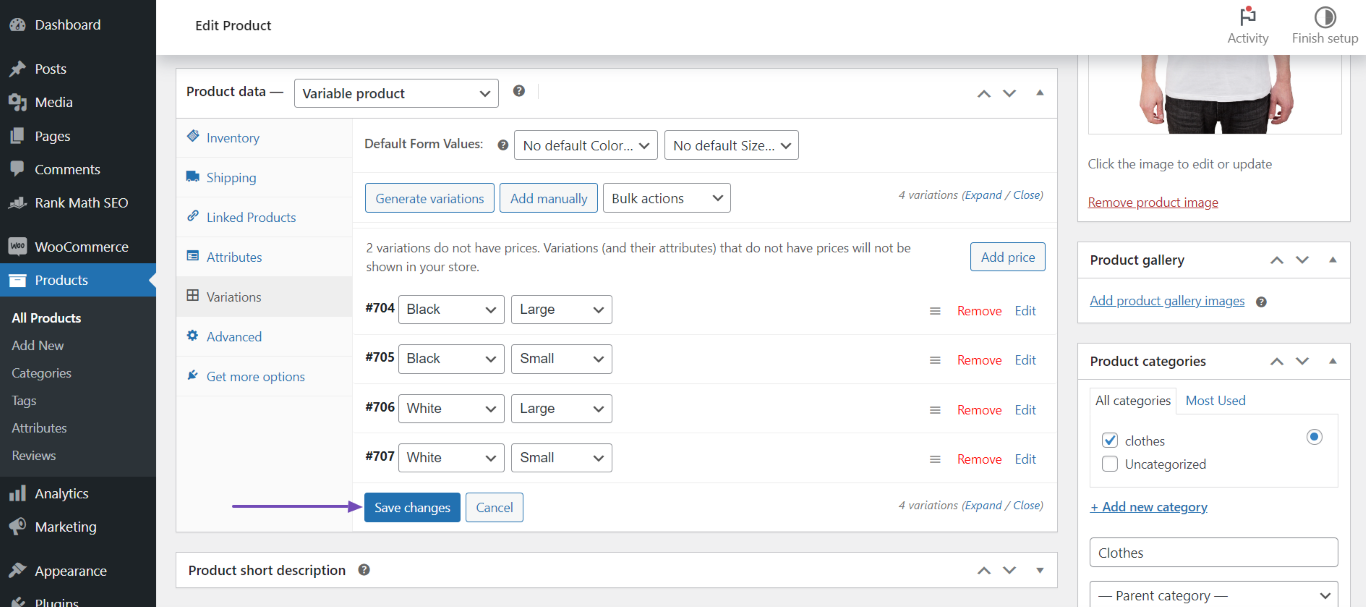
After creating or selecting your attributes, return to Variations and click Generate variations. Then click OK to create your variables.
Now, click Edit and fill in the required fields. Make sure to fill in the Regular price ($) field.
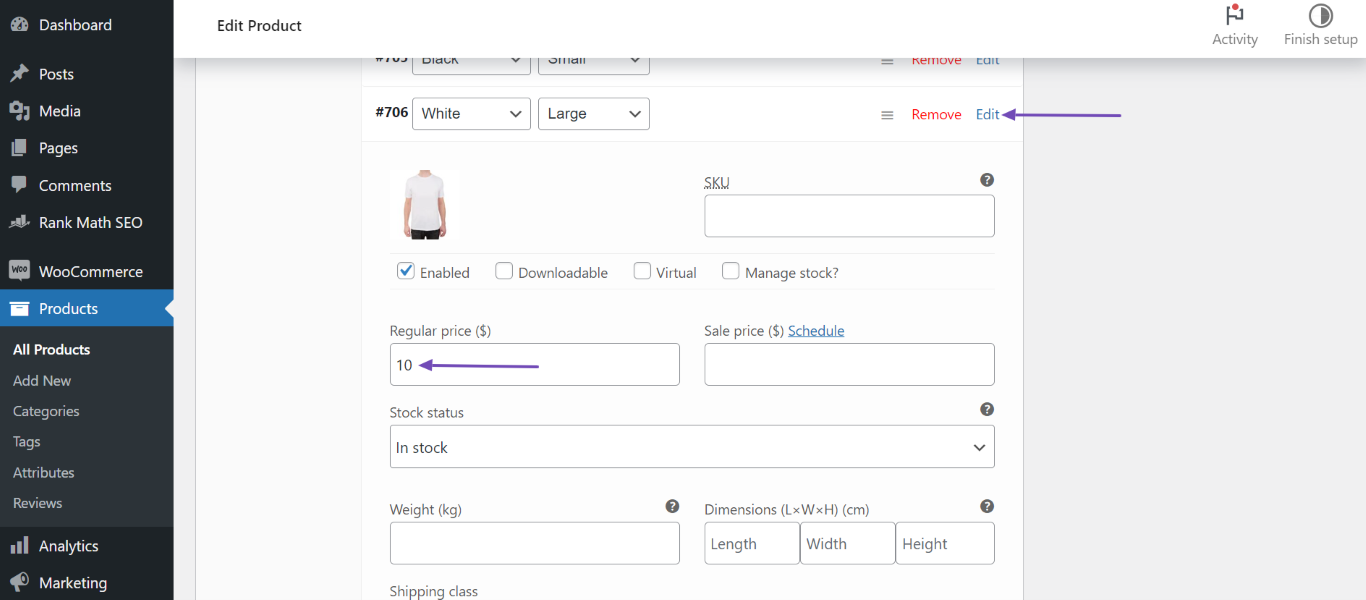
Once done, scroll down and click Save changes. You can then publish or update the product page.
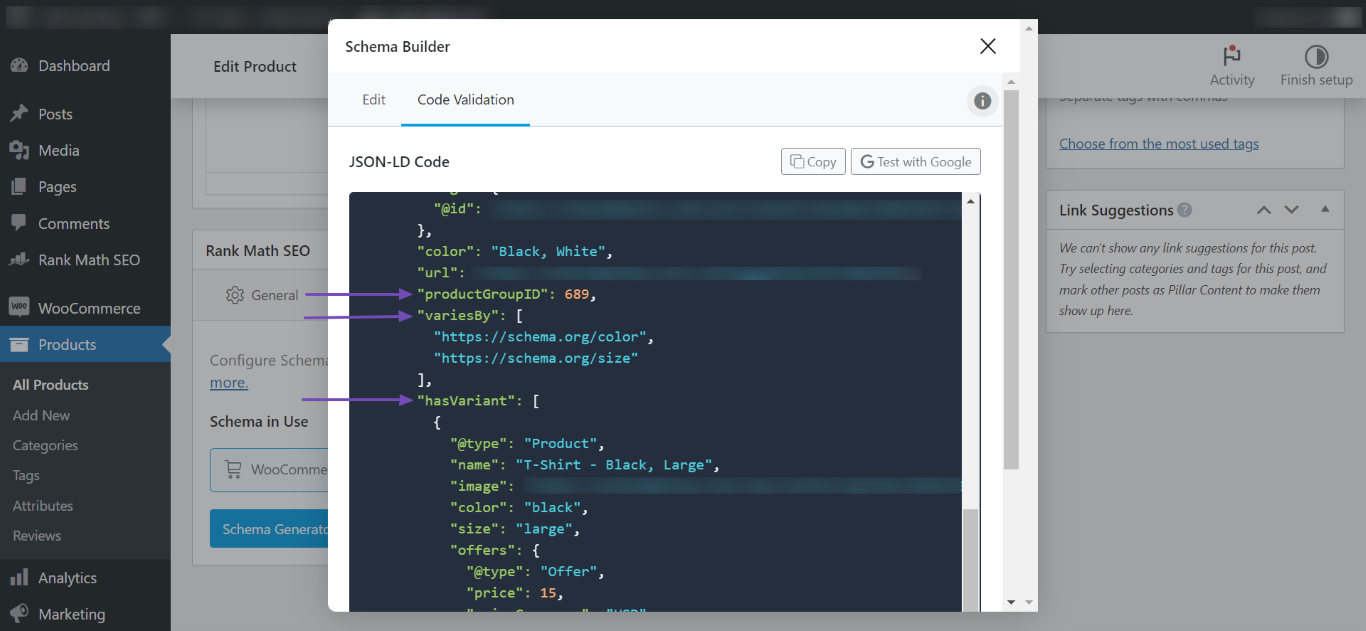
After creating your variants, you can review your Schema Markup by heading to the Rank Math SEO metabox and clicking Schema, as shown below.
Next, navigate to the WooCommerce Product Schema and click the View icon.
Now, click Ctrl+F on your keyboard and search for productgroup. You will be presented with the productGroupID, variesBy, and hasVariant properties of the Schema Markup, as shown below.
3 Open Graph Meta Tags for Products
Open Graph Meta Tags are small snippets of code that describe what the content of a web page is and allow you to have control over how the display should be when it is shared on social networking sites like Facebook and Twitter.
There are several different open graph meta tags that you can use to make your website or product easier to find. Each tag provides additional information about your site or product, helping to improve its visibility. Rank Math makes it easier for you by picking up these data based on what you’ve configured for WooCommerce Product Schema.
Some of Open Graph Tags for Product Schema include:
3.1 Product Price Amount
This particular meta tag product:price:amount displays the price at which the product is available for sale. This price is the same as what is configured for Offer Price in the Product Schema.
3.2 Product Price Currency
The meta tag product:price:currency shows the currency in which you are selling the product. By default, it will be set in $ (USD). If you want to change it, navigate to WooCommerce → Settings → General, scroll down and change it under Currency options.
3.3 Product Availability
The product:availability meta tag displays the stock status that you have configured previously in the Inventory tab of Product data. The available stock statuses include In stock, Out of stock, and On backorder.
3.4 Product Retailer Item ID PRO
The product:retailer_item_id is the legal entity-specific identification of the released product. For example, marvel_tshirt_001.
Rank Math uses the SKU that you’ve configured for the product, when you have the Manage Stock option selected.
3.5 Product Brand
The product:brand meta tag includes the brand name of the product you’re selling. Rank Math includes this brand name based on what you’ve configured under Rank Math SEO → General Settings → WooCommerce → Select Brand.
And, that’s it! We hope the tutorial helped you configure your product page with WooCommerce Product Schema. If you’ve absolutely any questions, please feel free to reach our support team directly from here, and we’re always here to help.