Search engines like Google continuously work to ensure their search results provide users with the most accurate and relevant information.
To further enhance the user experience, they are now actively seeking to feature authentic content created by humans, complete with transparent and clear creators’ profiles (whether people or organizations).
To facilitate this, Google encourages website owners to implement the ProfilePage markup on their profile or “about me” pages. But what exactly is this markup, and why is it so important?
In this knowledgebase article, we’ll discuss the ProfilePage markup and how to implement it on your WordPress website.
Table Of Contents
1 What is a Website Profile Page?
A Profile Page is a page on a website that provides information about a user or member of the site. It’s a dedicated webpage that acts as a hub for information about you, a group, or even an organization.
It typically includes details such as:
- Core Information: This could be your name, location, and contact details (depending on privacy settings).
- About Me: A short bio or description that lets people know your interests, skills, or background.
- Visual Representation: A photo or avatar that helps people recognize you.
- Additional Details: Depending on the platform, you might find sections for interests, achievements, links to your work, or even multimedia content.
Profile pages are commonly found on social media platforms, personal or news websites, Q&A platforms, online forums, and other online communities.
2 What is Profile Page Schema Markup?
ProfilePage Schema markup is a special code you add to your website’s profile page to help search engines better understand the information about you or your organization. It is usually in JSON-LD or Microdata formats.
The ProfilePage Schema markup includes organized, structured data on your profile page, such as your name, bio, contact details, social media links, and even follower count.
This markup uses a specific language that search engines understand. It makes it easier for them to recognize you as the content creator or an expert in your field.
As we continue this guide, you’ll learn more about the common structured data used in the ProfilePage Schema markup.
3 How to Add Profile Page Schema Markup in WordPress
To implement Profile Page Schema markup on your WordPress website, follow these steps:
3.1 Set Up Your Profile Page
First, you’ll need to ensure your WordPress profile page has all the necessary details and is properly set up.
So, navigate to Users → Profile in your WordPress dashboard. Here, you’ll find options to begin setting up your profile. Focus on the ‘Name’ section.
In the “Name” section, ensure you provide your real first and last name. You can also use your social media handle as your “Nickname” option if available.
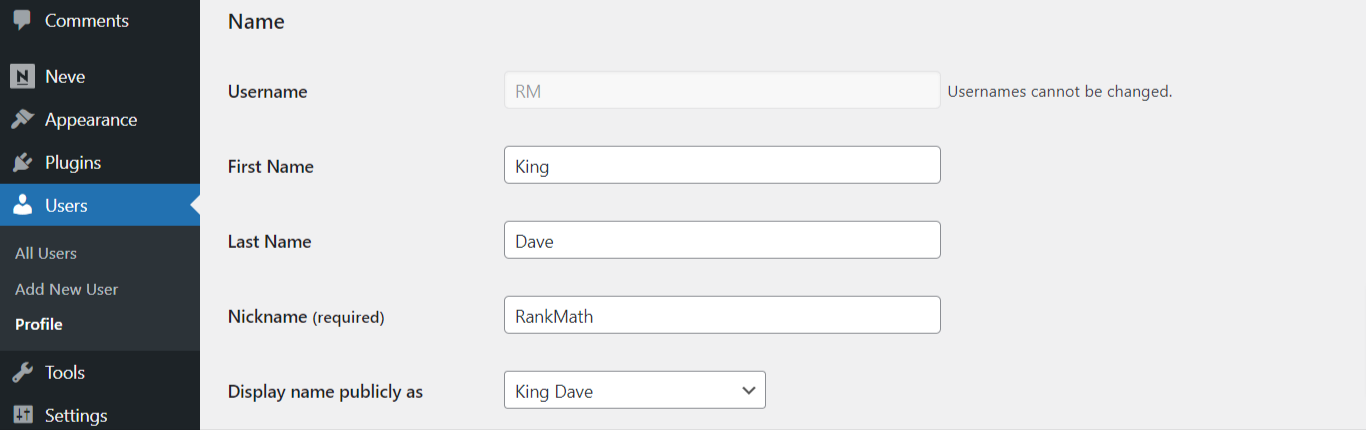
Moving on to the “Contact Info” and “About Yourself” sections, enter your accurate email address, website URL, and a detailed biography.
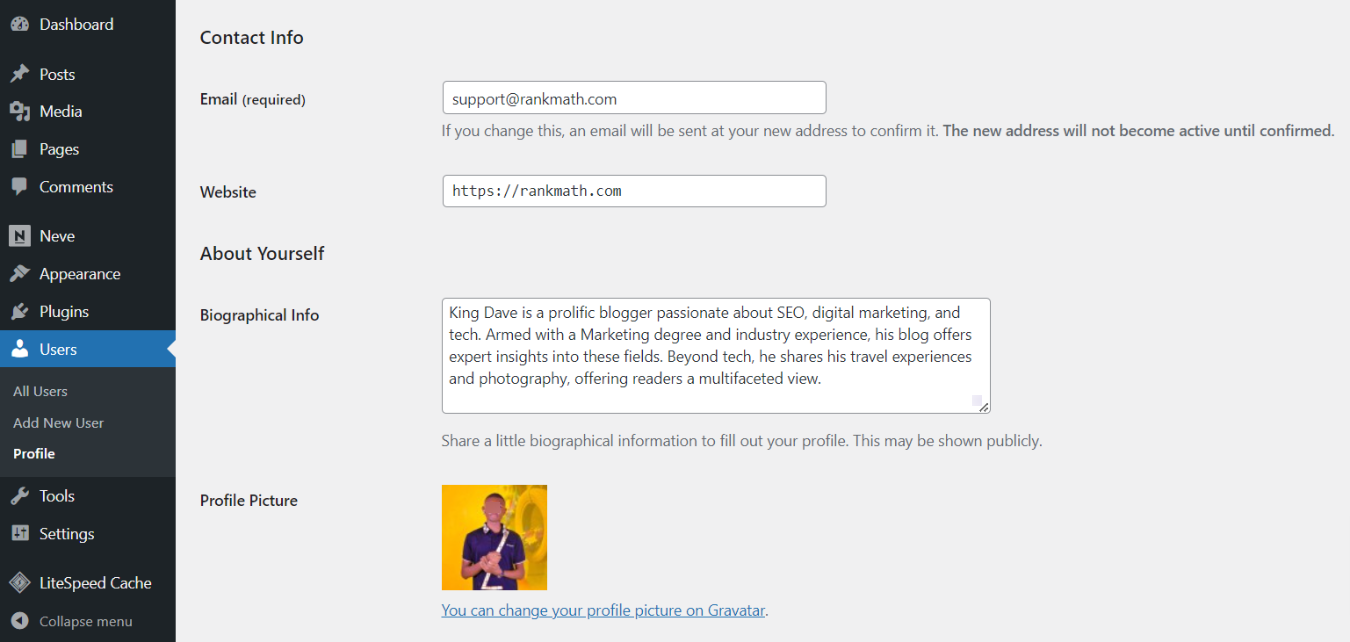
Google recommends using your real-life image rather than the default icon or placeholder images for your profile picture.
After configuring these details, scroll to the bottom of the page and click Update Profile to save changes.

If your WordPress site involves multiple contributors, encourage them to complete their profiles accordingly.
4.2 Configure ProfilePage Schema Markup Details
Once you have finished setting up your profile page, you will want to ensure that everything is in place by setting up the Schema Markup.
To do this, navigate to Rank Math SEO → Titles & Meta. Here, you’ll need to focus on three key features: Local SEO, Social Meta, and Authors.

These features allow you to input relevant details about yourself as the website owner, which can be incorporated into the website’s ProfilePage Schema.
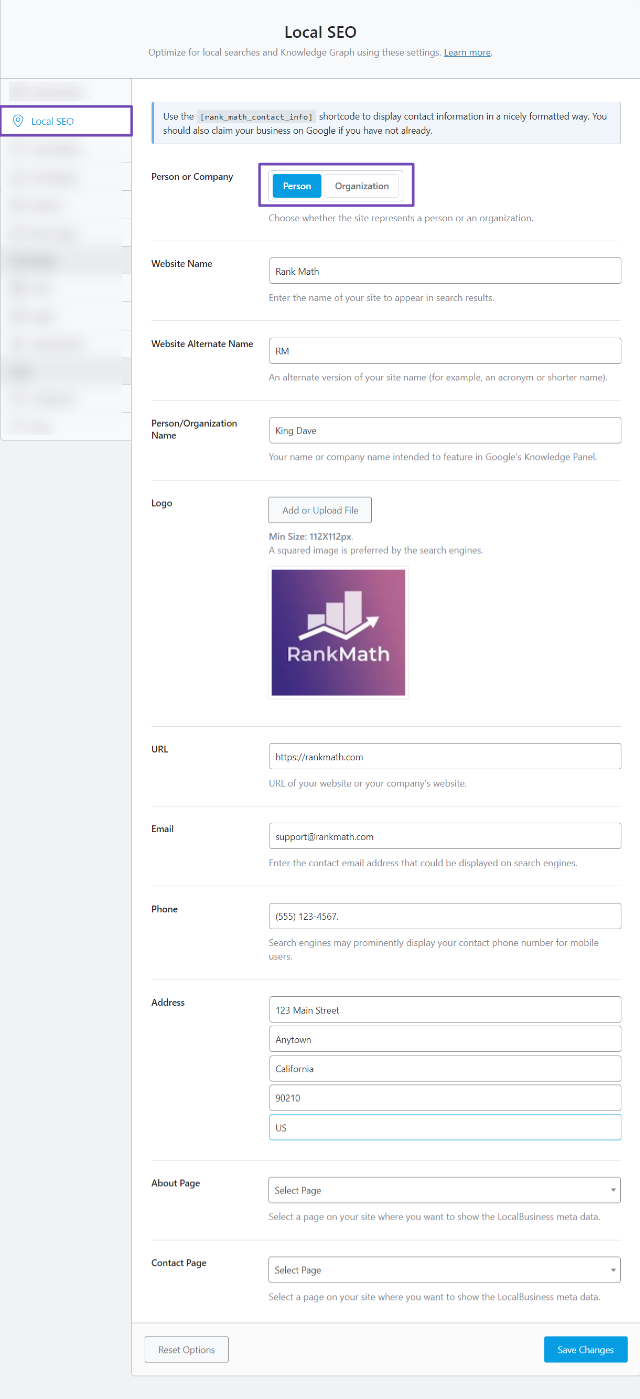
Configure Local SEO Settings
In the ‘Local SEO’ tab, select whether you’re a Person or Organization and provide your details as prompted. Before configuring this section, make sure to enable the Local SEO module. For more details, refer to our detailed guide on how the Local SEO module works and how to set it up properly.
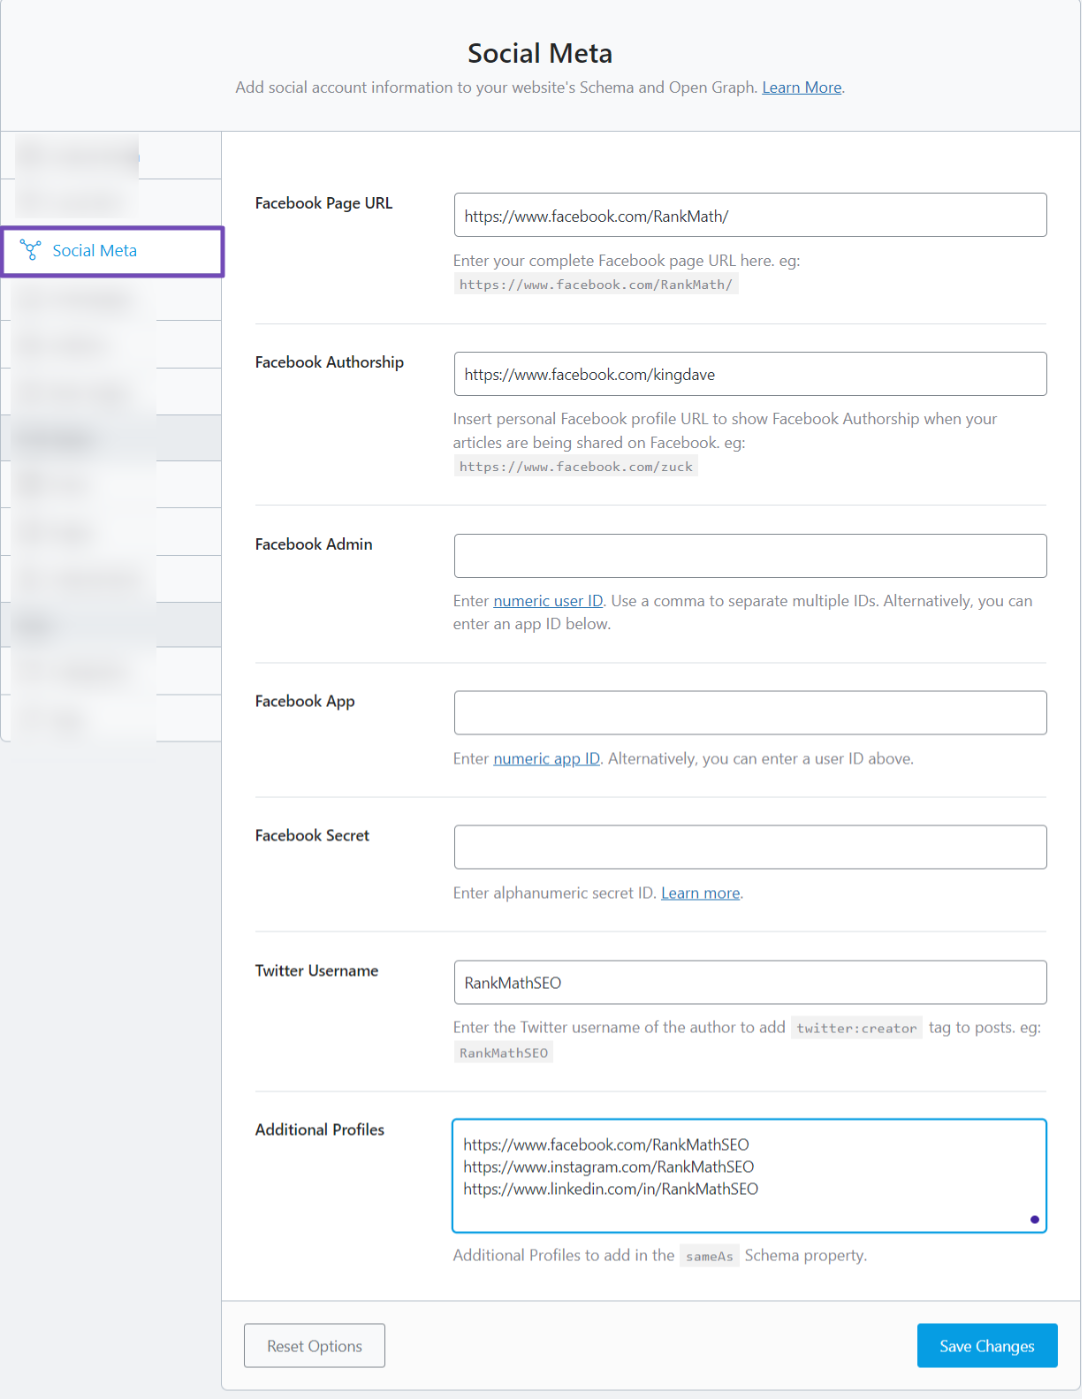
Configure Social Meta Settings
Next, move to the ‘Social Meta’ tab and enter your social media page URLs and any additional profile links you want to include in the ‘Additional Profiles’ field, as shown below. For more details, refer to our guide on setting up the Social Meta Settings.
Customize Author Settings
Finally, head to the ‘Authors’ tab. Here, you can customize the appearance of your profile in search results. Remember to change the ‘Author Robots Meta’ setting to “Index” so your profile page can be crawled and indexed.
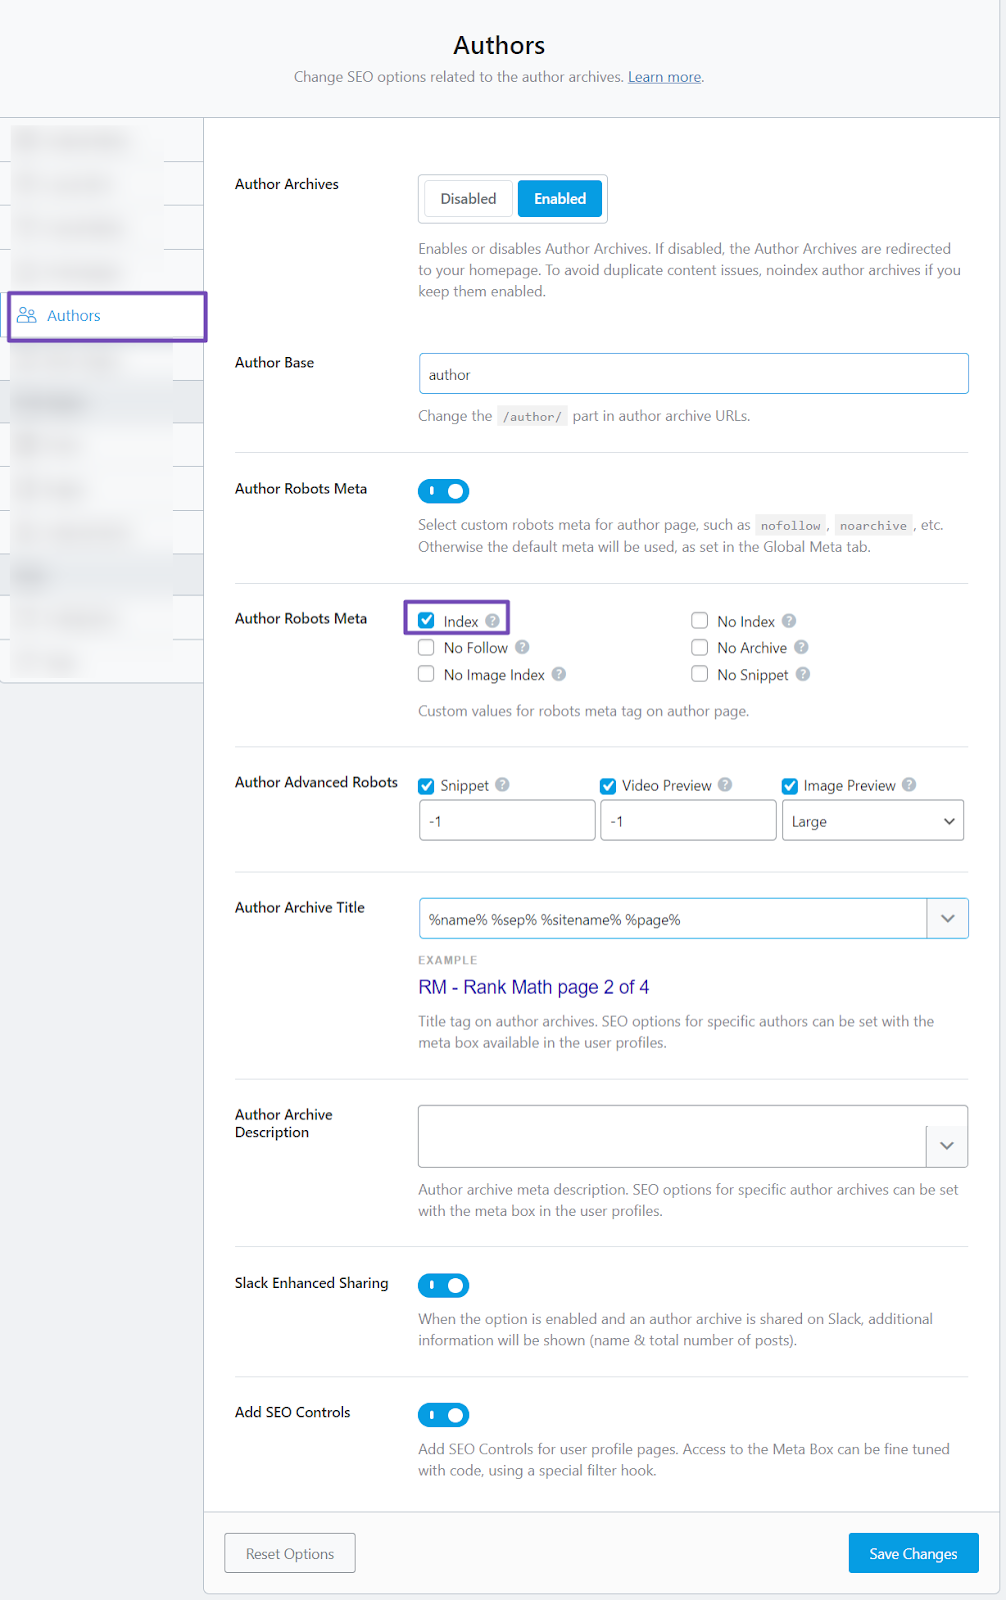
Please ensure you click the Save Changes button below once you’re done with any of these configurations.
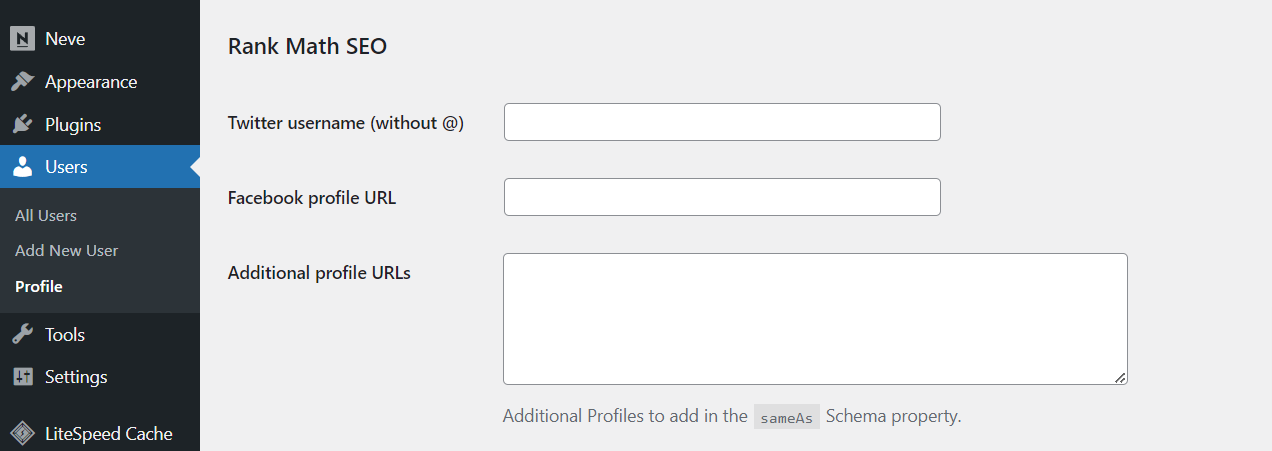
Alternatively, you can set up the Author feature directly from your user profile. Just scroll down to the Rank Math SEO section. Then, input the necessary details in the social media URLs and the SameAs Schema property.
Now, in the Rank Math meta box, navigate to the ‘Advanced’ tab and set the profile page to ‘Index’ in the ROBOTS META option.
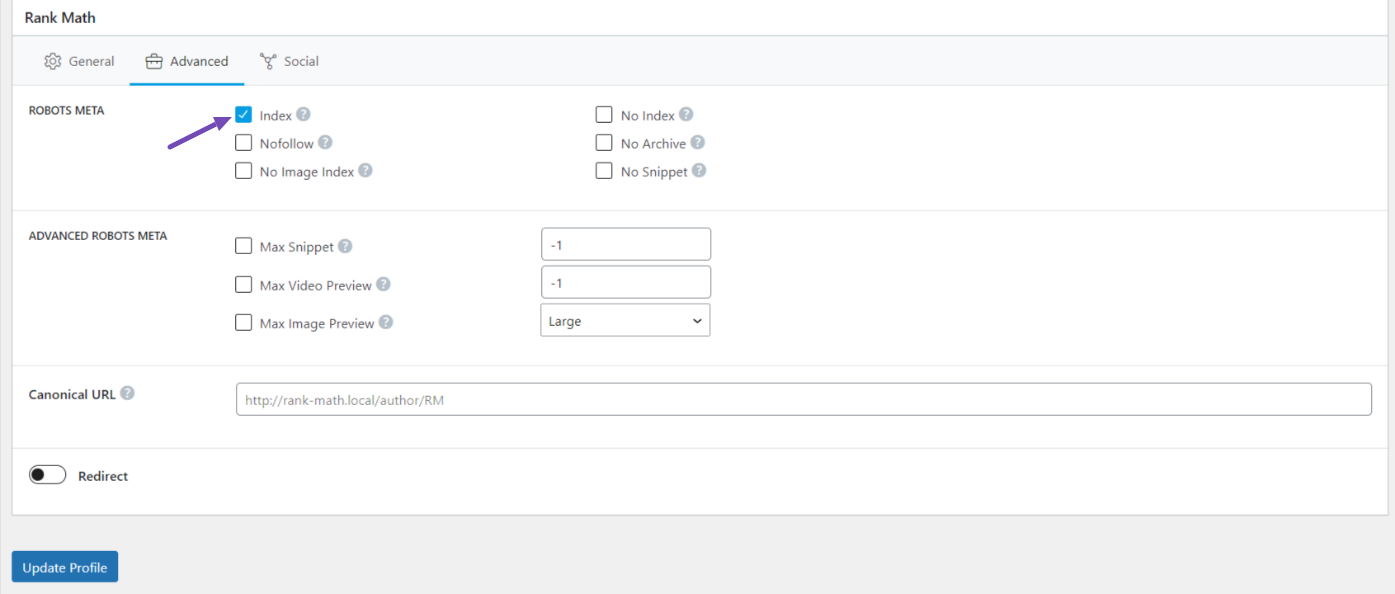
Then, configure other settings like title, URL slug, and meta description accurately. Remember to click the Update Profile button to save changes.
4.3 Verify Schema Markup Implementation
Once you have implemented the ProfilePage Schema markup, it’s important to verify that it has been implemented correctly. You can achieve this by using Google’s Rich Results Test tool.
Once you’re there, you will need to paste your profile page URL, and the test results will show the Schema data Google was able to detect. For more details, refer to our guide on how to use Google’s Rich Results Test tool.
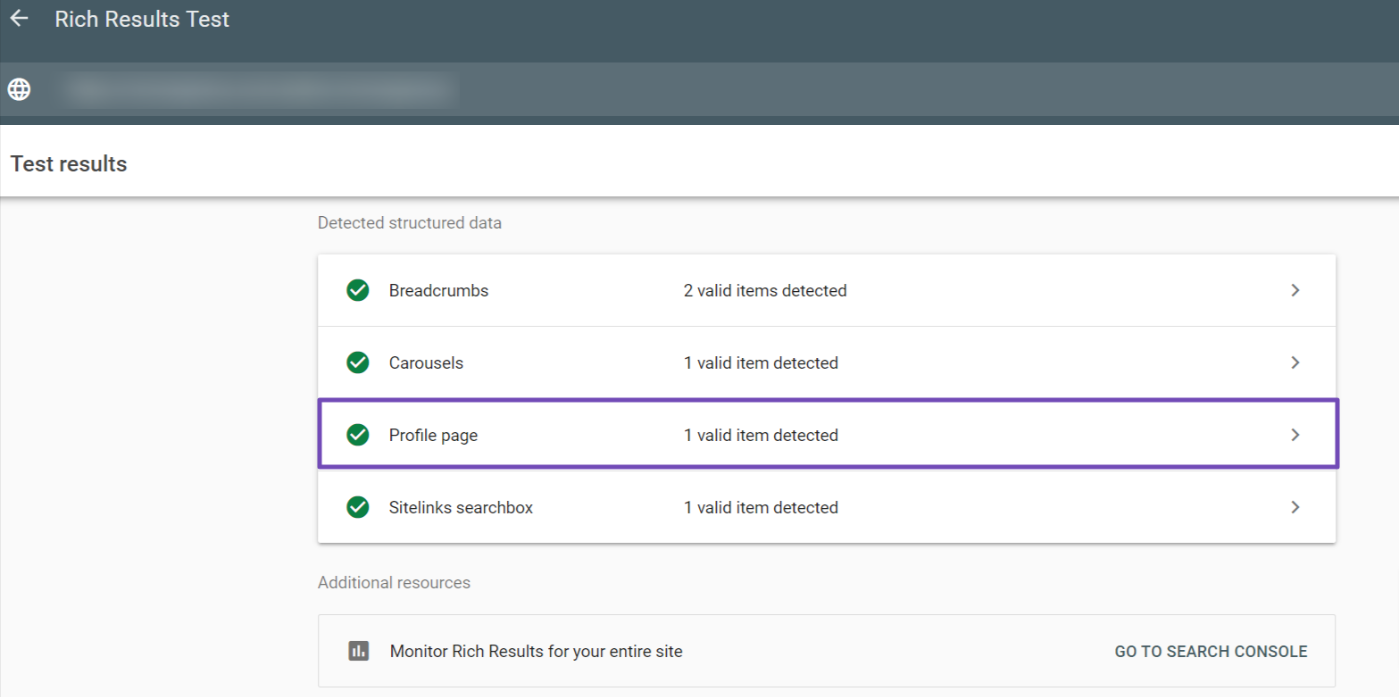
So, expand and review the test results for any errors or warnings from Google and make necessary adjustments.
Note: Implementing the Schema markup doesn’t guarantee your profile snippets will be displayed in search results, but it does make you eligible.
In the next section, we’ll share some tips to help you optimize your ProfilePage Schema and increase your chances of visibility.
5 Tips to Improve Your Profile Page Schema Implementation
Certainly, here are the tips for enhancing ProfilePage Schema implementation along with Google’s structured data requirements and recommendations:
5.1 Define Profile Page Use Cases
Profile pages serve specific purposes, primarily to highlight an individual or organizations associated with a website. Valid use cases include:
- User Profiles on Forums and Social Media
- Author Pages on News Sites
- “About Me” Pages on Blogs
- Employee Pages on Company Websites
Avoid using profile pages for inappropriate purposes, such as:
- The Main Home Page of a Store
- An Organization Review Site
These tips ensure the correct application of ProfilePage Schema and maintain eligibility for Google-rich results.
5.2 Incorporate Author Bios in Content
This is another essential tip that can help you. You should ensure each content on your website includes an author bio section. This allows Googlebot to crawl from the content to the profile page, where the ProfilePage Schema markup is implemented.
For example, in a blog post, include the author’s information either at the beginning, end, or both.
1. At the Beginning:
2. At the End:

Also, ensure that clicking on the author’s name directs users and Googlebot to the respective profile page where the Schema markup is implemented.
If your WordPress theme doesn’t support this feature, consider upgrading to a premium theme or creating a custom blog layout using a page builder.
5.3 Create High-Quality Content
Focus on crafting helpful, reliable, and user-centric content on your blog. Google prioritizes content that is informative and relevant in search results.
Also, familiarize yourself with Google’s search guidelines to understand content requirements better.
Implementing these best practices enhances your ProfilePage Schema and improves your website’s visibility and credibility in search results.
That’s it! If you have any further questions regarding ProfilePage Schema Markup implementation and Rank Math SEO, feel free to reach out to our support team. We’re available 24/7, 365 days a year.