Let’s have a look at how you can set up your Location Post Type in Rank Math. We’ve made it extremely easy to add multiple locations for businesses that serve multiple local areas – here’s how:
Note: The option to add multiple locations is available only in Rank Math PRO
Table of Contents
1 Configure Local SEO Settings
First, you need to go to Local SEO in the Rank Math dashboard.
You can put your company name and logo, URL, email address, address, and your business type from the various business types drop-down menu.
Try to be precise and fill in the details as you want your business to be displayed on google search results.
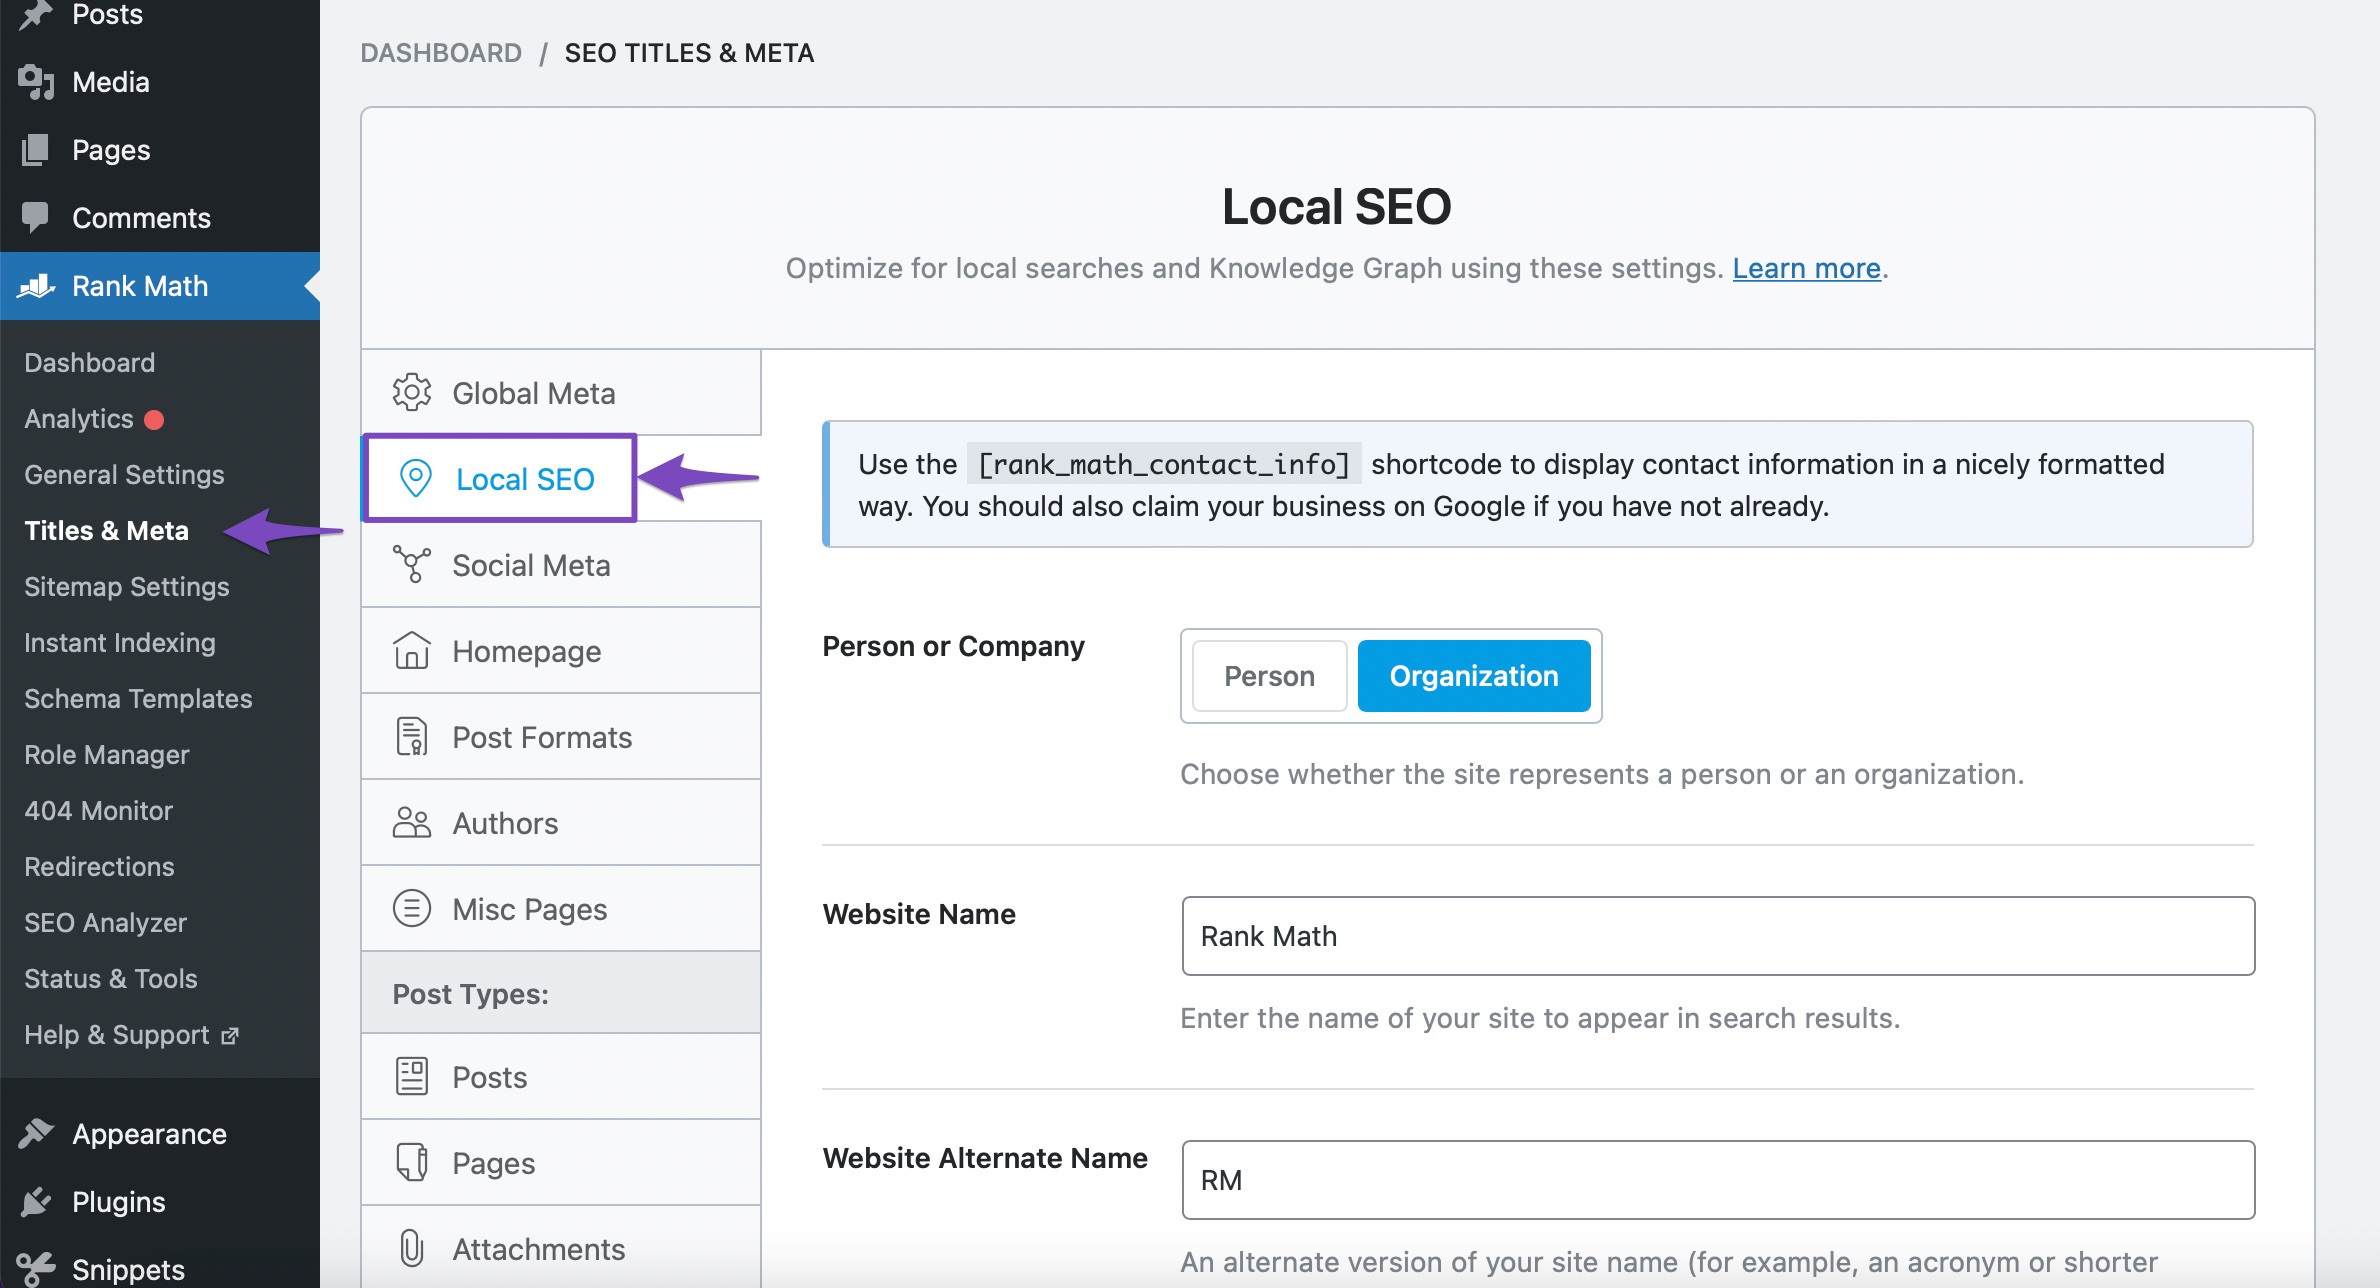
Enable the Use Multiple Locations and Save your changes.

2 Create Your New Location(s)
Once you enable the Use Multiple Locations, Rank Math will create a new custom post type called RM Locations, where you can add multiple locations of your business or organization.
The Location Post Type label and the Location Post Type Plural label is by default, RM Locations.

Then click on RM Locations in your dashboard.
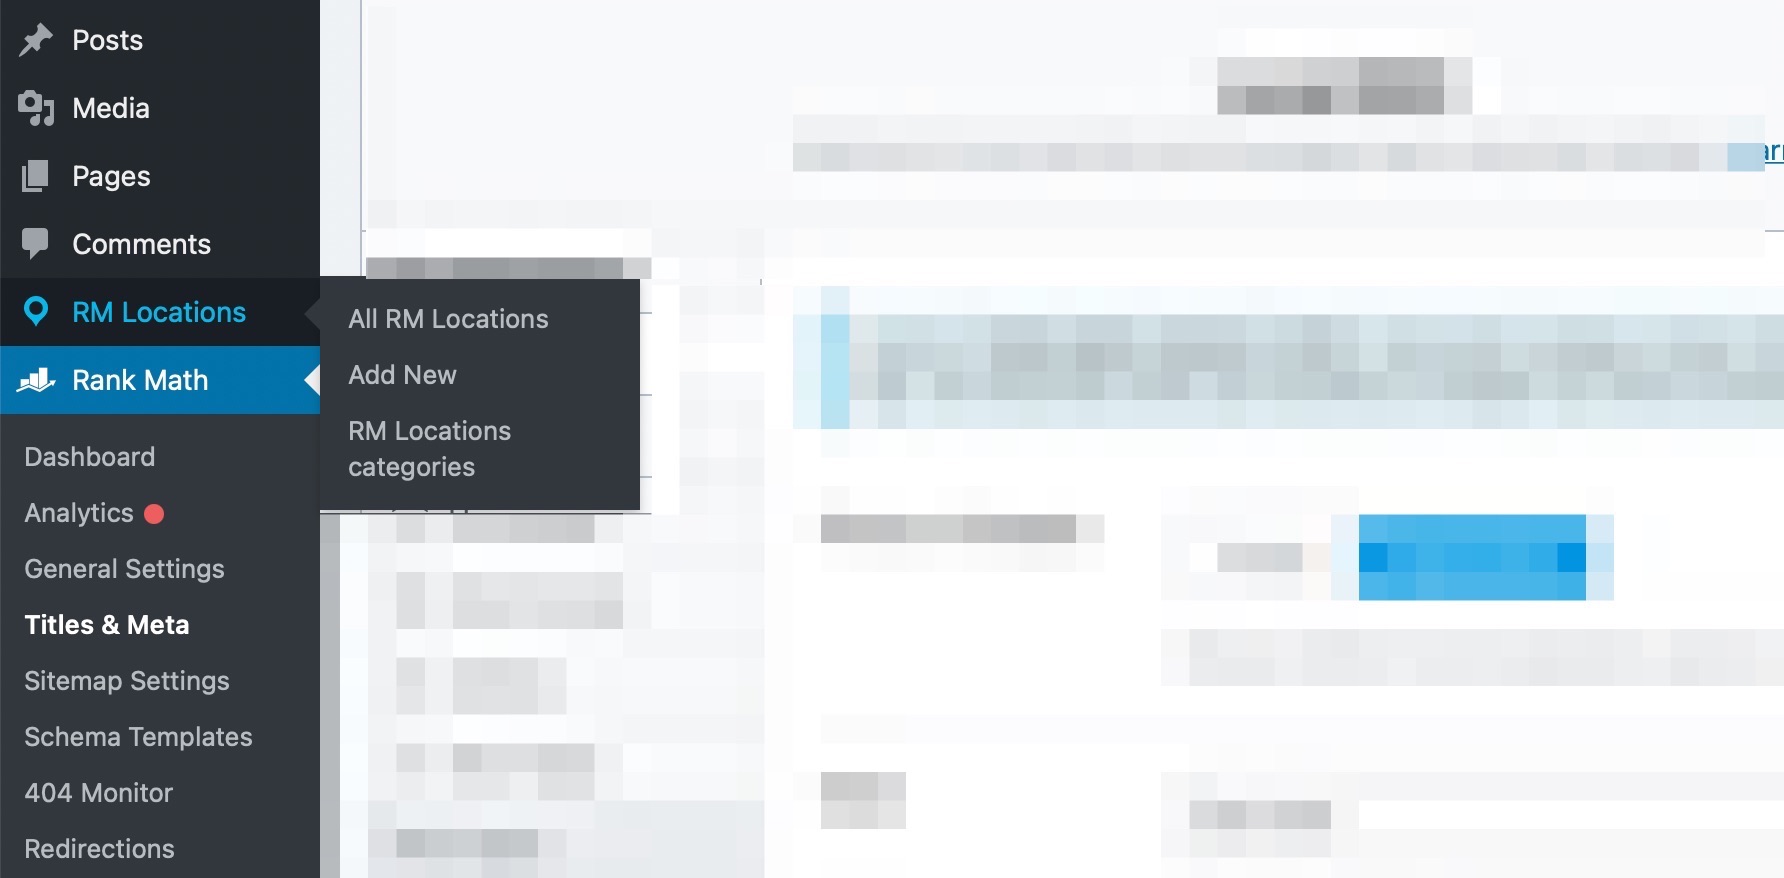
Once you are in the RM Location, you can add a location by clicking on Add New and name it as per your choice.

For example, I have named it New York Location. Then head over to New York Location and click on Edit.

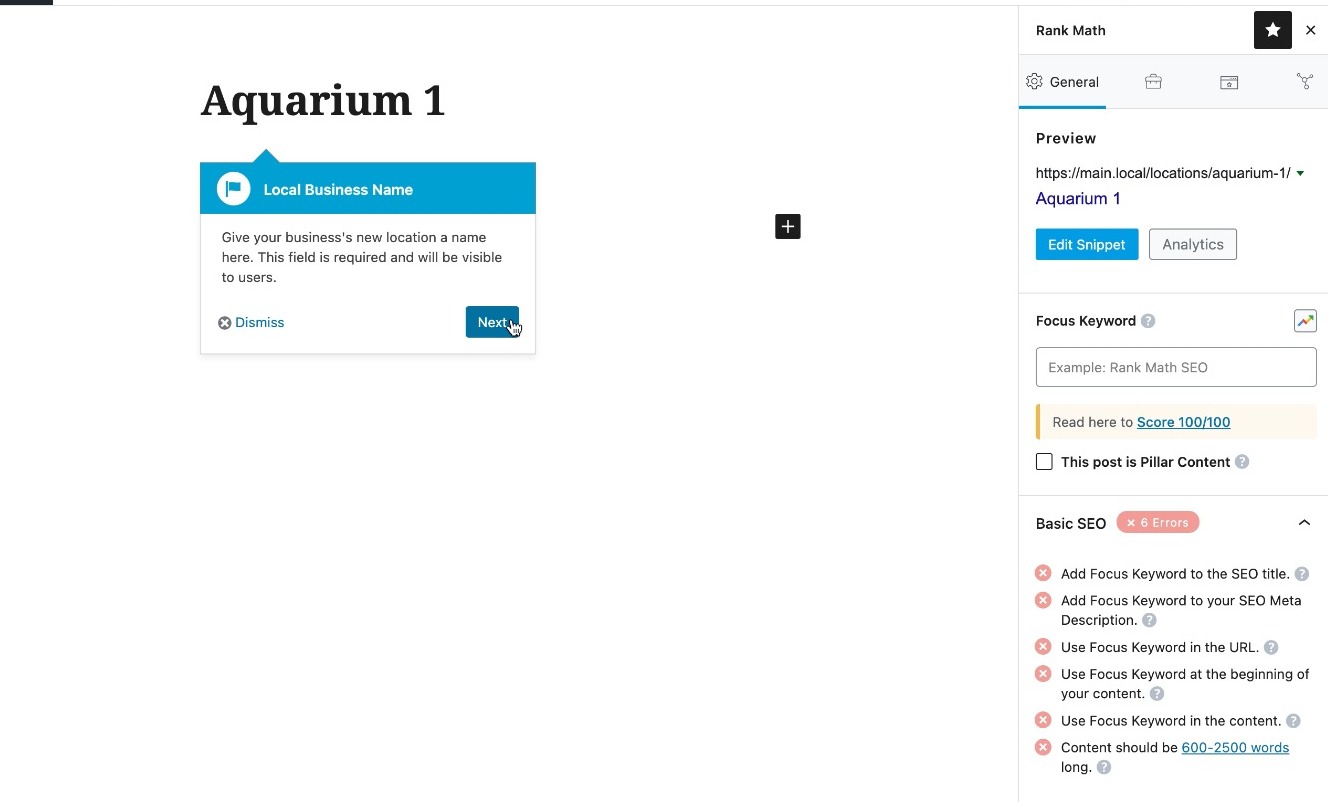
When you create the first Business Location in the RM Locations CPT, we’ll also guide you with the help of a small tutorial.
We inform you to add a Local Business Name as shown below:
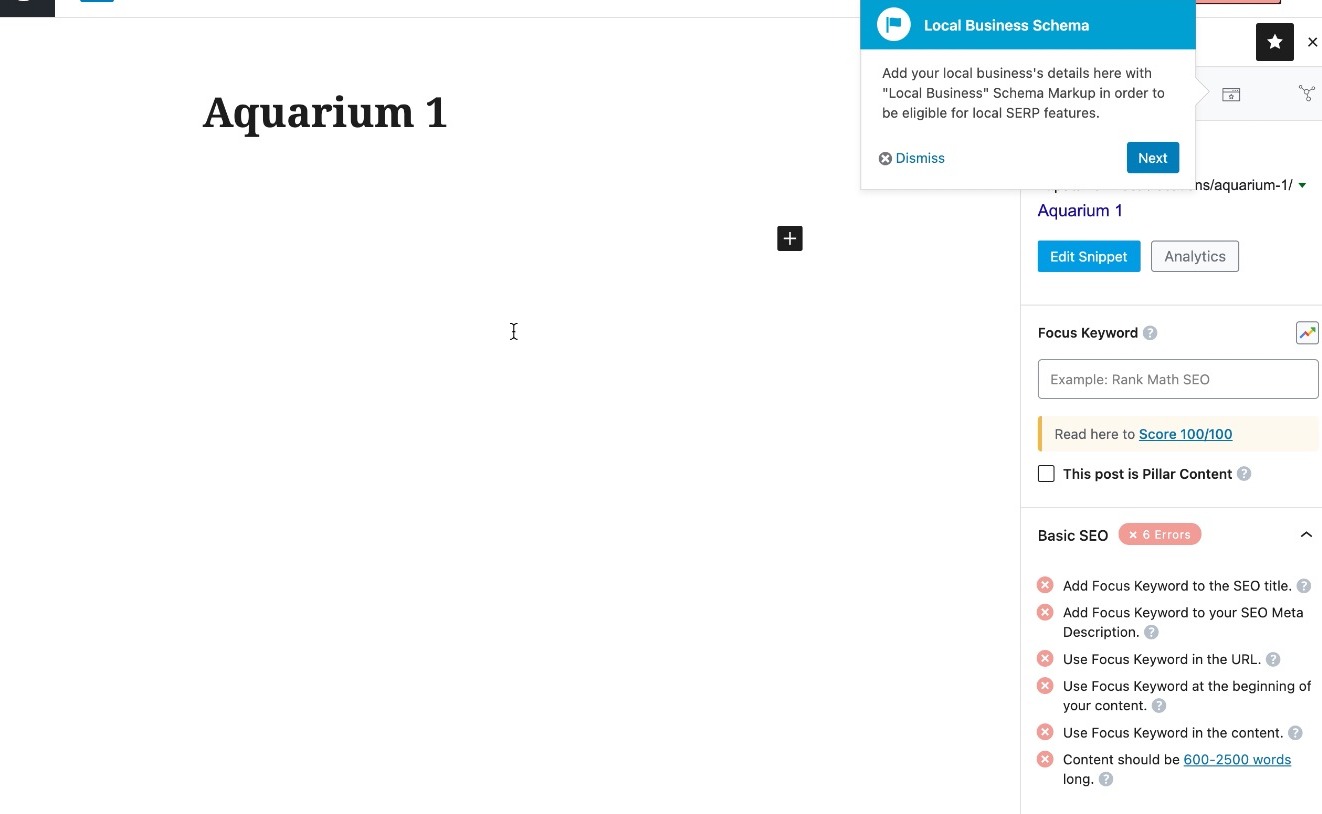
Once you click on next, we also inform you to add Local Business Schema as shown below:
Next, you’ll be advised to add Rank Math’s Local Business Block:
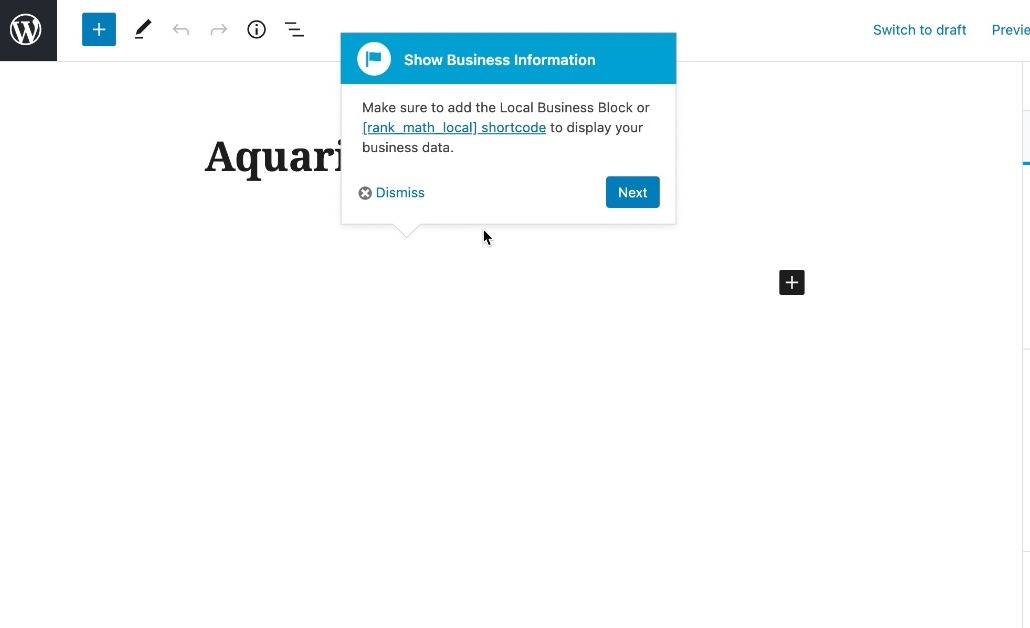
Note: You can learn more about Rank Math’s Local Business Block and all of its available options here.
Last but not least, once you have edited the changes, we remind you to publish your location. Our tutorial guides you through the steps, and we make sure that the entire process is made easy for you.
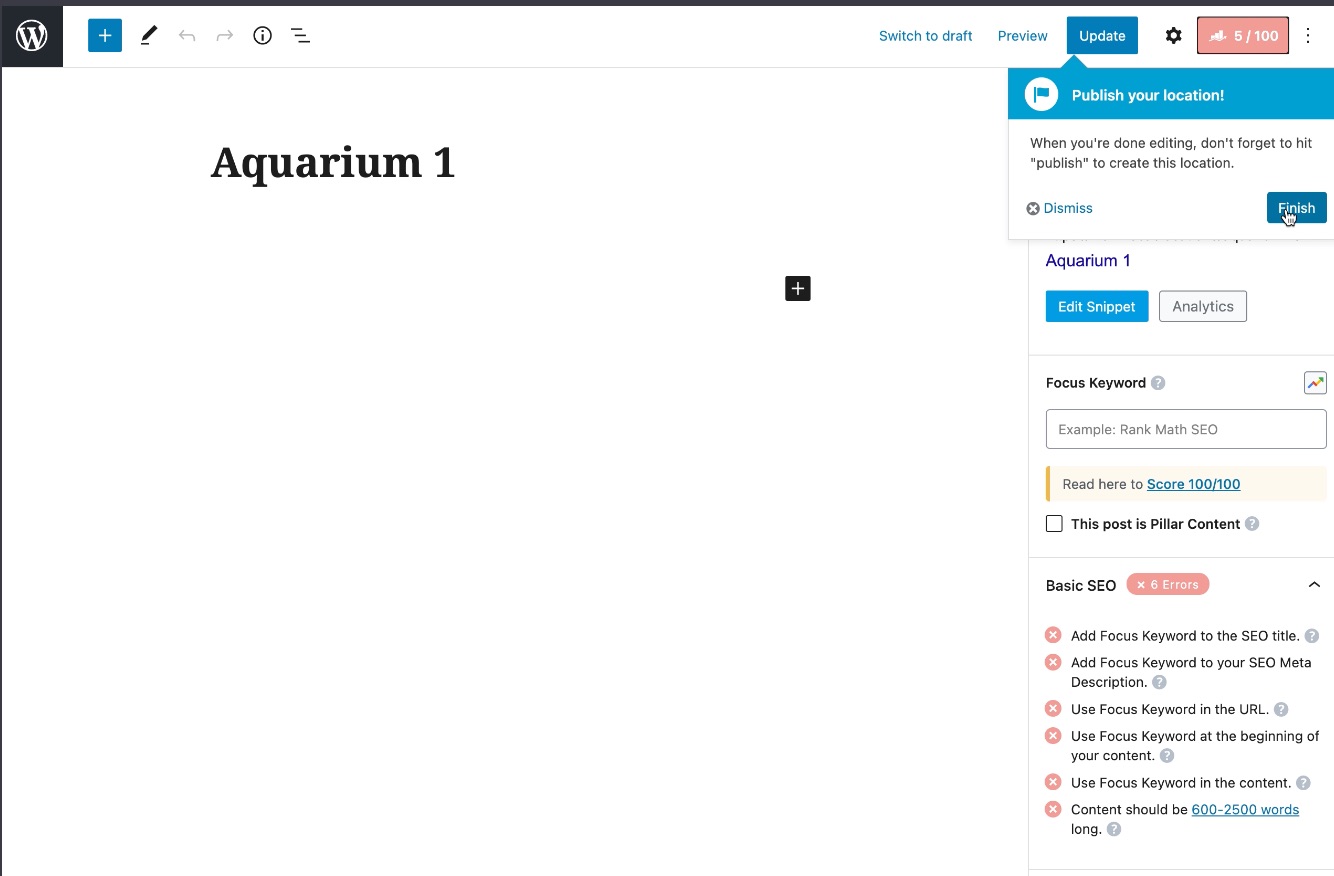
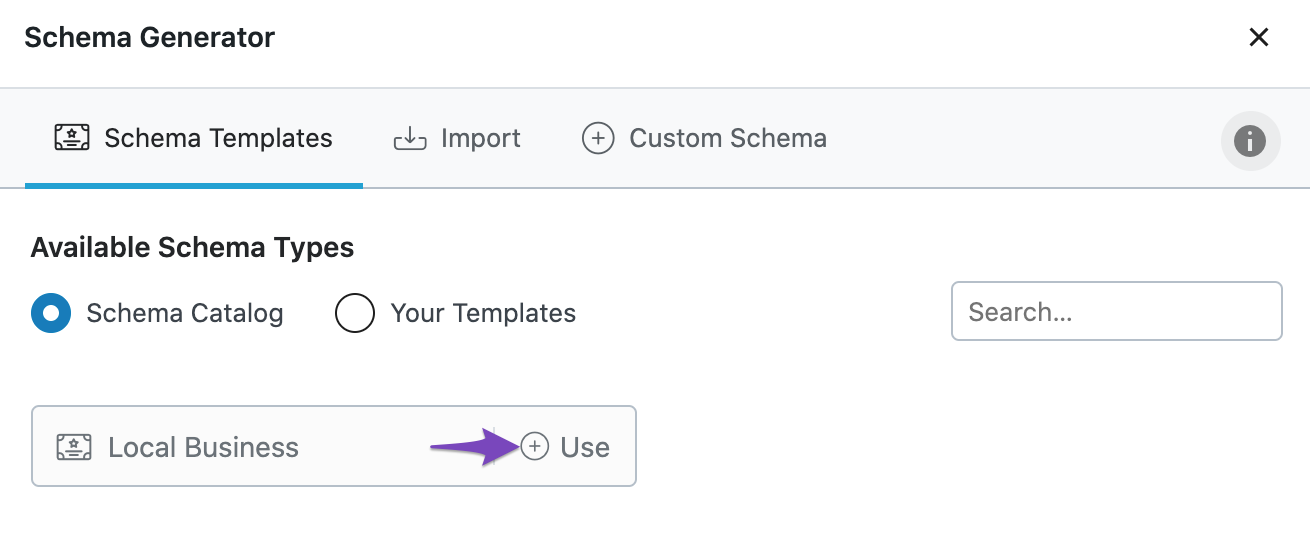
Now let’s go back to the editor and once you are in the editor, then in your Rank Math plugin, go to the Schema tab and click on Schema Generator.

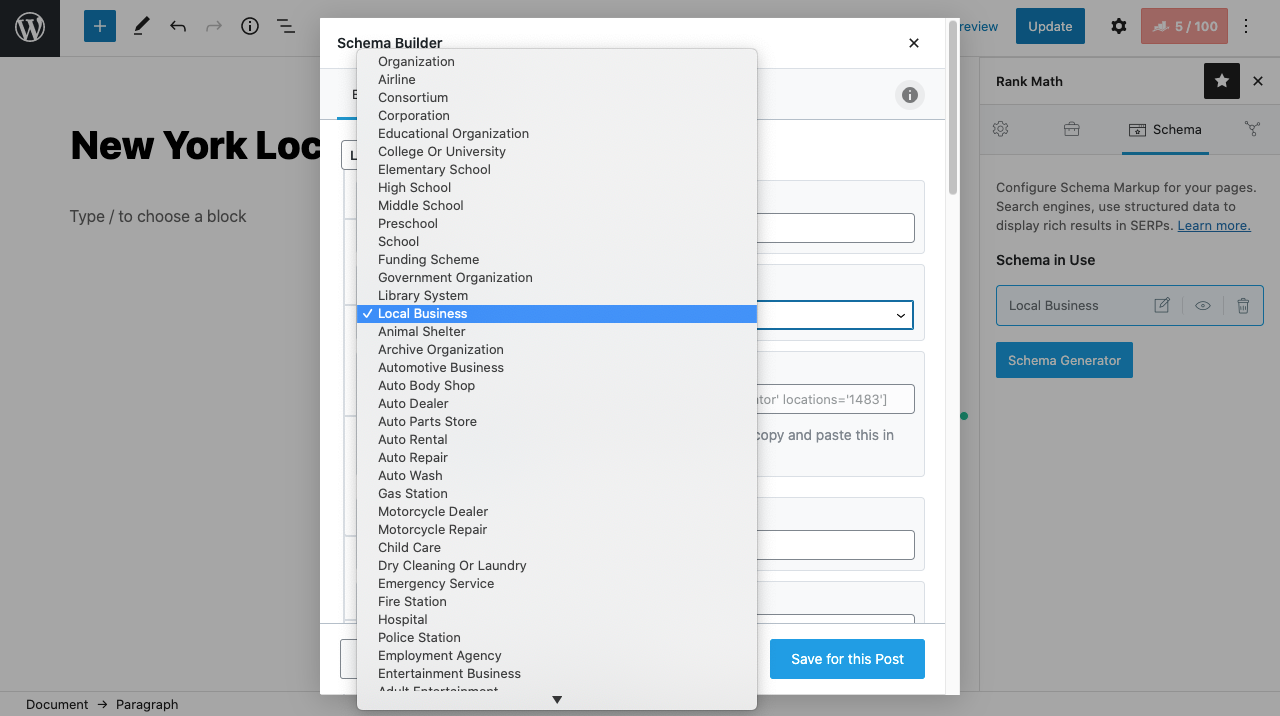
In the Schema Generator, click on the Schema Type – LocalBusiness as shown below.
Then, it will open the Schema Builder.
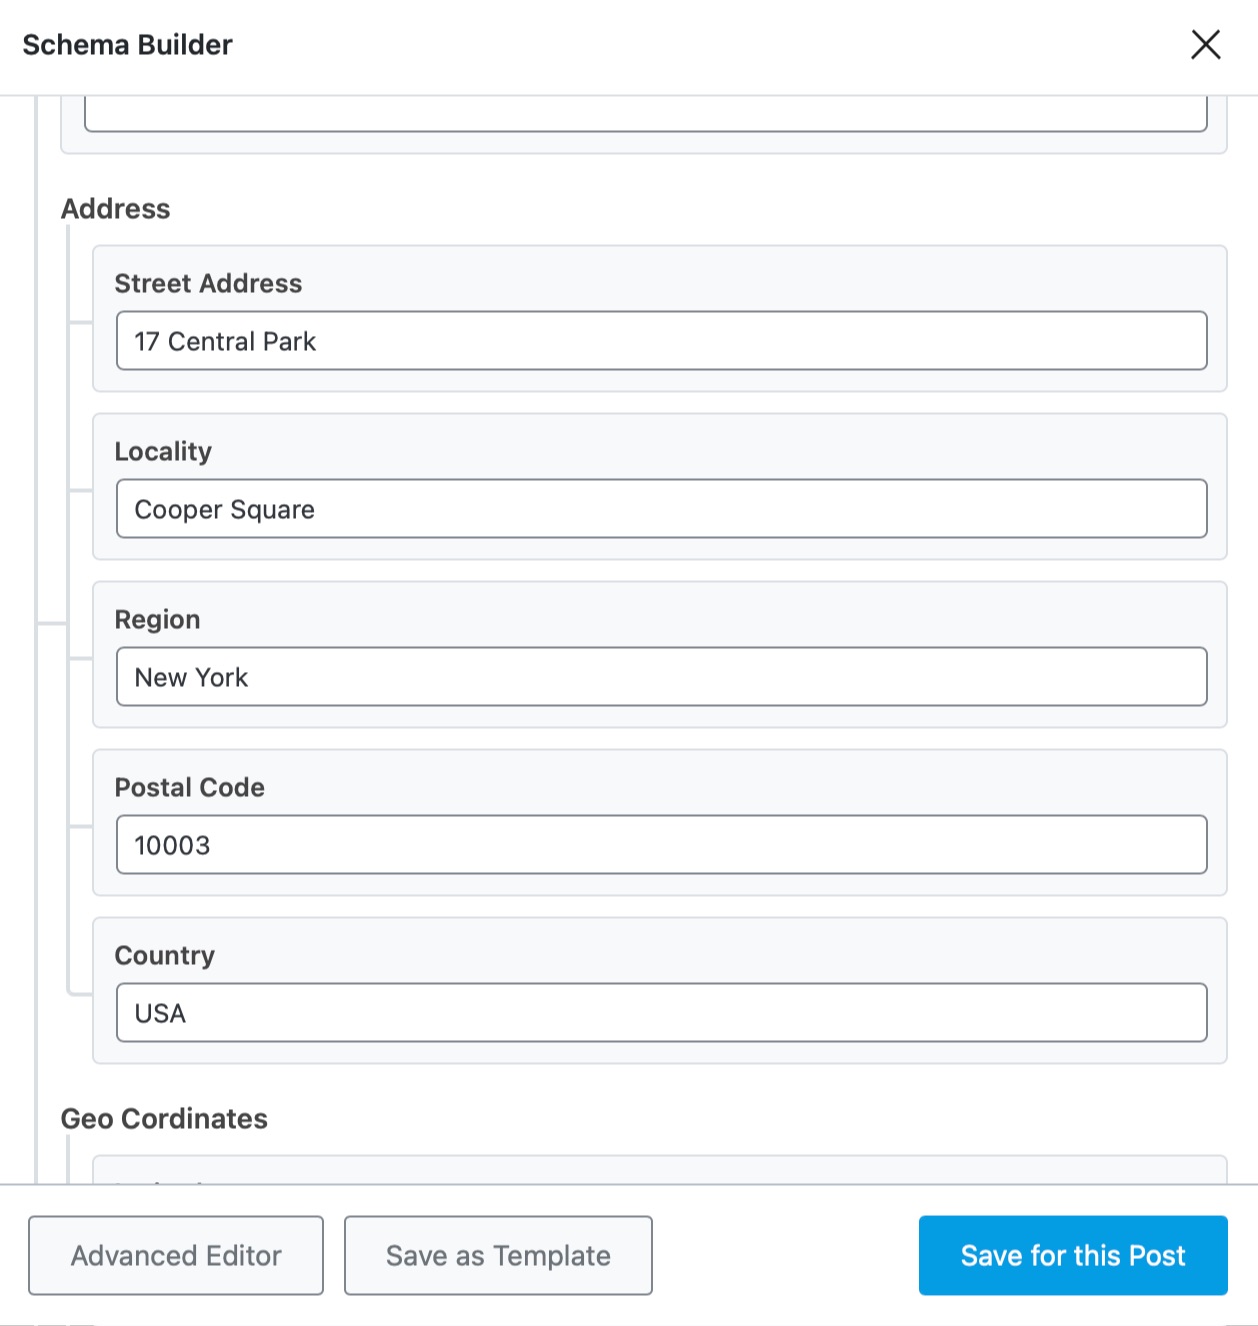
Once you fill in the details in the Schema Builder, Save them by clicking on Save for this Post.
3 Configuring Local Business Schema
3.1 Name
Enter the name of your business here, or you can leave with the default %seo_title% variable.

3.2 Business Type
Choose your business type from the exclusive list. In case if you’re unable to find your business type here, then choose Organization.
3.3 Shortcode
The local business info that you’re configuring with this Schema Builder can be displayed on the front-end for users by using a local business block or with a shortcode.
If you prefer using the shortcode to display your business info anywhere inside the content, then copy and paste this shortcode.

While pasting the shortcode, make sure that you set the type attribute. Rank Math offers 4 options for the type attribute, namely,
- address
- map
- opening-hours
- store-locator
These options define how the business info will be shown on the front-end.
For example, if you wish to use the address type, then the shortcode has to be used, as shown here [rank_math_local type='address' locations='1483']
That said, Rank Math offers more attributes to customize the shortcode, and you can read more about them here.
3.4 Image URL
Enter the image URL that represents your local business.

3.5 Email
Enter the email address that is specific to this business location.

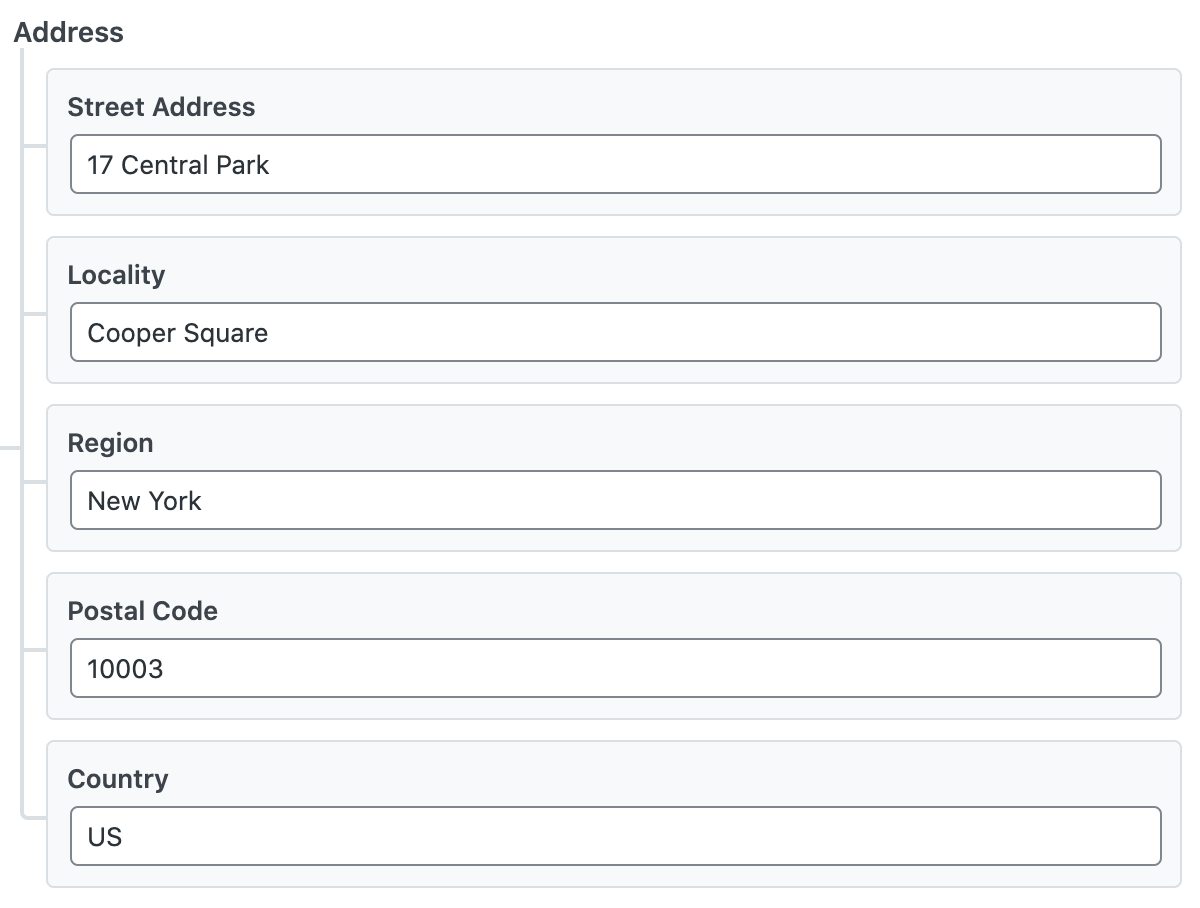
3.6 Address
Enter the address of your business location with Street Address, Locality, Region, Postal Code, and Country fields. The country should be entered in ISO 3166-1 alpha-2 format, for example, US for the United States and FR for France.
3.7 Geo Coordinates
Enter the latitude and longitude coordinates of your business location. Ensure that the coordinates are as accurate as possible. Google expects a precision of at least 5 decimal places in the latitude and longitude coordinates.

3.8 Primary Number
Enter the primary phone number for this business location. Ensure that you’re adding country code and area code to your phone number.

3.9 Secondary Number
Enter the secondary phone number of this business location, if applicable. Again, ensure that you’re adding country code and area code here in the phone number.

3.10 Business FAX
Enter the fax number of your business location, if available.

3.11 VAT ID
Add the VAT ID (Value-added Tax ID) of your business in this field, if applicable.

3.12 Tax ID
Add the Tax ID of your business here. Please note, this would vary depending on the country, such as TIN in the US, CIF/NIF in Spain, etc.

3.13 Chamber of Commerce ID
If your business is a part of Chamber of Commerce, then enter your Chamber of Commerce ID here. Please note, this field isn’t a part of the Local Business Schema and is used only in the business info displayed on the front-end using the Local Business block or shortcode.

3.14 Price Range
Enter the price range of your business here. This can be either a numerical range (eg: $5-20) or a normalized number with currency signs (eg: $$$).

If you’re using normalized number with your local currency signs, they are interpreted as follows,
| $ | Cheap/Inexpensive |
| $$ | Moderate |
| $$$ | Expensive |
| $$$$ | Very Expensive |
Note: This option would be available only if you had chosen one of the local business types in the Business Type field. If you had chosen Organization and similar types, this field would not be available.
3.15 Currencies Accepted
Enter the currencies accepted in ISO 4217 format. If you’re unsure of your currency’s ISO code, Wikipedia has got an extensive list. If your business accepts multiple currencies, separate them with comma.

Note: This option will be available only if you had chosen one of the local business types in the Business Type field. If you had chosen Organization and similar types, this field would not be available.
3.16 Payment Accepted
Enter the payment methods accepted in this business location. Some examples include Cash, Credit Card, Cryptocurrency, etc.

Note: This option would be available only if you had chosen one of the local business types in the Business Type field. If you had chosen Organization and similar types, this field would not be available.
3.17 Area Served
Enter specific locations your business serves customers, such as cities, postal codes, or other types of areas. Do not enter states, countries, or radius-based areas like “within 20km,” as these are not supported by Google.
You can include up to 20 service areas, and they should fall within approximately a 2-hour driving distance from your business location.

3.18 Open 24/7
Enable this option only if your business is open 24/7.

3.19 Use 24h Format
Enable this option if you wish to display the opening hours in 24h format when you use Local Business Block or shortcode.
Note: This option will not be available if you’ve enabled Open 24/7

3.20 Opening Hours
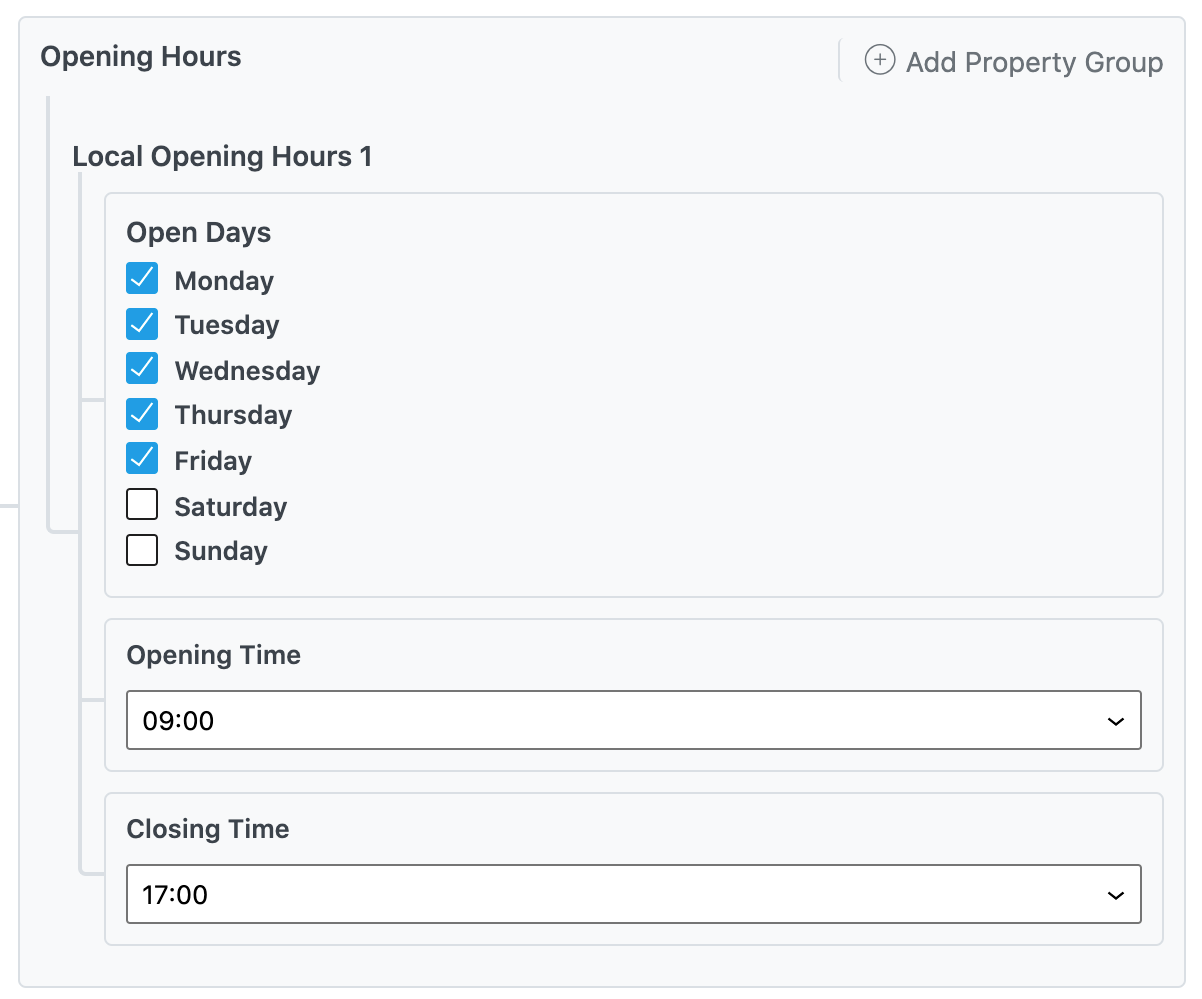
The option lets you select the opening hours, so customers can visit/avail of your service. There are possibilities that your business might even have different schedules for opening hours & Rank Math lets you configure that.
Select only the days your business opens at specific timing and enter the Opening Time and Closing Time. Then click the Add Property Group button to add another set to the list. There select the rest of the days and the respective opening & closing times.
Note: This option will not be available if you’ve enabled Open 24/7
3.21 Select Timezone
From the last field, select the timezone that corresponds to your business location. However, please note, this option would be unavailable if you had already enabled the Open 24/7 option.

4 Use Rank Math’s Local Business Block
You can then make use of Local Business Block by Rank Math as shown below:
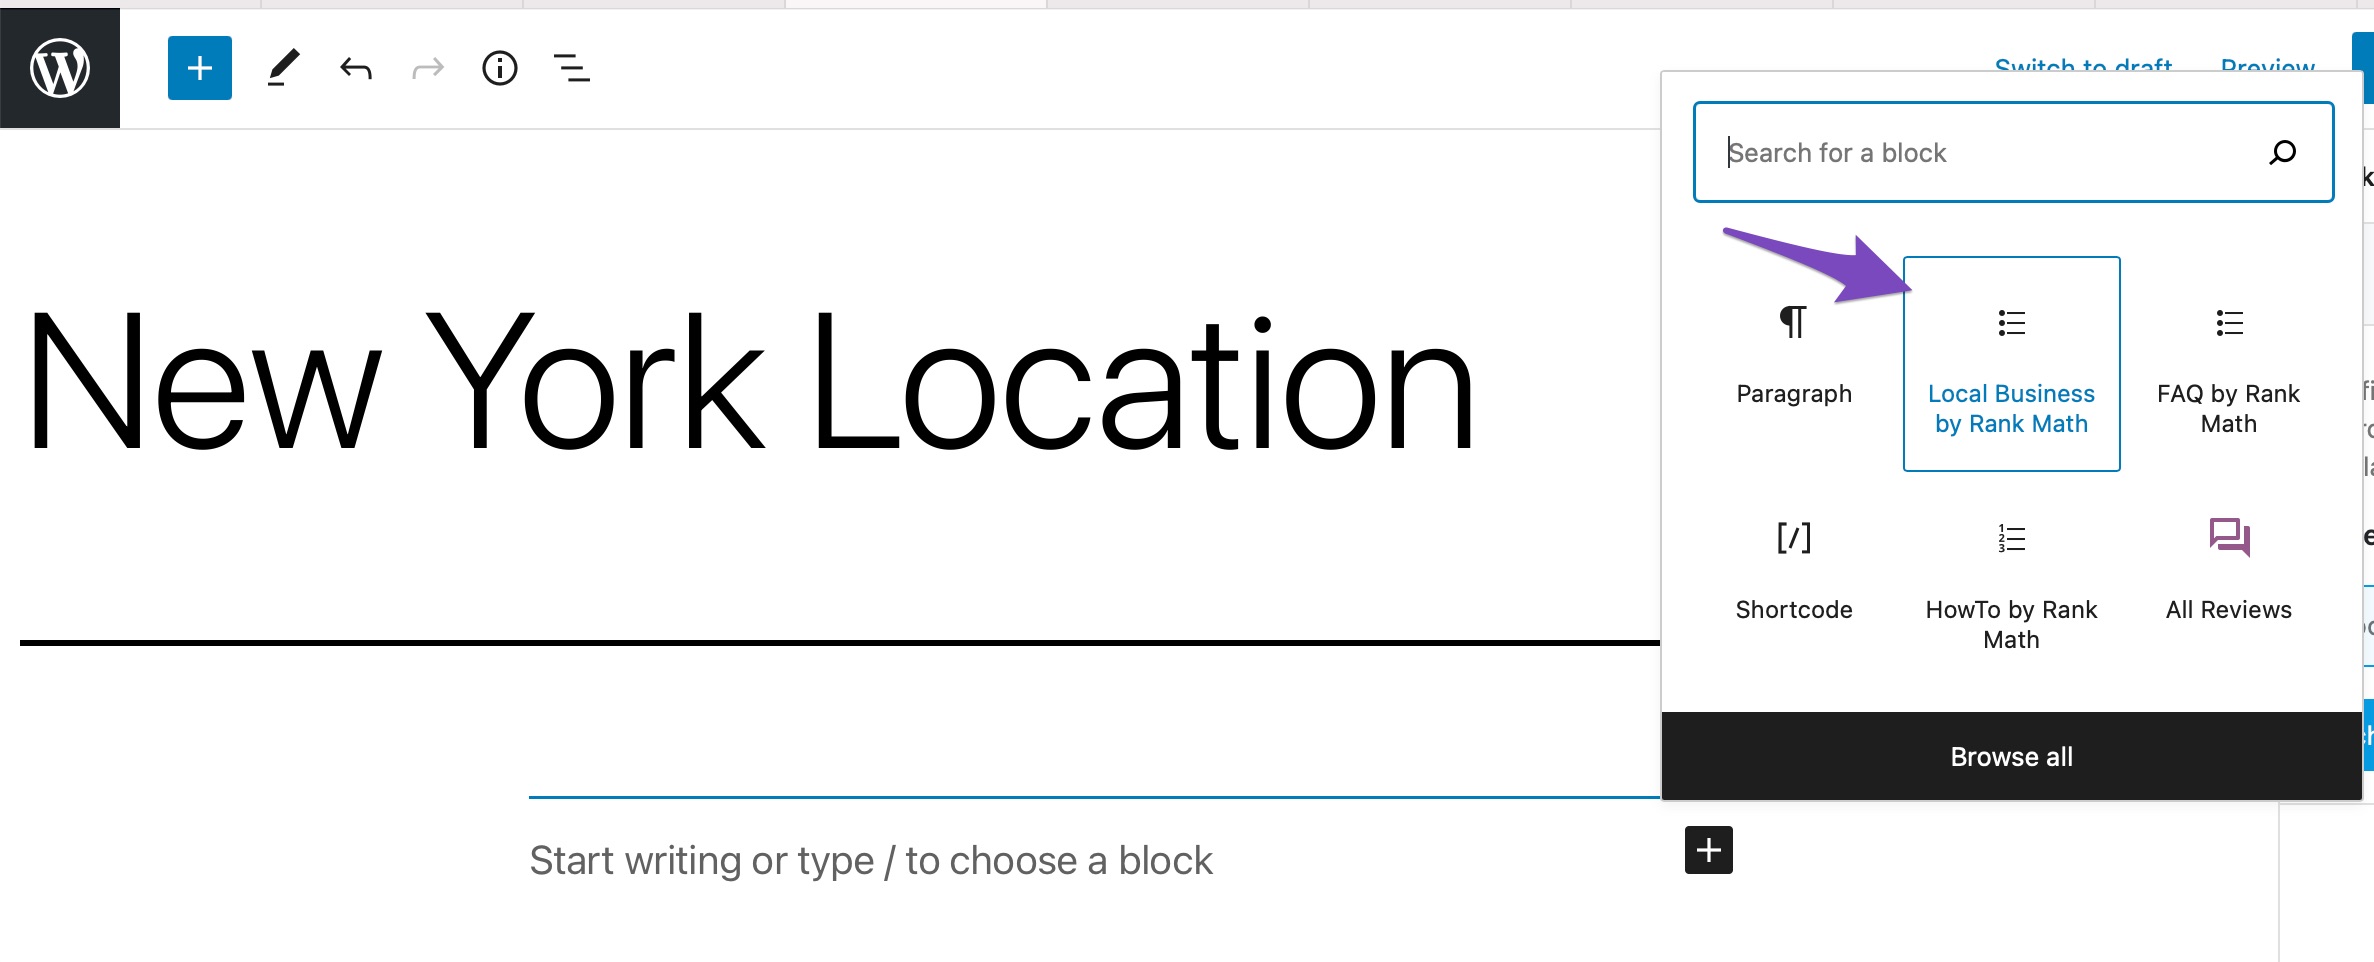
Select Local Business by Rank Math block.
In the Block settings → Type, You can set the Address, Opening hours, Map, Store Locator for your location accordingly.
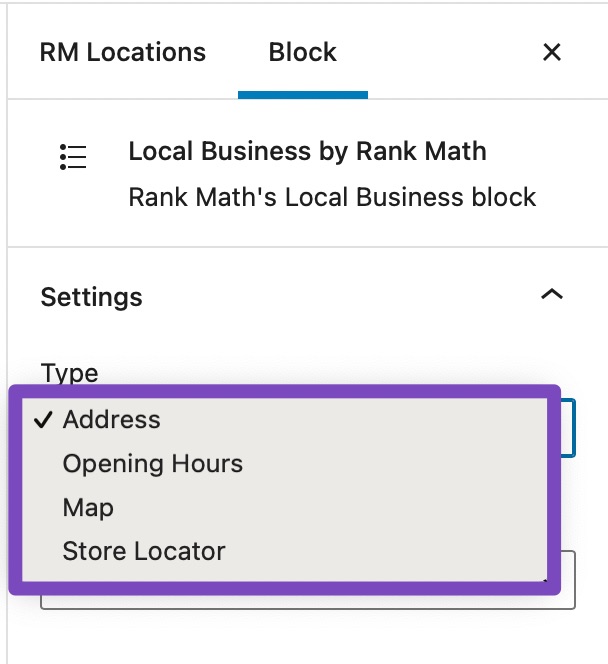
Once it is done, Save the changes.
As an alternate method, if you aren’t yet using the Gutenberg Block editor, you can also insert this information using Rank Math’s Location Data Shortcode.
Now, let’s look at each of the LocalBusiness Block’s settings in detail.
5 Rank Math LocalBusiness Block Settings
5.1 Address
Select Address in the Settings Type, and you can notice the address details as shown below:
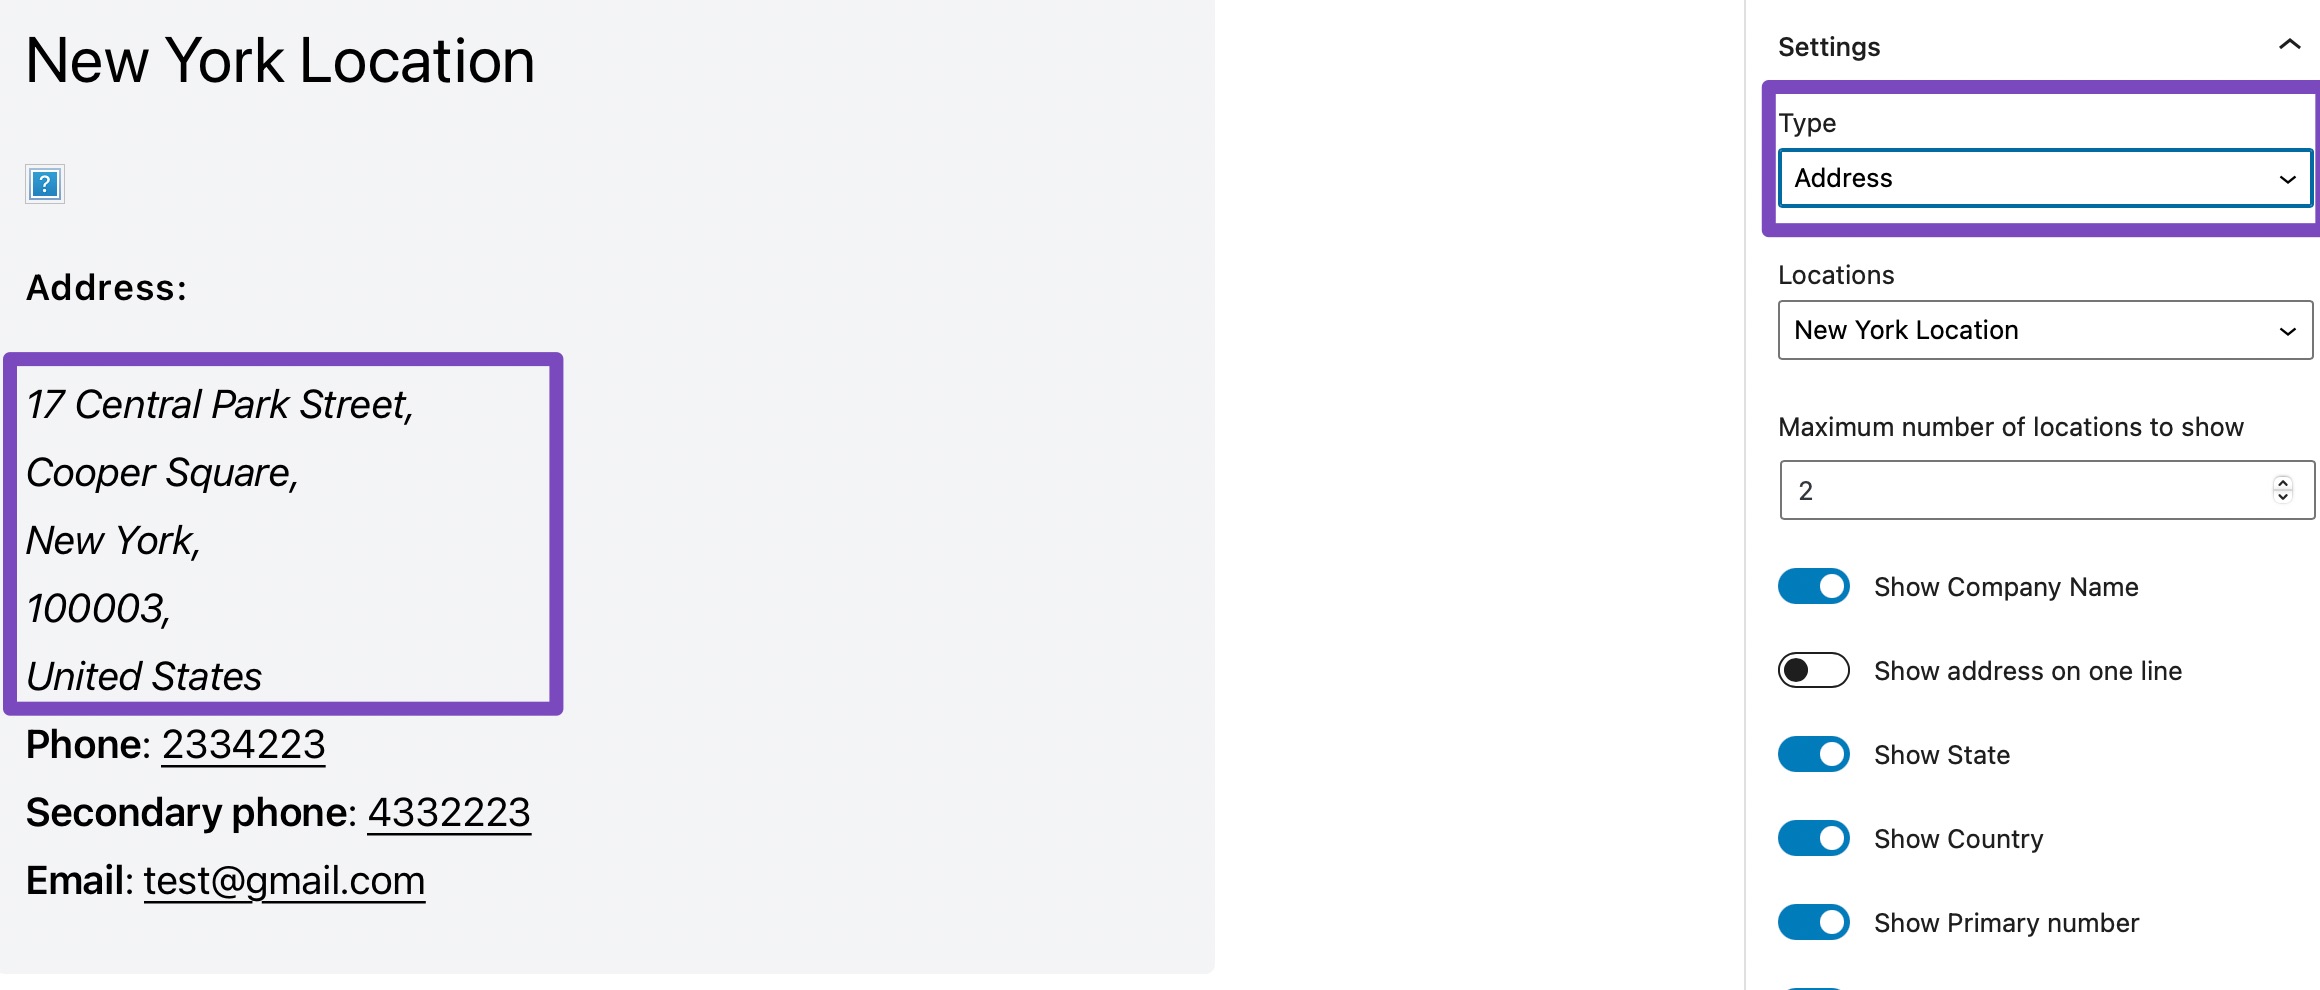
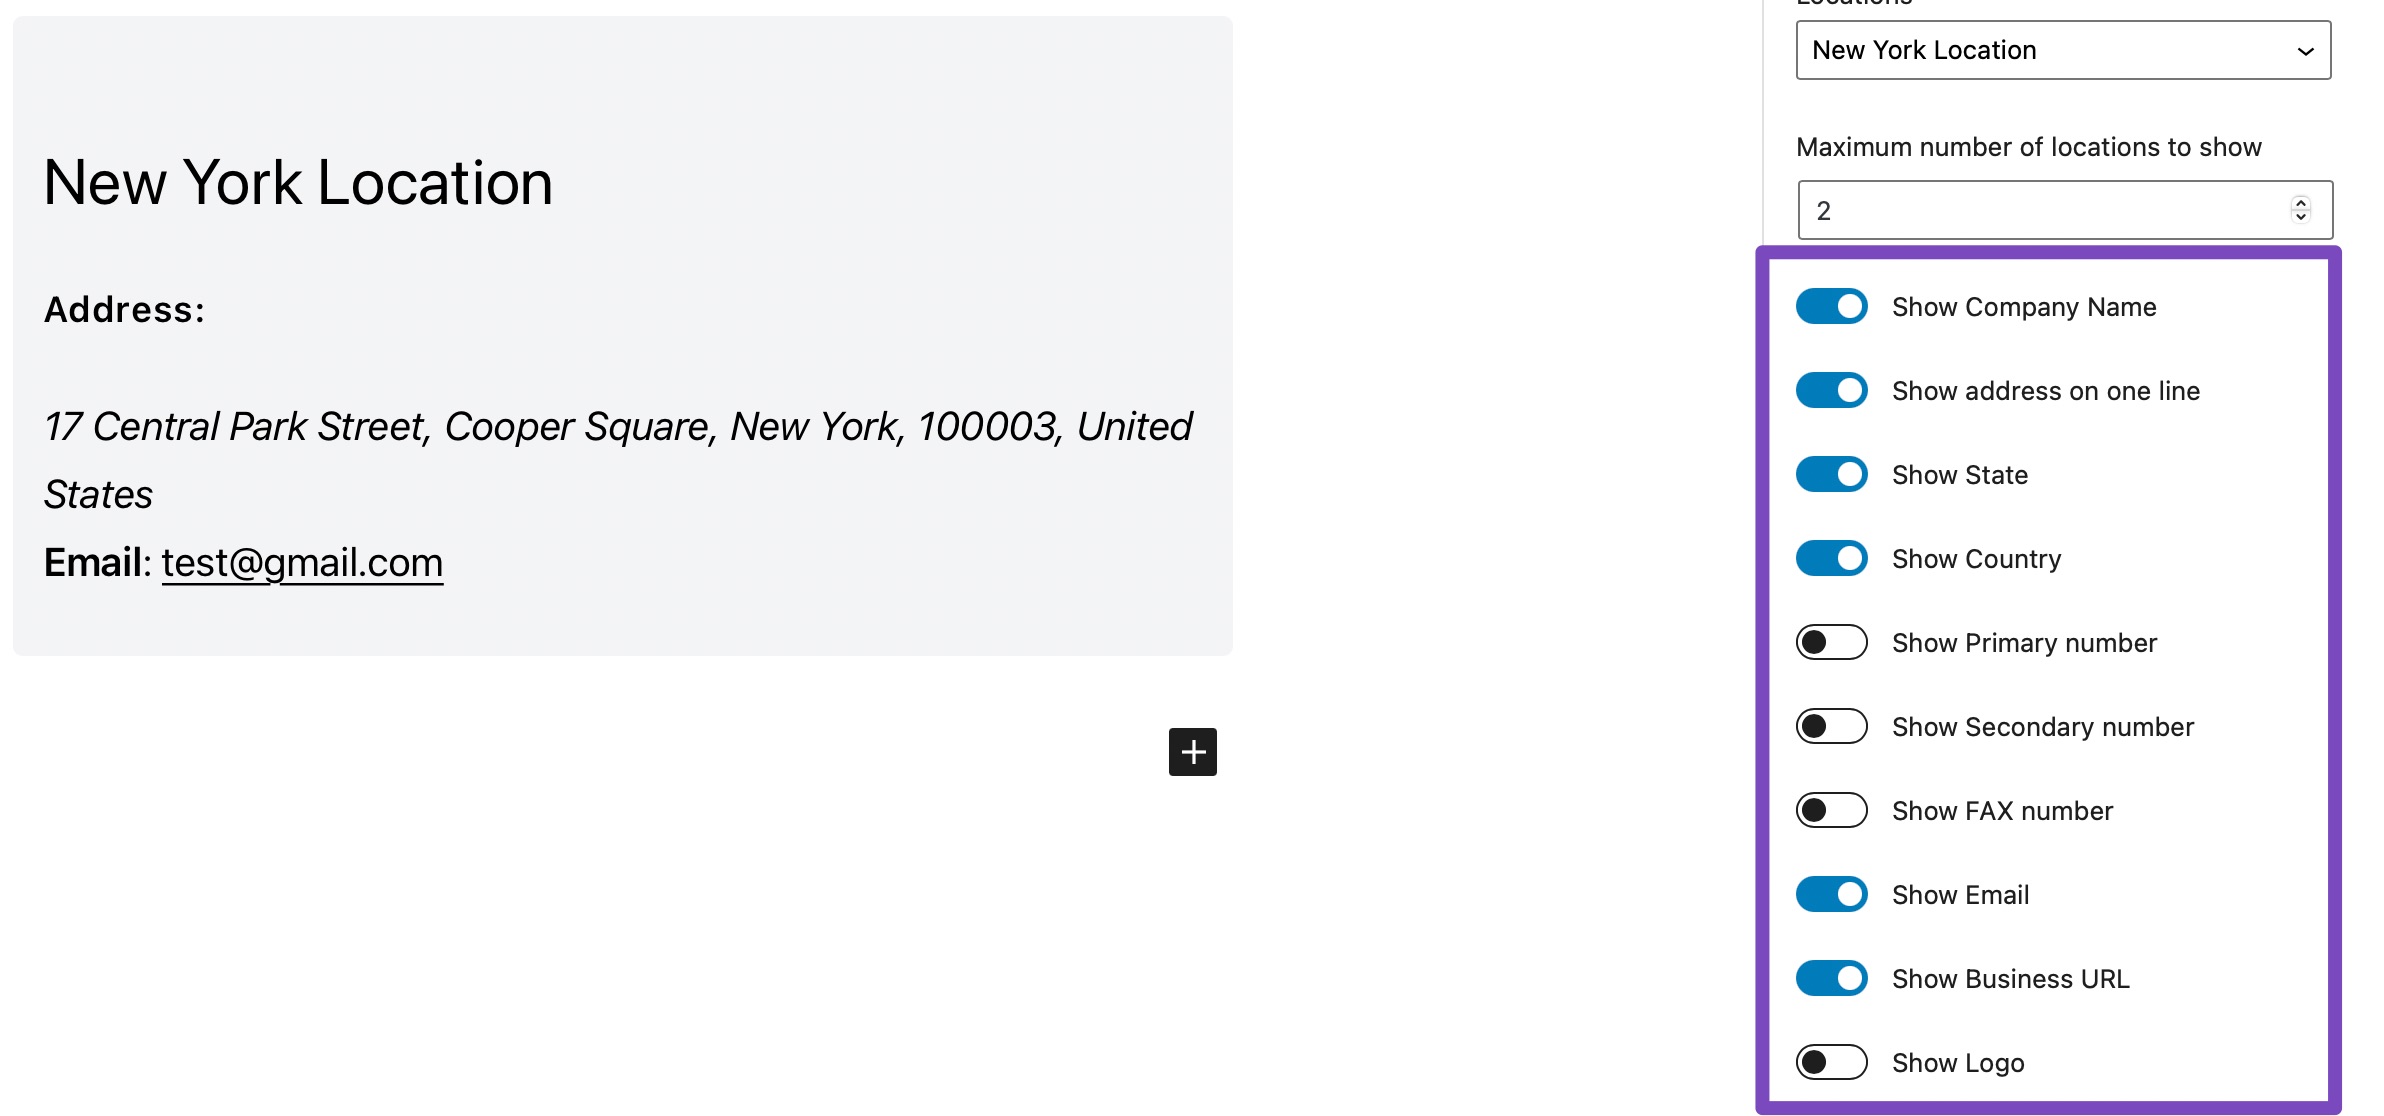
Also, you can choose which options you want to display with the LocalBusiness Block. You can choose to display your Company Name, Address in one line, State, Phone Number, etc., as shown in the image below:
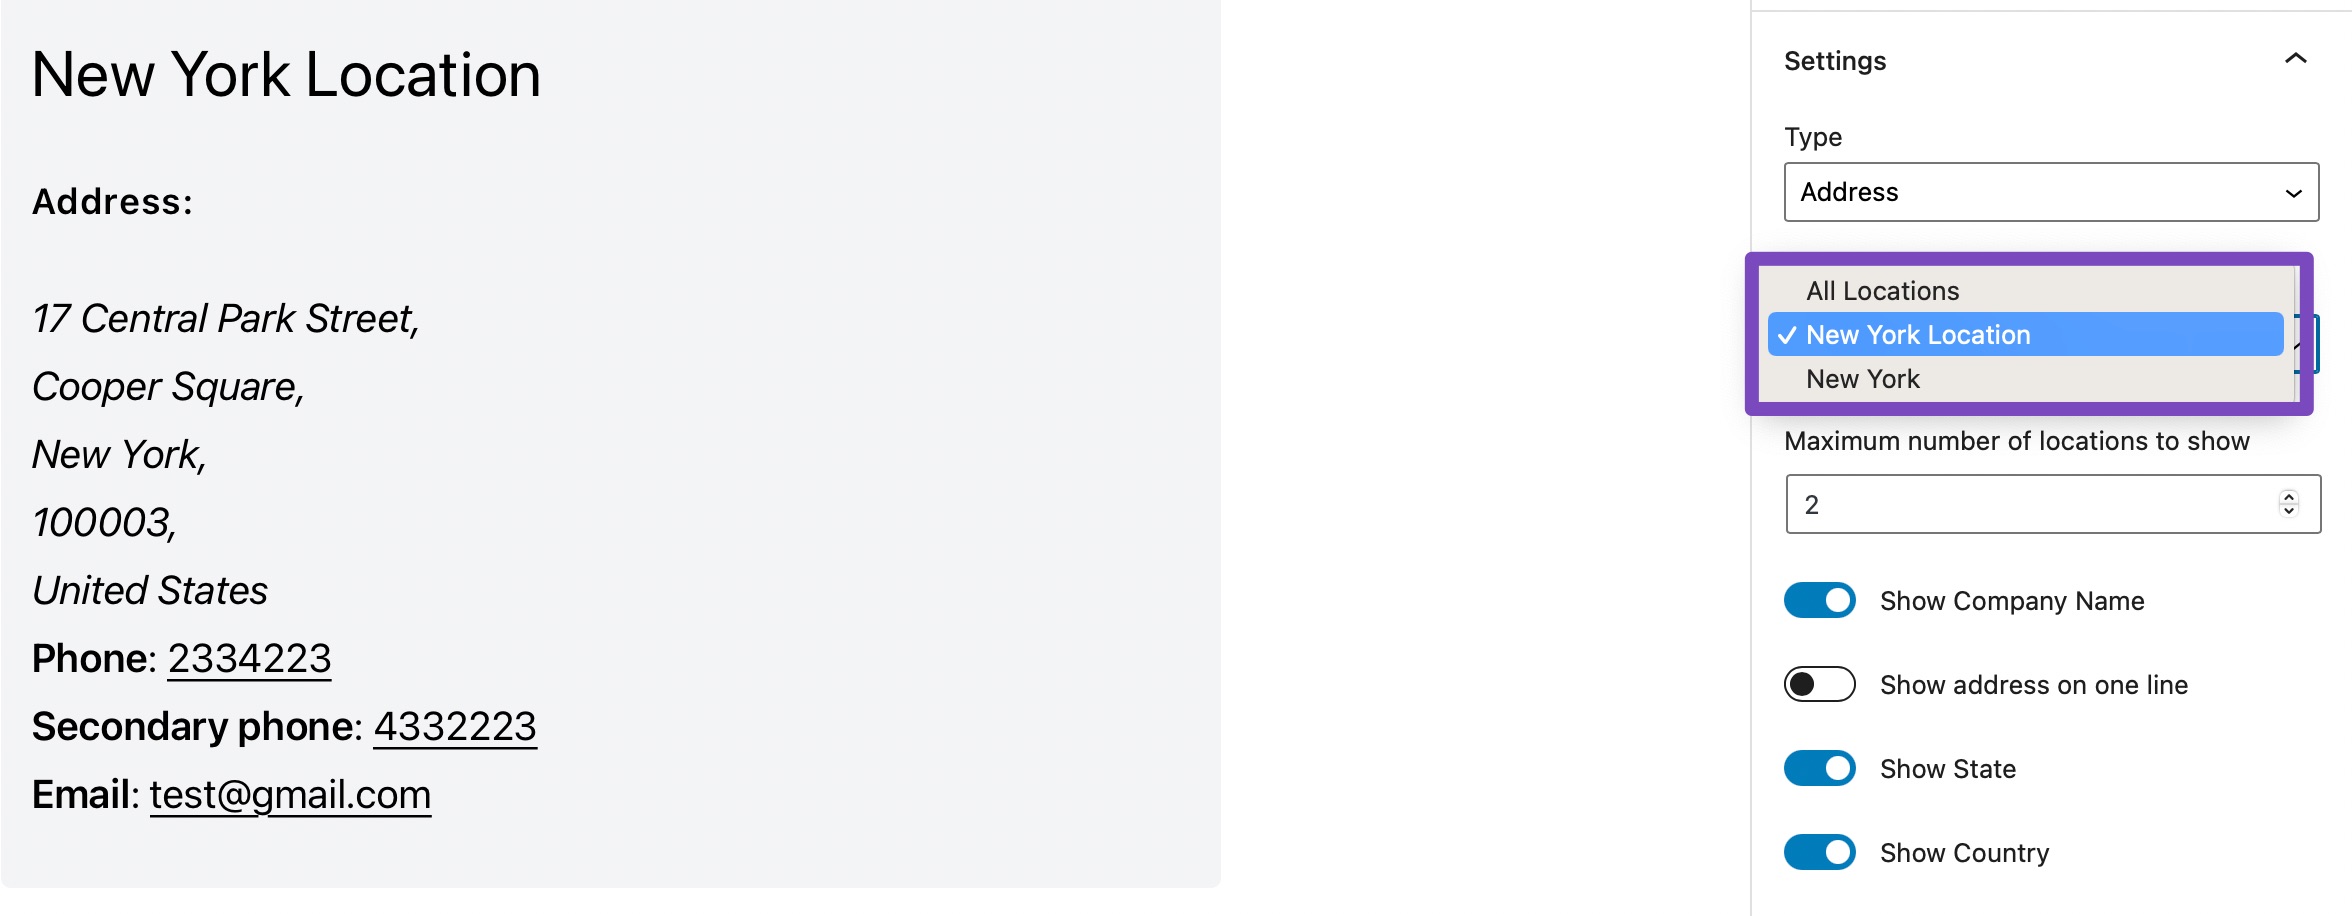
You can also use the Locations option to list all the locations on a single page or to show individual locations. This will help you to create a single page with all locations or multiple pages for each location.
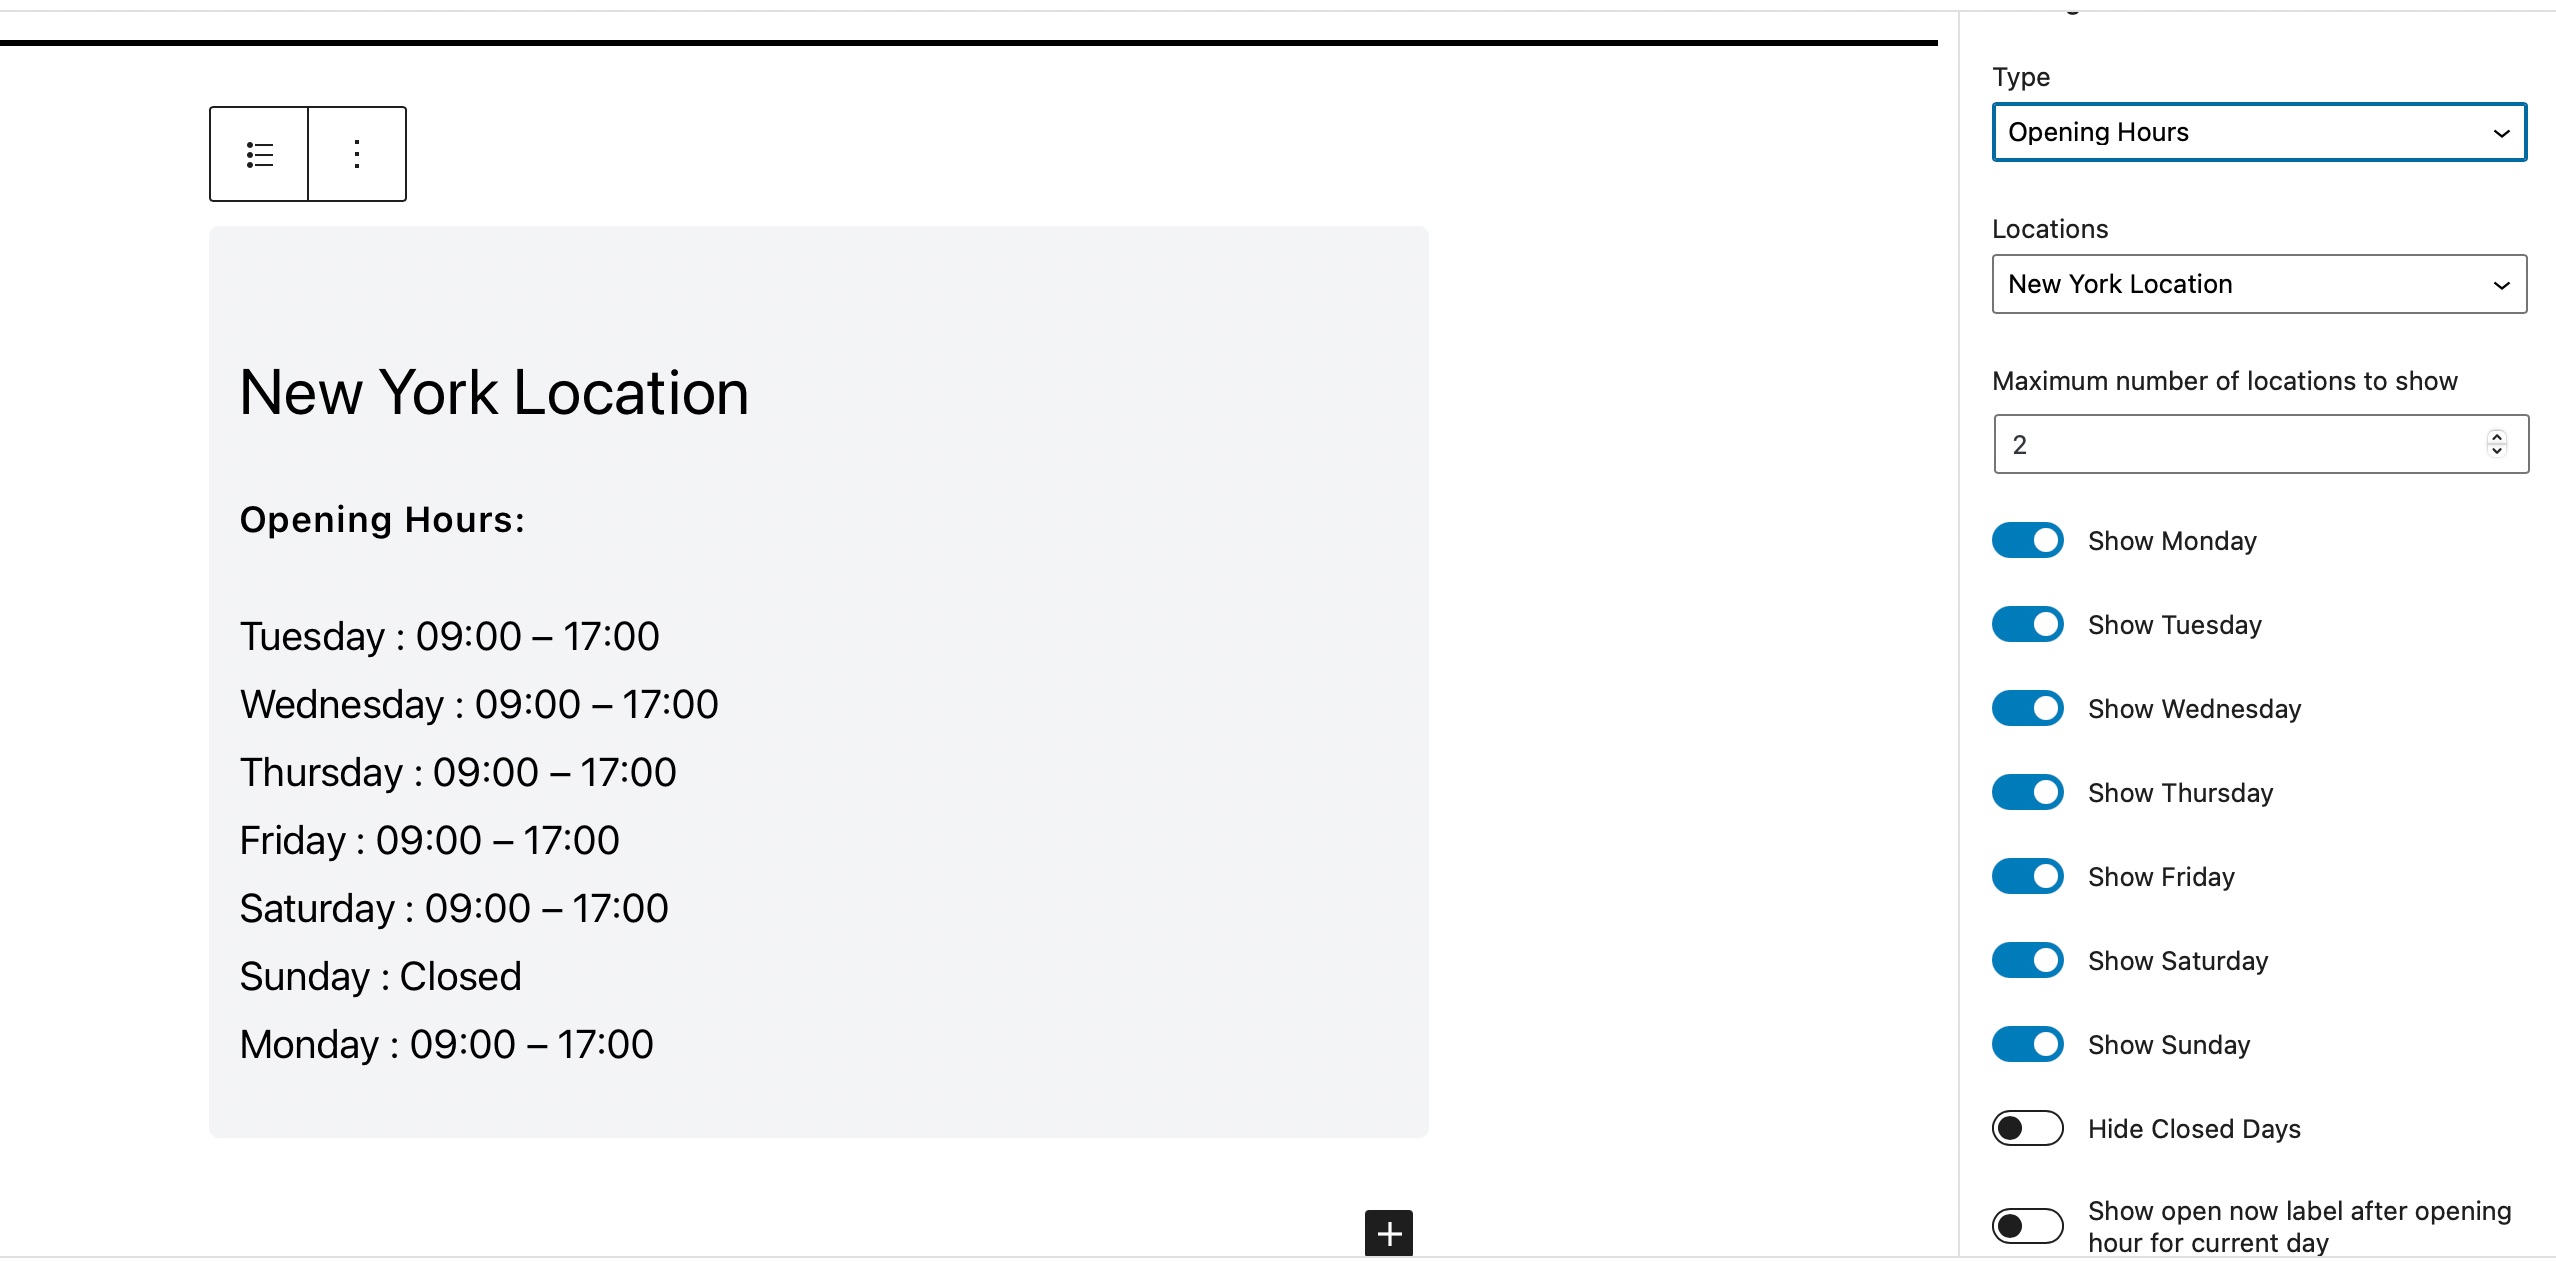
5.2 Opening Hours
Select the opening hours from the Settings in order to display the opening hours of the business.
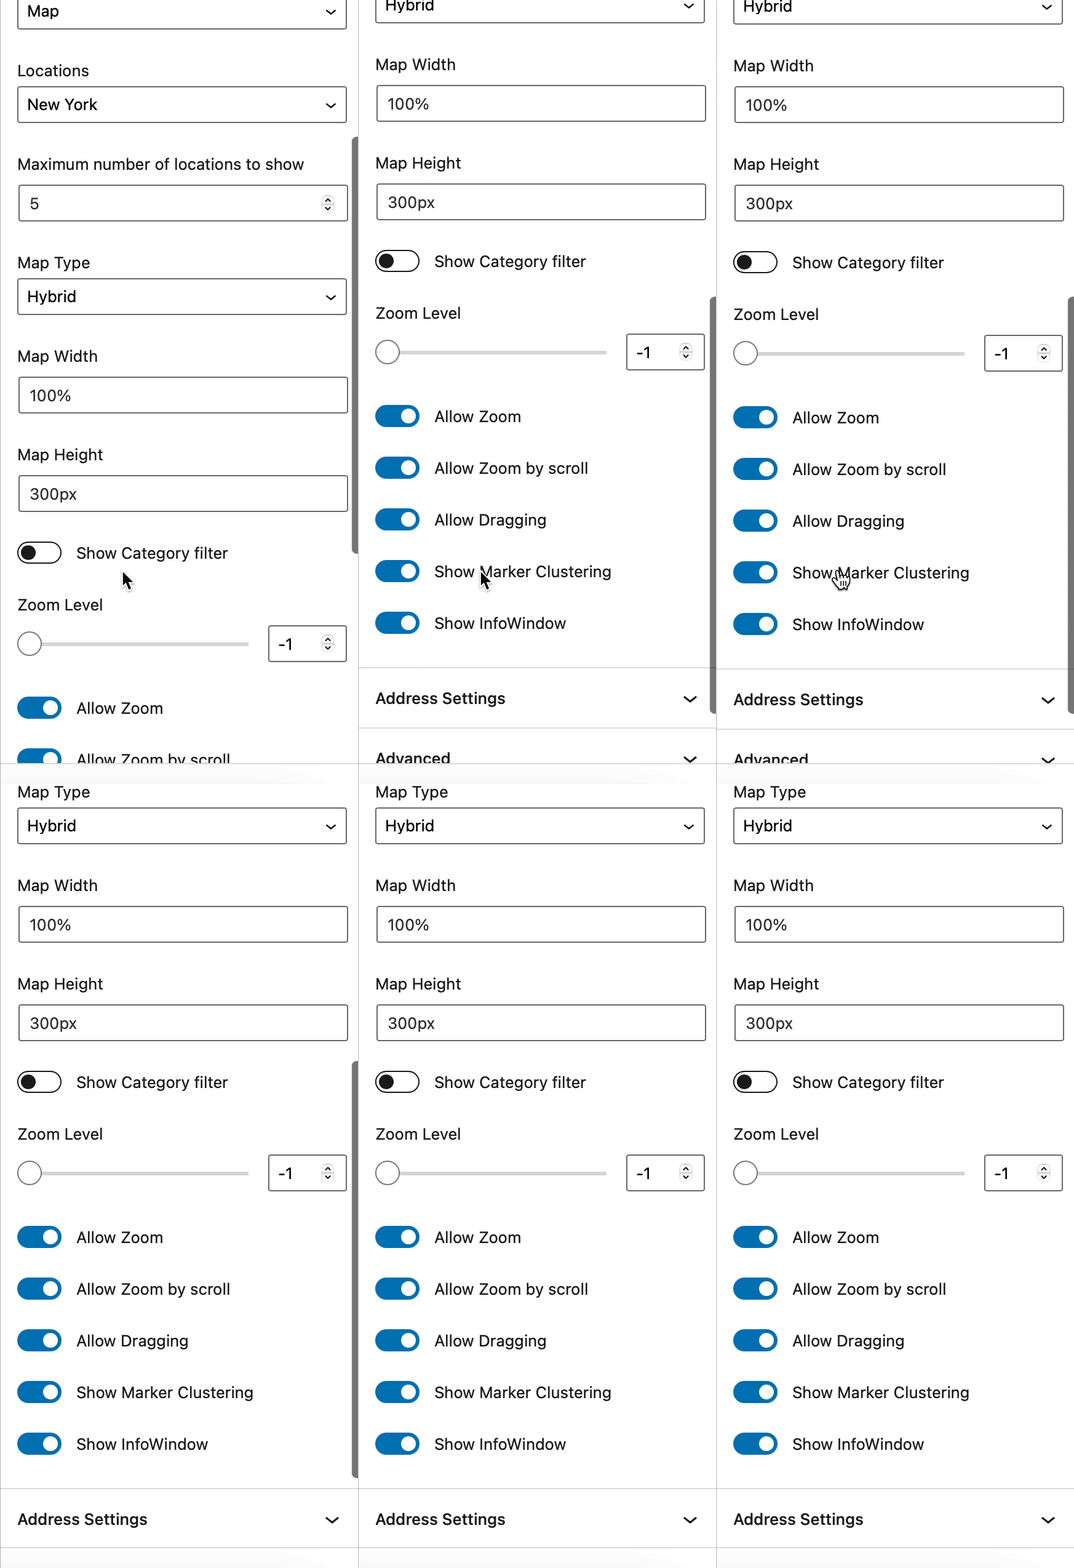
5.3 Map
Select Map in order to display your business on the map. The options available in Map are as follows:
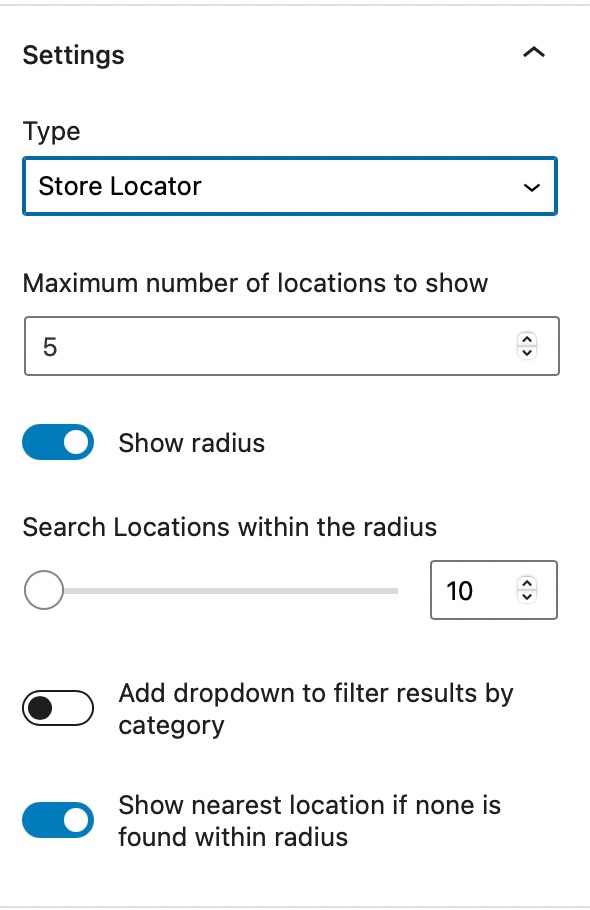
5.4 Store Locator
Rank Math makes it very easy locating your store with the help of Store Locator.
5.5 Area Served
Schema.org defines the areaServed property as the geographic location of the area where a service or offered item is provided.
You can make use of the Area Served option in the Local Business Schema that will cause all products and services to be available only to the service areas listed. You can use this option if everything you do as a business is confined to those service areas. This can include various products and services.
You can add the details to the area served field as shown below:
In the Schema Generator, select LocalBusiness and then fill the area served field as shown below:
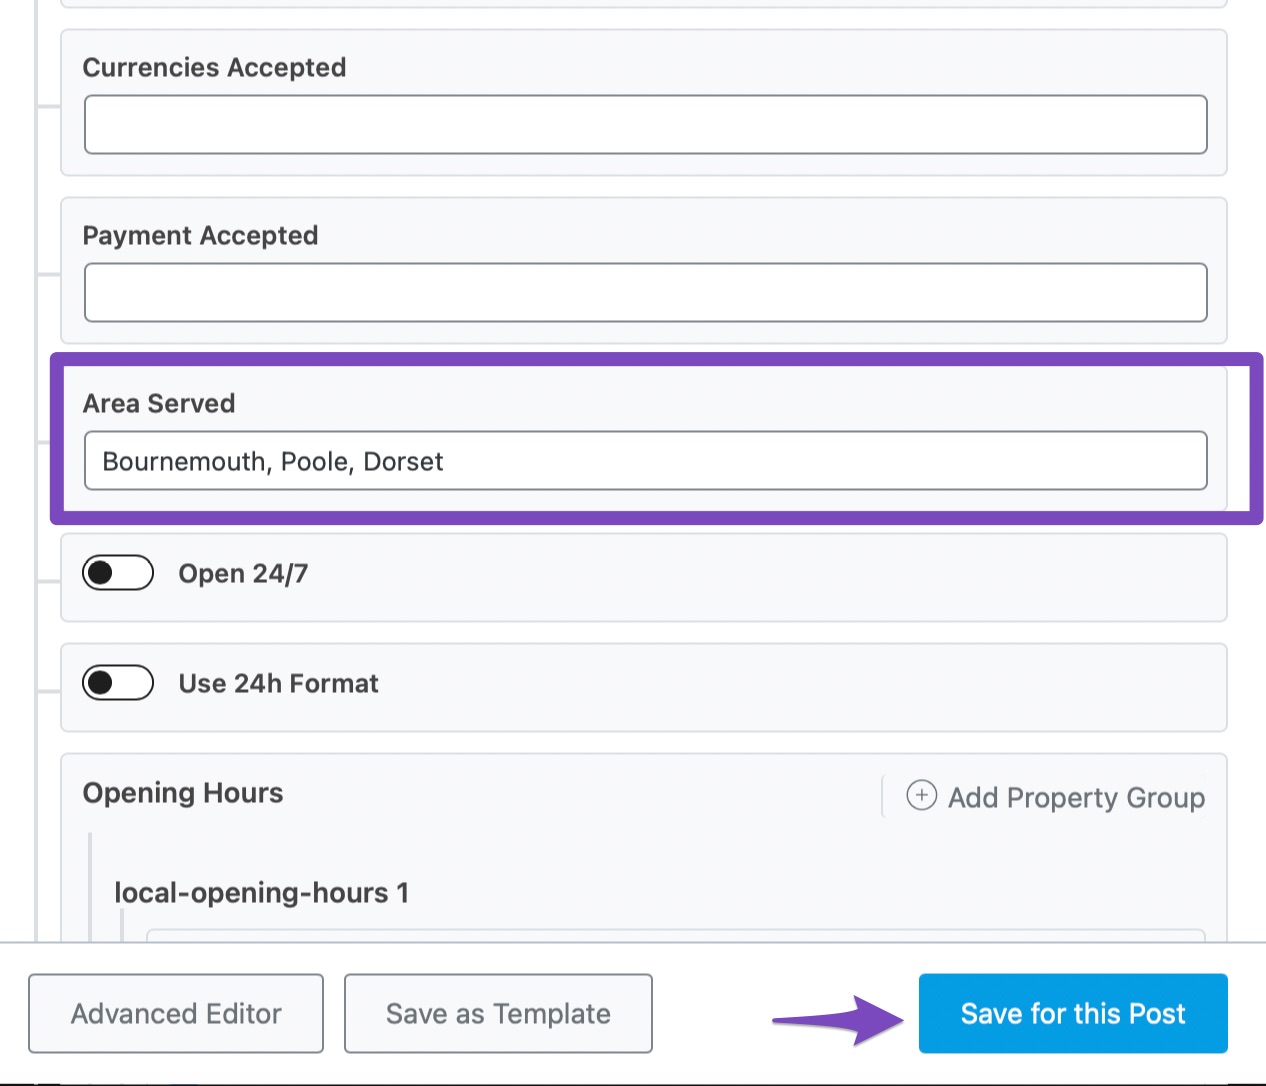
Once filled, click on Save for this Post and Update or Publish it as you would normally do.
You can then check your Schema with the help of Google’s Rich Results Testing Tool to ensure everything appears as expected.
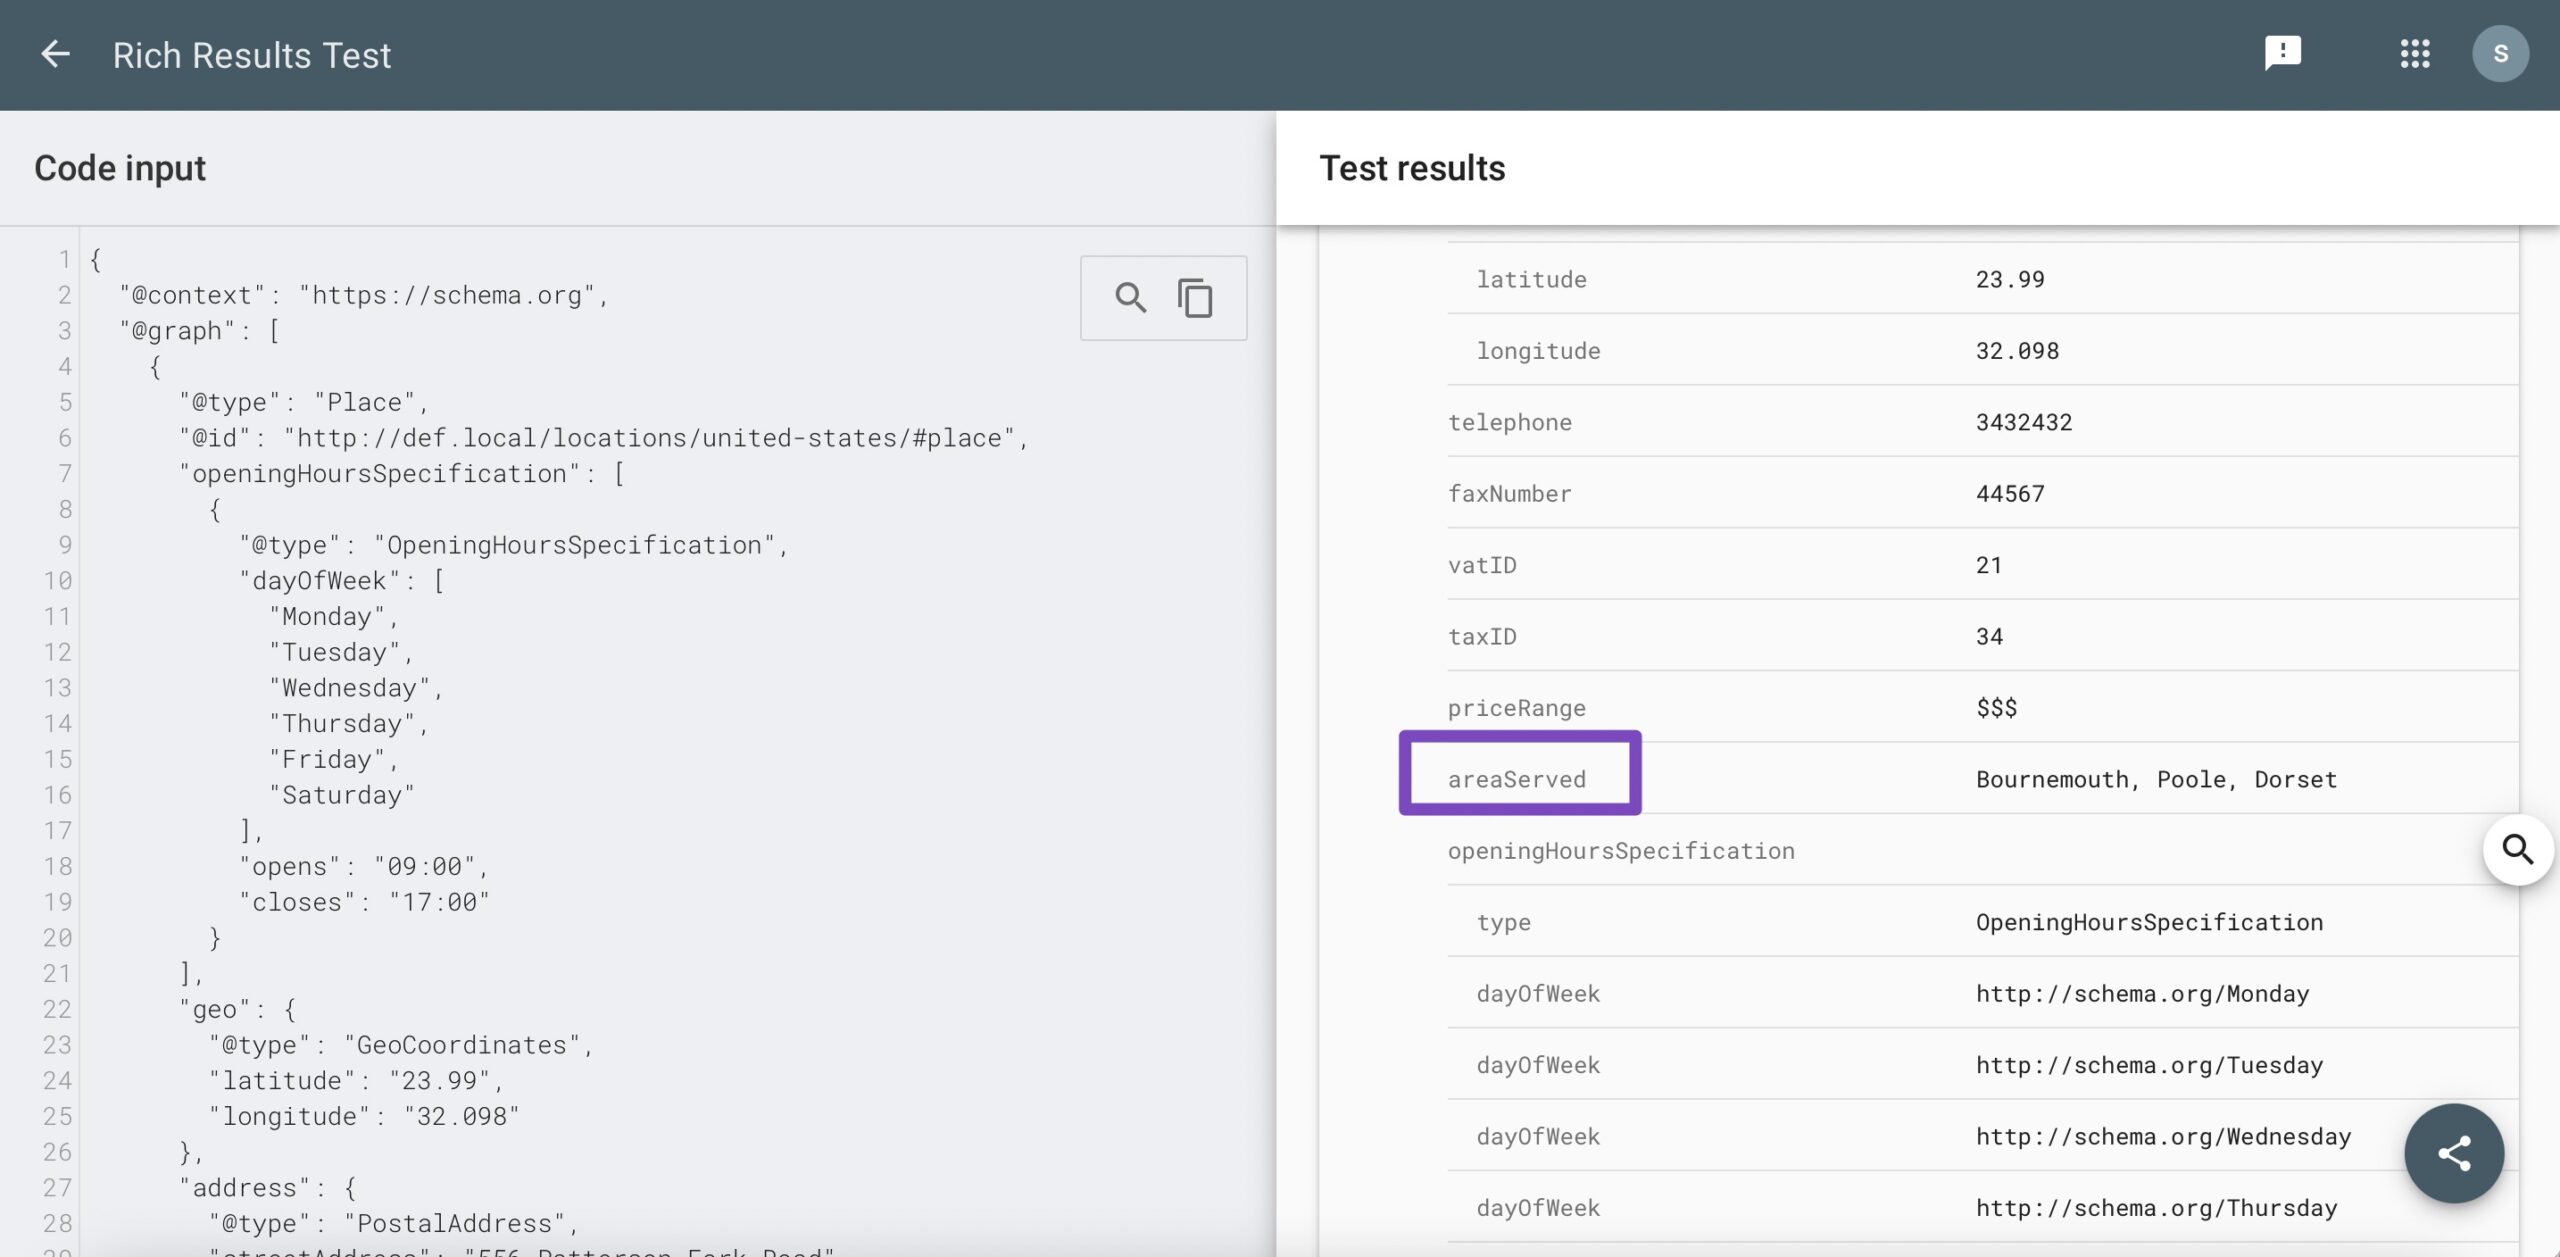
With the help of Rank Math, you can easily configure your Location Post Type settings. And, when using Rank Math PRO’s Local SEO Module to create multiple locations – you can easily auto-generate your KML sitemap for business locations. Learn more here.
If you still have absolutely any questions about using Local SEO with Rank Math, feel free to reach our support team from here, and our support expert will have a look into it right away.