Do you want more traffic from social media? Of course, you do! And one of the best ways to get traffic from social media is to make it easy for people to share your content. In this knowledgebase article, we’ll cover how to configure Facebook and Twitter sharing options using Rank Math.
We’ve already covered the General Tab, the Advanced Tab, and the Schema Markup Tab in Rank Math’s Meta Box, all of which helped you optimize your post for search engines.
Let’s try to figure out the importance of having the social media sharing options, before jumping into the configuration section.
Why do You Need to Configure Social Media Options?
SEO is a great source of traffic, but it can take a long time before you start seeing any results from it—especially if your website is brand new.
When you configure social media options, you make it easy for people to share your content with just a few clicks. This increases the likelihood of your content being shared, which can lead to more traffic.
In addition, when you properly configure social media options, you can also control how your content is displayed when it’s shared. For example, you can choose to show the title, the description, the image, and more.
The beauty of social media is that you can create a community for your business. It’s not just about advertising, but rather building relationships with potential customers and followers who may want to buy what they see on Social Media channels like Facebook or Twitter!
There is also some evidence that “social signals” co-relate with higher rankings—social signals meaning likes, shares, and comments—overall engagement on social media.
A good presence on these platforms will help you get noticed, and increase credibility and visibility among potential customers by giving them an option to share the content. And, not just today but also in years to come as they share their experience with others who could be interested.
Every Social media prime platform’s focus is engagement; which happens when the right kind of content meets the right kind of people and provides them with the right kind of experience. But, to do that, you first have to compel the user to click through your content and reach your website.
That is where the power of Rank Math’s social box comes in. It equips you with the right tools to create engaging, enticing, and high-performing social media content for Facebook and Twitter. In addition, the WooCommerce product SKU is now added to the OpenGraph data, and the data is grabbed from the Product’s SKU.
Here are all the options that you will find in Rank Math’s social media tab:
- Add a custom title, description, and image
- Automatically generate social media images
- Customize Twitter card type as per your need
- Use data from Facebook to the Twitter tab
- And more…
Here’s the screenshot below:
As you can see, the number of options isn’t huge, but the options are effective nevertheless. That is because these are not the only most popular social media. There are some other social media platforms that use OpenGraph. For example, Instagram is very popular, but you can’t share links on it, and therefore, not only does it not use OpenGraph, but it also needs no optimization.
Now, let’s take a look at how to configure Facebook and Twitter sharing options in Rank Math.
In This Article, We’ll Cover How To
1 Configuring Facebook Sharing Options
First, let’s see how you can configure Facebook sharing options. For this, edit your content and navigate Social Settings by clicking on the Social Tab.
Next, you’ll see the Facebook tab where you’ll see the Facebook preview, title, description, and image, settings.
The Facebook Preview shows how your content should look when posted on Facebook based on the Title, Description, and Image you set.
For further ado, see the screenshot below:
Apart from the preview, there are 4 options in the Facebook section. Let’s discuss all available options one by one.
1.1 Setting the Facebook Image
When you share an image on Facebook, Facebook will try and find a thumbnail to attach it with. But this process is not always perfect as there are many factors that affect what they end up choosing – including colors, aspect ratio, and even the image itself might not be a great choice when sharing the image on Facebook.
That is why we recommend that you choose an image specifically for Facebook with this option.
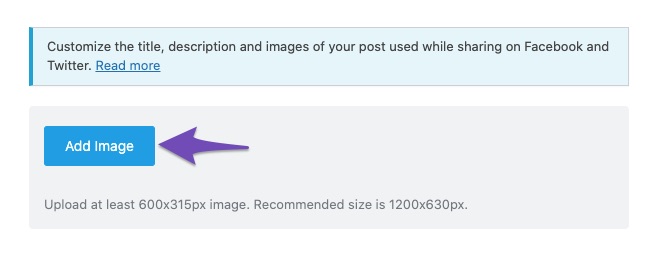
To do it, click the Add Image button to open up the media gallery.
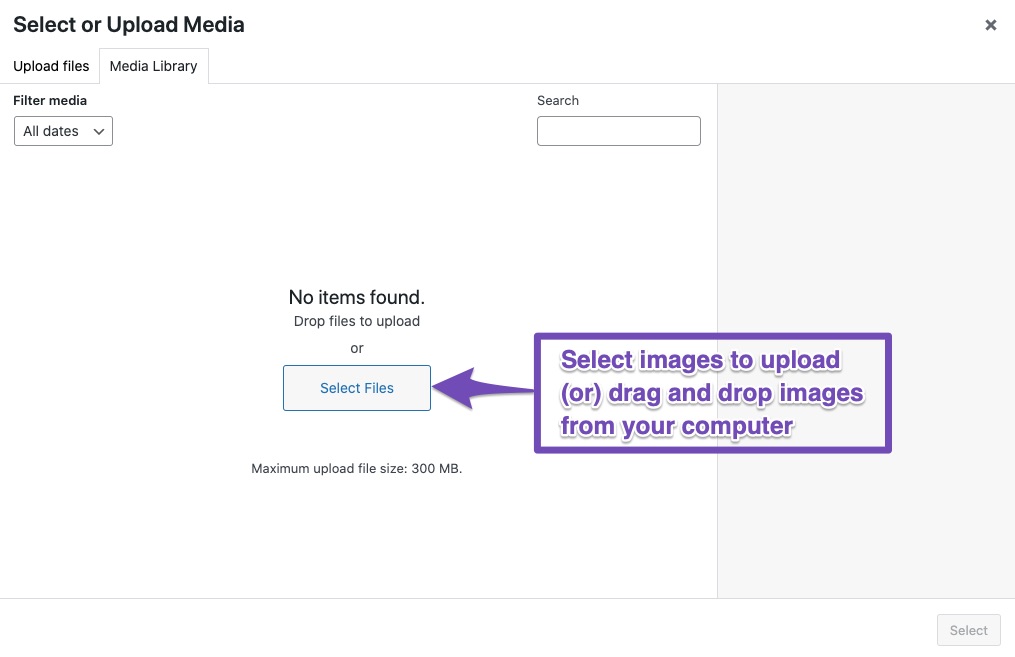
Next, the WordPress image setting will be displayed where you can select an image from the Media Library, upload an image from your system, or just drag and drop an image in the empty area.
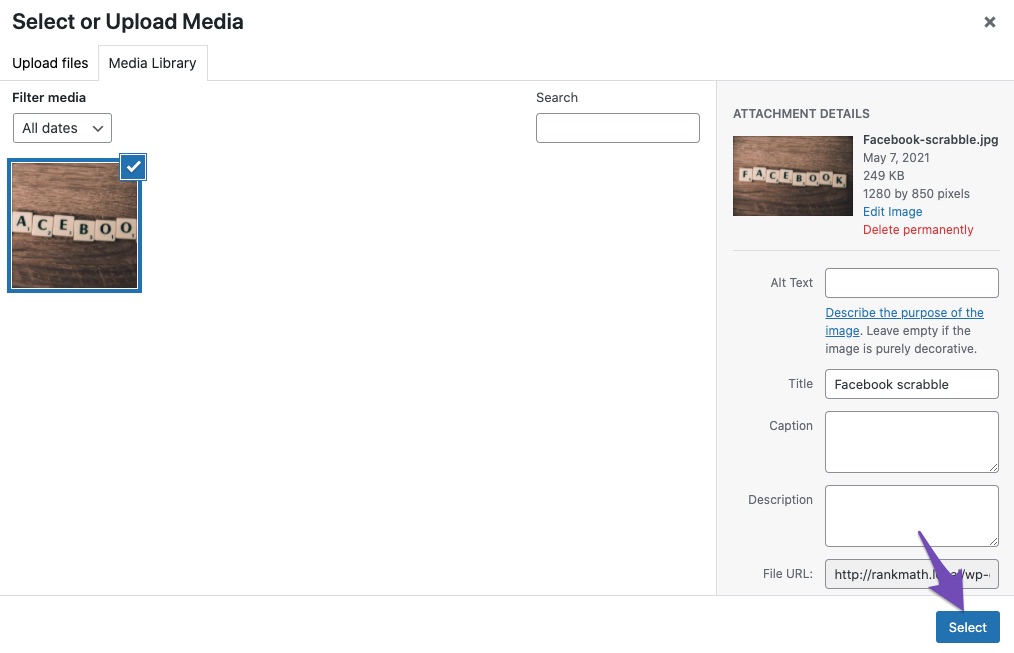
In our case, we’re going to upload an image from the Media Library. Next, click on the Select button.
Once you selected it, the image will now replace the default image in the Facebook sharing preview.
For further ado, see the screenshot below:
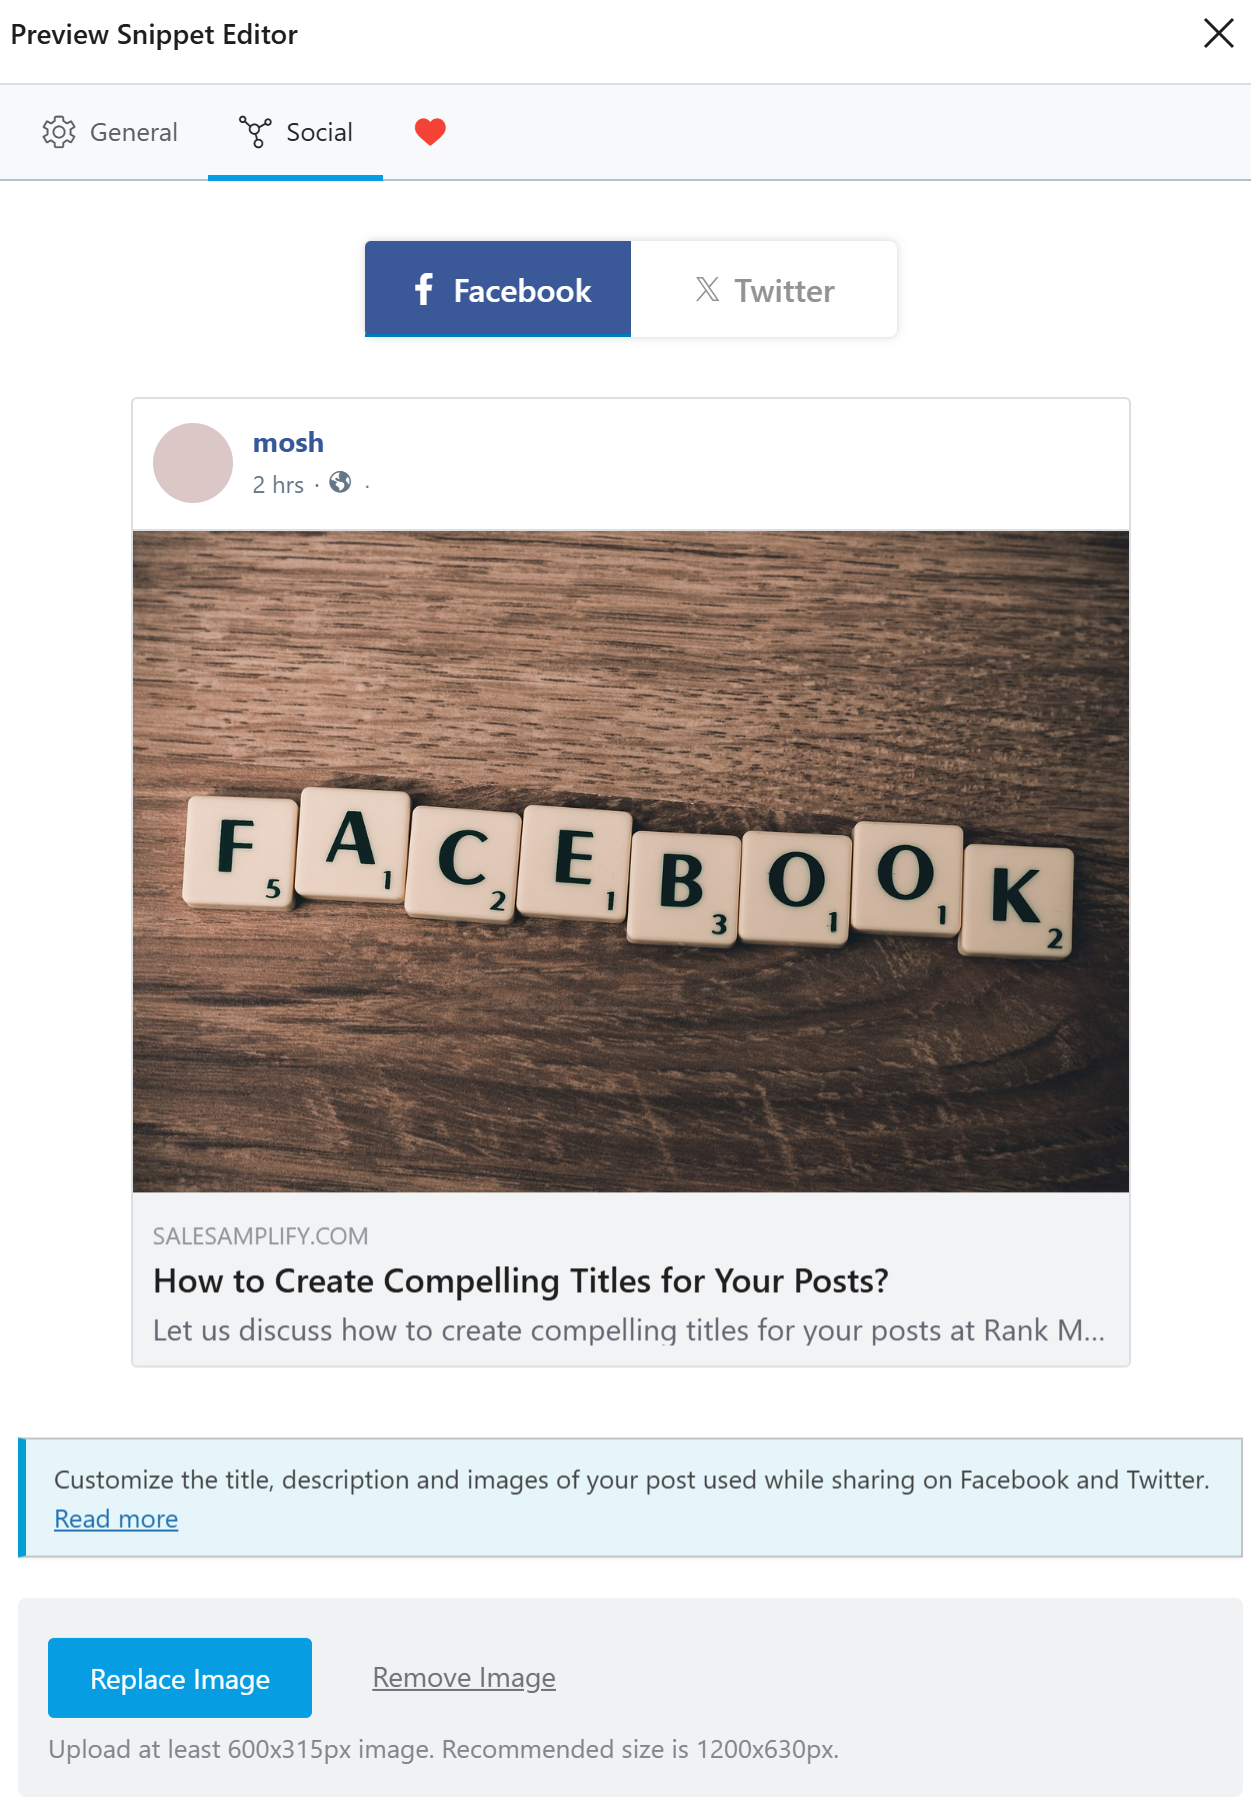
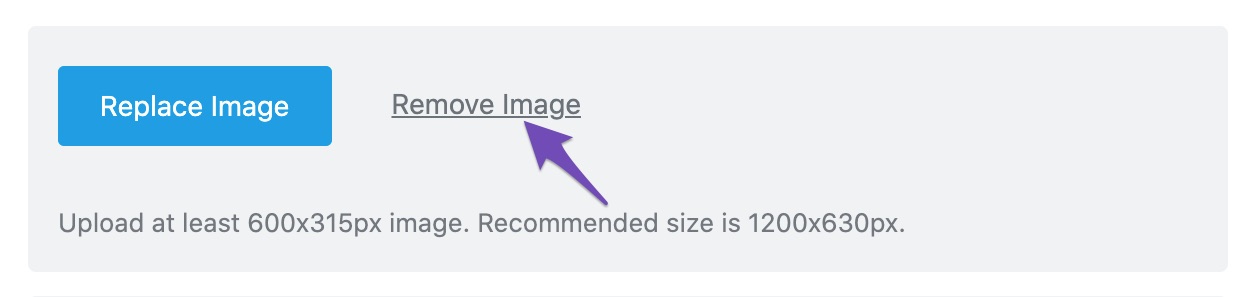
If you want to change the image, click the Replace Image option, and from the WordPress media gallery, you can either upload a new image or choose an existing one.
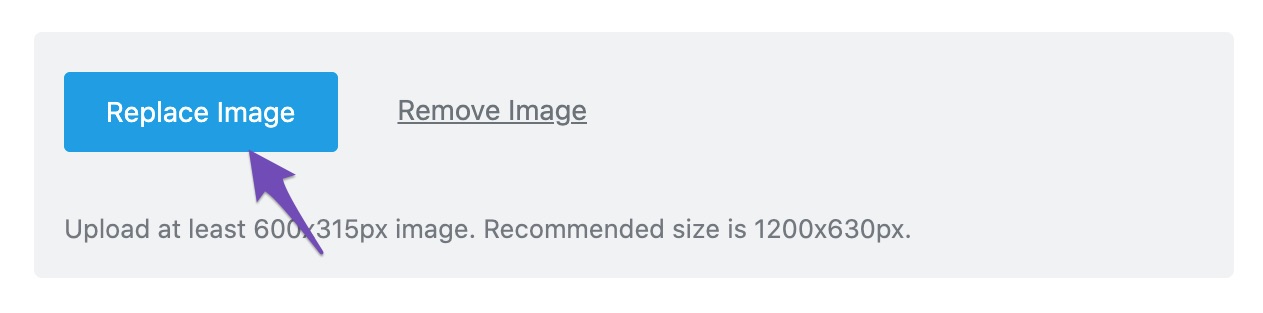
You can also click the Remove Image to delete the image (it will not be deleted from your website, just from this option).
1.2 Important Things to Know About Facebook Images
There are a couple of things you should know about images that you use for Facebook sharing. First, Facebook heavily compresses any image you upload to the website. This happens to pictures you upload to Facebook directly and will also happen to thumbnails that are fetched from the website. So, if the quality of the picture you see on Facebook isn’t quite as good, Facebook’s compression is to blame.
Second, you should use the appropriate aspect ratio when choosing an image. The recommended size for upload is 1200 pixels wide and 630 pixels tall. You can get away with uploading smaller images, but keep the aspect ratio the same to make the best use of the space.
1.3 Setting the Facebook Title
The Title is where you set the title of the shared post. The title is displayed just below the image and is very important to achieve a good click-through rate, as users typically notice the image first, then check the title to see if what they are seeing is relevant to them.
You might have noticed that the title field has a placeholder, and it is not any default text.

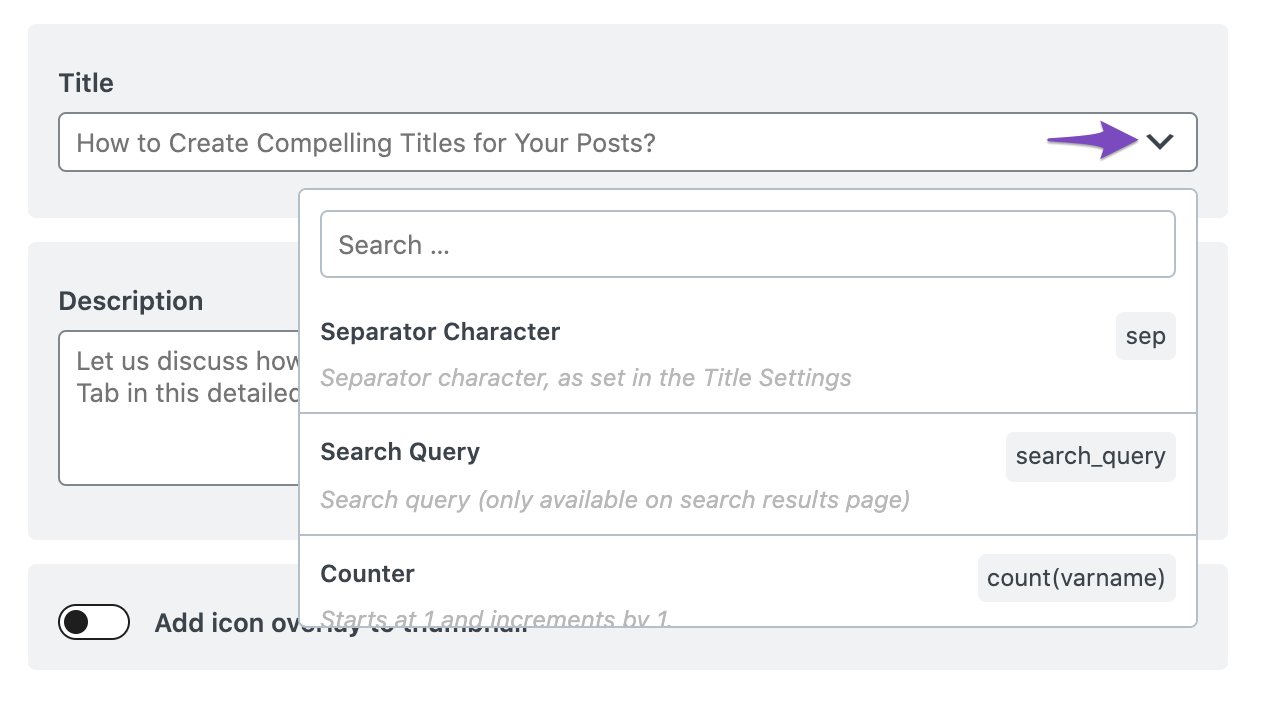
Similar to other Titles & Meta fields in Rank Math, you can take advantage of the variables here to add any data from the post.
To do this, click the downward Arrow Button on the right end side, and select variables from here.
If you don’t want to set a dedicated title here, you can leave it with the default placeholder text, which is actually imported from the SEO title that you’ve set for your post in the General Tab of Rank Math.
Now you might think that the same title can work for SEO and social, but you’d be wrong. On Google search, people specifically search for certain keywords to find some information. That helps define their intent, which you can use to create a compelling title.
On social media, content is mostly discovered, which means your viewers might come across your post even if they had no intention of doing so. This difference is very important to understand. That is why you need to craft a different headline for your social media instead of re-using the title that you created for search.
1.4 Setting the Facebook Description
The description is usually present just below the title of the shared post, and it helps drive more relevance to your post.
The importance of the description is something that isn’t always mentioned. On search, the title and description (also the URL) help the user make the decision to click through. However, on social media, users primarily look at the image and the title to determine if they want to click, and the description is largely ignored.
But, that doesn’t mean that you should ignore the description, as it can benefit you in many ways. Facebook’s algorithm also keeps evolving, and you might never know what data they use to match the user’s intent with content.
Enter a description in the Description field of the Facebook profile that will be used for social media.
Alternatively, click the downward Arrow Button on the right end side, and select the available variables tags you can choose from.

You can also use the same meta-description, which you have optimized in the General Tab. To do so, simply leave this field empty.

But, as we explained, the SEO meta-description and the social description have different intents, and therefore, should be treated differently.
1.5 Checking the Facebook Preview
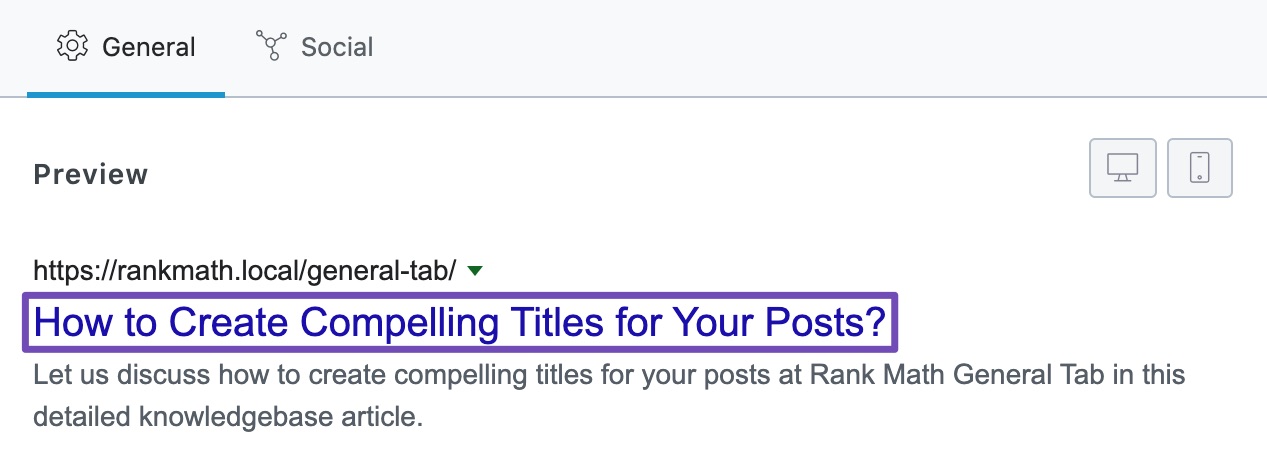
If you remember, we have built a preview option in the General Tab of the Meta Box, which helps you preview how your website will appear in the search results. It helps visualize your title, URL, and description and make changes to make it more appealing to the users. Wouldn’t it be nice to have a similar option for social media?
Actually, we have built the same feature for social media as well, and you can check the Facebook preview right below the Facebook button. Rank Math generates a realistic-looking preview of a Facebook post using your configuration. Here’s what it looks like.

1.6 Add Icon Overlay to Thumbnails
Icon Overlay is a pretty powerful feature inside Rank Math that can skyrocket your click-through rate on Facebook if used correctly. What this option does is add an overlay to your image, making it look like a video or a playable GIF.
Once you enable it, the dropdown menu will appear where you’ll see two options:
- Play Icon
- GIF Icon
The Play icon simply overlays a play button on the video, while the GIF icon overlays a GIF file’s icon. Here is how the Play Button looks when enabled.
And, this is how the GIF image appears:
Apart from the default overlays (Play and GIF icon), Rank Math PRO users will also have the ability to create custom thumbnail watermarks. The option to create one is available under Rank Math’s Titles & Meta settings, and any such created thumbnails will also appear under the Icon overlay option.
You can make use of this feature to add your own logo or any custom overlays. You can refer our dedicated tutorial to configure this option.
1.7 Important Note About the Icon Overlay Feature
Although the Icon overlay is quite powerful and is likely to get you higher clicks, you should use it responsibly and not as a simple click-bait trick. Facebook is hard on pages that give people an unsatisfactory experience and reduces their reach frequently.
To avoid this, use the overlay only on pages where you do have videos or animated gifs related to the topic on the page. Also, make sure to have the video or gif at the beginning of the page rather than the end. This way, the user will immediately notice it and is unlikely to bounce back to Facebook.
You can now configure how your content will look when posted on Facebook.
Let’s move to the Twitter configuration.
2 Configuring Twitter Sharing Options
You can switch to the Twitter tab, and configure the same options for Twitter that you just configured for Facebook. For example, you can set a unique title and description for your tweets, and add an image as well.
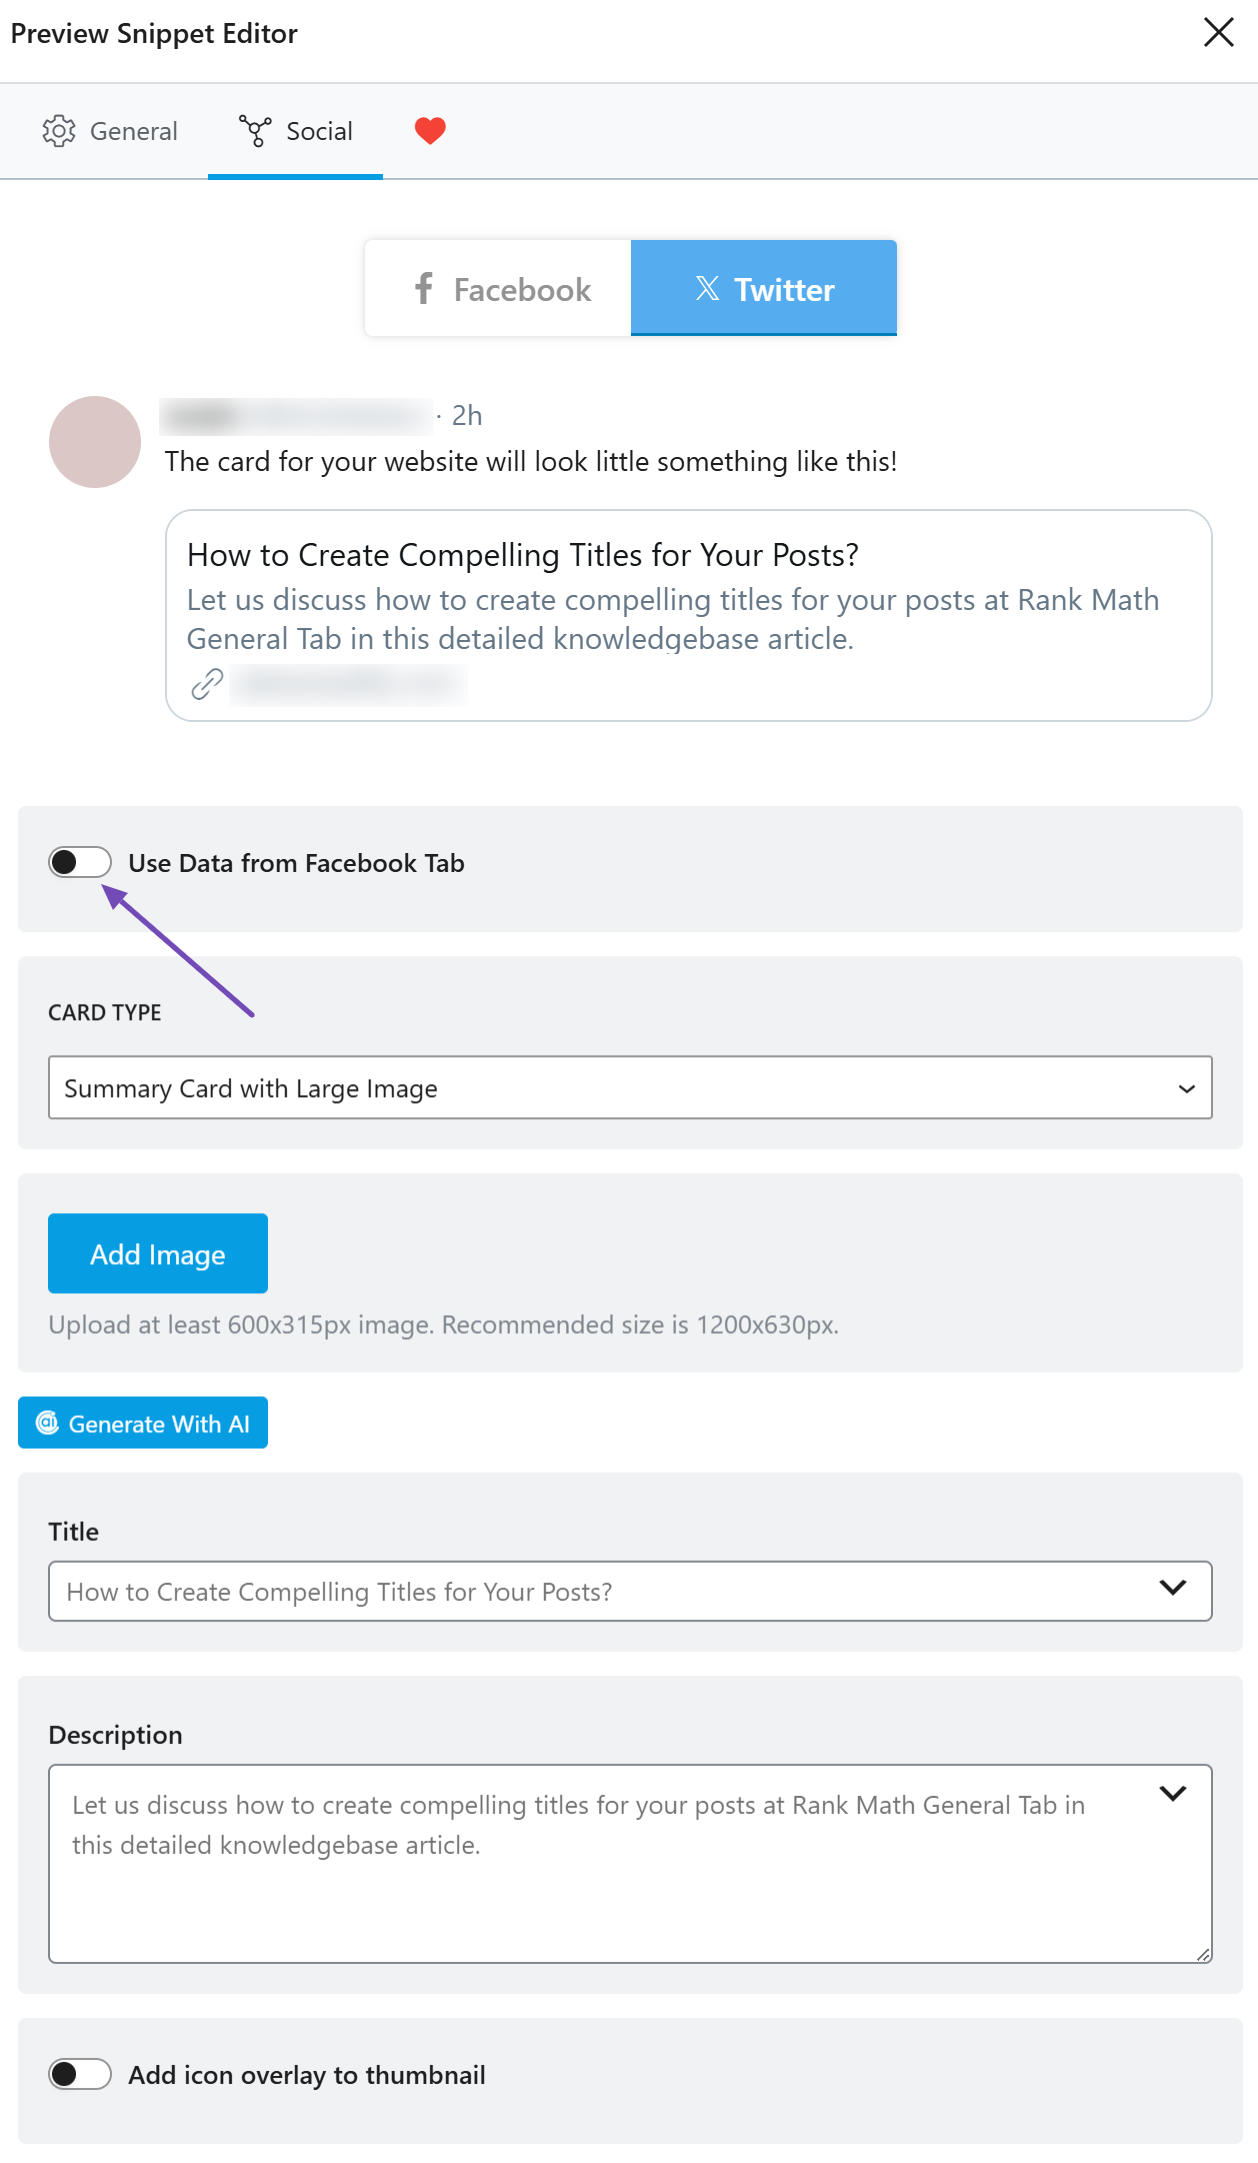
Once clicked, all the Twitter options should become visible, and your screen should look something like this:
As you see, the options in the Twitter tab are quite similar to the Facebook options, but there are a couple of additional options as well. Let us discuss all the options.
2.1 Use Data from Facebook Tab
This is the first option in the Twitter Tab, and it can save you a bunch of time. This option is enabled by default, it simply copies all the relevant settings from the Facebook Tab and uses them for configuring your Twitter settings as well, saving you a bunch of time.
When you disable this, all the settings that are taken from the Facebook Tab are also disabled, and you’ll see options to add Image, Title, Description, and Icon Overlay.
Here is how your settings will look if you disable this option.
Whether you should use this option or not depends a lot on the type of content you produce, your audience, and the availability of your time. People on Facebook and Twitter behave quite differently, and we would strongly advise you to craft a headline and description exclusive for your Twitter audience.
But, we also understand that doing so requires time and effort, and you might not want to invest that—especially if your following is small or not very active on Twitter. Instead of not optimizing your Twitter at all, we would recommend that you at least use the Facebook options that you’ve configured. All it takes is a click of a button.
2.2 Setting Up the Image
The image is self-explanatory. It represents the image that will be used when your post is shared on Twitter. Depending on the type of card you configure, the image will appear different in the final result, and we’ve already shared examples of how the Summary Card and the Summary Card with Large Image looks.
The only difference between the Facebook image and the Twitter image is the supported aspect ratio. Twitter expects an image with an aspect ratio of 2:1 with minimum dimensions of 300 pixels wide by 157 pixels tall and maximum dimensions of 4096 pixels wide and 4096 pixels tall. The image must also be less than 5 MB in size.
2.3 Setting Up the Title
Similar to the Facebook Title, the Title is the headline that appears next to the image. From a user’s perspective, the Title reads out like the headline of the link that they see, so make sure to create an eye-catching title, but also make it relevant to the actual content.
2.4 Setting Up the Description
The Description is the supporting text that appears just below the title of the card, and its job is to give a sneak peek of the content to the user. Similar to the title, the description should be crafted to entice the user to click, but it should also be an accurate representation of the content.
2.5 Default Title and Description
You might have noticed that the Title and Description fields have placeholders, and even the preview uses the placeholder. That text is not a default placeholder text, but it is taken from your SEO Title and SEO Description that you’ve set in the General Tab.
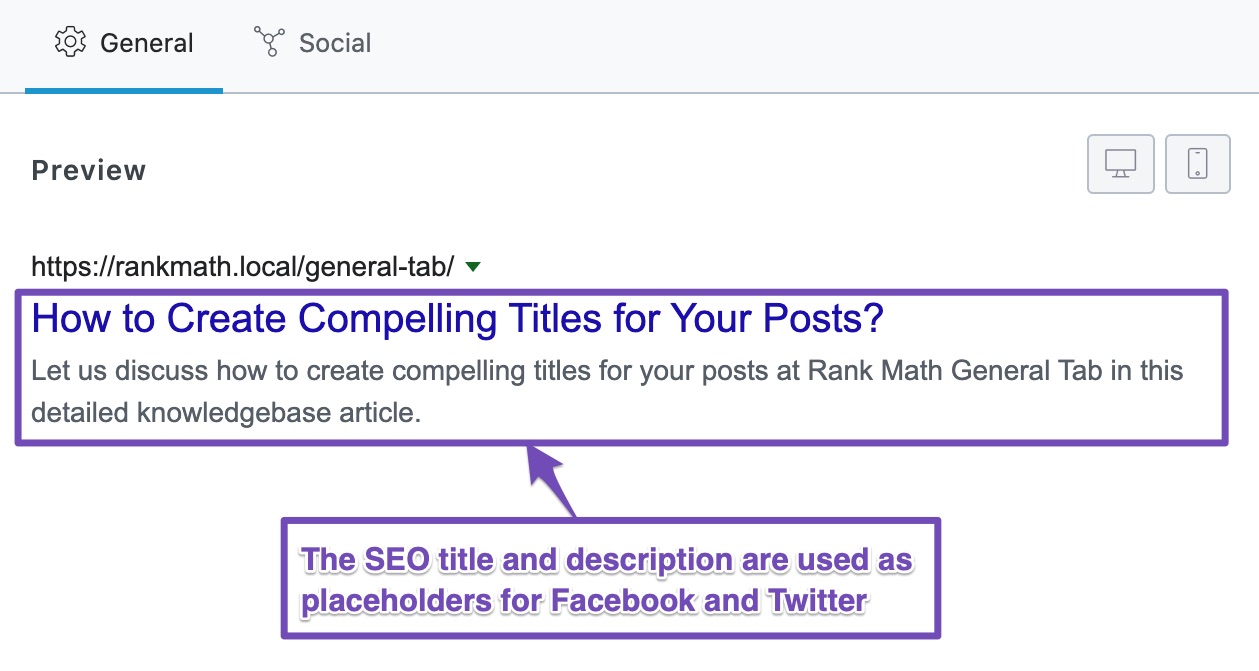
We, of course, recommend that you create customized titles and descriptions not only for your search results but the individual social media channels as well. We also understand that it is not always feasible to do this; that is why the default behavior is set to use the Title and Description set in the General Tab.
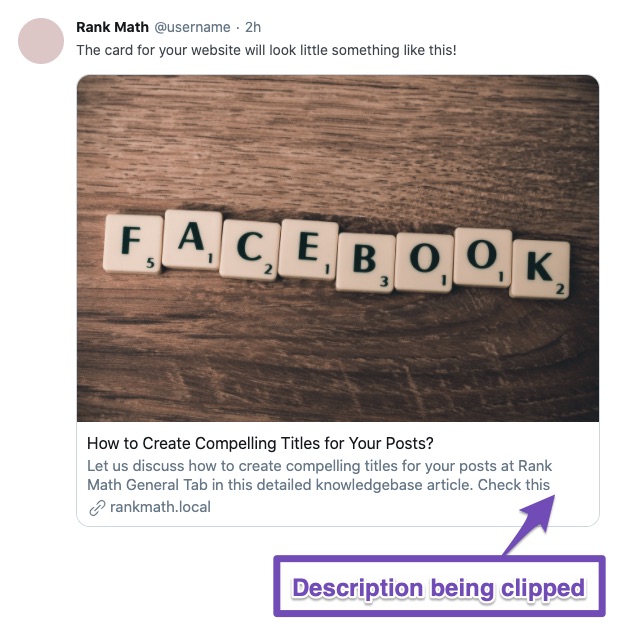
Just pay attention to one thing, though. Search engines and social media channels have different recommended lengths for their titles and descriptions, and clipping may occur if the title or description is too large.
Here is an example.
In the General Tab, you can see that the title and the description are of the appropriate length.
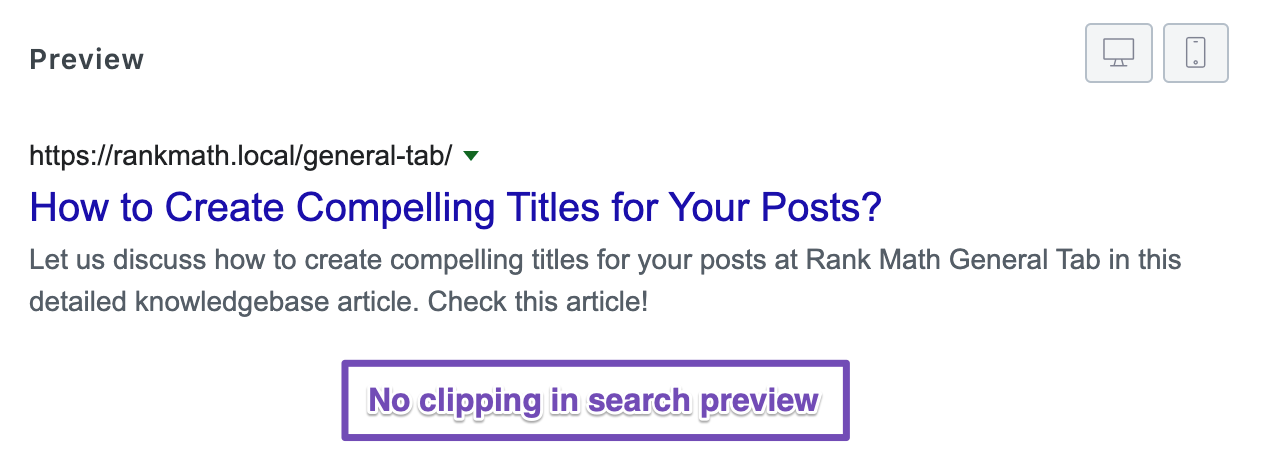
But, when the same title and description are used for Twitter, the description is trimmed as it exceeds the maximum length by a large margin.
Only when you type in a smaller description, the complete description will show up in the preview.
2.6 Card Type
This is the only setting that is not available in the Facebook section, as this feature is exclusive to Twitter. Unlike Facebook, Twitter allows many different types of content sharing, each of which is suitable for specific types of content. Twitter calls them cards, and here are all the card types supported in Rank Math.
- Summary Card with Large Image
- Summary Card
- App Card
- Player Card
Let’s discuss each card type in detail.
2.6.1 Summary Card with Large Image
A summary card with a large image is the most suitable card type for blog posts. This card can include a large thumbnail (which makes it more attractive), and it will also show the title and description of your post.
Here’s the example screenshot below:

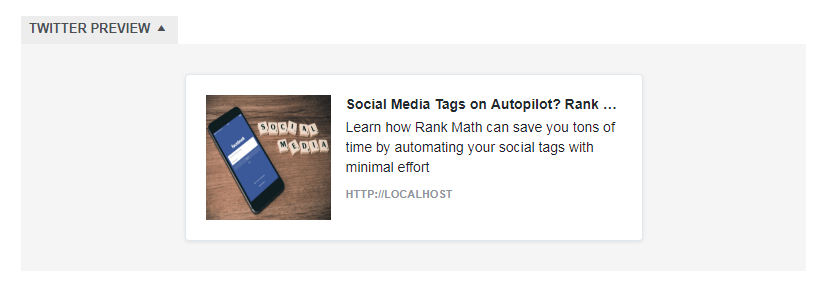
2.6.2 Summary Card
This card type features a small thumbnail placed to the left of the title. It will also show the title and description of your post.
Here’s the example image below:
2.6.3 App Card
App Card is the perfect way to promote your mobile app. With its simple goal of getting people to install your app, it makes it easy for people to find and share your content.
When you release an app, be sure to blog about it using App Card. This will help get the word out and increase installation rates.
That is a good thing. When people Tweet about your app, it reaches out to their friends and followers. Some of them will be intrigued, and a percentage of them will install the app too.
That is the definition of viral marketing in a nutshell. On the other hand, is rarely predictable. All you can do is experiment, optimize, and hope for the best.
App Cards reduce the number of steps it takes to discover an app and install them. Usually, when people come across a new post about apps on their timeline they have to take multiple extra clicks before being able to access these services through official channels like Google Play Store or Apple App Store – that’s where AppCards come in!
They not only help the right people to the app but also increase your download conversion rate. Users just have to click a link, and they will reach the app store, where they can download the app.
Now that you understand the power of App Cards, now take a closer look at all the options in it.
Here’s an image that shows all the options in the App Card.
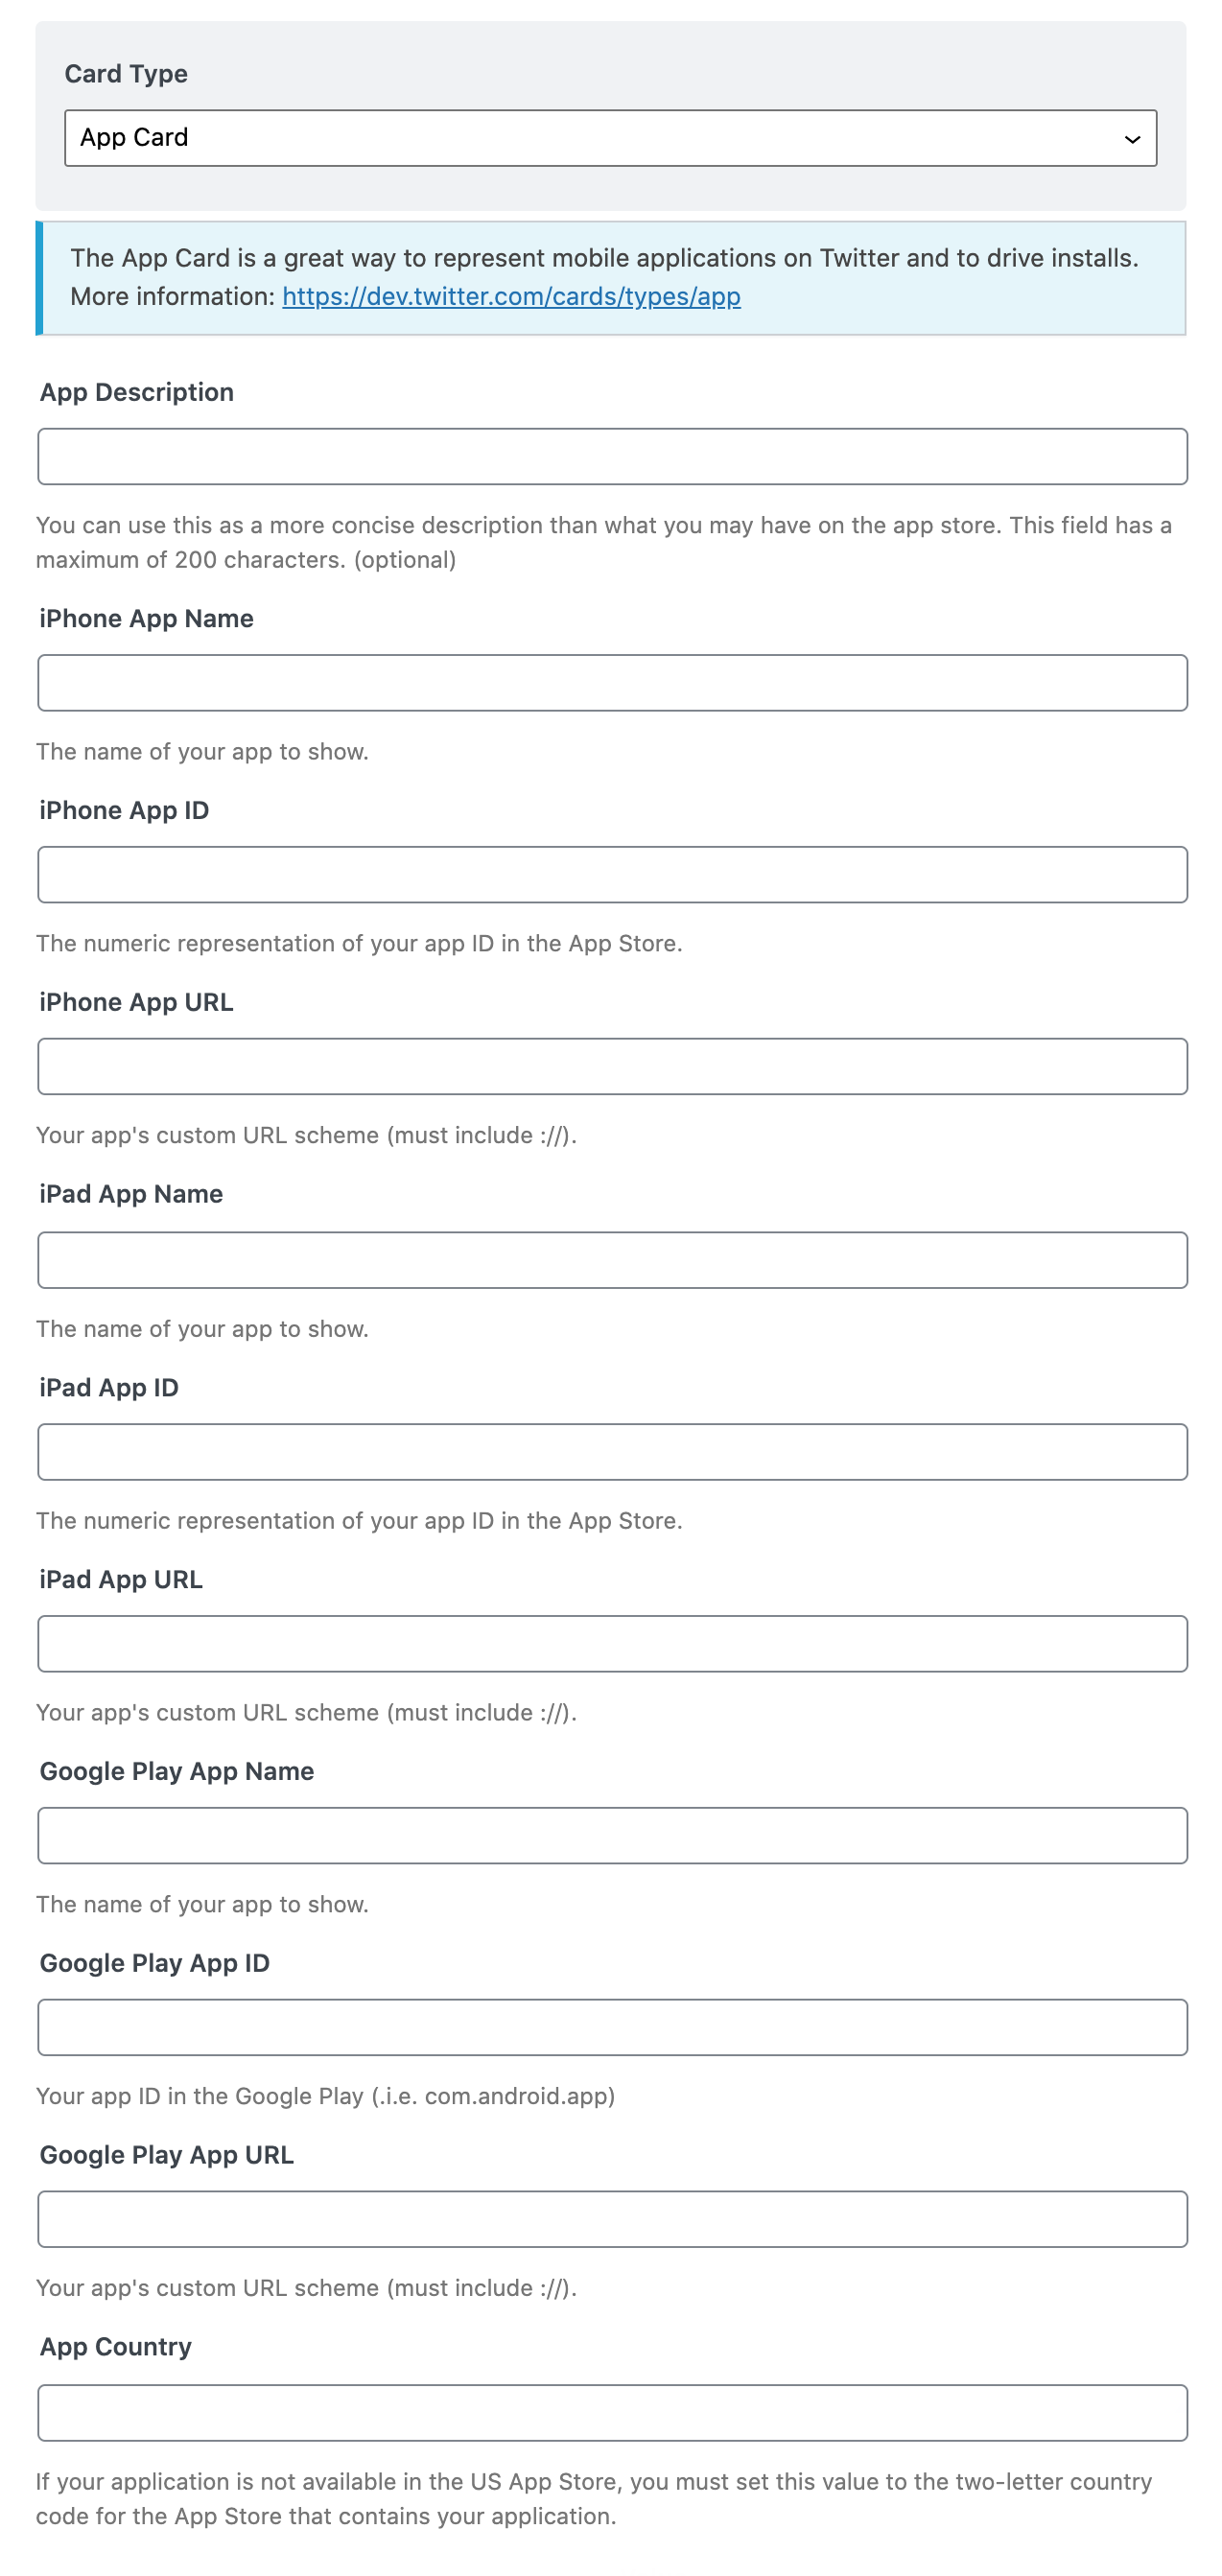
Let us understand all the options.
- App Description: You’ll need to enter a description of the app. This field has a limit of 200 characters, so make sure to keep the description precise.
- iPhone App Name: Enter the name of your iPhone app.
- iPhone App ID: Enter the app’s numerical ID from the App Store.
- iPhone App URL: You’ll need to enter your app’s custom URL scheme including the “://” character.
- iPad App Name: If you also have an iPad variant of the app, enter the name of the App here.
- iPad Add ID: Enter the iPad App’s unique App ID here
- iPad App URL: Enter the app’s Custom URL scheme, including the “://”.
- Google Play App Name: Enter the name of the App as it appears on the Google Play Store.
- Google Play App ID: Enter the unique Google Play App ID for the App here.
- Google Play App URL: Enter the app’s Custom URL scheme, including the “://”.
- App Country: If your app isn’t available in the US App Store, then enter the two-letter country code for the App Store where your app is available.
Setting up the App Card is fairly simple and quick, as all you have to do is put in a lot of data. However, there are significant benefits. Your app will be visible to a whole new set of people every time you retweet it, allowing them to install the app with a single click.
If you’d like to learn more about the App Card, you can refer to Twitter’s official documentation.
2.6.4 Player Card
The Player Card is used when you’re embedding audio or video content right inside the Twitter timeline. Technically, you can embed anything within an iFrame, but Twitter has strict rules on what you can embed using the Player Card.
The main benefit of using the Player card is that when people see a Player card in their timeline, they are more likely to click and watch the embedded content. This is because the player card is visually more appealing than a regular tweet with a link.
The Player card is one of the most complicated to set up, but most of the time, you don’t need to use this feature. You’ll understand it better when we explain the Player Card in detail.
Here’re all the options that you would see in the Player Card.
- Player URL
- Player Size
- Stream URL
- Stream Content-Type (the MIME type)
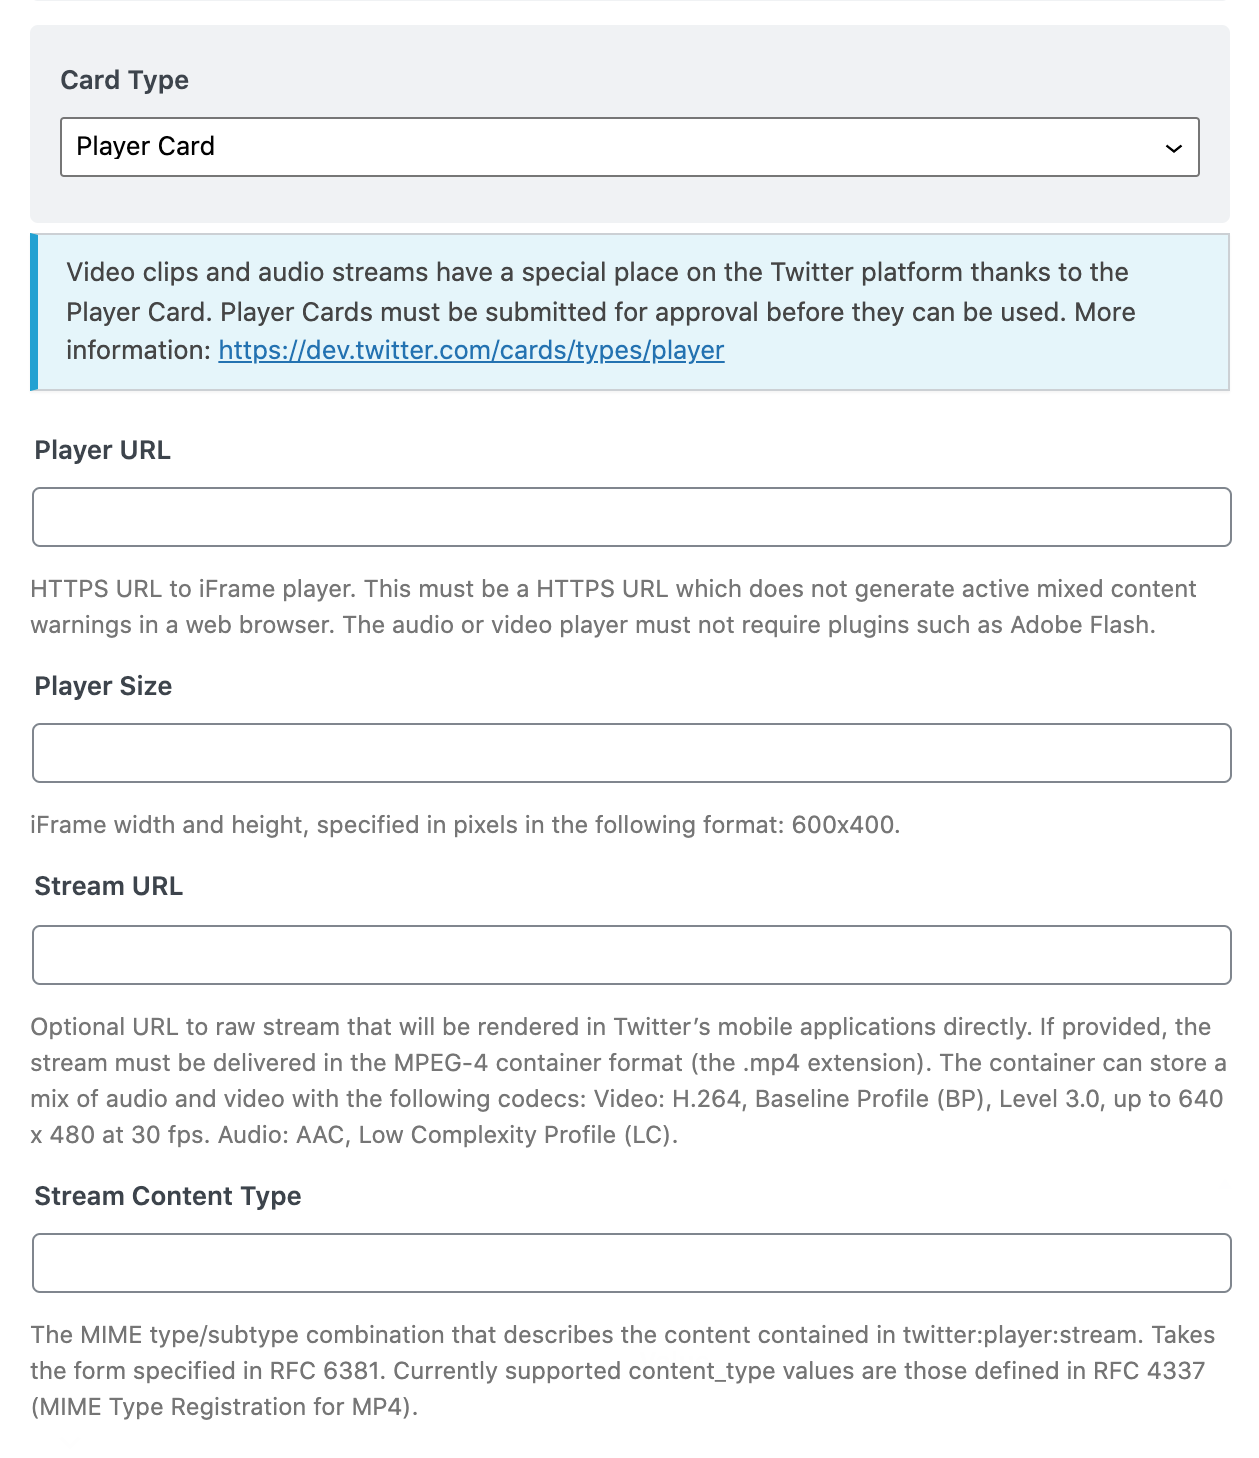
Let’s take a look at each of these options one by one.
Player URL
The player URL is loaded into an iframe on the standard web version of Twitter (not the mobile app) – it should scale to fill the full size of the frame, and it should provide standard player controls.
The player must have a secure HTTPS URL to make sure your content is safe.
You can’t utilize any plugins, such as Macromedia Flash, on Twitter because it is a cross-platform service. Fortunately, HTML5 provides standards for video elements that may be used on all popular platforms.
Player Size
In this part, you need to put in the width and height of the iframe player that you’ve added in the previous field. The iframe size should be entered in pixels, for eg:600×400.
Stream URL
In order for people to see your video on Twitter, you need to give them a special link to watch it. This is called the Stream URL. You also need to put in the size of the video player and the height and width of the frame. The video must be in MP4 format.
Stream Content-Type
In this part, you have to provide a detailed MIME type for the video, using the format outlined in RFC 6381 – Codecs and Profiles parameter for bucket media types and RFC 4337 – MIME type registration for MPEG-4 (these are web standards).
MP4 videos are not all the same – MP4 is just a container file. Just like a zip file can contain many different file types, an MP4 can contain many different varieties of video and audio.
MIME types are a way to describe the file type so that software can handle it properly – in this case, we need to tell Twitter’s Mobile App how to play your video.
As a WordPress user, you don’t usually have to worry about MIME types – the webserver handles that for you.
If the above sounds like gibberish to you, then you may need the help of a developer to set it up the first time.
As long as your videos are all in the same format (same video codec and audio type), then you can copy-paste the values in the future.
So, this is certainly the most technical card type. It’s important to get the settings right, or else the card won’t work. What’s more, the card won’t become active until it’s been reviewed by Twitter’s team.
You can read more about the process here.
The standards documents in the link are pretty dense reading, even for experienced tech-heads who understand how video files work. If you aren’t familiar with this type of thing, we don’t recommend you try to tackle it yourself. It’s better to hire a professional to do it for you–it will spare you a lot of headaches, trial, and error.
The bottom line is, is it worth it? Well, if your ideal customer is on Twitter, then it is definitely worth it. Also, you have to remember that you have to configure the Player Card with all the technical details if you’re hosting the content yourself.
If it doesn’t affect your business goals, you can always use a video streaming service like YouTube or Vimeo to upload your content and embed it on Twitter without the hassle.
Now that we’ve covered all the options applicable to Twitter.
Final Thoughts
That’s all! We have covered everything that you can do inside the Social Tab of Rank Math’s Meta Box. As you’ve seen, the social options may be tricky to understand and configure, but the results that they can get you are massive.
If you have any questions or doubts regarding the Social Tab or Rank Math in general, we encourage you to open a support ticket on our forum or ask your question on the Facebook Group.