Optimizing your images just got easier! If you’re using Rank Math PRO, you can install Imagify—a powerful image optimization plugin—directly from your settings with a single click. No manual downloads or installations are needed; Rank Math takes care of everything.
By compressing images without losing quality, Imagify enhances SEO and site performance, keeping your visuals sharp while ensuring faster load times.
In this knowledgebase guide, we’ll walk you through the steps to automatically install the Imagify plugin via Rank Math.
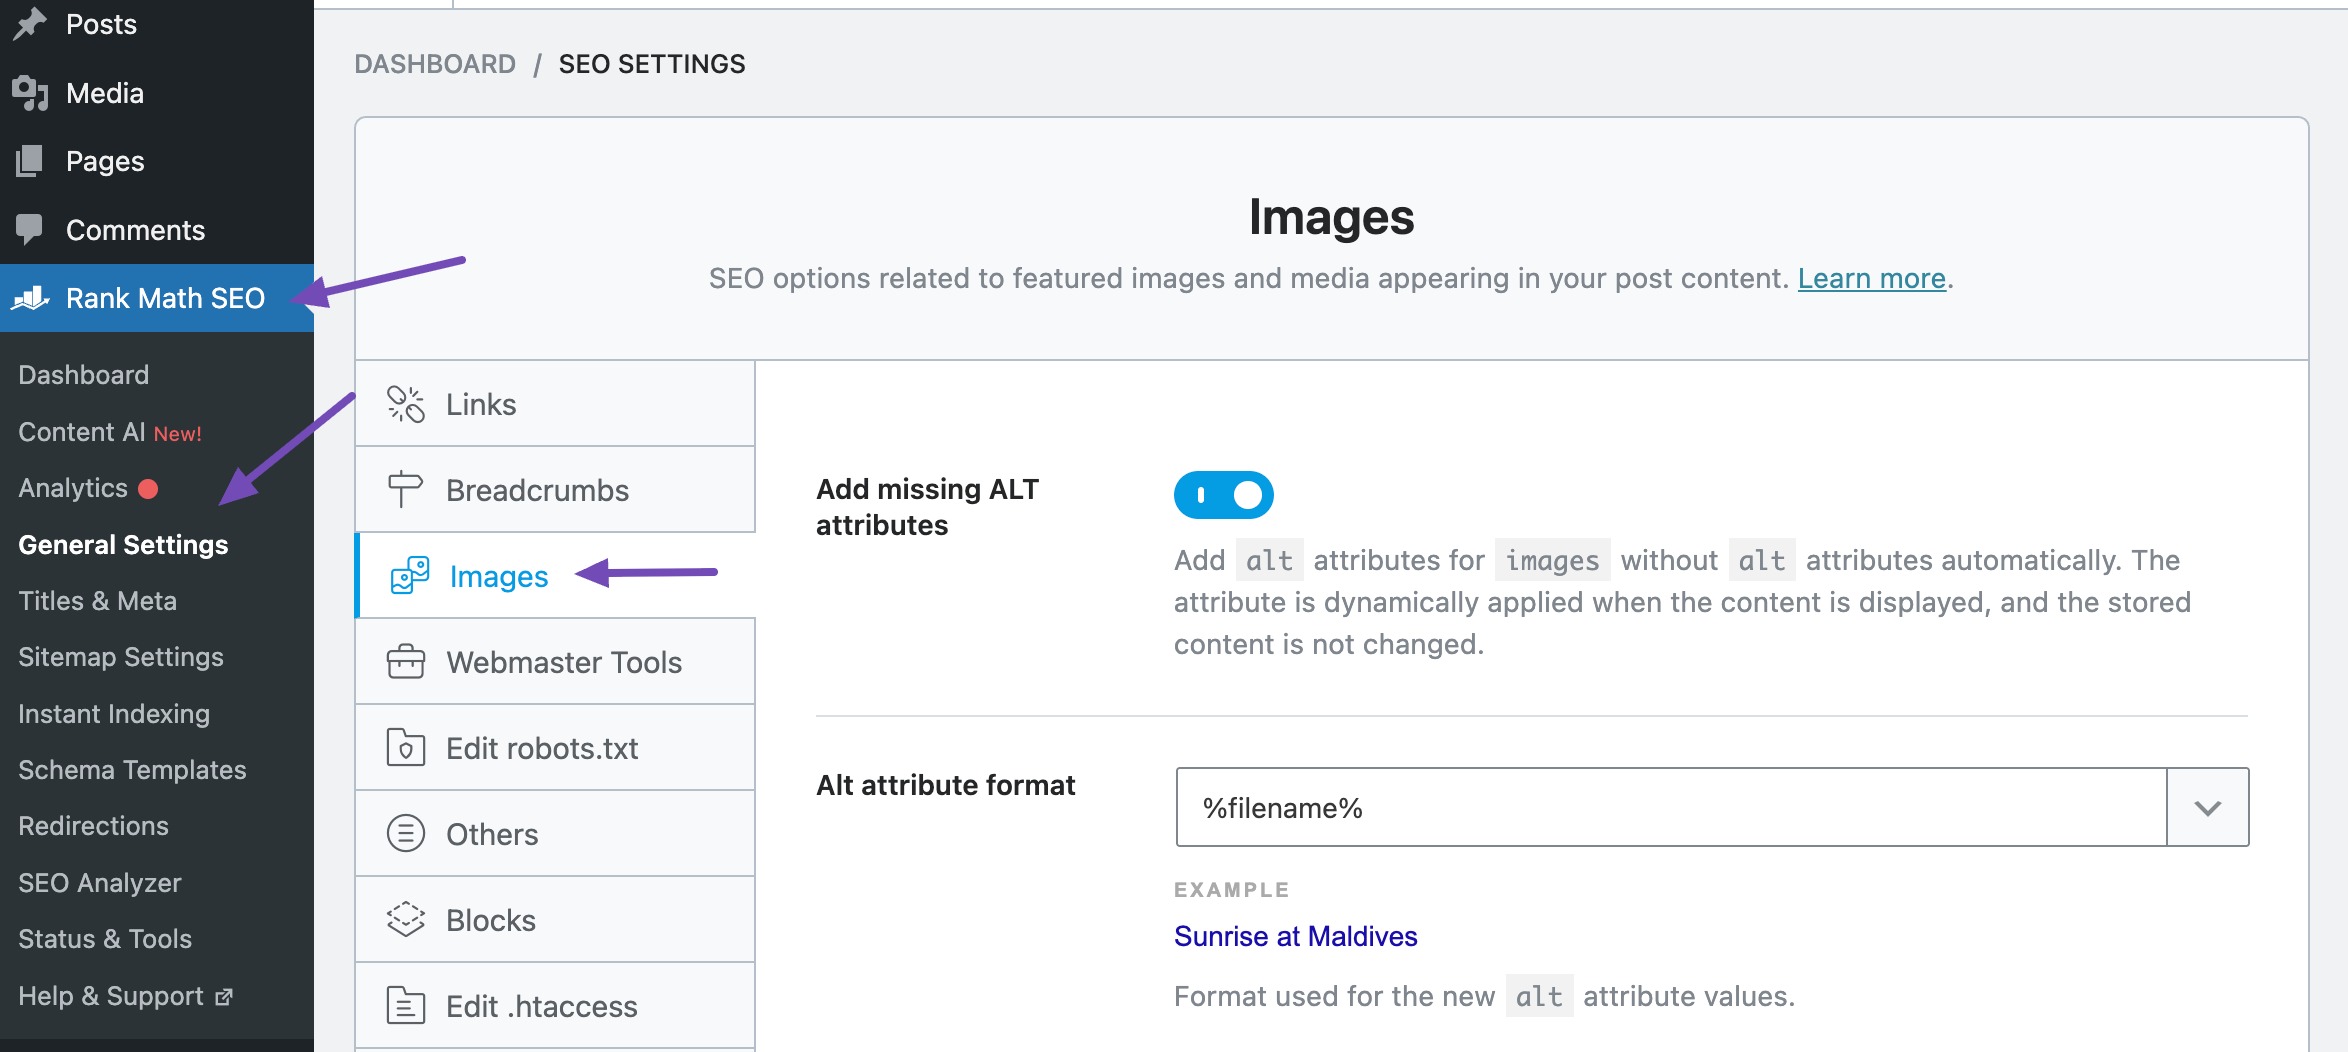
1 Access the Rank Math General Settings
To begin, log in to your WordPress dashboard and navigate to Rank Math SEO → General Settings from the left-hand menu. Next, go to the Images section.
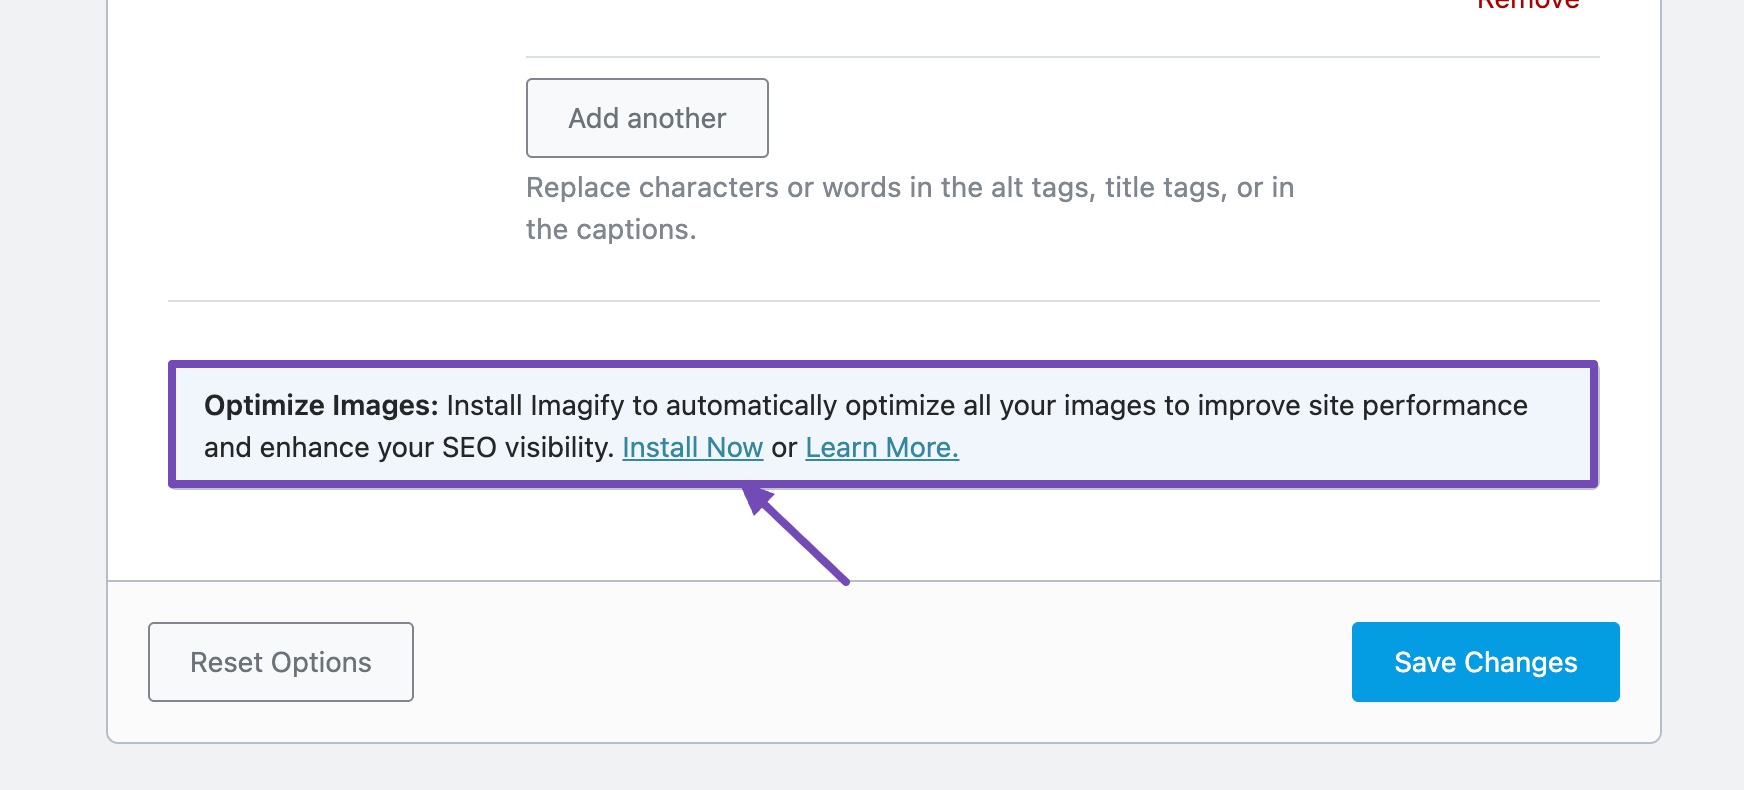
Scroll to the bottom, and you will see a notice prompting you to install the Imagify plugin on your site.
Note: This notice only appears if the Imagify plugin has not been installed. If installed, the notice will disappear and reappear if the plugin is deleted.
2 Install the Imagify Plugin PRO
To install the Imagify plugin, click the Install Now link in the notice.
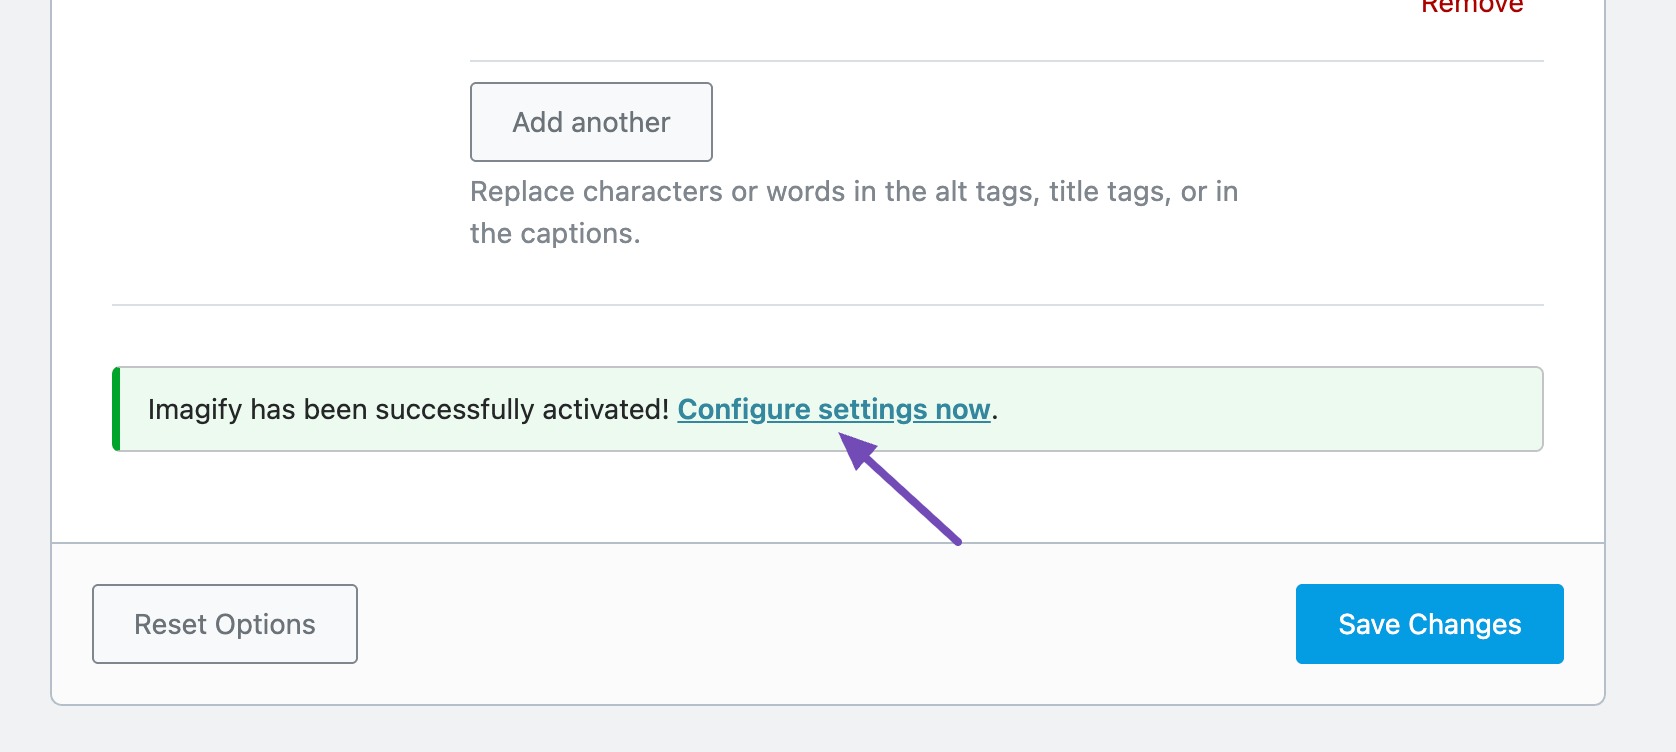
Rank Math will then automatically install and activate the plugin in the background, ensuring a smooth experience. Once completed, the notice will be updated to confirm successful activation.
3 Configure Imagify After Installation
Now that Imagify is installed, you’ll need to configure it to start optimizing your images. Click the Configure settings now link in the success message to access the Imagify plugin settings.
Alternatively, you can navigate to Settings → Imagify in your WordPress dashboard.
If you’re using Imagify for the first time, you’ll be prompted to enter an API key. If you already have an account, simply enter your key in the designated field and click the SAVE CHANGES button to unlock all of Imagify’s features.

If you don’t have an API key yet, click the CREATE A FREE API KEY button. Enter your email address, and you’ll receive a confirmation link to set up your account and your API key.
Once your API key is activated, take a moment to adjust the plugin’s optimization settings.
3.1 General Settings
In the General Settings section, you’ll find the following options:
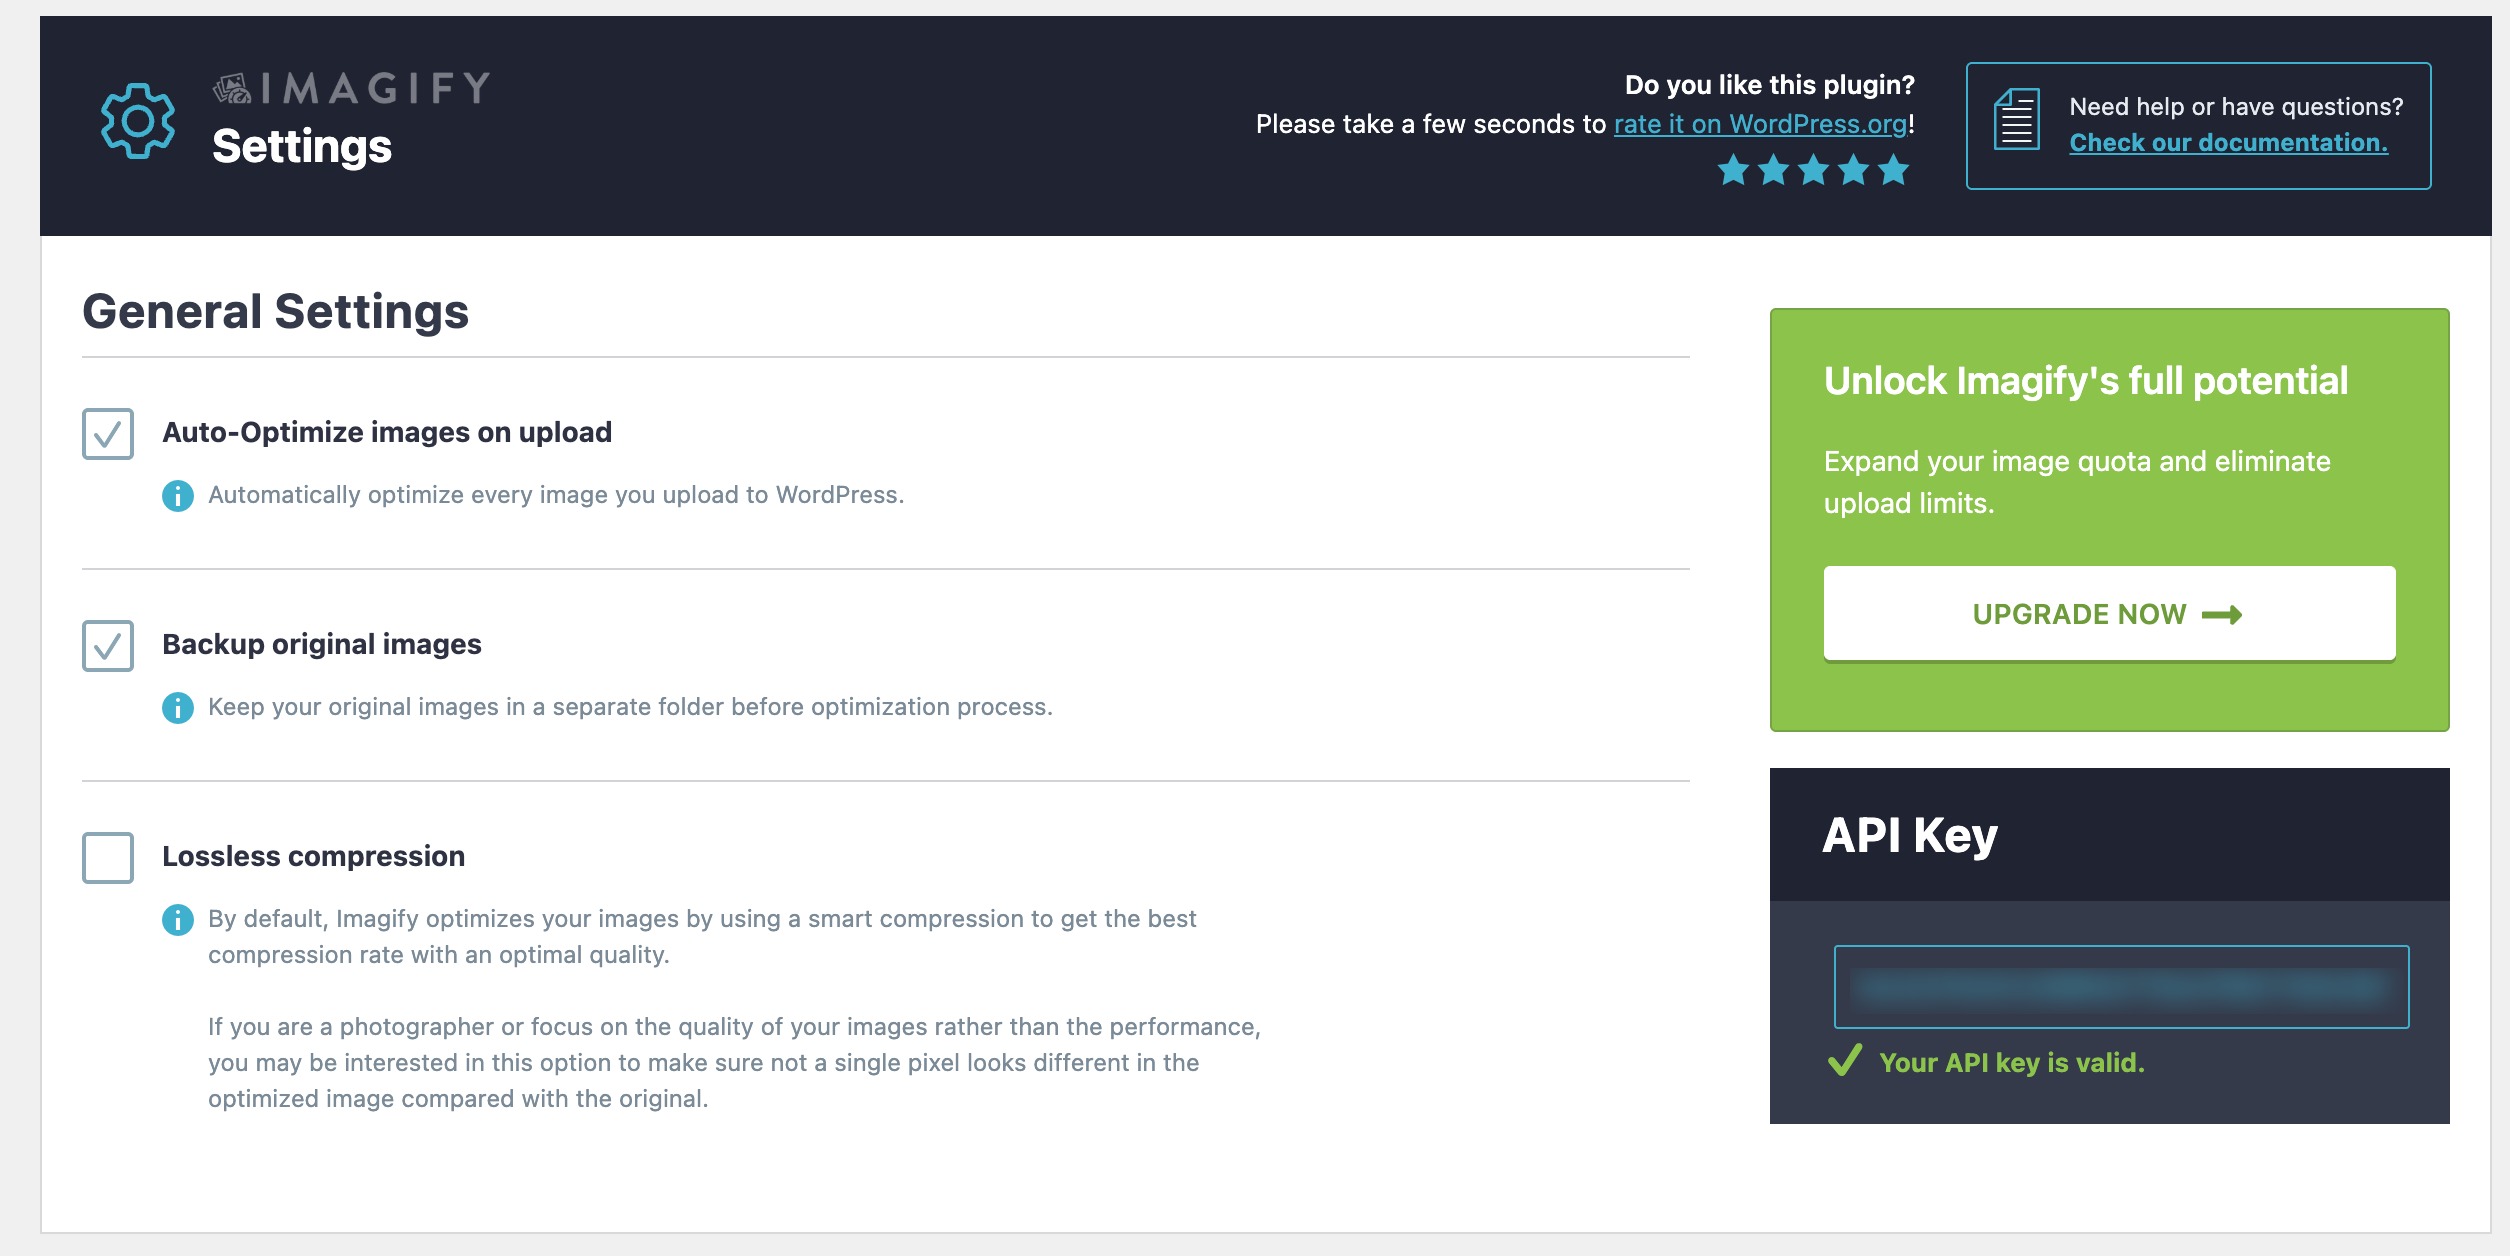
1. Auto-Optimize Images on Upload: This option is enabled by default and is highly recommended. It ensures that any new images uploaded to your media library are automatically optimized.
2. Backup Original Images: It’s advisable to keep this option enabled. Backing up your original images allows you to generate new thumbnail sizes if you change themes or install a plugin. It also enables you to restore original images if needed and generate next-gen formats like WebP or AVIF.
3. Lossless Compression: By default, Imagify uses smart compression to achieve the best balance between file size reduction and image quality. However, you can enable Lossless Compression if you want to preserve the original pixel quality, though this may result in larger file sizes.
3.2 Optimization Settings
The Optimization section includes several important options:
1. Next-Gen Image Format – You can choose from advanced image formats such as AVIF and WebP.
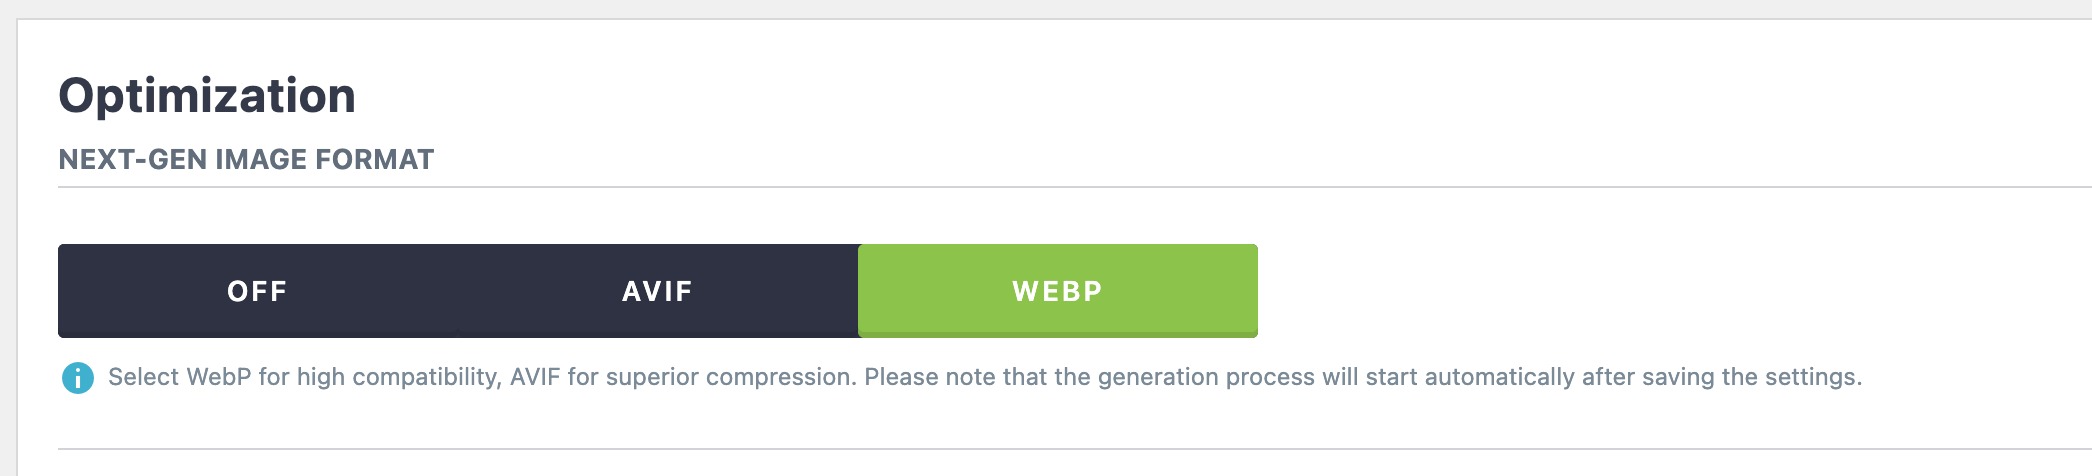
- WebP has wider browser compatibility.
- AVIF offers slightly better compression but is supported by fewer browsers.
- You can also choose OFF if you don’t want to use Next-Gen formats.
2. Display Images in Next-Gen Format on Your Site – Imagify uses a fallback mechanism so that if a browser doesn’t support WebP or AVIF, the optimized PNG/JPG version will be served instead.
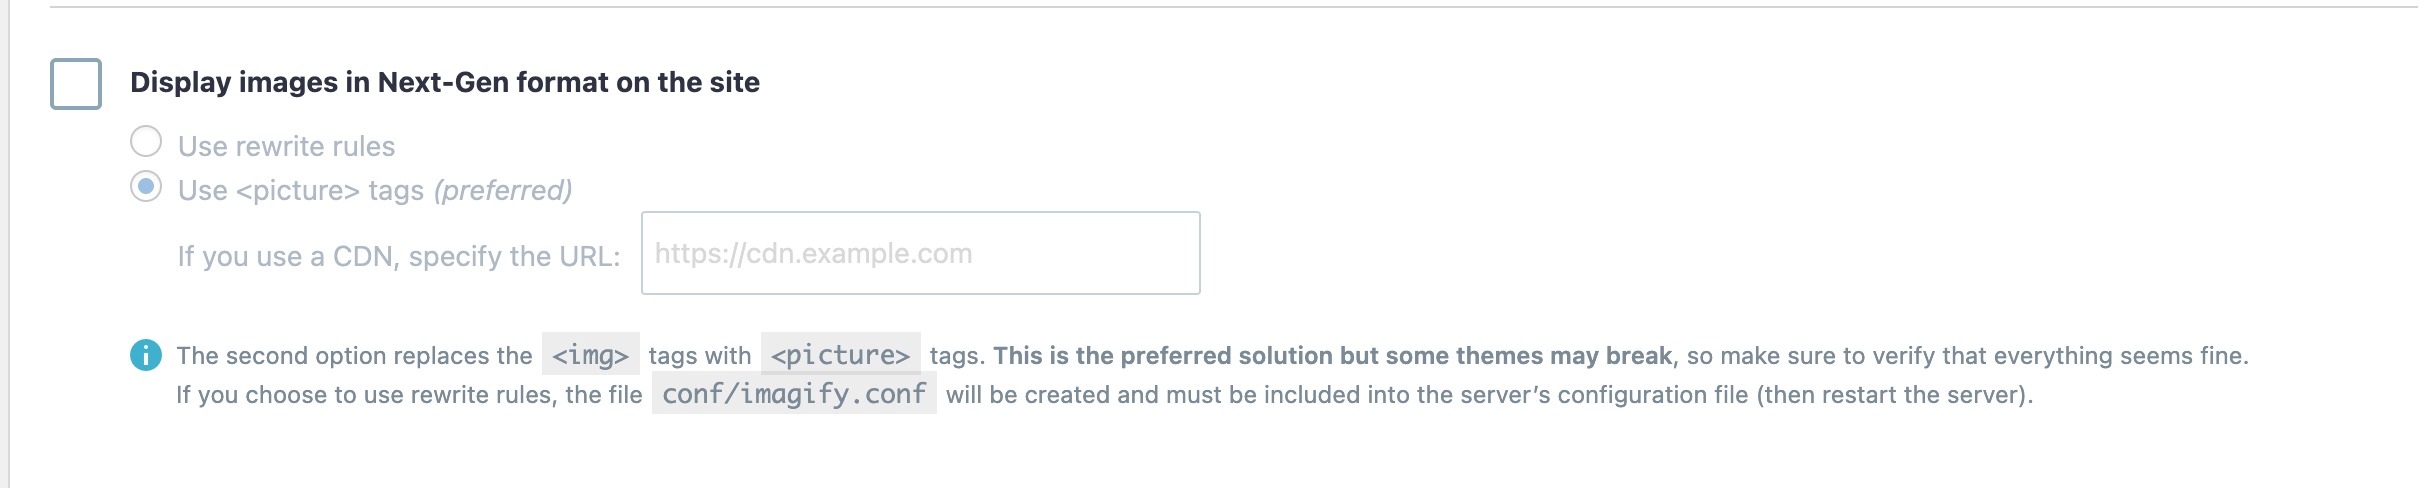
- Use Rewrite Rules (Recommended): This method doesn’t alter your site’s HTML and works well for most setups, except when using Cloudflare or a CDN.
- Use
<picture>Tags: This method replaces<img>tags with<picture>tags for better compatibility with Next-Gen formats.
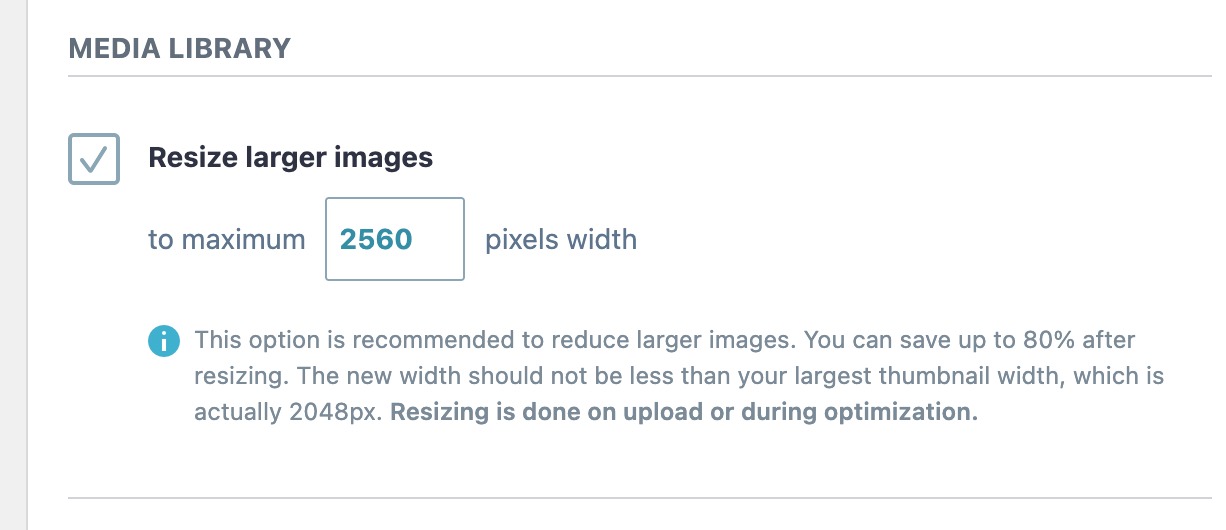
3. Resize Larger Images – You can set a maximum width for images based on your site’s needs. This ensures that large images are resized appropriately before being displayed.
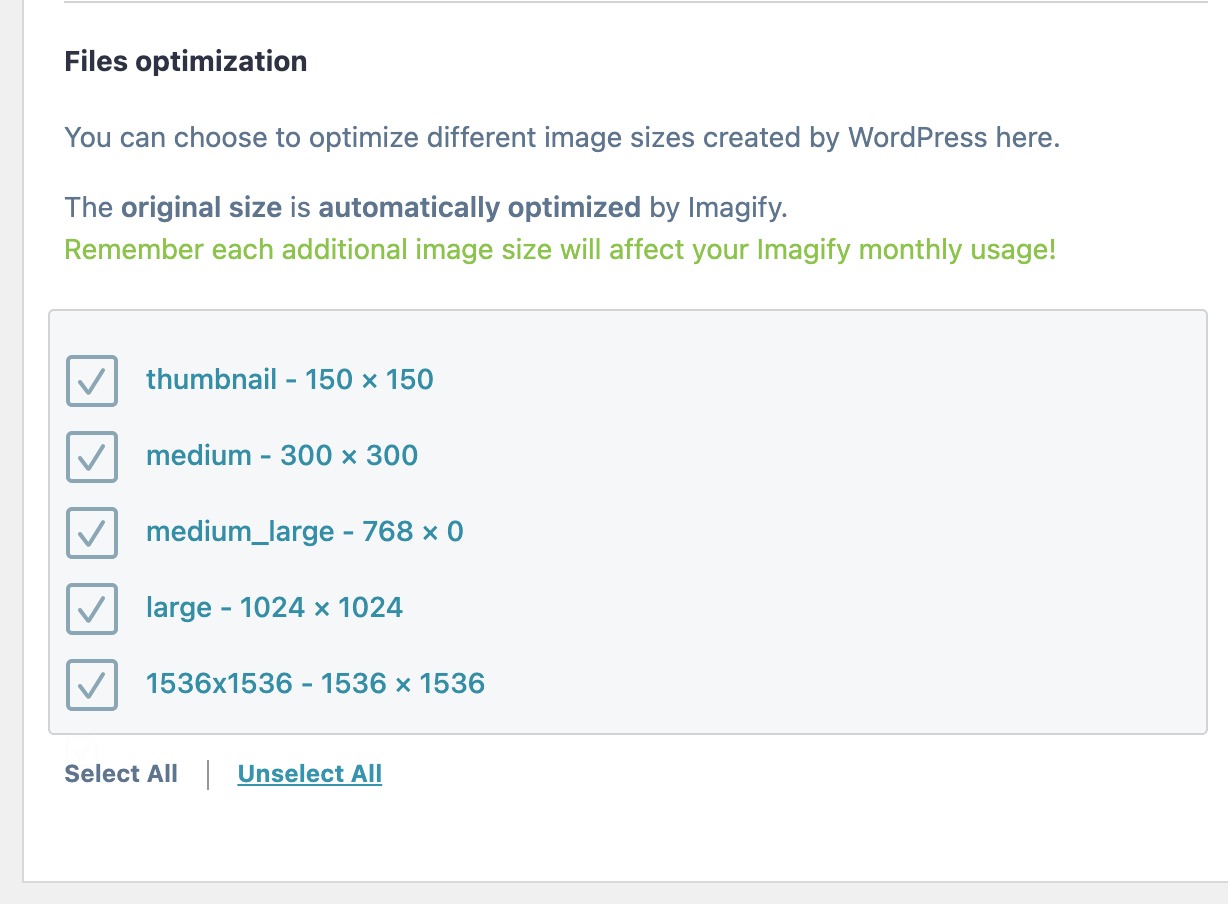
4. Files Optimization – This section lists all thumbnail sizes registered for your site’s media library. Imagify optimizes and creates Next-Gen versions for the selected sizes. It’s recommended that you keep this enabled for images actively used on your site while disabling unused ones.
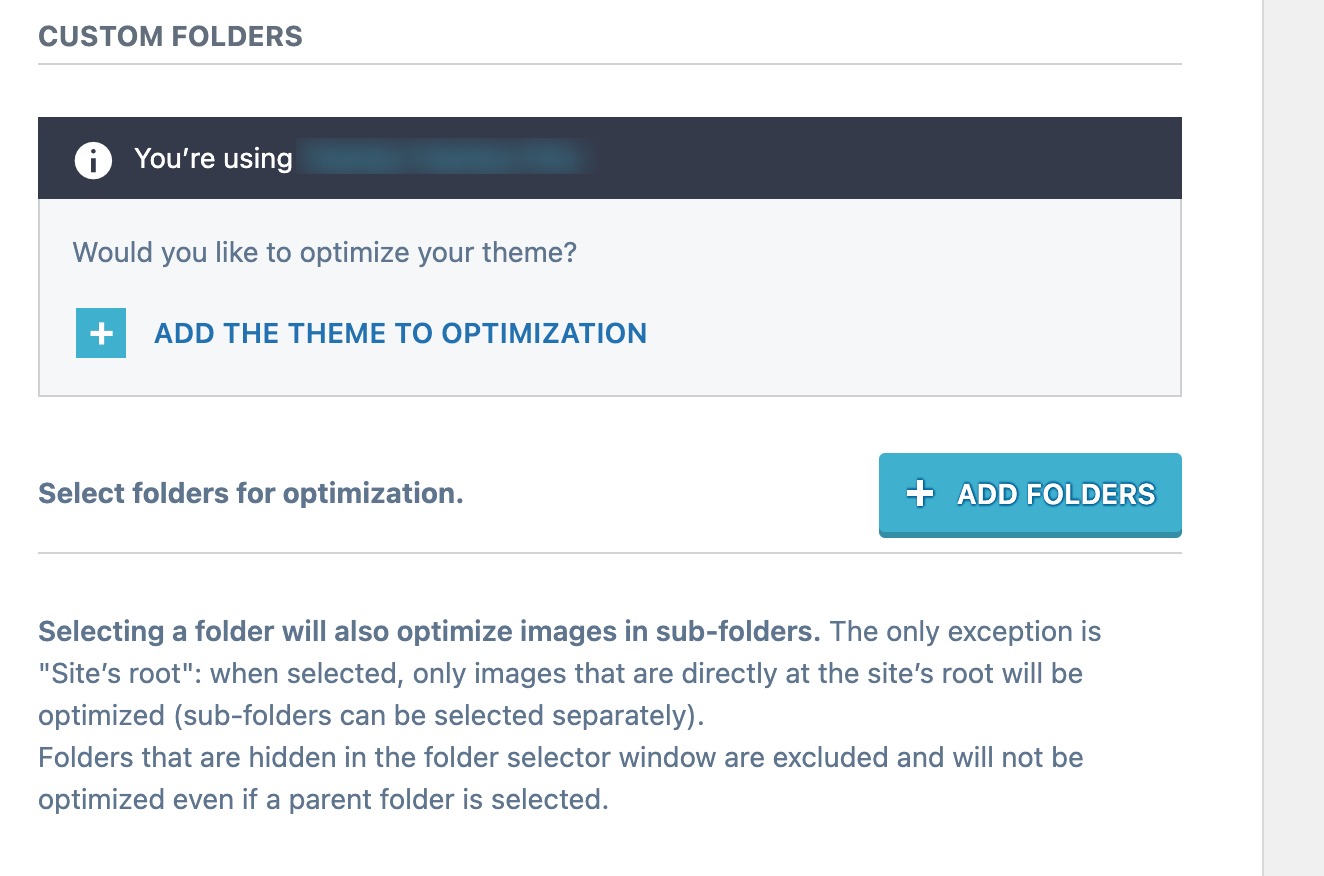
5. Custom Folders – Imagify can optimize images in specific folders outside the media library. You can add custom folders for optimization as needed.
Once your settings are configured, Imagify will start optimizing your images. You can refer to this guide for more detailed information about the Imagify plugin and its setup.
That’s it! With this quick setup, you’ve successfully installed Imagify through Rank Math. If you have any doubts or need assistance with Rank Math, you can reach out to our support team. They’re always available and willing to help.