You must have often heard that HTML sitemaps are helpful for SEO. Well, they certainly are! HTML sitemaps help you in many ways, and there is no good reason not to have one. With that said, Rank Math makes it extremely simple to create an HTML sitemap on your website.
In this knowledgebase article, we’ll show you how to create an HTML sitemap using Rank Math. But before we begin, let’s walk you through some of the basics of HTML sitemaps.
Table Of Contents
1 What Is an HTML Sitemap & How Does It Help?
When you first create a website, it may seem easy to access each page from the single drop-down menu. However, as more and more pages are added, and complex additions occasionally result in a web page that isn’t linked from anywhere, you need a central list of every single link in your website to keep track of it all. This is what an HTML sitemap does: it is the primary blueprint of your entire website.
Search engines are constantly “crawling” websites: exploring your site’s content and categorizing it in ways that help them show it to searchers at relevant moments. As per Google’s guidelines, crawlers can understand and organize your website faster and more easily with an HTML sitemap. When the crawlers know how to organize your site, it can increase your search engine visibility.

Additionally, an HTML sitemap can provide links to all of the important pages on your website, which can help increase your site’s overall link popularity.
2 How to Enable HTML Sitemap
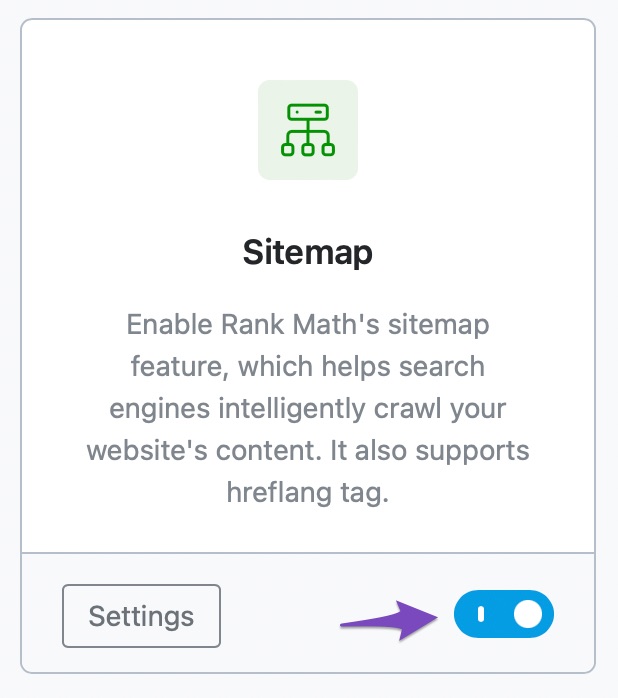
It is extremely easy to enable the HTML sitemap in the free version of Rank Math. First, ensure that you’ve enabled the Sitemap module from WordPress Dashboard → Rank Math SEO, as shown below.
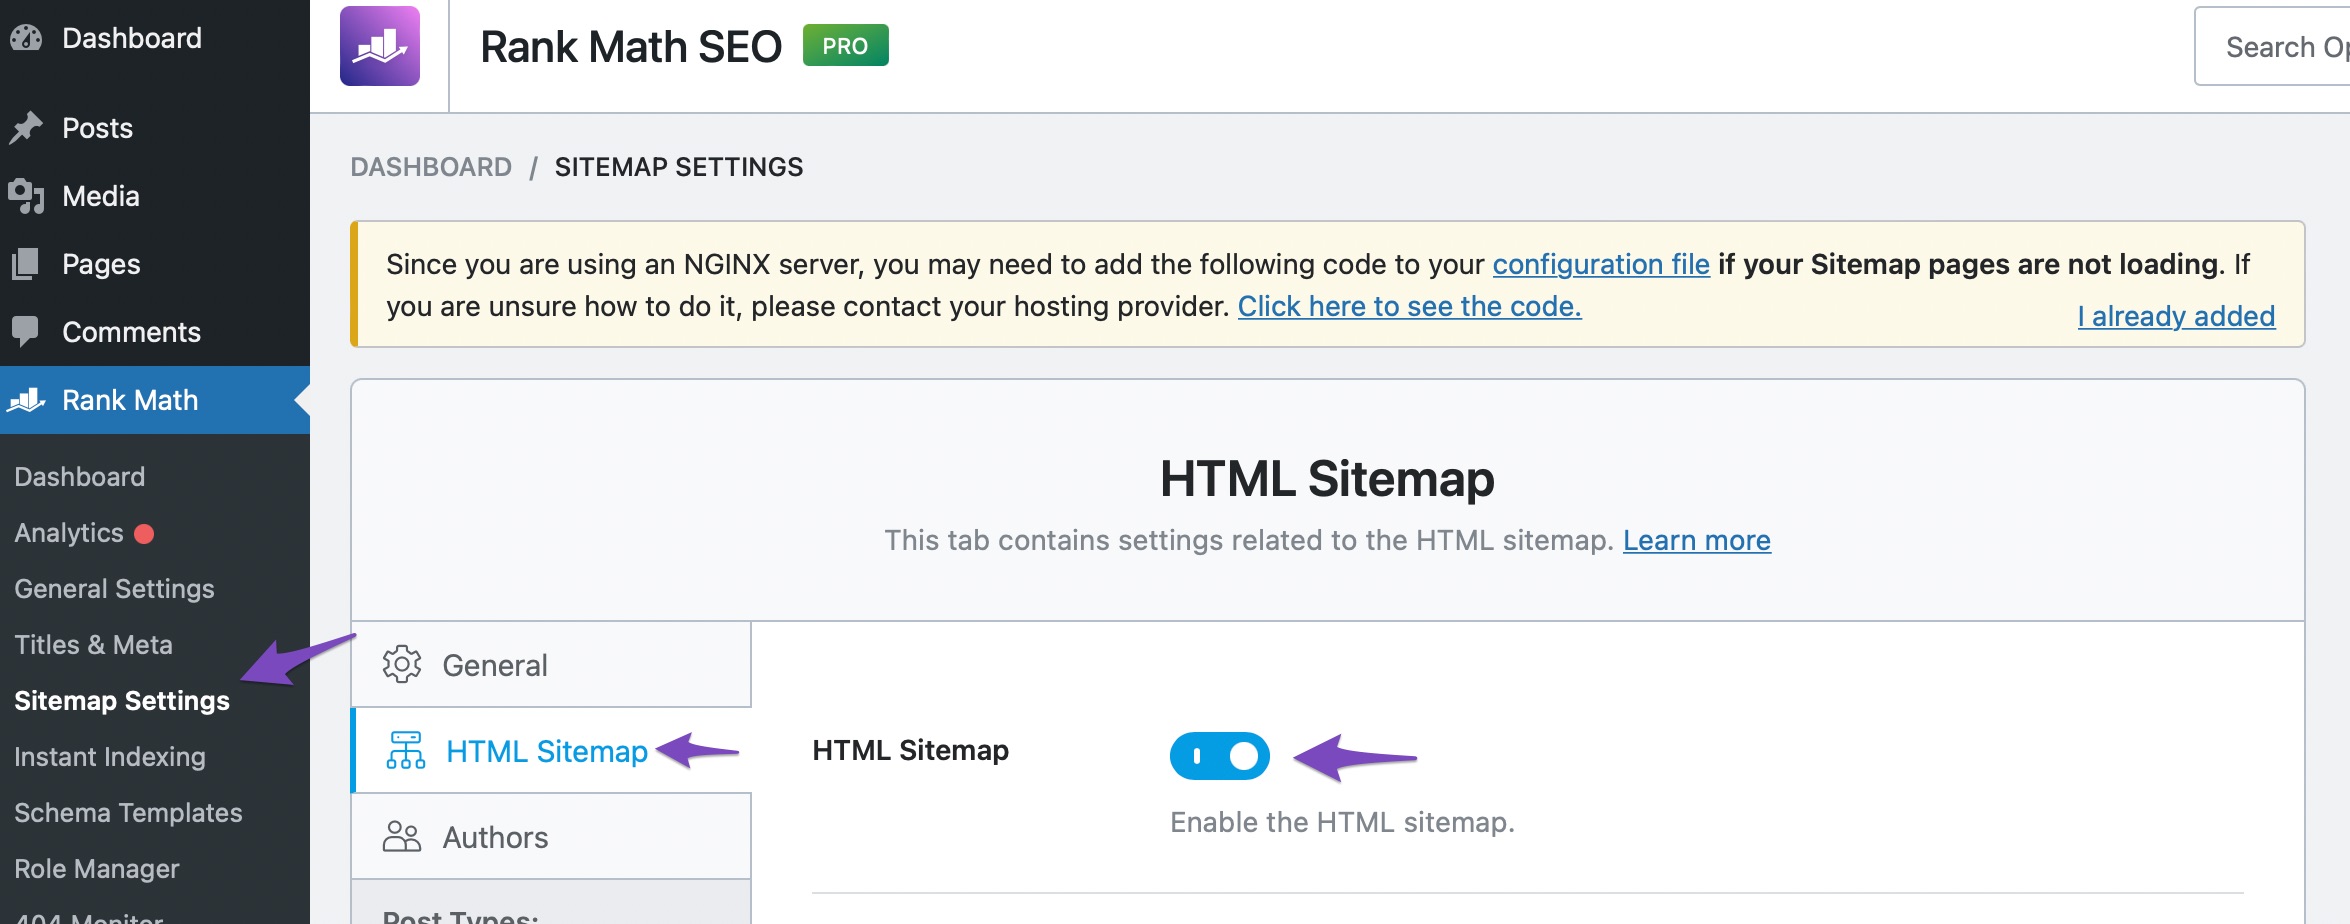
Next, navigate to Rank Math SEO → Sitemap Settings → HTML Sitemap and toggle the HTML Sitemap option.
3 Configuring HTML Sitemap Options
Once you enable the HTML Sitemap option, you’ll notice a list of options that’ll help you configure your HTML sitemaps, as shown below.
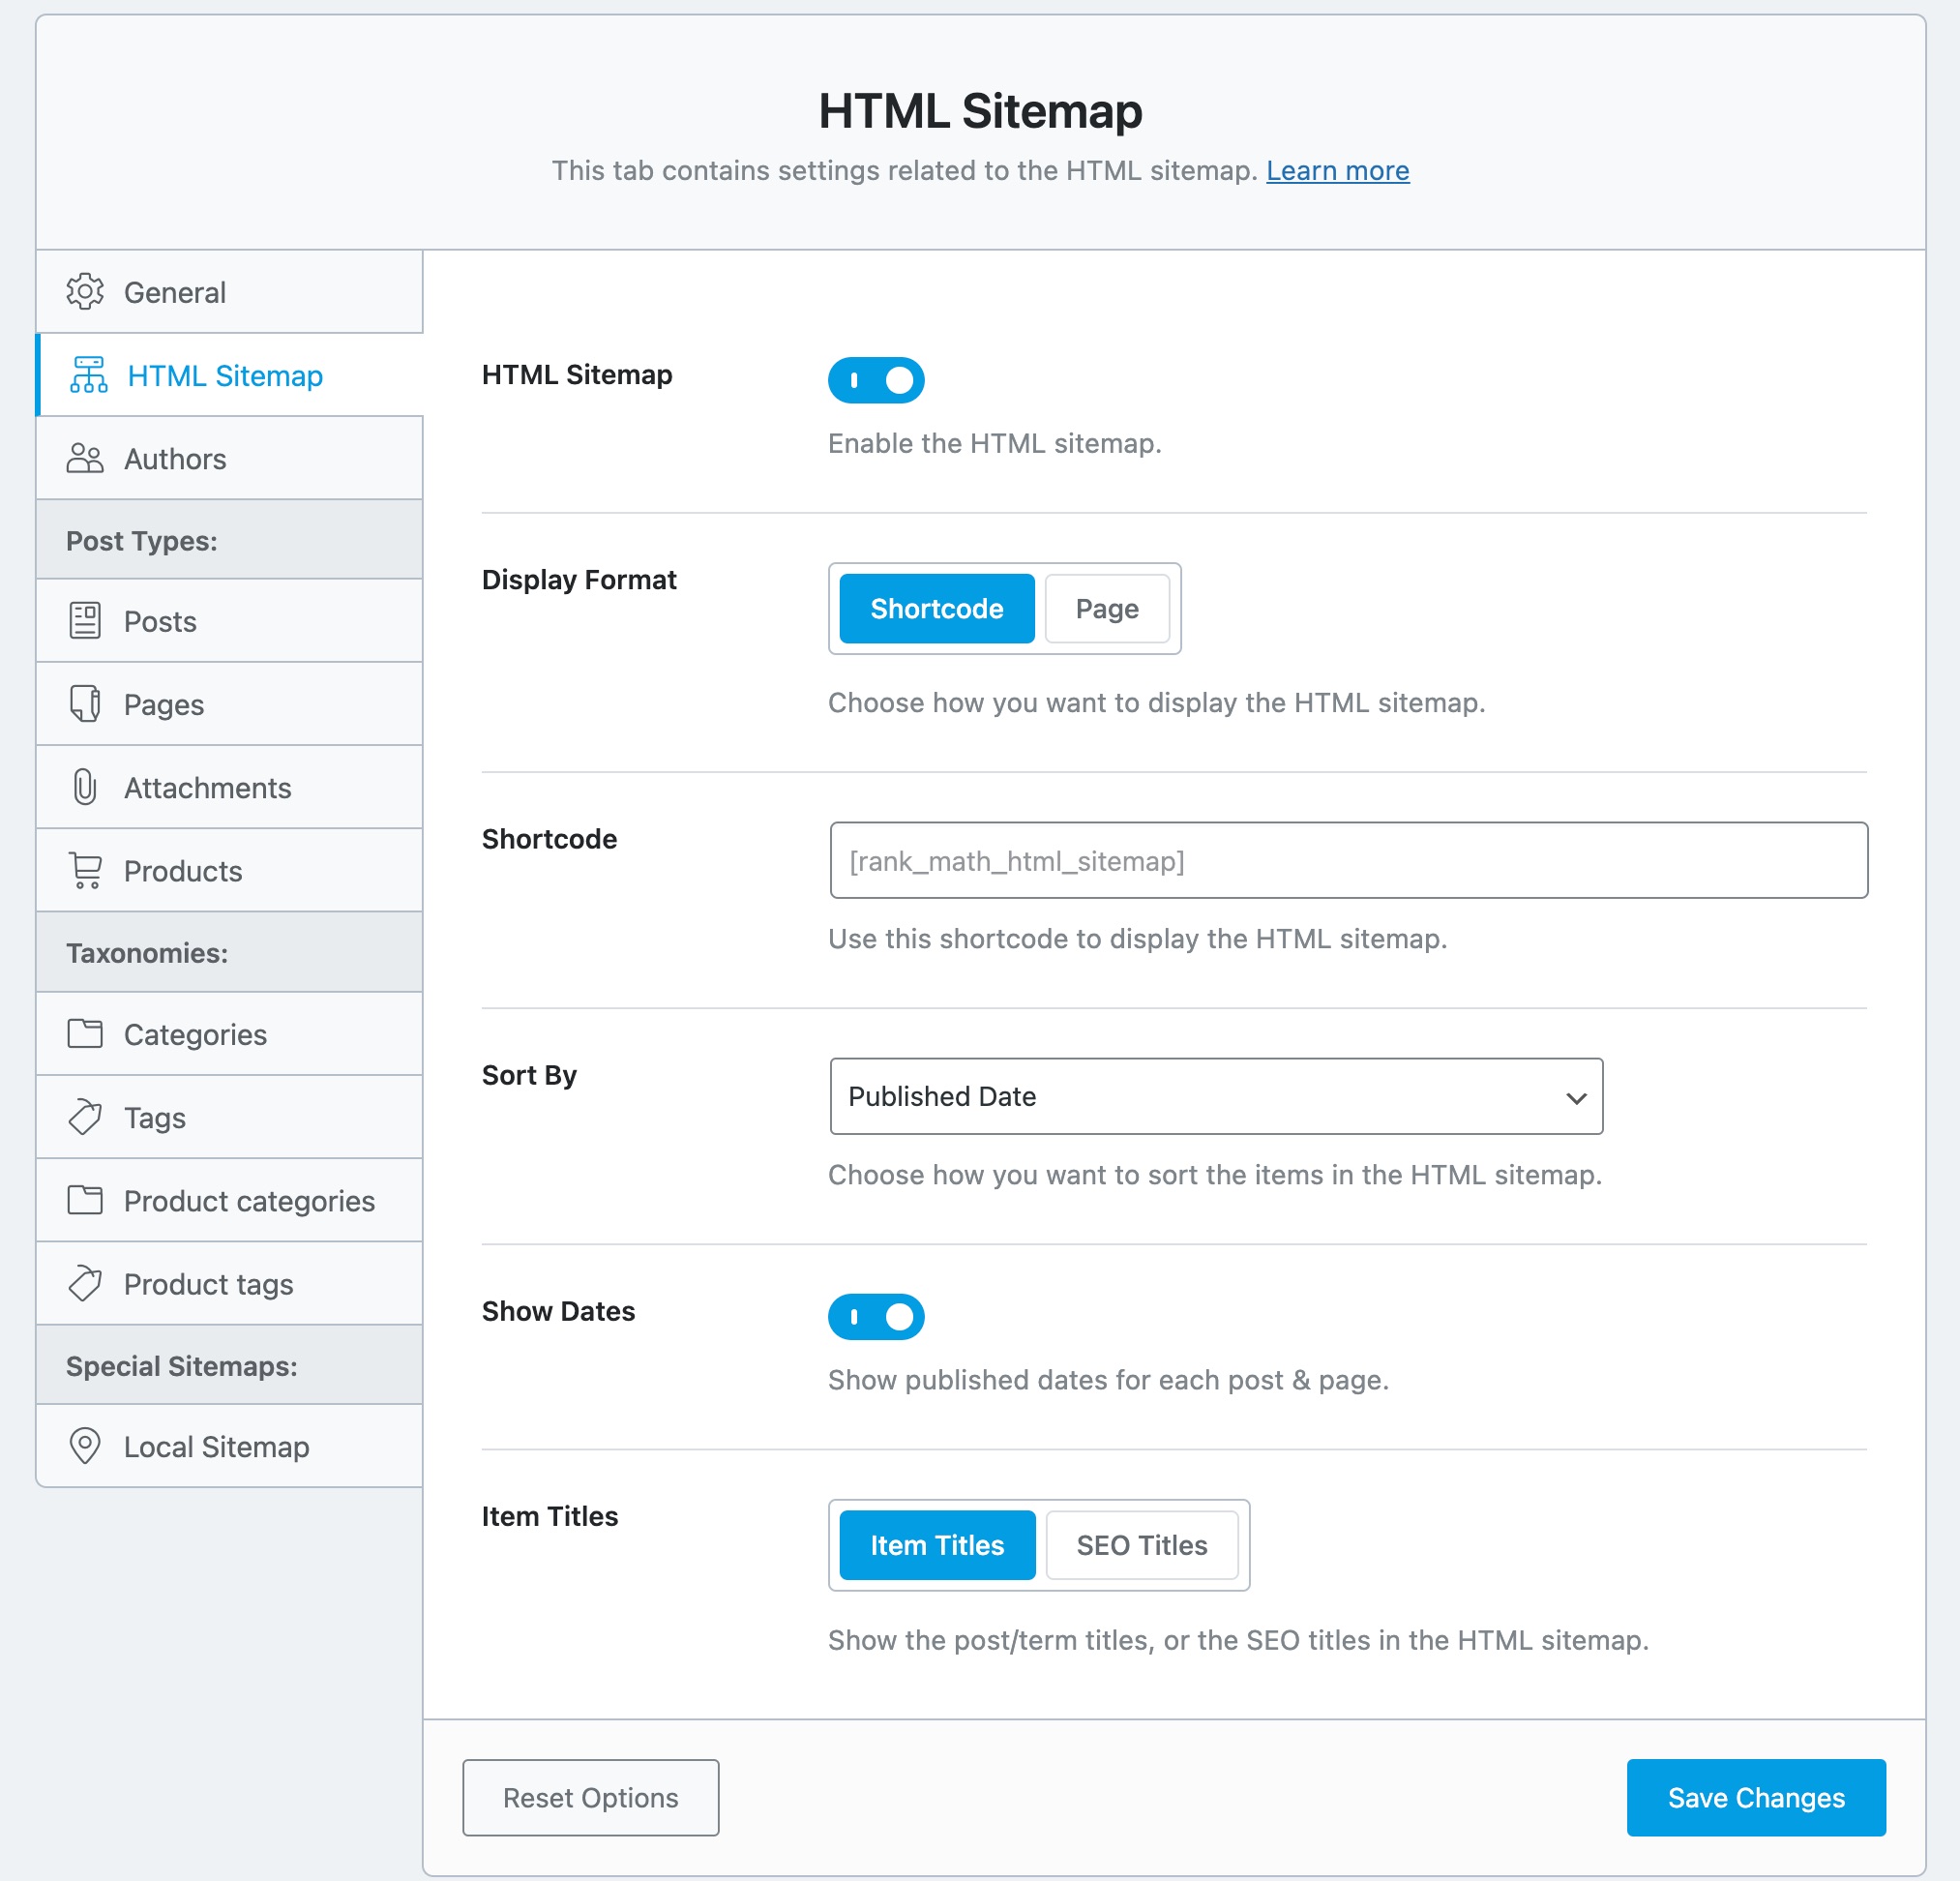
We’ll now discuss each option in detail.
3.1 Display Format
You can choose Shortcode or the Page option to display the HTML sitemap.

3.2 Shortcode
You’ll find this option if you’ve selected the Shortcode option in the Display Format. Copy and paste the shortcode where you want to display the HTML sitemap.

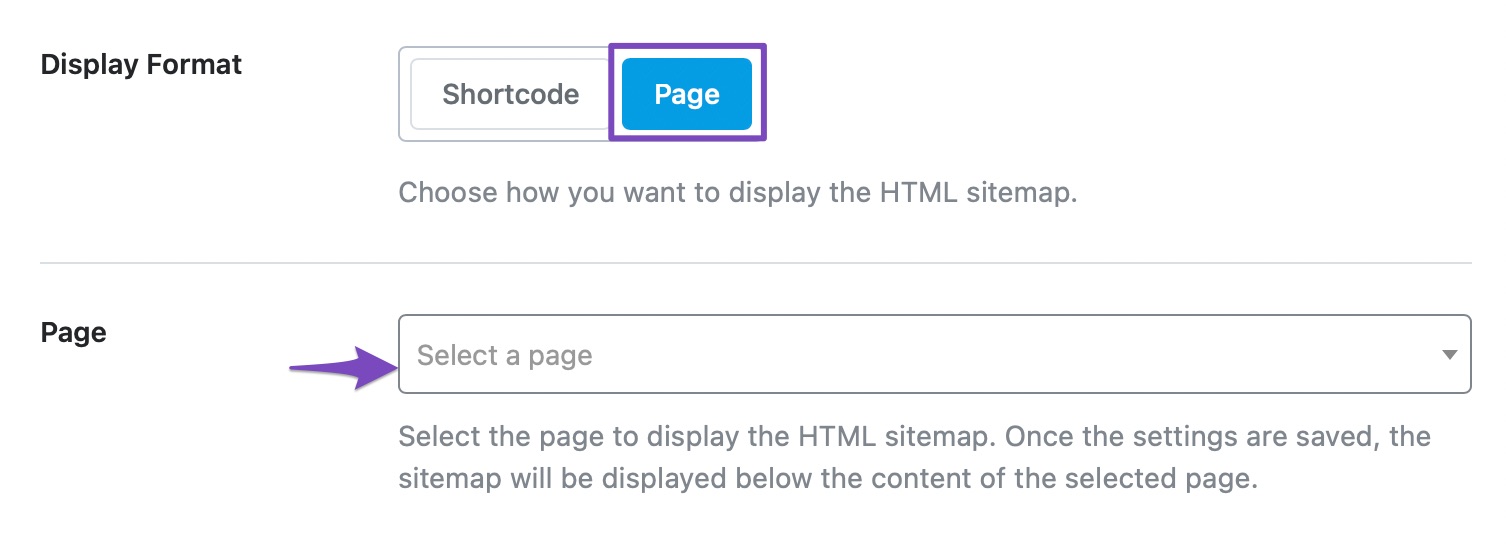
3.3 Page
You’ll find this option if you’ve selected the Page option in the Display Format. Select a page from the drop-down where you want to display the HTML sitemap.
3.4 Sort By
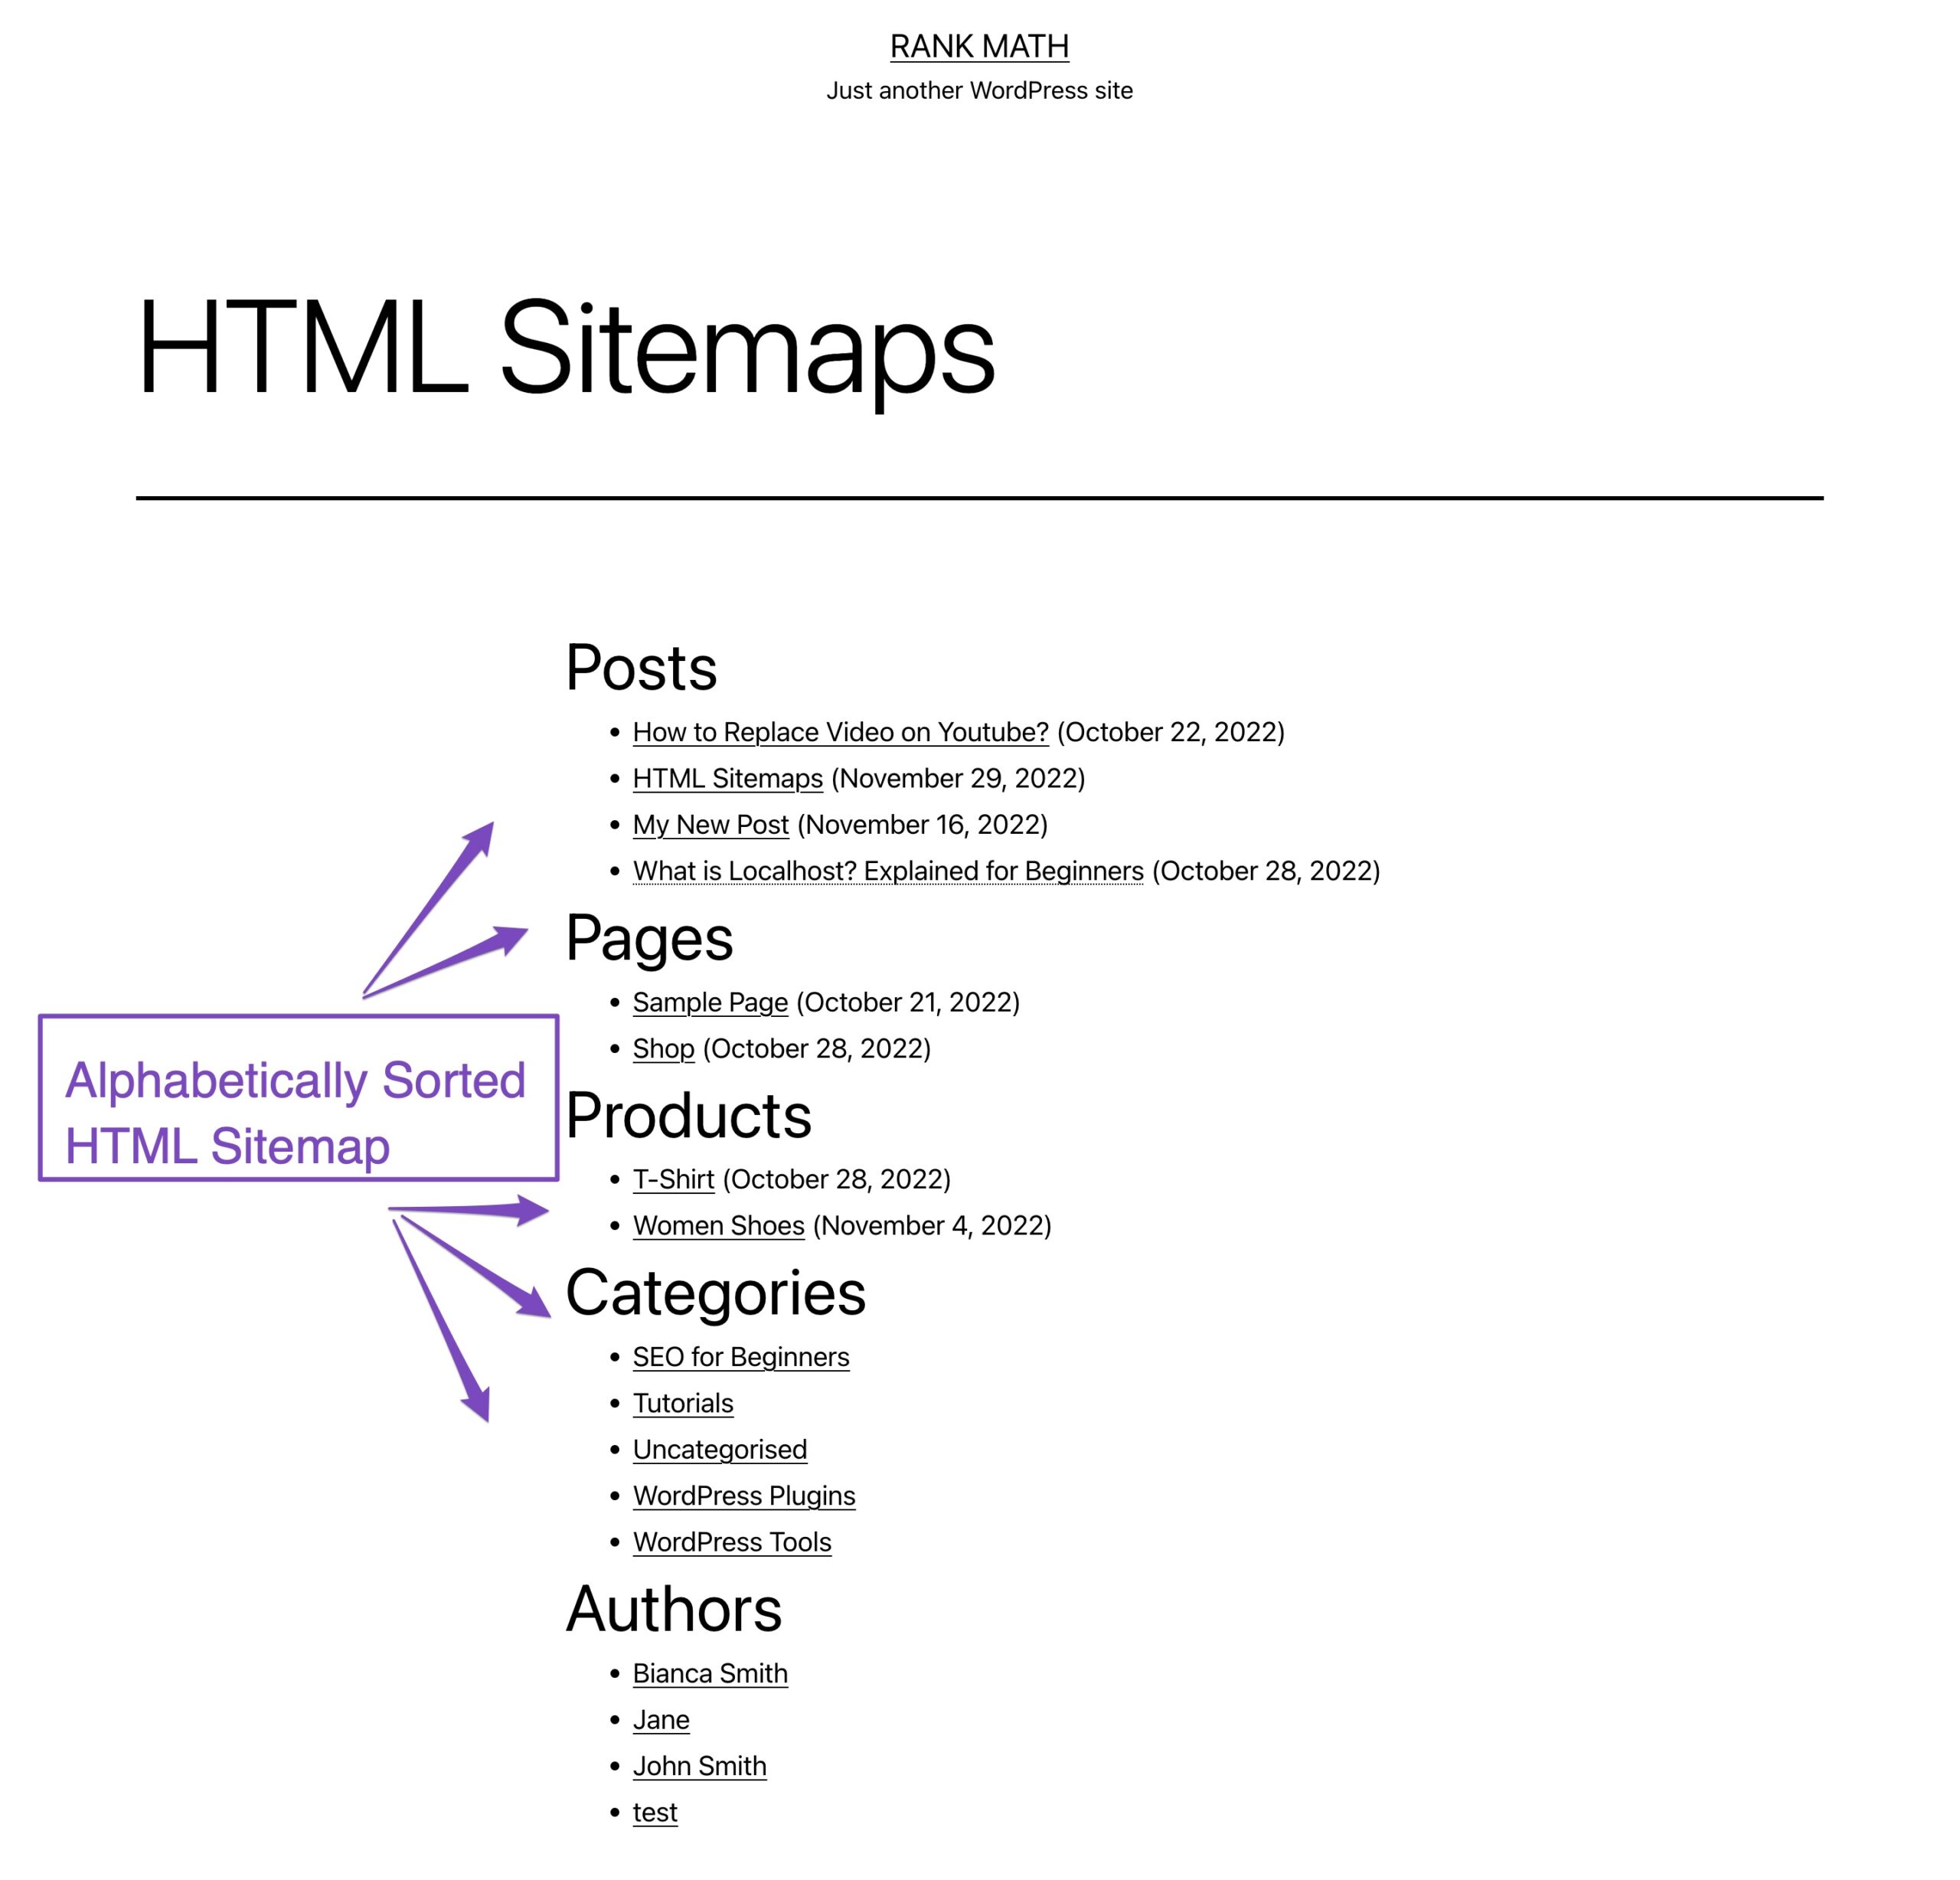
Choose how you wish to sort the items in the HTML sitemap. The available options are Published Date, Modified Date, Alphabetical, and Post ID.

For instance, if you choose Alphabetical from the drop-down menu, the items in the HTML sitemap will be sorted alphabetically, as shown below.
3.5 Show Dates
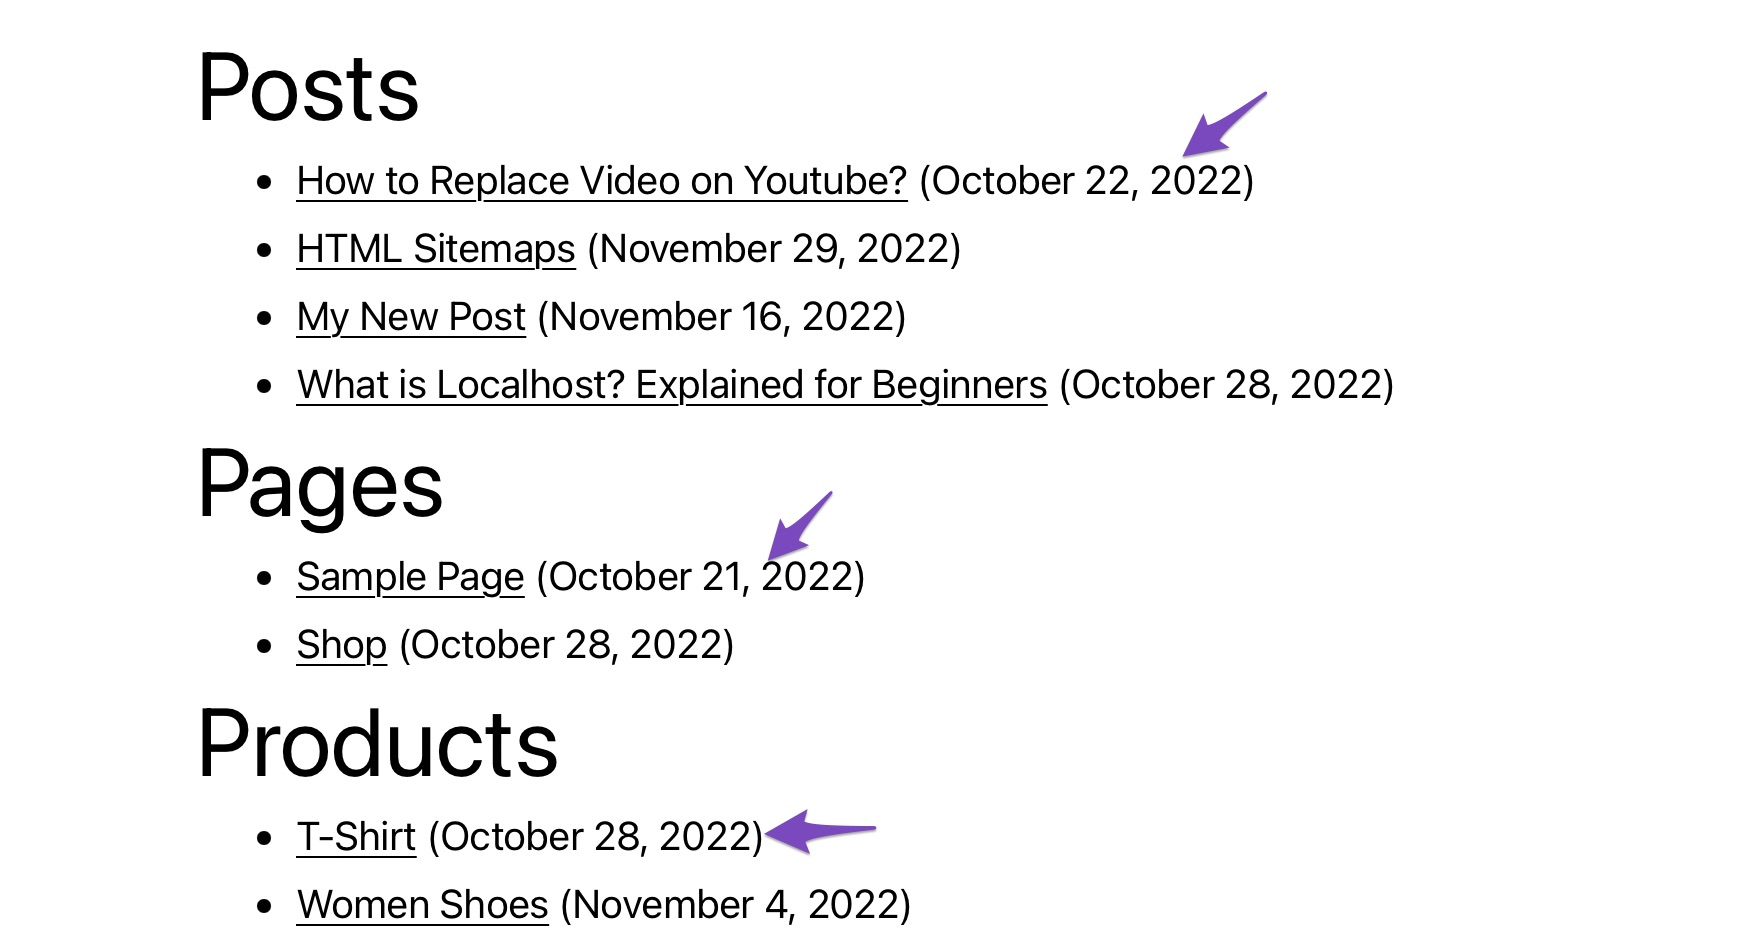
Enable the toggle to display the publish date for each post.

Once the Show Dates option is enabled, all the published dates will be displayed for each post and page.
3.6 Item Titles
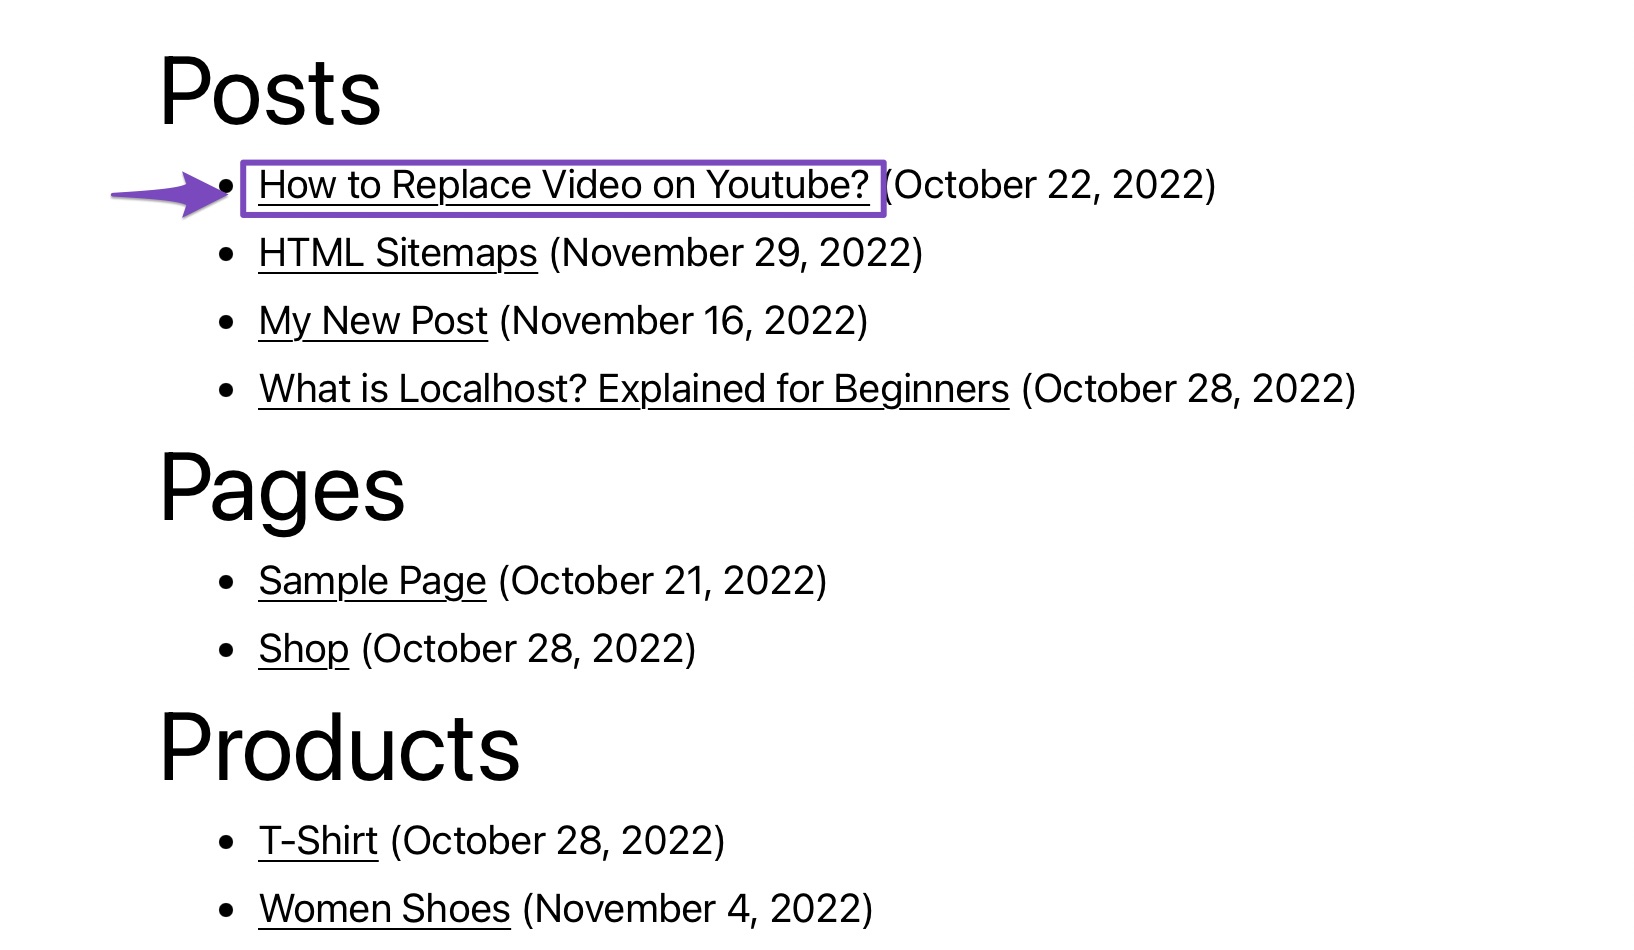
This option displays the titles for each post. Available options are Item Titles and SEO Titles.

For instance, if you choose the SEO Titles option, all the SEO titles will be displayed, as shown below.
Once you’ve configured the HTML Sitemap settings, click on the Save Changes button to save your settings.
4 How to Choose the Post Type & Taxonomies to Include in HTML Sitemap
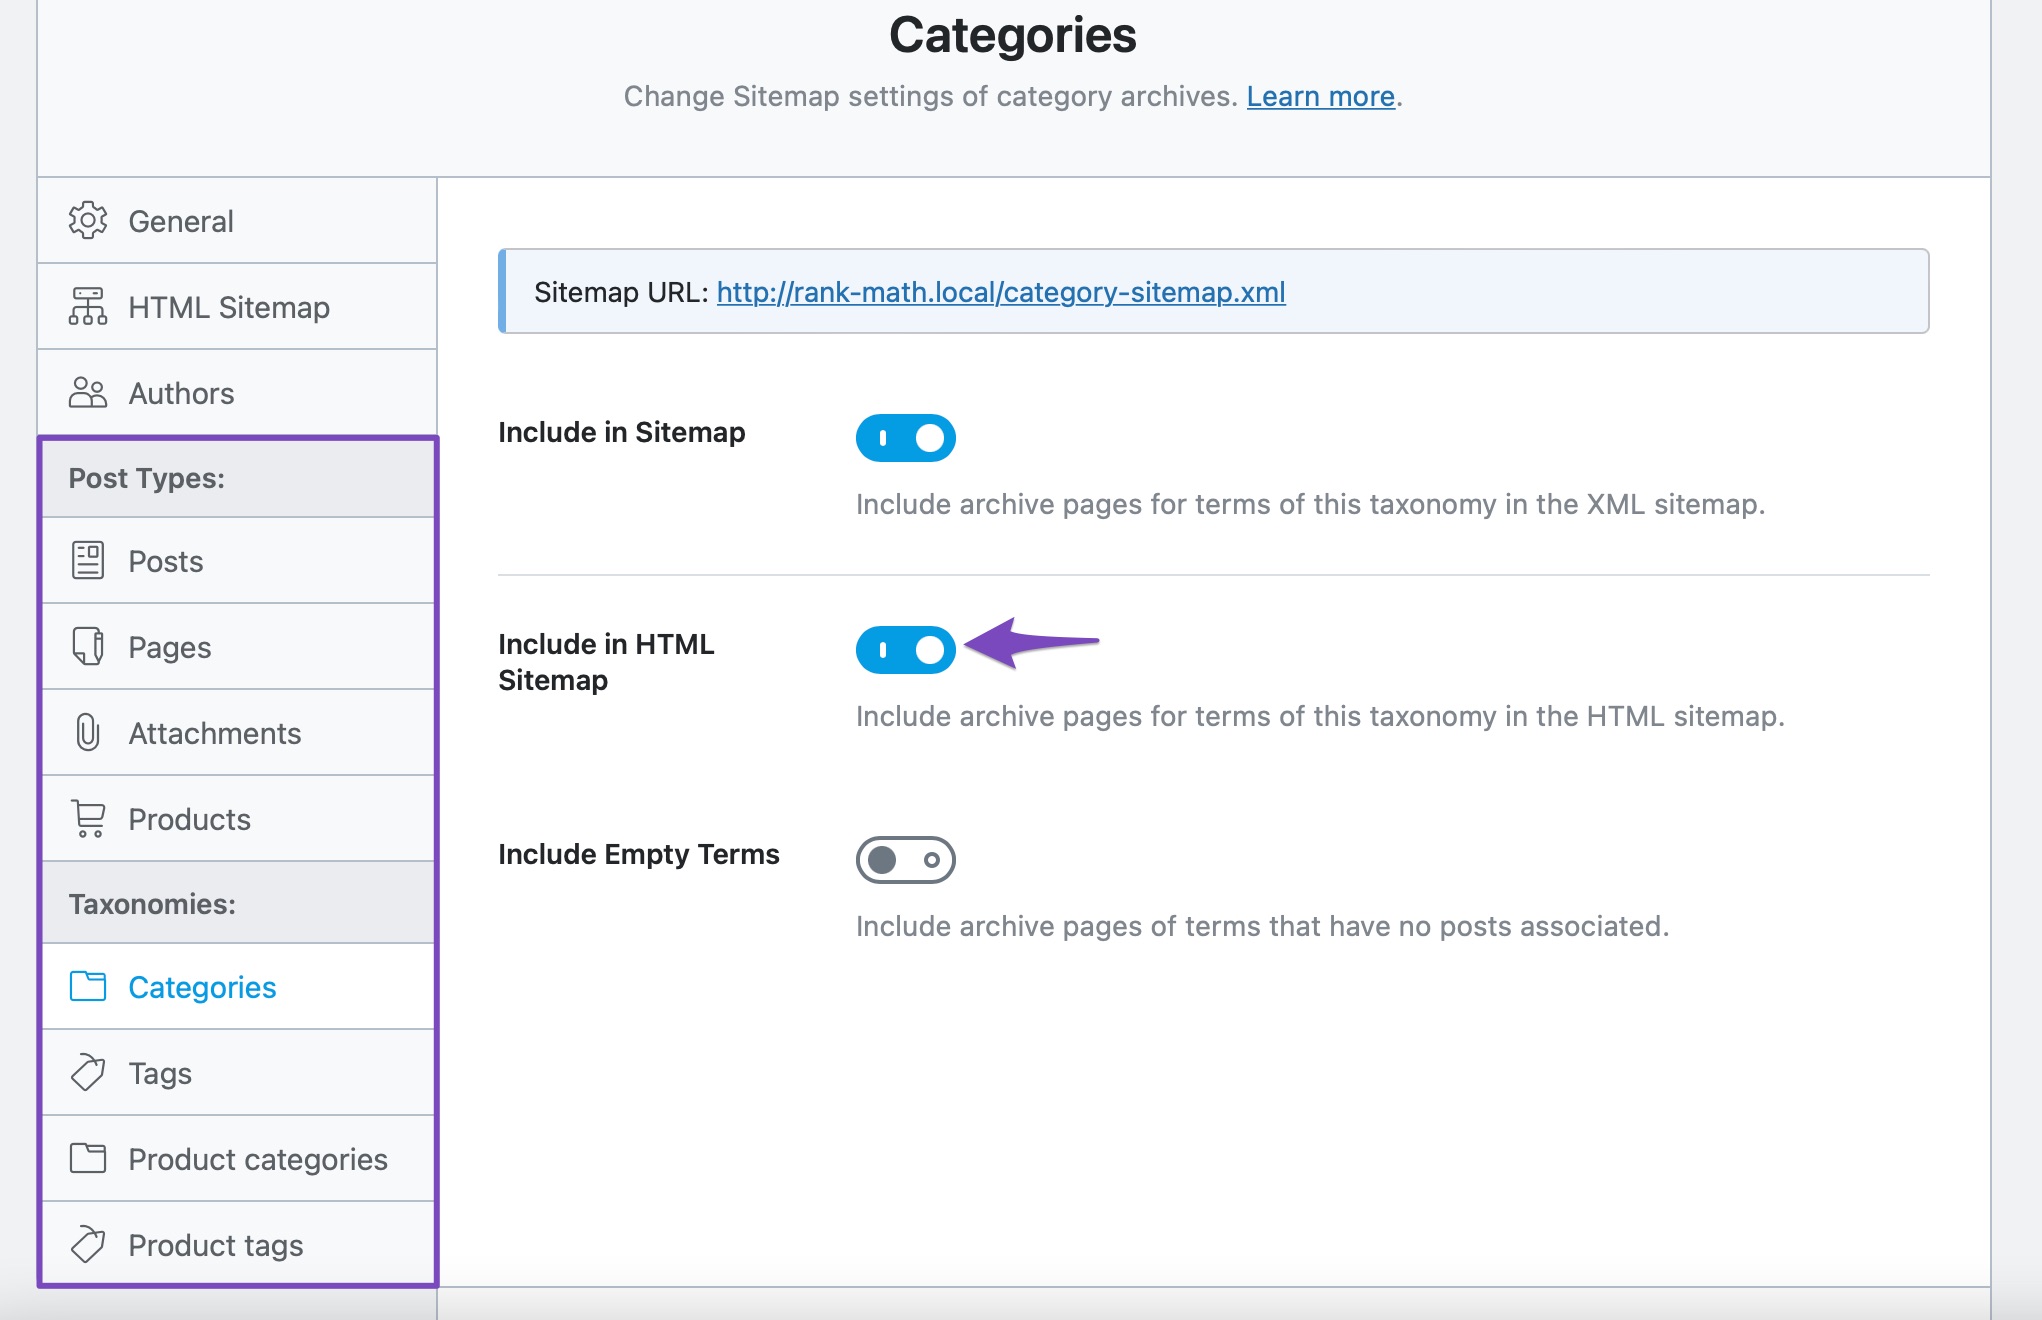
Now that we’ve configured the HTML Sitemap settings, you can also choose the post type and taxonomies to include in the HTML sitemap.
To do so, navigate to Rank Math SEO → Sitemap Settings. Under each post type & taxonomies, you can find an option Include in HTML Sitemap, as shown below. Enable the toggle button to include it in the HTML sitemap.
Once done, click on the Save Changes button to save your settings.
5 How to Access HTML Sitemaps
If you’ve selected the Page option, choose your page from the drop-down menu, as shown below.

Once you’ve selected the page and saved the changes, you’ll see the page where you can access the sitemap, as shown below.

If you’ve selected the Shortcode option, either create a new post/page or navigate to your existing post/page editing screen from your WordPress dashboard.
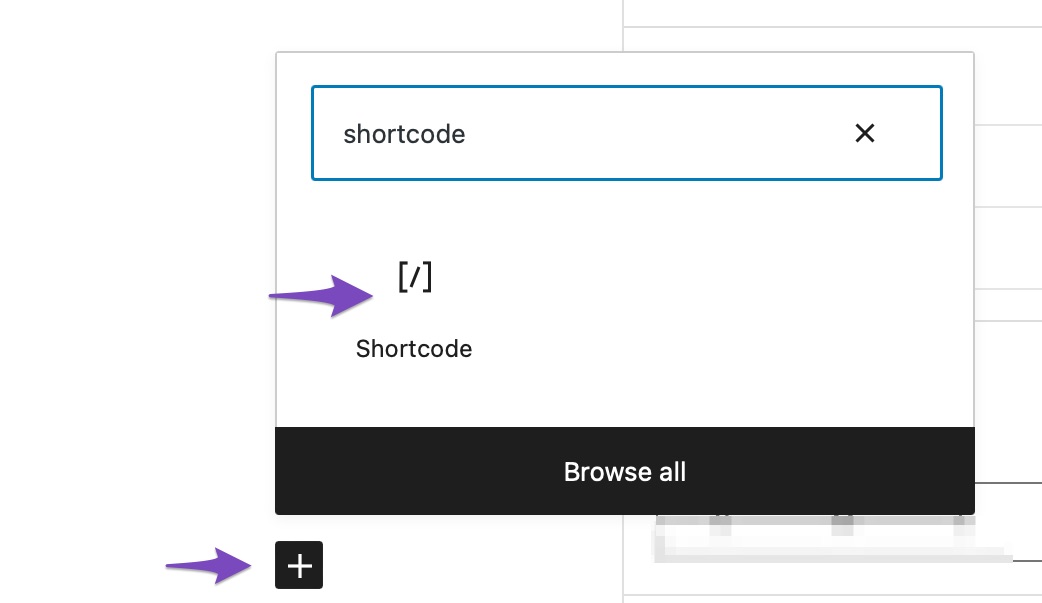
In the post/page editing screen, click on the ‘+’ sign and add a Shortcode block, as shown below.
Next, add the HTML sitemap shortcode to display the HTML sitemap, as shown below.

You can also use this shortcode along with any WordPress page builder like Elementor, Divi, etc. Once done, Save/Publish your post.
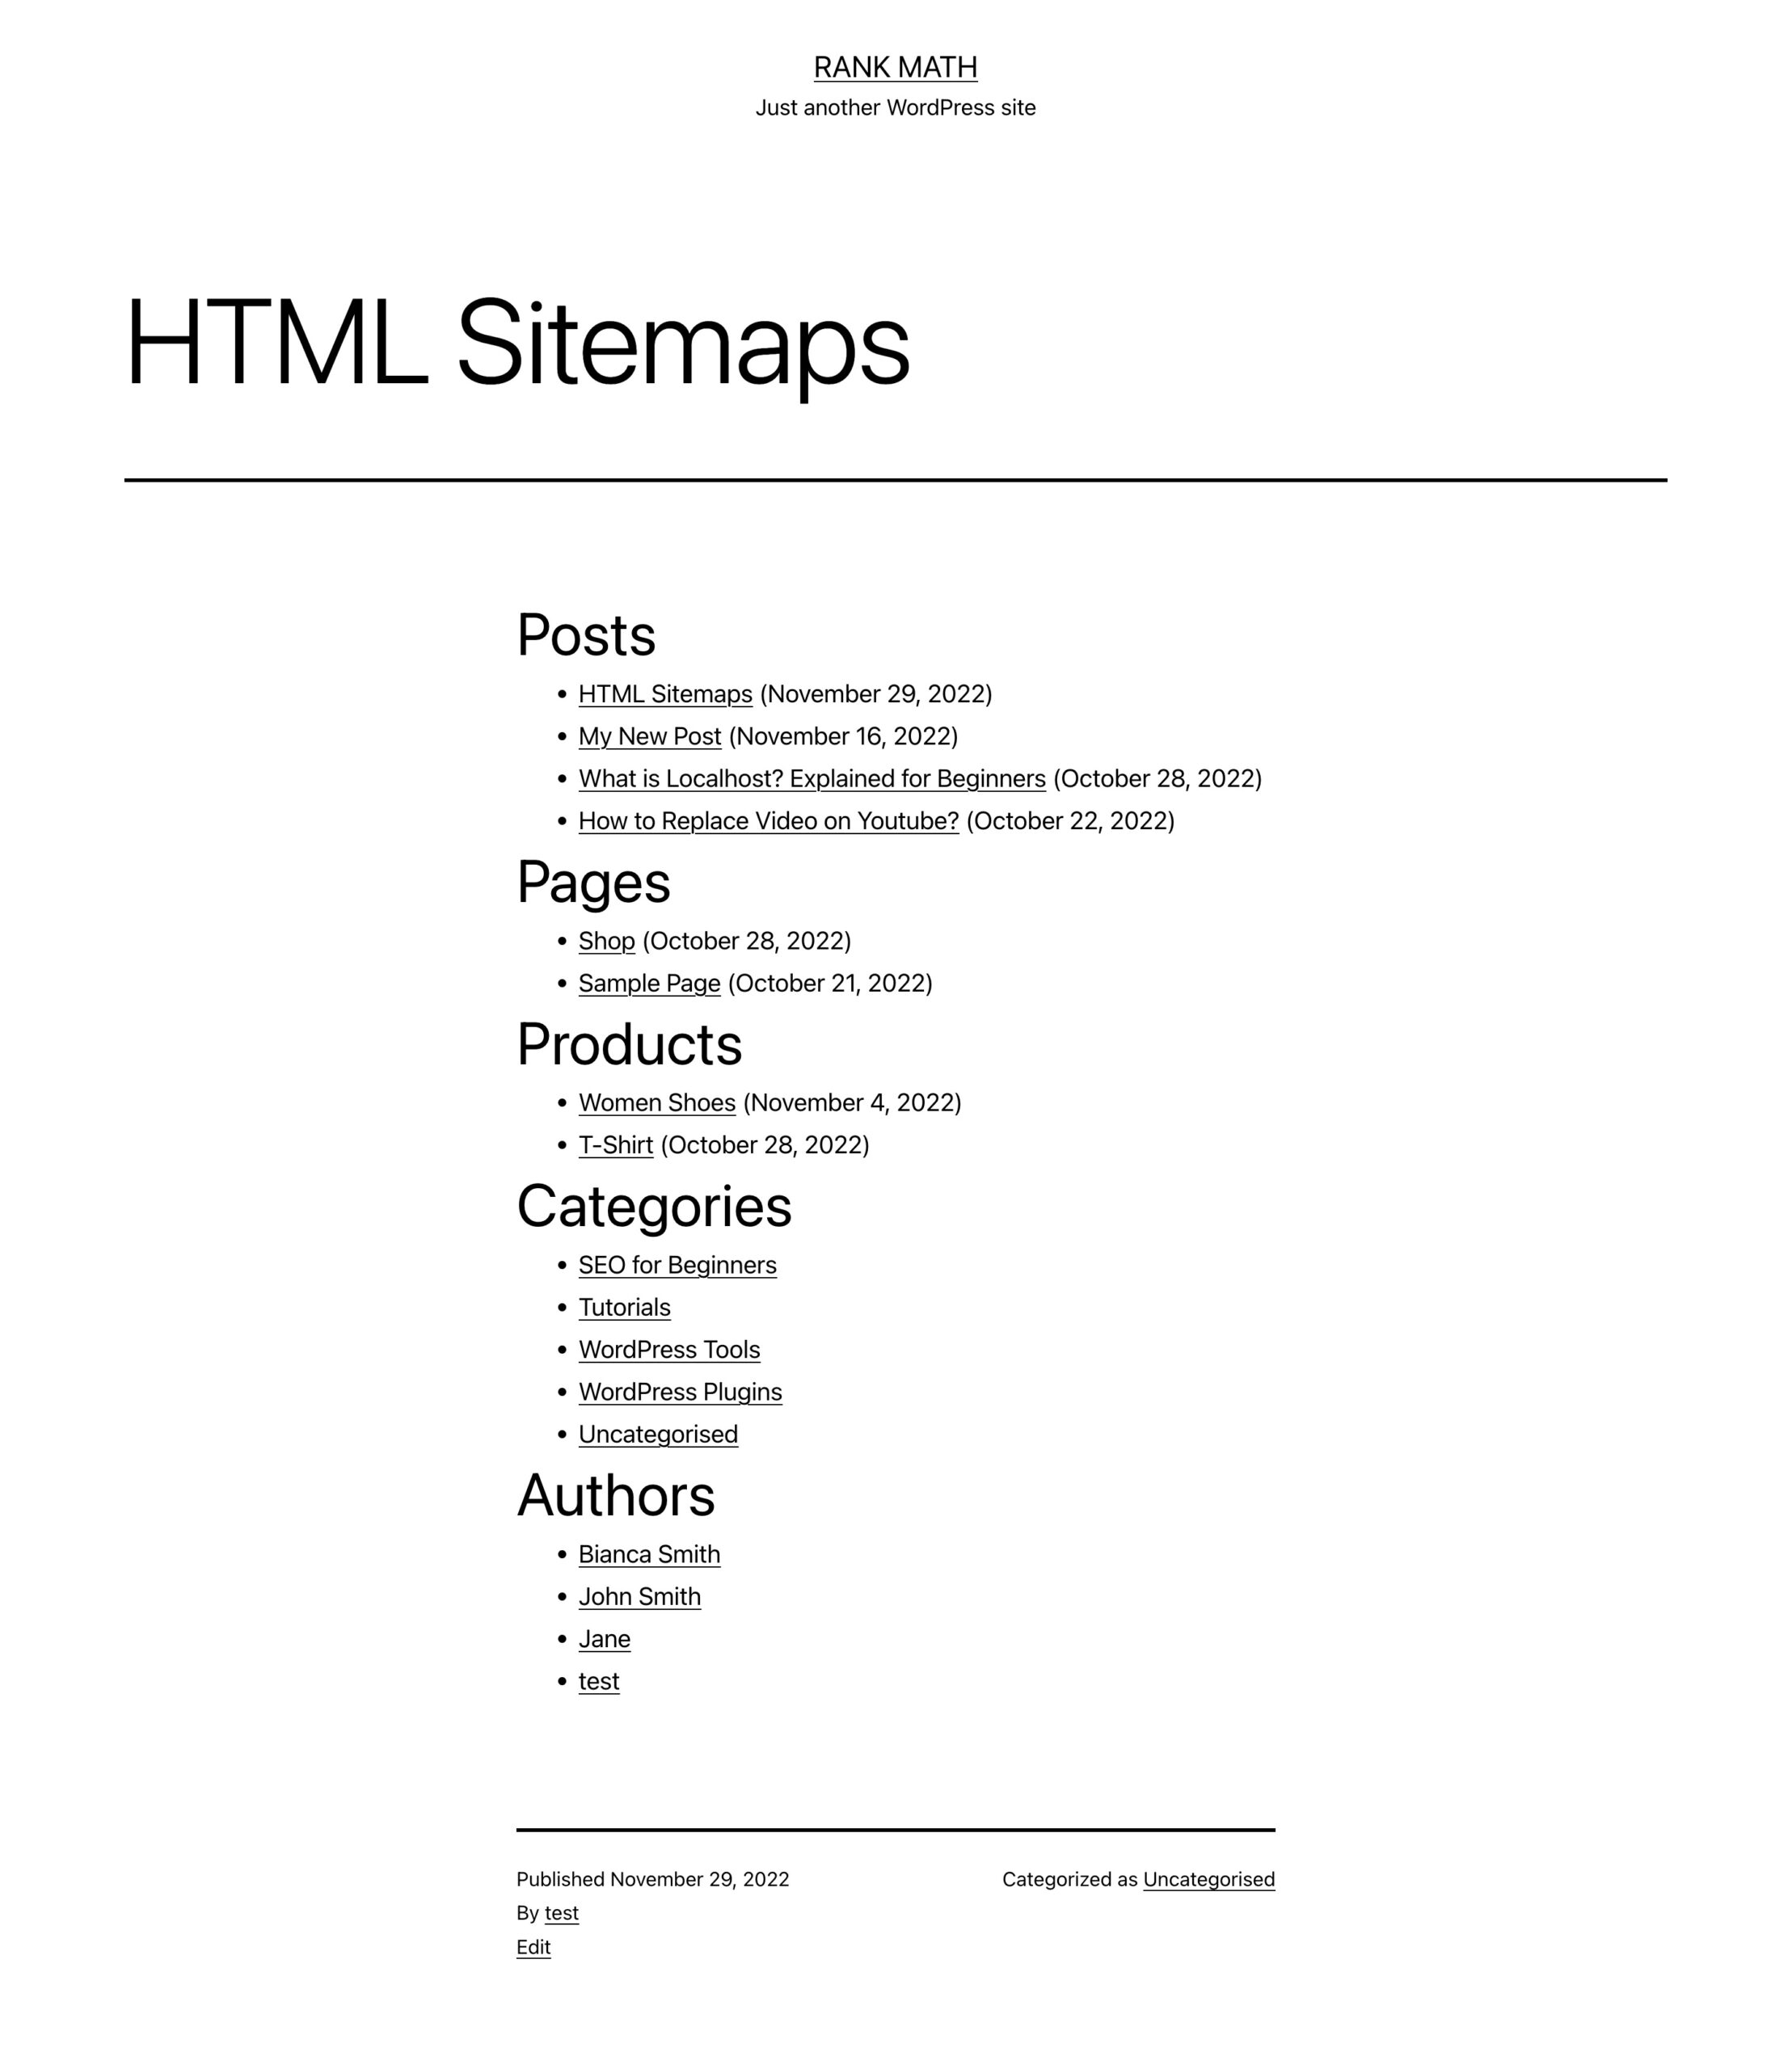
And that’s it! You can then view the post/page, as the HTML sitemap will now be available, as shown below.
6 Frequently Asked Questions
XML sitemaps vs. HTML sitemaps?
The main difference between XML and HTML sitemaps is that an HTML sitemap helps visitors gain a comprehensive understanding of your site, while XML, more specifically, caters to search engines. When you add new pages or content to your site, you can use XML sitemaps to notify the search engines.
What if you’re importing from another SEO plugin (AIOSEO)?
Rank Math can import your HTML sitemap from the All In One SEO plugin, you don’t have to make any changes to settings; even if the site uses the previous plugin shortcode, our HTML sitemap will work.
Should you submit an HTML sitemap to Google Search Console?
You can’t submit an HTML sitemap to Google Search Console. Google supports the following sitemap formats: XML, RSS, mRSS, Atom 1.0, and Text. With that said, you can still submit your HTML sitemap for indexing and help search engines crawl other important pages on your website.
HTML Sitemaps help improve the user experience by making content more accessible and navigable. They also enable search engine crawlers to index pages more quickly.
Fortunately, adding an HTML sitemap using Rank Math to your website doesn’t require coding skills. We hope this article has helped you to create an HTML sitemap easily.
If you still have questions about creating HTML sitemaps using Rank Math – you’re always more than welcome to contact our dedicated support team. We’re available 24/7, 365 days a year…