If you see a 403 Forbidden error when you try to access the IndexNow key location, don’t worry – you’re not alone. This can be a common issue for some users, but it’s easy to fix.
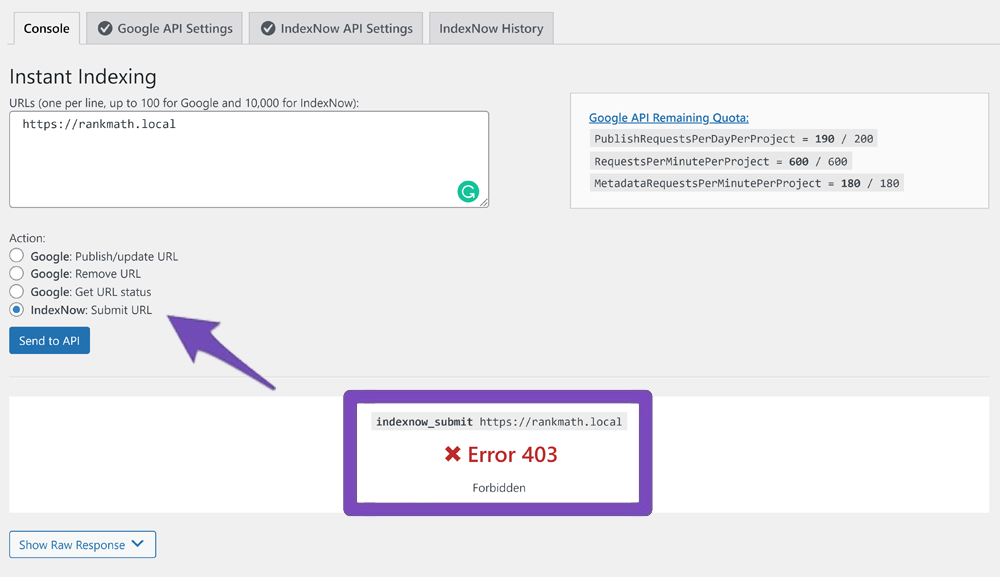
In this knowledge base article, we’ll walk you through the steps so you can index your website with IndexNow. We’ll also explain what might be causing the 403 Forbidden error in the first place.
Let’s get started!
Table of Contents
1 What Causes the 403 Forbidden Error with IndexNow?
There are a few possible reasons why you might be seeing the 403 Forbidden error when trying to access the IndexNow. The most likely explanation is that the text file containing the API key has not been created automatically. This can be due to a plugin conflict.
There are two simple steps that you can take to fix the 403 Forbidden error with IndexNow. Let’s check them out:
2 Method One: Change the API Key in Rank Math
2.1 Change API Key
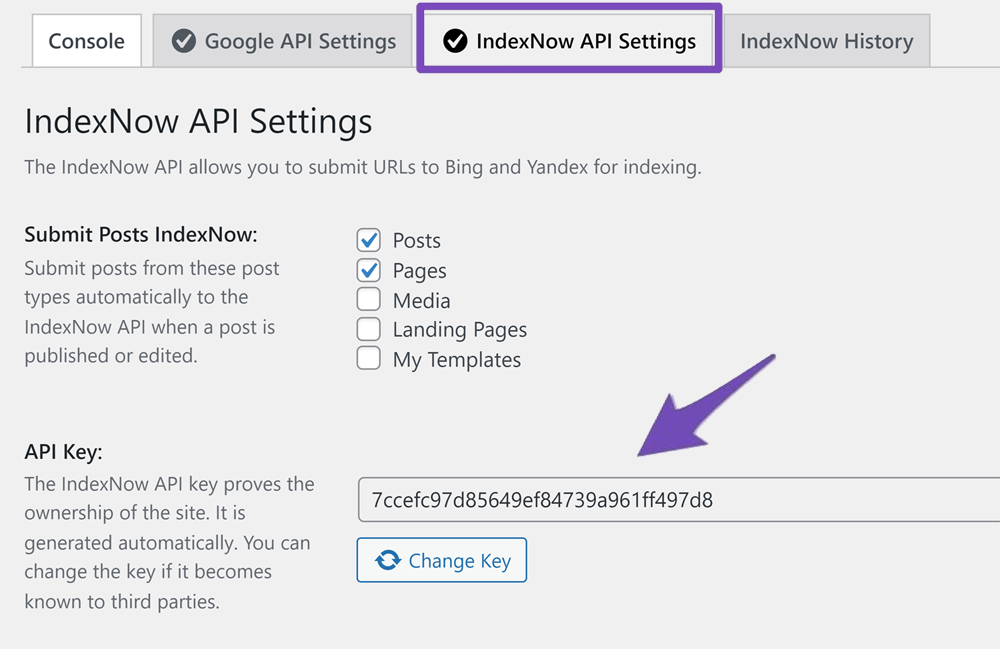
The first thing you should try is changing the API key from within the Rank Math plugin. The API key field displays the API key that Rank Math has generated automatically for your website. In addition, this API key helps you prove the ownership of your site to IndexNow-related search bots.
In order to change the API Key, you need to navigate Rank Math SEO → Instant Indexing → IndexNow API Settings → API Key. Then click on the Change Key button.
2.2 Check API Key Location
Once you’ve done that, clear the cache and check to see if your API key is accessible to search engines. In order to do this, click on the Check Key button available under the API Key location. A new tab will open and lead to the location where Rank Math hosts the API key.

If the new tab displays your API key, then you can rest assured that the API key will be sent to search engines to verify your site (provided this page is not blocked through robots.txt).

If the key file is not opening or redirects to a 404 page, that means it doesn’t exist. This implies that the API key was not automatically created when you enabled the Instant Indexing module in Rank Math. In that case, you need to create a txt file in the root directory of your website—a step that we’ll cover later in this tutorial.
2.3 Check the History
The IndexNow History tab in Rank Math’s Instant Indexing shows you all of the URLs you have submitted, as well as the response codes associated with each URL.
A “200 – OK” response code means that the URL was successfully submitted and should be indexed soon. Checking the history of your submissions can help you ensure that your URLs are being properly processed and indexed in a timely manner.
See the screenshot below:
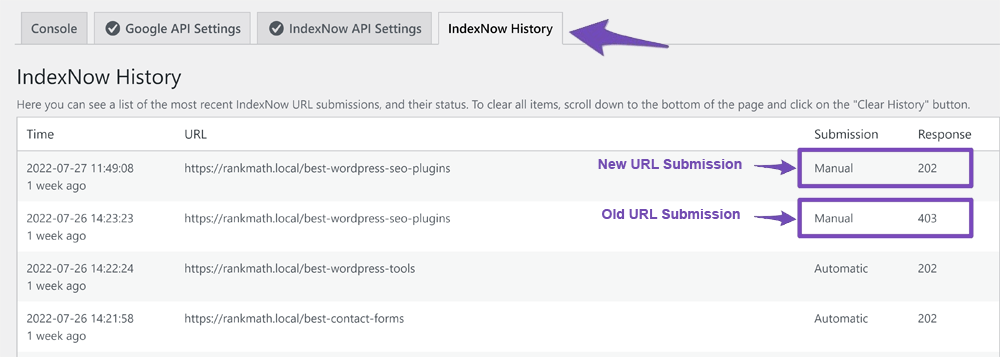
Note: Users will initially see the “202 – Accepted” status. This means that IndexNow API has accepted the request, but the site has yet to be verified with the API Key.
3 Method Two: Add the Text File Manually
If changing the API key from within Rank Math doesn’t work, there’s another simple fix. All you need to do is add the text file containing the API key manually to the root folder of your website.
Here’s how to do it:
3.1 Create a Text File
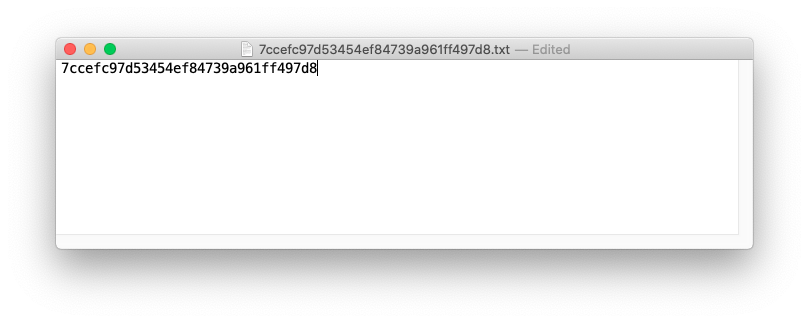
First, you’ll need to create a text file and name it [your_api_key].txt. Make sure that the file name includes your API key.
Next, you’ll need to add the API key to the text file. The key should be the only thing included in the file – no extra spaces or characters.
3.2 Upload the Text File
Once you’ve done that, you’ll need to upload the text file to the root of your website. You can do this using an FTP client like FileZilla or cPanel’s File Manager.
3.2.1 Using the FTP Client
Let’s walk through the process of logging onto a server using FTP. First, you need to collect the information you need – the FTP credentials (username and password), the FTP server address, and the document root directory.

Once you have all this information, you can connect to your server using an FTP client like FileZilla.
By the way, if you don’t have Filezilla, you can download it for free from the project’s site. It’s available on all platforms,
Once you have all the information entered, click the “Quickconnect” button.

Now that you’re connected to your server, it’s time to upload the text file containing your API key.
First, open the local site folder on your computer. It’s the folder where you saved the text file with the API key.
Next, open the remote site folder. It’s the folder on your server where your WordPress site is located. In most cases, it’s the “public_html” folder.
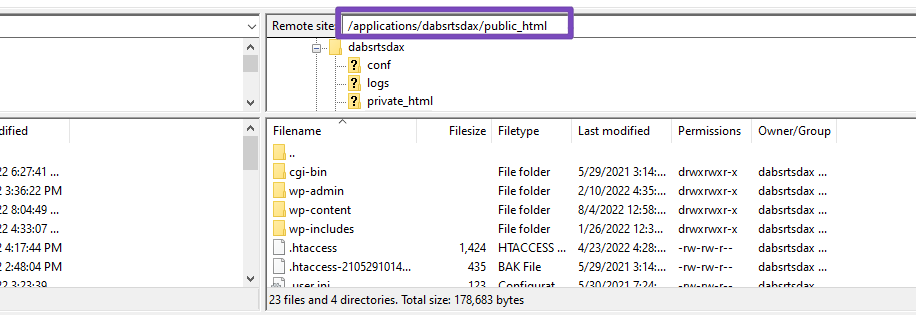
Once you have both folders open, drag the text file from the local site folder to the remote site folder.
The file will start uploading immediately, and you should see it in the remote site folder when it’s done.
Once the text file is in the right location, you should be able to access the IndexNow API key from its location, and search engines can make use of it to verify your site.
3.2.2 Using the cPanel’s File Manager
If your host uses cPanel, you can easily add the API Key text file to your WordPress website’s root directory.
Login to your cPanel account and navigate to File Manager.

Next, locate and select the public_html folder.

Now navigate to the top toolbar and locate and click on the Upload option.

Select the File option and choose the API key text file you created on your computer using your text editor.
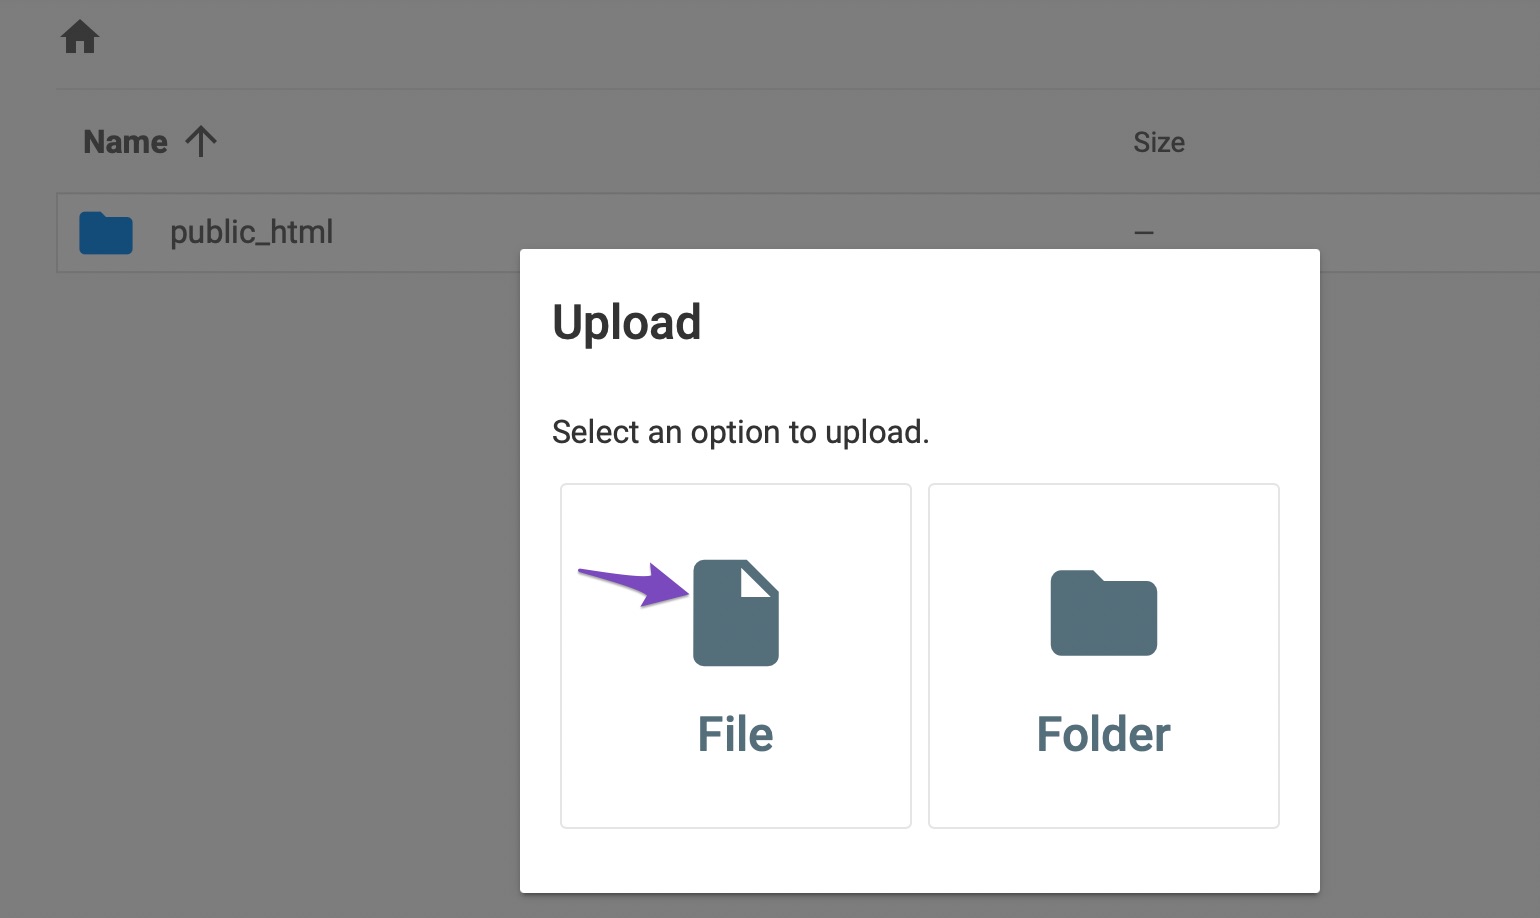
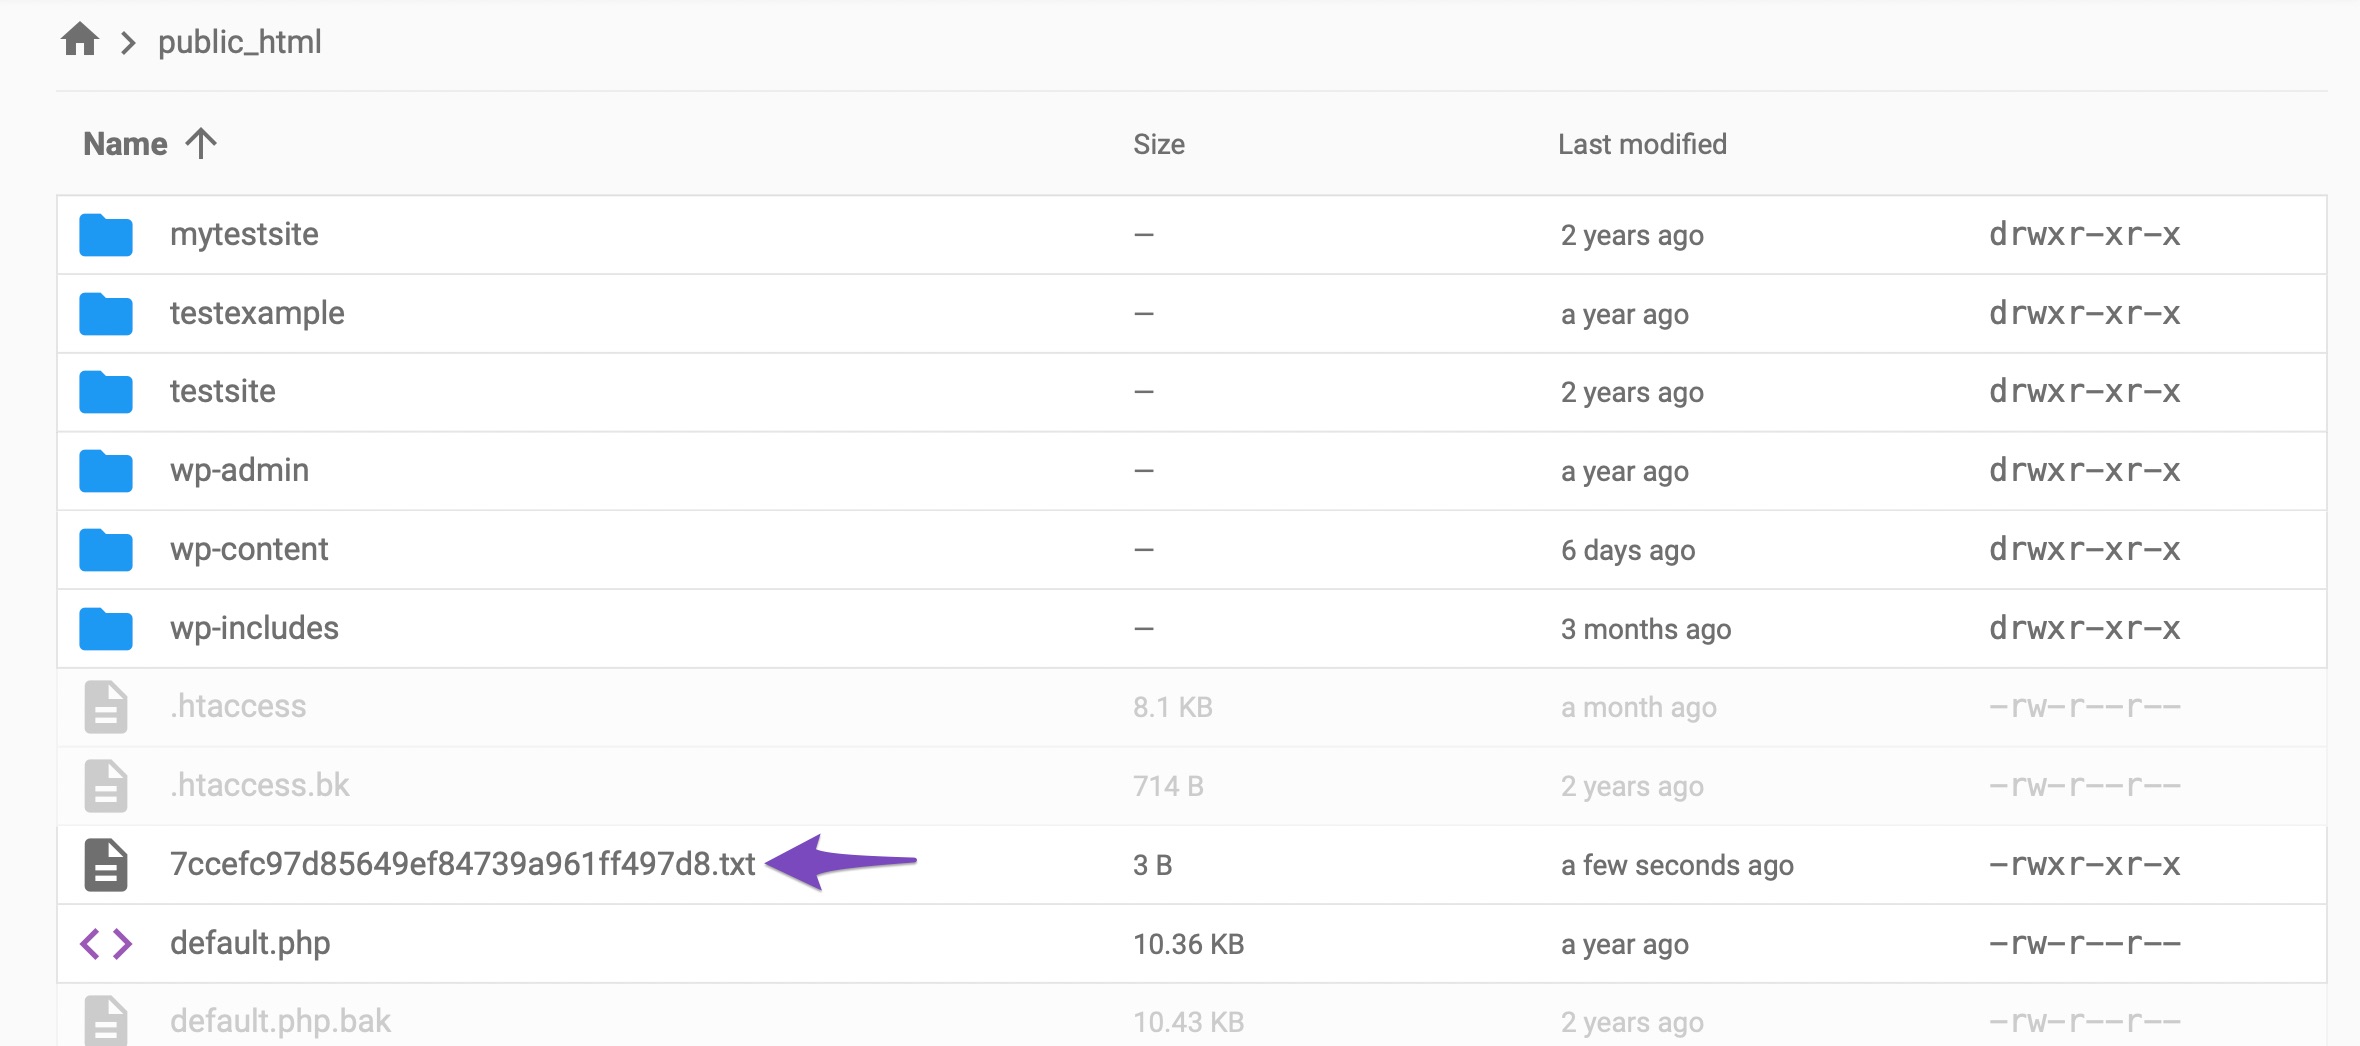
Once you’ve selected the file, it will be uploaded to your root directory, where search engines will be able to find it and verify your WordPress website.
4 Wrapping Up
And that’s it! Those are two simple steps that you can take to fix the 403 Forbidden error when trying to access the IndexNow API key.
We hope this article helped you learn how to fix the 403 Forbidden error. If you have any doubts or questions related to this matter, please don’t hesitate to reach out to our support team. We are available 24×7, 365 days a year, and happy to help you with any issues that you might face.