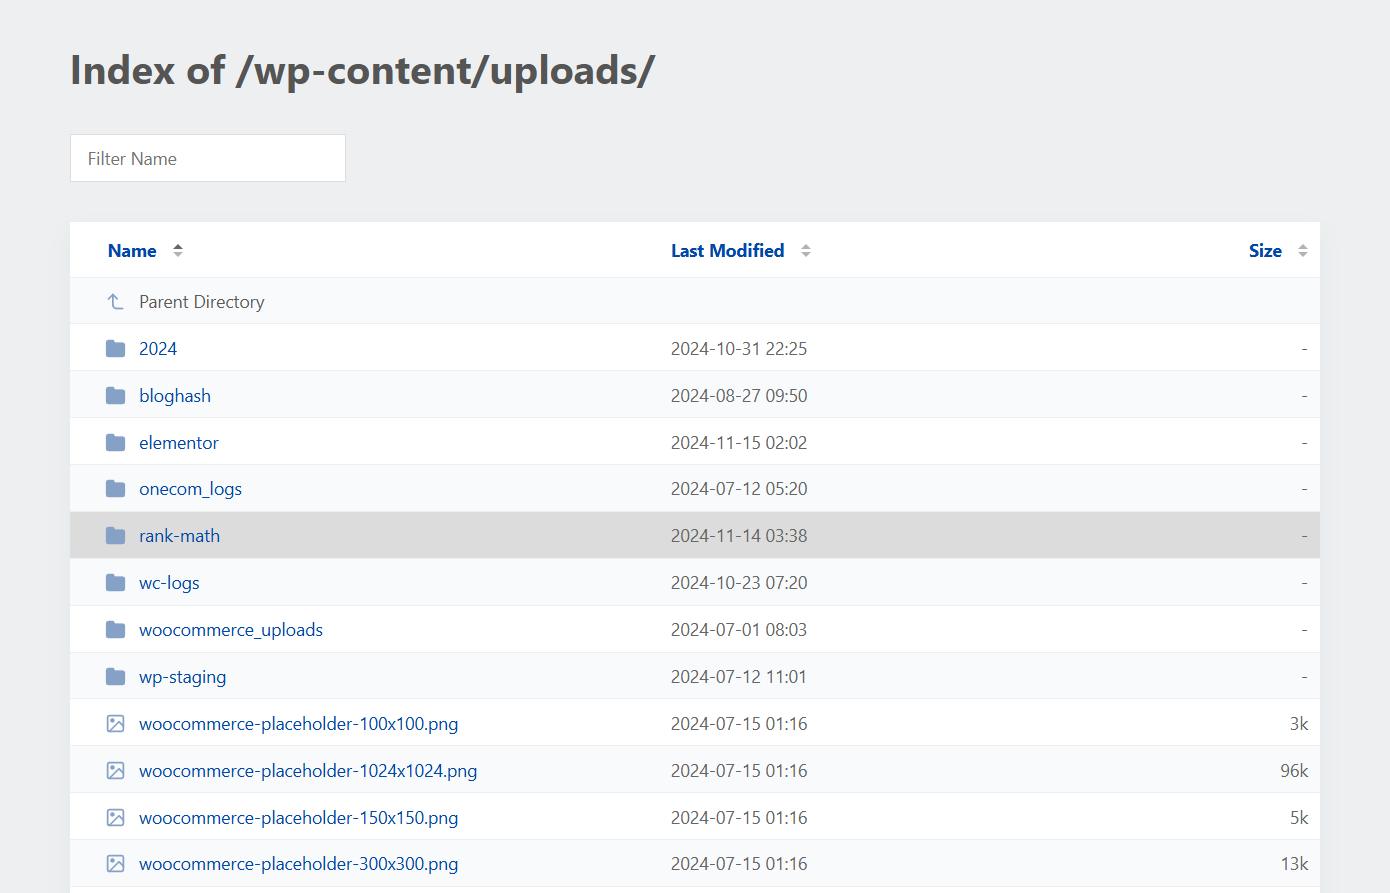
When someone visits a directory on your WordPress site that doesn’t have an index file, they might see a list of files and folders. This is known as directory listing. While it might seem harmless, it poses a significant security risk.
In this knowledgebase guide, we’ll explain why disabling directory listing is important and provide step-by-step instructions on how to do so on both Apache and Nginx servers.
1 Why Disable Directory Listing in WordPress?
Directory listing allows visitors, including hackers, to view the files and folders in your site’s directories. This can lead to various issues.
For one, it makes sensitive files like configurations, backups, and plugins vulnerable to unauthorized access. If directory listing is not disabled, users could potentially access and even download files directly from your website or server.
Additionally, hackers could exploit the exposed directory structure to identify vulnerabilities, putting your site at risk. Finally, directory listing can also appear unprofessional, exposing incomplete or unnecessary files to visitors.
By disabling directory listing, you’re taking an important step toward improving security, maintaining privacy, and ensuring your site looks polished.
2 How to Check If Directory Listing Is Enabled
To check if directory listing is enabled on your site, open your browser and enter a directory URL. For example, you can visit https://yourwebsite.com/wp-content/uploads/ or https://yourwebsite.com/wp-includes/ (replace yourwebsite.com with your actual domain).
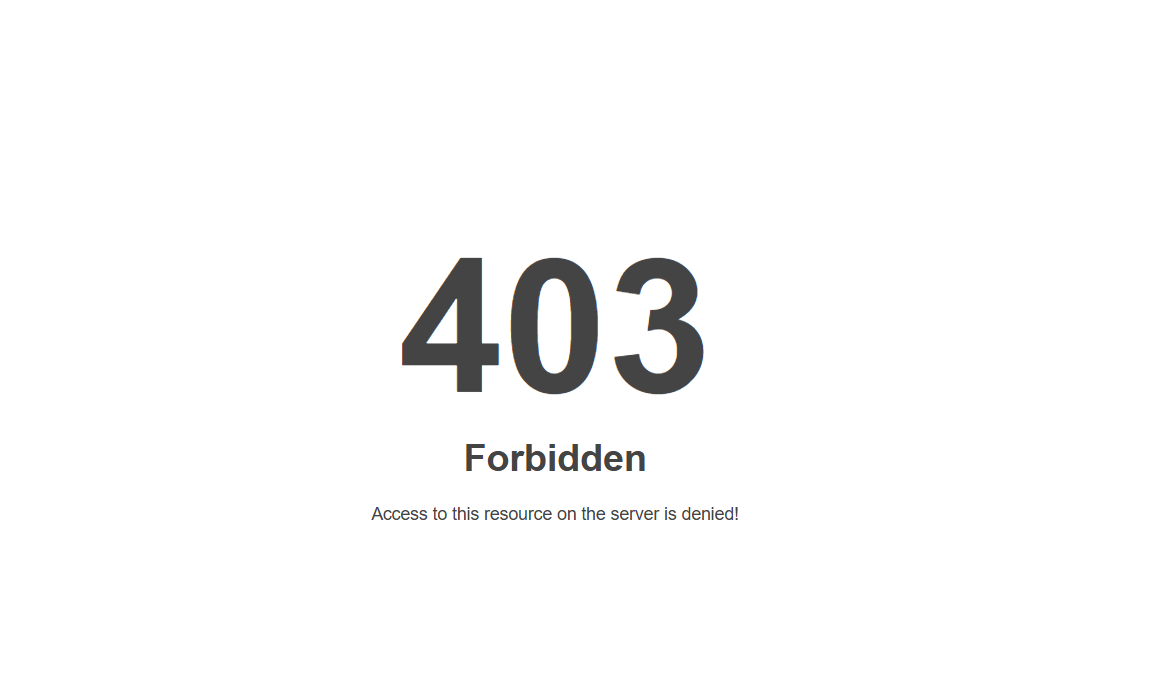
If the directory listing is disabled, you’ll see a 403 Forbidden error or a blank page.

On the other hand, if enabled, you’ll notice a list of files and folders displayed on the page.

In that case, you need to disable it by following the instructions below.
3 Method 1: Using .htaccess (Apache Servers)
If your site is hosted on an Apache server, you can easily disable directory listing by editing the .htaccess file. Usually, you will want to connect to your server using an FTP client or your hosting provider’s control panel to locate and edit your .htaccess file.
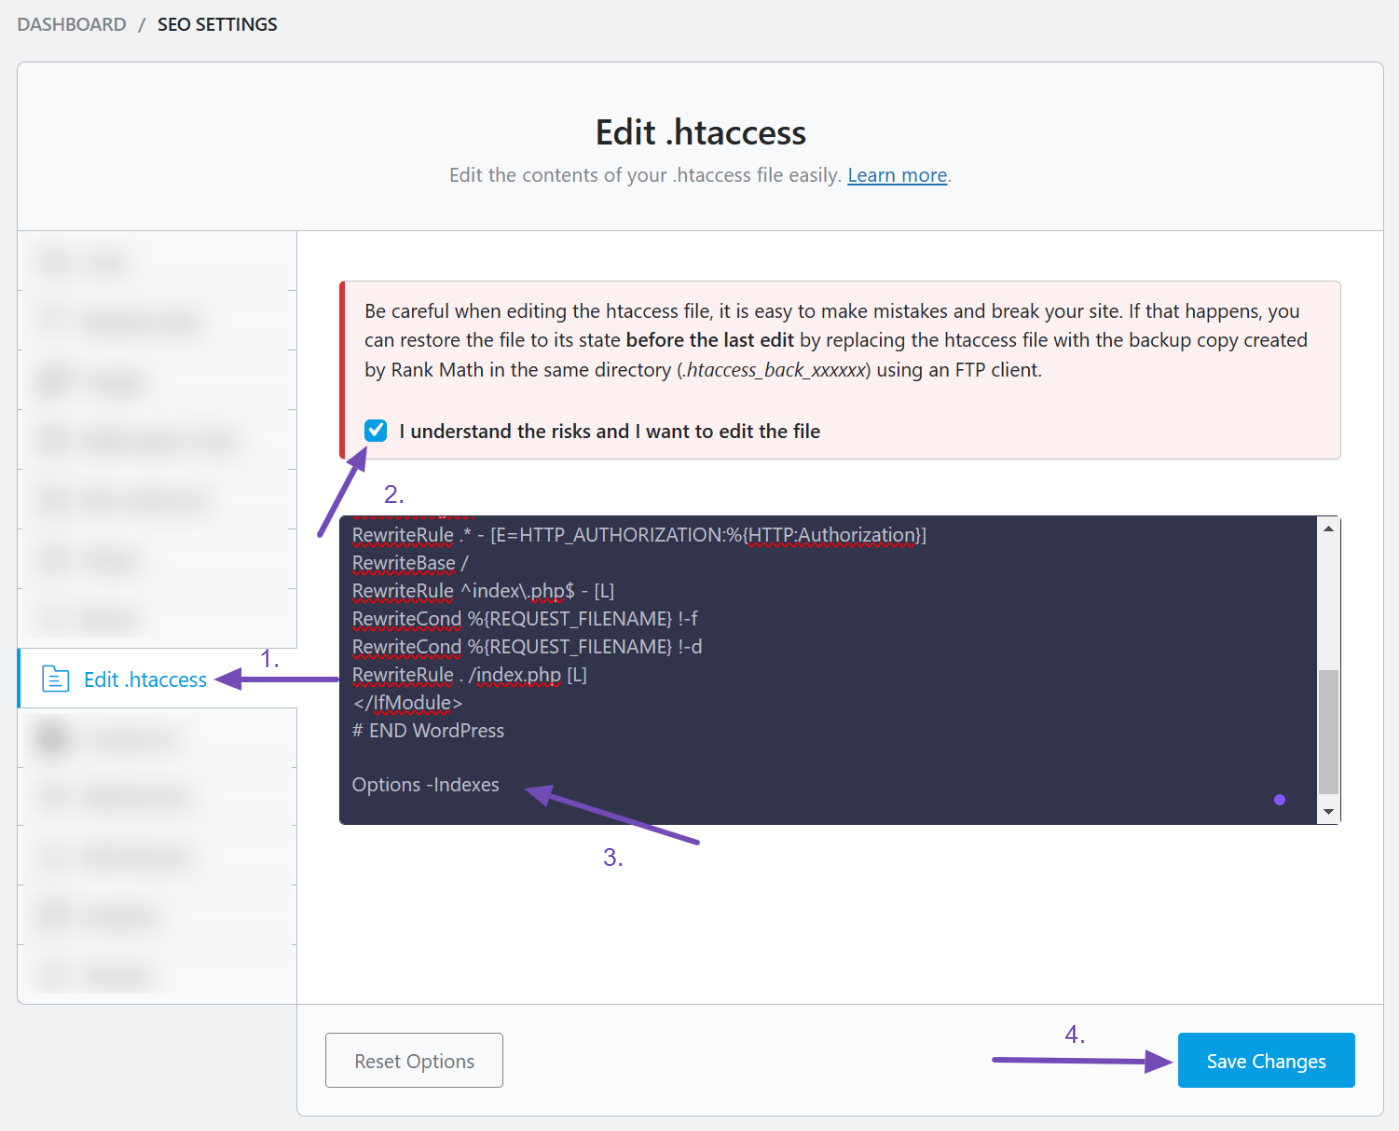
However, you can also access your .htaccess file using Rank Math SEO. To do this, ensure it is set up and navigate to Rank Math SEO → General Settings → Edit .htaccess from your WordPress dashboard.
Next, check to agree to the notice if you haven’t done so already, and paste the following line of code at the bottom of the file:
Options -IndexesIt will look like something like this:

Once done, click the Save Changes button to save your settings. Now, revisit the directory you tested earlier.
Instead of seeing a list of files, you should encounter a 403 Forbidden error, indicating that the directory listing has been successfully disabled.

4 Method 2: For Nginx Servers
For those using Nginx servers, the process is slightly different. Nginx doesn’t use .htaccess files, so you’ll need to edit the server configuration file instead.
Start by connecting to your server via SSH or your hosting provider’s file manager. Locate the configuration file for your site, typically found in /etc/nginx/sites-available/your-site.
Open the configuration file and find the server block for your domain. Inside the block, add the following directive:
autoindex off;Save your changes and restart Nginx to apply them by running the command sudo systemctl restart nginx. Once this is done, visit the directory URL to confirm that the directory listing is disabled. You should see a 403 Forbidden error on the page.

Disabling directory listing is a simple yet critical step in securing your WordPress site. For Apache users, adding Options -Indexes to the .htaccess file is the easiest and most effective method.
On the other hand, Nginx users can achieve the same result by updating their server configuration. By taking this precaution, you’re not only safeguarding sensitive data but also presenting a more professional and secure website to your visitors.
If you have any questions or encounter issues, feel free to reach out to our support team. They’re available 24/7 to assist you.