
Have you ever landed on a long article and wished you can skip straight to the part you care about?
That’s exactly what jump links let you do.
Instead of scrolling endlessly, your readers can click a link and jump right to the section they need. As a WordPress user, you don’t have to be a coding expert to set these up.
In this post, I’ll walk you through how I create jump links quickly in WordPress, and by the end, you’ll be able to use them on your own site to improve navigation and keep your visitors engaged.
So, without any further ado, let’s get started.
Want to see what it means? Just click here.
Isn’t it amazing? The best part is that you can do it all yourself, even if you don’t have a lot of HTML expertise. If the HTML-speak feels confusing, follow this post to help you create your jump links for your post with ease.
Table Of Contents
1 What is a Jump Link?
A jump link, also called an anchor link, is a special type of internal link that takes you straight to a specific section on the same page. Instead of scrolling through a long article, you (or your readers) can simply click the link and land exactly where you want.
I find them especially useful for long guides or tutorials where readers might only be interested in one section. From a user experience perspective, jump links make it easier for your audience to skim, navigate, and get the information they need quickly.
And here’s the bonus, you can also get a small SEO advantage. Google sometimes displays these links as “jump to” results in search, giving your content more visibility right on the SERP.
Jump links are great for WordPress SEO. Google can display an anchor link in the search results as a “jump to link.”
Here’s what the jump link looks like in Google SERP:
You can use jump links in WordPress for a few key reasons:
- When you’re targeting a broad keyword or breaking down a step-by-step process.
- To help readers skip directly to the section that matters most to them.
- To reduce bounce rates by keeping people engaged on your page.
- To increase your chances of showing up in search results snippets, especially for multi-topic or multi-intent queries.
2 How to Create Jump Links in WordPress
If you’ve ever wanted to help your readers skip right to the part of your content they care about, jump links are the way to go. Let me show you how you can quickly create them in WordPress.
2.1 Create an Anchor in WordPress
The first thing you need is an anchor; this is the spot on your page where visitors will land when they click the jump link.
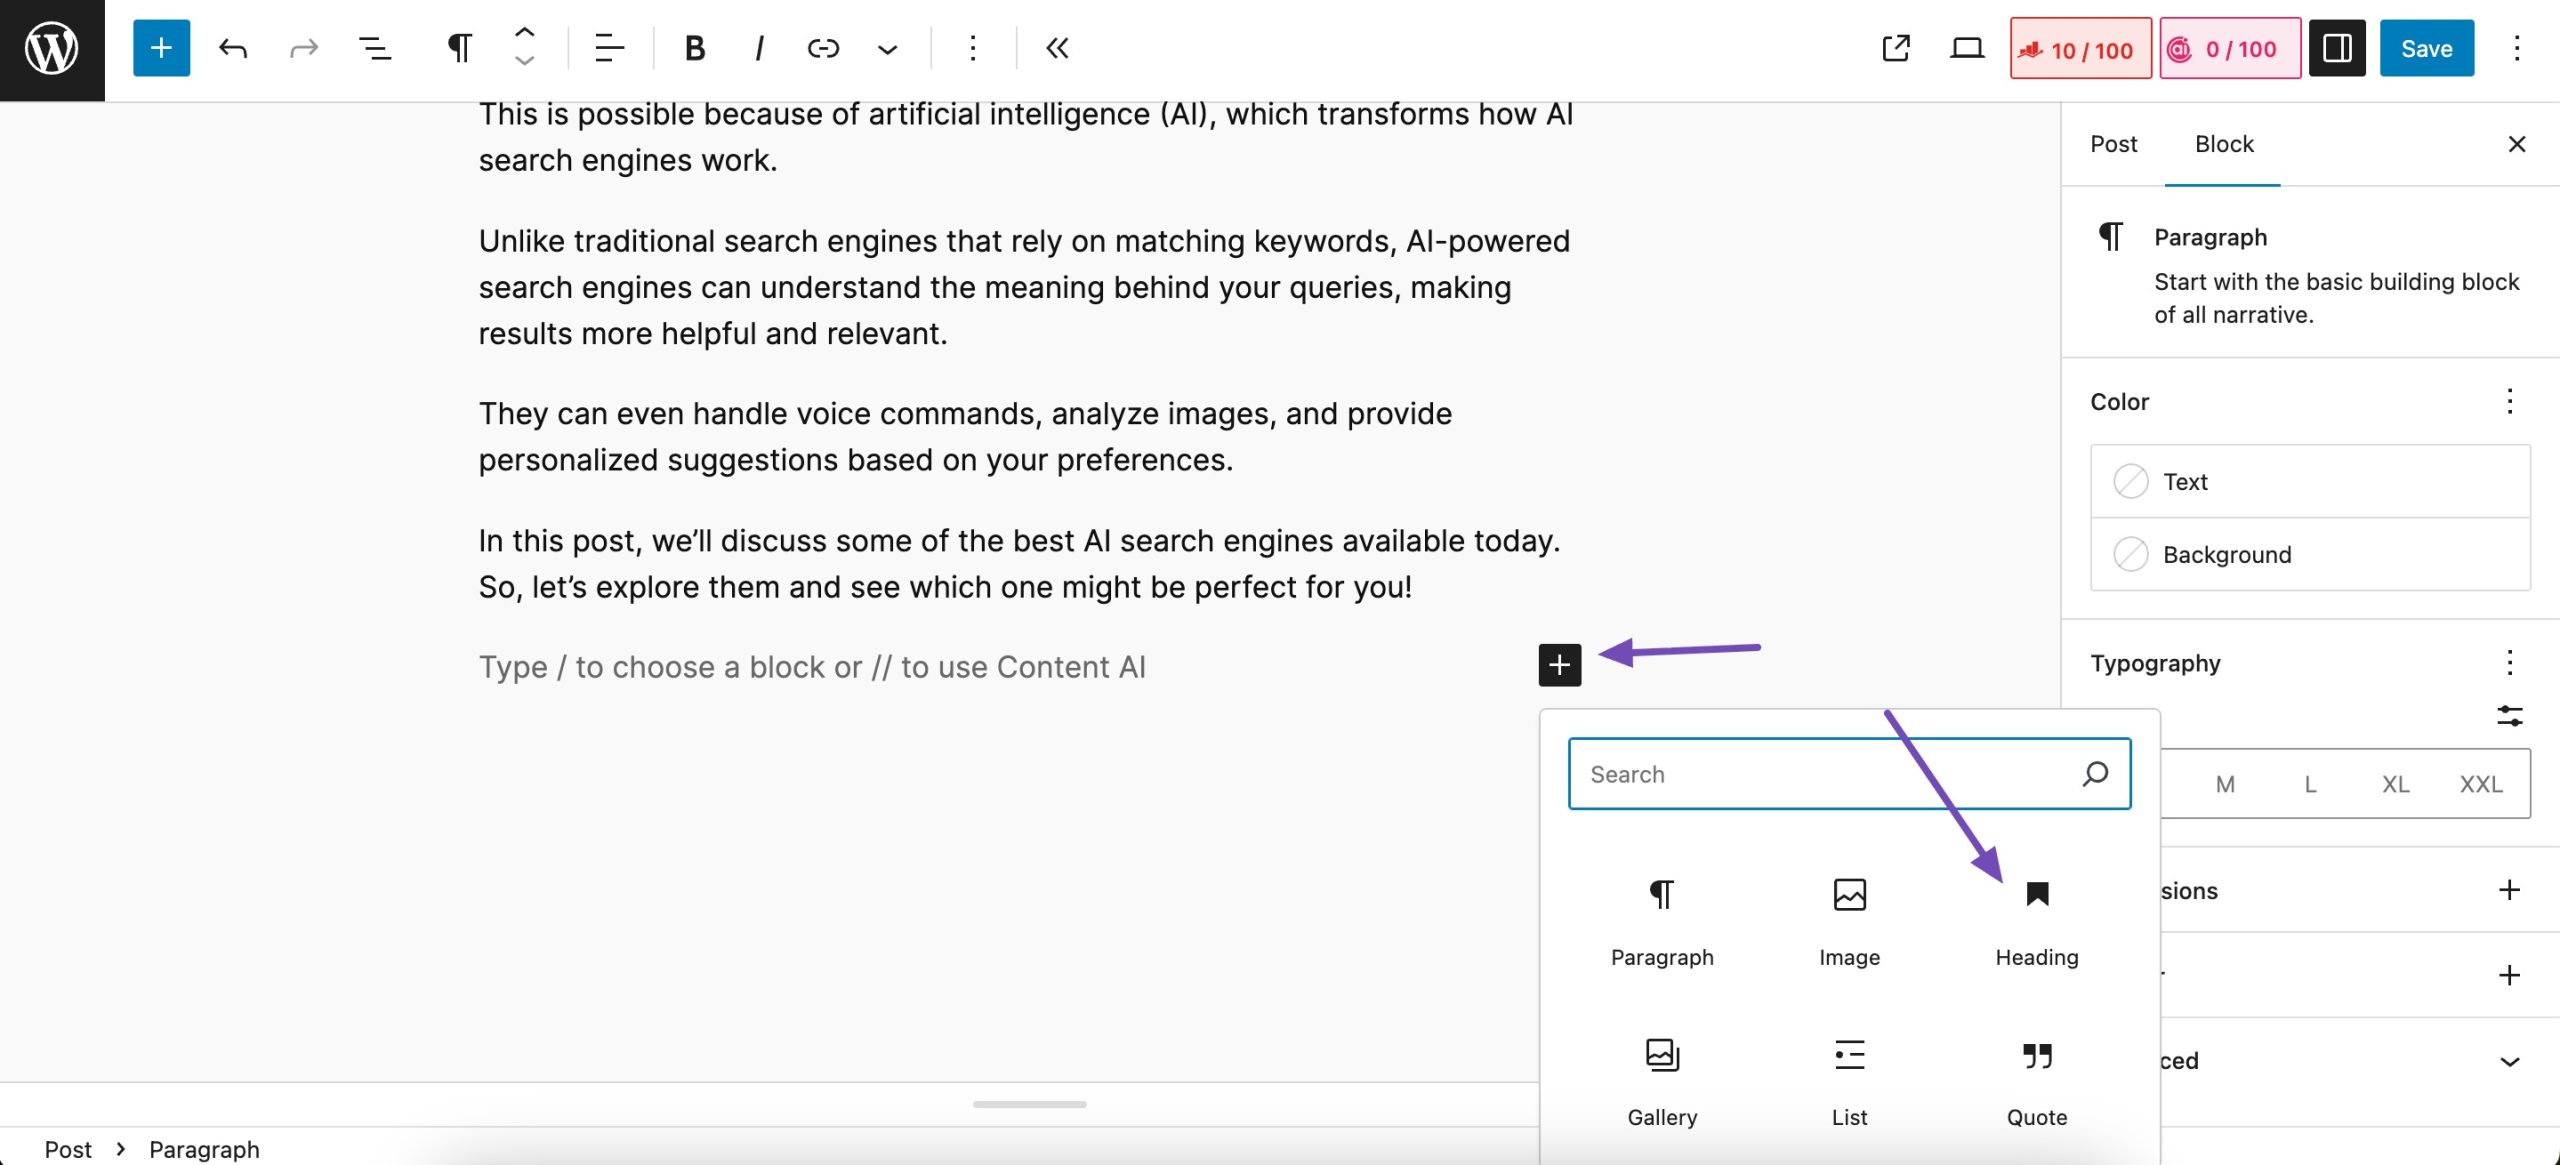
At first in your WordPress post editor, click on the + icon from the top left corner and add the Heading block as shown below.
Write your heading. Please ensure you write appropriate and powerful headings to make them appealing in search snippets.
Once your headings are written, navigate to Block Settings on the right side and click on Advanced. In the HTML anchor field, type a word to form your link. It’s possible that one was generated automatically for you.
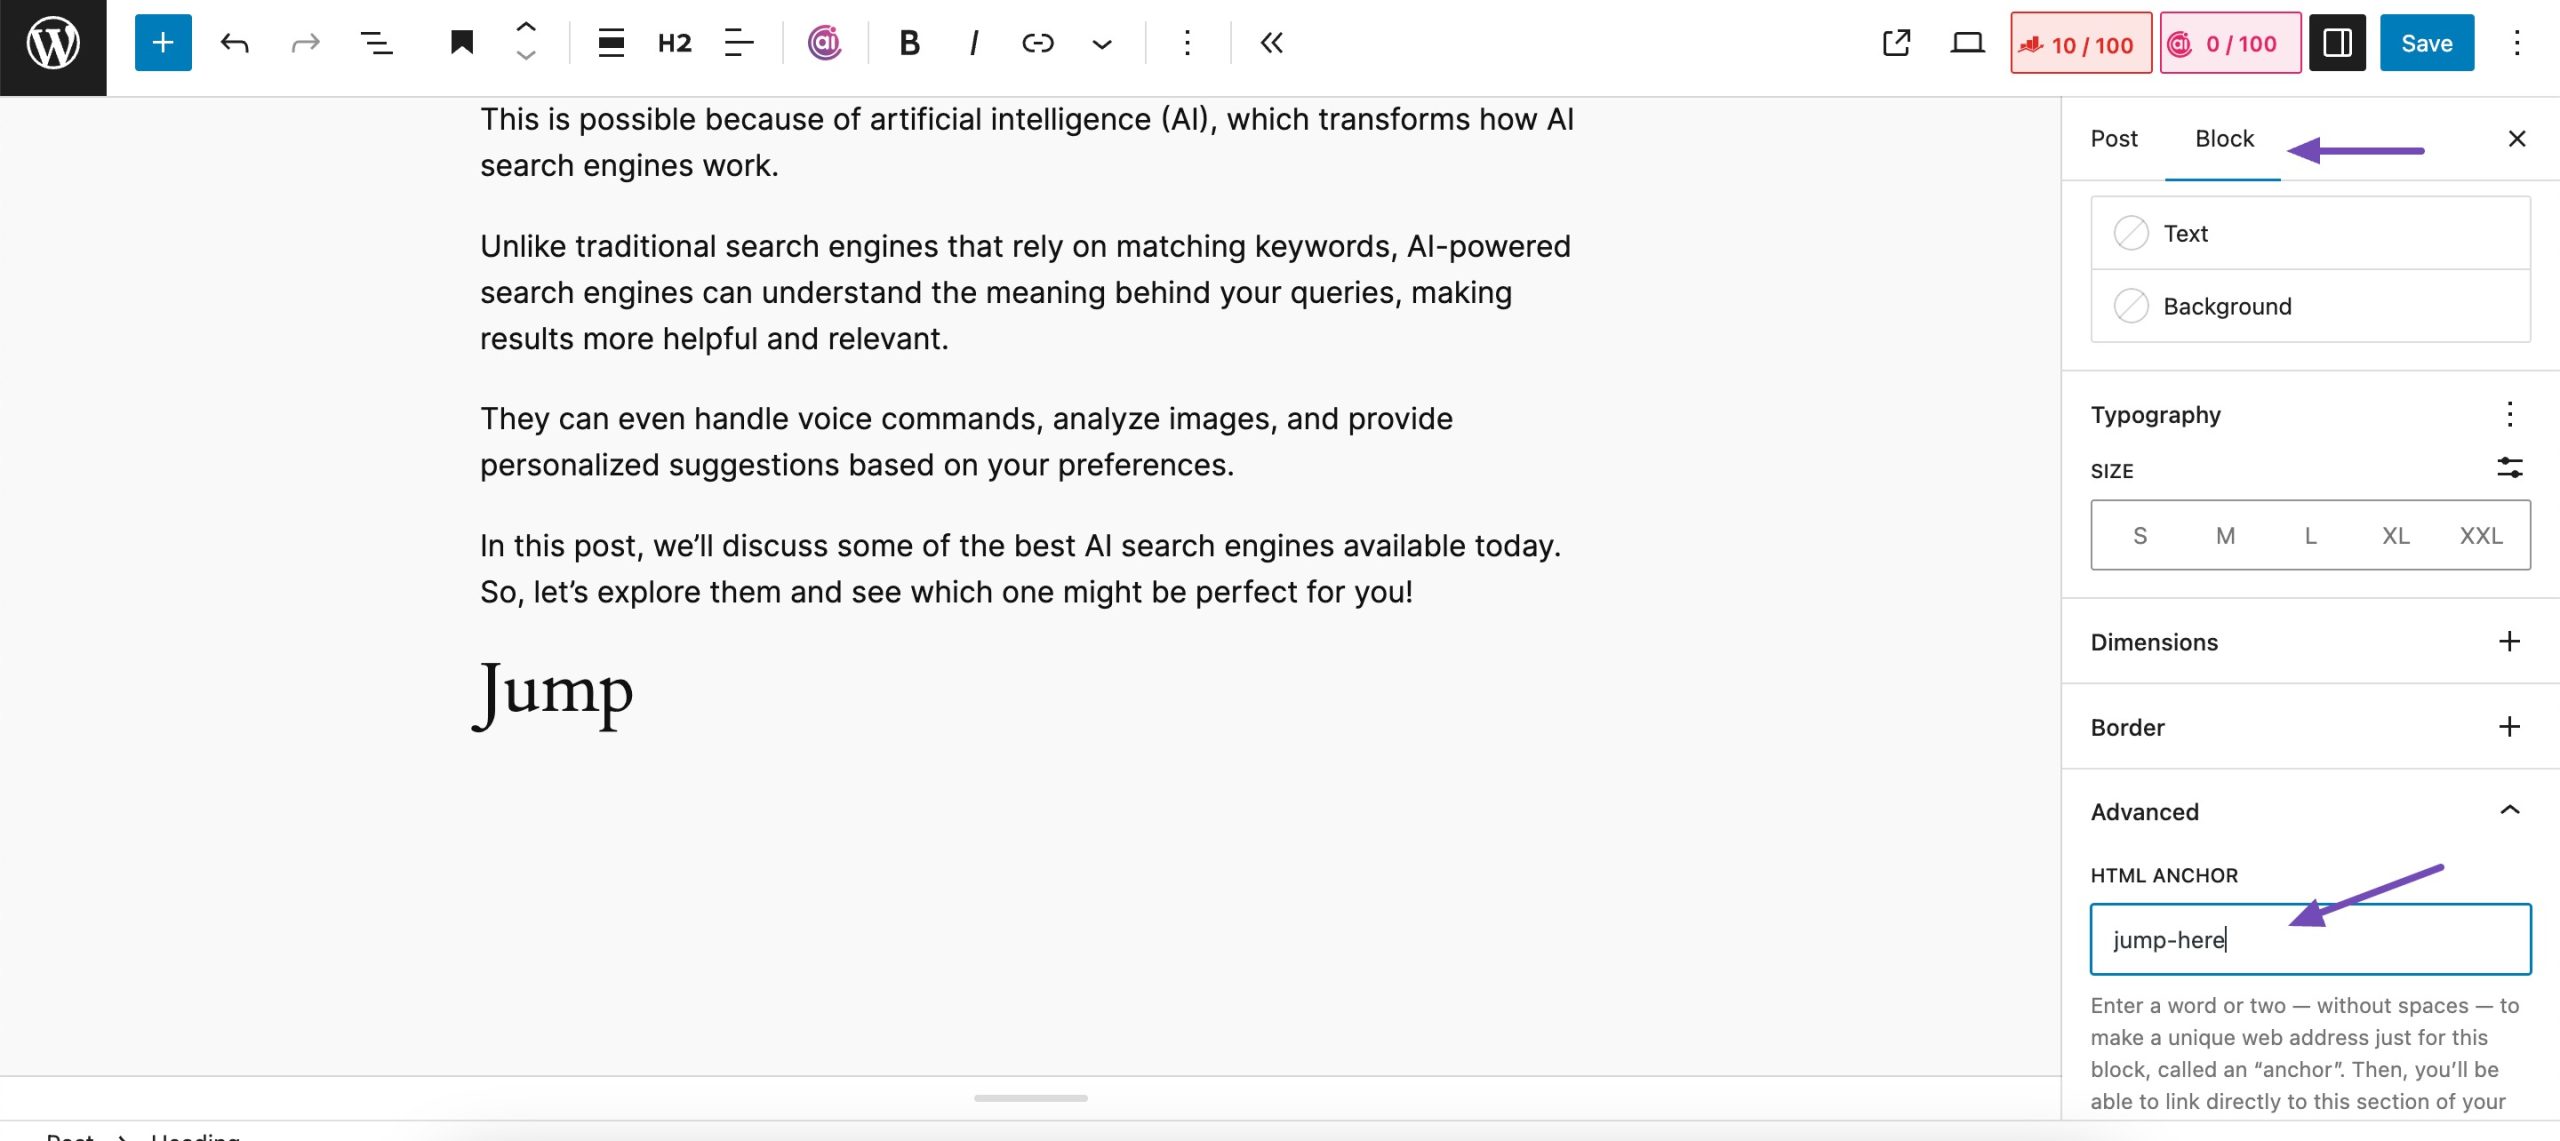
Make sure your anchor text doesn’t contain any spaces, as this can cause issues in browsers. Also, pick a unique anchor text that isn’t repeated anywhere on the page.
2.2 Create a Link to Your Anchor
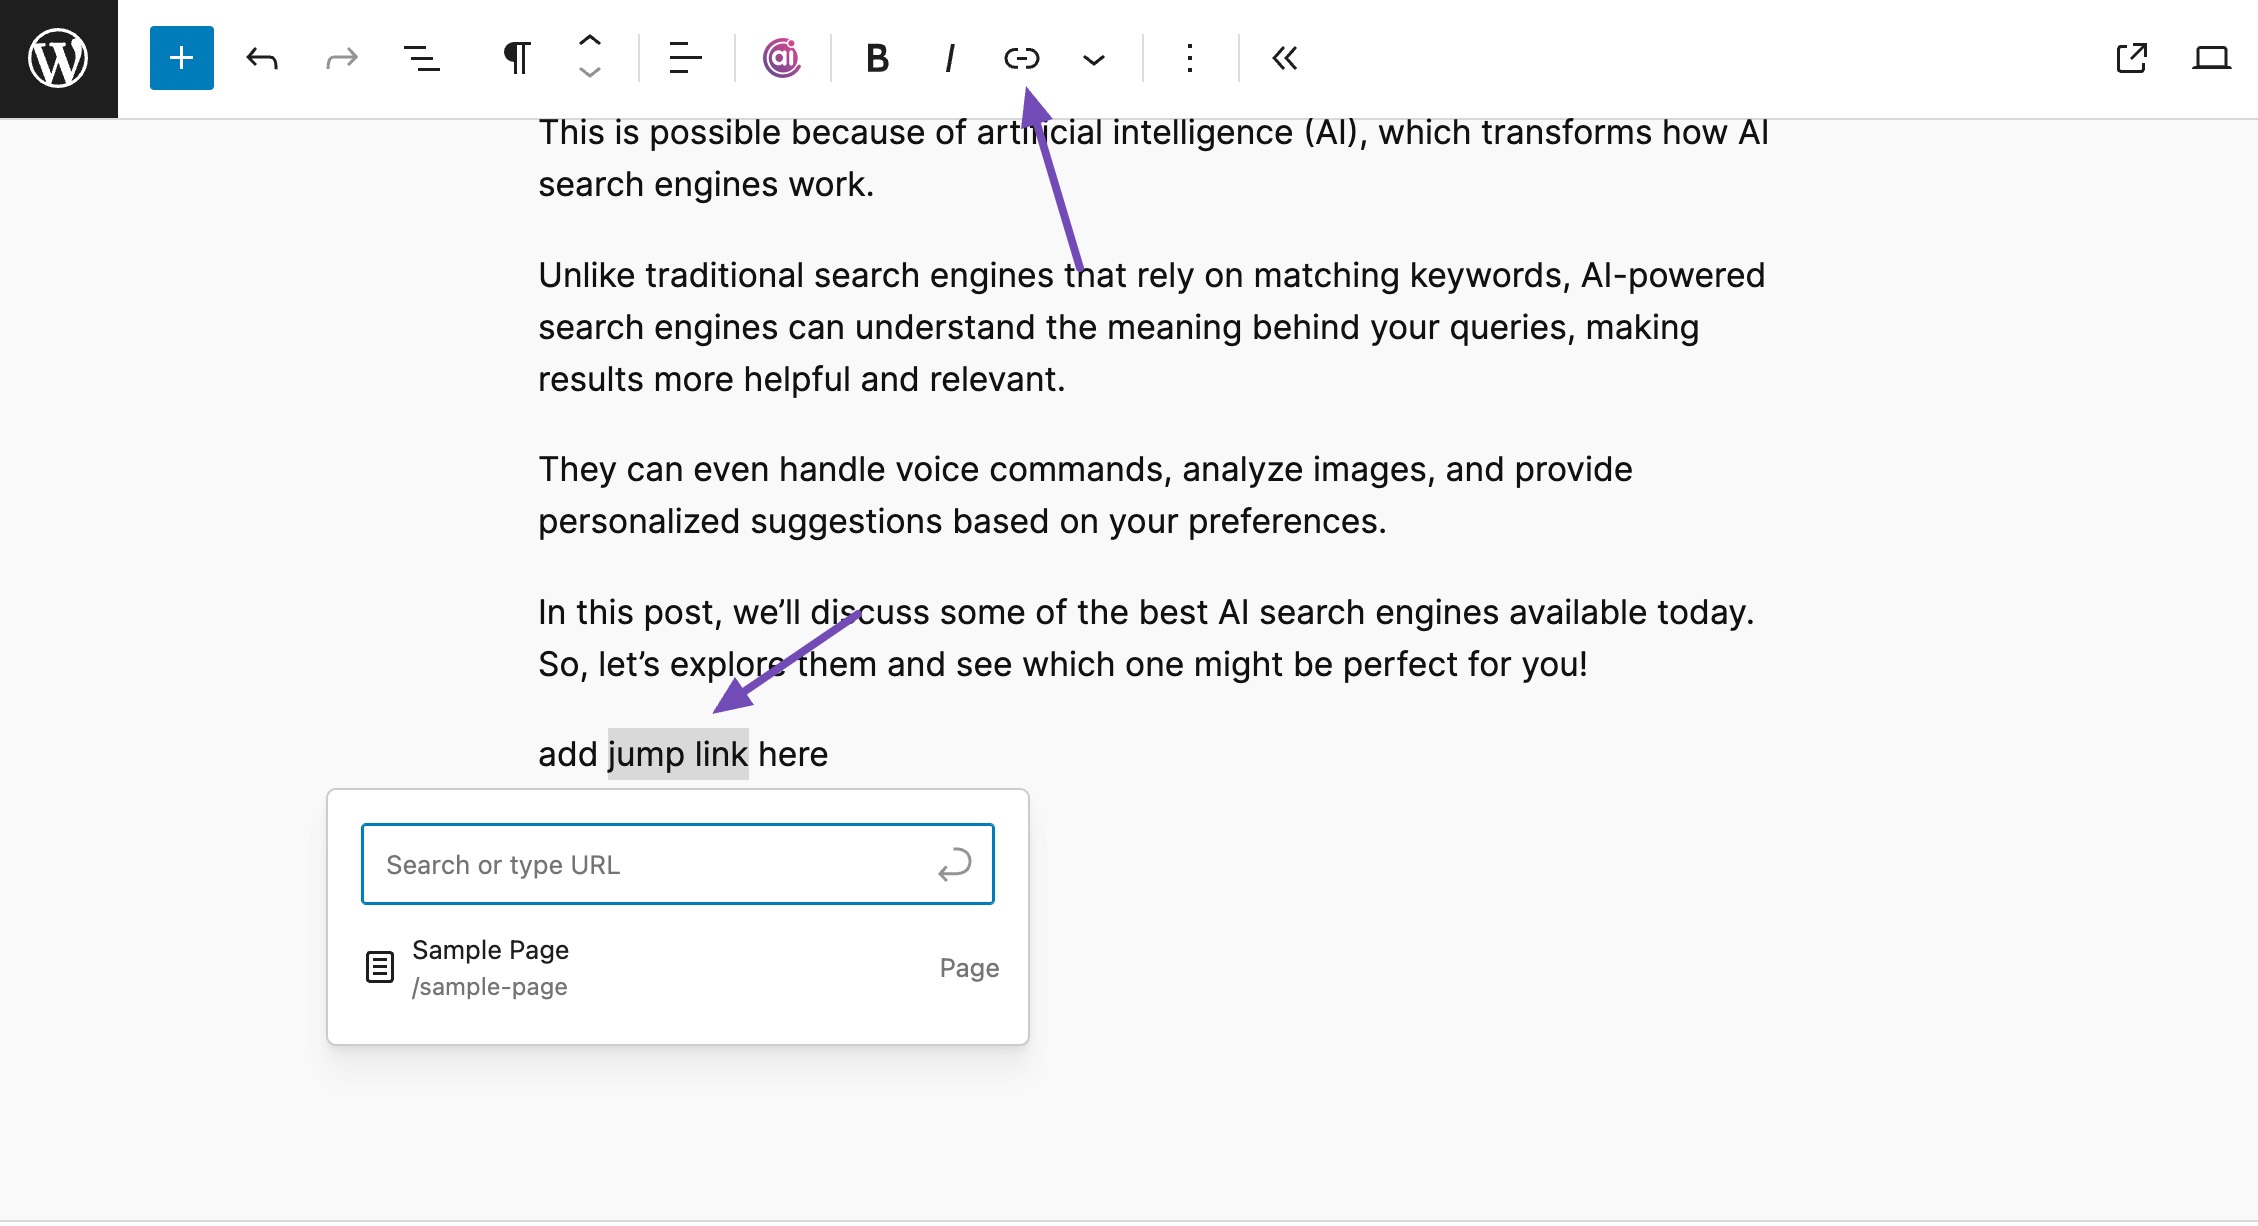
Next, you have to create a link to your anchor. This is the link where the visitors will land when they click on it. To do so, add some text that you’d like your visitors to click on. Then highlight the text and select the link option as shown below.
Type the HTML anchor you created and prefix it with the pound (#) symbol. For example, if you created an anchor named jump-here, you would link to #jump-here.
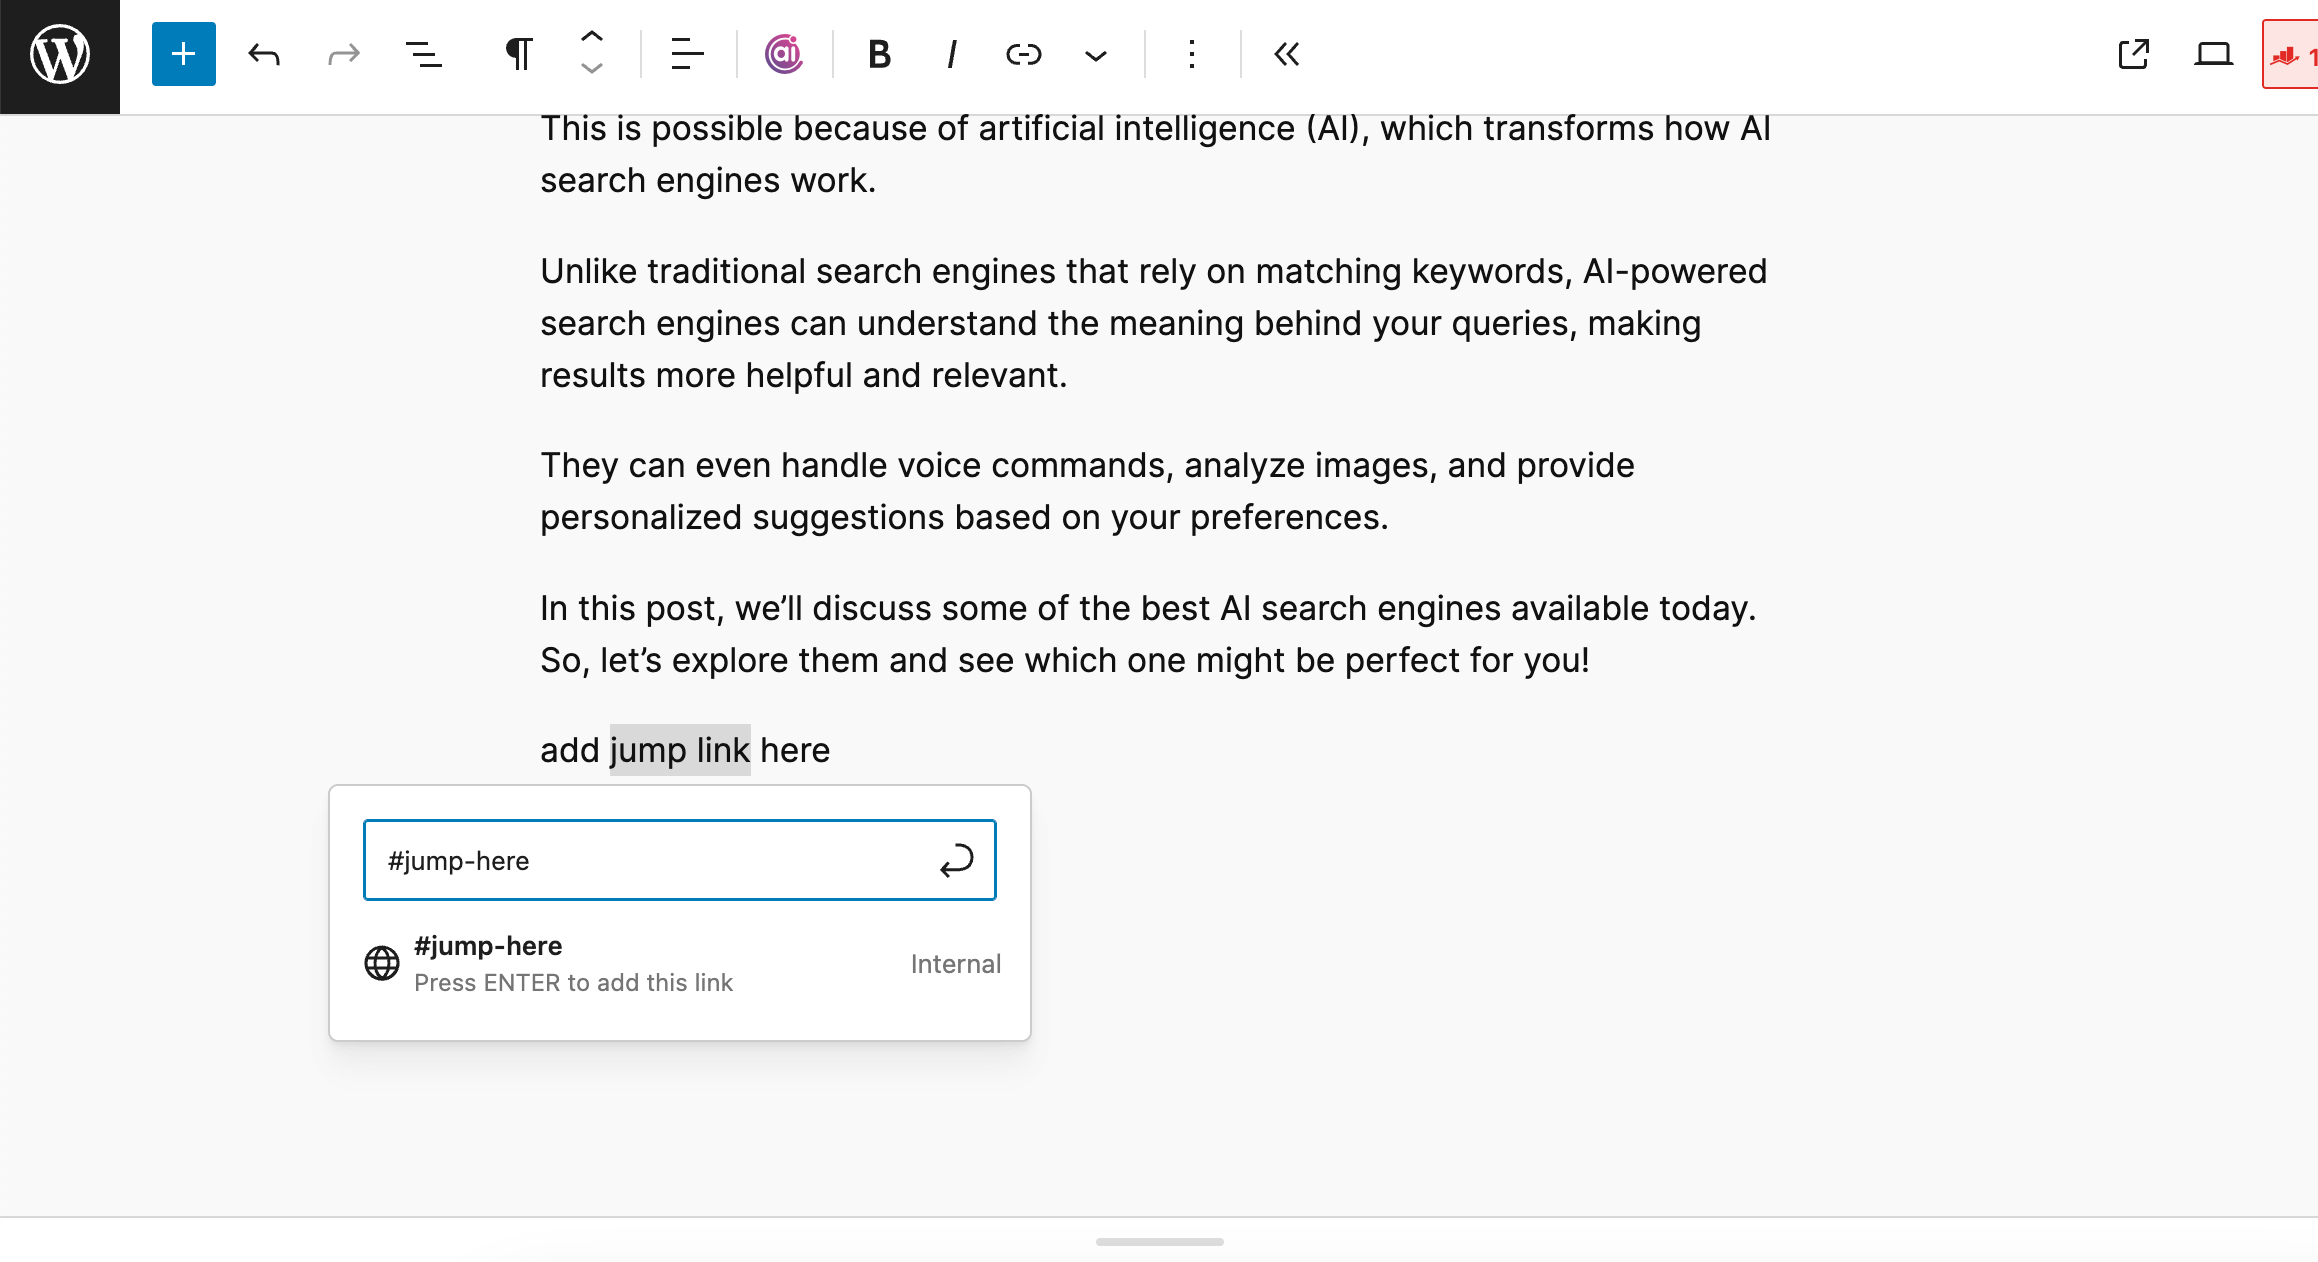
Click the arrow icon or press Enter/Return on your keyboard to save the link. You’ve now got a functioning hyperlink between two pieces of content on the same page.
3 Create a Simple Table of Contents With Jump Links
Jump links are commonly used in lengthier articles as a table of contents, allowing users to quickly jump to the sections they want to read.
Creating a table of contents with jump links will be easy if you have a basic understanding of HTML.
Take a look at the animated screenshot of Rank Math’s table of contents below:

As you can see, clicking on the table of contents anchor links takes the user to the specific section on the same page.
To add a table of contents, navigate to your post/page where you’d like to add the table of contents.
Create the headings that’ll be used as the items in the table of contents. Click on the first heading block. A WordPress toolbar will appear. Click the More Options button (the three vertical dots icon) and select Edit as HTML, as shown below.

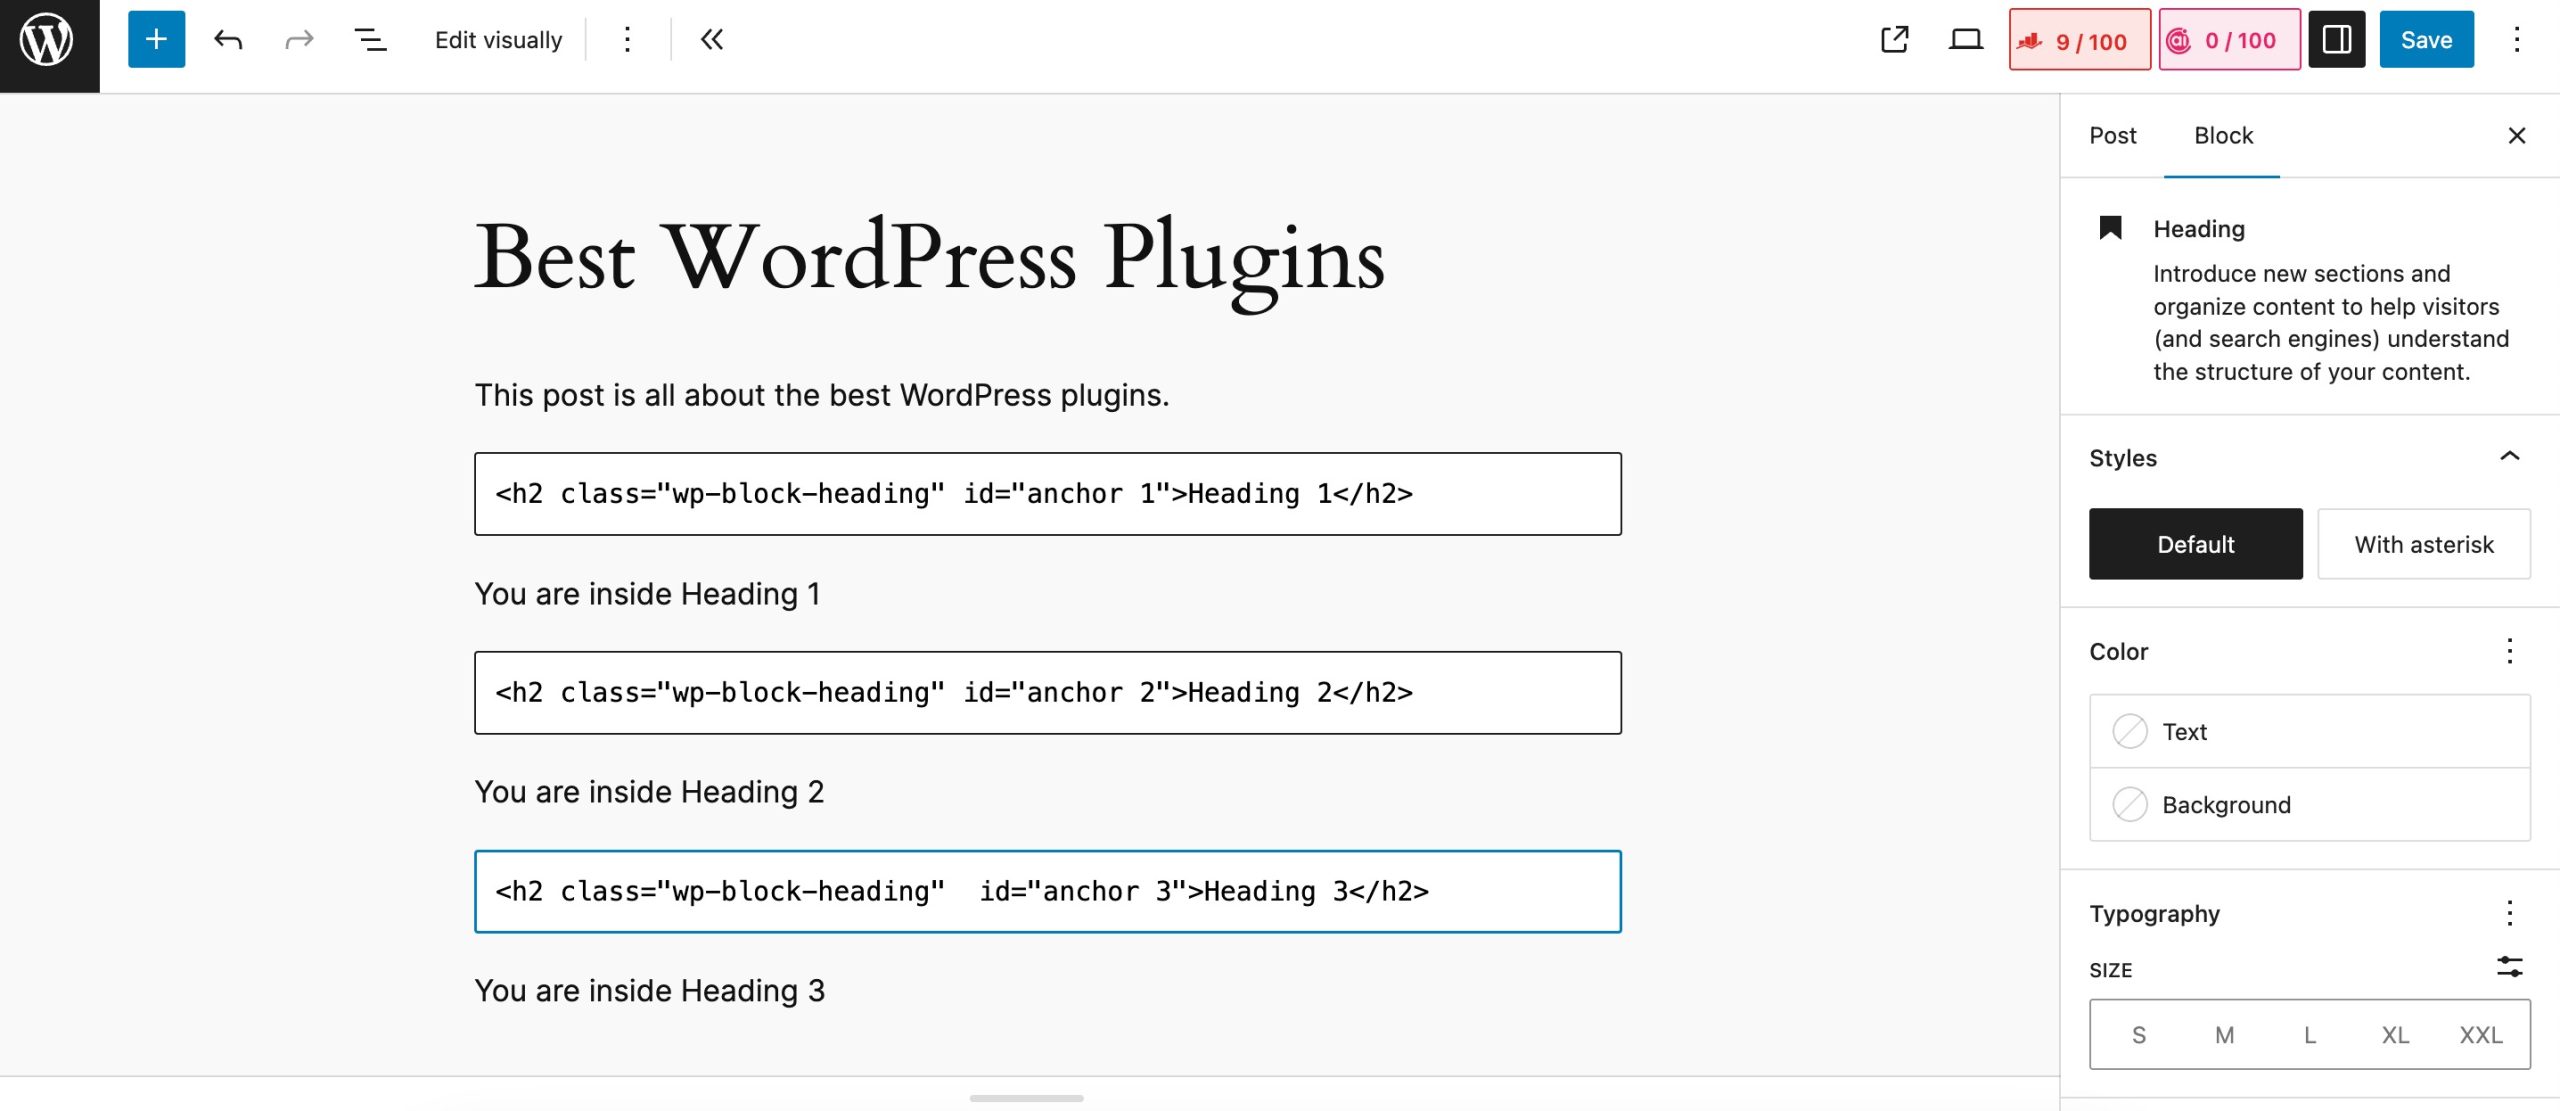
Now, add a unique ID name to the heading’s opening tag. An ID name is a unique identifier applied to an HTML element’s beginning tag. Here’s what a header should look like:
<h2 id=”anchor-1”> Heading 1 </h2>Repeat for the rest of the page’s headings (or only the ones you want to include in the table of contents). For this example, the ID names used are “anchor-1,” “anchor-2,” “anchor-3,” and “anchor-4.”
Navigate back to the top of the page and click the Add Block button in the top toolbar. Select the Custom HTML block from the menu. You can use this HTML block to make a table of contents.
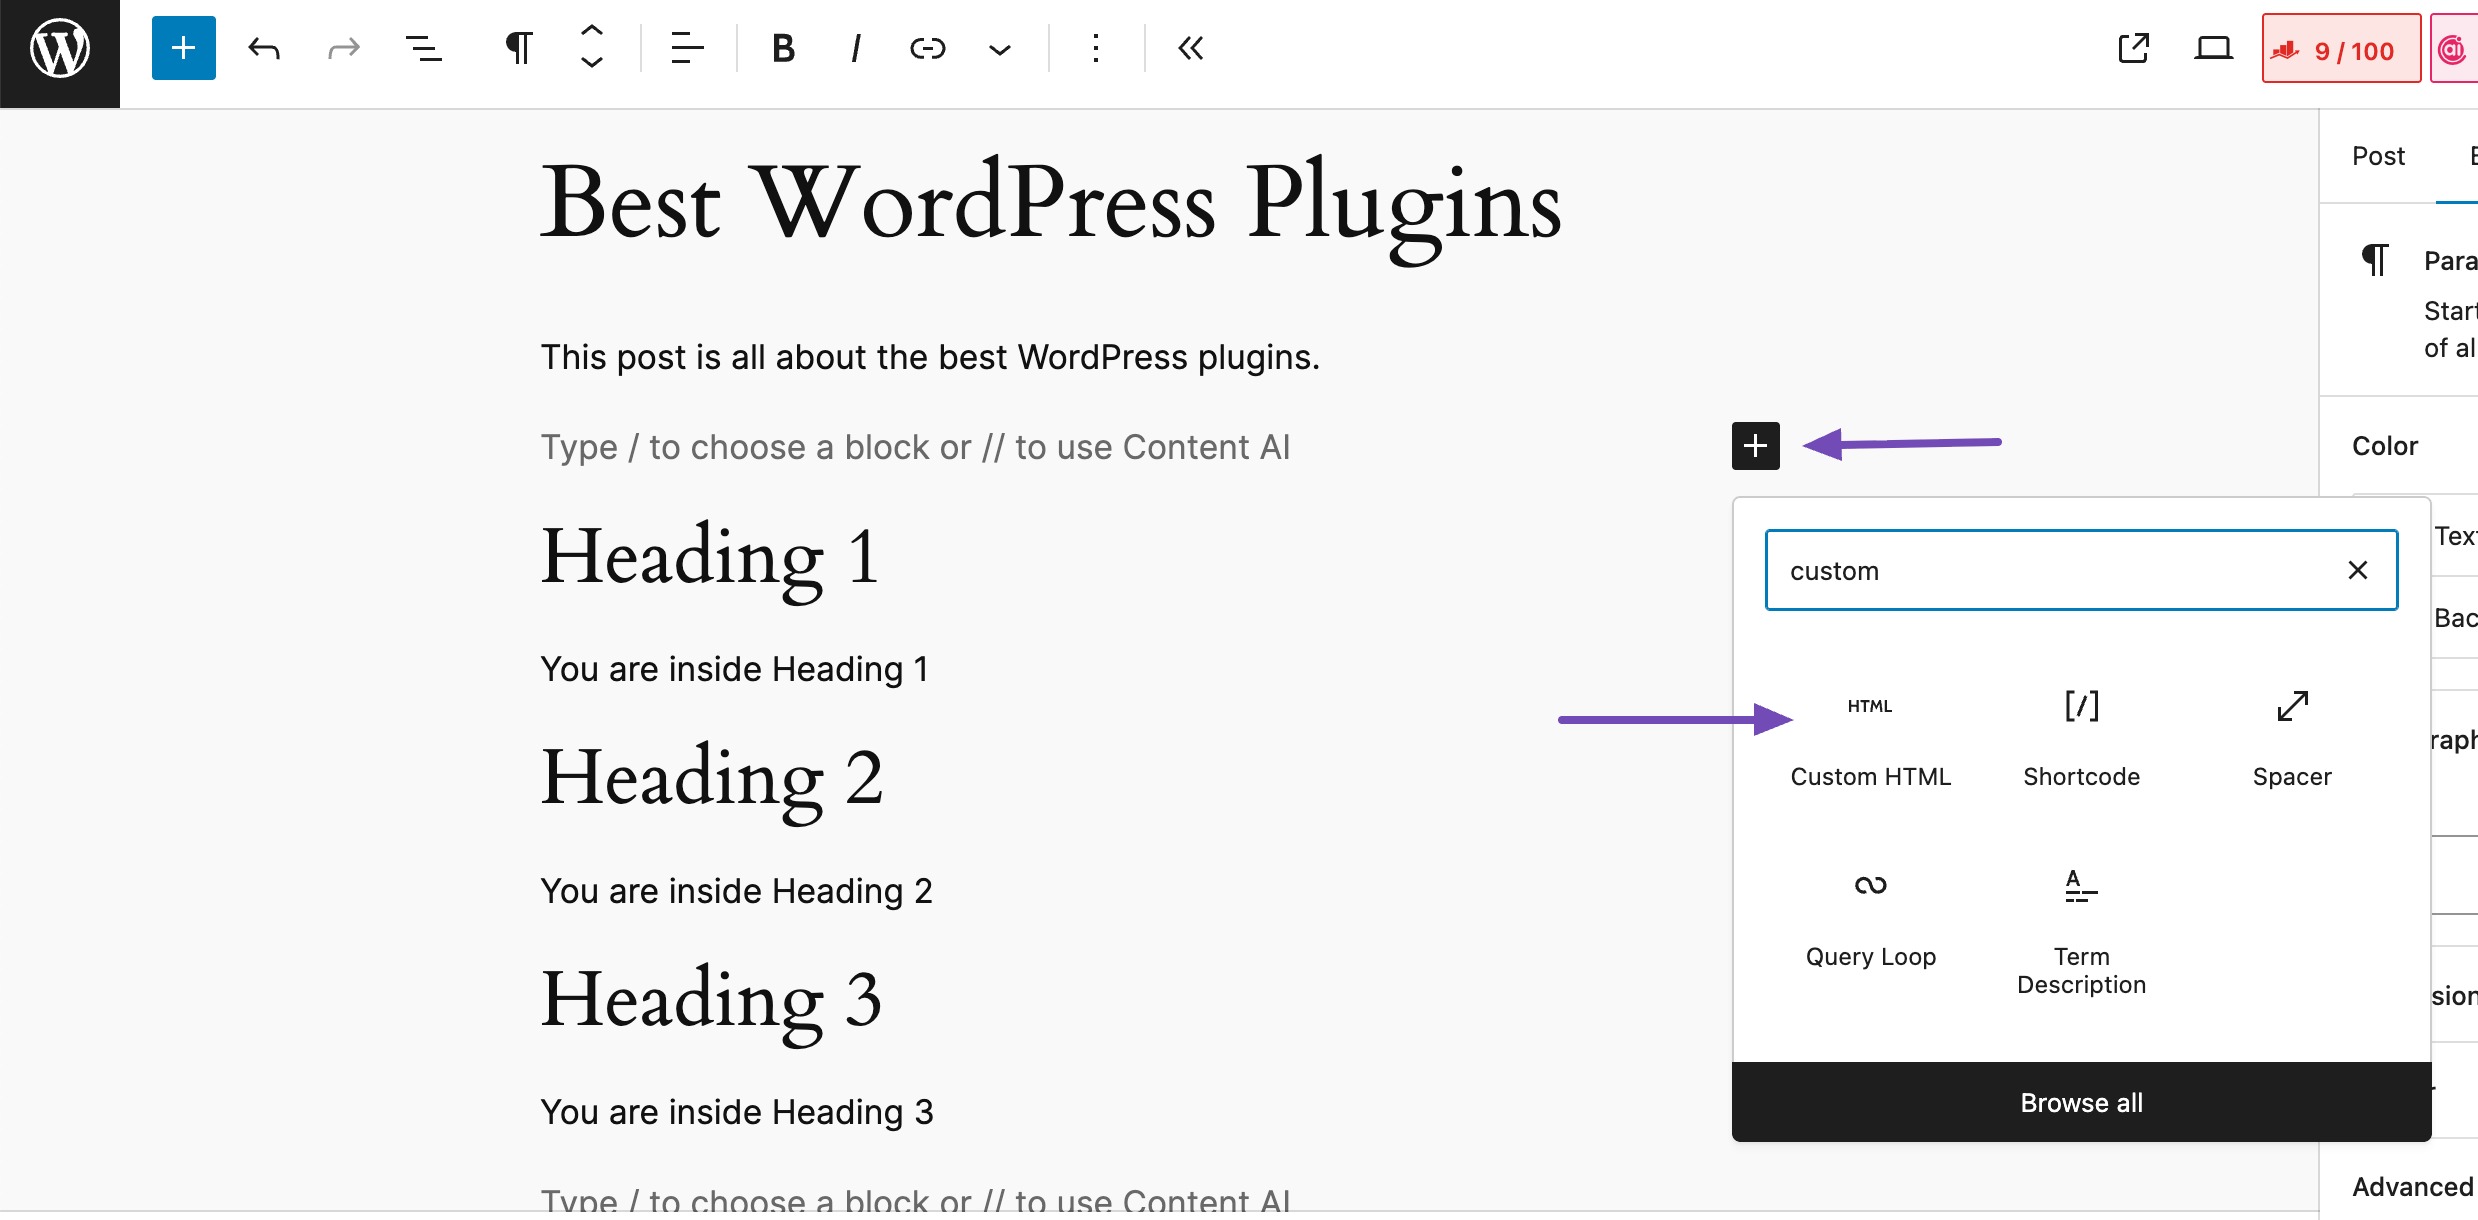
Now, add the table of contents with your jump links. To create the jump links, fill in the href attribute with a hashtag and the id name of the headings created before. Copy and paste the following code into the block:
<div>
<p>Table of contents</p>
<ol>
    <li><a href="#anchor-1">Heading 1</a></li>
    <li><a href="#anchor-2">Heading 2</a></li>
    <li><a href="#anchor-3">Heading 3</a></li>
    <li><a href="#anchor-4">Heading 4</a></li>
</ol>
</div>
Customize the section names and jump links to link to the correct headings as per your requirements. In other words, replace the text after # with your “id” values and the text between the opening and closing anchor tag (i.e., Heading 1, Heading 2…), and replace them with the title of the respective headings. And that’s it! Your table is ready.
You can also add a table of contents in WordPress using the Rank Math SEO plugin. Adding the table of contents block and customizing it in Rank Math is super easy. You can further refer to our dedicated tutorial on how to add Rank Math’s table of contents block.
4 Conclusion
And that’s it, you now know how to quickly create jump links in WordPress.
Once you start using them, you’ll notice how much easier your content becomes to navigate, especially for longer posts and guides.
Try adding a few to your next article, and you’ll see how much smoother your content feels for your audience.
If so, let us know by tweeting @rankmathseo. 💬 We’d love to hear your experience and thoughts.