Setting a minimum word count is a great way to maintain content standards, especially if you’re managing a multi-author blog or aiming to improve your own writing consistency.
It encourages more in-depth articles, which can boost engagement and help with SEO.
Fortunately, with tools like the PublishPress Checklists plugin, it’s easy to set a minimum word count and take control of your content quality.
In this post, we’ll show you how to set a minimum word count for your WordPress posts. So, without any further ado, let’s get started.
Table Of Contents
1 The Need to Set a Minimum Word Count for WordPress Posts
To keep your content consistent and useful, it helps to set a minimum word count. This is especially important if you manage a blog with multiple authors, but it’s also useful when writing on your own. It helps avoid short posts that don’t offer much information.
Longer posts often perform better in search engines. They usually cover topics in more detail, which can make them more helpful to readers and more likely to appear in search results.
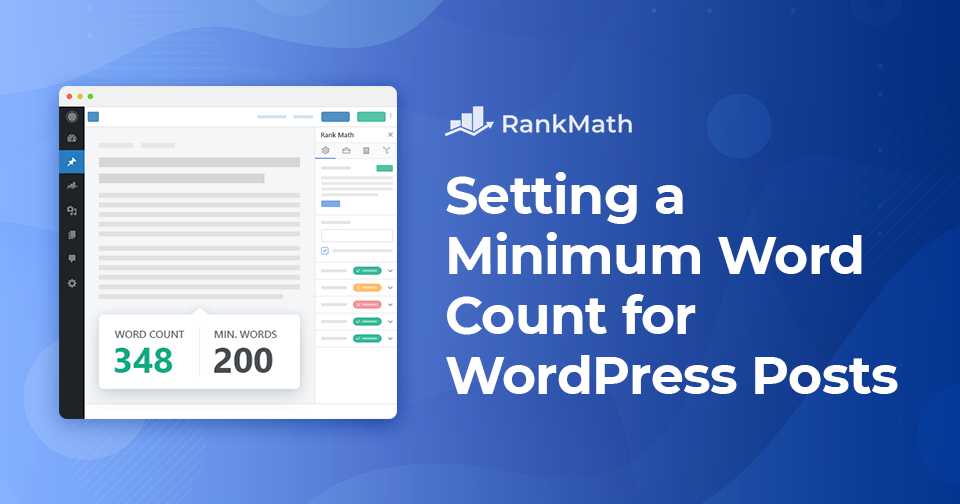
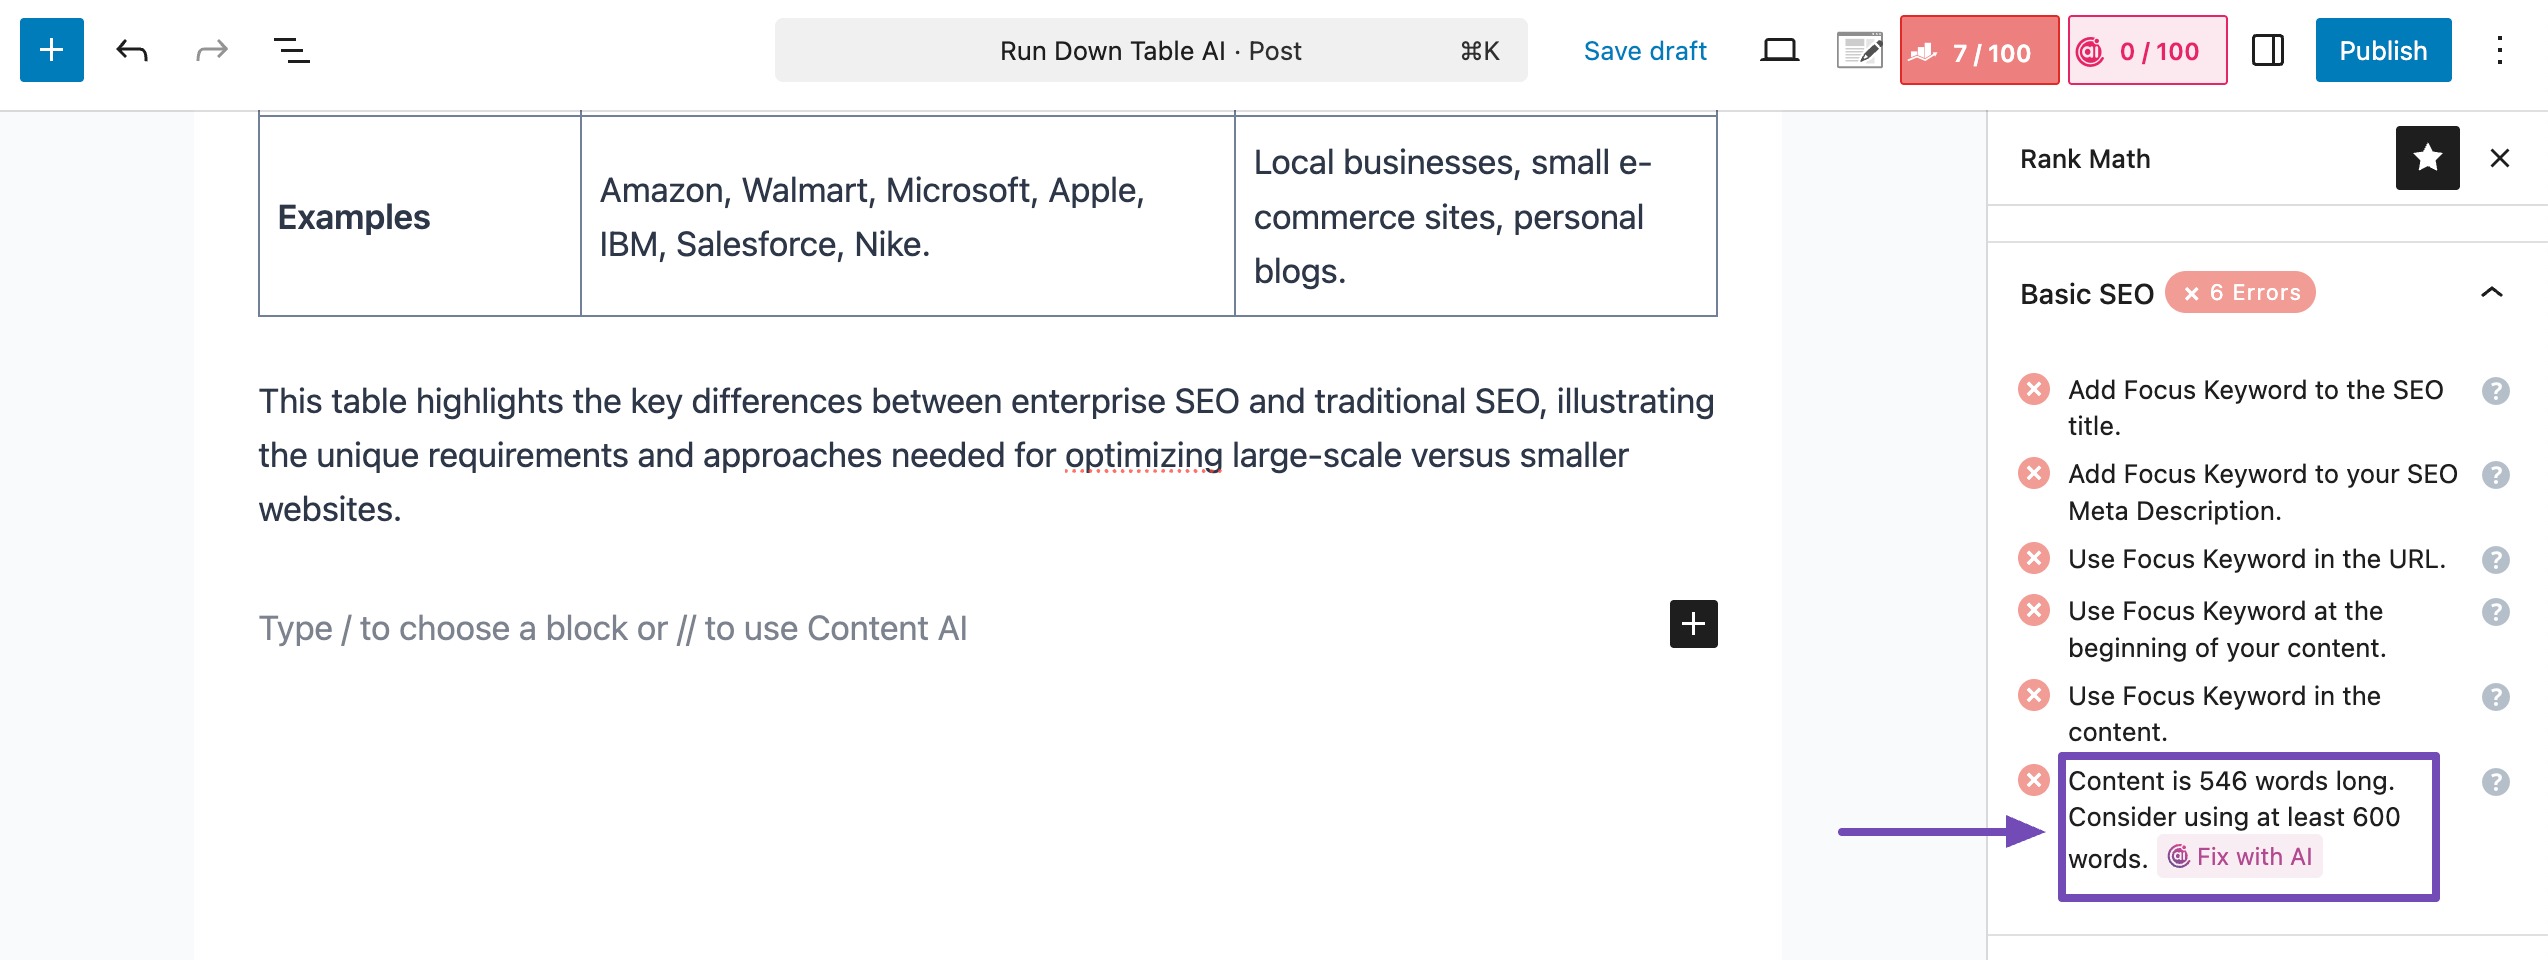
Rank Math SEO includes word count suggestions in its content analysis. It recommends at least 600 words for posts and pages, and 200 words for product pages. However, these are just suggestions—Rank Math won’t stop you from publishing a post that’s shorter than the recommended length.
If you want to make sure posts meet a minimum word count before they’re published, you’ll need to use a plugin. In this tutorial, we’ll show you how to do that in WordPress.
2 How to Check Word Count in WordPress
Rank Math’s Meta Box displays the word count of your post directly within the editing screen. Besides that, you can also check the word count easily in both the Gutenberg and Classic editors.
2.1 Check Word Count in Gutenberg Editor
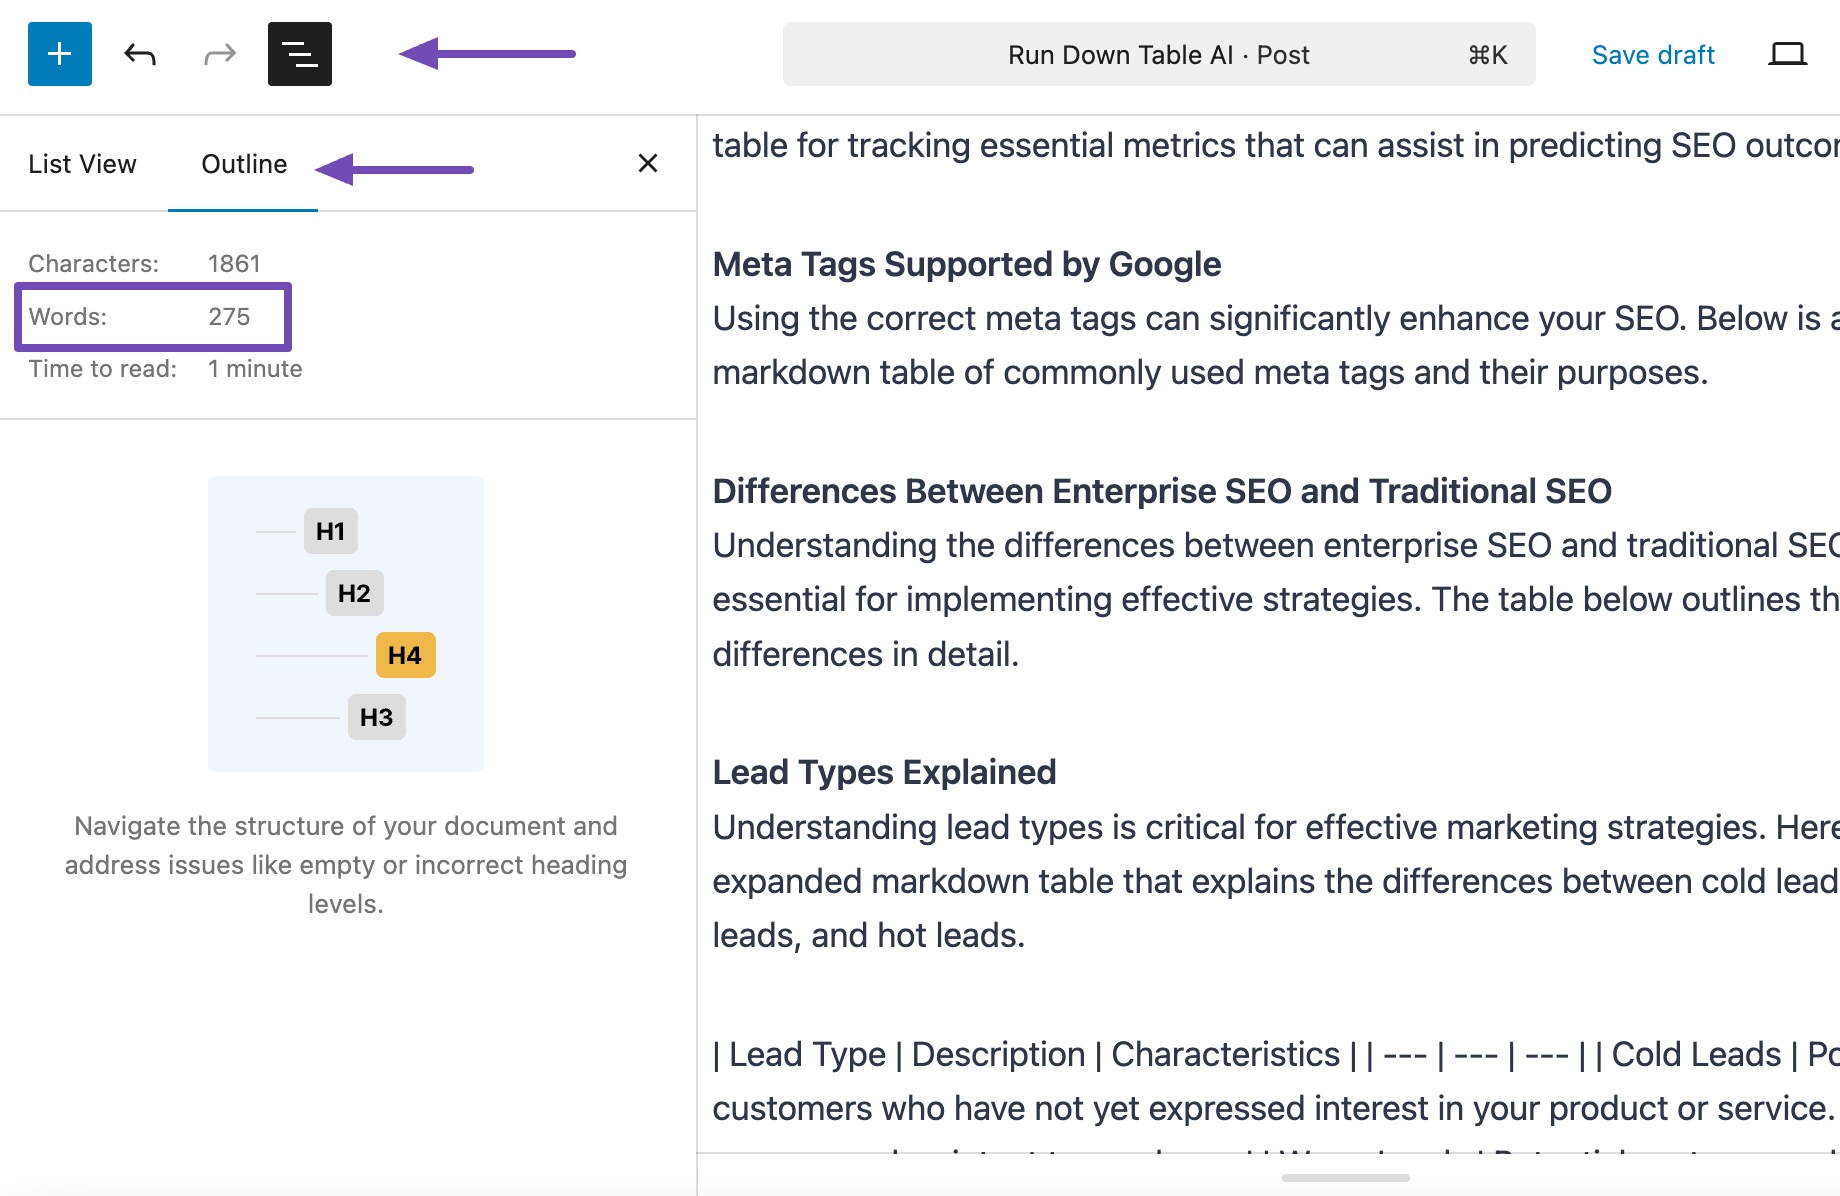
In the Gutenberg (block) editor, click on the three horizontal lines icon, as shown below. A sidebar will open showing details such as:
- A heading outline of your content
- Word count
- Character count
- Estimated reading time
2.2 Check Word Count in Classic Editor
In the Classic Editor, WordPress automatically displays the word count of your post as you write.
To view it, scroll to the bottom of the editing area (below the text box where you write your content). You’ll see the word count displayed in the bottom-left corner, just below the editor.
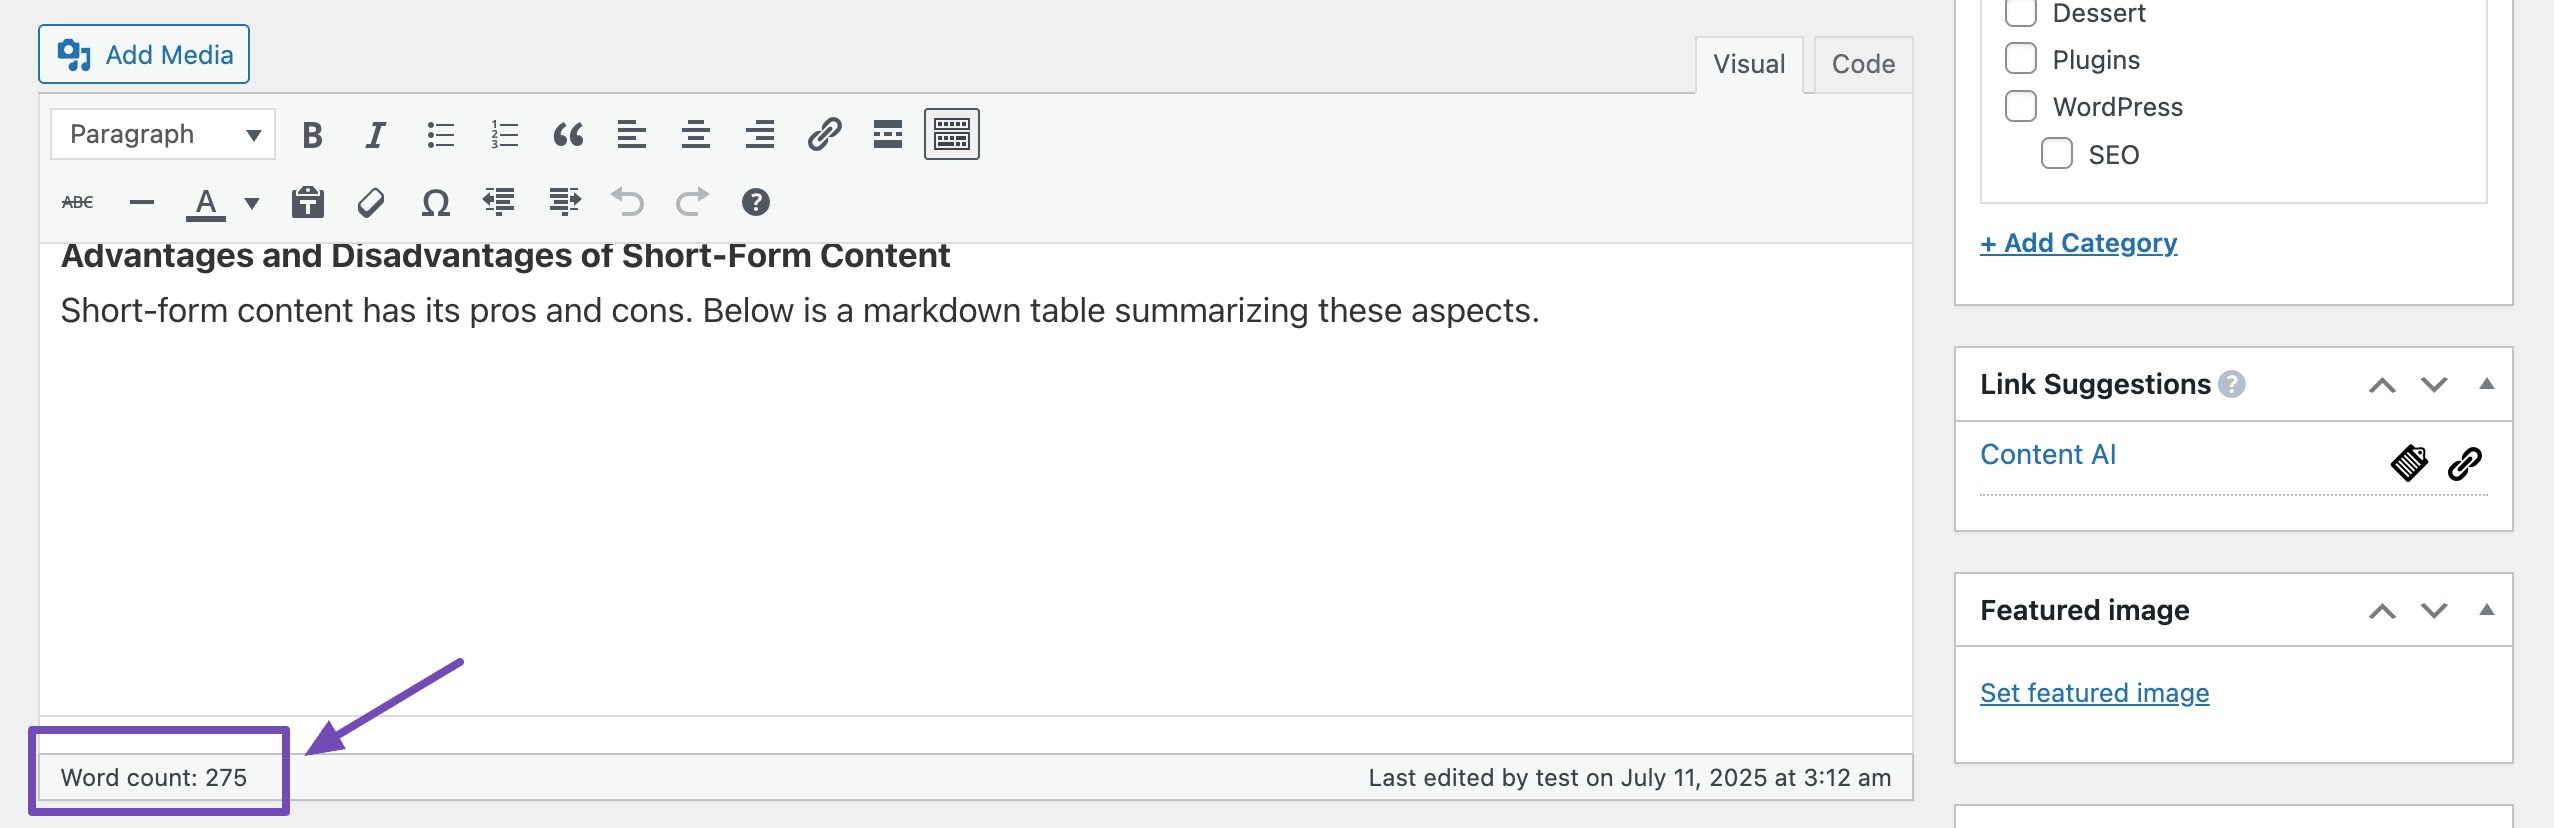
The count updates in real time, so you can keep track of how long your post is as you type or edit.
3 How to Set a Minimum Word Count for WordPress Posts
If you want to make sure your blog posts meet a certain length before they’re published, you can use the PublishPress Checklists plugin.
This plugin lets you set both a minimum and maximum word count for posts and pages. It also lets you assign writing tasks to authors before they publish.
So without further ado, let’s get started.
Set Minimum Word Count Using a WordPress Plugin
At first, you’ll need to install and activate the PublishPress Checklists plugin from your WordPress dashboard. Refer to our dedicated tutorial on installing plugins in WordPress.
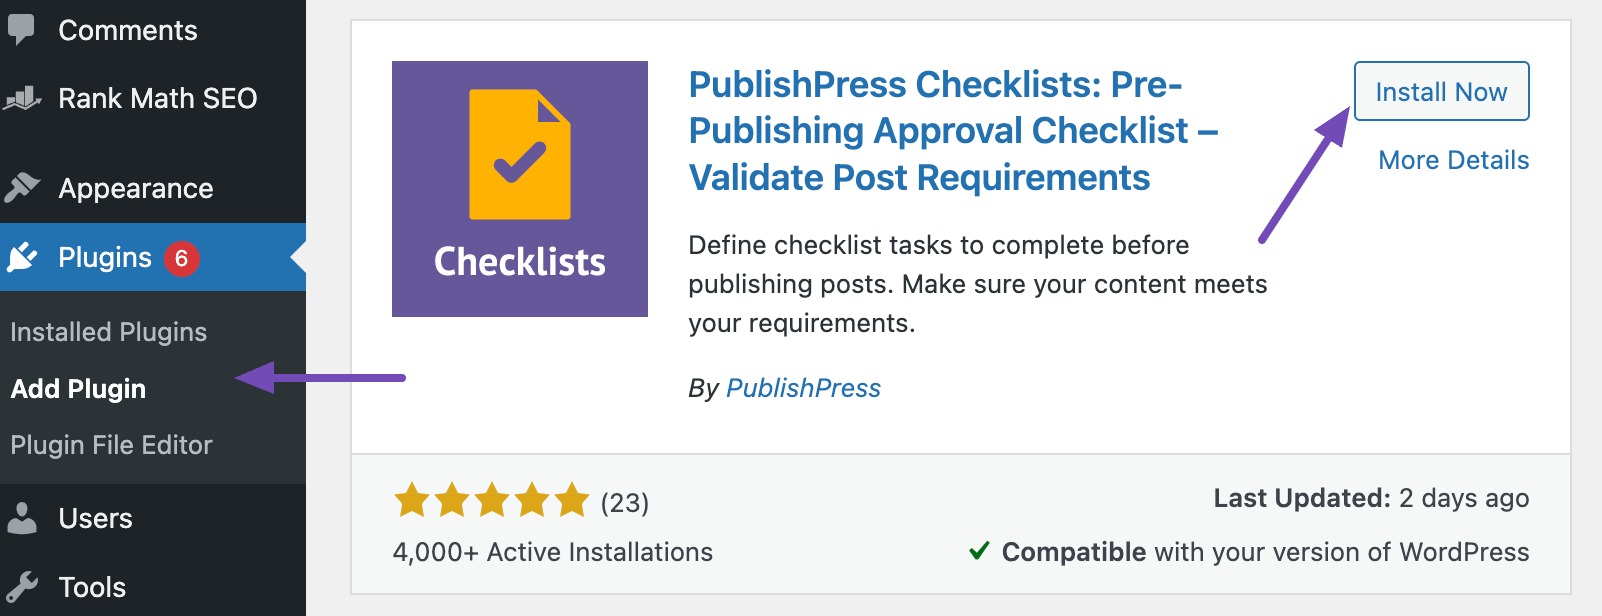
Once the plugin is installed and activated, navigate to Checklists from your WordPress admin dashboard, as shown below. Ensure that you configure the ‘Number of words in content’ option, which allows you to set the minimum and maximum number of words.
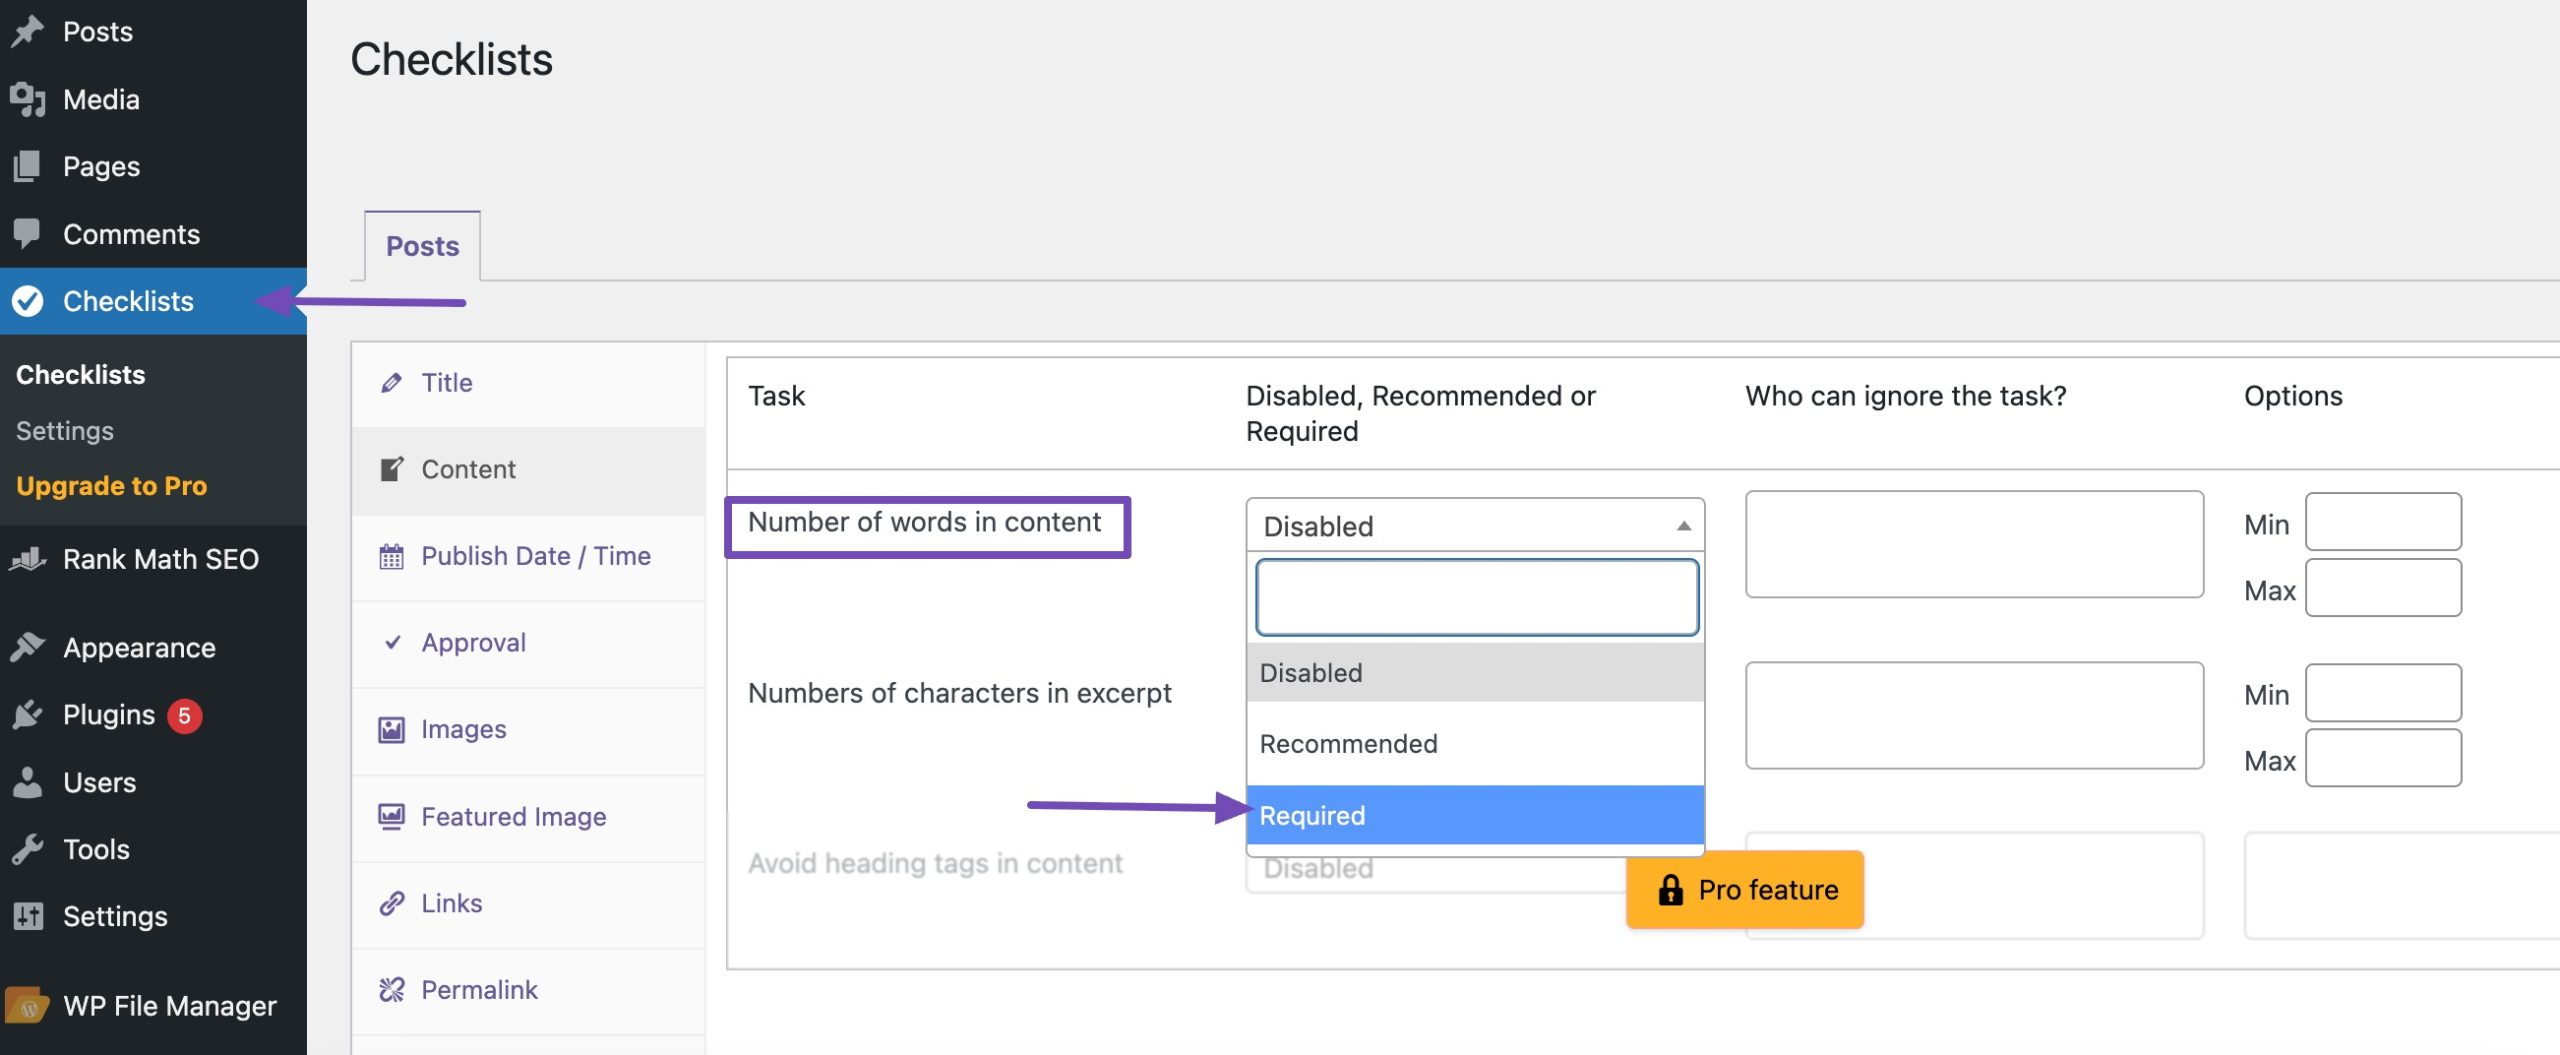
The drop-down list allows you to pick three options: Disabled, Required, Recommended.
- Disabled – No word count check.
- Recommended – Shows a message if the post doesn’t meet the word count, but still lets you publish.
- Required – Blocks publishing until the word count is met.
To make sure posts have a certain length before being published, choose Required.
You can set the minimum word count under the Options column (in the Min field), as shown below.
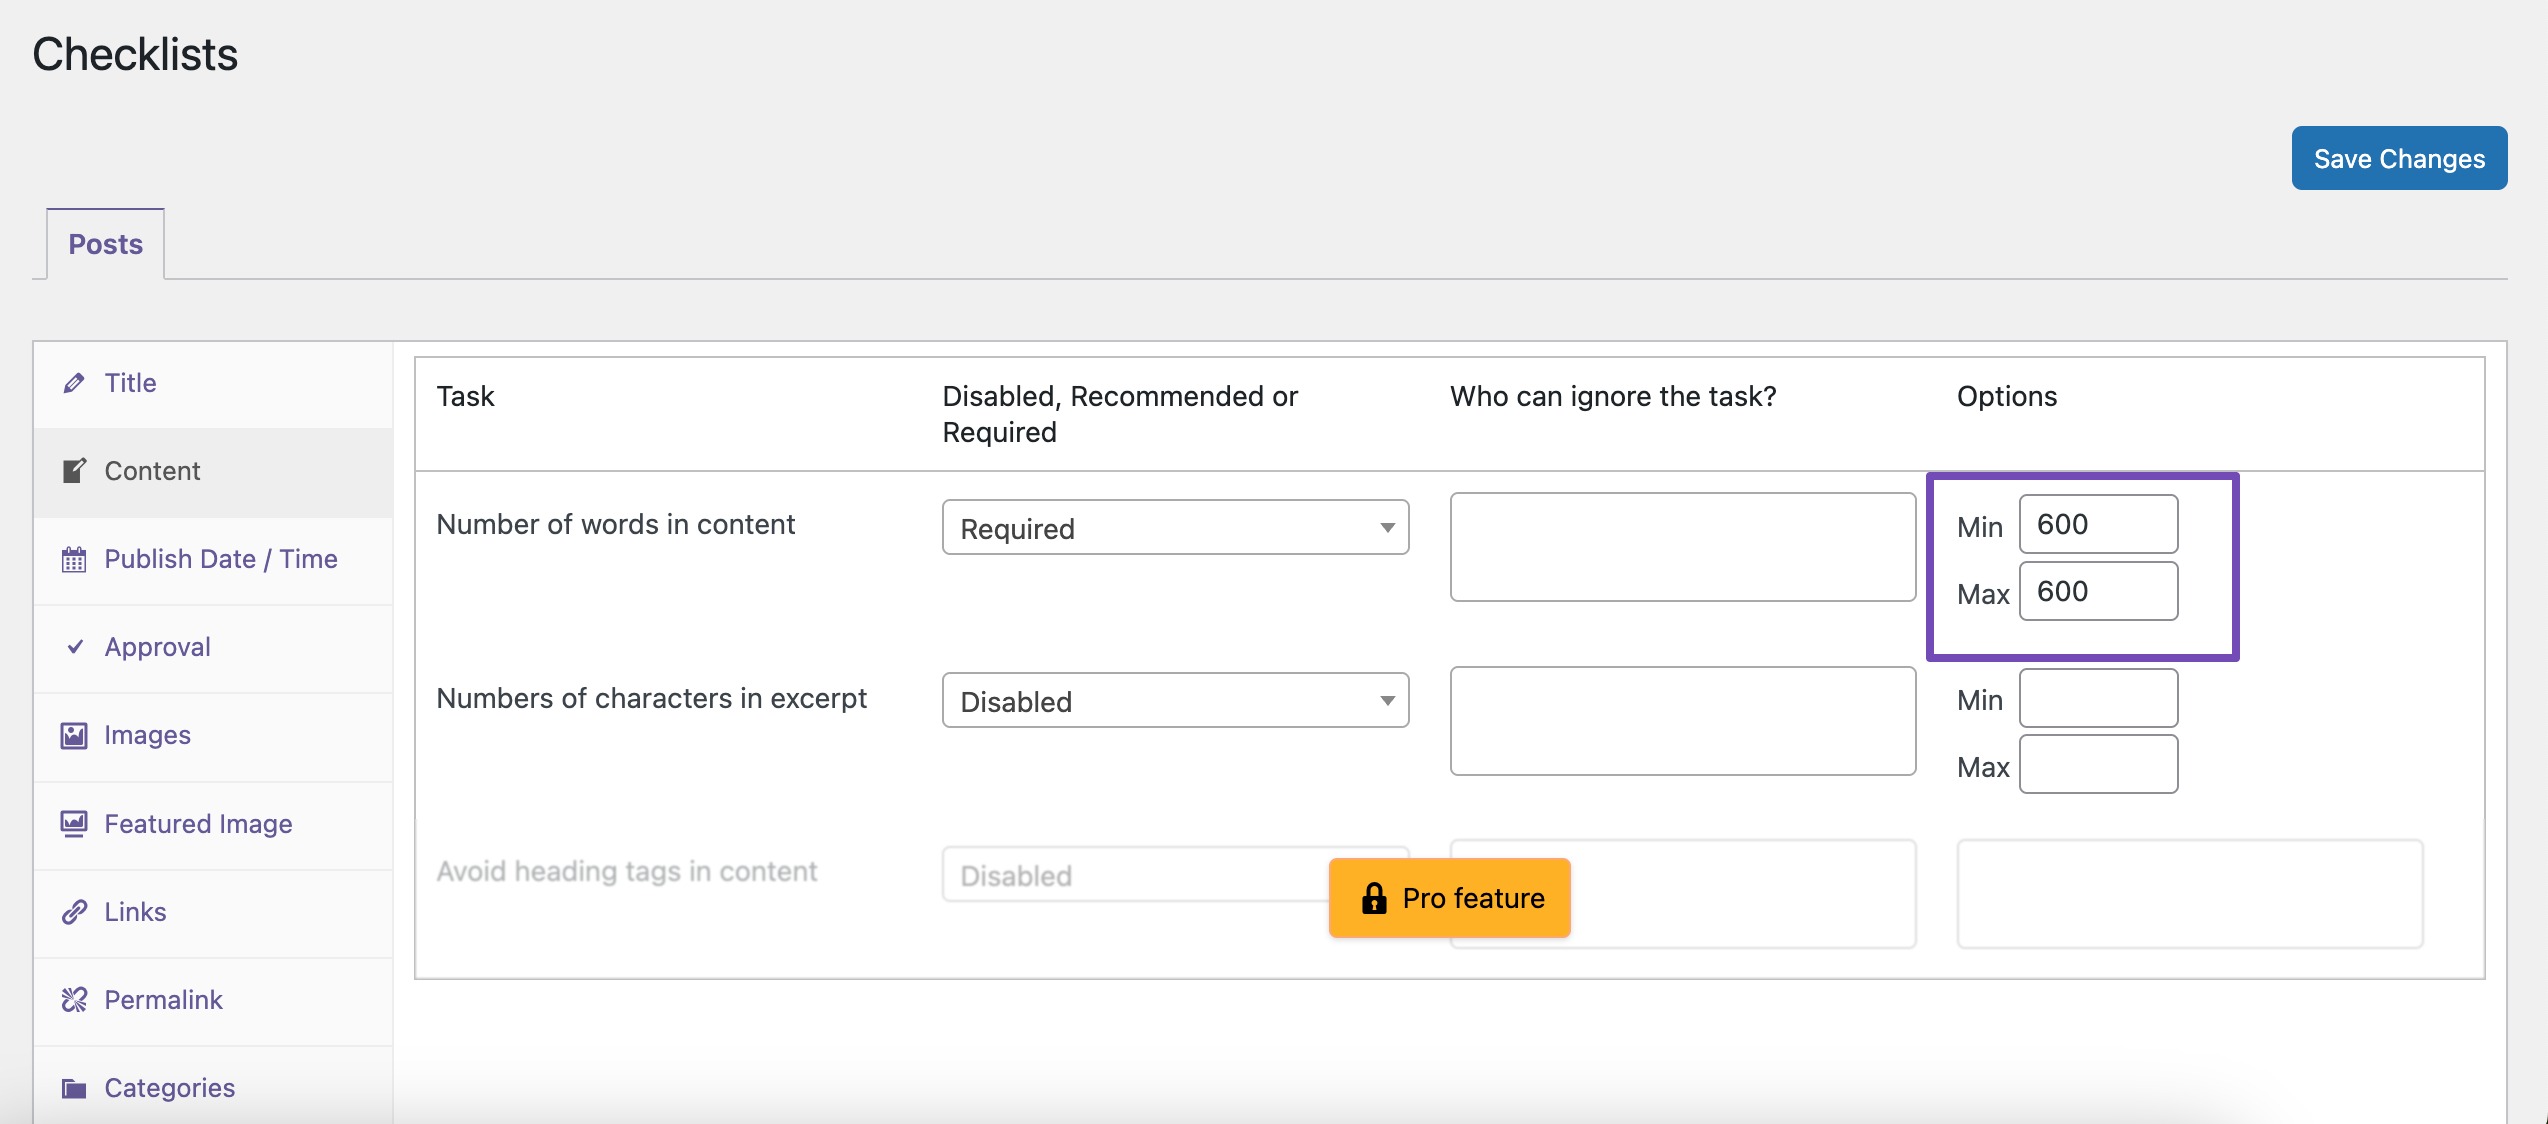
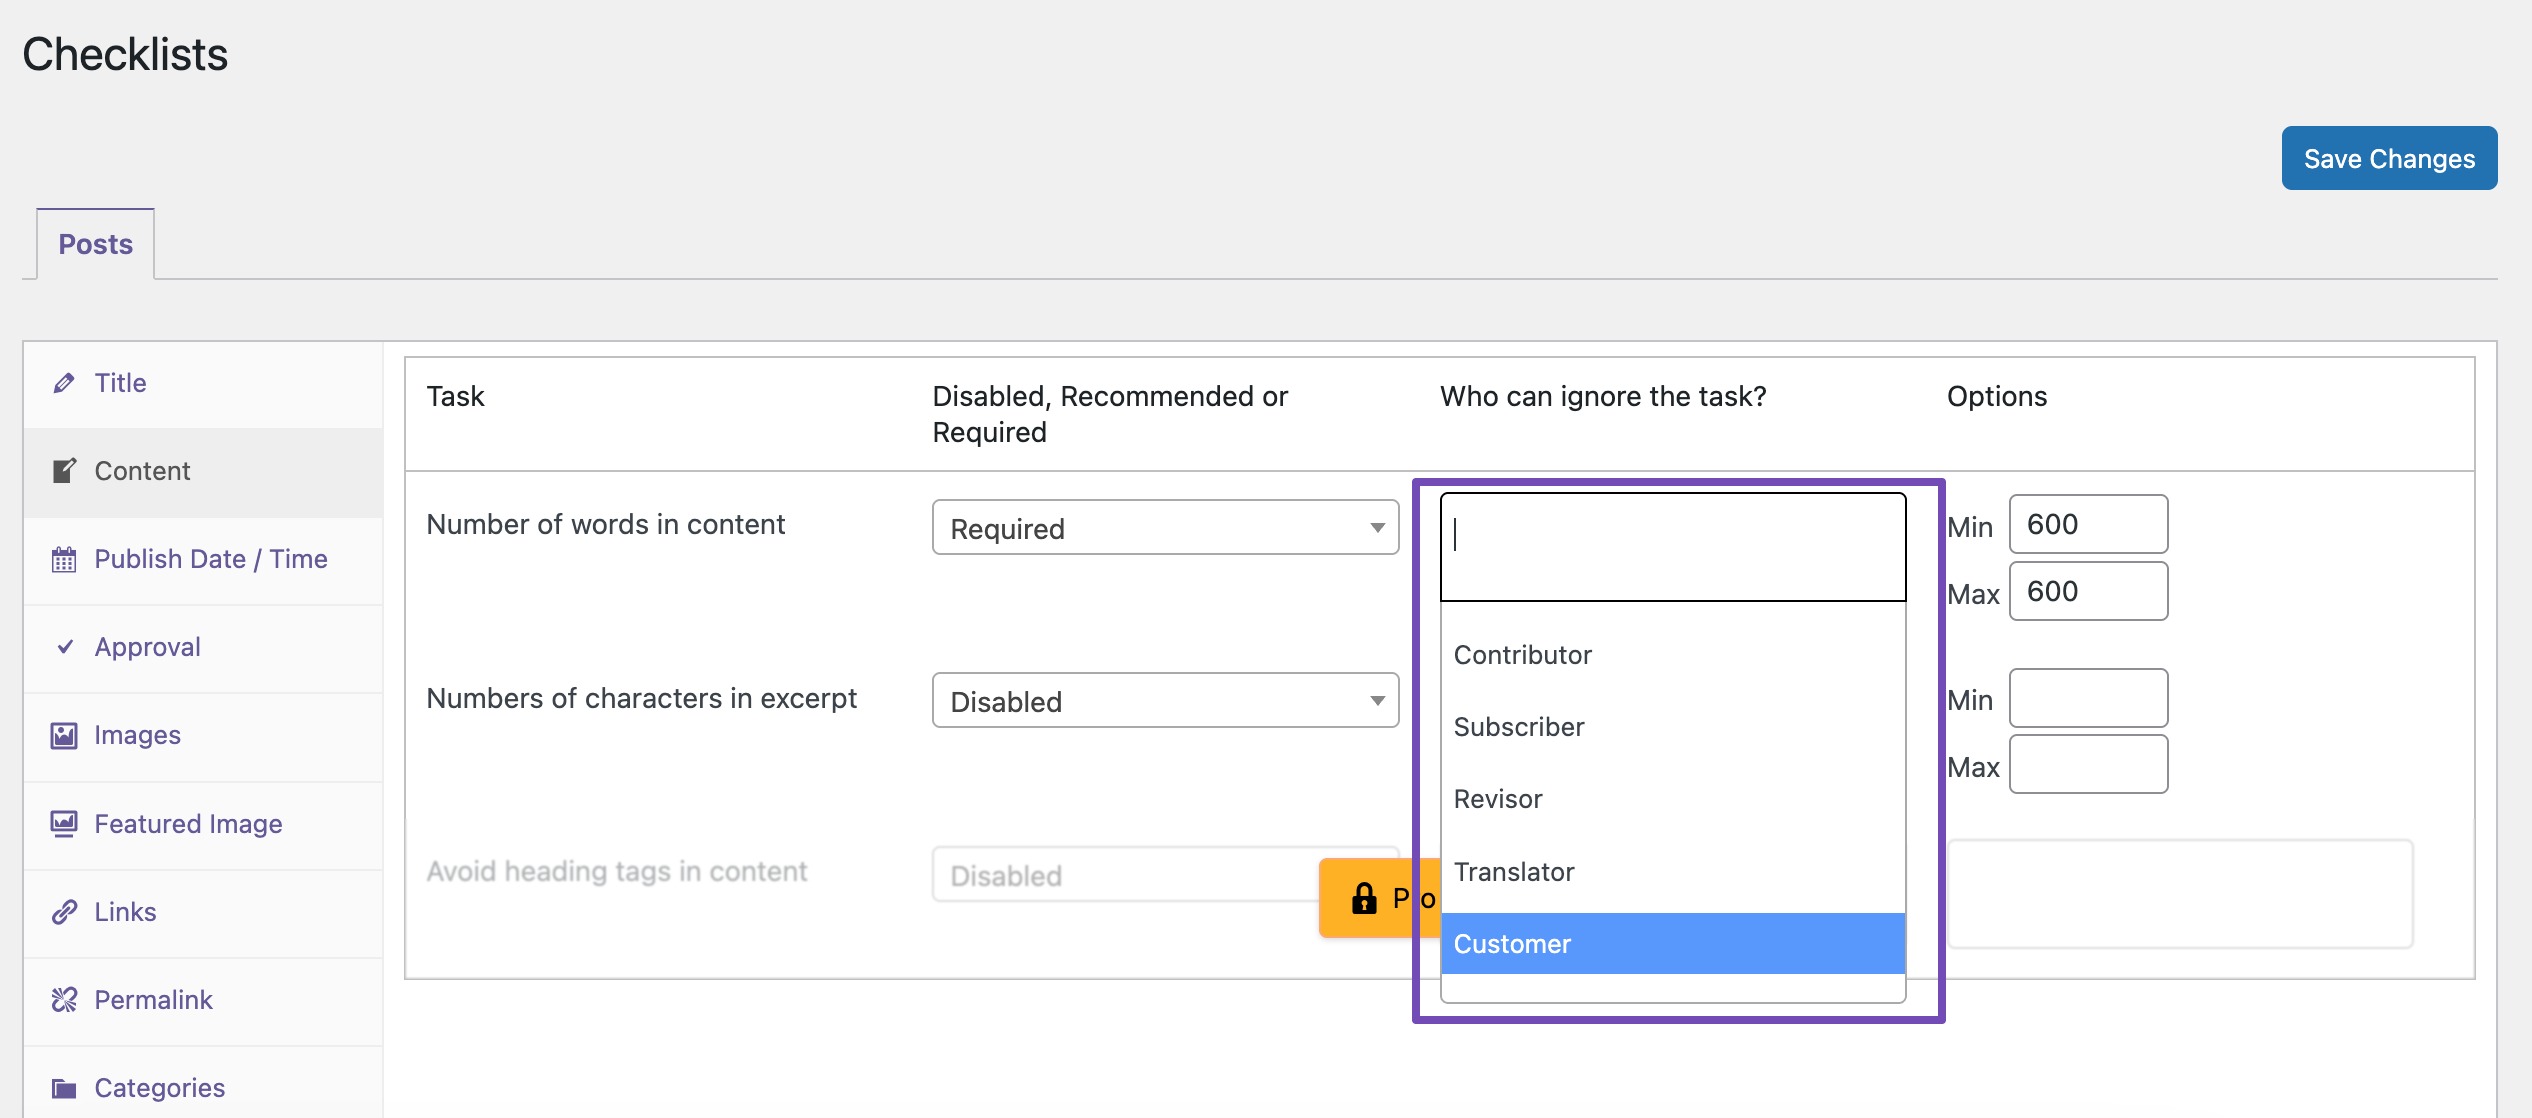
Additionally, PublishPress Checklists allows you to add user roles to exclude from meeting the word count requirement. Click on the box under the Who can ignore the task column and select a user role.
Once you’ve set the minimum word count, click on the Save Changes button.
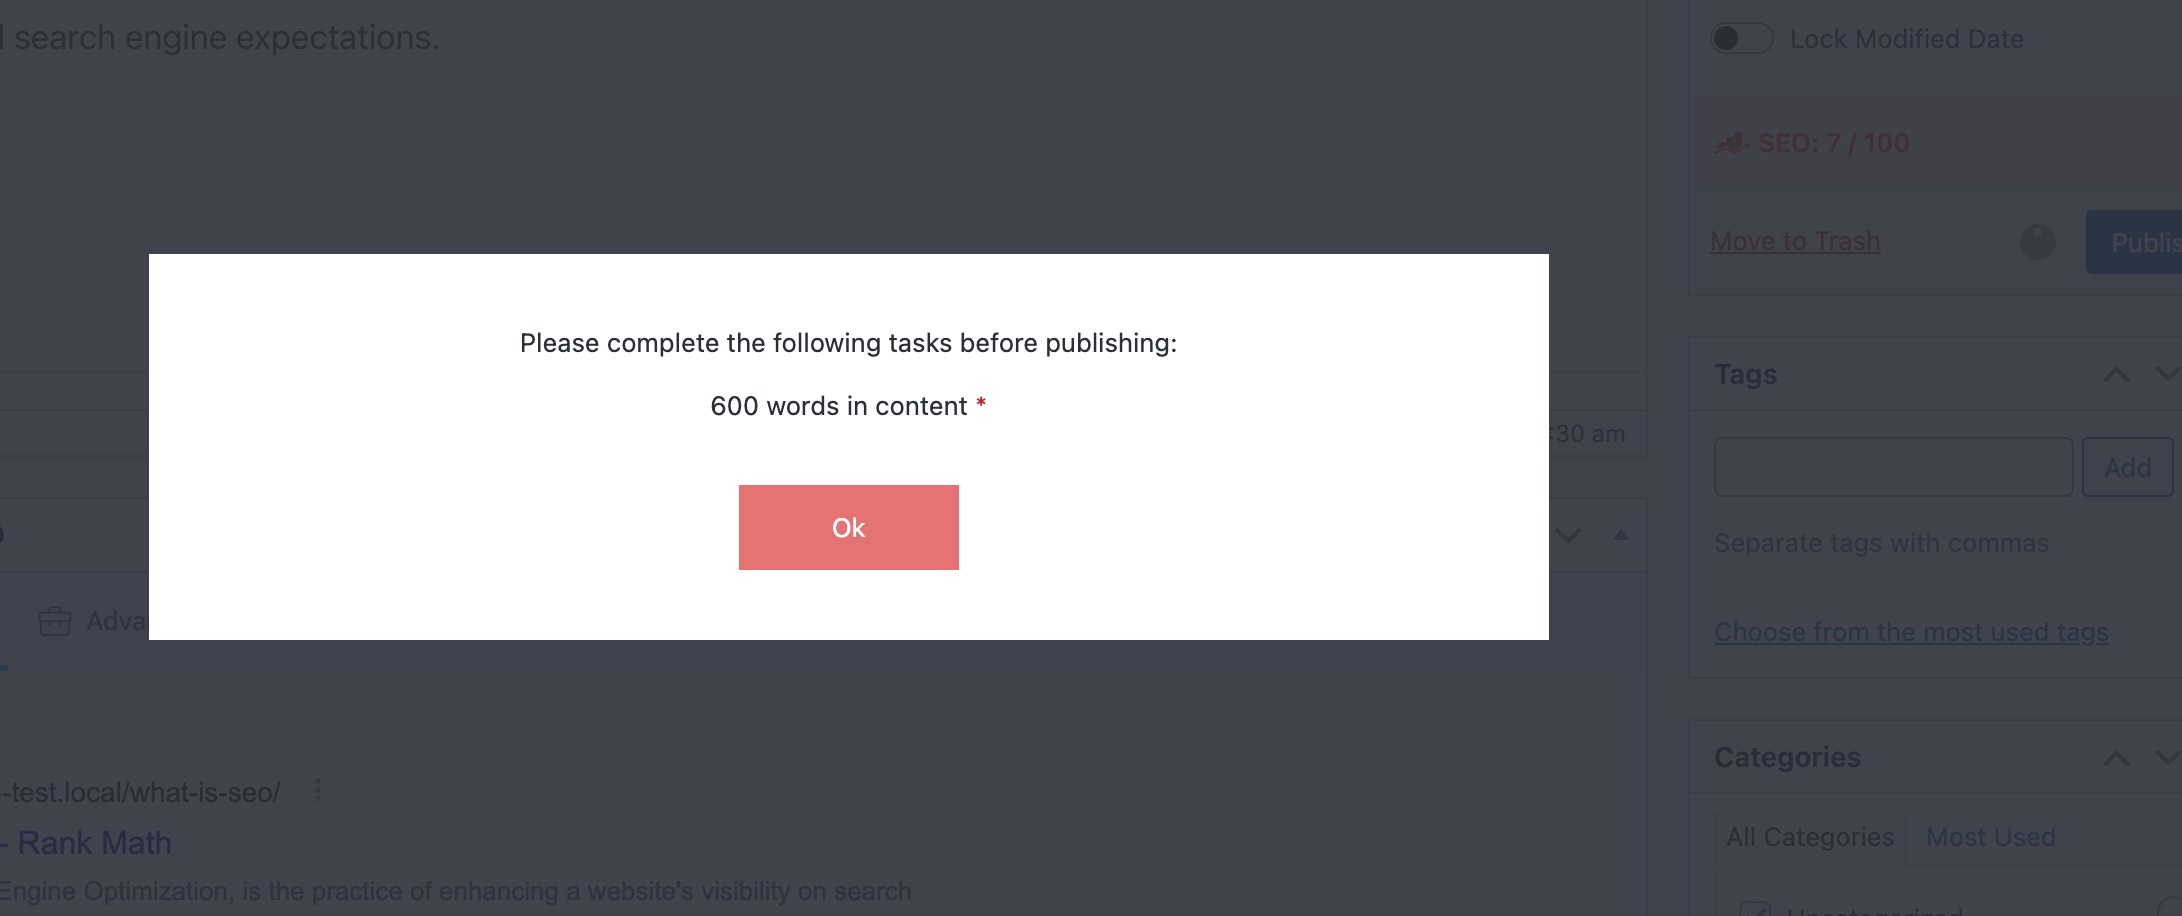
Once you’re done, navigate to Posts → Add New to create a new blog post. If your post doesn’t meet the minimum number of words you’ve set, you’ll receive a warning message in the Checklist settings when you click on the Publish button.
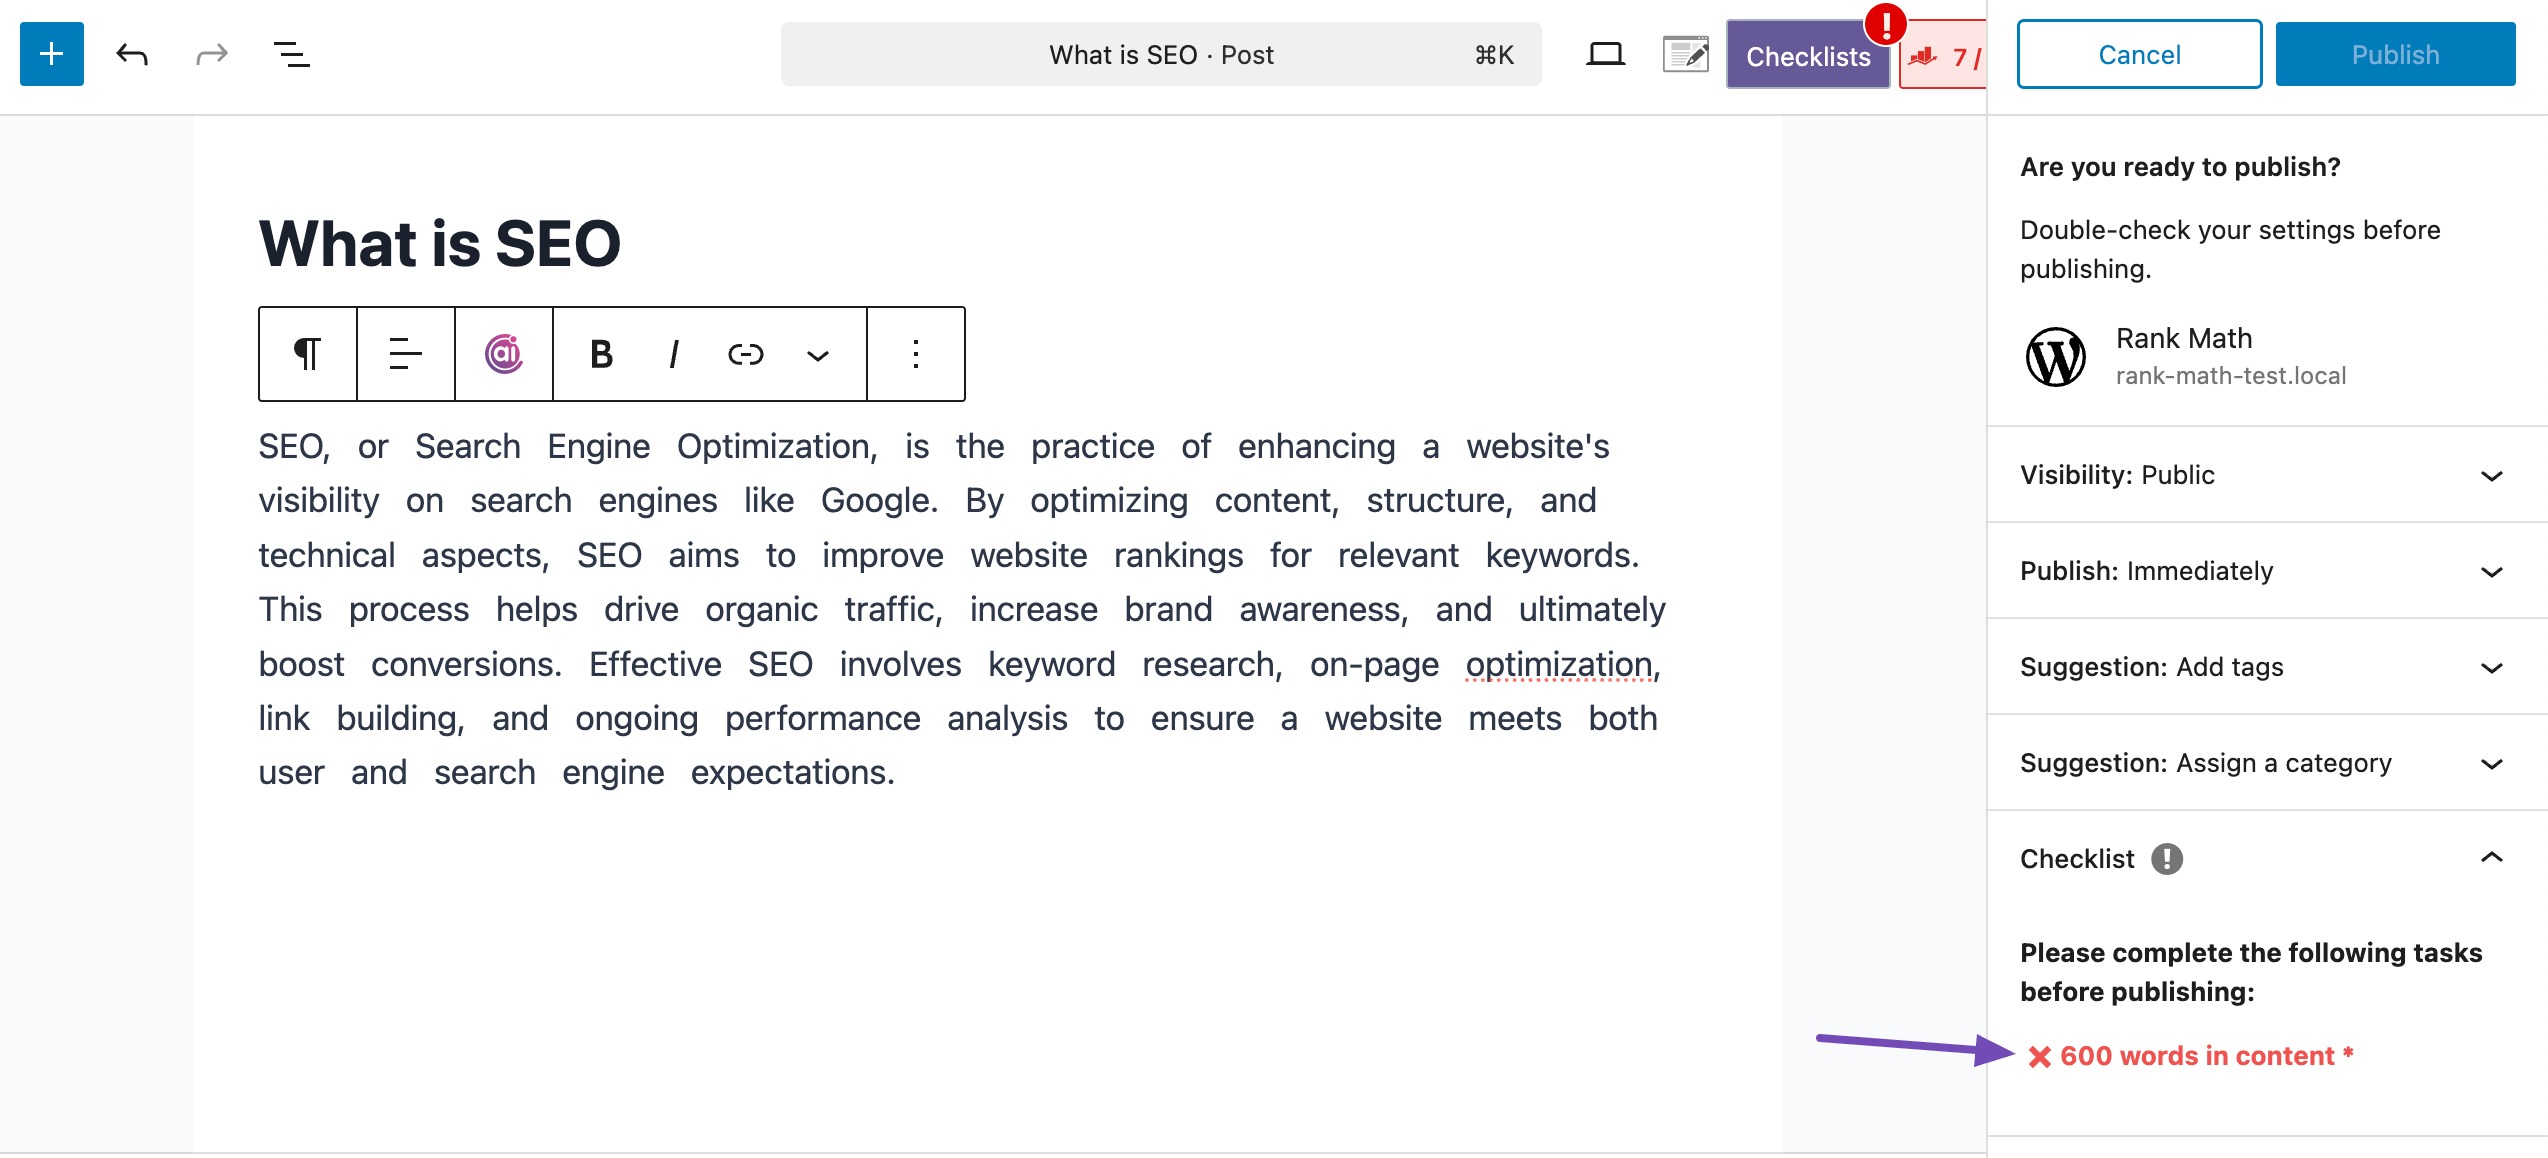
Once you reach the minimum number of words, the message will go away, and you’ll be able to publish the post.
The plugin works well in both Classic and Gutenberg editors. You’ll see a similar notice in the classic editor if the minimum required number of words is not met.
4 Conclusion
Adding a minimum word count to your posts can help improve the overall quality of your content and increase the chances of attracting more meaningful traffic to your blog. It encourages writers to provide more detail and value in every article.
Ready to get started? Set a minimum word count for your posts and keep your content consistent and informative.
Have a question we didn’t cover here? Let us know by Tweeting @rankmathseo. 💬