
Your website’s typography plays a big role in shaping your brand identity and improving readability.
While WordPress comes with default fonts, you might want to stand out by using unique, custom fonts that align with your brand’s style.
Adding custom fonts to your WordPress site not only enhances its visual appeal but also helps create a more personalized and professional look.
In this post, we’ll guide you through how to add custom fonts to your WordPress website.
So, what are you waiting for? Let’s dive in and get started!
Table Of Contents
1 Why Custom Fonts Matter for WordPress Websites
Custom fonts go beyond just making your website look good; they directly impact how visitors experience your content.
When you use custom fonts, you create a consistent brand identity across your website. Whether you want a bold, modern look or a clean, minimal style, fonts play a key role in shaping how people perceive your business. They can even influence emotions and trust, making your site feel more professional, approachable, or creative depending on the style you choose.
Custom fonts also give you more flexibility in design. Instead of being limited by your theme’s defaults, you can align your typography with your logo, colours, and overall branding. This consistency helps you build recognition and makes your website feel more polished and intentional.
But where can you find these custom fonts? Let’s discuss this in the next section.
2 Where to Find Custom Fonts for WordPress
Adding custom fonts to WordPress can be challenging, especially when you have to find the right fonts for your website. Fortunately, there are resources available to help you find the right font for your site.
A great starting point is Google Fonts, which offers a vast library of free fonts optimized for web use. You can easily search for fonts based on category, language, popularity, etc.
Another option is Adobe Fonts (formerly Typekit), which provides high-quality fonts that seamlessly integrate with WordPress. However, Adobe Fonts requires a Creative Cloud subscription to download.
Before choosing any font, always check the licensing terms to make sure you’re using it legally on your website.
Once you’ve selected the right fonts, you can add them to your WordPress site by uploading the font files, defining the font in your CSS stylesheet, and applying it to the desired elements on your website.
There are two ways to do this: using a plugin or manually adding the code to your theme.
Before adding custom fonts to your website, check if your WordPress theme has built-in Google fonts and the ability to upload custom fonts, such as Adobe fonts. If not, you can proceed with adding custom fonts to WordPress.
3 How to Add Custom Fonts in WordPress Using Plugins
You can use the Custom Fonts plugin to add custom fonts to your WordPress site.
It’s free to use and has no limitations. It is compatible with any WordPress theme and page builder, such as Elementor.
With this plugin, you can add any font to your website, whether from Google or local fonts from other sources.
3.1 How to Add Google Fonts as Custom Fonts in WordPress
To add Google fonts, you need to install and activate the Custom Fonts plugin. For more details, refer to our post on how to install WordPress plugins.
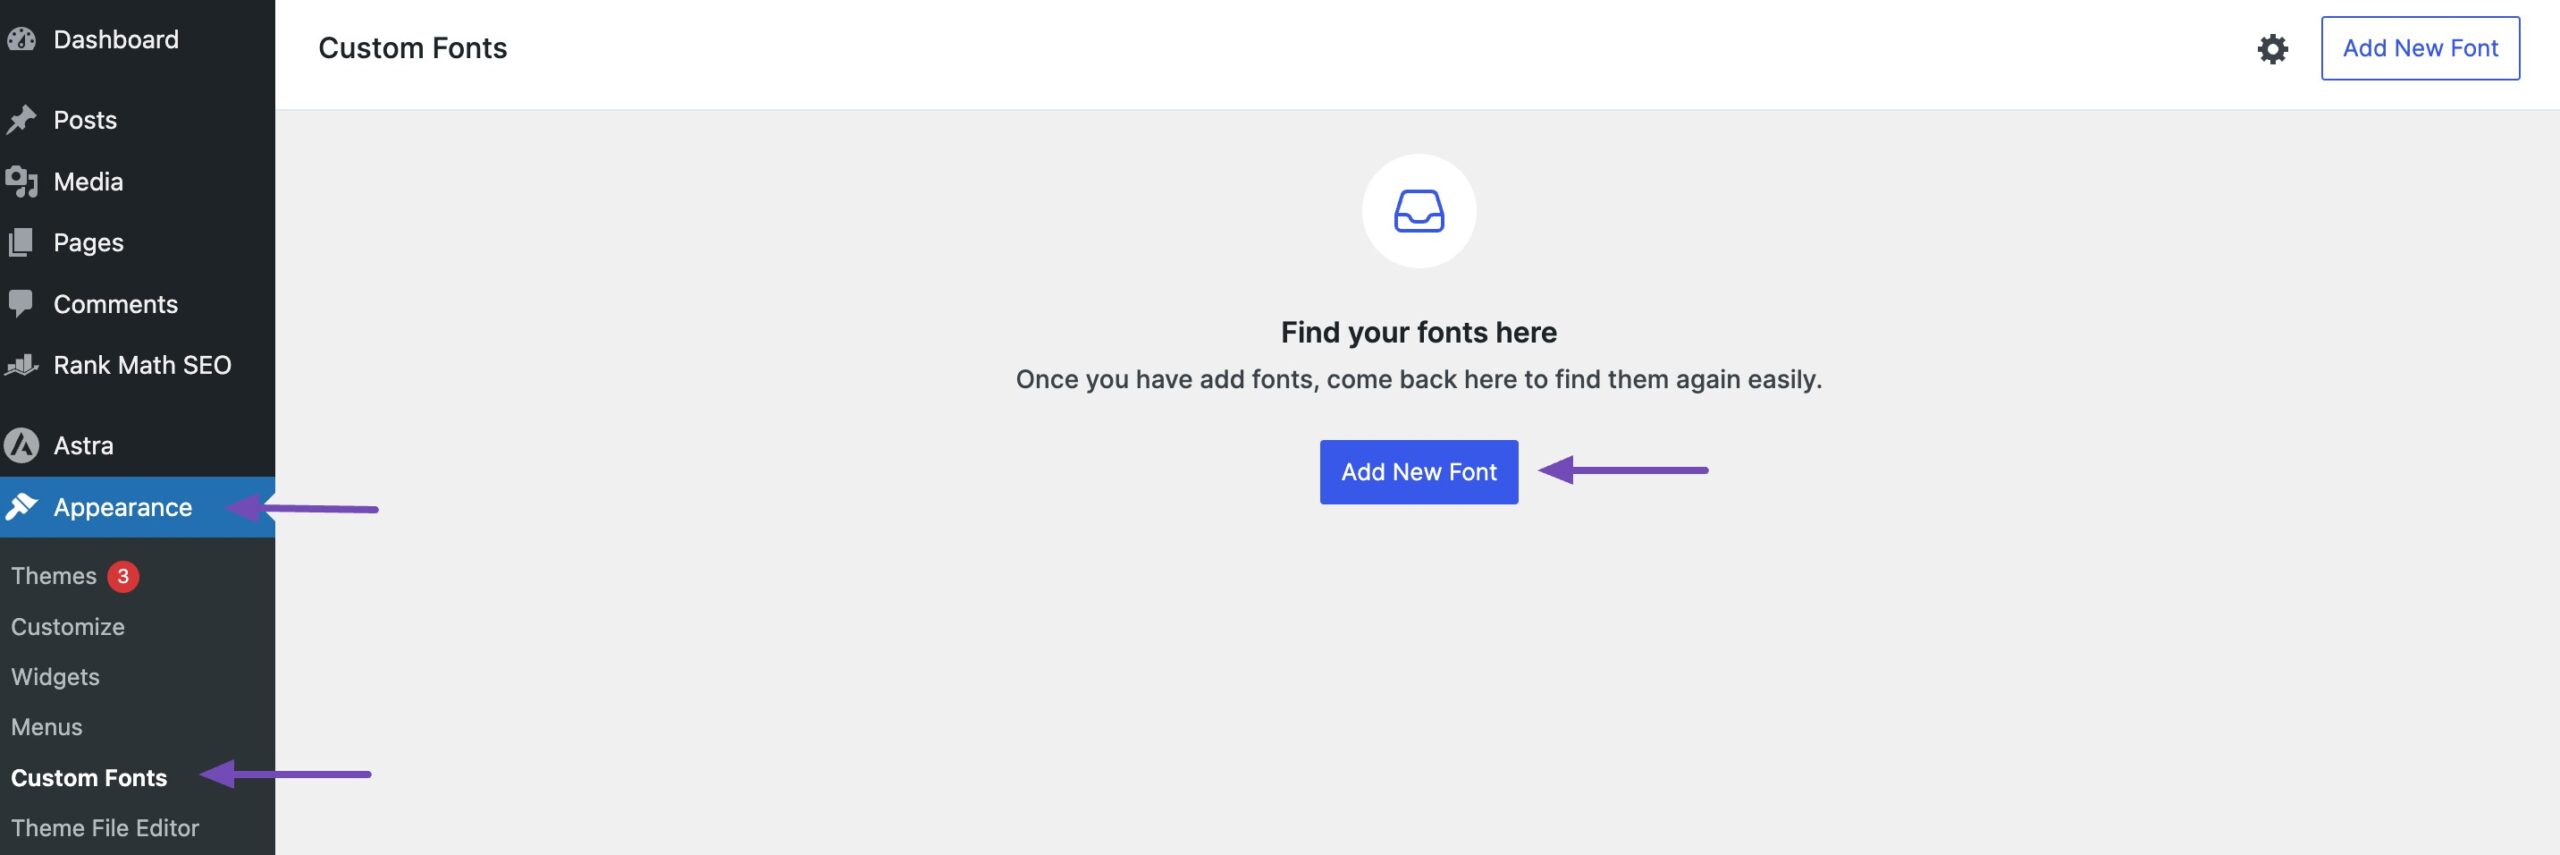
After activation, navigate to Appearance → Custom Fonts and click the Add New Font button, as shown below.
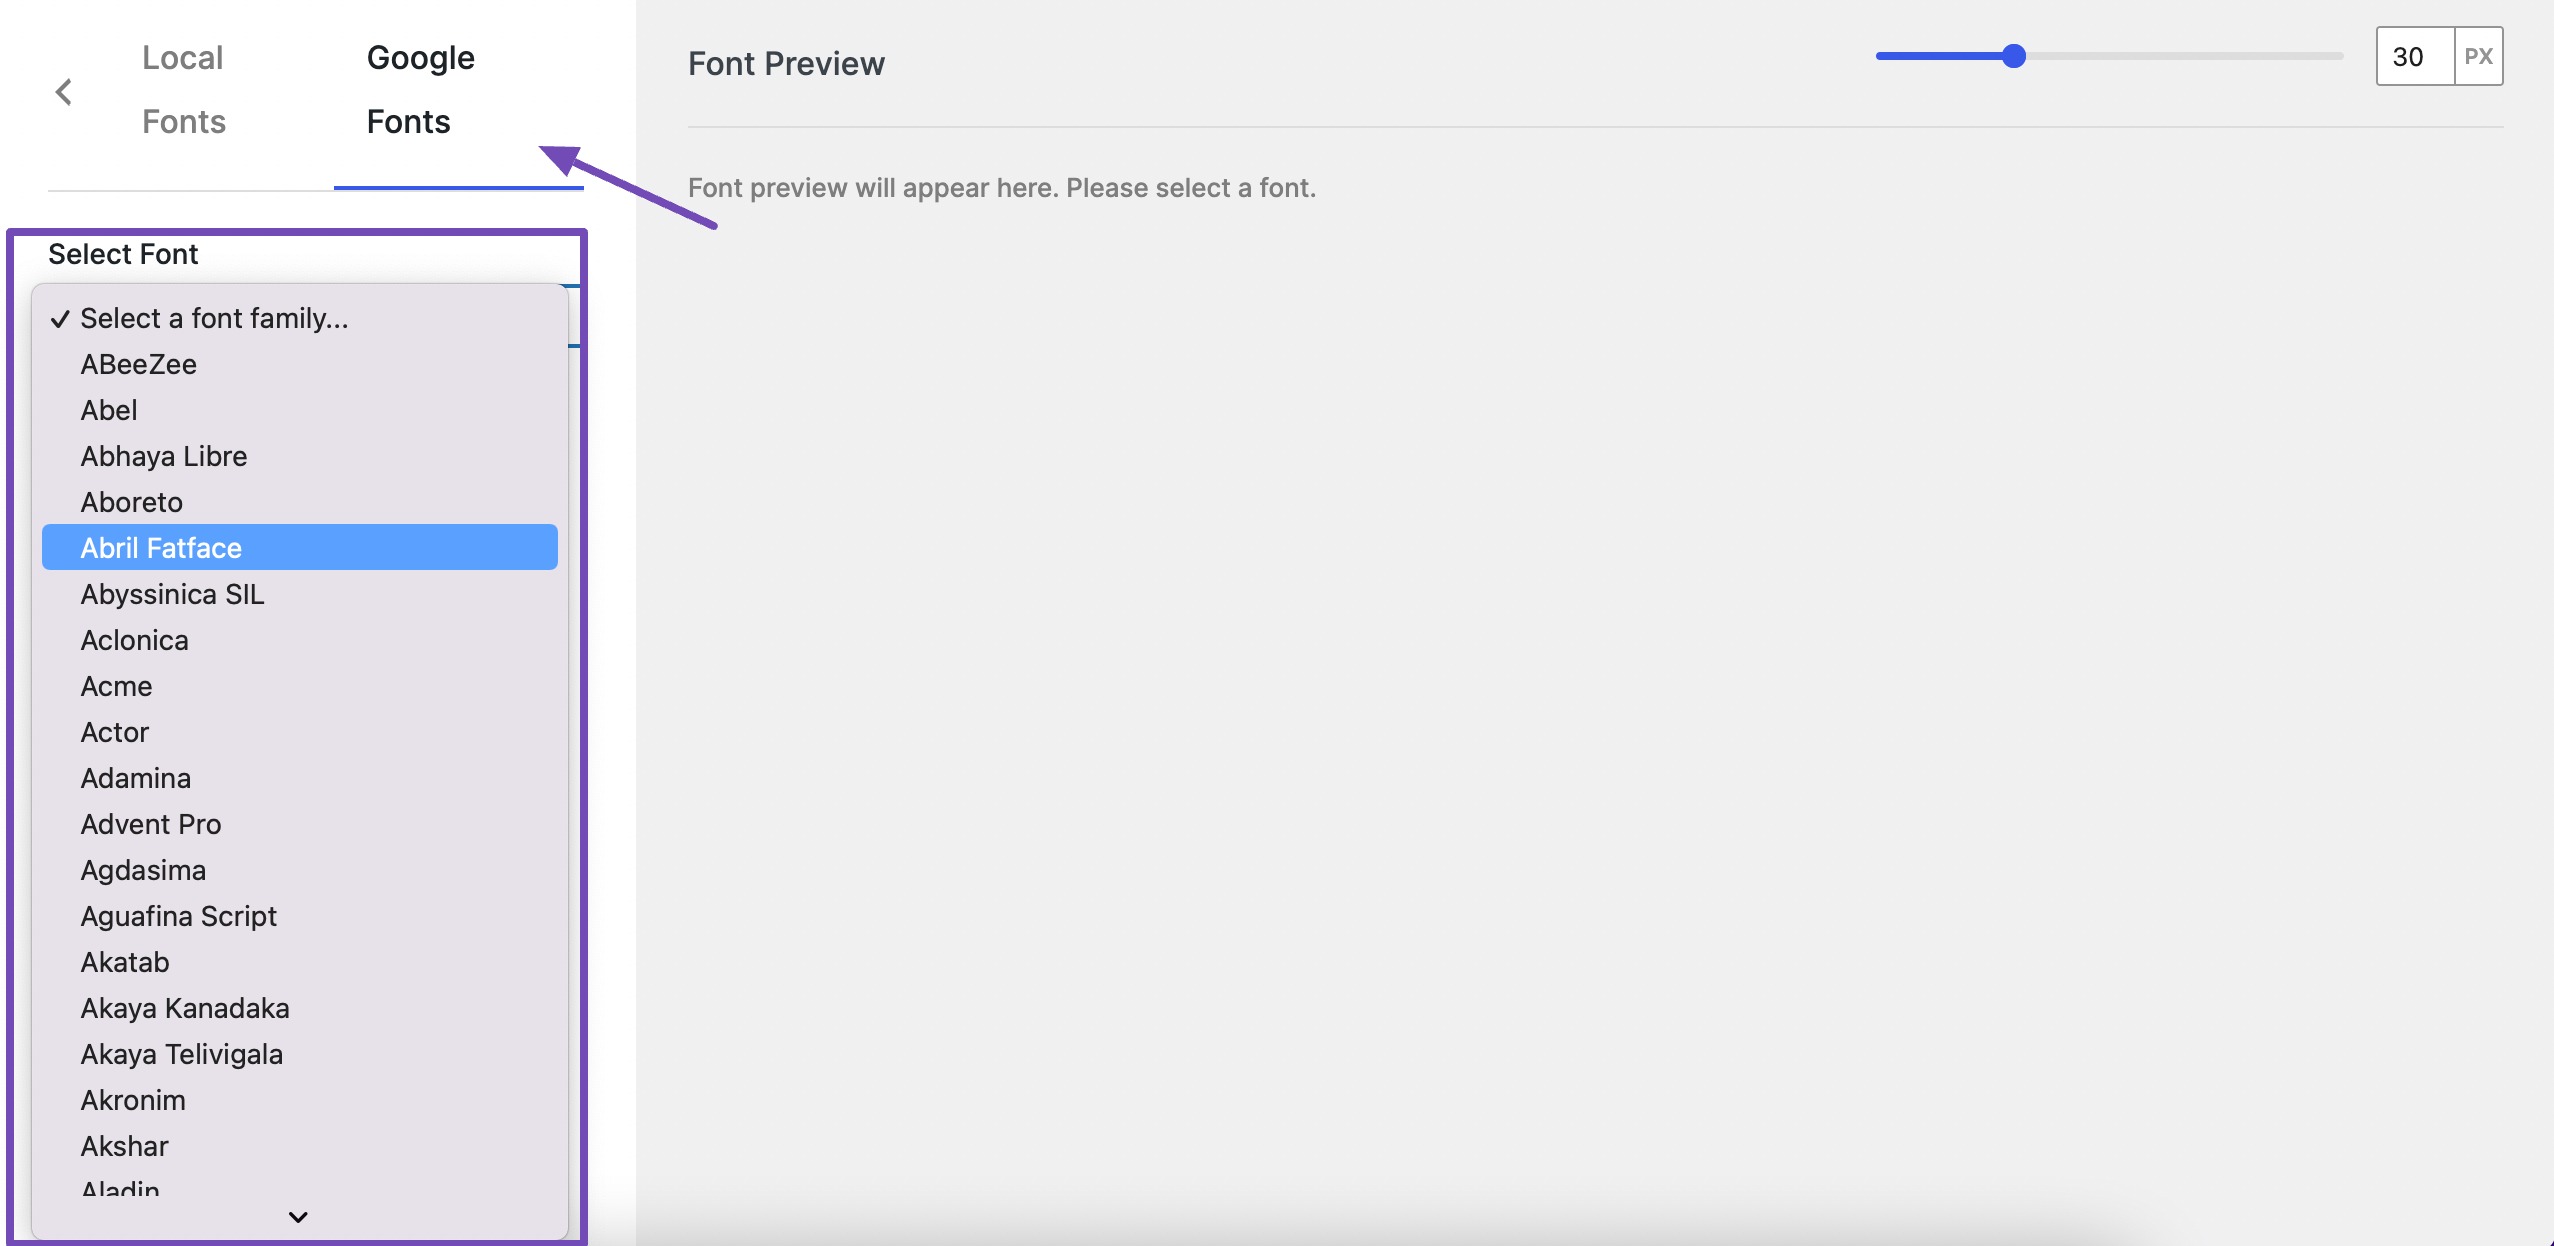
Next, navigate to the Google Fonts tab and click the dropdown menu under the Select Font option. Then, as shown below, choose the Google font family you want to use on your website.
The font family you select will be displayed in the Font Preview section. You can adjust the font appearance in px to ensure it matches your preferences perfectly.
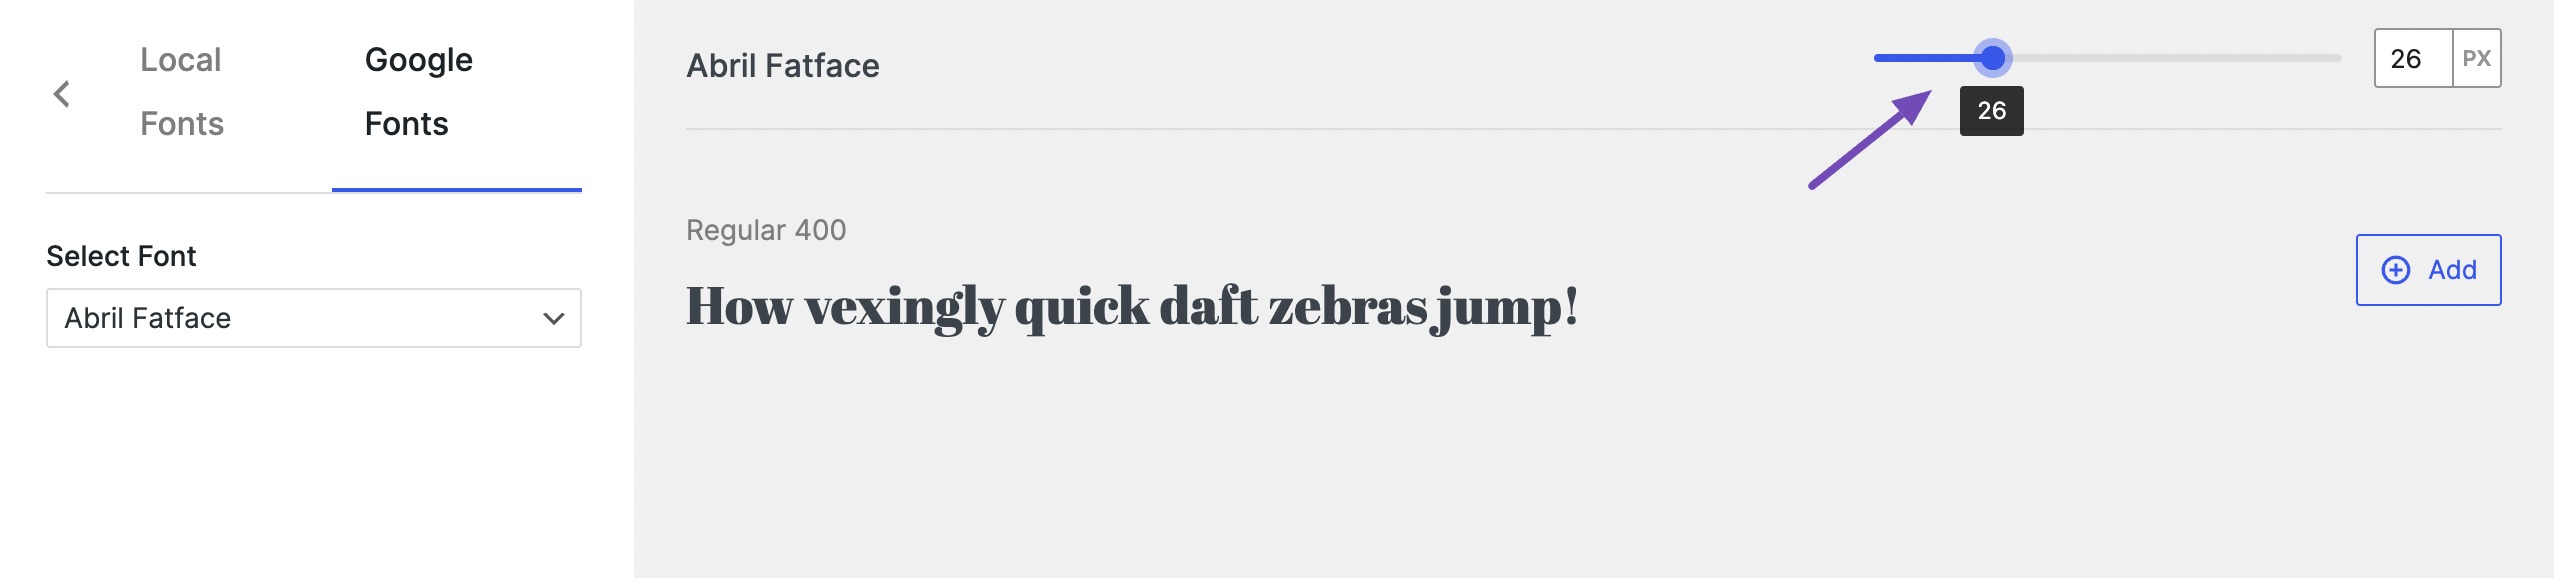
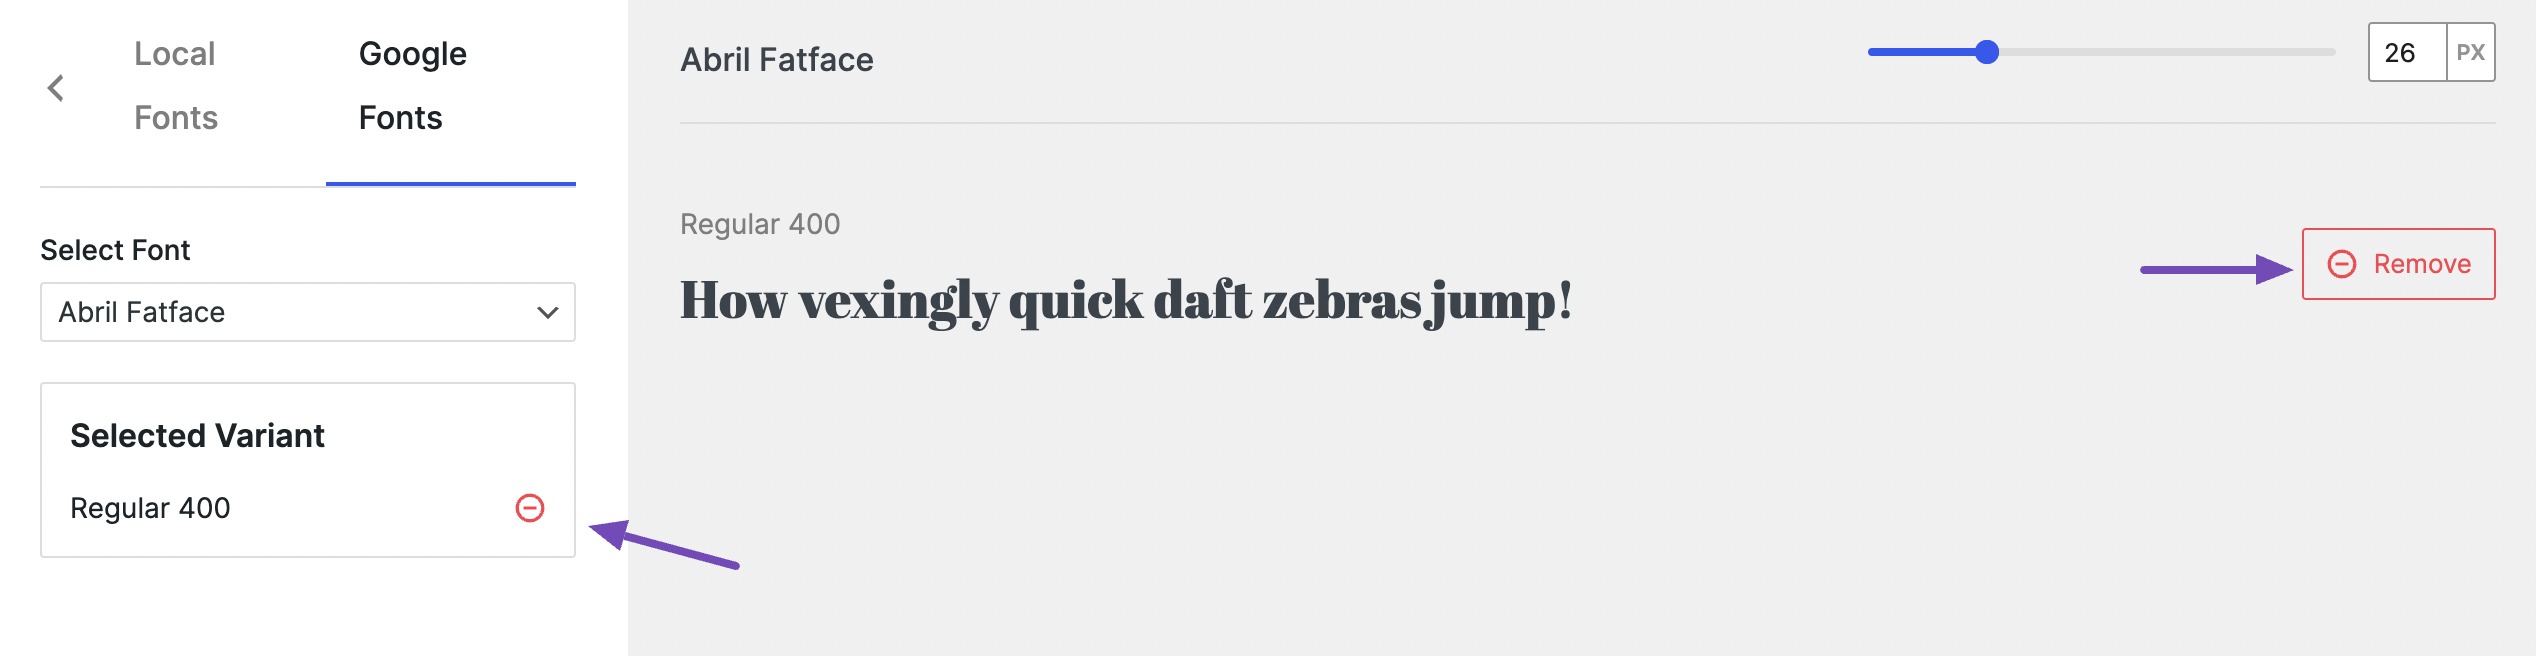
To choose a font family, click the Add button next to it. The selected fonts will appear in the Google Fonts section, and the Add button will change to Remove. This simplifies managing the fonts you’ve chosen for your website.
And that’s it! You’ve successfully added a Google font to your website.
When using the Custom Fonts plugin, any added or uploaded font gets saved locally on your server. For optimal website performance, only add the fonts you plan to use. It’s suggested to choose at least two different fonts, as loading too many fonts may potentially slow down your website.
Let us now discuss how to upload custom fonts from other sources using this plugin.
3.2 Uploading Custom Fonts to WordPress
Using the Custom Fonts plugin, you can also upload a custom font from sources like Adobe to your WordPress site.
To do so, navigate to the Local Fonts tab. Specify the font’s name, add a font fallback, and adjust the font display in the Advanced Options section.
Then, upload the font you obtained from external sources using the Choose File field.
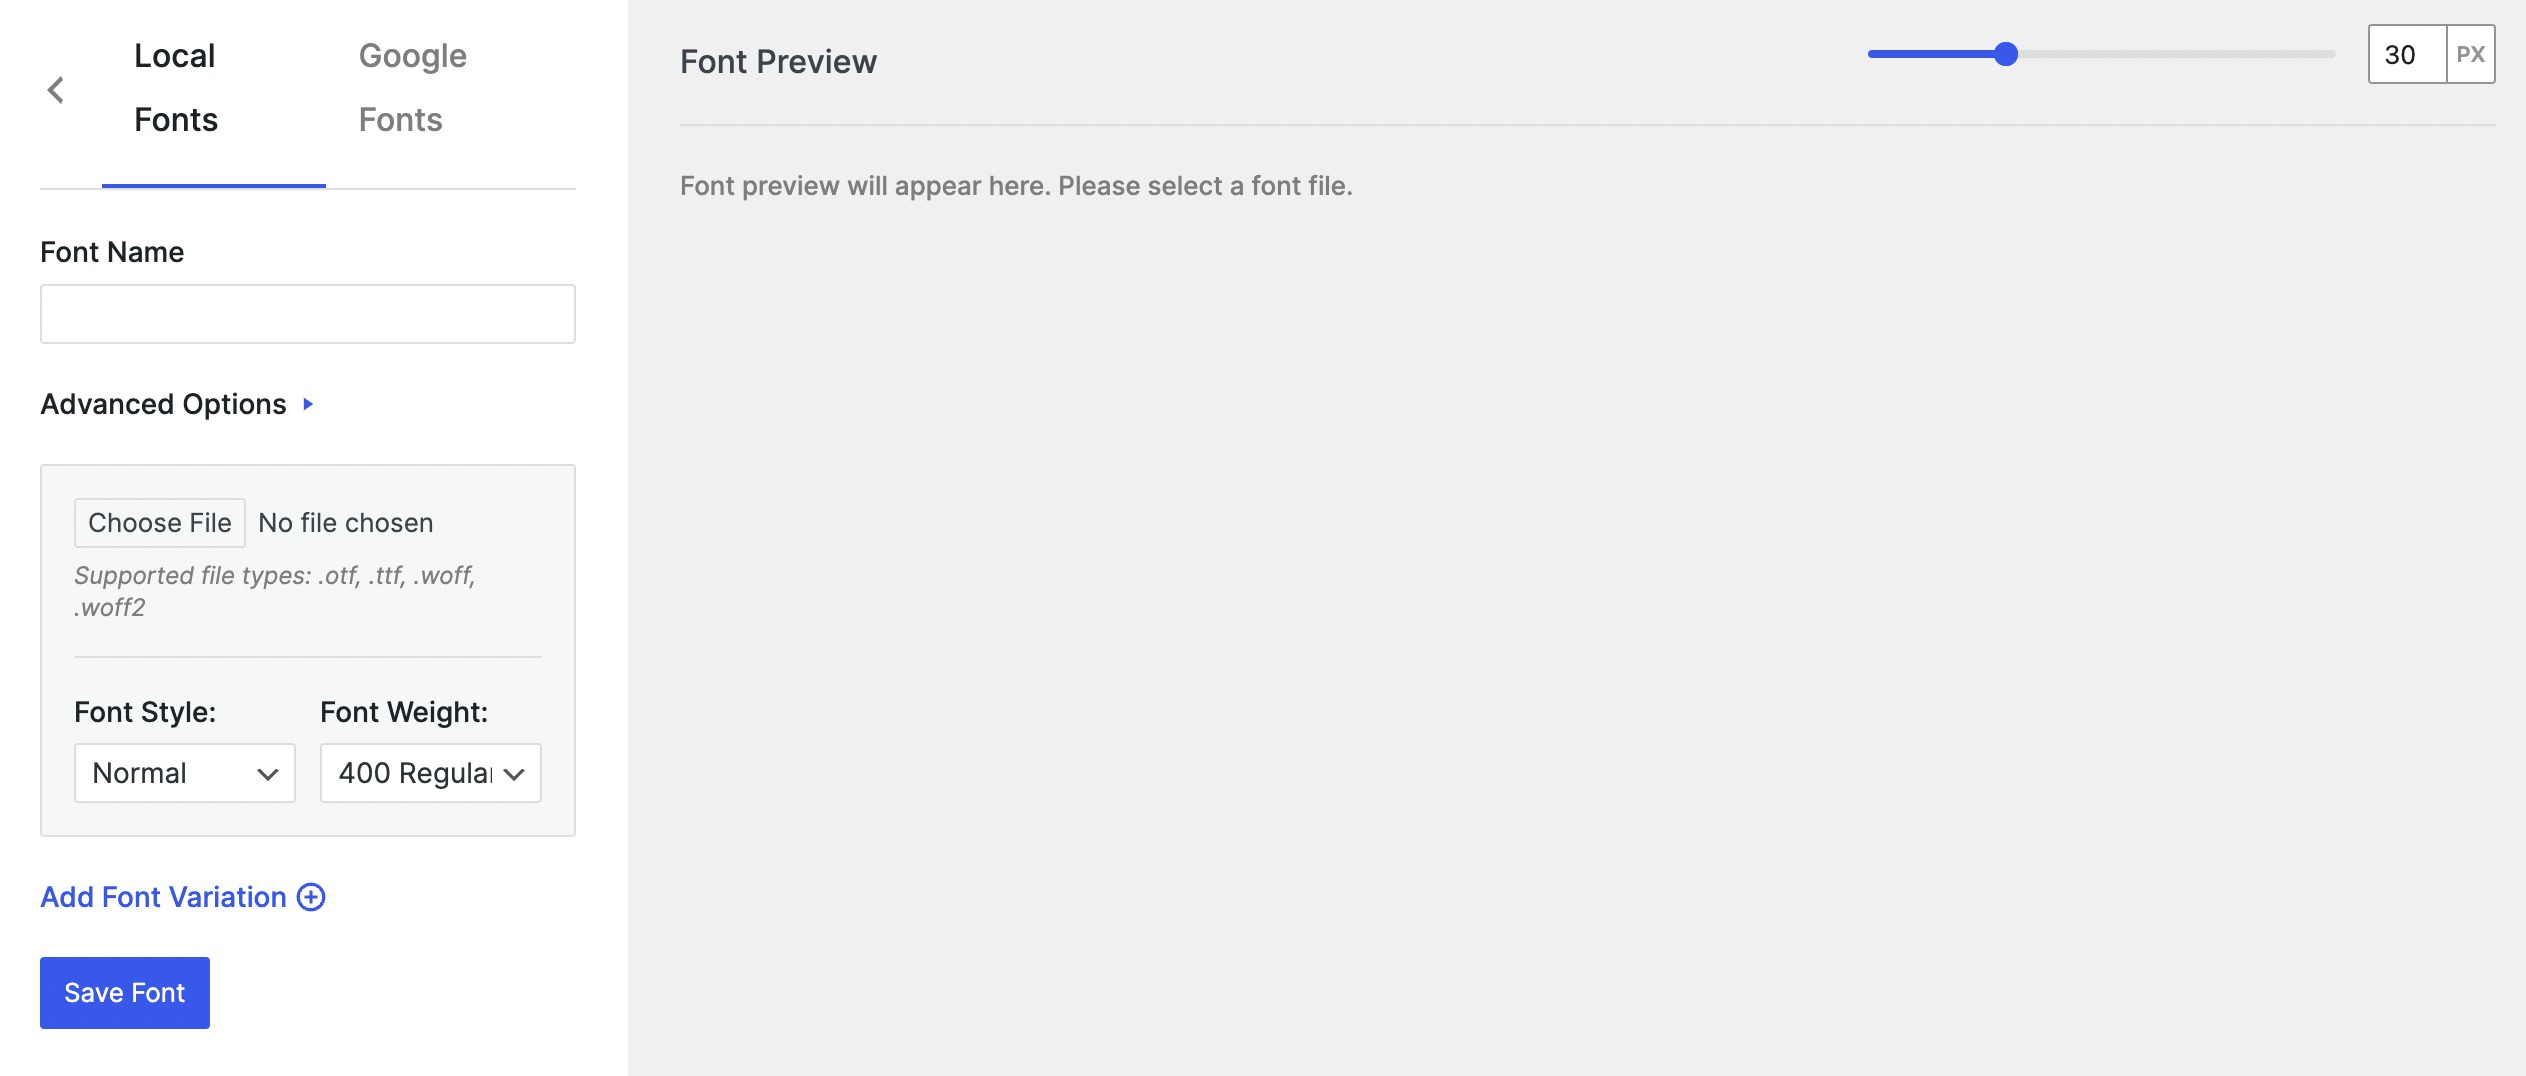
When uploading the font, ensure it is in a browser-supported format, as the plugin accepts the following formats:
- Open Type Fonts (OTF) is a popular web font that is compatible with most browsers.
- True Type Fonts (TTF) are co-developed by Microsoft and Apple and are widely used for Windows and macOS.
- Web Open Font Format (WOFF) is a recommended web page format by W3C.
- WOFF 2 has better compression abilities and is supported by all major browsers.
Once you’ve uploaded the font, the preview will be visible in the preview section. You can set the style and height as per your preference.

Furthermore, if you wish to add another font simultaneously, you can use the Add Font Variation option.
Once you’re satisfied with the changes made, click on the Save Font button to upload the font to your website.
All the fonts will be added to your site.
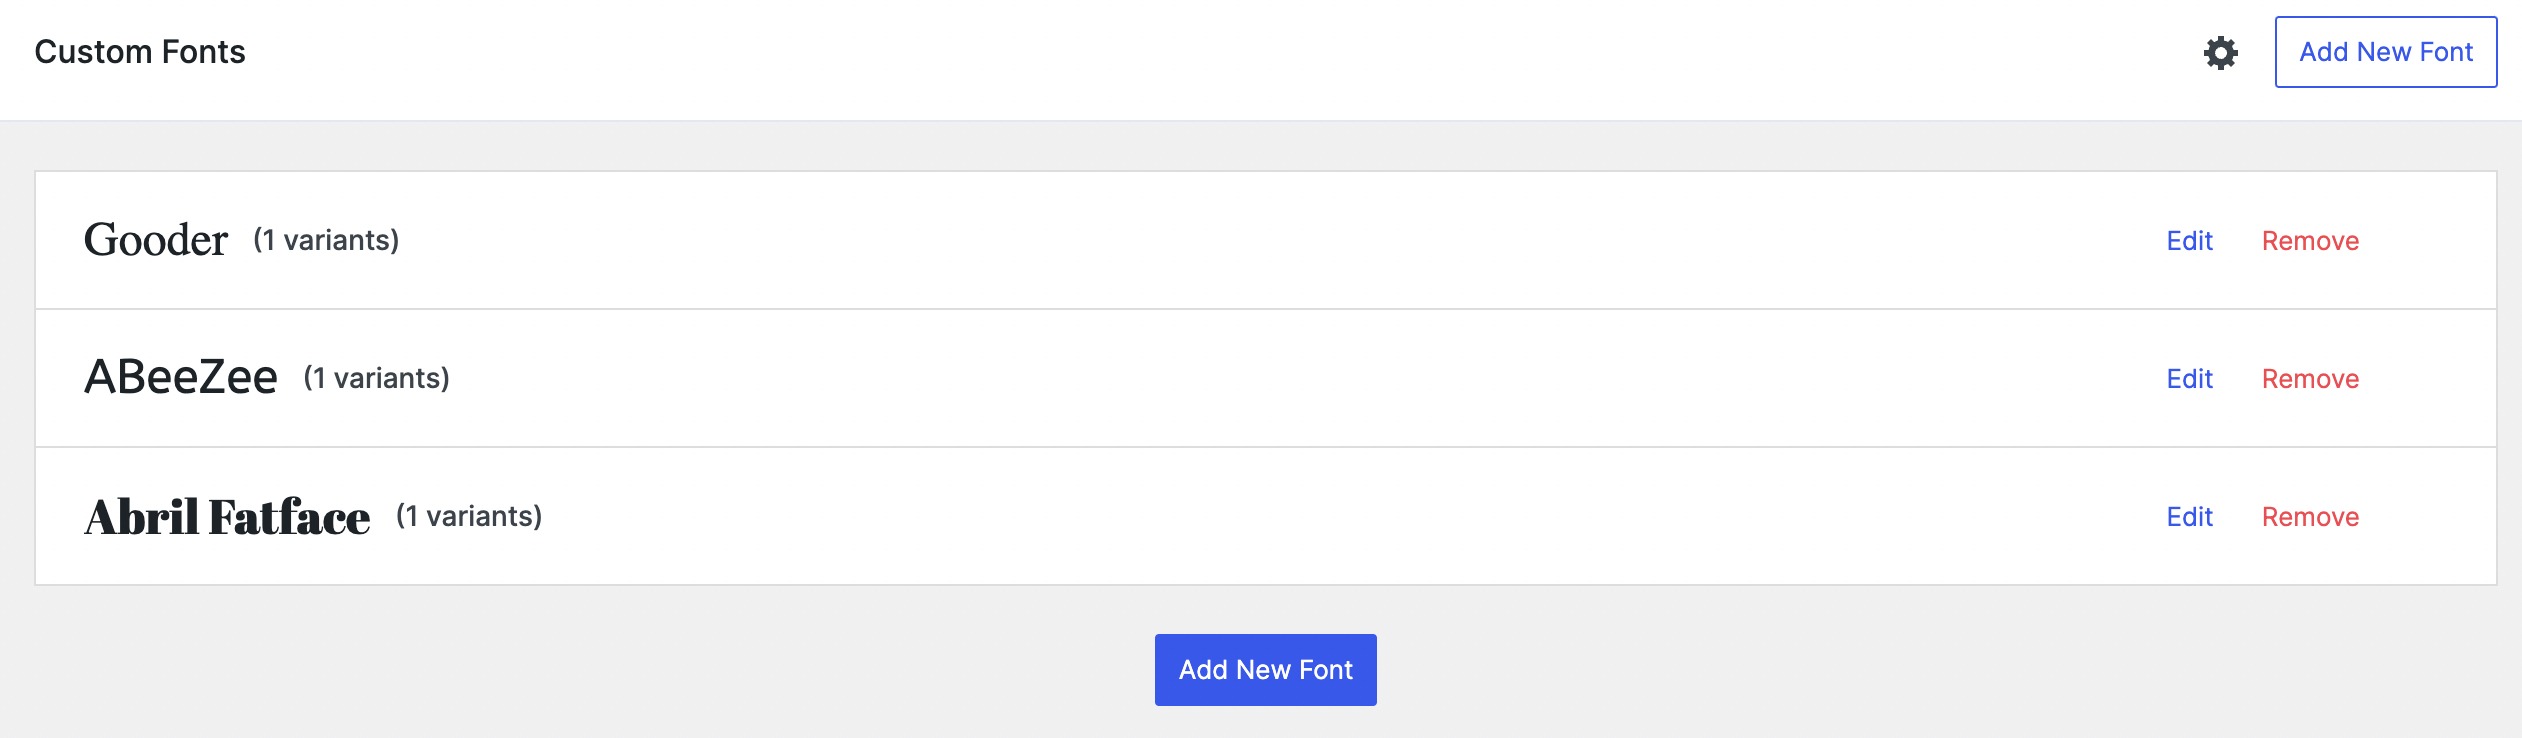
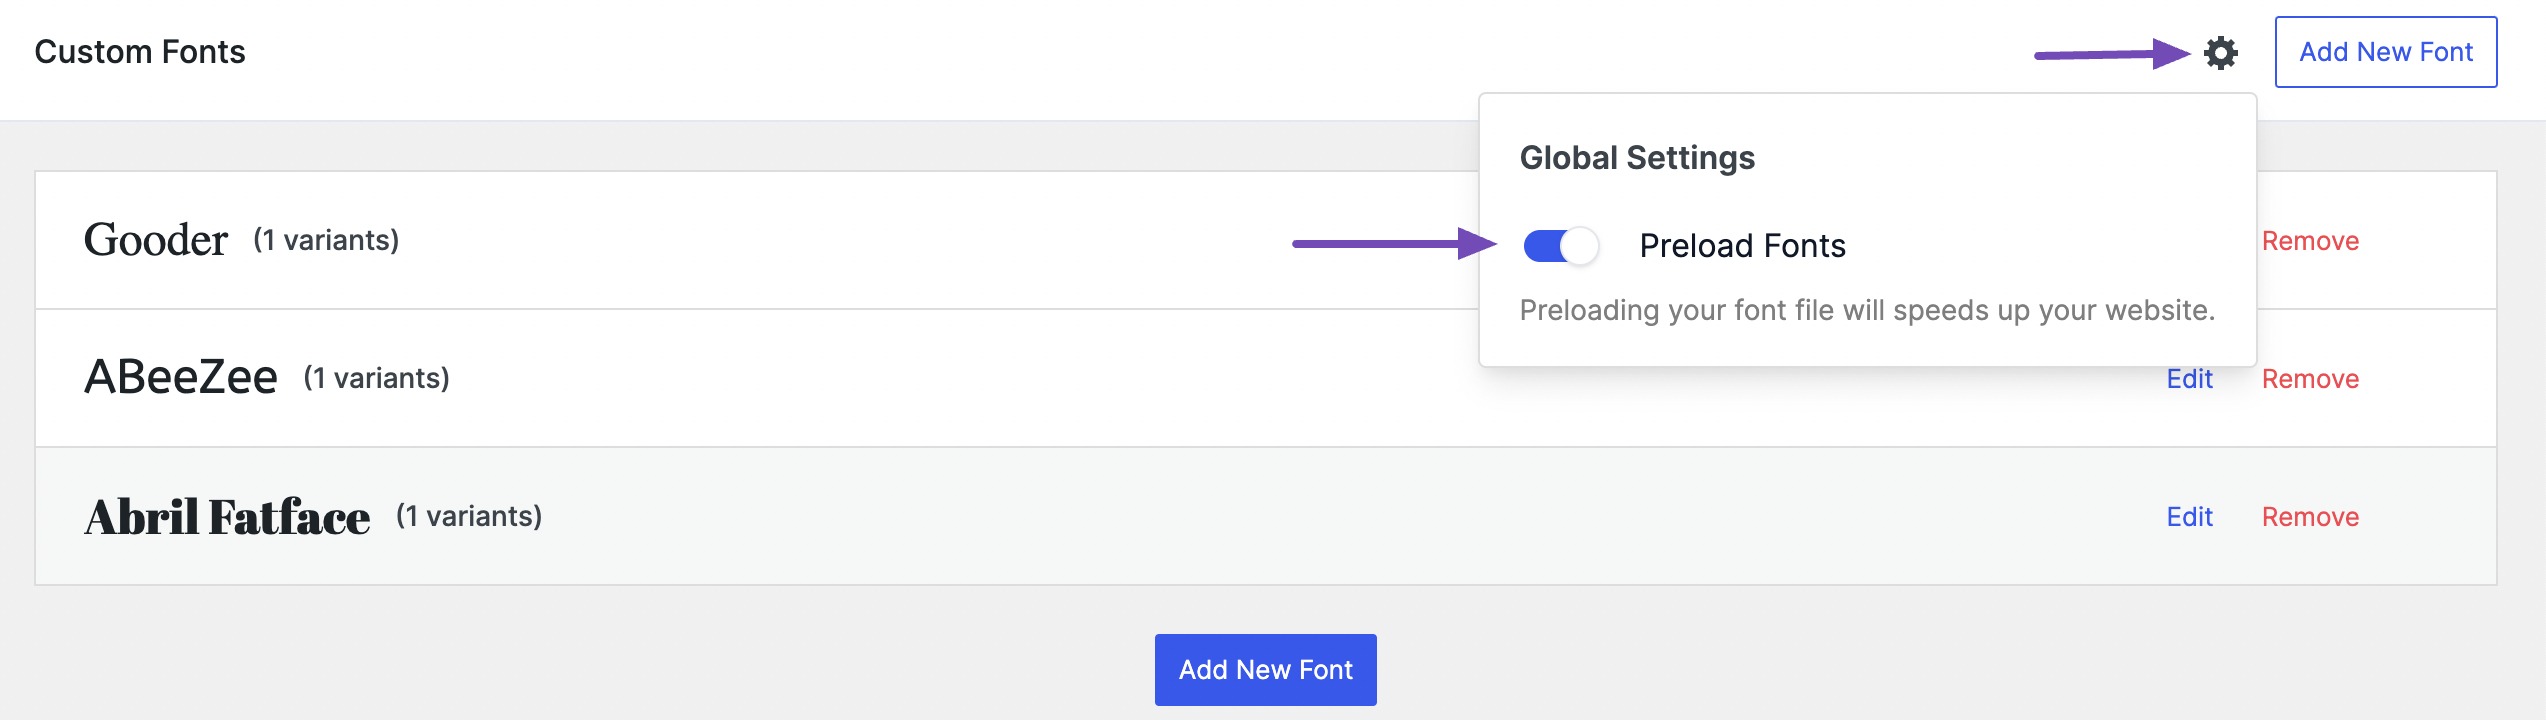
To optimize these fonts further, click the settings icon, as shown below.
Enable the Preload Fonts option, enhancing your website’s loading speed by preloading the selected fonts.
You can set the typography by navigating to Appearance → Customize → Typography from your WordPress dashboard.
4 How to Add Custom Fonts to WordPress Manually
You can add custom fonts to WordPress manually using the @font-face CSS rule.
This method provides greater control over the fonts you integrate and is relatively simple.
Here’s a quick rundown: download the desired fonts, upload them to your WordPress site, and then add them to your website’s CSS file. Let’s break it down step by step.
Begin by downloading the font of your choice to your computer in the supported format from trusted sources. Extract the .zip archive if necessary.
Next, connect to your WordPress site via FTP or a File Manager, and navigate to your theme’s directory (typically found at wp-content/themes/your-active-theme).
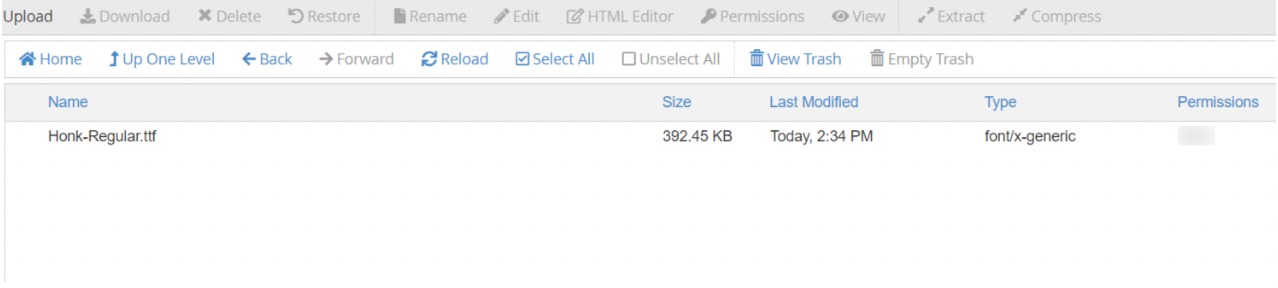
Check for the fonts folder within the directory. If it doesn’t exist, create a new folder named “fonts” and upload your font files into this folder.
In the image below, you can see that we have uploaded the Honk font.
Next, locate and edit the style.css file in your theme’s directory to utilize the @font-face rule. Alternatively, you can access it by navigating to Appearance → Theme File Editor from your WordPress dashboard.
Within the style.css section, scroll down and insert the following code to declare the @font-face rule:
@font-face {
    font-family: YourFontName;
    src: url(http://www.yourwebsite.com/wp-content/themes/your-theme/fonts/your-font-file.ttf);
    font-weight: normal;
}
Make sure to modify the font family and URL values to correspond with the font you used. Instead of editing your parent theme directly, you make changes in the child theme.
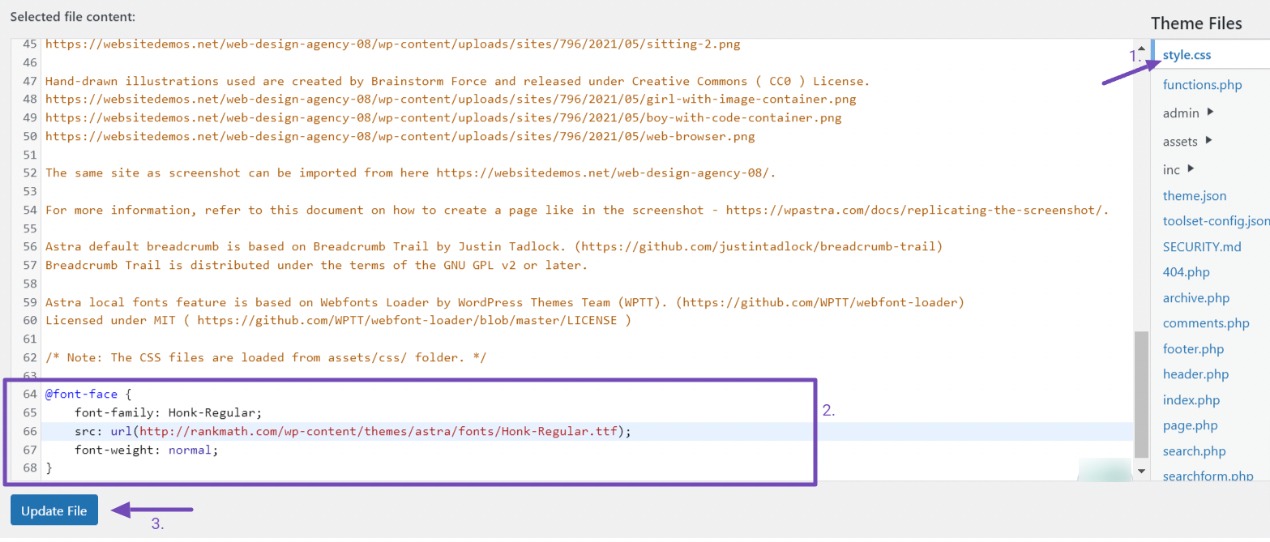
Once you’ve added the code, click the Update File button to save your changes.
It’s important to note that the font-face code loads the font every time a visitor visits your website. However, the font has not yet been applied to any element.
You need to edit the same style.css file to assign the font for a specific element. For example, the following code would apply the ‘Honk’ font to your website’s title:
h1.site-title {
  font-family: "Honk-Regular", Arial, sans-serif;
}
This code specifies the font family for the ‘h1’ element with the class ‘site-title.’ It sets the font to “Honk-Regular” first, followed by Arial, and finally, sans-serif as a fallback option.
This means that if “Honk-Regular” is not available to the user’s device or browser, it will try to use Arial instead, and if that’s not available either, it will default to the generic sans-serif font family.
“Honk-Regular” is a specific font style or typeface of the “Honk” font used in this article.
5 Conclusion
Adding custom fonts to your WordPress site is a simple yet powerful way to give your design a unique edge.
Whether using the built-in options within your theme settings or plugins, the flexibility offered by platforms like Google Fonts and other reputable font repositories allows you to build your site’s typography to align with your brand or design preferences.
Just remember to keep performance and licensing in mind when choosing fonts so your site looks great without slowing down or running into issues.
With the right fonts in place, your WordPress website can stand out, feel more professional, and leave a lasting impression on your visitors.
If you like this post, let us know by tweeting @rankmathseo.