
When you’re running a WordPress site, keeping your content fresh is just as important as publishing new posts.
I’ve often found that old articles can quickly become outdated, which isn’t great for readers or search engines.
The good news is, you don’t need to spend hours manually updating everything. WordPress gives tools to schedule content updates so you can plan ahead and keep your site looking active without the stress of doing it all in real time.
In this post, I’ll walk you through how you can quickly schedule content updates in WordPress and save yourself a lot of time and hassle.
Table Of Contents
1 The Problem With WordPress’ Content Scheduling Tool
Scheduling your content updates in advance can be a real time-saver. You get to plan, write, and set everything up ahead of time, which means less stress later.
WordPress does give us a built-in scheduling tool, but here’s the catch: it doesn’t always work well when you’re updating posts and pages that are already live.
If you try to schedule changes for a published post, WordPress will actually unpublish it and turn it into a draft. That means anyone visiting the post during that time will hit a 404 error instead of your content. Not only is that frustrating for your readers, but you also risk losing valuable traffic.
That’s why you need a smoother solution; a way to update content, schedule those updates, and keep everything live without any hiccups.
With that in mind, let’s dive into how you can streamline your content update process in WordPress.
2 Scheduling Content Updates in WordPress
The best way to schedule content updates in WordPress is by using a scheduling plugin.
The PublishPress Revisions plugin is a free and simple WordPress plugin that allows you to schedule and manage content updates.
Here’s how to schedule content updates in WordPress using the PublishPress Revisions plugin.
2.1 Install and Activate the PublishPress Revisions Plugin
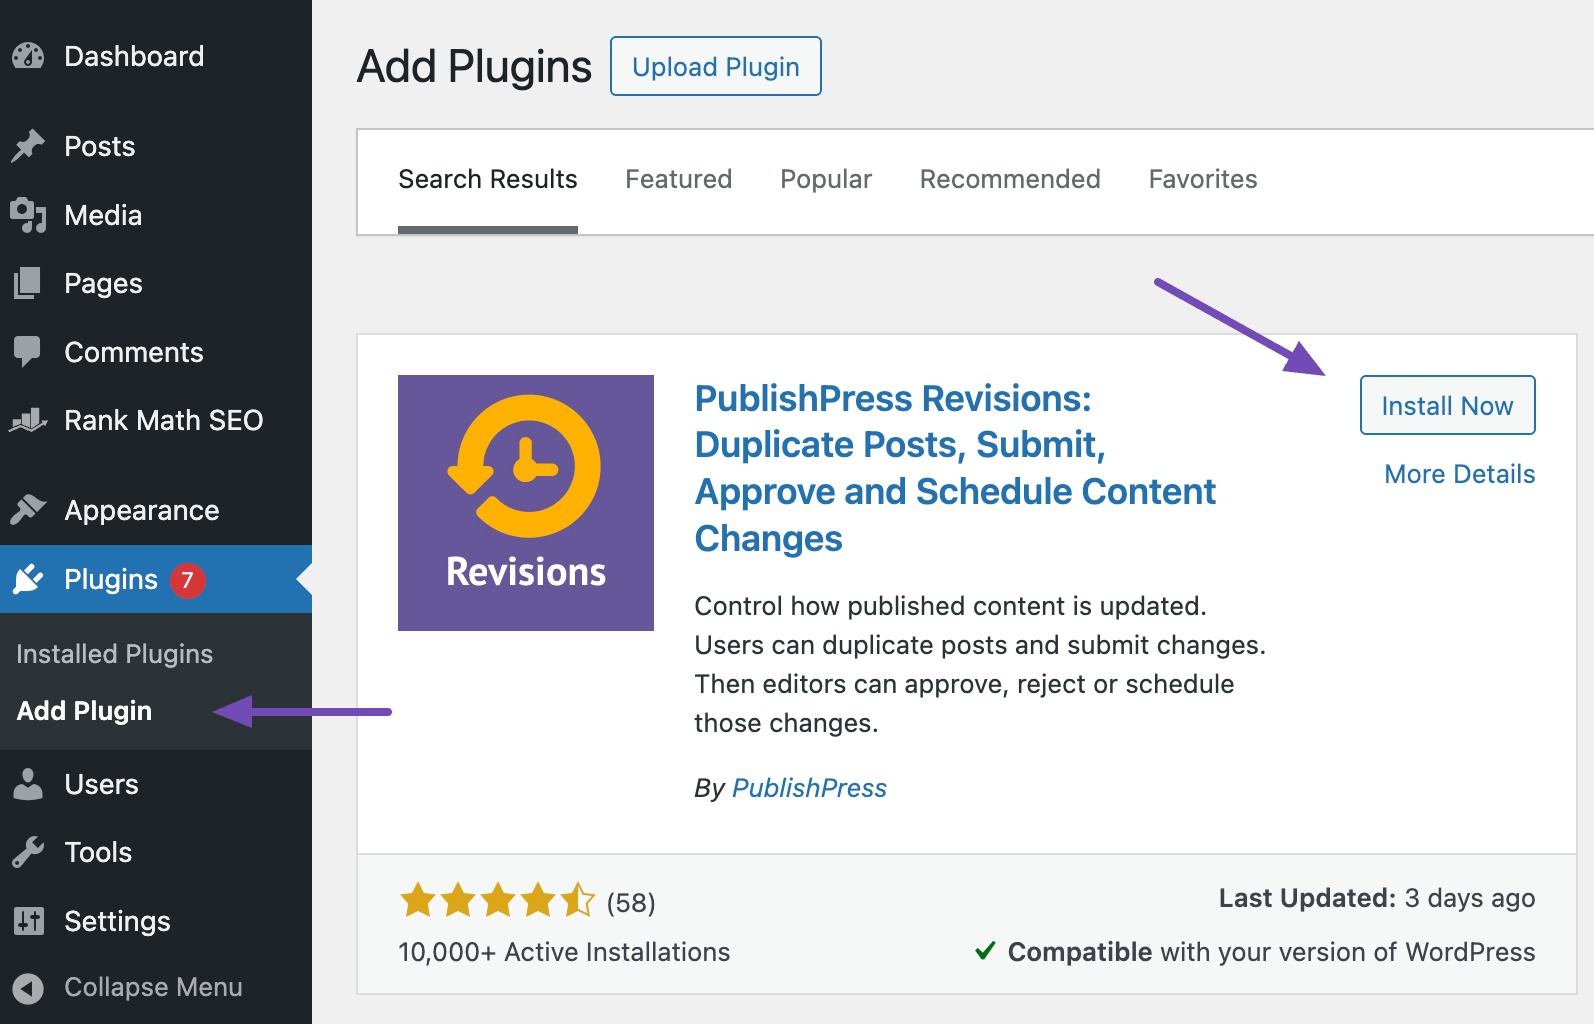
To schedule content in WordPress, install and activate the PublishPress Revisions plugin.
To do so, navigate to your WordPress dashboard’s Plugins → Add Plugin section. Search for the PublishPress Revisions plugin in the search bar and install and activate the plugin, as shown below.
Refer to our dedicated tutorial on installing WordPress plugins.
2.2 Schedule Content Updates Using PublishPress Revisions Plugin
Now it’s time to schedule WordPress updates to your already-published content. In this case, I’ll show you how to do it in WordPress posts.
Navigate to Posts → All Posts from your WordPress dashboard. Locate the post you wish to update and click the New Revision link, as shown below.
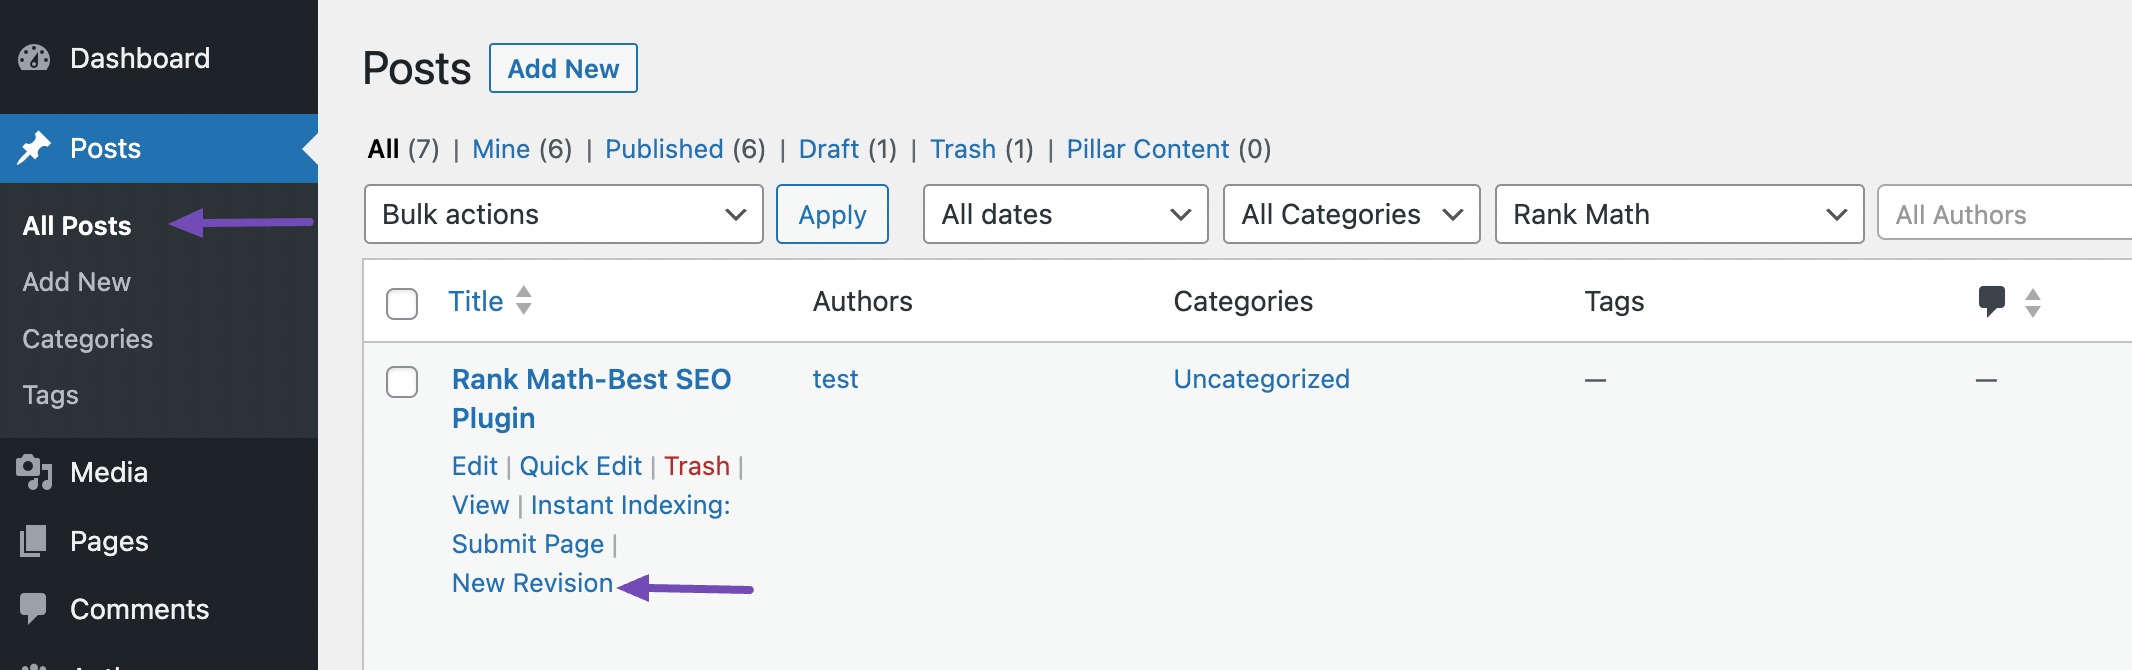
The plugin will automatically create a copy of your original post.
2.2.1 Scheduling Content in WordPress Block Editor
If you’re using the Block editor, you can easily schedule content updates using the PublishPress Revisions plugin, as shown in this section.
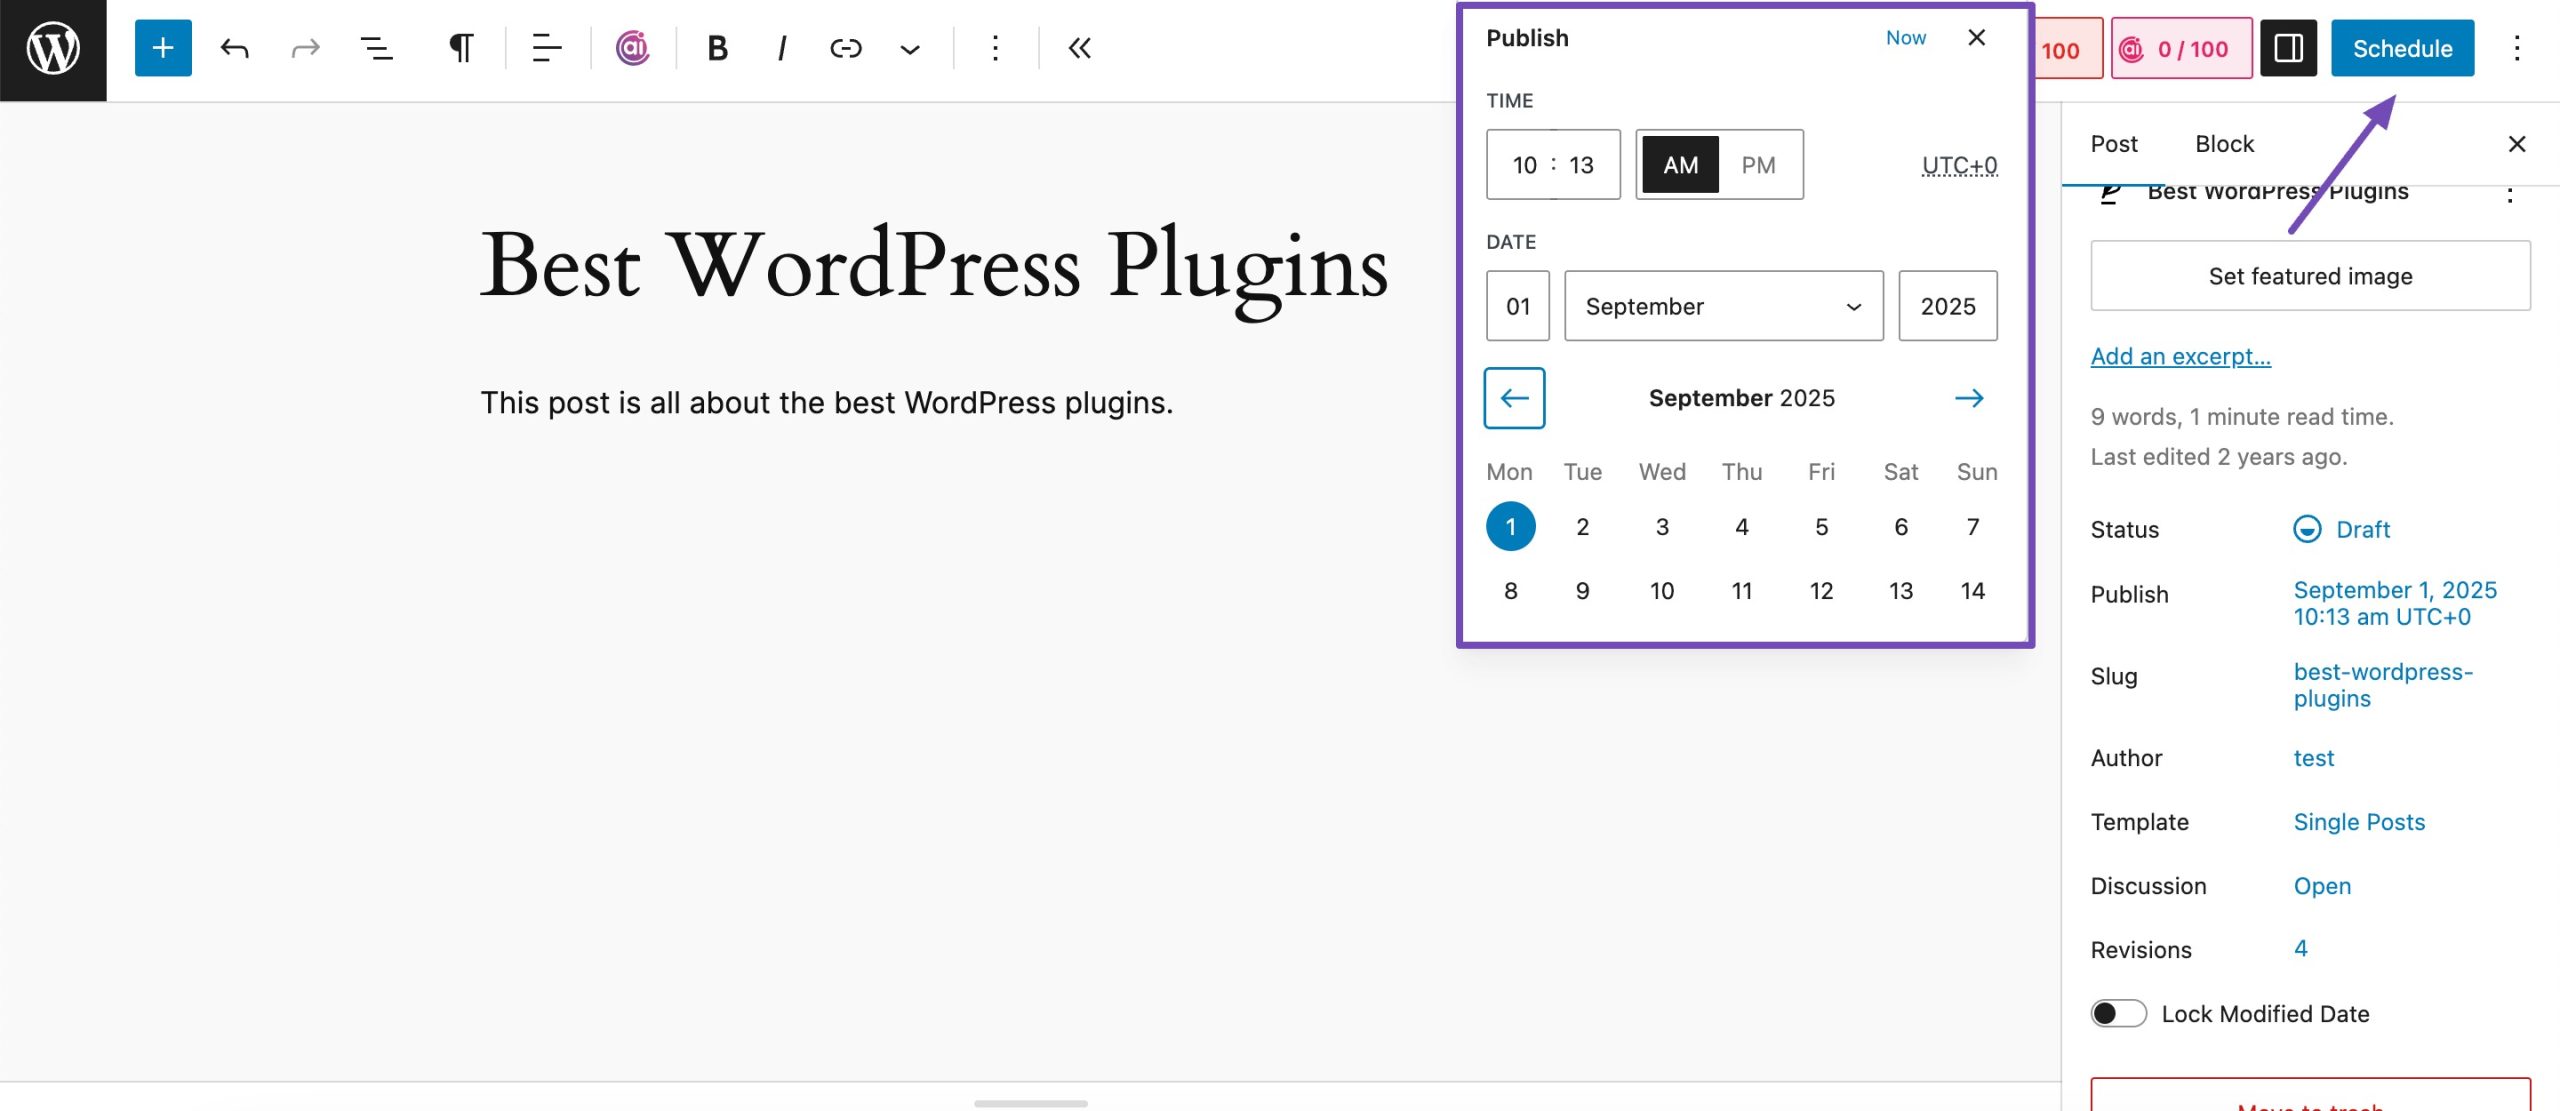
Let’s say you added a new section to your post, like a paragraph block. You can schedule the changes made in Block Editor by clicking on the Settings icon at the top. Then, in the Post tab, click the link showing the post’s publish date and time.
Next, set the date and time you want the draft to replace the current version.
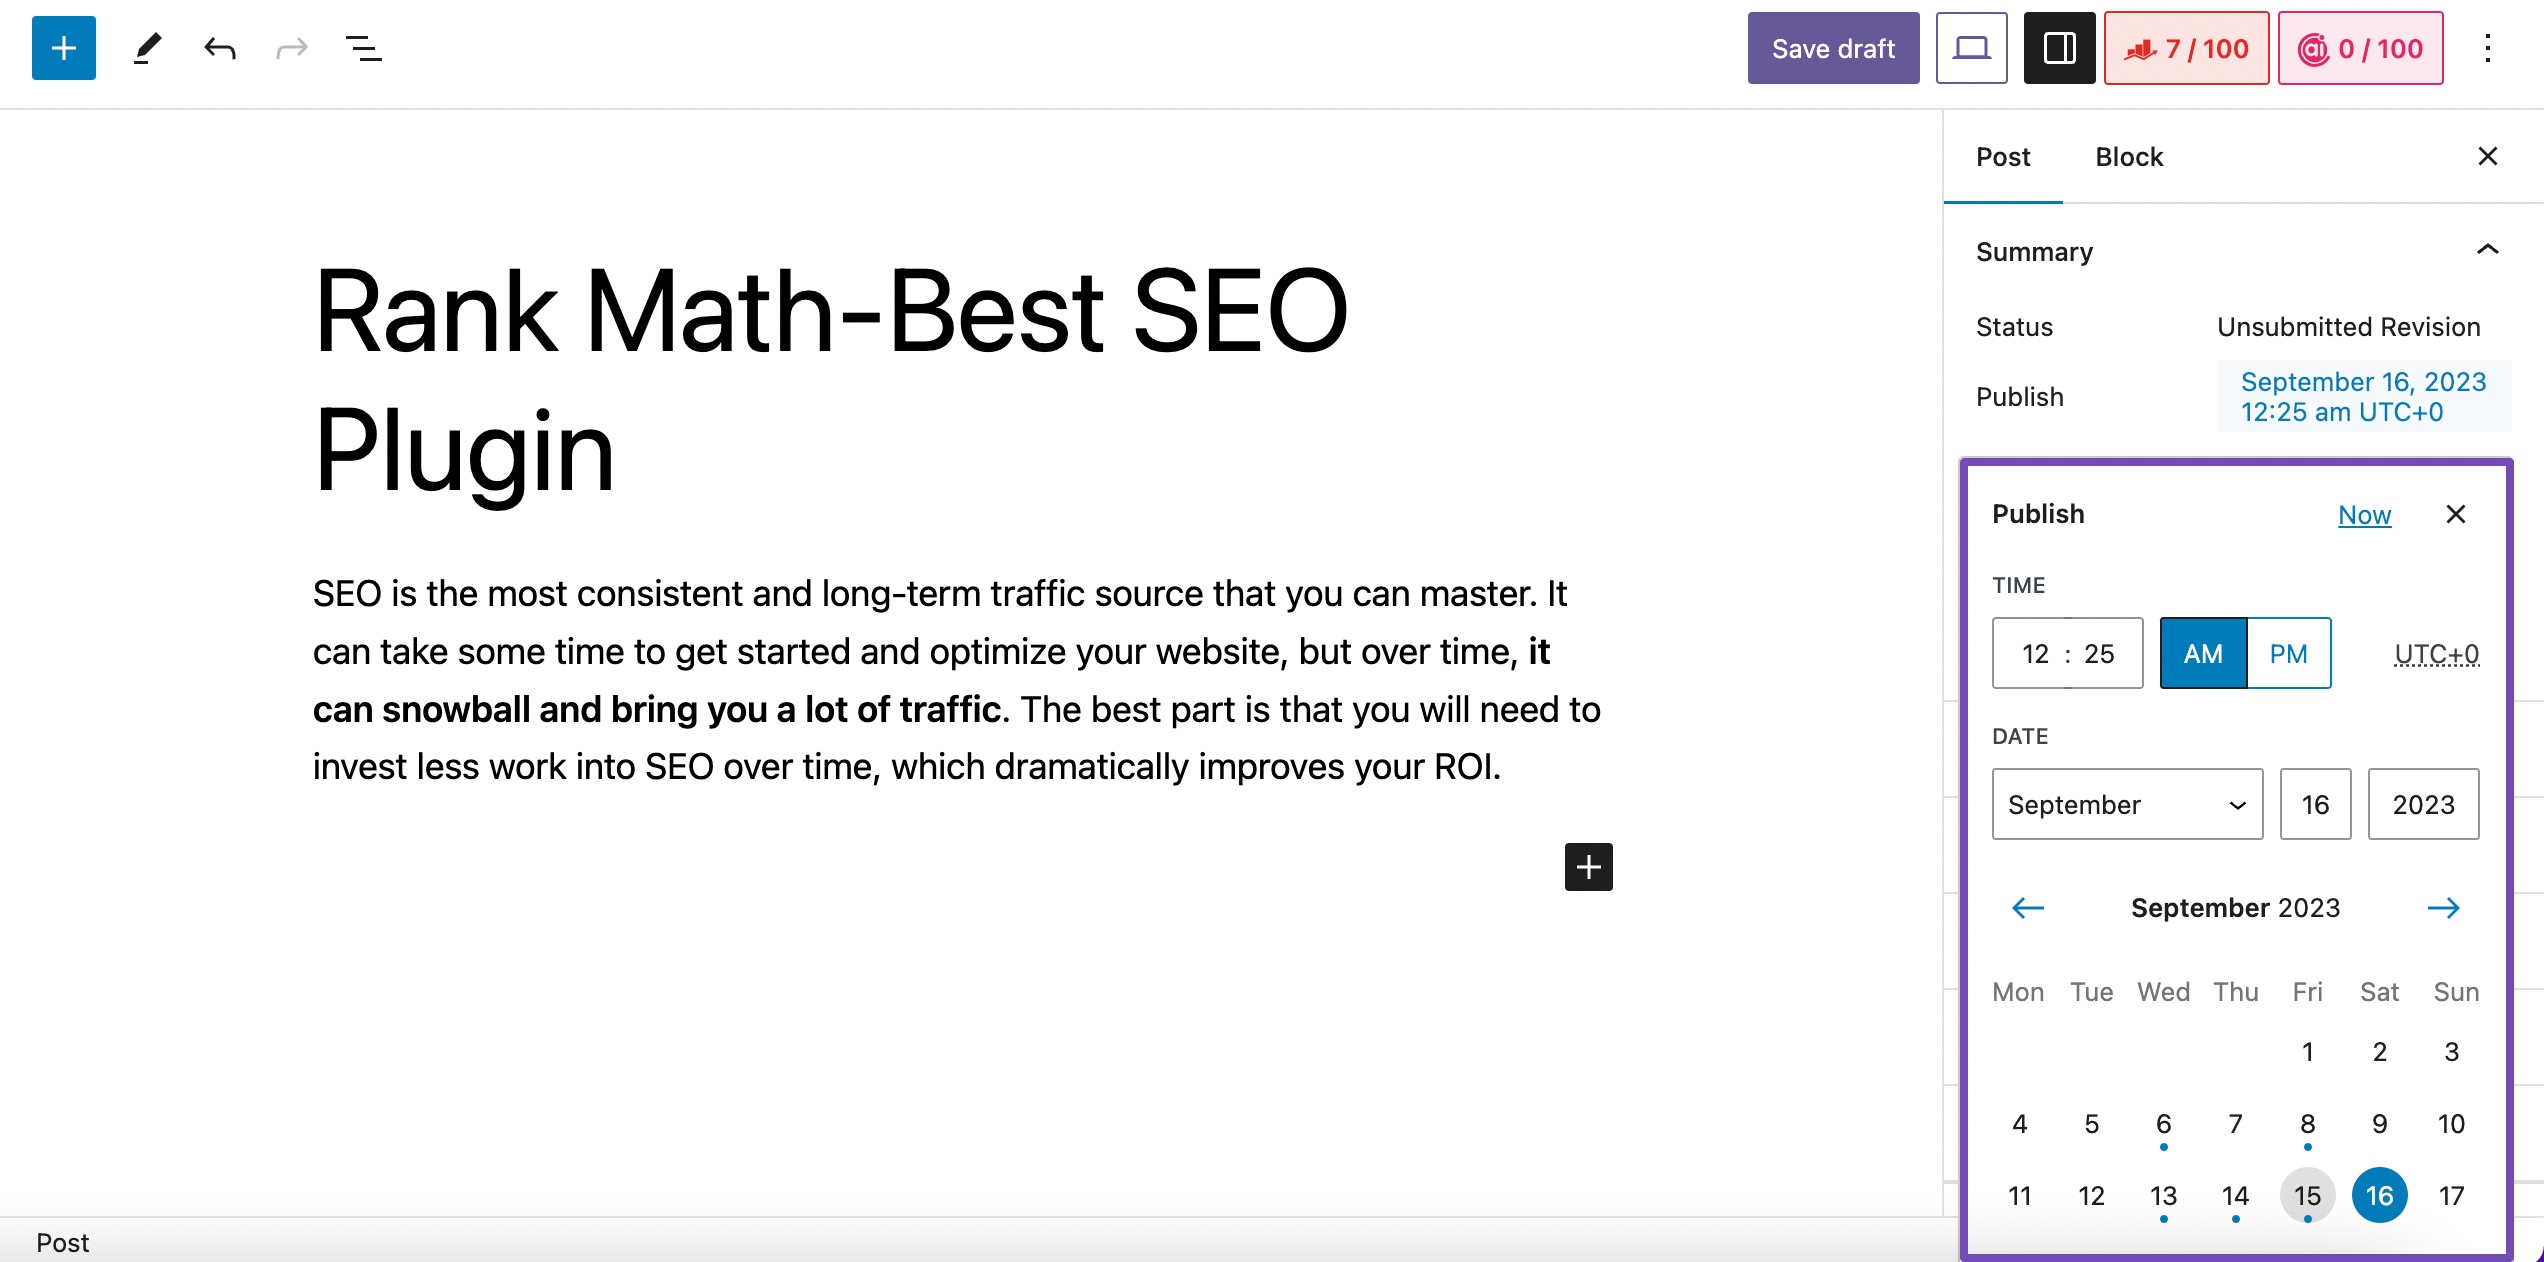
Once done, click on the Submit button.

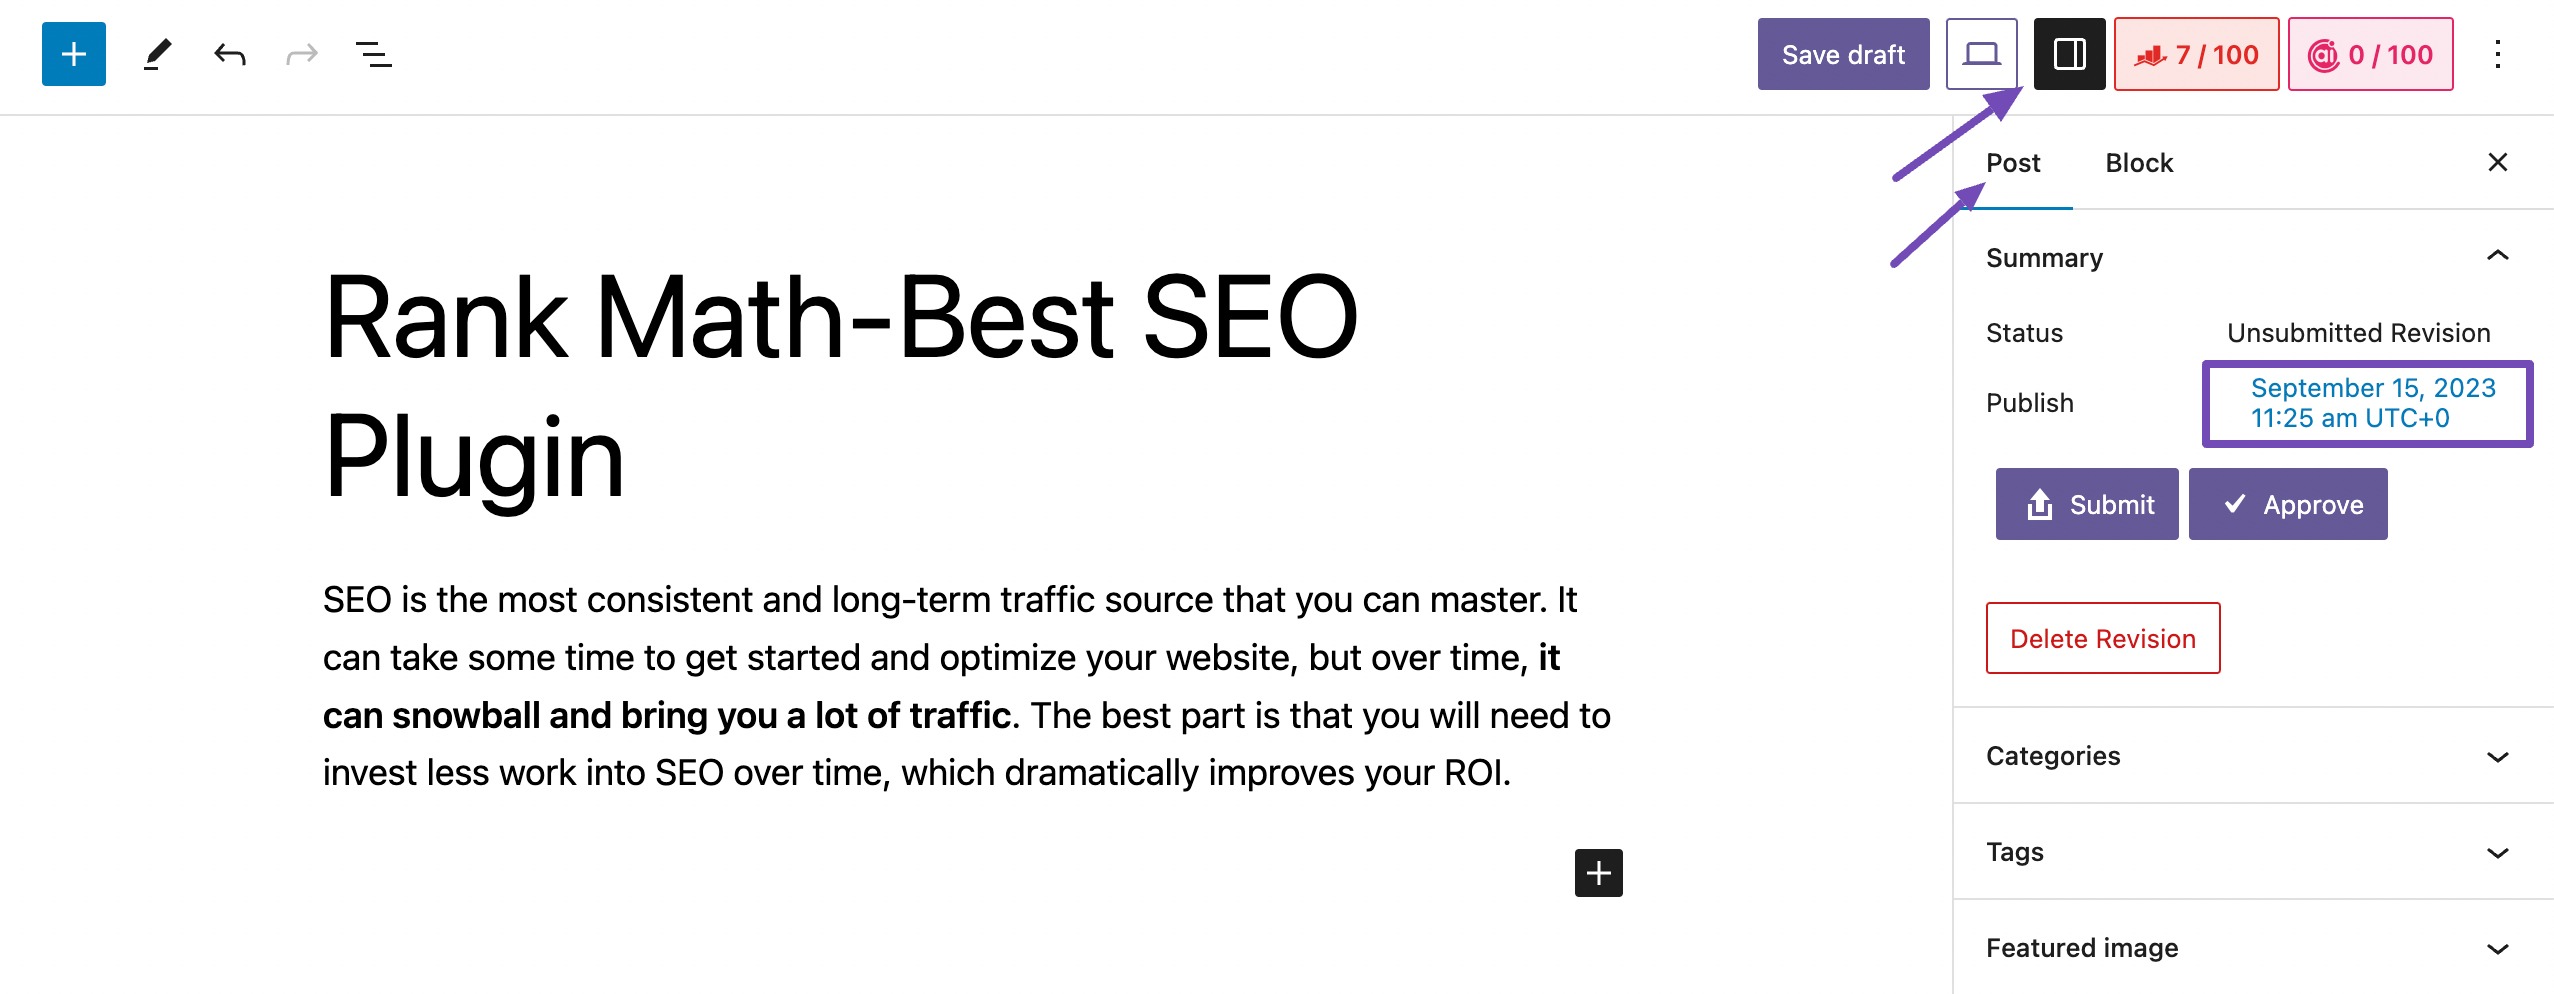
This allows the content editor of your team to double-check the changes you’ve made to the post before scheduling it. If you’re responsible for publishing content on the website and don’t need any approval for the changes made, you can click the Approve button.
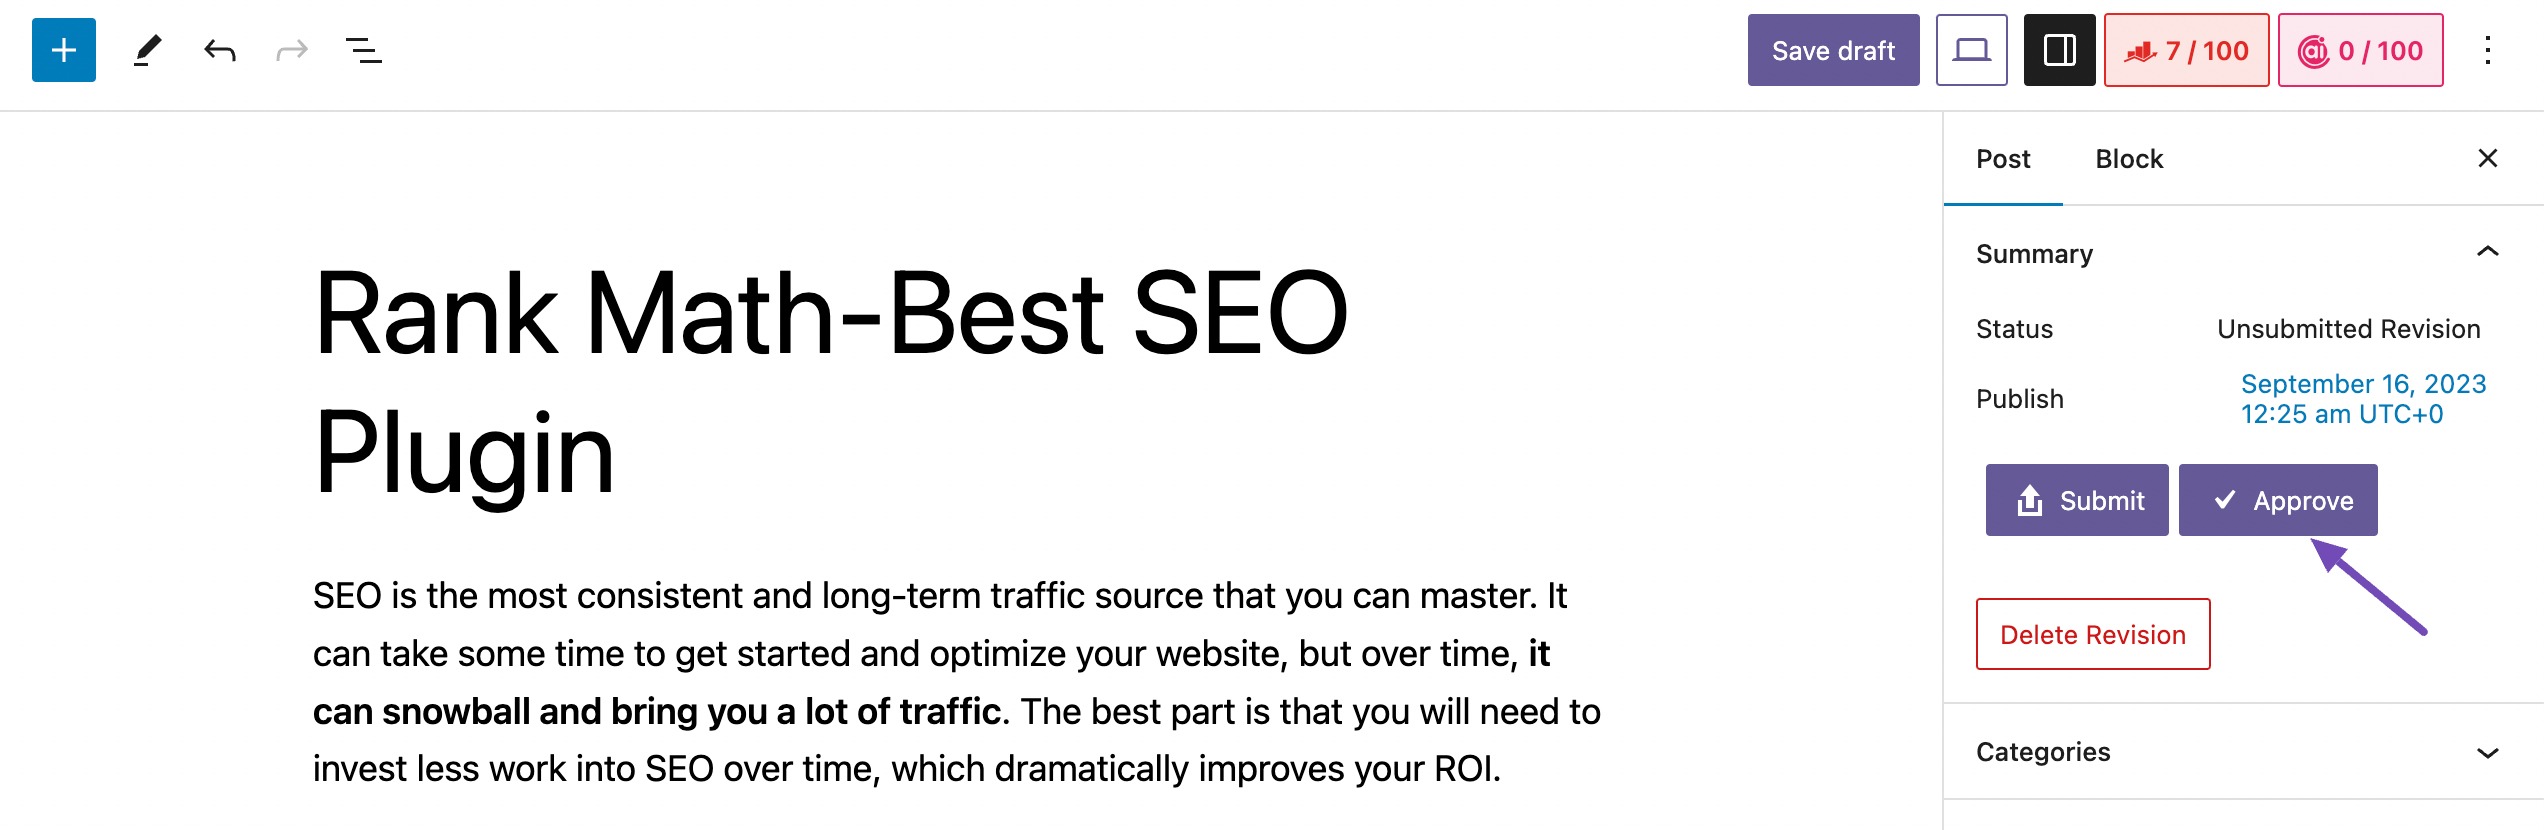
The plugin will then schedule the revision to be published at the specified date and time.
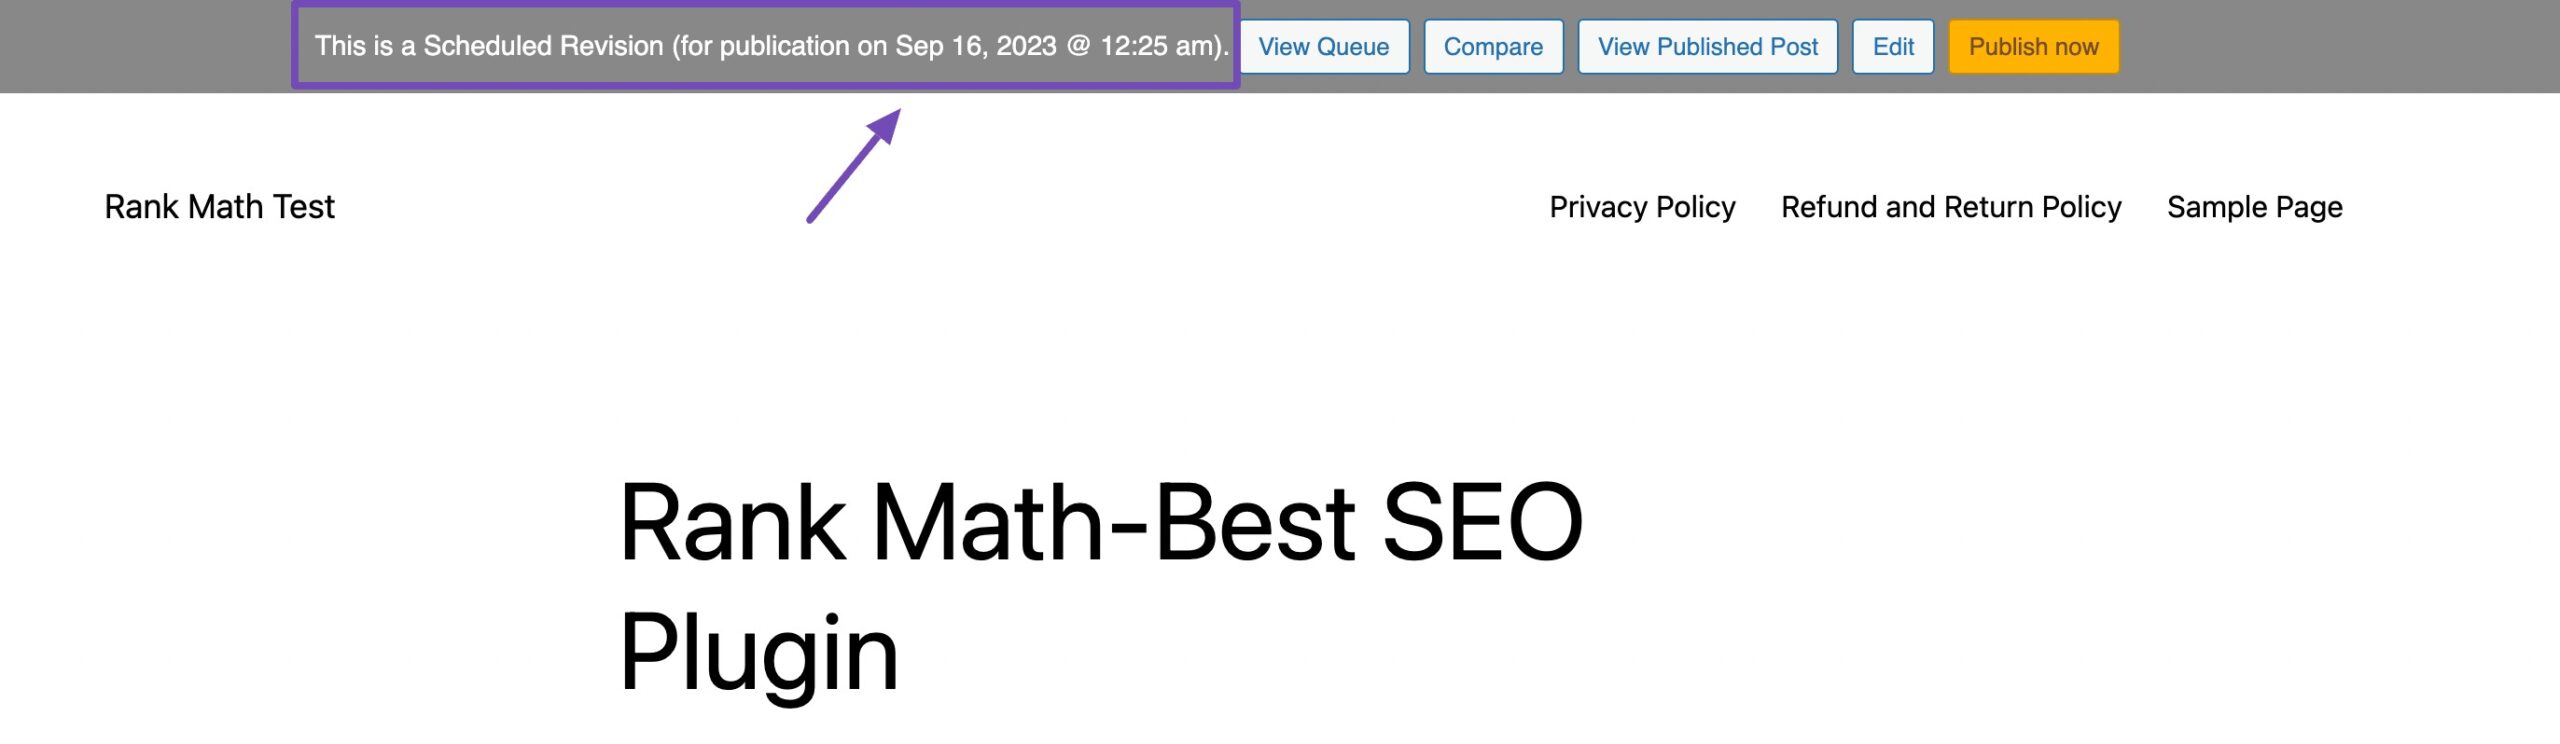
Meanwhile, you’ll be redirected to a preview of your updated version, with a notification bar at the top of the page displaying the date and time that your content revisions will be published.
2.2.2 Scheduling Content Updates in Classic Editor
If you’re using the Classic Editor as your default text editing tool for your WordPress posts, you can also schedule your content updates using the PublishPress Revisions plugin.
To do so, navigate to the post you wish to update. In the Publish block, locate the Publish on approval section, and click on the Edit link.
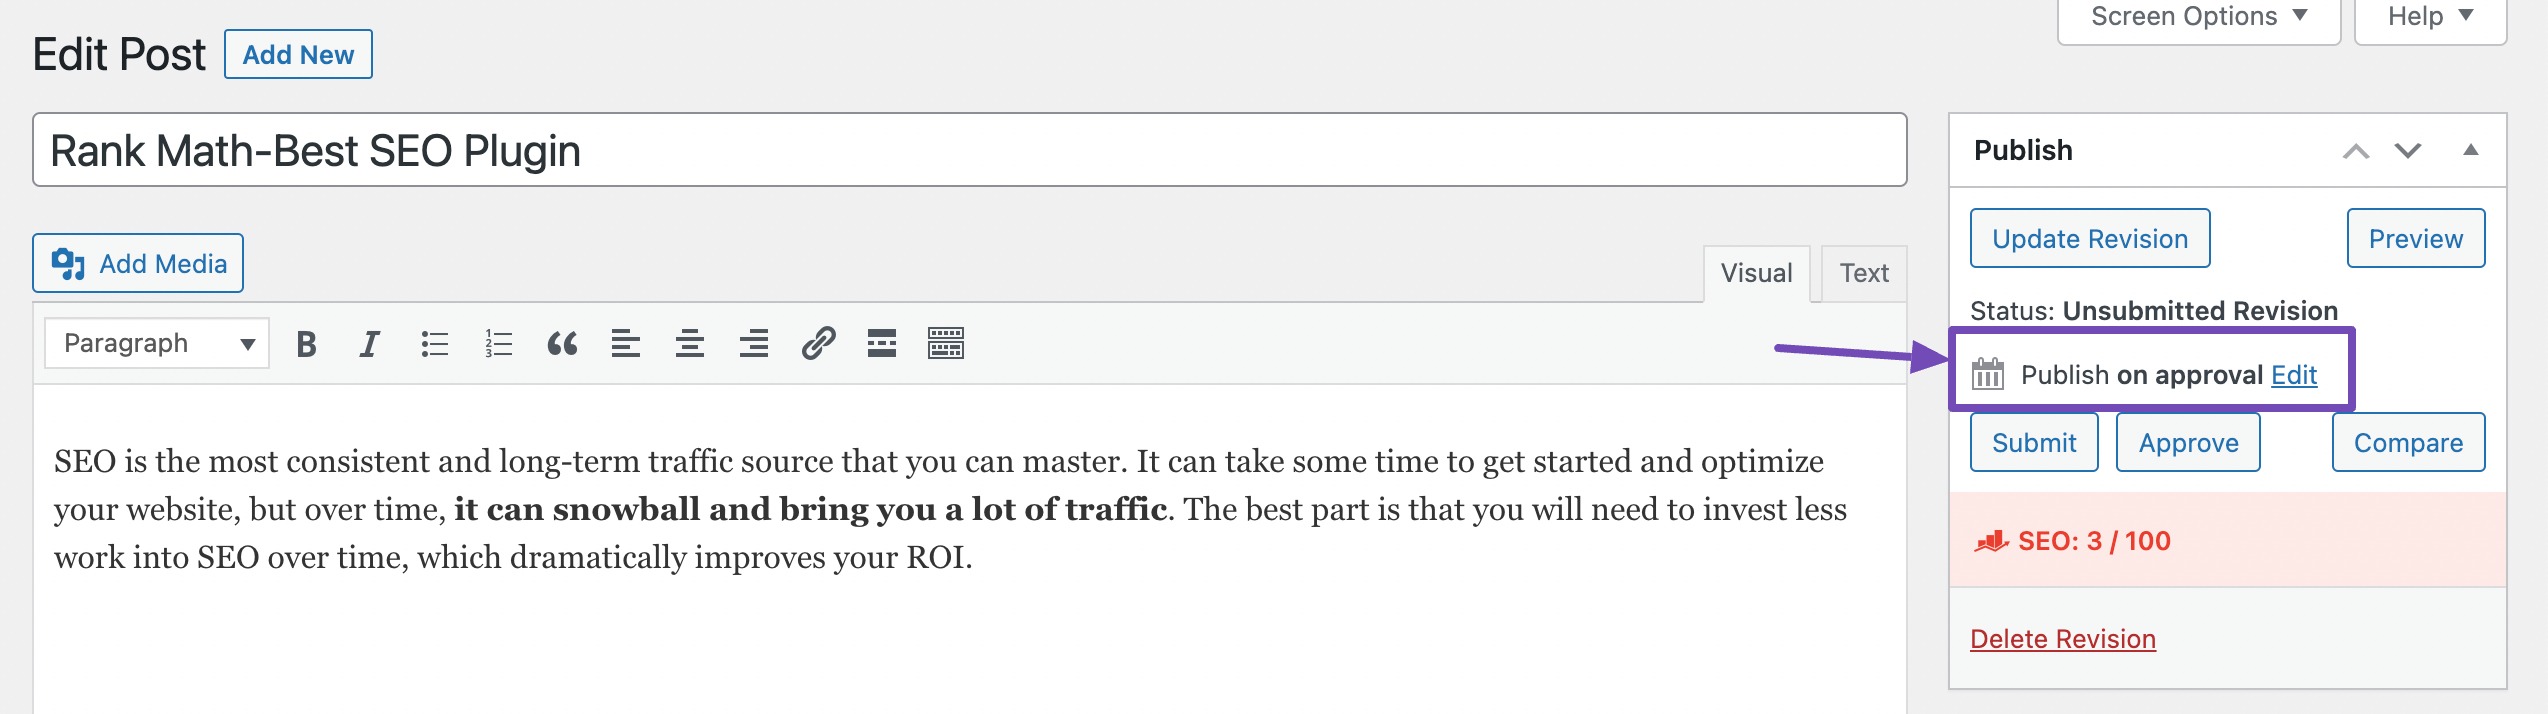
Proceed and enter the date and time you wish to publish your content updates, and once done, click on the OK button.
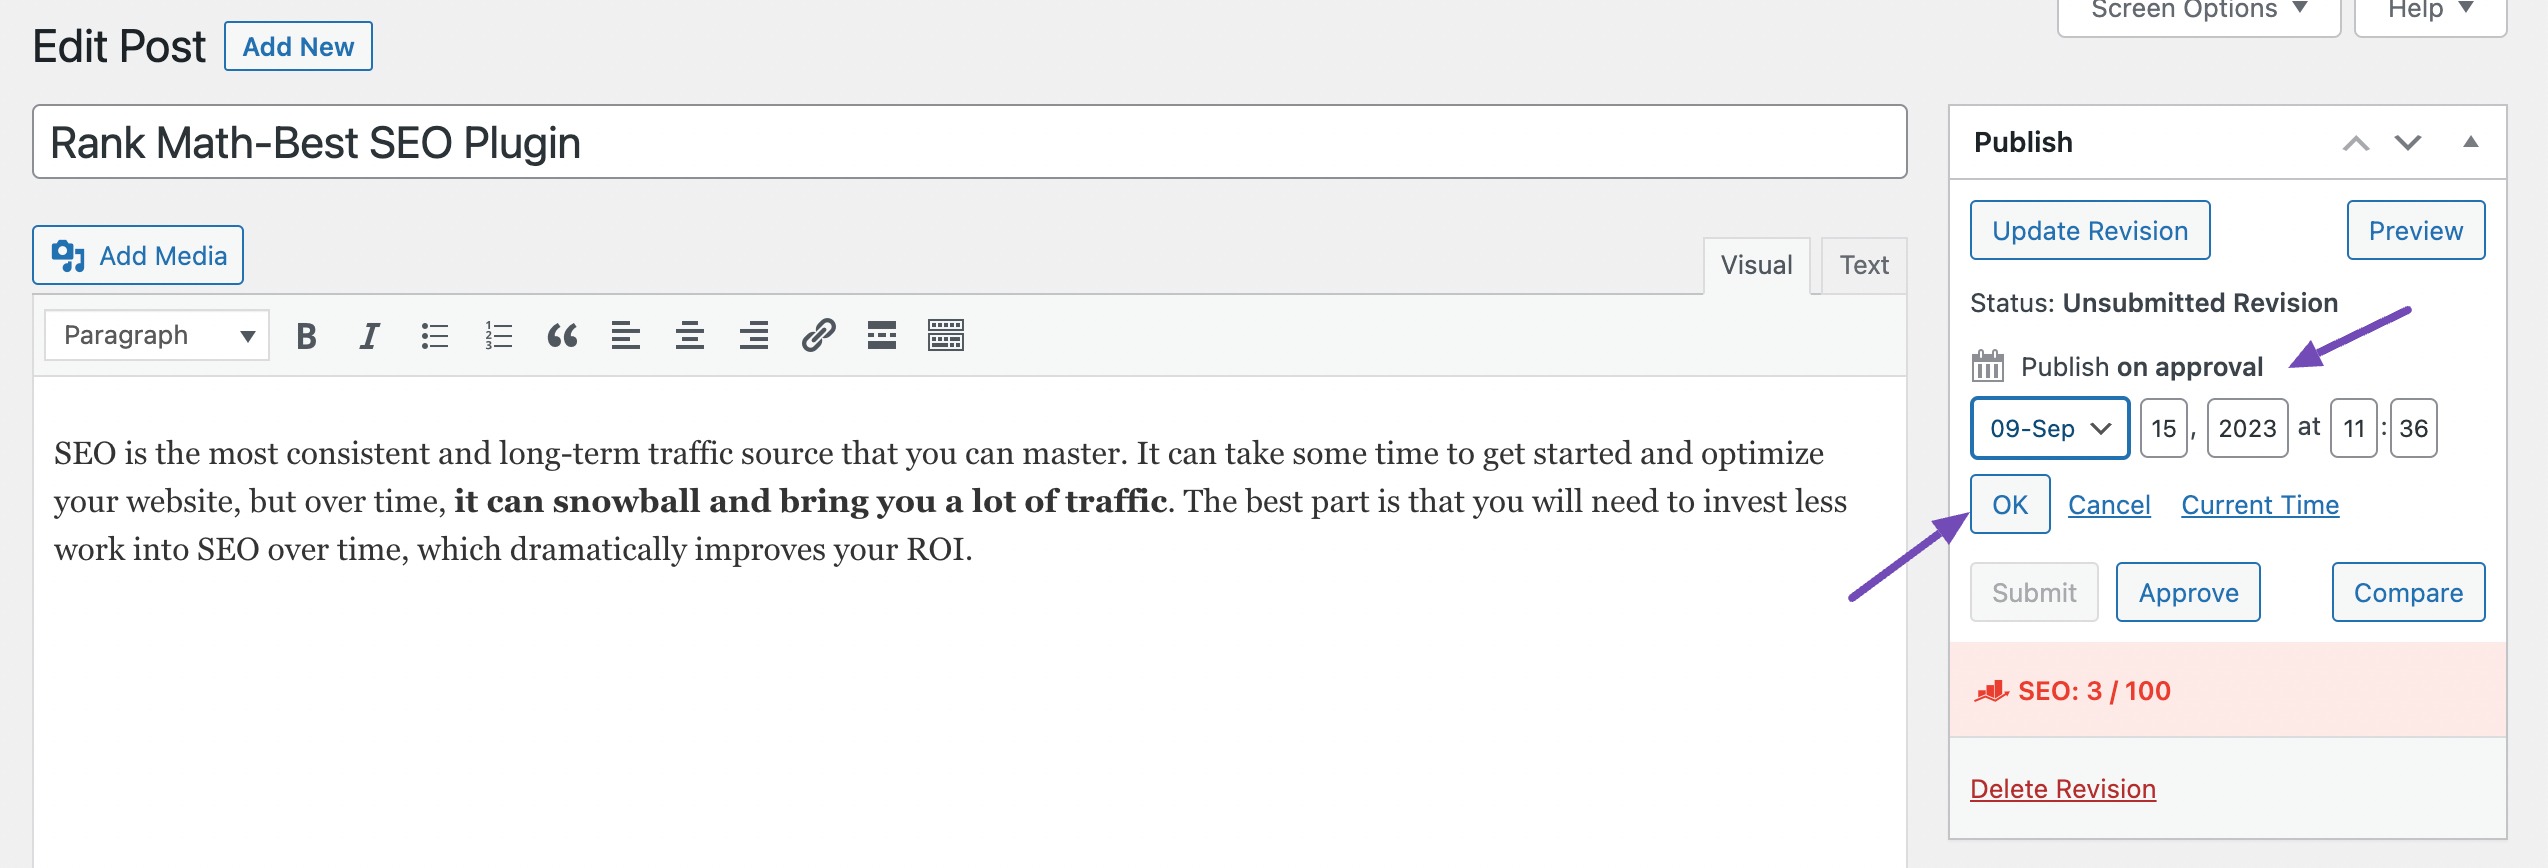
Click the Approve button to confirm the changes made to the post and schedule them.
2.3 Managing Scheduled Content Updates in the Revision Queue
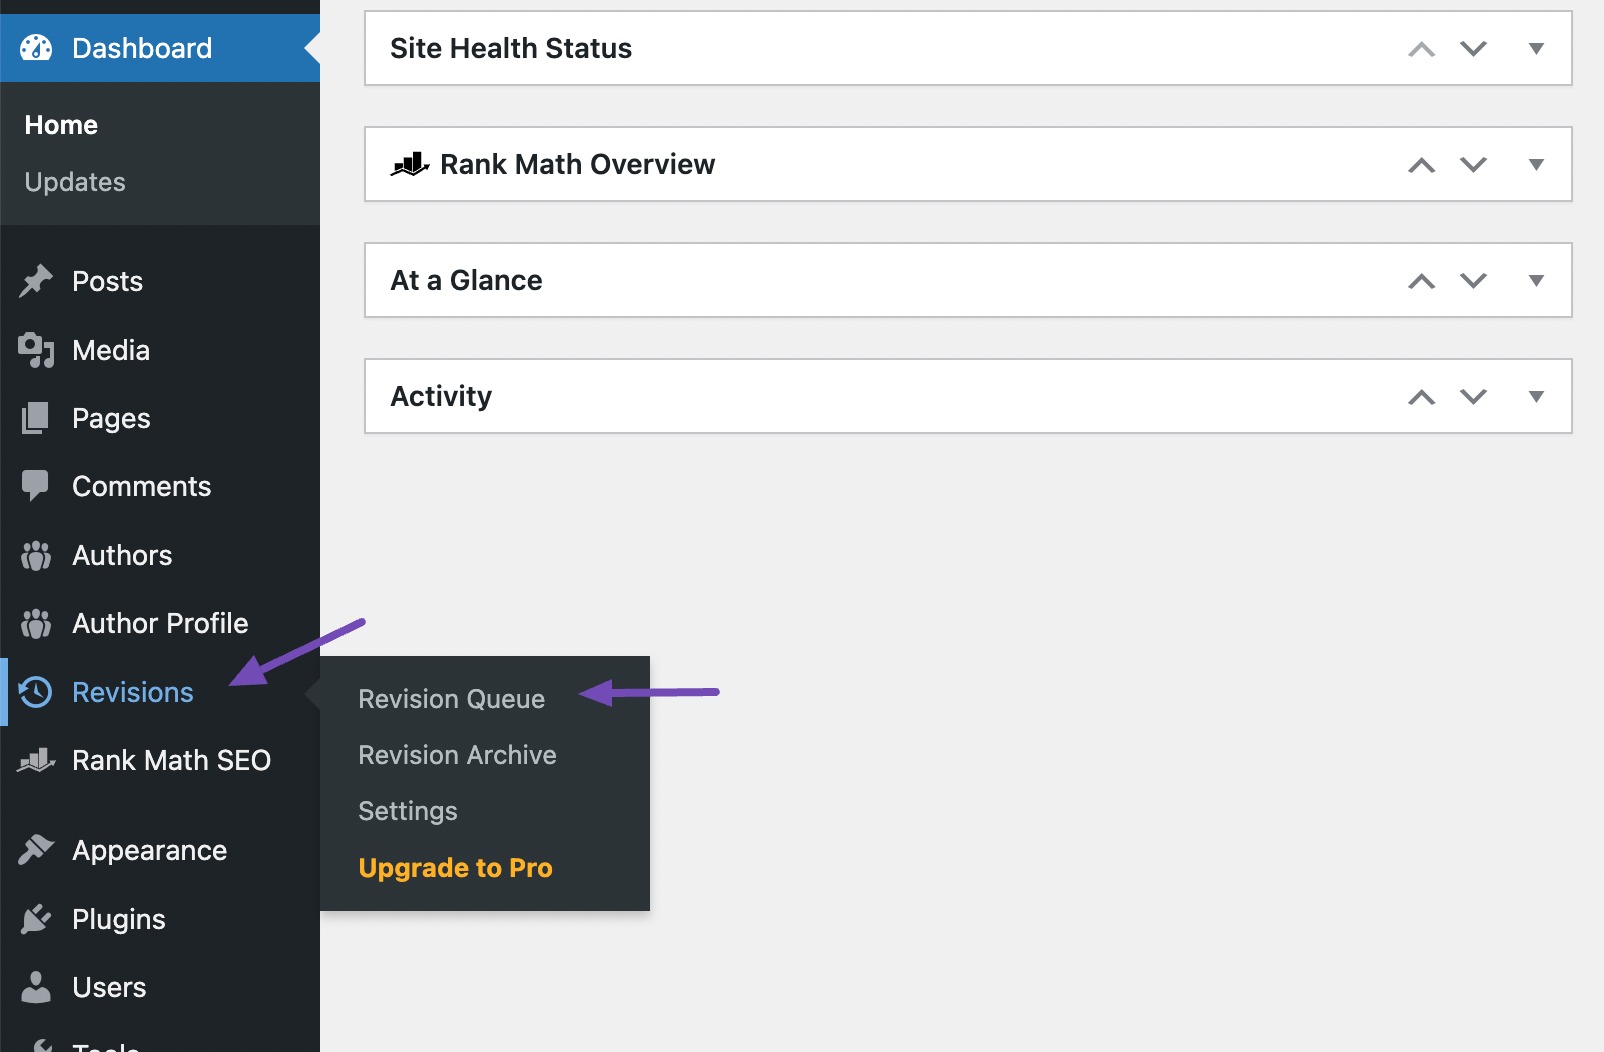
You can always check your scheduled revised posts by navigating to Revisions → Revision Queue from your WordPress dashboard.
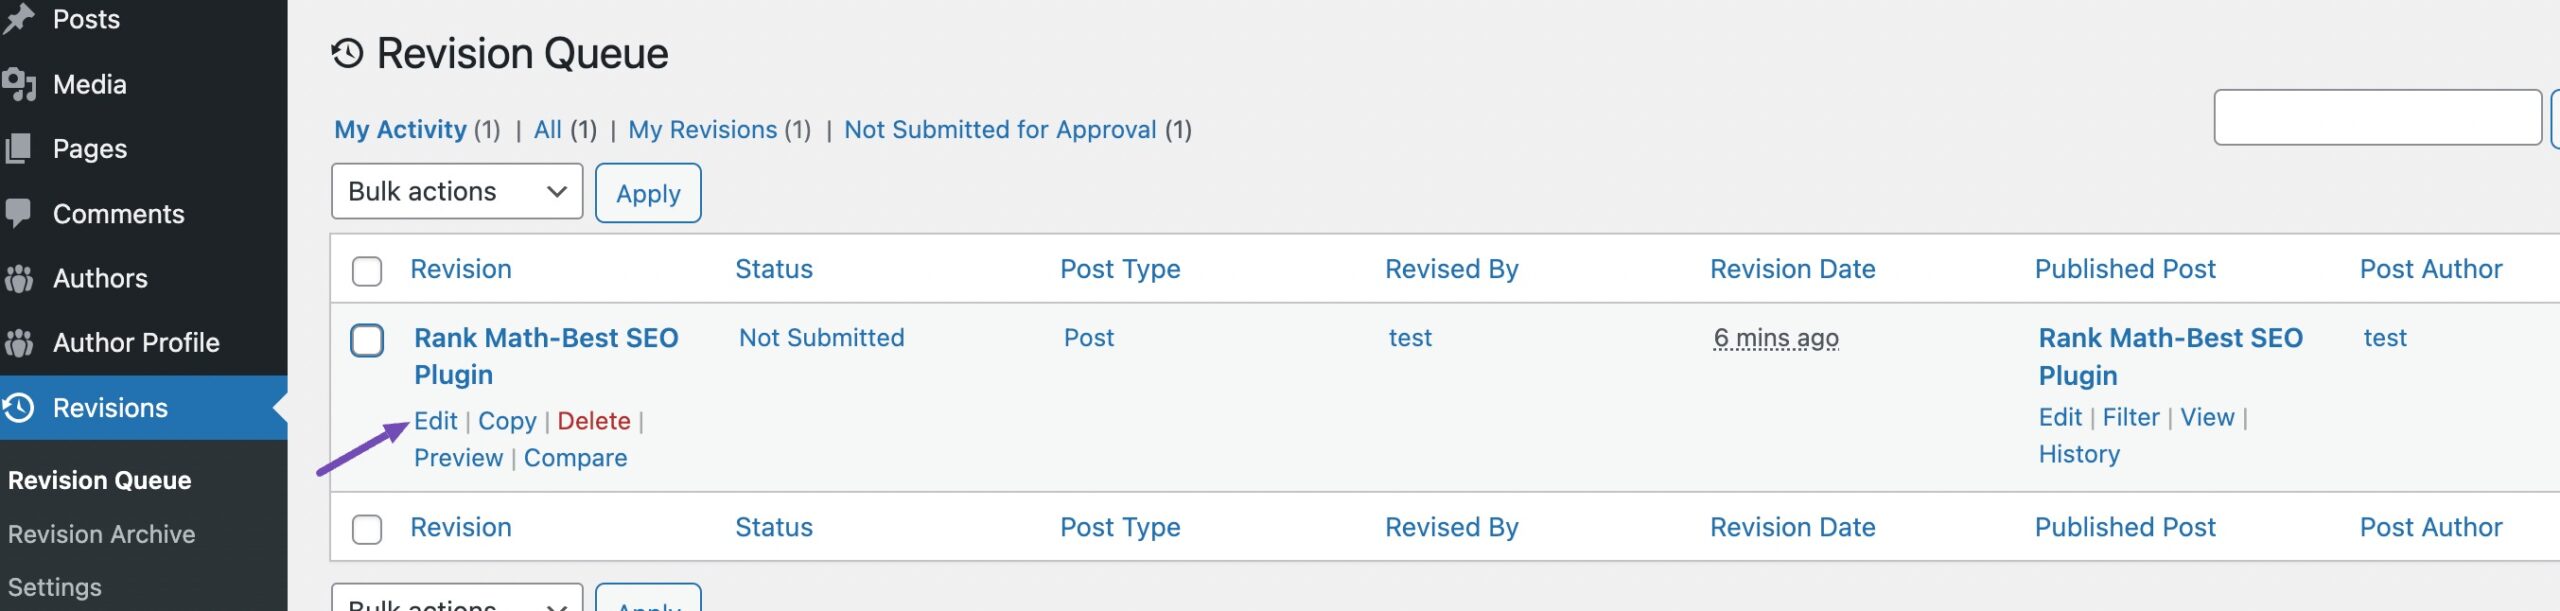
If you want to make additional changes to your post, click the Edit link, as shown below.
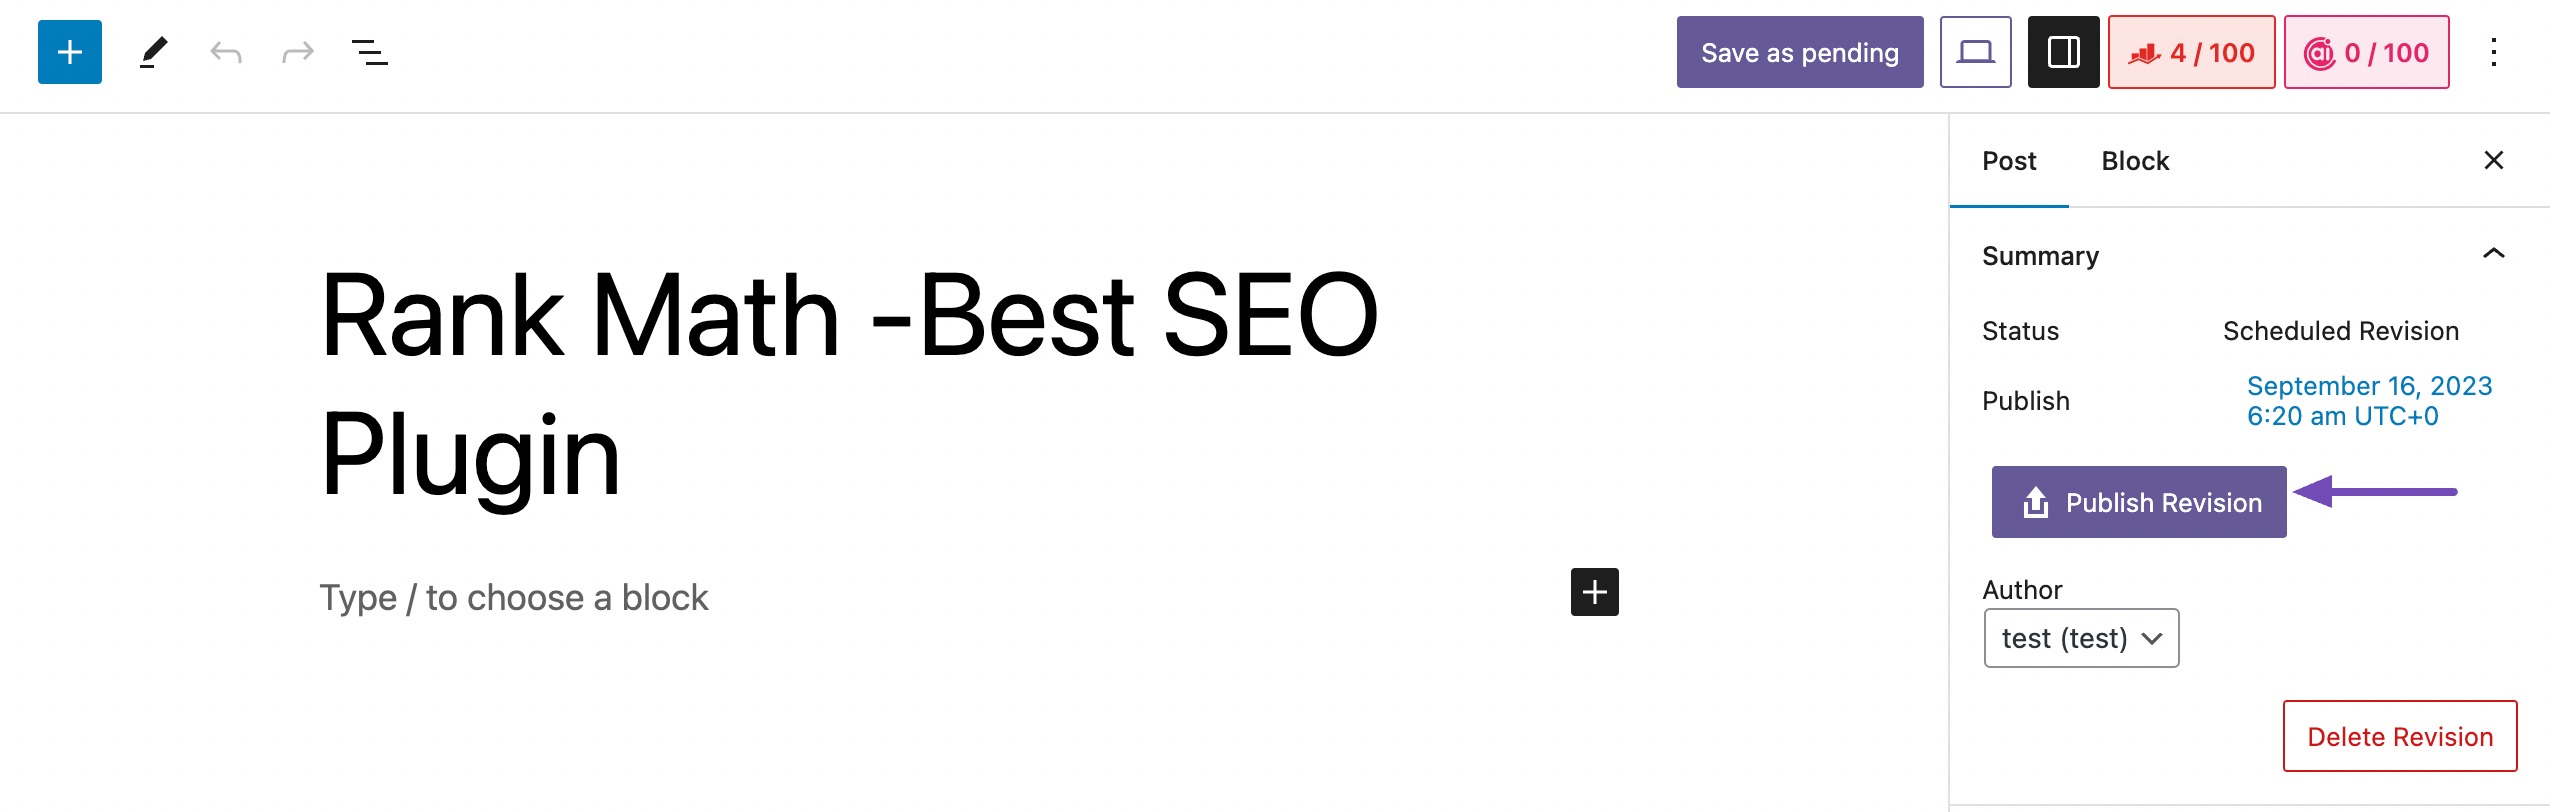
Once you’ve updated the post, click the Publish Revision button to save the changes.
3 Conclusion
Keeping your content fresh doesn’t have to be stressful or time-consuming. I’ve shown you how you can quickly schedule content updates in WordPress so your posts stay relevant without interrupting your publishing flow.
By planning ahead, you make sure your readers always see the most accurate version of your content, and you save yourself the hassle of making last-minute edits.
Now it’s your turn, try scheduling your next content update instead of editing on the fly. Once you get into the habit, you’ll find it’s one of the simplest ways to keep your site up-to-date and running smoothly. If you like this post, let us know by tweeting @rankmathseo.