If you’ve ever seen a WordPress post with a name at the top that looks something like this: “Jessica Miller wrote this post.” then you know the author name of a WordPress post. However, some blog owners may want to remove the author’s name displayed next to their posts.
WordPress does not provide an option to remove the author name by default, but there are ways to remove the author name from your WordPress posts. You can manually remove the author’s name, use a plugin to remove it from your post or remove it with the help of CSS code.
In this article, we’ll show you to remove the author’s name using both methods. So without further ado, let’s get started.
Table Of Contents
1 Why to Remove the Author Name in WordPress?
The metadata for the author’s name is an important aspect of WordPress. It assists readers in learning more about the writer.
However, there are several instances where hiding or eliminating the author’s name is advantageous.
If multiple members contributed to a blog post, applauding a single person would be unjust to the entire team. It would help if you then hid the name of the authors.
In another instance, you may have numerous contributors/freelance writers who contribute articles regularly, but you want your site to maintain a consistent style and voice.
Now, let’s look at the various methods to remove author names from WordPress.
2 How to Remove the Author Name in WordPress
Let us now discuss the methods to remove the author name in WordPress.
2.1 Remove the Author Name Using a Plugin
First, you need to install and activate WP Meta and Date Remover plugin. To do so, navigate to Plugins → Add New section of your WordPress dashboard. Search for WP Meta and Date Remover plugin, and install and activate it.

All meta information is automatically erased once the plugin is active. To erase the data, it employs two methods: CSS to hide it from the front end and PHP to remove it from the back end. The latter method implies that the metadata is no longer visible to search engines, and you can use either method.
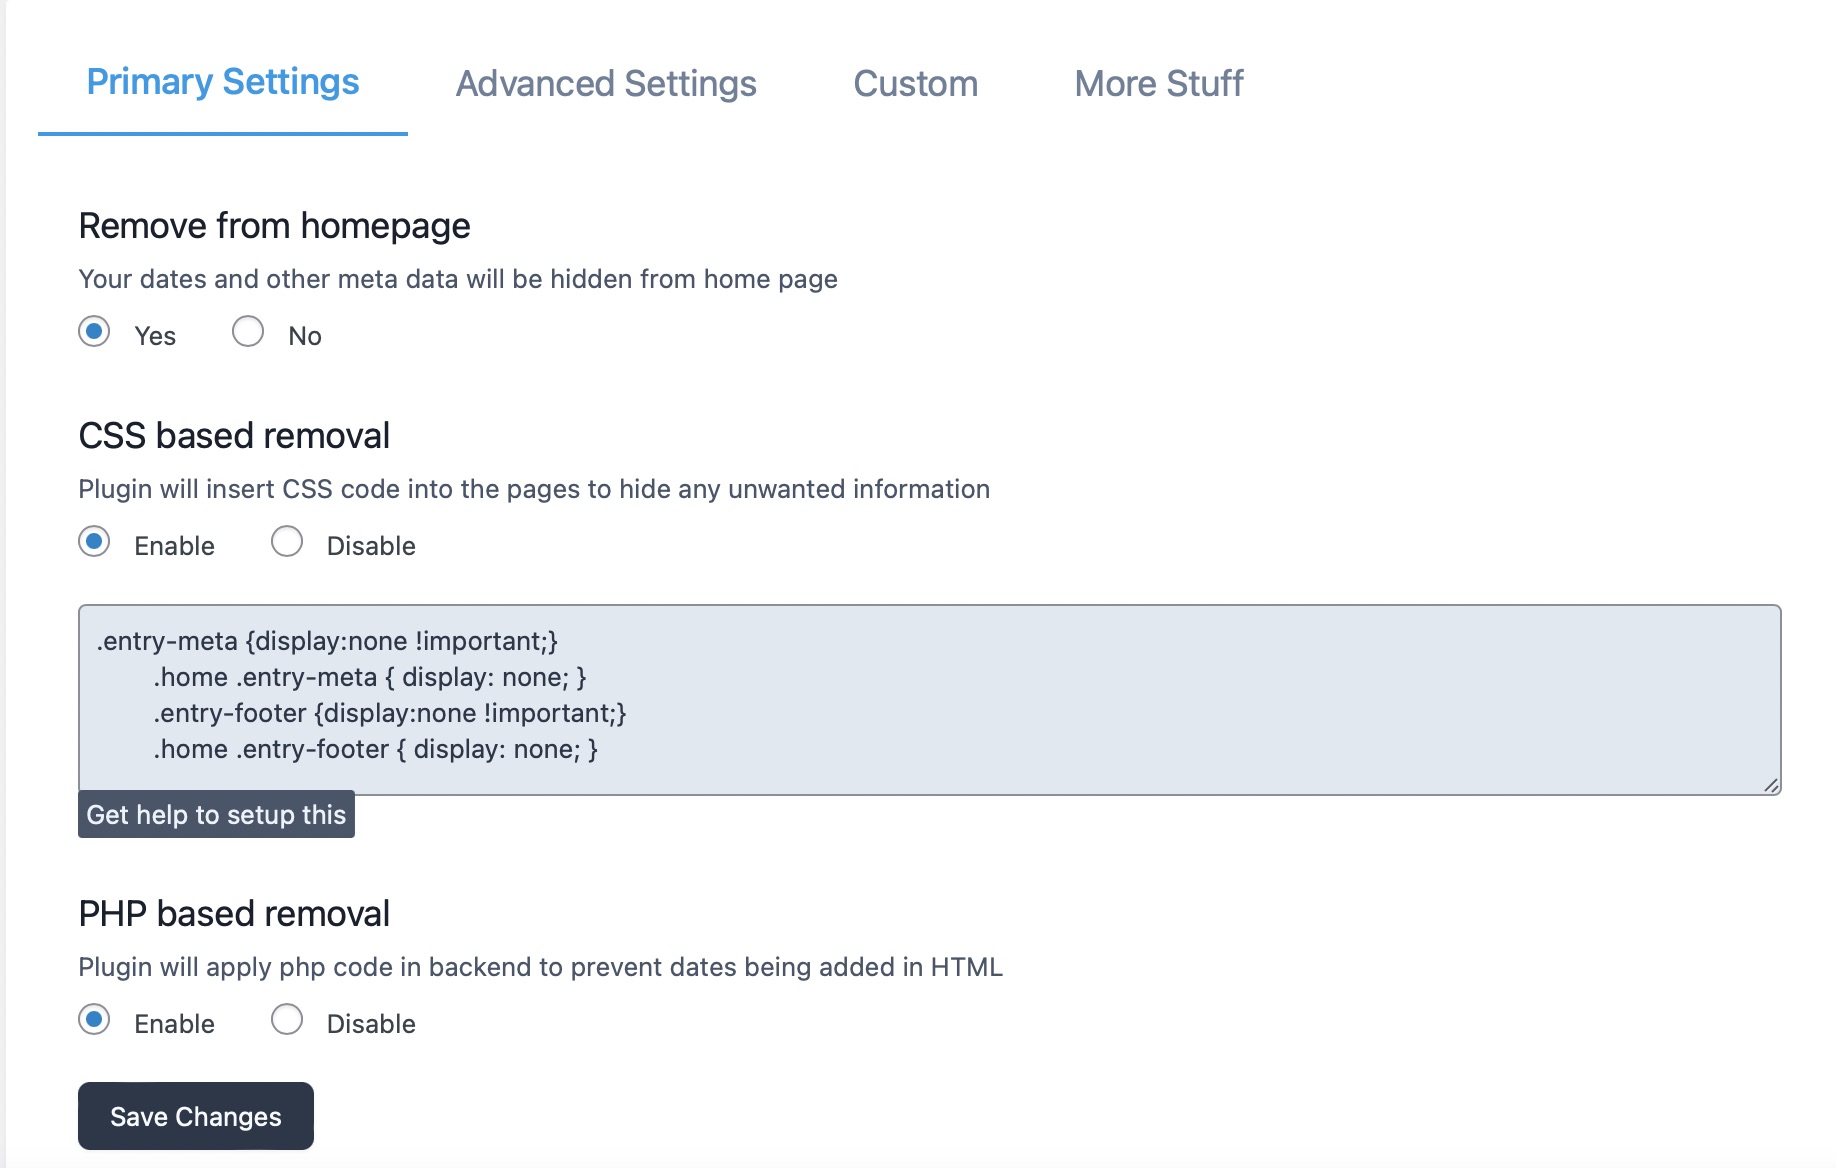
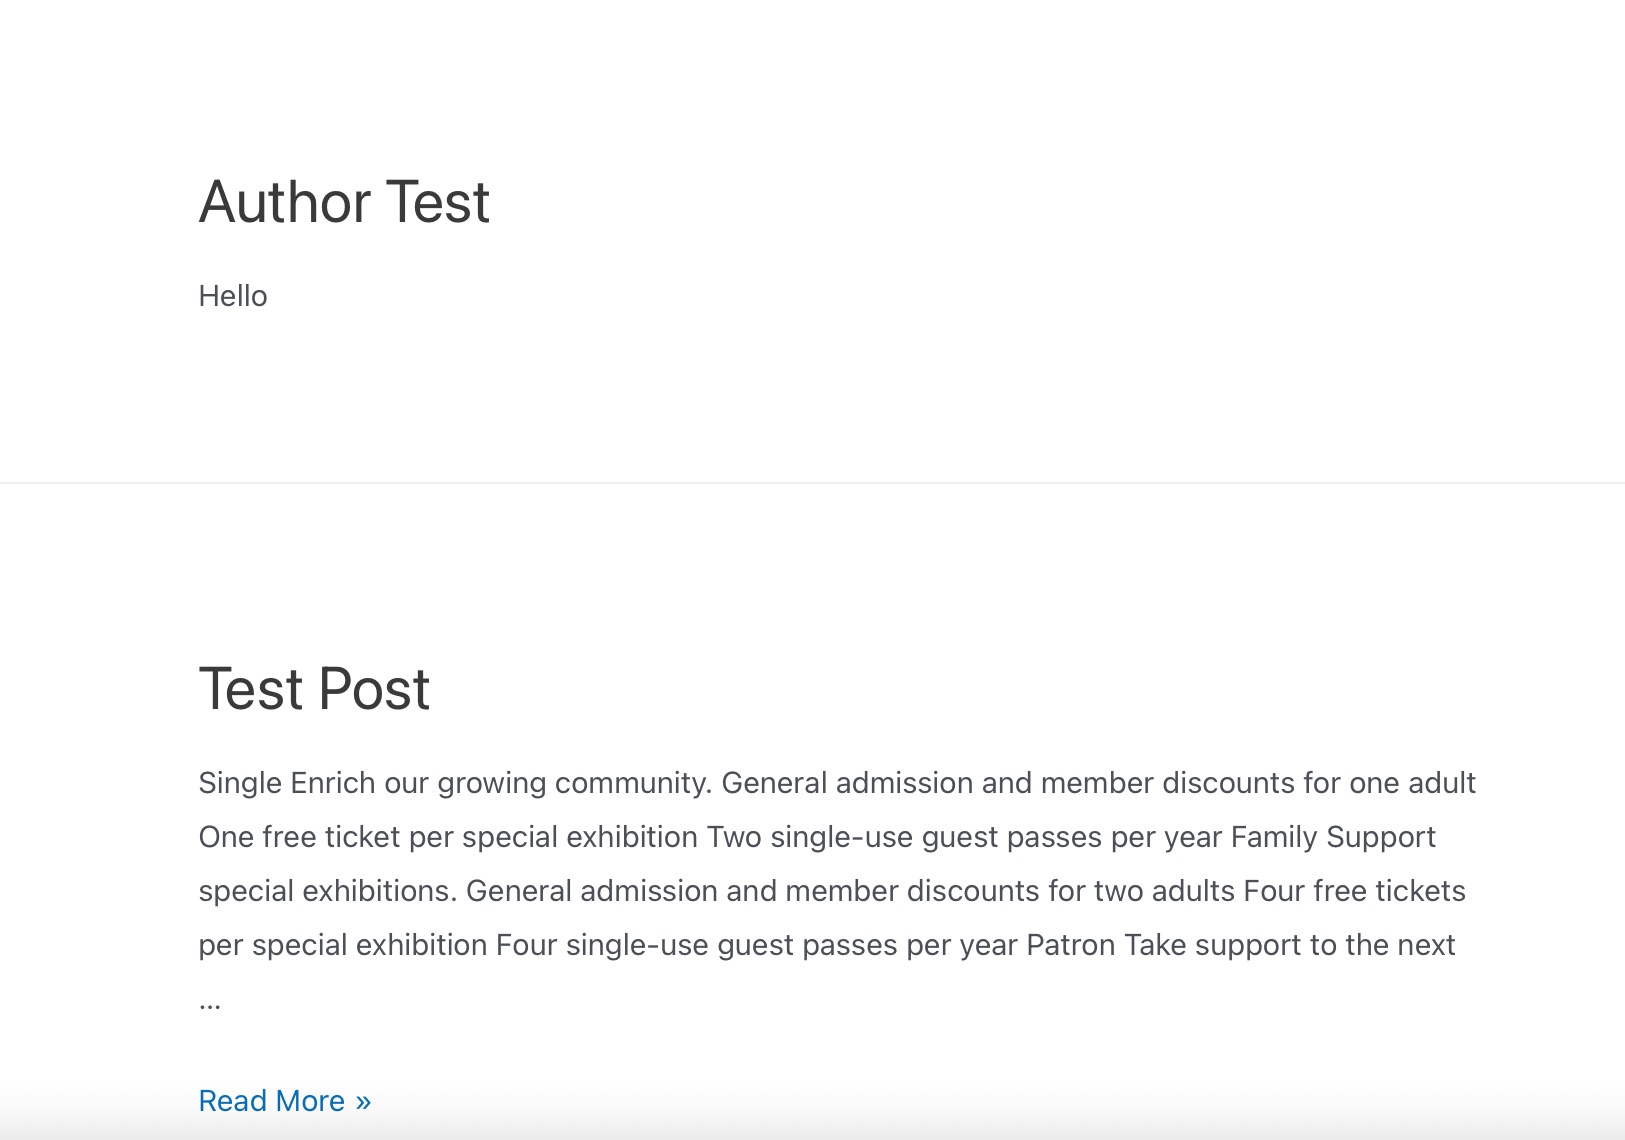
Click on the Save Changes button to save your settings. You can then visit your site and see that the author’s name has been removed.
2.2 Remove the Author Name from Schema Markup
Rank Math helps optimize author profiles by enabling an SEO meta box. If you want to remove the author, you may need to use a filter to remove the author schema. To do so, you need to add the following code snippet to your theme’s functions.php file.
/**
 * Filter to change the schema data.
 * Replace $schema_type with schema name like article, review, etc.
 *
 * @param array $entity Snippet Data
 *
 * @return array
 */
add_filter(“rank_math / snippet / rich_snippet_{$schema_type}_entity”, function ( $entity ) {
    if ( isset( $entity['author'] ) ) {
        unset( $entity['author'] );
        return $entity;
    }
    return $entity;
});
Please note you need to change the {$schema_type} to the object type you wish to modify.
For example, if you wish to change the {$schema_type} object to an article, the above code will look as shown below.
add_filter(“rank_math / snippet / rich_snippet_article_entity”, function ( $entity ) {
    if ( isset( $entity['author'] ) ) {
        unset( $entity['author'] );
        return $entity;
    }
    return $entity;
});
2.3 Using a Generic Author Name
Using a generic, non-revealing name instead of fully eliminating the author’s identity from your blog entries is sometimes a preferable option. This method is particularly advantageous for articles authored by a group of people, such as an editorial team or freelancers, who have a distinct and consistent writing style. Maintaining the same writing style makes the absence of a particular author less noticeable.
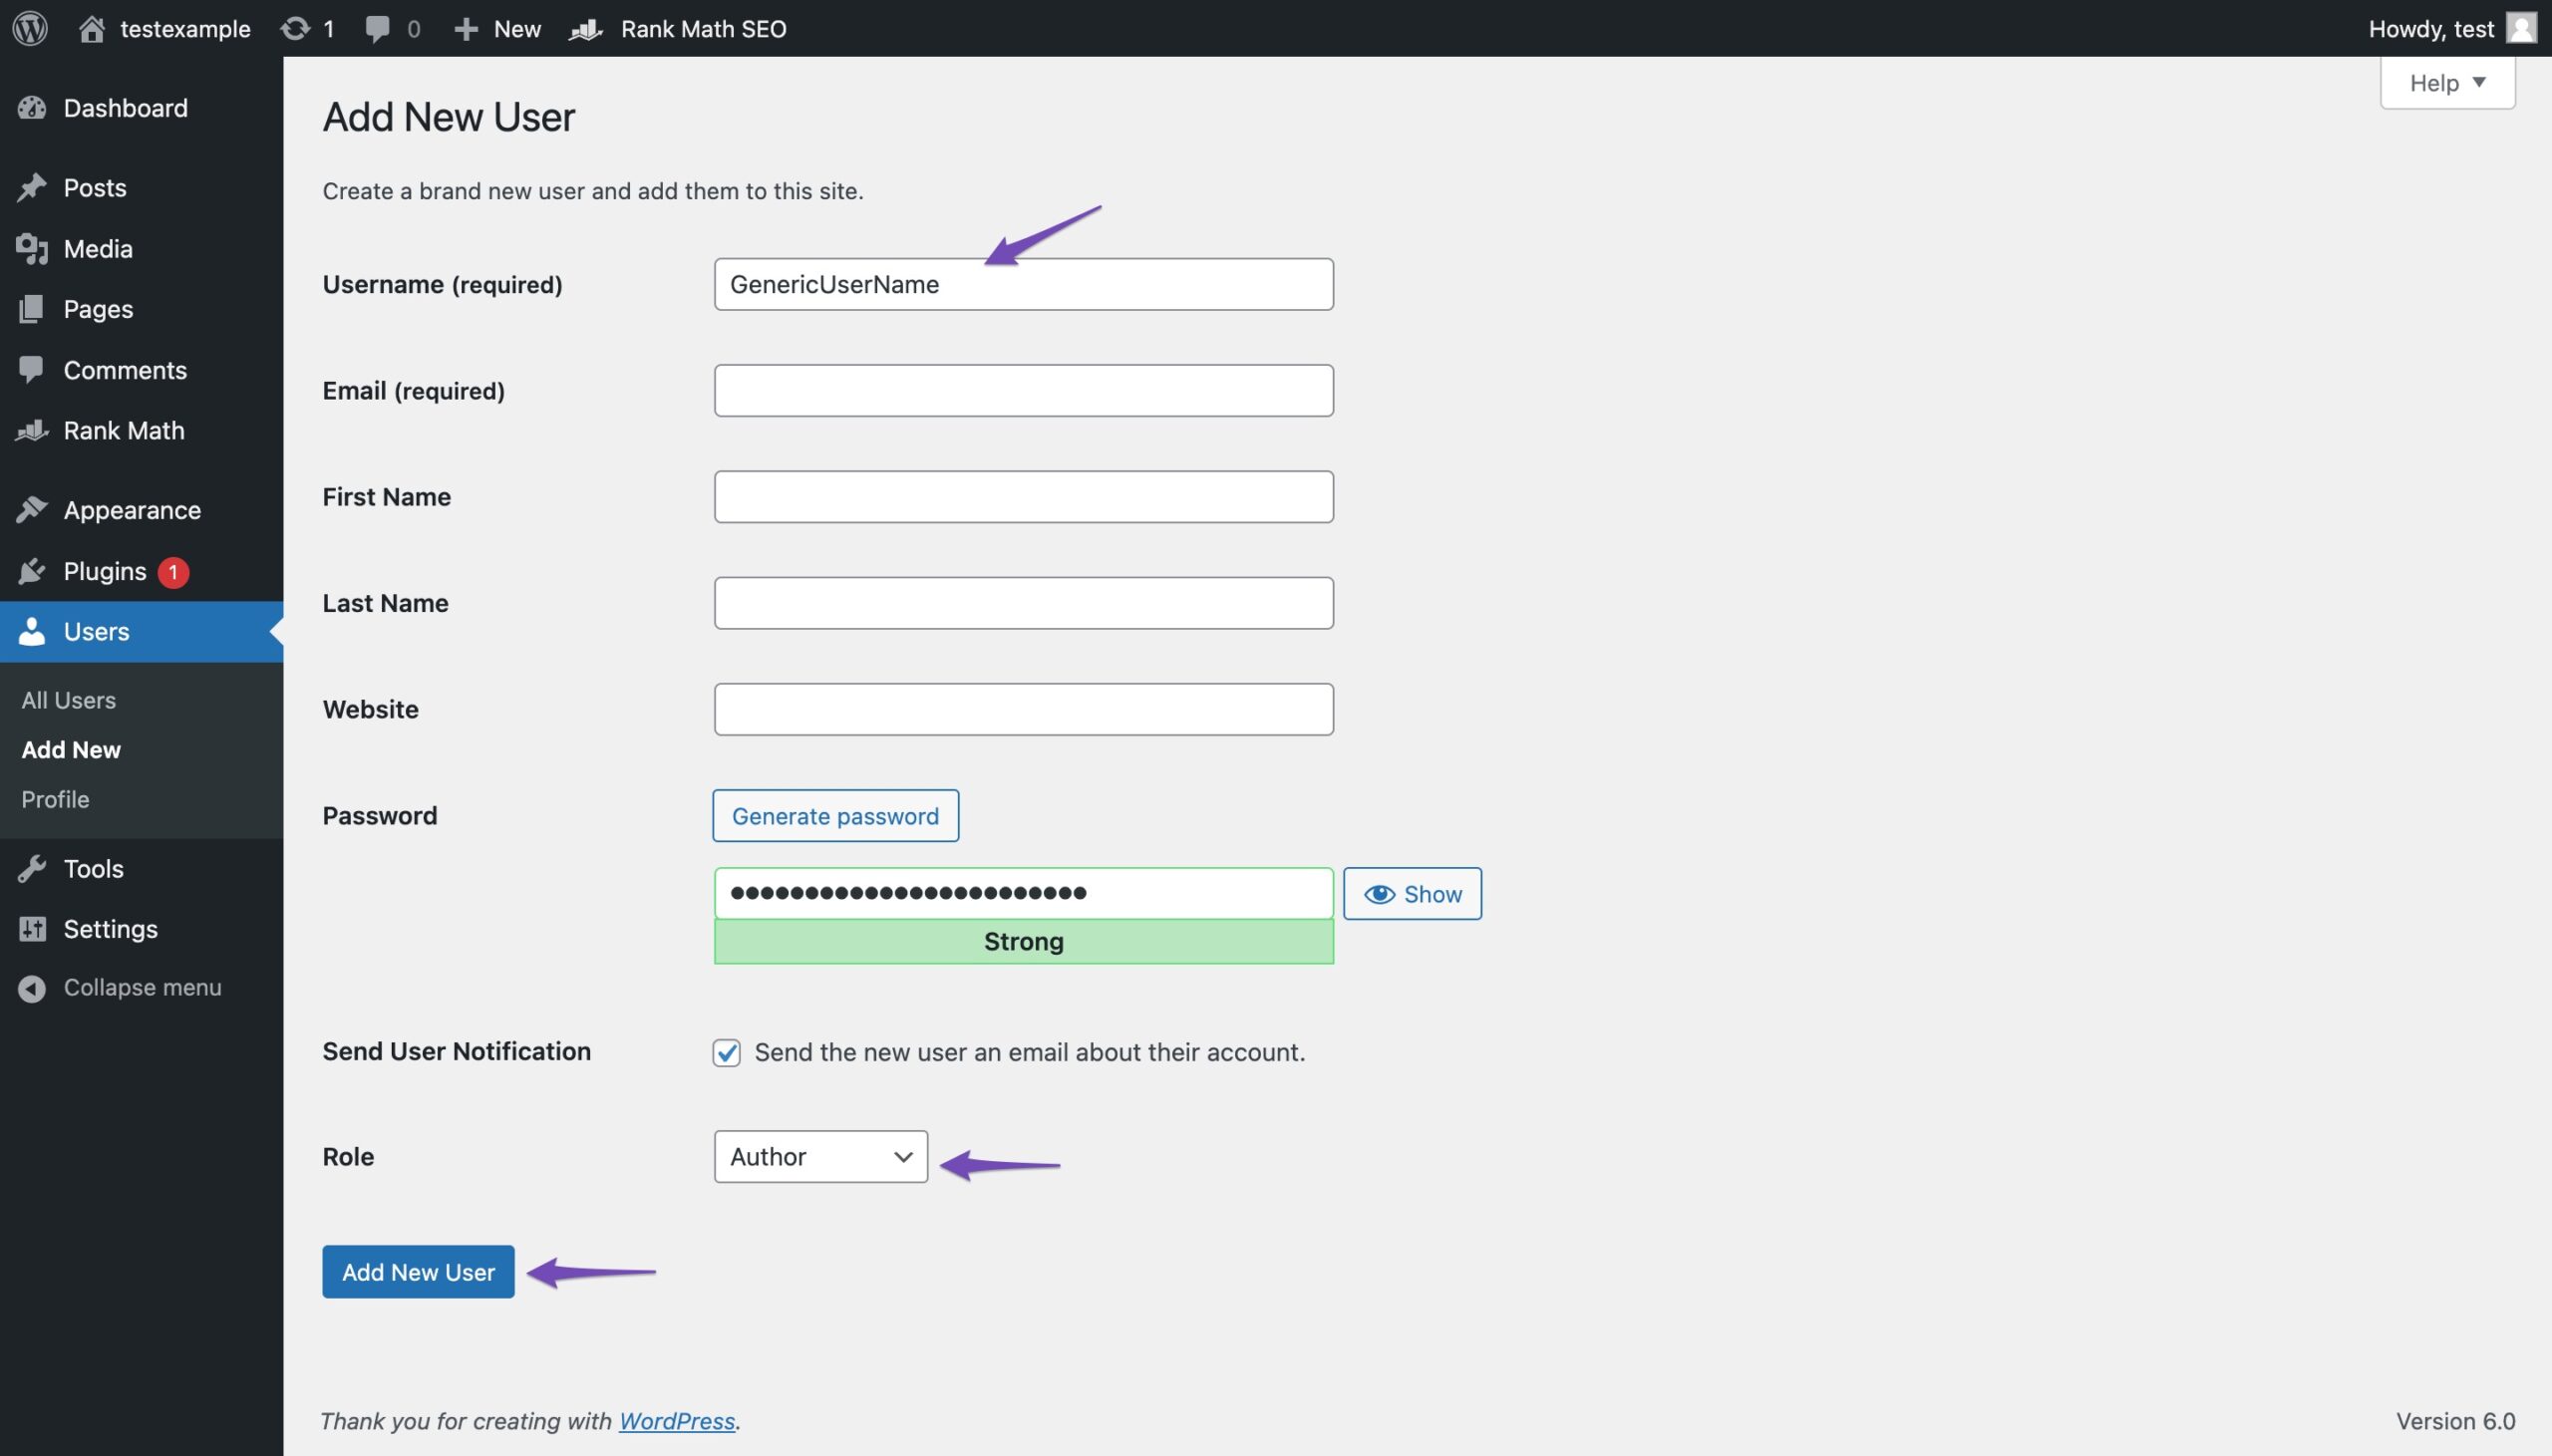
To add a generic name, navigate to Users → Add New from your WordPress dashboard. Create a new username and fill in the required details you wish to add, and choose the user role. Click on the Add New User button.
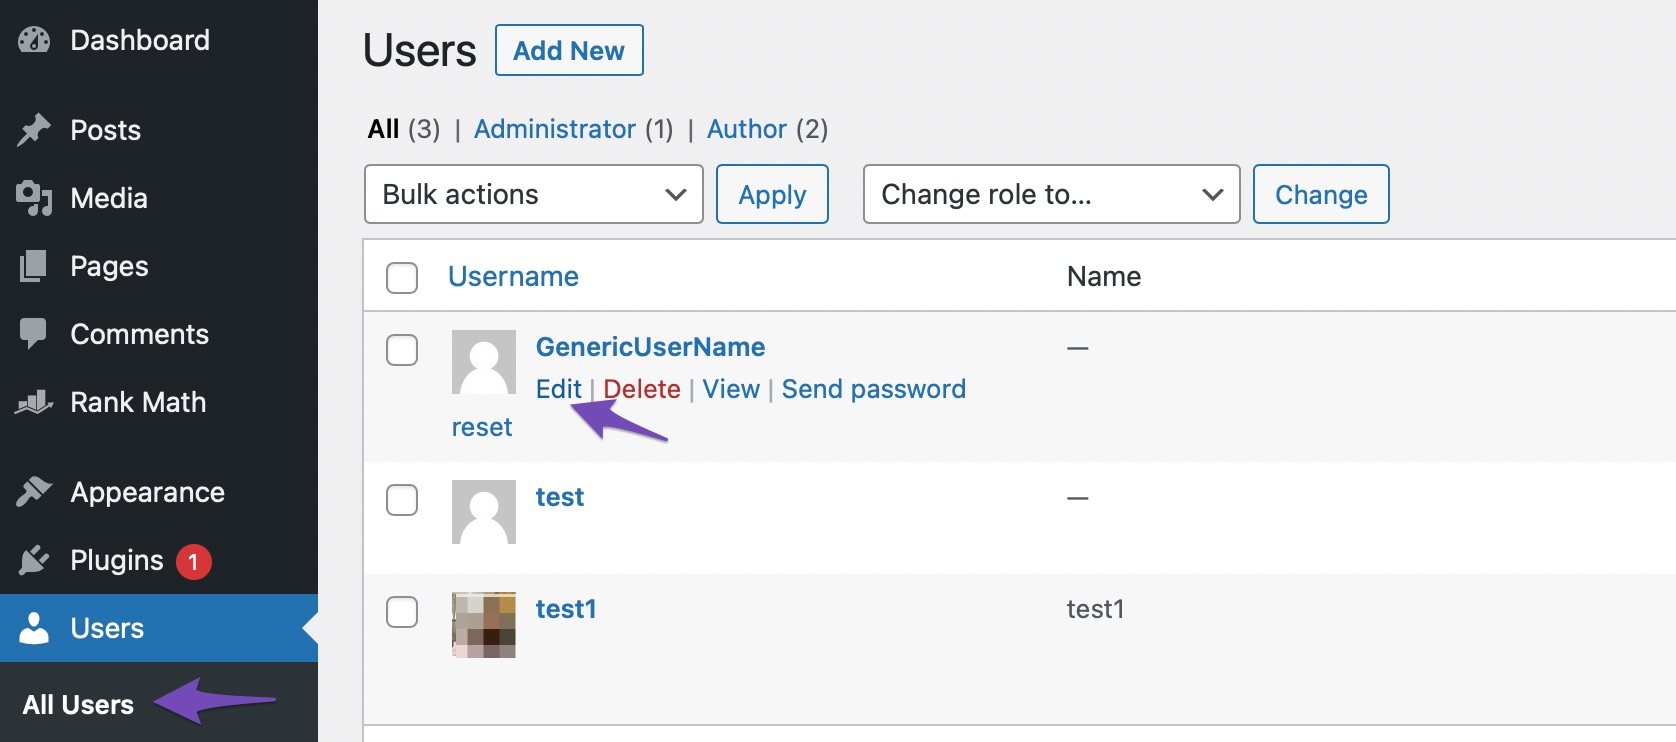
Next, navigate to Users and click on All Users. Click on Edit next to the new username you just created, as shown below.
Enter the Nickname you want to display on your posts, for example, the editorial team. Then, select the nickname you created from the Display name publicly as a drop-down menu.
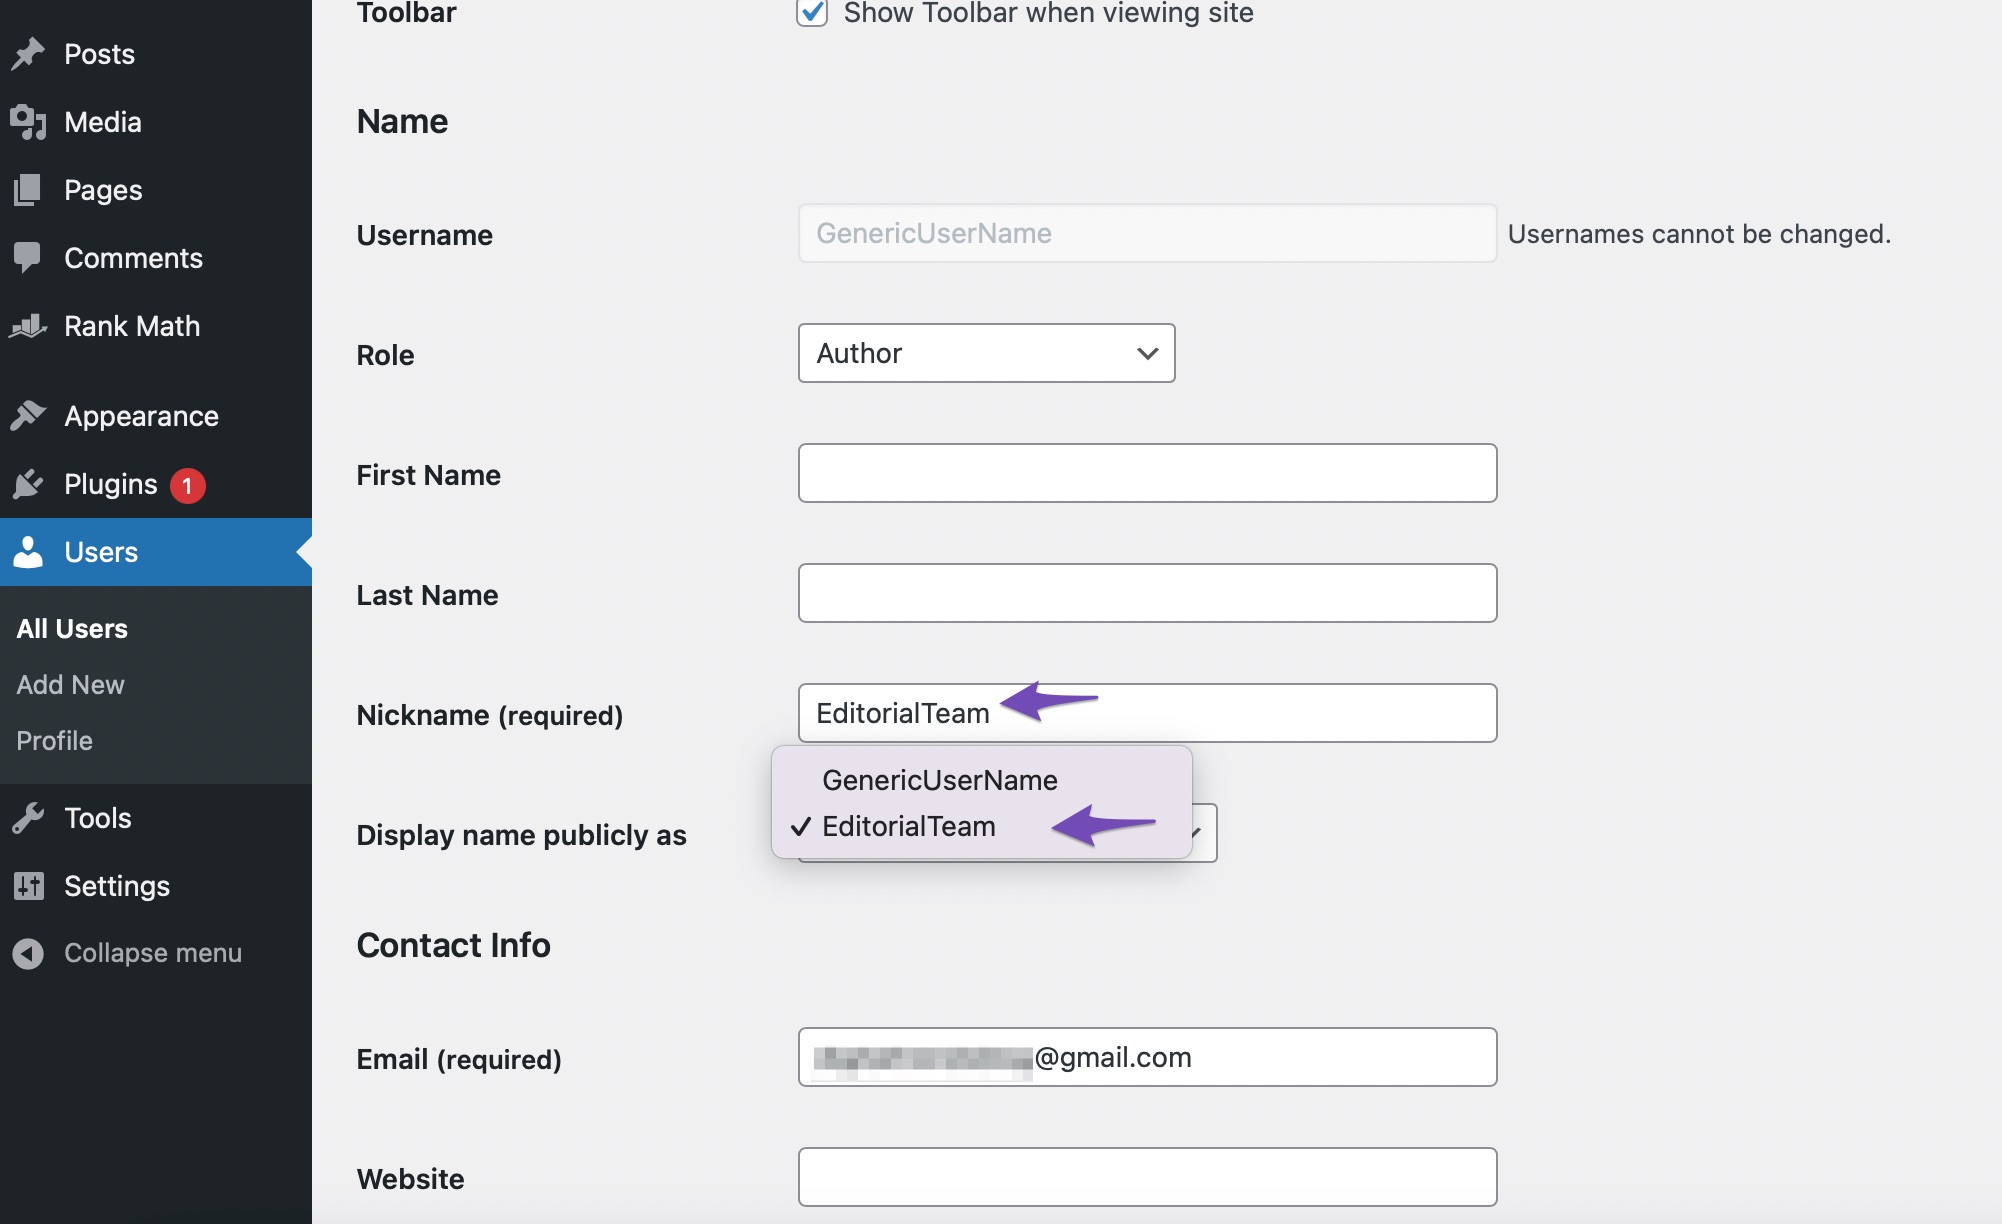
Once done, click on the Update User button to save your changes. You can now use this generic name for your posts.
2.4 Manually Remove the Author Name
This method requires you to edit WordPress theme files. Doing so might require some coding knowledge and WordPress familiarity.
Note: Before making any changes, ensure you have a backup of your theme or child theme. If something goes wrong, you can swiftly undo the changes.
To manually remove the author name, you must locate and delete the code responsible for displaying the author’s name in your theme files. The most common locations to look for this code are single.php, content.php, archive.php, and index.php files.
In some cases, it’s not possible to locate the author’s name in the current template. If that is the case, then look for the codes in the template-tag.php or functions.php files.
For example, the Cenote theme uses the template-tags file for the author information and uses the cenote_posted_by() function as shown below.
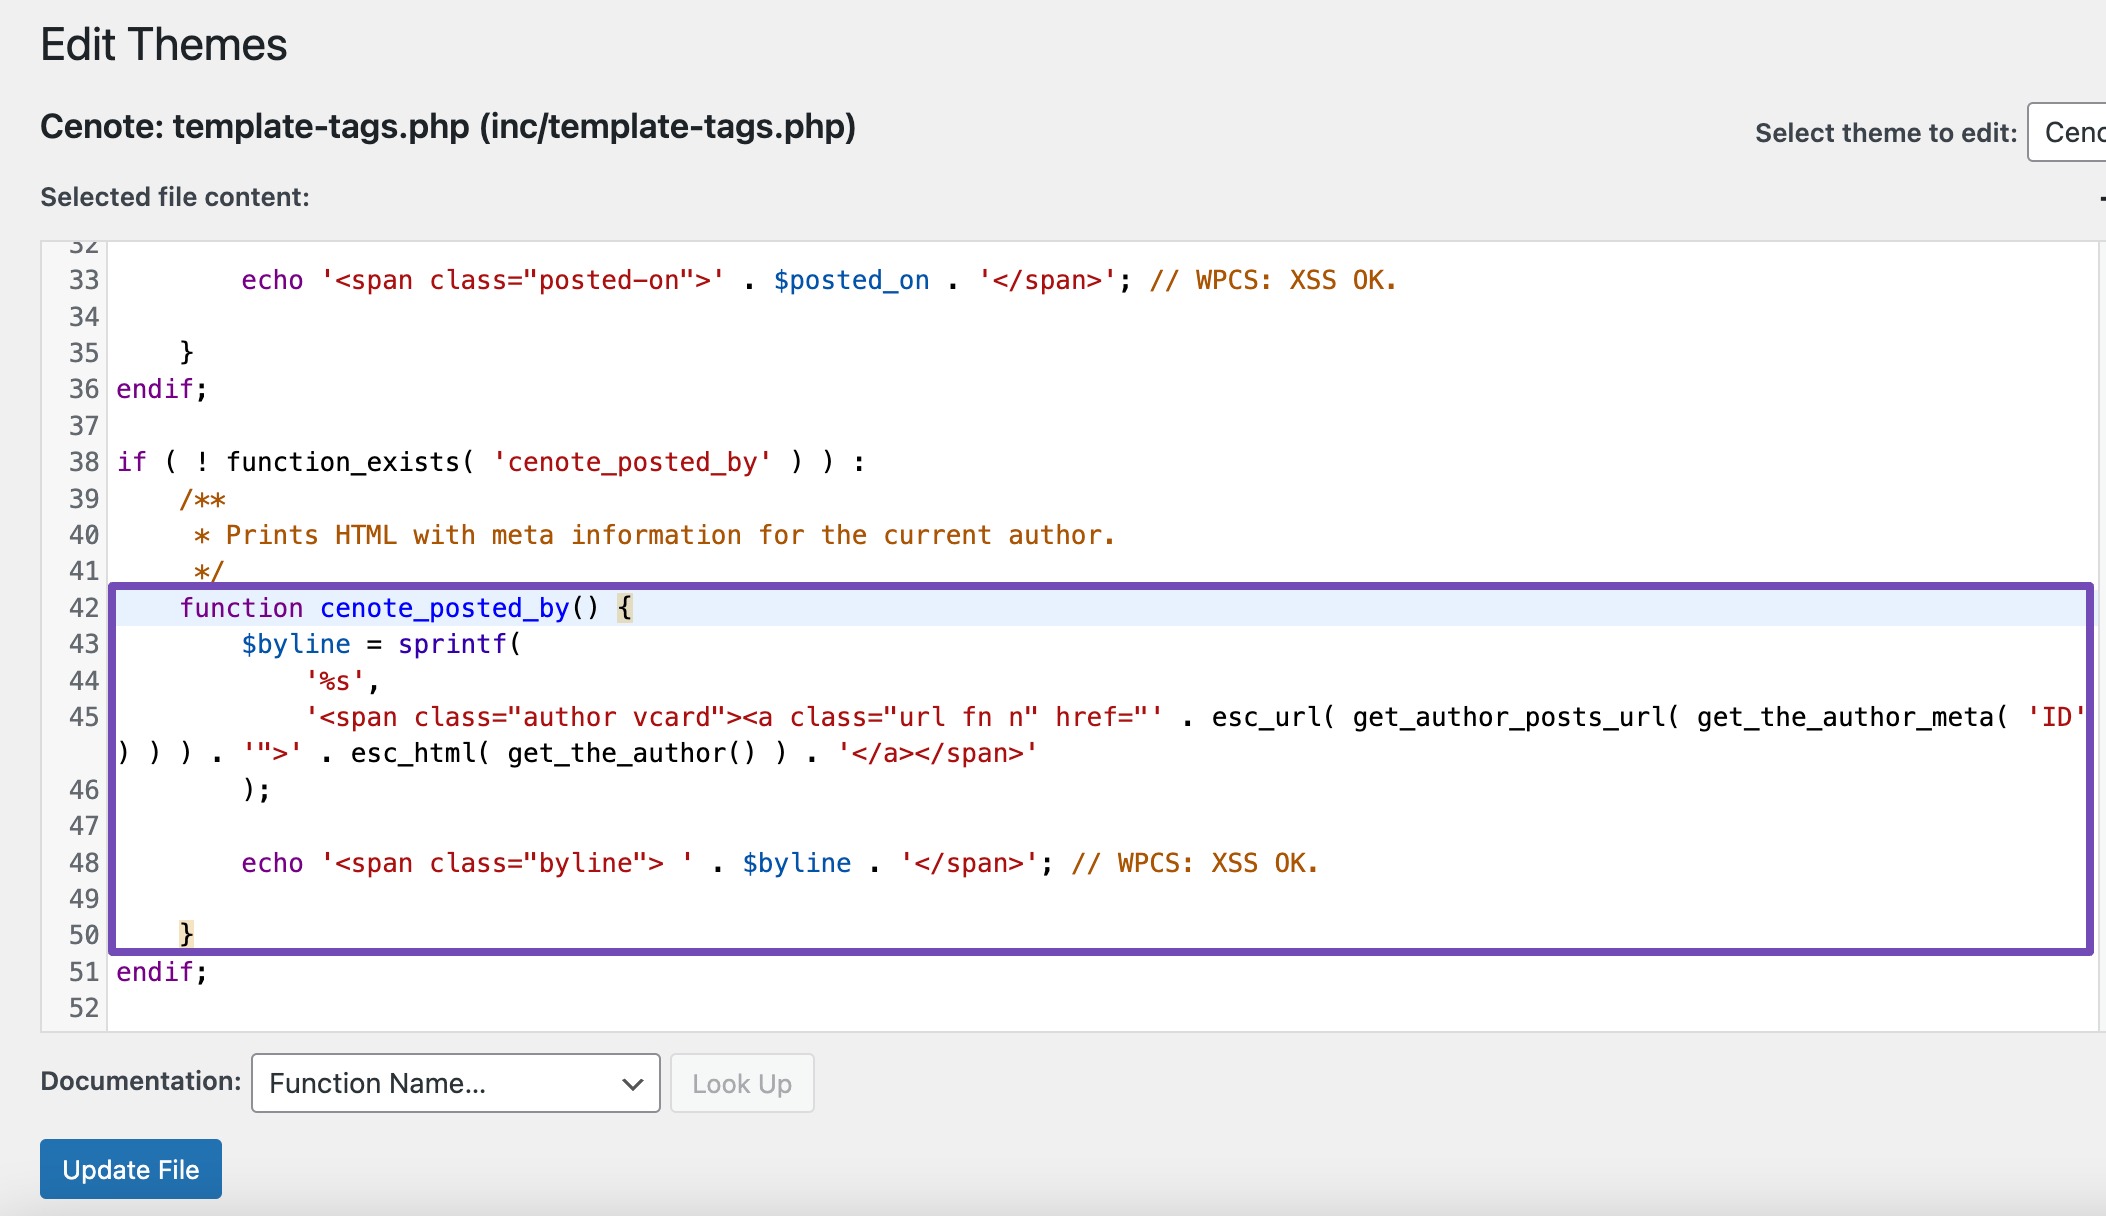
To remove the author’s name, you need to replace it with the following code.
function cenote_posted_by() {
}
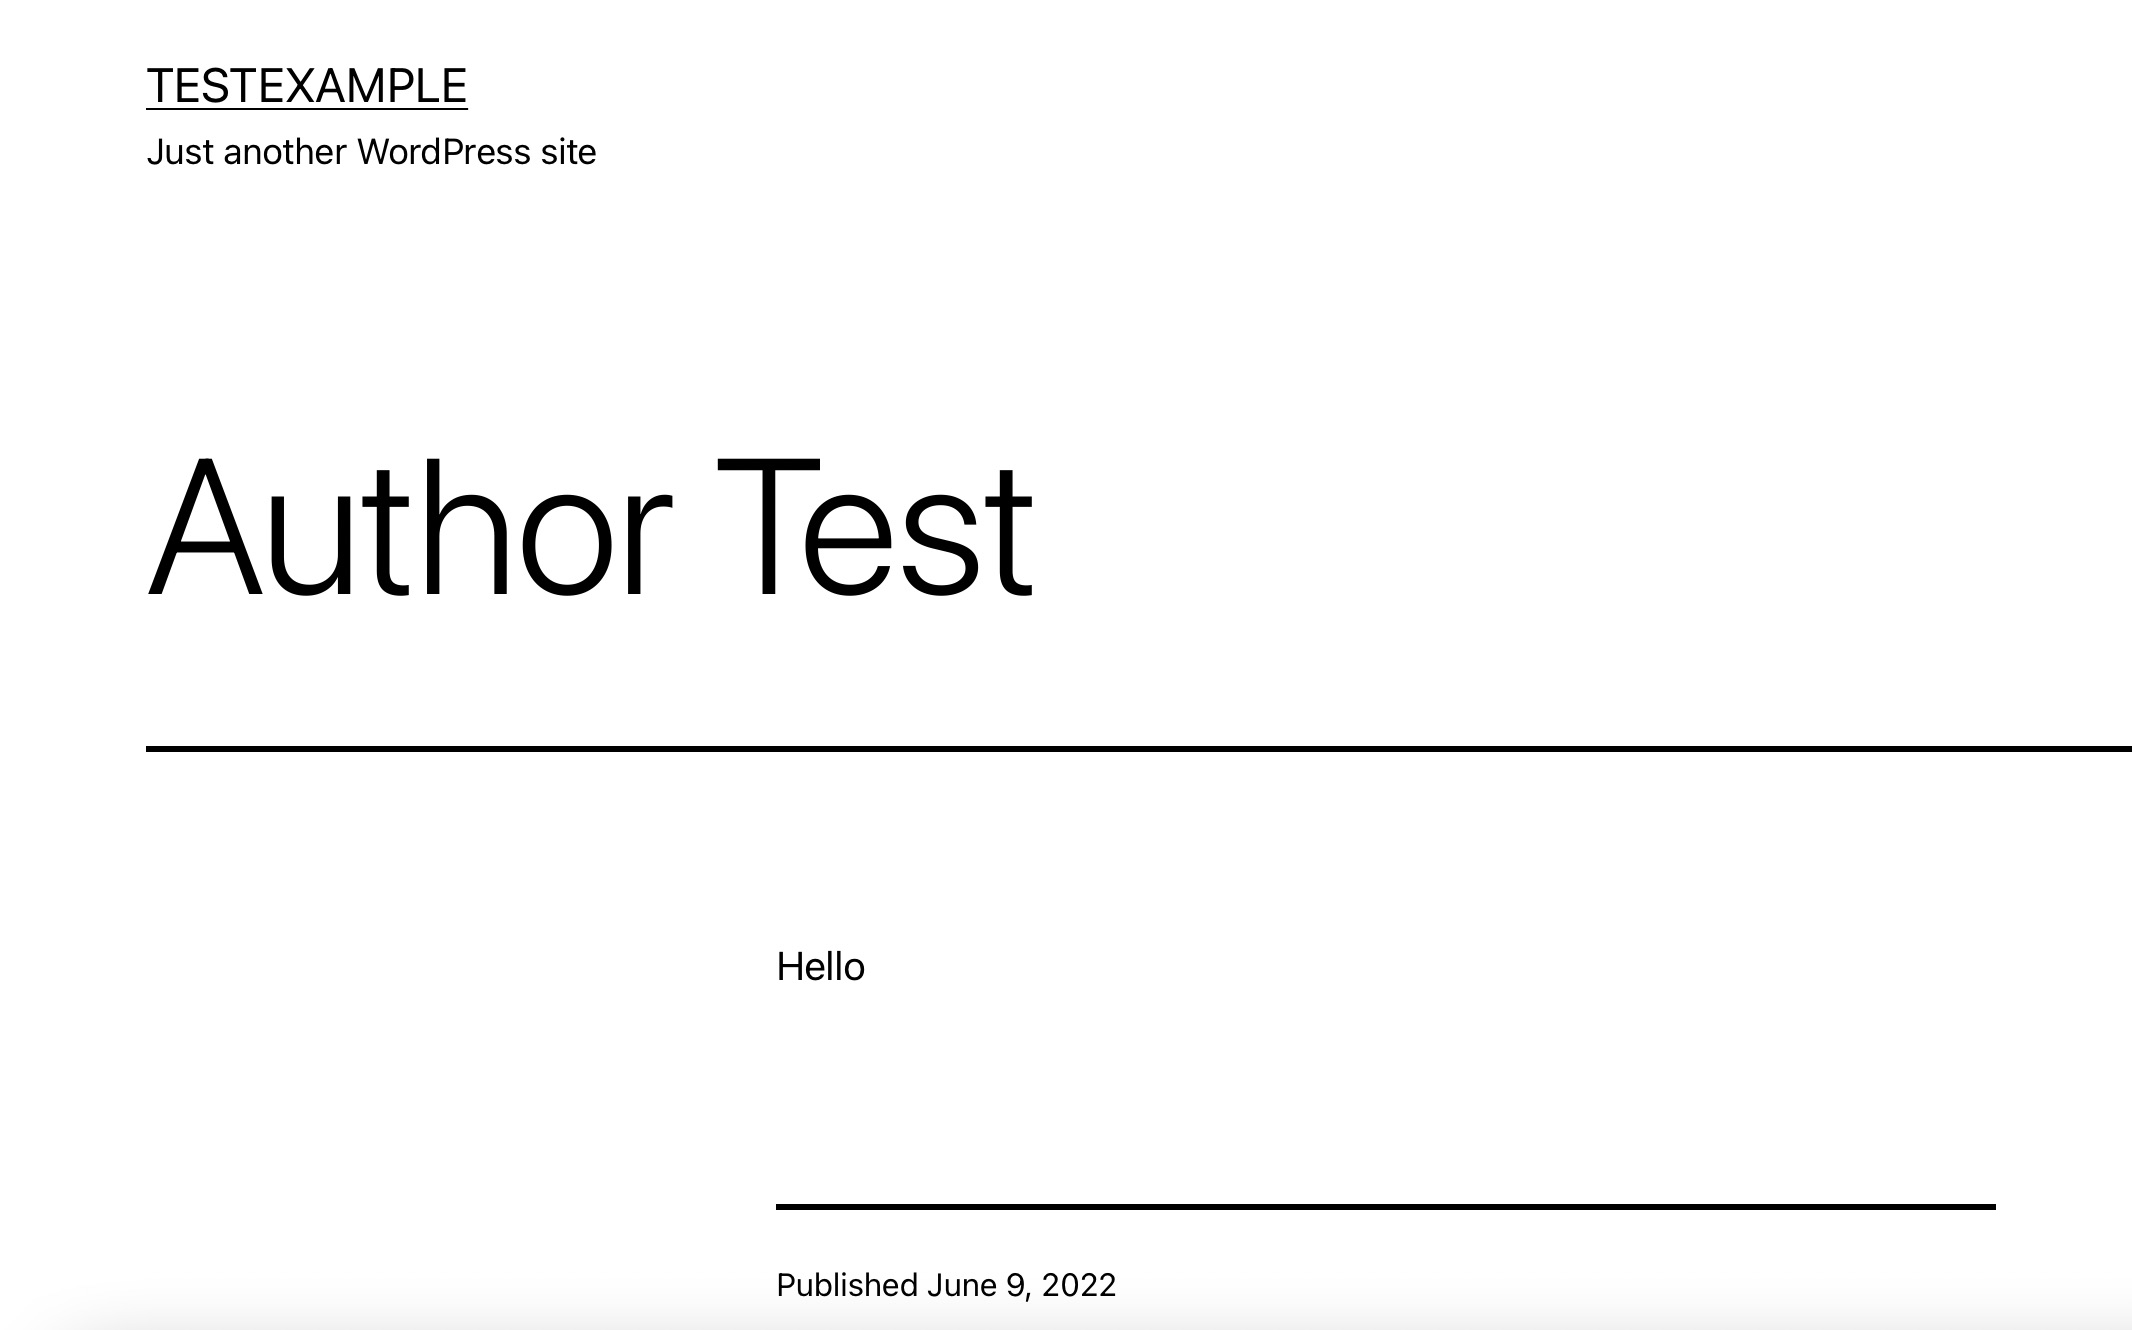
Click on the Update File button to save your changes. You can now visit your site to see the changes applied.
2.5 Remove the Author Name Using CSS Code
If you have some coding knowledge, you can add CSS code and remove the author’s name from your posts. To do so, navigate to one of your posts, right-click on the author’s name and click on the Inspect Element option.
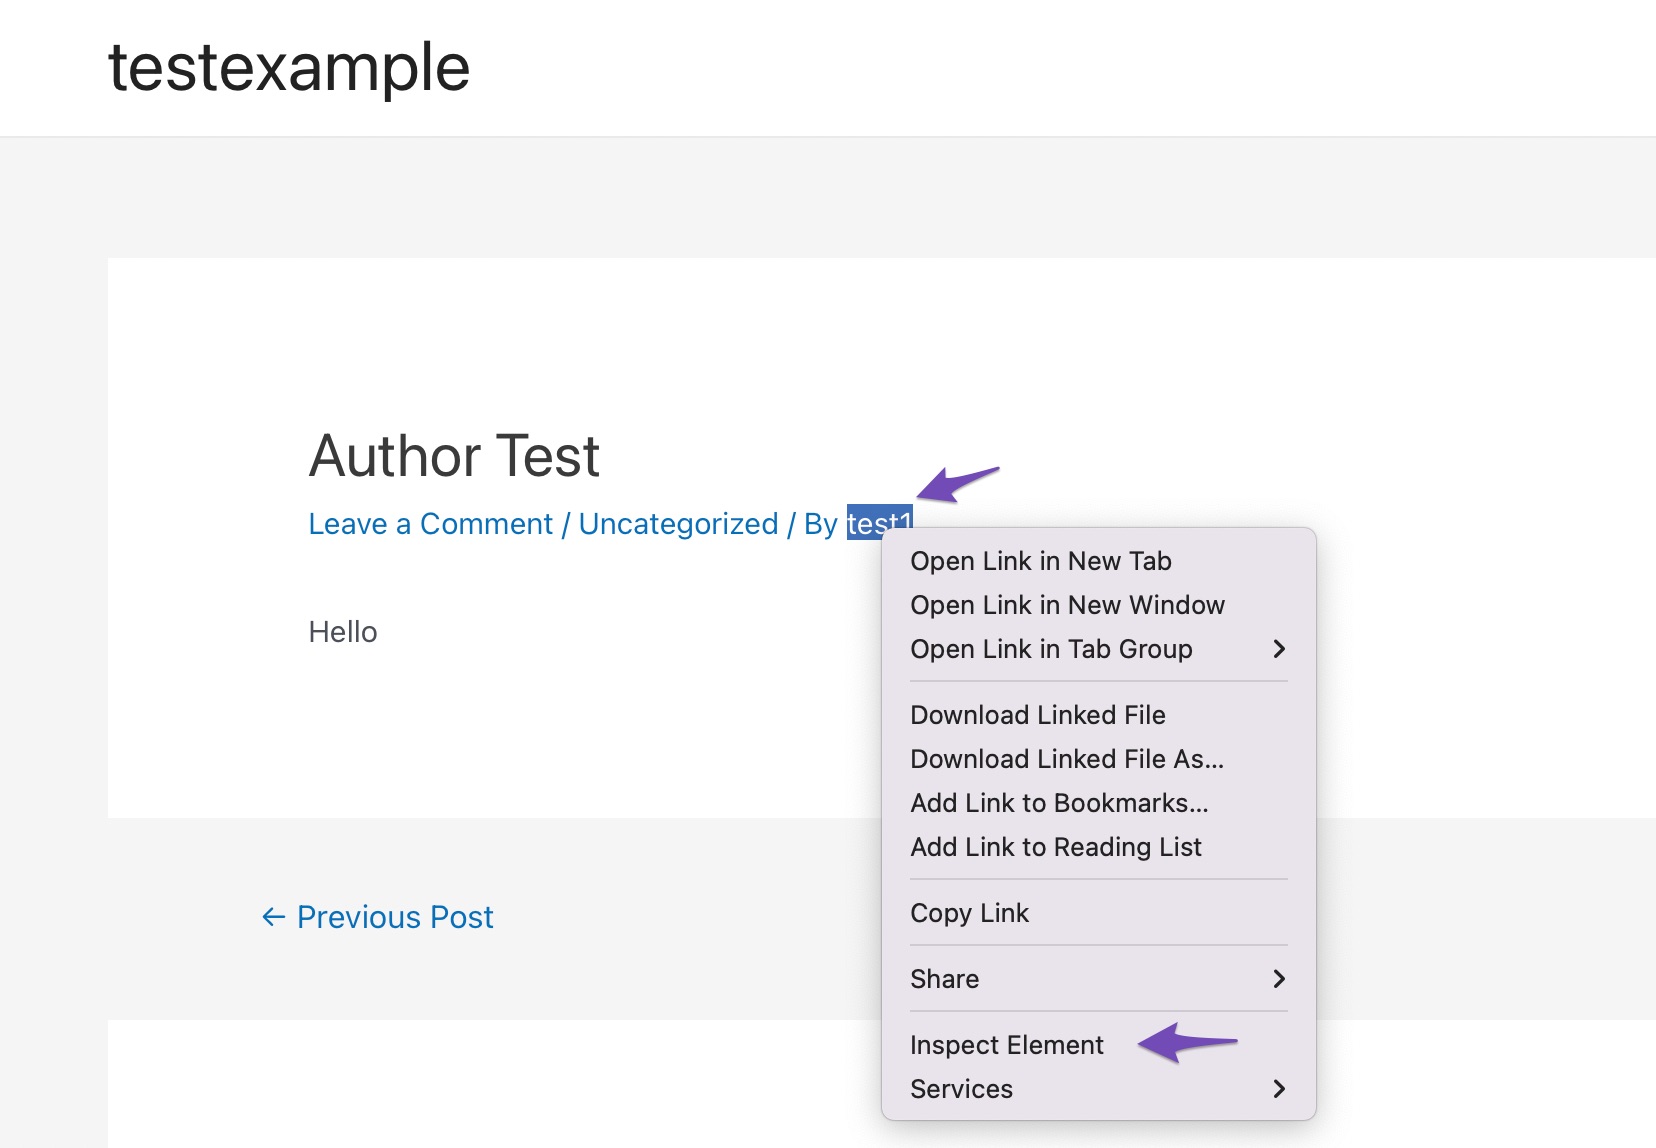
Locate the HTML element that encompasses both the author name and the By: label in the Elements tab. Hover over different HTML elements on the page until the one that contains both By: and the author’s name is highlighted.
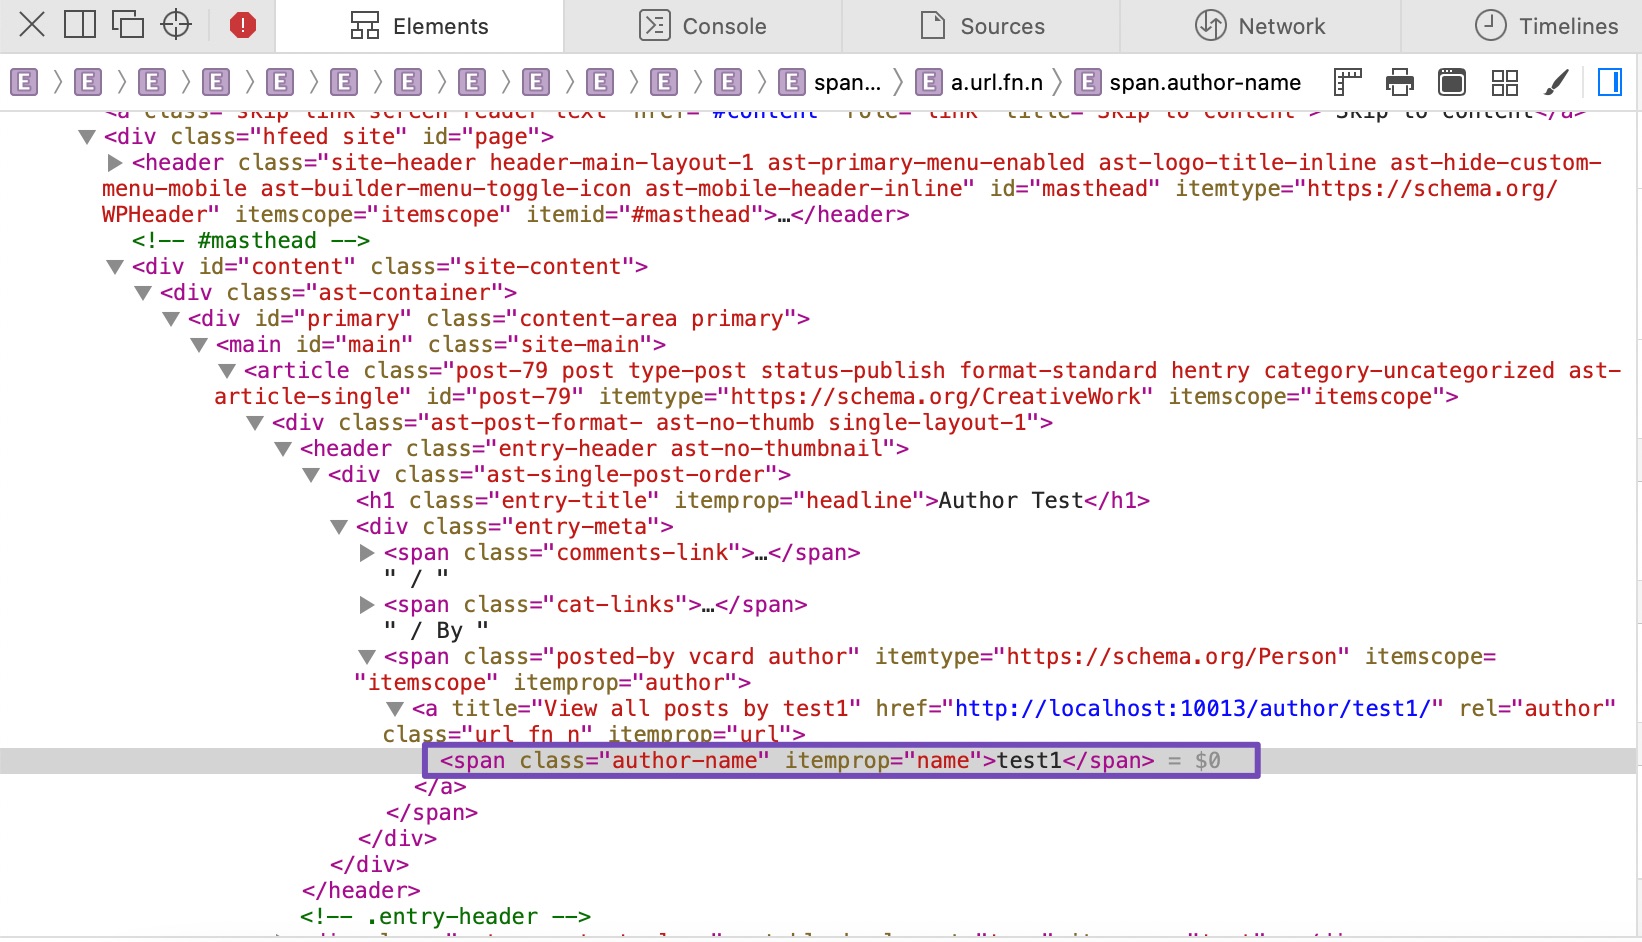
The relevant wrapper element in the above screenshot is a div with the class author-name. To hide your author and the By: line in CSS, all you have to do is apply the display: none; rule to the proper CSS selector. Add the following code snippet to remove the author’s name.
.author-name
{display: none;}
Once you’ve created your code, navigate to Appearance → Customize → Additional CSS. Add the above code snippet and click the Publish button.
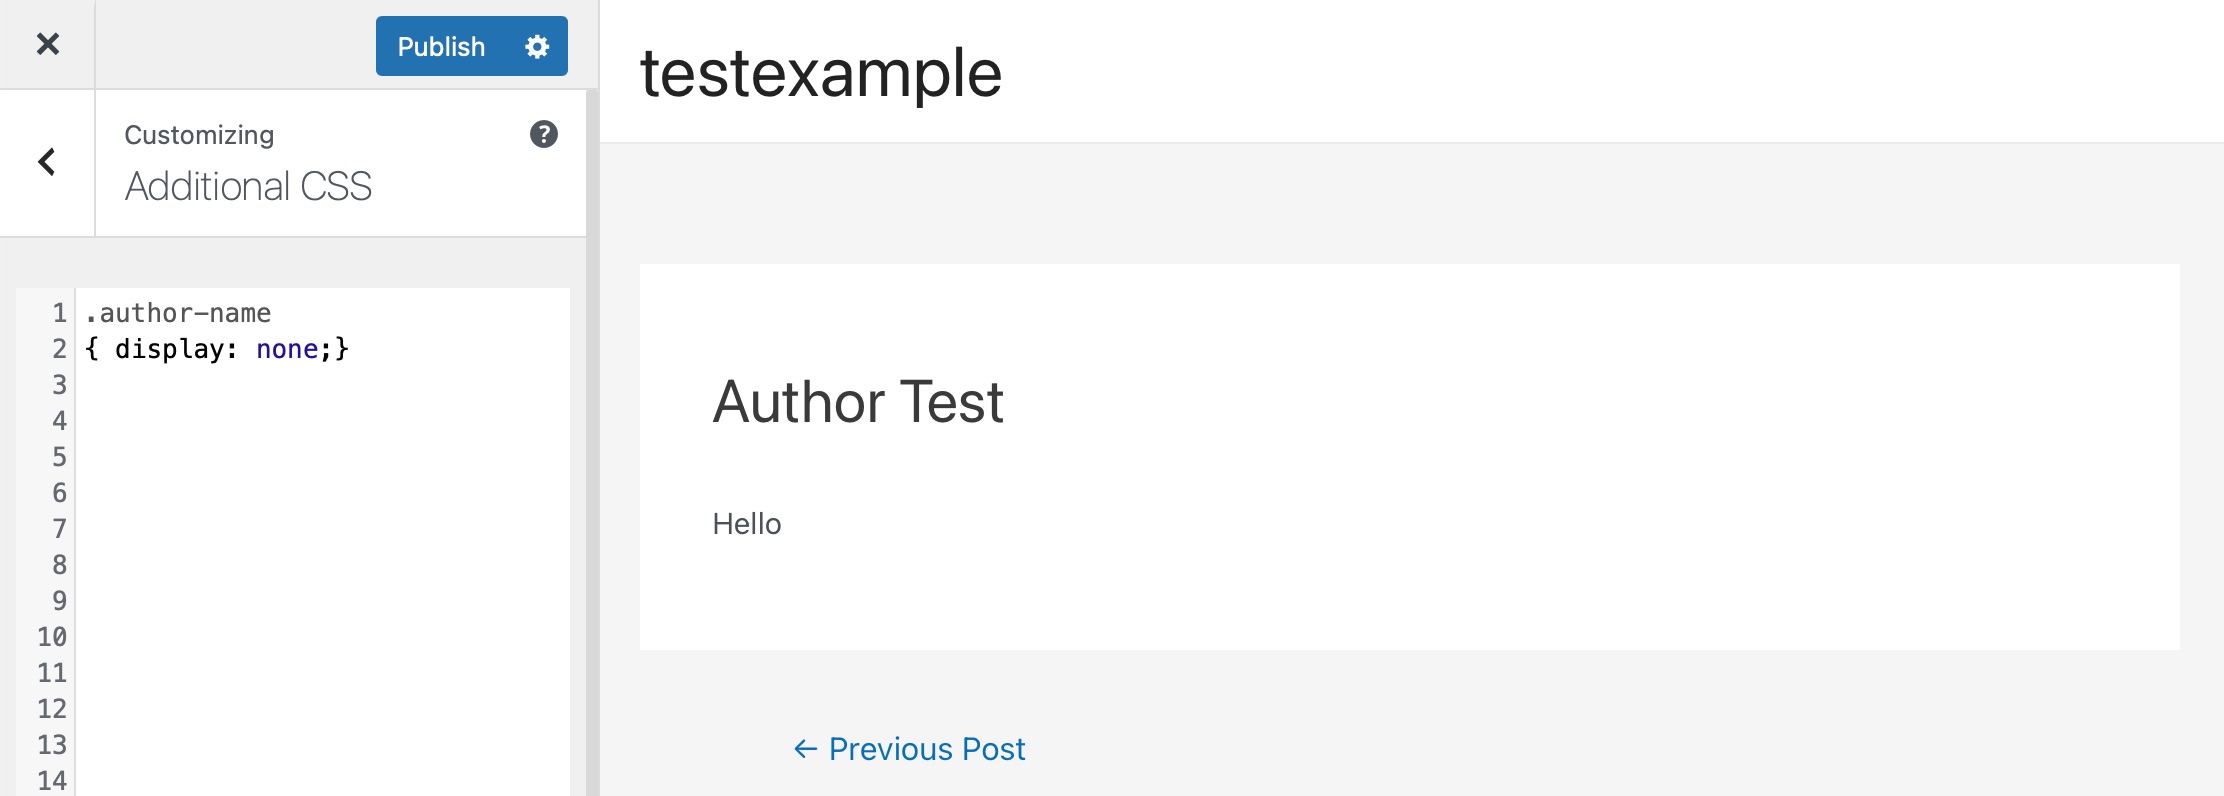
You can then visit your post, and the author’s name will be removed.
3 Conclusion
Now that you’re aware of the various reasons why hiding an author’s name is beneficial, you can also decide whether this is the best option for your website. We’ve discussed various methods to remove the author’s name; you can utilize the one that best suits you.
If you like this post, then let us know by Tweeting @rankmathseo. 💬
