Having a strong online presence is crucial for both businesses and individuals. However, simply having a website isn’t enough.
You need to ensure search engines understand your website and can effectively present it to users searching for relevant information. This is where WebSite Schema comes in.
In this knowledgebase article, we’ll explore WebSite Schema, why it matters, and how to implement it on your WordPress website.
1 What is WebSite Schema?
WebSite Schema is a structured data markup designed to provide search engines with detailed information about your website.
Typically found on the homepage and sometimes other pages, it includes crucial details such as the website’s URL and potential search actions users can perform.
The primary goal is to help search engines understand your website’s structure and navigation, leading to improved search engine visibility and more accurate indexing.
2 How Does WebSite Schema Work?
WebSite Schema helps search engines understand your website’s structure and content by using a specific vocabulary of tags (or microdata) that you can add to your HTML.
Here’s an example of WebSite Schema using JSON-LD and a brief description of its properties.
Example of WebSite Schema Markup
<script type="application/ld+json">
{
    "@context": "https://schema.org",
    "@type": "WebSite",
    "url": "http://example.com",
    "name": "Example",
    "potentialAction": {
      "@type": "SearchAction",
      "target": "http://example.com/search?q={query}",
      "query-input": "required name=query"
    }
}
</script>
3 Implementing WebSite Schema on Your Site
To add WebSite Schema to your site, you need to write the Schema markup and add it to your website’s HTML. However, with the Rank Math SEO plugin, you can easily implement WebSite Schema on your WordPress site without writing any code.
Simply install and set up the plugin on your WordPress website. Once done, enable the Schema module by navigating to Rank Math SEO → Dashboard.
On the Modules tab, scroll down and enable the Schema (Structured Data) module, as shown below.
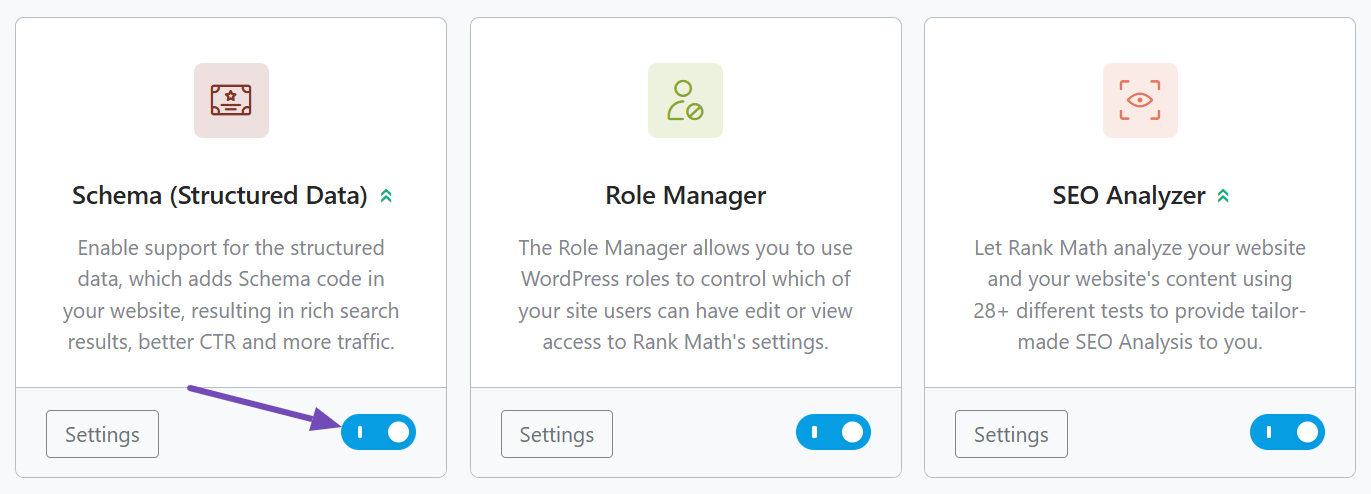
Once enabled, Rank Math will automatically add the WebSite Schema markup to your site. To verify this, navigate to your homepage’s edit page and locate the Rank Math meta box. Click on it and go to the Schema tab, as indicated below.
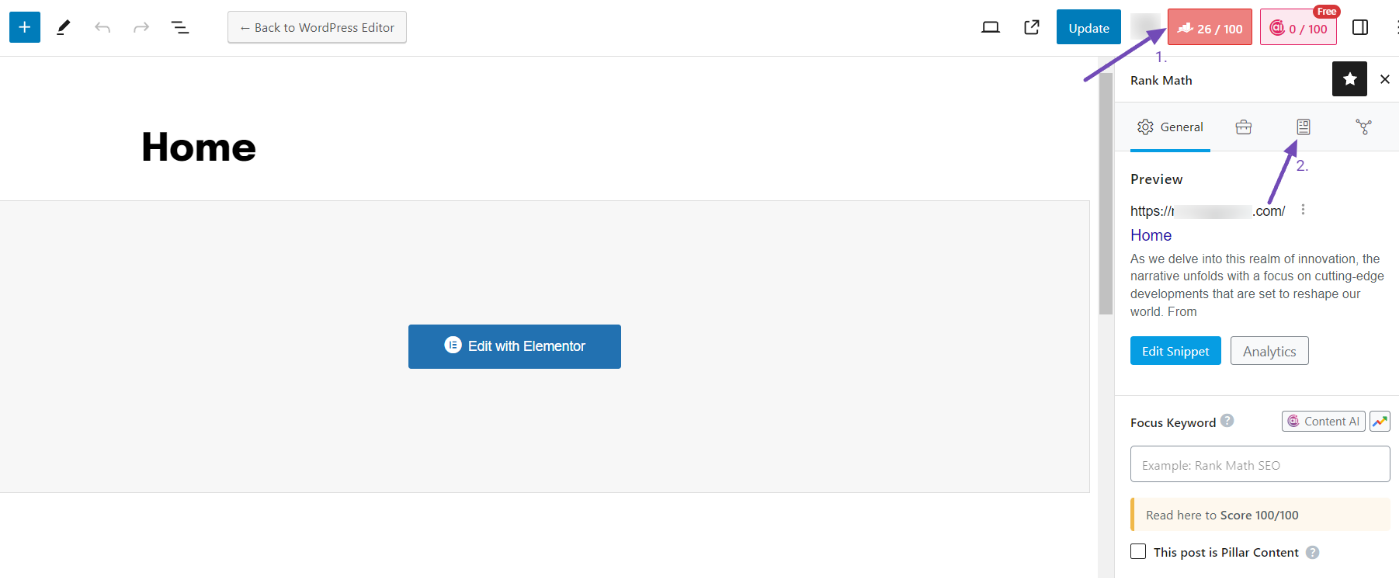
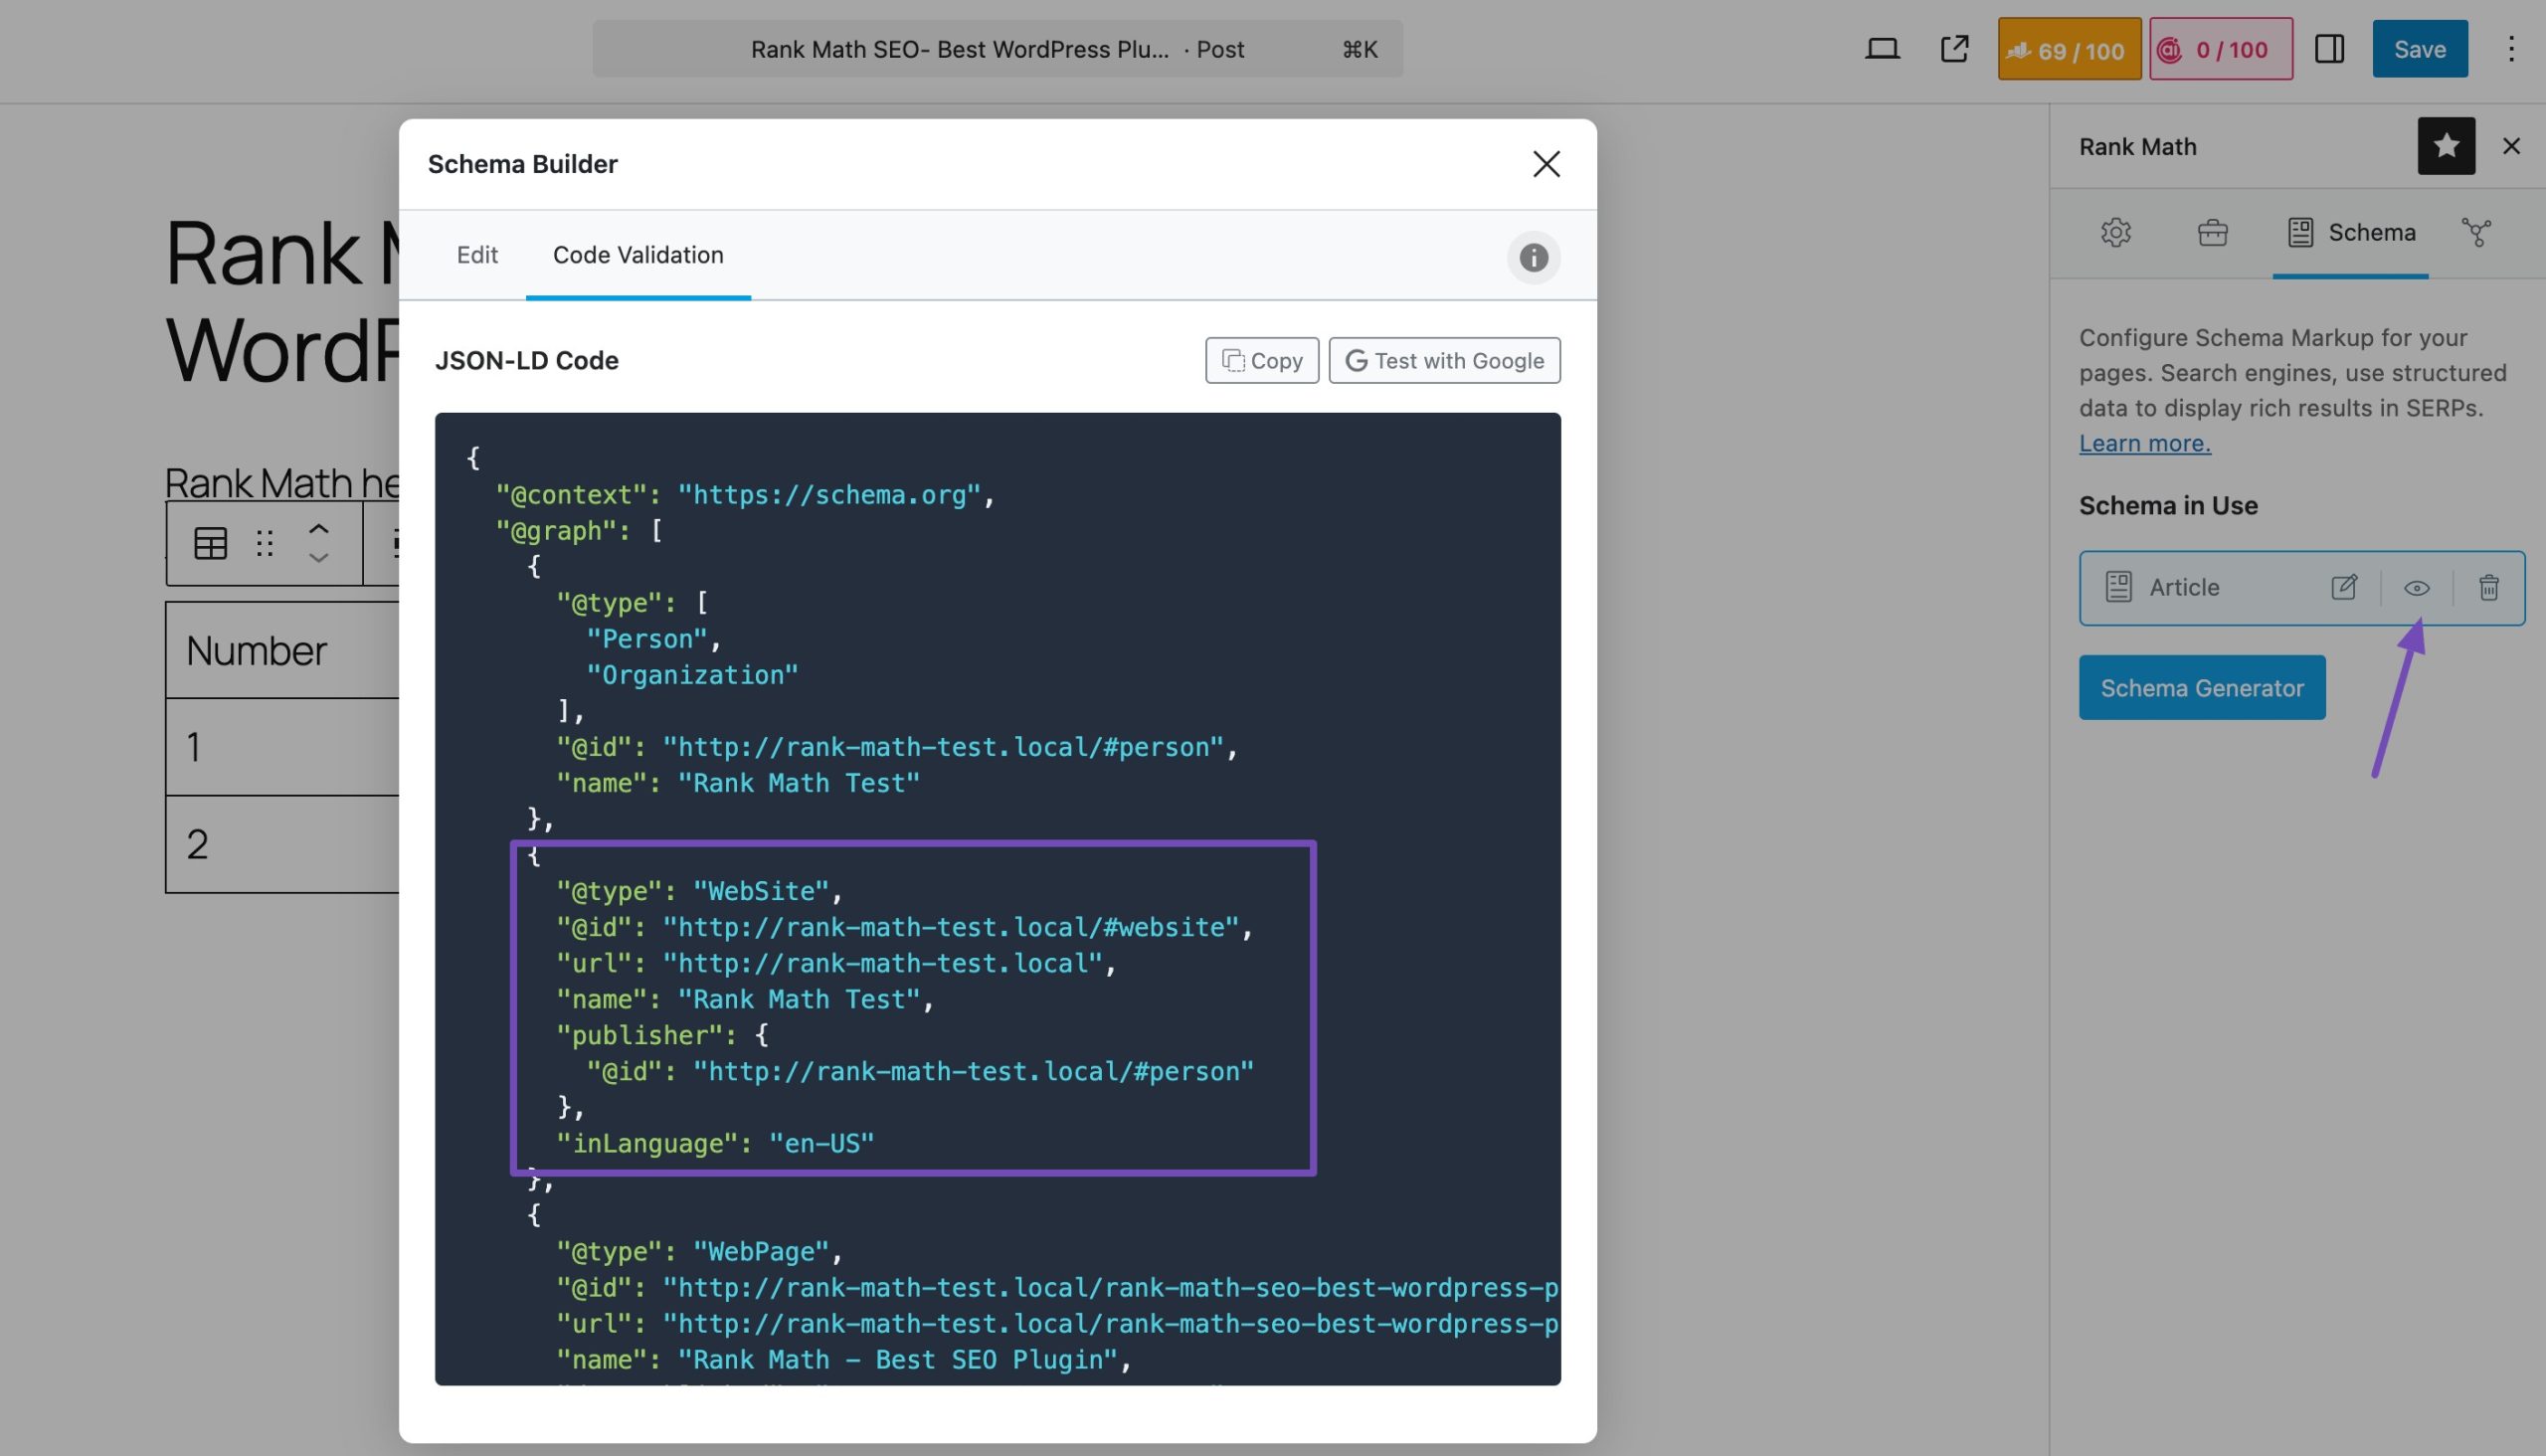
When you access the Schema tab, you will notice that Article Schema is already used for the page.
Next, click the eye icon on the interface to view the Schema JSON-LD Code. Scroll down a bit, and you will find the WebSite Schema markup attached to it, as shown below.
Alternatively, inspect the source code of your homepage by right-clicking and selecting ‘View page source’ from the context menu.

Then, use the keyboard shortcut Ctrl + F (Windows) or Command + F (Mac) to search for ‘@type’.
The first highlighted line will show the WebSite Schema markup implemented by Rank Math, as shown below.

Test Your Markup
After adding Schema markup, it’s crucial to test it using tools like Schema Markup Validator to ensure everything is implemented correctly.
Simply paste your homepage URL or the JSON-LD code snippet from your homepage’s edit page in the provided field. For more details, refer to our guide on how to use the Schema Markup Validator.
On the structured data detected, you will see the ‘Article’ option. Click to expand it.
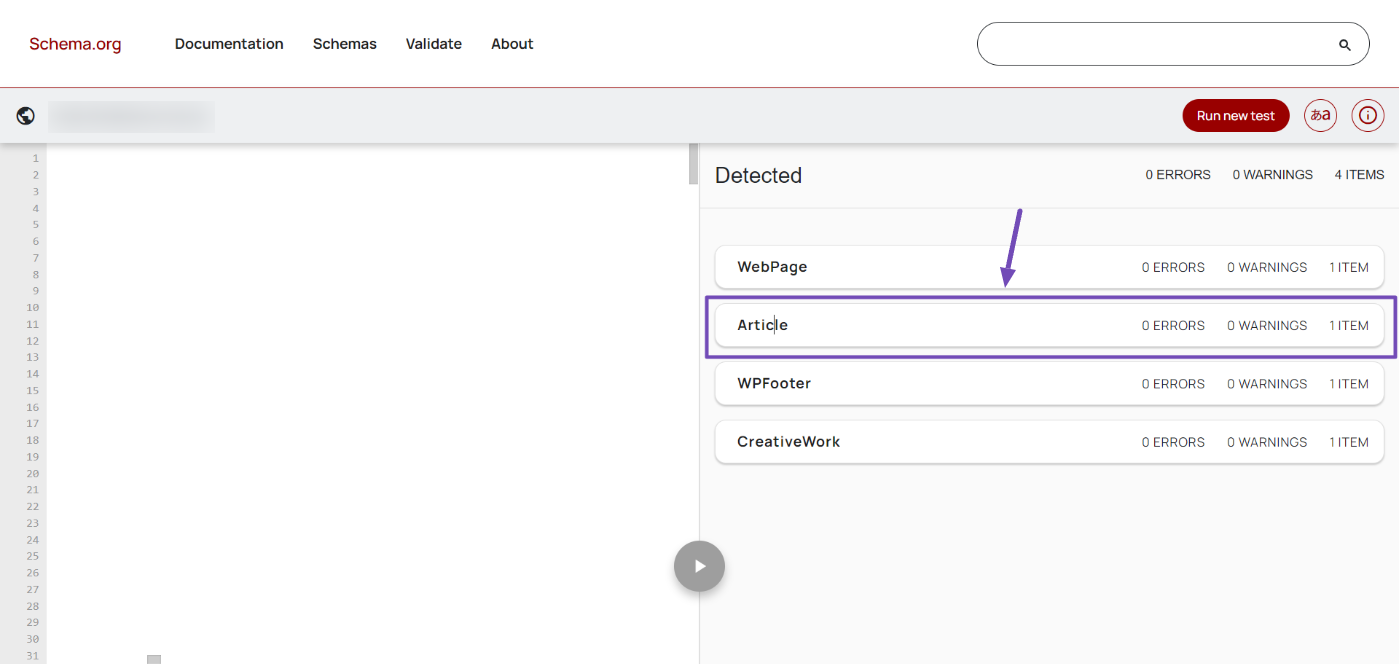
Once you’ve done that, you can use the CTRL+F keyboard shortcut to search for “WebSite” or scroll down a bit, and you will see the WebSite Schema you implemented.
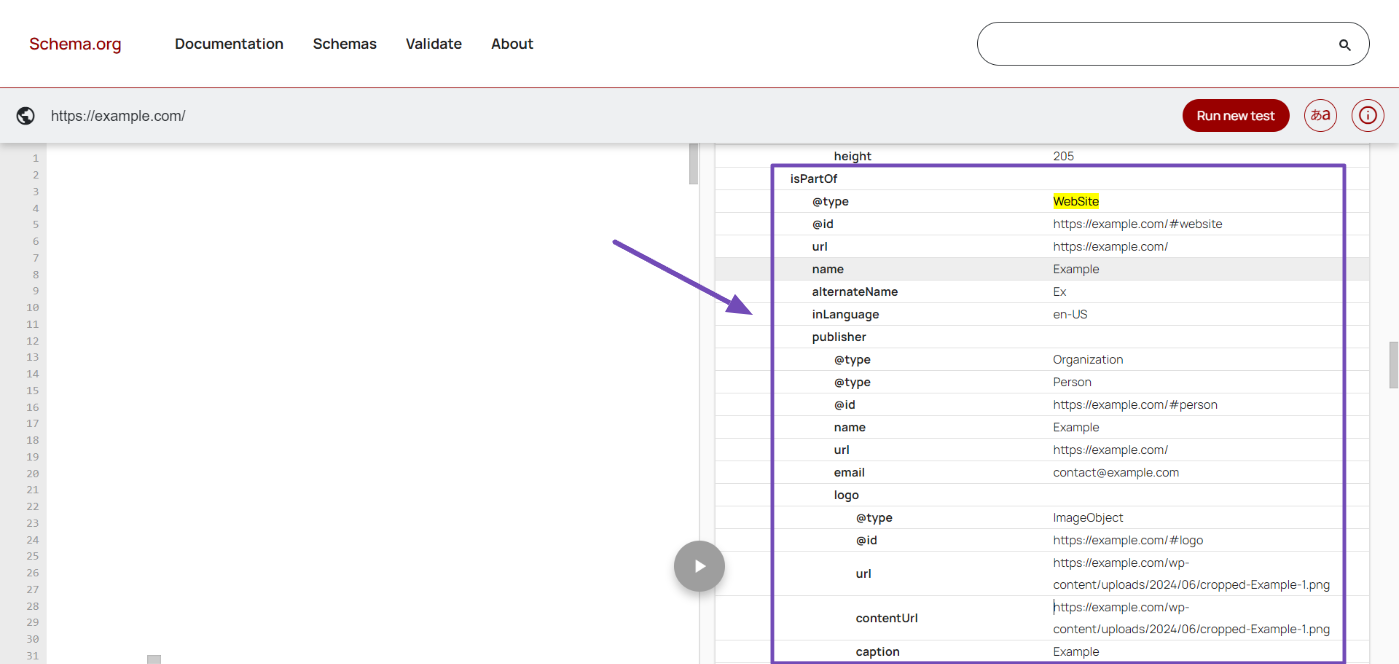
Remember to fix any errors or warnings if you see any.
That’s it. We hope you have learned about WebSite Schema and how to implement it on your website. If you still have questions about WebSite Schema or Rank Math, feel free to contact our dedicated support team. We’re available 24/7, 365 days a year.