WordPress is a popular content management system (CMS) that powers millions of websites worldwide. However, it’s not uncommon to encounter roadblocks along the way.
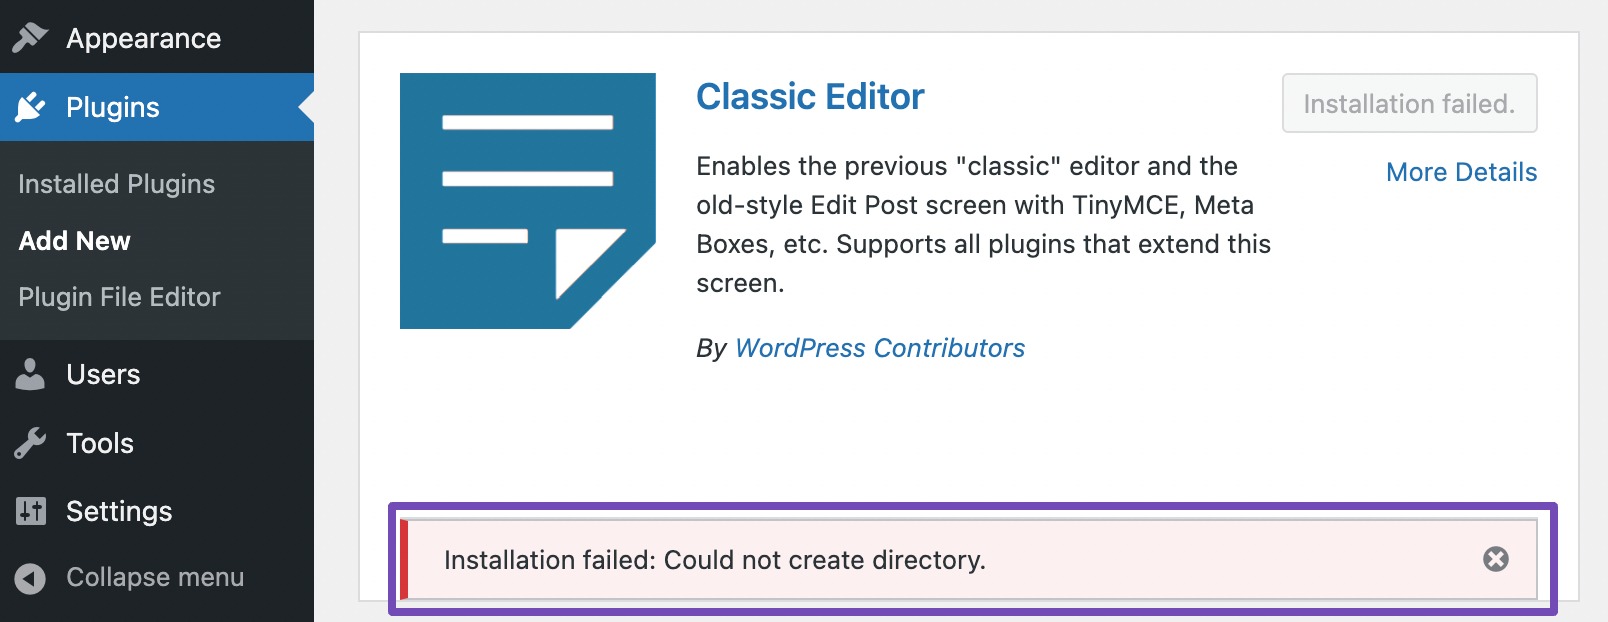
One such obstacle that can dampen the spirits is the “Installation Failed: Could Not Create Directory” error.
This error often appears when attempting to install a theme or a plugin or even during the initial setup of WordPress itself.
While the error may seem confusing at first glance, fear not, resolving it is well within your reach.
In this post, we’ll deal with the complexities surrounding the “Installation Failed: Could Not Create Directory” error, providing clear and concise steps to troubleshoot and overcome this error.
So, without any further ado, let’s get started.
Table of Contents
- What is the “Installation Failed: Could Not Create Directory” Error?
- What Causes the “Installation Failed: Could Not Create Directory” Error in WordPress
- How to Identify the “Installation Failed: Could Not Create Directory” Error in WordPress
- How to Fix the “Installation Failed: Could Not Create Directory” Error in WordPress
- Frequently Asked Questions
- Conclusion
1 What is the “Installation Failed: Could Not Create Directory” Error?
You might see the “Installation Failed: Could Not Create Directory” error when you try to install or update a plugin, theme, or even WordPress itself.
This happens because WordPress doesn’t have the necessary permissions to create a new folder or directory on your server to store the required files.
Essentially, this error means that some server settings or folder permissions on your site aren’t properly configured, preventing WordPress from creating or modifying directories.
Now that you understand what this error is, let’s dive into the common causes behind it.
2 What Causes the “Installation Failed: Could Not Create Directory” Error in WordPress
There are two main reasons you might encounter the “Installation Failed: Could Not Create Directory” error in WordPress:
- You don’t have the correct file permissions.
- Your disk space is full or insufficient.
Let’s take a closer look at each cause.
2.1 You Don’t Have the Correct File Permissions
File permissions control who can read, write, or modify files and folders on your server. If your permissions aren’t set correctly, WordPress may not be able to create new directories for plugins, themes, or updates.
Sometimes, your hosting provider sets security measures to protect your server and site directories. While these rules are important, they can prevent you from making necessary changes if the permissions aren’t properly configured.
For example, when you install a new plugin or theme, WordPress needs to create a folder for it in the wp-content directory.
If your permissions are too restrictive, this process will fail, causing the “Installation Failed: Could Not Create Directory” error.
2.2 Your Disk Space is Full or Insufficient
WordPress also needs enough disk space on your server to store files, including plugins, themes, and updates. If your server is running low on space, WordPress can’t create new directories, leading to this error.
Low disk space often happens because of old backup files or a hosting plan that doesn’t meet your website’s needs. You can check your disk usage in your WordPress dashboard or contact your hosting provider for help.
If disk space is the issue, upgrading to a hosting plan with more storage can solve the problem. Even though this cause is less common than file permission issues, keeping an eye on your disk space ensures your site continues running smoothly.
3 How to Identify the “Installation Failed: Could Not Create Directory” Error in WordPress
We’ve outlined two methods to help you solve the “Installation Failed: Could Not Create Directory” error.
3.1 Use the WordPress Site Health Tool
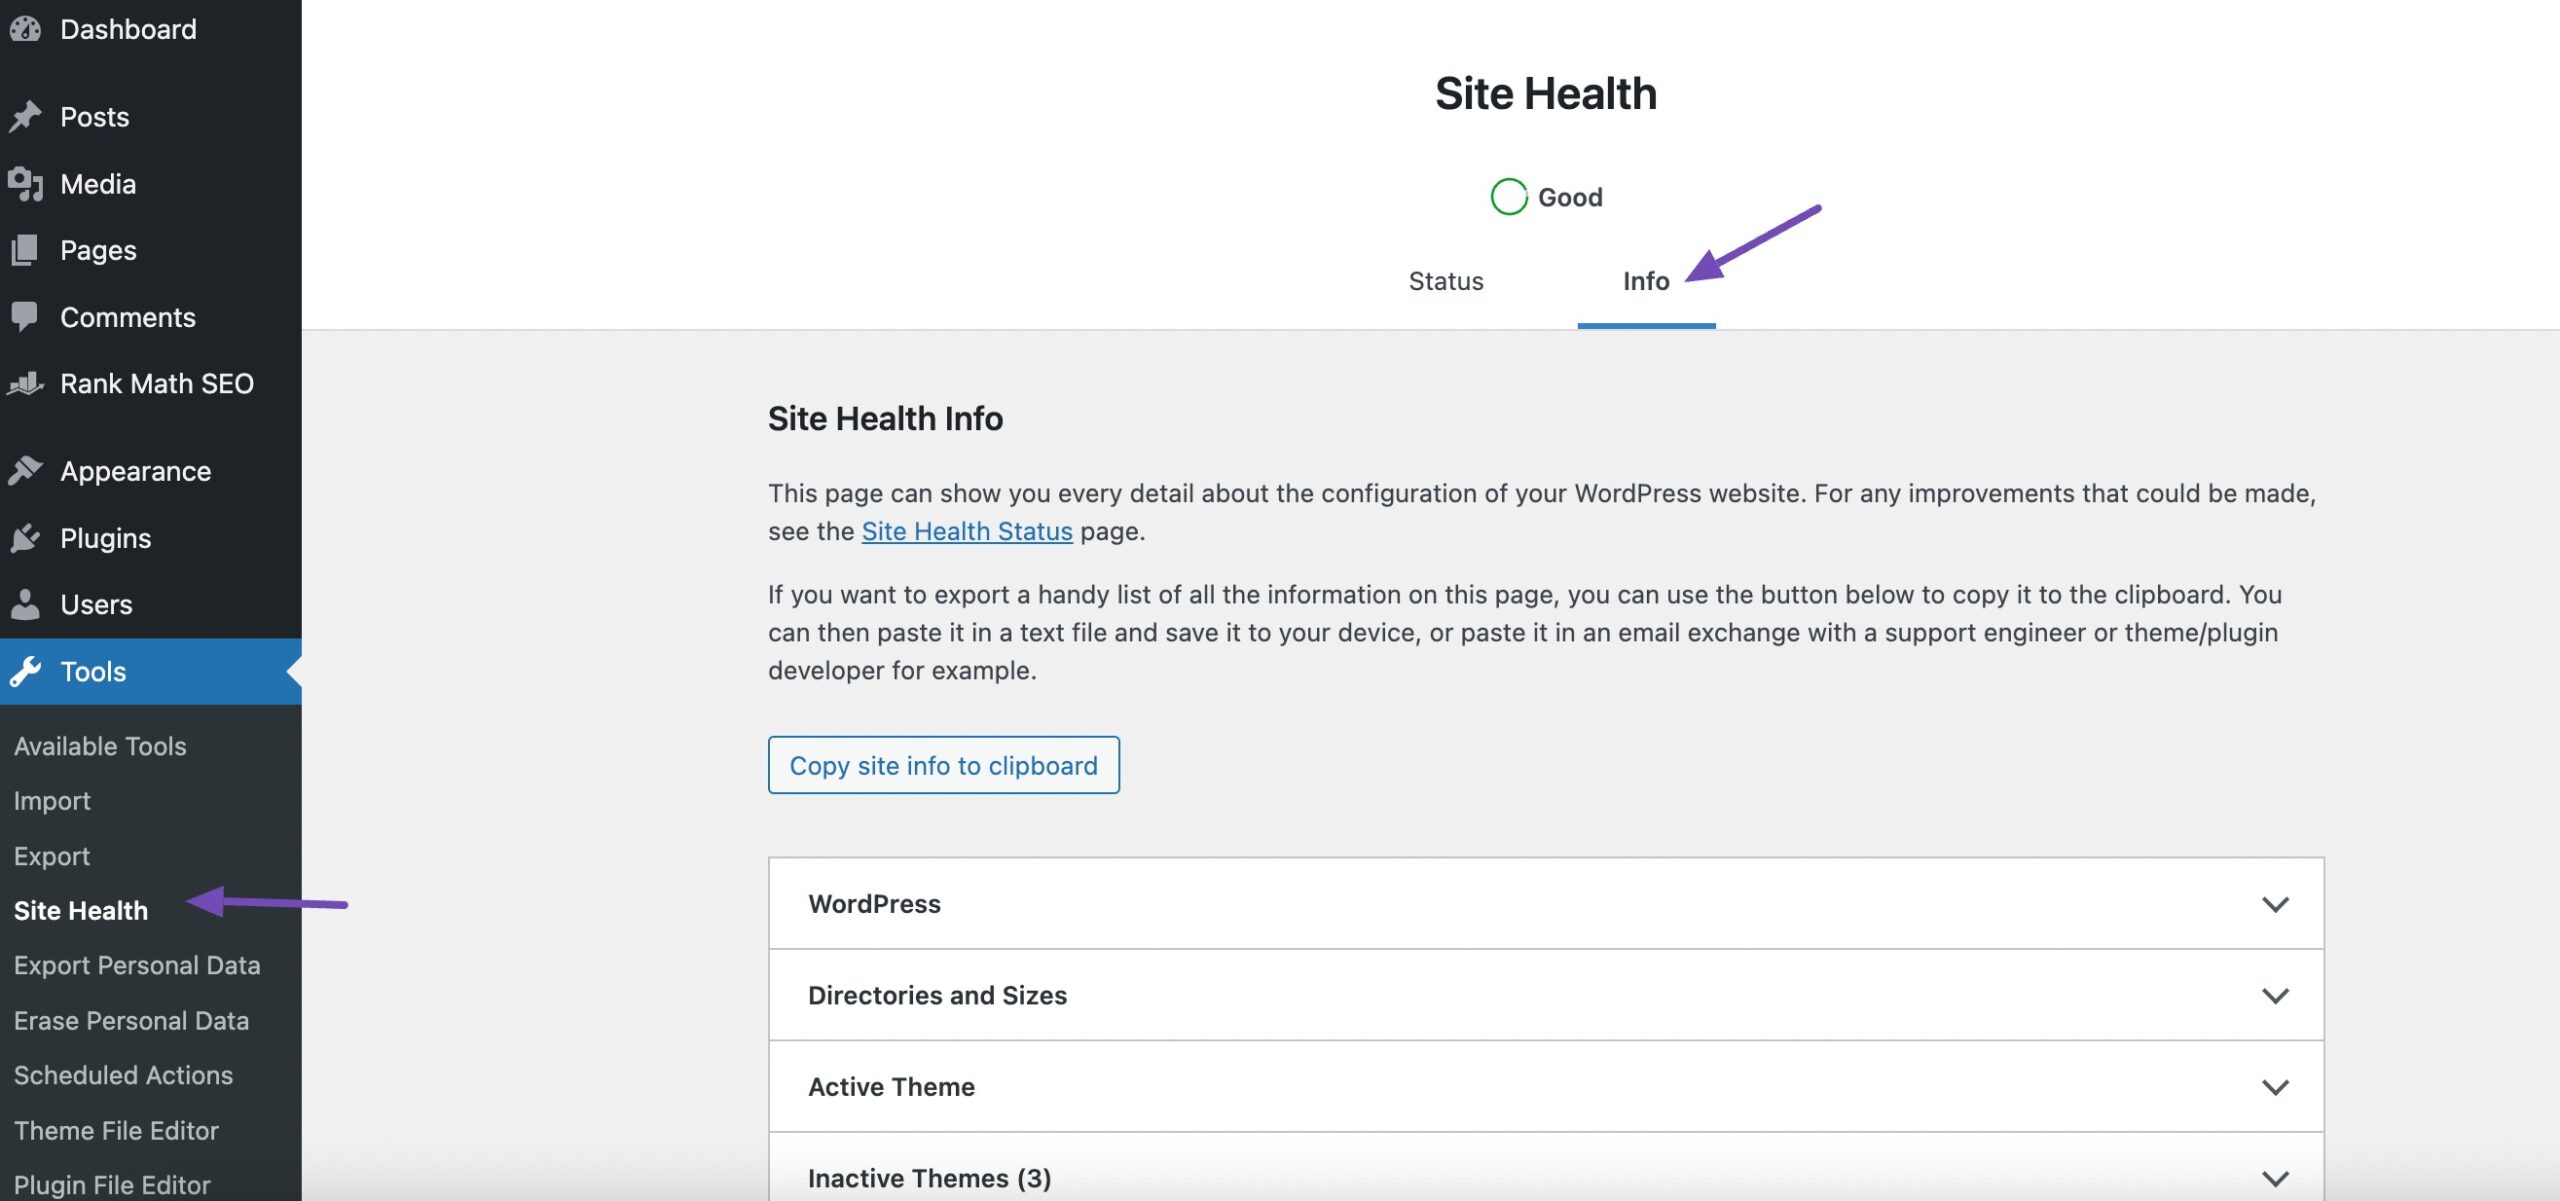
WordPress provides a built-in Site Health Check tool that can identify potential problems with your site, including file permissions issues.
You can access it by navigating to Tools → Site Health from your WordPress dashboard. To check your file permissions settings, click on the Info tab, as shown below.
Next, scroll down to the Filesystem Permissions section and click on it.
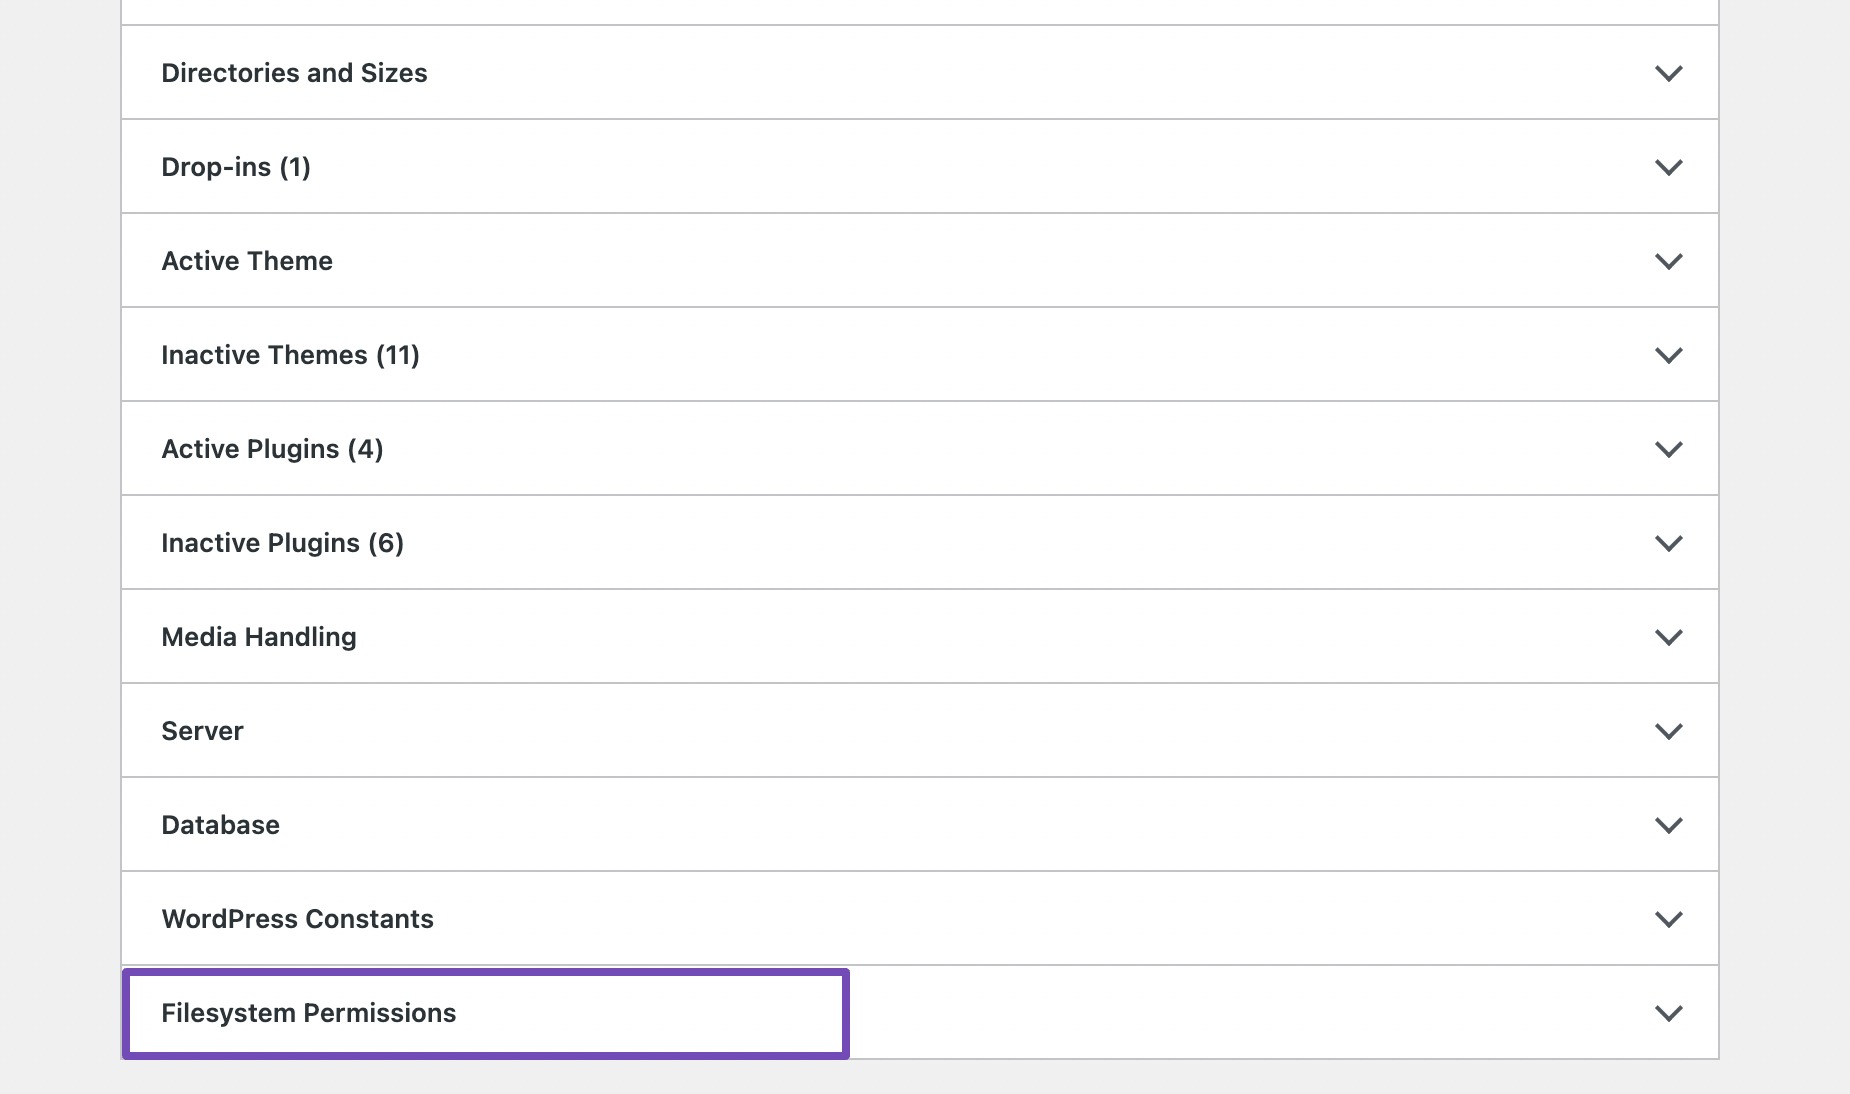
You’ll find a list of important WordPress files, including the plugin and theme directories. Ideally, they should all be marked as Writable.
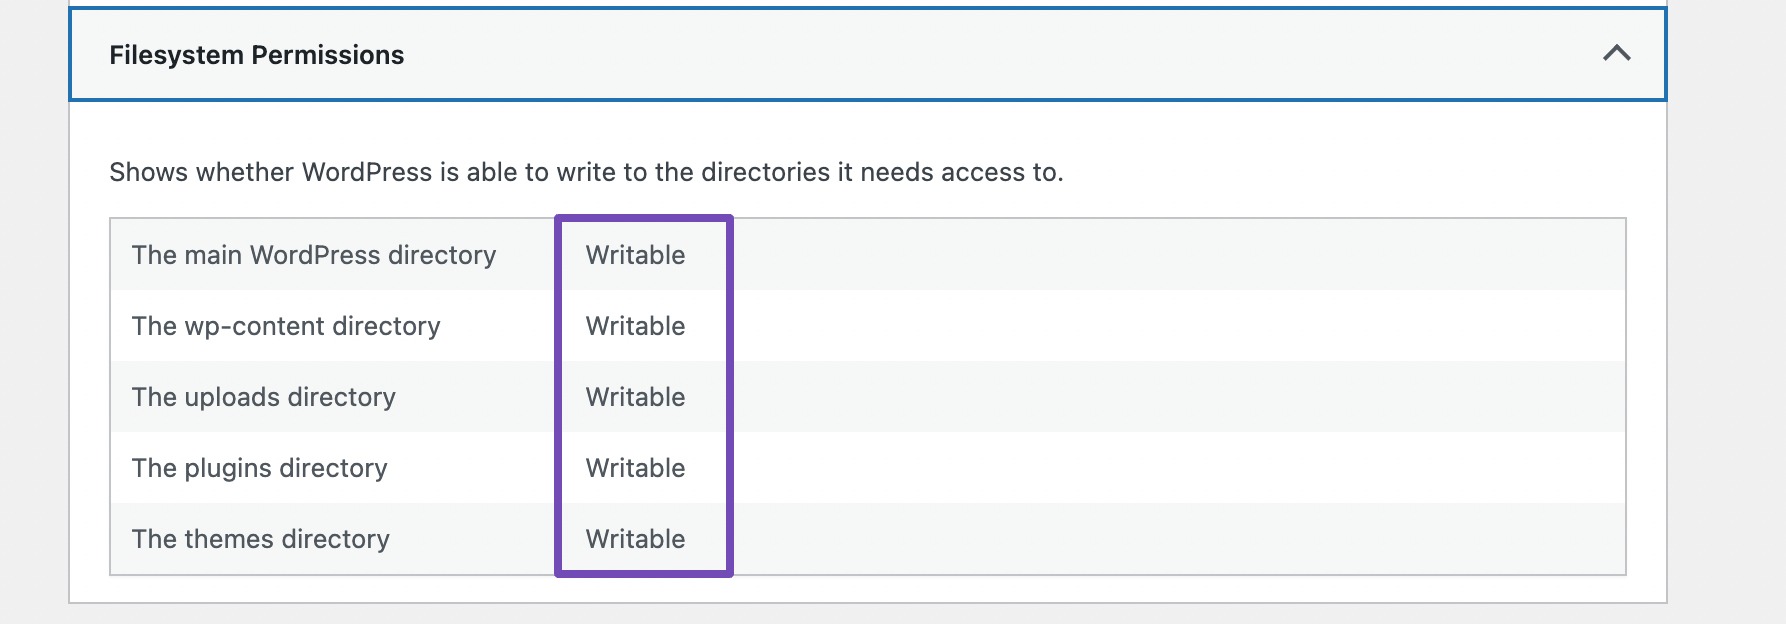
If your permissions aren’t set up correctly, you’ll notice Not writable next to the folders causing issues. In such instances, it’s a clear indication that your file permissions need to be corrected.
3.2 Review Your Server Error Log
Another method to pinpointing the “Installation Failed: Could Not Create Directory” involves checking your server’s error log.
This log serves as a record detailing errors and problems occurring on the server that hosts your website. It is recommended to regularly review and keep an eye on both application access and error logs. This allows you to scrutinize process details for every ongoing request and any encountered errors.
Most WordPress hosting providers include log monitoring features on their platform. This error log can be accessed through certain hosting dashboards or the cPanel.
If you’re using cPanel, login to your account and navigate to File manager, as shown below.
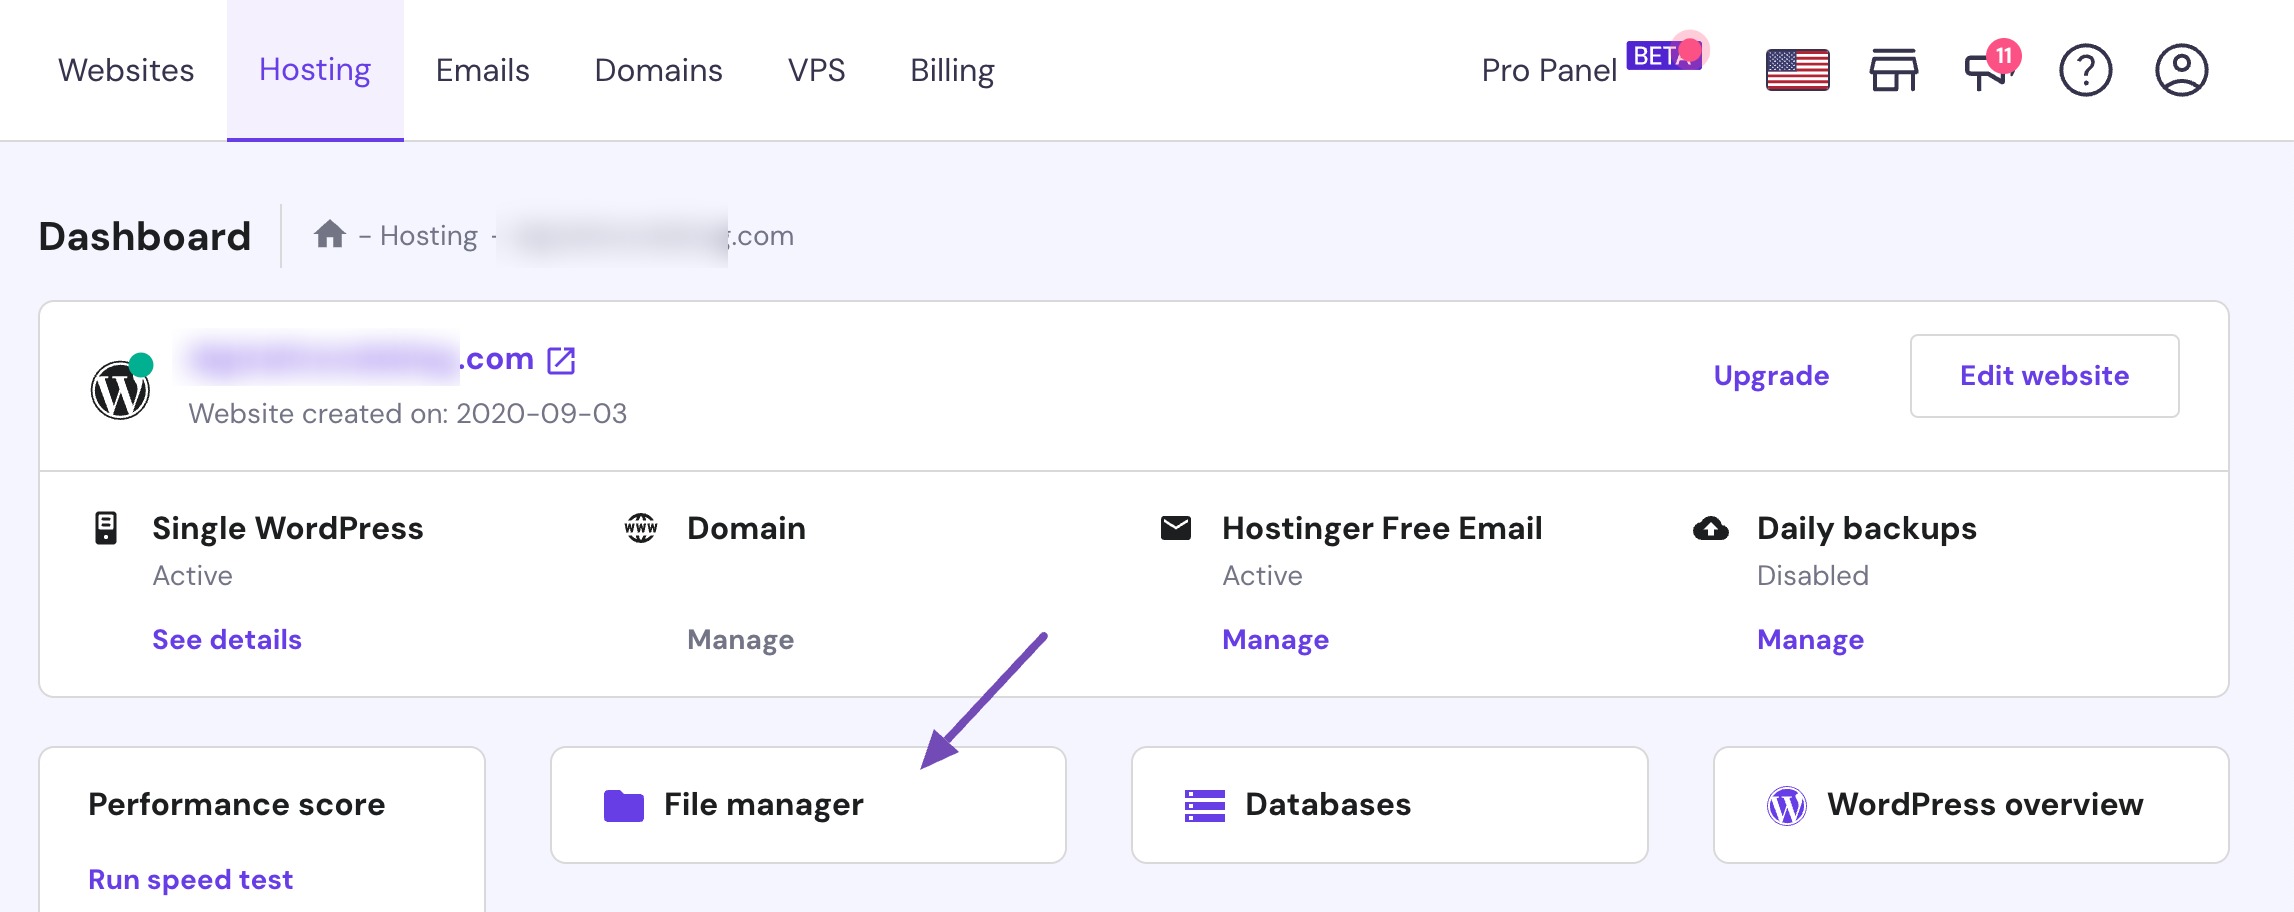
Next, navigate to the public_html folder.

Right-click on the error_log file and select View/Edit.
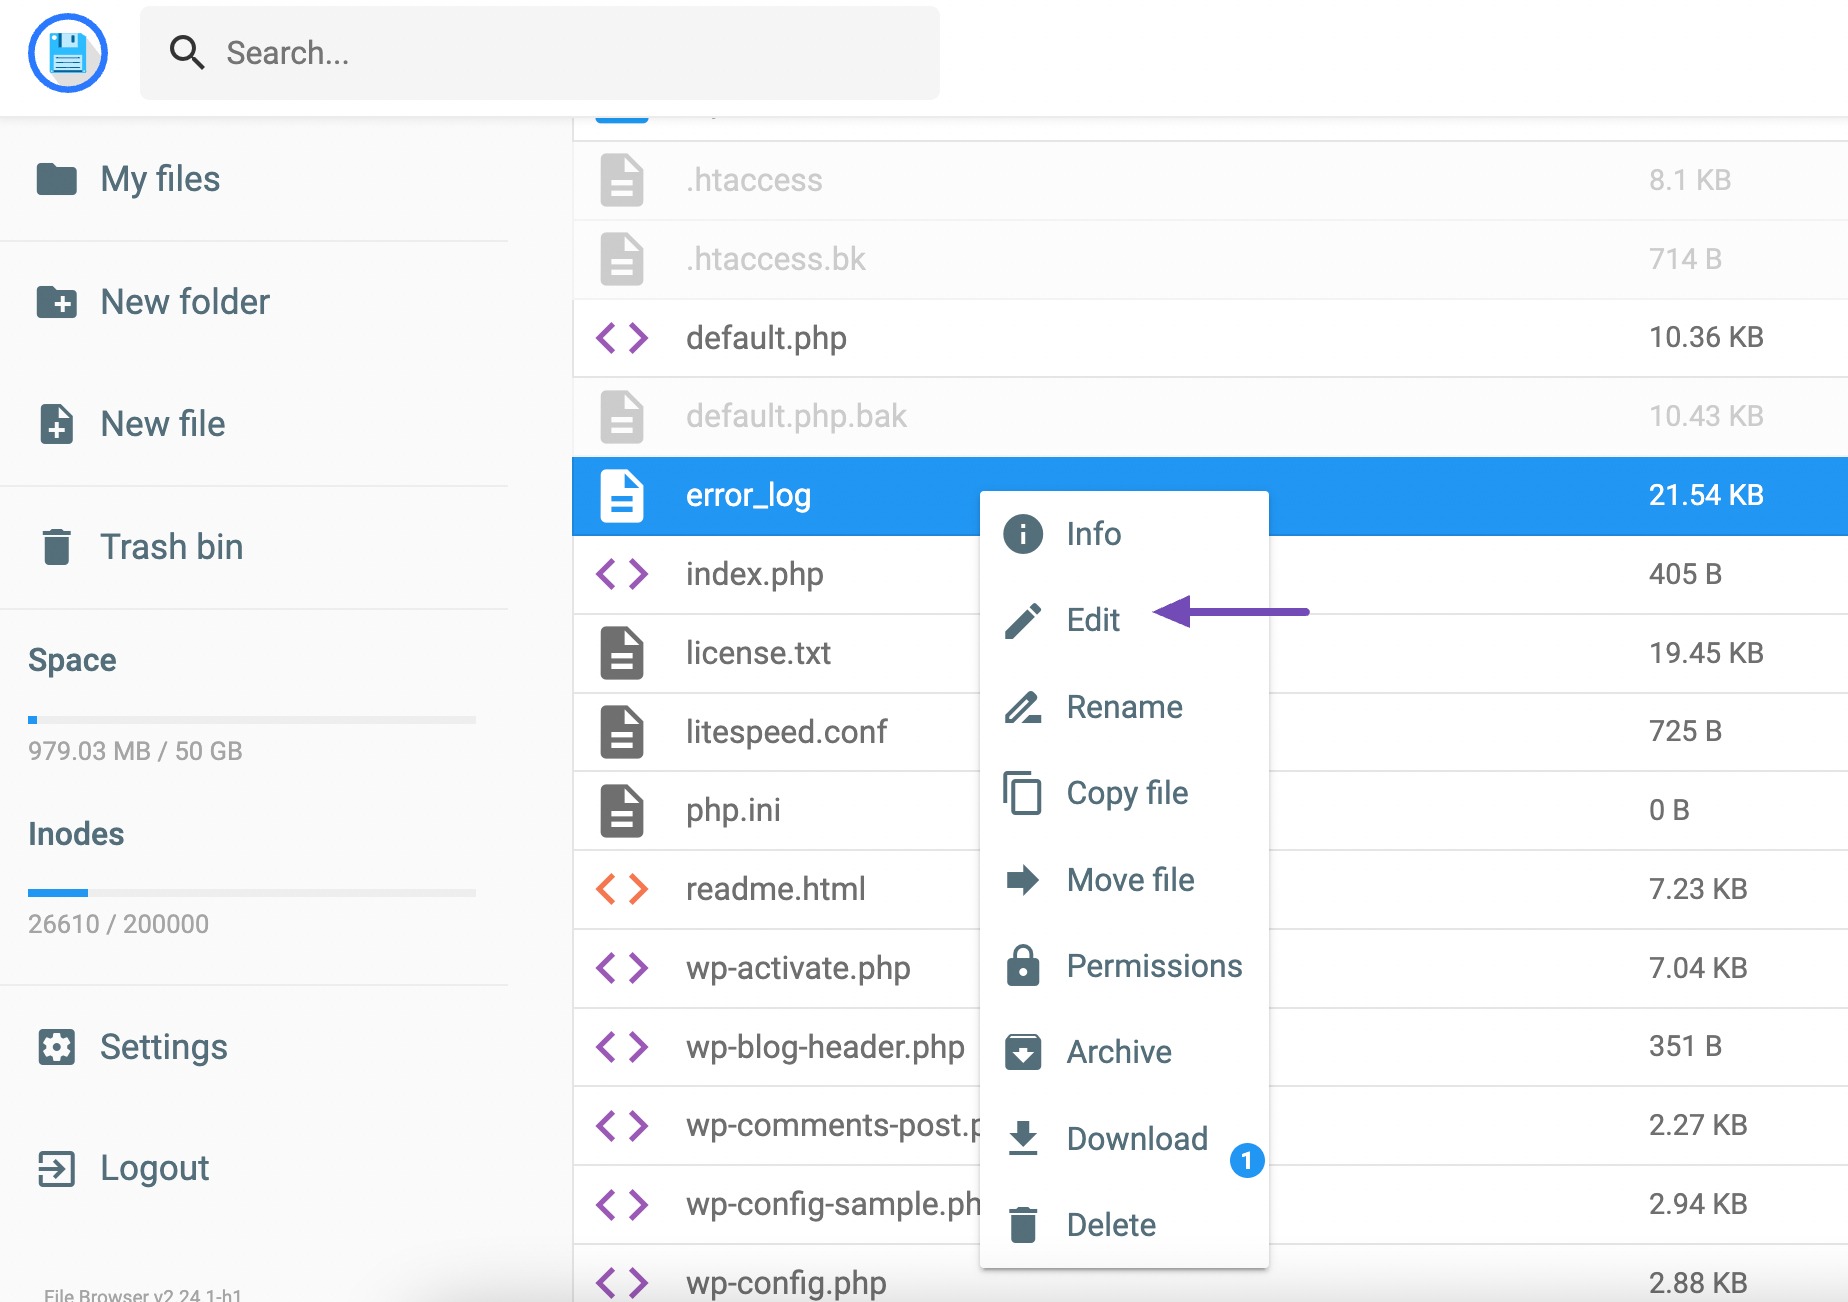
Reviewing the error log provides insights into recent server issues like incorrect file permissions or insufficient storage, potentially leading to the installation error.
There is a lot of information there, so you’ll have to scroll to the bottom to see the most recent errors on your website.
To address these issues, you have two primary options: utilize the file permission configuration method or upgrade your website hosting plan according to your requirements.
Now, let’s see how to resolve this error.
4 How to Fix the “Installation Failed: Could Not Create Directory” Error in WordPress
Note: Before dealing with this error, it’s essential to safeguard your website by creating a backup. A backup provides a safety net in case anything goes wrong, allowing for a swift restoration of your website.
The first step to resolve the error involves checking and rectifying your file permissions.
Specifically, focus on the file permissions related to the WordPress core file where the error originated. This error typically surfaces during the installation or updating of WordPress themes or plugins.
Locate the folder associated with the error, commonly situated in the /wp-content/ directory.
Here, you’ll want to review the file permission settings to ensure everything is in order. You can do this using an FTP client or your hosting provider’s control panel.
In this post, we’ll show you how to use cPanel to check and correct the file permissions.
So login to your cPanel account and navigate to File Manager → public_html folder → wp-content directory, as shown below.

Inside the wp-content directory, you’ll find folders dedicated to your website’s themes, plugins, and other components.
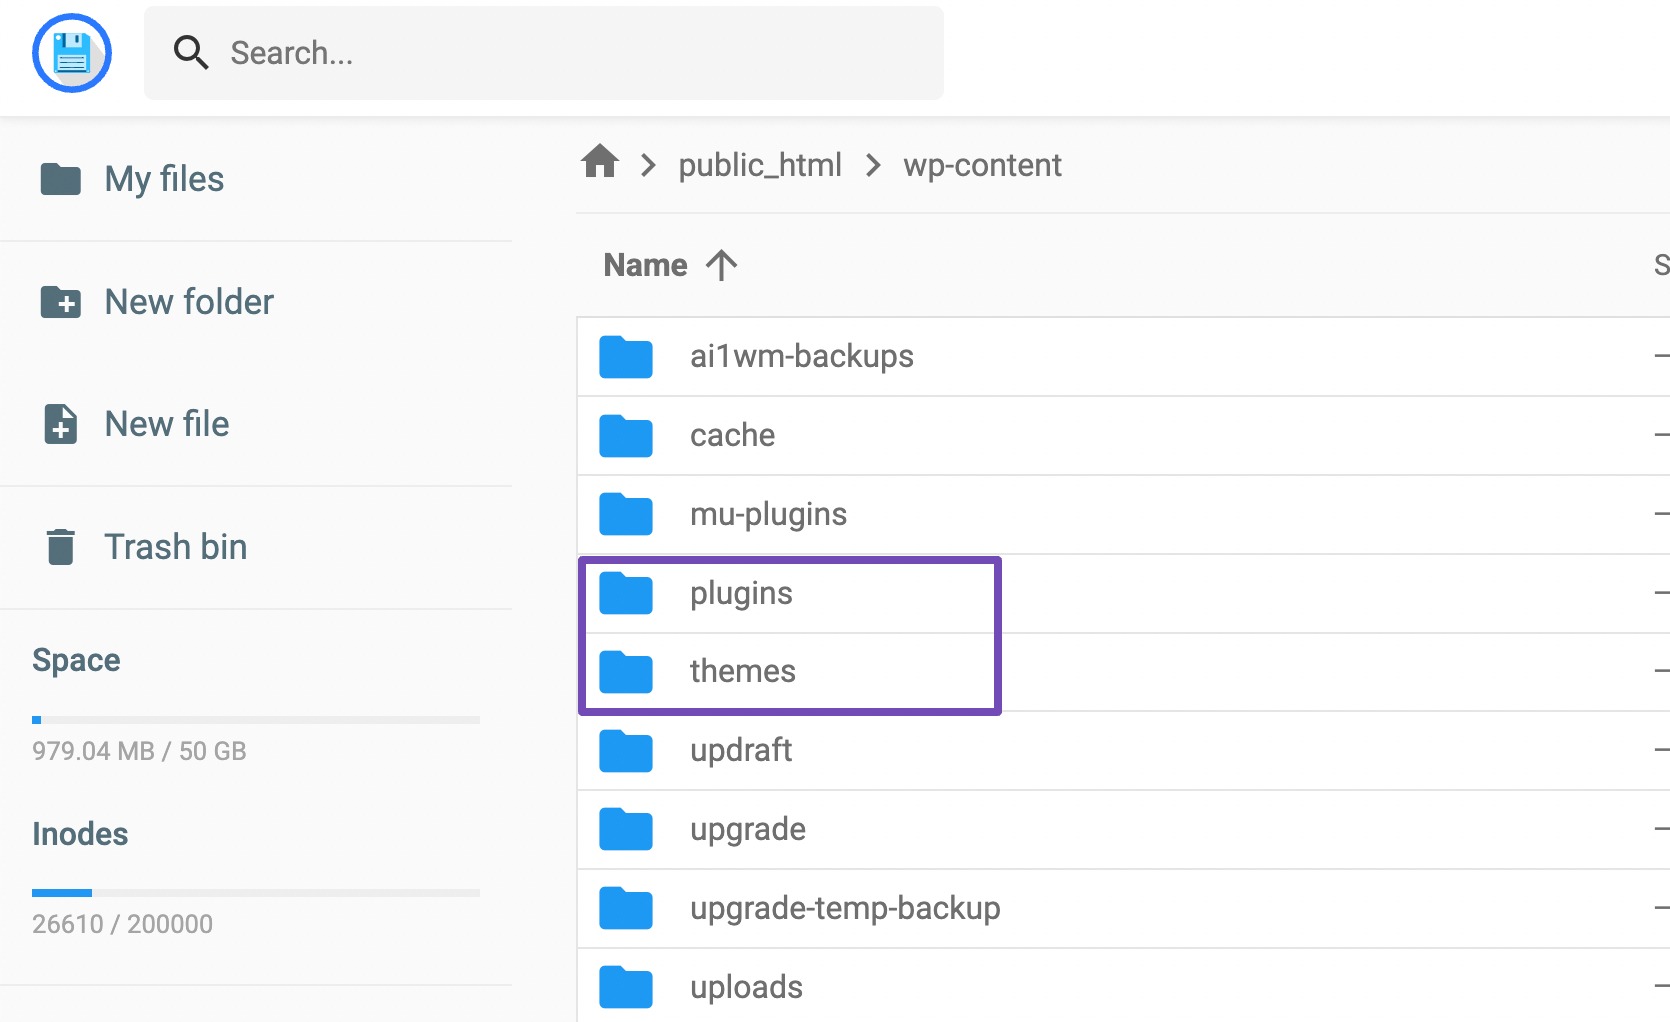
To pinpoint the core file triggering the error, you can check the error_log file. If you’re unable to locate the error, you can inspect the permission settings of WordPress core files.
Let’s say you want to start with the plugins folder. To do so, right-click on it and click on Permissions, as shown below.
Note: The steps might slightly differ depending on your hosting provider. However, all cPanel hosting providers allow you to change the permission settings.
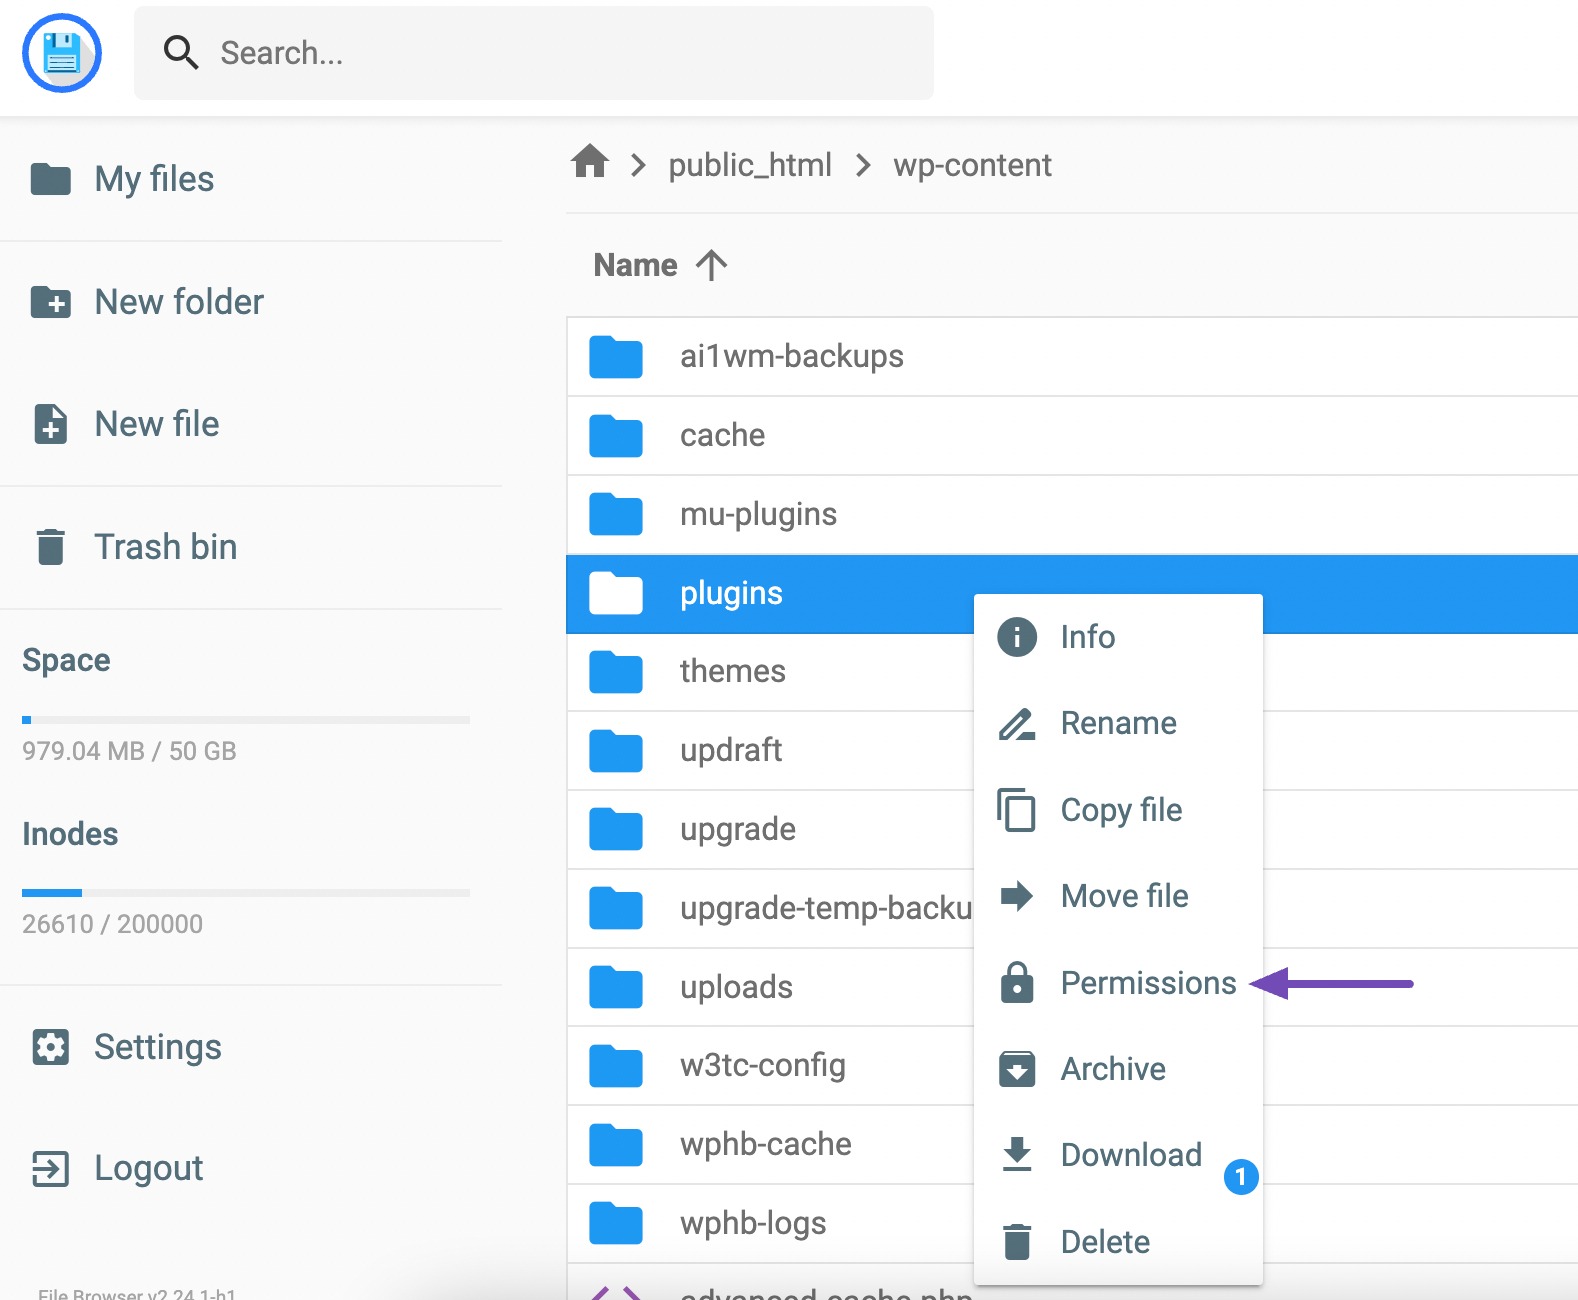
When you select it, you will see a Permissions window containing several permission settings.
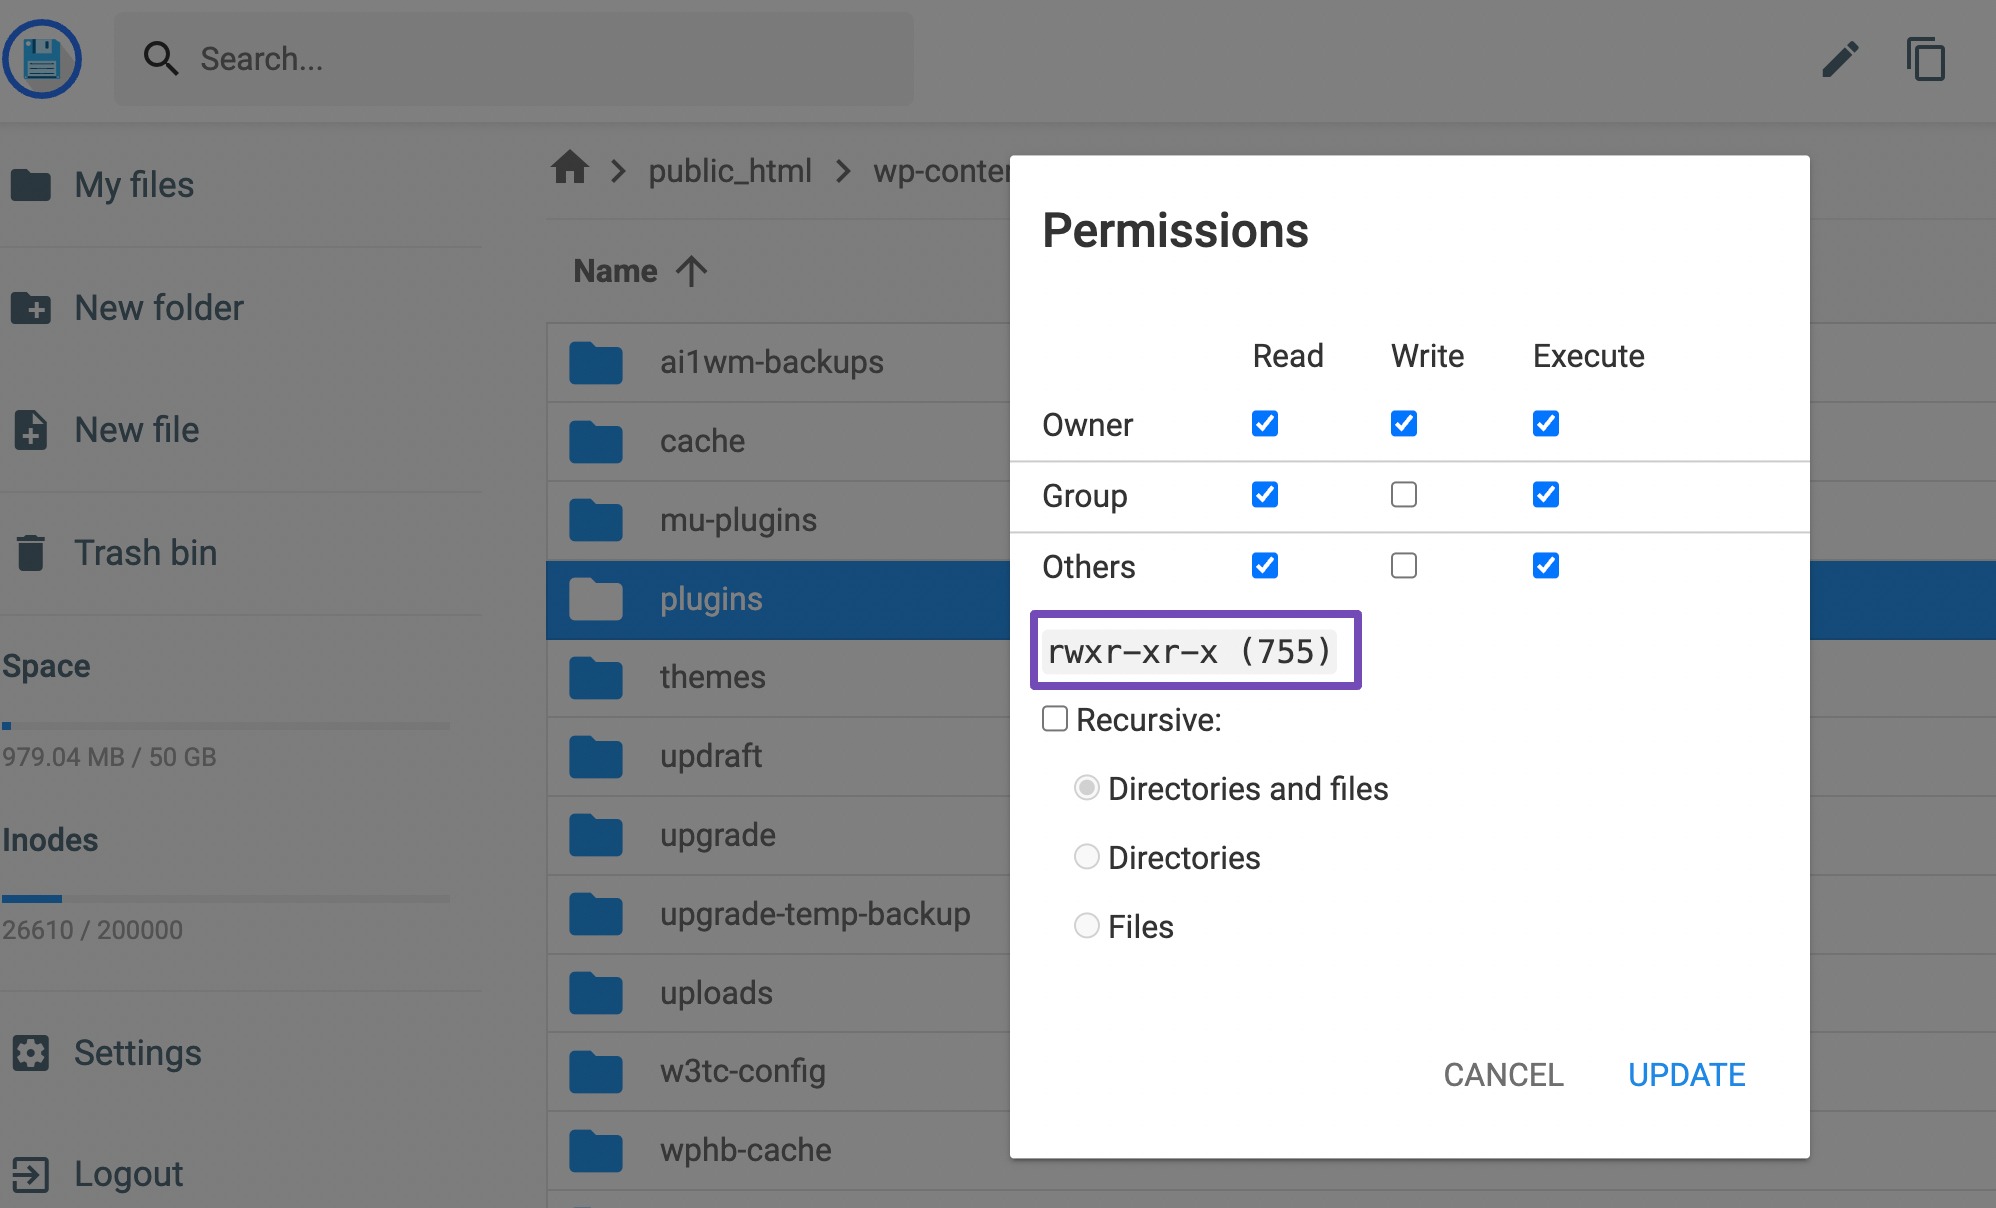
The permissions for the selected file or folder will be displayed in a numerical format which is 755.
Each digit represents a specific permission level for the file or folder:
- First digit (User): Read (4), Write (2), Execute (1)
- Second digit (Group): Read (4), Write (2), Execute (1)
- Third digit (World): Read (4), Write (2), Execute (1)
Well, this is just a representation of the permissions, but you can change them by using the checkboxes next to each permission level.
Please ensure that your settings look exactly like the default settings in the image above, and then click on UPDATE to apply the changes.
Head back to your website and try installing or updating the plugin/theme again.
If the issue persists, contacting your hosting provider is the next step. They might need to reset your file permissions, optimize your disk usage, or undertake other necessary actions to resolve the issue.
5 Frequently Asked Questions
What are the specific file permissions required for WordPress installations?
WordPress requires the following file permissions:
Directories: 755 (rwxr-xr-x)
Files: 644 (rw-r–r–)
These permissions ensure that the web server has access to create, modify, and read files within the WordPress installation.
What are some preventive measures to avoid the “Could not create directory” error?
Keep your WordPress core, plugins, and themes up to date.
Avoid installing your WordPress themes/plugins from your hosting File Manager.
Regularly check disk usage and upgrade your hosting plan if necessary.
Avoid installing plugins or themes from untrusted sources.
Use a reputable WordPress security plugin to protect your site from malware and vulnerabilities.
6 Conclusion
Fixing the “Installation Failed: Could Not Create Directory” error in WordPress starts with checking your file permissions and ensuring your server has enough disk space.
By following the steps in this post, you can resolve the issue and install themes or plugins without problems.
Whether it’s correcting permissions or considering a hosting upgrade, taking a systematic approach makes the process much easier. Regular maintenance and attention to your WordPress setup will also help prevent similar issues in the future.
Try the solutions outlined here, and if they work for you, share your success by tweeting us at @rankmathseo!
