In this knowledgebase article, we’ll show you how to set a custom brand for your WooCommerce Store using Rank Math.
Table Of Contents
How to Set a Custom Brand Name? PRO
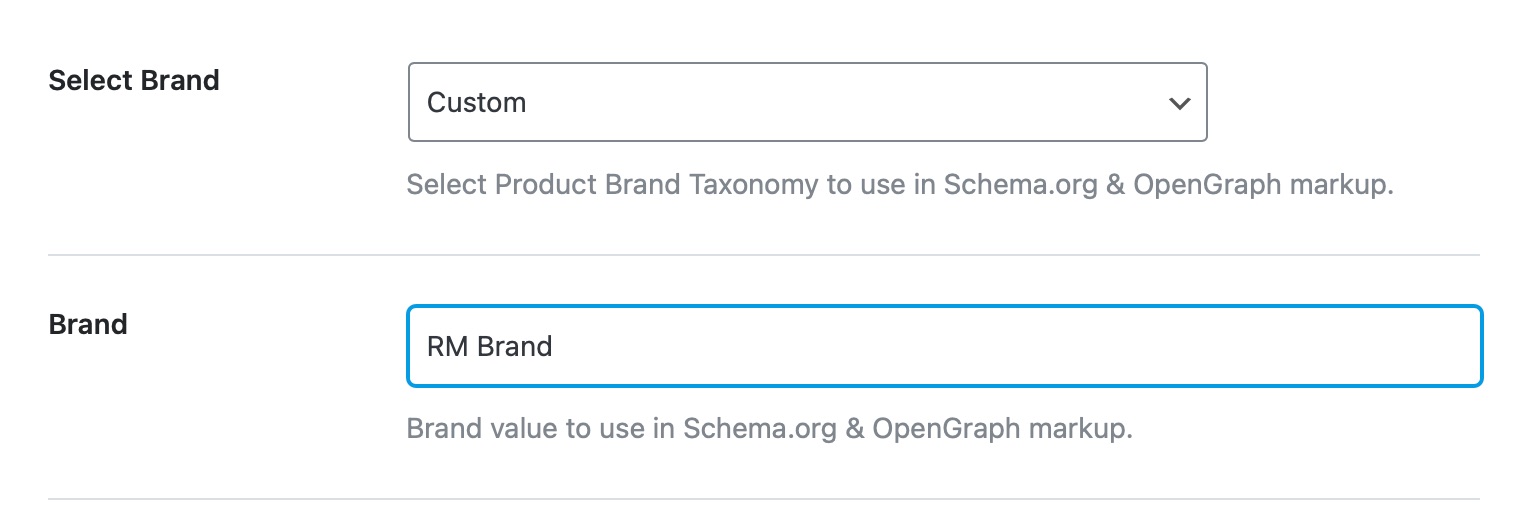
In Rank Math’s WooCommerce settings, which can be found by navigating to Rank Math SEO → General Settings → WooCommerce in your WordPress admin area, you’ll find a dropdown menu for the Select Brand setting.
Rank Math has added a Custom option in it. This option will add the custom Brand Name to the Product Schema. This is useful if you’re seeing brand name-related warnings in Google’s Schema testing tools or in your Search Console.
If you want to use custom value for your brand then select the Custom option from the drop-down list.

Once you select Custom you’ll be able to add a Brand value that you want to use in Schema.org and OpenGraph markup. Once done save your changes.
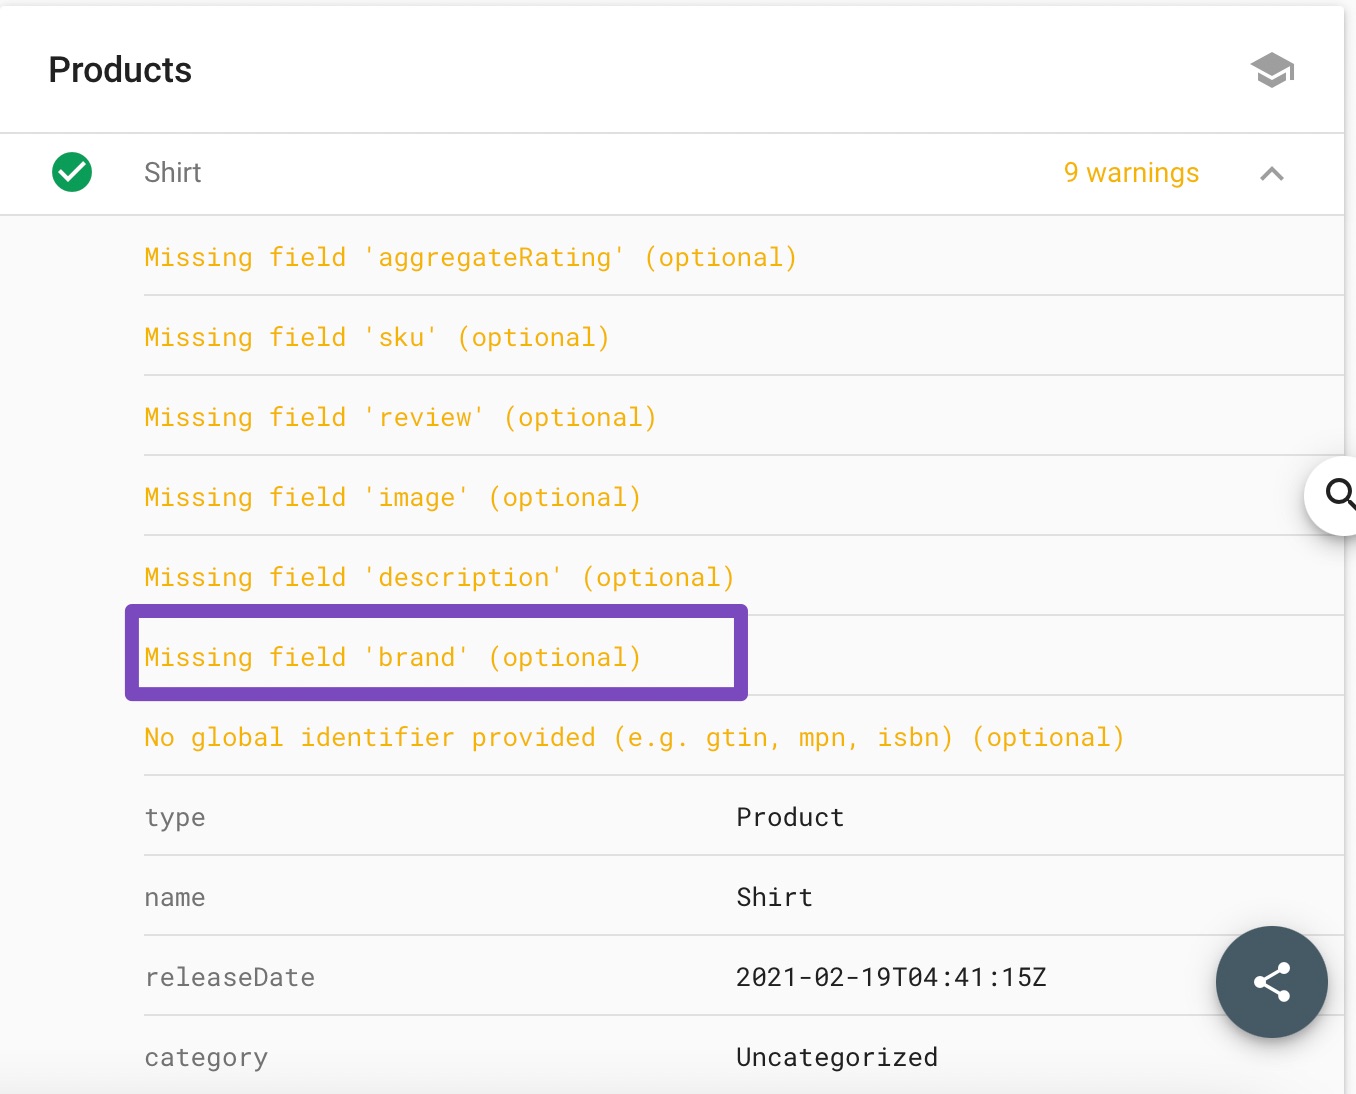
Adding the brand value fixes the below warning:
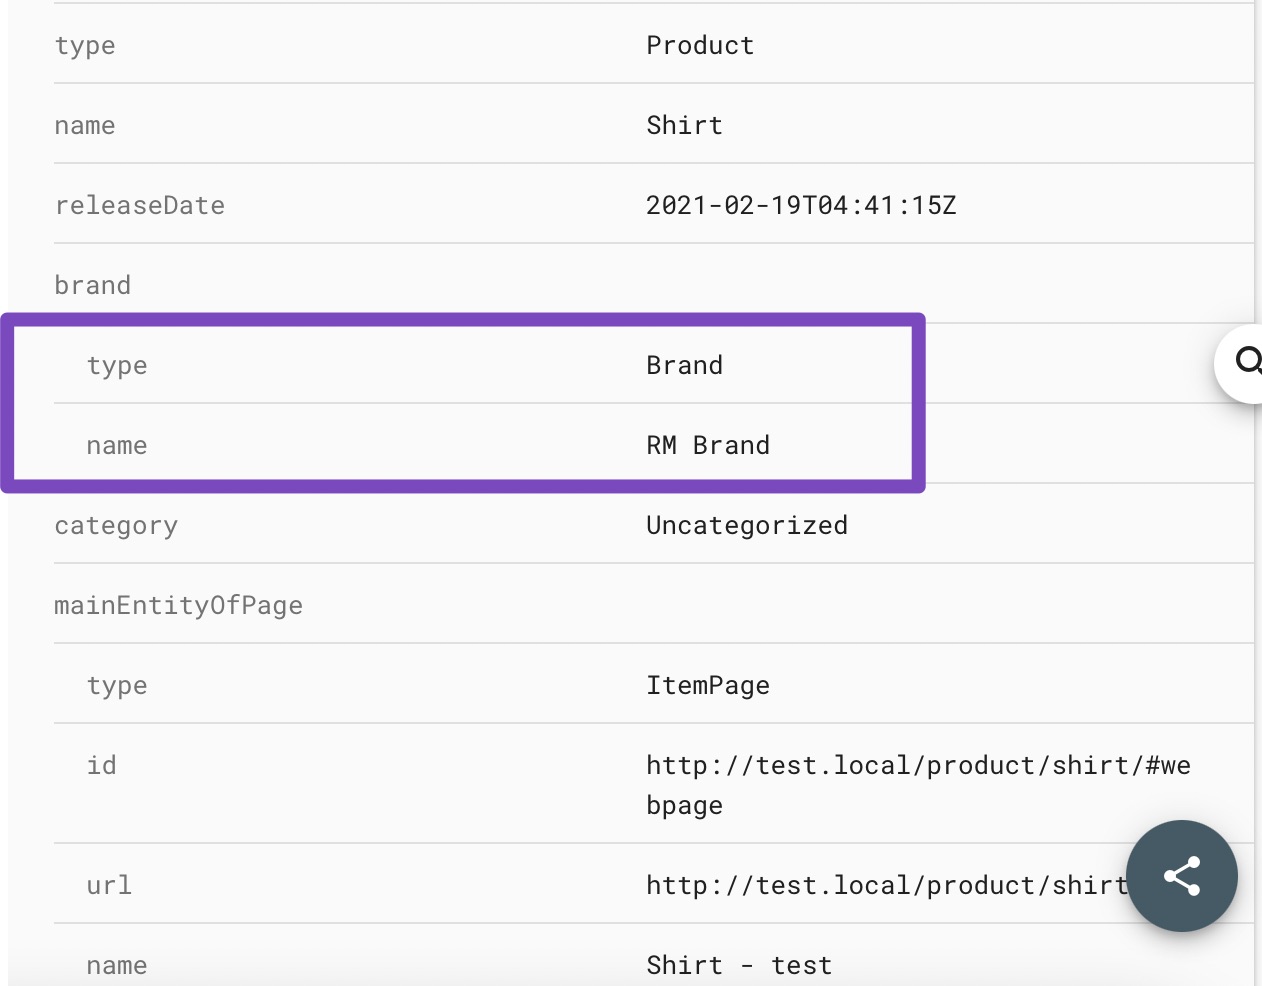
After adding a custom brand name your product’s page source will look like this:
How to Set Custom Brand Name Using Filter?
If you’re using the Rank Math free version, then you may not see the Custom option under the Select Brand setting as shown above. In that case, you can simply use a filter to set your custom brand name by following the steps discussed below.
1 Navigate to the Theme File Editor
Head over to Appearance → Theme File Editor (for Classic Theme) from your WordPress admin area.
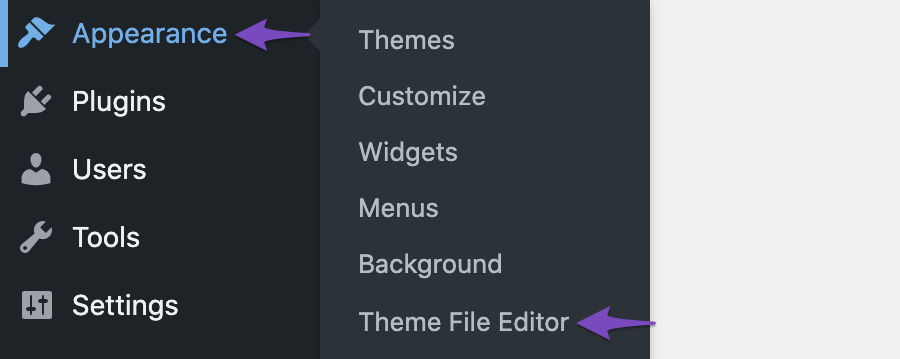
In the case of Block Theme, navigate to WordPress Dashboard → Tools → Theme File Editor, as shown below.
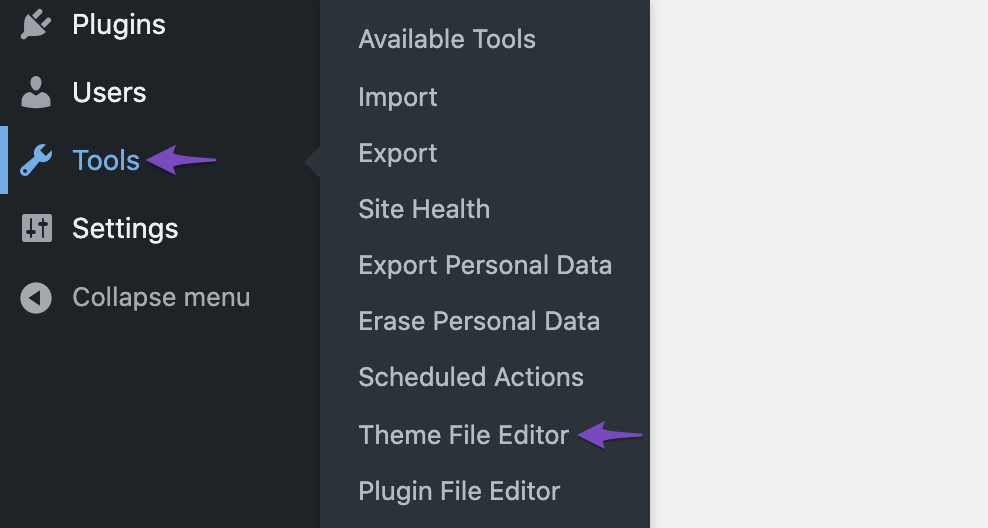
Then, choose rank-math.php from the list of theme files shown on the right side of the screen.
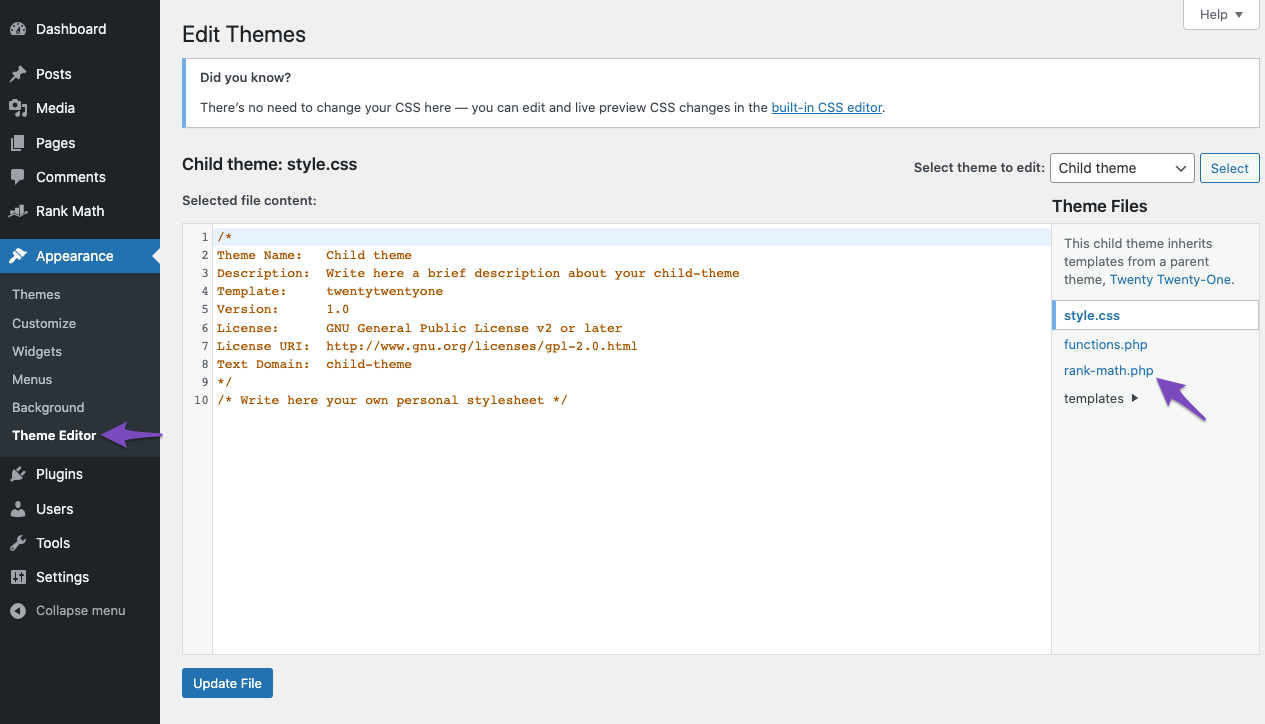
Or, navigate to Tools → Theme File Editor from the WordPress dashboard (for Block Themes). And, add the code to the rank-math.php file from the theme files. Then save the settings by simply clicking the Update File button.
2 Add the Code Snippet
In the code editor (displayed in the middle of your screen), copy-paste the following code snippet. Make sure to replace Rank Math with your brand name in the code snippet.
/**
 * Filter to add custom Brand for WooCommerce Products.
 *
 * @param array $entity Snippet Data
 * @return array
 */
add_filter( 'rank_math/snippet/rich_snippet_product_entity', function( $entity ) {
    $entity['brand']['@type'] = 'Brand';
    $entity['brand']['name'] = 'Rank Math';
    return $entity;
});
And then click the Update File button.
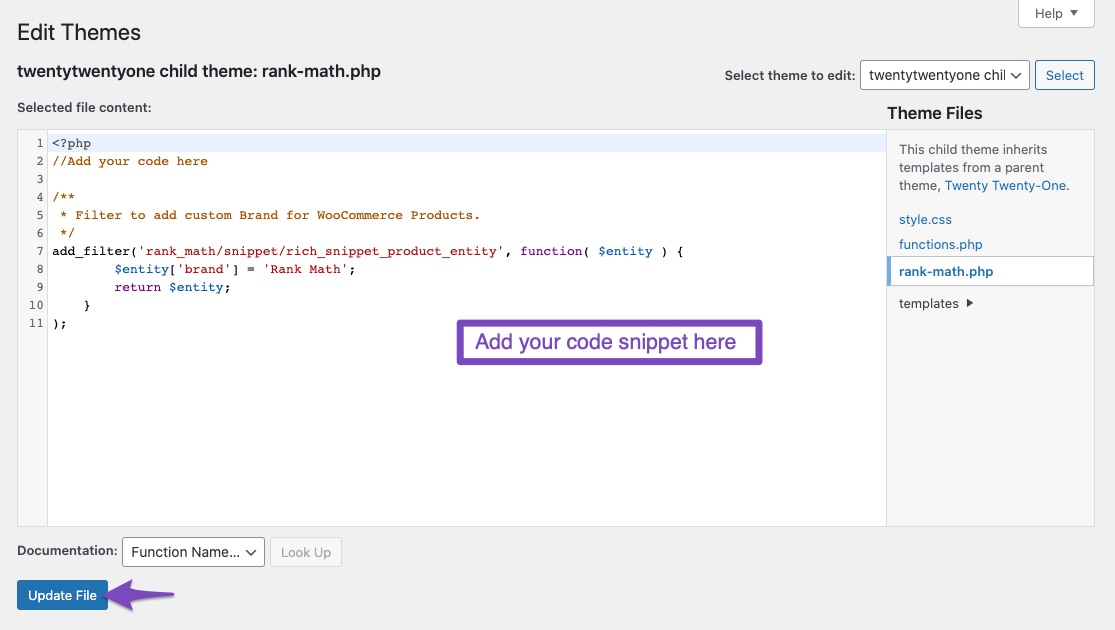
3 Check Schema Markup
Now you can check your page with Google’s Rich Results Testing Tool to see if your brand name has been added.
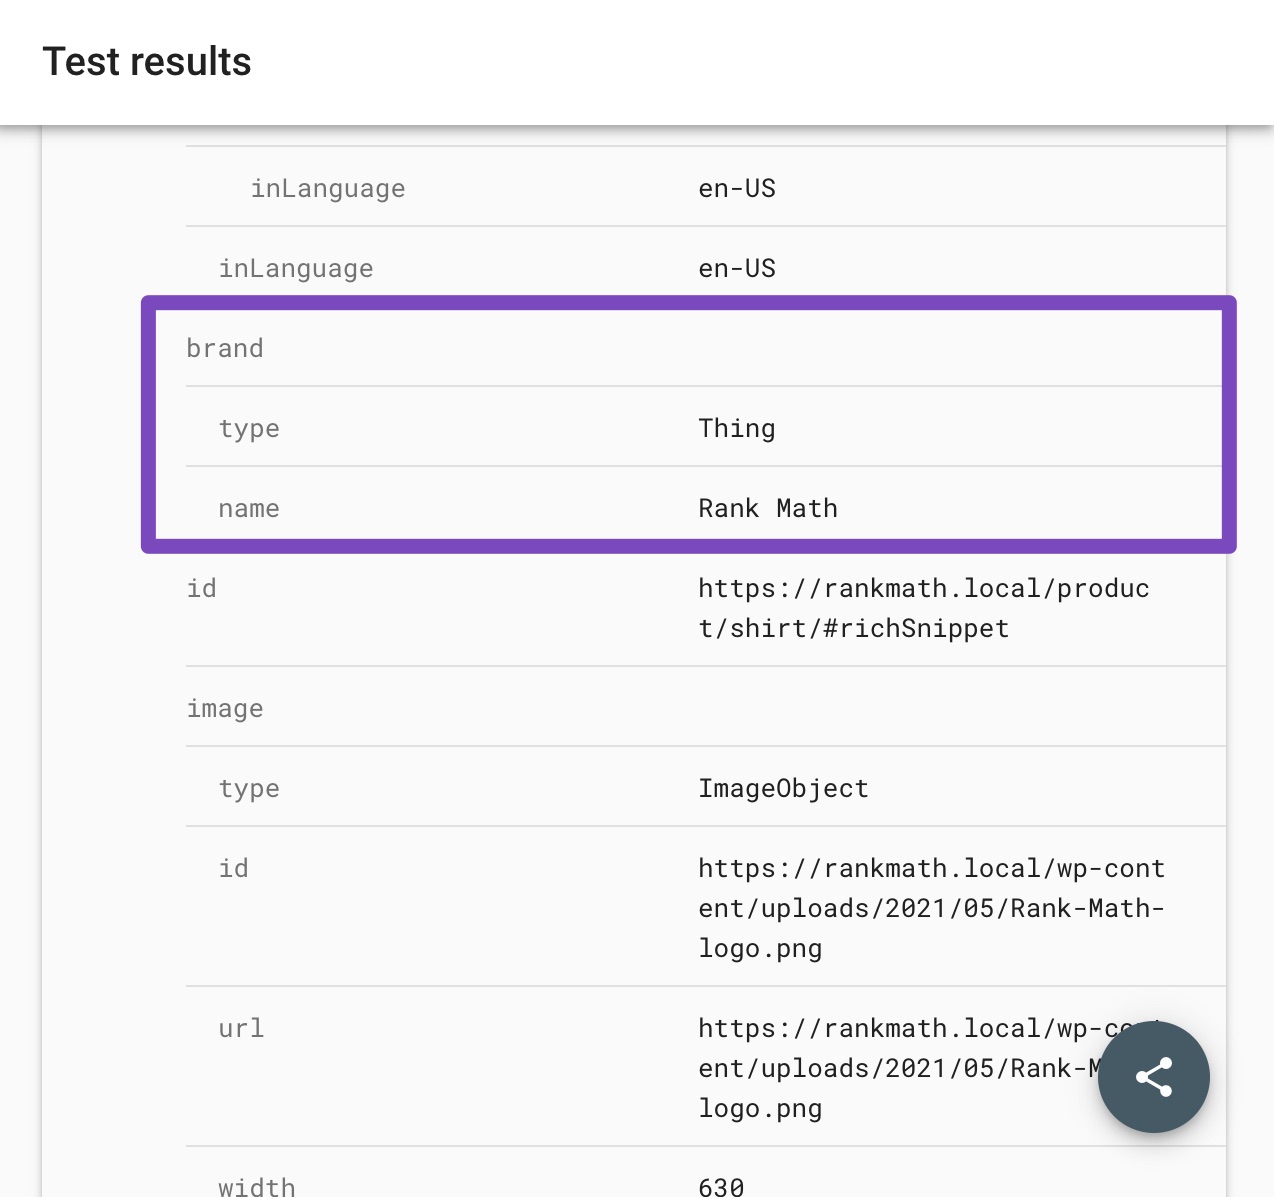
And, that’s it! This is how Rank Math allows you to add a custom name to your brand easily. Hence we strongly recommend you install the Rank Math plugin and enjoy its features. If you still have absolutely any questions, please feel free to reach our support directly from here, and we’re always here to help.