Have you ever wondered how often your files are downloaded from your website? Tracking file downloads is crucial for understanding user behavior, especially if you offer resources like PDFs, eBooks, or downloadable guides. This data can help you gauge the popularity of your content, identify what resonates with your audience, and refine your offerings.
Thankfully, tools like Google Analytics (GA4) make it easy to track file downloads and gain valuable insights into your users’ preferences, and Rank Math makes it super easy to set up Google Analytics on your site.
In this knowledgebase guide, we’ll show you how to track file downloads on your WordPress website using Google Analytics.
1 Ensure Google Analytics Is Connected to Your Site
Before proceeding, ensure Google Analytics is connected to your website and collecting data. If you haven’t set it up already, then using Rank Math, you can easily connect with Google Analytics by following this simple guide.
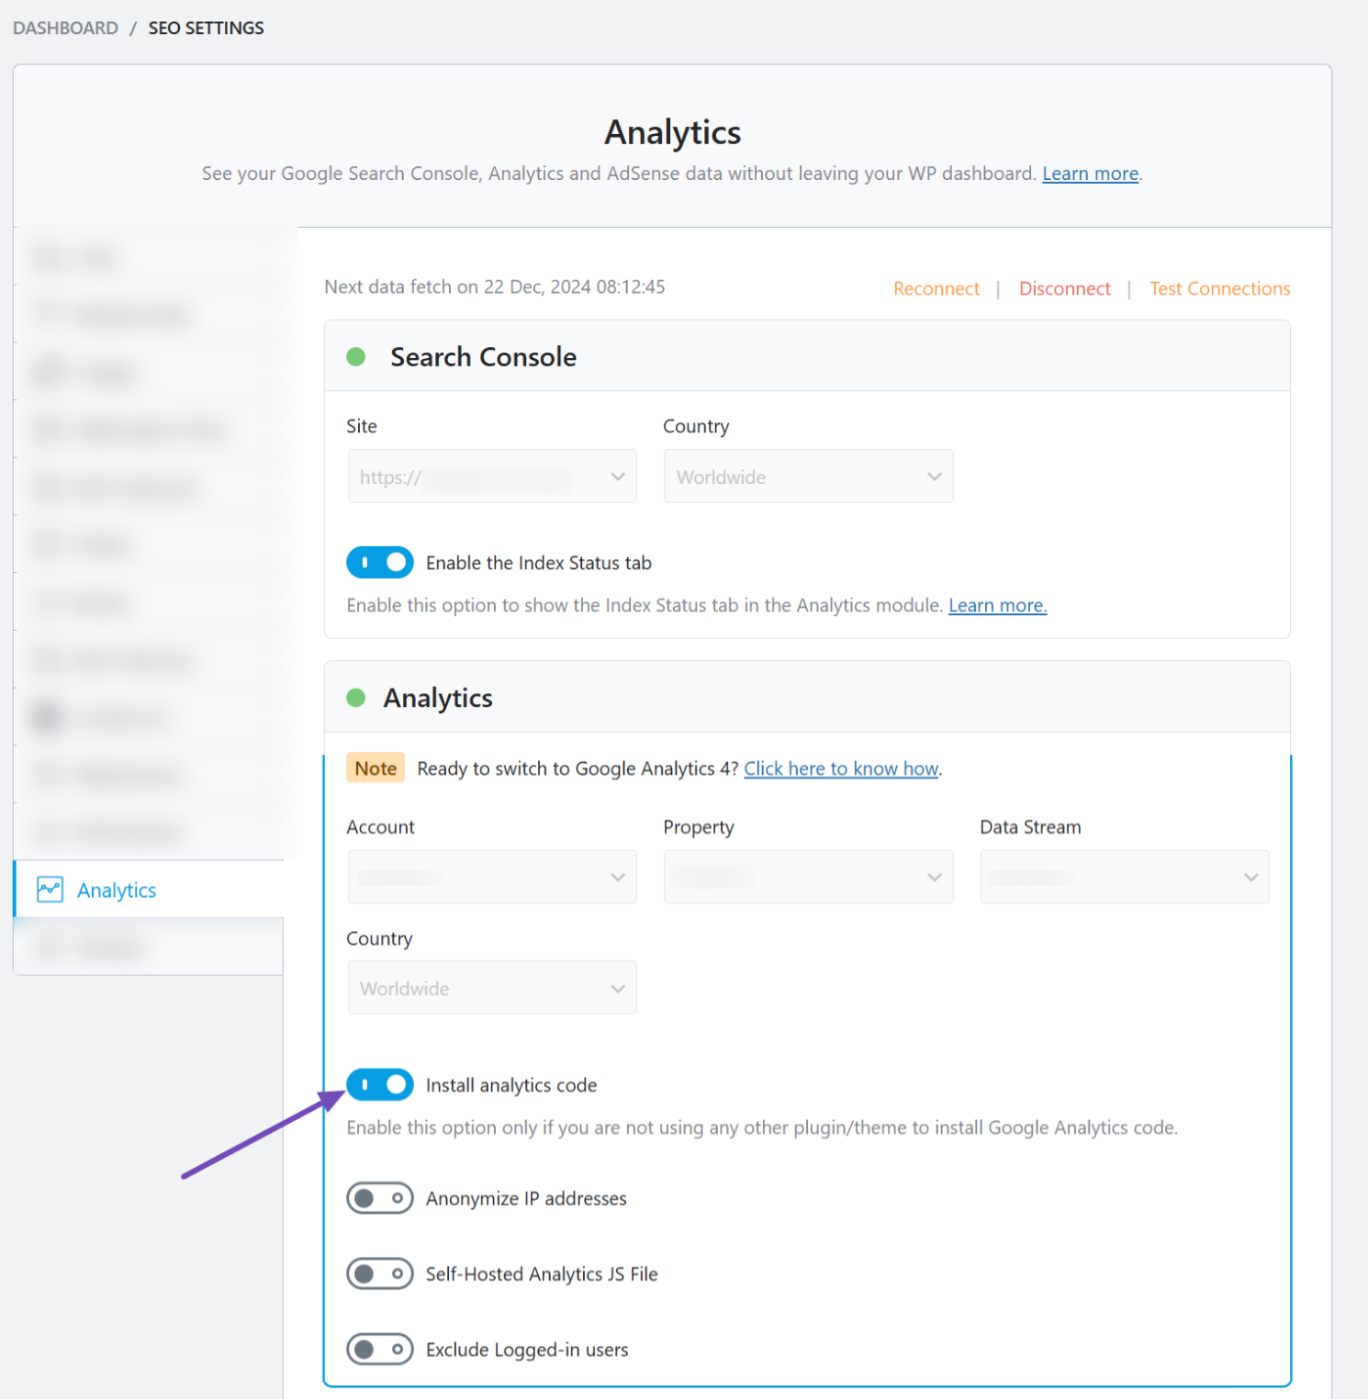
Once you’ve successfully connected it, you’re all set to move on!
2 Access Your Data Stream
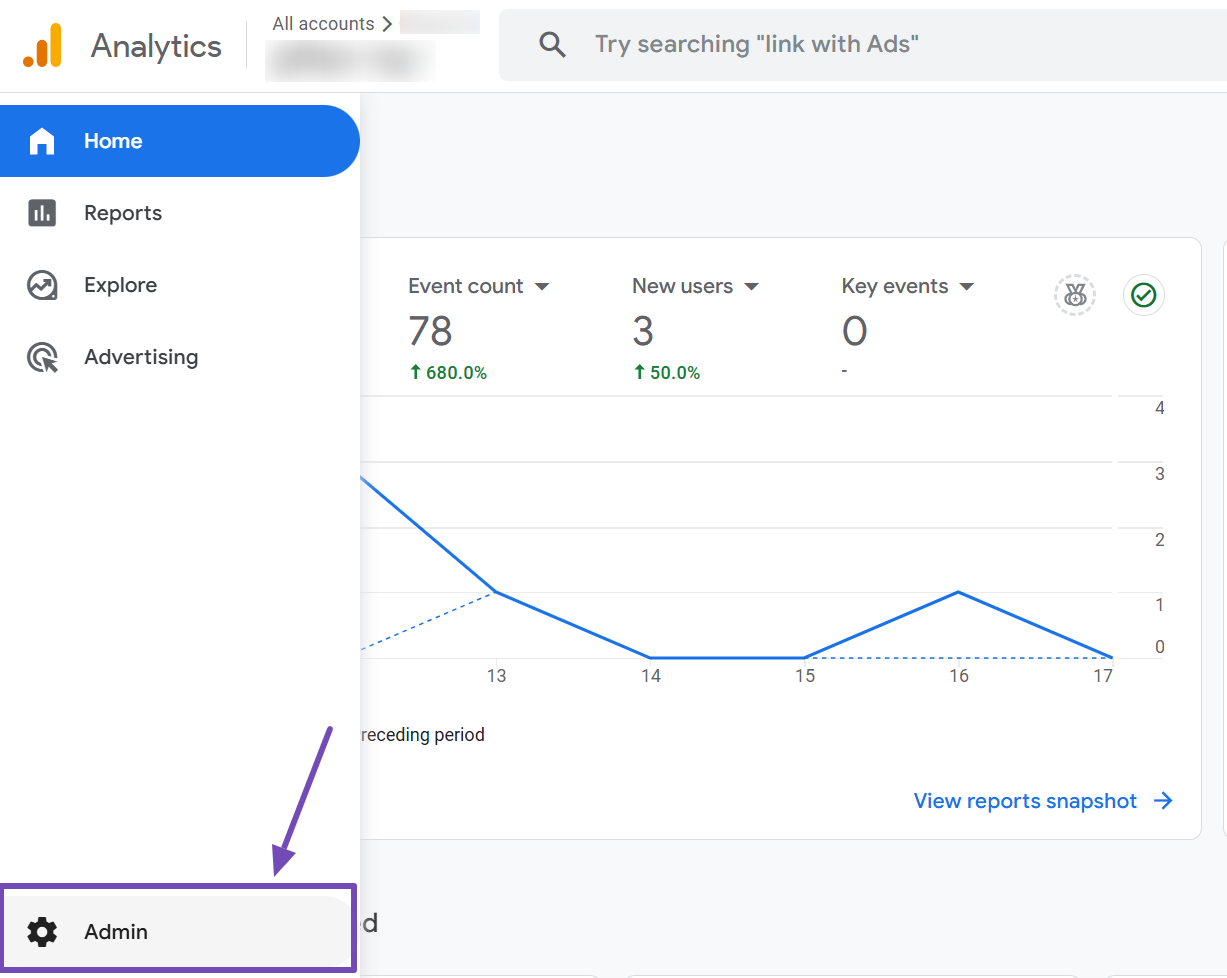
Start by logging into your Google Analytics account. From the dashboard, navigate to the Admin section in the left-hand menu.
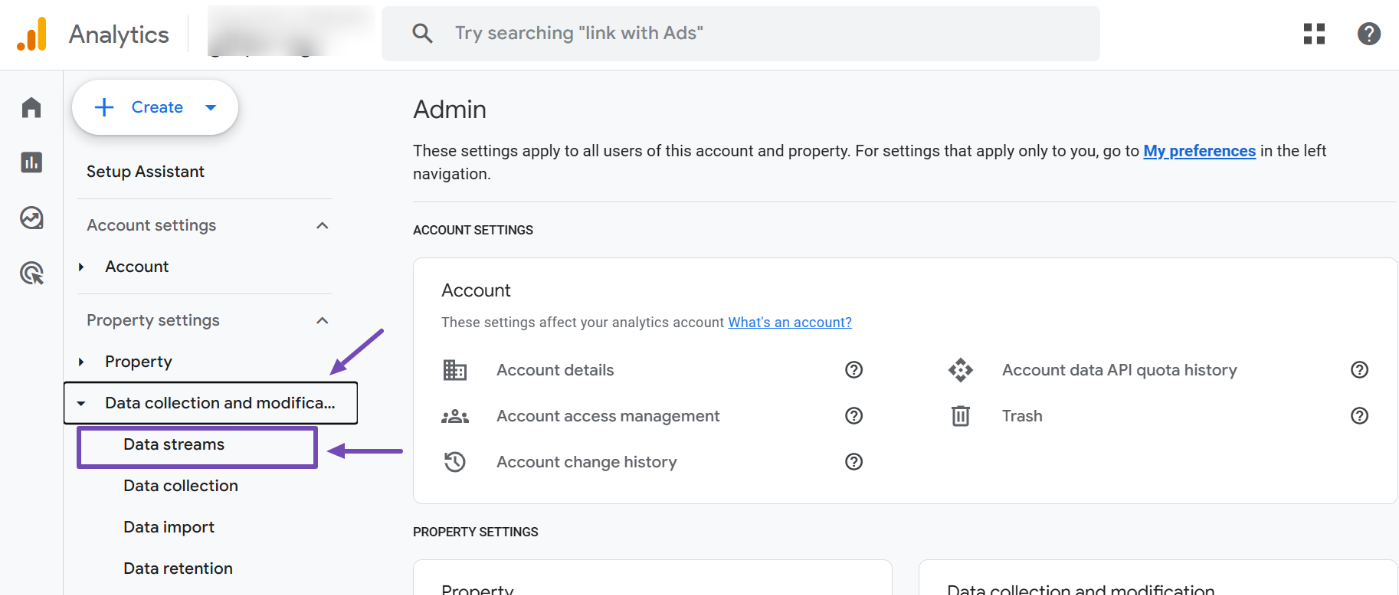
In the Admin settings, locate the Property Settings menu. Open the Data Collection and Modification toggle and click on Data Streams.
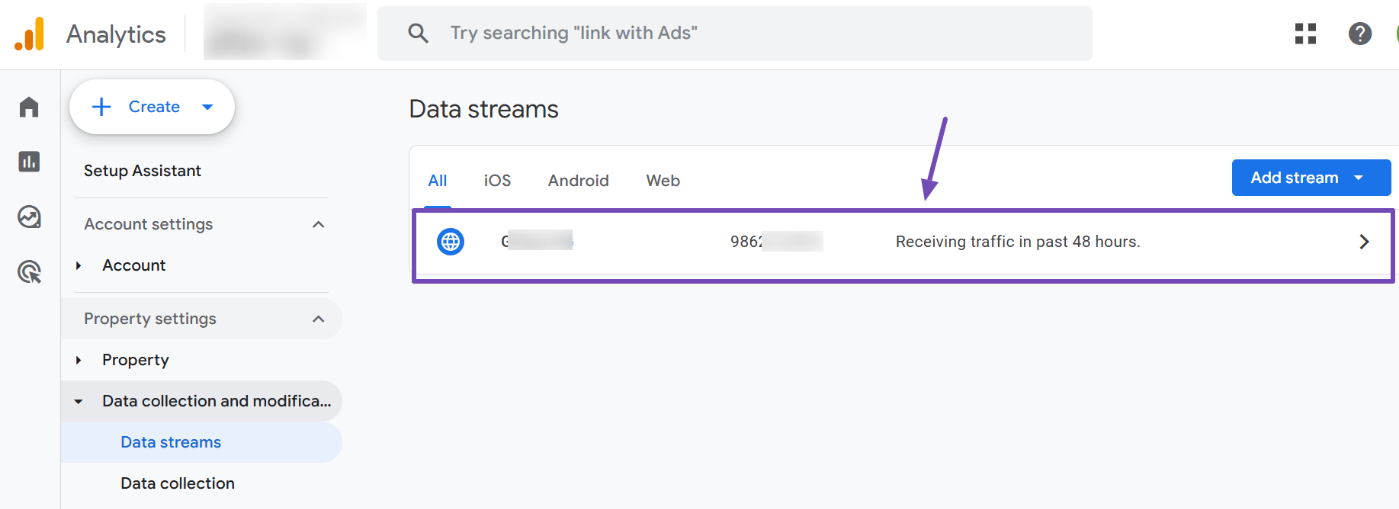
On the Data Streams page, find the stream associated with your website and select it. This will open your site’s data stream details on the right side of the screen.
3 Enable Enhanced Measurement
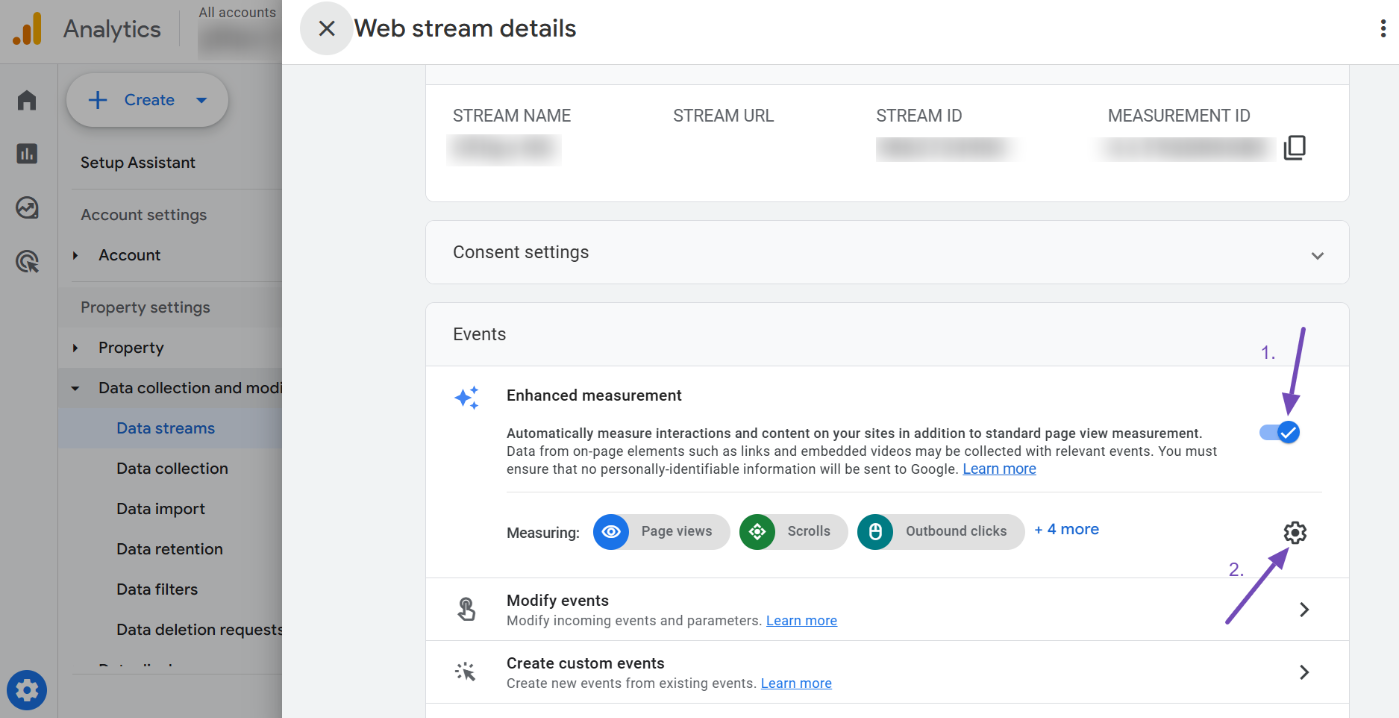
Scroll down within your data stream settings to find the Enhanced Measurement section. This feature automatically tracks certain events—like file downloads—without the need for extra tags or code.
Ensure the Enhanced Measurement toggle is enabled, then click the settings icon to configure file download tracking, as shown below.
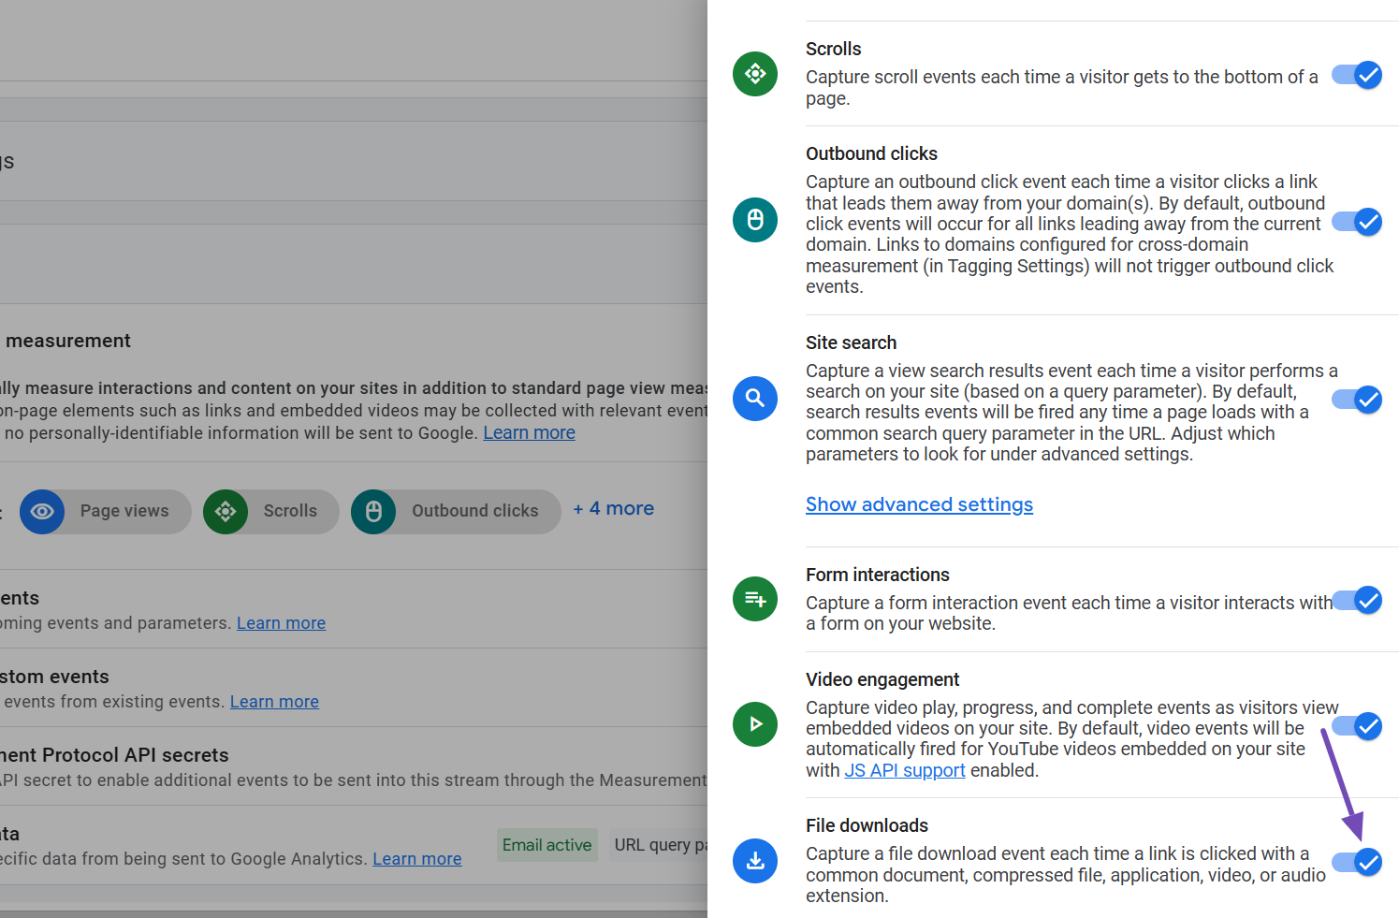
When the settings menu opens, look for the File downloads toggle. If it’s not already turned on, enable it, then scroll back up and click Save to apply your changes.
4 View File Downloads in Google Analytics
Now that everything is configured, Google Analytics will need some time (usually about 24 hours) to start collecting download data.
Keep in mind that Google Analytics will only track downloads of files with supported extensions. These include: .pdf, .xls, .xlsx, .doc, .docx, .txt, .rtf, .csv, .exe, .key, .pps, .ppt, .pptx, .7z, .pkg, .rar, .gz, .zip, .avi, .mov, .mp4, .mpe, .mpeg, .wmv, .mid, .midi, .mp3, .wav, and .wma.
It’s also important to note that Google Analytics will only begin tracking file downloads after you complete this setup. If your site doesn’t receive much traffic, you can test the tracking by downloading a few supported files yourself.
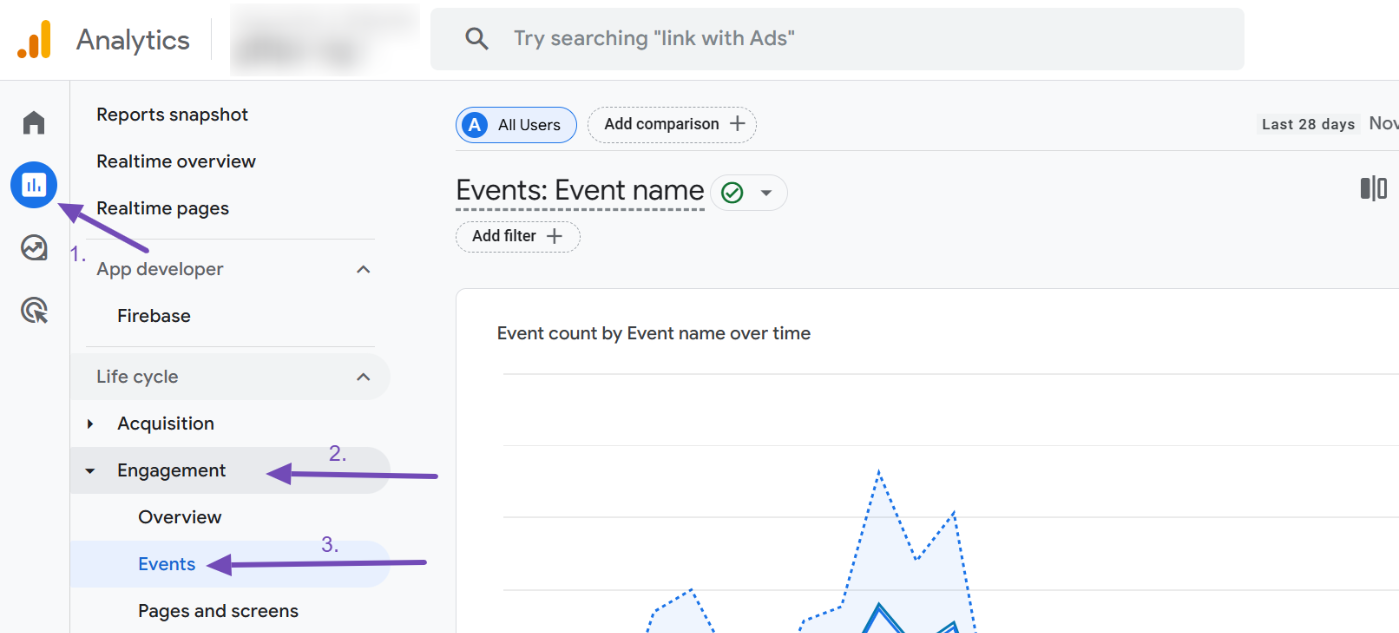
After some time, log back into your Google Analytics account to view the data. Navigate to Reports → Engagement → Events.
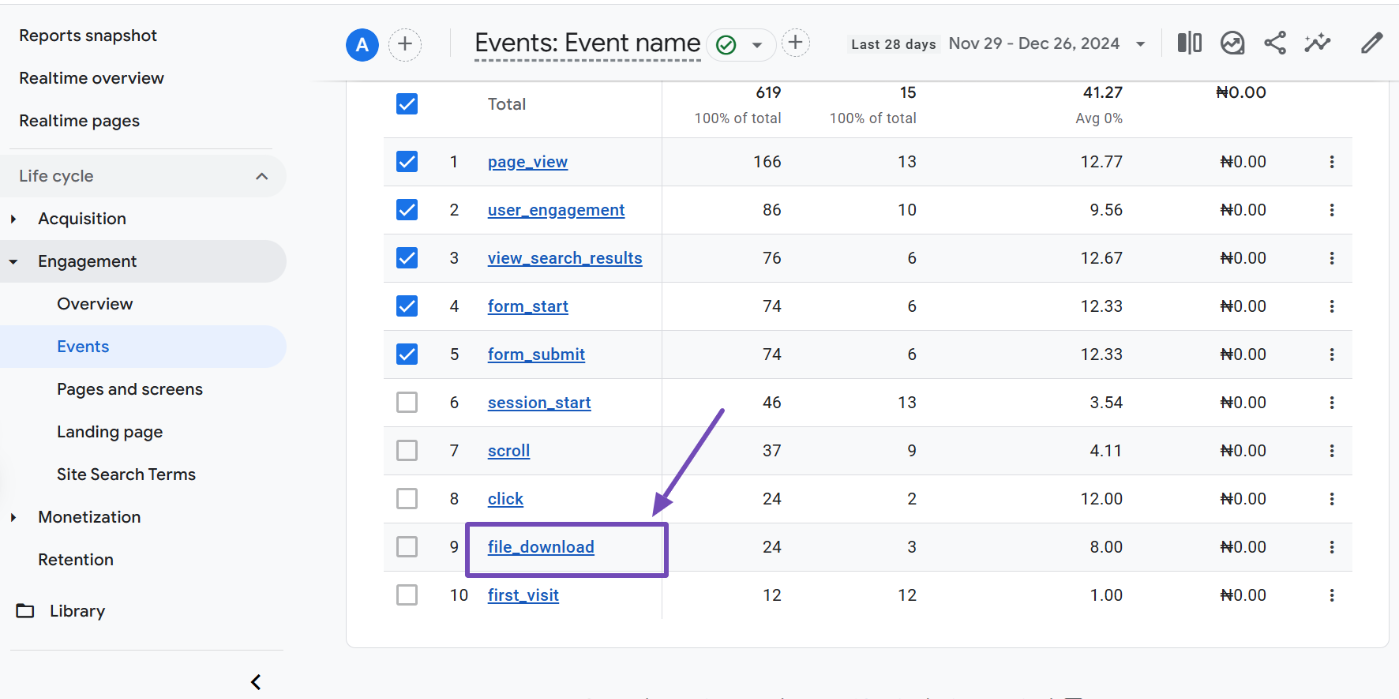
On the Events report page, scroll down and look for the file_download event. This event is automatically triggered when a user downloads a file on your site. Click on it to analyze the download activity, as shown below.
5 Analyze File Download Data
Within the file_download event page, scroll down to the EVENTS IN LAST 30 MINUTES section. You’ll see a dropdown labeled PARAMETER NAME.
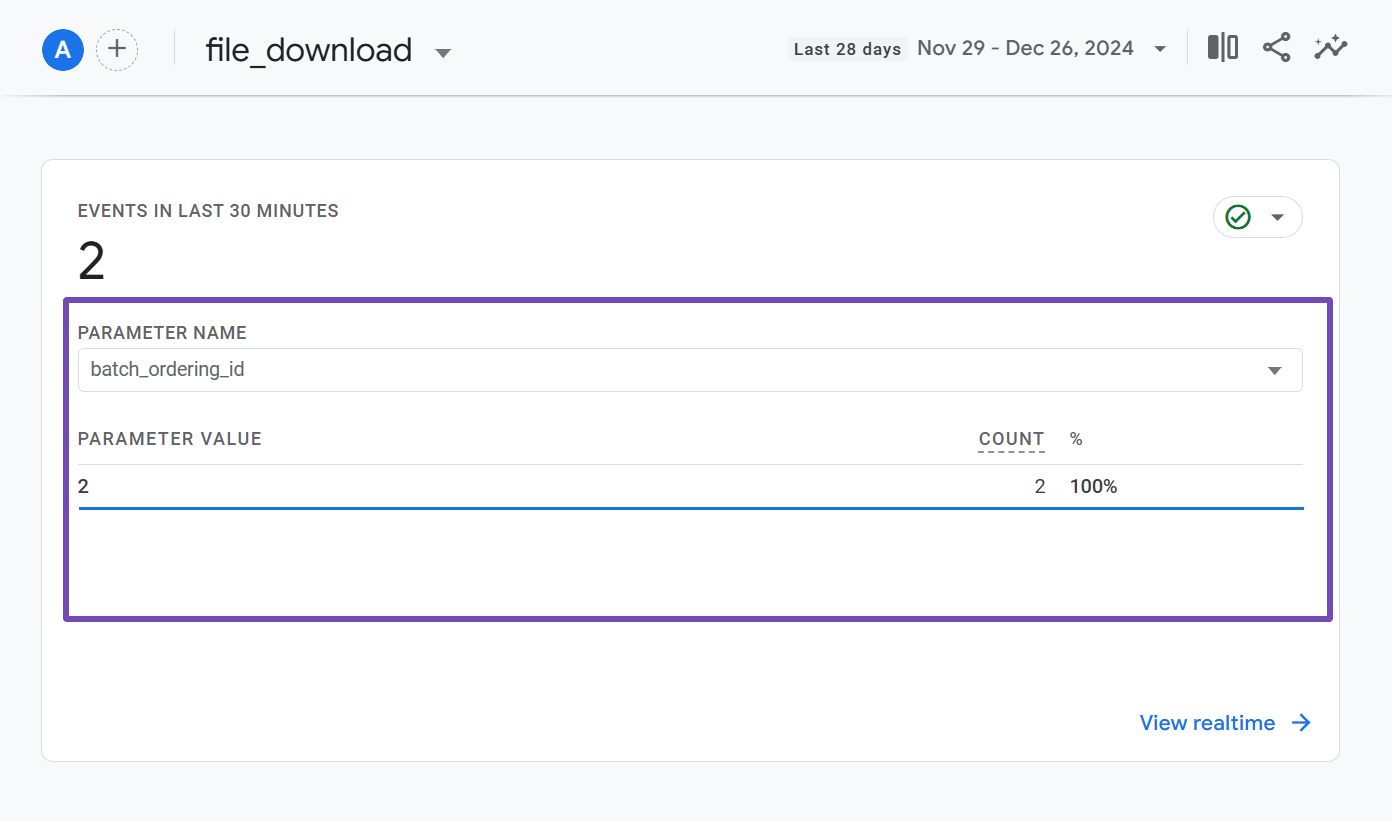
Click on the dropdown, and you’ll find several options for viewing reports related to the file downloads event. Some of these include:
- file_extension: The type of file extension downloaded (e.g., .pdf).
- file_name: The name of the downloaded file.
- link_text: The text on the button or link clicked to download the file.
- page_location: The URL of the page from which the file was downloaded.
- page_referrer: The domain URL of the site from which the file was downloaded.
- page_title: The title of the page where the file was downloaded.
- link_url: The URL of the downloaded file (this is the one you’re most likely interested in).
You can select link_url from the dropdown to add it to your report, as shown below.
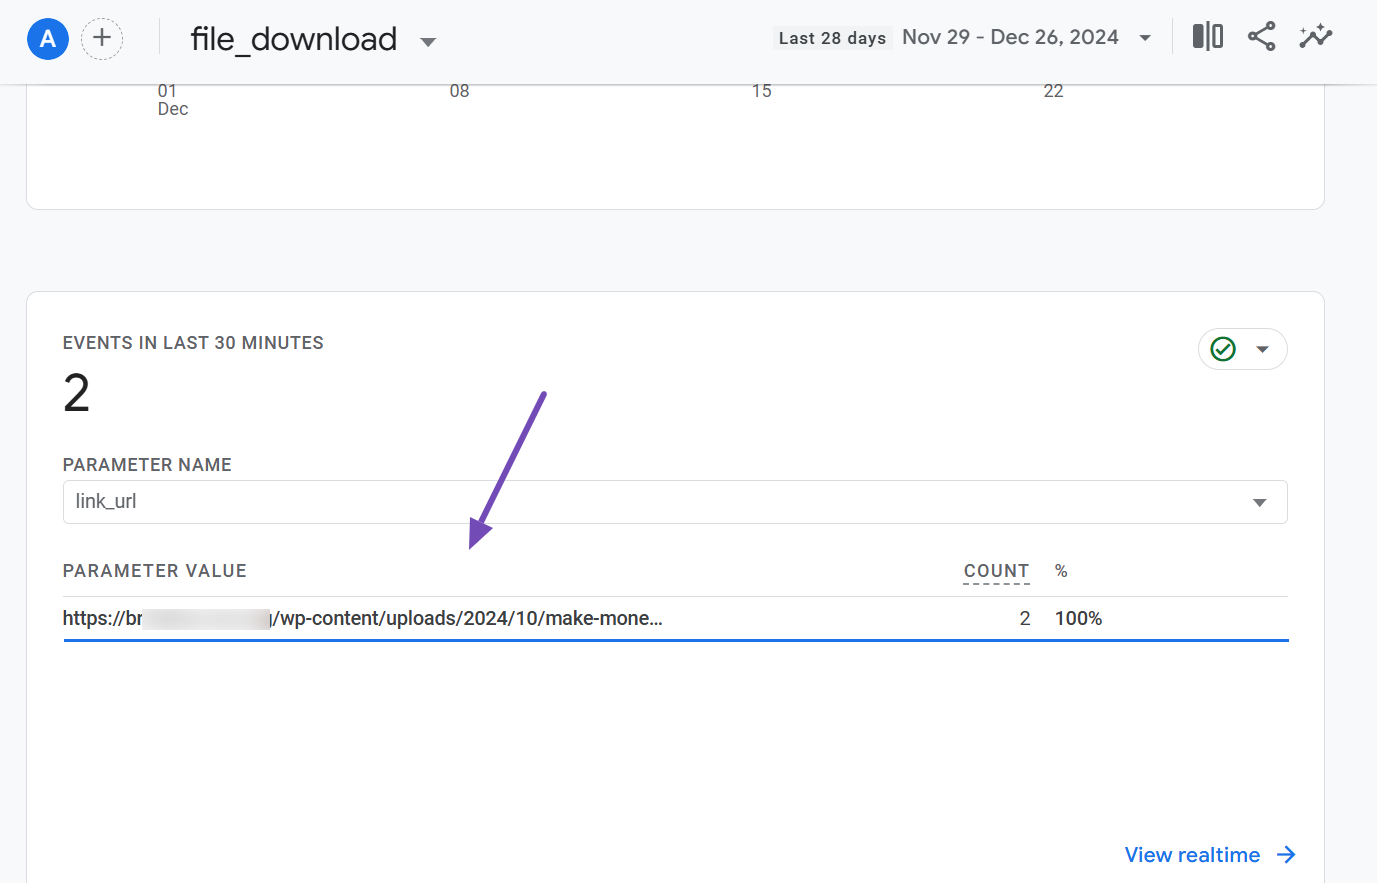
However, a limitation with this method is that it shows only real-time results. After a few minutes, the data disappears. To track file downloads over a longer period, including past downloads, you’ll need to use the Explorations tool in Google Analytics.
6 Track File Downloads Using Explorations
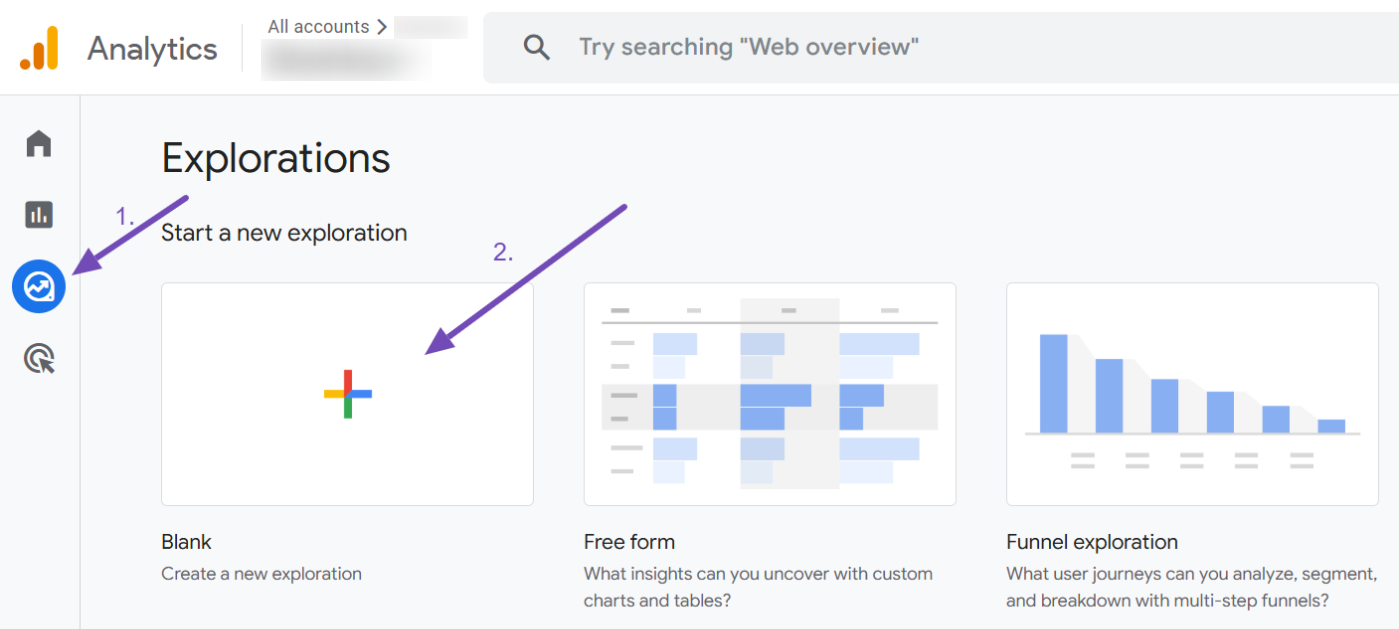
Explorations in Google Analytics 4 (GA4) offer a more powerful way to track file downloads. To access this tool, navigate to Explore in the GA4 left-hand menu and select the Blank Exploration option, as shown below.
6.1 Adding Dimensions
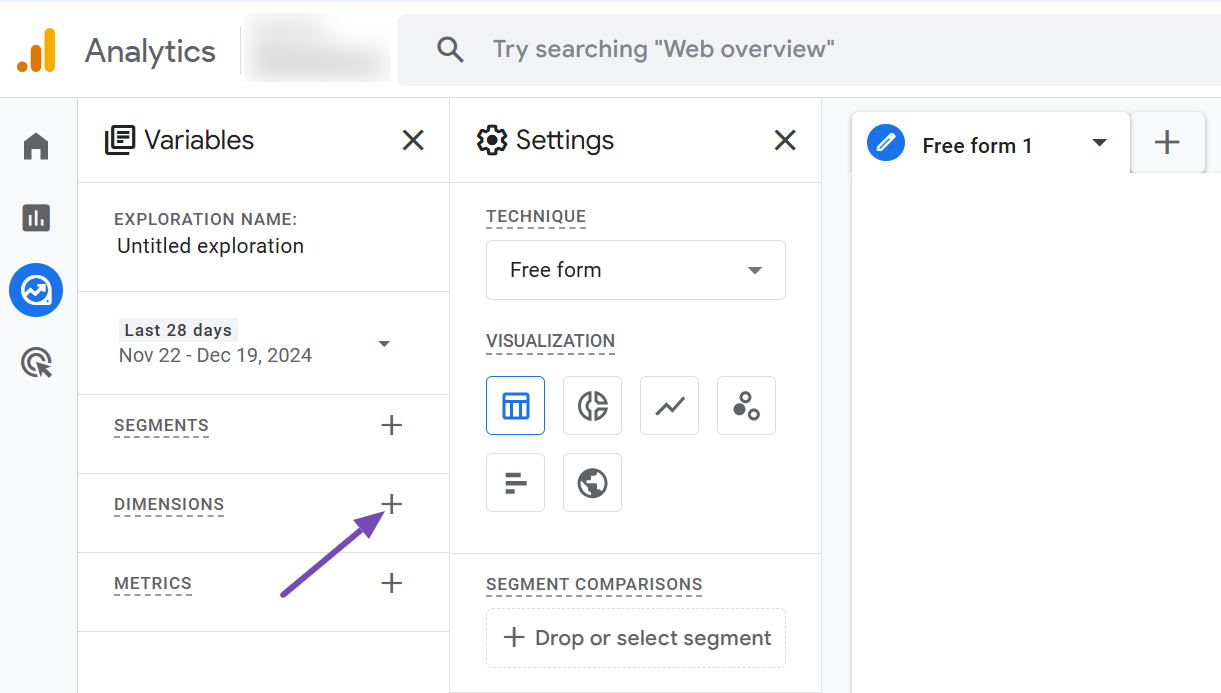
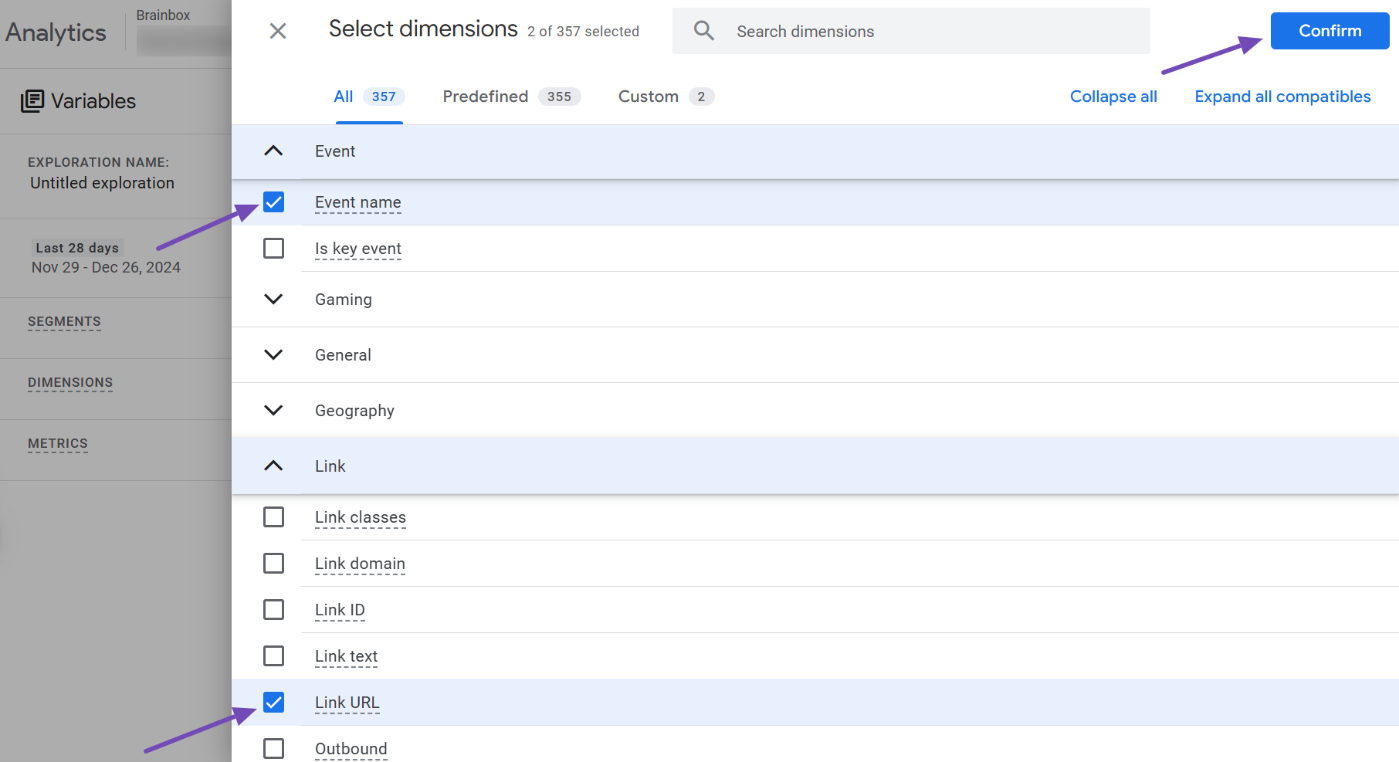
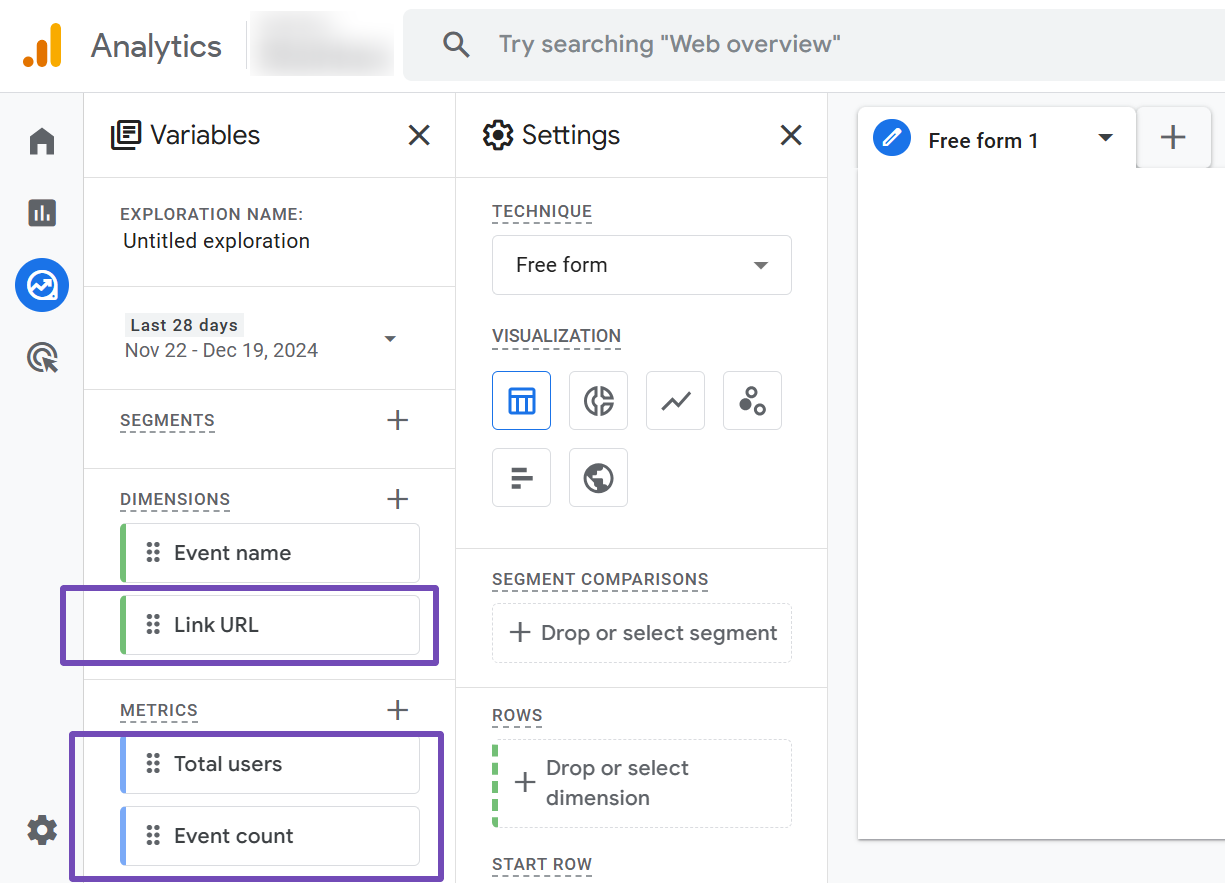
In your blank exploration, the first step is to add the necessary dimensions. Click the + icon next to the DIMENSIONS section. This opens a side panel where you can select dimensions for your report.
From the panel, select Event name (under Event) and Link URL (under Link). Once selected, click Confirm to import them into the report, as illustrated below.
6.2 Adding Metrics
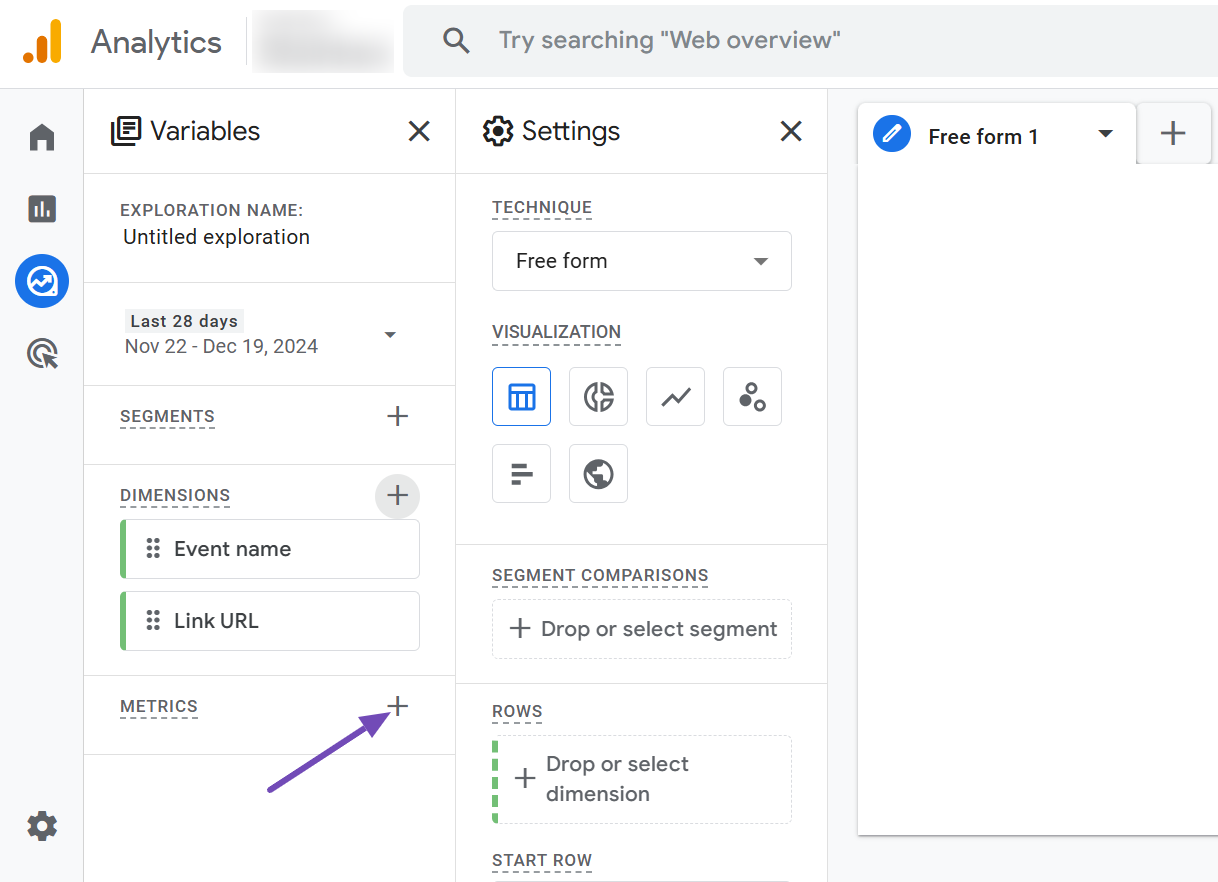
Next, click the + icon in the METRICS section and add the relevant metrics for your report.
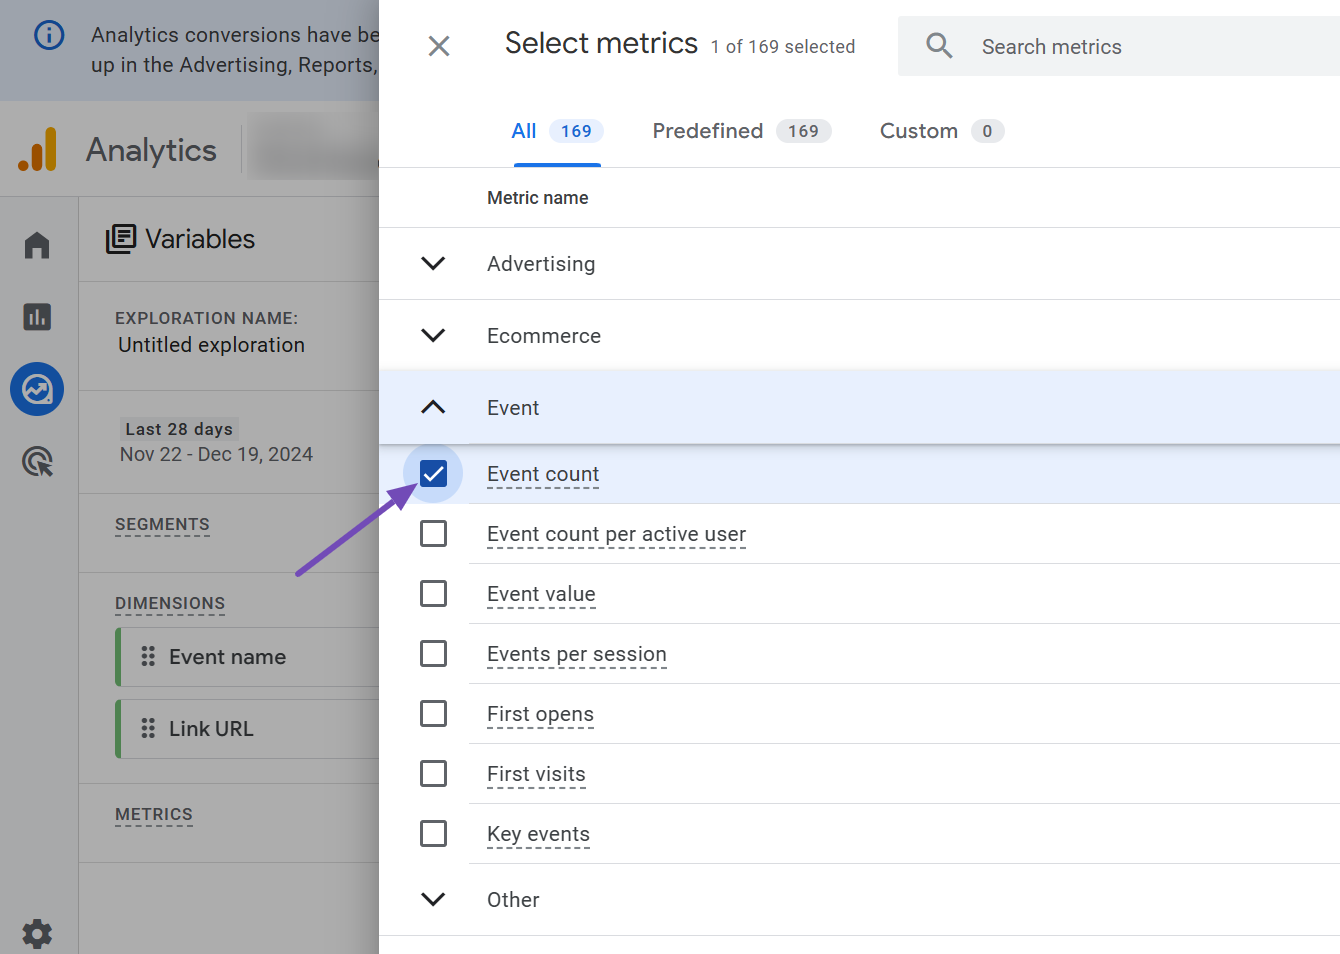
Choose Event count (under Event).
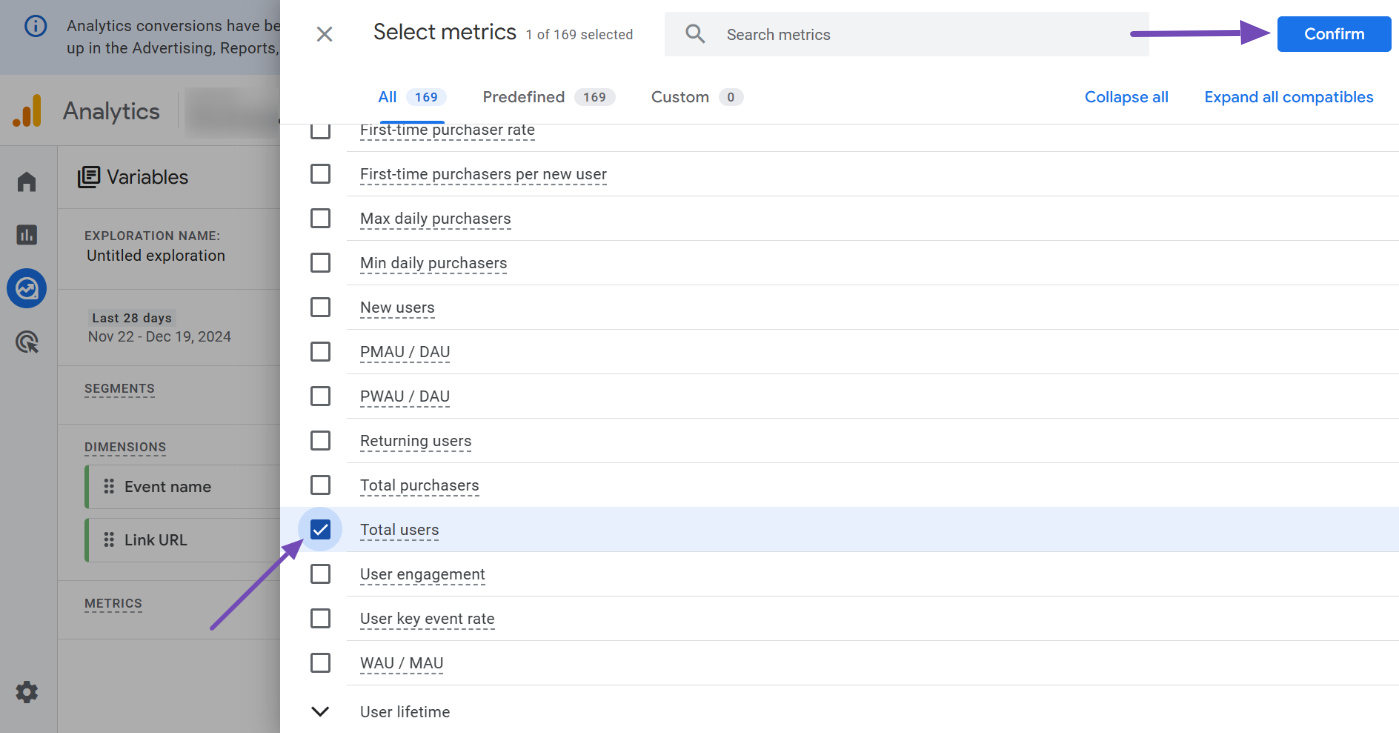
Then, Total users (under User). After selecting these, click Confirm to include them in your report.
6.3 Building Your Report
Now double-click on the Link URL dimension, as well as the Event count and Total users metrics, to add them to your report workspace.
You’ll now see a table displaying a mix of file download links and outbound links clicked by users on your site. You might notice that the first row of the table is empty.
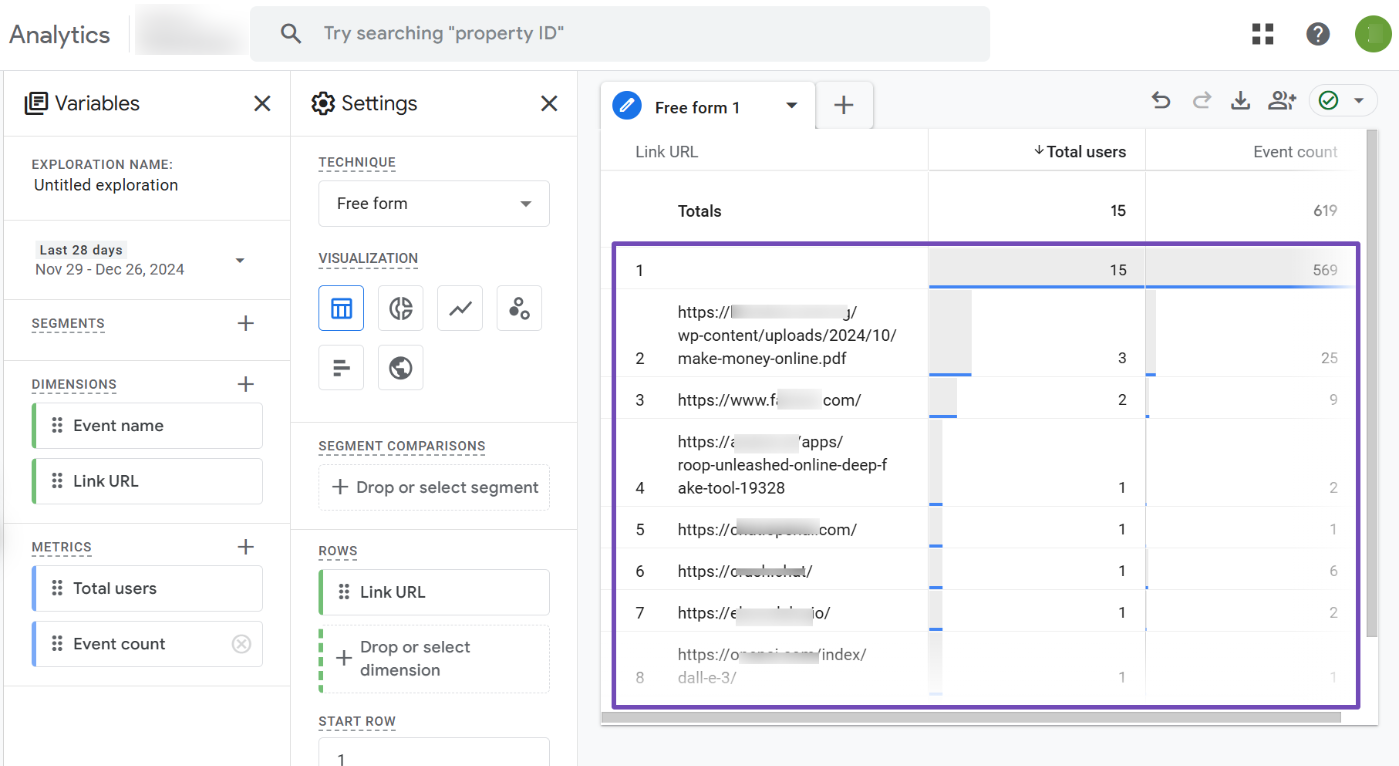
This happens because your current report shows data for all events on your site, not just the file download links. To narrow it down to focus specifically on file downloads, you’ll need to refine the report.
6.4 Refining the Report with Filters
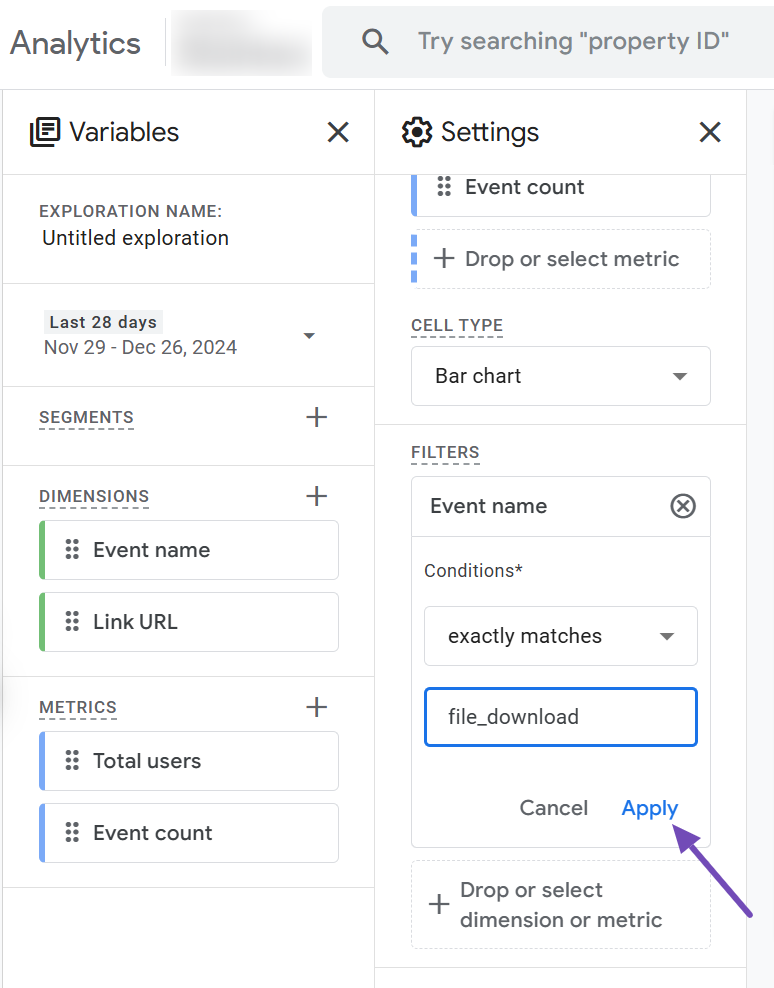
Locate the FILTERS section in the Settings tab. Click on the Drop or select dimension or metric field. From the dropdown that appears, select Event name.
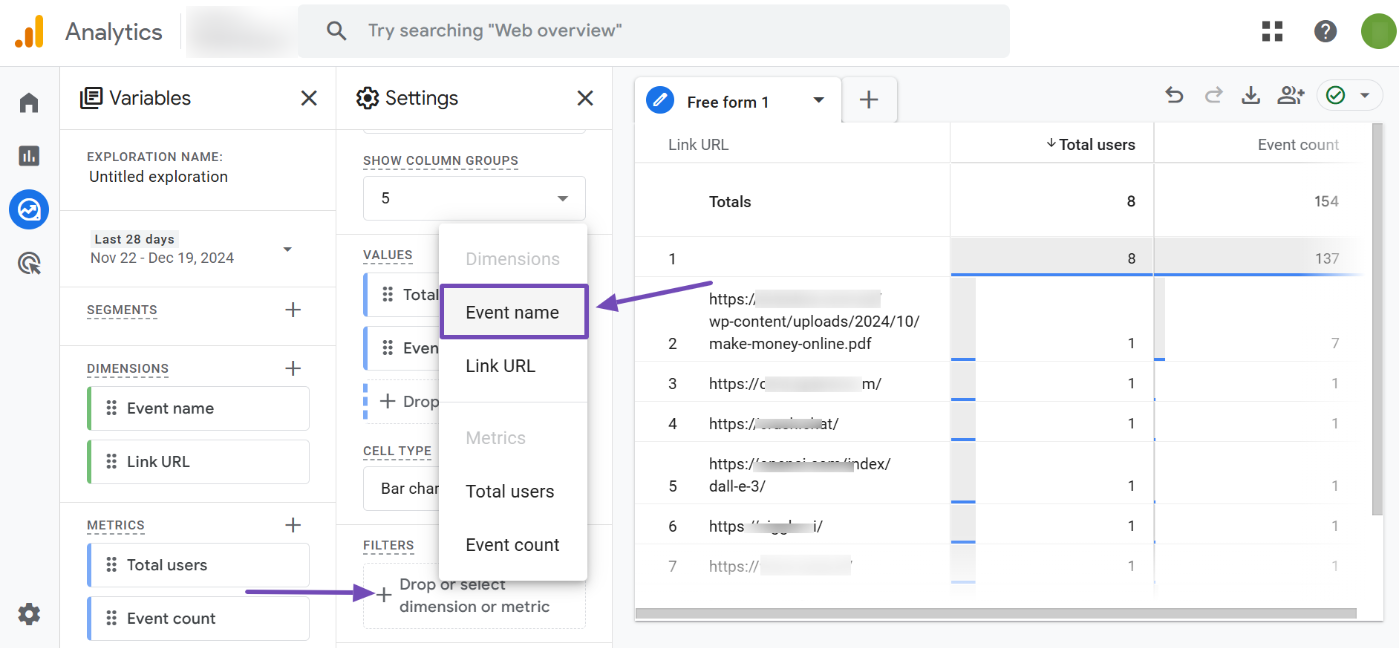
Once added, adjust the filter condition by selecting exactly matches from the match type dropdown.

Then, choose file_download from the expression dropdown, as shown below.
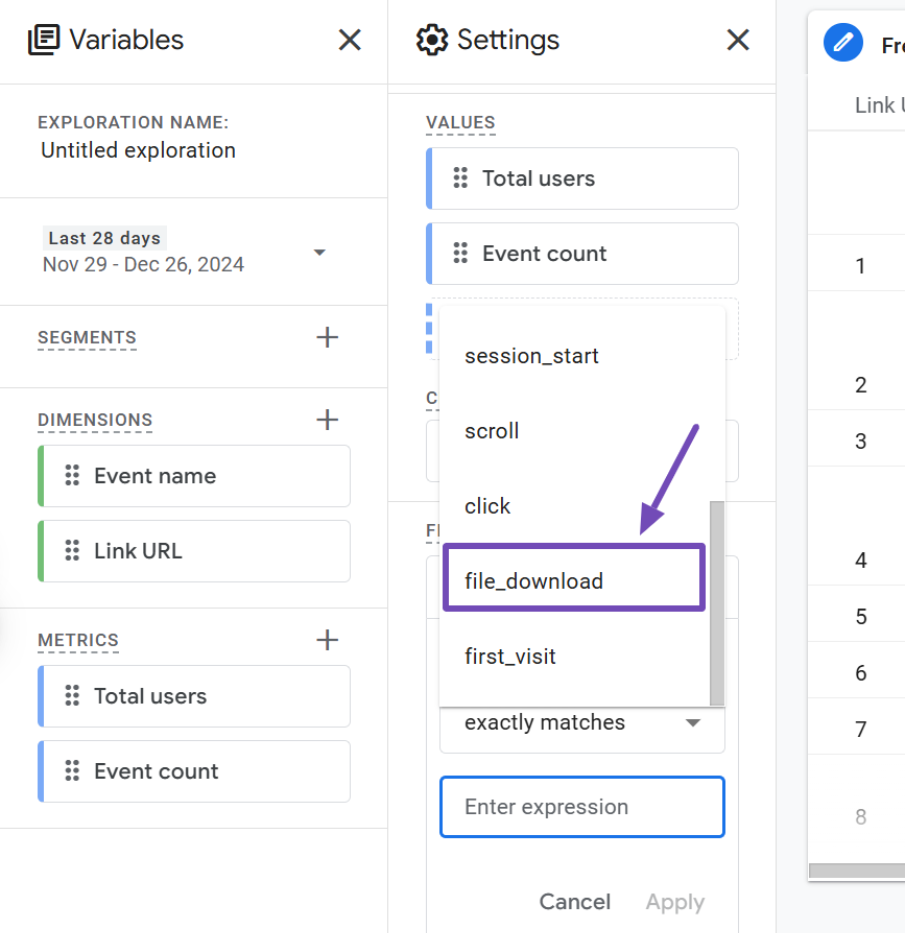
Next, click Apply to save your filter settings.,
6.5 Viewing File Download Links
With the filter applied, your report will now display only the links clicked to download files from your website.
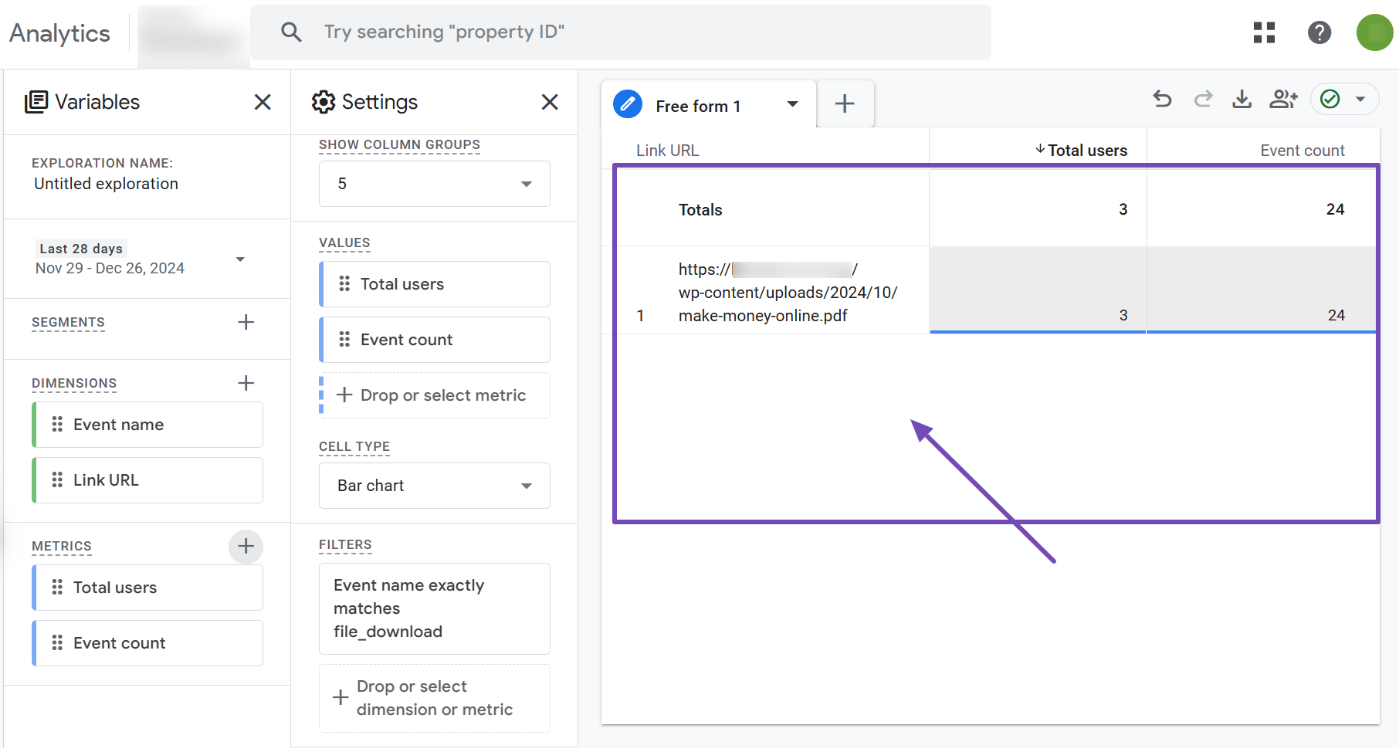
If some links appear truncated due to their length, simply hover over them to view the full URL in a popup.
And that’s it! By following these steps, you can effectively track file downloads on your website using Google Analytics. If you have any questions or need any assistance with Rank Math, feel free to reach out to our support team. They’re available 24/7, 365 days a year, to assist you.