Do you know how visitors use the search bar on your site to find what they need? Imagine being able to peek into exactly what they’re looking for—it’s like having a cheat sheet to their interests. What do they want? What are they struggling to find? And, more importantly, what opportunities are waiting for you to seize, whether it’s new content or products?
The good news is that you can track those search terms easily with Google Analytics, and Rank Math helps you set up Google Analytics 4 on your website.
In this knowledgebase guide, we’ll walk you through the steps to find the search terms people use on your site with the help of Google Analytics.
1 Ensure Google Analytics Is Connected to Your Site
Before starting, ensure your website is connected to Google Analytics and collect performance data.
If Google Analytics isn’t set up yet, Rank Math SEO makes connecting Google Analytics simple and code-free. Follow this guide and enable the Install analytics code option in Analytics settings, as shown below.
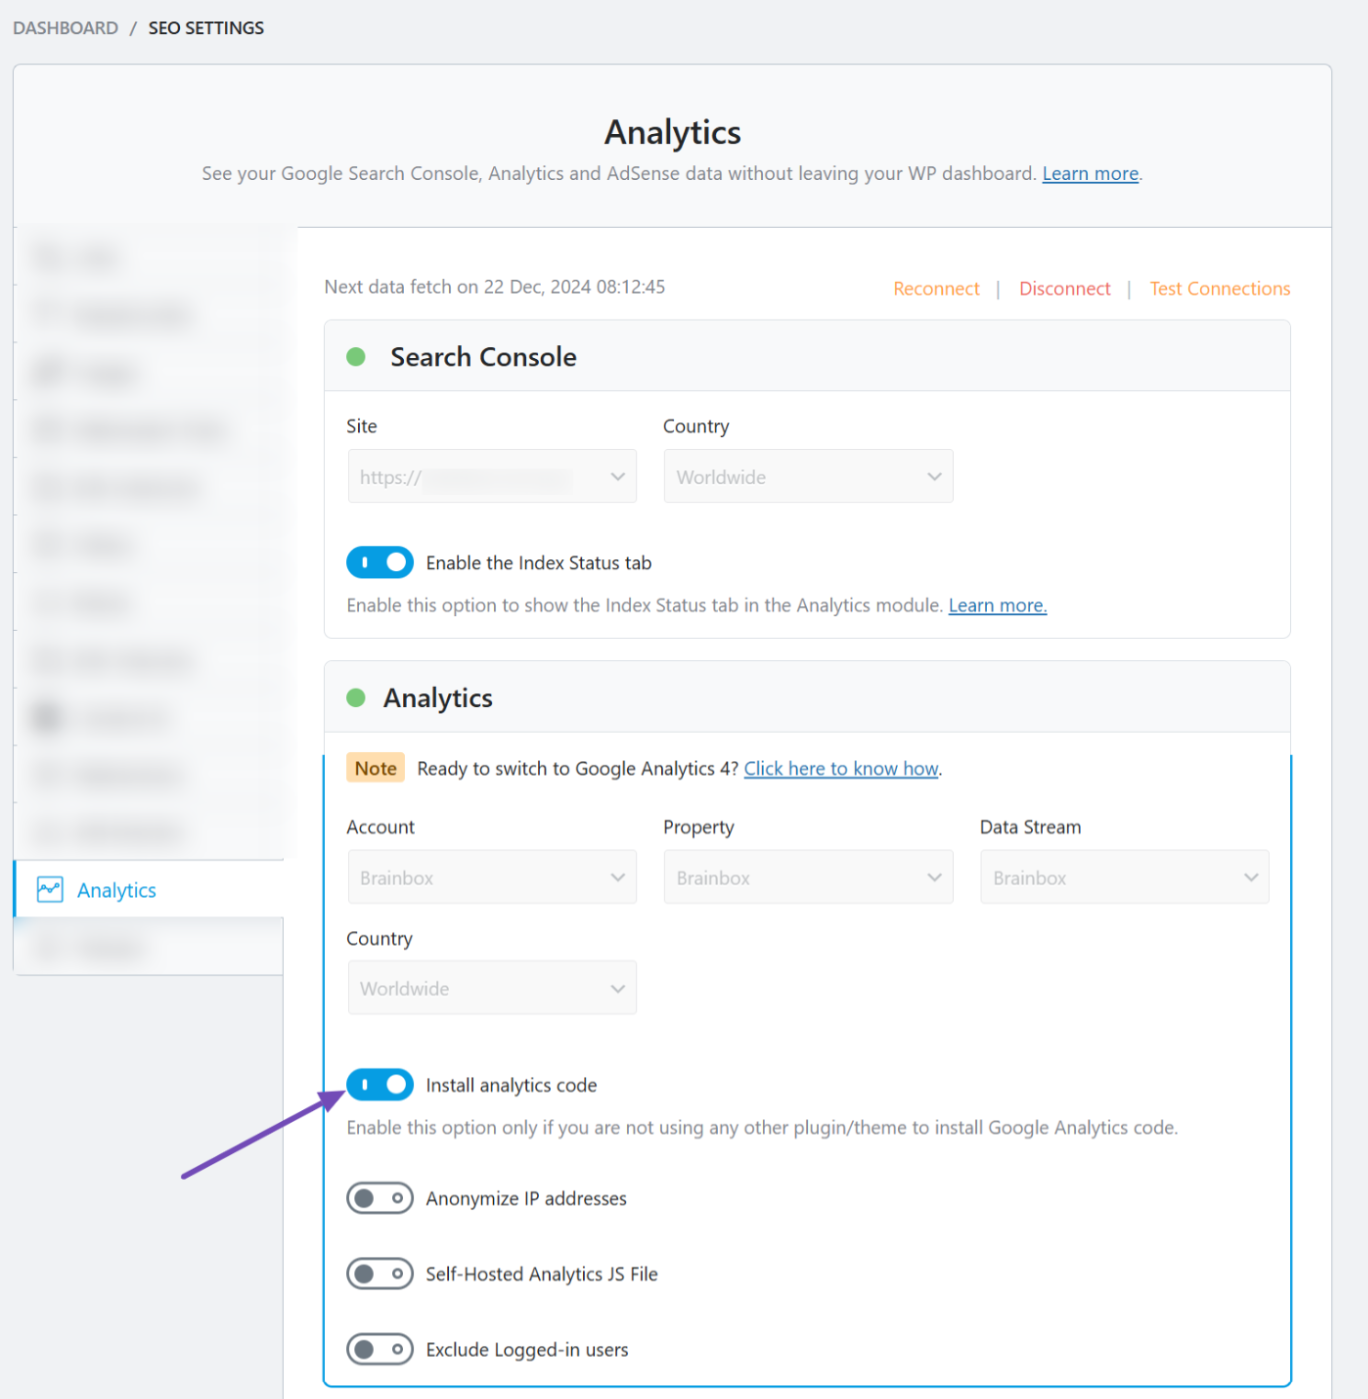
Once you’ve successfully connected it, you’re all set to proceed!
2 Access Your Data Stream
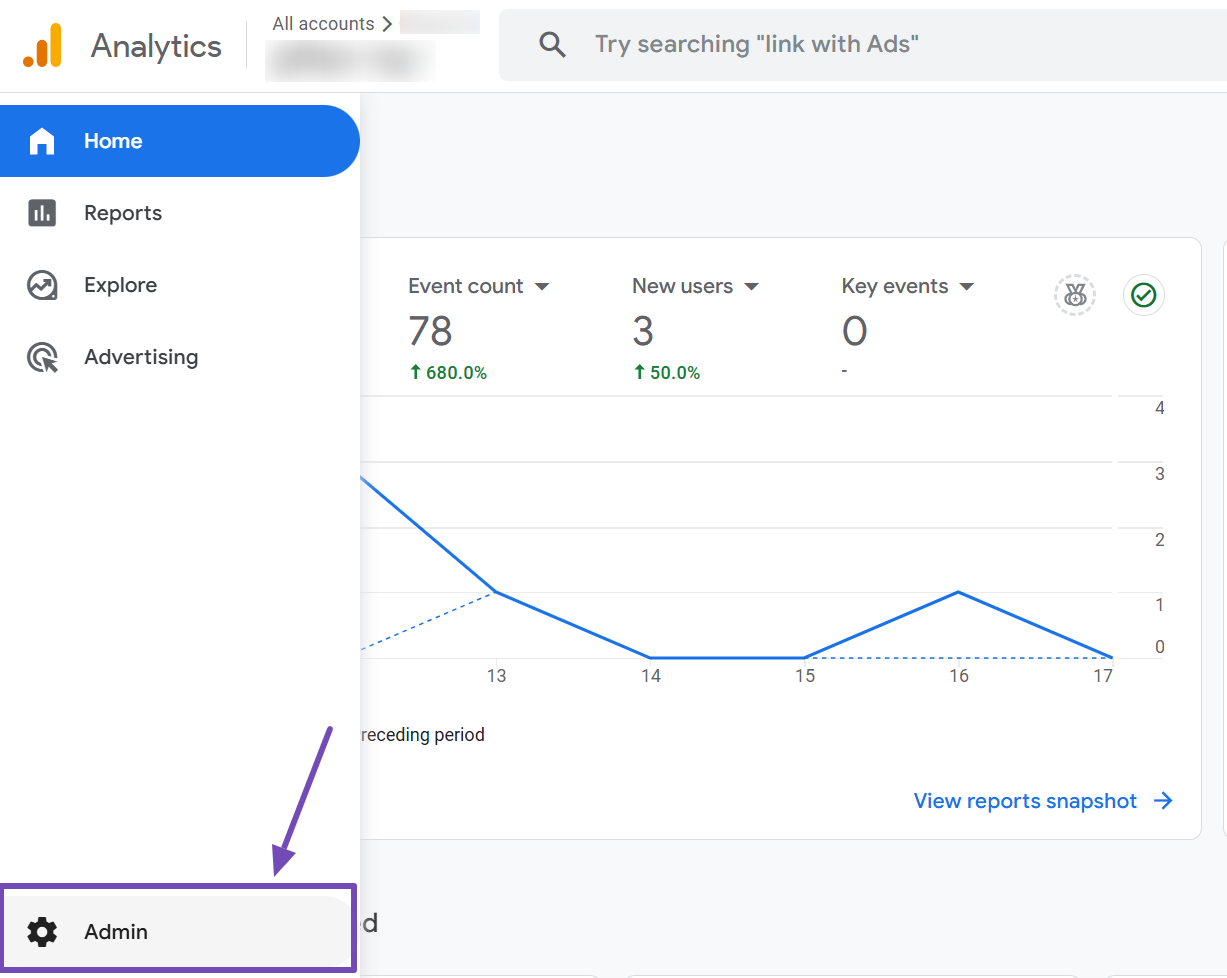
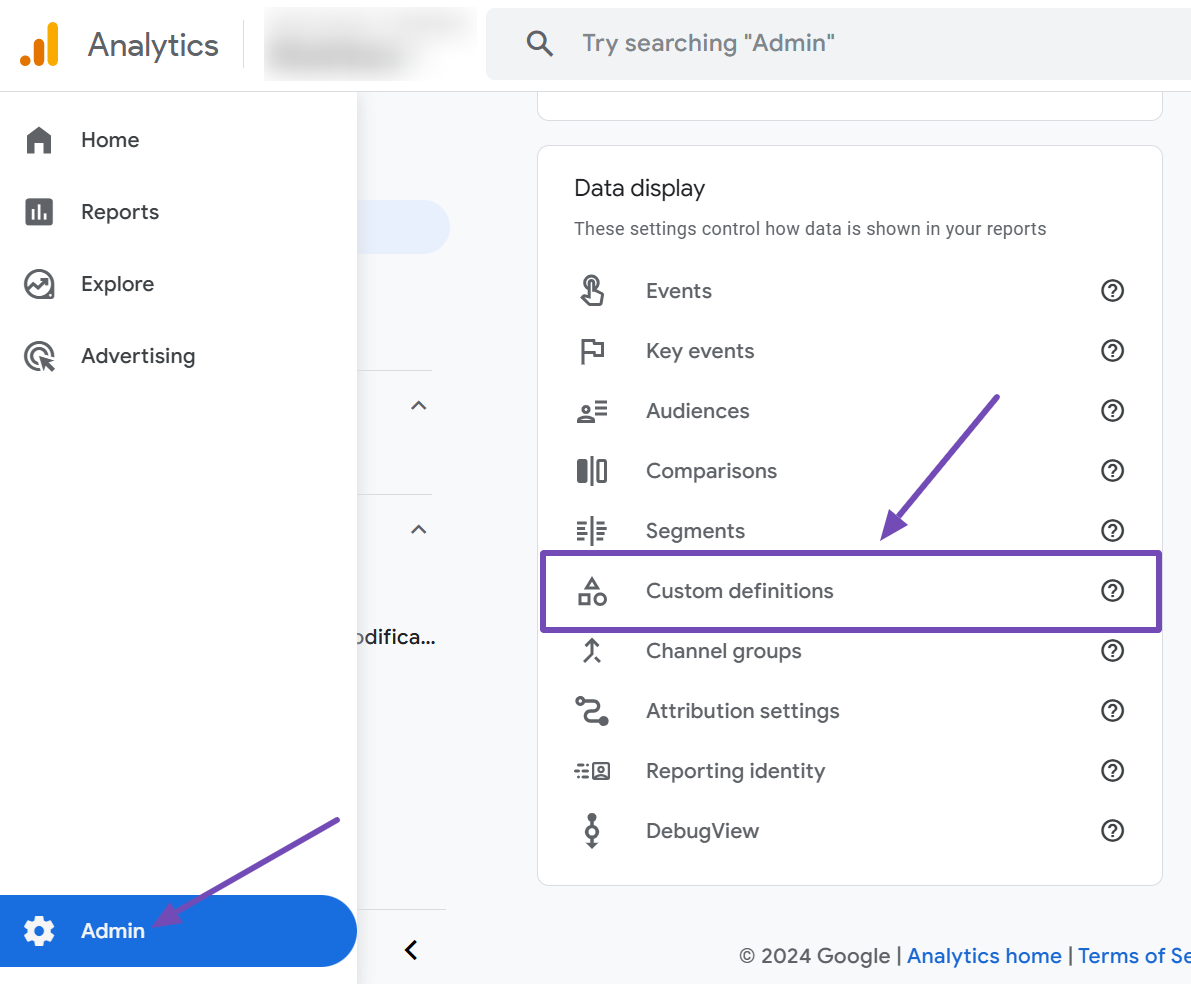
Start by logging into your Google Analytics account. From the dashboard, navigate to the Admin section in the left-hand menu.
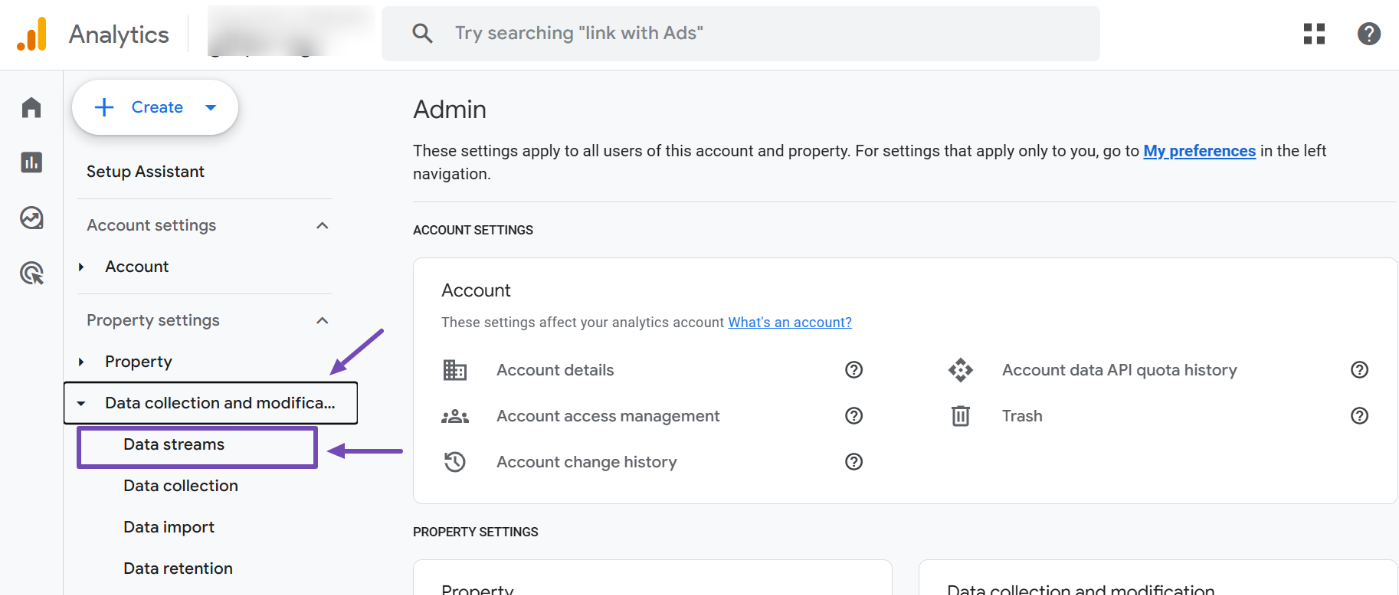
Once you’re in the Admin settings, locate the Property Settings side menu. Open the Data collection and modification toggle and click on Data streams.
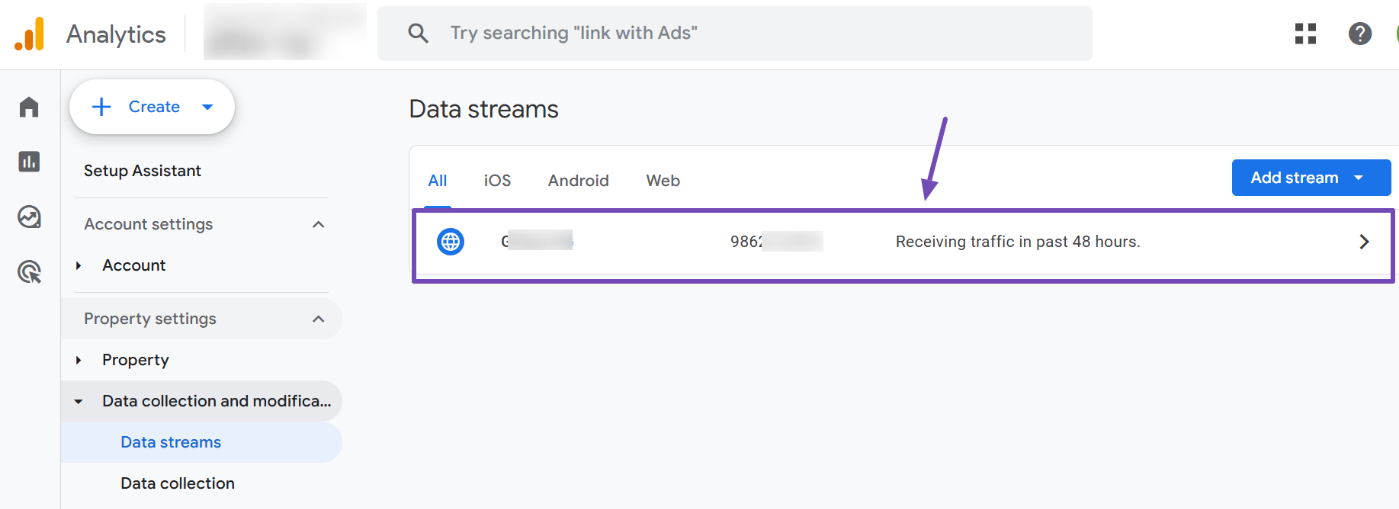
On the Data Streams page, find the stream associated with your website and select it. This will open your site’s data stream details on the right side of the screen.
3 Enable Enhanced Measurement
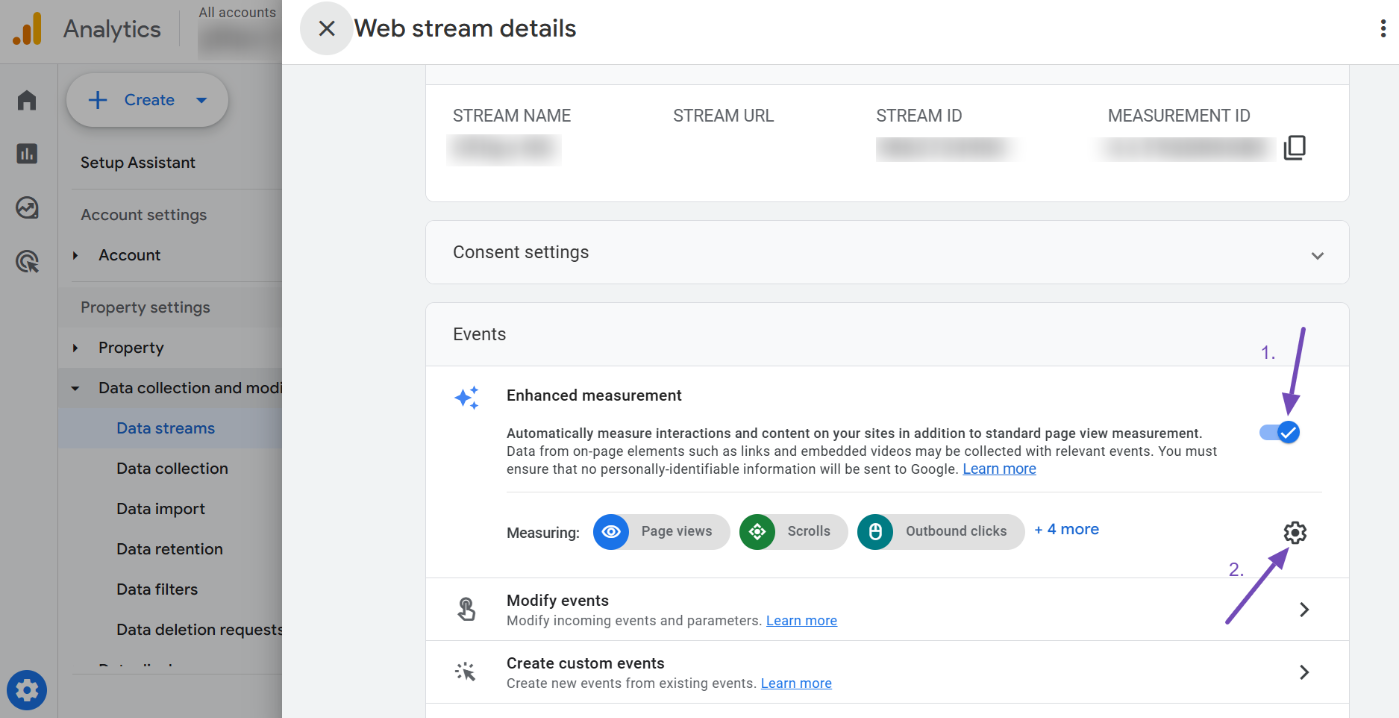
Scroll down within your data stream settings to find the Enhanced measurement section. Enhanced measurement is a powerful feature that automatically tracks certain events—like site searches—without needing extra tags or code.
Make sure the Enhanced measurement toggle is enabled, then click on the settings icon to configure site search tracking, as shown below.
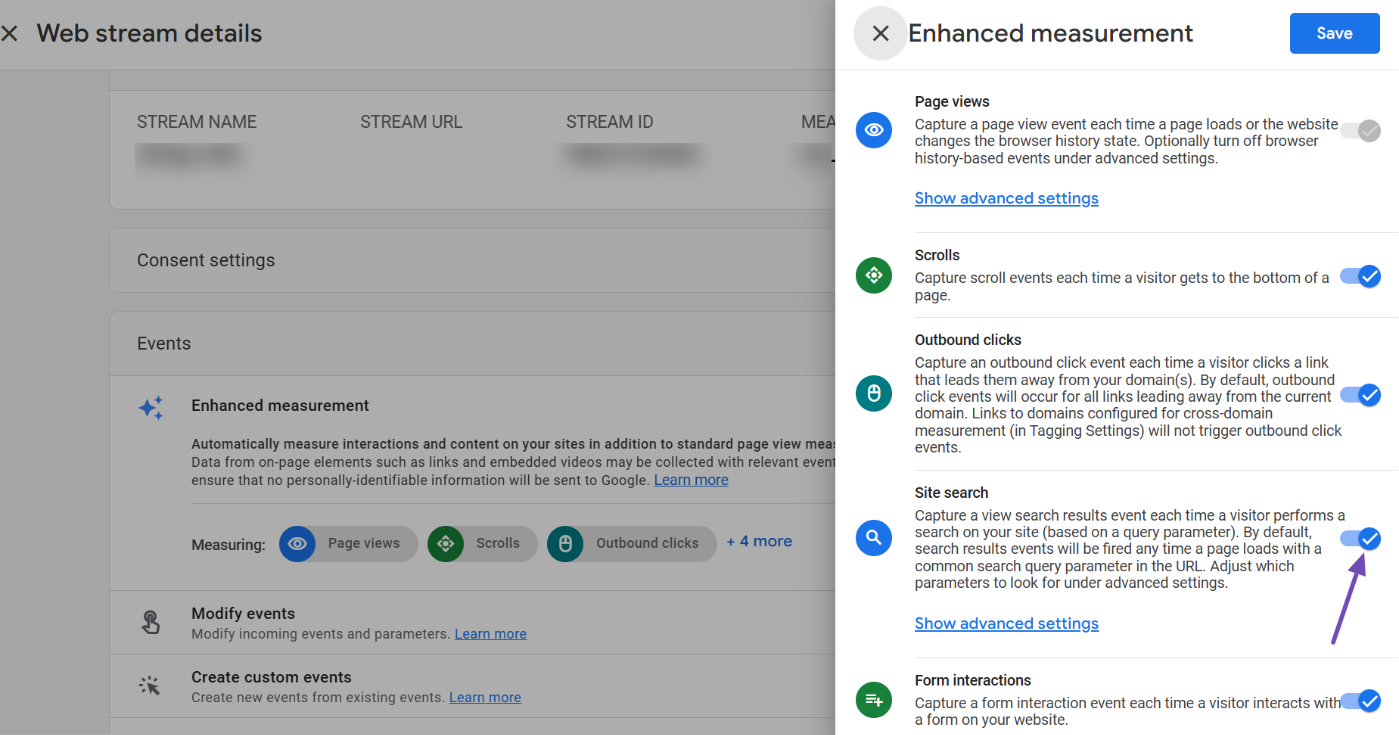
When the settings menu opens, look closely at the options. You’ll notice several toggles enabled by default. Locate the Site search toggle and enable it if it’s not already turned on.
4 Specify the Query Parameter
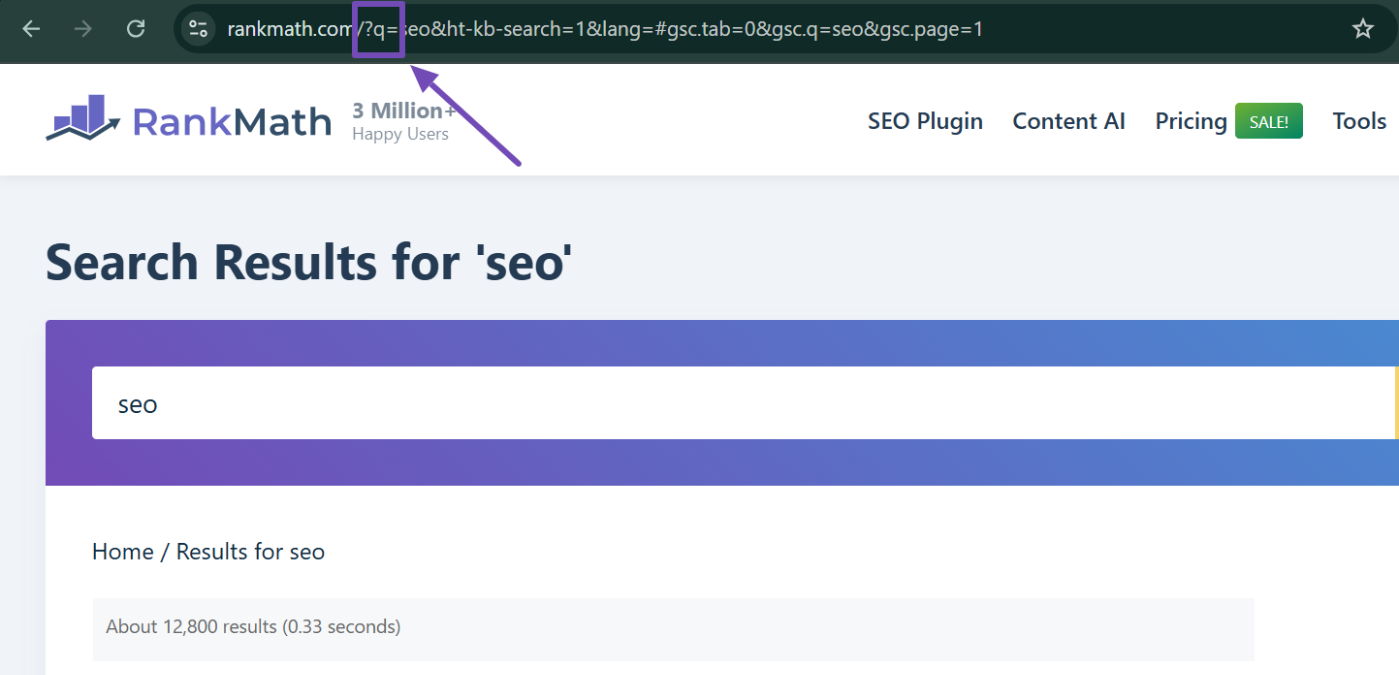
With Site Search enabled, you’ll need to identify the query parameter your site uses to capture search terms. This is easy to find. Simply perform a search on your site and examine the URL in your browser’s address bar.
The query parameter is the part of the URL that holds the search term. Different sites use different parameters—some might use s, others q, or even something unique.
For instance, a search on the Rank Math knowledge base uses the query parameter q.
On another test site, the parameter was s instead, as shown below.

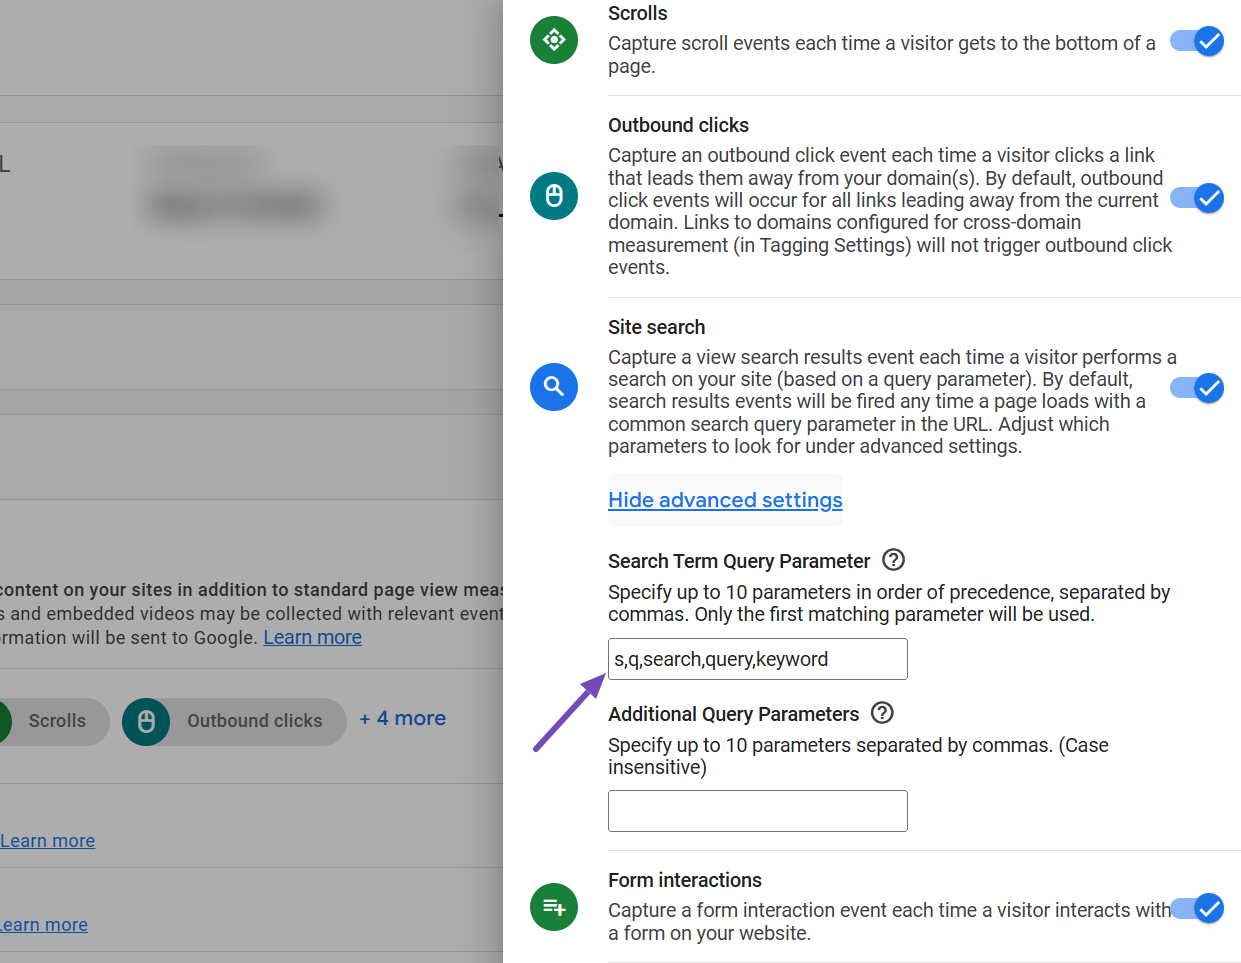
Check your site’s query parameter to confirm. Once you’ve identified your query parameter, return to the Site search settings in Google Analytics. Click on the Show advanced settings link to expand the options.
Here, you’ll find a field to enter your site’s query parameter. Common defaults like q,s might already be listed and separated by commas. If your parameter isn’t there, add it to the list—placing it first if you prefer—while keeping the same comma-separated format, as shown below.
When done, scroll back up and click the Save button to apply your changes.
5 View Search Terms in Google Analytics
Now that everything is configured, Google Analytics will need a few hours (at least 24 hours) to start collecting data on search activity. Note that it can’t track searches made before this setup.
If your site doesn’t get much traffic, you can test it yourself by performing a few searches.
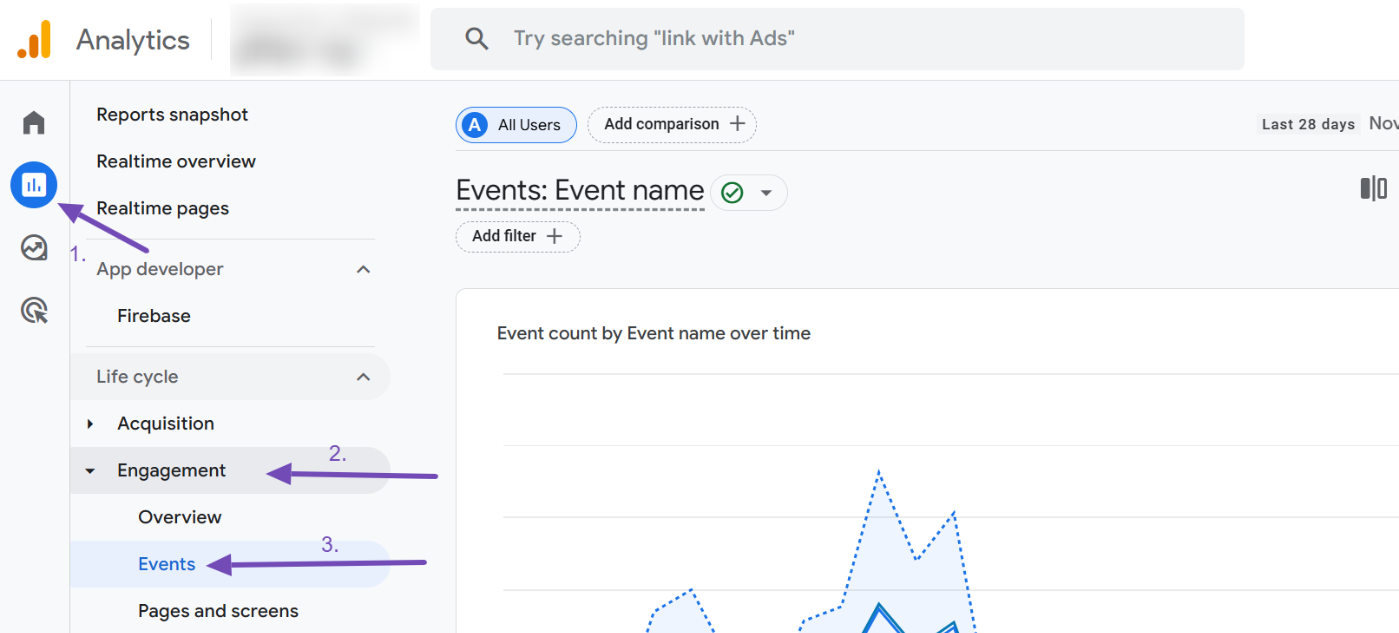
After some time, log back into your Google Analytics account to view the data. Navigate to Reports → Engagement → Events.
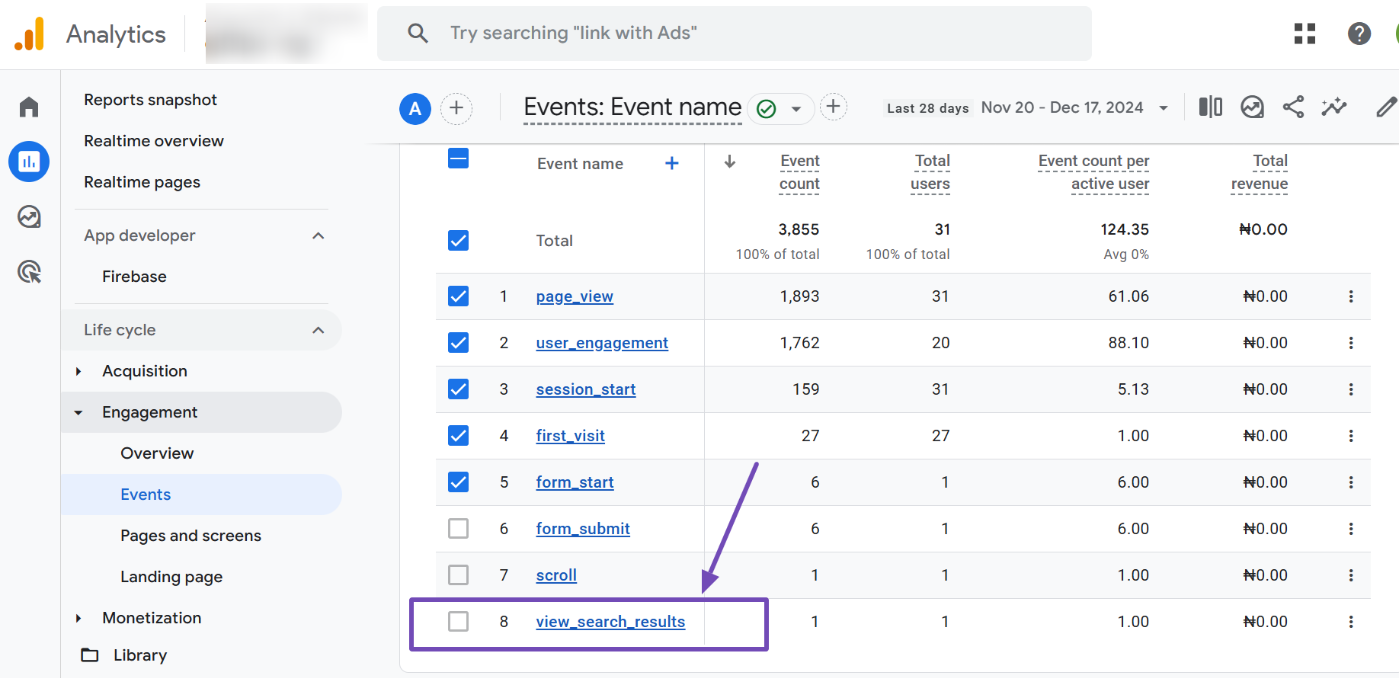
On the Events report page, scroll down and look for the view_search_results event. This event is automatically triggered when a user performs a search on your site. Click on it to analyze the search activity, as shown below.
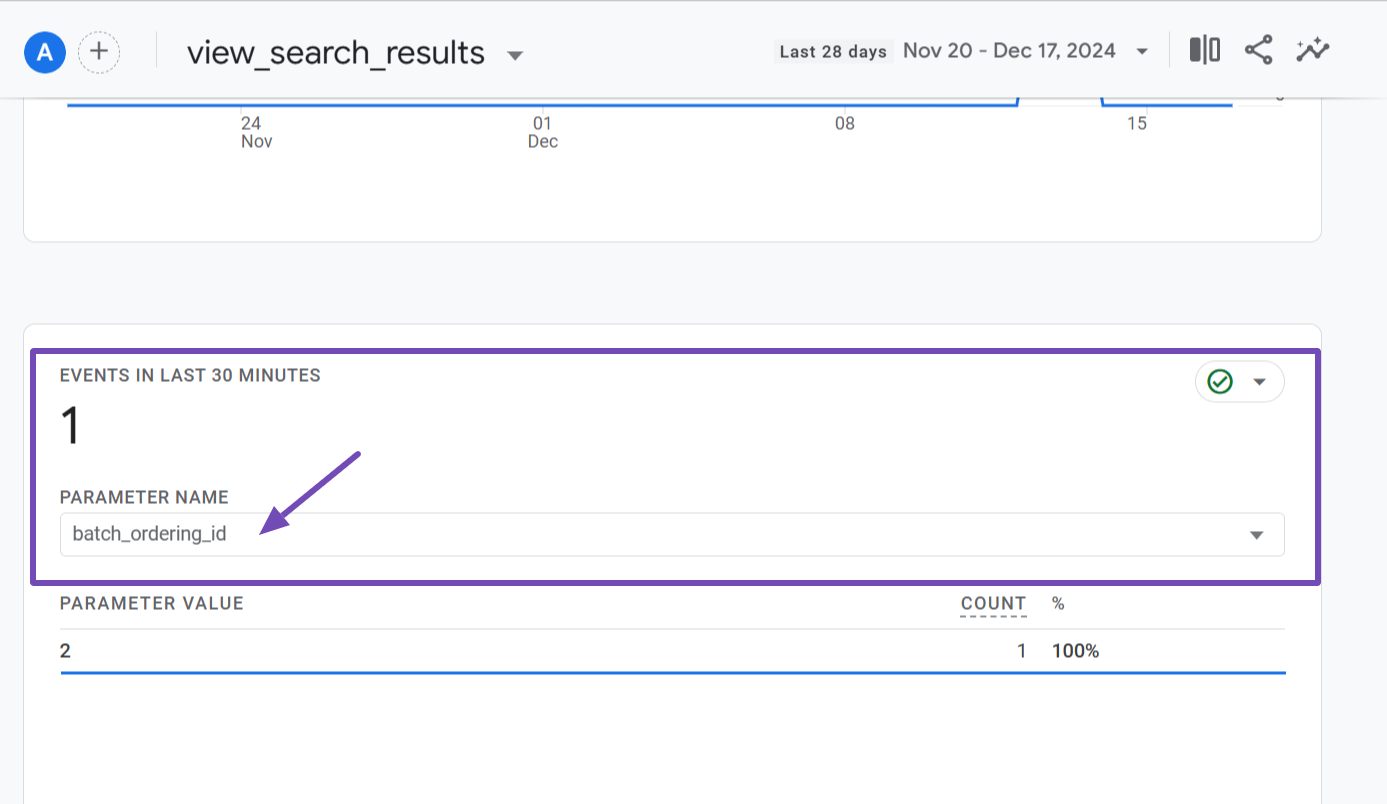
Within the view_search_results event page, scroll down to the Events in Last 30 Minutes section. You’ll see a dropdown field labeled PARAMETER NAME.
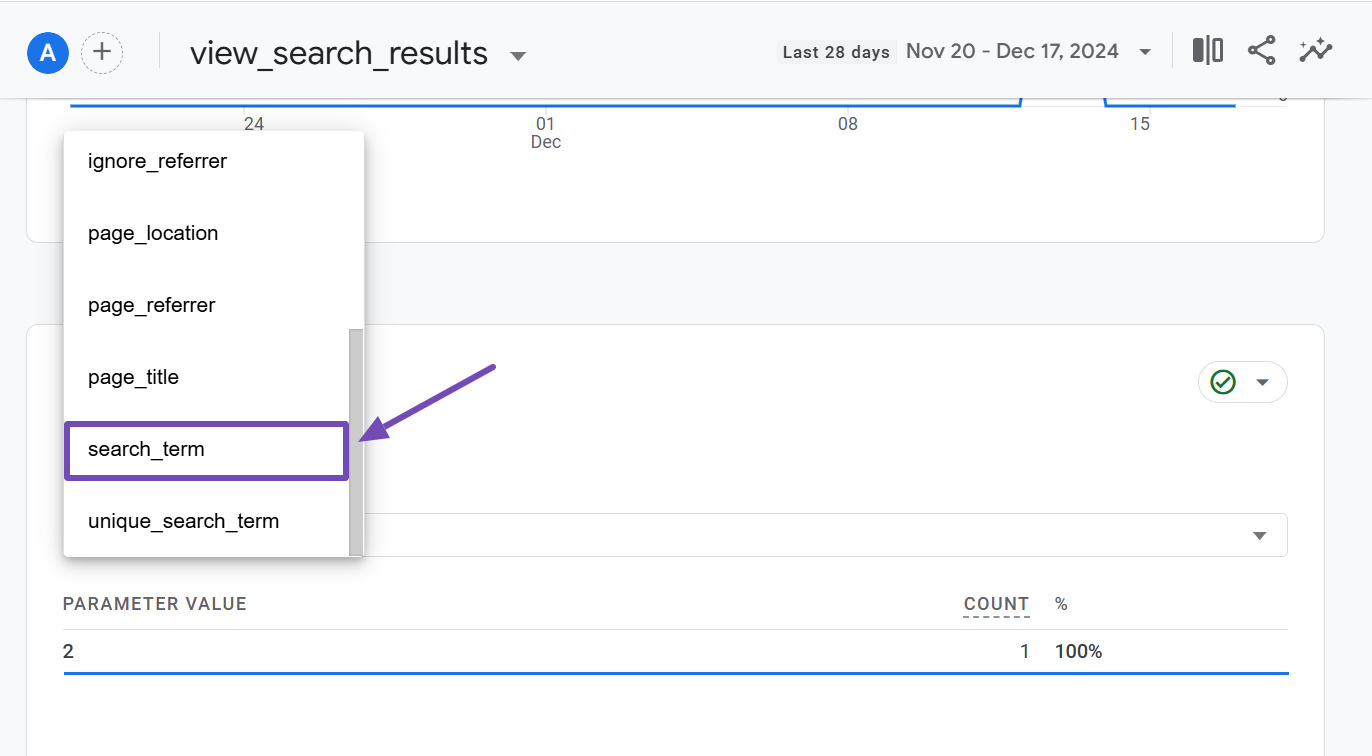
Click on the dropdown and select the search_term dimension to add it to the report.
Once selected, the report will display the exact terms users searched for on your site in the last 30 minutes, as shown below.
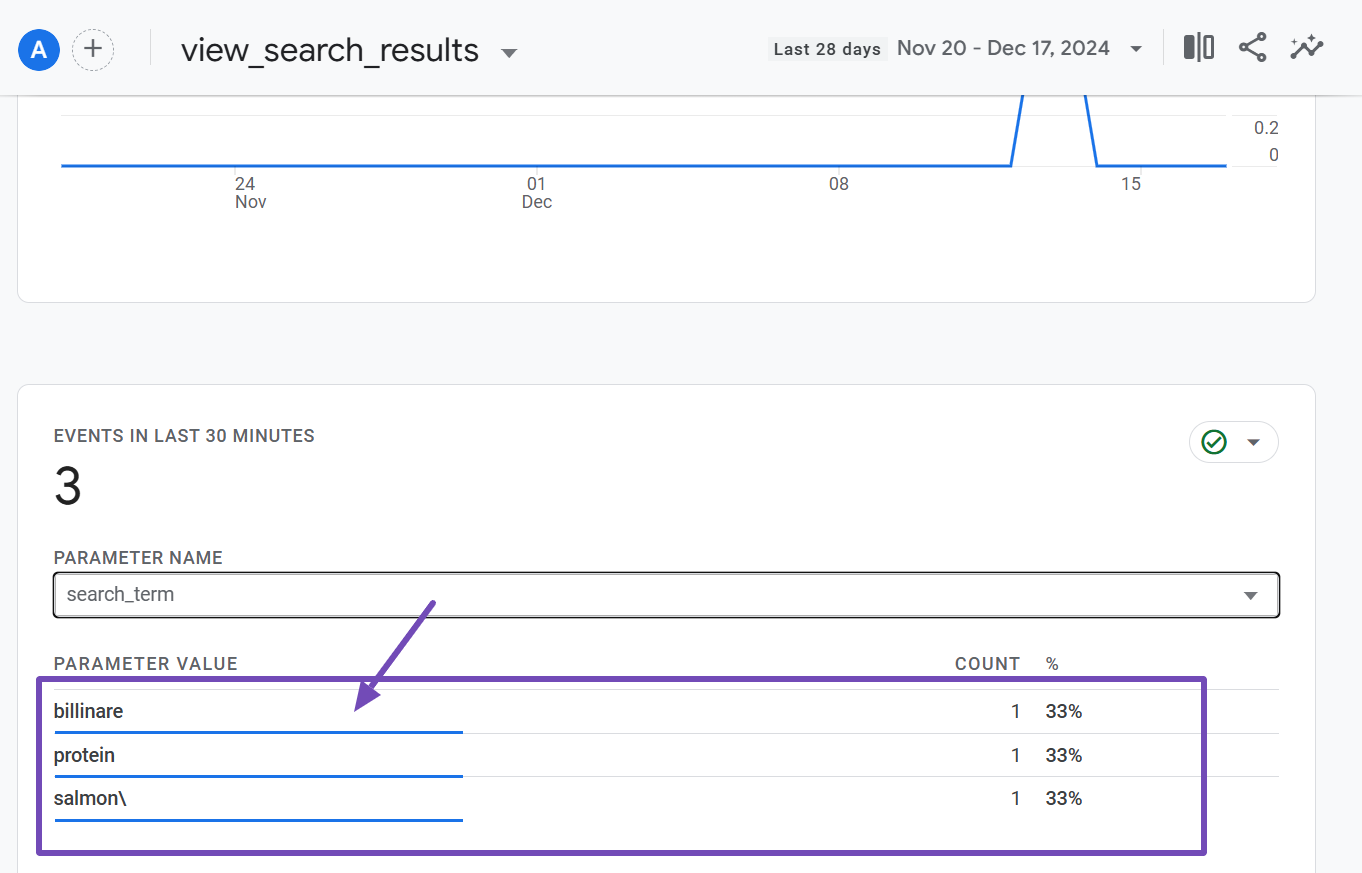
Over time, you can analyze these reports to gain deeper insights into user behavior. However, this is not exactly what you’re looking for, as this data only shows searches within the last 30 minutes of a user’s visit. To view search terms over a longer period, you need to customize the report.
6 Customizing the Report to Show Data Over a Longer Period
To do this, go to Admin → Custom definitions in your GA4 account.
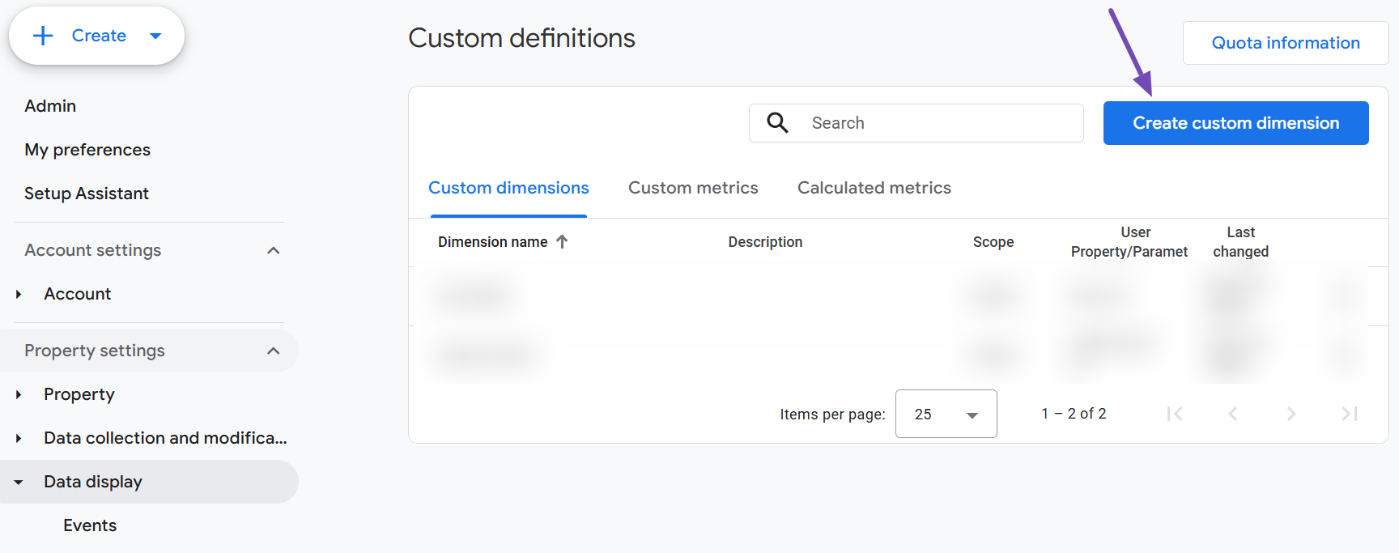
Next, click the Create custom dimension button, as shown below.
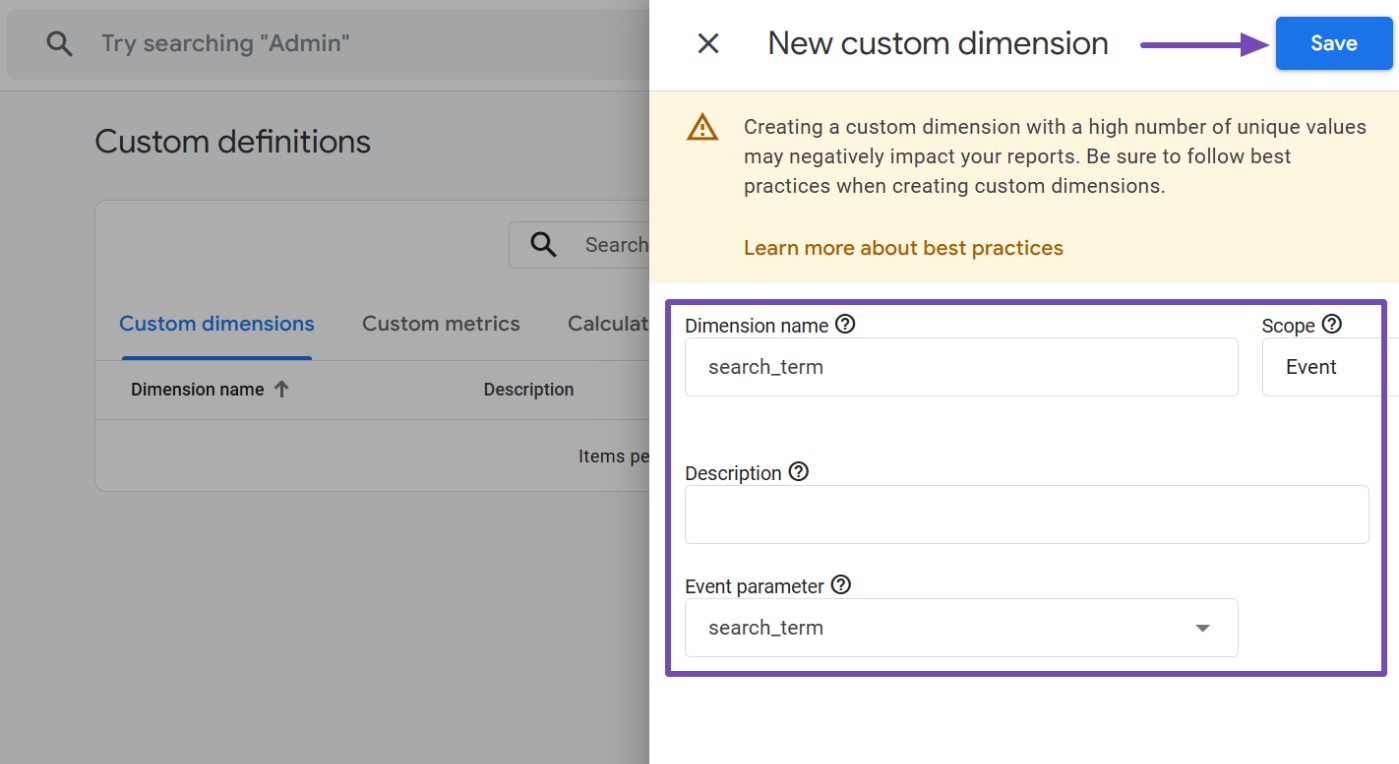
A slide-in panel will appear from the right side to create the custom dimension. Set it up as follows:
- Dimension name: Enter
search_term - Scope: Select Event
- Description: Leave it empty, as this is for internal use only.
- Event parameter: Search for and select
search_termfrom the dropdown list.
Once everything is configured, it should look like this. Click the Save button at the top to save your changes.
After setting this up, you will need to wait at least 24 hours for Google Analytics to update the reports. Once the time has passed, go back to Reports → Engagement → Events → view_search_results.
Scroll past the previous report, and at the bottom of the page, you’ll find a new report or widget labeled search_term, which is the one you just set up.
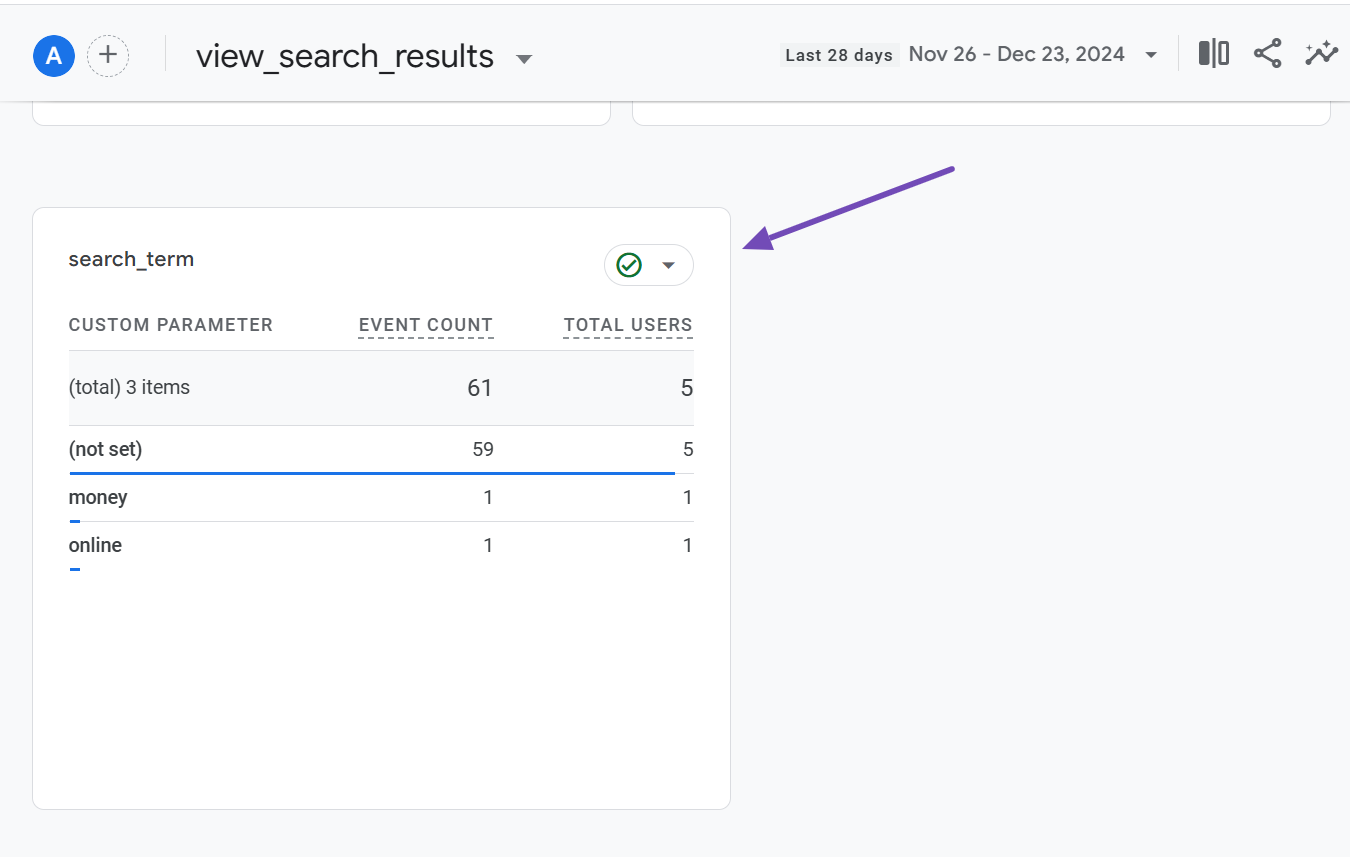
Keep in mind that this report will only show newly collected data after the configuration. While it displays search terms over a longer period than the previous 30-minute report, it does not update in real time.
And that’s it! You now know how to find and analyze the search terms people use on your site with Google Analytics. If you have any questions or need assistance with Rank Math, please don’t hesitate to contact our dedicated support team. They are available 24/7, 365 days a year.