The .htaccess file is a configuration file that helps you configure redirections, modify HTTP headers and more. Rank Math makes it easier for you to edit your .htacess file right inside your WordPress dashboard.
In this knowledgebase article, we will walk you through how to edit your website’s .htaccess file using Rank Math and, in case of any issues with the changes made, how to restore the .htaccess file from the backup.
Table of Contents
But before we begin, it’s essential to understand the file in which you’re making changes. Let’s take a look at what the .htaccess file is.
1 What Is htaccess File in WordPress?
The .htaccess is a configuration file in WordPress that can control how your server runs your website.
The .htaccess is one of the most powerful configuration files that can manage many functions on your website, including SSL connections, 301 redirects, adding a custom header, blocking users based on their IP addresses, and more.
2 Editing htaccess File
Let’s take a look at how you can edit your .htaccess file using Rank Math.
Note: Ensure your firewall or security plugin is set up to whitelist Rank Math. Otherwise, it might block the edits made using Rank Math. You can talk to your web host about this.
2.1 Navigate to Edit .htaccess
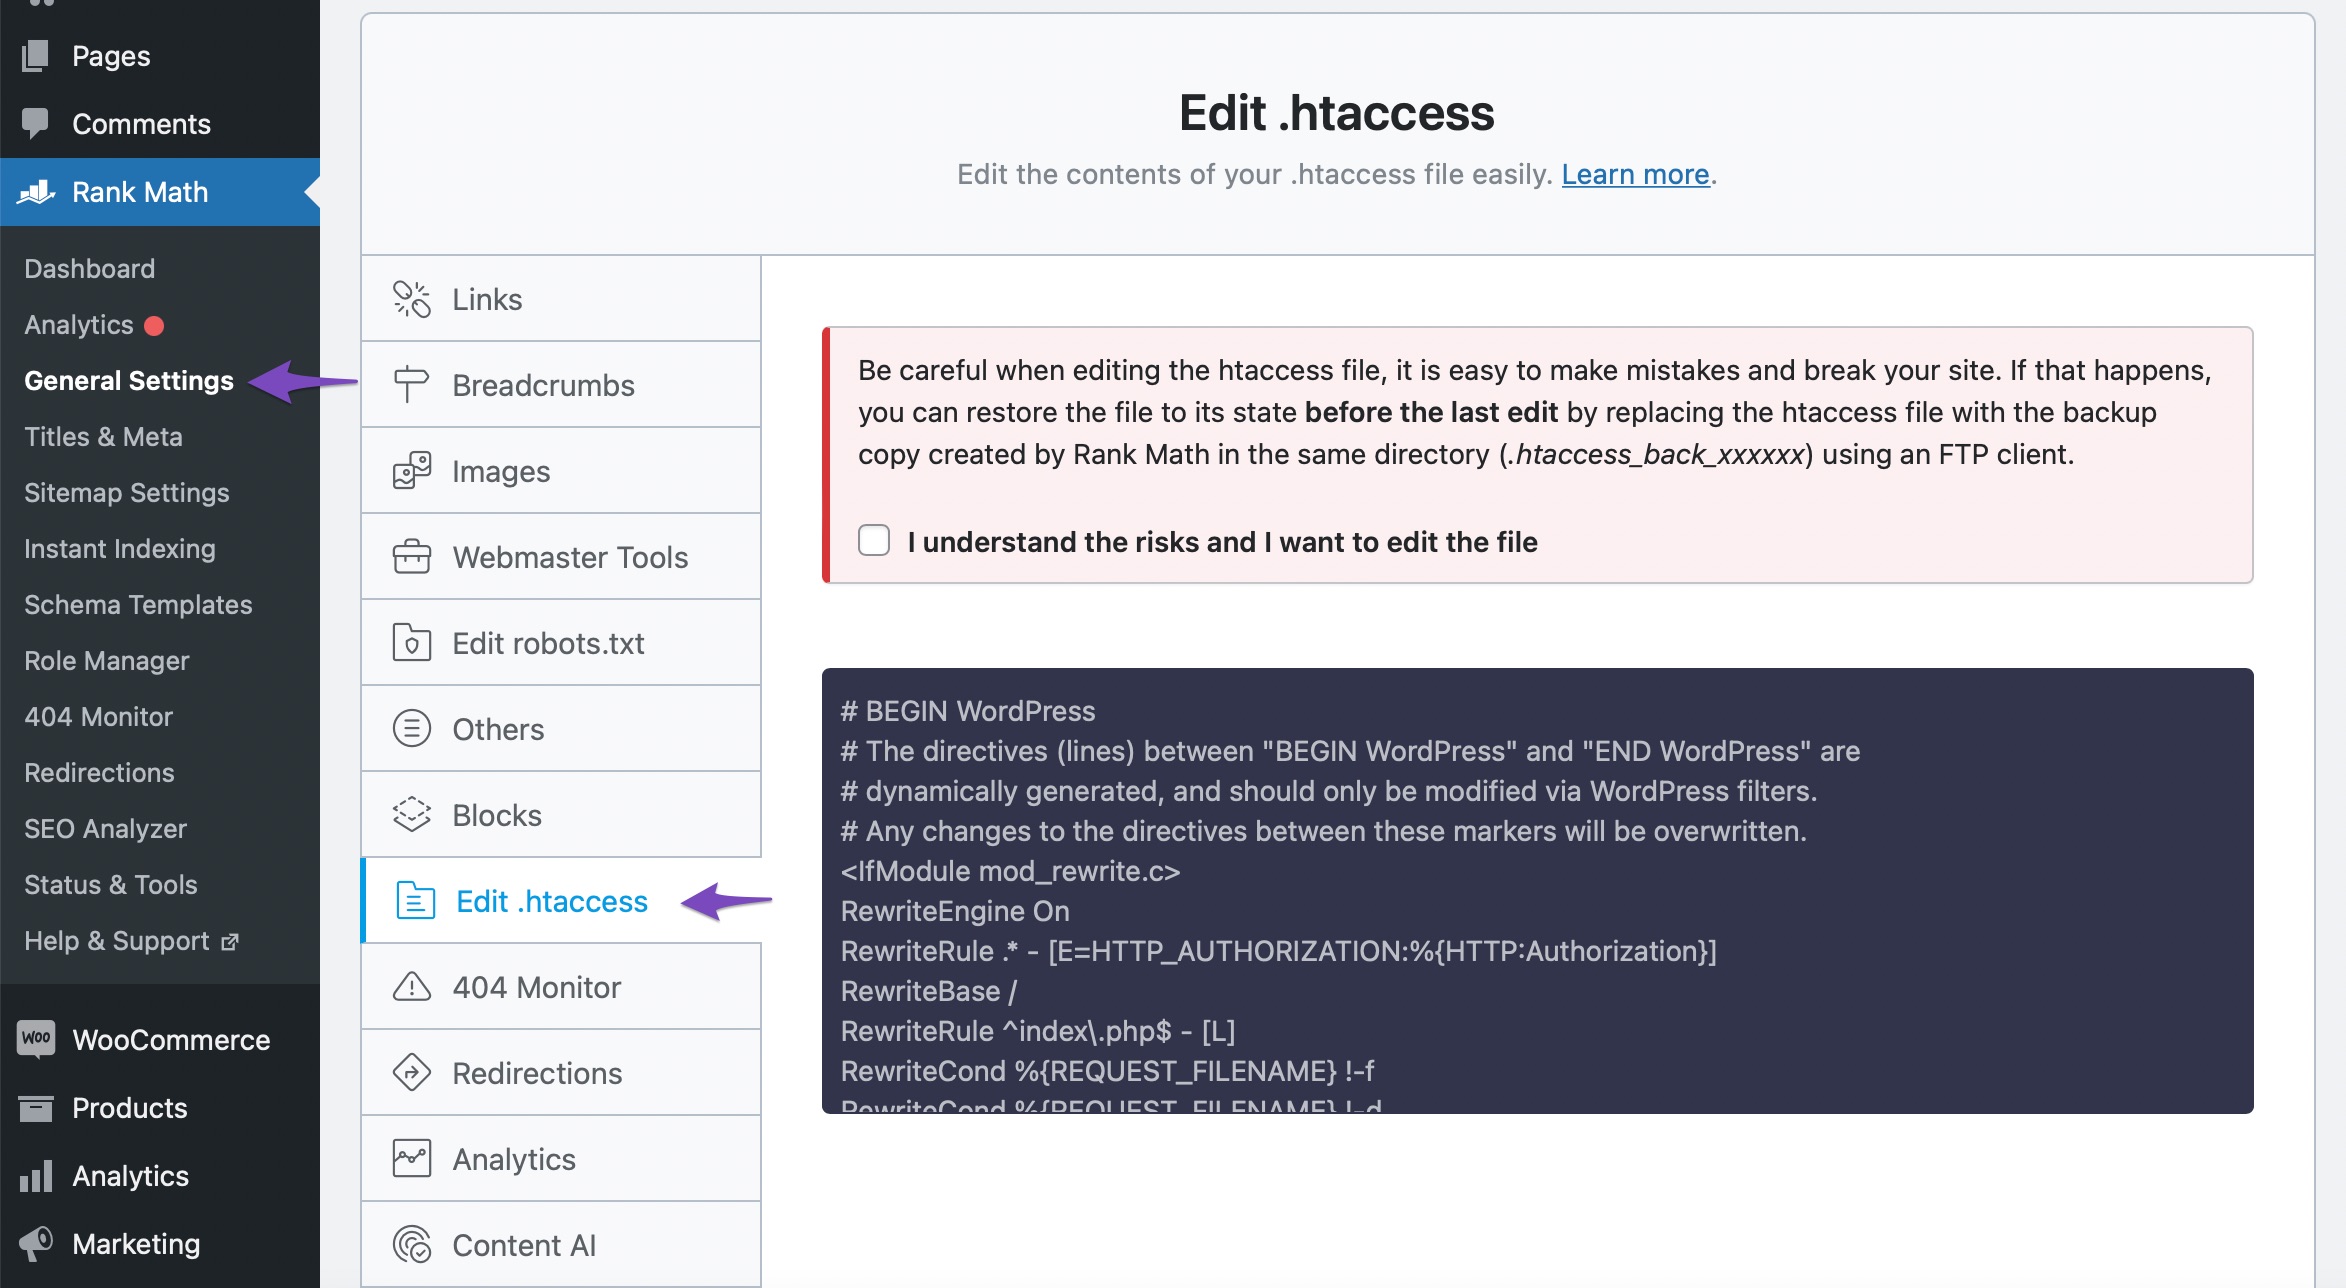
In order to edit your .htaccess file, go to Rank Math SEO → General Settings → Edit .htaccess. If this section is not available on your website, then ensure that you’ve switched to the Advanced Mode in Rank Math.
Note: If the Edit .htaccess setting displays a .htaccess file is not writable message, add the below filter to your site. You can refer to this guide on adding filters to your site.
/**
 * Allow editing the robots.txt & htaccess data.
 *
 * @param bool Can edit the robots & htacess data.
 */

add_filter( 'rank_math/can_edit_file', '__return_true' );
2.2 Make Changes to htaccess
Inside this section, you will notice a single text area that can be used to edit the .htaccess file. Please be careful and read the warning above the text area before you edit the .htaccess file.
The notice warns you that changing the .htacess file can harm your website. Even if you are technically capable, you are bound to make mistakes. To prevent issues, Rank Math automatically backs up your .htacess before you modify it.
If you want to edit the .htacess file, click the checkbox below the text. The text area below will become active, and you can edit your .htacess file as shown below.
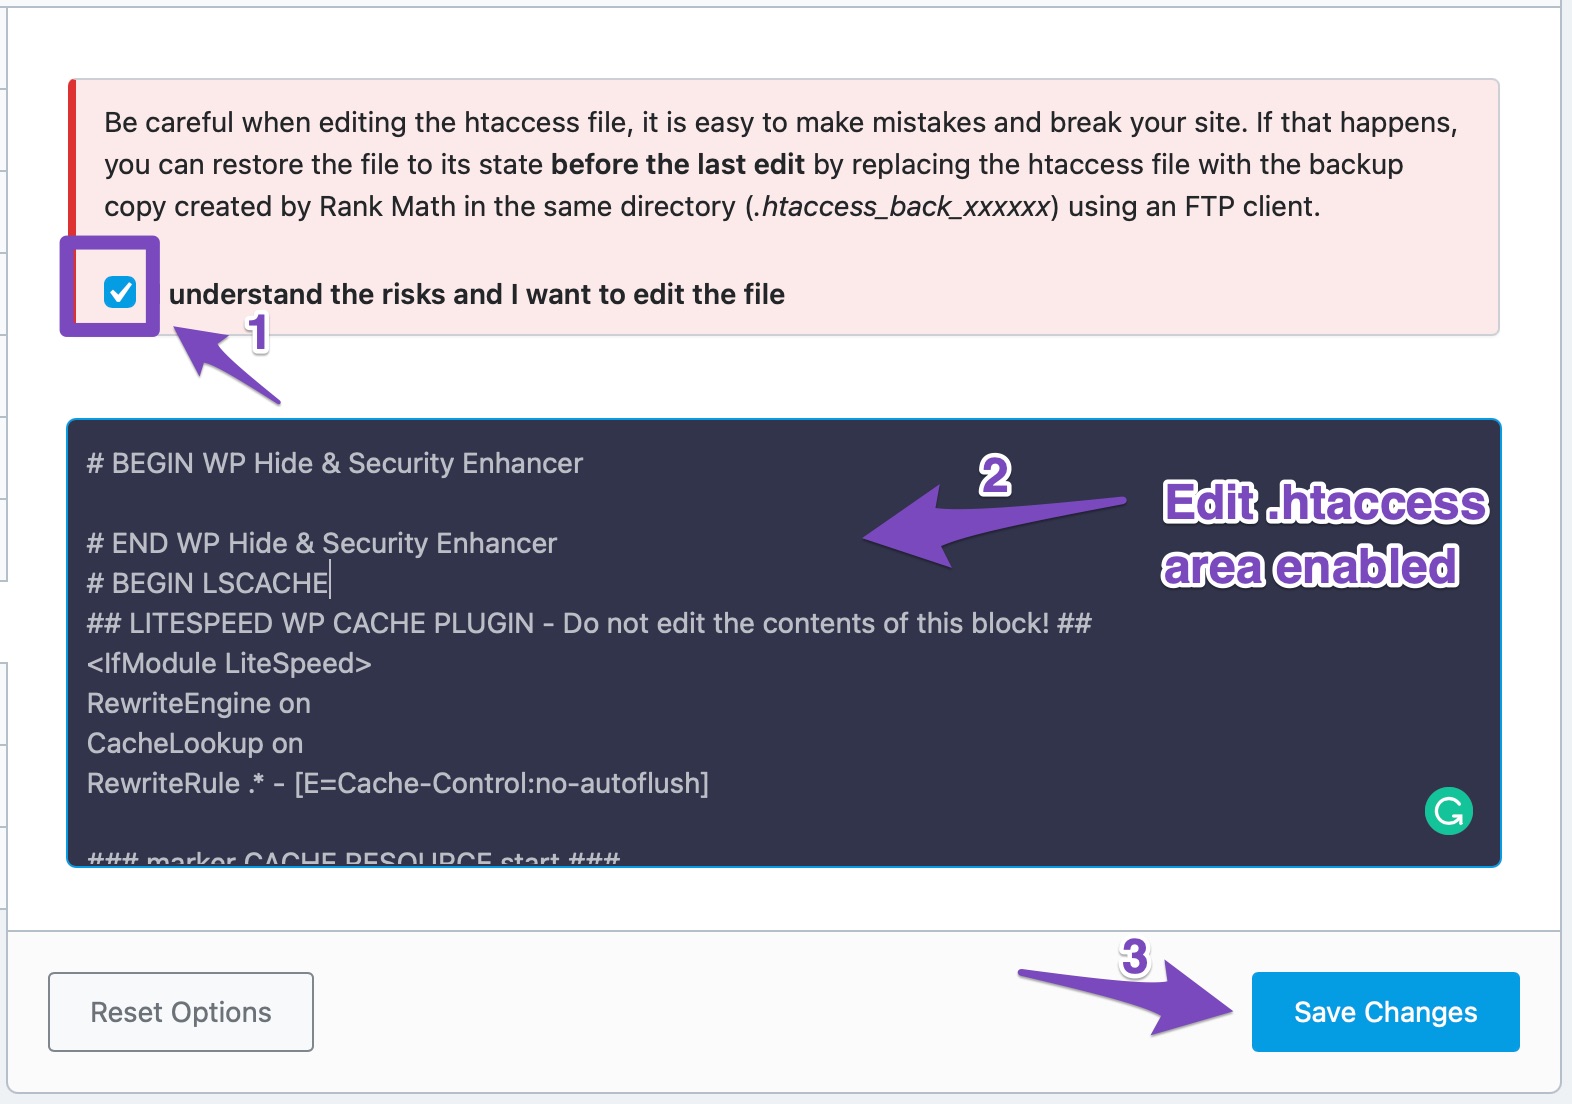
2.3 Save Changes
When you’re done making all your changes, click Save Changes and check if the expected changes are reflected on your website.
3 Restore htaccess Backup
In case, after saving the changes, if you cannot access your website, that means something went wrong, and you need to restore the backup, by following the steps discussed below.
3.1 Access Your Website Files
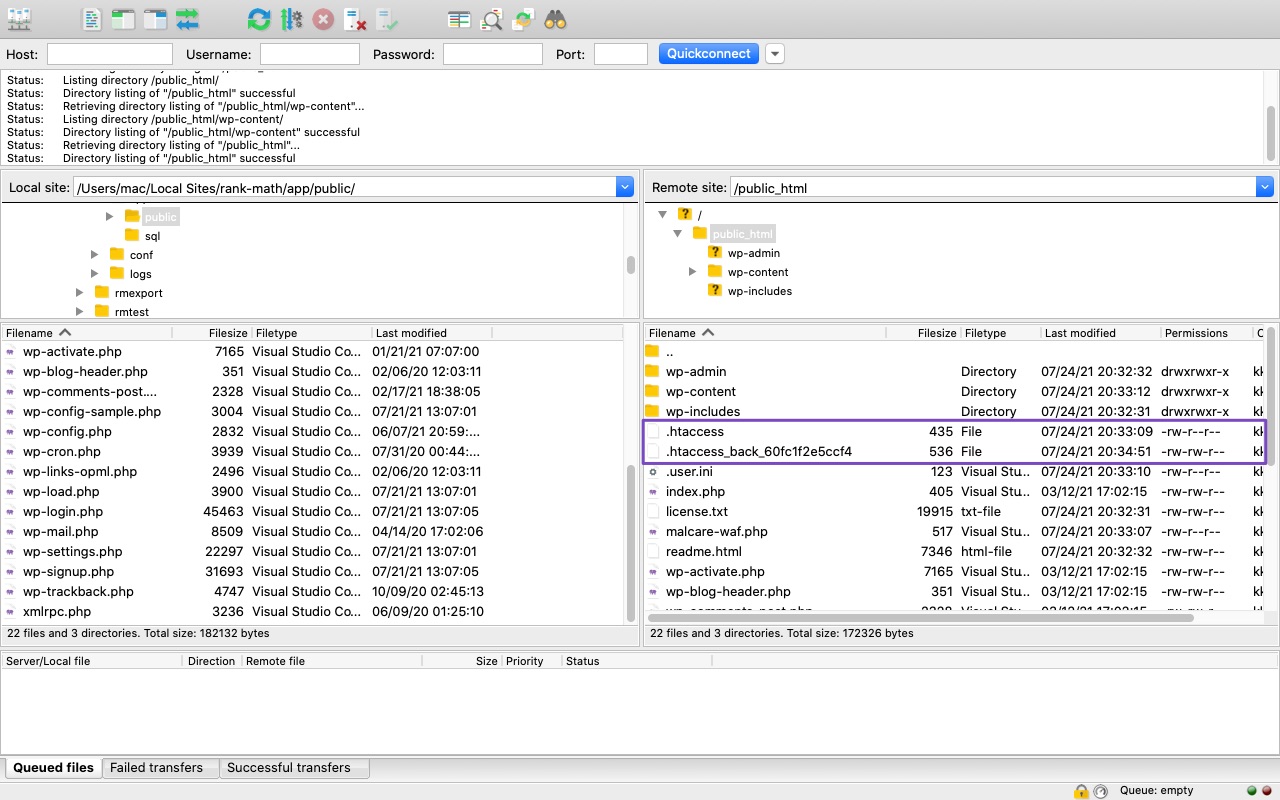
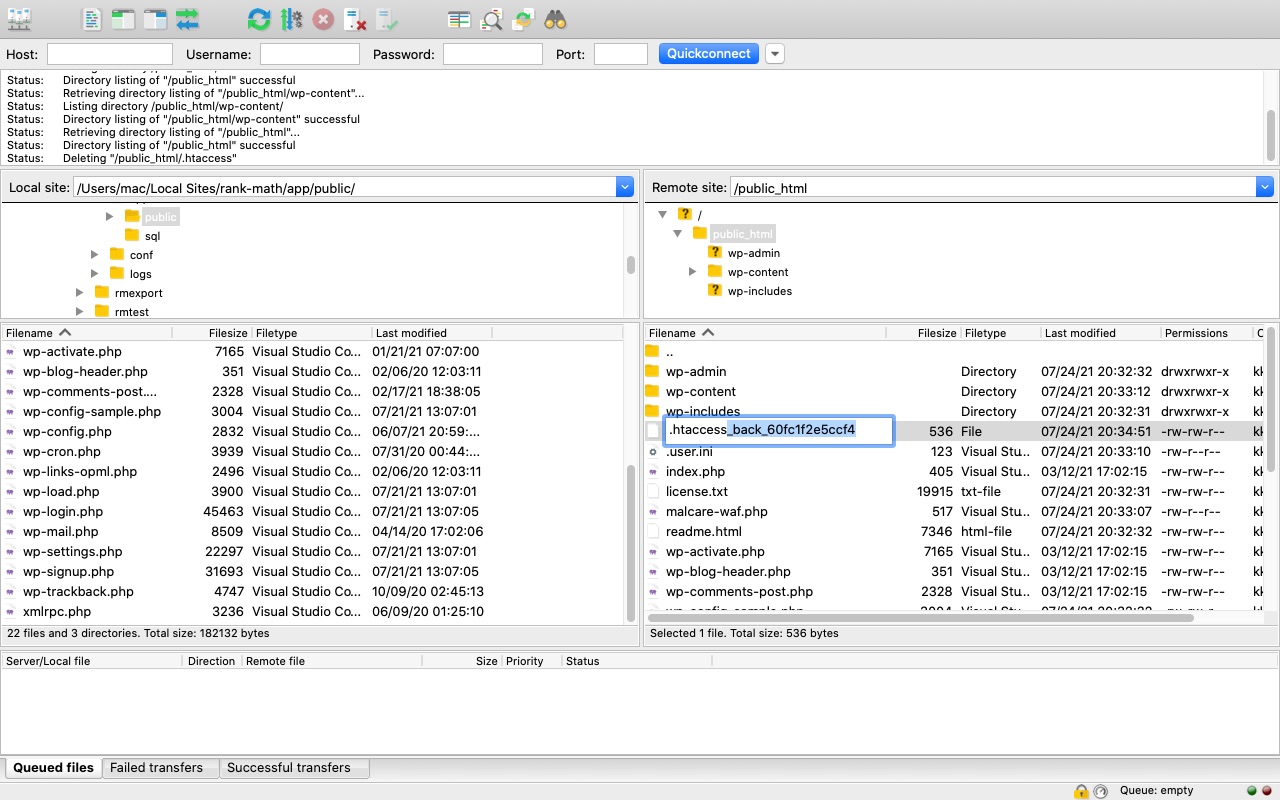
Now, log in to your website using FTP or cPanel File Manager to fix the issue. At the root of your website, you can notice a .htaccess file and a backup file named .htaccess-back-XXXXX.
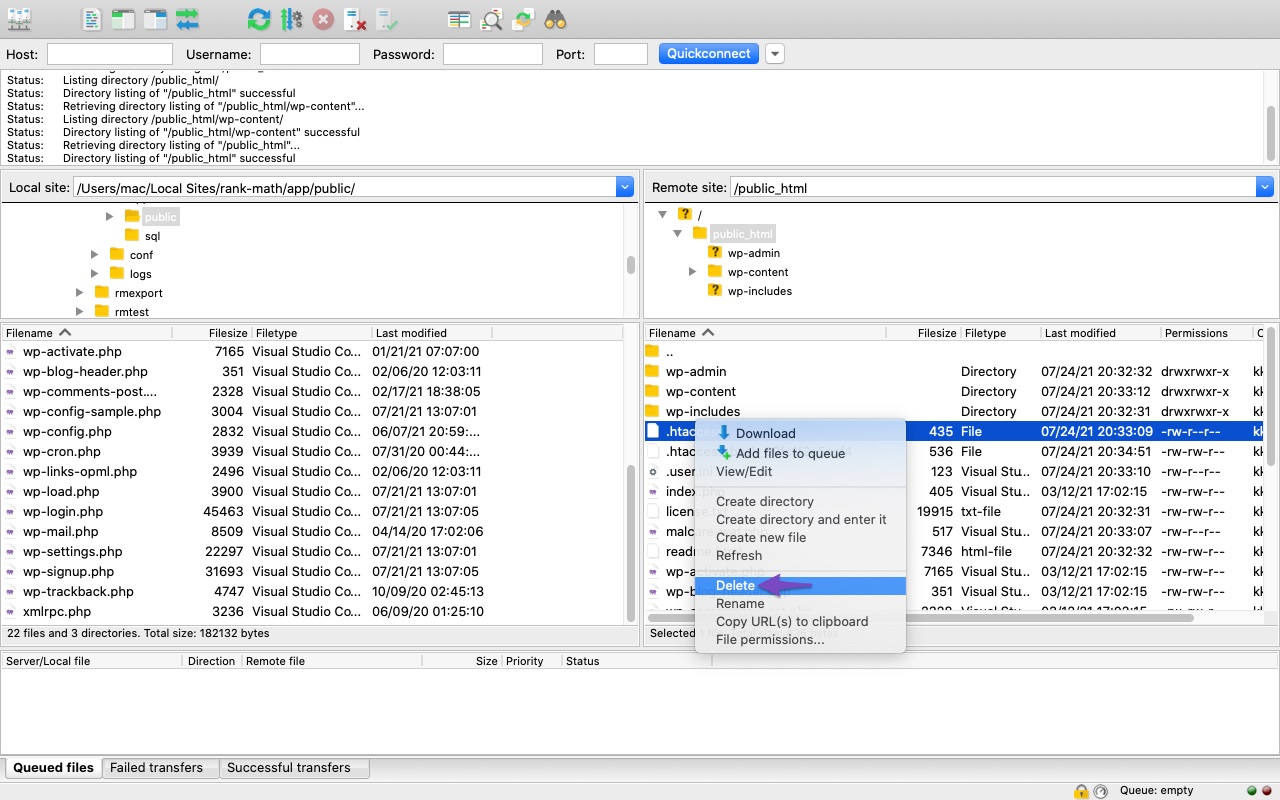
3.2 Delete the Existing file
Now delete the existing .htaccess file. (You can also download a copy of the .htaccess file saved to your computer before deleting it, in case you want to analyze what went wrong).
3.3 Restore the Backup File
Once you’ve deleted the .htaccess file, rename the .htaccess-back-XXXXX to .htaccess.
Once you’ve renamed the file, you can check if your website can be accessed now.
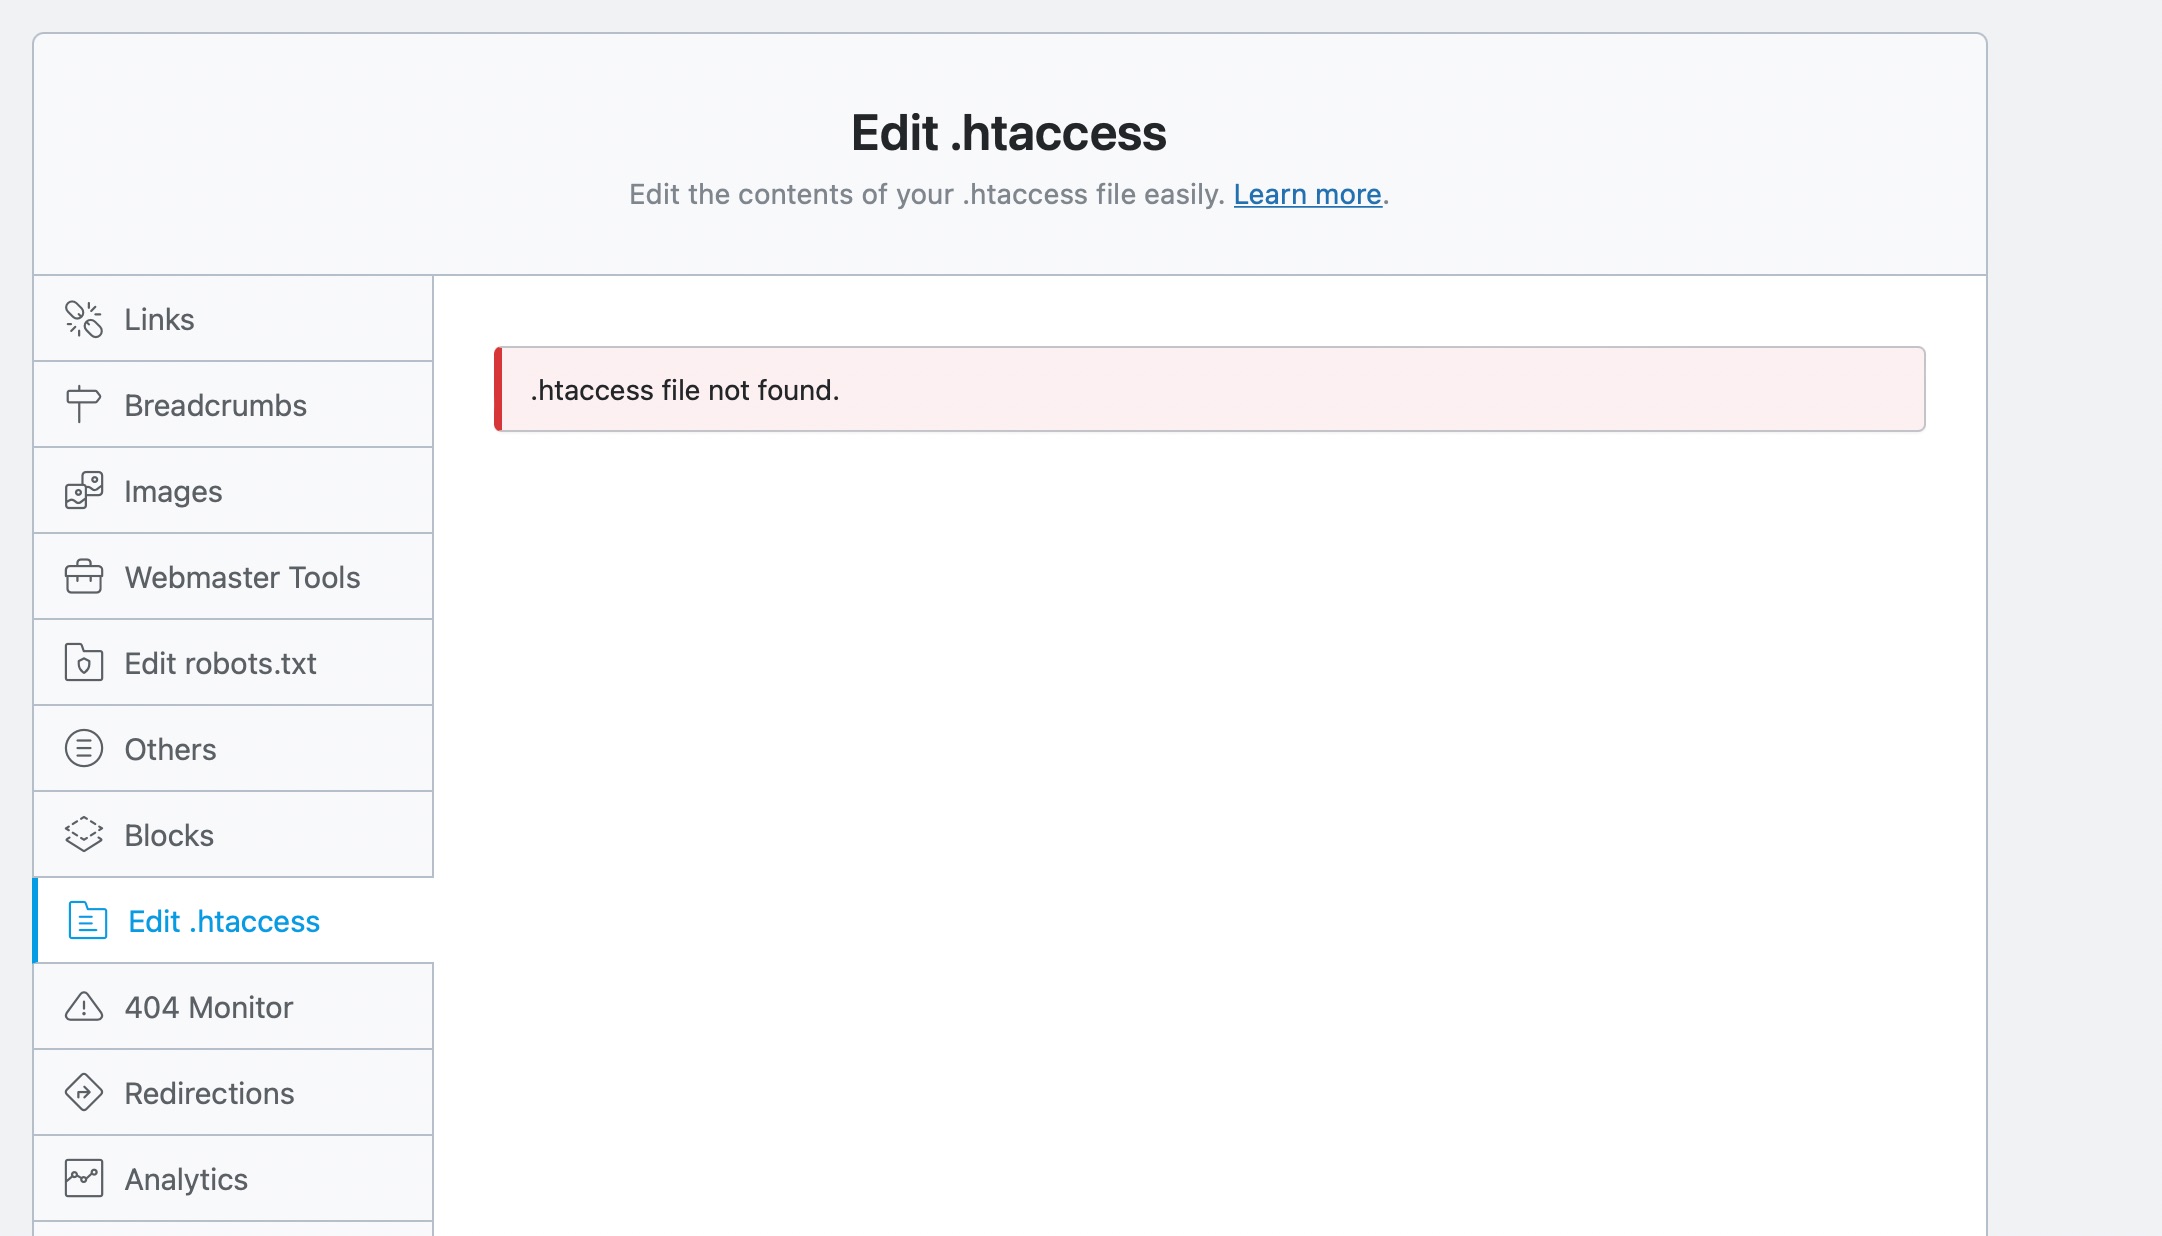
4 How to Fix the ‘.htaccess file not found’ Error?
In case you see the error “.htaccess file not found,” it is because Rank Math cannot find the .htaccess file at the root of your website. If you wish to edit .htaccess with Rank Math, you must create one at your website’s root.
4.1 Create .htaccess File
You can create a .htaccess file using FTP or cPanel File Manager by following the steps discussed below.
Note: If you are not able to add the .htaccess file directly, please reach out to your web host; they’ll be able to add this for you.
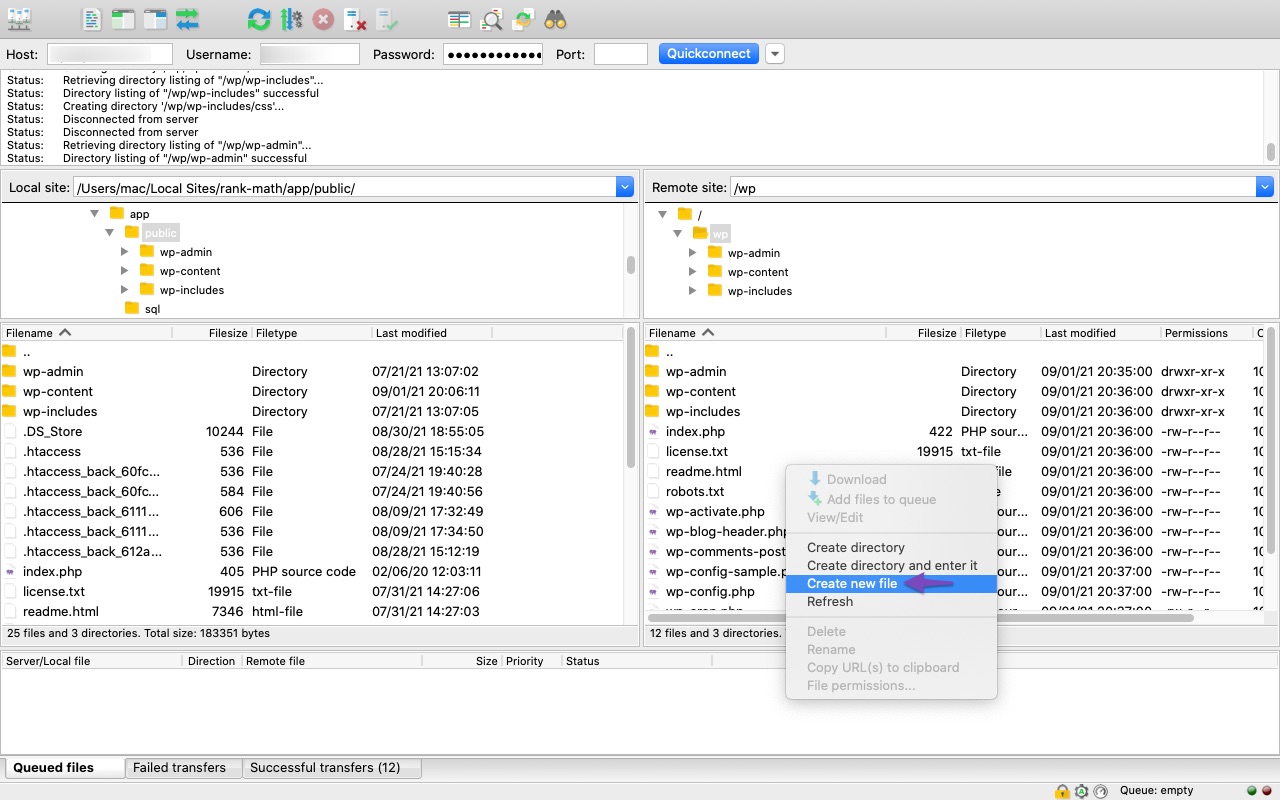
FTP:
If you’re using FTP, access your website file’s root. And then, right-click on the Create new file option.
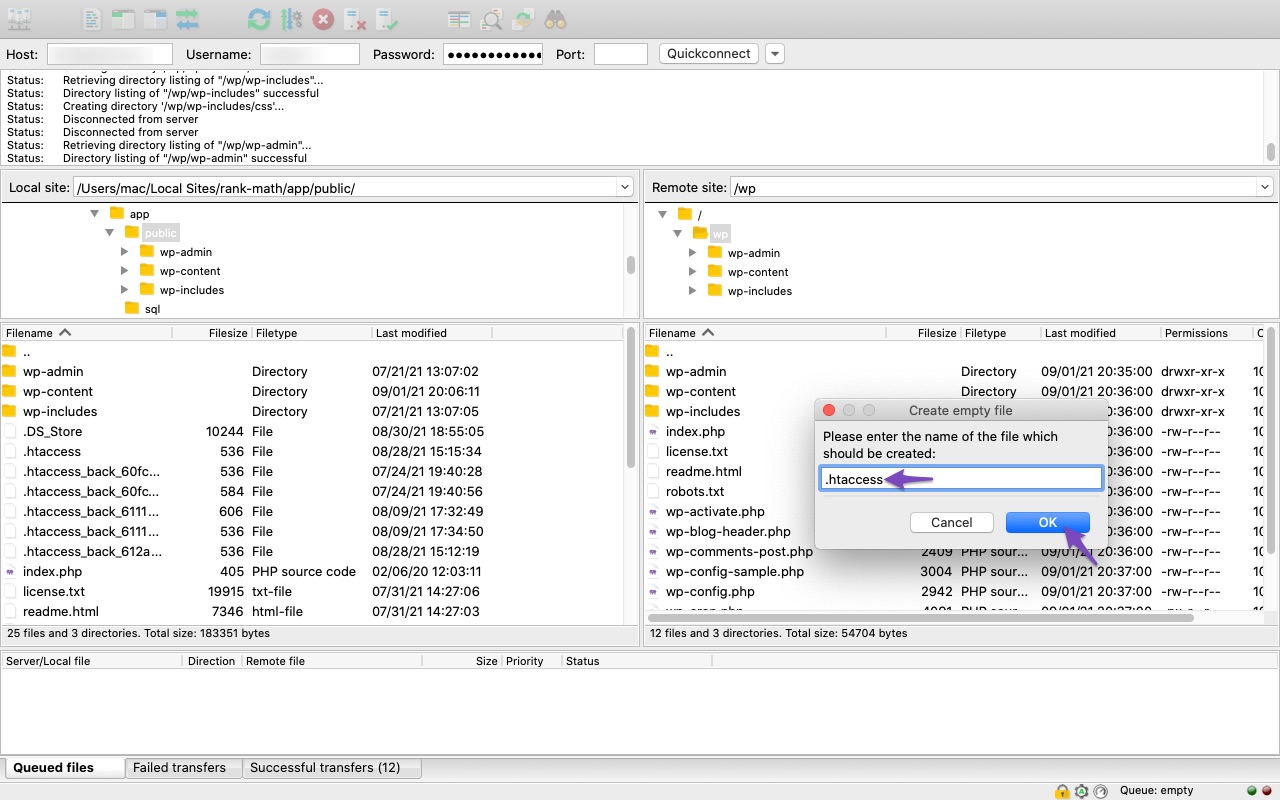
Enter the name .htaccess and click the OK button, as shown below.
cPanel File Manager:
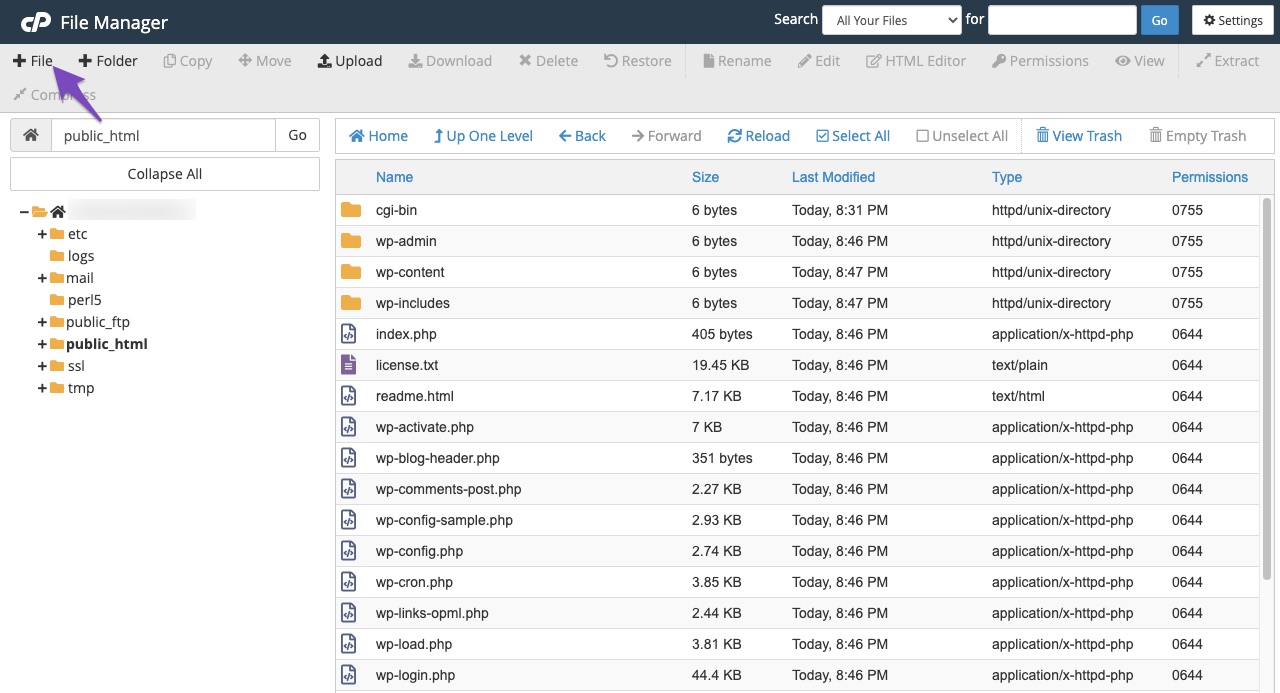
If you’re using cPanel File Manager, then in the root of your website’s directory, click the + File button at the top-left corner.
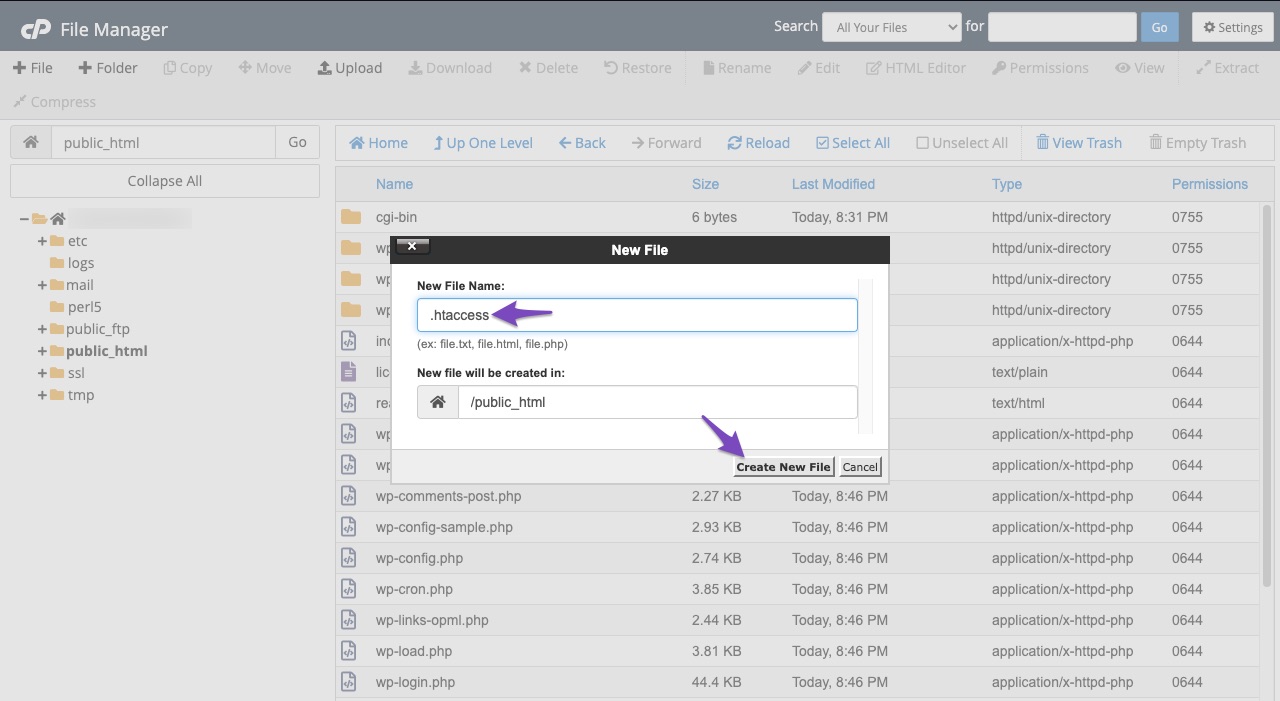
Next, enter the file’s name as .htaccess and click Create New File option.
4.2 Add the Code
Next, navigate to Edit .htaccess under Rank Math SEO → General Settings inside your WordPress dashboard and add the following code to the .htaccess file, as discussed earlier in this tutorial.
Please note the code below is standard for all basic WordPress sites to allow WordPress to manage your permalinks. If you’re using multisite, you can refer to the code in the official WordPress documentation.
# BEGIN WordPress

RewriteEngine On
RewriteRule .* - [E=HTTP_AUTHORIZATION:%{HTTP:Authorization}]
RewriteBase /
RewriteRule ^index\.php$ - [L]
RewriteCond %{REQUEST_FILENAME} !-f
RewriteCond %{REQUEST_FILENAME} !-d
RewriteRule . /index.php [L]

# END WordPress
Now click Save Changes at the bottom of the screen, and you can start making changes to your website’s .htaccess file with Rank Math. You can use the htaccess tester tool to debug and ensure that the rewrites are correct before adding them to the .htaccess file.
5 Examples of .htaccess File Rules
A .htaccess file is a special file placed into a directory that affects how the web server responds to requests for files. Let’s look at a few examples of how to do this:
Please note that these example codes should be added before anything else in the .htaccess file for them to work.
5.1 301 Redirection
To redirect the existing URL to a new URL, you can use the following code in your .htaccess file.
Redirect 301 /previous-url https://yourdomain.com/new-url5.2 Domain Redirection
You can use the following rule to redirect the old domain to the new one.
<IfModule mod_rewrite.c>
  RewriteEngine On
  RewriteCond %{HTTP_HOST} ^olddomain.com$ [OR]
  RewriteCond %{HTTP_HOST} ^www.olddomain.com$
  RewriteRule (.*)$ http://www.newdomain.com/$1 [R=301,L]
</IfModule>
5.3 Redirect to HTTPS
To ensure your website operates securely, you can redirect all HTTP traffic to HTTPS. This is crucial for protecting user data and enhancing overall site security.
Here’s the code to implement the redirect in your .htaccess file:
RewriteEngine On
RewriteCond %{HTTPS} off
RewriteRule ^(.*)$ https://www.YourDomain.com/$1 [R=301,L]
Replace www.YourDomain.com with your actual domain name. This setup will automatically redirect users to the secure HTTPS version of your site.
5.4 Adding a Custom Header
The snippet code required to add a custom header value is shown below.
Header set Custom-Header-Name "Custom Header Value"
Replace Custom-Header-Name with the actual name and Custom Header Value with the value of your HTTP header.
5.5 Block Users Based on IP
You have the power to block users based on their IP. This is done for security purposes.
order allow,deny
deny from 255.x.x.x
deny from 123.x.x.x
allow from all
From the above snippet code, you can see that two IPs are blocked. All users with those IPs that contain the first three digits, 255 and 123, will get blocked. You can also choose to include the last digits of the IP or even an exact IP so that those users with the same IPs will be denied access.
5.6 Domain to Sub-Directory Redirection
If you want the users visiting your website (example.com) to be redirected to the sub-directory (example.com/blog), then use the following code snippet in the .htaccess file.
RewriteCond %{HTTP_HOST} ^example.com$
RewriteCond %{REQUEST_URI} !^/sub-directory-name/
RewriteRule (.*) /subdir/$1
Replace example.com with your domain name and /sub-directory-name/ and /subdir/ with your sub-directory name like /blog/.
5.7 Leveraging Browser Caching
The following .htaccess code snippet can be used to improve website performance by leveraging browser caching.
## EXPIRES CACHING ##
<IfModule mod_expires.c>
    ExpiresActive On
    ExpiresByType image/jpg "access 1 year"
    ExpiresByType image/jpeg "access 1 year"
    ExpiresByType image/gif "access 1 year"
    ExpiresByType image/png "access 1 year"
    ExpiresByType text/css "access 1 month"
    ExpiresByType application/pdf "access 1 month"
    ExpiresByType text/x-javascript "access 1 month"
    ExpiresByType application/x-shockwave-flash "access 1 month"
    ExpiresByType image/x-icon "access 1 year"
</IfModule>
## EXPIRES CACHING ##
And that’s it! If you have any other questions about editing your .htaccess file with Rank Math – don’t hesitate to reach out to our support team, and we’re always here to help.