When you mark up your posts and pages with Article Schema, they help search engines better understand the correct headline, published date & primary image of your article, and how they should be used in the search results. This gives search engines an opportunity to include your articles in various search features, and your articles gain increased visibility over normal search results.
In fact, all the articles in our Knowledge Base section and Rank Math Blog use Article Schema, and here is how our snippets appear in mobile search results with images.
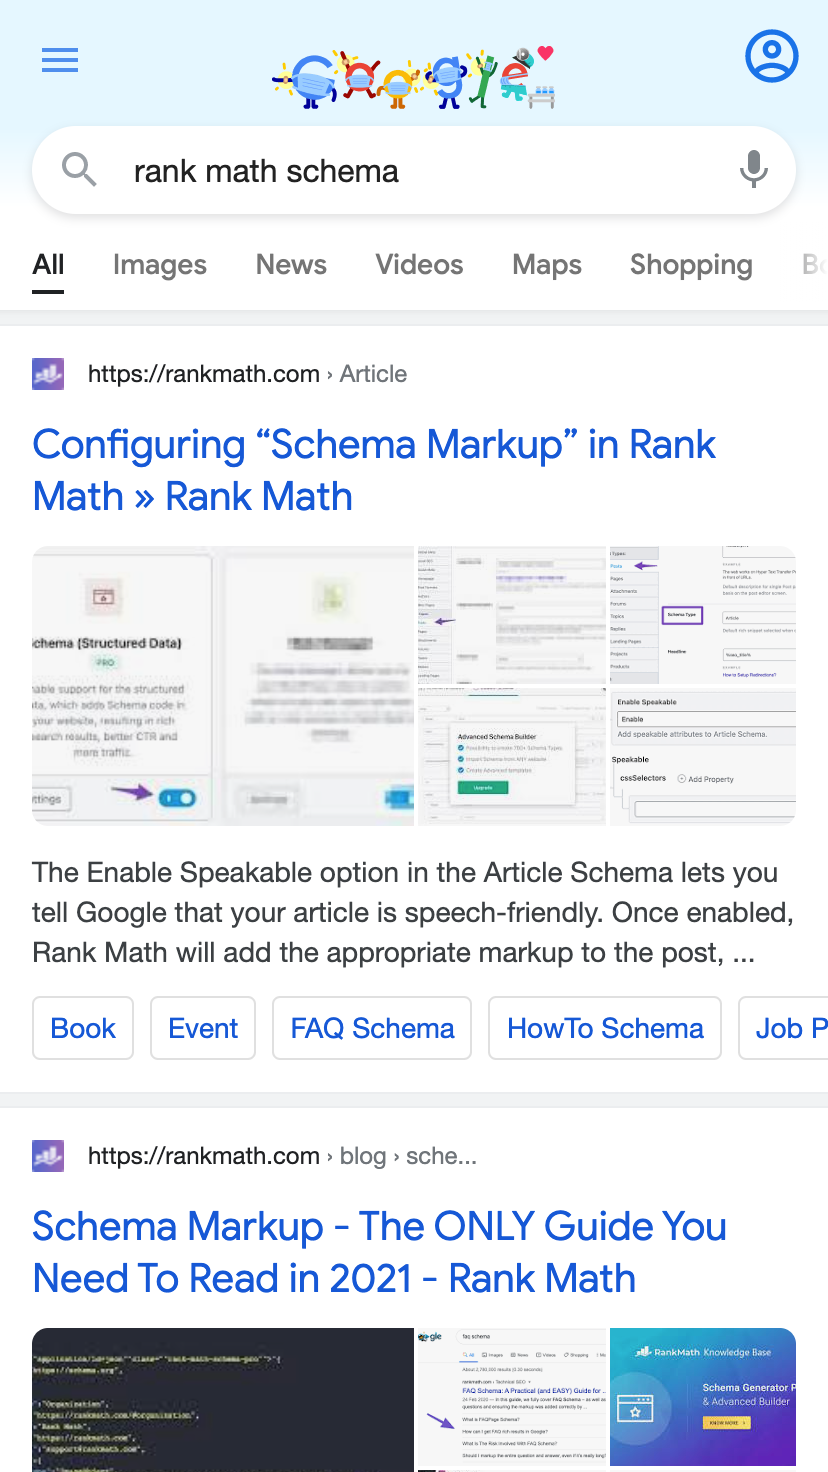
If your website uses AMP too, your articles are also eligible to feature in enhanced search results like Carousel, Top Stories, etc., for relevant search queries on mobile devices, attracting users to click through your results.
Thankfully adding Article Schema is so easy with Rank Math, and in this knowledgebase article, we’ll discuss more about Article Schema Type and how you can use the Article Schema Type on your posts and pages – let’s get started:
Table of Contents
1 Choosing Article Schema as Default Schema Type
Rank Math has made it easy to select a Schema type that you use the most on your website from the wide range of built-in Schema types…
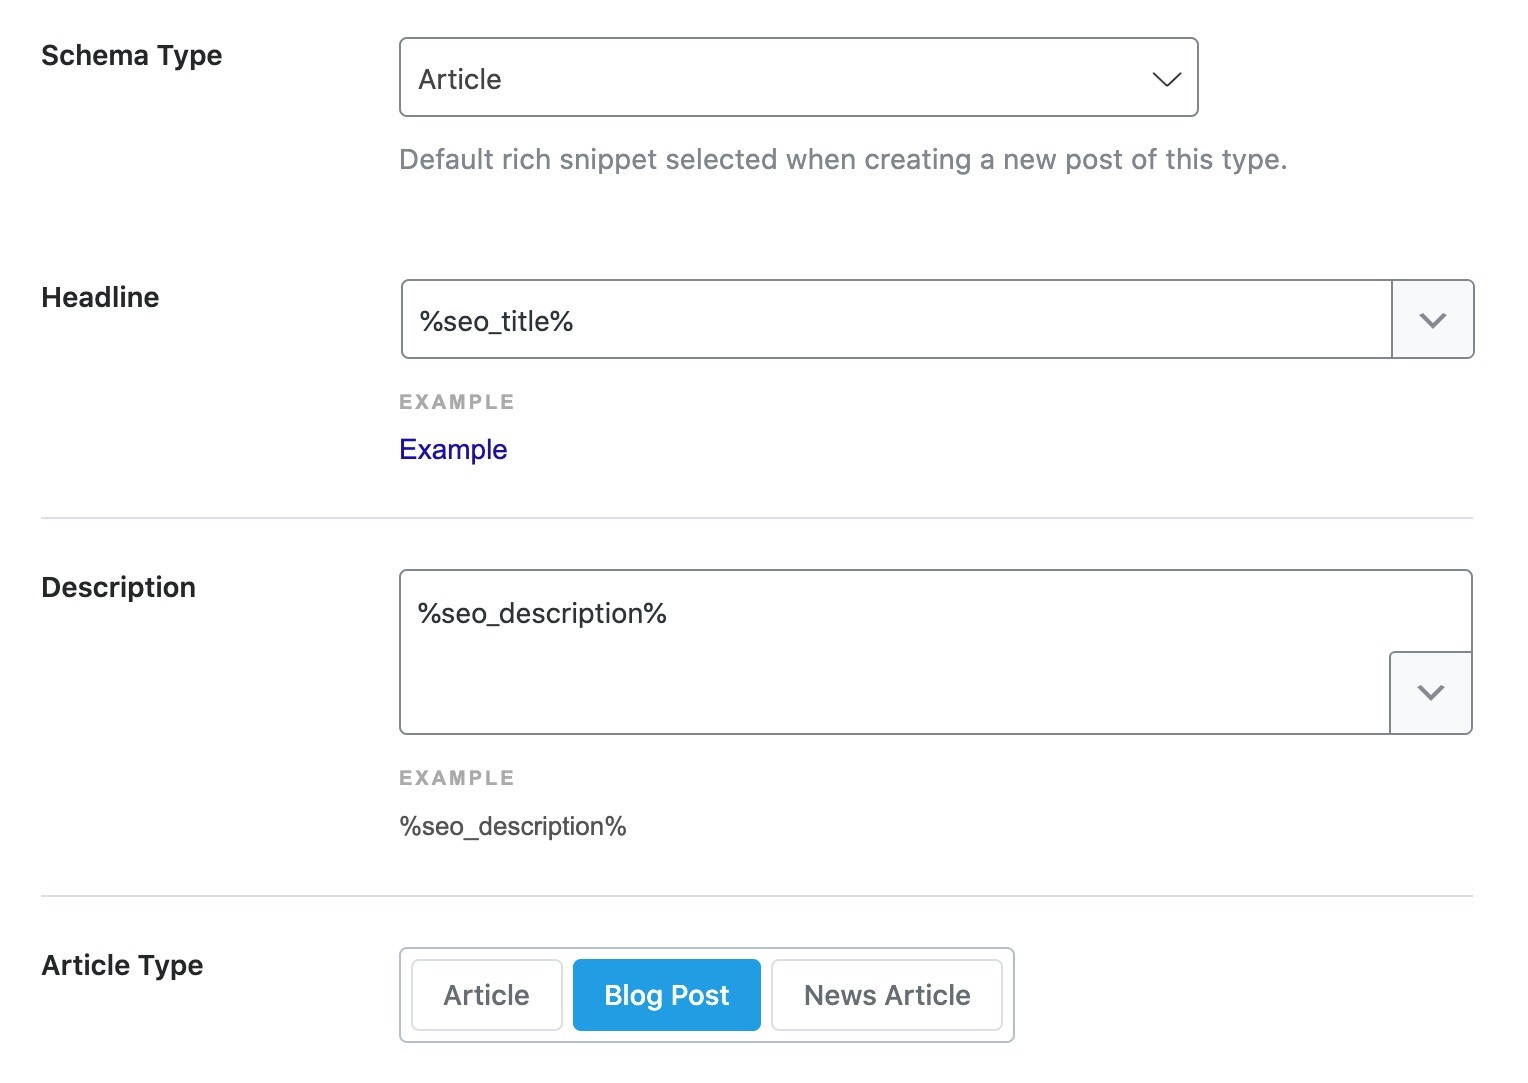
You can use the Article Schema Type on all the articles on your website. Rank Math uses Article for Pages and Posts by default, but you can always change that by navigating to WordPress Dashboard → Rank Math SEO → Titles & Meta → Posts/Pages and choosing the Schema Type of your choice.
2 Configuring Article Schema on Your Post/Page
While the default Schema Type lets you mark up all your posts/pages with Article Schema, you can also set this Schema Type to a specific post/page with the Schema tab under Rank Math’s Meta Box.
2.1 Edit Your Post or Page
To set the Article Schema Type, open your post/page by clicking on Edit post as shown below:

2.2 Open Rank Math in the Gutenberg Sidebar
Click on the Rank Math SEO icon that displays alongside this post/page’s SEO score to open the SEO settings for this page.
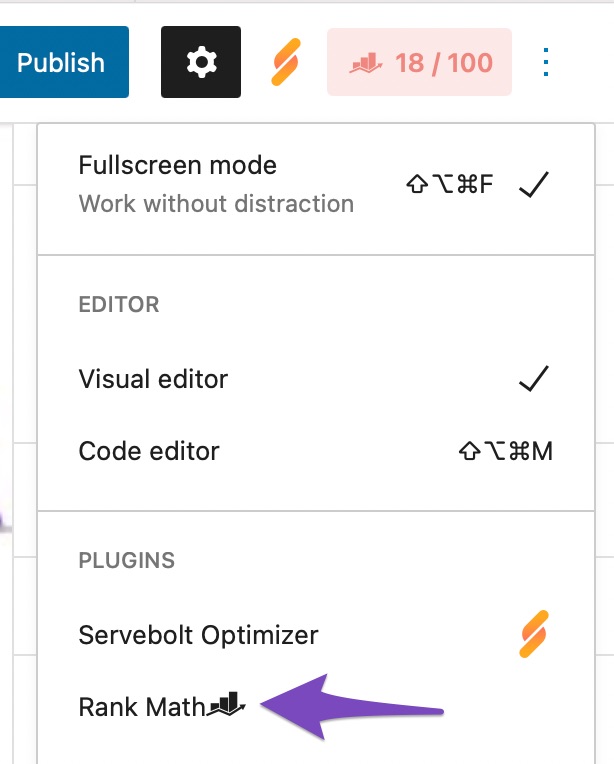
Or alternatively, click the three vertical dots in the top right-hand corner of the edit page and select Rank Math in the Plugins section – as shown below:
2.3 Navigate to the Schema Settings for This Post/Page
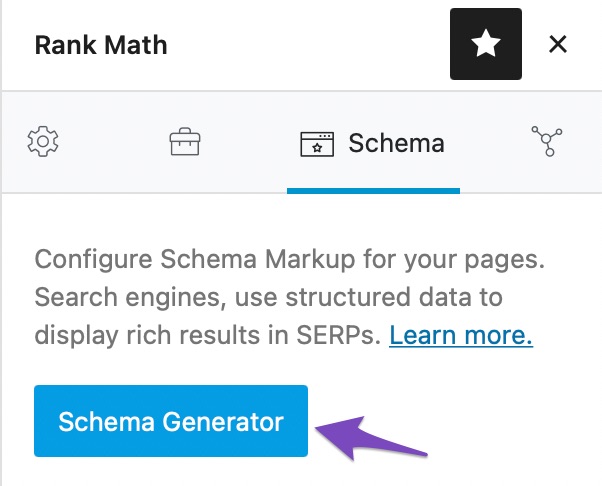
Click on the Schema tab of Rank Math SEO Metabox. If it doesn’t appear here, ensure that you have enabled the Schema module by navigating to Rank Math SEO → Dashboard → Modules in your WordPress admin area.
Then click on Schema Generator, as shown below.
2.4 Navigate to the Schema Builder
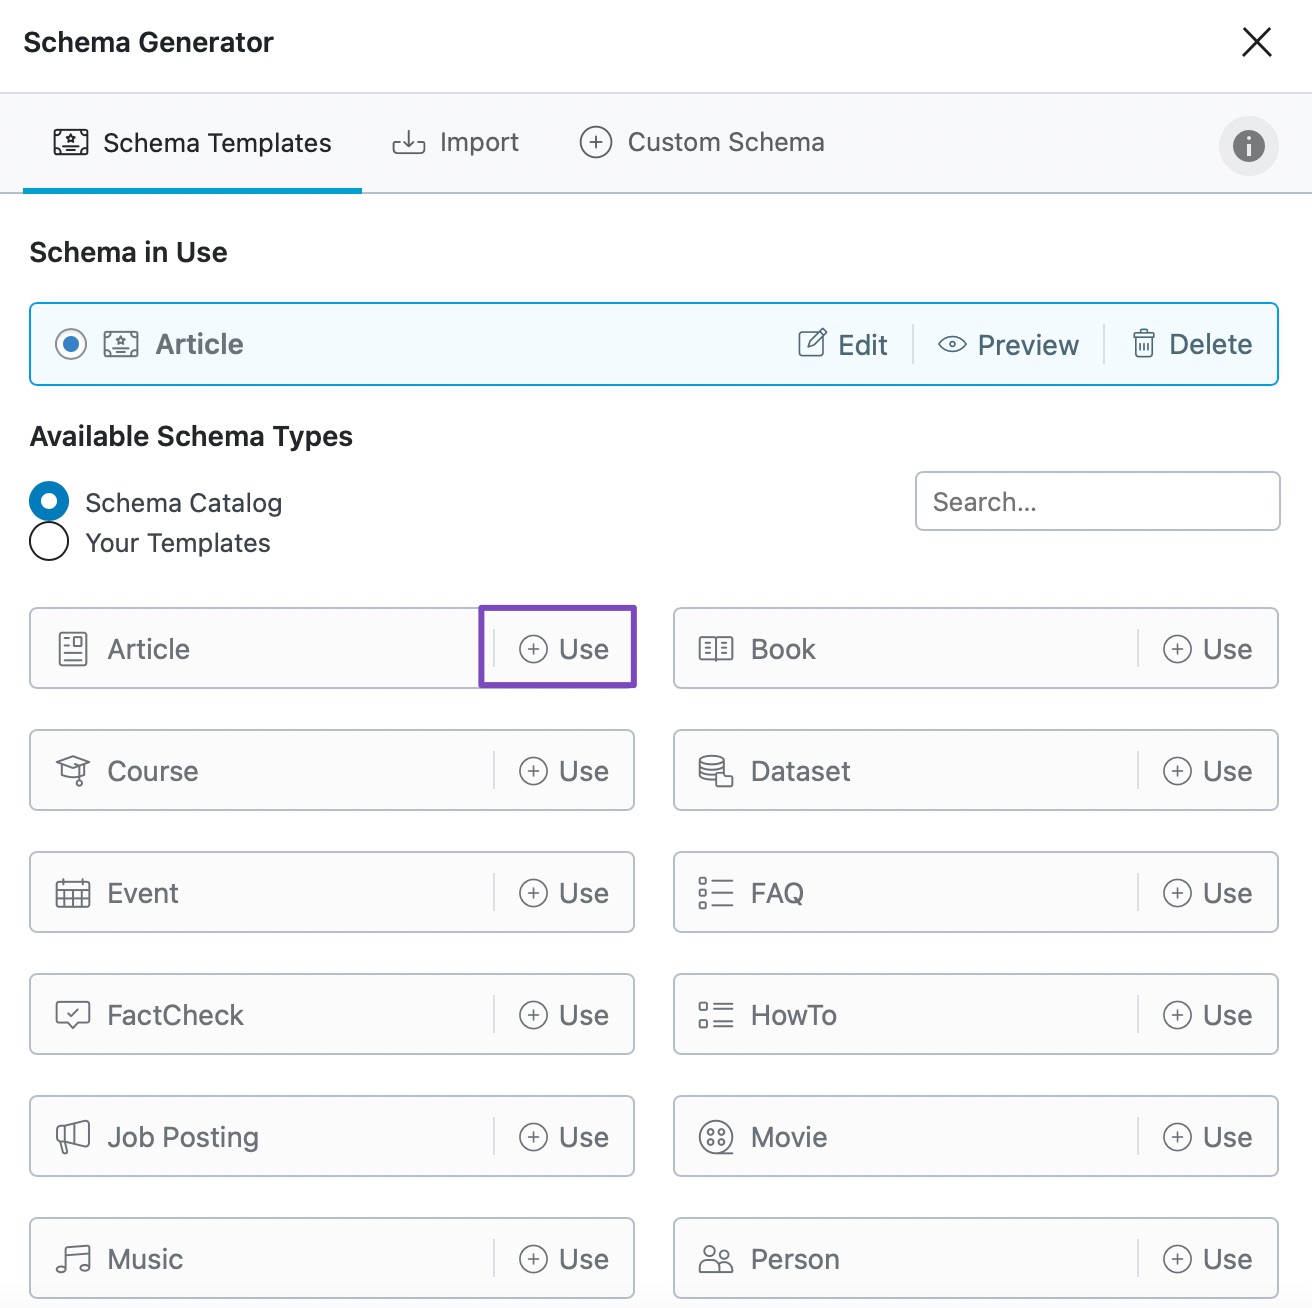
Search for the Article Schema Type and click on Use to open the Schema Builder.
2.5 Fill the Details in the Schema Builder
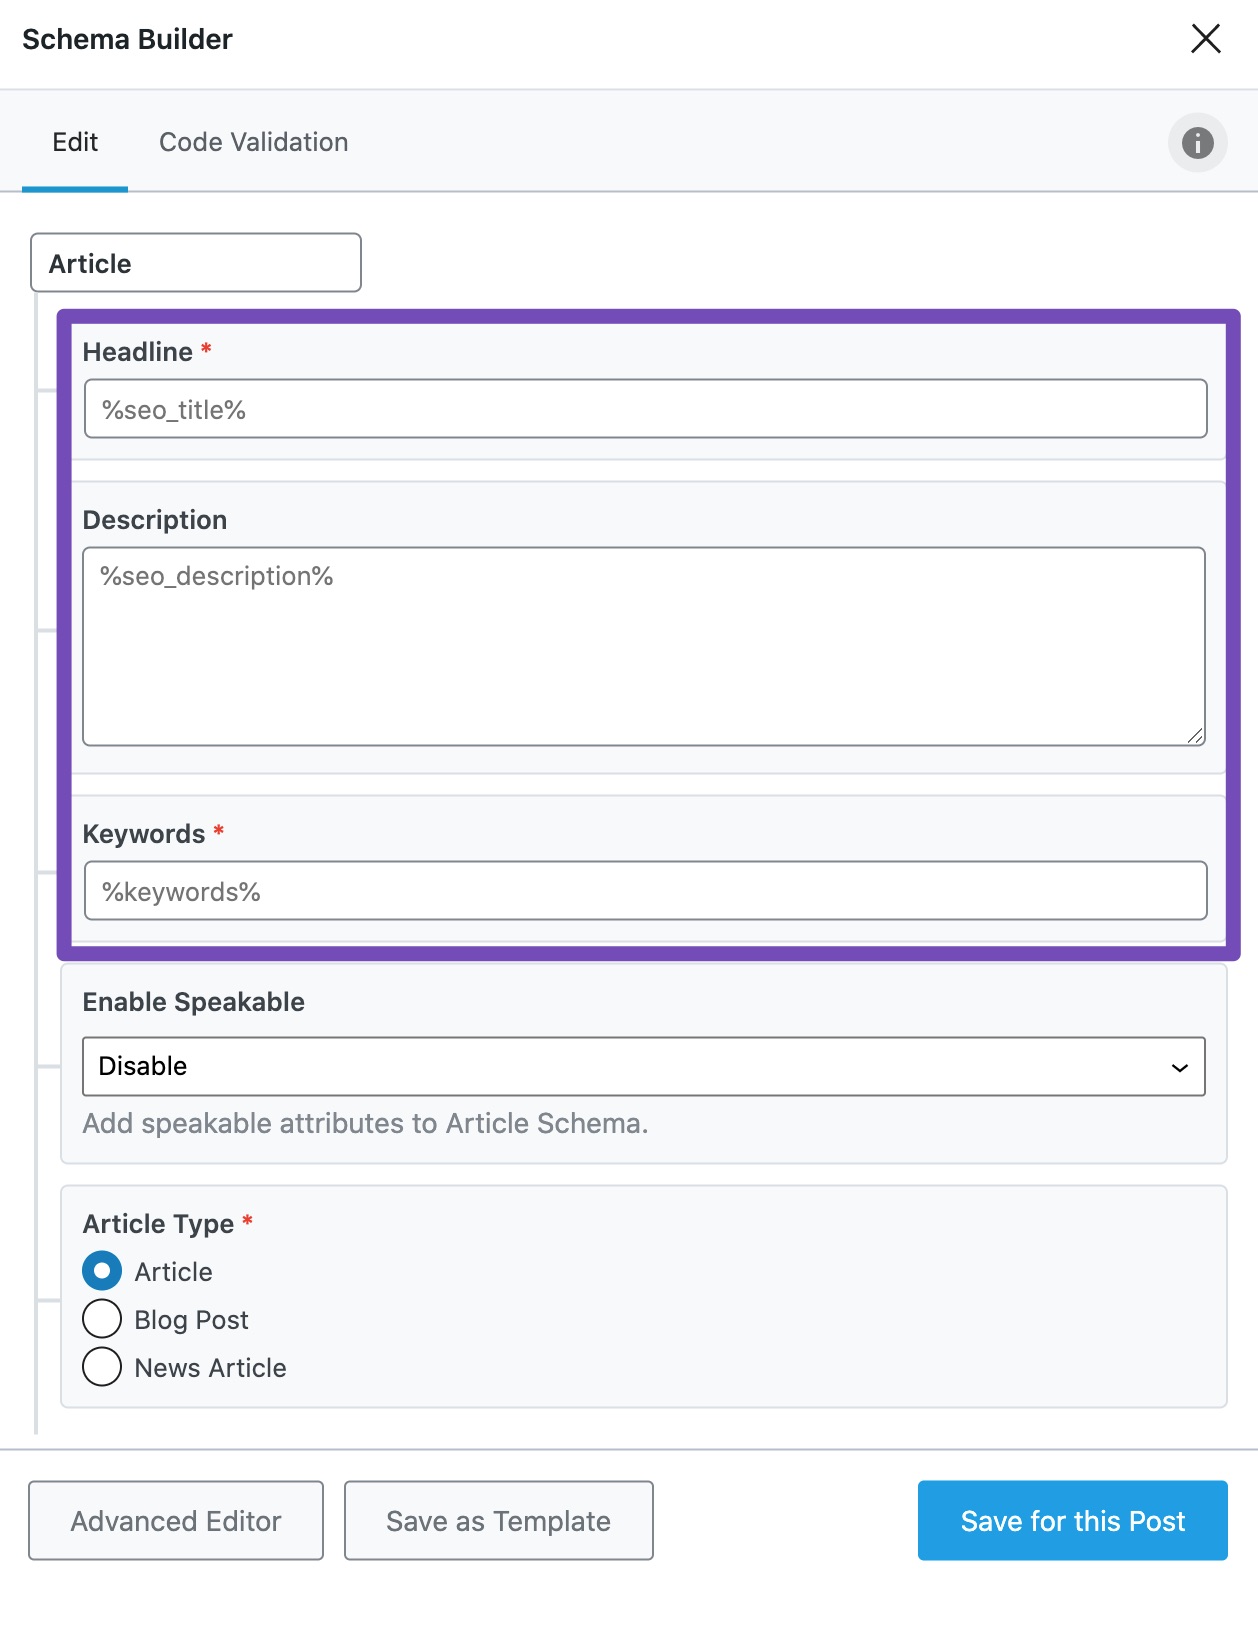
Now, Rank Math’s Schema Builder will show up. This is where you can set the headline, SEO description, keywords, and other fields available for the Schema type you’ve selected.
Headline
The default variable %seo_title% will populate the SEO Title you’ve set for the post/page. Instead, you can also define your custom title. Although the headline has no character limit, search engines encourage having a concise title to avoid being truncated for smaller devices.
Description
If you leave this field with the default variable %seo_description%, then Rank Math will use the meta description you’ve added for the article.
Keywords
The Keywords field is set with the default variable %keywords%, which would automatically populate the focus keyword(s) you’ve set for the post/page. If you wish to add the keywords manually, be sure to separate them with commas.
The keywords you add to the Schema Markup will describe the content to the search engines. Although there isn’t a limit on the number of keywords you can add to this field, adding a huge number of keywords can do more harm than good.
Search engines’ usage of meta keywords is a separate topic for discussion; however, Bing uses them cautiously only to identify spam pages. Hence, we recommend leaving the field with the default value or adding only a reasonable number of keywords.
2.6 Enable Speakable Option PRO
With the rise in voice searches and everyone looking to get ahead of the game, Speakable Schema makes your most important information coherent and easy to read.
With Speakable, you select the information you want Google to read and use for your audience. In addition, the Speakable Schema.org property identifies sections within an article or a web page best suited for audio playback using text-to-speech (TTS).
The Enable Speakable option (available in Rank Math PRO) lets you add speakable attributes to your Article Schema. You can enable it by selecting ‘Enable’ from the drop-down list. Once you select it, you can add a property by clicking Add Property. Then, add the cssSelectors such as .headline and .summary here.
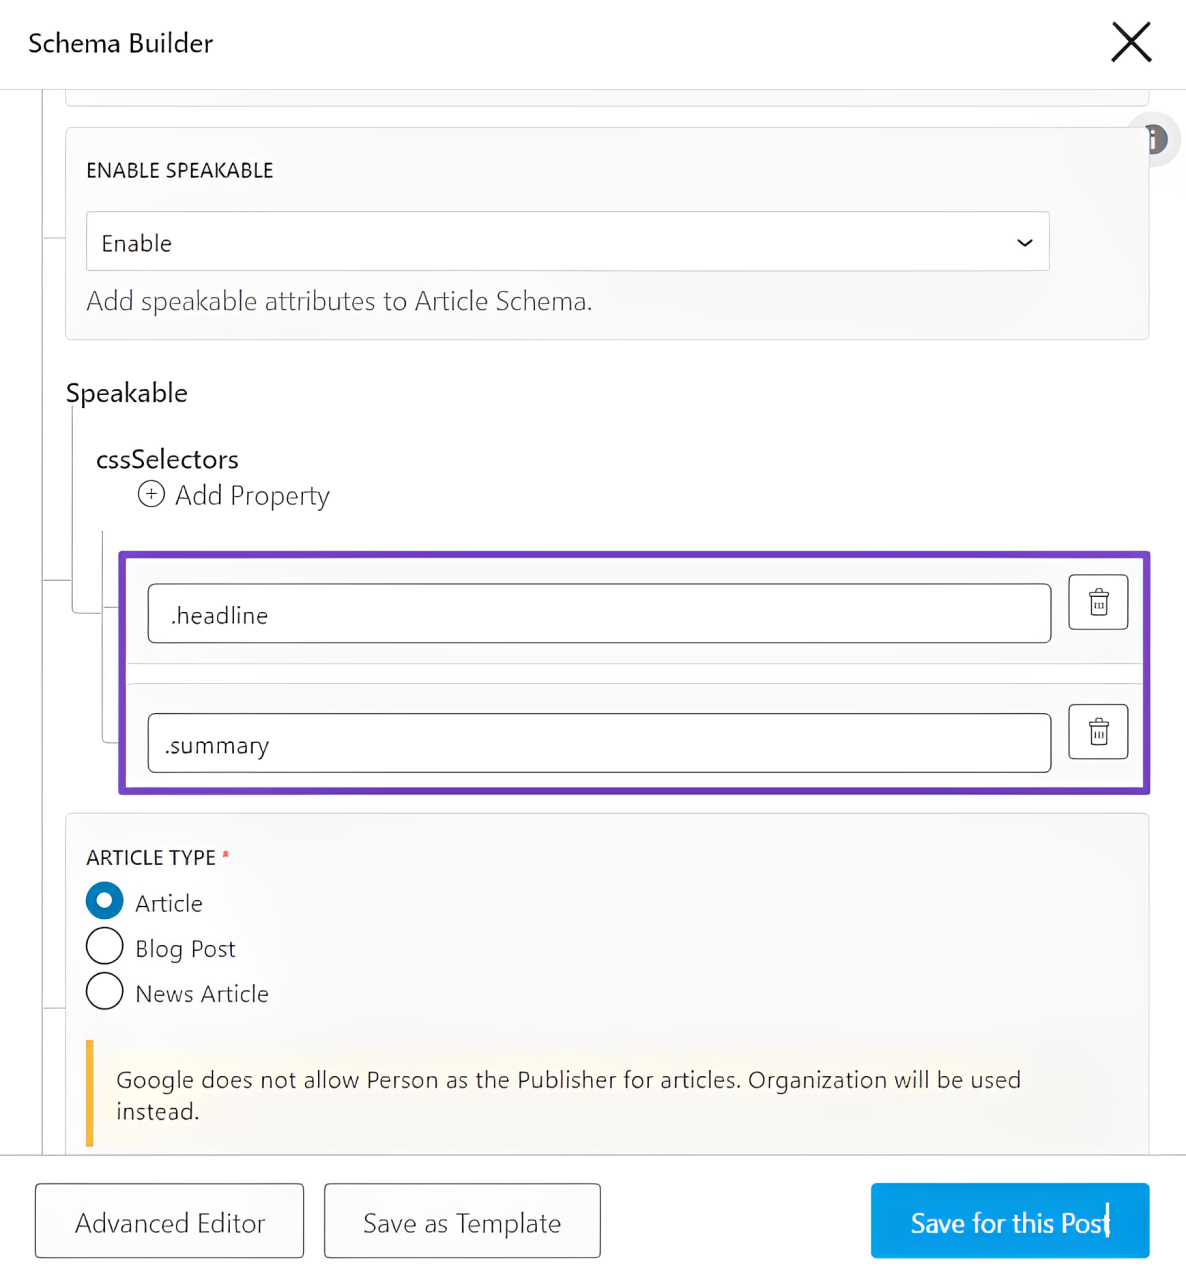
However, this depends on the WordPress theme you’re using and the class assigned to your H1 heading tag, as it might not be .headline. To verify this, navigate to the source code of the specific page or post, then press CTRL+F (or Cmd+F) to search for keywords.
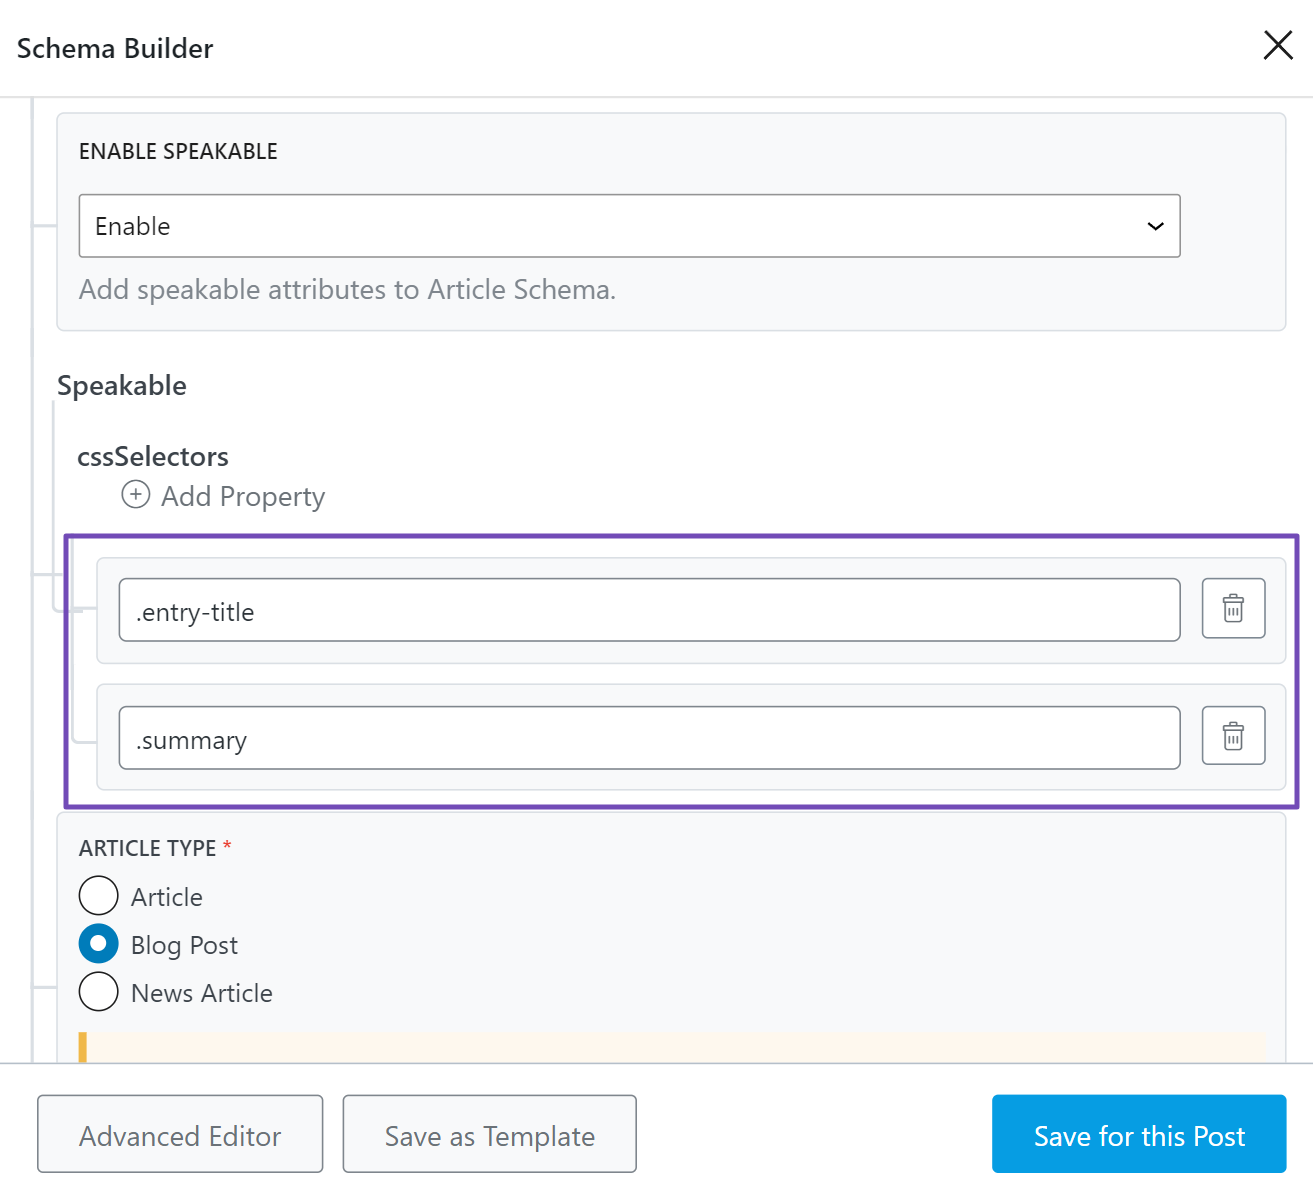
Look for /h1 in the search bar, and you’ll see that, for this theme, it shows a different class, which is entry-title as illustrated below.

Copy this class, then return to the cssSelectors property and add it, starting with a dot, along with the .summary property, as shown below. Be sure to save your changes.
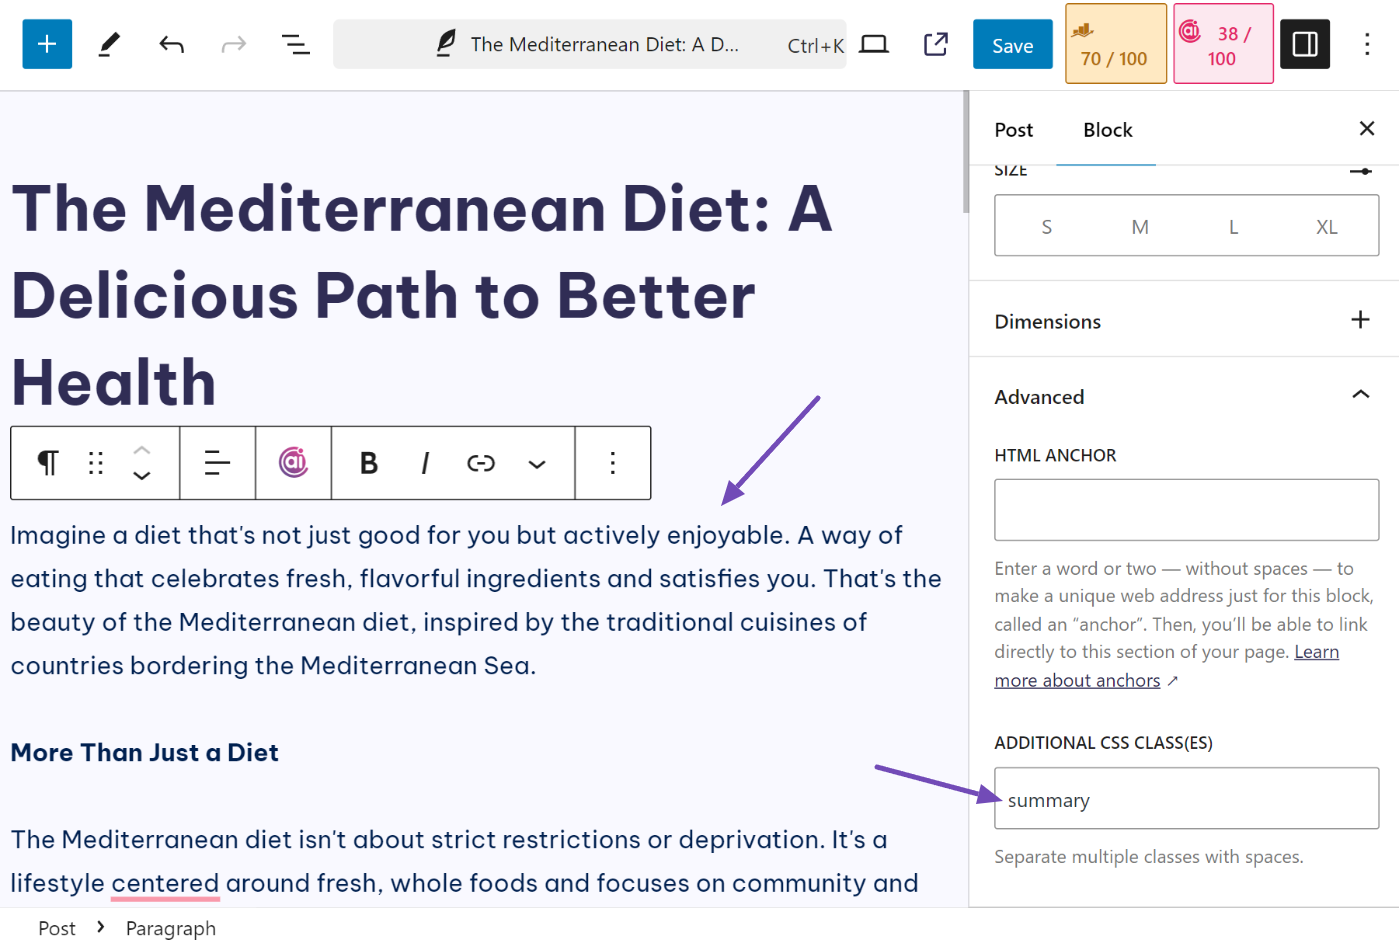
After adding the .summary property, you’ll need to specify which paragraph of your article should include the Speakable Schema, as it’s not yet defined. To do this, go to the chosen paragraph, click on it, and access the Block settings. Then, locate the Additional CSS class(es) section and enter summary in the field, as illustrated below.
Don’t forget to publish or update the page.
2.7 Choose Article Type
And the last option would let you select the Article Type. You’ll see three options available: Article, Blog Post, and News Article. Let’s get to know more about each type.

Article
This type is used more generally and is widely used across any article. Hence, Rank Math, by default, sets Article as the type, but you can always change it to a more specific one.
Blog Post
If you’re covering blog posts on your website, then you can set the article type as Blog Post. As a matter of fact, BlogPosting is a more specific type of Article under the Schema.org hierarchy. The usage of the type Article or Blog Post for your article is completely a choice of yours. But given that, Google’s guidelines recommend using the most specific Schema Type, it is suggested to choose Blog Post as the type whenever it is applicable.

News Article
If your post is an article on a News website, then you can set the type as News Article. Rank Math includes a fully compliant News Sitemap generator, which is a requirement for your site to be featured in Google News, Google Discover, and other time-sensitive content.
If you’ve configured your post type to be included in the News Sitemap, then by default, Rank Math sets the Schema Type to NewsArticle for all the posts/pages you’ve marked as “news”, even if you set the type to Article or BlogPosting.
Note: Google does not allow a person as the publisher for news articles. For Article Schema, the Publisher must be an “Organization”, not a “Person”, so Rank Math adds it automatically. Also, the news article schema should only be used for factual news content. If this Schema is used for usual content you might get an error in the rich results test by Google.
2.8 Update Your Post or Page
Click on Save for this Post once you have made the changes. Now simply save the existing post/page as you normally would do after making a change or click on Publish (if this is a newly created post/page).
You can then check your Schema with the help of the Schema Testing Tool.
Note: To get the Schema code of the Article Schema, you can use the Code Validation feature in Rank Math.
3 How to Add Author URL in Article Schema?
Google recommends including author URL to your Article Schema. Rank Math adds the author URL to Article Schema automatically if the author archives are enabled.
If you prefer adding the author URL to Article Schema, head over to Rank Math SEO → Titles & Meta → Authors → Author Archives.
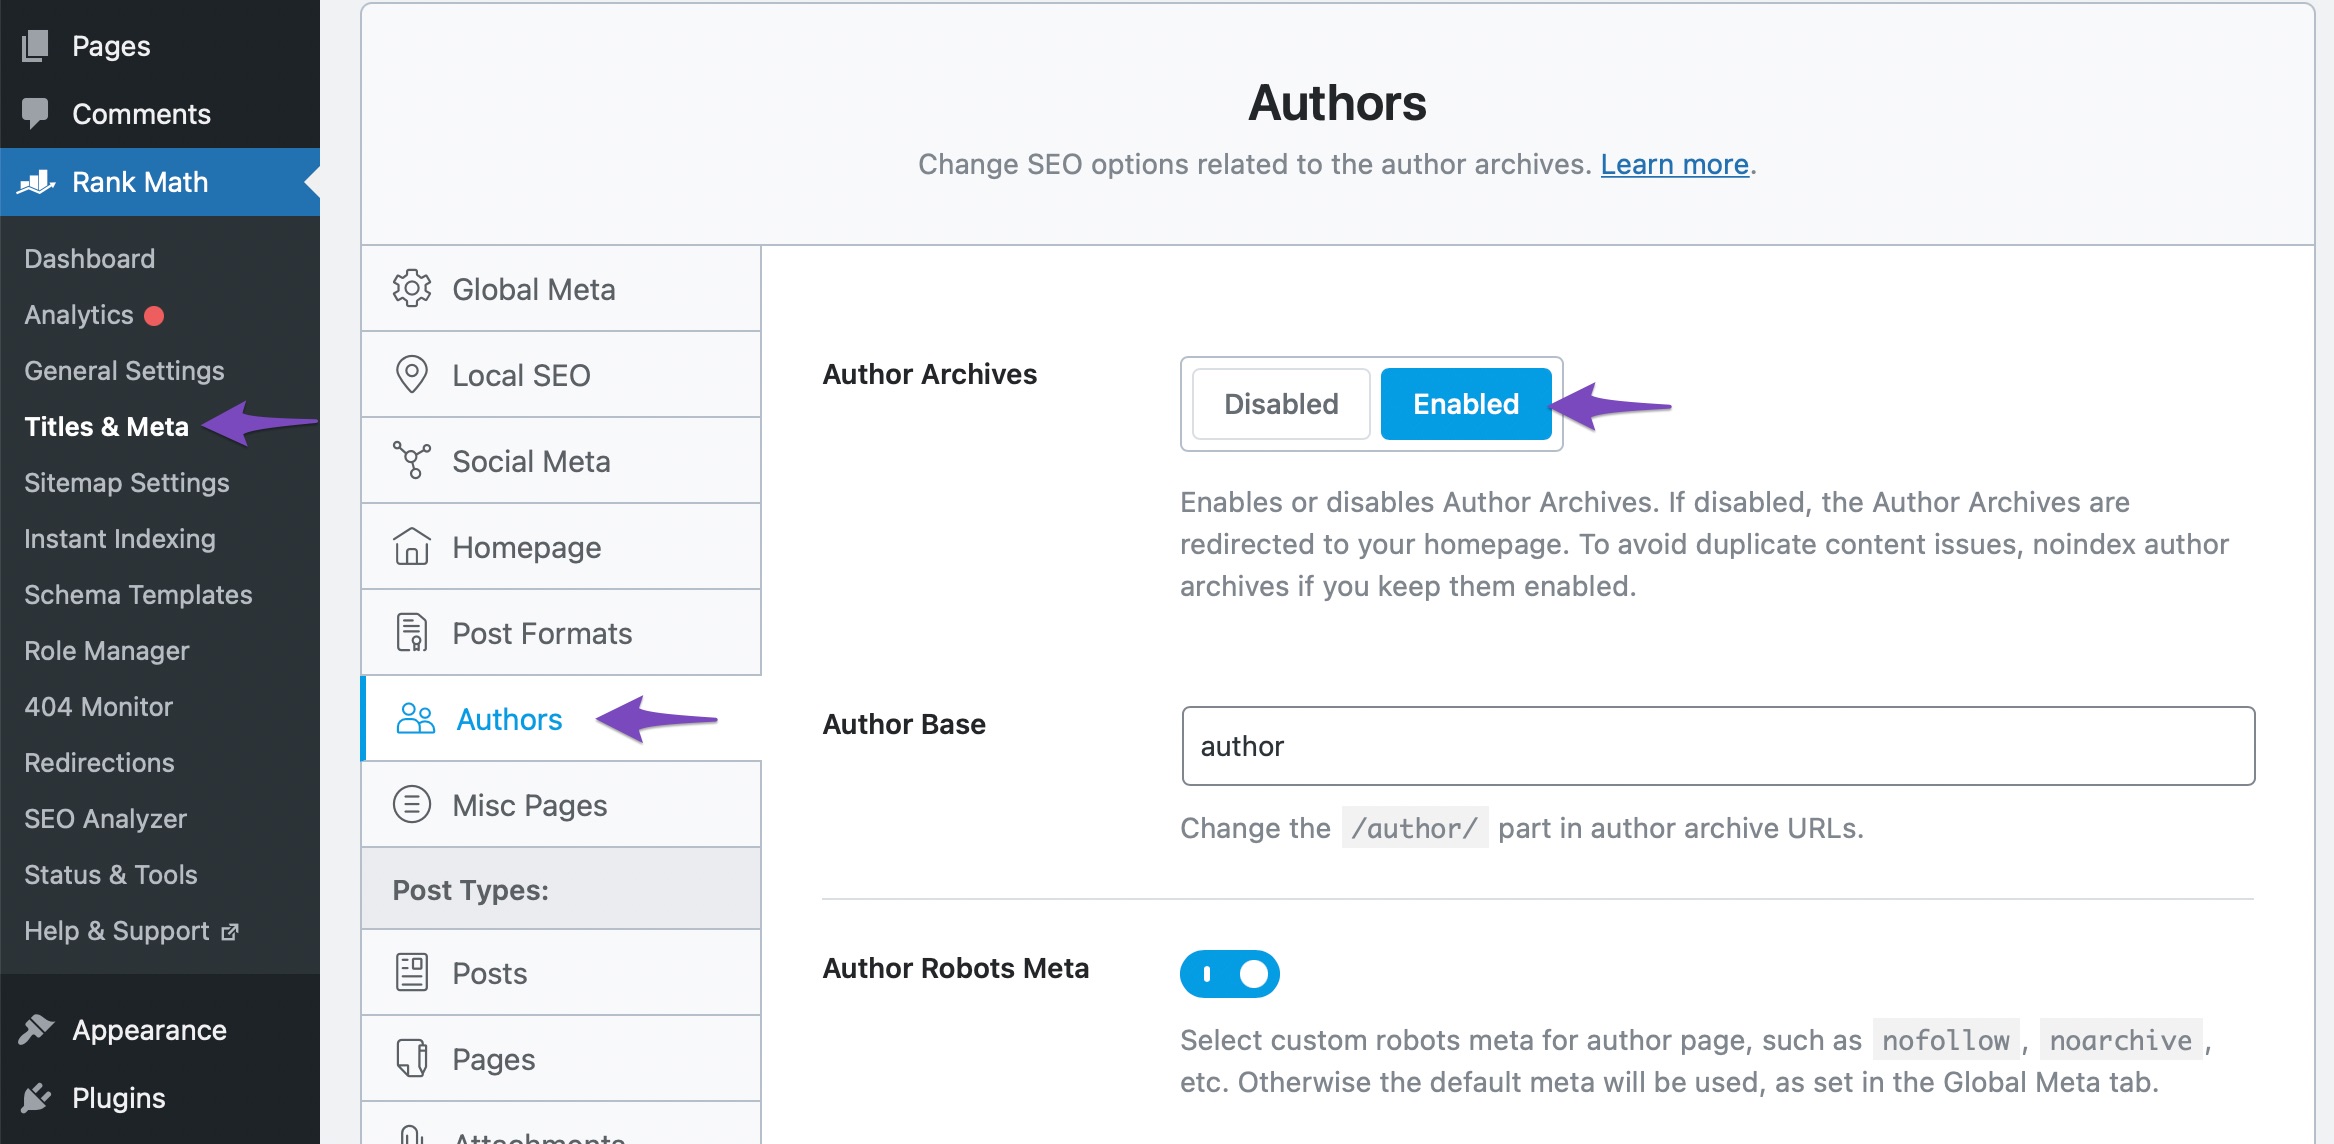
Here you can check if the Author Archives are enabled or disabled. In case if the option is disabled, you can toggle the option to enable it.
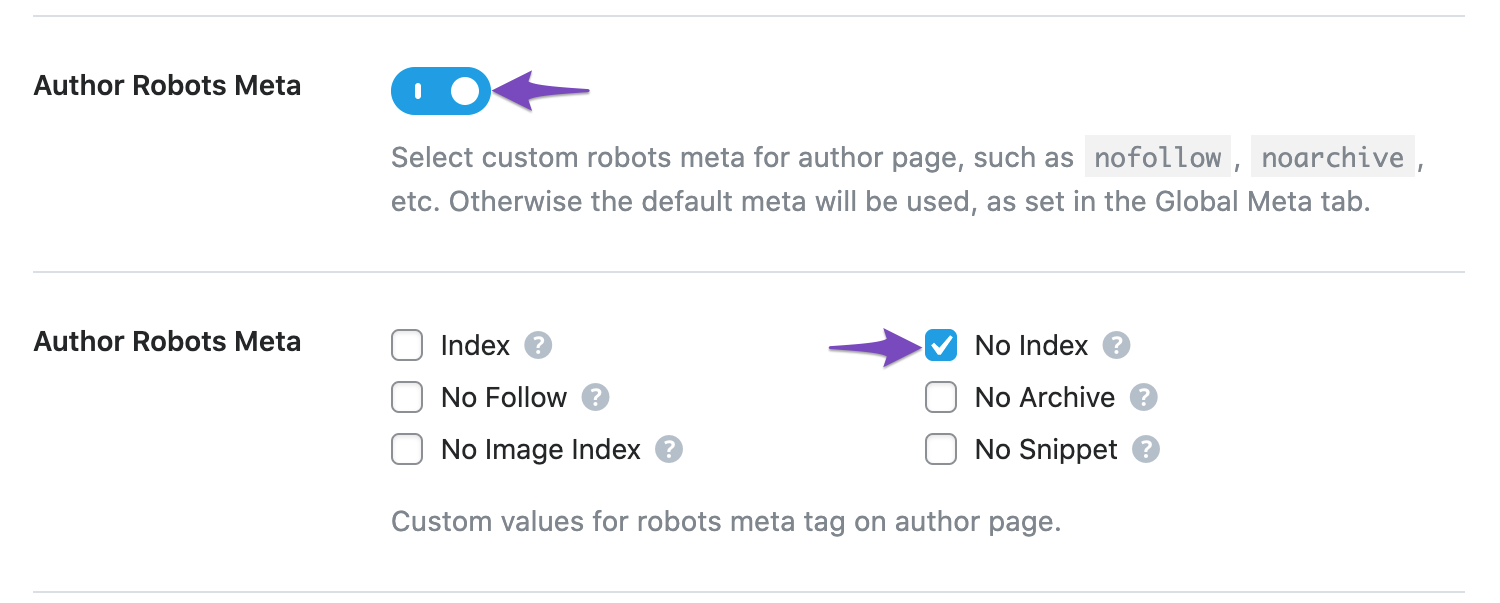
Please note if your author archives do not contain any unique information, we recommend adding a noindex to the author archive pages, as shown below, to prevent pages with thin content from being indexed.
Once you’re done making changes, scroll down to the bottom of the page and click the Save Changes button.

4 How to Add Multiple Author Schema in Rank Math? PRO
Rank Math, by default, will only include the primary author in the Article Schema. However, if you wish to include multiple authors, you may need to edit your current Article Schema further using our Advanced Editor.
You can refer to this guide from Google to properly apply multiple authors to your markup.
To add Multiple Author Schema in Rank Math, navigate to Rank Math SEO → Schema and select the Article Schema, as shown below.
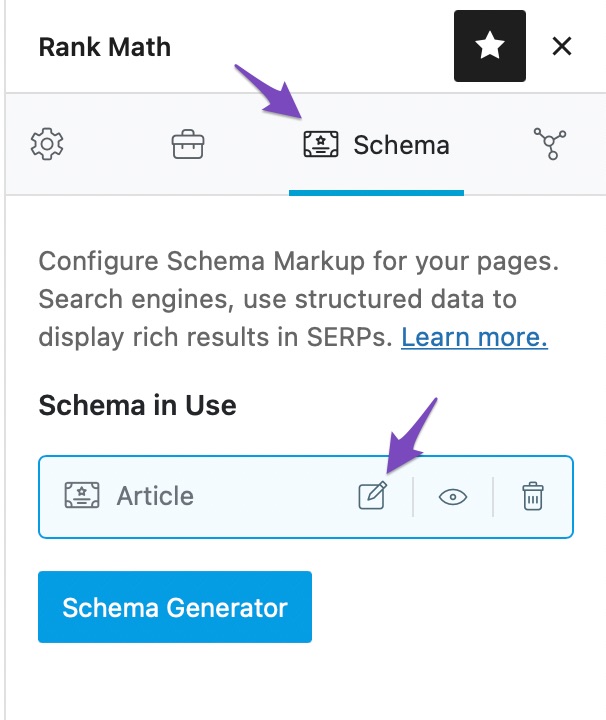
Next, in the Schema Builder, click on the Advanced Editor option at the bottom.
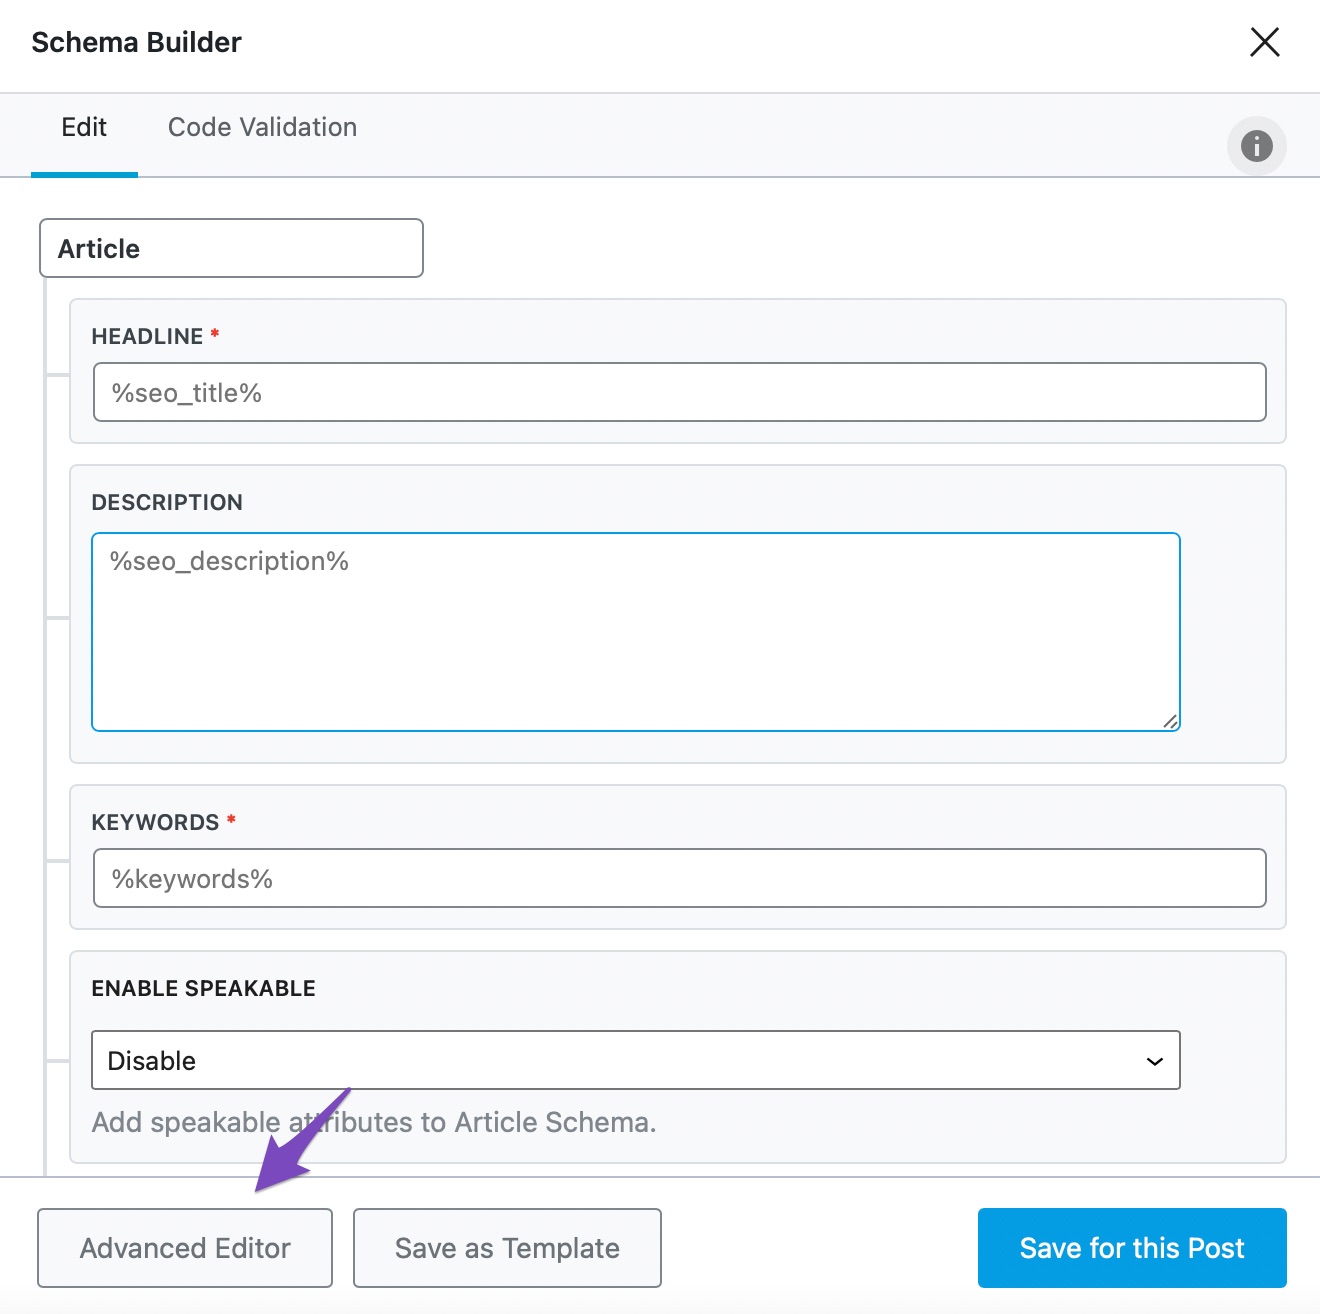
You’ll then see a confirmation message on the screen. Click OK to proceed.

In the Advanced Editor, you can add the Multiple Author Schema by using the Add Property and Add Property Group options, as shown below.
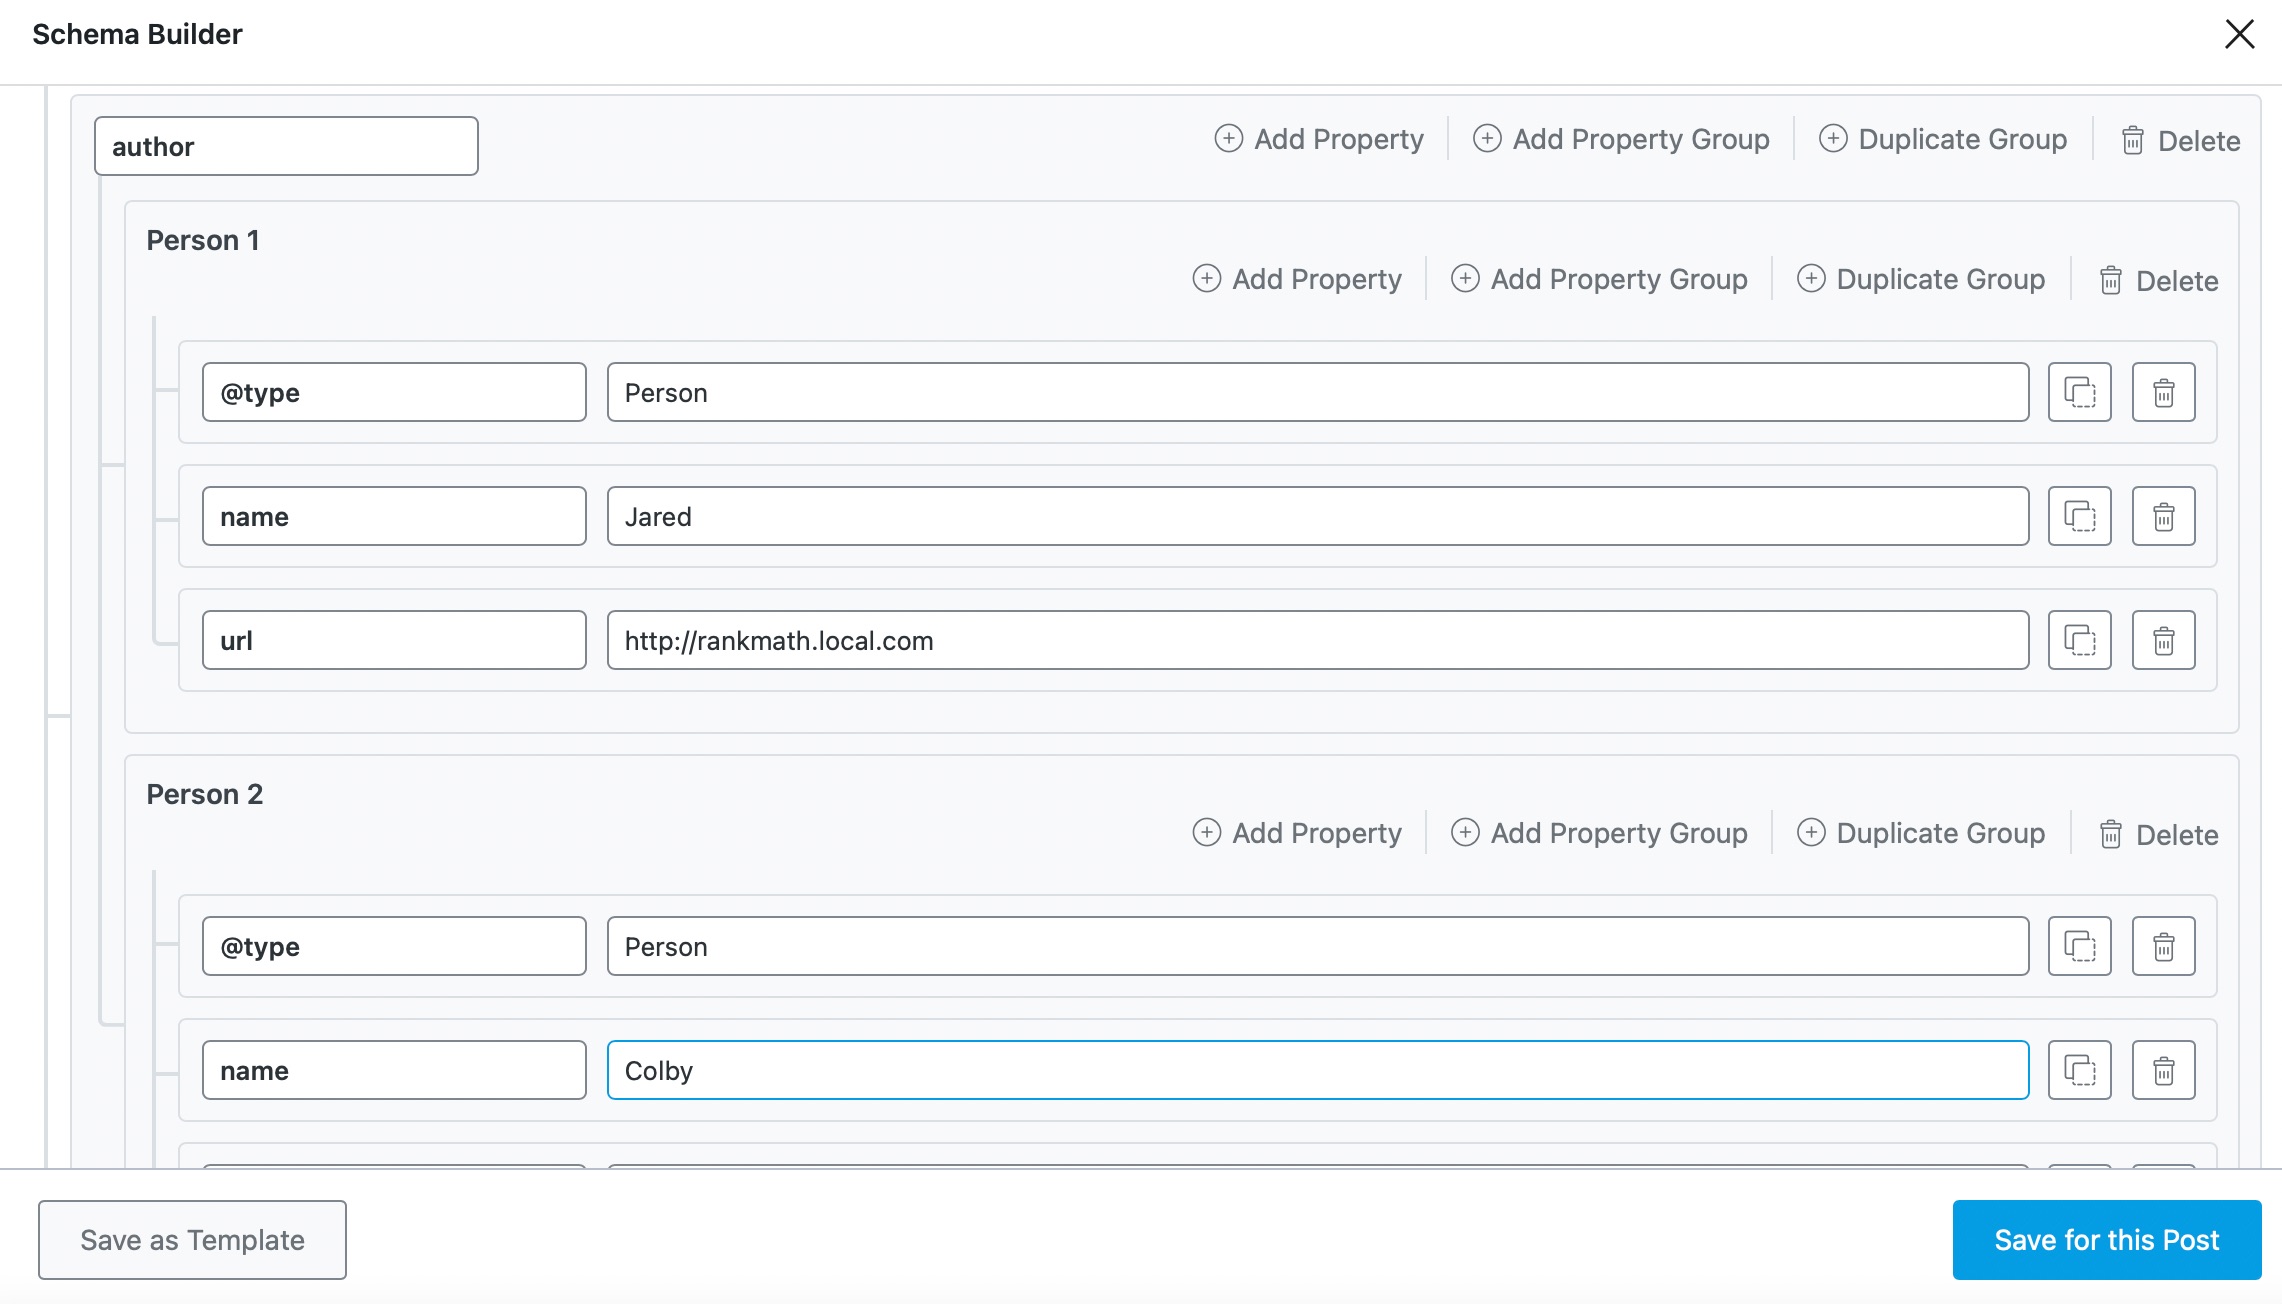
Once done, click the Save for this Post button to save the Schema. You can then check your Schema with the help of Google’s Rich Results Testing Tool.
5 How to Use reviewedBy Schema Entity? PRO
Including Author Schema Entity, reviewedBy Schema is also one of the highest priority opportunities to signal good E-E-A-T. As we know, E-E-A-T (Experience, Expertise, Authoritativeness, and Trustworthiness) is Google’s framework to evaluate and rank great content on their search engine results.
By using the reviewedBy Schema Entity, you can improve your E-E-A-T and overall organic performance. As shown below, you can use our Advanced Editor to add and customize your reviewedBy Schema Entity.
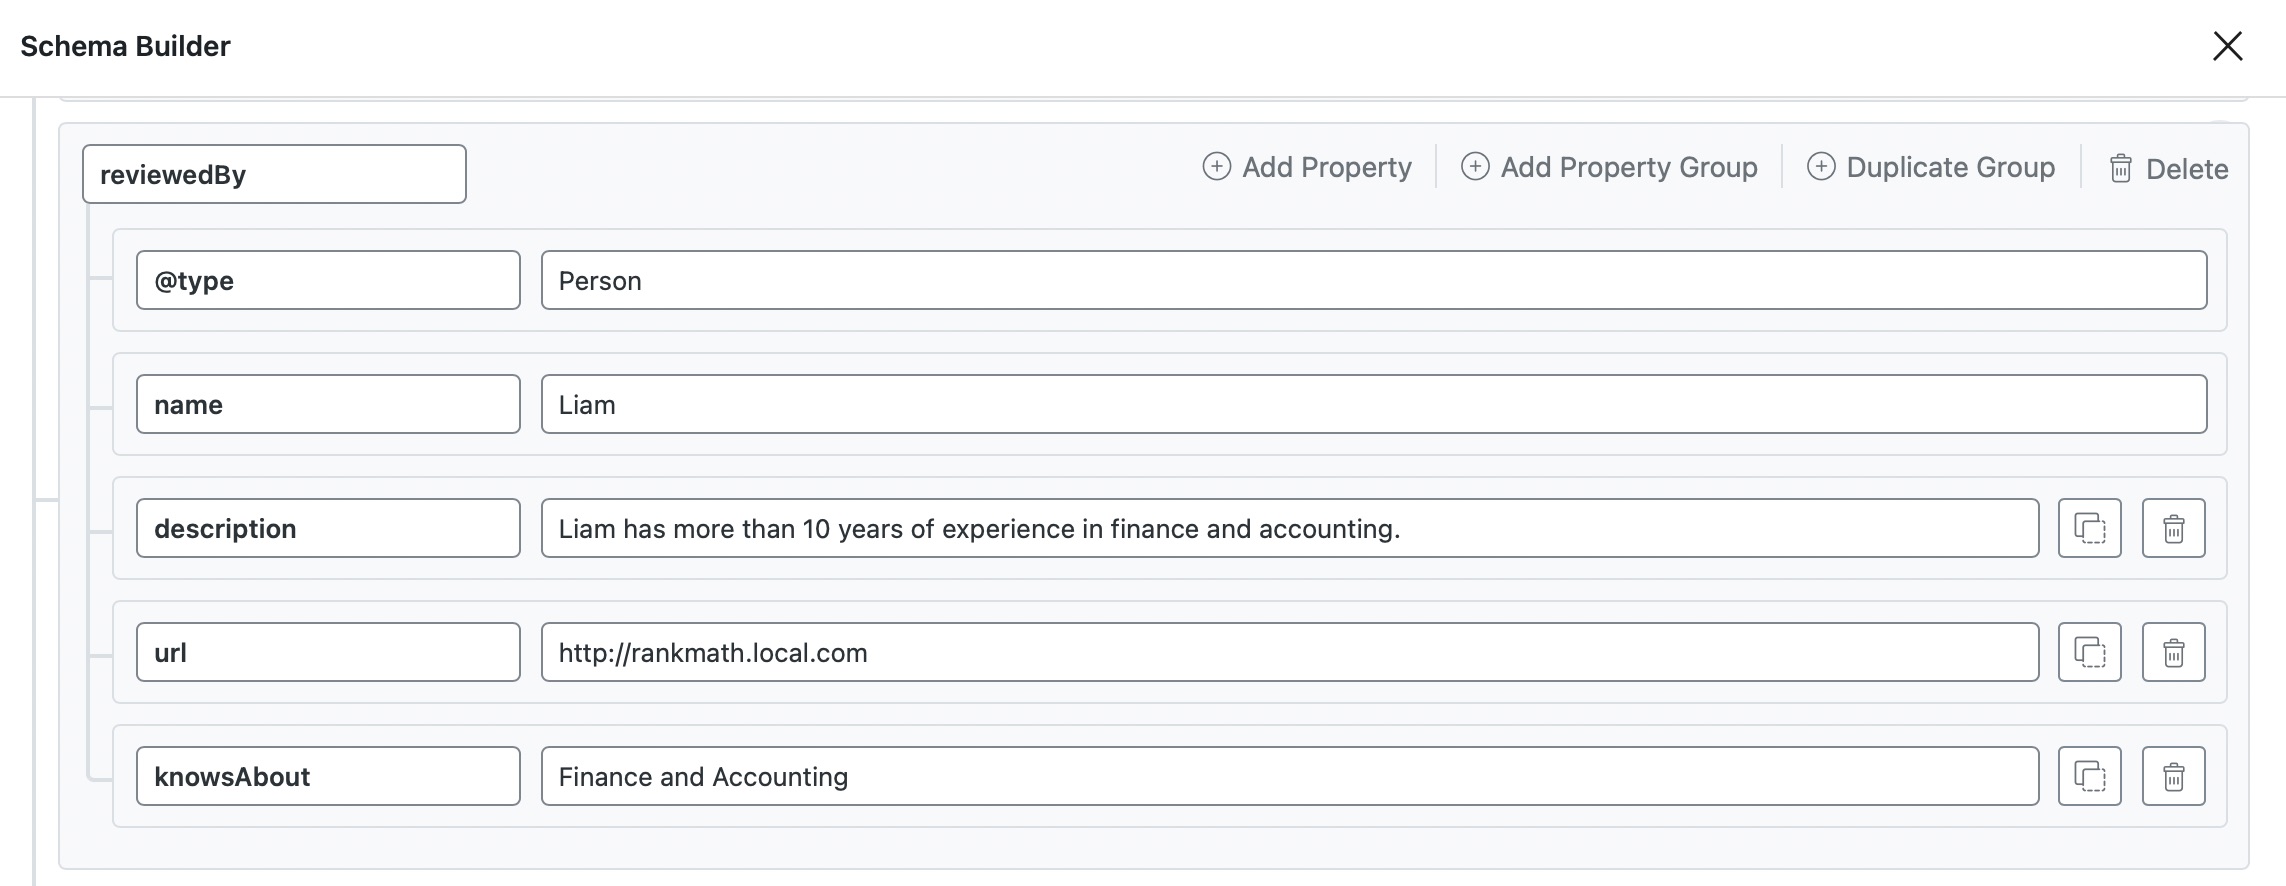
And that’s it! We hope the tutorial helped you take advantage of Article Schema. If you still have questions about using Article Schema, feel free to contact our support team — we’re always here to help.