Are you tired of dealing with unwanted visitors on your WordPress site?
From spam comments and annoying bots to hackers trying to break in, these disruptions can slow down your site and cause you a lot of stress.
The good news is, you can take control. By blocking IP addresses in WordPress, you can protect your site, keep your community safe, and enjoy smoother performance.
In this post, I’ll walk you through how to spot suspicious IPs and the different ways you can block them. So, without any further ado, let’s get started.
Table Of Contents
1 What is an IP Address?
Every device that connects to the internet, whether it’s your computer, phone, or tablet, has a unique number called an IP address (short for Internet Protocol address). Think of it like a phone number: just as phone numbers let you call each other, IP addresses let devices find and talk to one another online.
An IP address usually looks like a series of numbers (for example, 192.168.1.1), and it serves two main purposes: identifying a device on a network and showing its location. Whenever someone visits your WordPress site, their IP address gets recorded in your site’s access logs. The same happens when you visit other websites too.
So, if IP addresses are so essential, why would you ever want to block them? That’s exactly what I’ll dive into next.
2 Reasons to Block IP Addresses in Your WordPress Website
Blocking IP addresses isn’t just for advanced users, it’s a practical step you can take to protect and manage your WordPress site. Let’s look at some common reasons why you might want to block certain IPs.
2.1 Preventing Malicious Activity
If you notice repeated hacking attempts, brute force login attacks, or suspicious behavior from the same IP address, blocking it can stop these threats in their tracks.
This simple action helps protect your site from security breaches and unauthorized access.
2.2 Preventing Spam and Unwanted Emails and Comments
Spam comments with shady links or irrelevant form submissions can clutter your site and inbox.
By blocking the IPs behind this spam, you can keep your comment sections clean, your inbox manageable, and your visitors focused on meaningful content.
2.3 Managing Unwanted Traffic
Sometimes, certain IPs, or even whole ranges, can overwhelm your server with excessive requests. These can be bots, crawlers, or even DDoS (Distributed Denial of Service) attacks.
Blocking them reduces server load, improves site speed, and ensures your real visitors have a smooth experience.
2.4 Restricting Access to Content or Company Policies
You may want to block IPs so only the right audience sees your content.
For example, subscription sites can limit access to paying members. Companies can also block certain IPs so employees don’t visit websites that are against workplace rules.
2.5 Geographical Restrictions
If you want to stop traffic from certain countries or regions, blocking IPs from those areas is one way to do it. This is useful if your service is only available in certain locations.
3 Identifying the IP Addresses to Block in WordPress
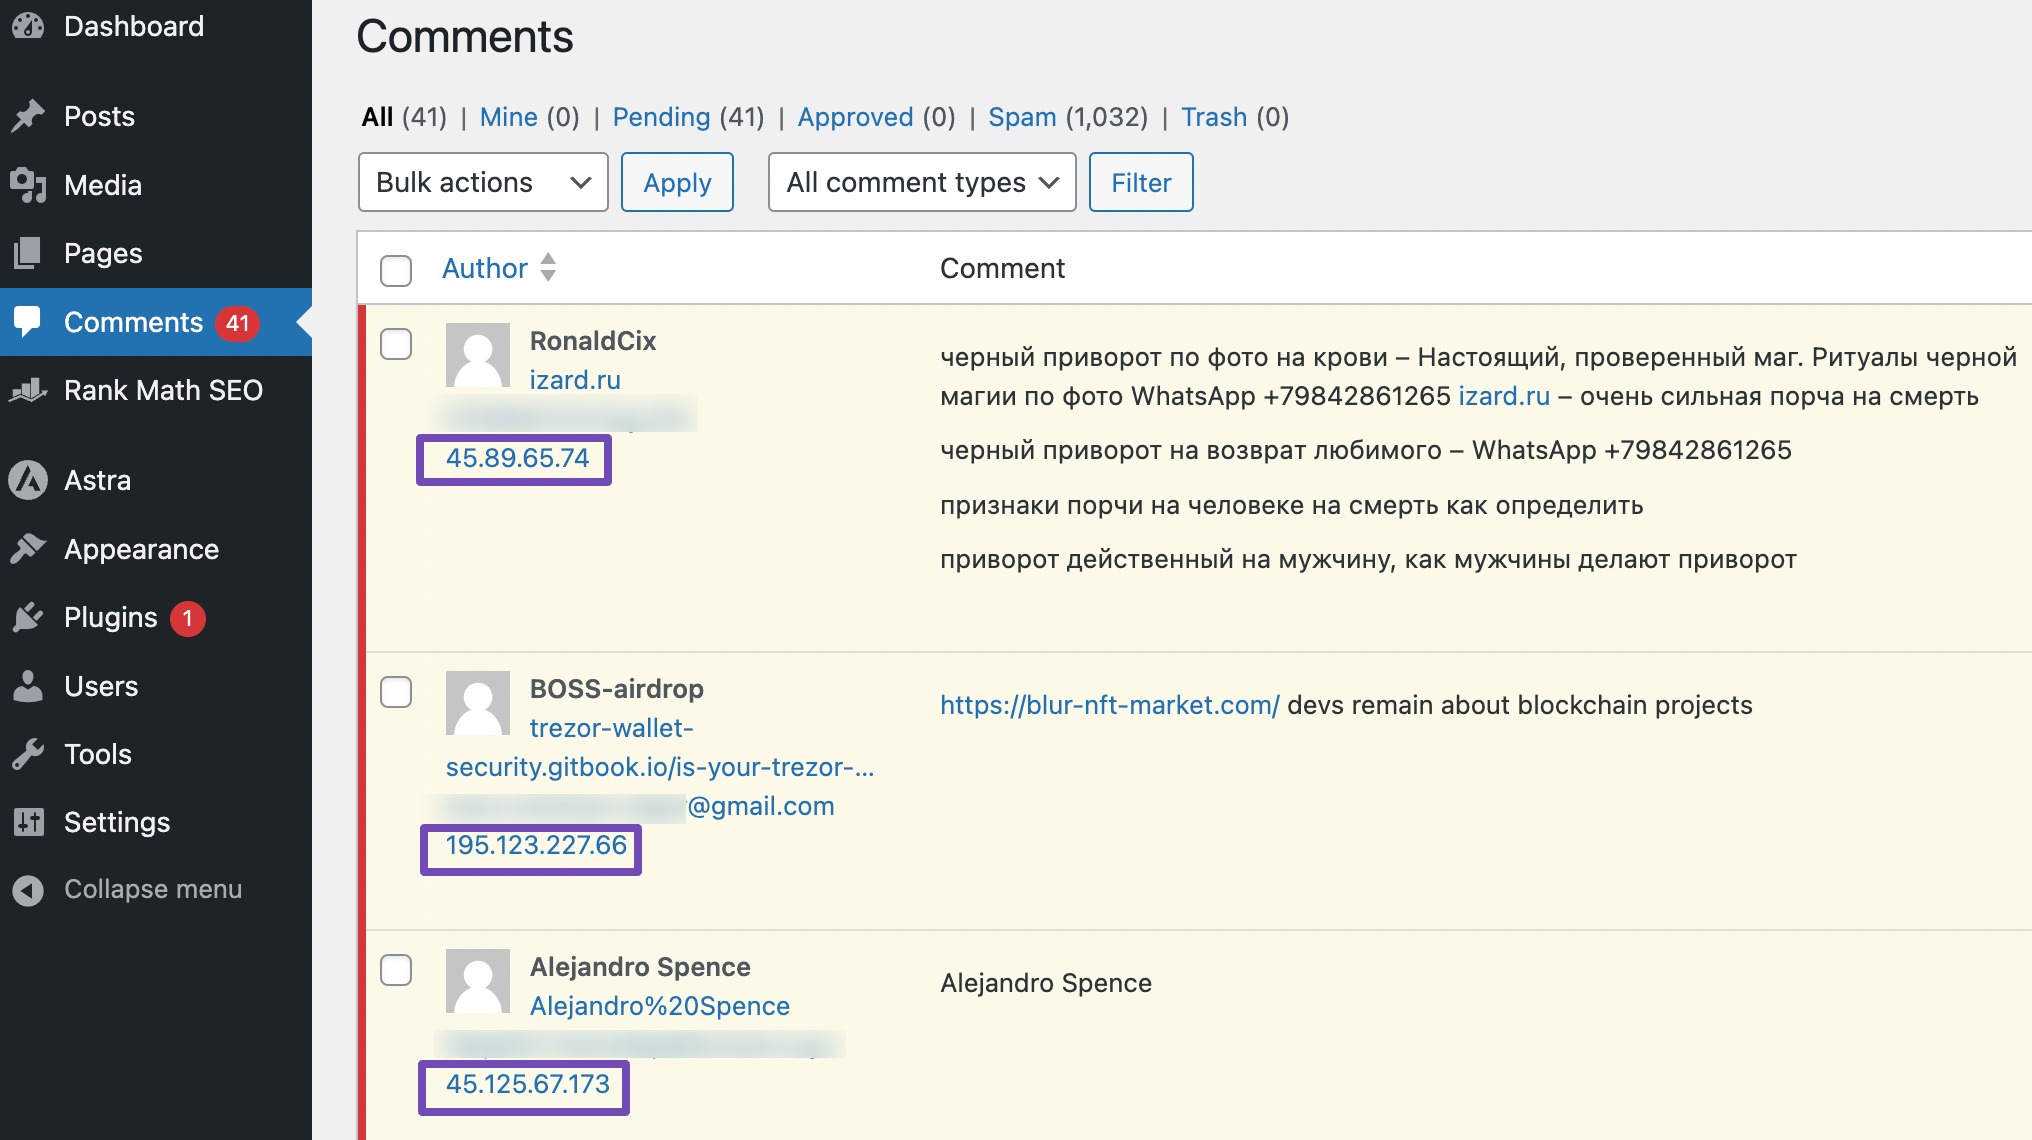
If you’re dealing with spam comments on your posts or pages, it’s essential to note that WordPress stores the IP addresses of your website commenters.
To locate this information, simply navigate to the Comments page from your WordPress admin area.
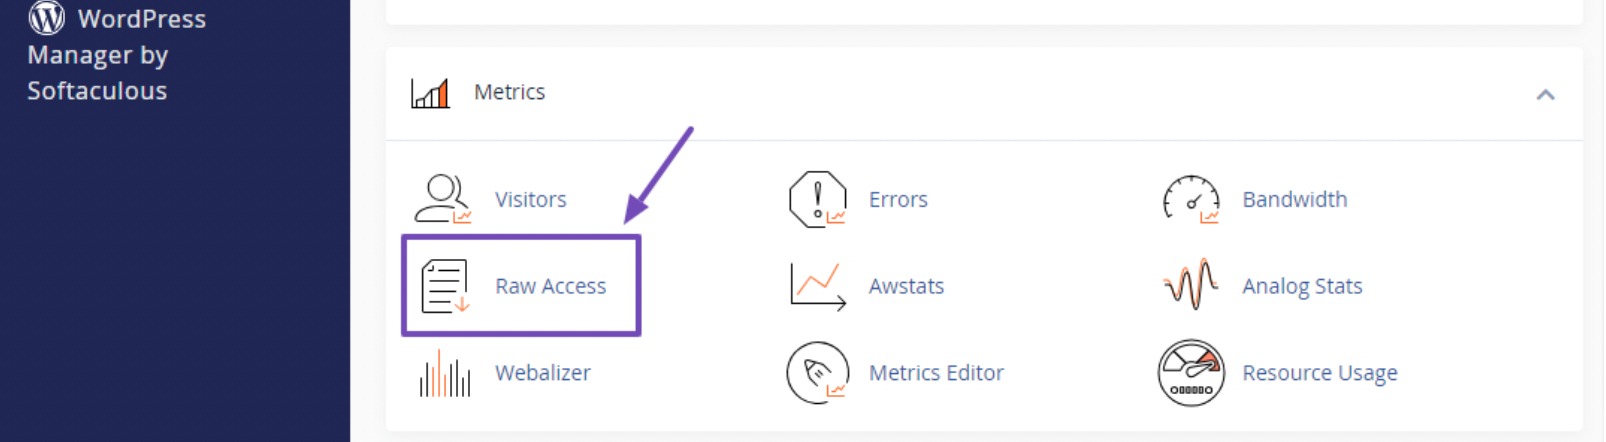
However, in the case of a severe attack impeding access to your admin area, it’s important to examine your server’s access log. Access this log through your hosting provider’s cPanel tools.
Navigate to the Metrics section and select the Raw Access option, as shown below.
This action will lead you to the Raw Access Log page, where you’ll find the raw access log for your domain. Click on the domain to download the access logs file.
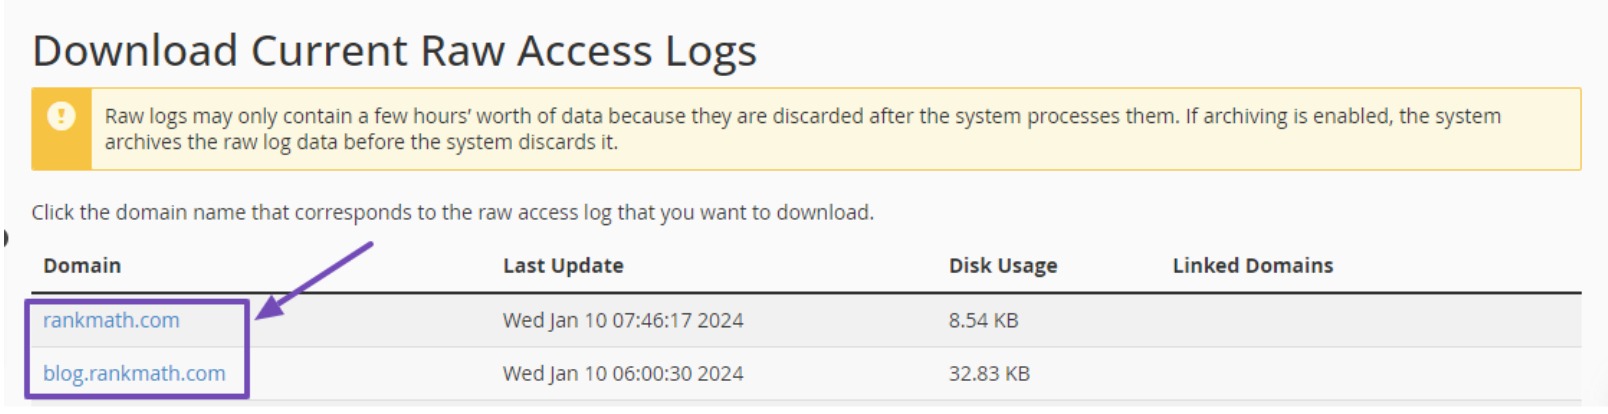
By clicking on your domain, you’ll download your server’s log file in .gz archive format. Proceed to extract the file.
If you’re having trouble opening this file format on your computer, try converting it to DOC or PDF using online tools. You can then download the converted file to view your raw access logs.
The access log file comprises raw data of all requests made to your website, with each line starting with the IP address responsible for that particular request.
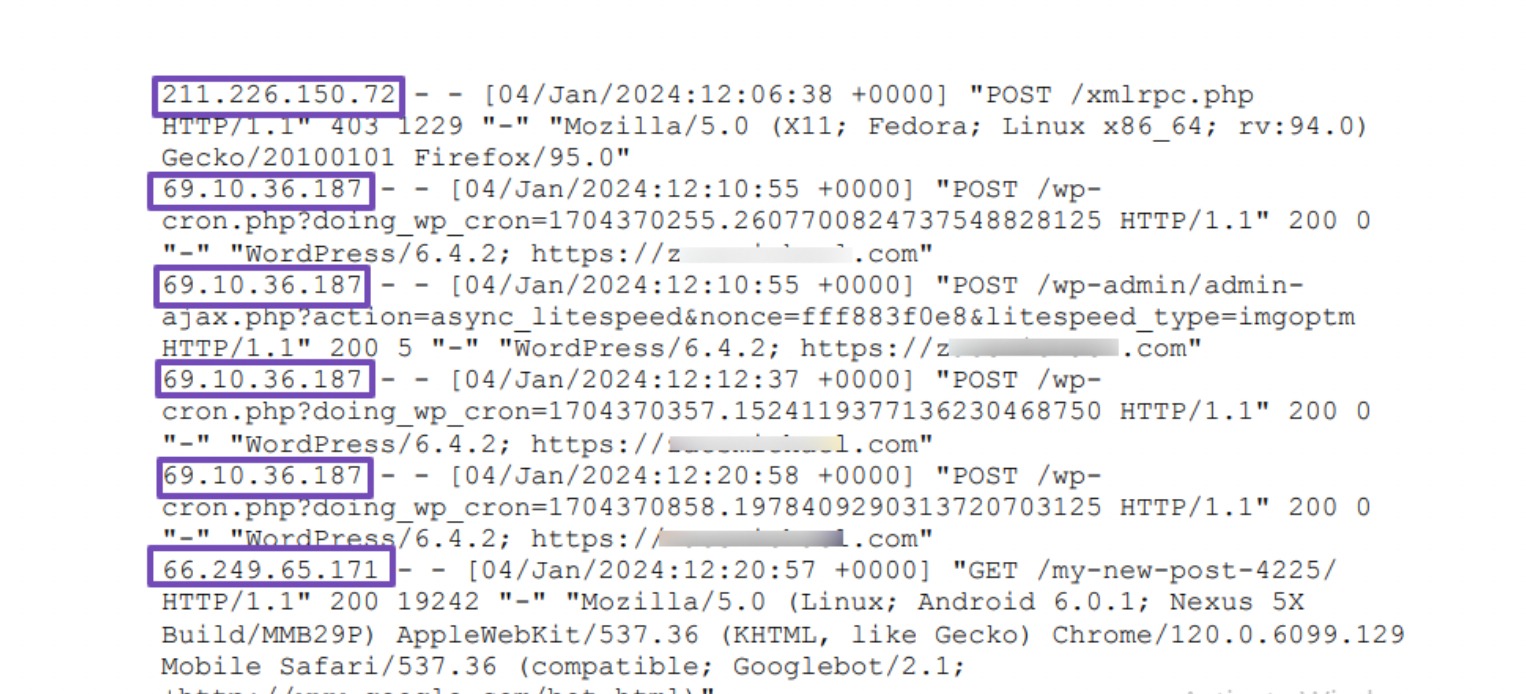
It’s a good idea to keep an eye out for any suspicious IP addresses in the access log, particularly if you notice a certain IP address showing up frequently.
Be careful not to block yourself accidentally, the genuine audience, or search engines from accessing your website.
If needed, use an online IP lookup tool to get more information about a suspicious IP address before making any decisions.
Now that you know how to identify suspicious IPs on your website, let’s discuss how to block these IPs from accessing your site.
4 Methods to Block IP Addresses in WordPress
Let’s discuss five methods to block IP addresses from accessing your WordPress website.
4.1 Block IP Addresses of Commenters
This method allows you to block the IPs from commenting on your WordPress posts or pages.
To implement this, navigate to Settings → Discussion from your WordPress dashboard and scroll down to the Disallowed Comment Keys section.
Ensure that you enter the IP addresses one per line, as shown below.
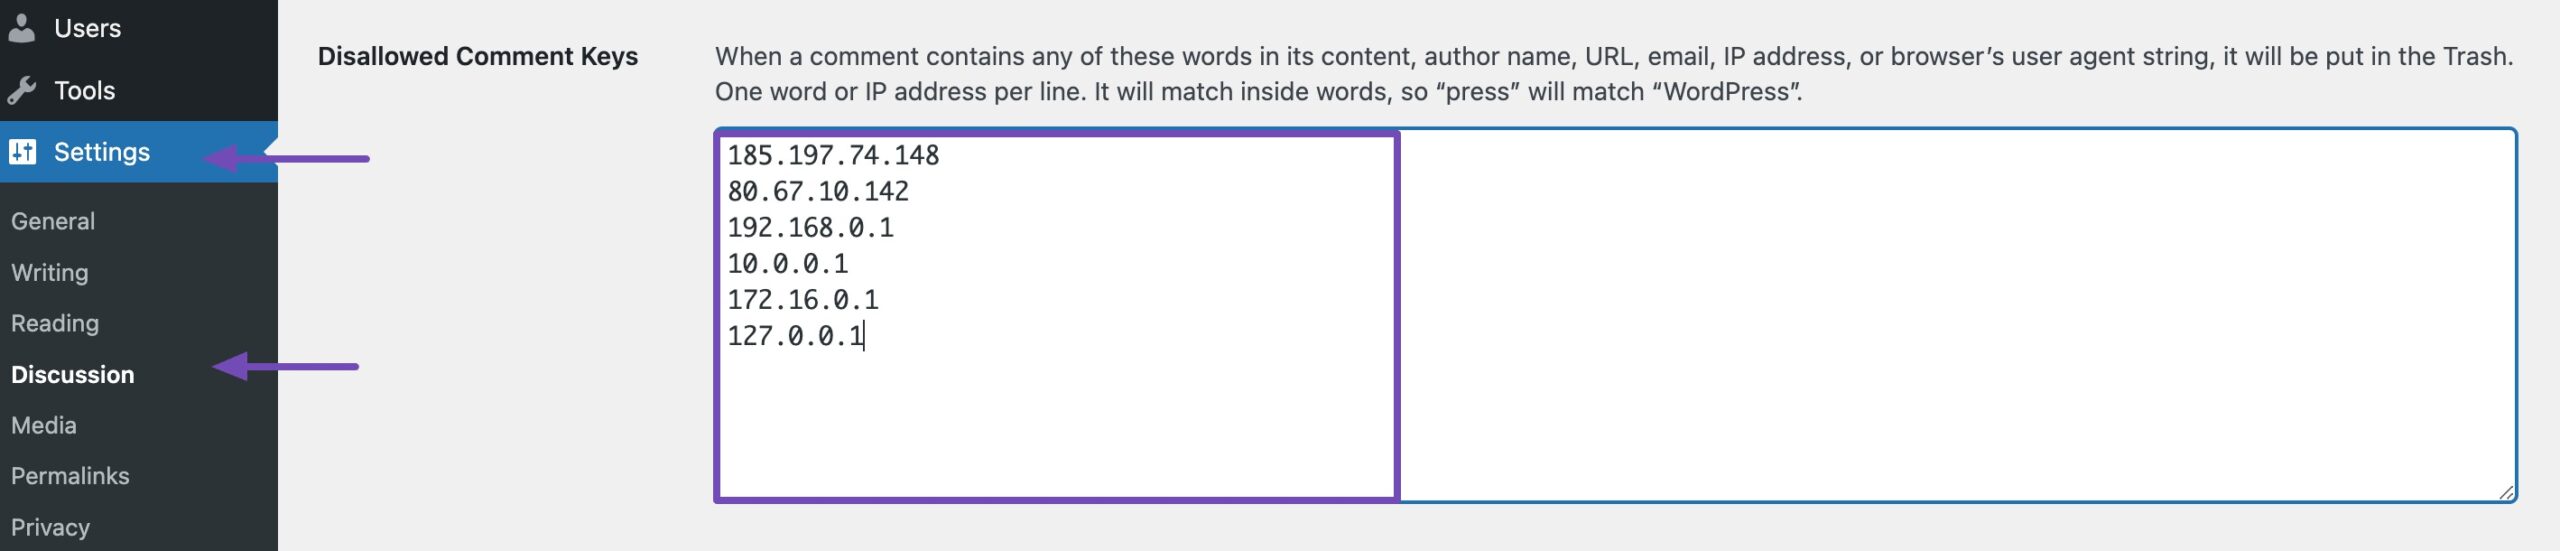
Once you’ve entered the IP addresses, scroll down to the bottom of the page and click on the Save Changes button.
WordPress will now automatically prevent users with these IP addresses from posting comments on your website. While these users can still visit your site, they’ll encounter an error message if they attempt to submit a comment.
4.2 Block IP Addresses Using cPanel
This method enables you to block an IP address entirely, providing a robust measure to protect your WordPress site from potential hacking attempts and DDoS attacks.
Log in to your hosting account’s cPanel dashboard and navigate to the Security section. Choose the IP Blocker icon, as shown below.
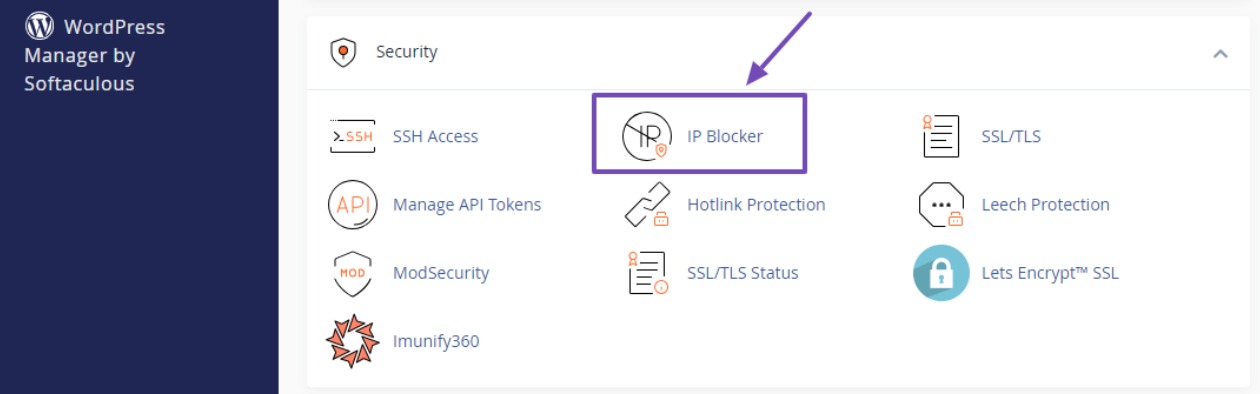
This will direct you to the IP Blocker page, where you can precisely specify the IP address you wish to block from accessing your website.
You can add a single IP address or an IP range and click the Add button.

After that, scroll down to view the list of IP addresses you have restricted from visiting your website. You can come back anytime you want to delete or unblock any IPs by clicking the Delete option.

4.3 Block IP Addresses Using a Security Plugin
Blocking IP addresses using a security plugin is the easiest method to enhance the protection of your website against potential threats and unauthorized access.
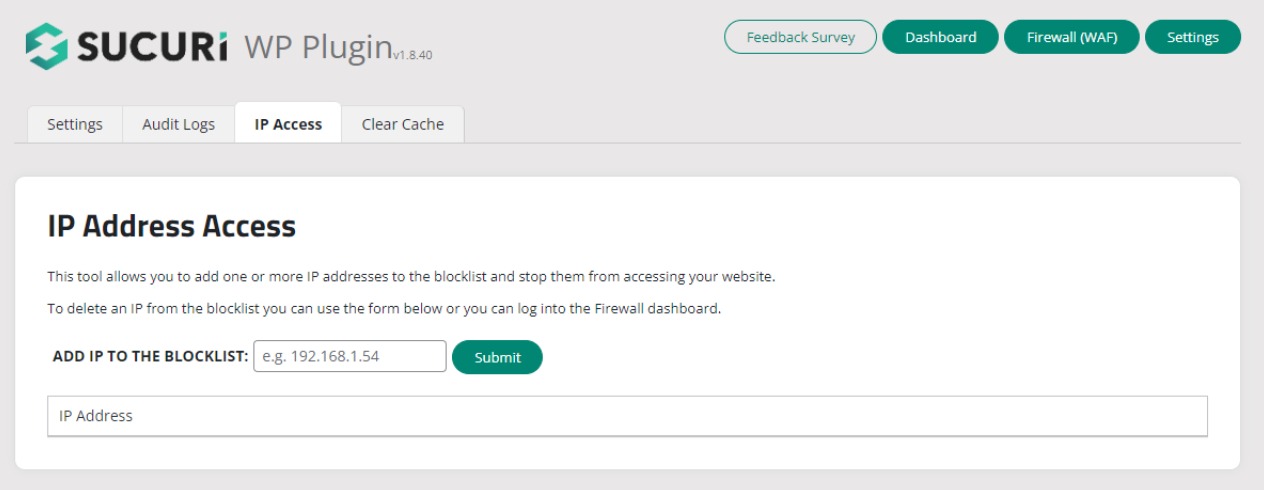
Security plugins like Sucuri Security help protect your website from malicious attacks. Refer to our tutorial on installing a WordPress plugin on your website.
The process typically involves the use of a Web Application Firewall (WAF) integrated into the security plugin. This firewall acts as a barrier between your website and incoming traffic, analyzing each request for potential threats. Suspicious IP addresses, known for malicious activities like hacking attempts, are automatically detected and blocked by the security plugin.
Moreover, you can still block the IP addresses manually using the Sucuri plugin.
4.4 Block IP Addresses by Editing the .htaccess File
You can block suspicious IP addresses from accessing your website by adding a few lines of code to your website’s .htaccess file.
However, if you lack coding knowledge, we recommend using the previously mentioned methods.
Note: It’s important to back up your website before adding any code so that you can restore your site if anything goes wrong.
Log in to your FTP client or cPanel and locate the File Manager within your public_html or your site’s directory. Choose to edit the .htaccess file.
In the .htaccess file, paste the following code at the bottom of the file:
deny from [IP Address You Want To Block]Replace the IP Address You Want To Block with the actual IP address you wish to block, as shown below.
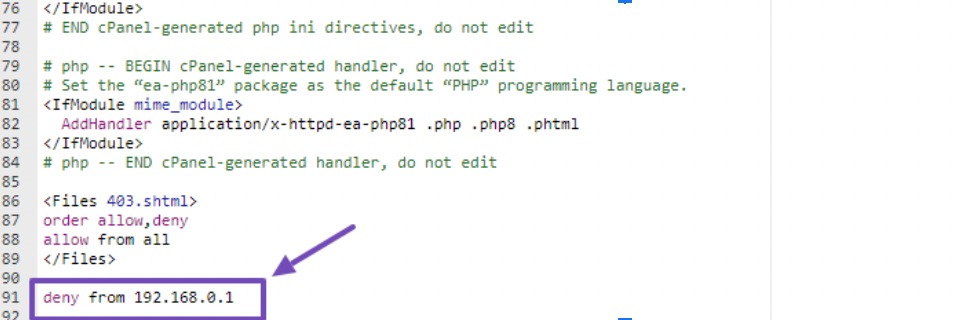
If you have multiple IPs to block, continue adding the code with each IP address.
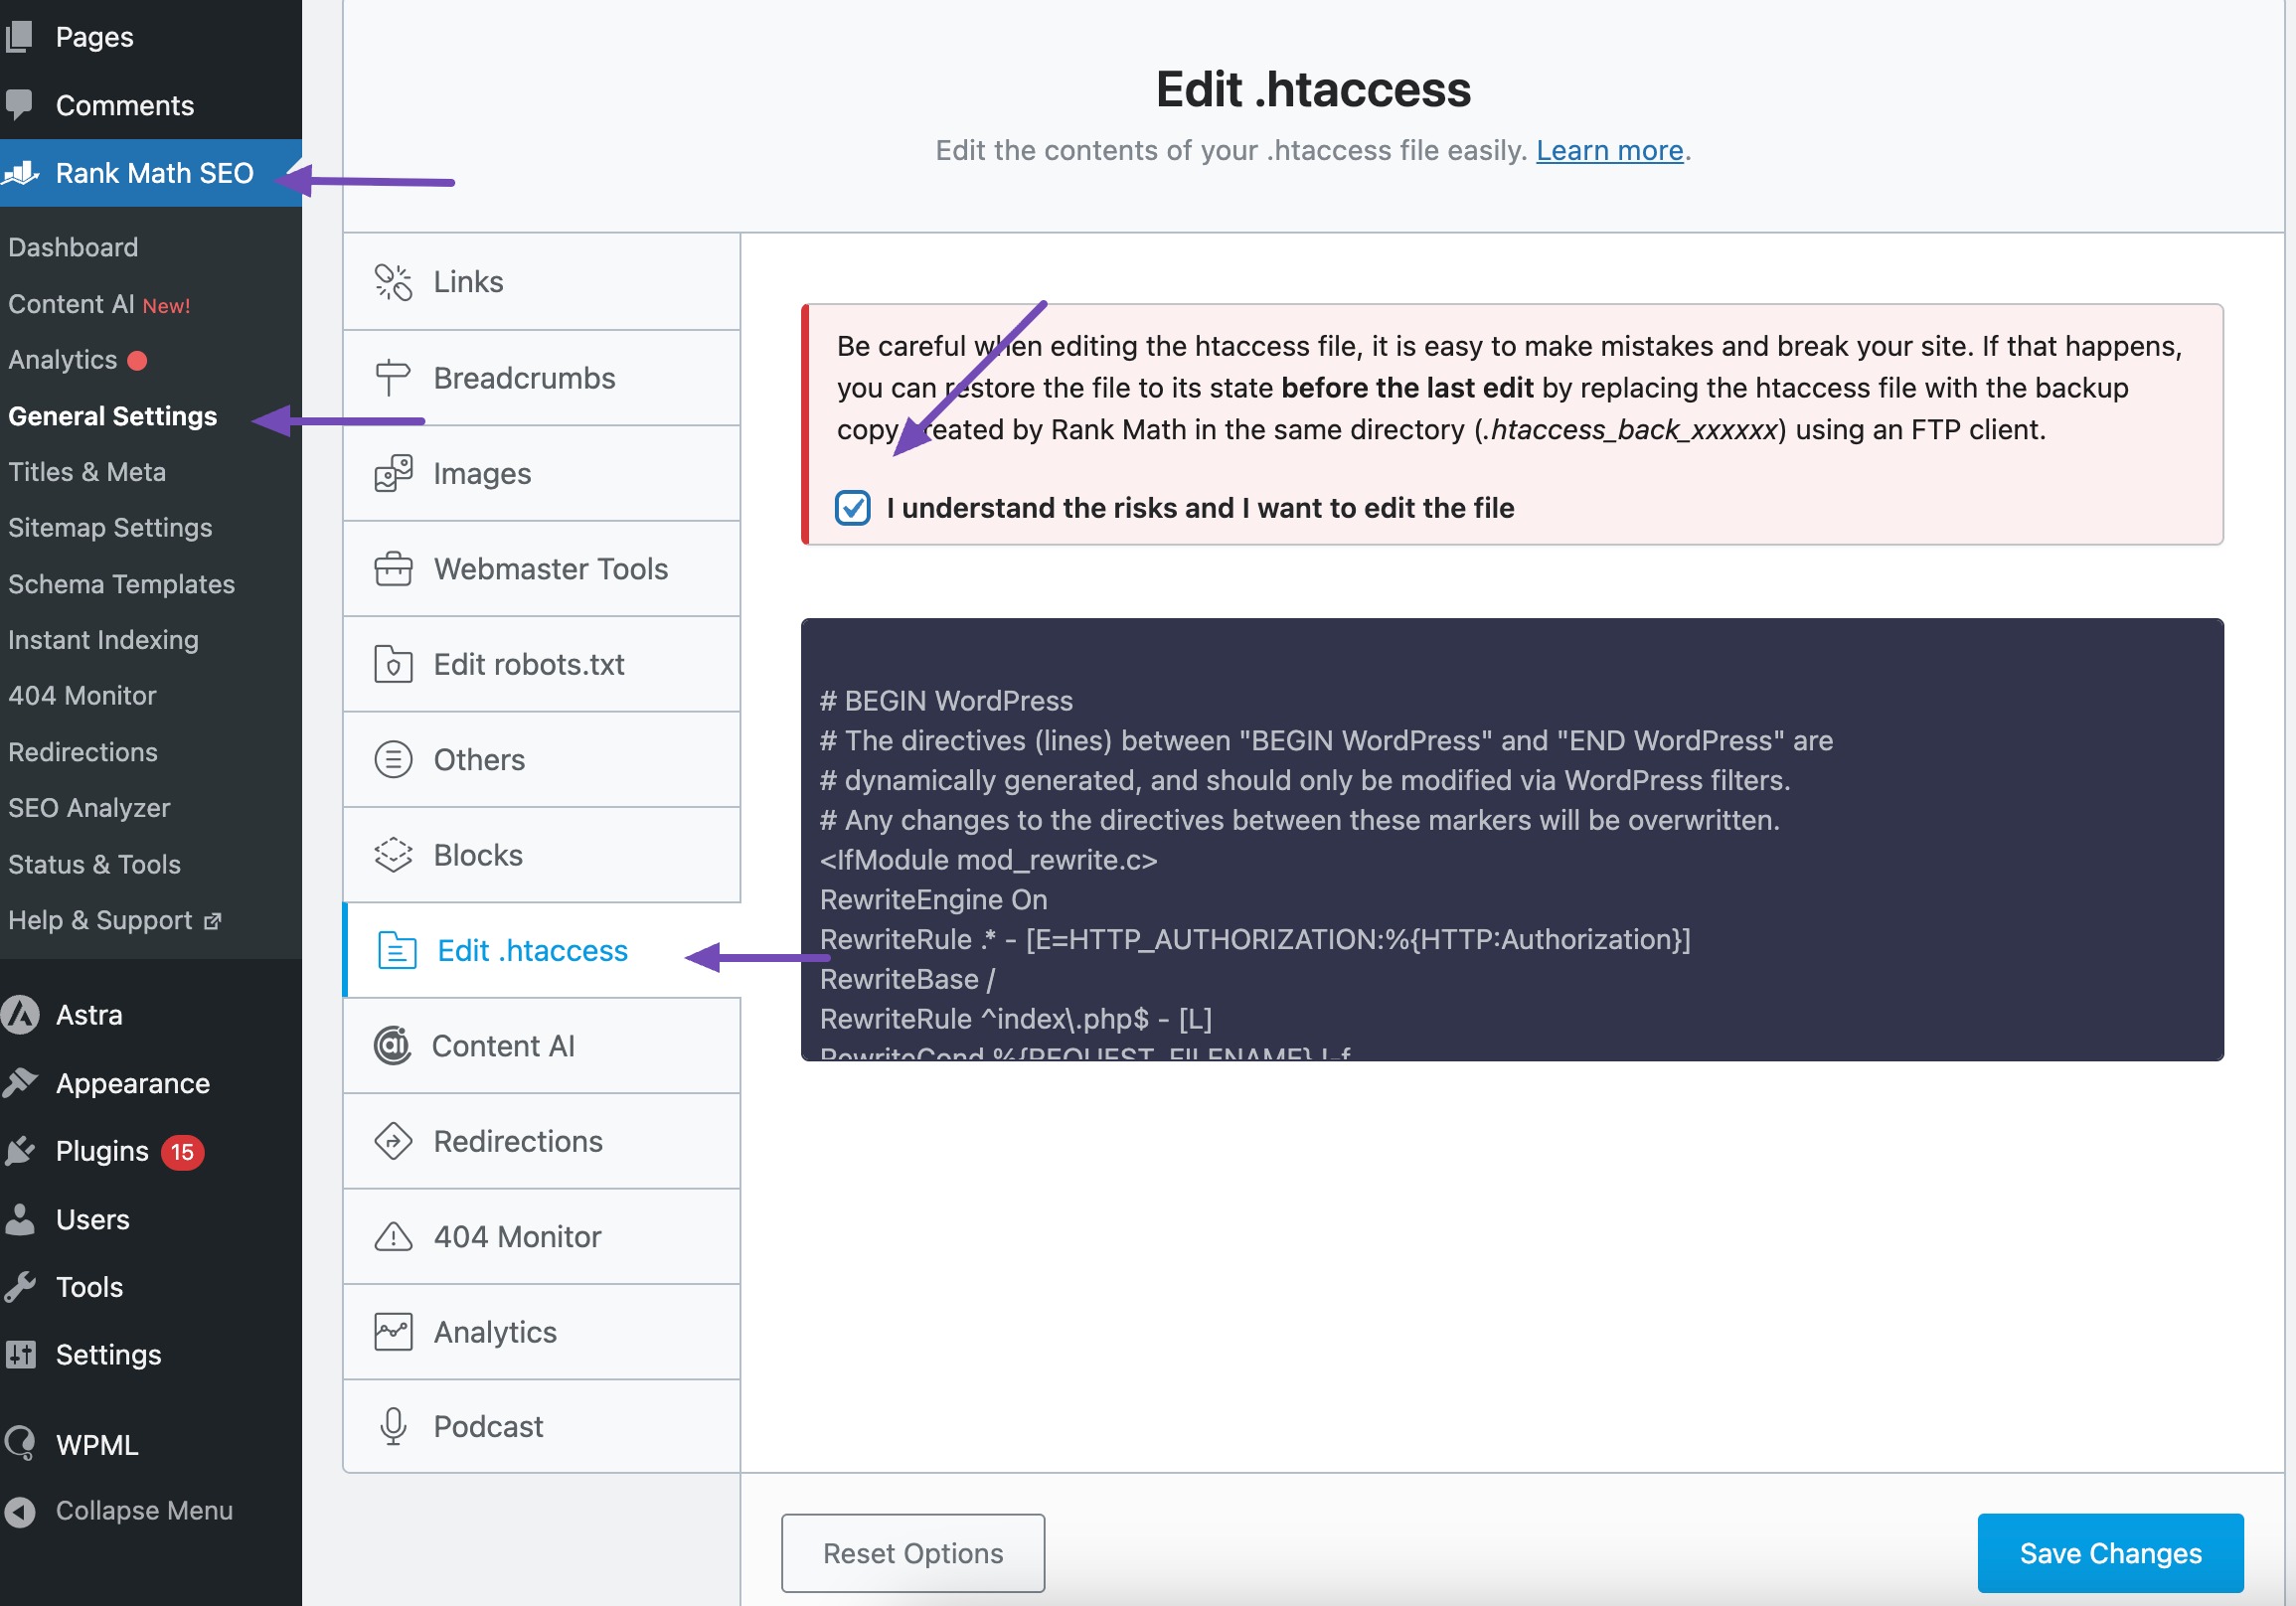
Rank Math makes it very simple to edit your .htaccess file. To edit your .htaccess file, go to Rank Math SEO → General Settings → Edit .htaccess. If this section is not available on your website, then ensure that you’ve switched to the Advanced Mode in Rank Math.
If you want to edit the .htaccess file, click the checkbox below the text. The text area below will become active, and you can edit your .htaccess file.
4.5 Block IP Addresses Using the WordPress functions.php File
This method requires adding custom code into the functions.php file of your active WordPress theme.
Below is a code snippet that demonstrates how to block an IP address using functions.php. The code utilizes an array to keep track of blocked IP addresses. It checks whether the visitor’s IP is in the array before granting access.
function block_ip_addresses() {
    $blocked_ips = array(
        '192.168.0.1',
        '10.0.0.1',
        '123.456.789.0'
    );

    if (in_array($_SERVER['REMOTE_ADDR'], $blocked_ips)) {
        wp_die('Access Denied');
    }
}
add_action('init', 'block_ip_addresses');
Add as many IP addresses as needed using the style from the $blocked_ips array. If you have only a few, delete the other IPs and input the IPs you want to block.
Access your active theme’s functions.php at Appearance → Theme File Editor. Choose functions.php, scroll to the bottom, and paste the code as shown.
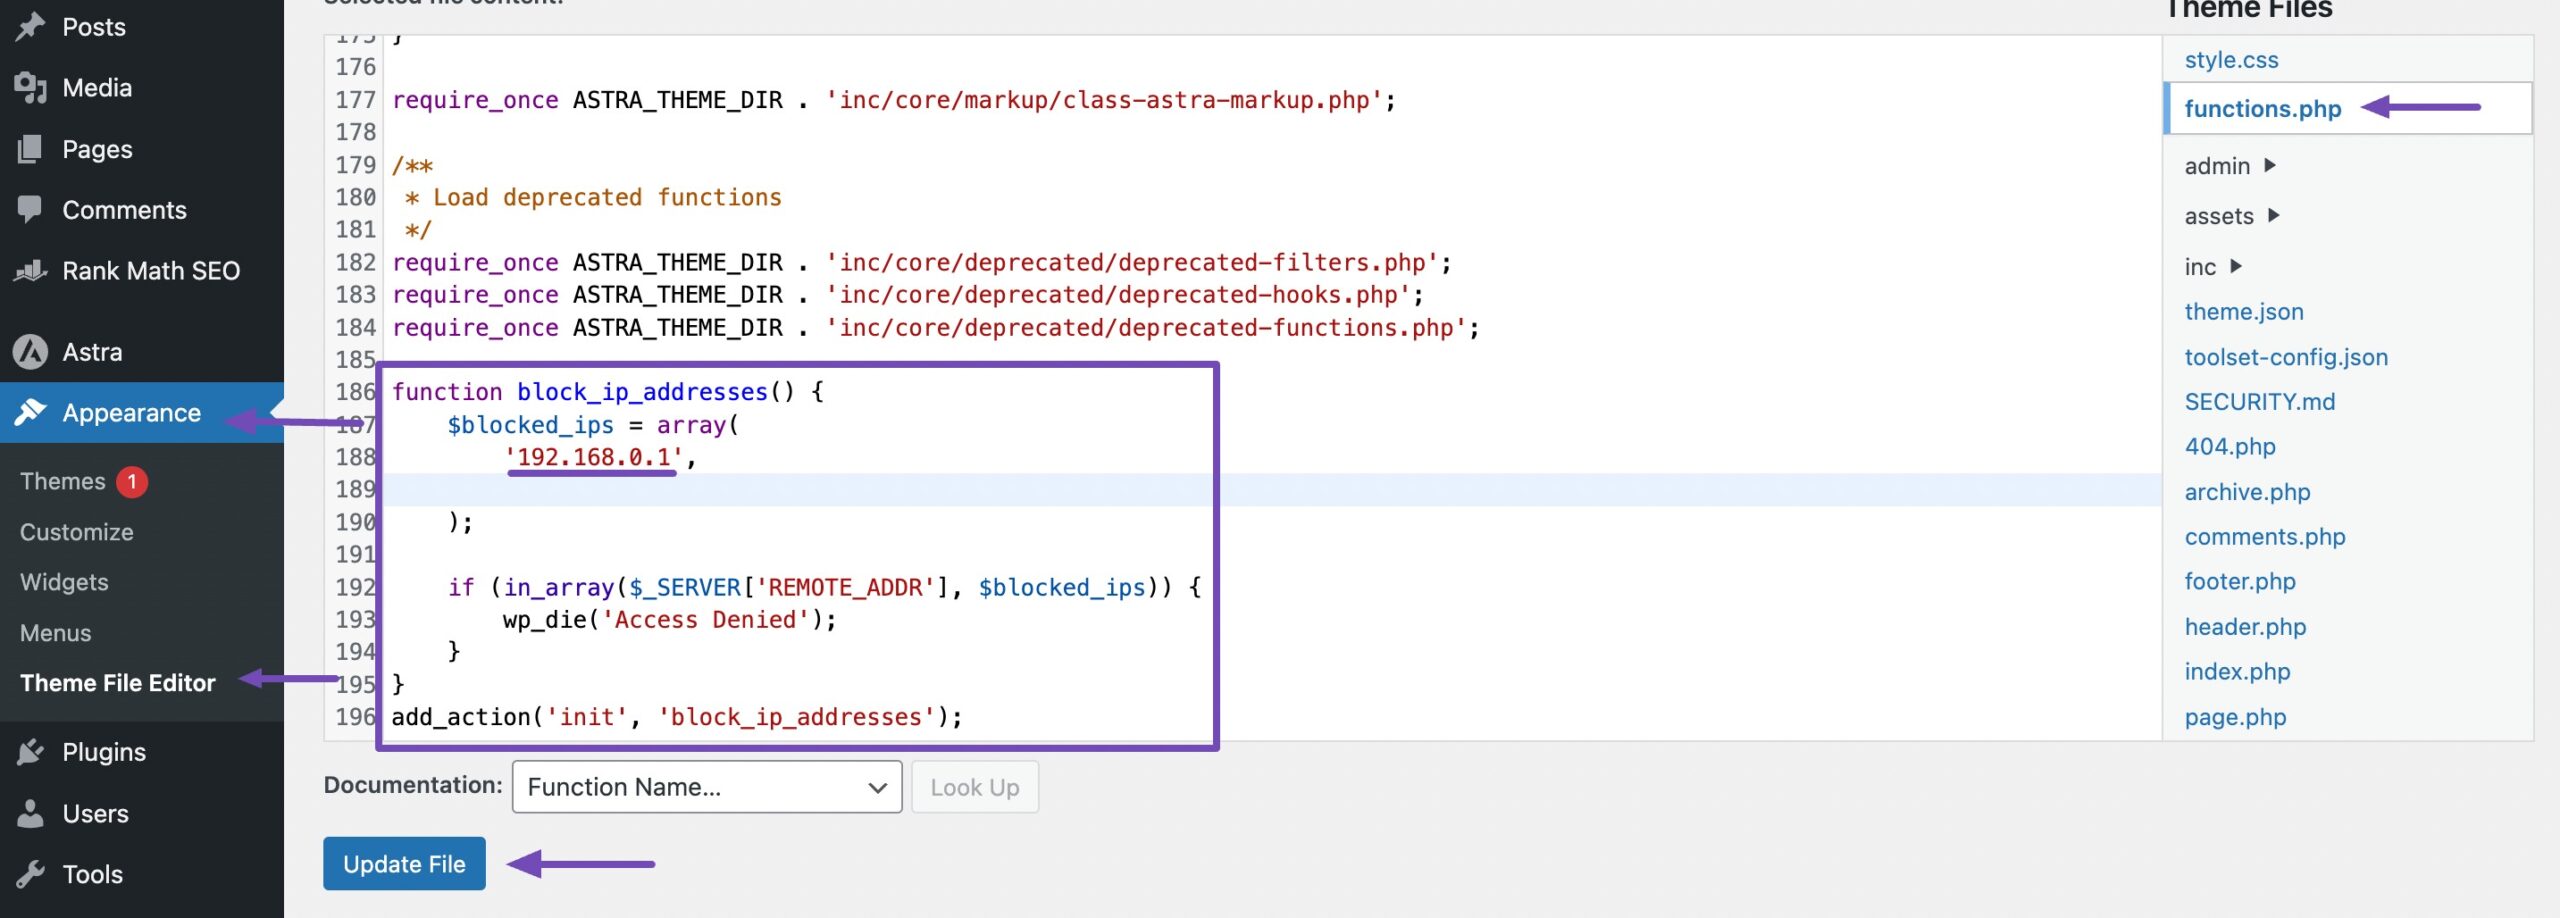
Once you’ve added all the IPs you want to block, simply click the Update File button to save your changes.
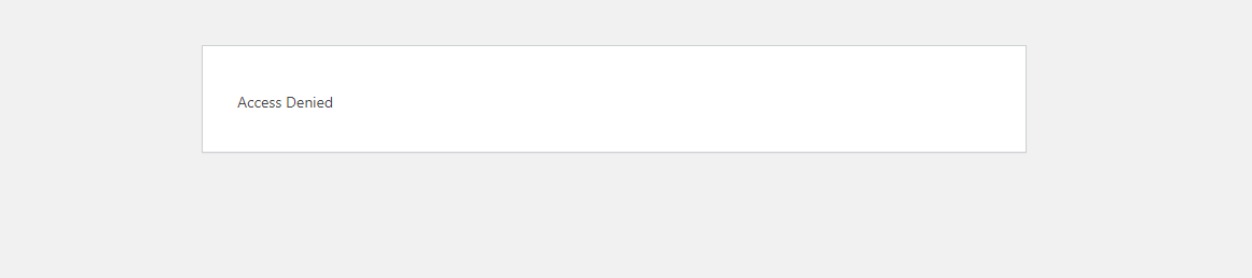
After successfully applying this code, the specified IP addresses will be denied access. The code utilizes the wp_die function displaying the message “Access Denied” to the blocked user, as shown below.
5 Conclusion
Keeping your WordPress site safe from hackers, spam, and unwanted traffic is important if you want it to run smoothly. The good news is, you have different ways to block IP addresses, whether that’s using a plugin, editing your .htaccess file, or setting up a firewall.
Just remember, blocking the wrong IP can lock out real visitors or even potential customers. So, always double-check before you block an address.
When you use this feature wisely, blocking IPs can give your site an extra layer of protection, improve performance, and create a safer experience for your visitors.
If you like this post, let us know by tweeting @rankmathseo.