Do you wish to create a custom page template for your WordPress site, but you’re not sure where to start? Maybe you have a specific layout or design in mind that doesn’t fit the default theme.
WordPress makes it easy to launch a website using pre-designed templates. Just install a theme, replace the demo content with your own, and you’re good to go.
But what if you want a page that looks different from the rest? WordPress gives you the flexibility to create a custom layout and create something unique.
And the best part? You don’t need to be an expert in HTML, CSS, or PHP.
In this post, we’ll show you how to create a custom page in WordPress step by step. Let’s get started.
Table Of Contents
1 Why Create a Custom Page in WordPress?
Creating a custom page in WordPress gives you more control over how your content looks and functions. Instead of using the same layout across every page, you can design specific pages that serve a particular purpose, like a landing page, portfolio, or product showcase.
Custom pages let you break away from the standard theme design and create something that stands out. This not only makes your site look more unique but also helps improve user experience by aligning the layout, content, and navigation to what your visitors need.
For example, if you’re running an online store, you might want a product page that includes image sliders, customer reviews, and related items. A custom layout makes that possible and gives your visitors a better shopping experience.

On top of that, custom pages can also help improve your site’s performance and SEO. You can optimize them for faster loading and structure them in a way that search engines and users can easily understand.
If you want a website that reflects your specific goals and gives visitors a better experience, creating custom pages is a smart move.
2 Creating a Custom Page in WordPress
Let’s look at how you can create a custom page using different methods in WordPress.
2.1 Using the Full-Site Editor
If you’re using a block-based theme, the Full Site Editor makes it easy to customize individual pages without creating a separate template file. You can find compatible block-based themes in the WordPress.org theme directory.
Navigate to the WordPress dashboard and click on Pages → Add New Page to create a new page or edit an existing one.
Next, you can enter a title, add categories and tags, upload a featured image, and make any other adjustments you desire. Once done, save your changes.
Now, navigate to Appearance → Editor, as shown below.
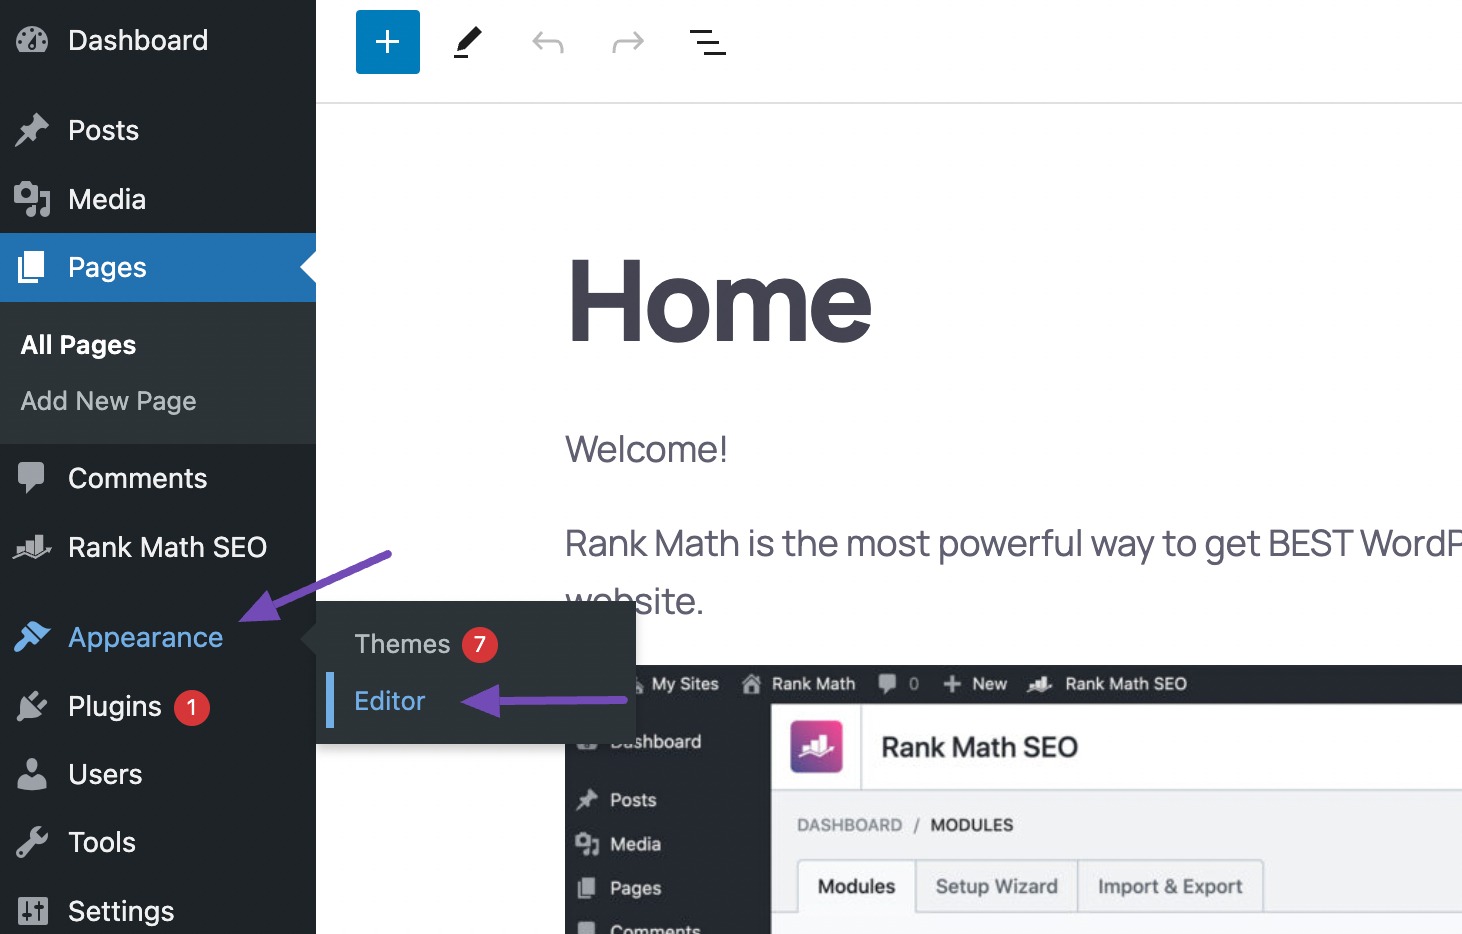
Next, navigate to Pages and choose the page you wish to redesign. WordPress will now show a preview of the design.

Next, to edit the template, click on the small pencil icon.

You can now edit the page’s layout using the full-site editor tools. Once done, save your changes.
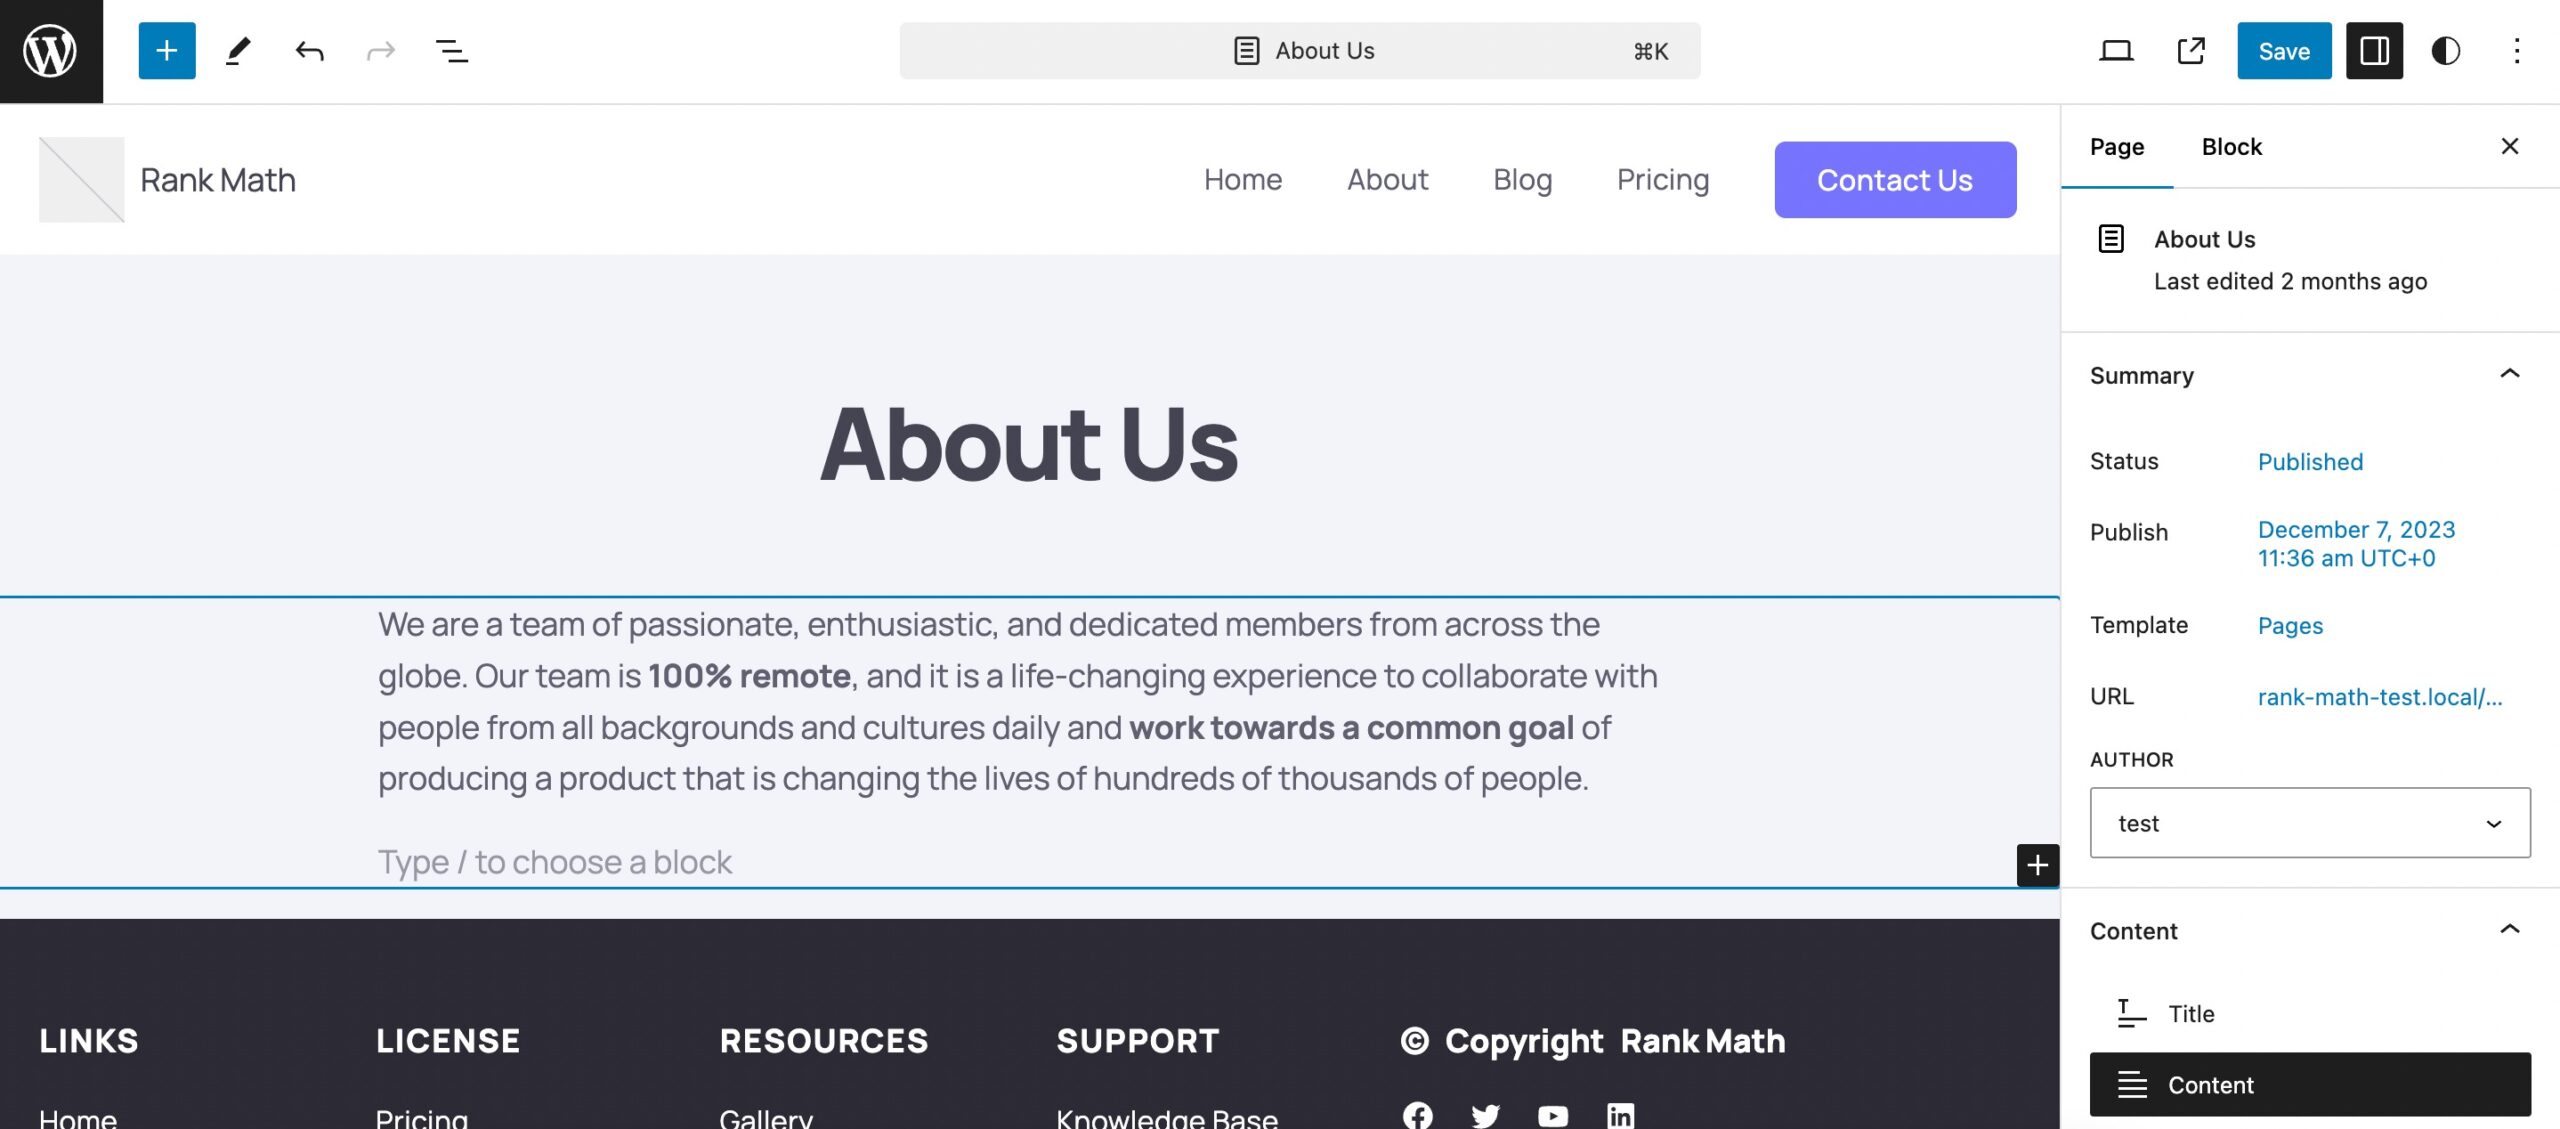
Now, when you visit this page on your website, you’ll see the new page design in action.

2.2 Using a Page Builder
Let’s look at how you can create a custom WordPress page using two popular page builders: Elementor and Divi.
Building a Custom WordPress Page With Elementor
Elementor is a drag-and-drop page builder that lets you design fully responsive pages without writing any code.
Begin by installing the Elementor plugin from the WordPress plugin repository. Once installed, activate the plugin on your WordPress site.
Refer to our dedicated tutorial for installing a WordPress plugin.
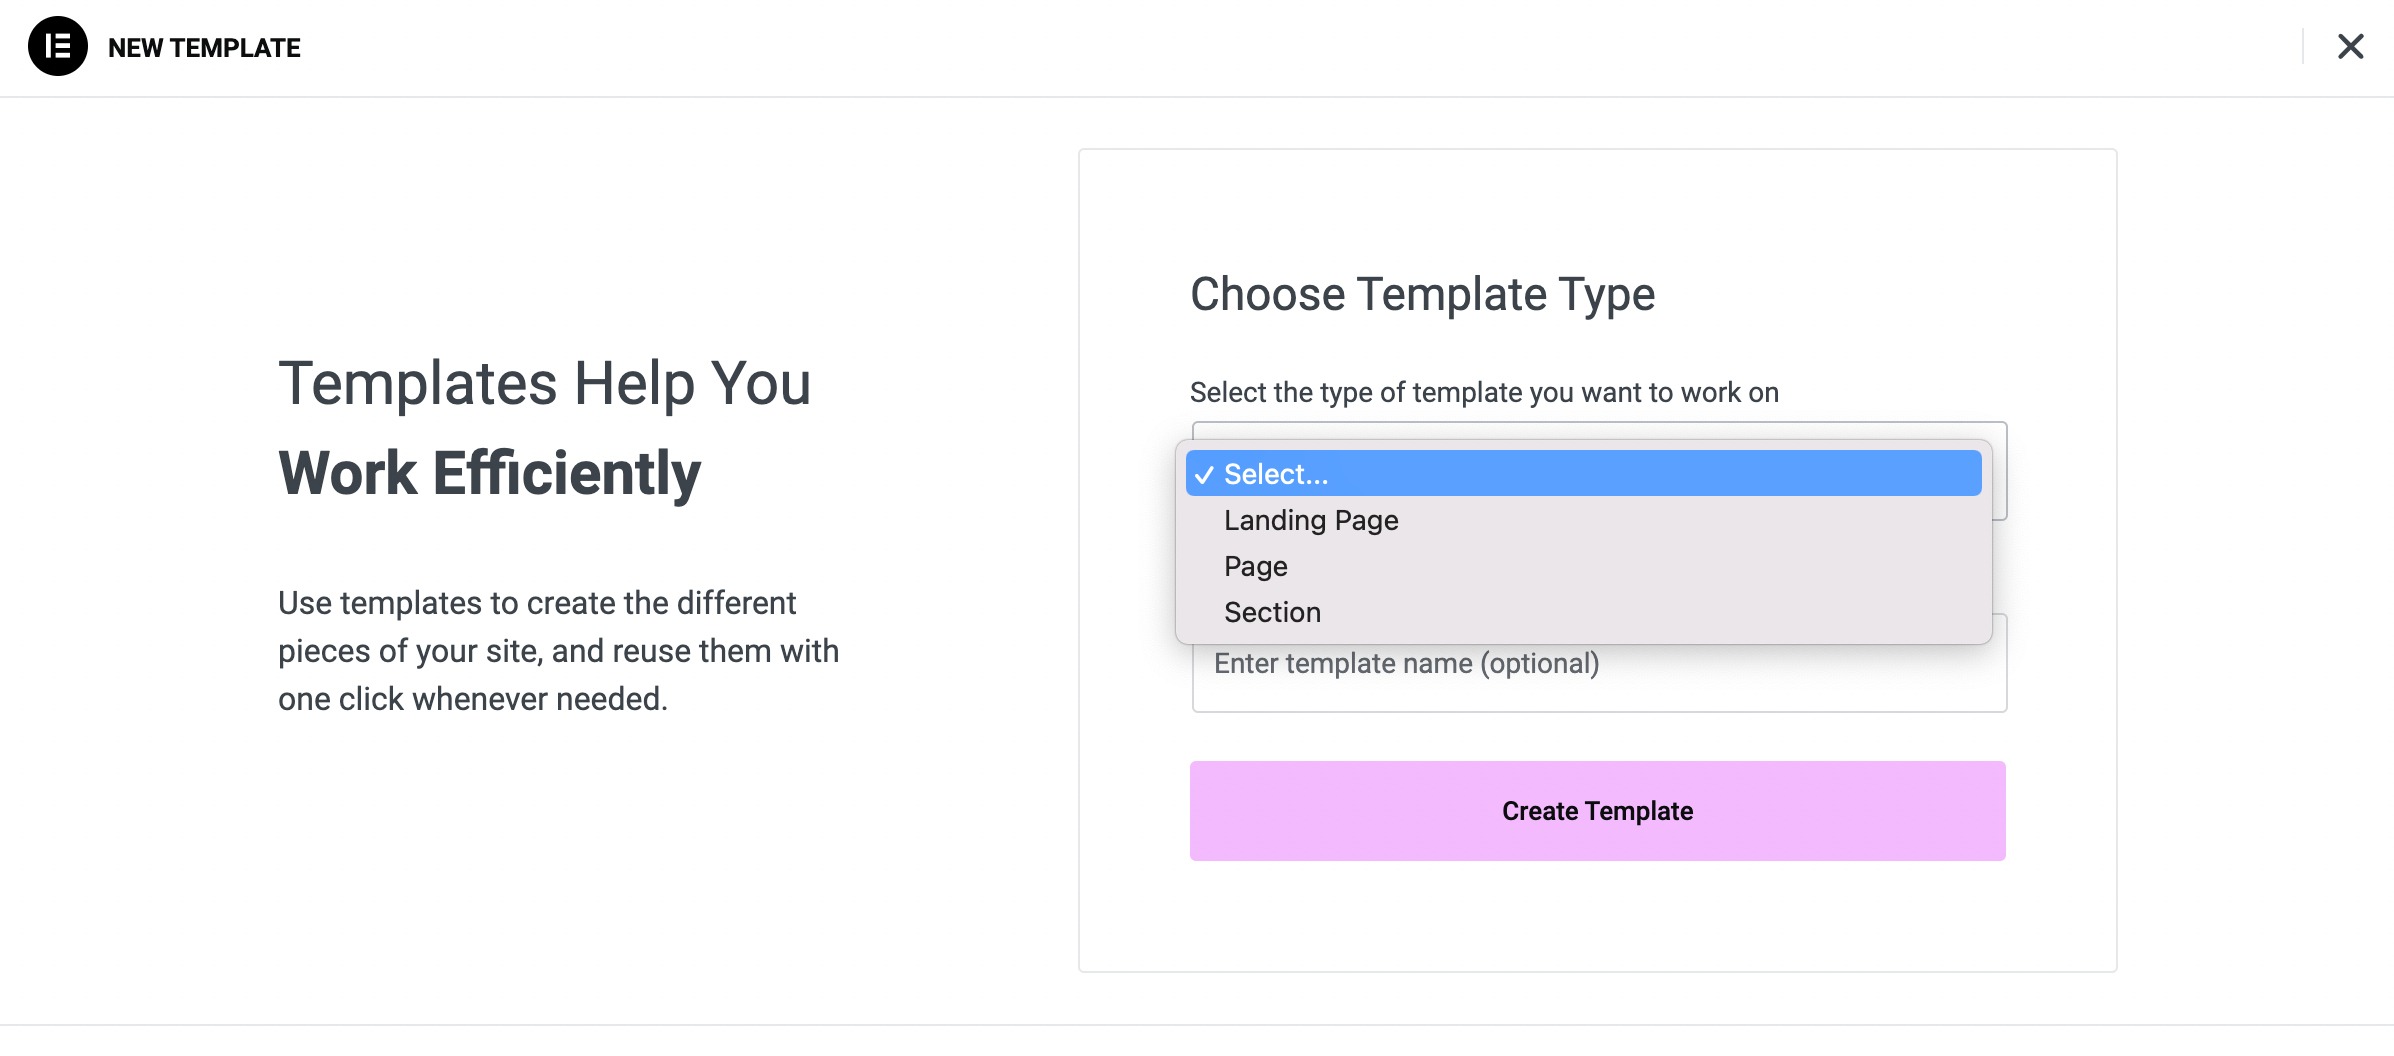
Once the plugin is installed and activated, navigate to Templates → ADD NEW TEMPLATE section from your WordPress dashboard.
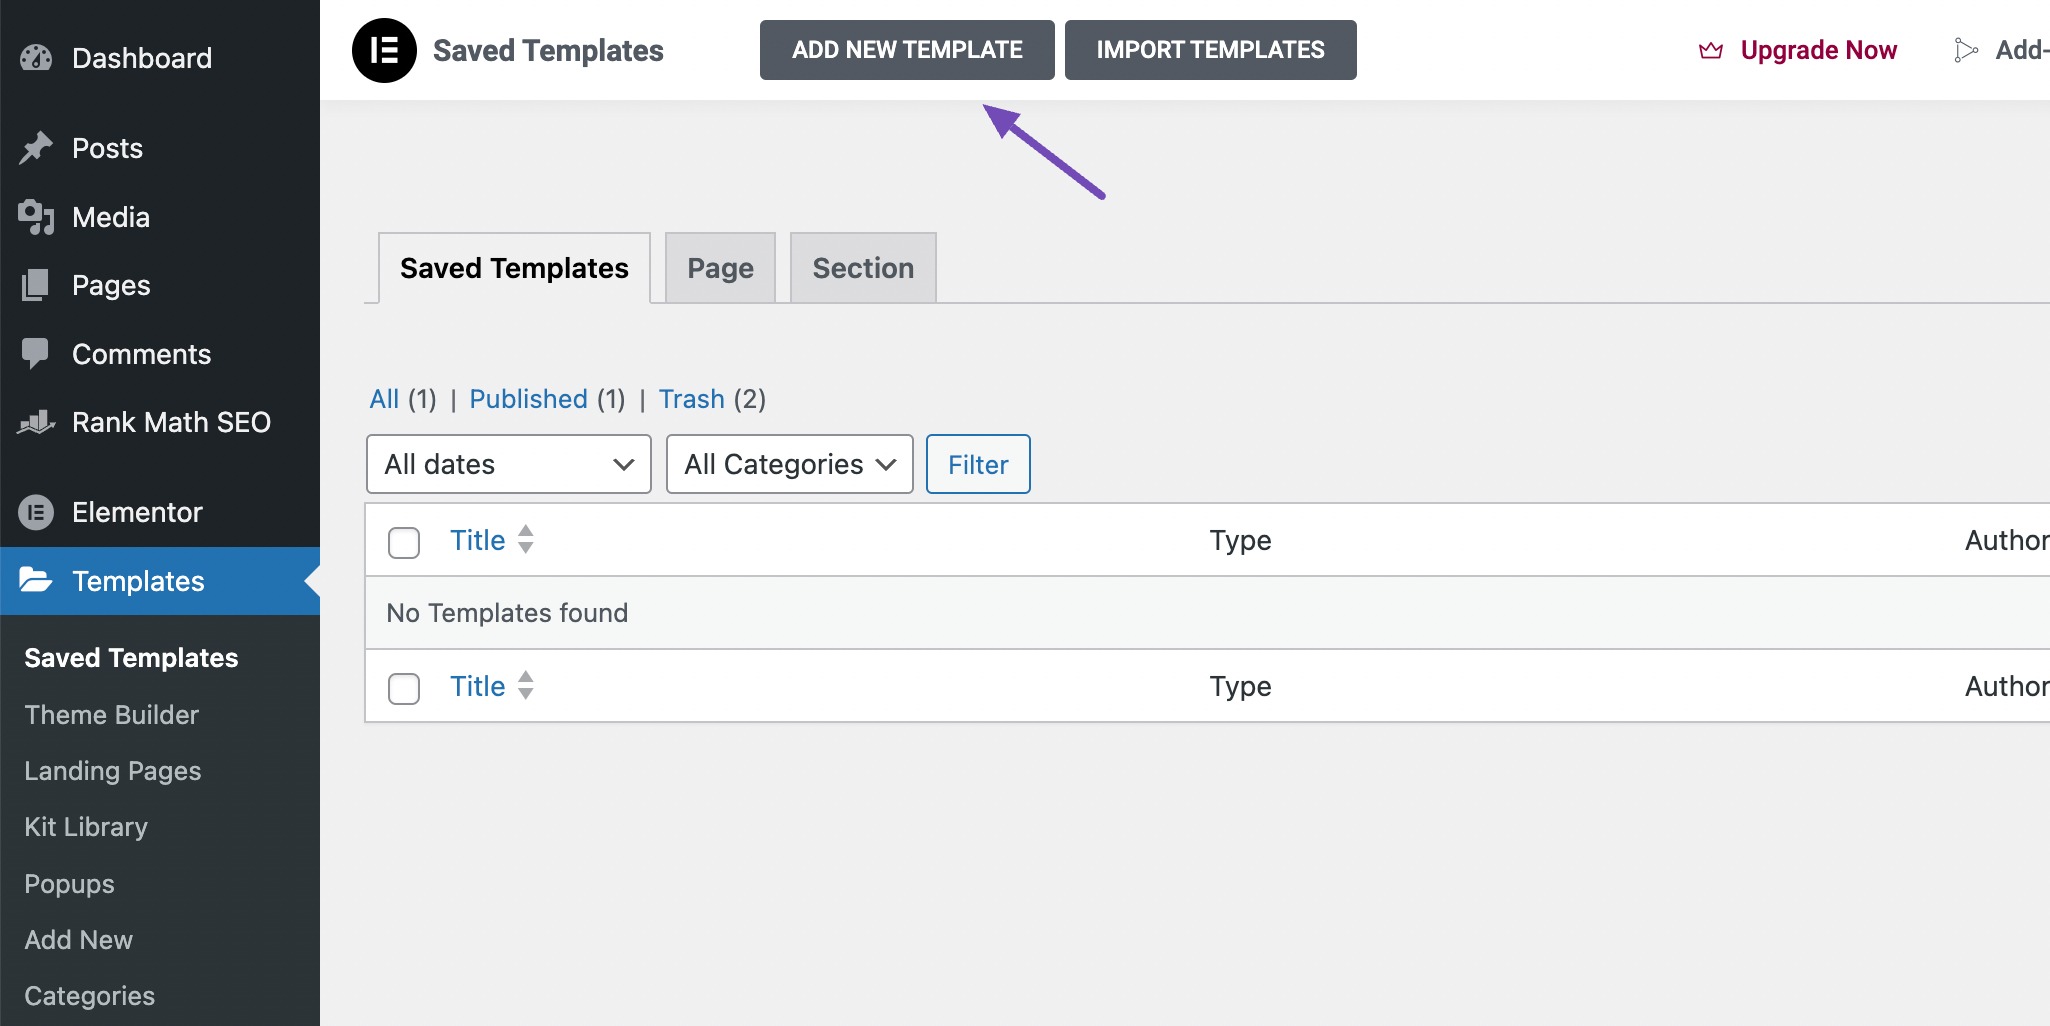
Choose the type of template (Page, Section, or Landing Page), name it, and click Create Template.
(Note: To create templates for posts or custom post types, you’ll need Elementor Pro.)
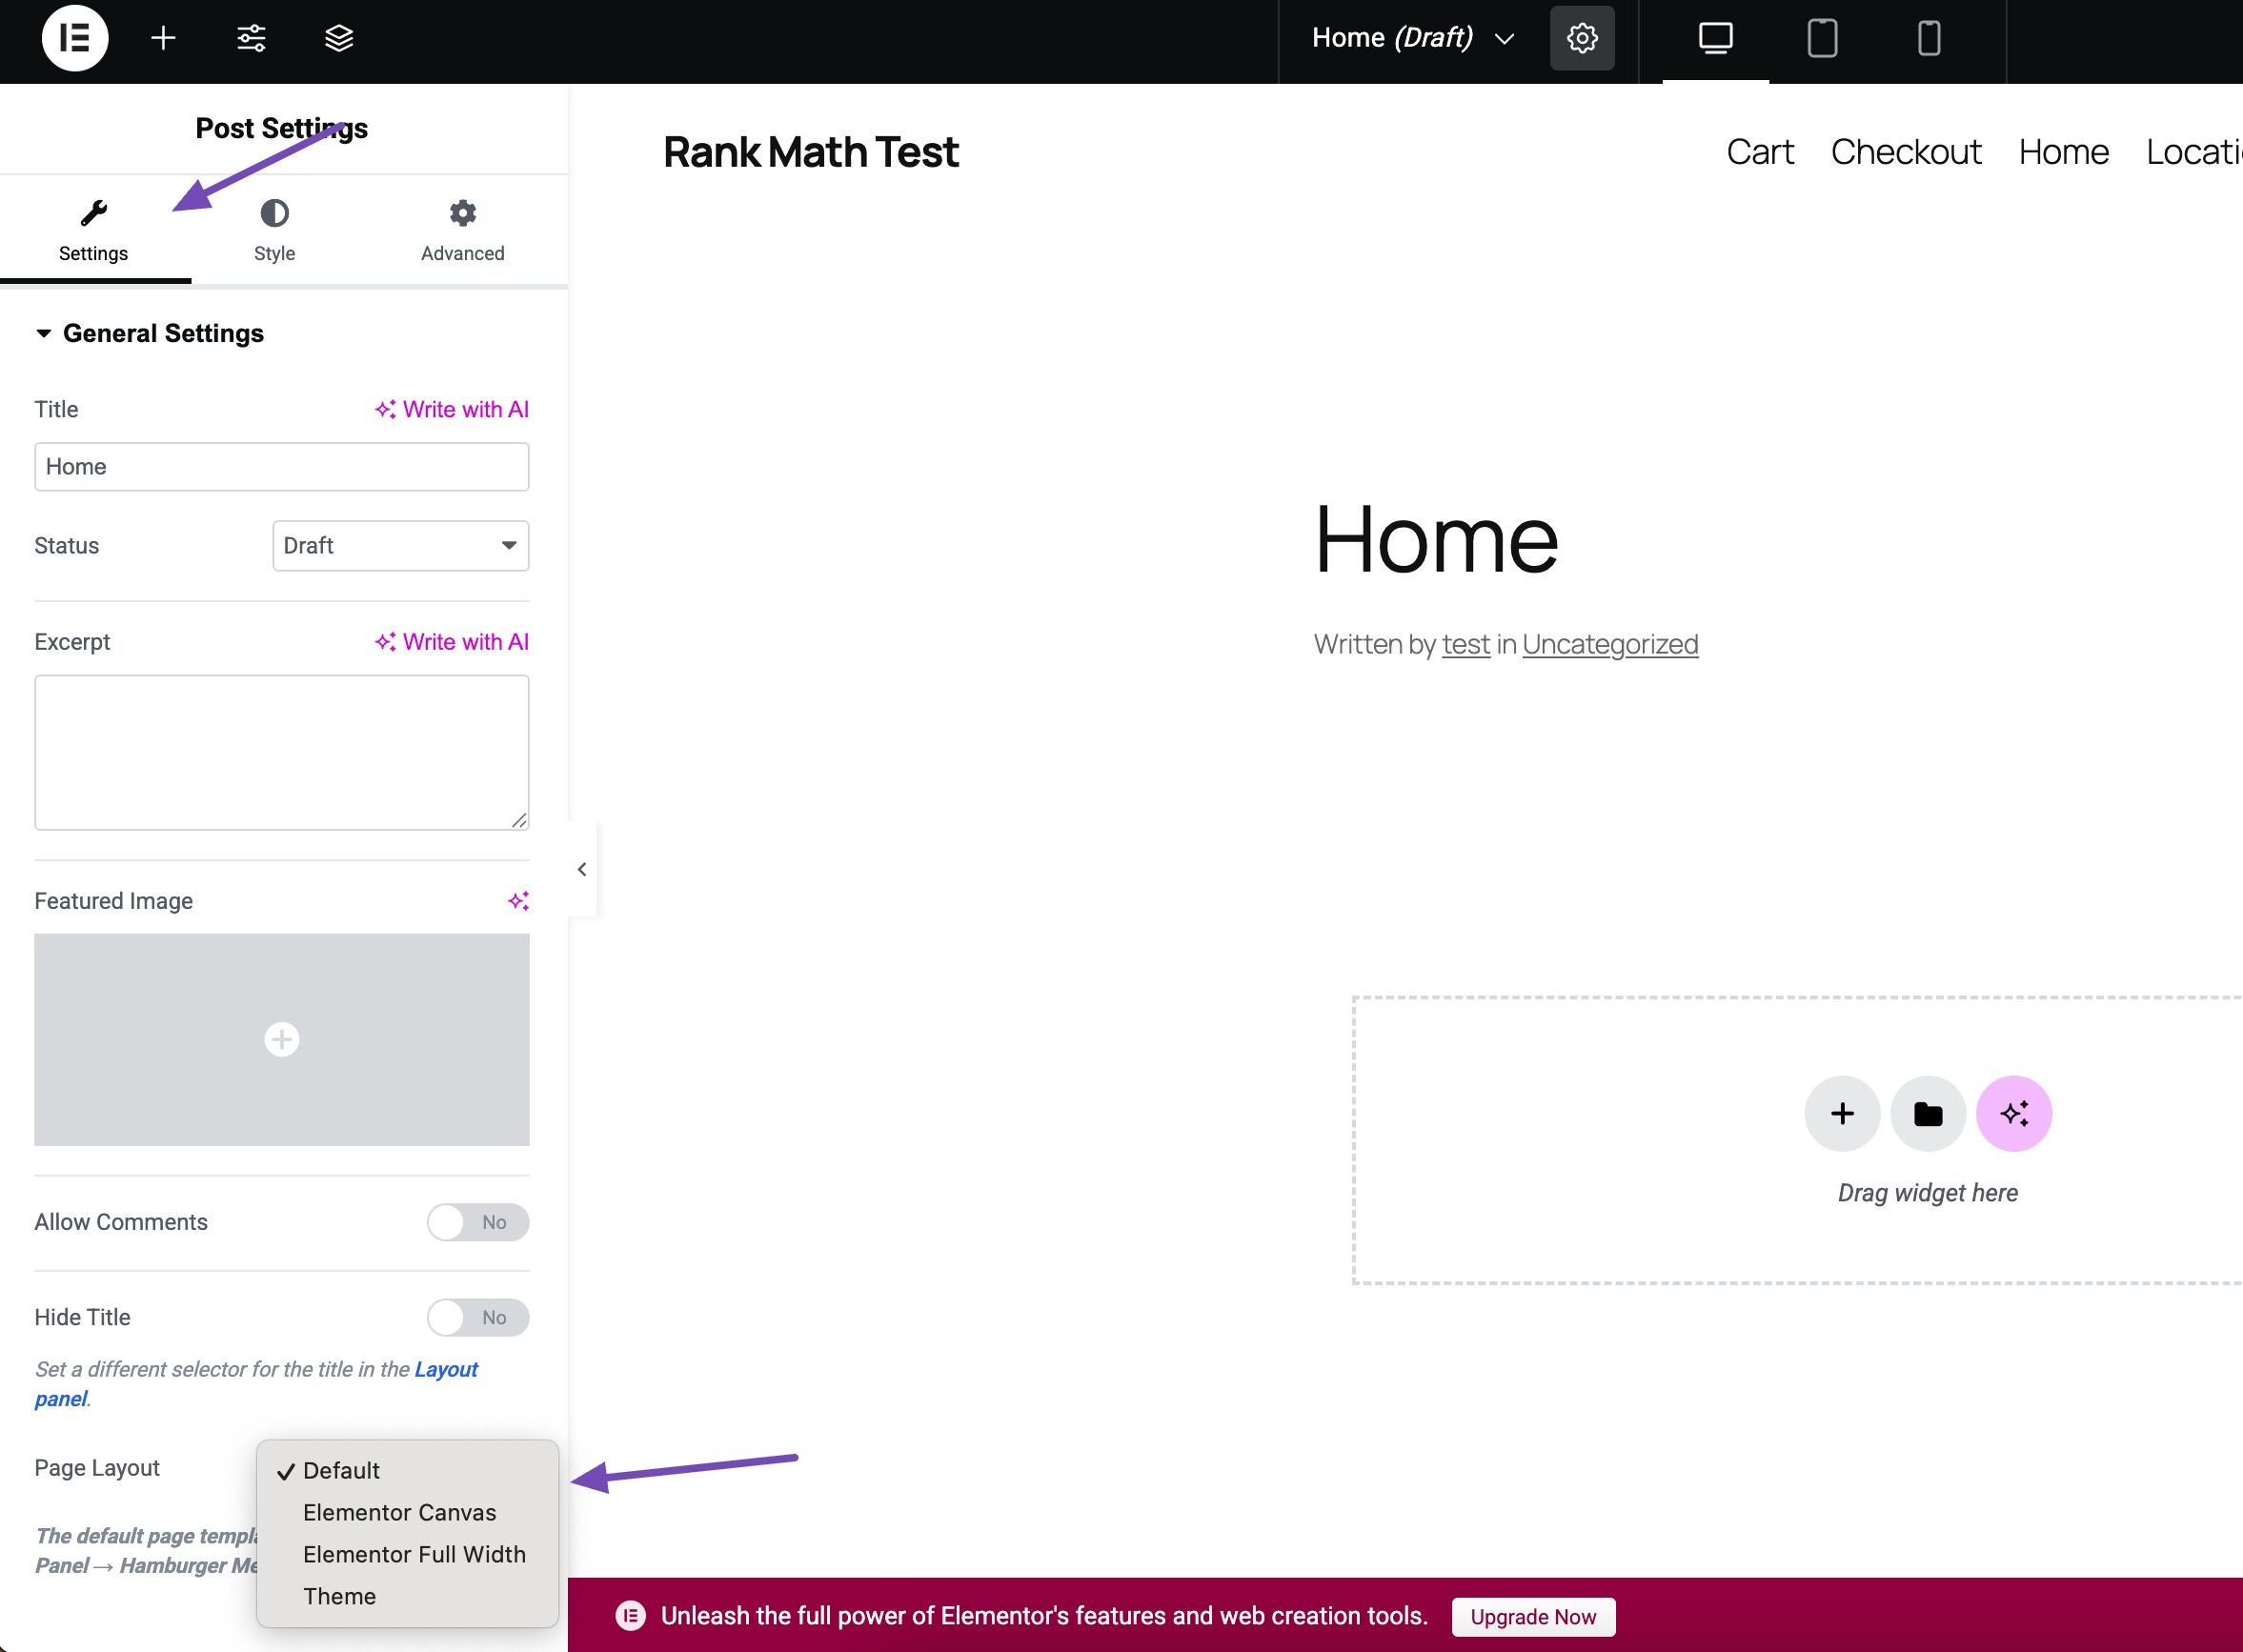
Click the Settings icon (bottom left corner) and choose your desired Page Layout from the dropdown.
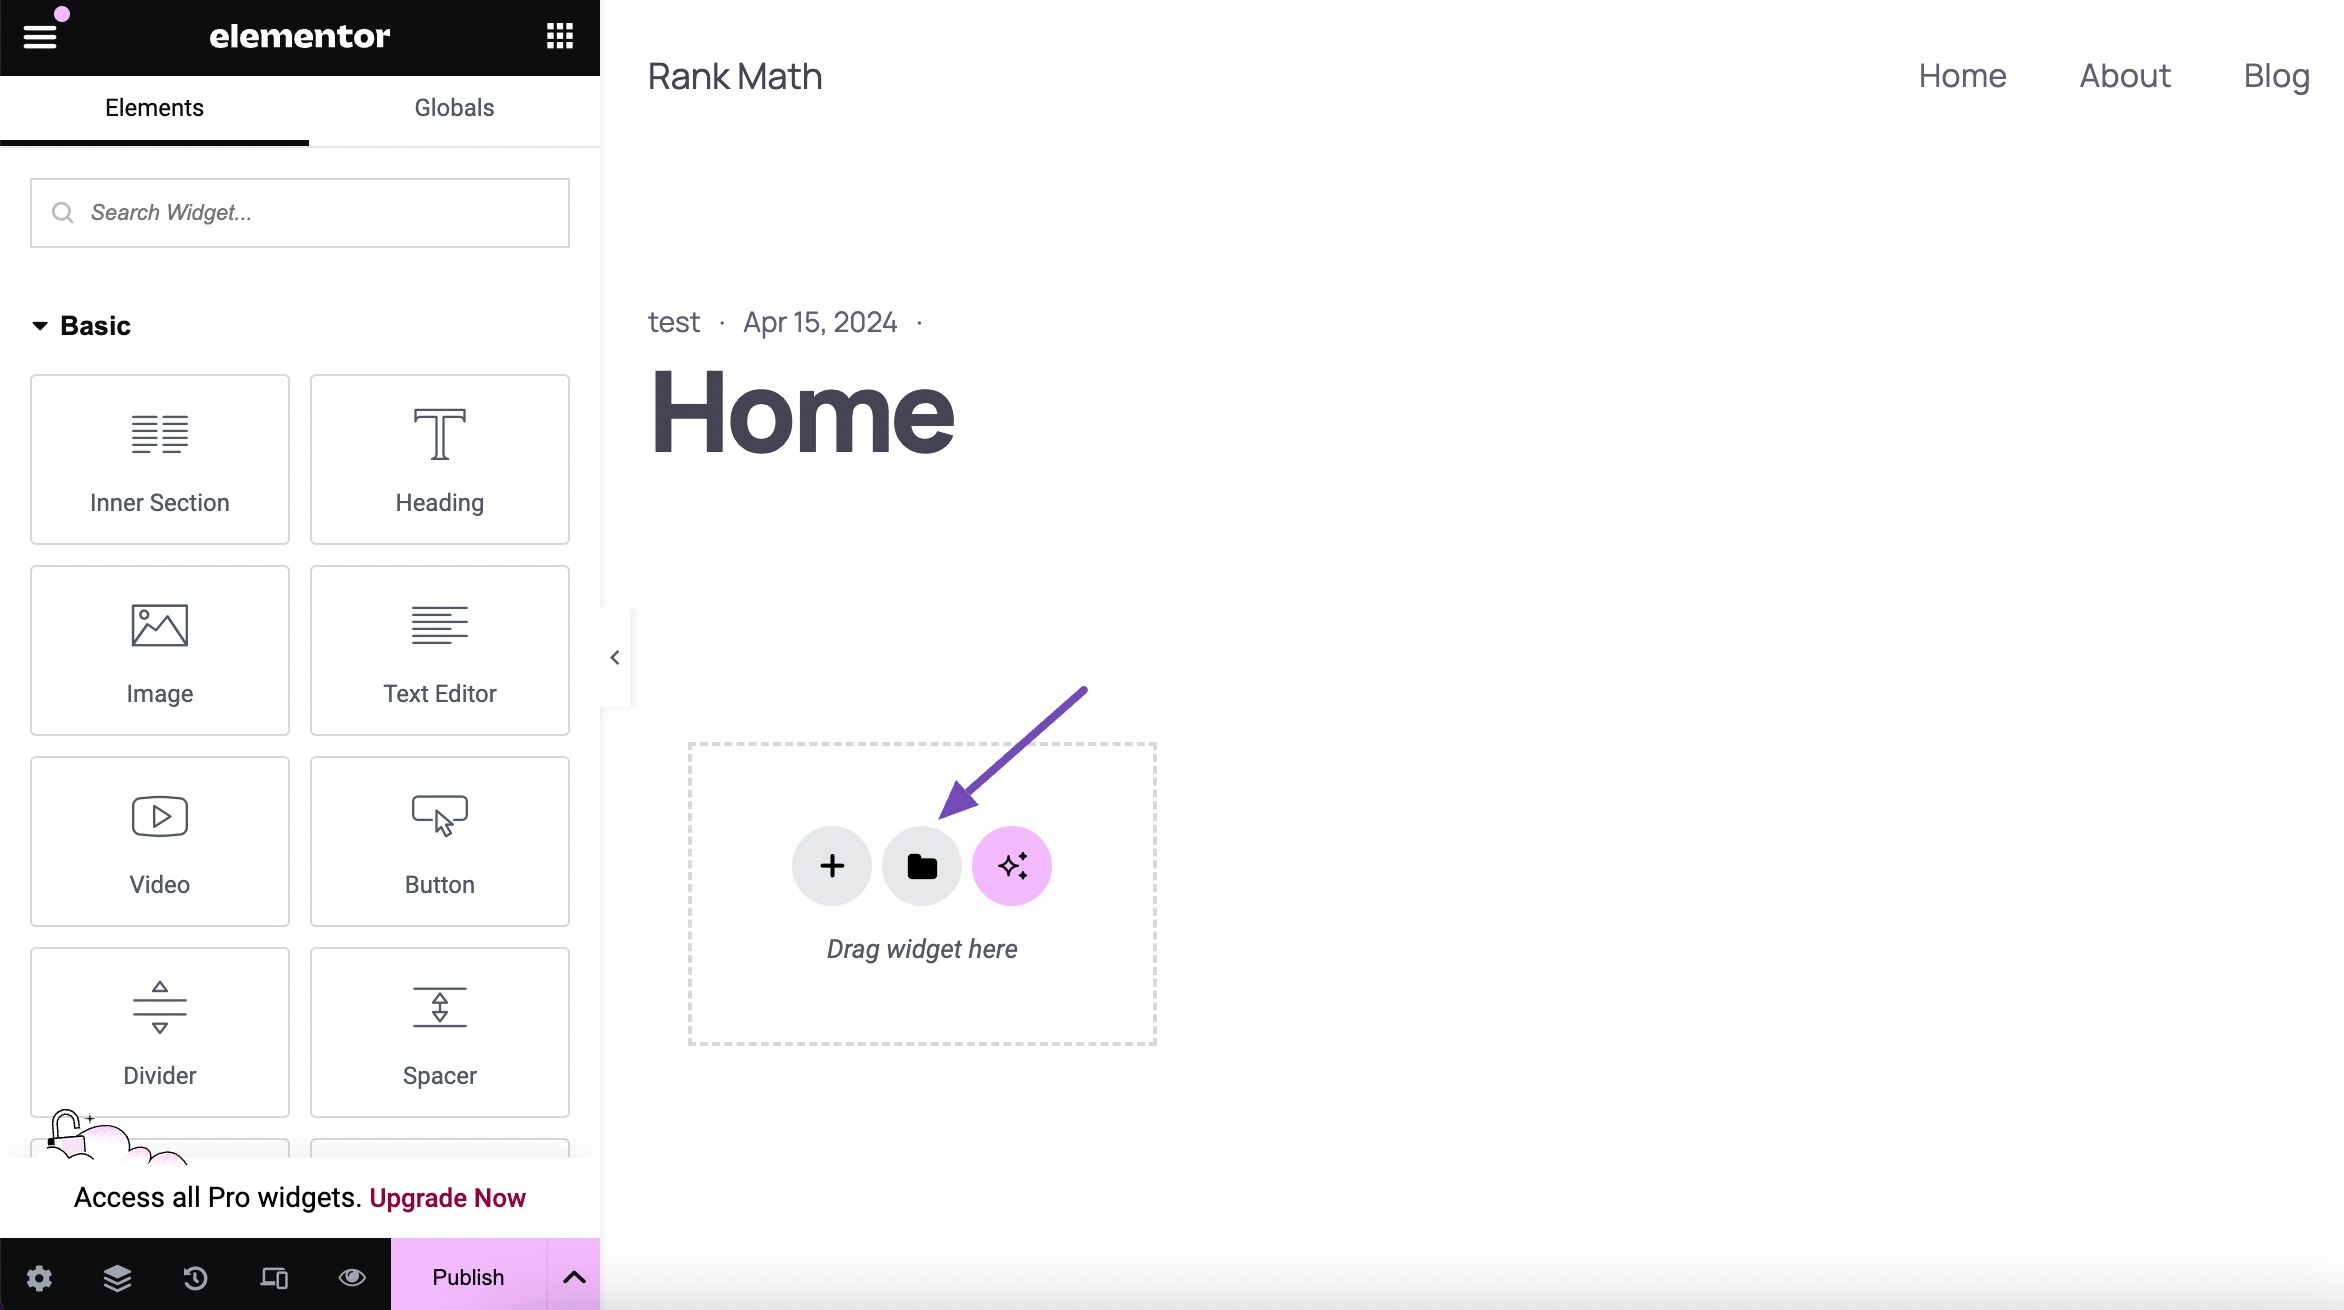
Use Elementor’s drag-and-drop interface to add and customize elements like text, images, buttons, and videos.
Alternatively, you can use an existing template as your base. To access these Elementor templates, you just need to click on the folder icon.
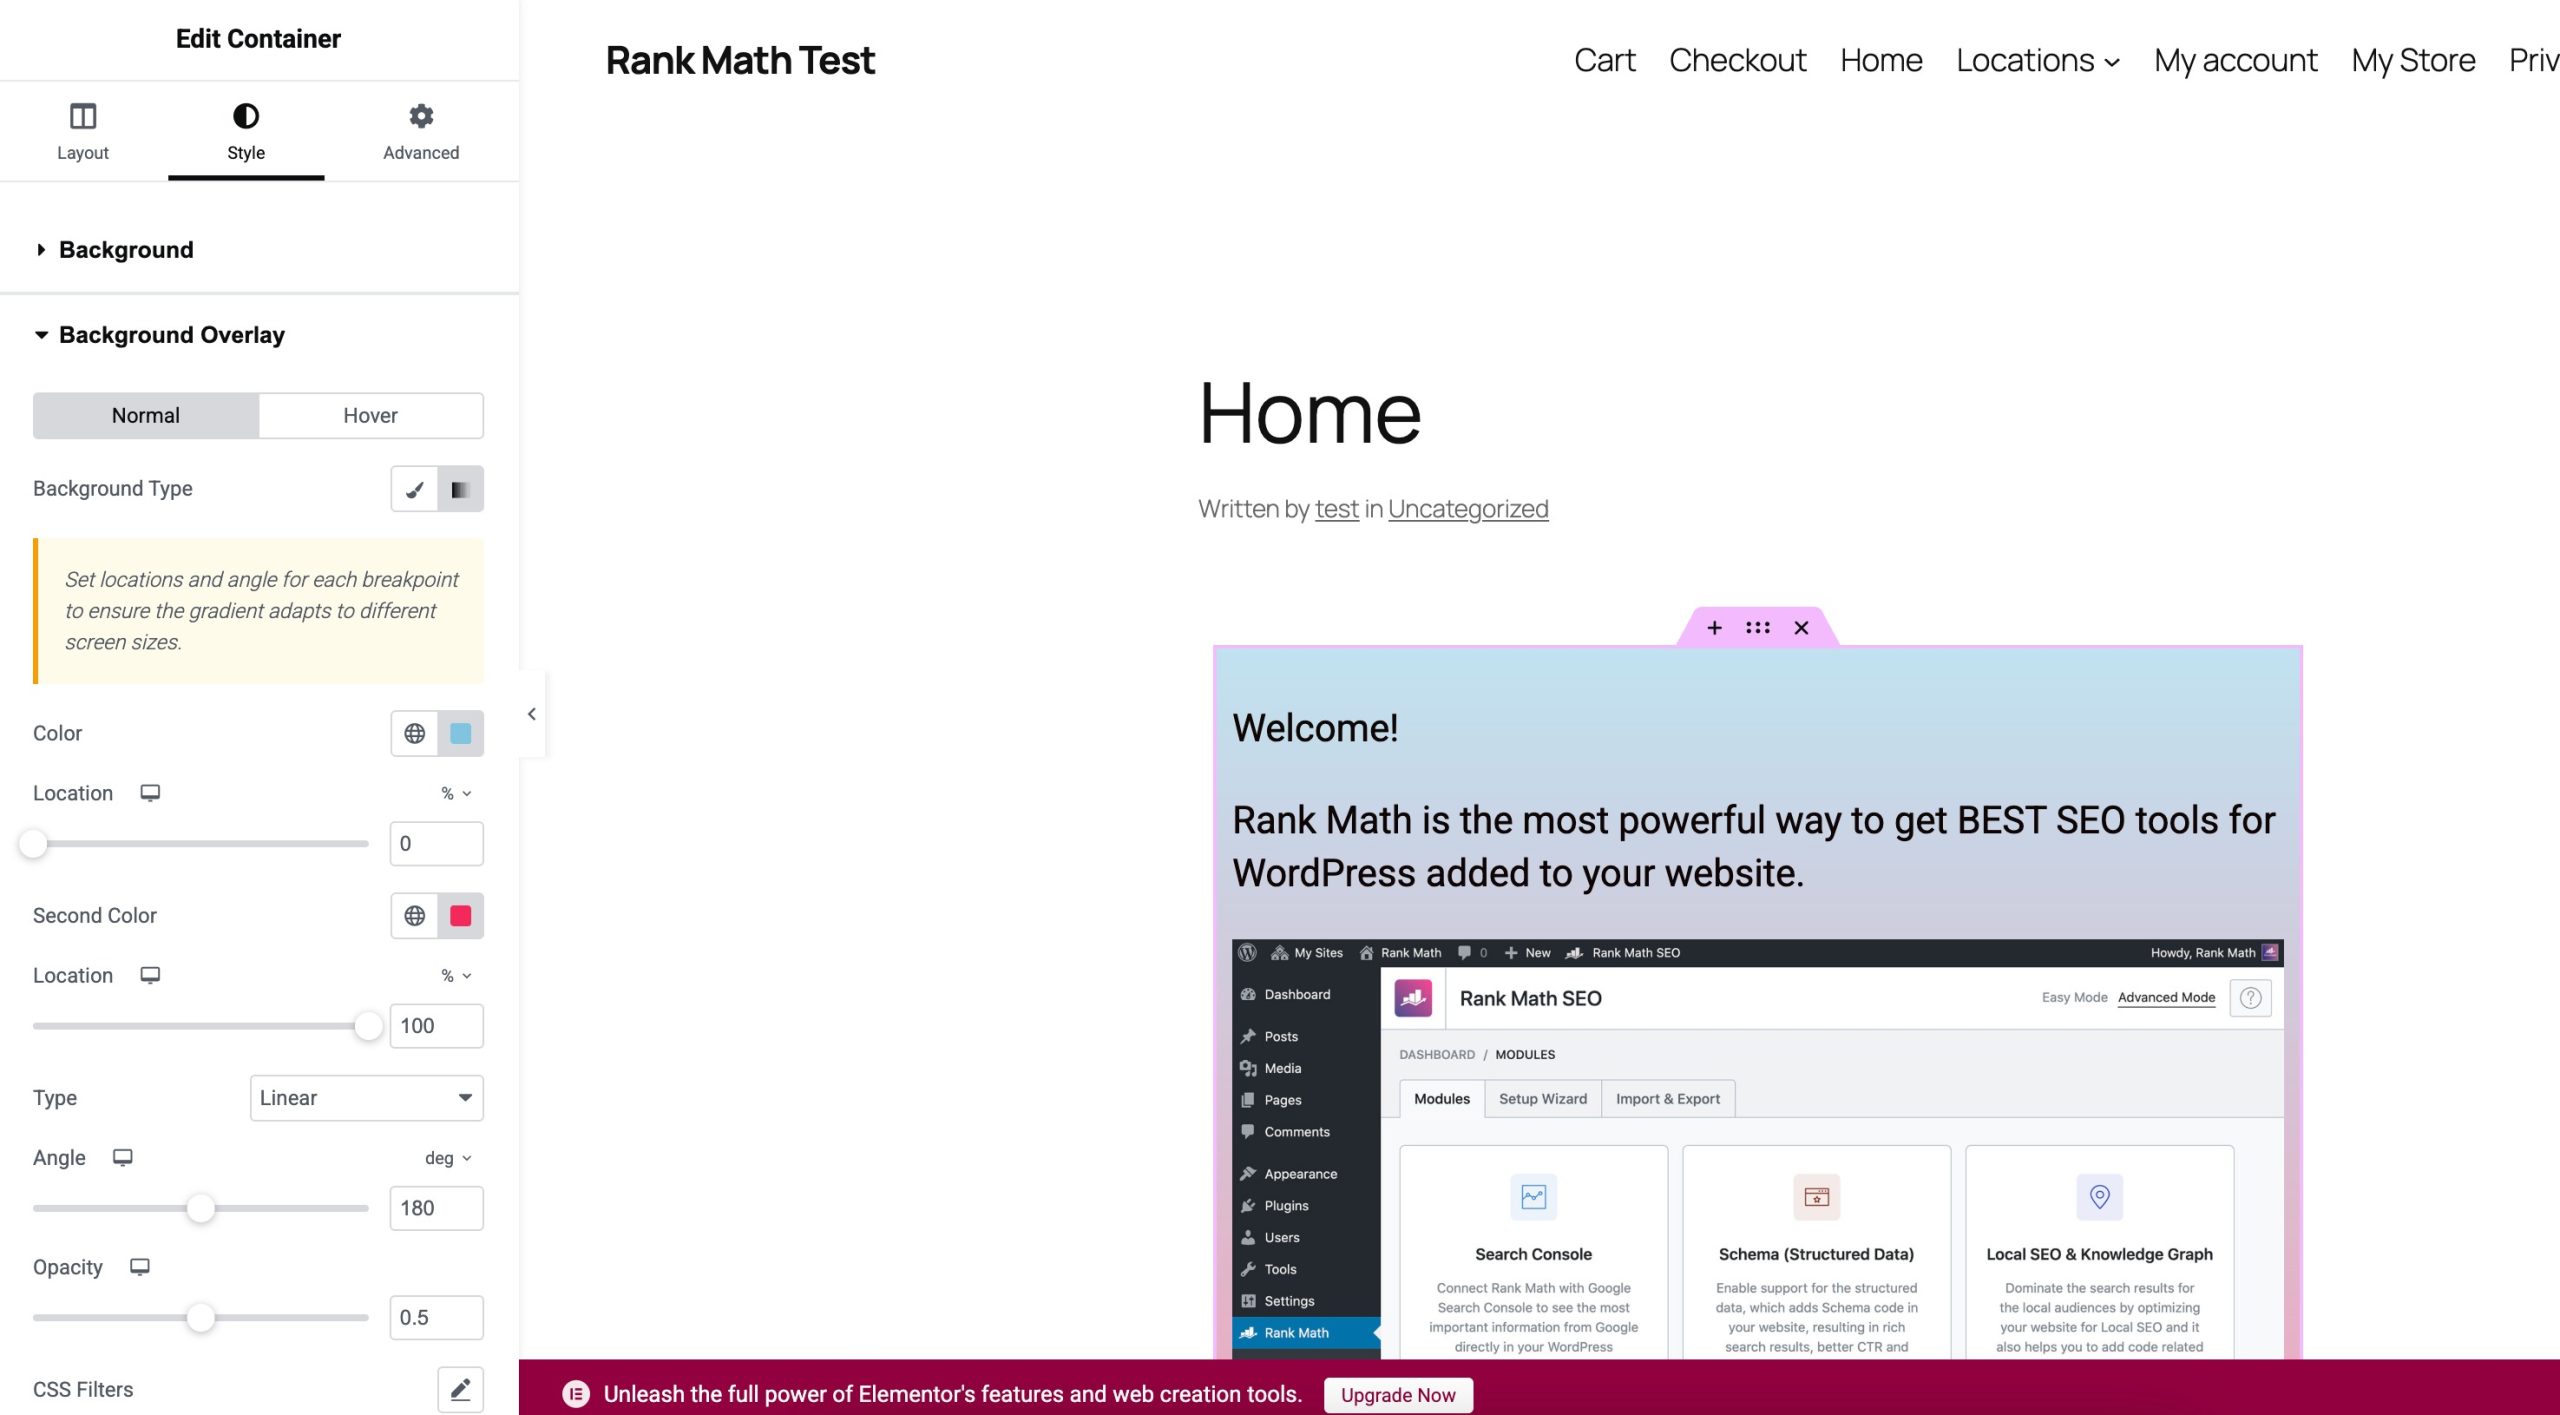
After designing your custom page layout, preview it to see how it looks on different devices and screen sizes. Once you’re satisfied with your custom page design, save your changes, click on the arrow next to the Publish/Update button, and select Save as Template.
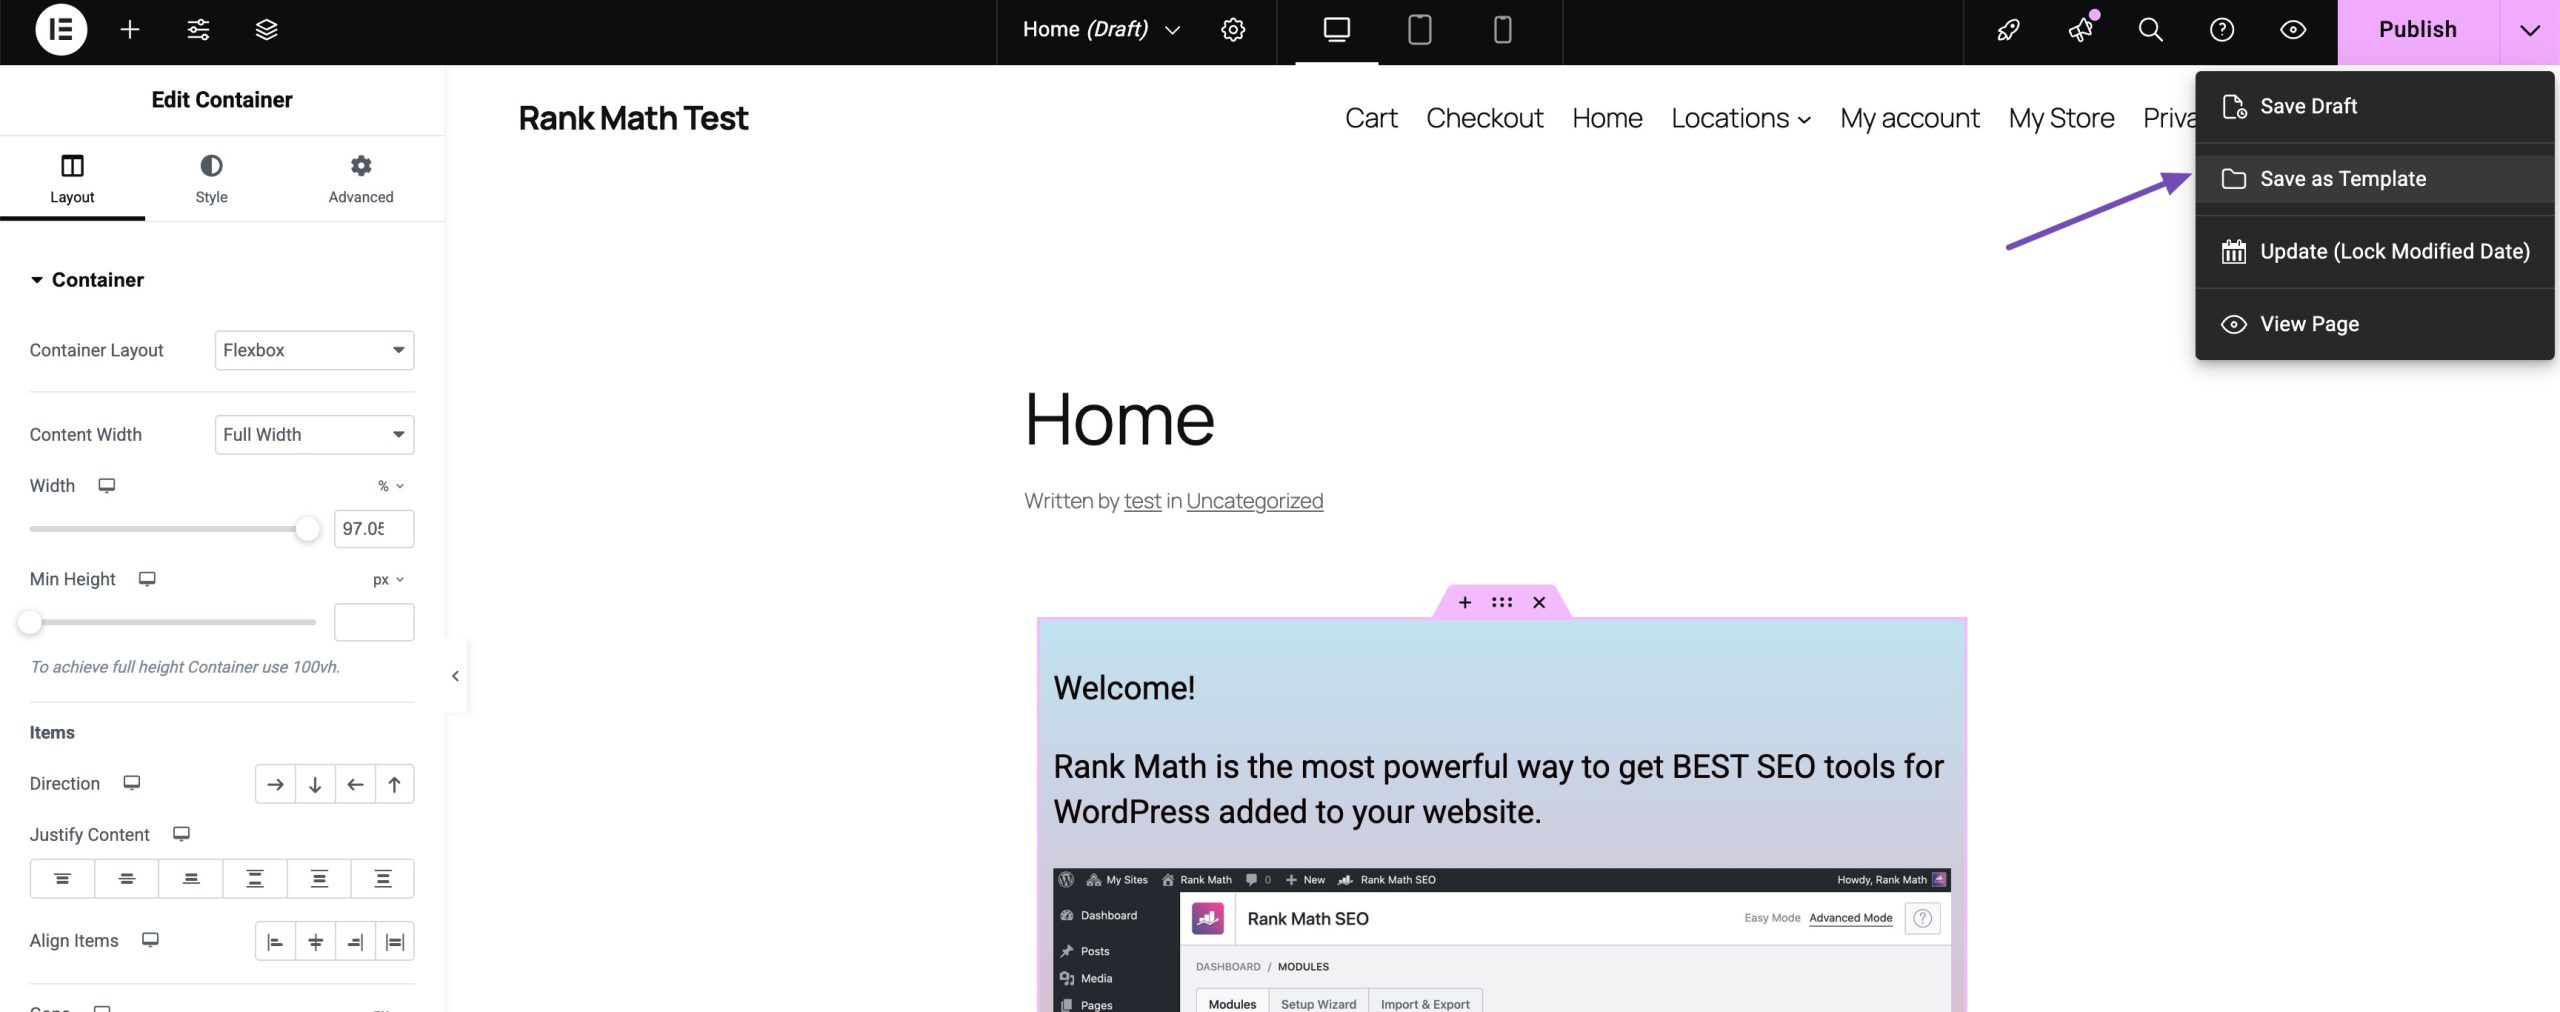
Next, Elementor will ask you to enter a name for your template. This layout will then be saved to your template library.
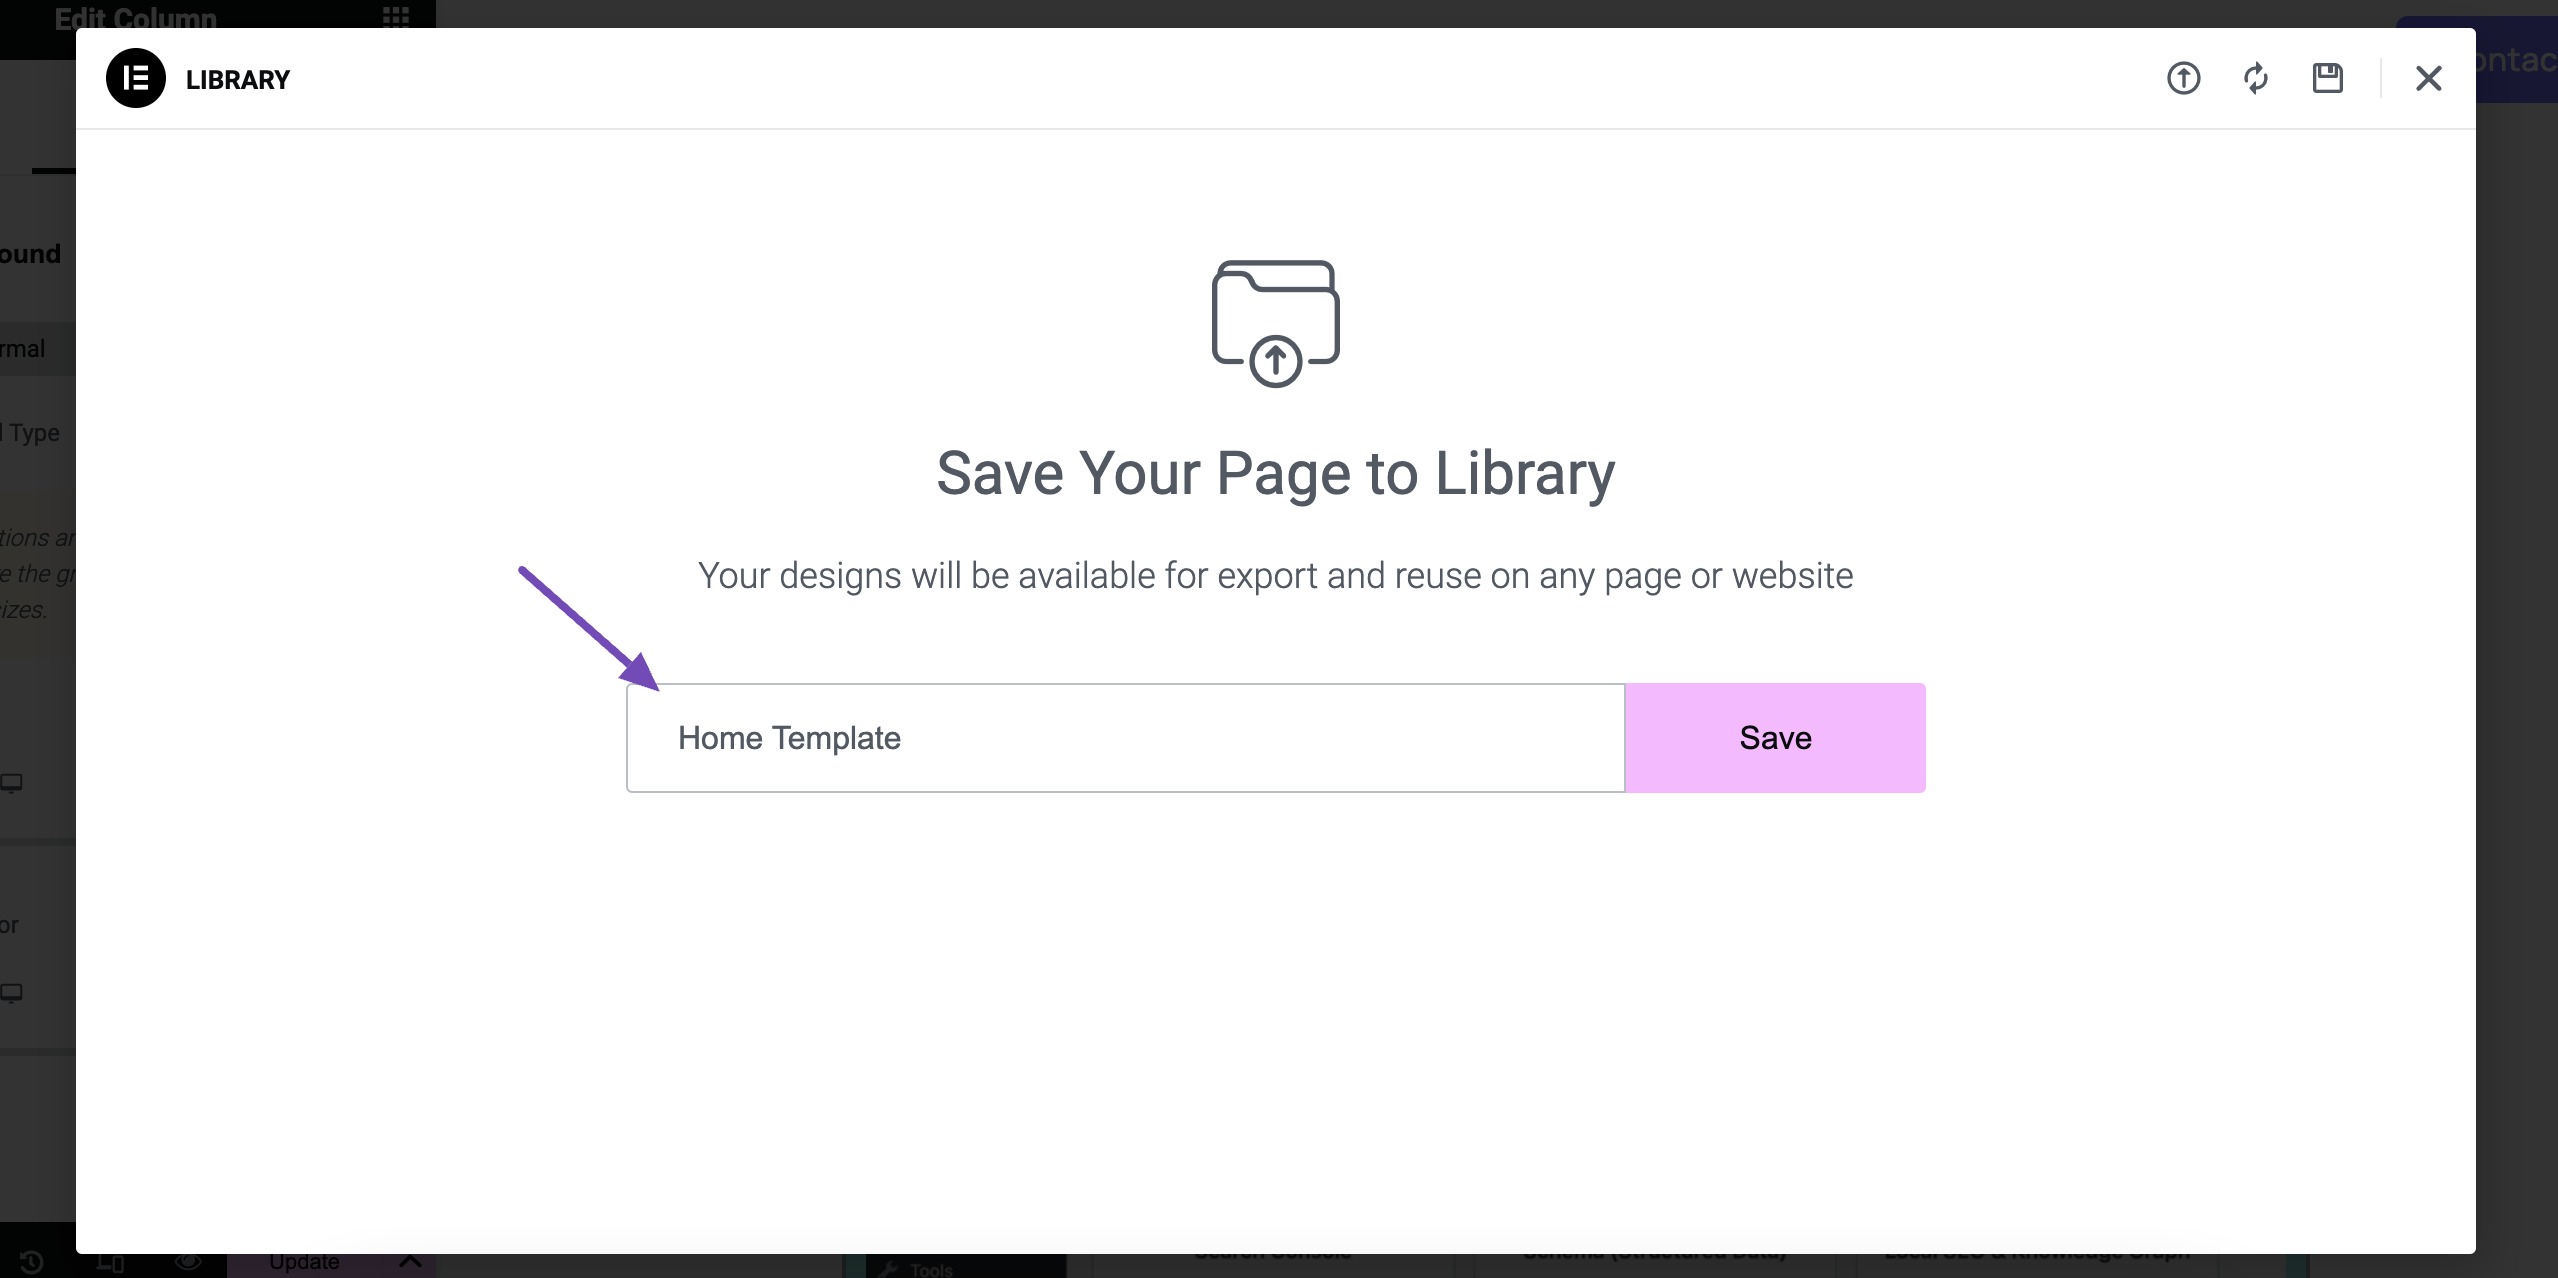
Once you’ve created and saved your template, you can use it on any page designed in Elementor.
Building a Custom WordPress Page With Divi
Divi is both a WordPress theme and a powerful page builder with its own drag-and-drop interface.
Log in to your WordPress dashboard and navigate to Pages → Add New, where you’ll build your custom template.
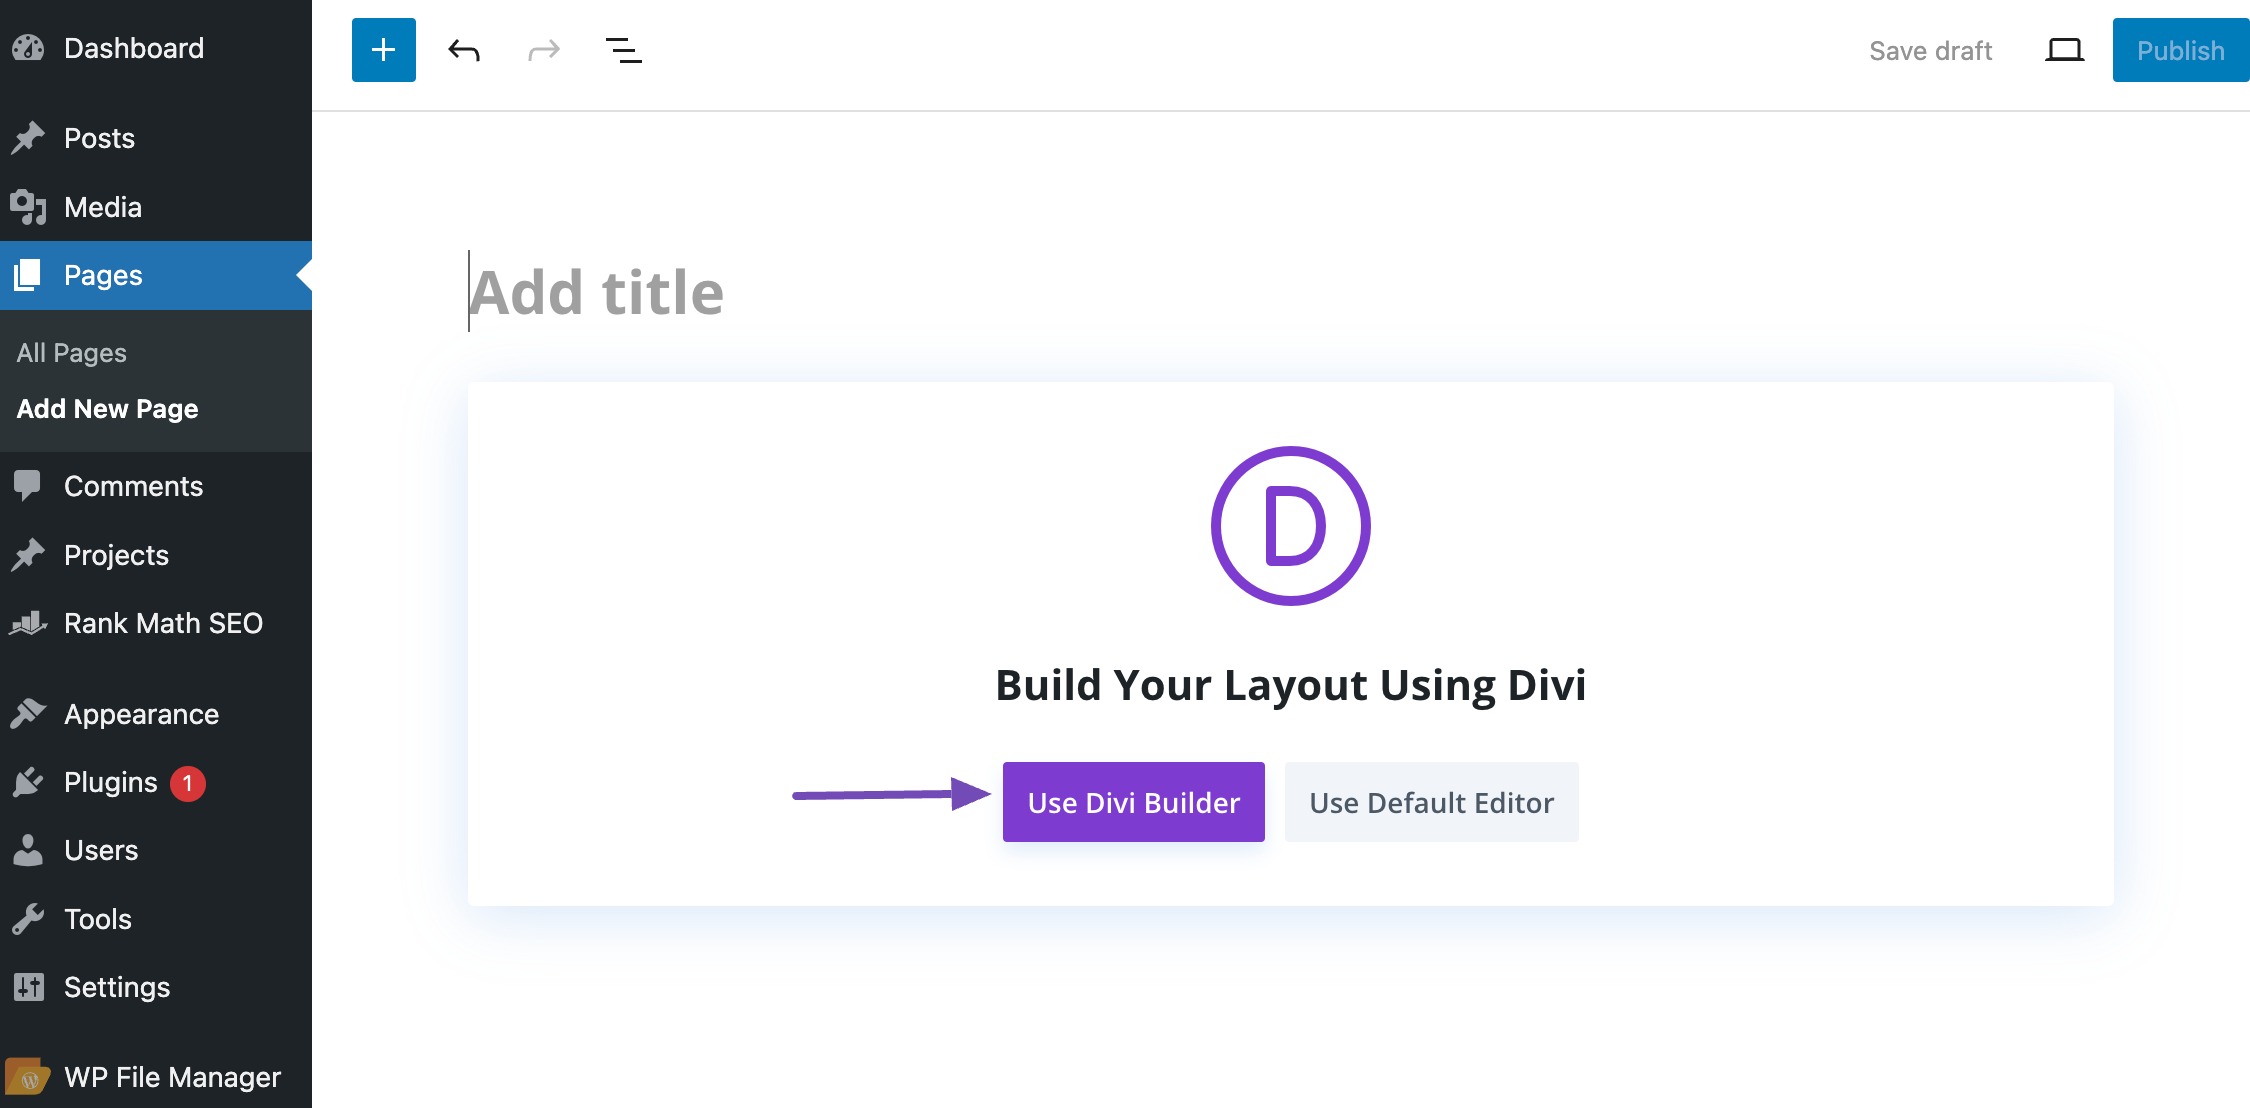
After creating the new page, click the Use Divi Builder button to launch the Divi Builder interface.
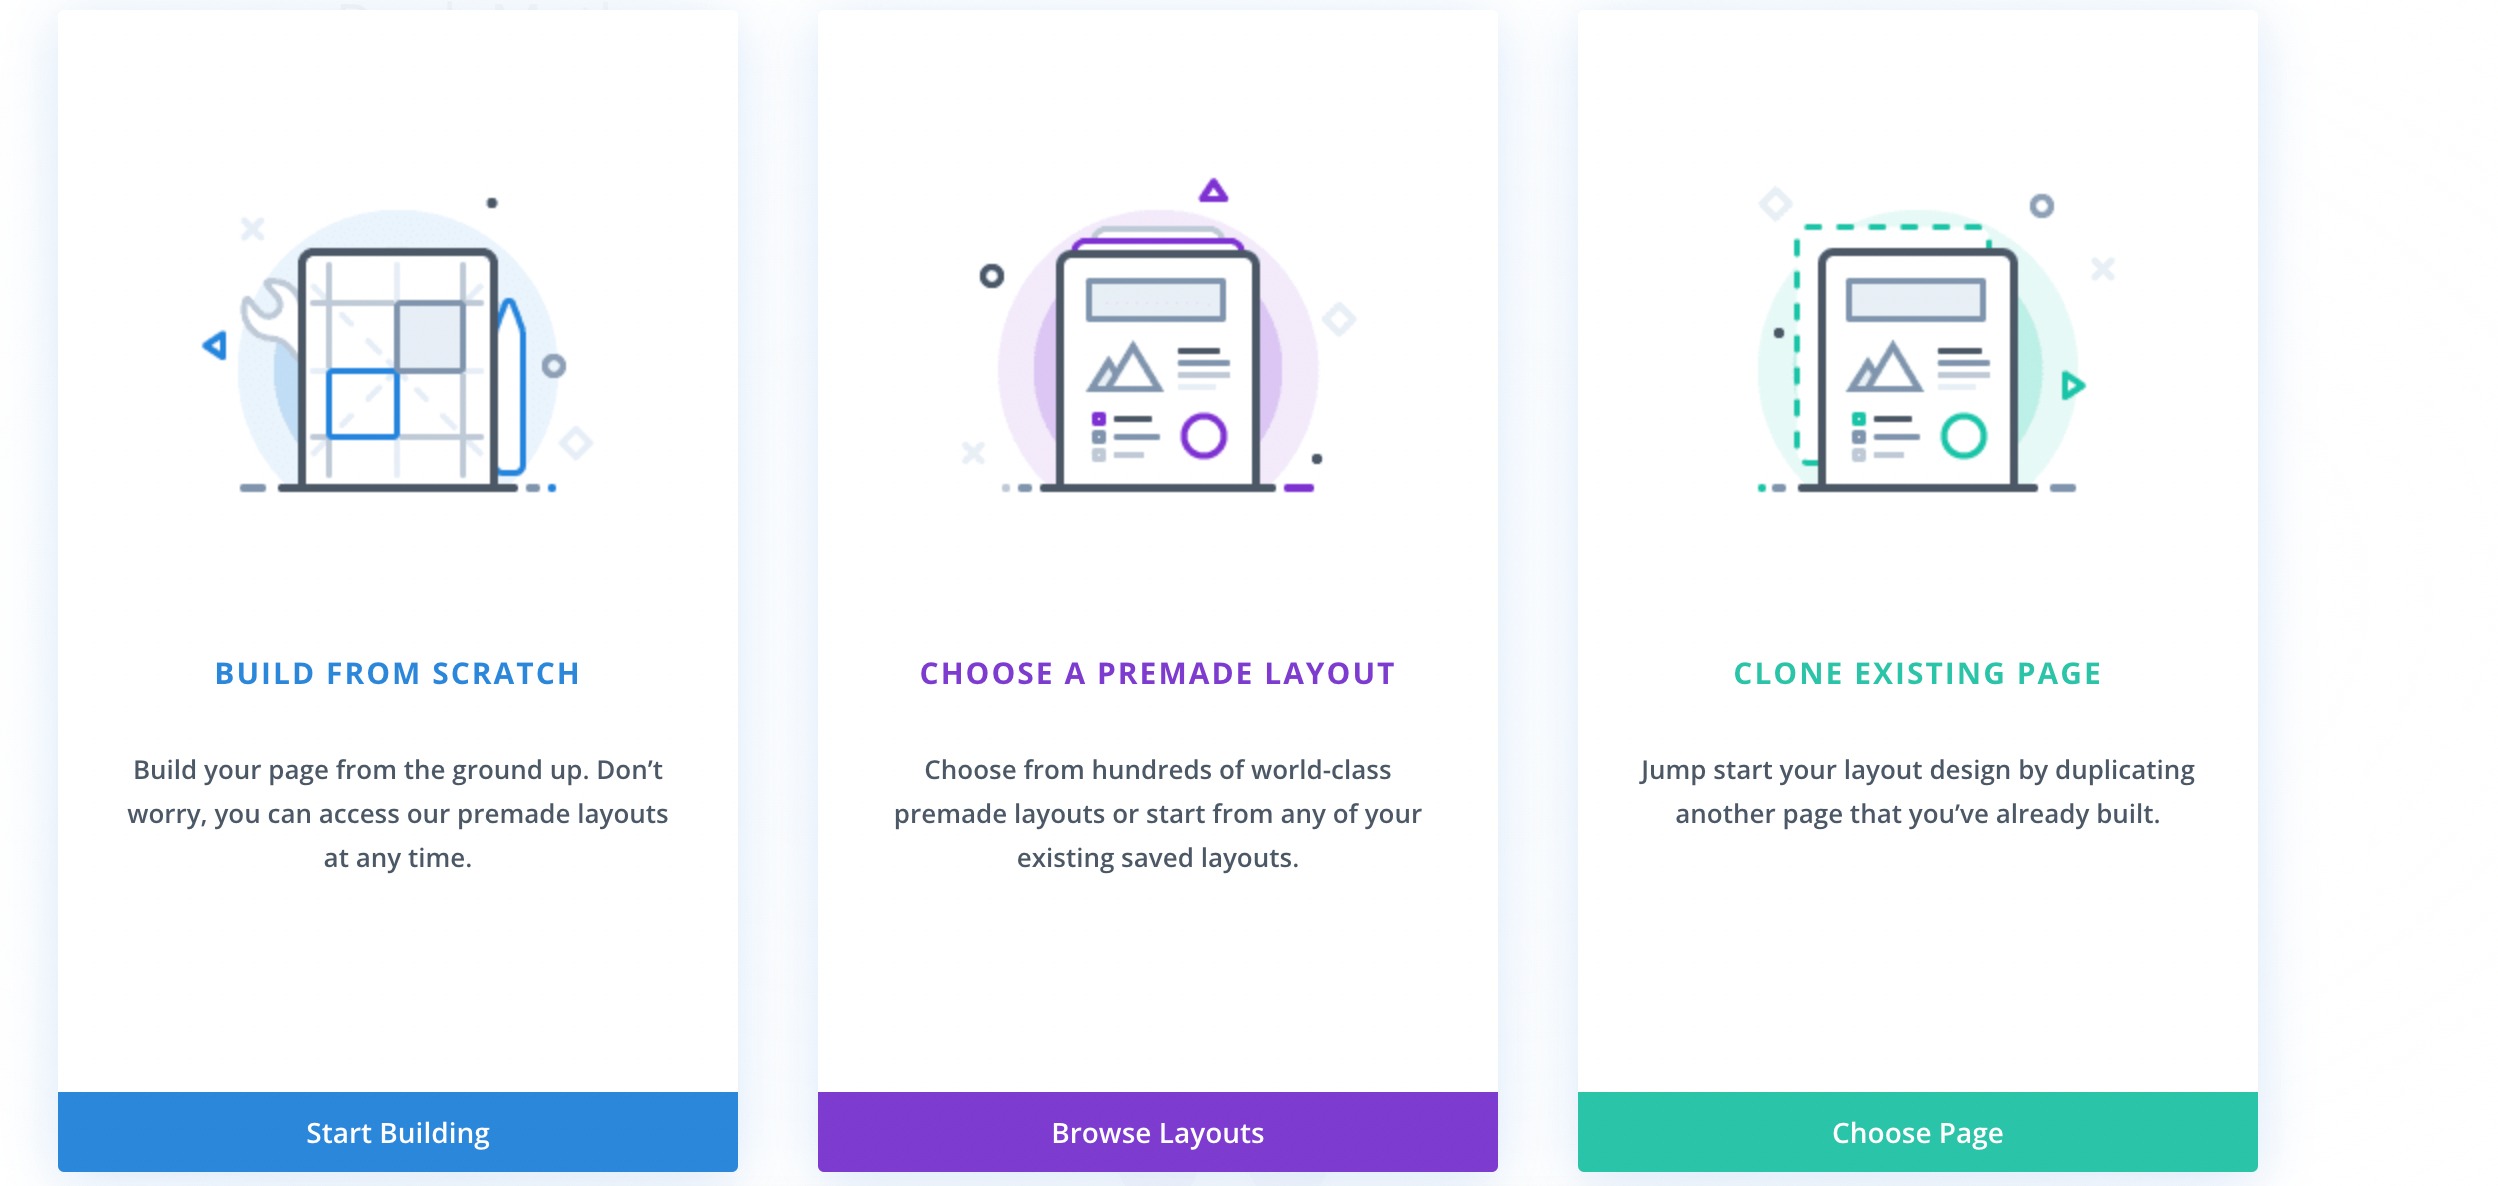
Divi offers a variety of pre-designed layouts to choose from. You can select a layout that closely matches your design concept or start from scratch.
Use the Divi Builder’s drag-and-drop interface to add and customize elements on your page. You can add sections, rows, and modules to create the desired layout. Customize the appearance of each element using the built-in design settings.
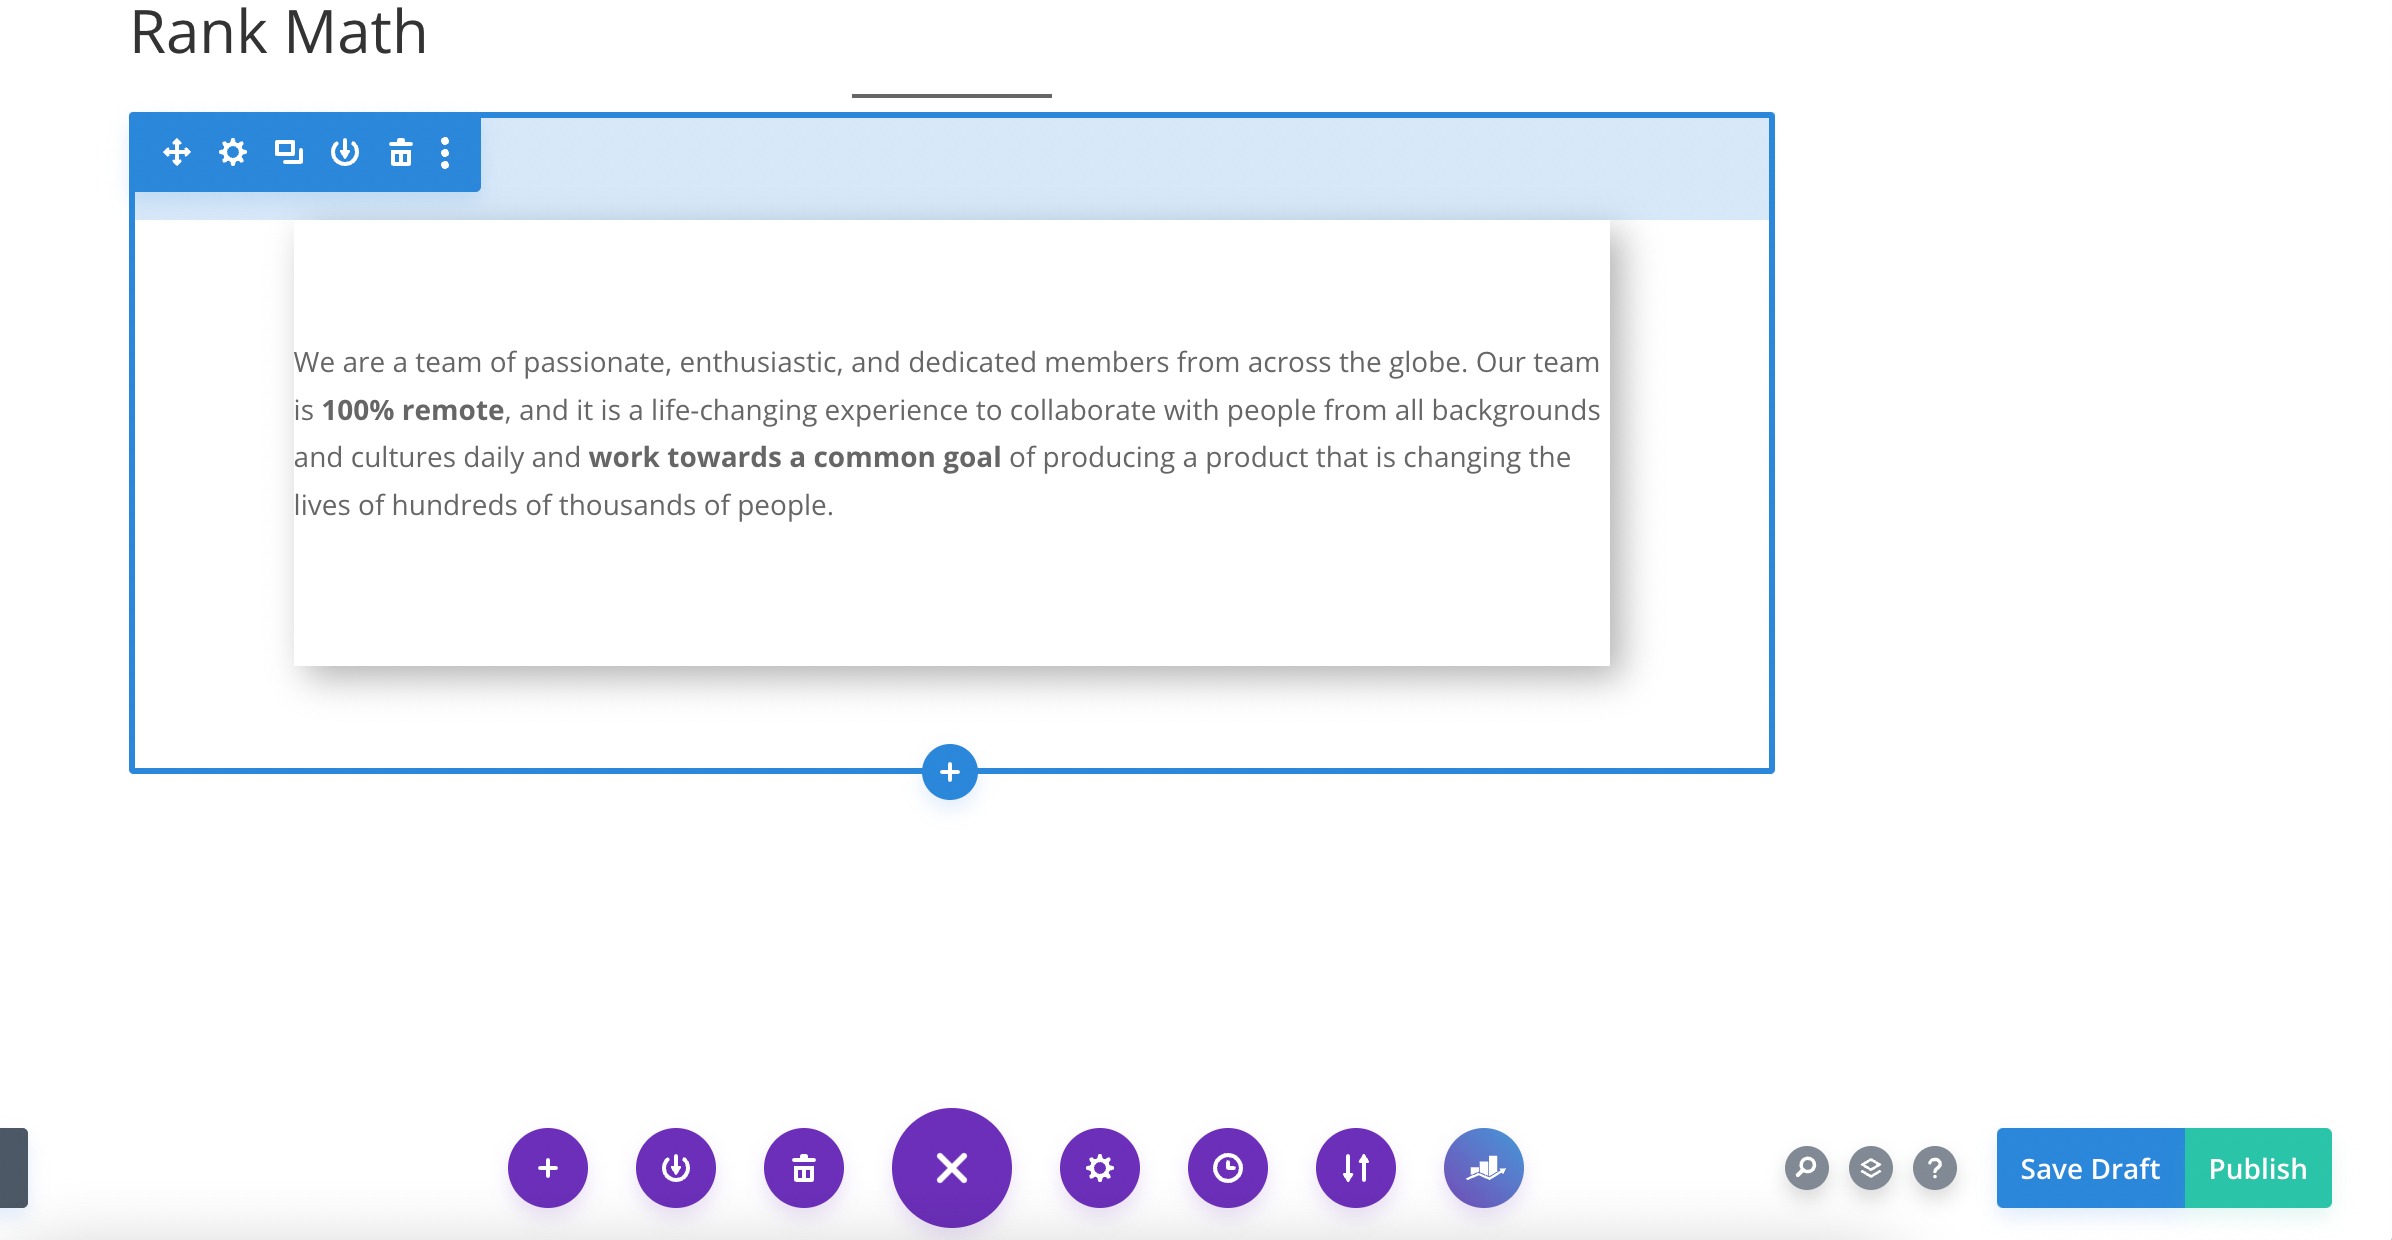
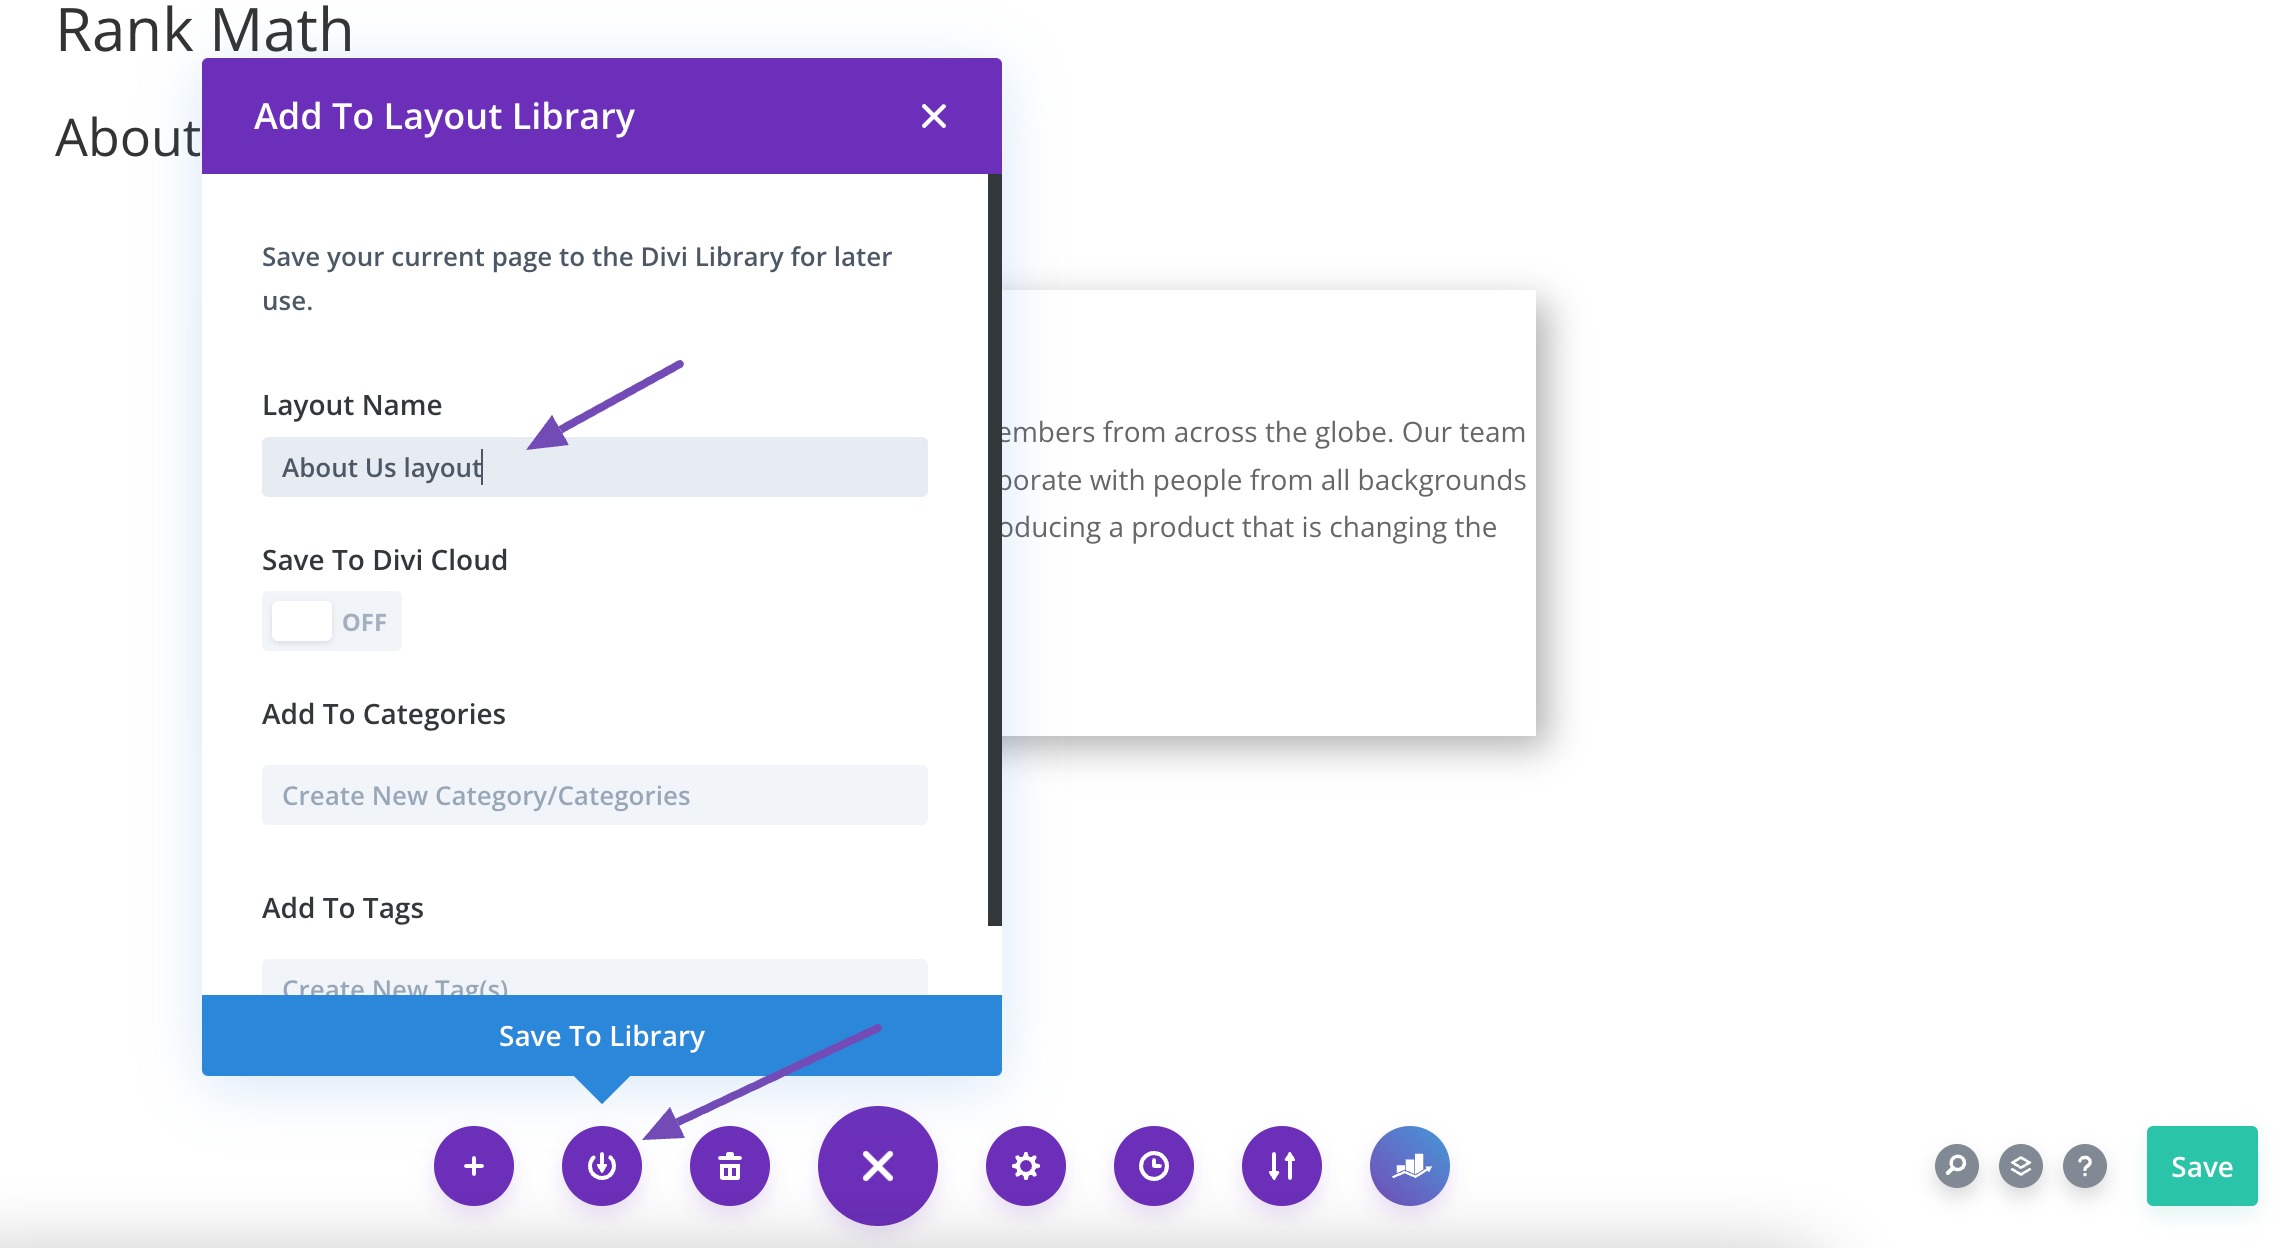
Once you’ve designed your custom page layout, you can save it as a template for future use. Save the changes. Click the Save To Library icon in the Divi builder toolbar. Give your template a name and save it.
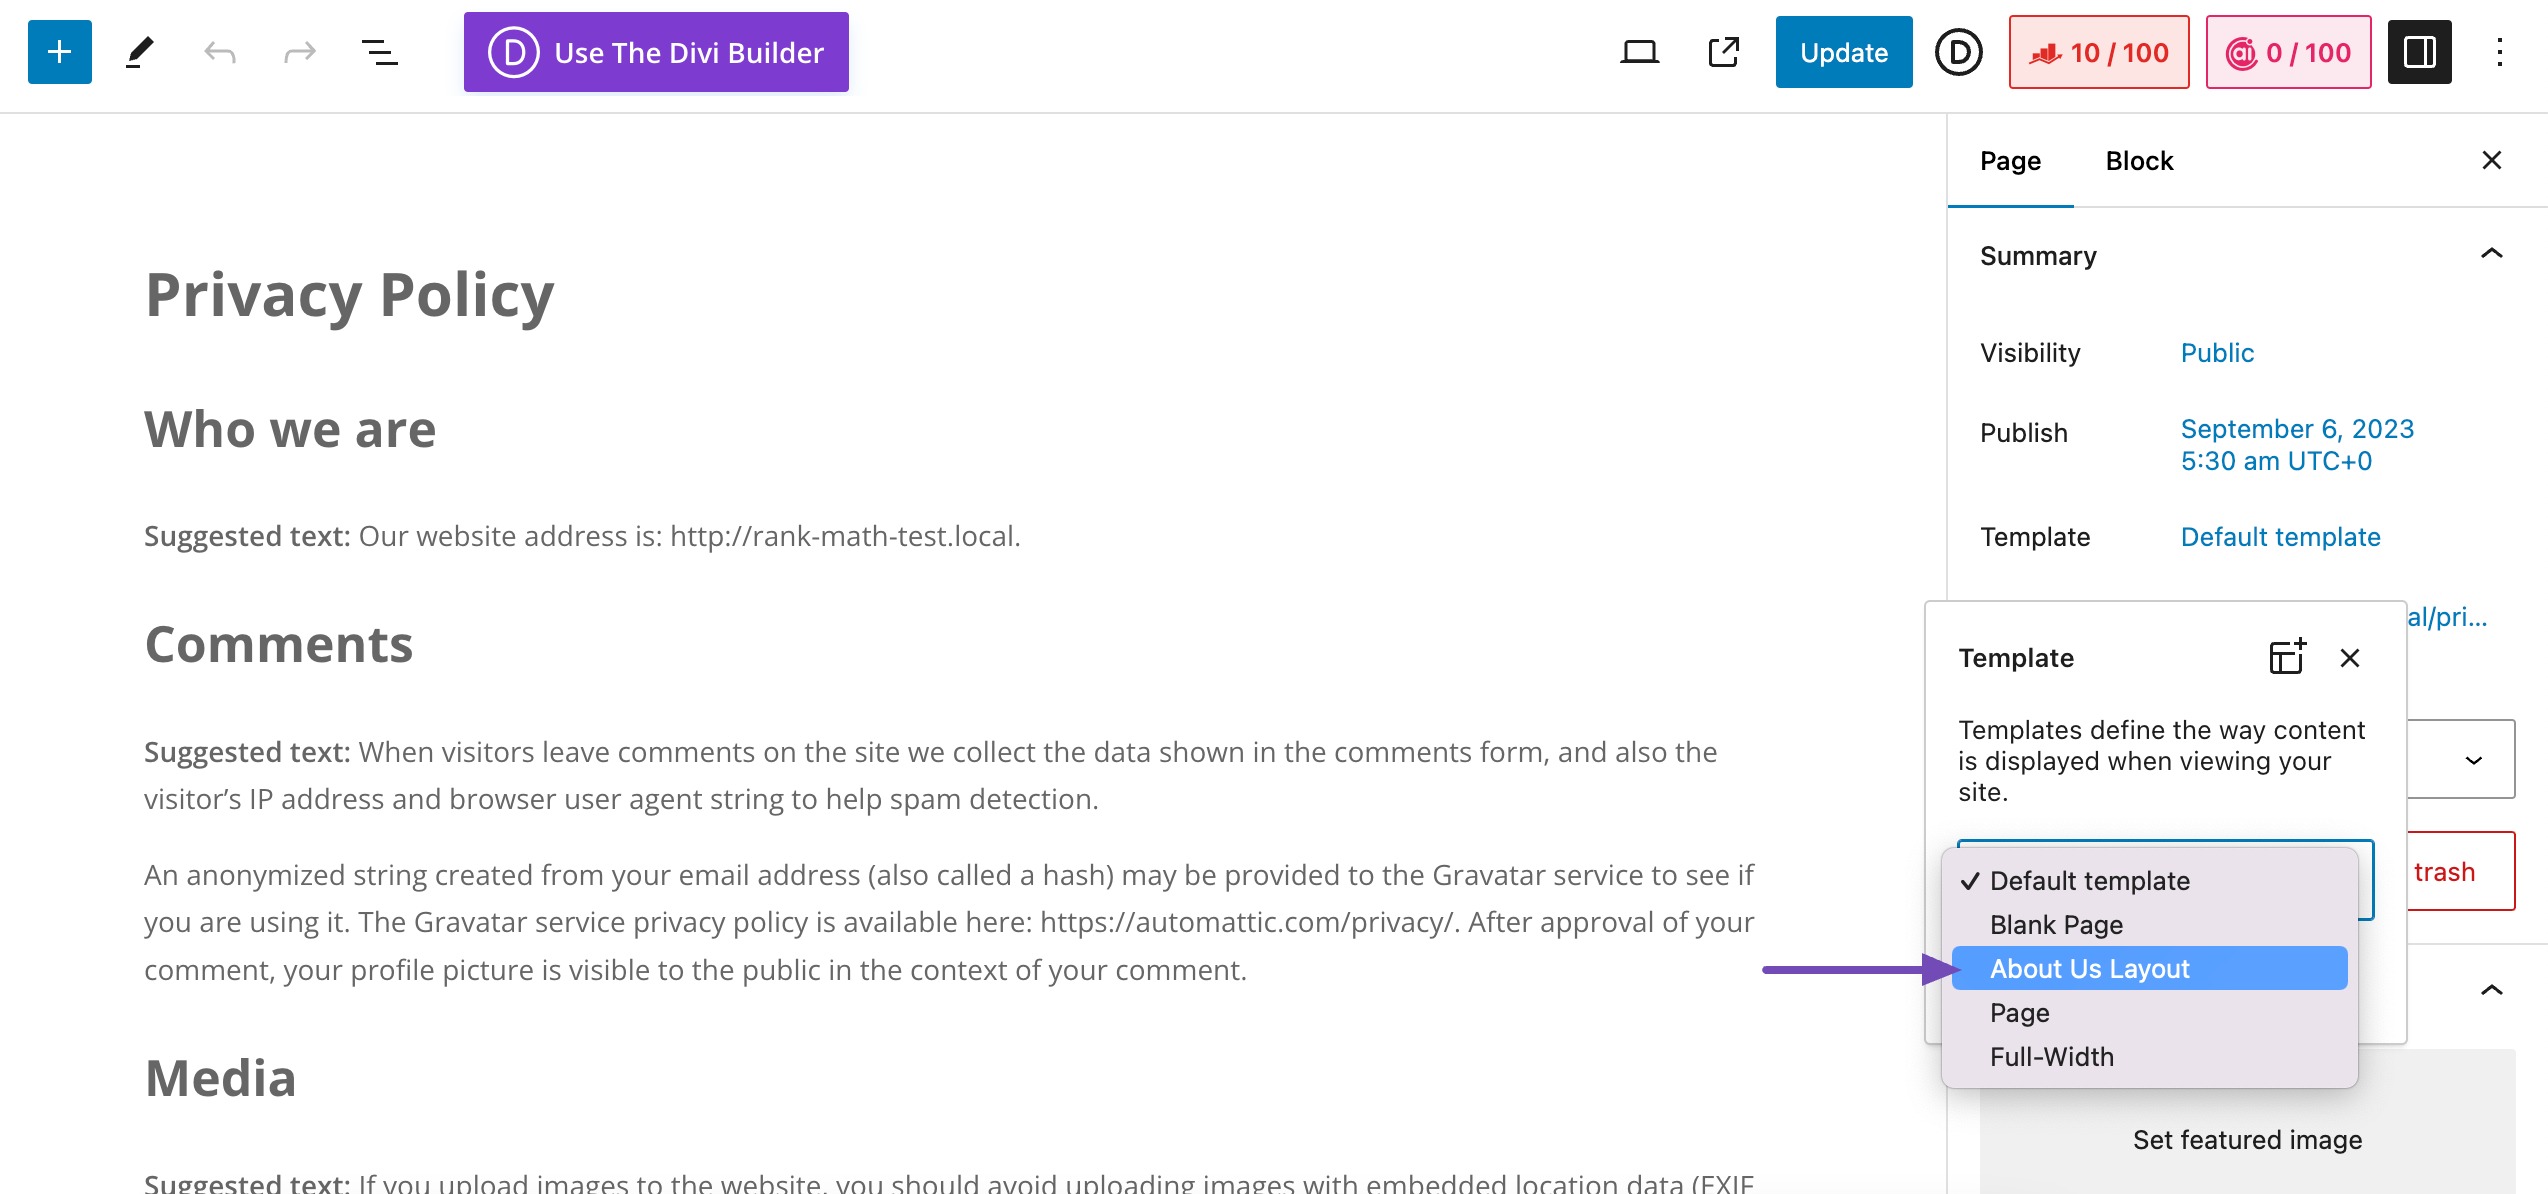
Now that you’ve created the custom template, you can assign it to specific pages within WordPress. When editing a page, scroll down to the Page Attributes meta box, and under the Template dropdown, select the custom template you’ve created from the list of available templates.
After assigning the custom template to a page, publish or update the page to apply the custom template. Then, visit the page on the front end of your website to ensure that the layout and functionality are as expected.
3 Conclusion
Custom page templates let you build pages that look and work exactly the way you want. They’re a great way to improve your site’s layout and make it easier for visitors to find what they need.
Feel free to try out different templates and see what works best for your site. It’s a simple way to make your WordPress site more personal and useful.
If you like this post, let us know by Tweeting @rankmathseo.
