Are you running into the WordPress Memory Exhausted error while trying to upload files or run scripts on your site? Don’t worry, this is a common issue, especially if your website uses a lot of images, videos, or resource-heavy plugins.
You might see error messages like:
- Fatal error: Allowed memory size of X bytes exhausted (tried to allocate Y bytes)
- PHP Fatal error: Out of memory (allocated X) (tried to allocate Y bytes)
These errors simply mean your site has hit the PHP memory limit set on your server, and WordPress doesn’t have enough memory to complete the task.
In this post, I’ll walk you through why this error happens, how you can fix it, and how to increase your site’s PHP memory limit to keep everything running smoothly.
Table Of Contents
1 Understanding the WordPress Memory Exhausted Error
If you’ve ever seen the WordPress memory exhausted or PHP memory limit error, it means your site has used up the amount of memory your hosting server has allowed for PHP scripts.
WordPress runs on PHP, a server-side programming language that powers everything from your themes to your plugins. When you sign up for a hosting plan, your provider sets a memory limit to make sure no single site or script hogs all the resources.
As you add more features to your website, like plugins, themes, or media files, your site starts to require more memory to function properly. And when it runs out of memory? You’ll get an error that looks something like this:
Fatal error: Allowed memory size of X bytes exhausted (tried to allocate Y bytes)
This usually happens when you try to install a plugin, upload a large file, or run a resource-heavy process.
Now that you know what causes this error, let’s take the next step and check how much PHP memory your WordPress site currently has, and how to increase it if needed.
2 How to Check Your WordPress PHP Memory Limit
To check your WordPress site’s PHP memory limit, navigate to Tools → Site Health → Info from your WordPress dashboard.
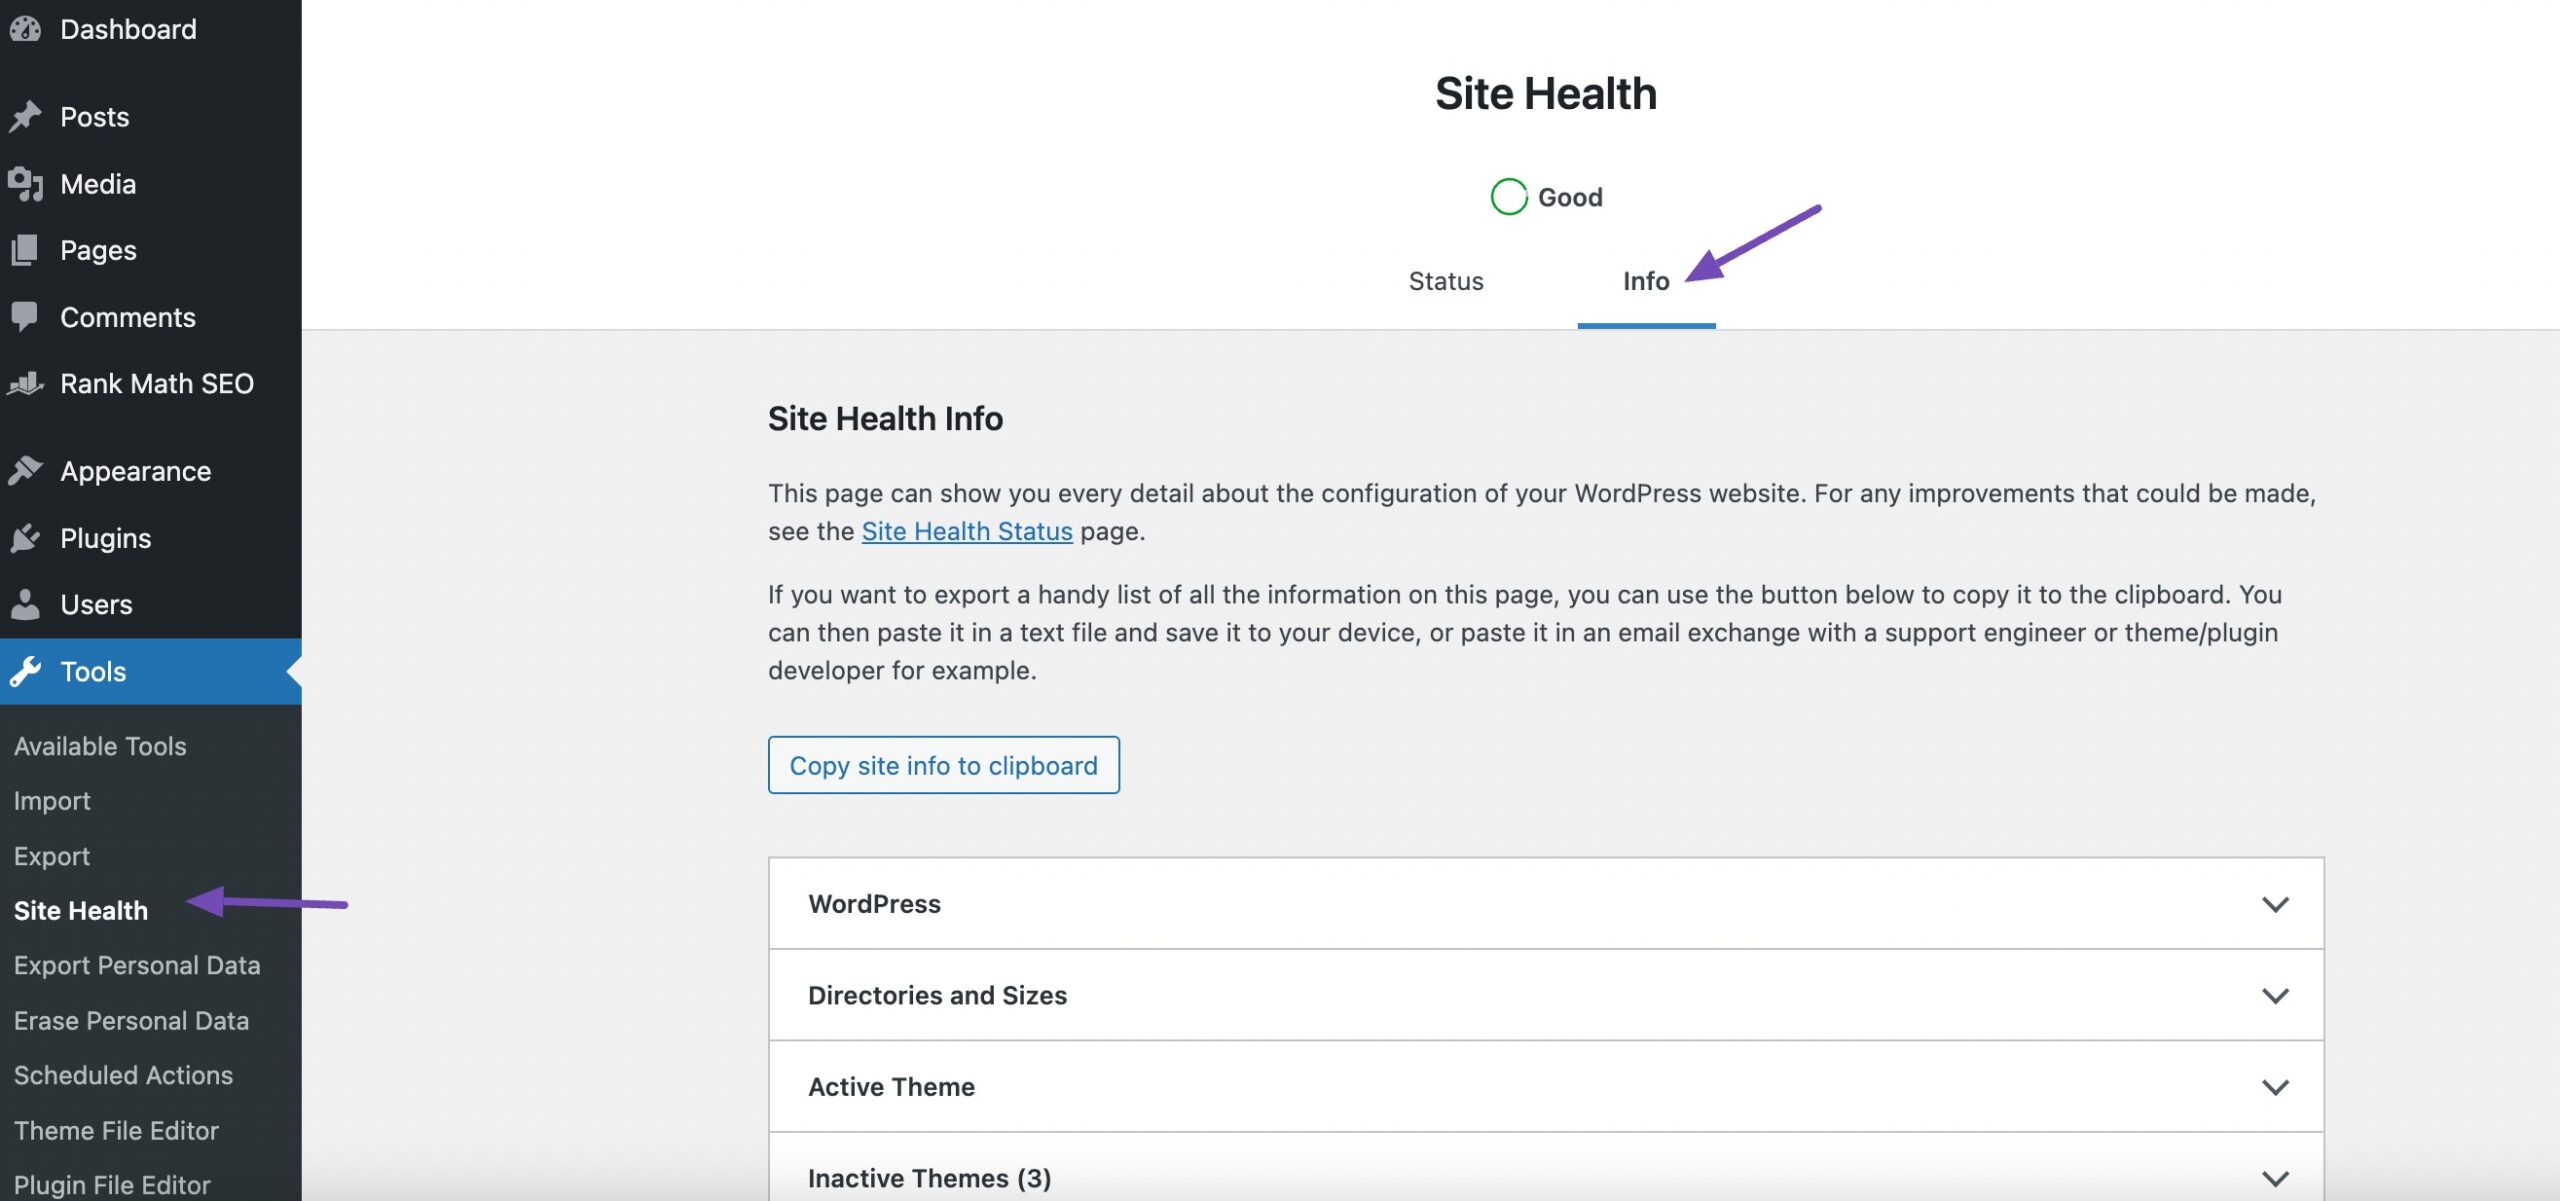
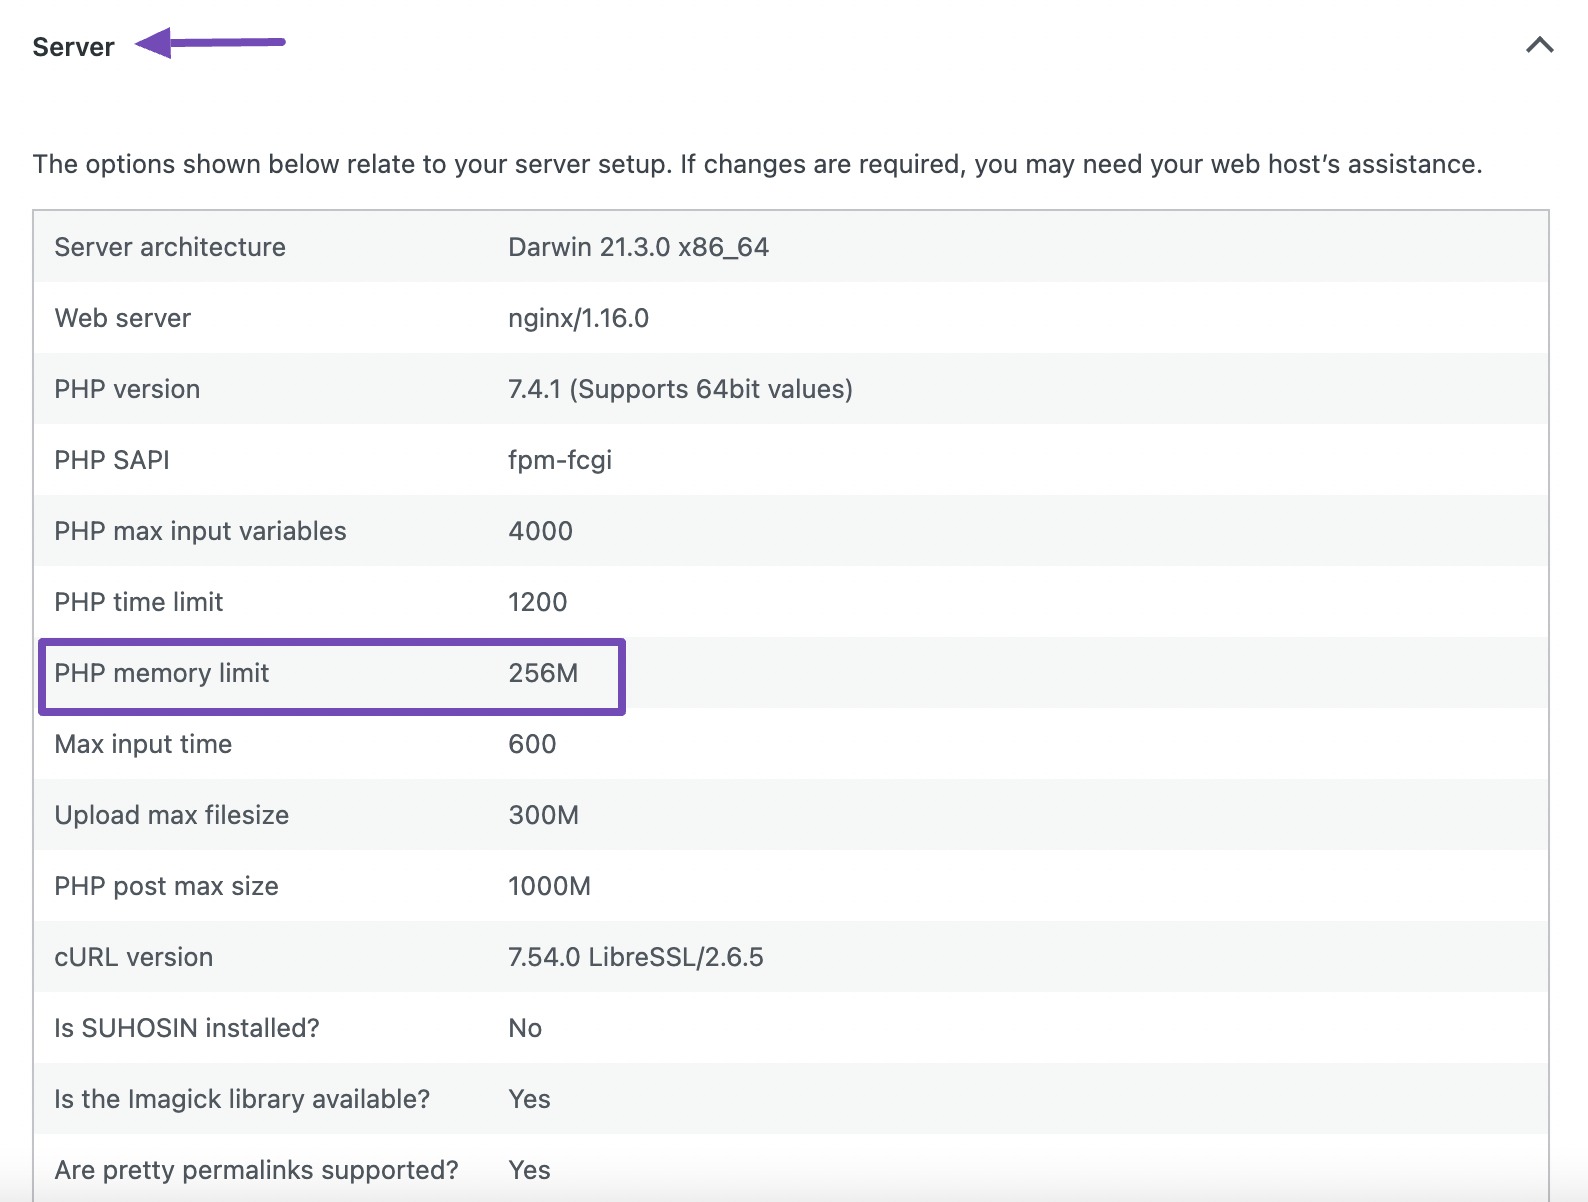
Scroll down, navigate to the Server option, and find the PHP memory limit entry. This will show you how much memory is currently allocated to your site.
If the value is low, that’s likely the reason you’re running into the error. But don’t worry, there’s a simple way to increase your memory limit.
Let’s walk through how you can do that next.
3 How to Fix the WordPress Memory Exhausted Error
Running into the WordPress memory exhausted error can be frustrating, especially if you’re new to WordPress. What makes it worse is that the platform doesn’t give you any clear instructions on how to fix it.
The good news? It’s one of the easiest issues to resolve.
In this section, I’ll walk you through three simple ways to increase your site’s PHP memory limit and get things back on track.
3.1 Edit Your Site’s wp-config.php File
The wp-config.php file is one of WordPress’s core files. It contains important configuration settings, like your database credentials and memory limits.
To fix the memory exhausted error, you’ll need to increase your PHP memory limit by editing this file. You can do this using either an FTP client like FileZilla or through your hosting account’s cPanel.
Let’s go through both methods.
3.1.1 Using FileZilla
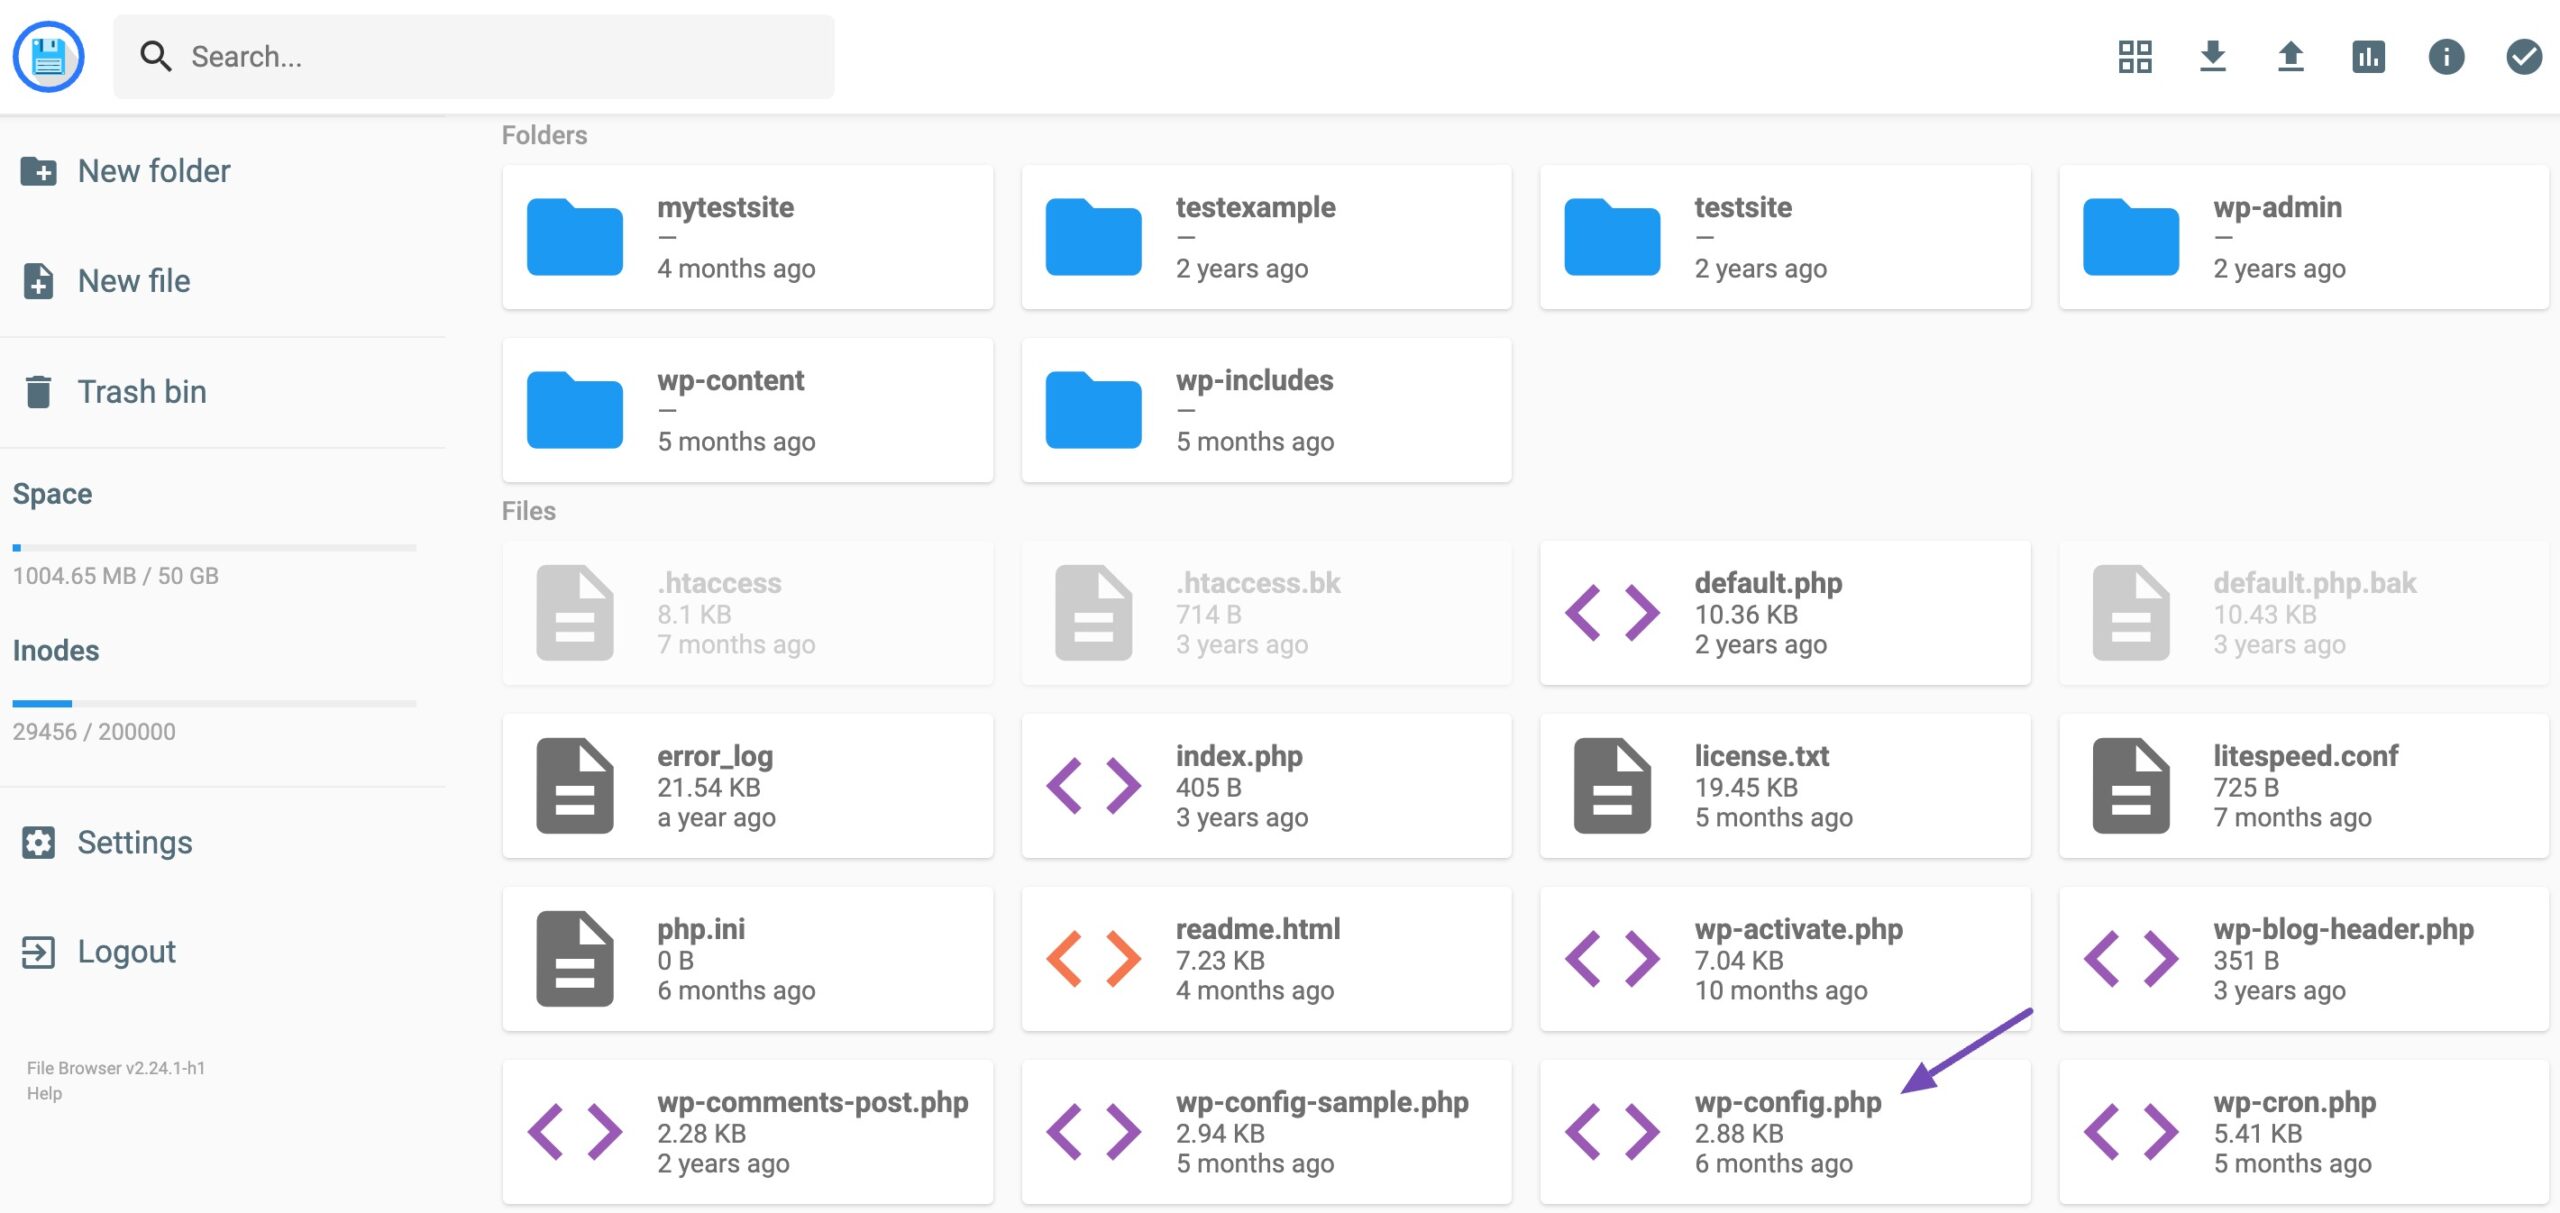
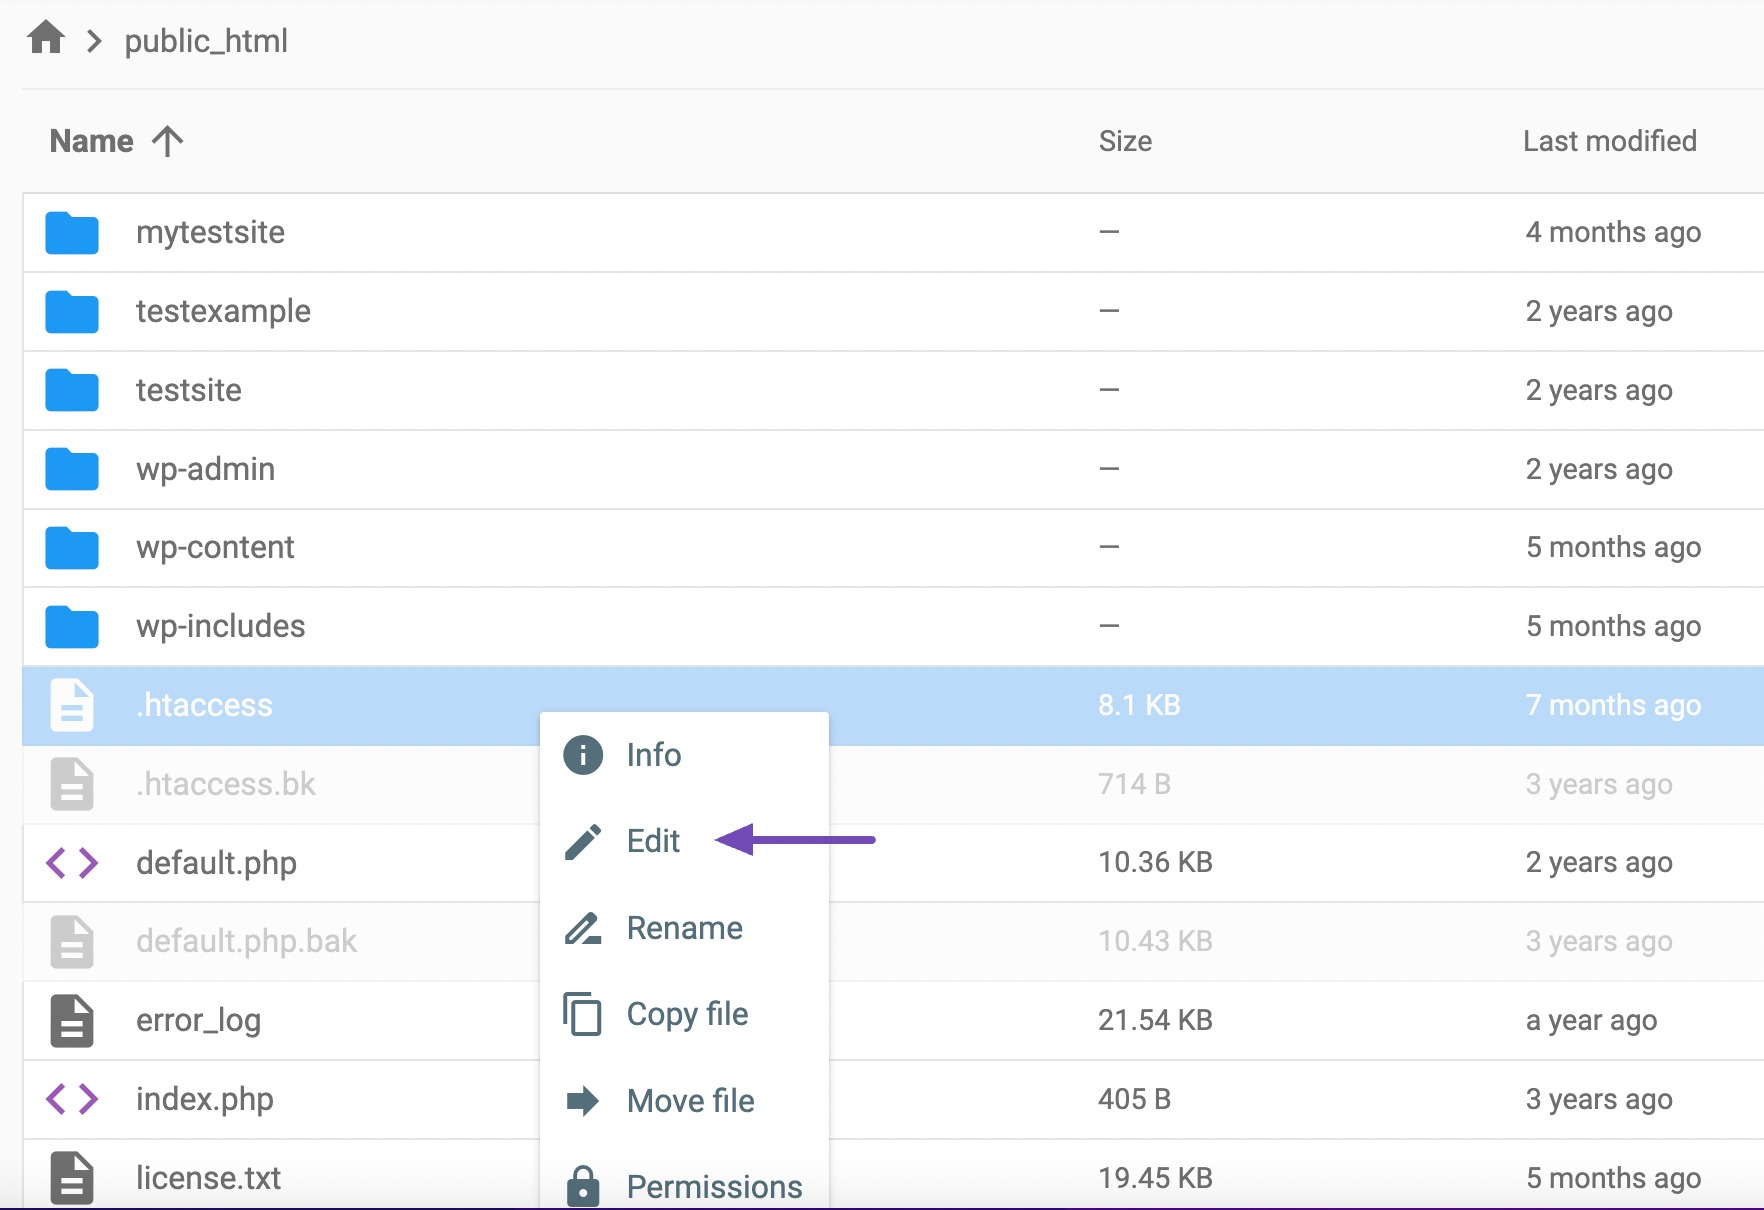
You can edit the wp-config.php file using FileZilla. To do so, connect to your website using FTP and edit the wp-config.php file. You can locate this file under the public_html folder.
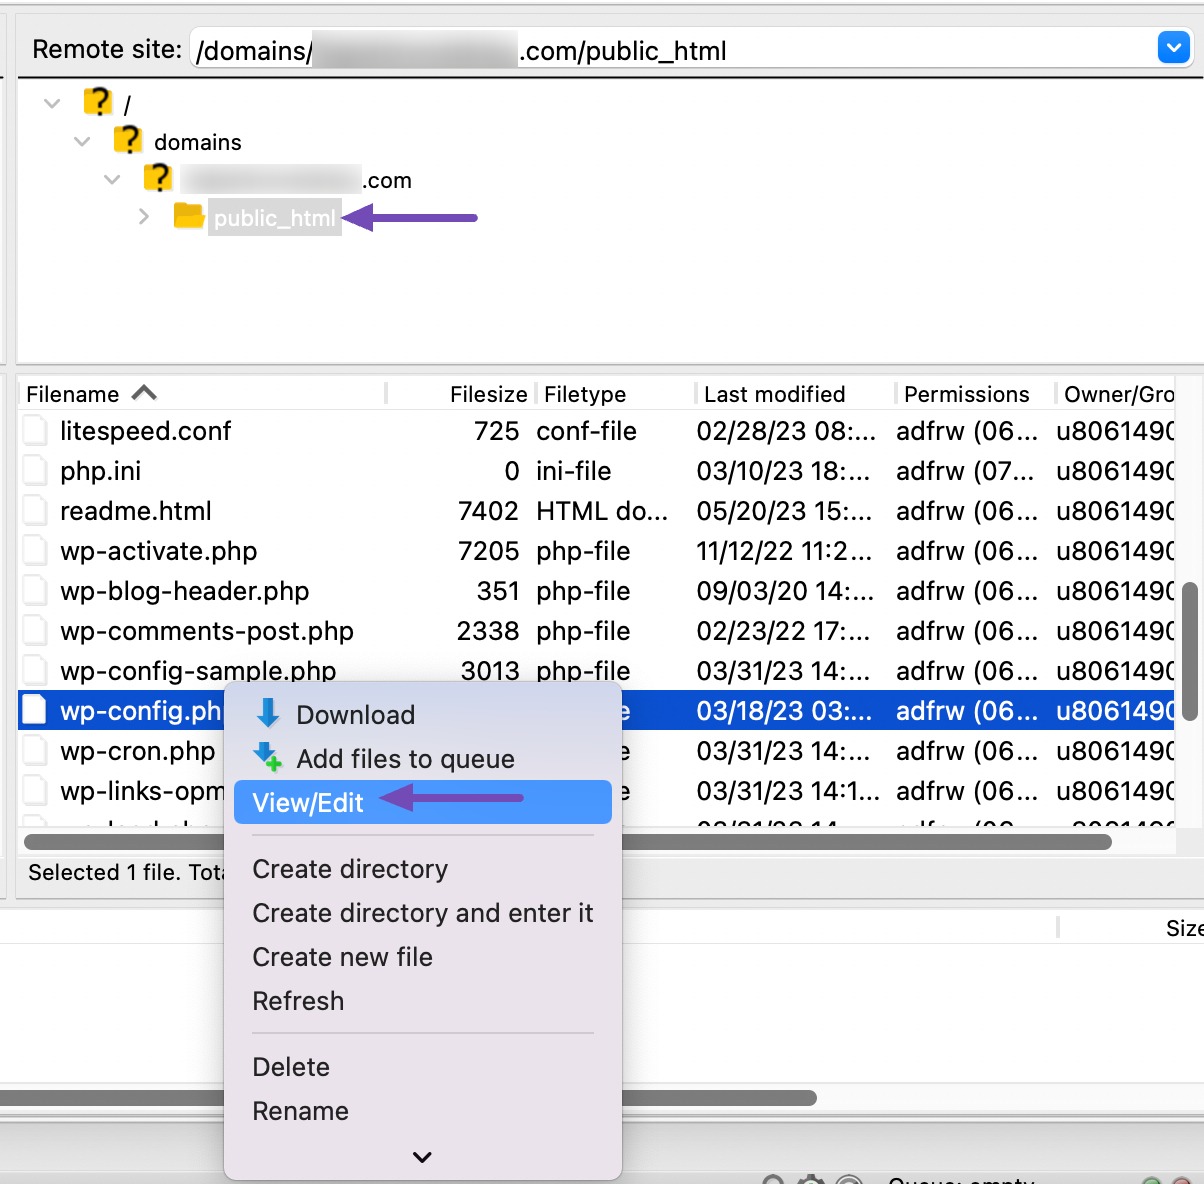
Note: wp-config.php file stores critical information about your website. We recommend taking a backup before making any changes to the file.
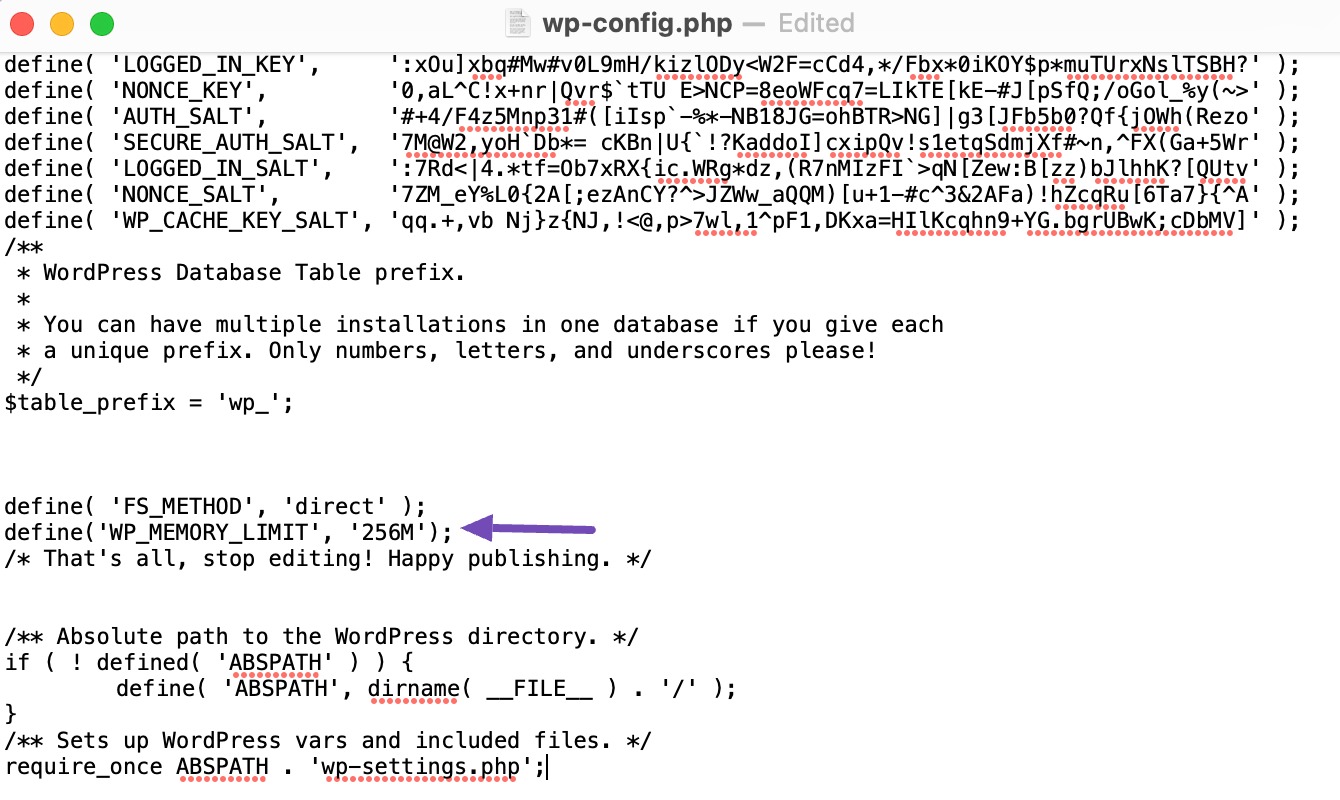
Once you have the backup of the file, right-click on the file and click the View/Edit option to edit the file. Now locate the following line of code:
define('WP_MEMORY_LIMIT', '256M');Please note that the memory size will differ depending on the memory limit that your hosting provider has allocated. You may also not find this line at all.
If you’re able to locate the line, go ahead and increase the number it contains. In most cases, 256 MB should be sufficient. If you don’t find the line, you can paste it before the part of the file reading: “That’s all, stop editing! Happy blogging.”
3.1.2 Using cPanel
If your host provider uses cPanel, you can easily access your site’s wp-config.php file and increase your PHP memory limit.
To do so, log in to your cPanel account and navigate to Files → File Manager. Locate the public_html folder and search for the wp-config.php file.
Right-click and edit the file. Now search for the define( ‘WP_MEMORY_LIMIT’, ’64M’ ) line of code. Again, if you can’t find the line code, add it to your wp-config.php file before the “That’s all, stop editing! Happy publishing.” line, as shown previously.
Increase the value of the PHP memory limit to 265M or 512M. Once done, click on the Save Changes button.
3.2 Modify Your Server Settings via php.ini
The php.ini file is a plain-text configuration file with directives that define how PHP should behave, including settings related to memory usage, file uploads, error handling, and more.
If the above method doesn’t fix the error, you can edit your php.ini file and increase your memory limit via cPanel.
Follow the below steps to fix the WordPress memory limit error by modifying your php.ini file.
Firstly, locate the php.ini file. In most cases, you’ll find the file in the root directory of your website, labeled public_html. If the file does not exist, you can create a blank php.ini file using a plain text editor like notepad, add the below code snippet, and upload it to your website.
memory_limit=256M3.3 Edit Your .htaccess File
Access your .htaccess file via cPanel by navigating to Files → File Manager → public_html. Next, locate the .htaccess file. Right-click on the file and then click on the Edit option.
Now add the following code after the # End WordPress line.
php_value memory_limit 256M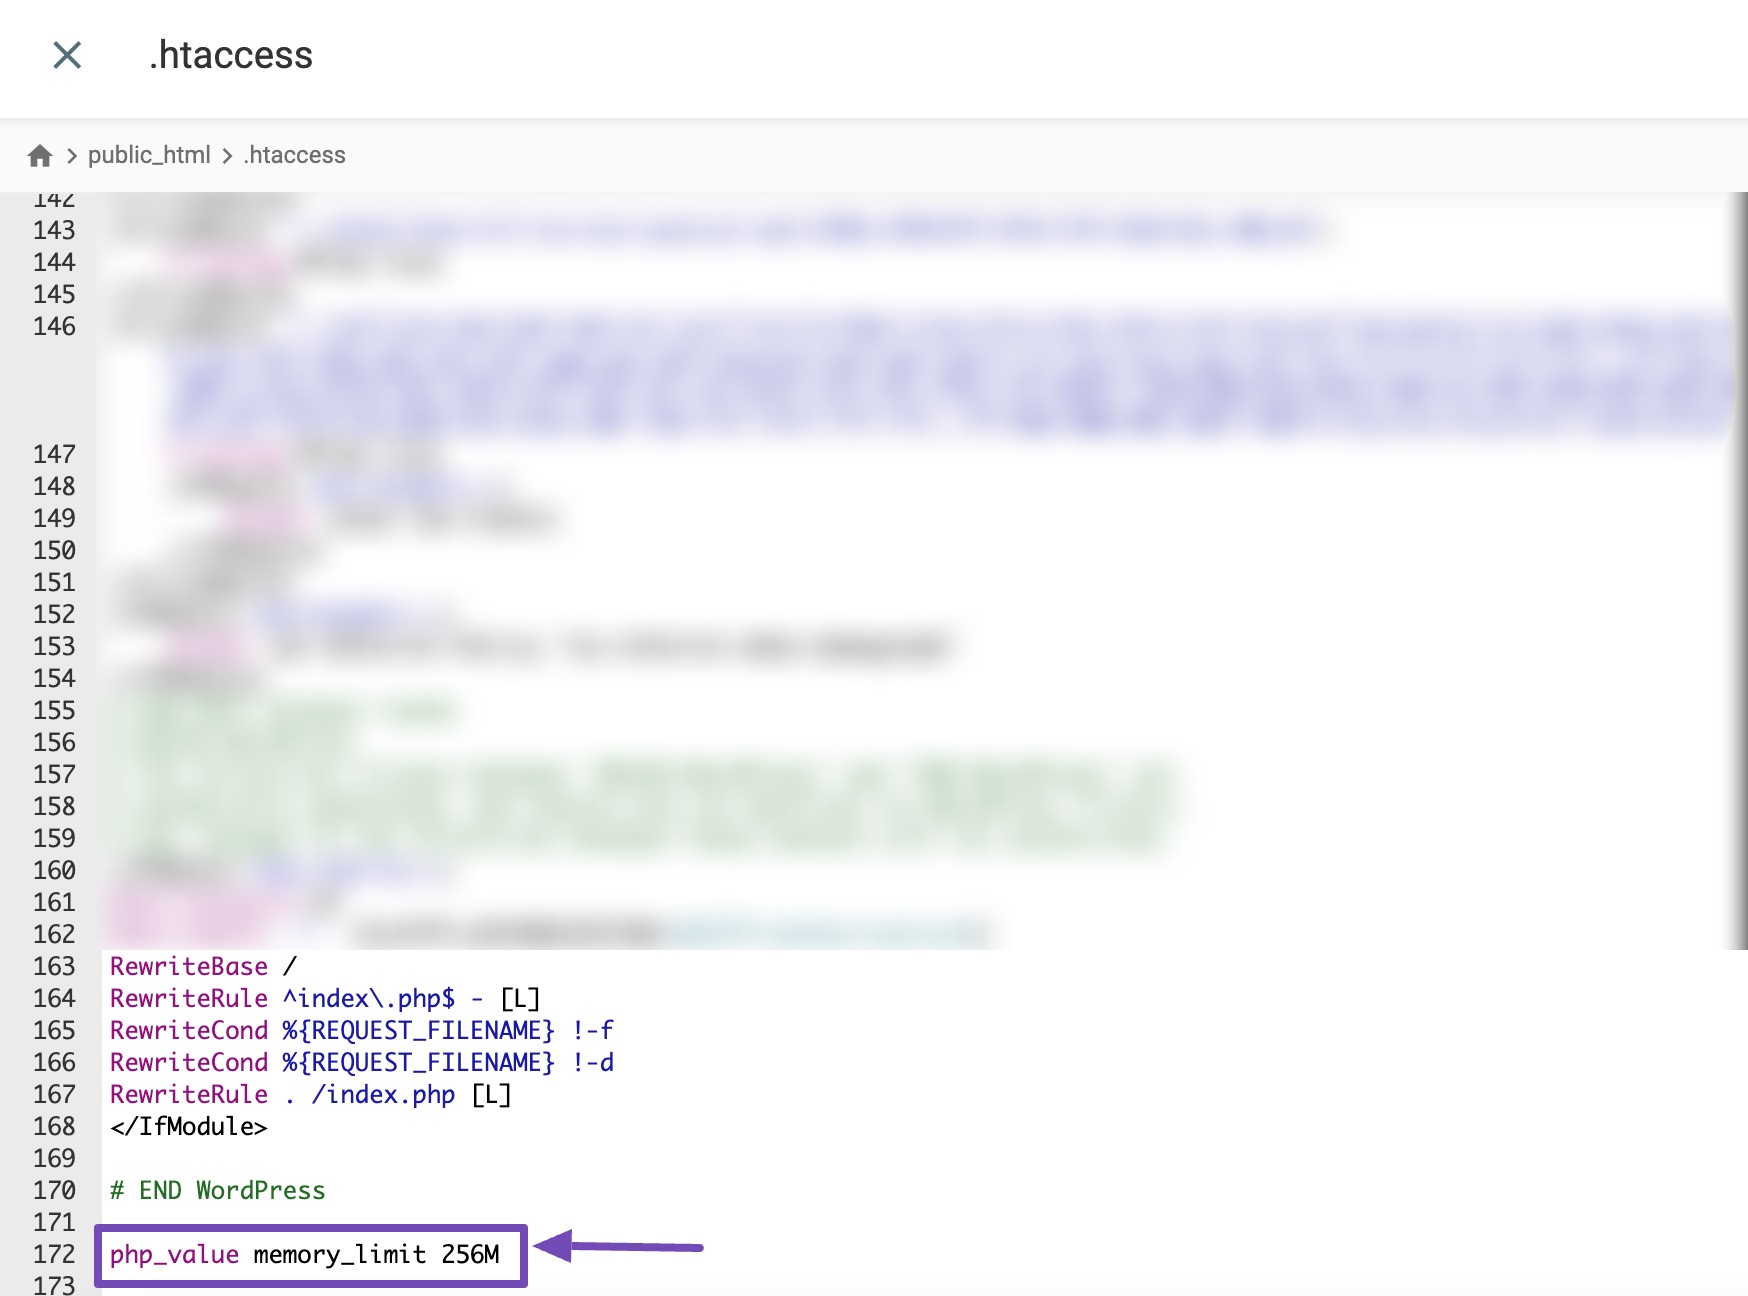
This will increase your PHP memory limit to 256M and fix the error.
3.4 Upgrade Your Hosting Plan
If you’ve tried increasing your memory limit and you’re still seeing the error, your current hosting plan might be the problem.
Most hosting plans come with fixed resource limits, including how much memory your site can use. As your website grows, especially if you’re adding more plugins, media, or traffic, it can outgrow these limits.
This issue is most common with shared hosting, where your site shares server resources with many others. In these setups, hosting providers often restrict how much memory each site can access to keep things fair.
To resolve the memory exhausted error and improve your site’s overall performance, consider upgrading your hosting plan. Moving to a VPS (Virtual Private Server) or cloud hosting solution usually gives you more dedicated resources, including higher memory limits.
It’s a bigger step, but if your site is growing, it might be exactly what you need.
4 Conclusion
The WordPress memory limit error can be frustrating, especially if you’re new to WordPress. The best part is that it is one of the simplest to resolve, even for less technically savvy WordPress users.
To fix the error, you need to increase your memory limit, which you can do by editing your wp-config.php file, upgrading your hosting plan, or modifying your server settings using the PHP.ini file, just as we’ve explained above.
Just remember: always back up your configuration files (wp-config.php, php.ini, and .htaccess) before making any changes. That way, if anything goes wrong, you can quickly restore your site to its previous state.
Did any of these methods help resolve your issue? Let us know by Tweeting @rankmathseo.