Affiliate links are essential for earning commissions through partnerships, but tracking their performance is just as important. It helps you identify which links drive the most clicks, allowing you to optimize your strategy and boost revenue.
In this knowledge base article, we’ll cover how to set up and track affiliate link clicks on your website using Google Analytics 4 (GA4). By the end, you’ll have a reliable system to monitor your affiliate links and gain valuable insights.
1 Connect to Google Analytics
To track affiliate link clicks, first connect your site to Google Analytics. Without this connection, monitoring performance won’t be possible.
With the Rank Math SEO plugin, you can connect effortlessly—no need for coding. Simply follow our guide on connecting your site to Google Analytics using Rank Math.
After connecting, enable the Install Analytics Code option in Rank Math Analytics settings, as shown below.
2 Enable Outbound Clicks in GA4
Next, enable Outbound Clicks under Enhanced Measurement to track external link clicks, including affiliate links.
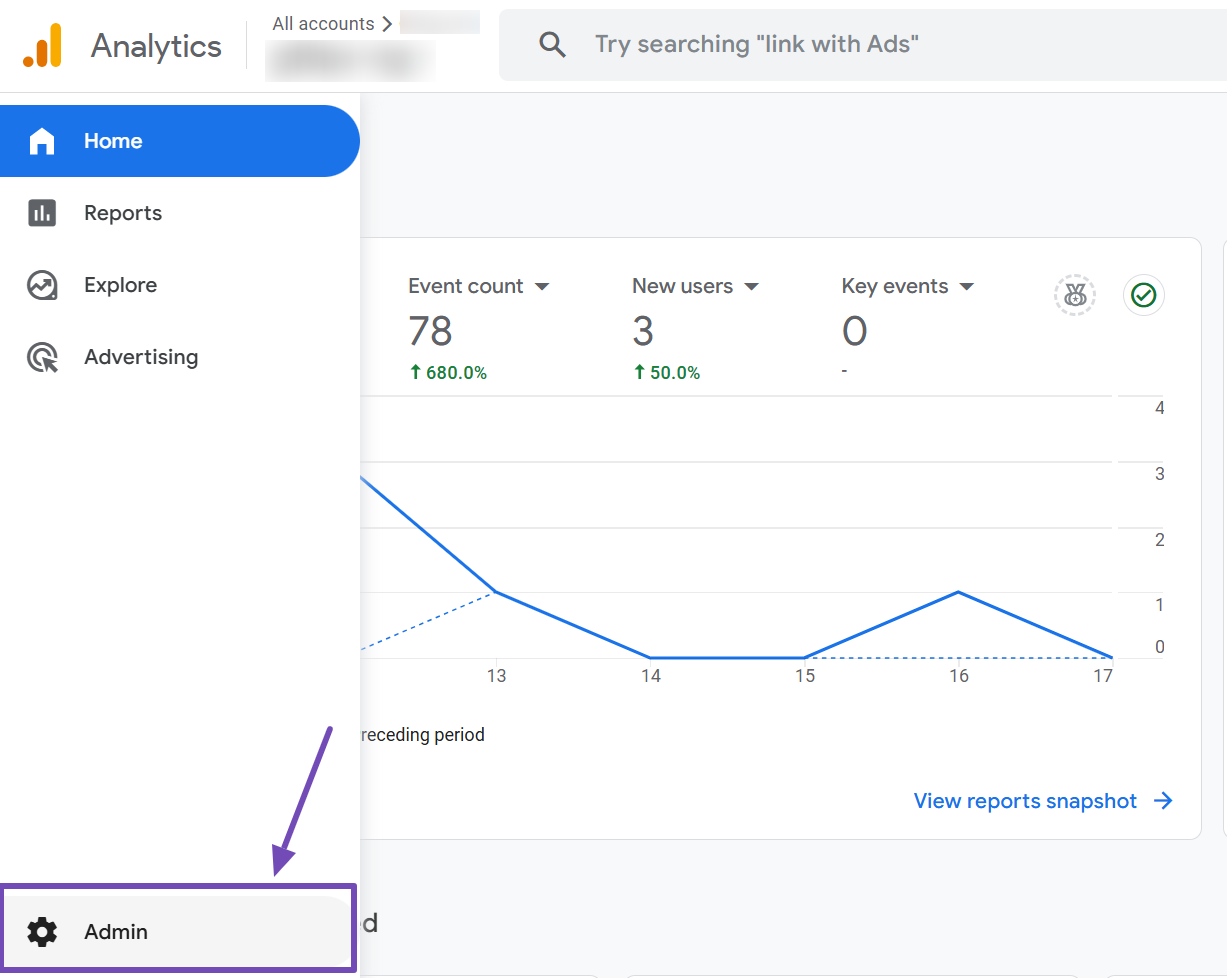
To do this, log in to your Google Analytics account. From the left-hand menu, navigate to the Admin section.
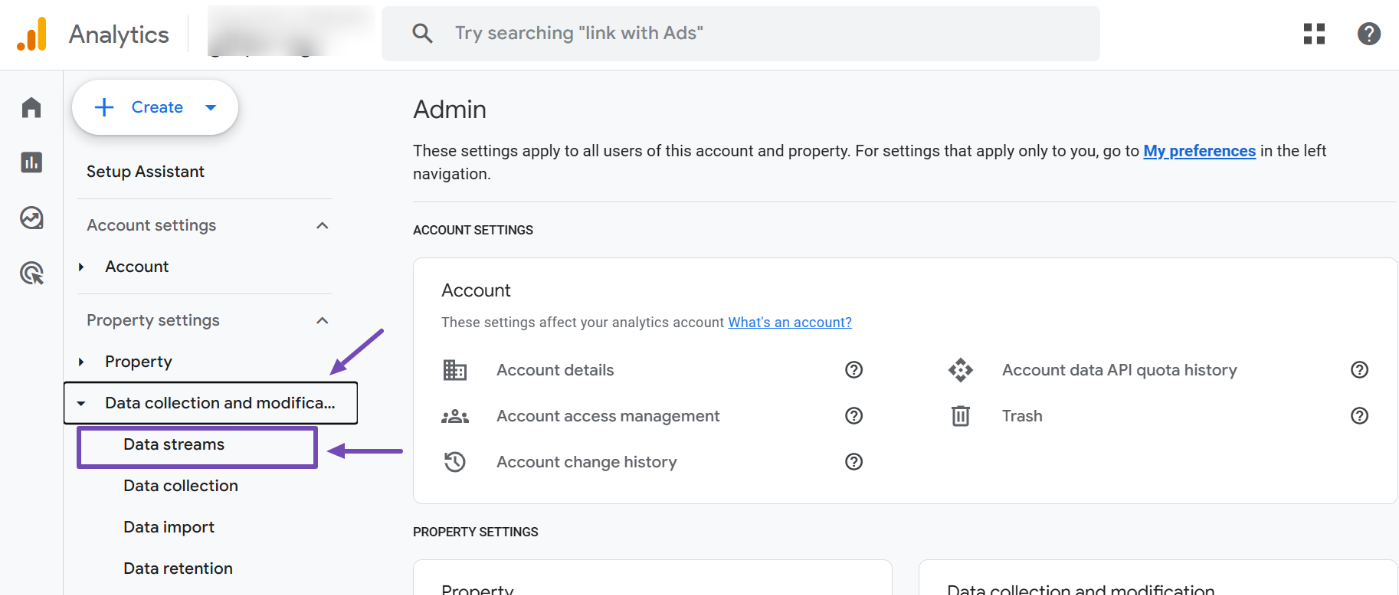
Locate the Property Settings and find the Data Collection and Modification section. Under this, click on Data Streams to proceed.
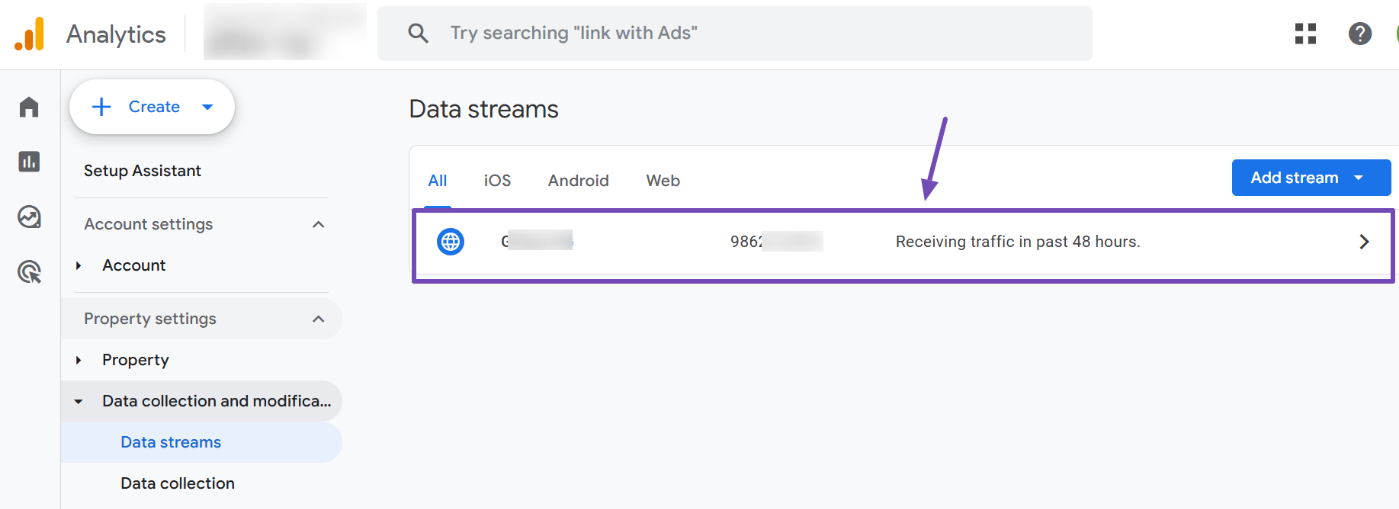
On the Data Streams page, select the stream linked to your website. This will open your site’s data stream details on the right-hand side of the screen.
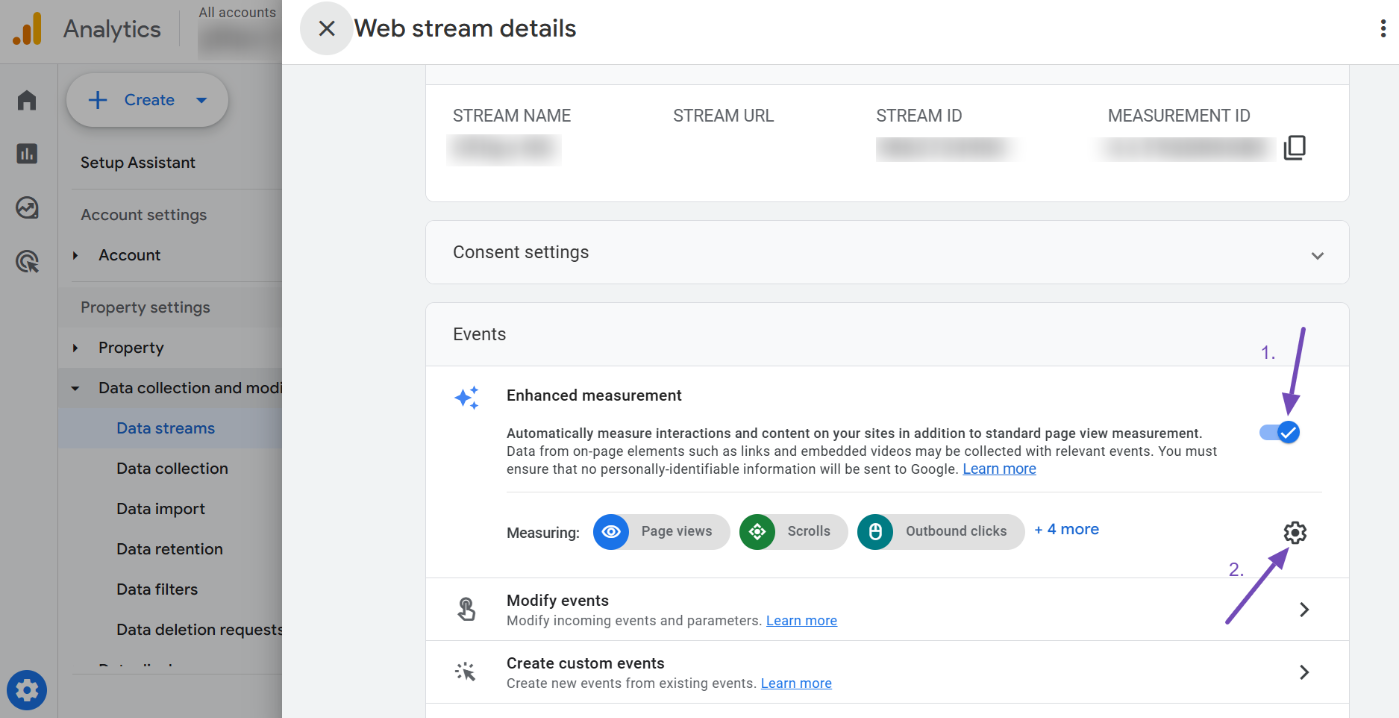
Scroll through the data stream settings until you find the Enhanced Measurement section. Ensure that the toggle for Enhanced Measurement is enabled. Next, click the settings icon to explore additional configuration options, as shown below.
Within these settings, you will see several pre-enabled toggles for tracking different interactions. Locate the Outbound Clicks option. This ensures that Google Analytics tracks clicks, taking users off your site.
Double-check that the Outbound Clicks toggle is switched on. When everything is set, click Save to confirm your changes.

With the Outbound Clicks option enabled, Google Analytics will now track affiliate link clicks on your site. Since affiliate links typically lead to external domains, this feature automatically captures those clicks along with any others that direct users away from your site.
3 Set Up a Custom Event in GA4 for Link Clicks
Now you’ve set up Google Analytics to track your website’s outbound clicks, it’s time to create a custom event specifically for affiliate link clicks. This ensures you can track affiliate clicks separately from other outbound clicks, giving you cleaner and more actionable data.
To do this, navigate to Admin → Events in your GA4 account.
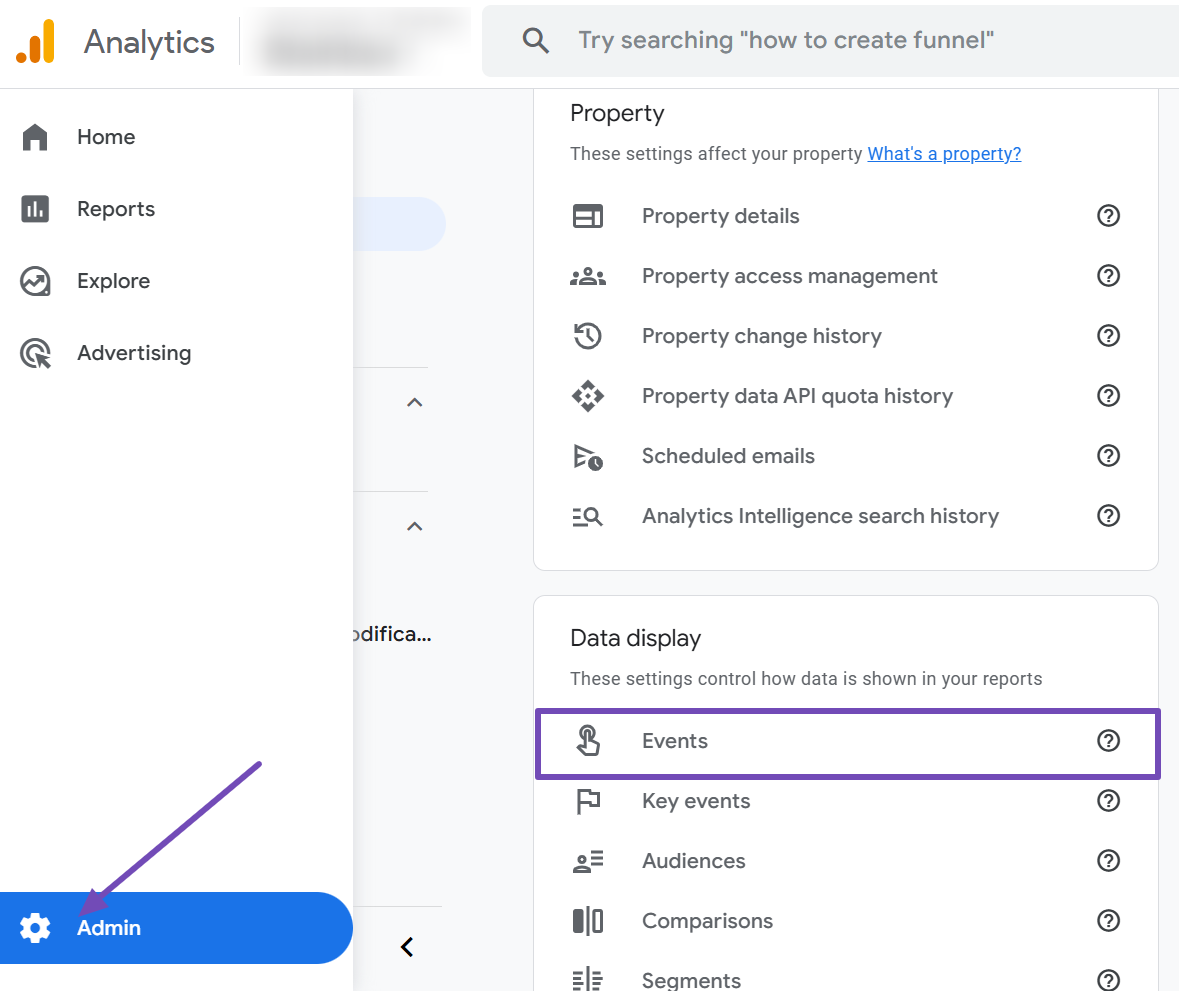
On the Events page, select the Create Event button, as shown below.
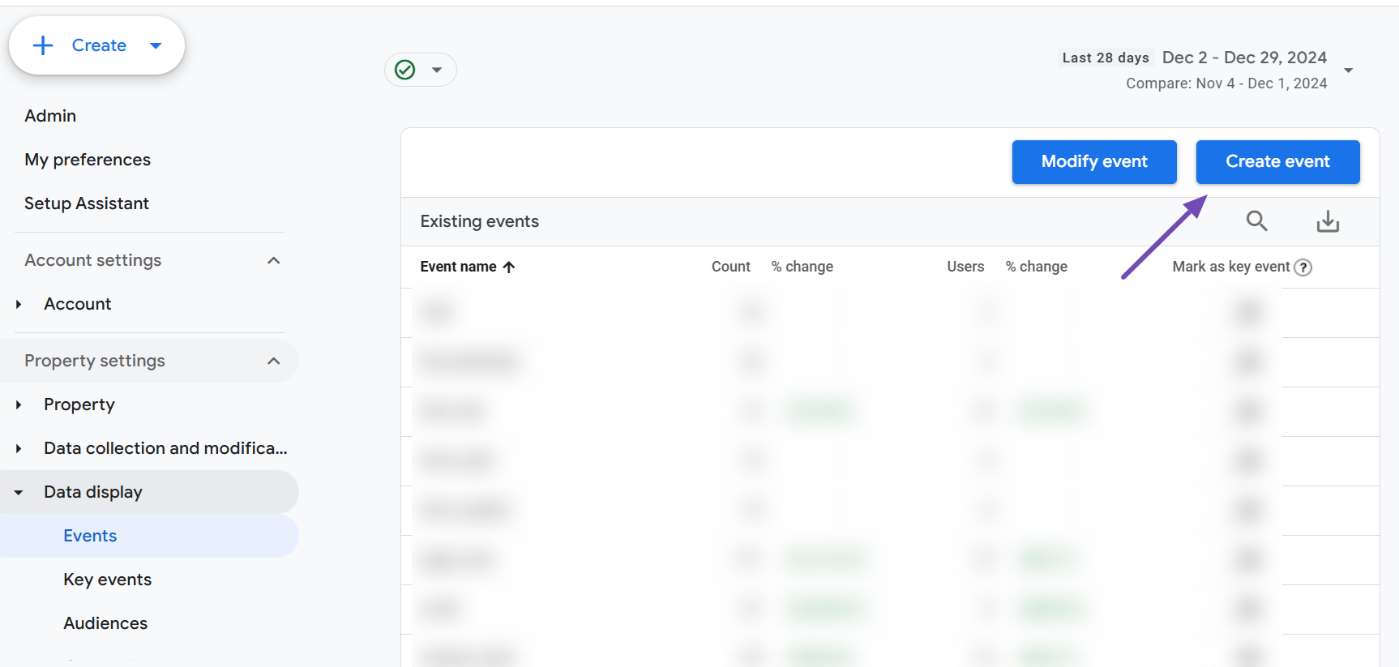
Next, click the Create button to start building your custom event.
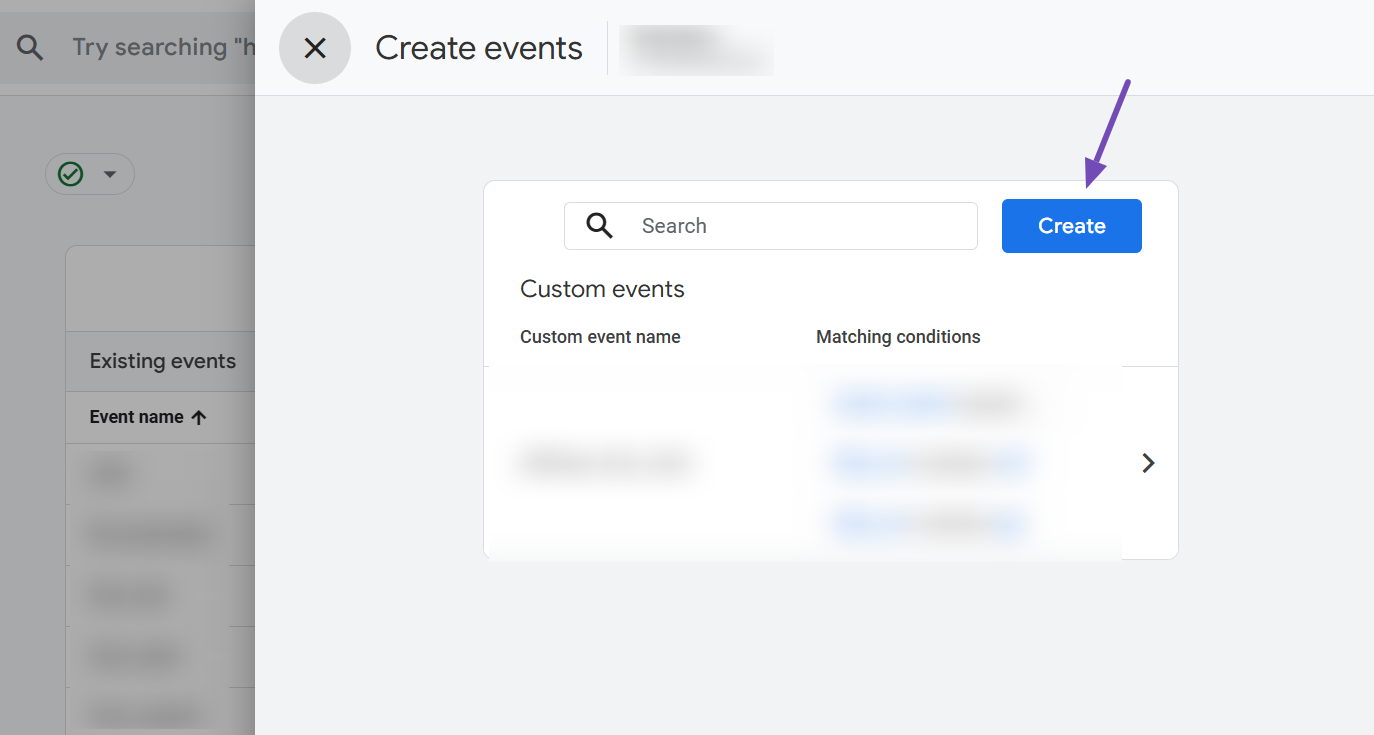
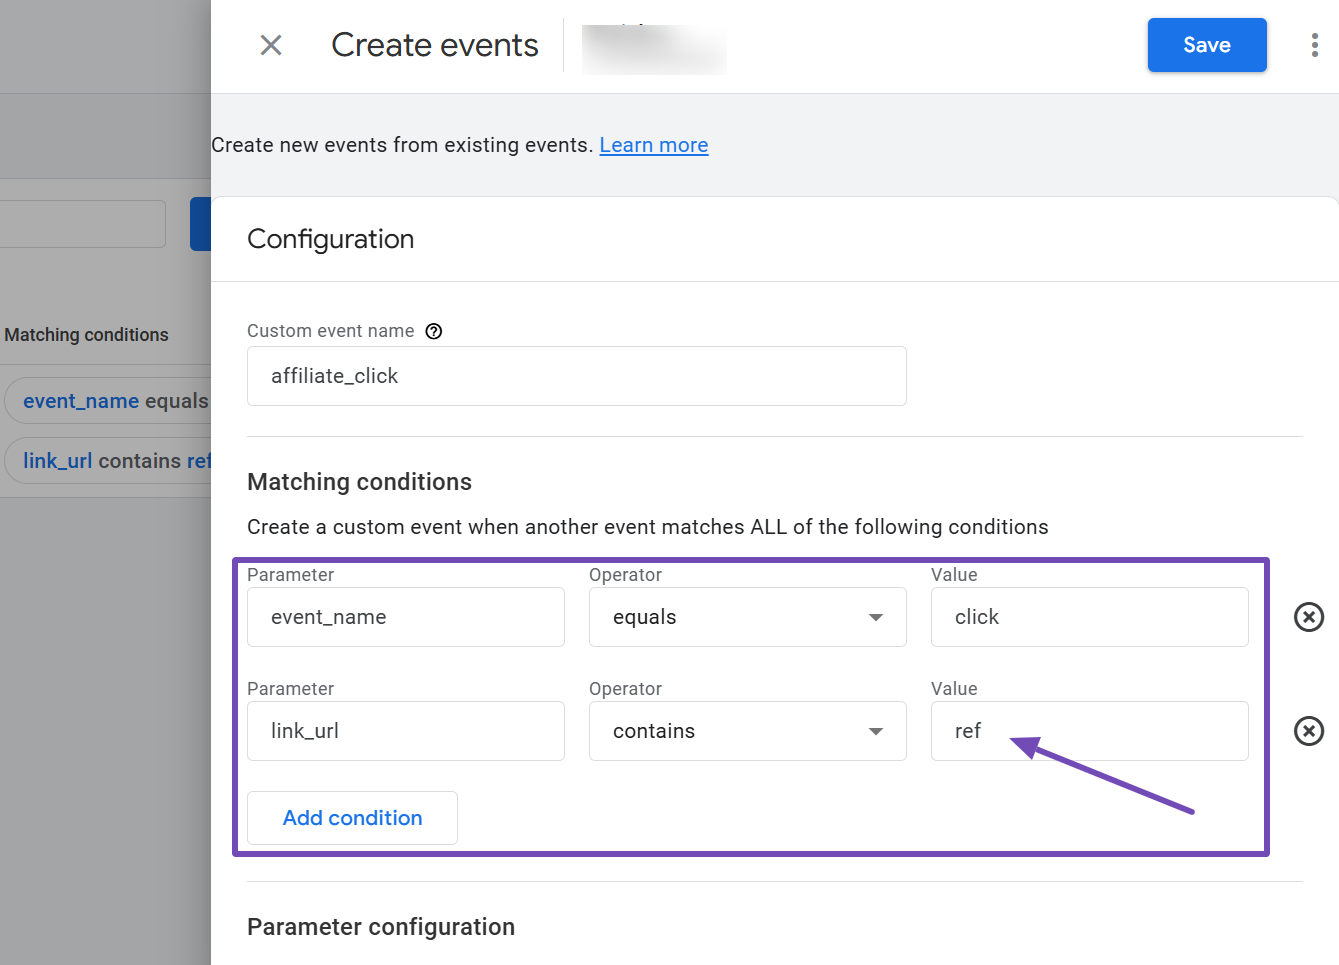
Begin by naming your new event, for example, affiliate_click, and setting up conditions for when this event should fire.
Since GA4 already tracks outbound clicks as click events, set the first condition to have event_name as the Parameter, with the Operator set to equals, and the Value as click.
This initial setting will capture all outbound clicks, but to refine it for affiliate links, you’ll need to add a second condition.
For the second condition, use link_url as the parameter, set the operator to contains, and enter a keyword associated with your affiliate URLs, such as a domain name or a specific prefix like ref.
For example, if you’re a Rank Math affiliate and your affiliate URLs include a domain like rankmath.com, you can use that as the value. Alternatively, if your URLs have a common prefix, you can use that instead, such as ref.
If you’re working with multiple domains or prefixes, use a regular expression to combine them. Switch the operator to matches regular expression (ignore case), and in the Value field, enter the domains or prefixes separated by the pipe operator (|).
For example, you could enter rankmath.com|amazon.com for multiple domains or ref|aff|go|affiliate for common prefixes.
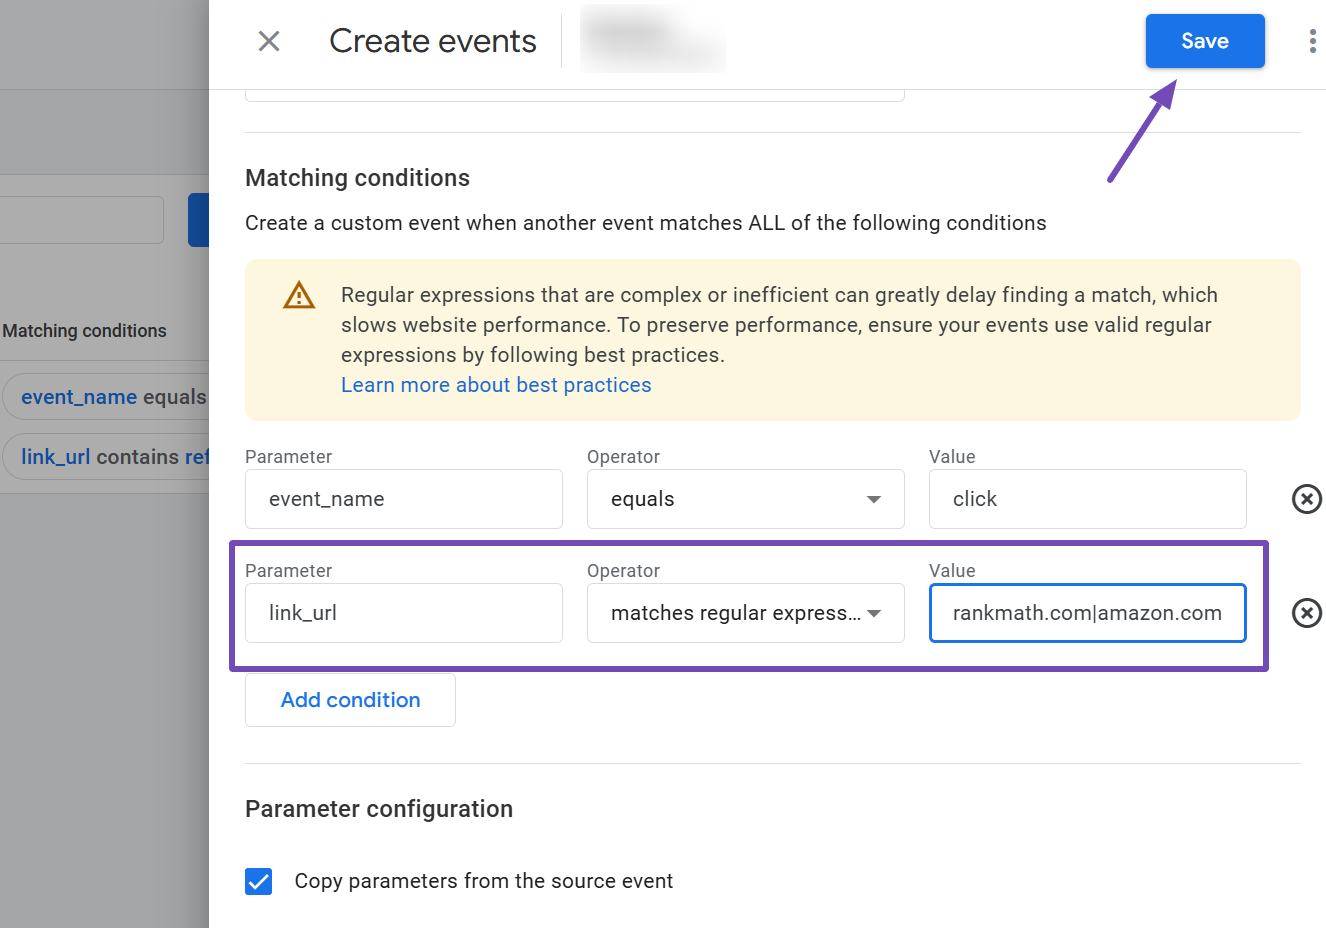
After configuring your conditions, click Create to save the event.
Congratulations! You’ve successfully set up a custom event in GA4 to track affiliate link clicks on your website. This custom event will now help you monitor affiliate link performance more accurately without mixing it with other outbound click data.
5 Test to See the Affiliate Link Click Data in GA4
Now that everything is set up, it’s time to test and create a report that displays only the affiliate links clicked on your website. For this, you’ll use the Explorations feature in GA4.
Keep in mind that you’ll only start seeing these reports after at least 24 hours of setting up affiliate link tracking in Google Analytics. If your website has little to no traffic, you might need to click on the affiliate links yourself to test the tracking.
5.1 Viewing Affiliate Link Click Data
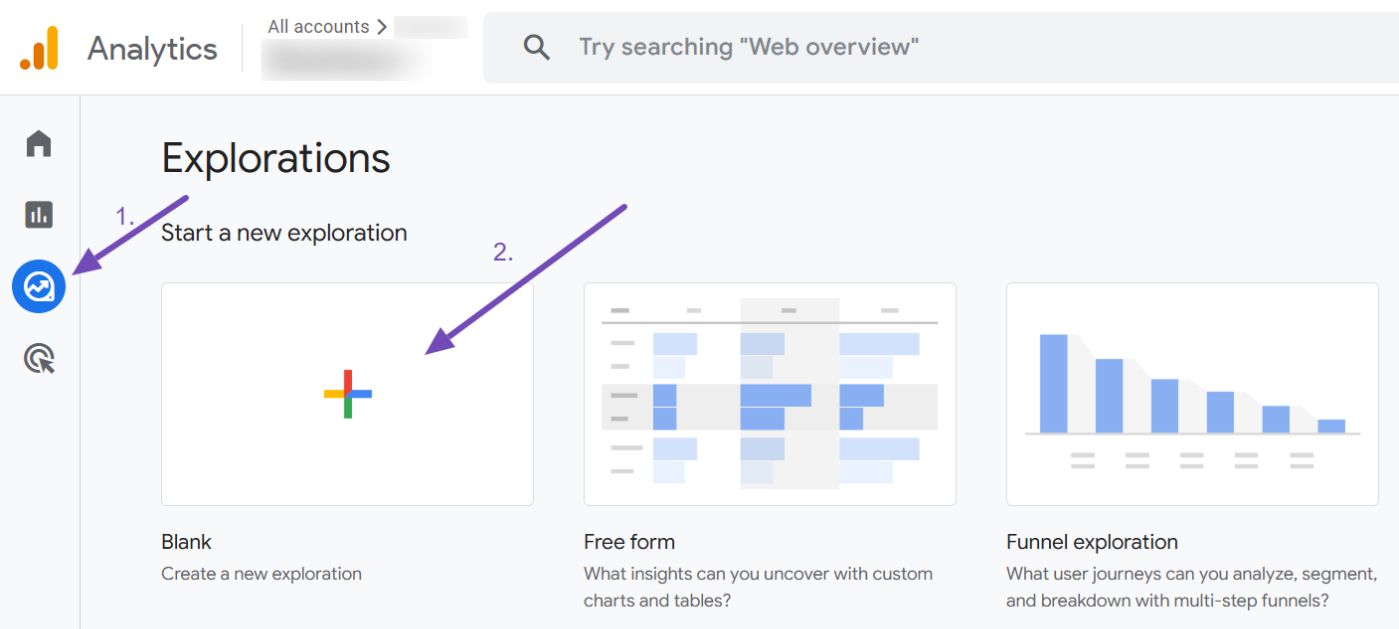
Once the 24-hour wait is over, navigate to the Explore section in GA4’s left-hand menu and select the Blank Exploration option, as shown below.
5.2 Adding Dimensions
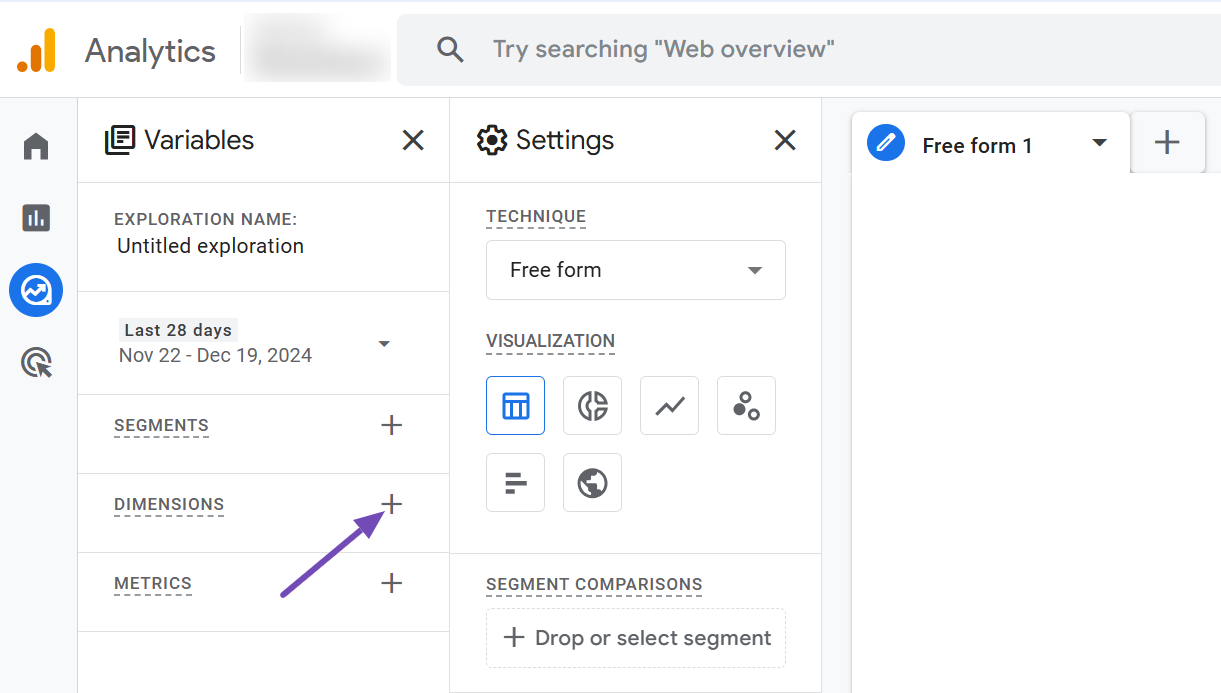
In your blank exploration, the first step is to add the necessary dimensions. Click the + icon next to the DIMENSIONS section. This opens a side panel where you can select dimensions for your report.
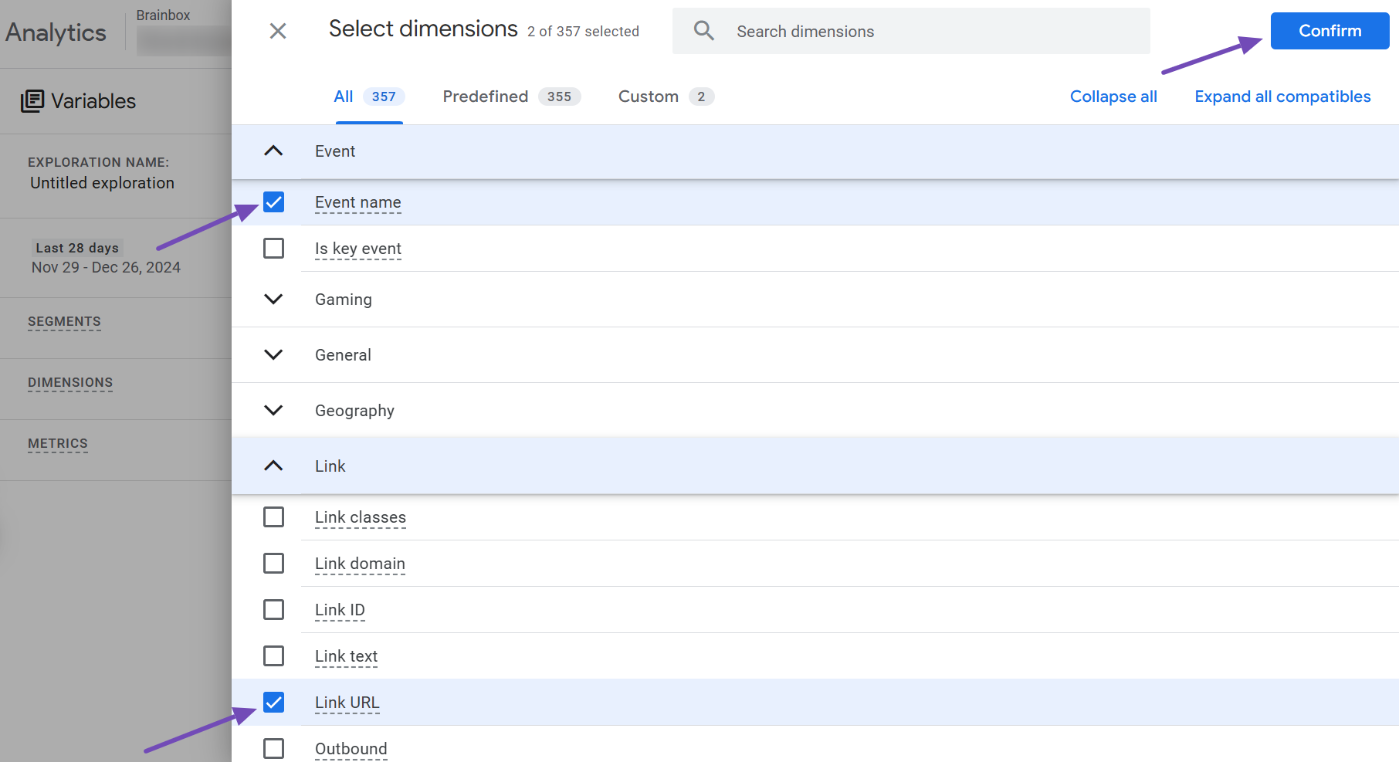
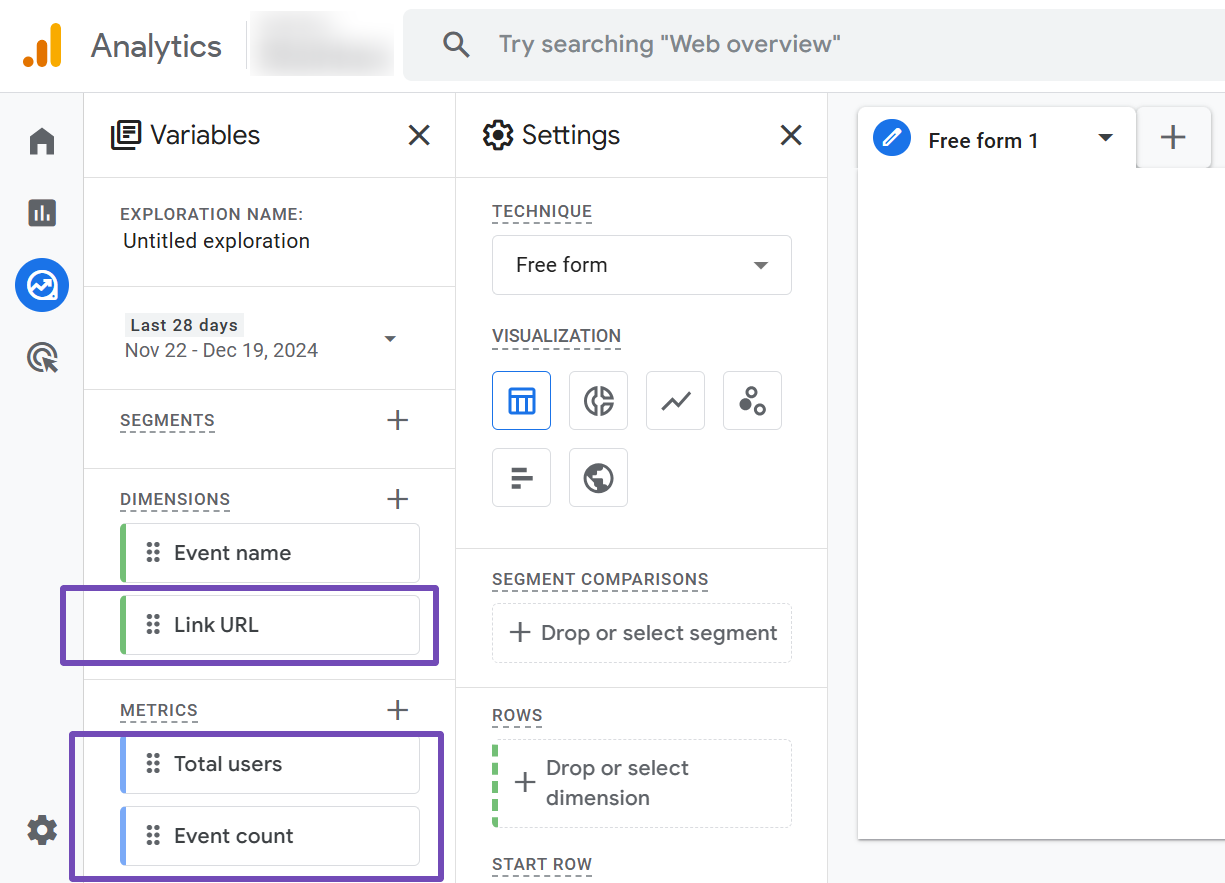
From the panel, select Event Name (under Event) and Link URL (under Link). Once selected, click Confirm to import them into the report, as illustrated below.
5.3 Adding Metrics
Next, click the + icon in the METRICS section and add the relevant metrics for your report.
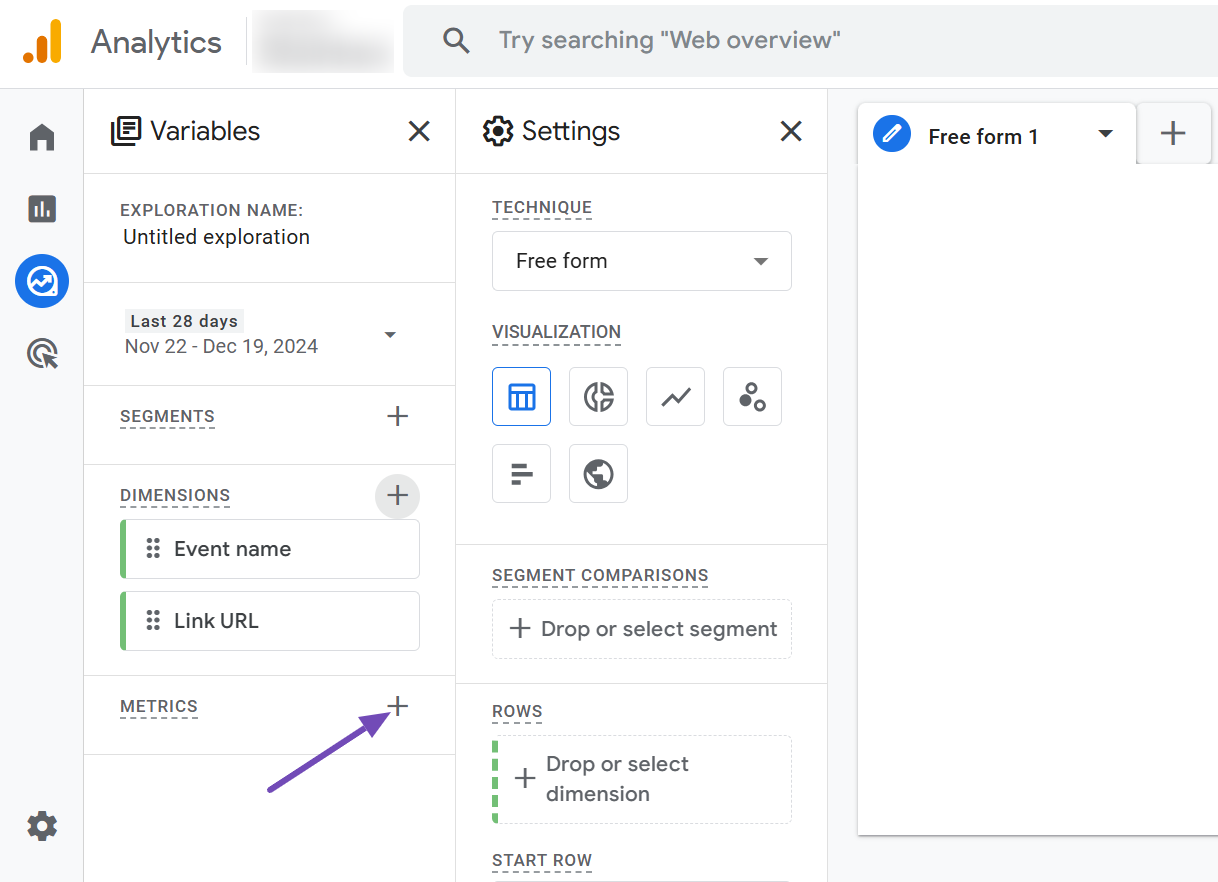
Choose Event count (under Event).
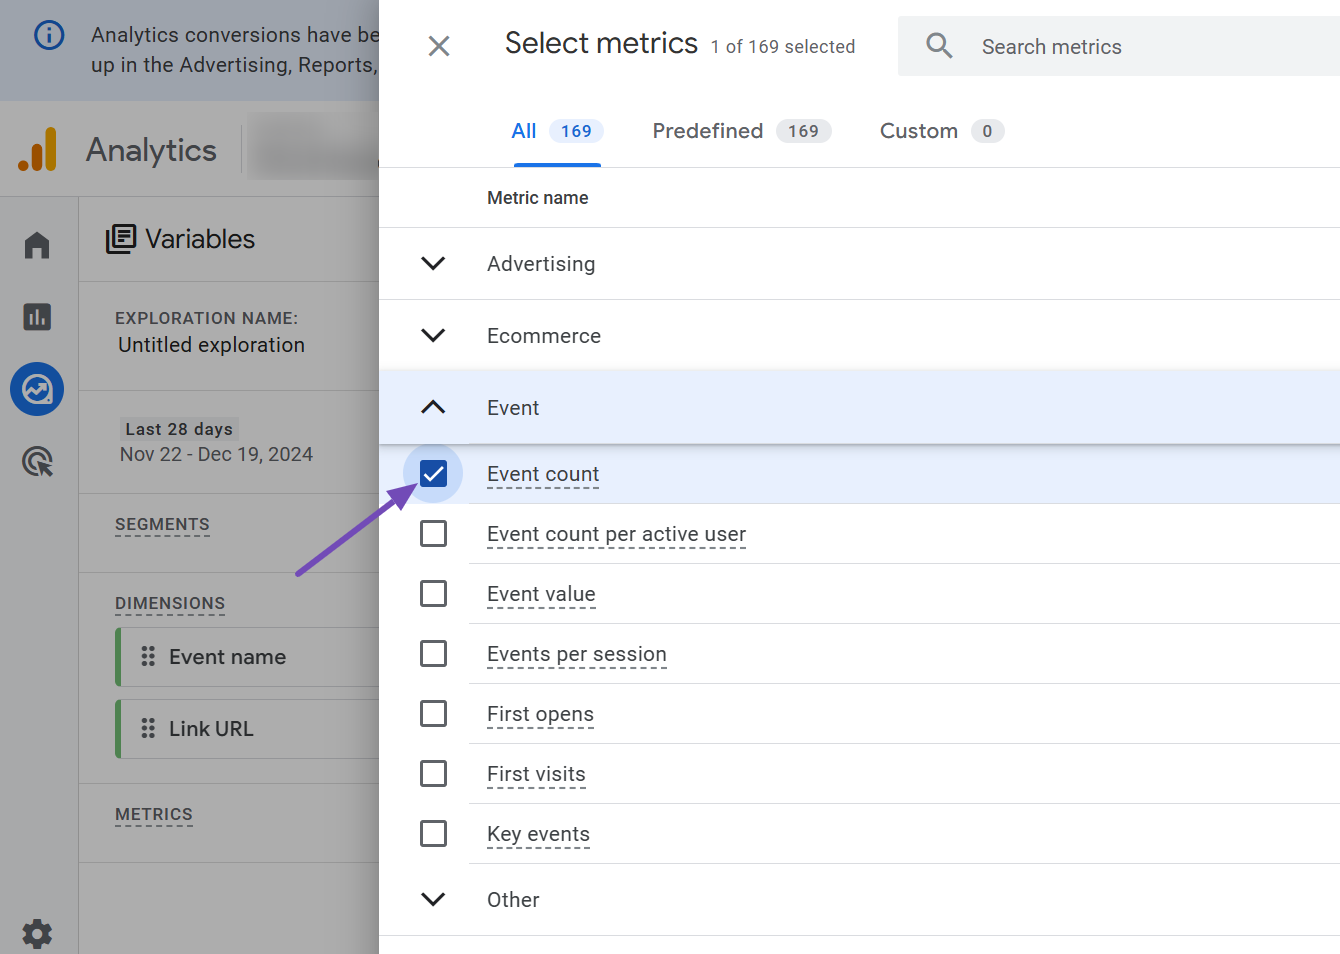
Then, Total users (under User). After selecting these, click Confirm to include them in your report.

5.4 Building Your Report
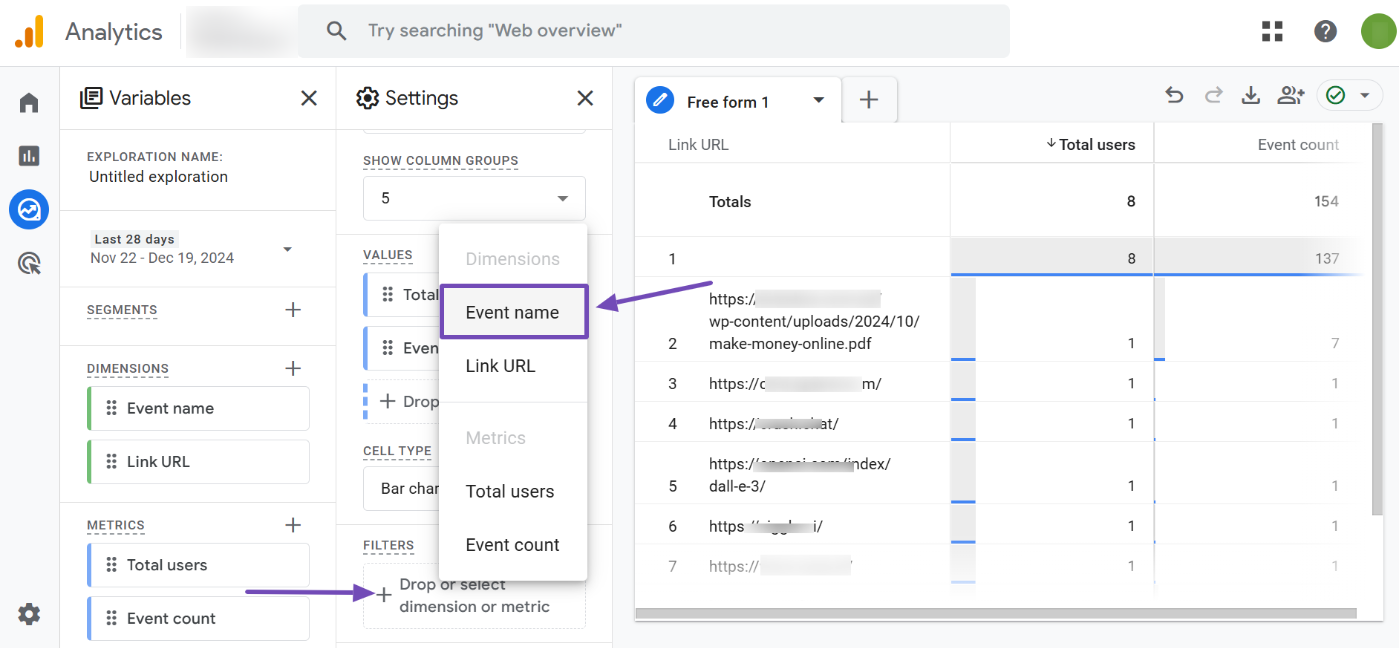
Now, double-click on the Link URL dimension, as well as the Event Count and Total Users metrics, to add them to your report workspace.
You’ll see a table displaying a mix of all file download links and outbound links clicked by users on your site. You might notice the first row of the table is empty.
This happens because your current report shows data for all events on your site, not just the affiliate link clicks. To narrow it down to focus specifically on clicked affiliate links, you’ll need to refine the report.
5.5 Refining the Report with Filters
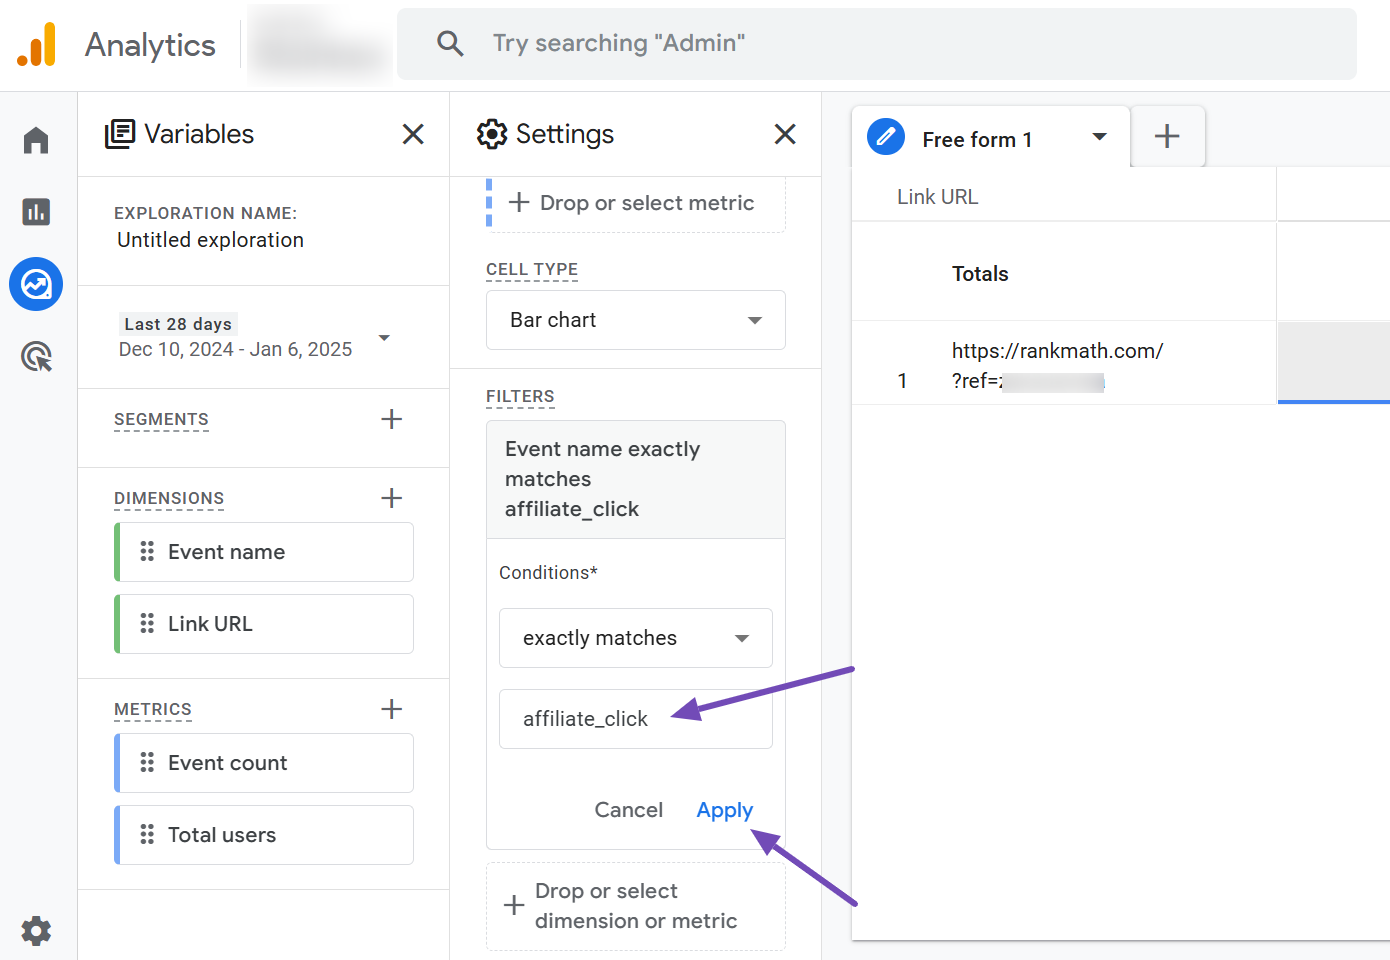
Locate the FILTERS section in the Settings tab. Click on the Drop or select dimension or metric field. From the dropdown, select Event Name.
Once added, adjust the filter condition by selecting exactly matches from the match type dropdown.

Then, add affiliate_click in the expression field, as shown below. Click Apply to save your filter settings.
5.6 Viewing Affiliate Link Clicks
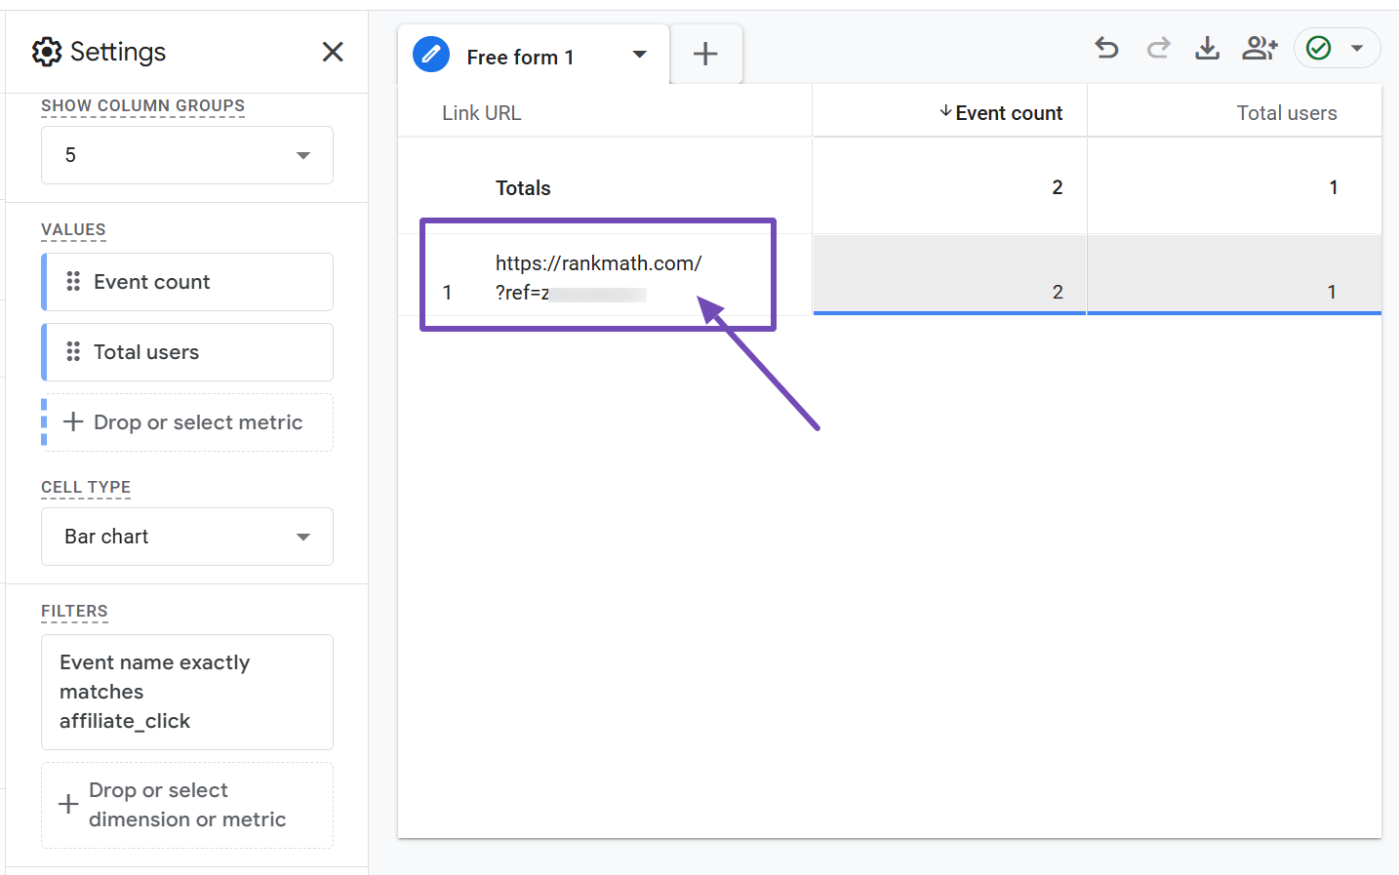
With the filter applied, your report will now display only the affiliate links users clicked on your website.
5.7 Seeing Pages the Affiliate Links Were Clicked
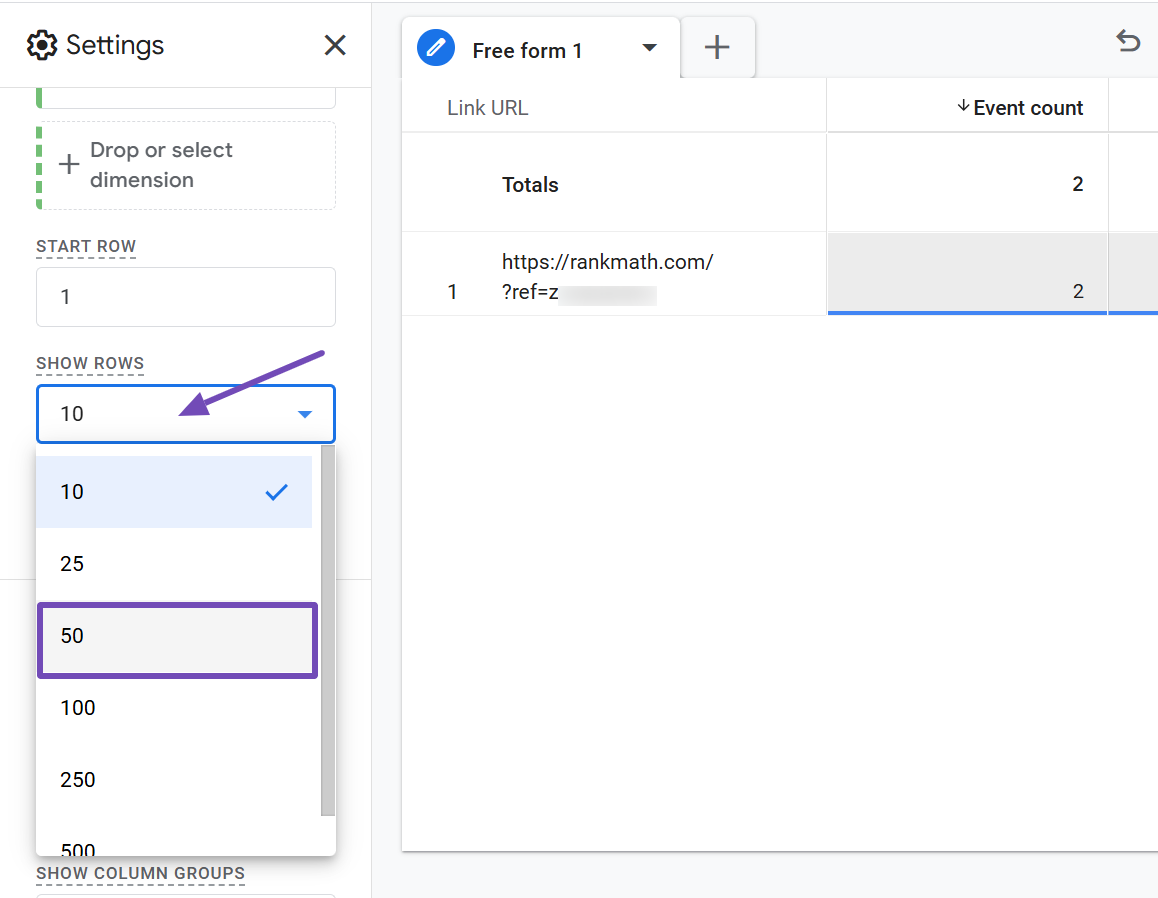
If you want to view the pages where the affiliate links were clicked, you can add Page Location as one of the dimensions. Double-click it to add it to the report workspace.
If the report is smaller, you can adjust the rows to 50 or more from the SHOW ROWS section.
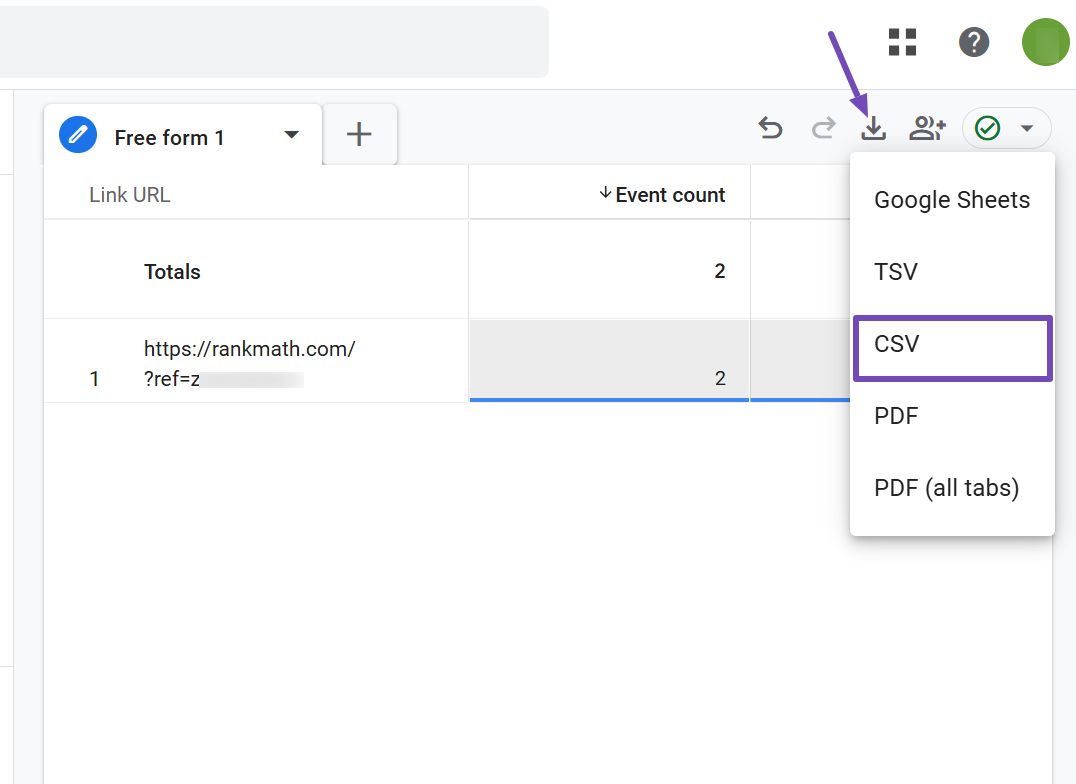
Over time, the report may feel cluttered due to affiliate and page links being displayed together. In such cases, you can export the report as a CSV file for easier viewing. To do this, click on the download icon at the top-right corner of the report and select CSV from the options, as shown below.
And that’s it! We hope this guide helped you track the affiliate links users clicked on your website. If you have any further doubts or need assistance with Rank Math, don’t hesitate to reach out to our support team—they’re always available and willing to help.