Orphan pages (or posts) are webpages that have no internal links pointing to them. In other words, no other pages on your site link to them.
This makes orphan pages difficult for search engines to discover, which can prevent them from being properly crawled, indexed, or displayed in search results. To prevent this, you should identify orphan pages and add relevant internal links pointing to them.
In this guide, we will show you how to detect orphan pages using the orphan posts filter and fix them using the keyword maps, all within AI Link Genius.
How to Fix Orphan Pages:
1 Head to the Orphan Posts Tab
To get started, click Rank Math SEO from your WordPress dashboard. Once done, enable Link Genius, as shown below.
Note: AI Link Genius is available exclusively in Rank Math PRO. If you haven’t installed Rank Math PRO yet, you can get a subscription of your choice from here.
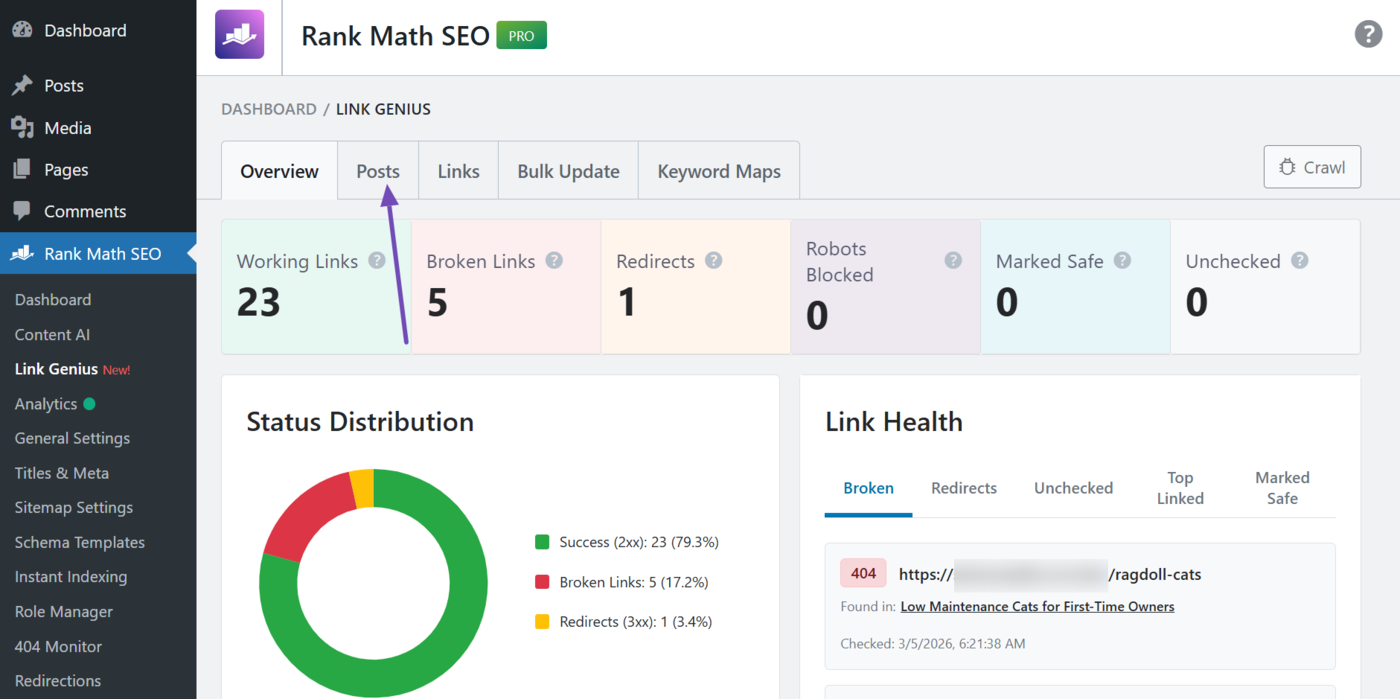
Now, head to Rank Math SEO → Link Genius, as shown below.
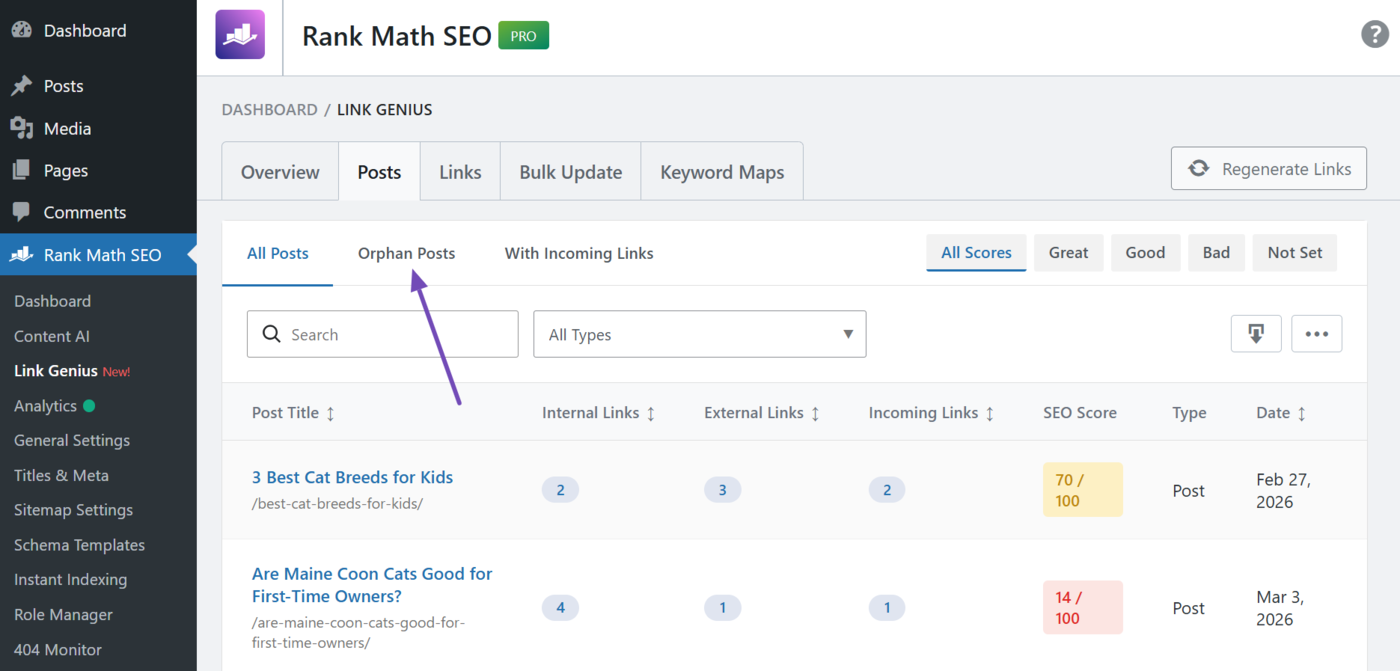
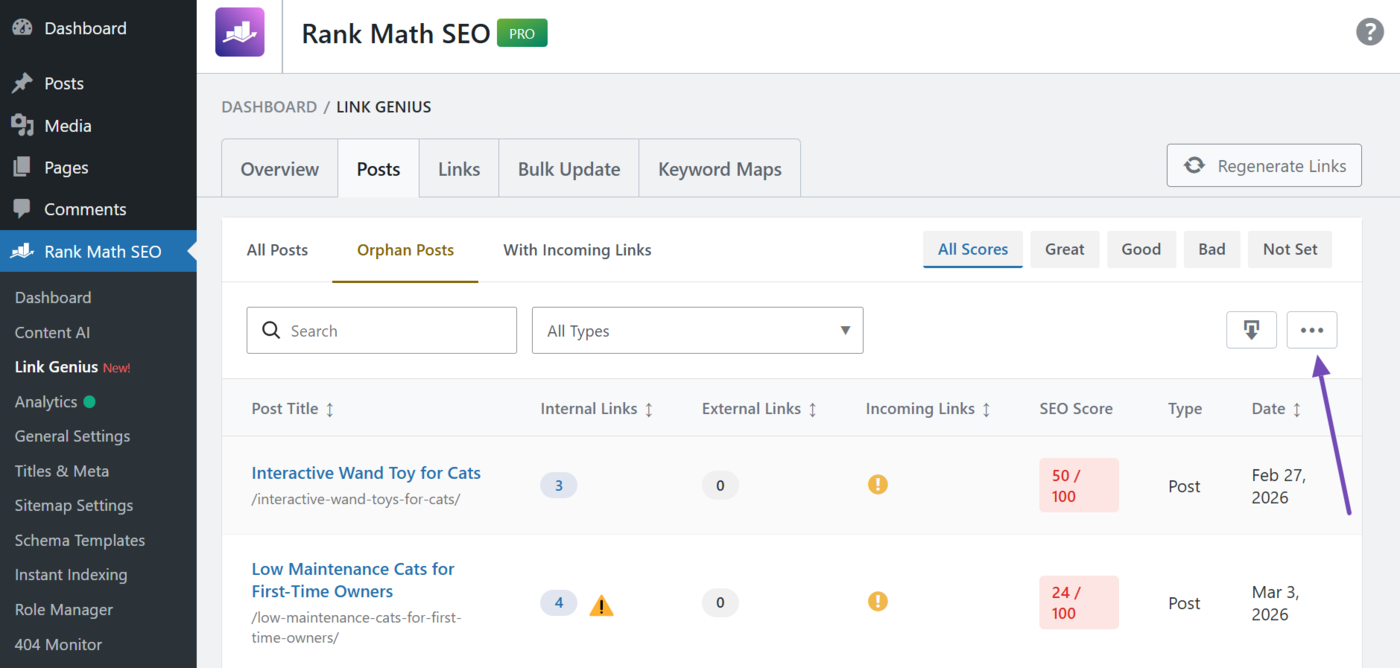
Then, click Posts.
Then, click Orphan posts.
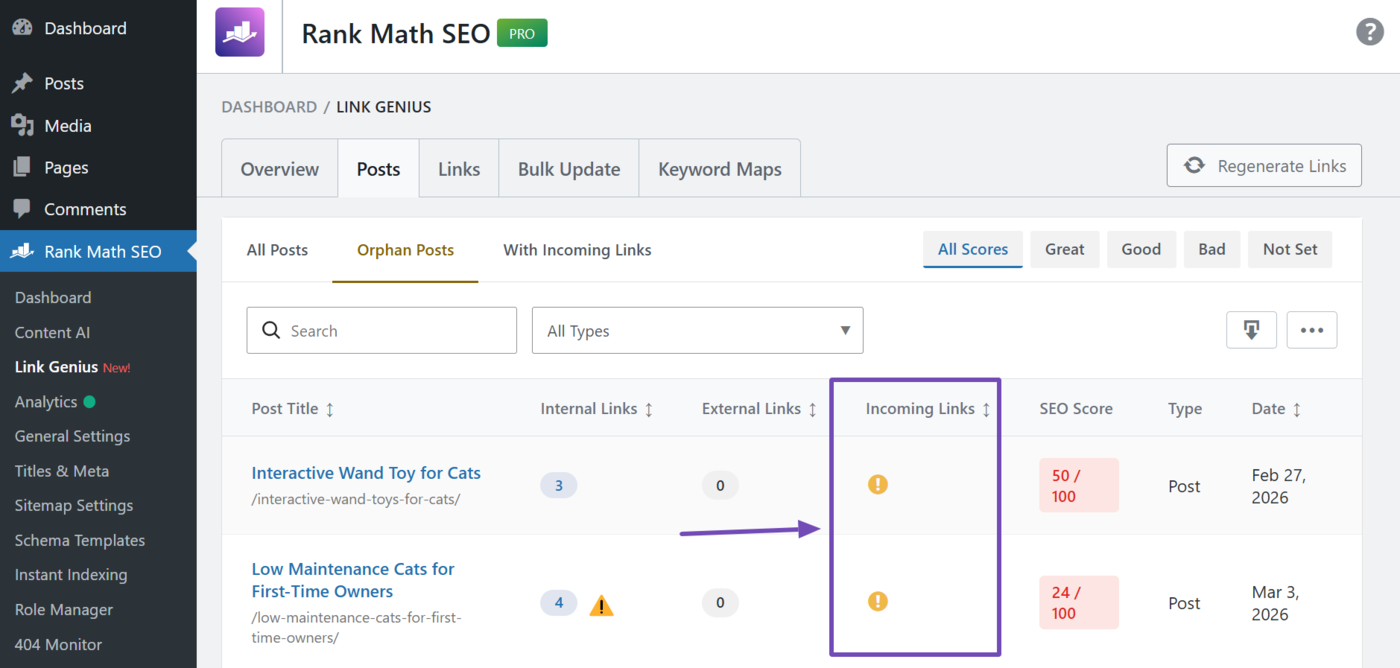
You will then be presented with the orphan posts on your site. The incoming links (from other posts on your site) to these posts will be zero and represented with an exclamation mark icon.
2 Filter the Orphan Posts
You can now use the filters on the page to narrow down on your orphan posts. This lets you identify which orphan posts to improve and which ones to ignore. It also helps you prioritize the pages that need the most attention.
There are multiple filters and options, and you can use them alone or in combination with other filters. This includes the:
- Search bar
- Post type filter
- SEO score filter
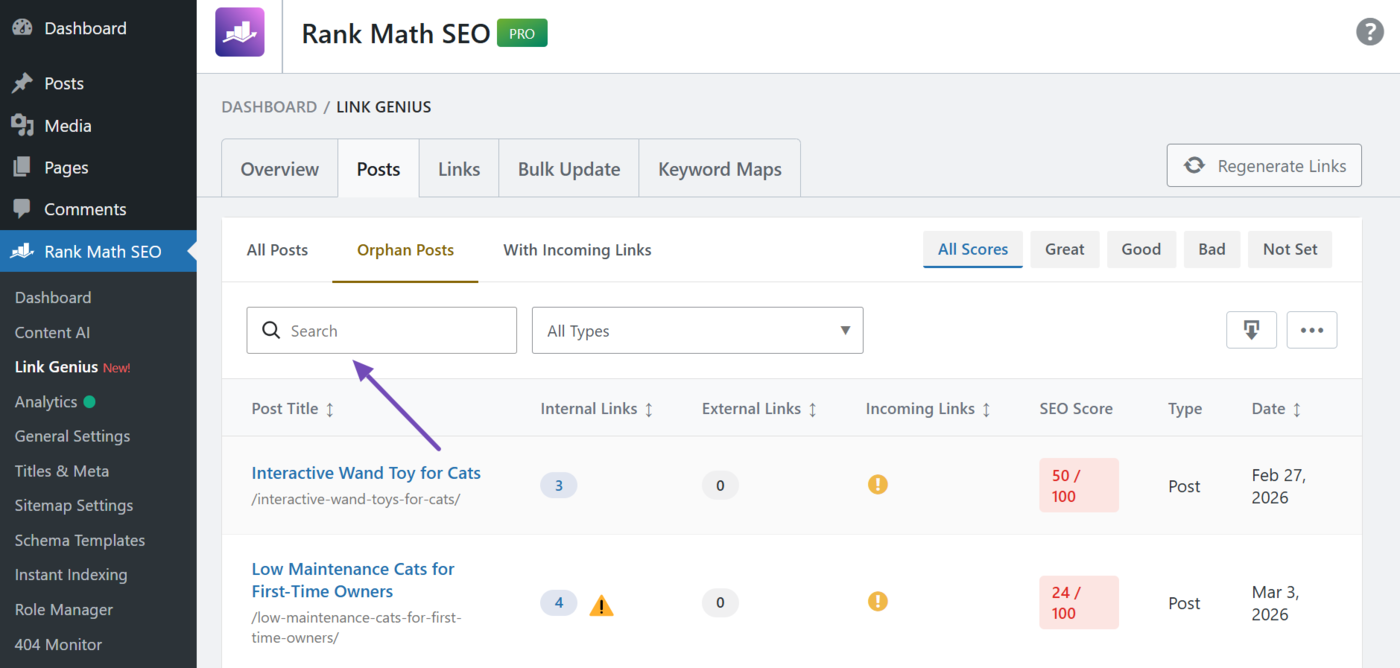
2.1 Search Bar
If you have a specific post (or posts containing a specific keyword) that you want to identify, enter the keyword into the search bar. Once done, the report will only display posts containing these keywords in their post title.
2.2 Post Type Dropdown
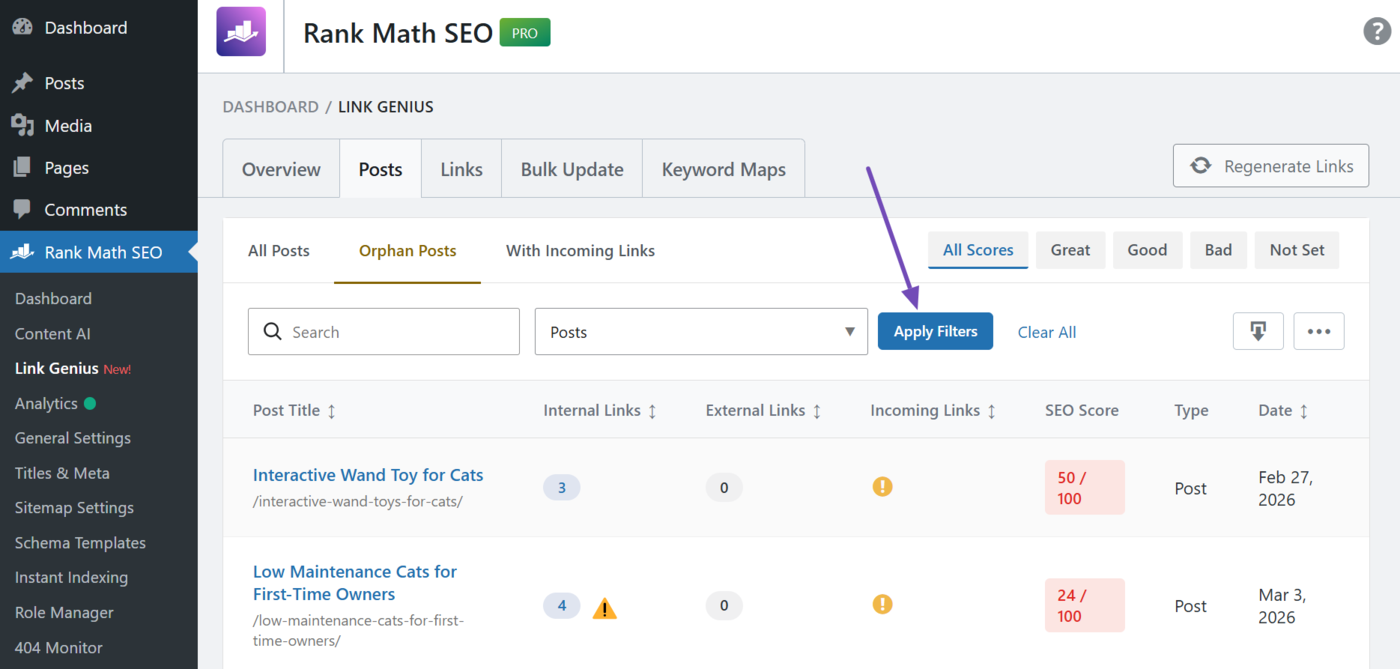
You can also filter your orphan posts by their post type. To do that, click the post type dropdown.
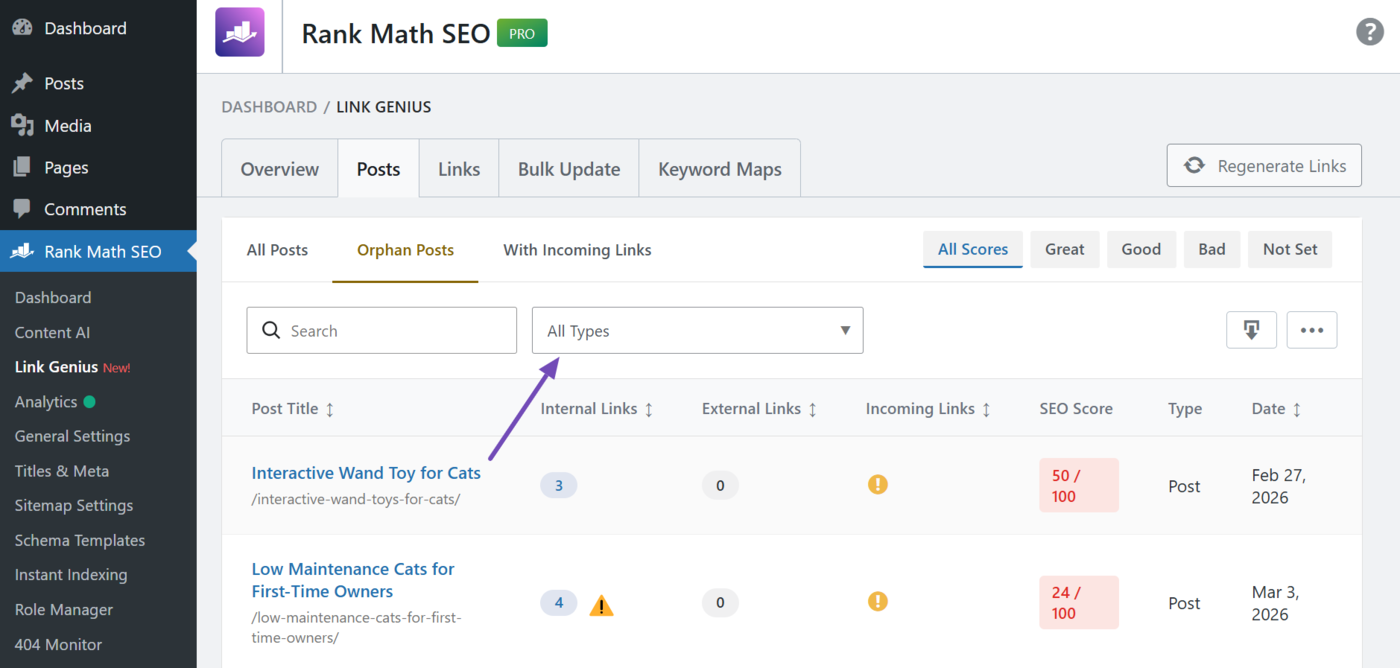
The options here will vary depending on the content on your site. Select the ones to review. (You can select multiple options.) Leave this field blank to review all post types.
Once done, click Apply filters, as shown below.
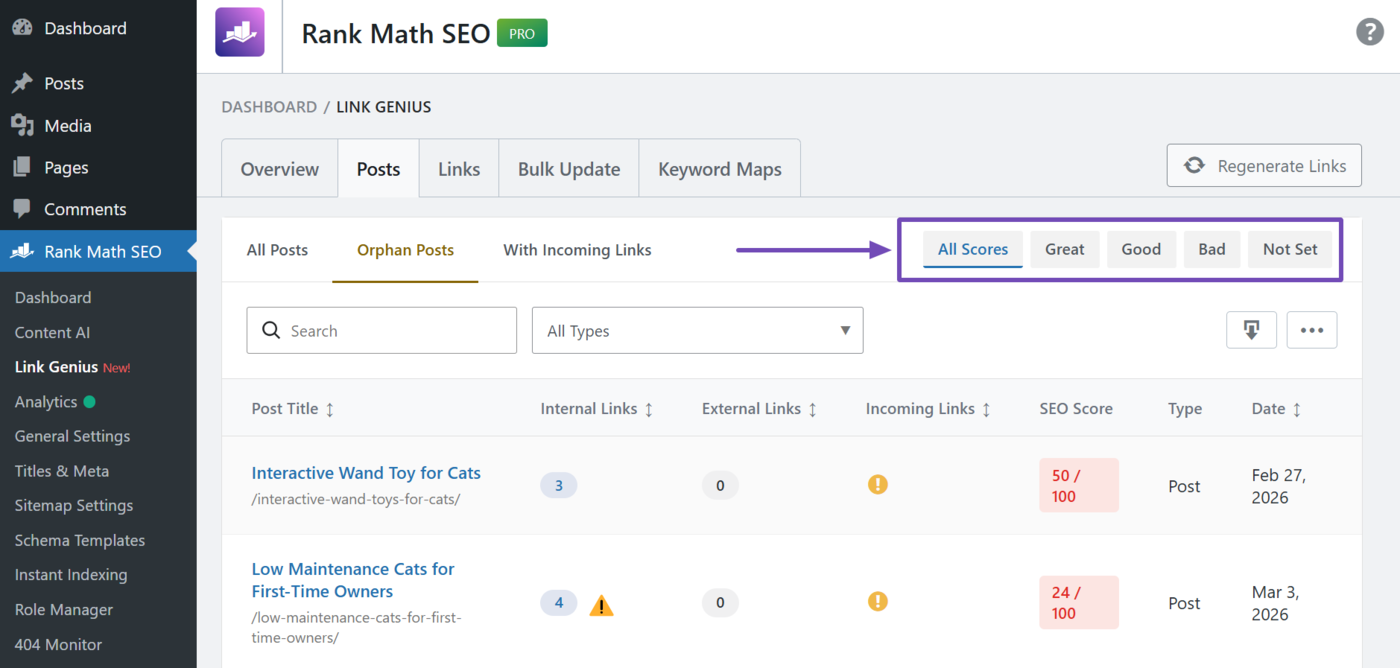
2.3 SEO Score Display
You can also use the SEO score display to further filter your report. For the SEO score, select the SEO score of the pages to assess. The available options include:
- All scores: Show all orphan posts, regardless of their SEO score
- Great: Only show orphan posts with an SEO score of 81 and above
- Good: Only show orphan posts with an SEO score between 51 and 80
- Bad: Only show orphan posts with an SEO score below 50
- Not set: Only show orphan posts without an SEO score
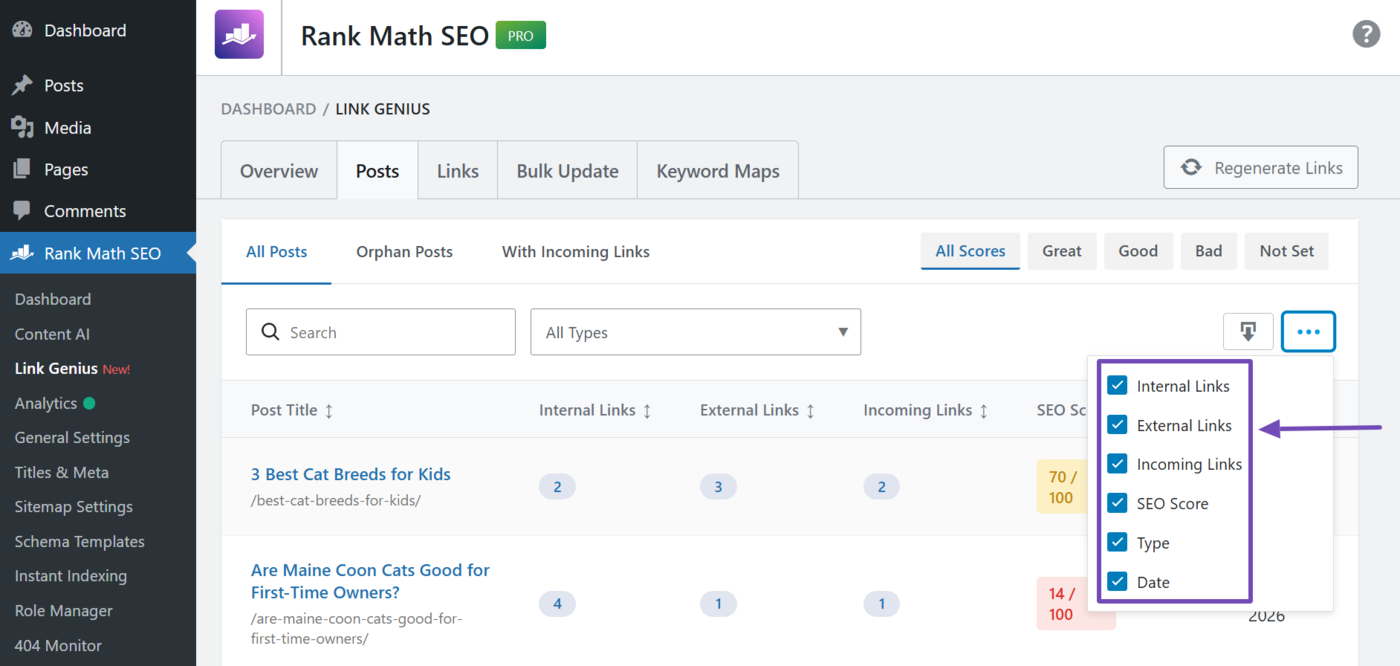
3 Choose Orphan Post Details to Display
You will now proceed to choose the columns to display in the orphan post report. This helps you avoid information overload and accurately identify posts to improve.
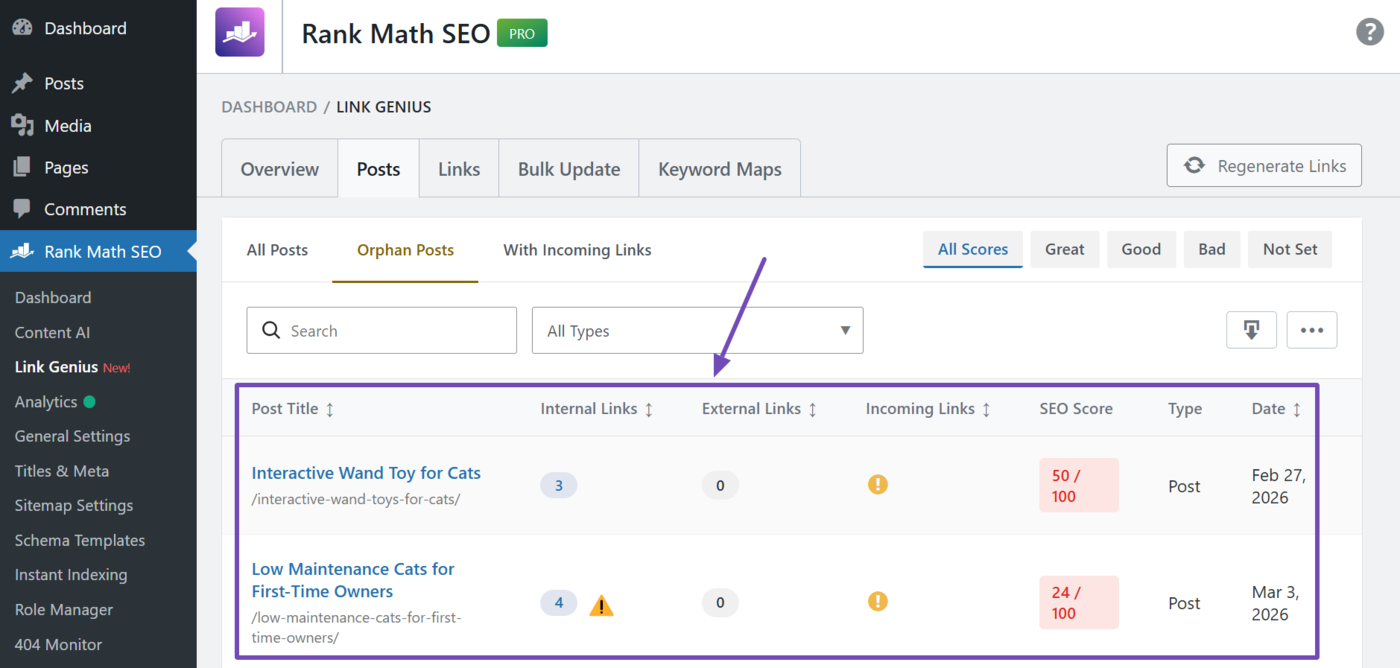
To get started, click the options menu (the one with three dots) to select the columns to display in the report.
The available options include:
- Internal links: Links that originate from the orphan post and point to other posts on your site
- External links: Links that originate from the orphan post and point to posts on another site
- Incoming links: Links that originate from other posts on your site and point to the orphan post
- SEO score: Shows the SEO score of the orphan post
- Type: Specifies whether the orphan post is a post, page, or product
- Date: Indicates the date the orphan post was last modified
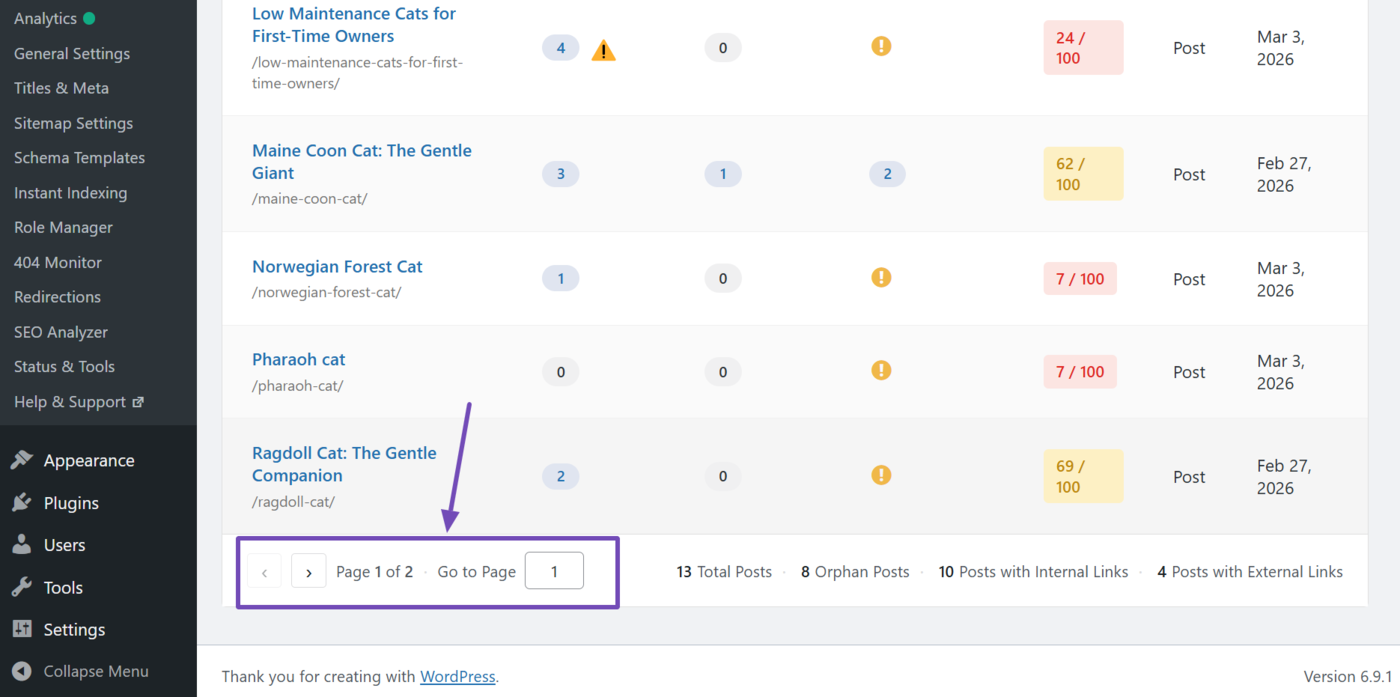
Note: The number of incoming links is always zero. Instead of a number, an exclamation mark ! is displayed to indicate there are no incoming links.
All options are checked by default. Make sure to uncheck the ones you do not want in your report.
You can also use the navigation menu at the bottom of the page to move through the report.
4 Fix the Orphan Posts Automatically
You now have a great overview of your orphan posts. It is now time to fix them. You can do that using the keyword map.
To do this, open your WordPress dashboard in a new tab and navigate to Rank Math SEO → Links → Keyword Maps.
Note: Do not open the keyword map in the current tab where you are viewing your orphan posts, else you may lose the filters you already applied to the orphan posts report.
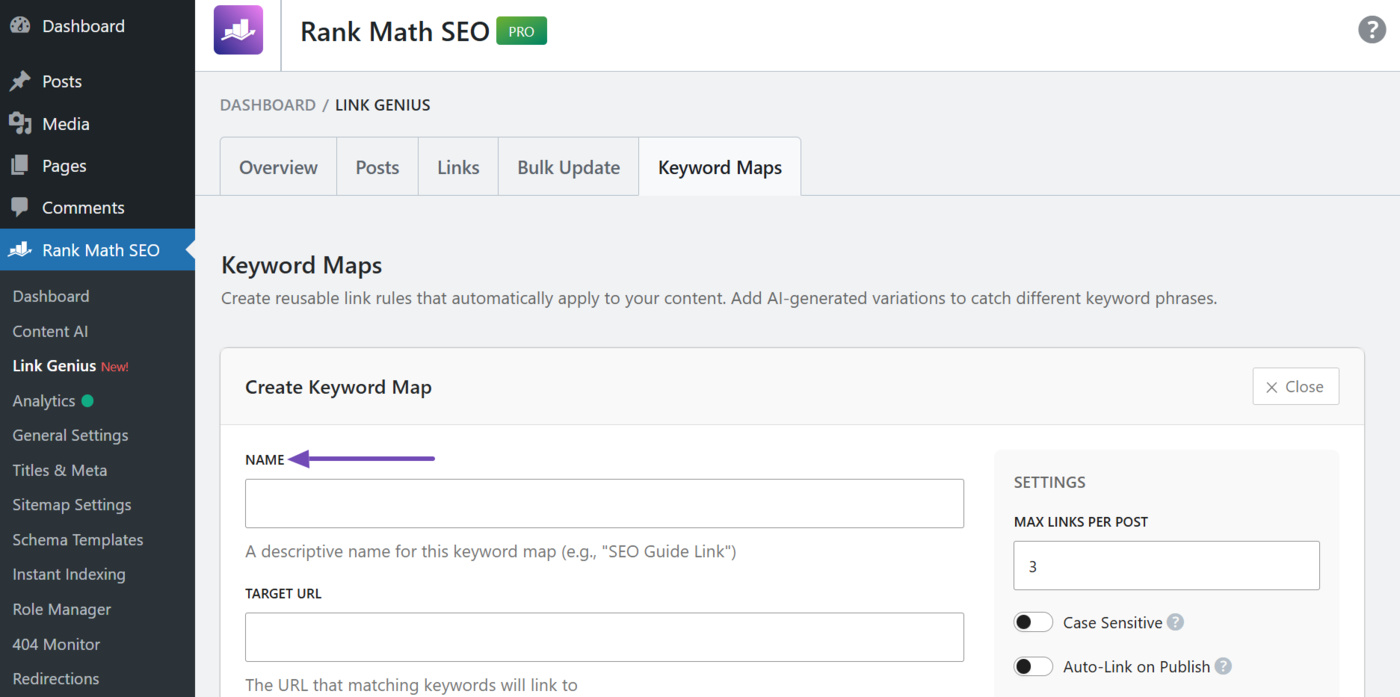
Once done, click Create Keyword Maps.

You will be presented with some fields, settings, and buttons, including:
- Name field
- Target URL field
- Description field
- Keyword variations field
- Generate AI variations button
- Keyword map settings
- Create keyword map button
Note: The Keyword variations field and Generate AI variations button will only appear when you enter a keyword into the Name field.
4.1 Name
Enter the main keyword for which you want to optimize the orphan post. This will be used as the anchor text of the link.
4.2 Target URL
Enter the URL of the orphan post here. Make sure to enter the full URL. For example, https://yourdomain.com/most-popular-cats.
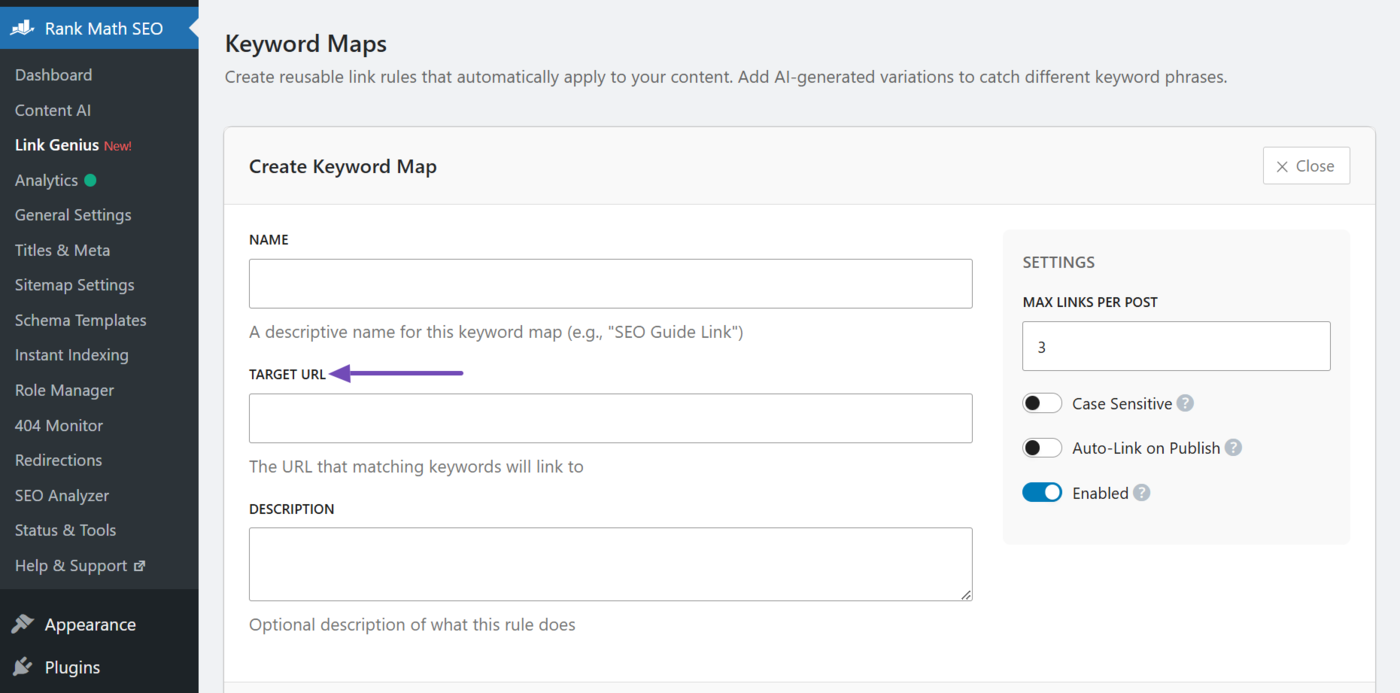
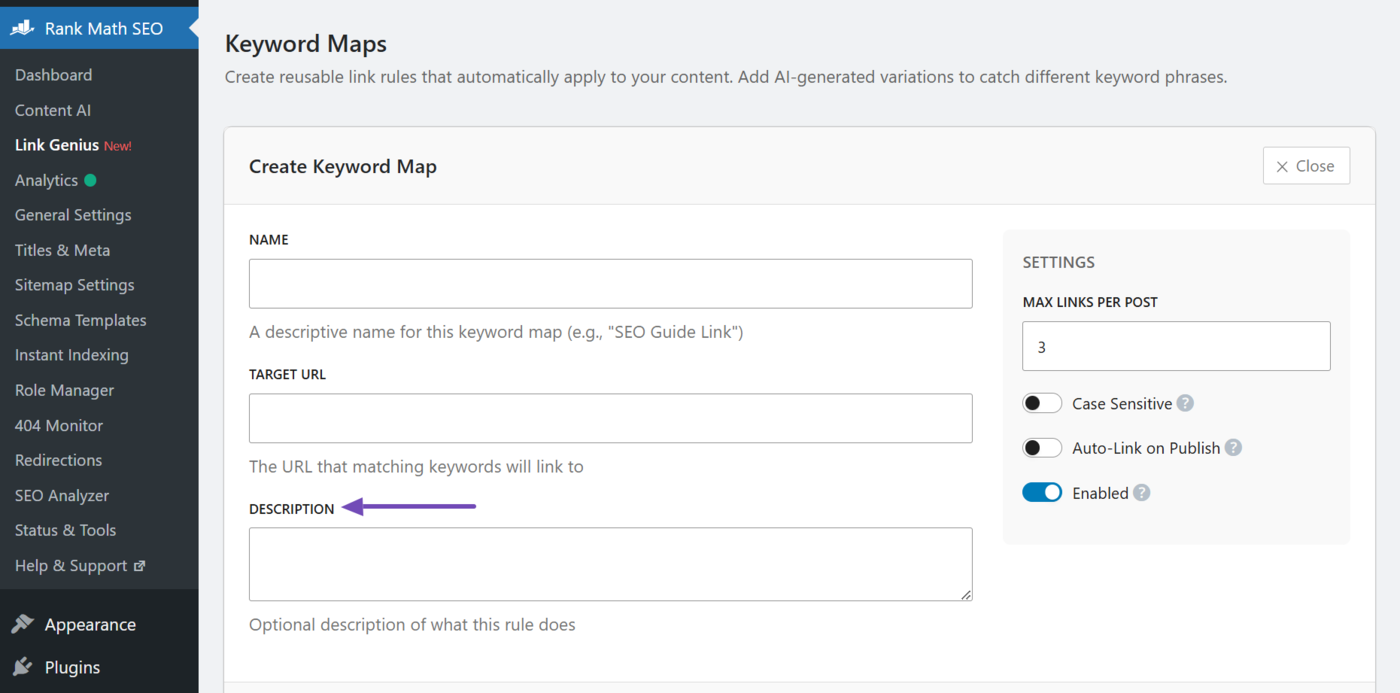
4.3 Description
Enter a brief description so you remember why you created this keyword map. This is optional and is not included in the link created for the orphan page.
4.4 Keyword Variations
Enter additional (secondary) keywords for which you want to optimize the orphan page. These keywords will also be used an anchor texts for the link. Once done, click Add variation.
Note: Make sure to enter each keyword into a separate line. If you enter them into the same line, make sure to separate them with a comma.
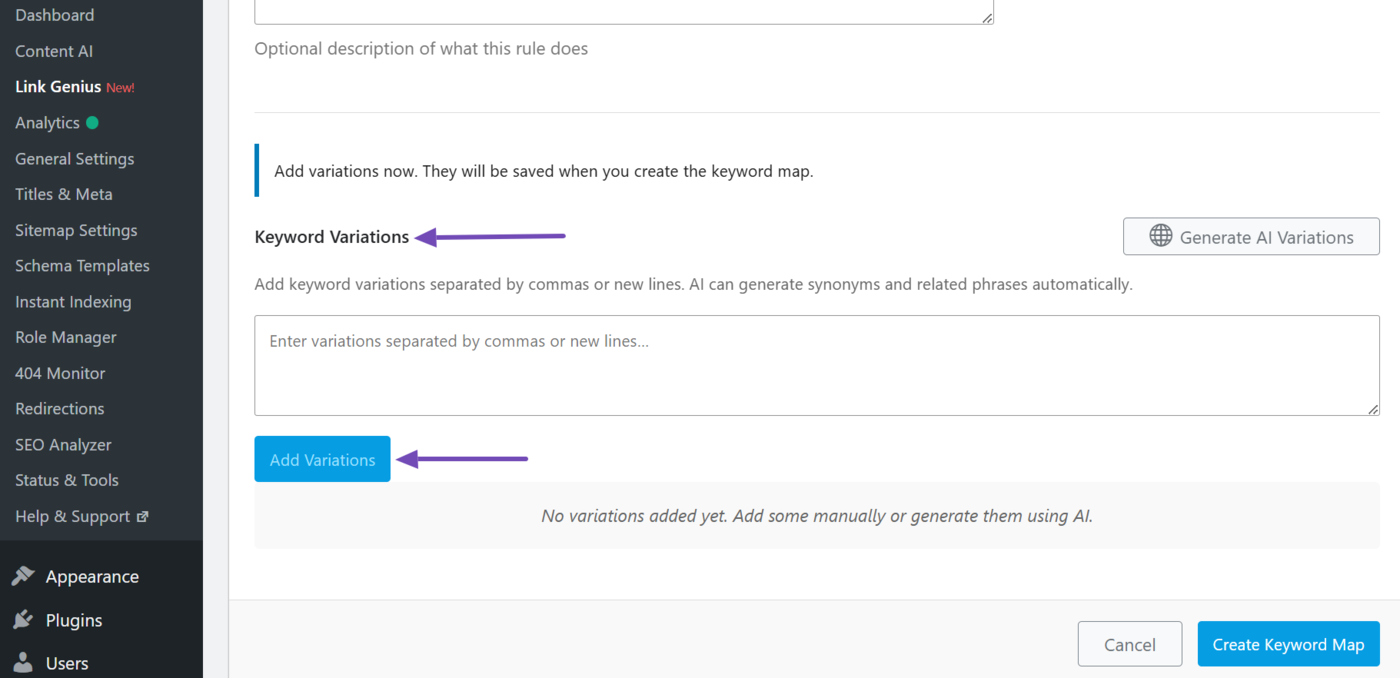
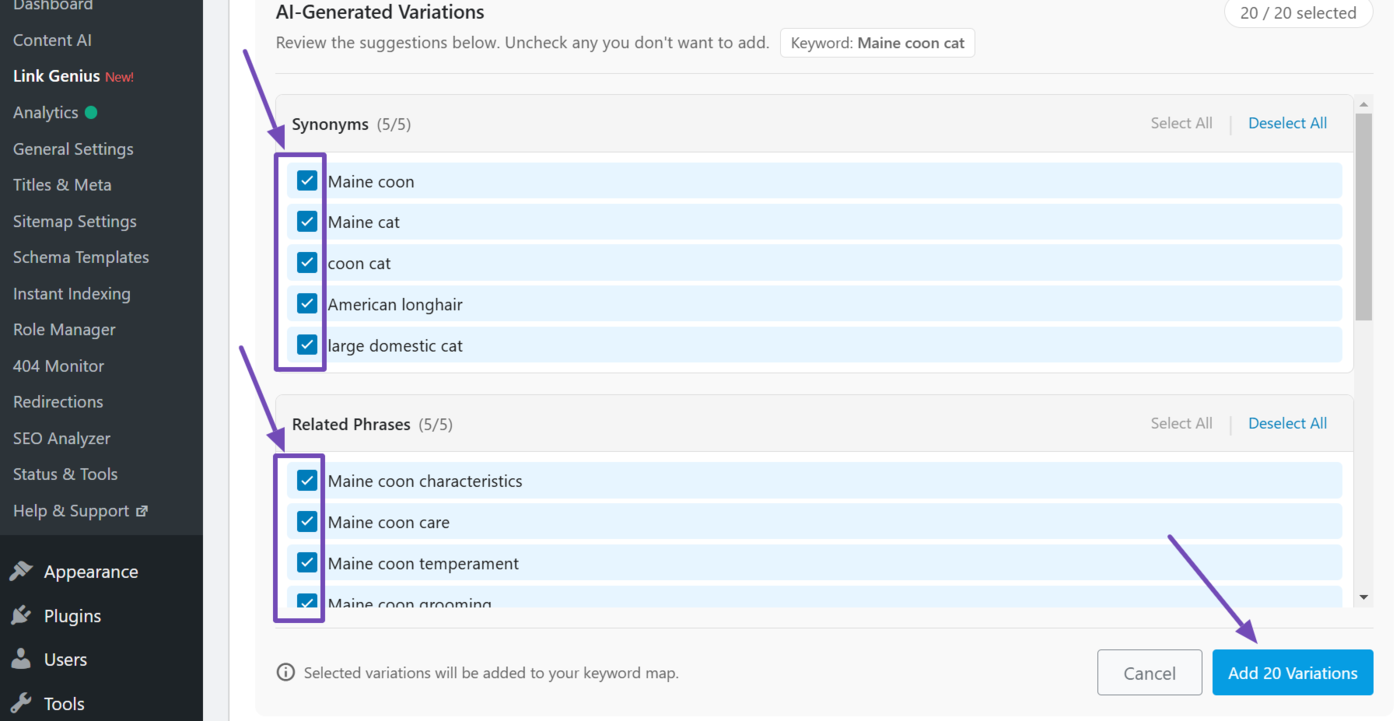
You can also get AI Link Genius to generate some additional keywords. To do that, click Generate AI variations.

Once done, review the keywords. Uncheck the ones you do not want and click Add variations.
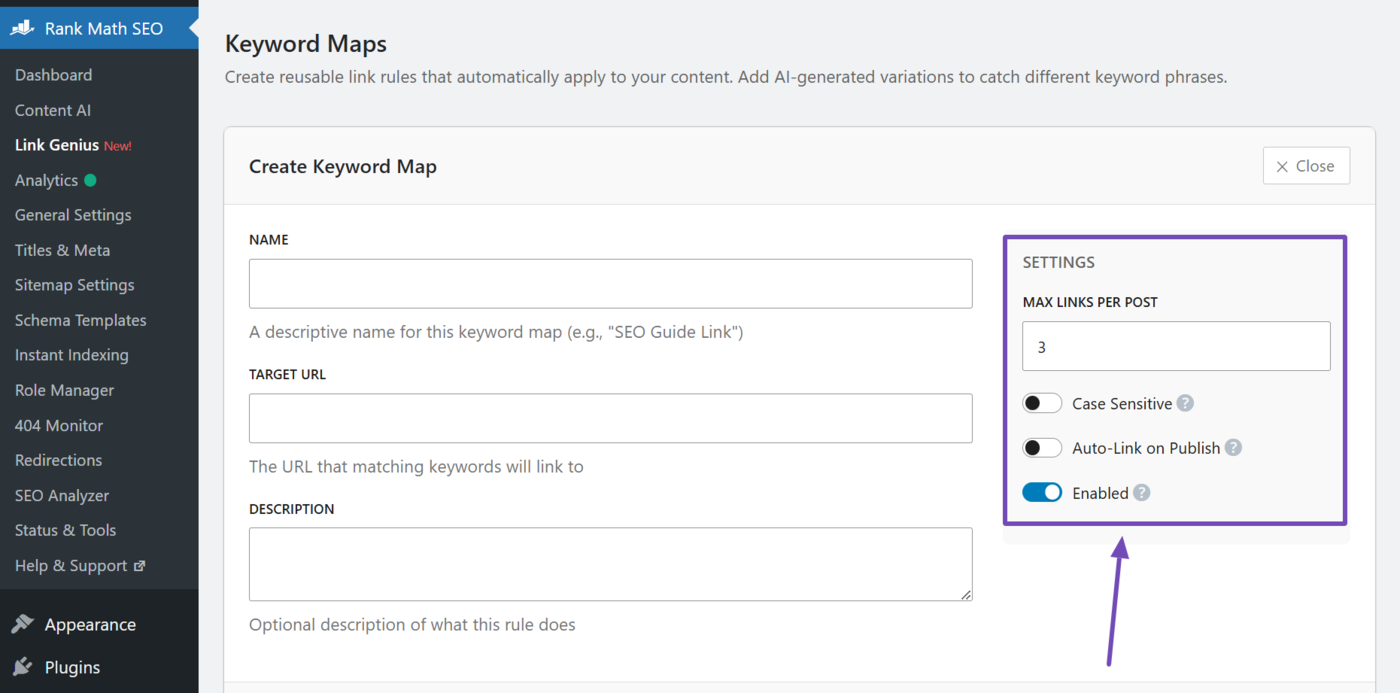
4.5 Keyword Map Settings
The keyword map also includes additional settings, such as:
- Max links per post: Set the maximum number of links that can point from a page to the orphan page
- Case sensitive: Determines whether links are created only when the keyword matches the exact letter case you used in the “Name” and “Keyword variation” fields
- Auto-link on publish: Enable this to automatically link future mentions of the keyword to the orphan page
- Enabled: Leave this enabled so your keyword map starts working immediately
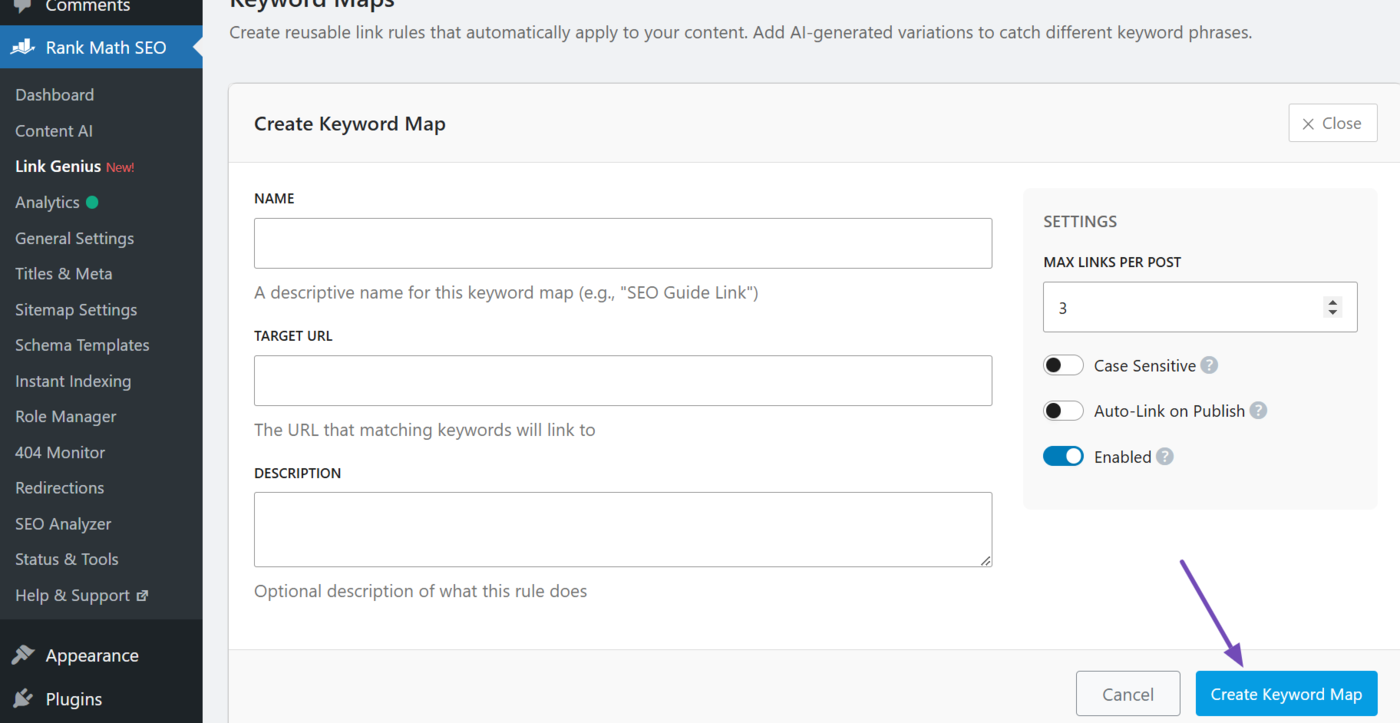
4.6 Click Create Keyword Map
Once done, click Create keyword map to create your keyword map.
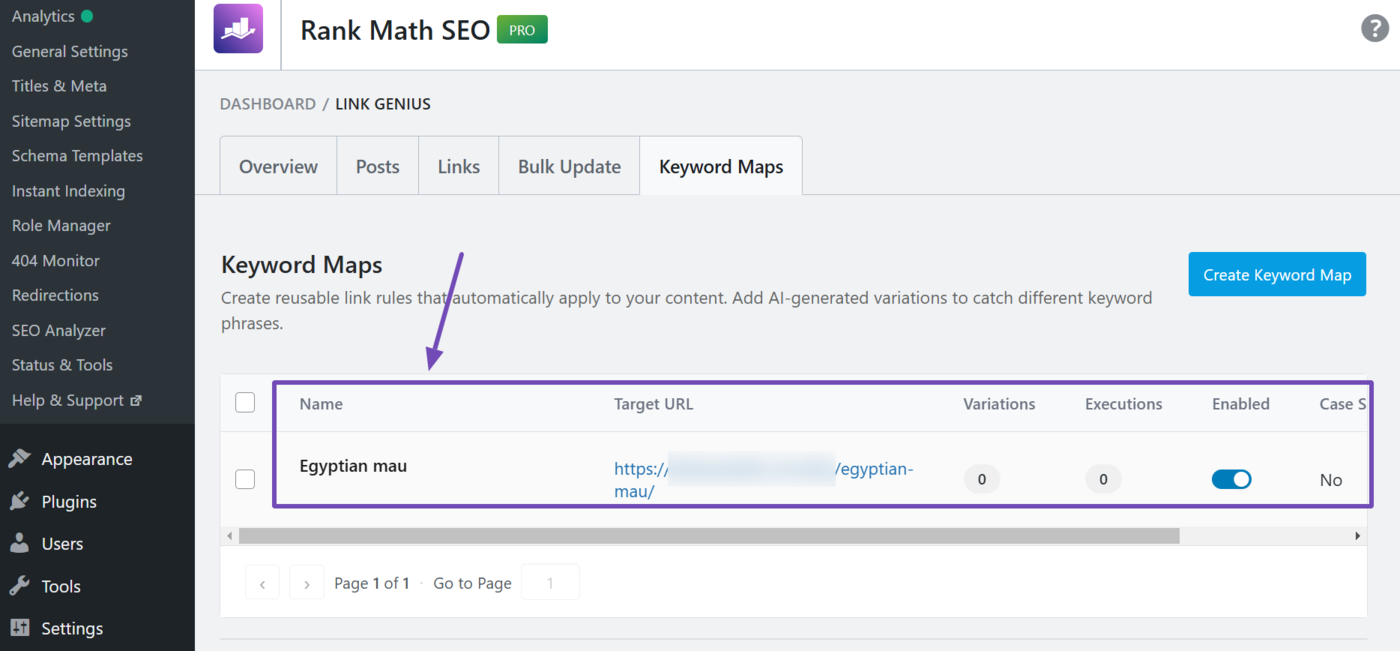
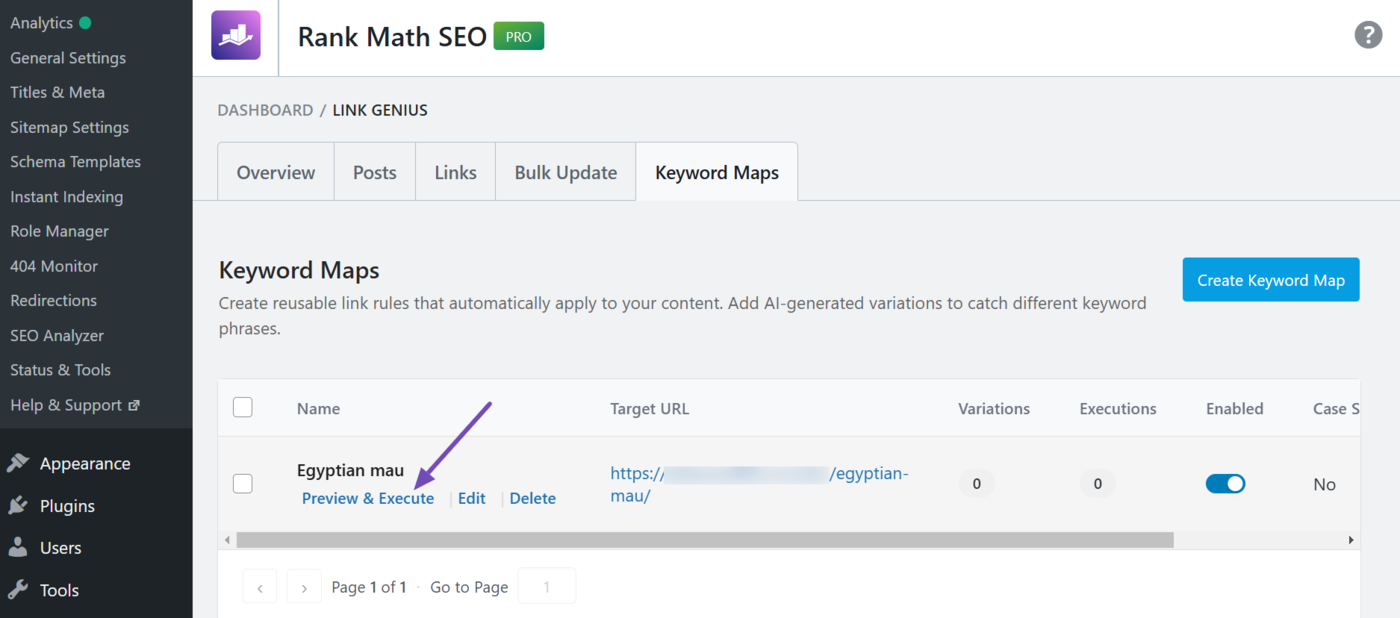
AI Link Genius will create your keyword map, and it will be visible to you in the Keyword map tab, as shown below. However, the keyword map has not been applied to your site. You will do that in the next steps.
4.7 Apply the Keyword Map
Hover over the keyword map you just created. Some options will appear. Click Preview & Execute.
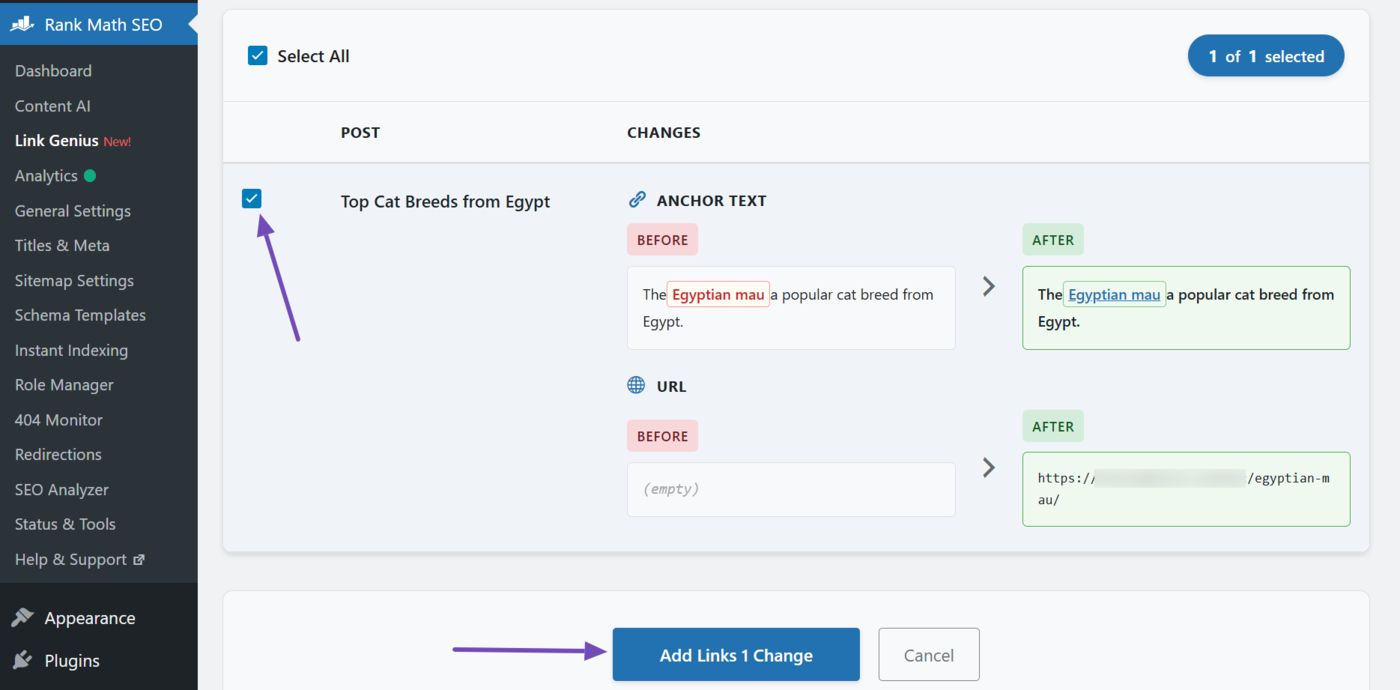
Link Genius will show you a preview of the internal link (URL and anchor text) that will point to your orphan page, along with the title of the post that will contain the link.
A checkbox appears before each post title:
- Uncheck it to exclude the post from linking to the orphan page
- If you want the post to link to the orphan page, leave it checked
Once done, click Add links change.
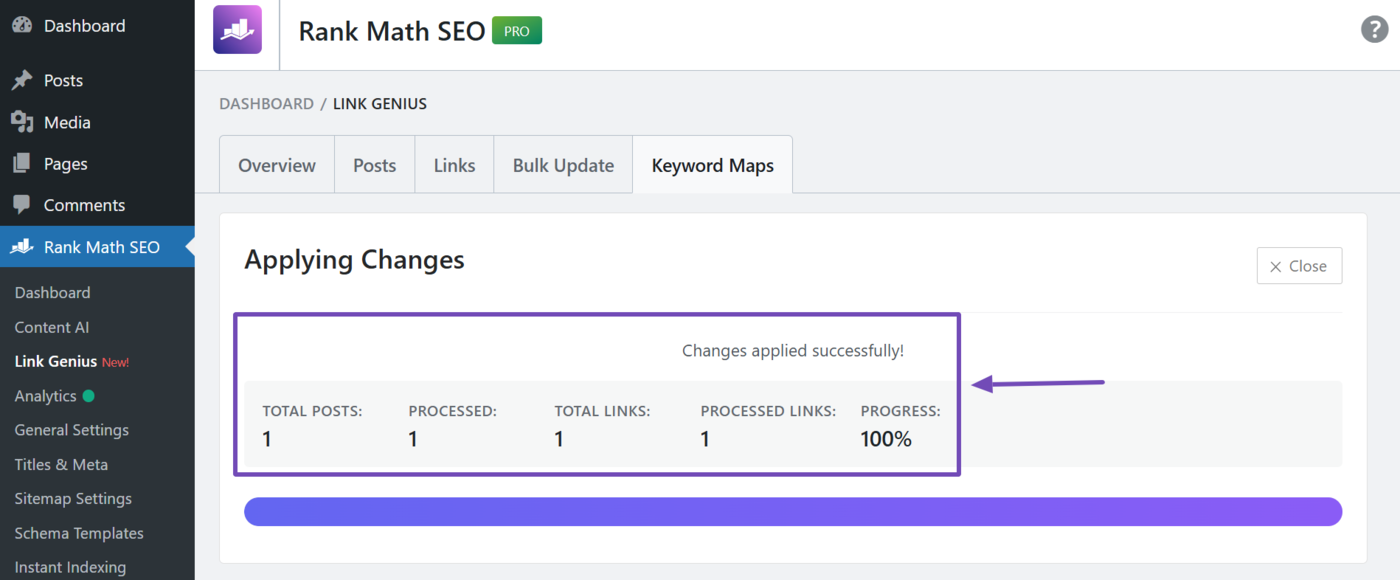
The keyword map will be applied to your site, meaning you now have one or more internal links pointing to the previously orphaned pages. You will also see a success message, indicating you have fixed your orphan page.
That is how to fix your orphan pages using AI Link Genius. However, Link Genius can do more than just detecting orphan pages. It can automate your internal linking strategy and allow you to bulk edit your internal links and anchor texts.
You can refer to this guide on what Link Genius is and how it works. If you have additional questions, you’re always more than welcome to contact our dedicated support team. They are available 24/7, 365 days a year.