Including helpful Schema Markup like ContactPage Schema will help search engines easily identify your Contact page and display it in SERP for relevant queries.
In this knowledgebase article, we will guide you through the steps to set up ContactPage Schema in Rank Math.
Follow these steps to set up your website ContactPage Schema.
1 Enable the Local SEO and Schema Modules
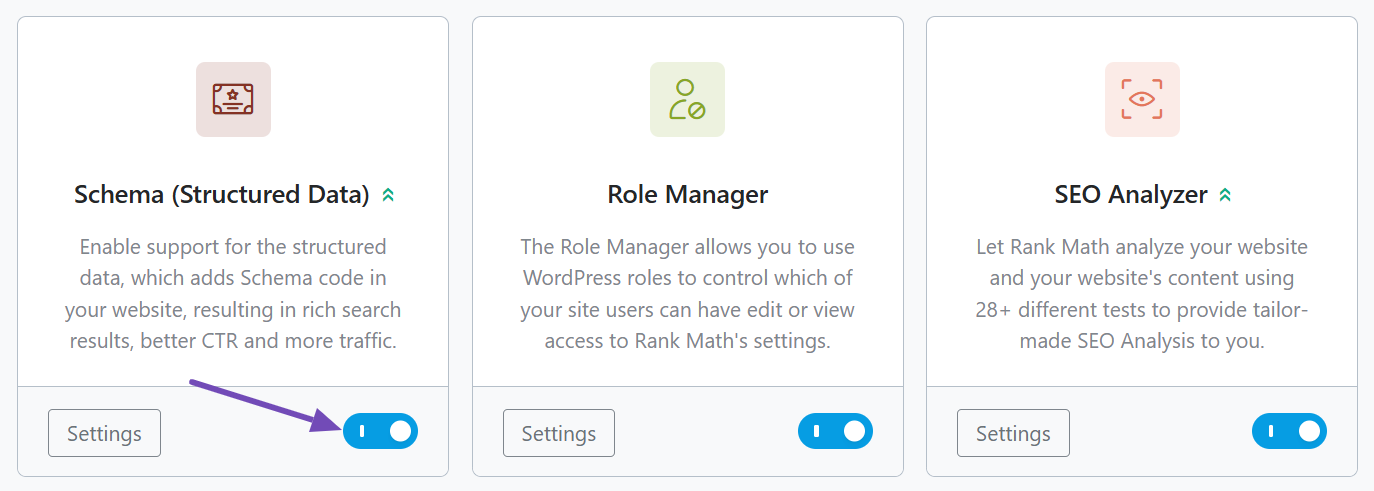
First, navigate to WordPress Dashboard → Rank Math SEO → Dashboard and enable the Local SEO module, as shown below.

Next, ensure that the Schema Module is also enabled.

2 Navigate to the Local SEO Settings
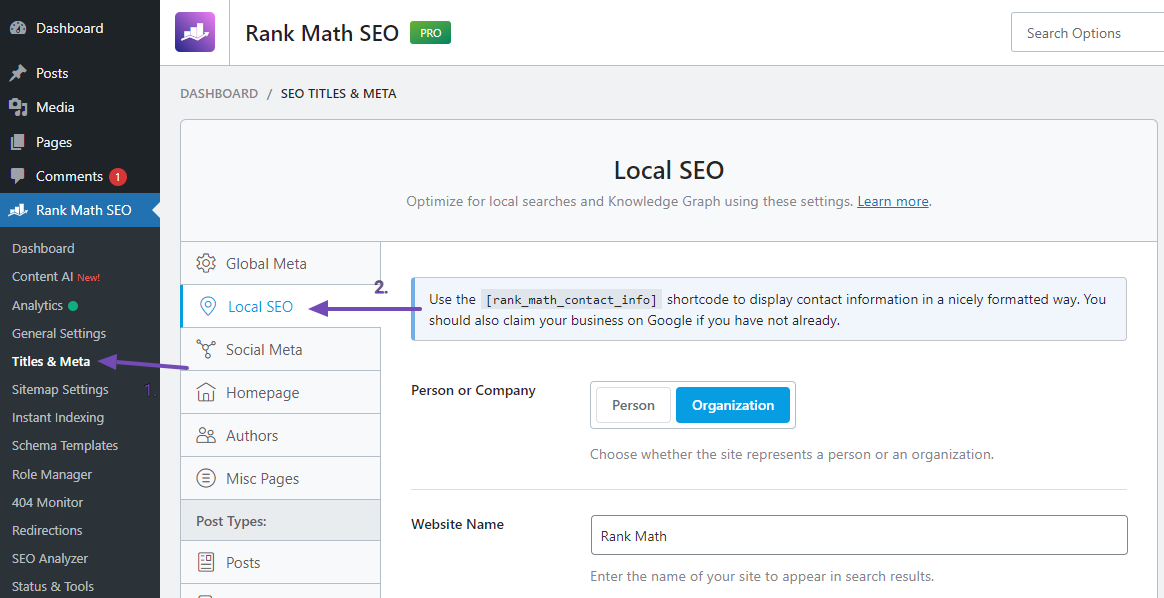
To set up the ContactPage Schema, head over to Rank Math SEO → Titles & Meta → Local SEO from your WordPress dashboard.

You can input accurate details about your business and its operations in the Local SEO section. By filling out the provided fields, your information will appear as Schema on the search engine’s Knowledge Graph.
Including your website’s contact page in Local SEO will display it as a Schema and other information.
Additionally, you can utilize a Shortcode to easily display the contact information provided in the Local SEO section anywhere on your website by simply pasting the Shortcode.
You’ll learn how to add your website’s Contact Page to Local SEO and showcase the contact information on any desired location of your website using Shortcode.
3 Update the Contact Page Settings
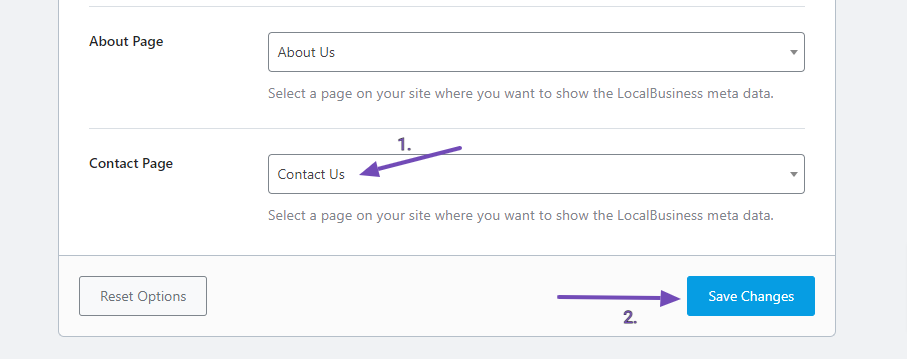
Scroll down the Local SEO section to find the Contact Page option. In the drop-down list, search for your website’s contact page and select it.
Next, click on the Save Changes button, as shown below.

However, if your website does not already have a Contact Page, you must create one for it to appear on this list.
So that’s how you set up your ContactPage Schema. Now, let’s look at how to use the contact information Shortcode.
4 Using the Contact Info Shortcode
As demonstrated below, you can copy the Shortcode while you’re still in the Local SEO section of your WordPress dashboard, which is found when you go to Rank Math SEO → Titles & Meta.

Once you have copied the shortcode, you can paste it on your website wherever you want your contact details to appear.
For example, if you want to paste it into one of your pages, navigate to Pages → All Pages and select the page you want by clicking “Edit” beneath it, as shown below.

If you want to begin with a new page, you can still click the “Add New Page” button above.
To insert the contact info shortcode, open the block inserter in the page editor and search for “Shortcode.”
Once you find it, click on it or drag and drop it to the desired location. Finally, paste the contact info shortcode into the Shortcode block, as shown below.

After completing the page’s content, you can save the changes by clicking the Publish/Save button.
Once the changes are successfully saved, the Contact info will appear on the page, as shown below.

We also provide some additional options for this contact information shortcode:
You can style the Shortcode by adding CSS classes, as shown here:
[rank_math_contact_info class=""]You can also display specific contact information on the Shortcode, as in
[rank_math_contact_info show=""]If you only want to include the name, email, and address in the contact information, add the code as follows:
[rank_math_contact_info show="name, email, address"]You can also customize this shortcode with the attributes discussed here. After completing the steps successfully, remember to save your changes.
That’s it. If you have questions regarding the ContactPage Schema – you’re always more than welcome to contact our dedicated support team. We’re available 24/7, 365 days a year…