In case you want the Rank Math team to configure the Rank Math PRO plugin on your website or troubleshoot any issues with the Analytics module, then our team would request you to provide access to your Google Search Console account.
In this knowledge base article, we’ll show you how to add a user to your Google Analytics 4 account.
1 Log in to your Google Analytics Account
To get started with Google Analytics, you’ll need to log in to your account.
Note: If you don’t have an account, you can create one for free. You can learn more about how to create a Google Analytics account here. In case you face any hassle with setting up your Google Analytics account, our team will handle this for you.
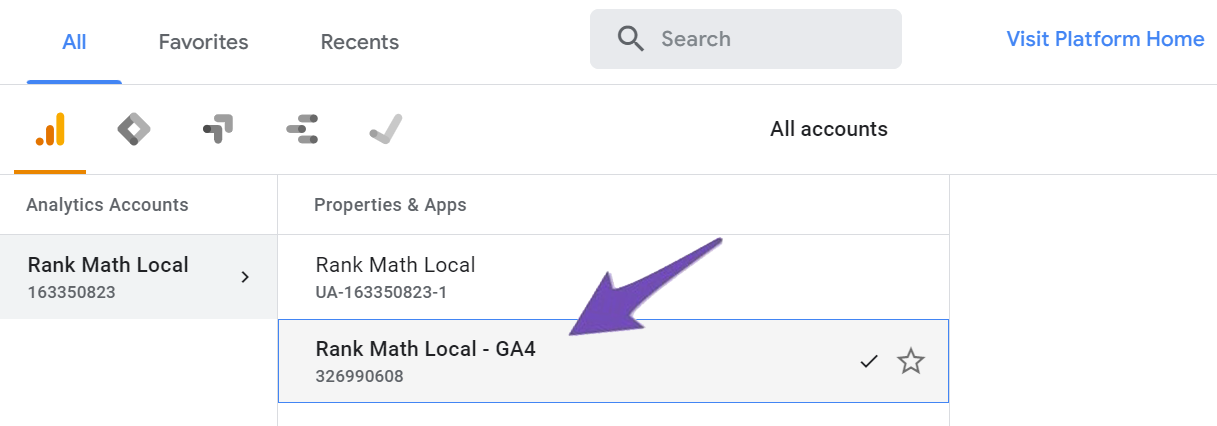
Once you’re logged in, you’ll be able to select the property associated with your site from the Properties & Apps dropdown at the top of the page.

2 Navigate to Admin
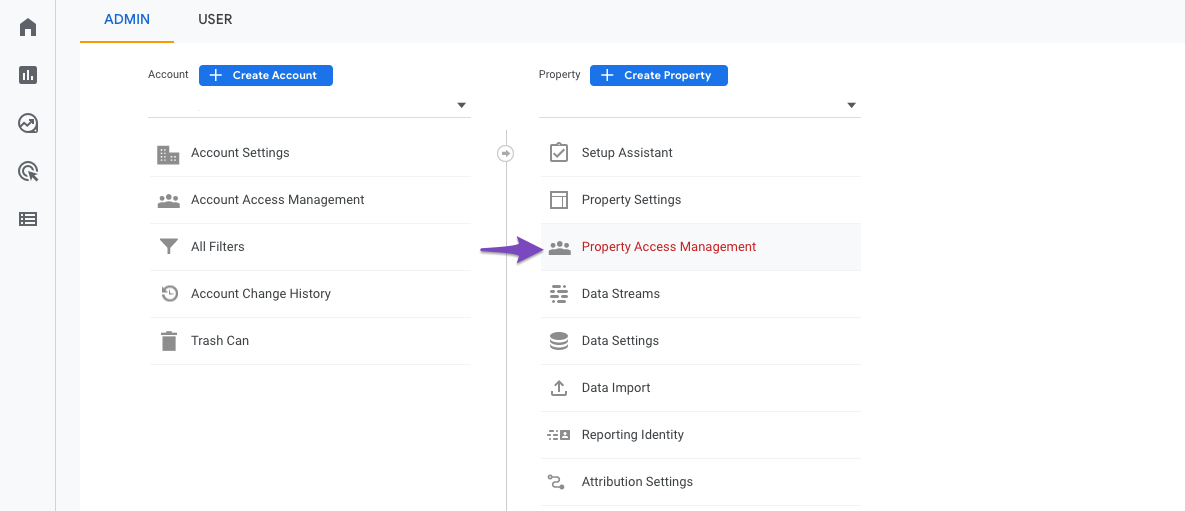
From the All Accounts dropdown, click on the ADMIN tab. Under the property column, you’ll see a list of options. Click on Property Access Management.

3 Add New Users
On the next page, you’ll see a list of all the users who have access to your account. To add a new user, click the “+” icon in the top-right corner.

4 Add User Details
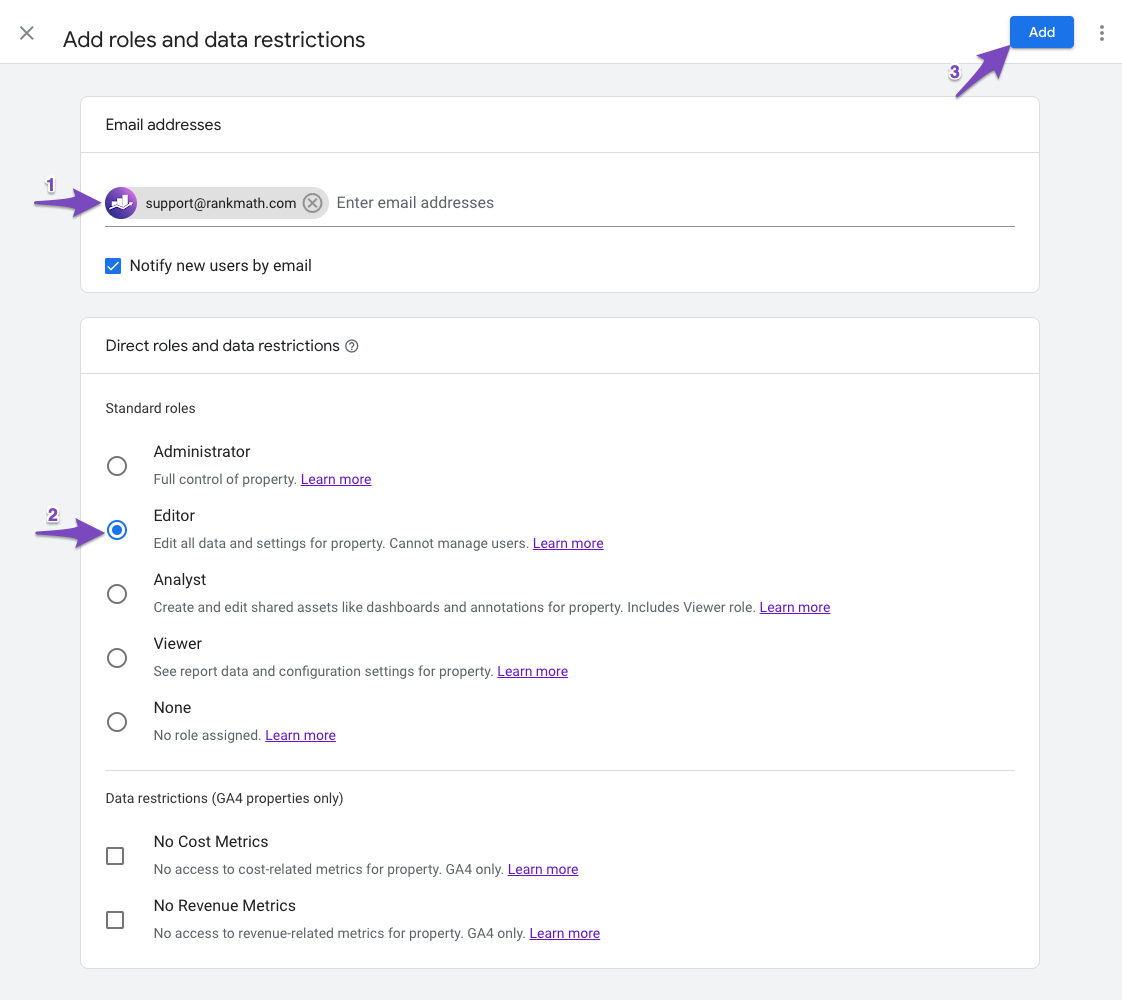
Now, you’ll need to enter the new user’s email address and select their level of access.
There are 5 different levels of access that you can grant to a user that we already explained above section. The new Google Analytics 4 (GA4) comes with two additional restrictions as No Cost Metrics and No Revenue Metrics.
- No Cost Metrics: This means that the user will not be able to see any data related to advertising spending or cost data for any of your data sources.
- No Revenue Metrics: This means that the user will not be able to see any data related to revenue or transactions for your property. Both of these restrictions can be applied to any user, regardless of their level of access.

5 Save User Settings
Once you’ve entered the user’s email address and selected their access level, click the “Add” button to save your changes. You can also check the “Notify new users by email” box to send them an email notification that they’ve been added to your account.

Note: The email address requested to add as an Editor by our support team could be one of our developers. So ensure that you add the correct email address provided to you here.
That’s all you need to do to add a new user to your Google Analytics account. By following the steps above, you can easily grant access to your Google Analytics account and use the restrictions to control the data that is available to access.
If you have any doubts or questions related to this matter, please don’t hesitate to reach out to our support team. We are available 24×7, 365 days a year, and are happy to help you with any issues that you might face.