Website owners frequently need to include many code snippets to track traffic, conversions, and other analytical data. Google Tag Manager is a tag management tool that assists in tracking sites performance metrics such as traffic, conversions, and other metrics.
This tool allows you to add a single tag, such as a Google Analytics tracker, or to add a series of tags, such as a digital ad. You can also use Tag Manager to update tags without needing to update the website itself. For example, if you have an ad running on a website, you can use Tag Manager to update the code for that ad without needing to access the website itself.
2 Why Should You Install Google Tag Manager in WordPress?
As an online business, it’s important to have a presence on as many platforms as possible. Google is one of the most important platforms for a lot of businesses, but most of them struggle to find a way to manage their presence on Google effectively.
Tag Manager is a tool that helps you manage your tags, which are the code added to the web pages you want to be shown in the search results. It’s a simple and easy way to increase your presence and generate more traffic on the platforms you care about most.
Let’s take a look at some of the benefits to install Google Tag Manager on your site.
2.1 Easy to Use & Saves Time
One of Google Tag Manager’s main benefits is that it doesn’t require any programming experience. Almost anyone can easily make modifications, add new tags, test each change, and deploy tags without adding complicated website code.
This gives you and your team autonomy and streamlines your workflow, which shortens the time between launches and gives your team the time it needs to concentrate on other crucial issues.
Google Tag Manager allows you to apply tracking codes, which saves you time independently. The Tag Manager platform can easily add, modify, and remove all tracking codes. There is no longer a requirement for a marketer to send tracking code to a developer and to have the developer install the code.
2.2 Comprehensive Data Collection
When you install Google Tag Manager, everything is in one place. The Tag Manager helps to obtain various website analytics data on conversions, page views, social shares, and more. This further helps to plan and optimize your future marketing strategies.
2.3 It’s Free of Cost!
Google Tag Manager is ideal for small and medium-sized businesses and is completely free. Larger enterprises can upgrade to Tag Manager 360’s premium version.
2.4Users and Permissions Management
You have complete control over who can make what modifications using Google Tag Manager. You can easily manage who has access to make changes (such as adding tags, macros, and rules) to the website.
2.5 Easy Troubleshoot
It’s simpler to troubleshoot and fix tag mistakes because everything is in one location—even before they’re published. In addition to information regarding triggers and other details about the data within tracking tags, Google Tag Manager’s Preview Mode will automatically show you which tags are functioning and which ones aren’t.
2.6 バージョン管理
In Google Tag Manager, an archived version is always stored whenever you make a change. This makes it simpler to undo changes, roll back to a previous version, or undo changes you unintentionally published to a live site before the tags were complete. Version control allows you to switch between versions without worrying about doing permanent harm.
3 How to Install Google Tag Manager to WordPress
Before you install Google Tag Manager, you’ll have to create a グーグルアナリティクス account for your website if you haven’t already done so. You can follow the instructions in our how to install Google Analytics with Rank Math video.
3.1 Manually Install Google Tag Manager
Once your Google Analytics account is set up, you can install Google Tag Manager on your site.
3.1.1 Sign up for a Google Tag Manager Account
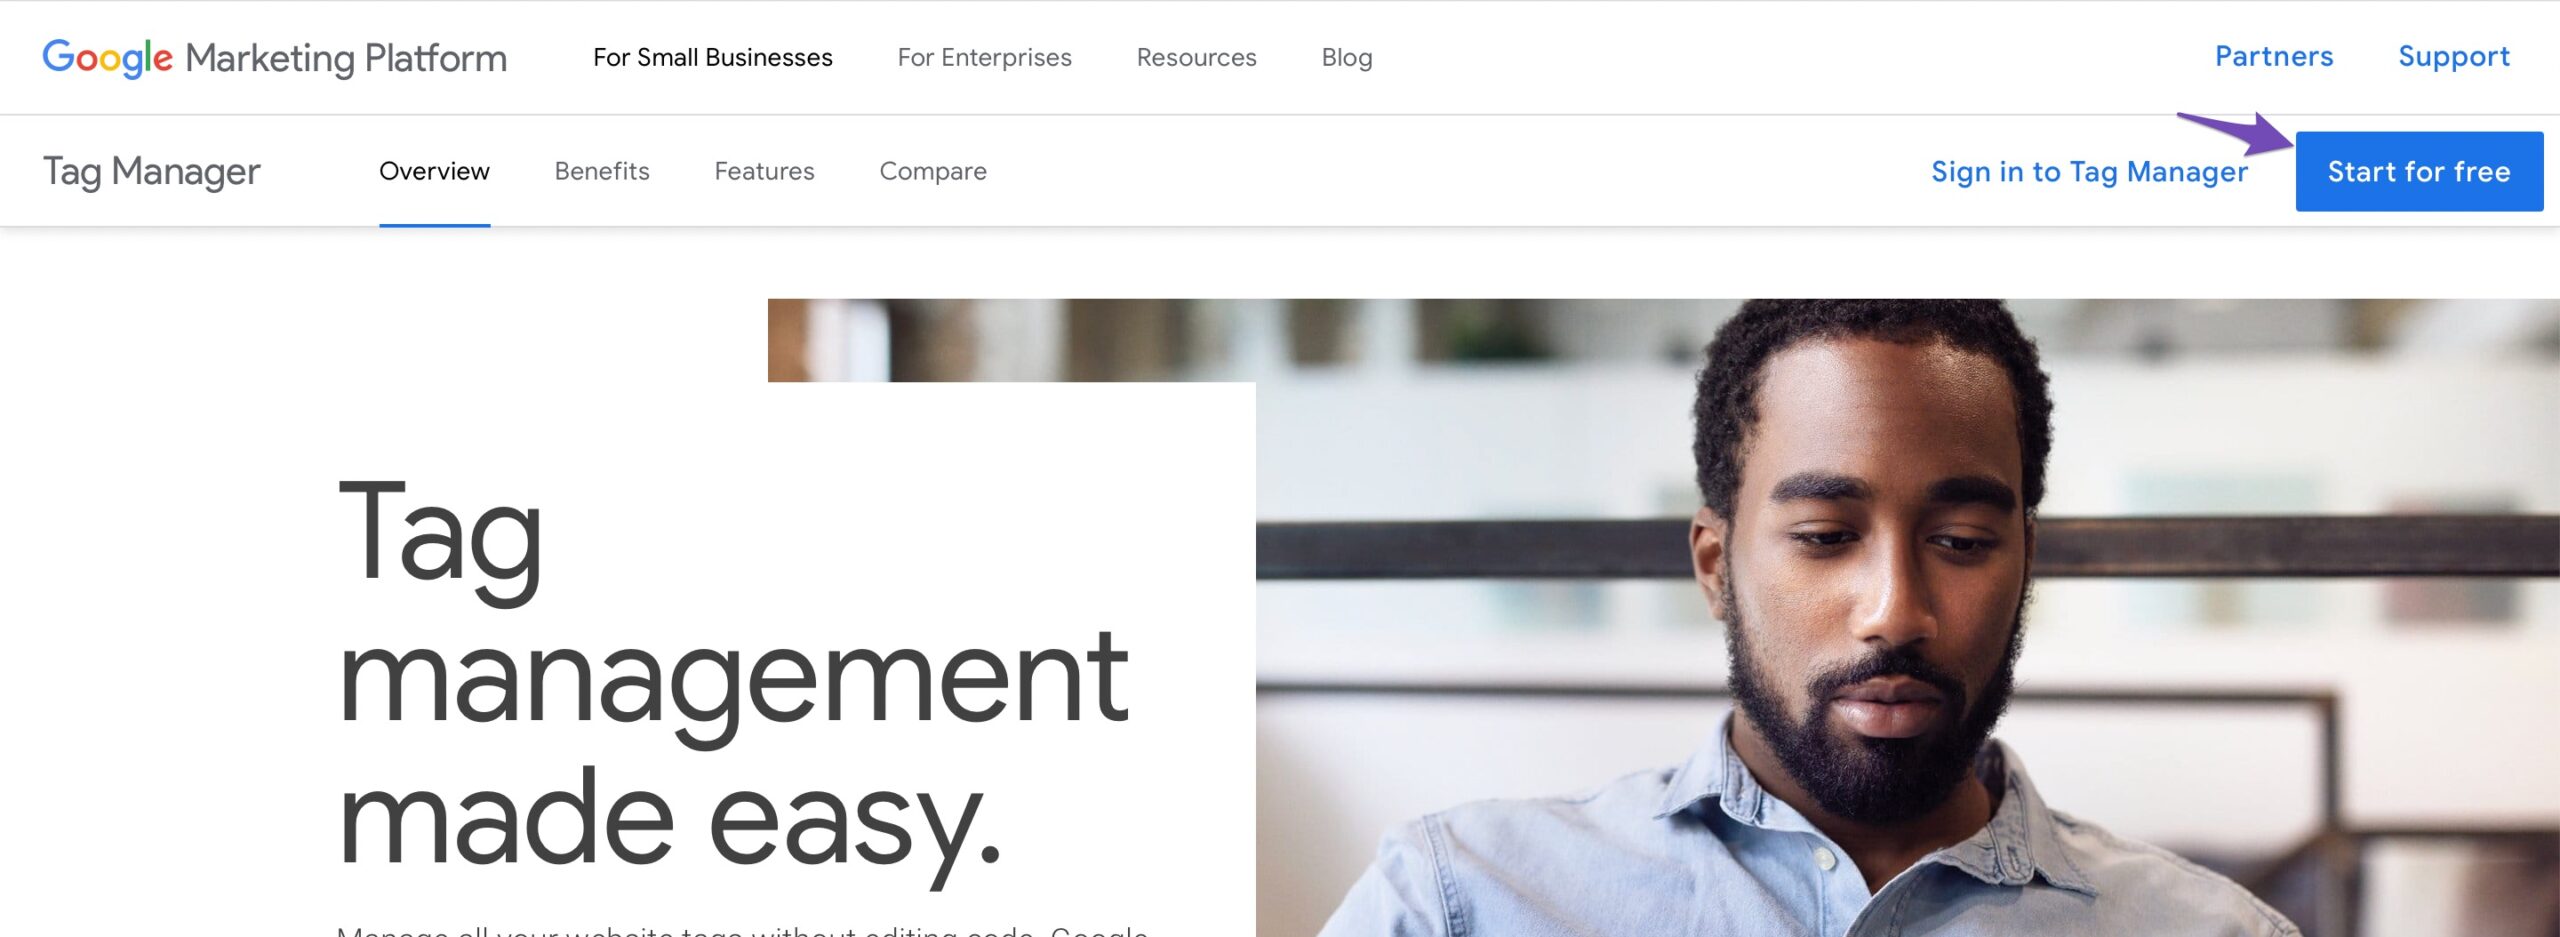
To begin with, the first thing you need to do is create a Google タグ マネージャー account. Visit the Google Tag Manager page and click the Start for free button to sign up.
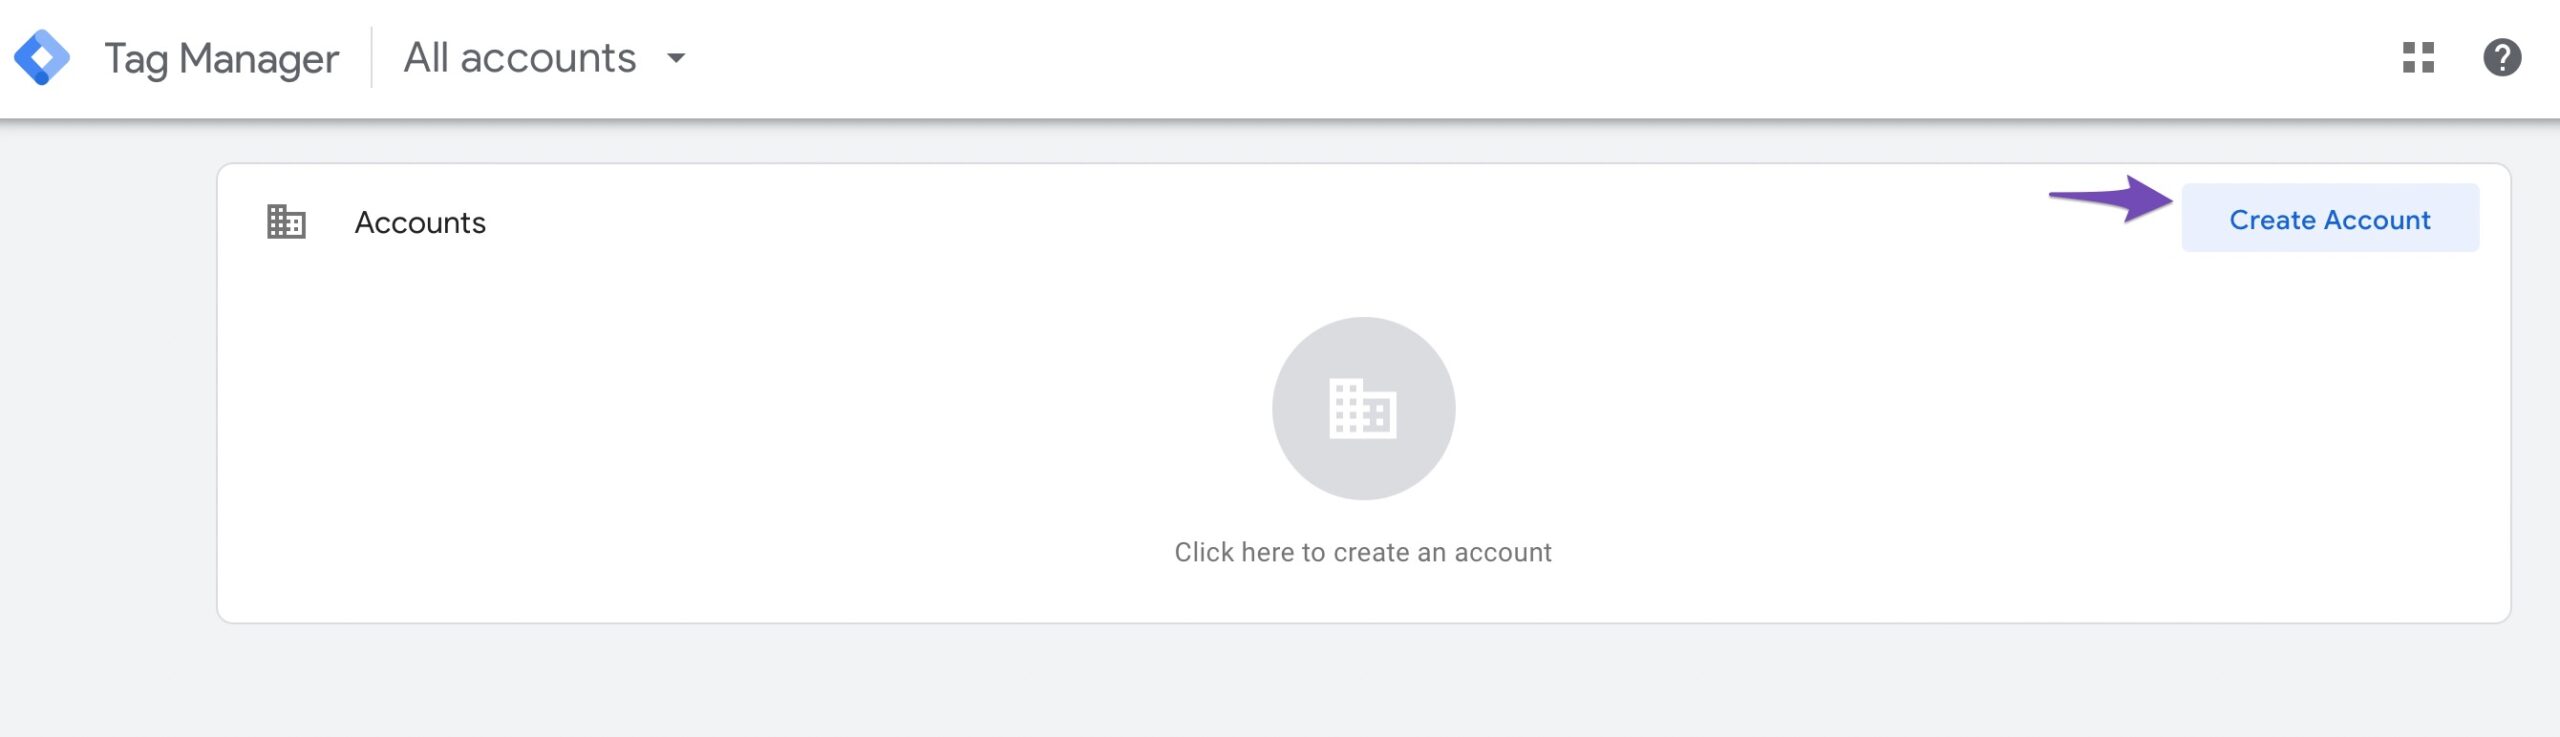
Sign in with a Google account. Once done, you’ll see the Accounts section. Click the Create Account 下図のようにボタンをクリックします。
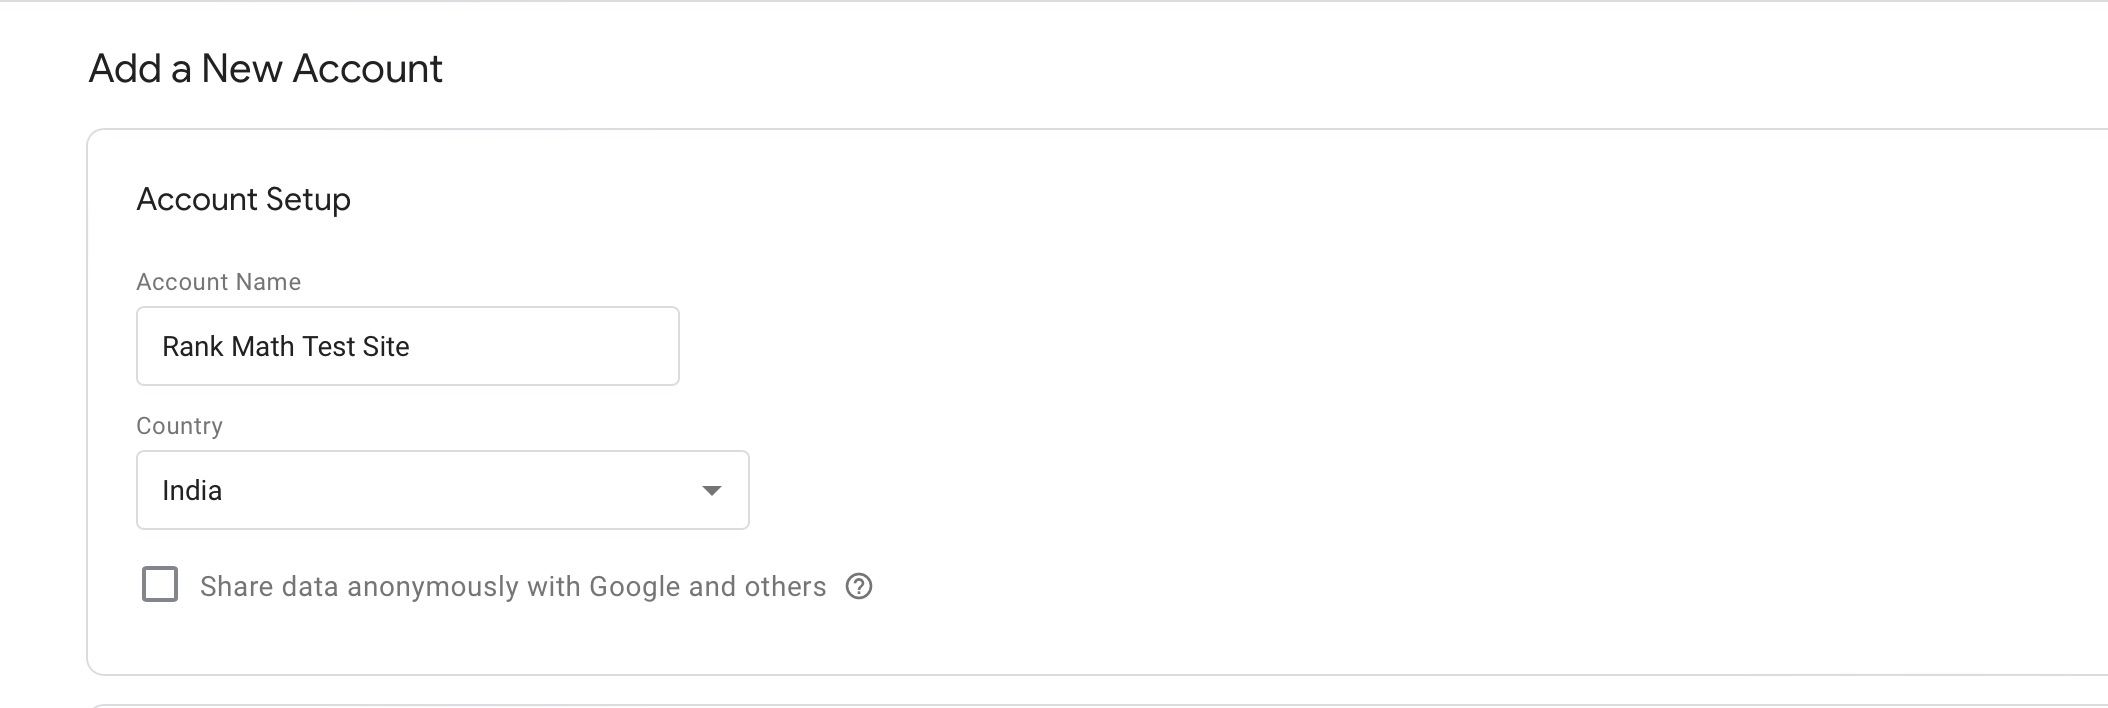
You’ll reach at the Add a New Account form. Under the Account Setup section, enter an Account Name と Country. If you have a company account, use the company name as the account name.
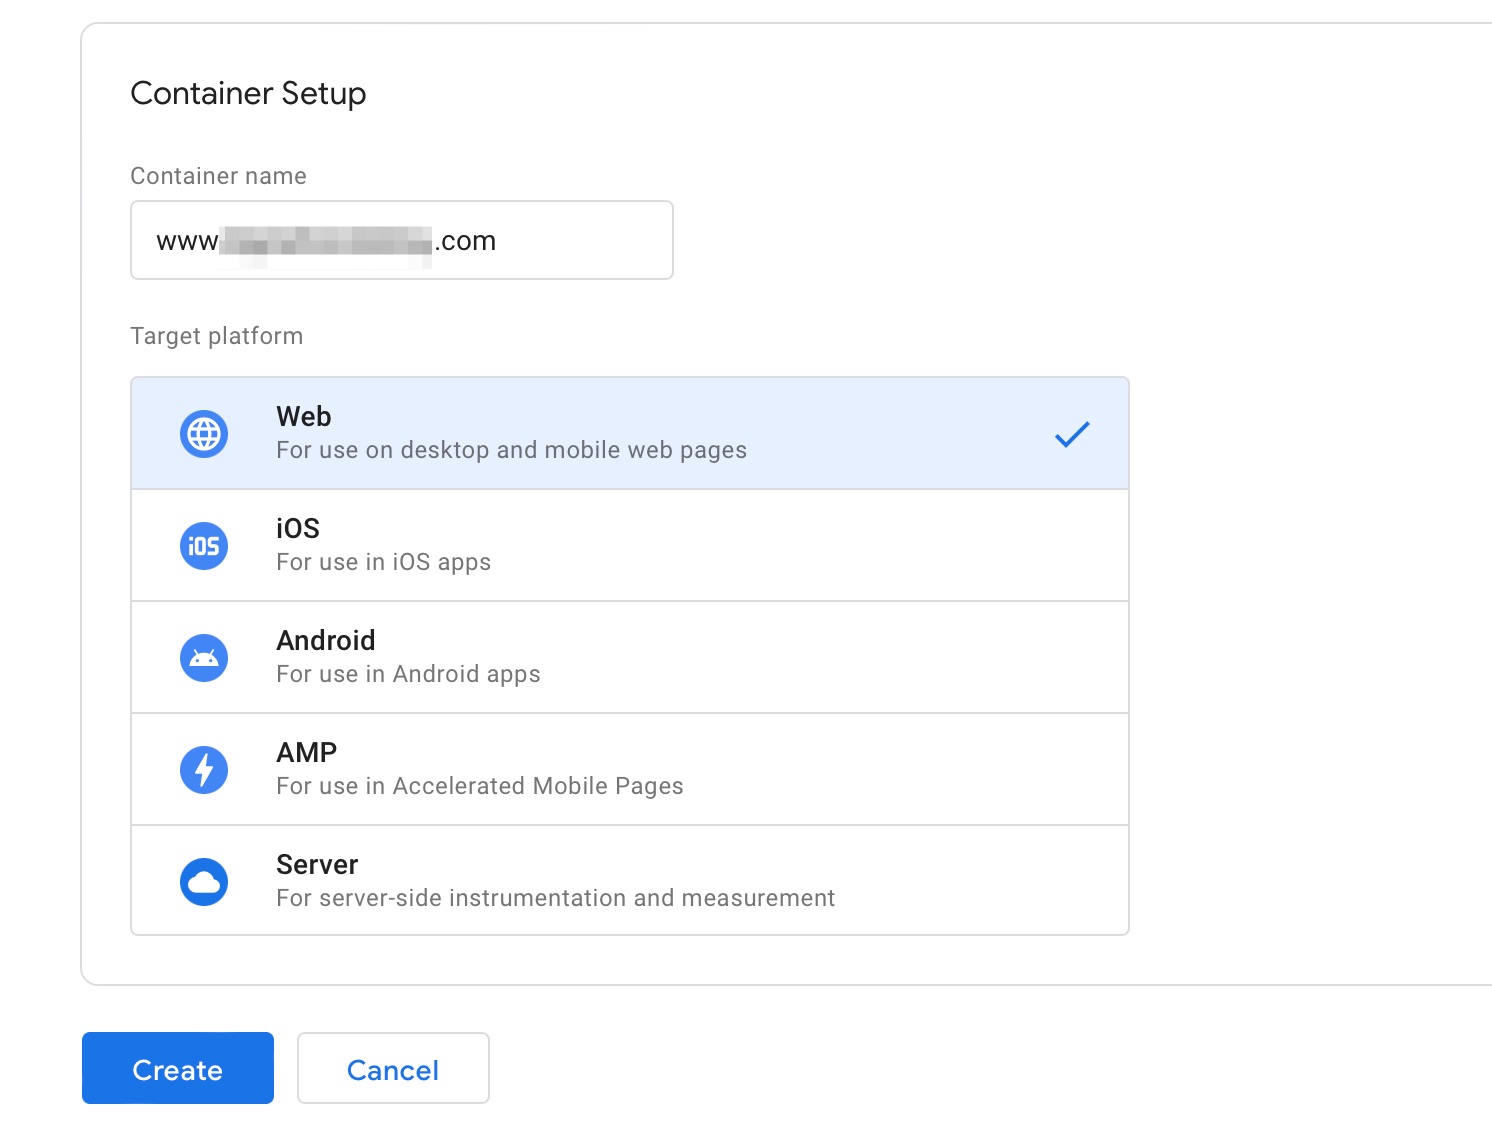
Scroll down to view the Container Setup section. Enter your WordPress website name as the Container name. Once done, click on the Create button to continue.
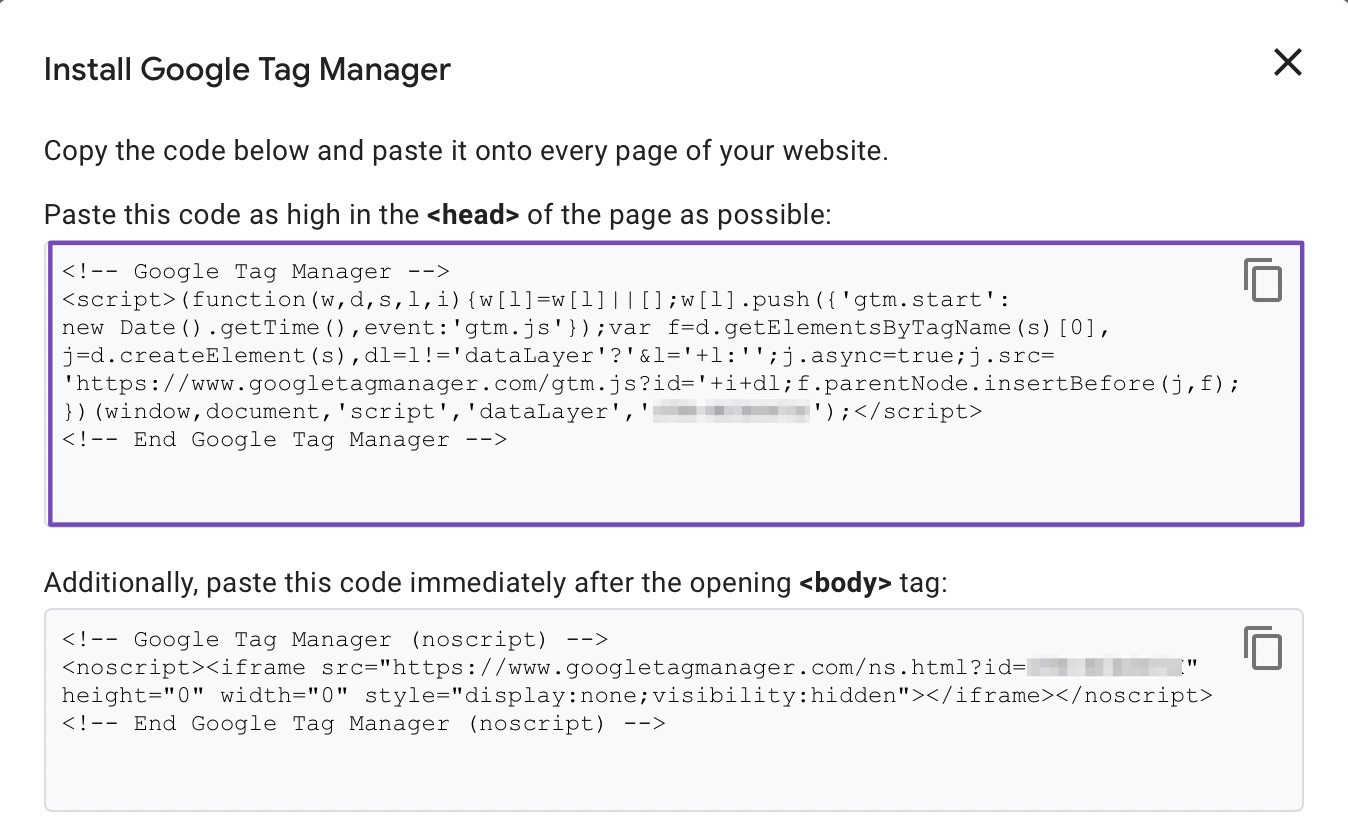
A pop-up will appear, prompting you to accept the Google Tag Manager Terms of Service Agreement to continue the process. Once you’ve accepted the agreement, a new window will appear displaying two code snippets that you’ll need to add Google Tag Manager to the website.
In the next step, this Google Tag Manager installation code will be added to your website, so copy the code and keep this tab open for easy access.
3.1.2 Copy and Add the Tracking Code
The next step after setting up your Google Tag Manager account is to add tracking codes to the WordPress website. You must copy the code snippets from the preceding step to add the tracking code to the website’s header and body via its theme.
ノート: We advise creating a backup of your WordPress site first because the theme file is sensitive to modifications. Don’t forget to download the backup files after making a backup of the website. To reduce the possibility of the site breaking, we also advise making these modifications to a child theme instead of the main theme.
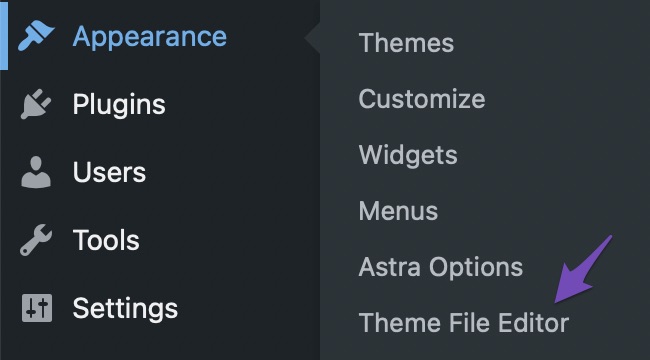
To add the tracking code, navigate to 外観→Theme Editor WordPress ダッシュボードから。
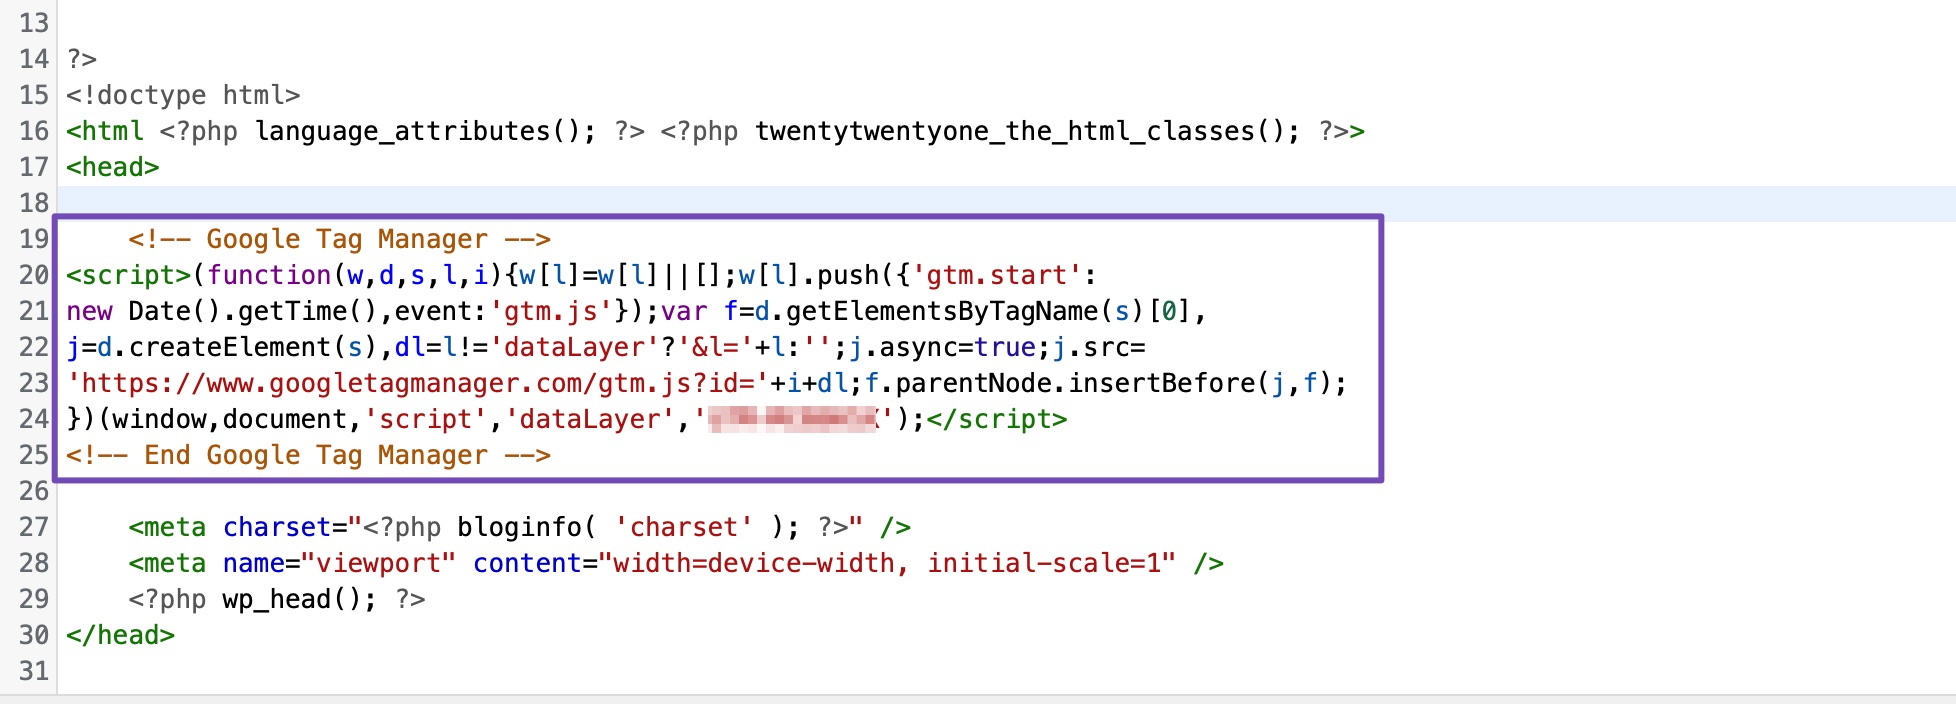
On the right side, locate header.php の中に Theme Files navigation panel. Click on the file to open it.
Locate the opening <head> tag and paste the tag manager code right below it, as shown.
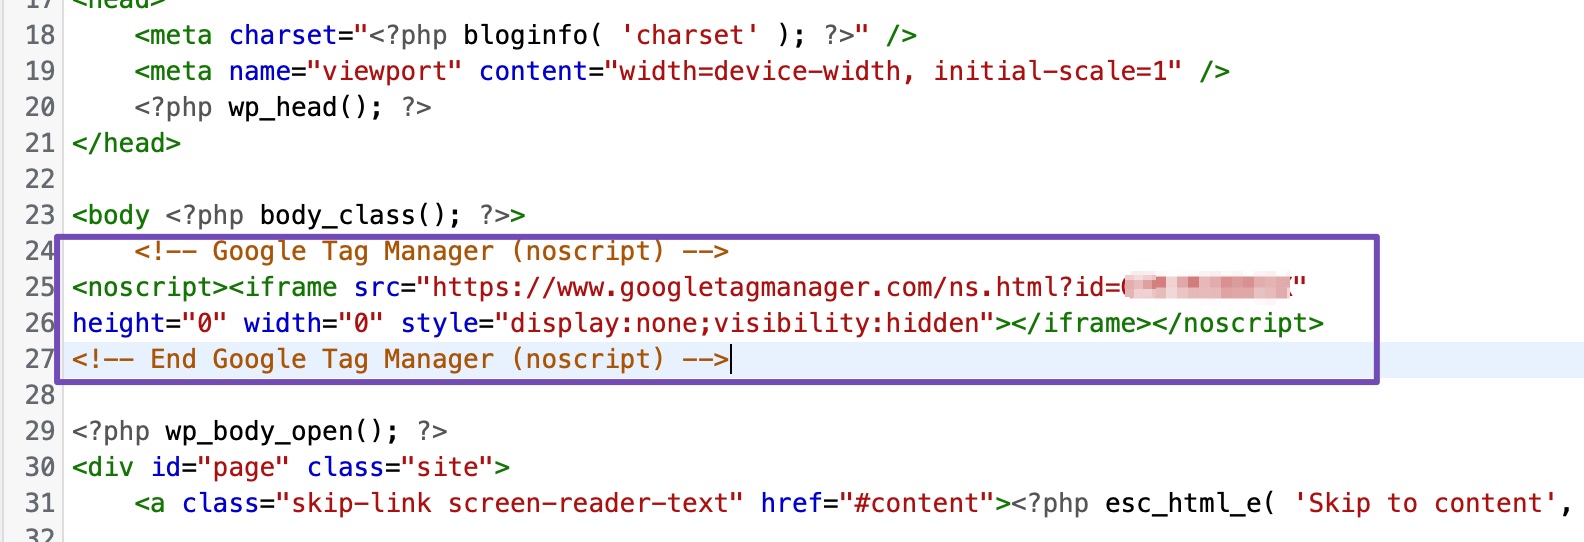
Once done, copy the second part of the code snippet from the Google Tag Manager tab and paste it immediately after the <body><script type='text/javascript' src='https://rankmath.com/wp-includes/js/jquery/jquery.js'></script><script type='text/javascript' src='https://rankmath.com/wp-content/plugins/translatepress-multilingual/assets/js/trp-iframe-preview-script.js'></script><link rel='stylesheet' id='trp-preview-iframe-style-css' href='https://rankmath.com/wp-content/plugins/translatepress-multilingual/assets/css/trp-preview-iframe-style.css' type='text/css' media='all' /><link rel='stylesheet' id='dashicons-css' href='https://rankmath.com/wp-includes/css/dashicons.min.css' type='text/css' media='all' /> tag, as shown below.
Once done, click the ファイルの更新 button to save the changes. Google Tag Manager is successfully installed on your website and can be used to install any tracking code.
3.1.3 Publish a New Tag
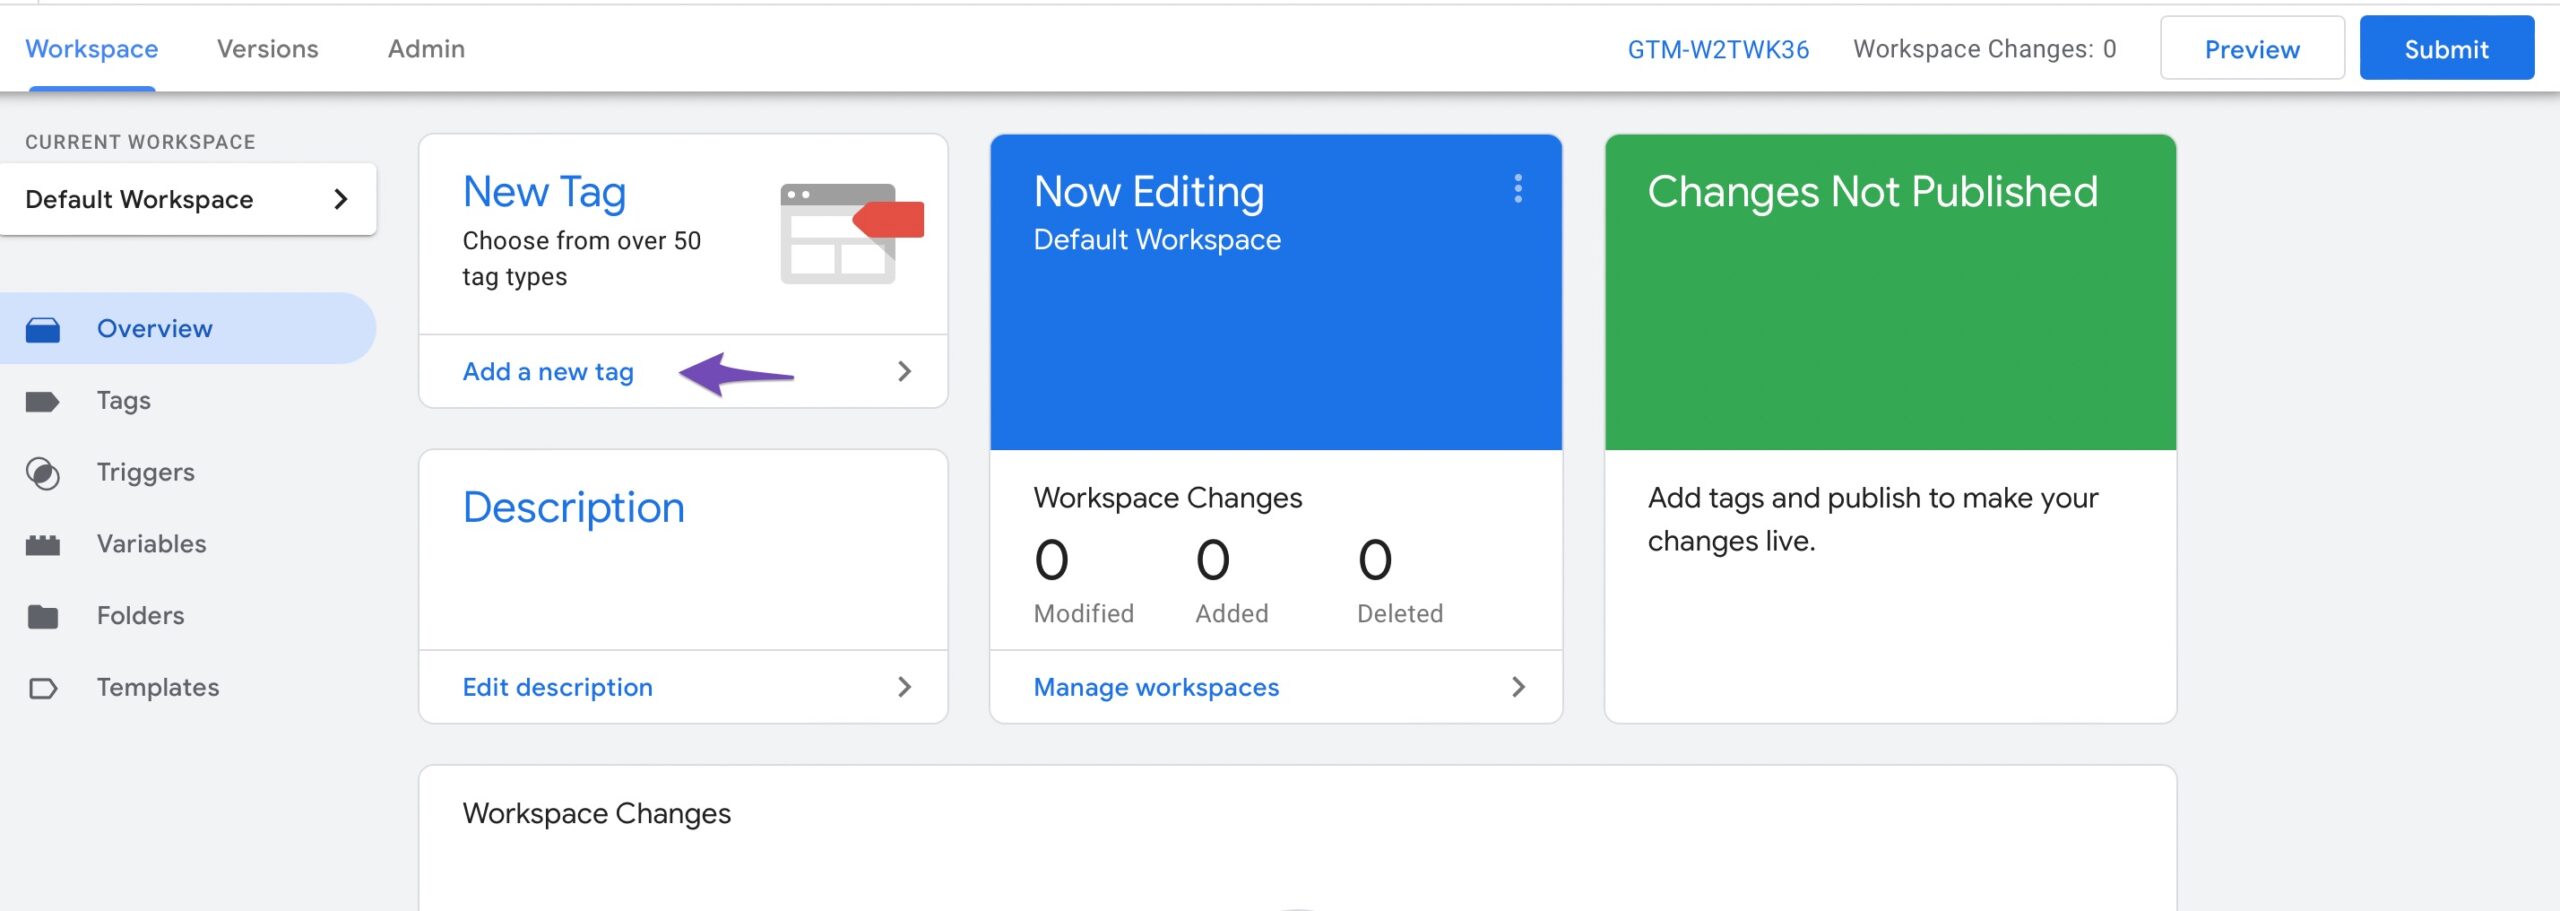
You can now add and publish tags on your website. To do so, open your Google Tag Manager account and navigate to the Workspace tab. In the New Tag section, click on Add a new tag 以下に示すように。
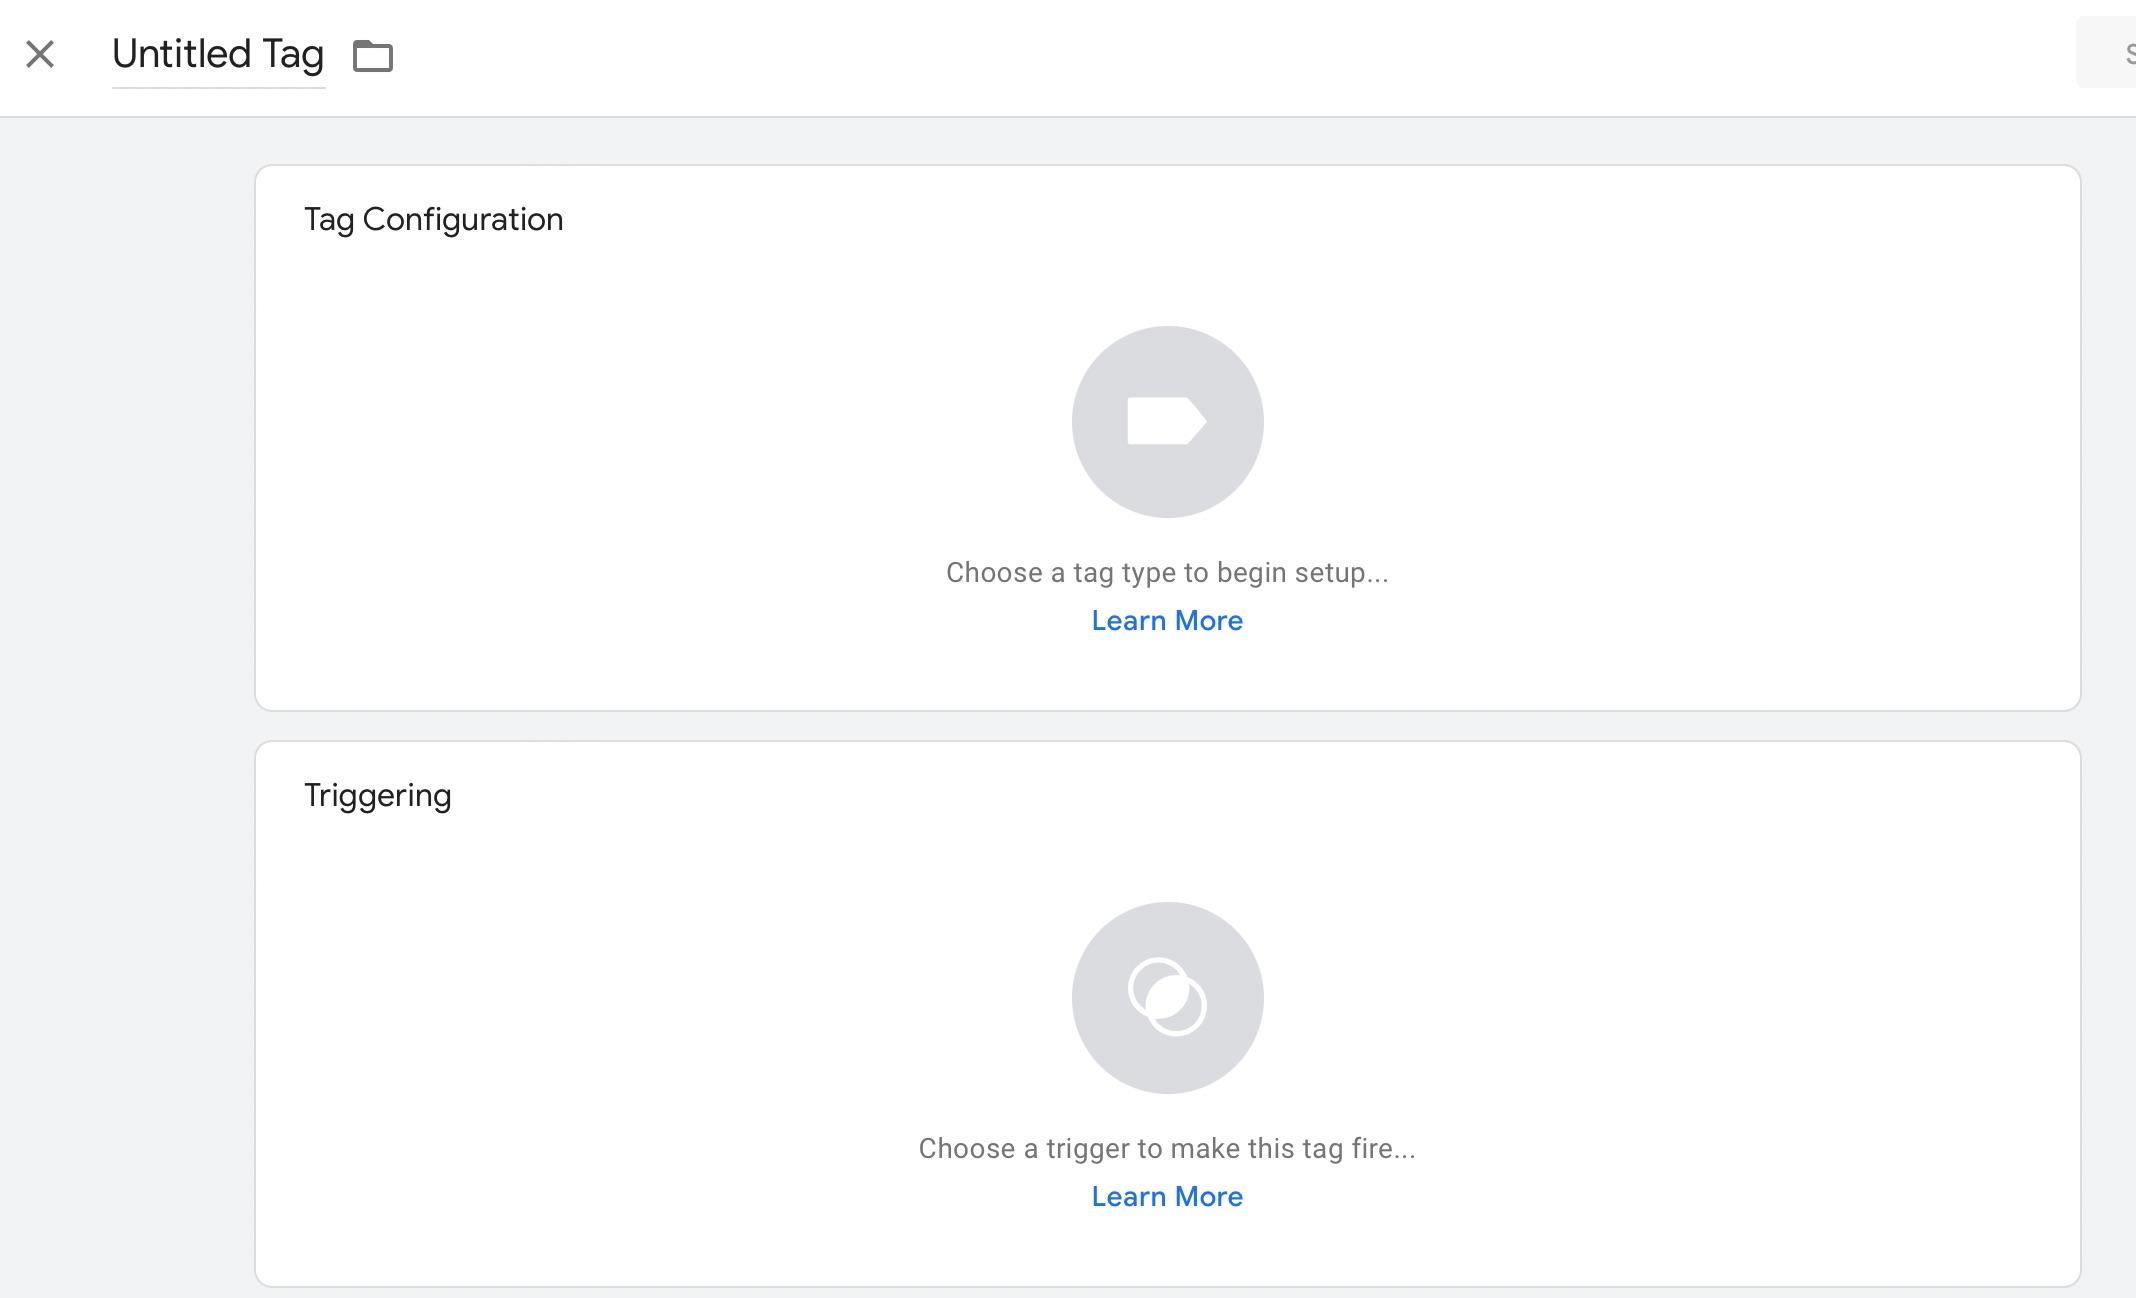
In the top-left area, you’ll see a field with the label, Untitled Tag. Rename it with the desired tag name. In this example, we’ll call it Site Analysis as we add a Google Analytics tag.
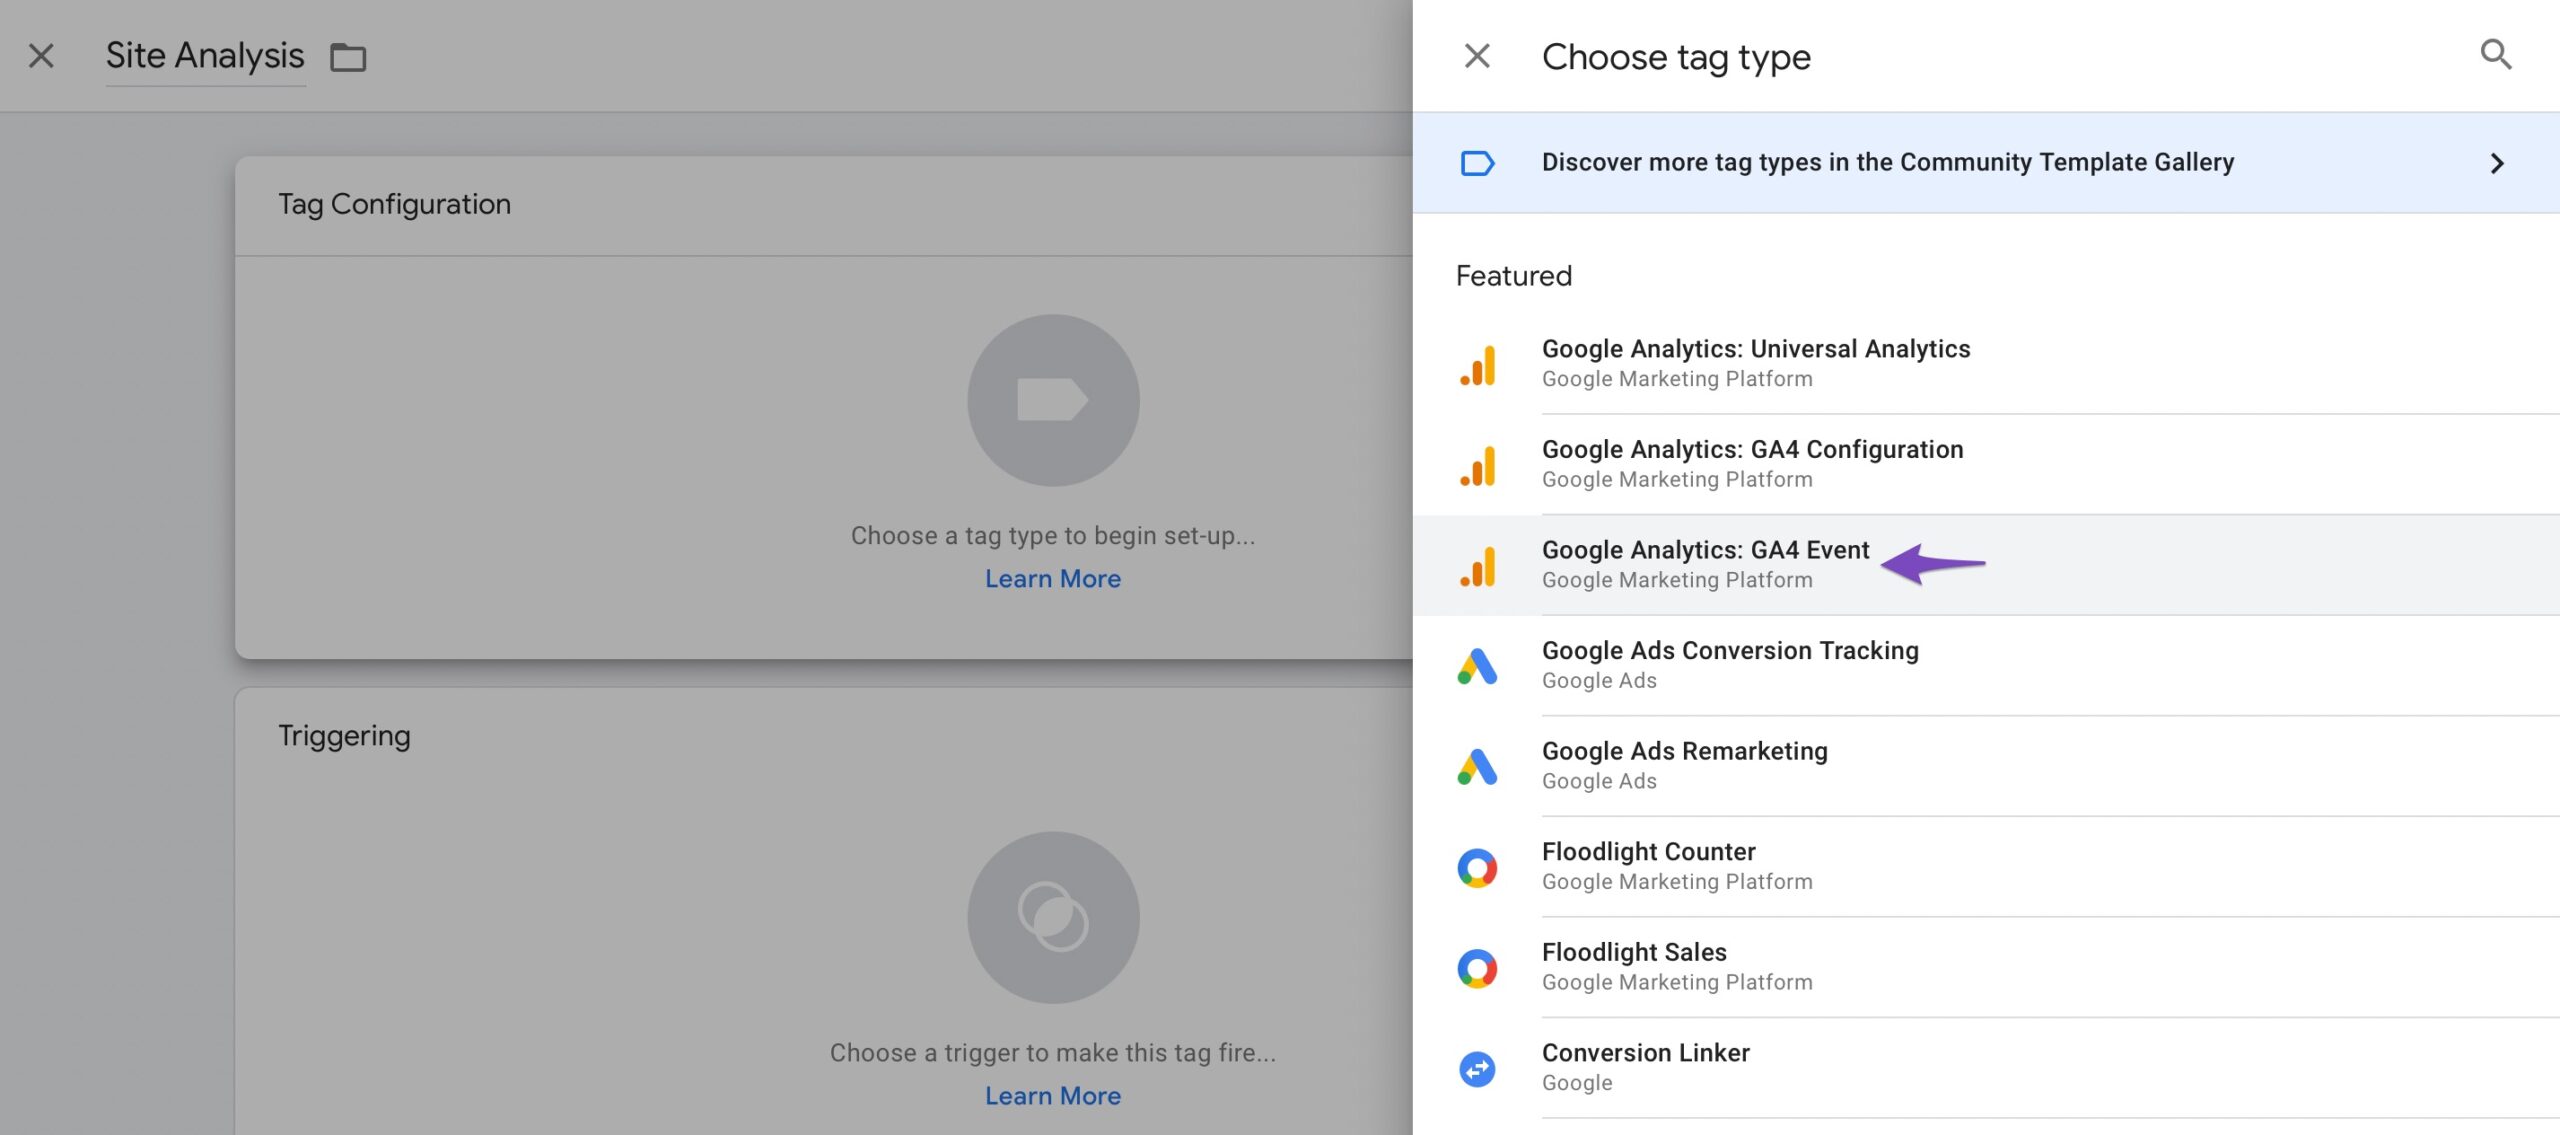
Click the large icon labelled Choose a tag type to begin setup の中に Tag Configuration section. In this example, we’ll select Google Analytics: GA4 Event.
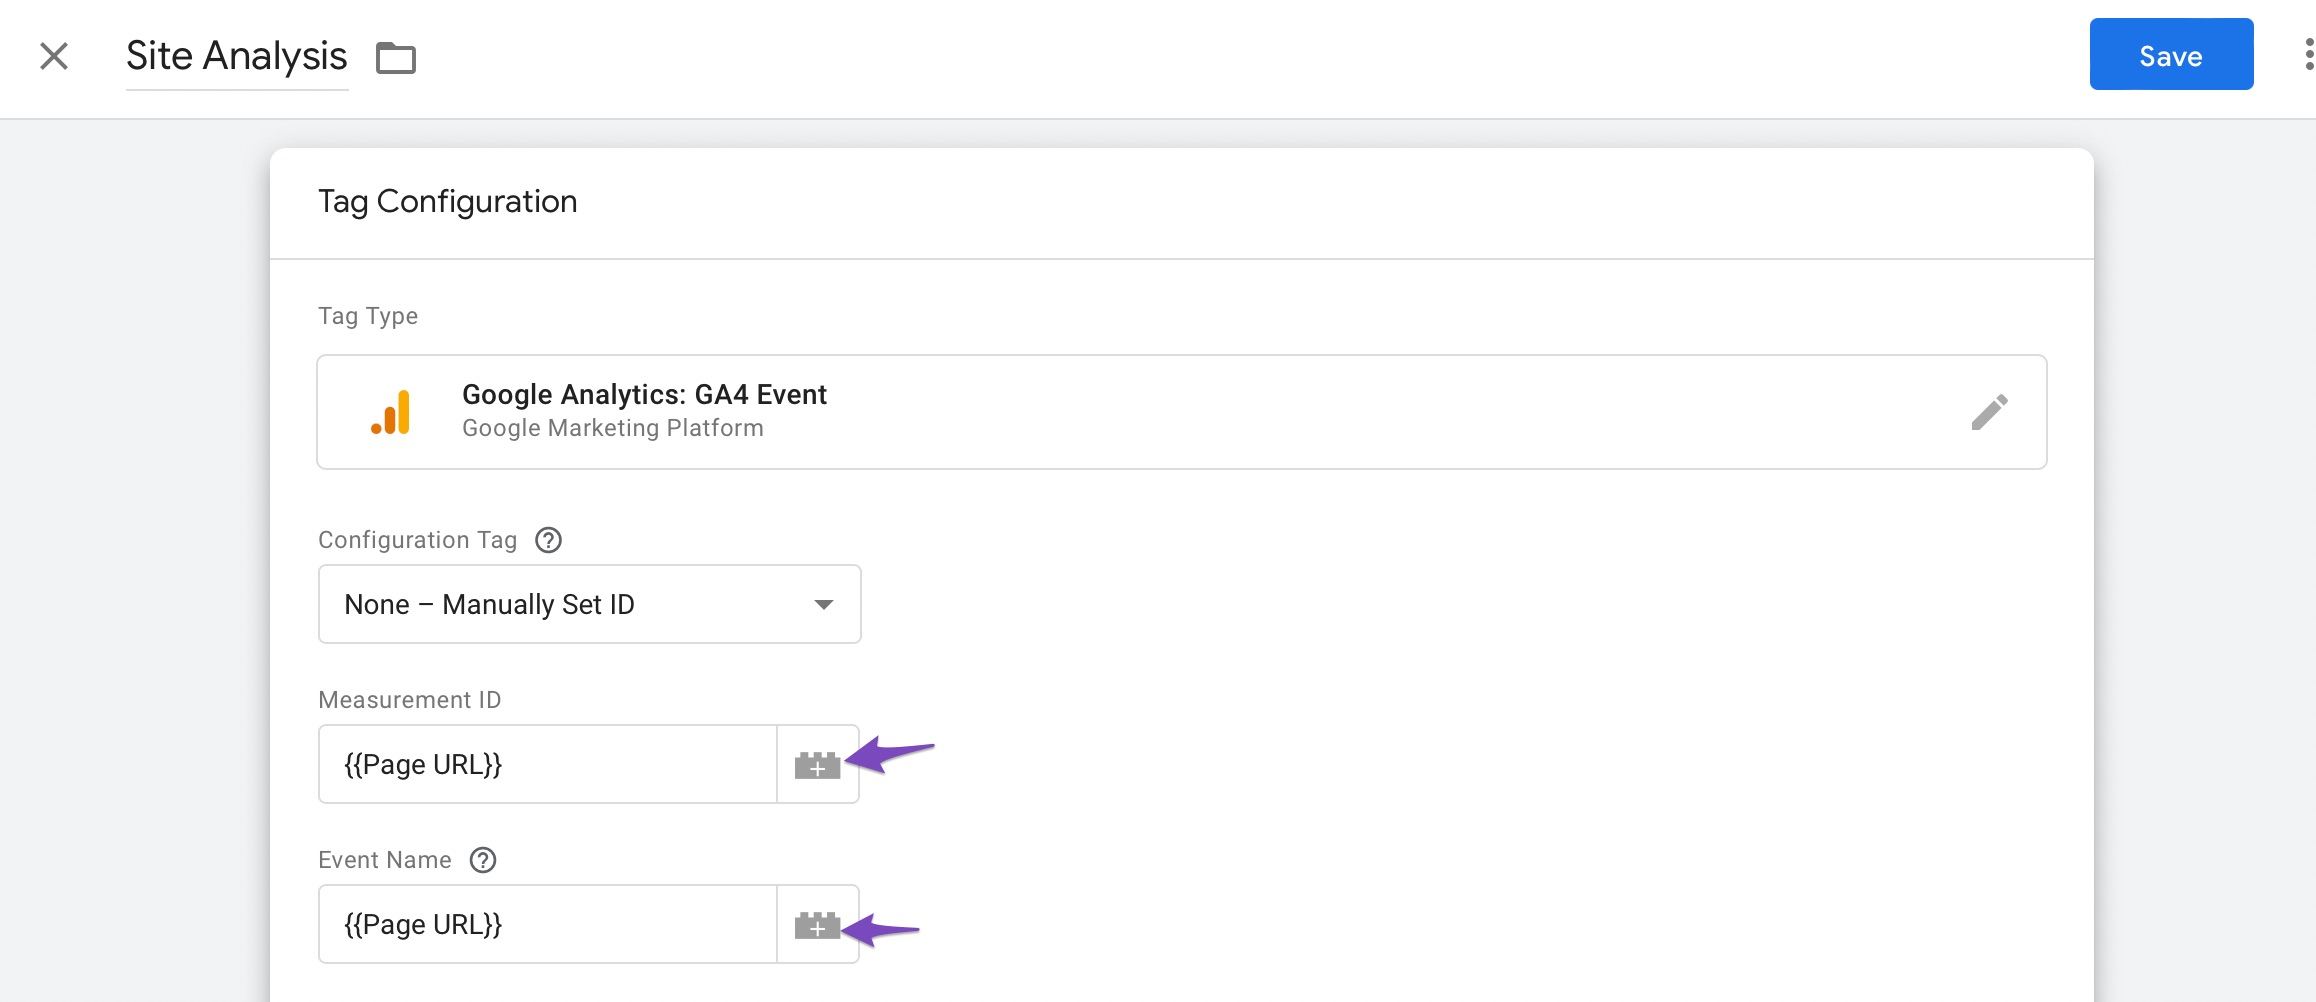
Next, set the Configuration Tag を選択します。 Measurement ID and the Event Name from the given list of options. From the available options, we’ve selected the Page URL as shown below.
Once done, click on the 保存 ボタン。
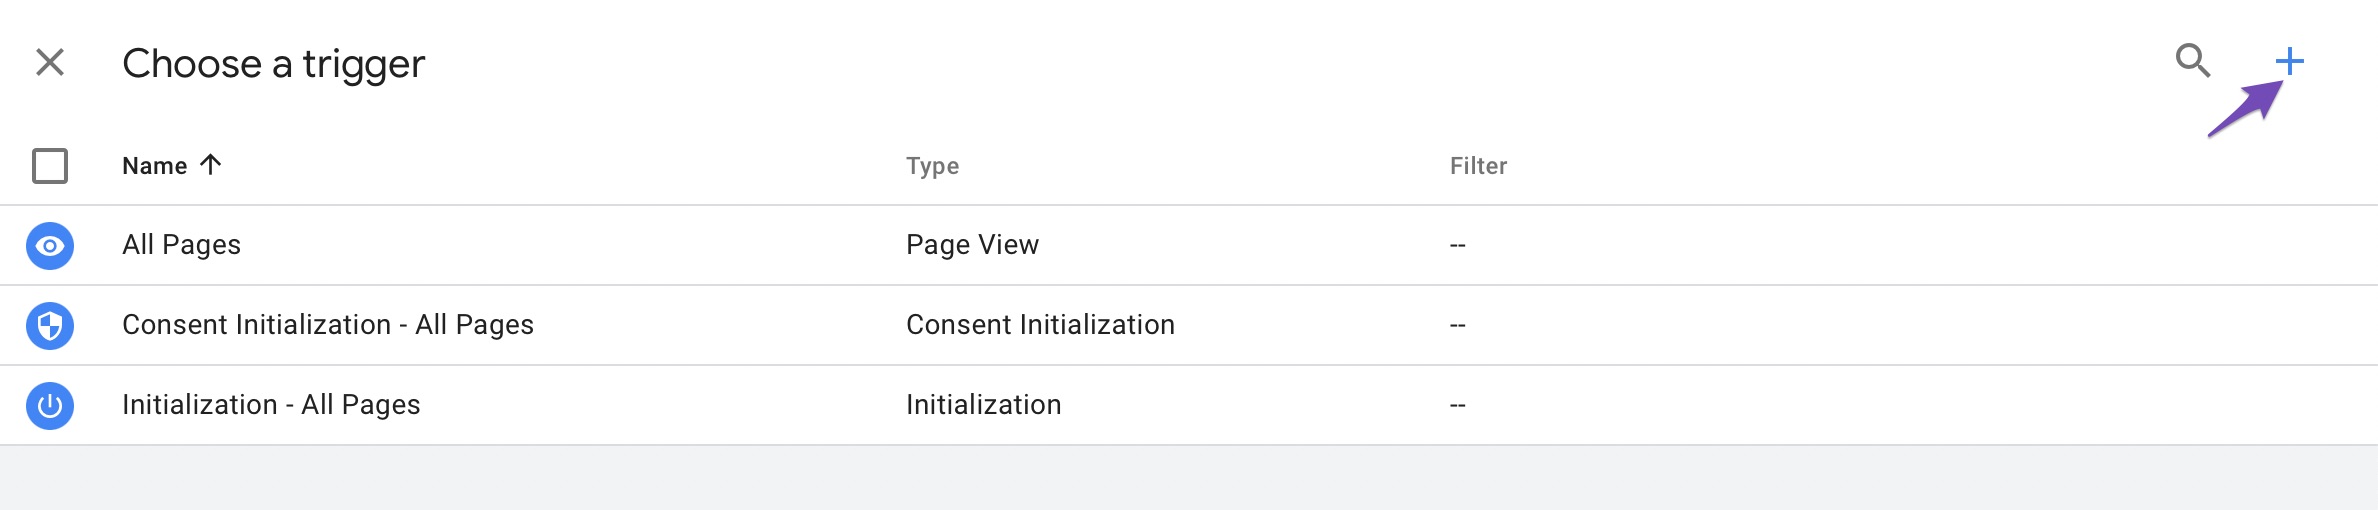
Now you have to set up a trigger. Click on Choose a trigger to make this tag fire 以下に示すように。
A list of available triggers will appear in the Choose a trigger section. If you can’t find the option you’re searching for, click the ‘+‘ icon in the top-right corner.
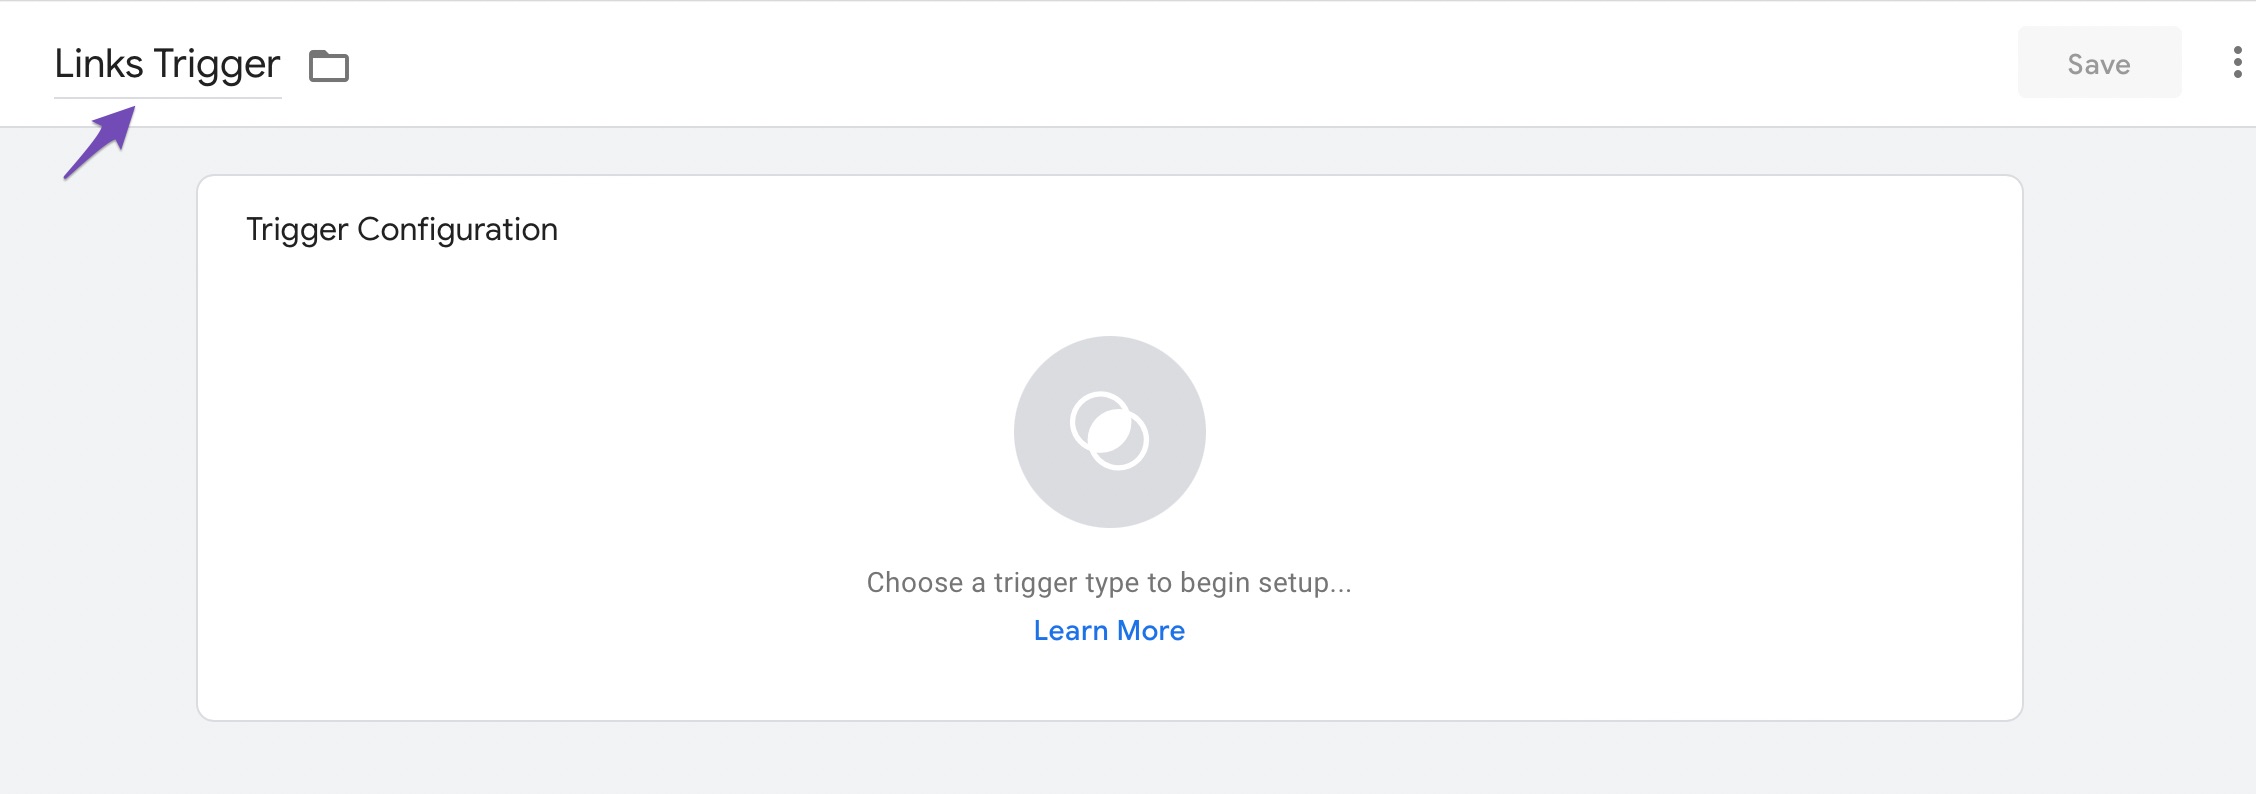
In the Trigger Configuration section, give your trigger a name and click Choose a trigger type to begin setup.
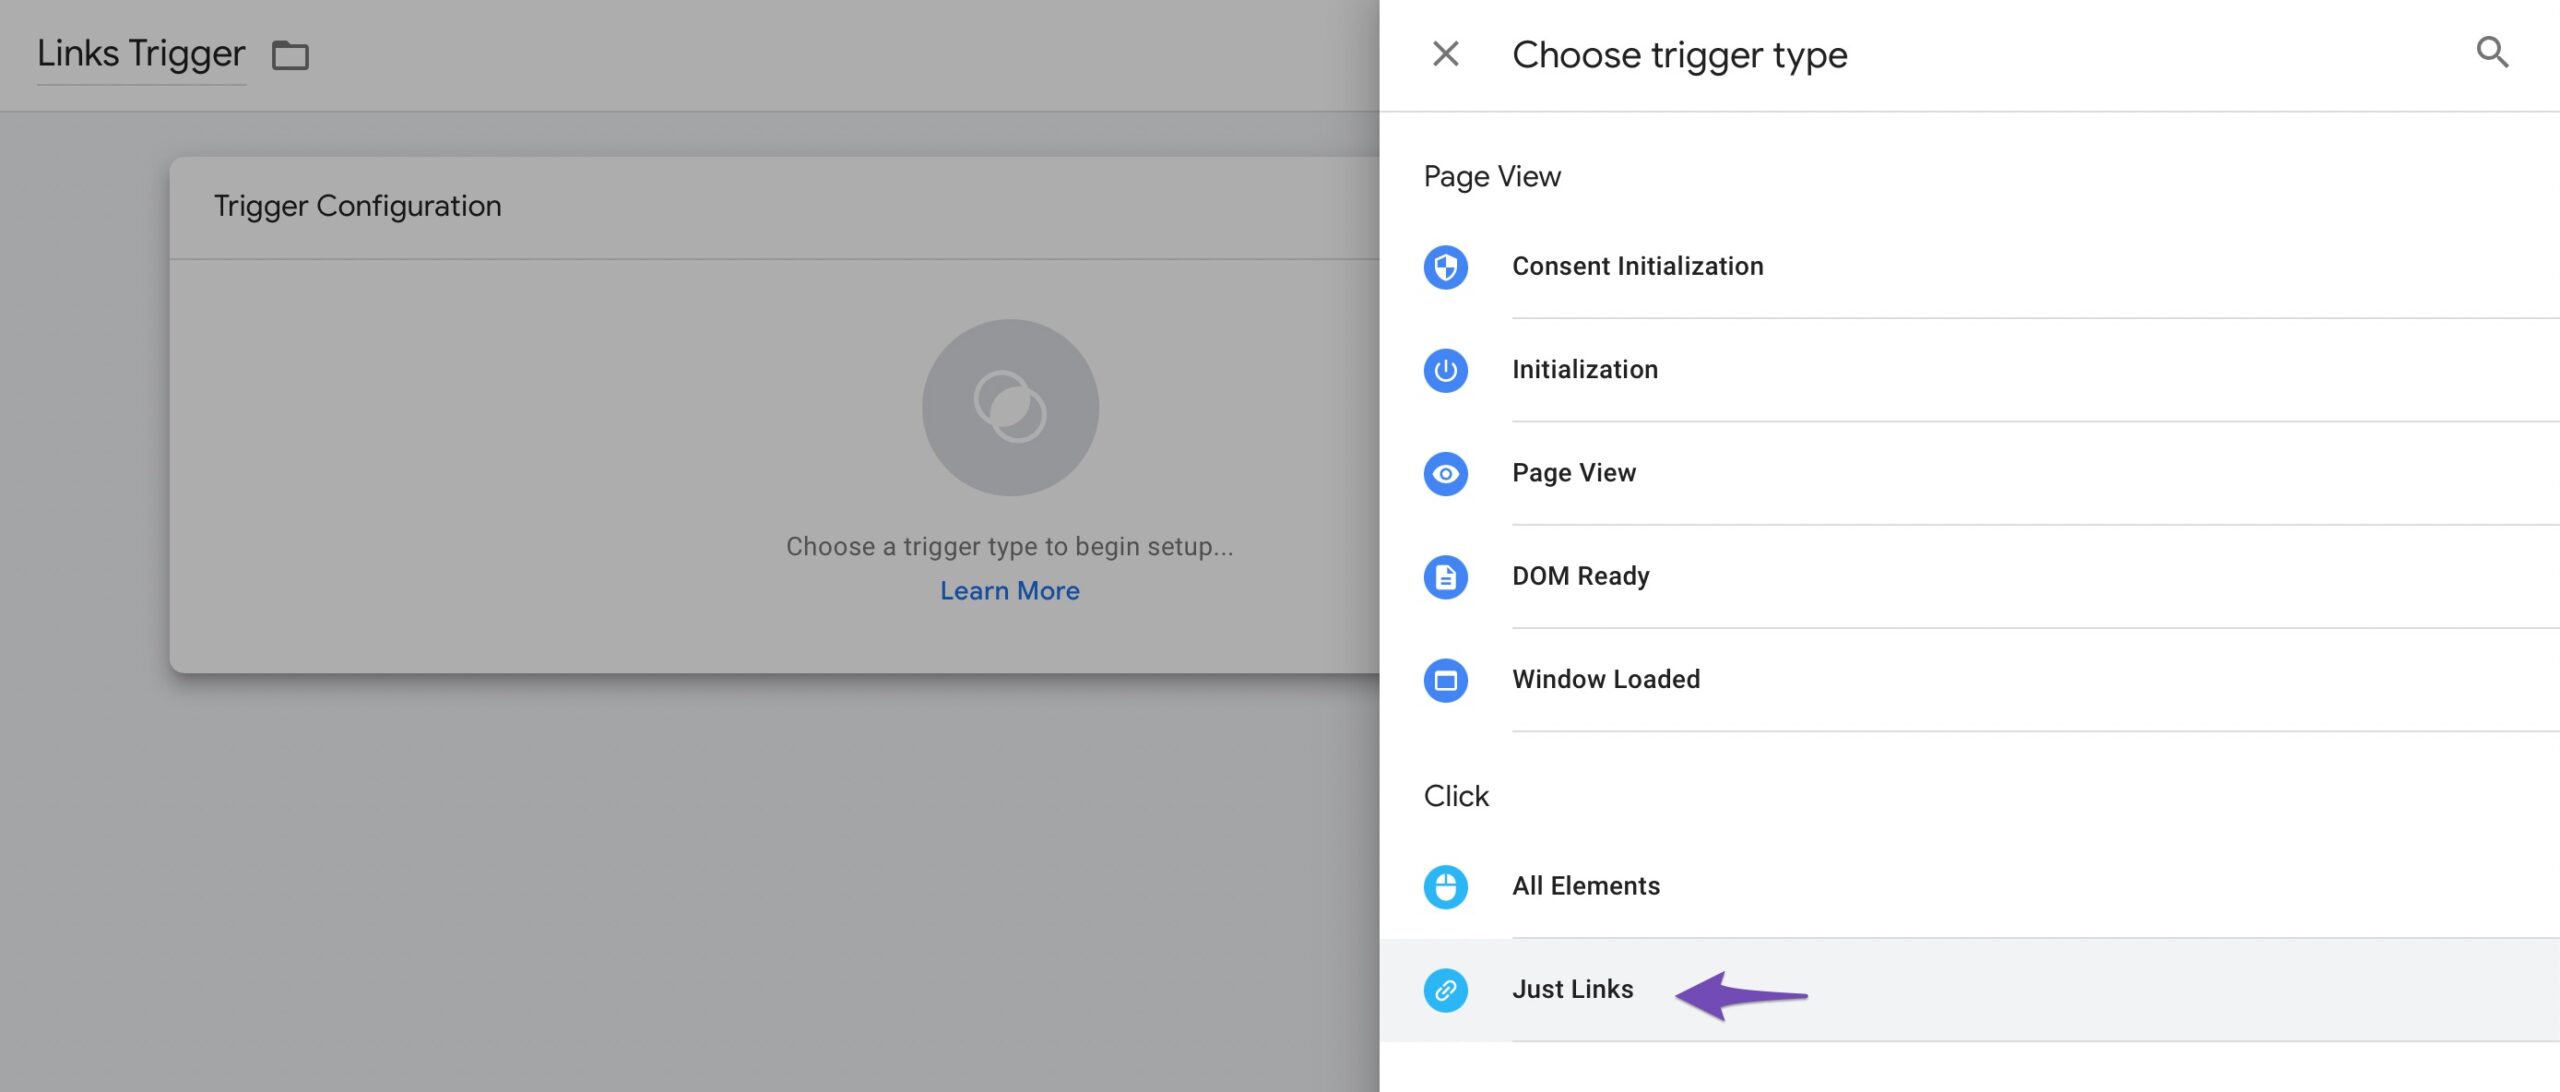
From the various trigger options, select the desired trigger. For example, we’ve selected Just Links.
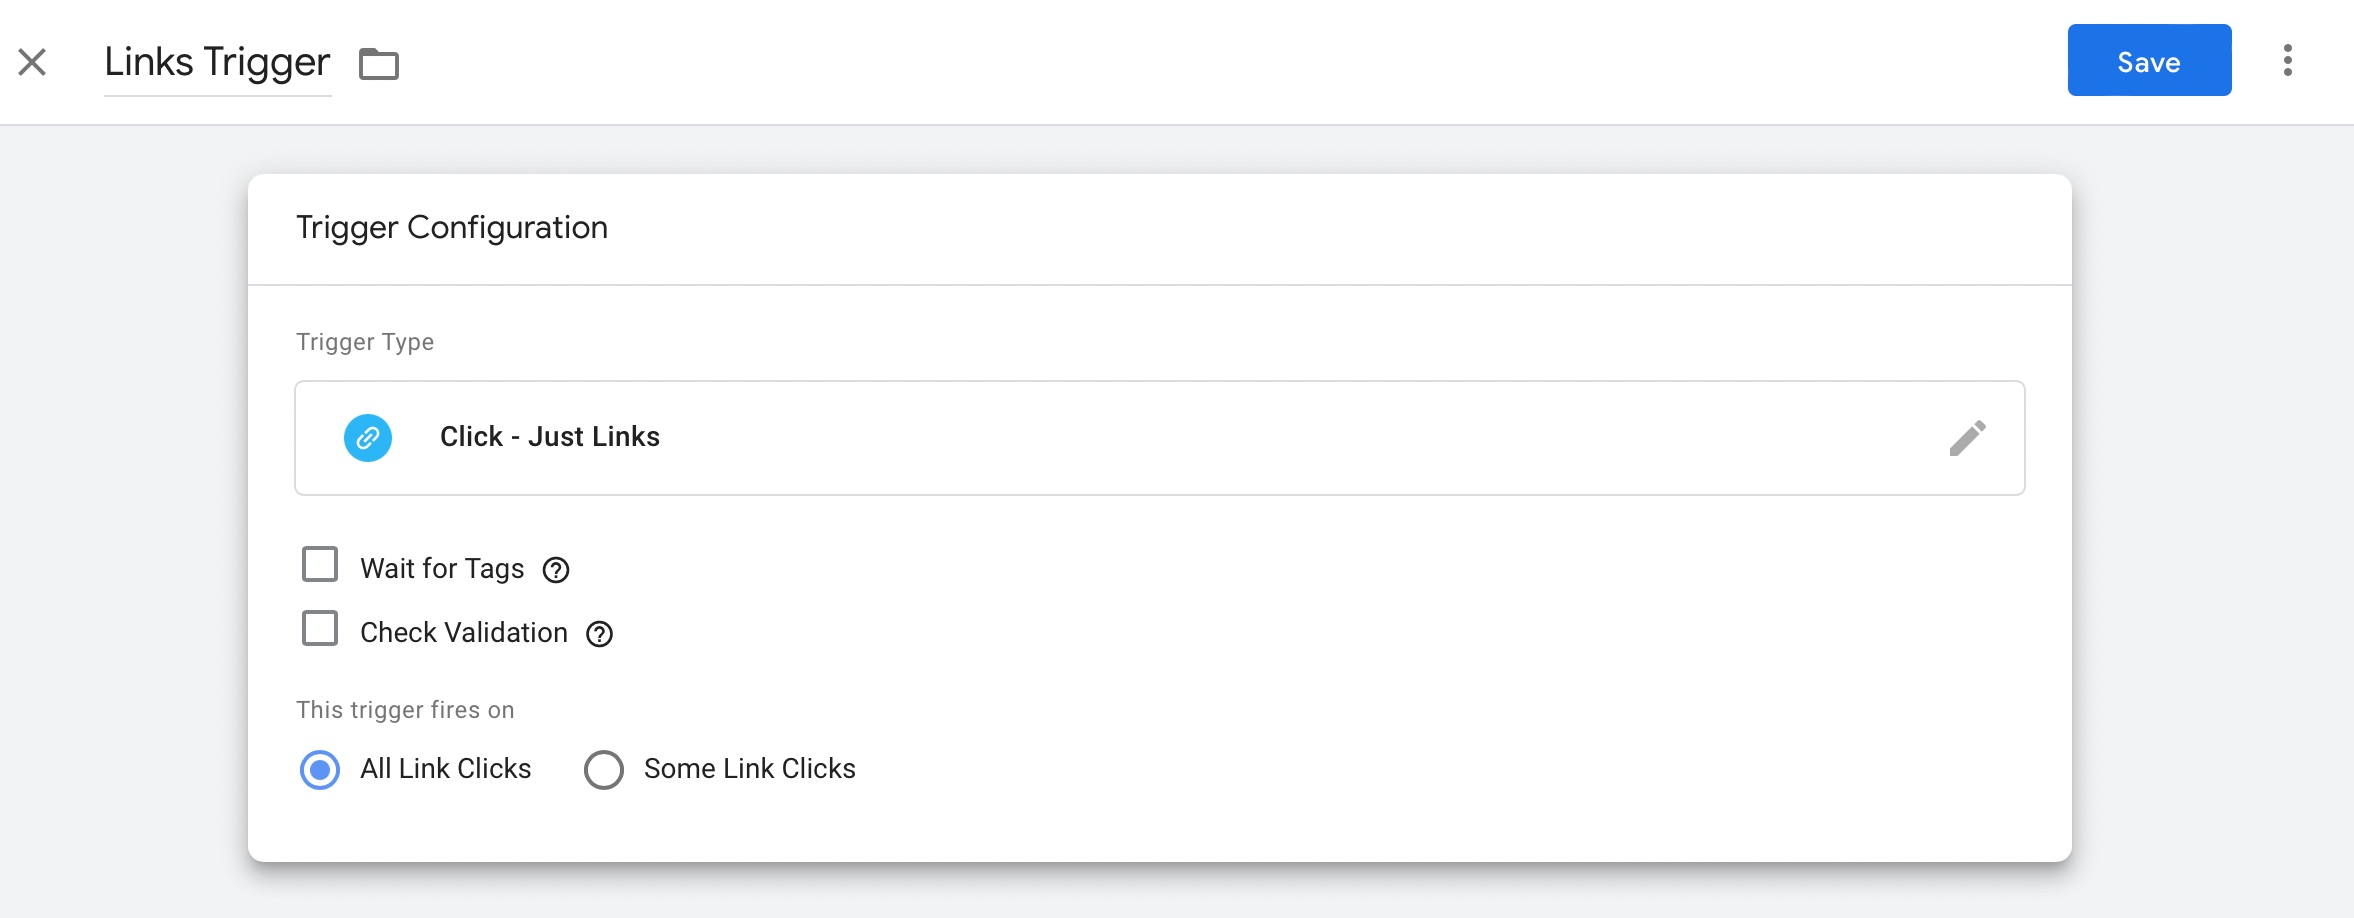
Next, check the desired options to apply in the tag in the Trigger Configuration section. Under the This trigger fires on section, we selected All Link Clicks. Click on the 保存 ボタン。
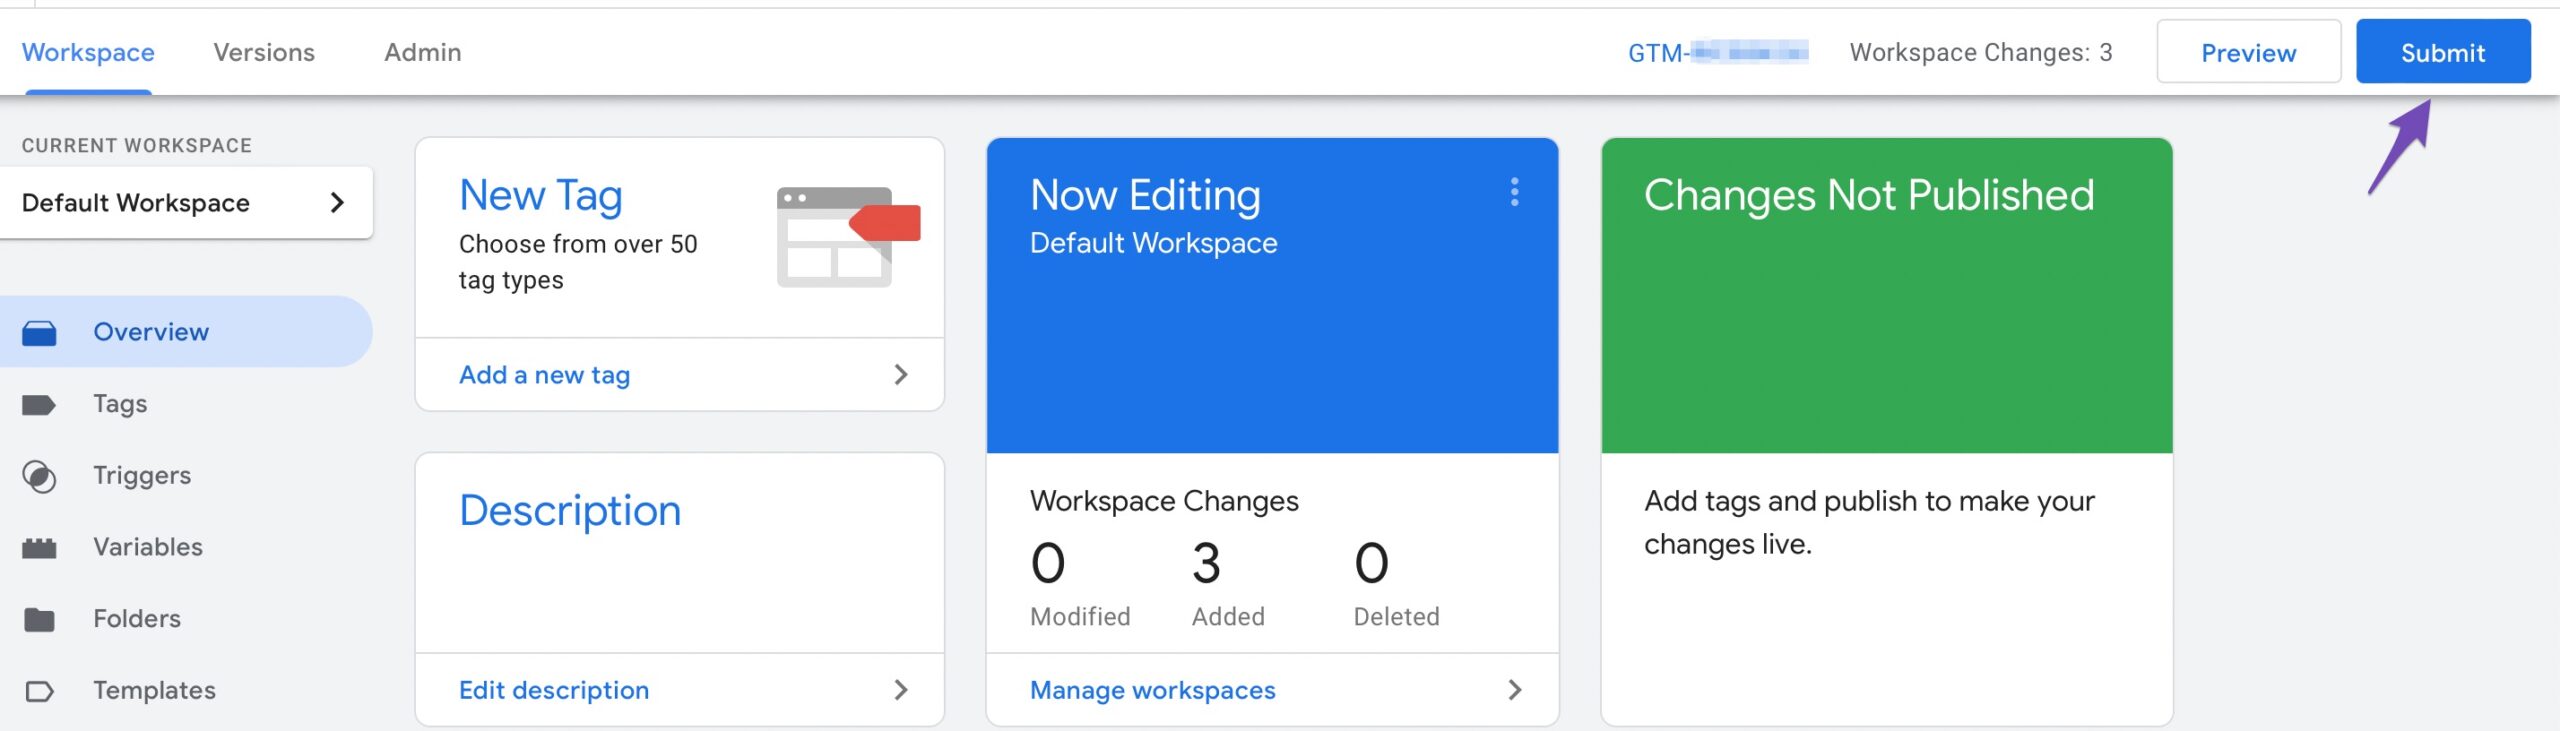
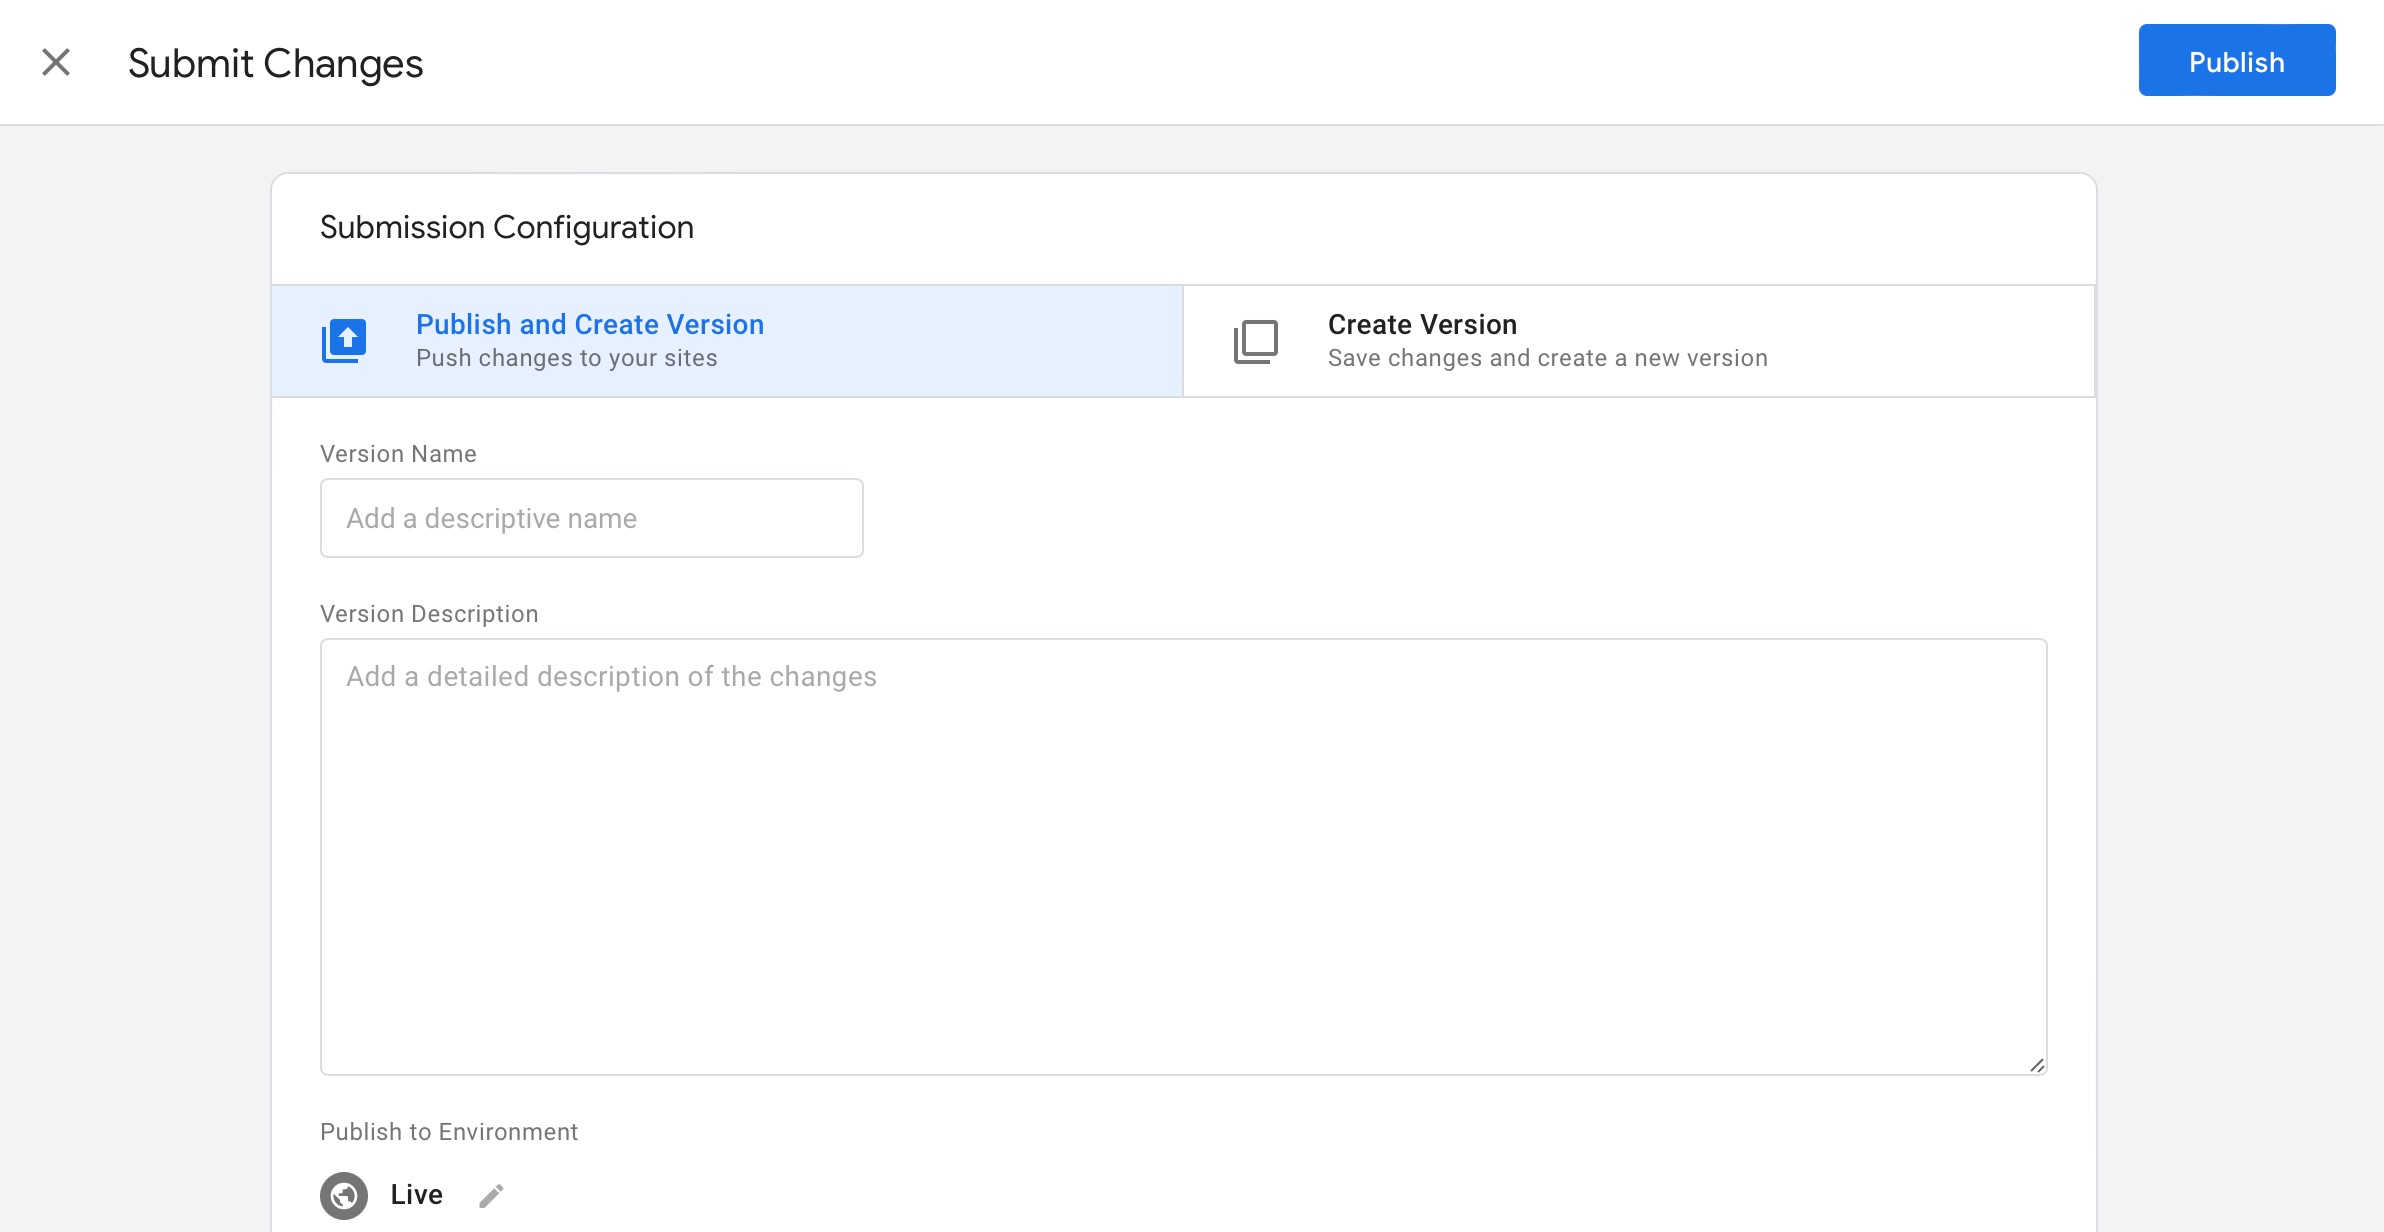
Finally, you can submit your newly created tag. Click the 送信 button on the Google Tag Manager dashboard’s Workspace タブ。
To push changes to your site, select Publish and Create Version. Fill the Version Name field with the tag name and click 公開.
And that’s it! You have successfully added a new Google Analytics tag to your WordPress website using Google Tag Manager.
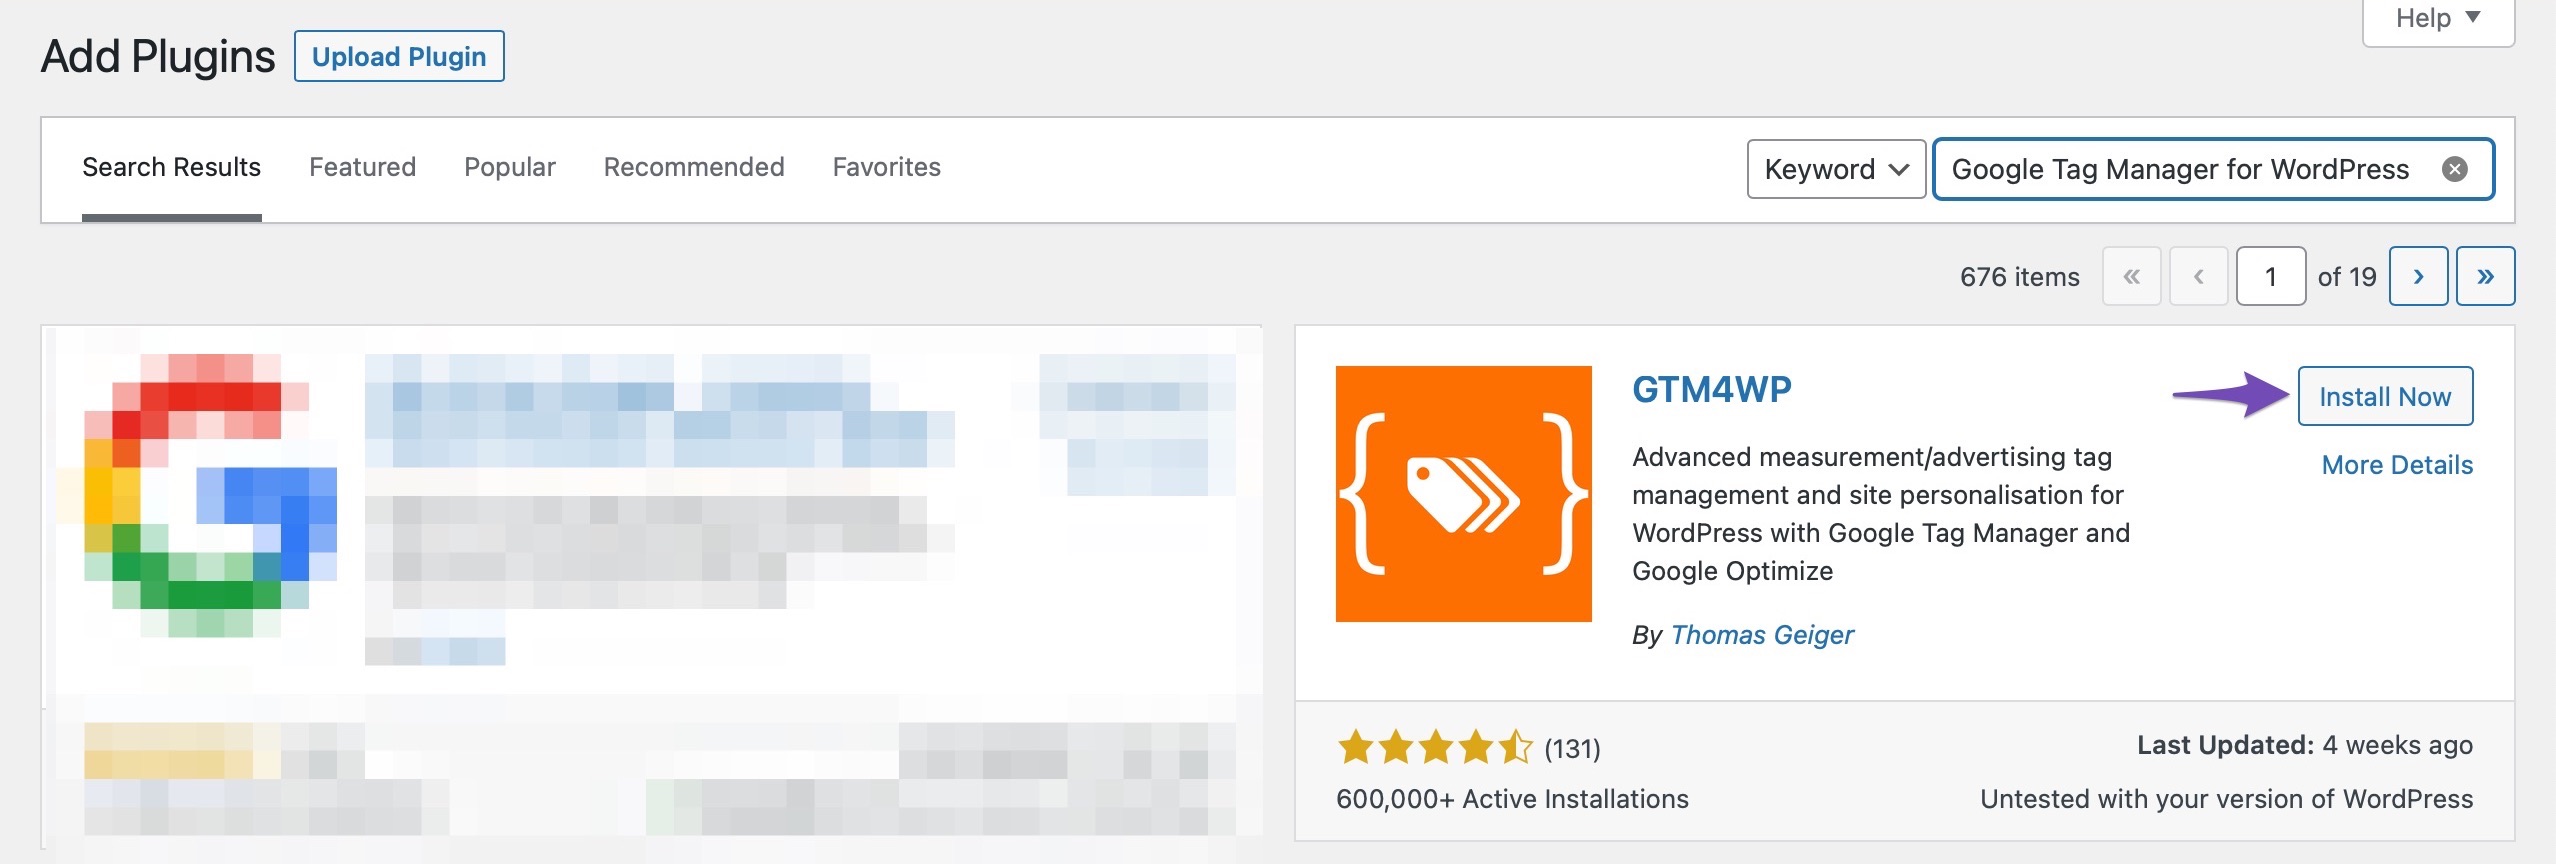
3.2 Install Google Tag Manager Using Plugins
WordPress plugins can be used to install Google Tag Manager as well. This approach is much easier for beginners to learn as it requires fewer code modifications.
By pushing page metadata and user information into the data layer, Google Tag Manager for WordPress is a plugin that completes your Google Tag Manager setup by giving you the data you need to use in tags, triggers, or variables.
At first, install the plugin by navigating to Plugins → Add New section of your WordPress dashboard. Look for Google Tag Manager for WordPress in the search bar, install and activate it.
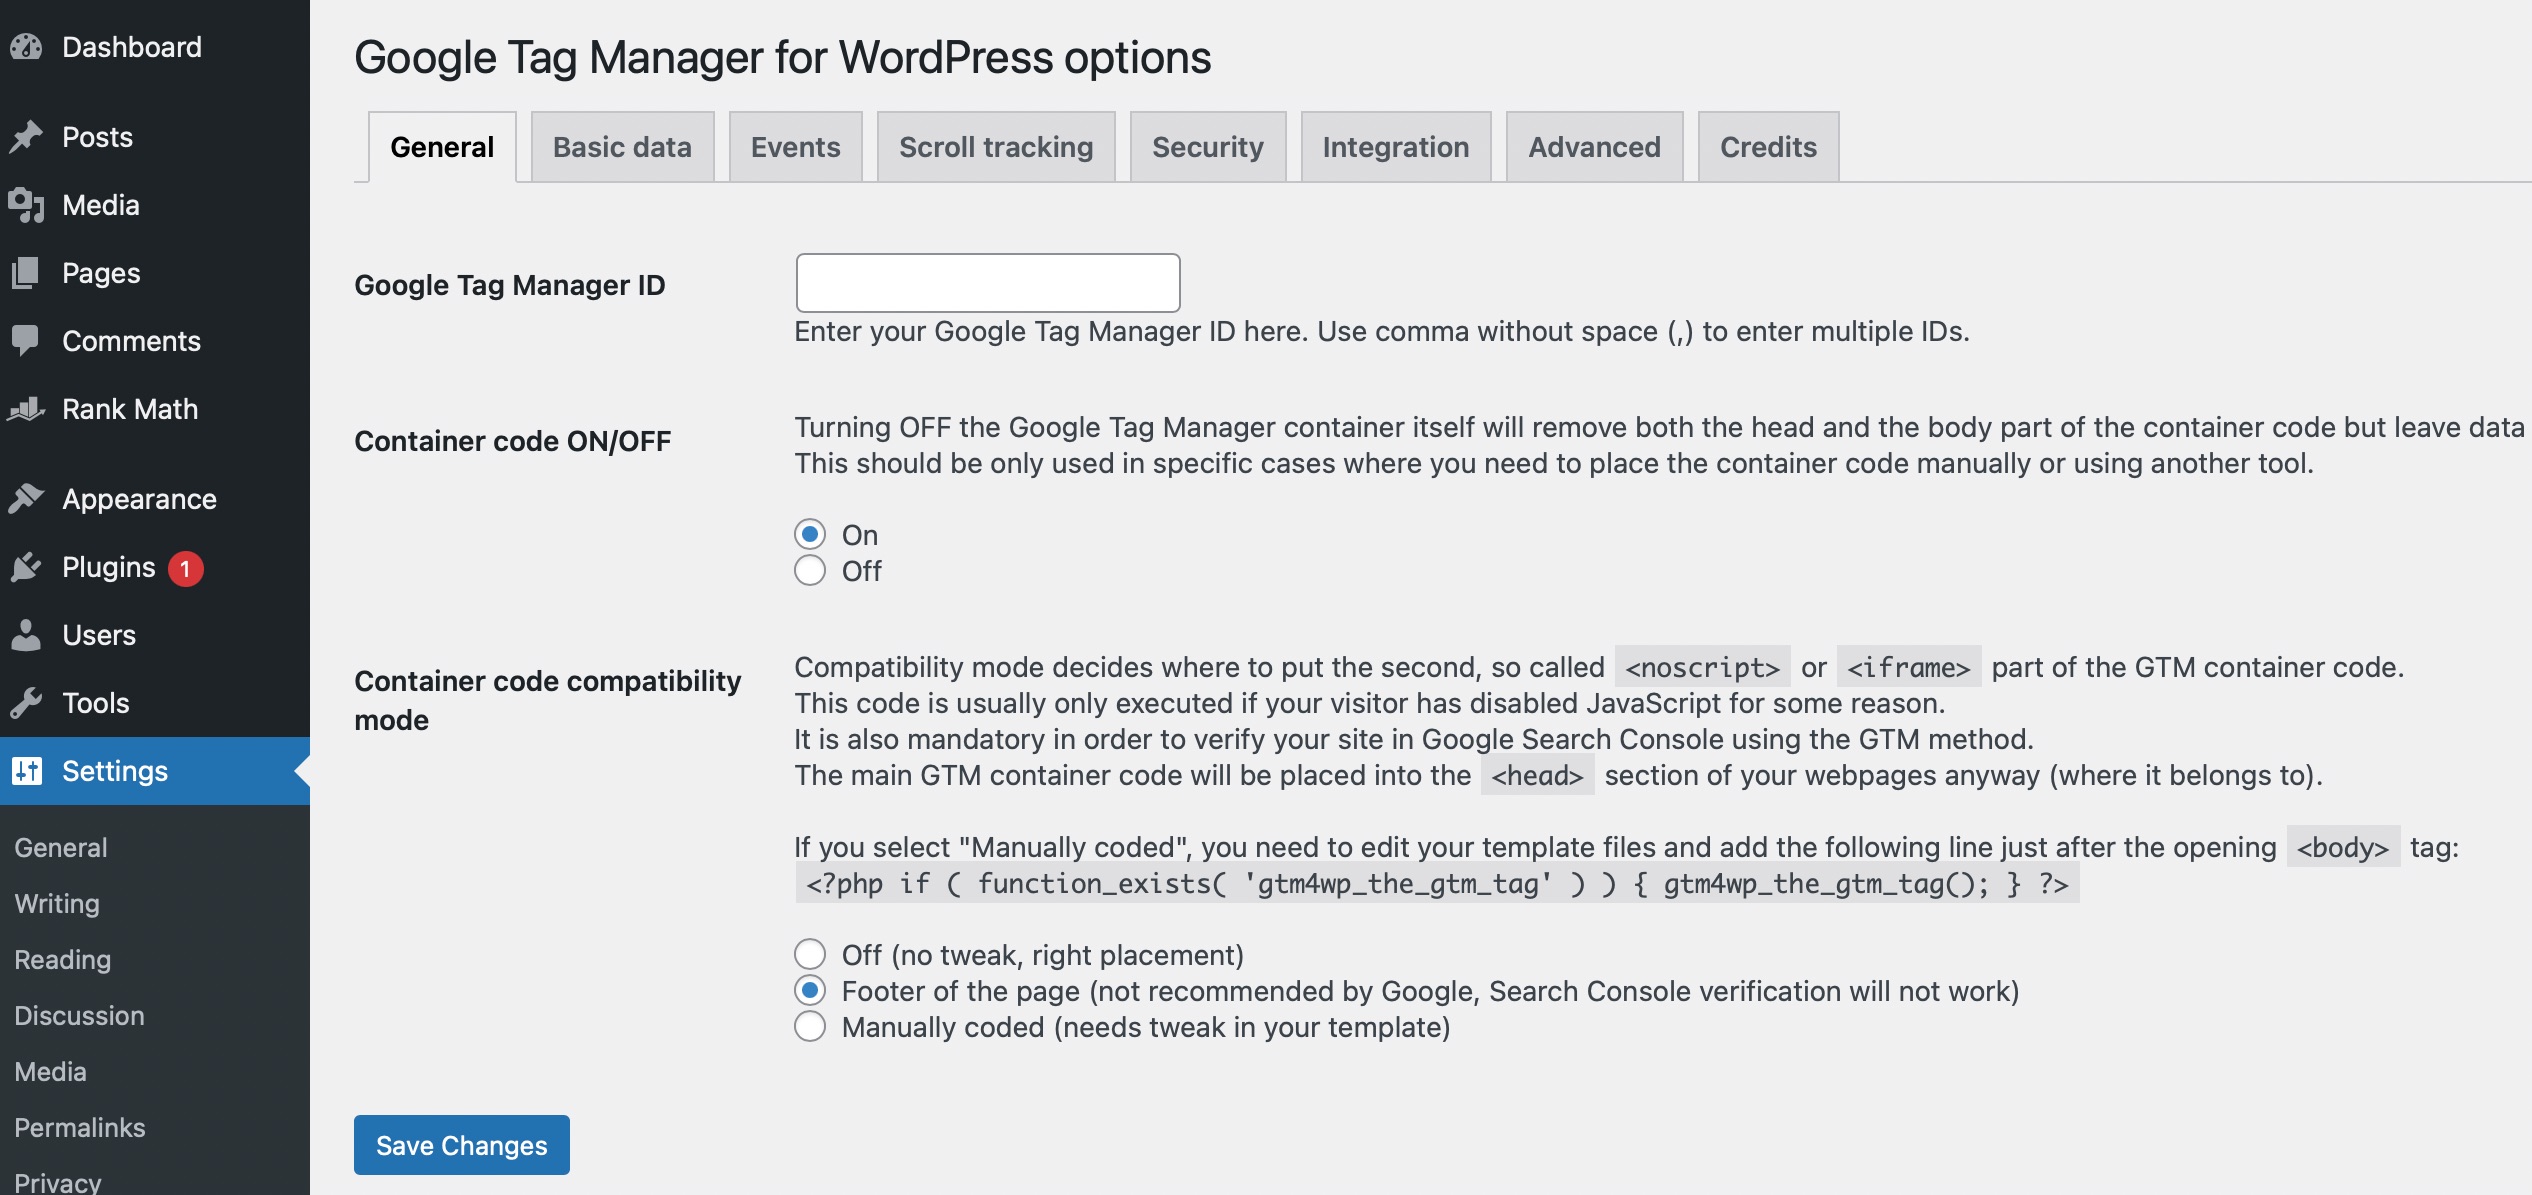
Once the plugin is activated, navigate to its 設定.
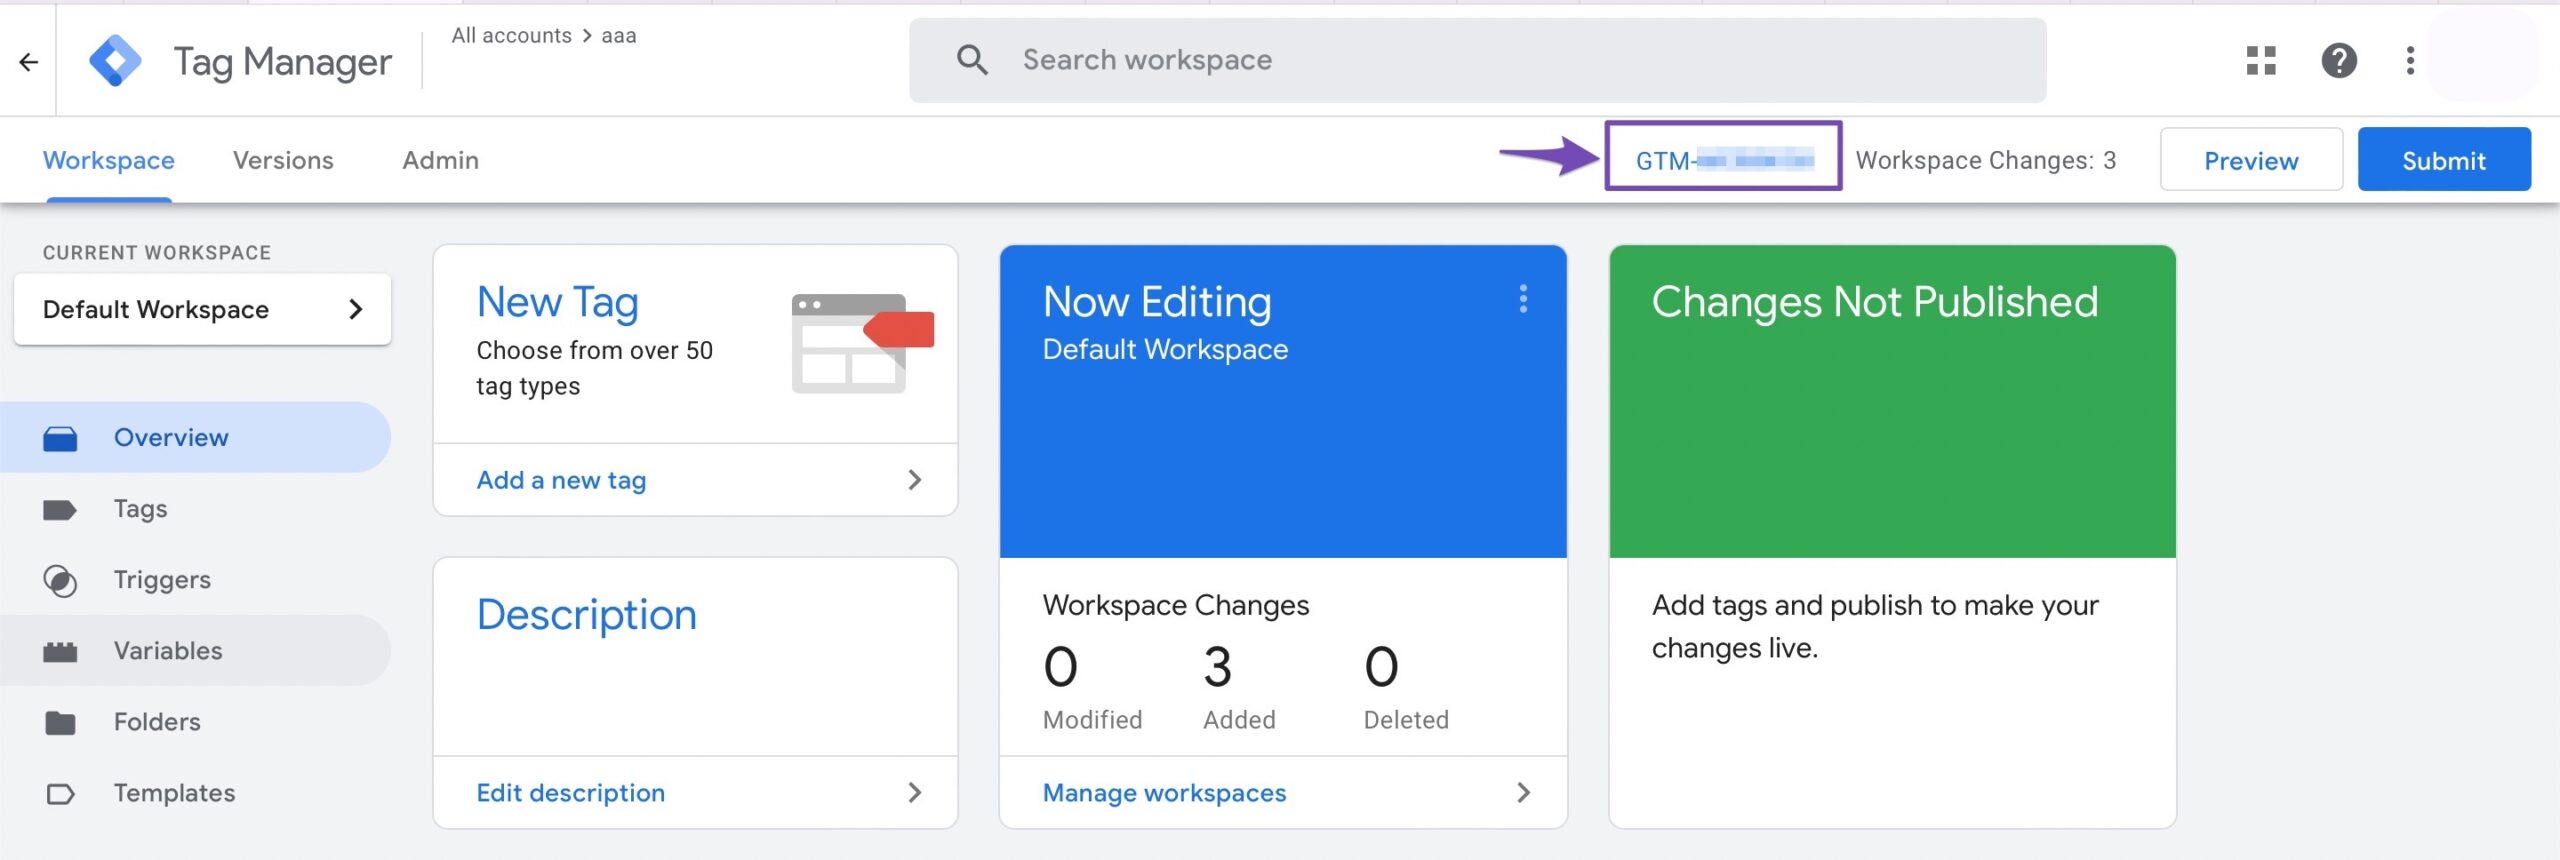
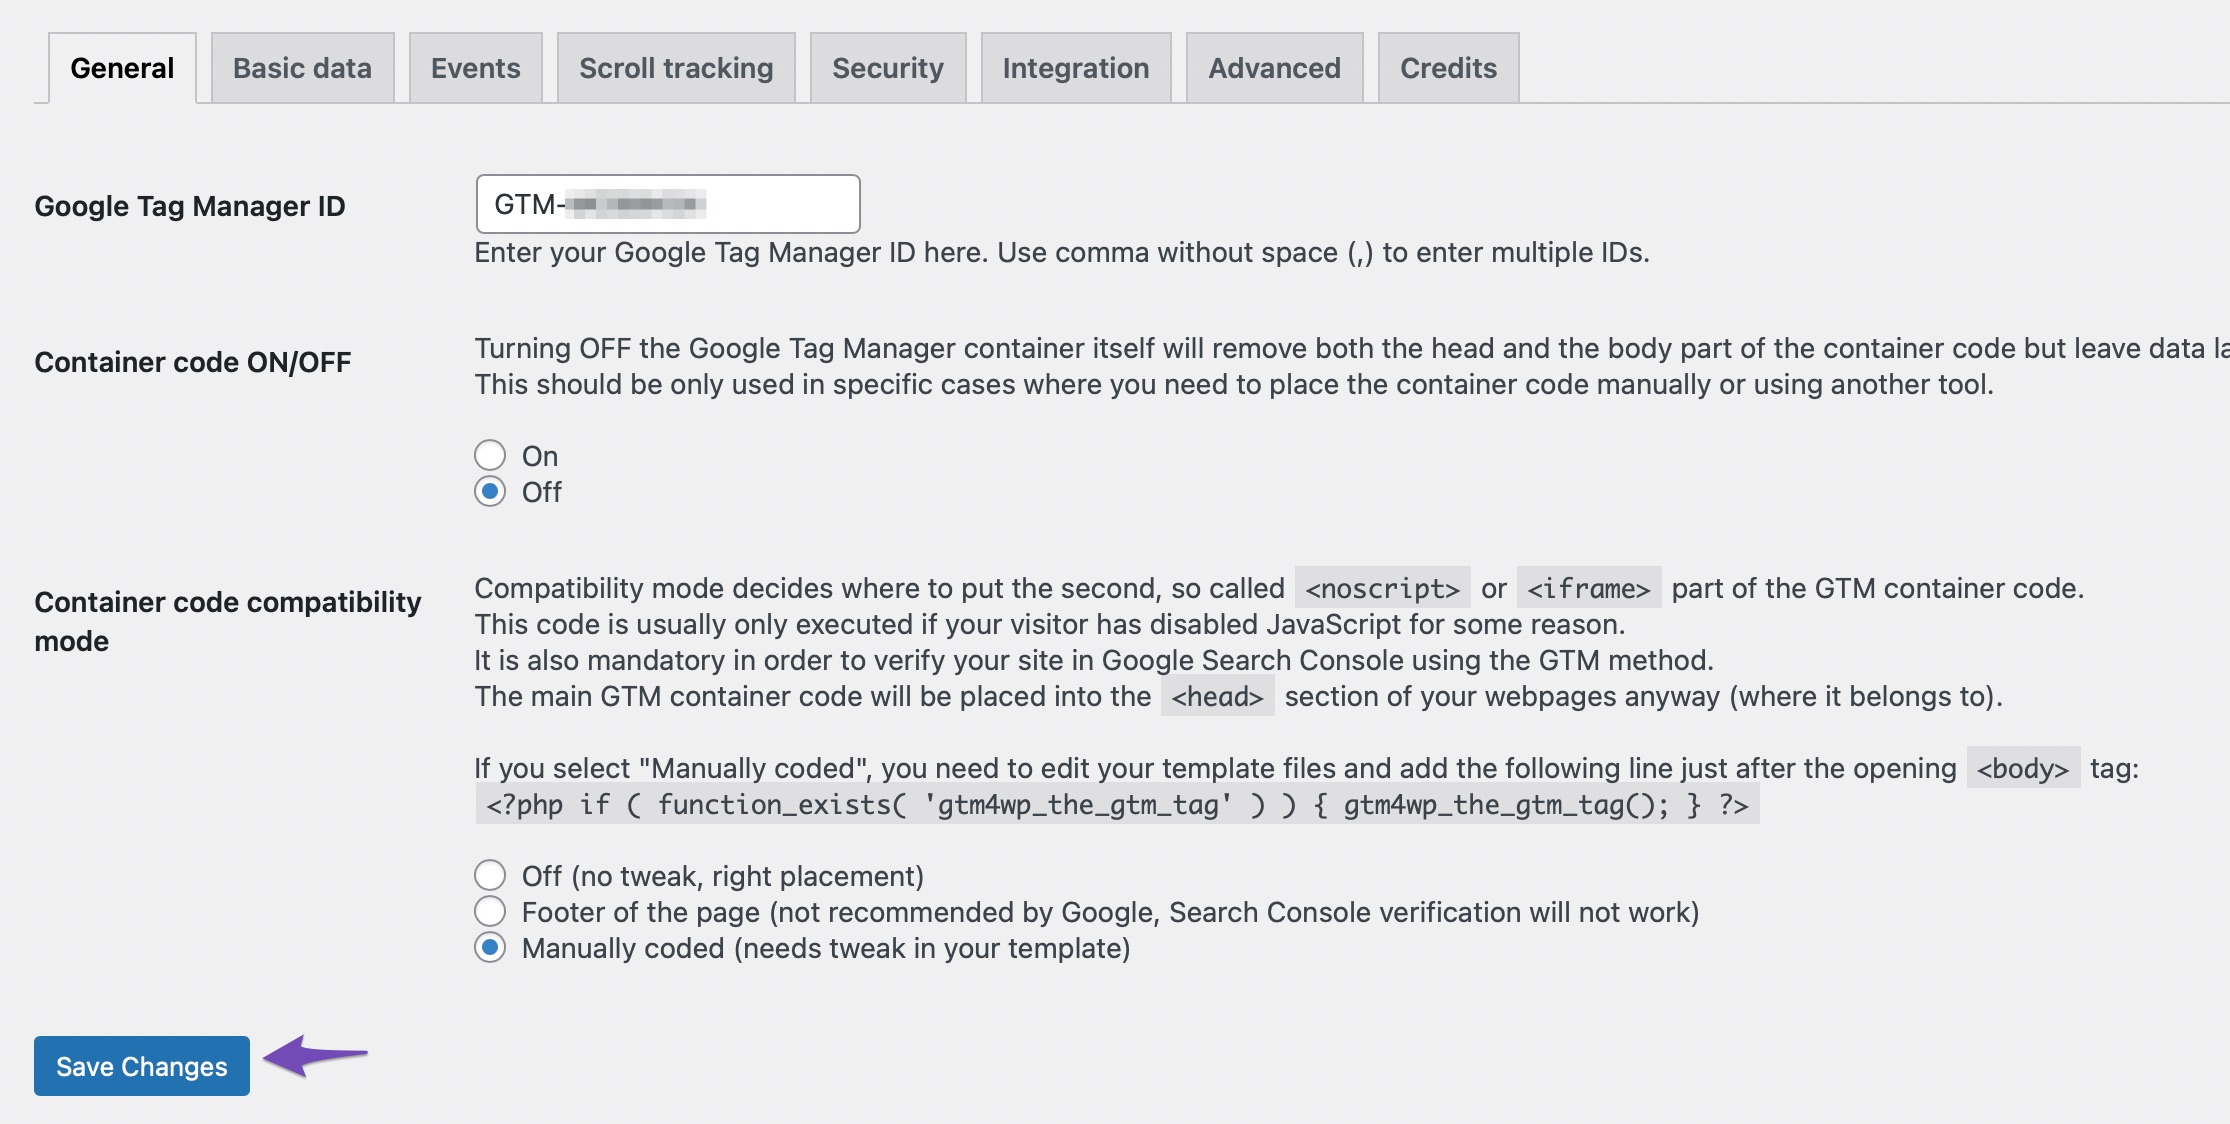
You need to enter your Google Tag Manager ID. You can find this ID from your Google Tag Manager console, as shown below.
Once you’ve entered the ID, choose the option where you want to place the code on your page.
を選択 Container code compatibility mode from the given options. Manually coded requires you to tweak the template file by pasting provided PHP code into it. The other options include the Footer of the page, which Google does not recommend, and オフ, which will place the code according to Google’s recommendation and add a data layer to the page source.
Once done, save your settings by clicking the 変更内容を保存 button. And you’ve successfully installed Google Tag Manager with the help of a plugin.
Some other plugins that you can use to install Google Tag Manager are as follows:
When you install Google Tag Manager on a WordPress website, you can manage, track, and deploy tags from a single dashboard without having to alter any individual code fragments. Additionally, it helps in data collection to enhance your marketing initiatives.
As explained in this post, you can install Google Tag Manager manually or through a plugin. So what are you waiting for? Go ahead and install Google Tag Manager on your WordPress website.
The Ultimate Guide: How to Install Google Tag Manager in WordPress » Rank Math
バヌ・アルワリア
In this post, we'll show you how to quickly install google tag manager to your WordPress site.
Rank Math SEOでGoogleAnalyticsをインストールする方法は? -Rank Math SEO
Rank Math's built-in Analytics module lets you install Google Analytics on your website without having the need for any additional plugin or adding the code ...
Setting Up Google Tag Manager: Complete Tutorial
Feeling overwhelmed with tracking interactions on your website? Not to worry, as in this video, we’ll walk you through how to efficiently create tags, track ...