So ändern Sie schnell die Schriftgröße in WordPress
When you’re working on your WordPress site, sometimes the default font size just doesn’t cut it. Maybe your text looks too small on a desktop, or maybe you want headings that really stand out.
The good news?
WordPress provides several simple ways to adjust your font size, ensuring your content is easy to read and suits your style.
In this post, I’ll walk you through quick methods you can use to change the font size in WordPress. So, without any further ado, let’s get started.
When you change the font on your WordPress site, you’re not just switching up the design; you’re shaping how visitors experience your content. The right font size and style can make your text easier to read, highlight important points, and reflect your brand’s personality.
Think about it: a font that looks perfect on your desktop might feel too small or cramped on a mobile screen. If visitors struggle to read your content, they’re less likely to stick around.
On the flip side, a clean, well-sized font keeps readers engaged and encourages them to explore more of your site.
Changing your font can also improve your SEO. A clear content structure, supported by readable fonts and headings, helps search engines understand your pages, especially if you publish long-form content. That means better chances of ranking higher and reaching the right audience.
2 How to Change the Font Size in WordPress
Now that you know why font size matters, let’s look at how you can change it in WordPress. Before you begin with any of the below methods, check your active theme settings to change the font size. Many modern WordPress themes come with built-in typography options that let you change font sizes, line height, and even font families directly from the Customizer.
2.1 Verwendung der Überschriften
One of the quickest ways to adjust font size is by using headings. Headings automatically appear larger than regular text in most WordPress themes, so they’re perfect for grabbing attention. They also break your content into sections, making it easier for readers to scan and understand.
On top of that, headings improve your SEO. Search engines use them to understand your content structure, which helps your pages rank better, especially if you publish longer posts.
By using headings wisely, you’re not only improving readability but also boosting your chances of showing up higher in search results.
Schriftstile im Blockeditor ändern (Gutenberg)
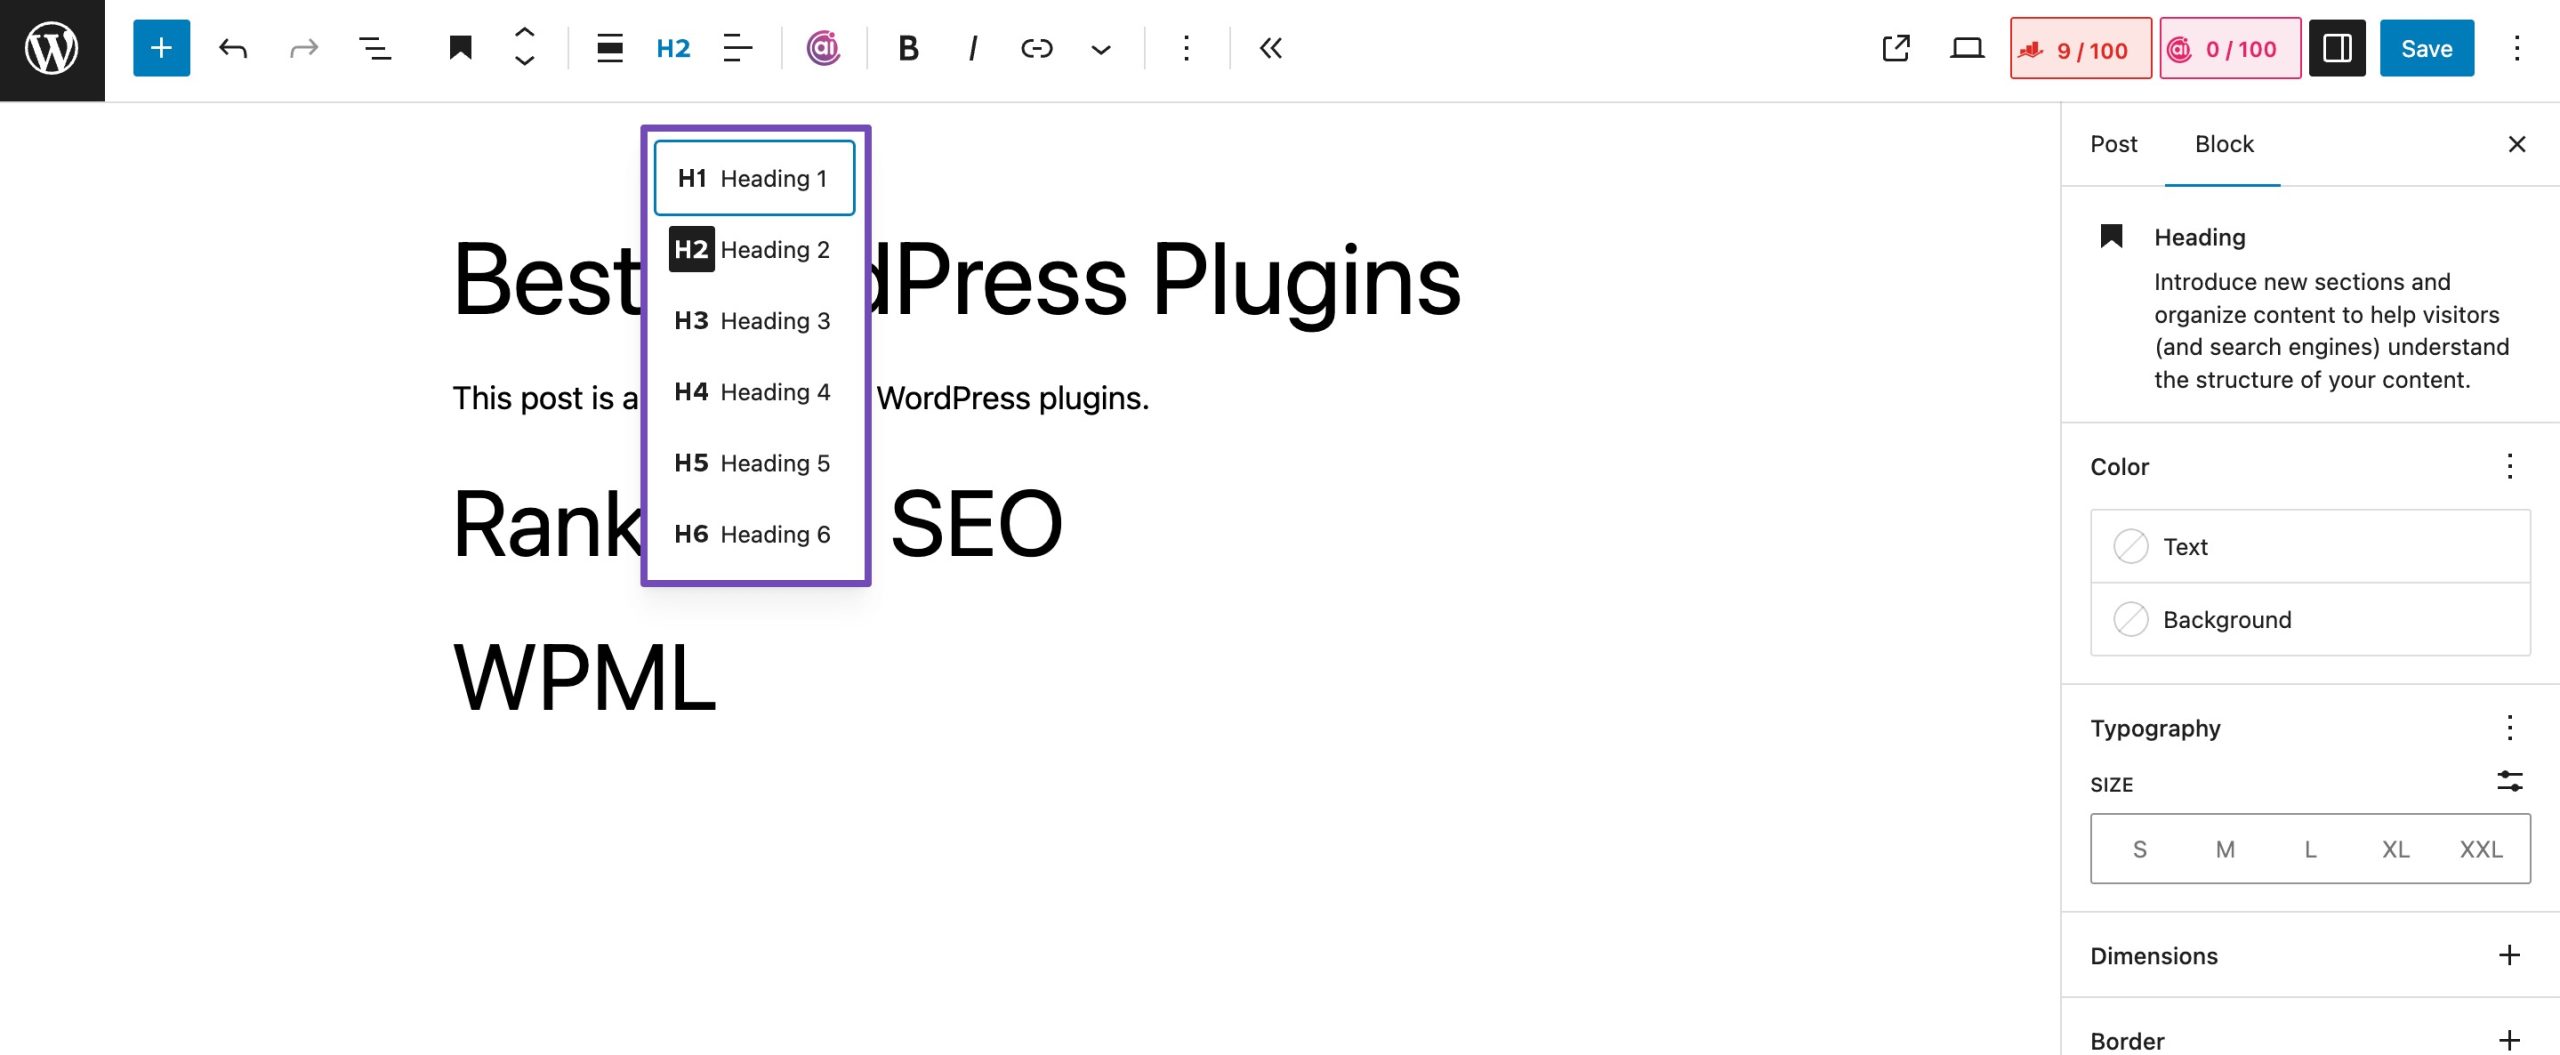
Um die Schriftgröße im Gutenberg-Editor zu ändern, navigiere zu deinem Beitrag oder deiner Seite.
Überschrift 2 ist die Standardeinstellung für den Block. Wenn Sie dies ändern möchten, wählen Sie eine neue Größe aus dem Dropdown-Menü „H2“.
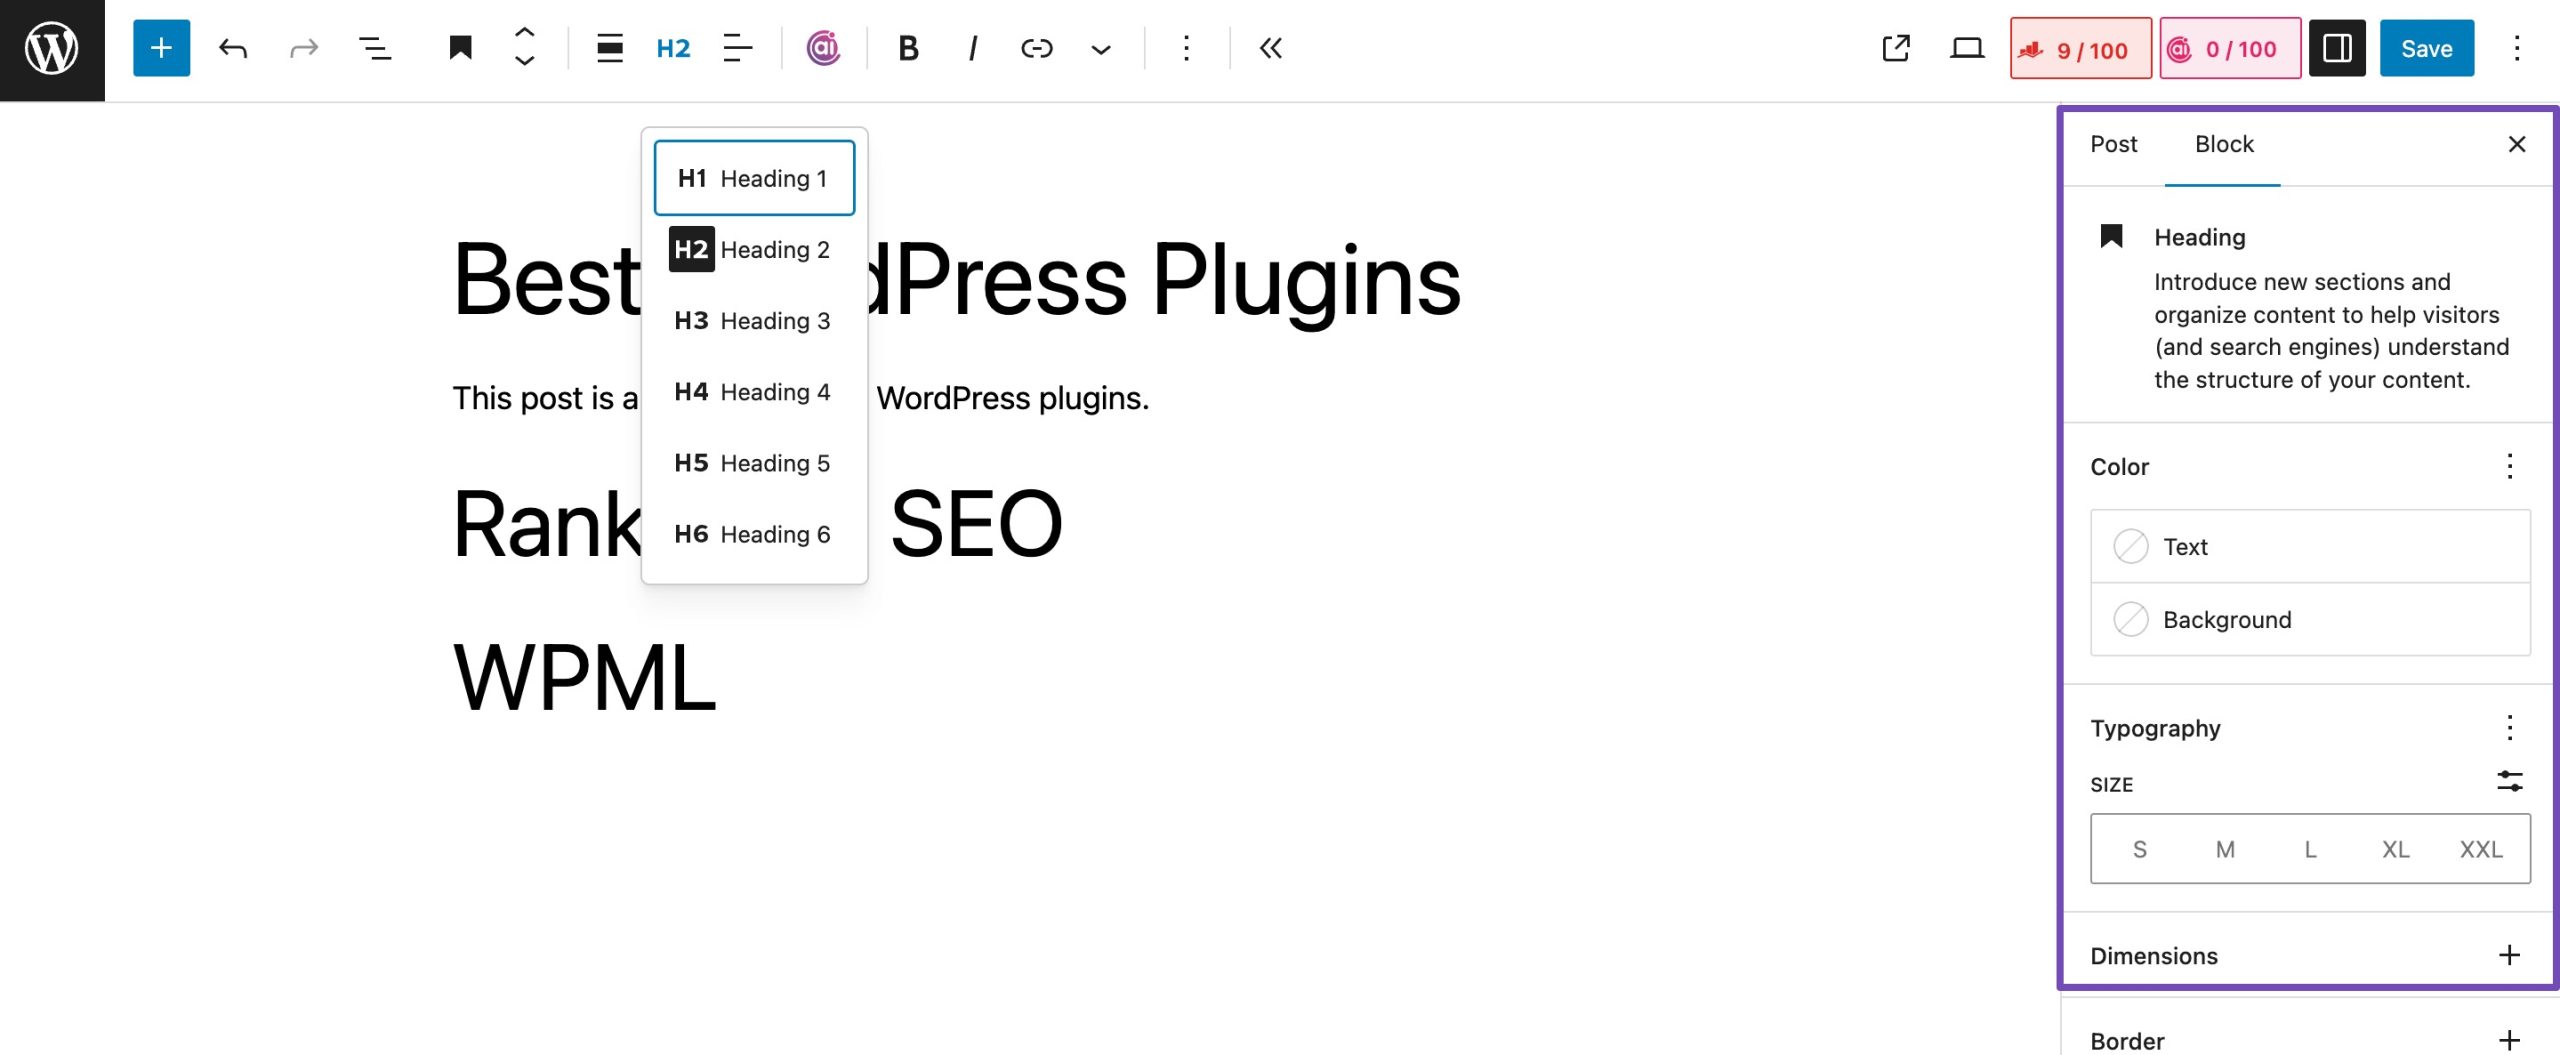
Sie können die Größe und Farbe auch in den Blockeinstellungen auf der rechten Seite des Bildschirms anpassen.
Once you’ve made the necessary changes, save/publish the post.
Schriftstile im Classic Editor ändern
If you’re using the WordPress Classic Editor, changing font styles is quick and easy.
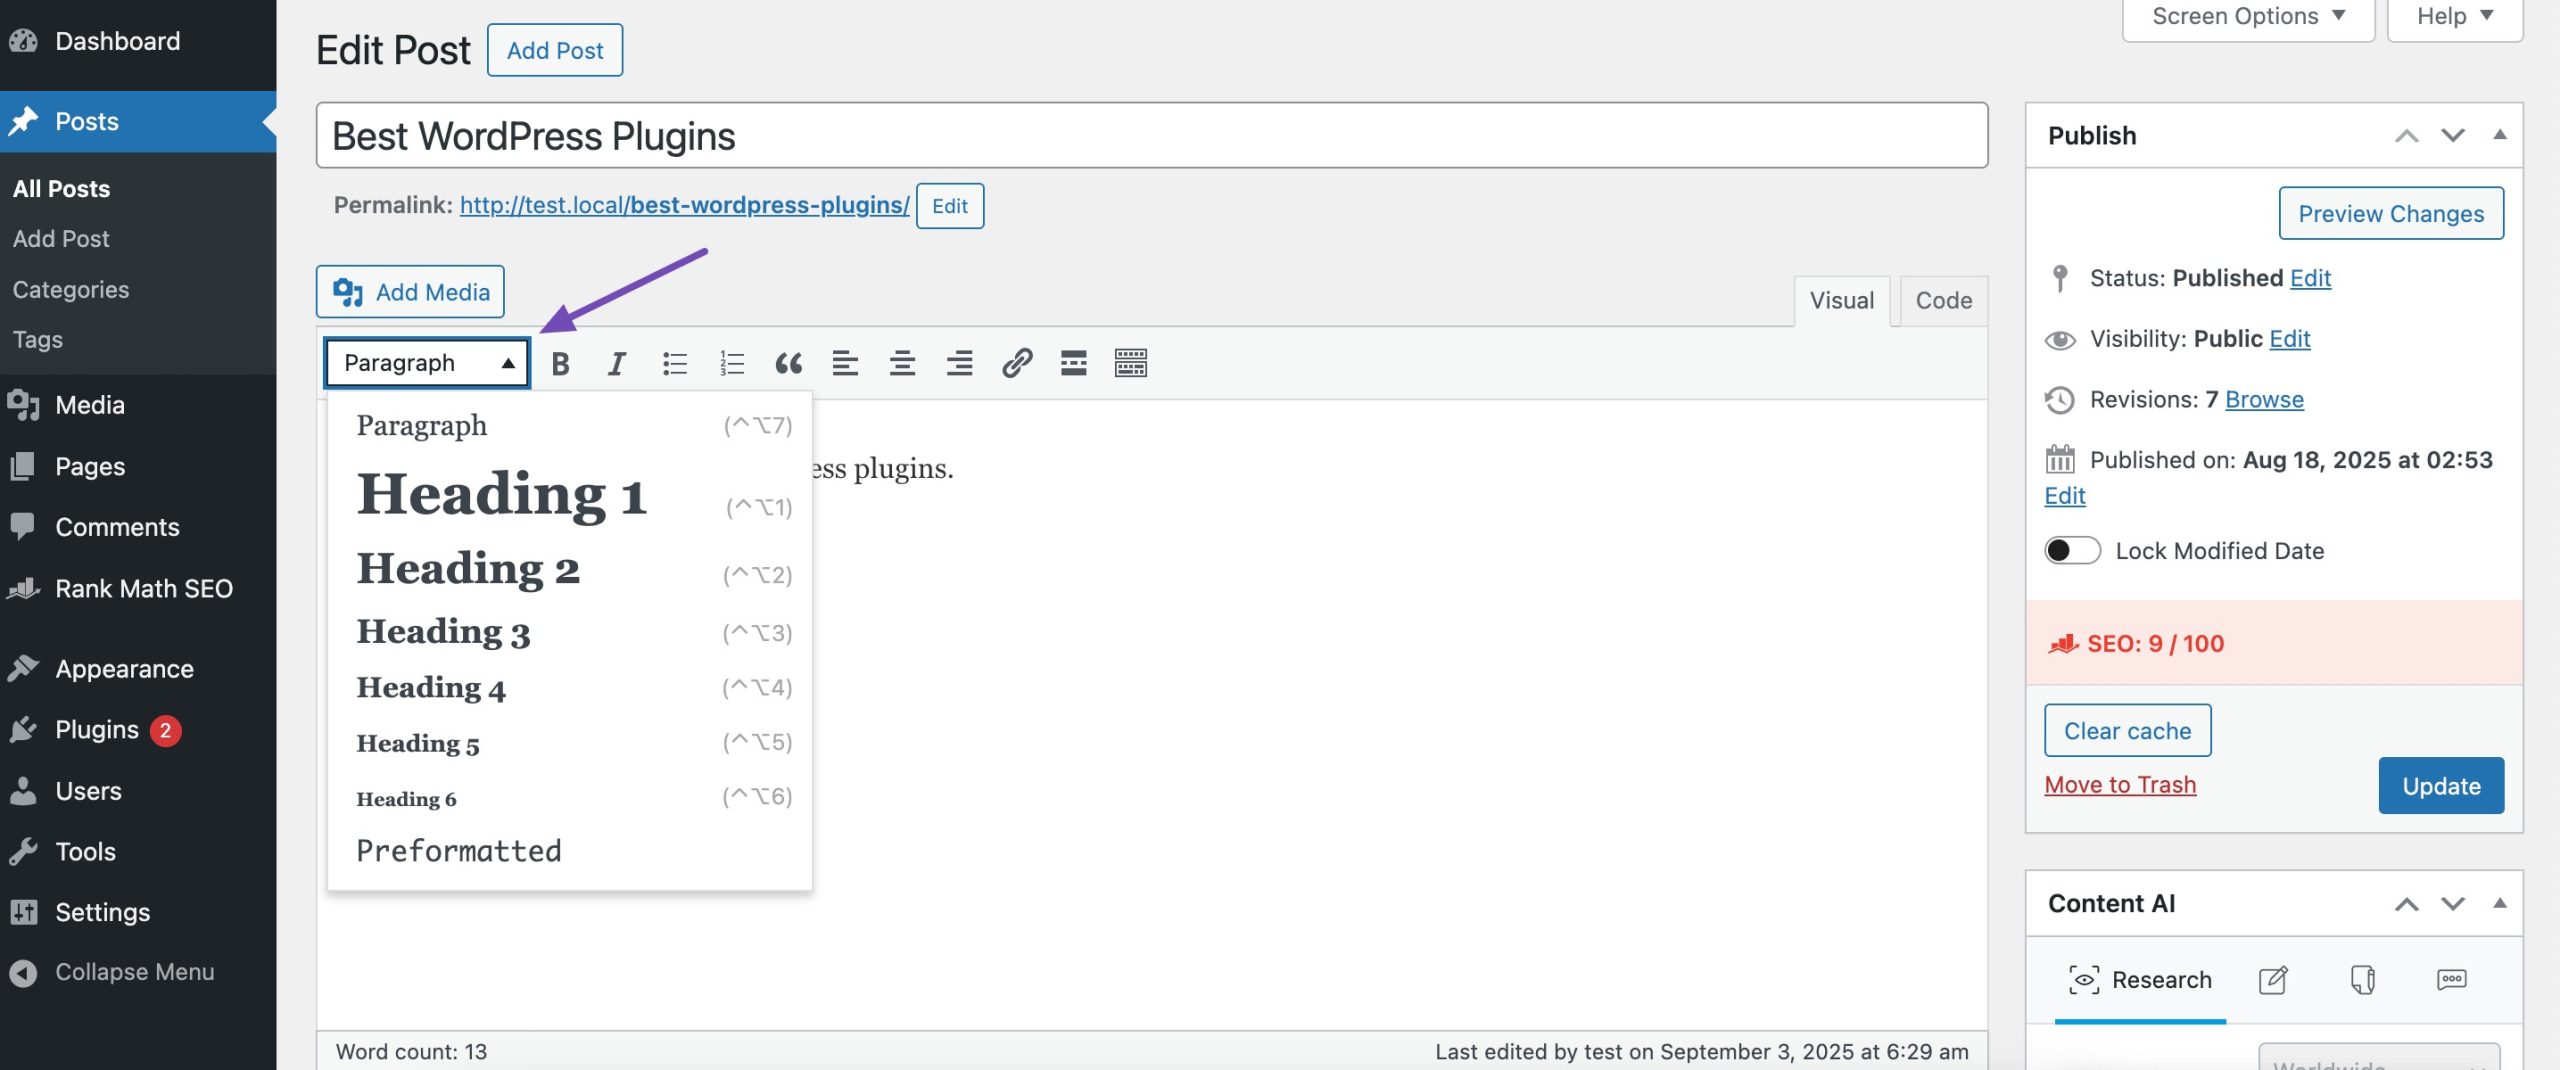
To do so, navigate to the post or page you want to edit. Highlight the text you’d like to turn into a heading.
In the toolbar, click the Absatz dropdown menu. Choose the heading level (H1, H2, H3, etc.) that fits your content.
Once you apply the heading style, your text will appear larger and more structured. Don’t forget to click Aktualisieren oder Veröffentlichen um Ihre Änderungen zu speichern.
2.2 Using a Plugin
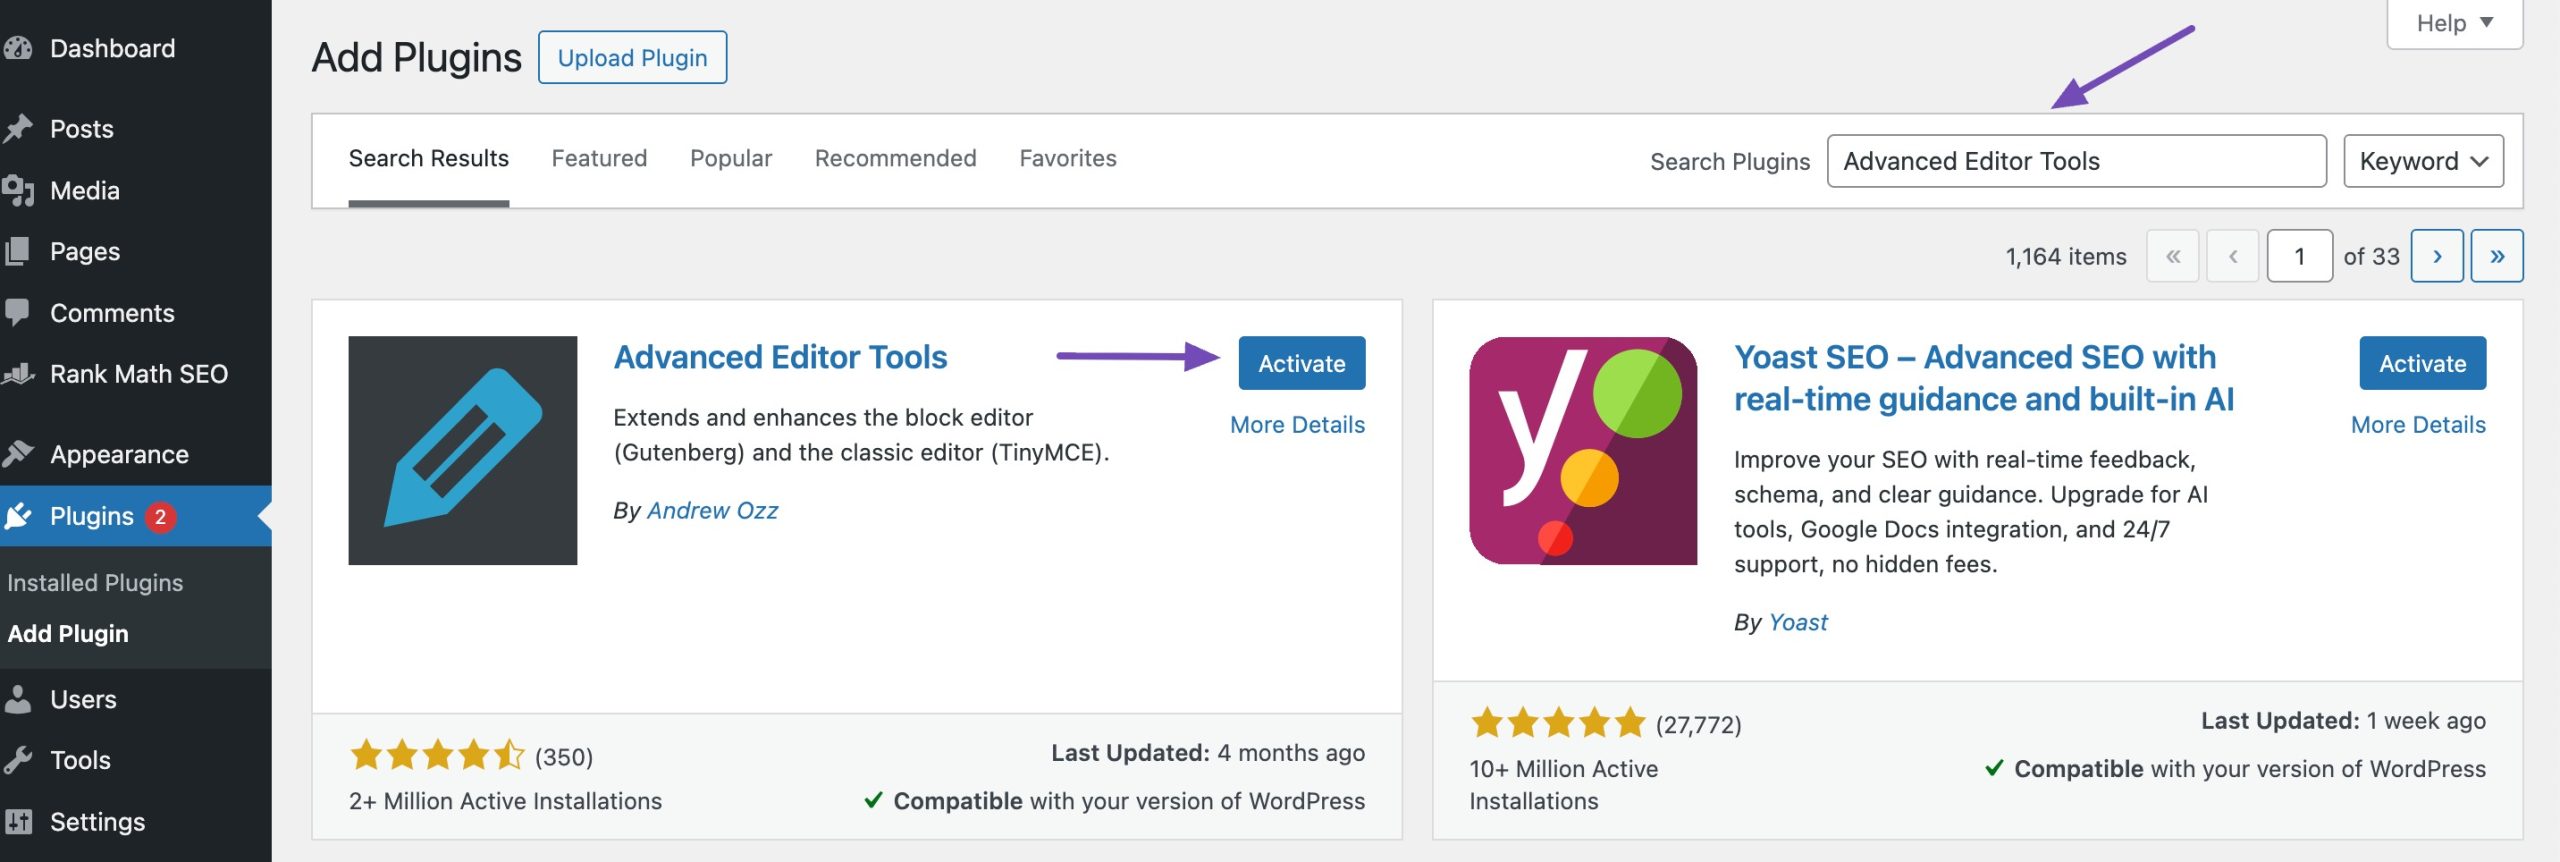
If you want more control over font sizes and text formatting, the Erweiterte Editor-Toolsplugin (formerly TinyMCE Advanced) is a great option. It gives you extra flexibility beyond the default WordPress editor, letting you adjust font sizes, styles, and more. Refer to our dedicated tutorial on installing plugins in WordPress.
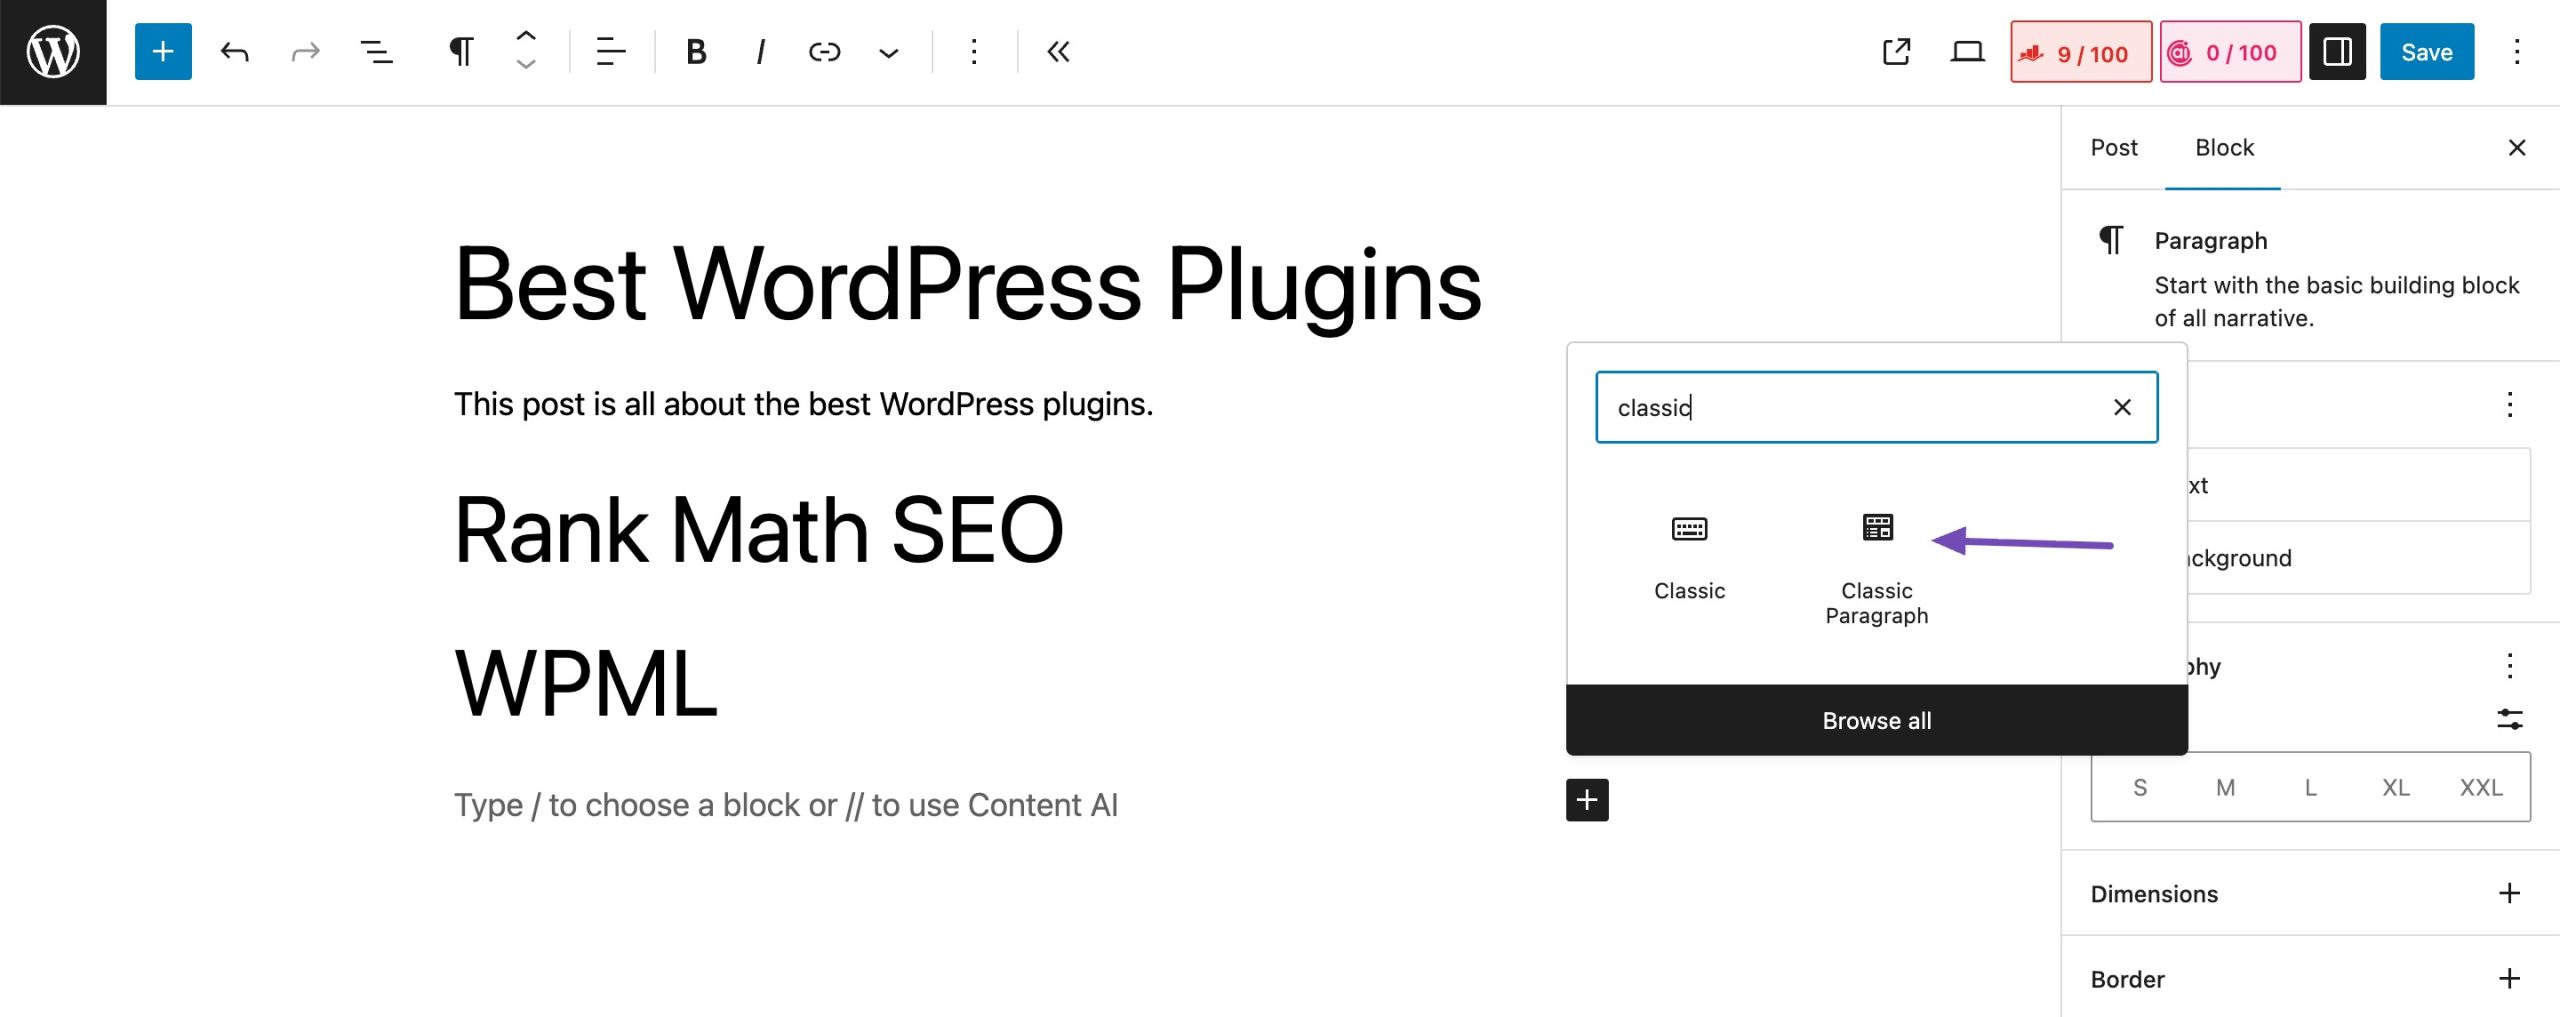
Nach der Installation fügt das Plugin a Klassischer Absatz Block zum Gutenberg-Editor. Um das Plugin zum Ändern der Schriftgrößen in WordPress zu verwenden, müssen Sie es installieren und aktivieren.
Navigieren Sie dazu zu Plugins Seite des WordPress-Admin-Dashboards. Suchen Sie in der verfügbaren Suchleiste nach dem Plugin, installieren und aktivieren Sie es.
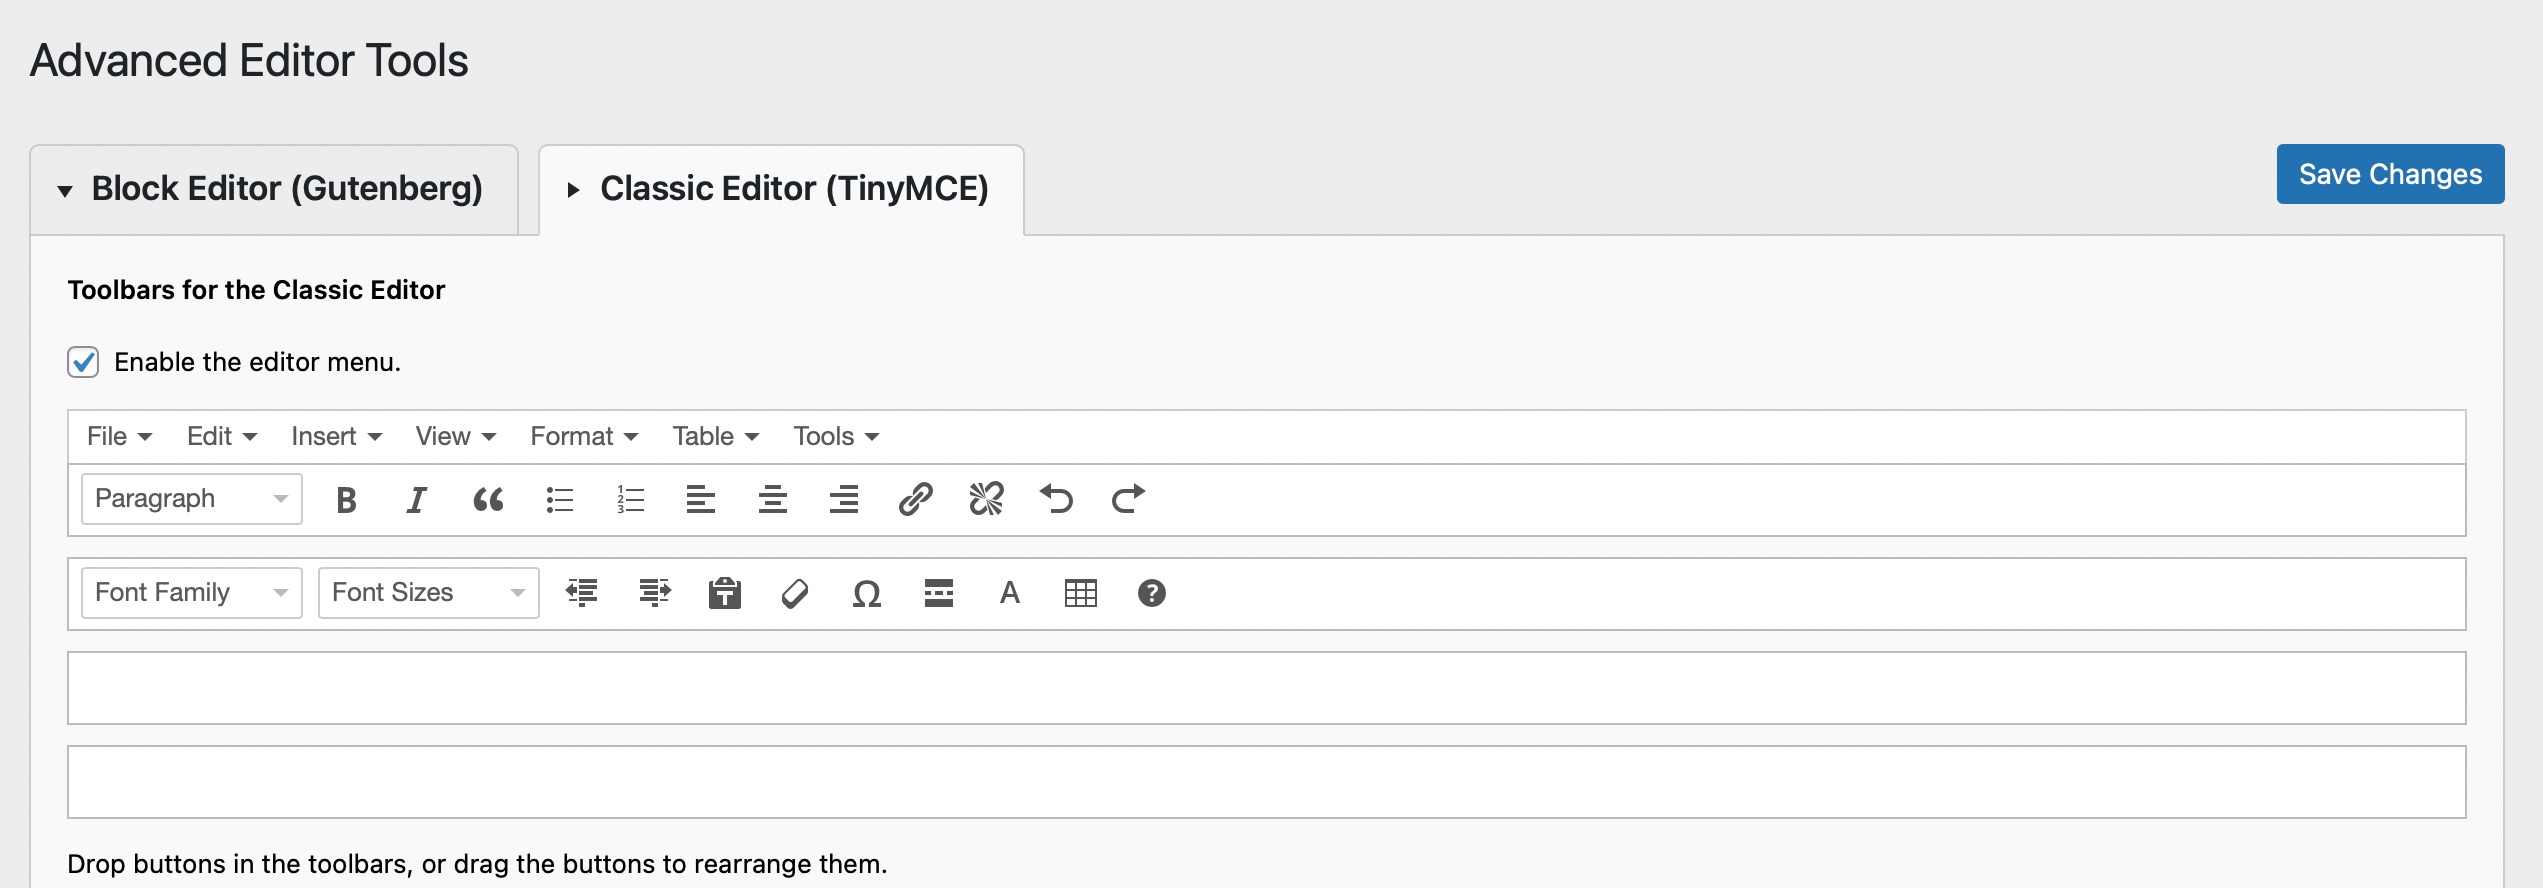
Navigieren Sie zu Settings → Advanced Editor Tool (TinyMCE Advanced) to configure the editor settings. This is where you may customize the TinyMCE Advanced toolbar with the buttons you want to use.
Next, navigate to your post or page. Now, search the Klassischer Absatz Block. Es wird automatisch hinzugefügt, da Sie das Plugin aktiviert haben.
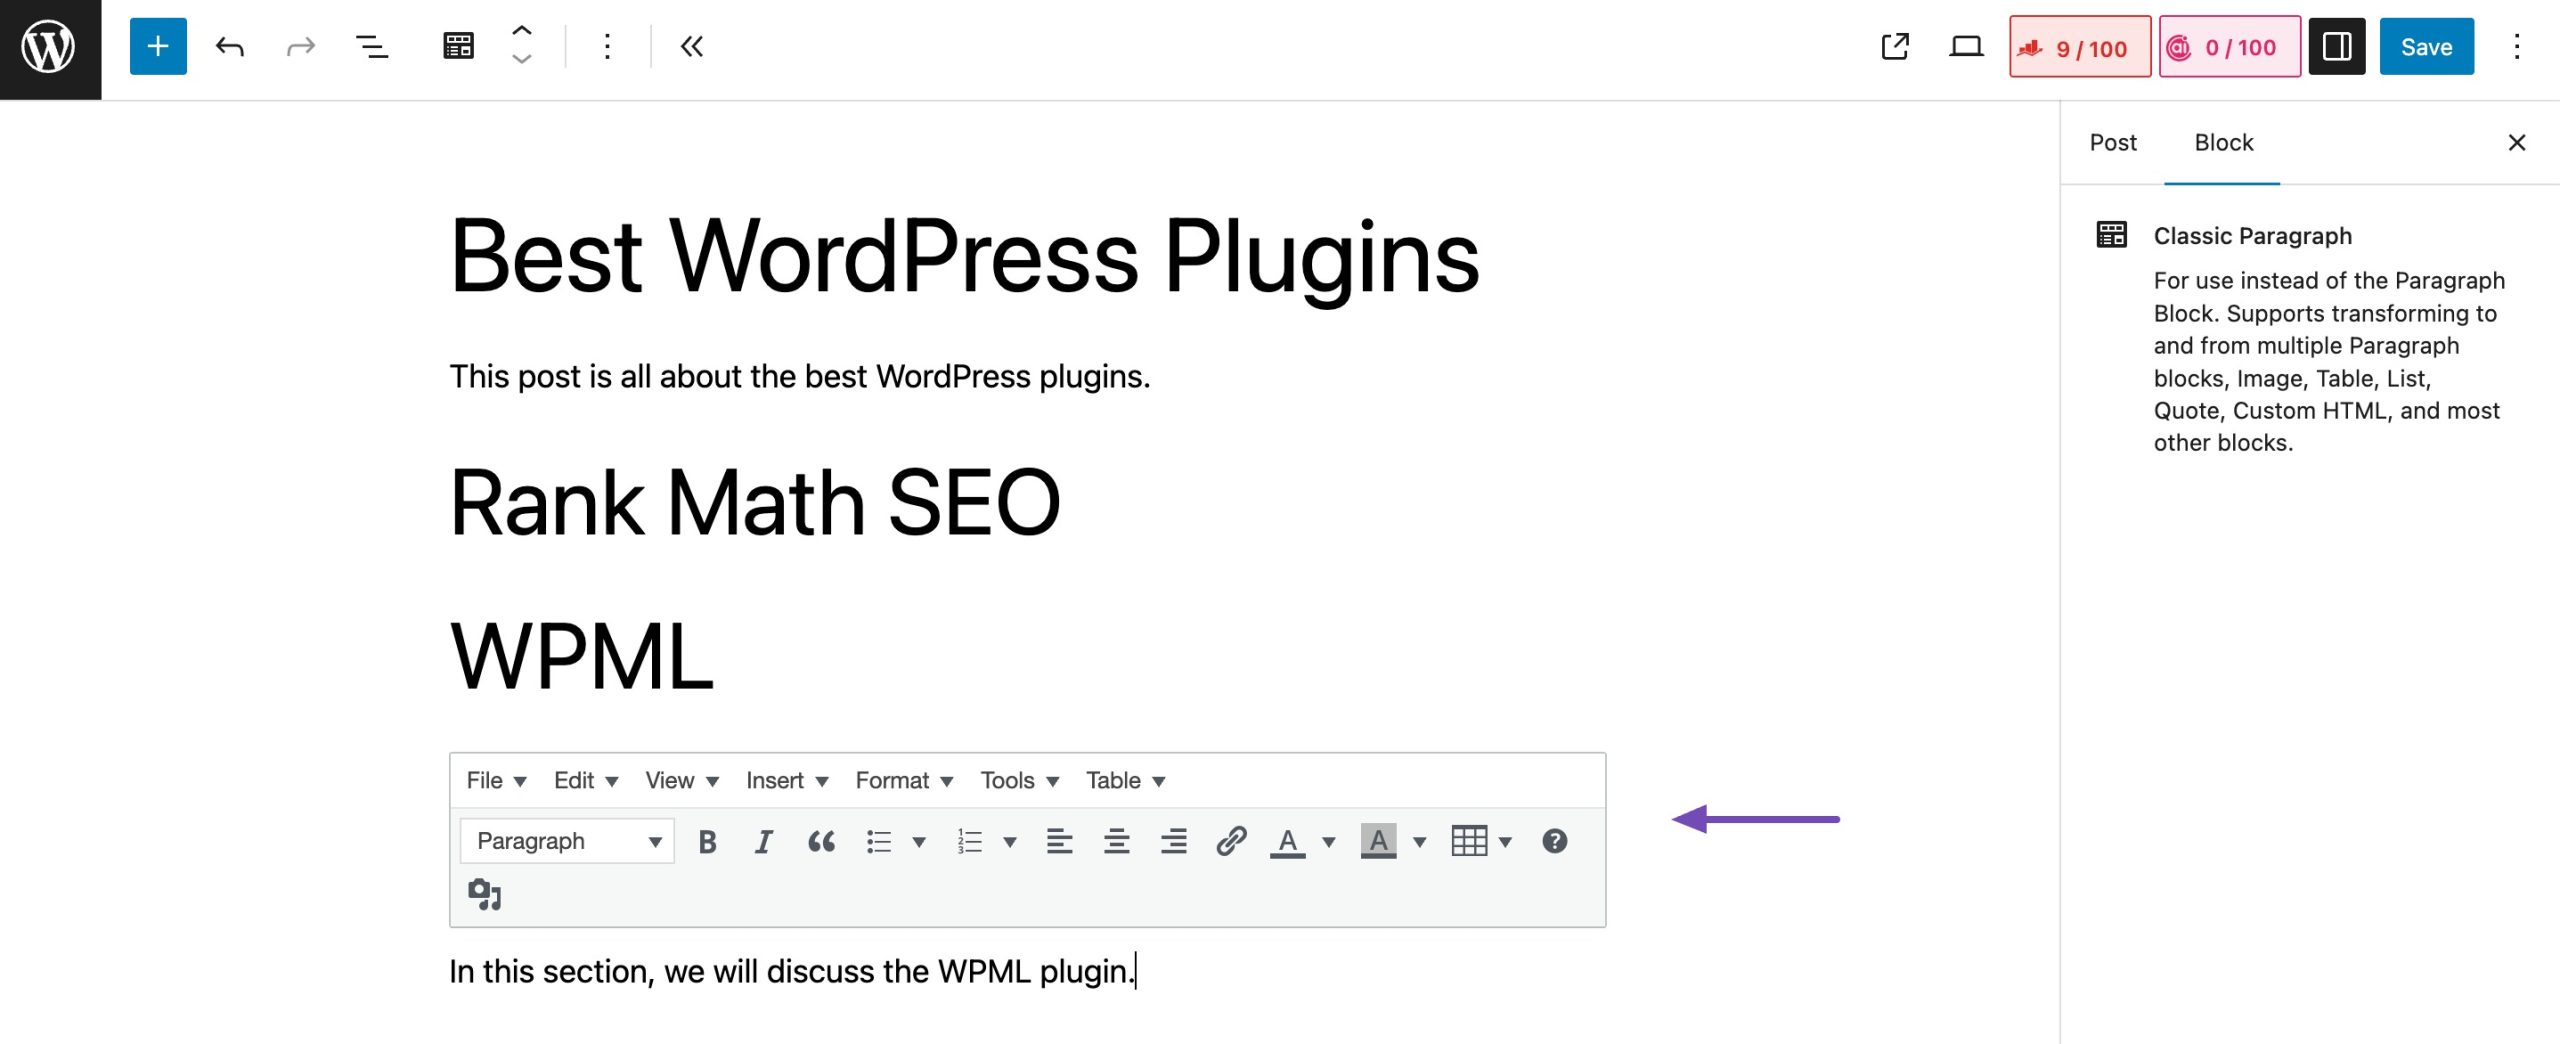
Add it to your post or page. You can now use the editor as you would if using the classic editor style and alter the font in WordPress using the tools provided.
2.3 Using Full-Site Editor
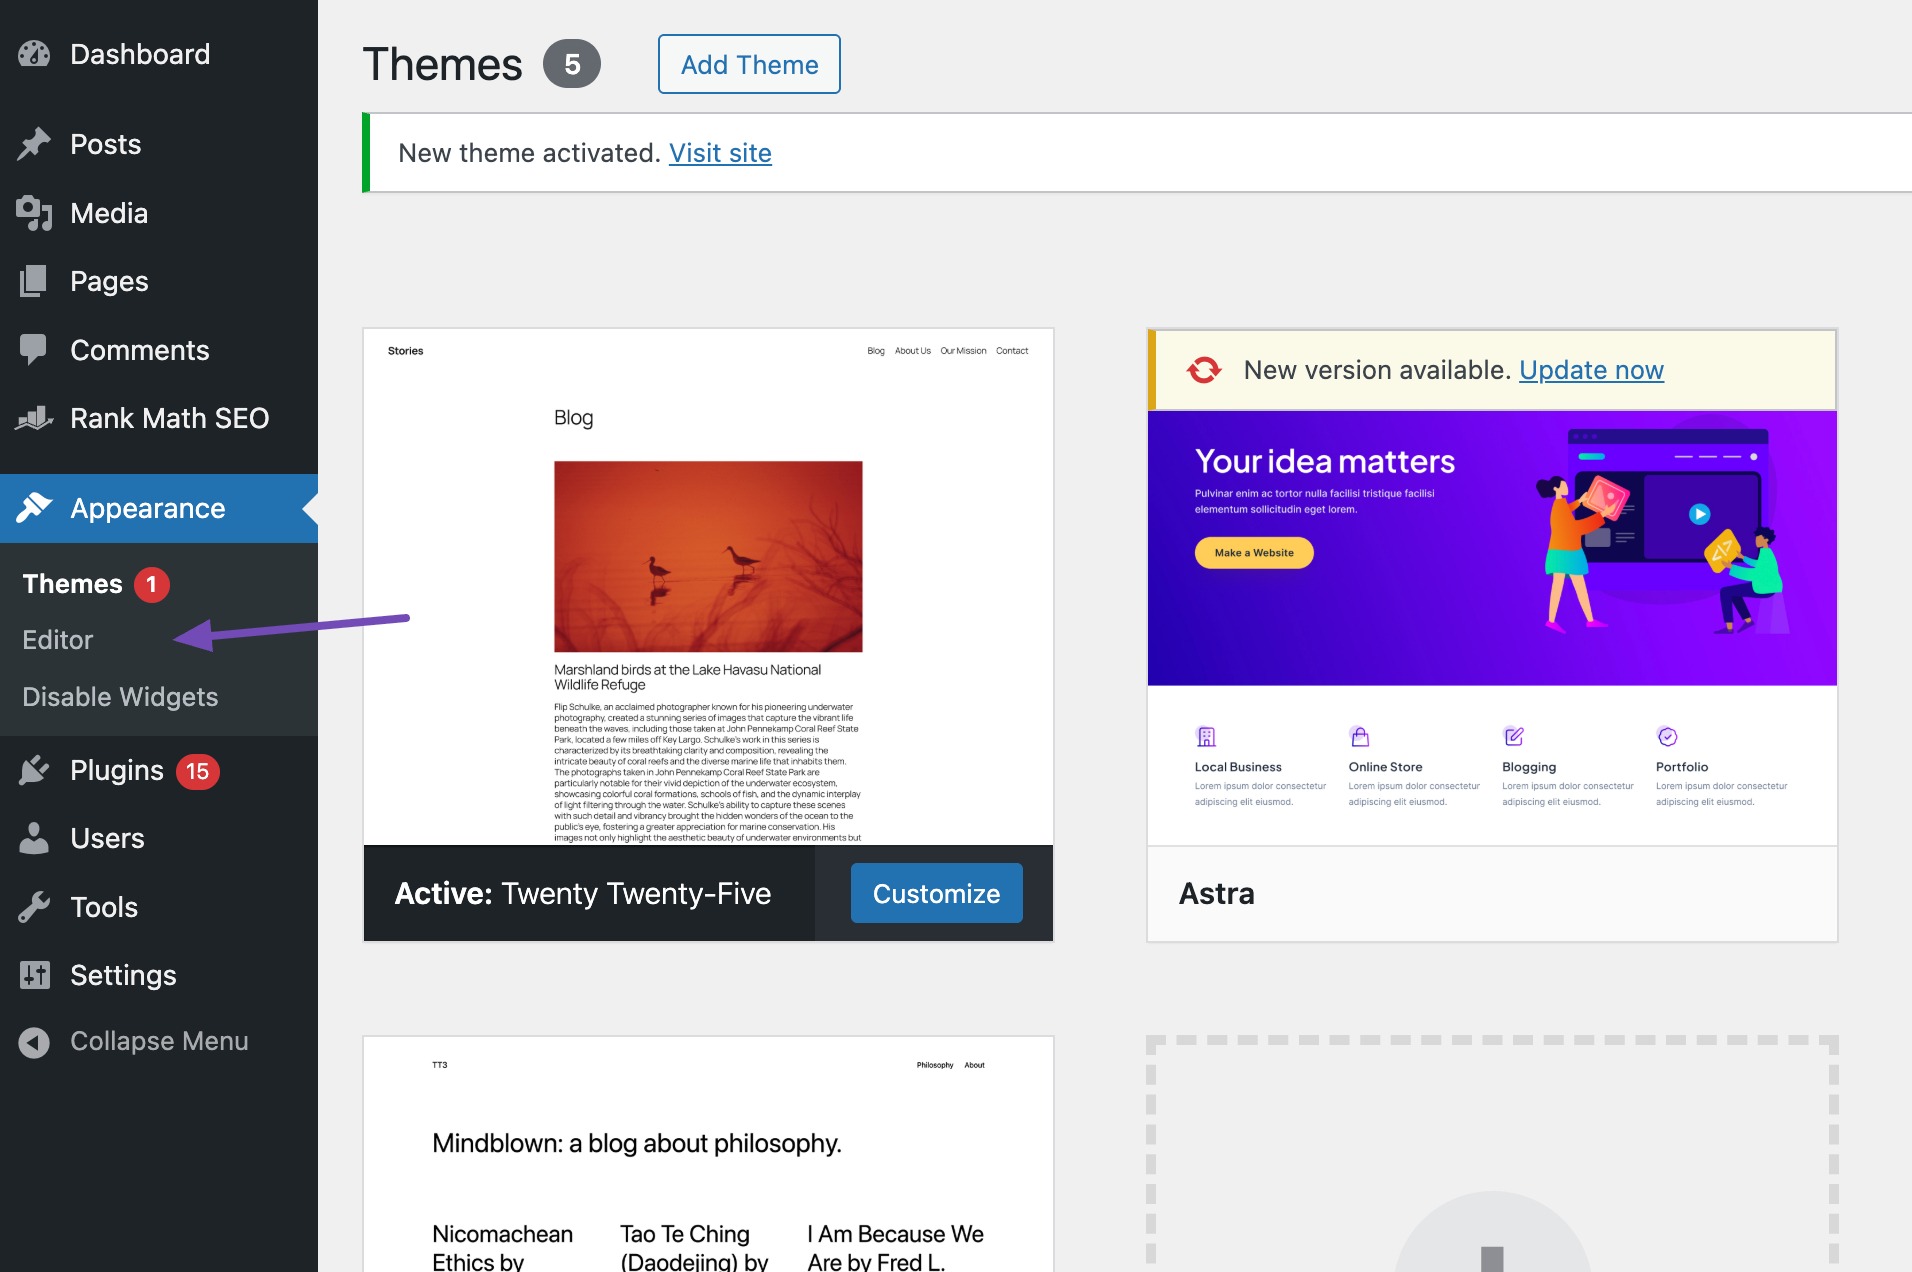
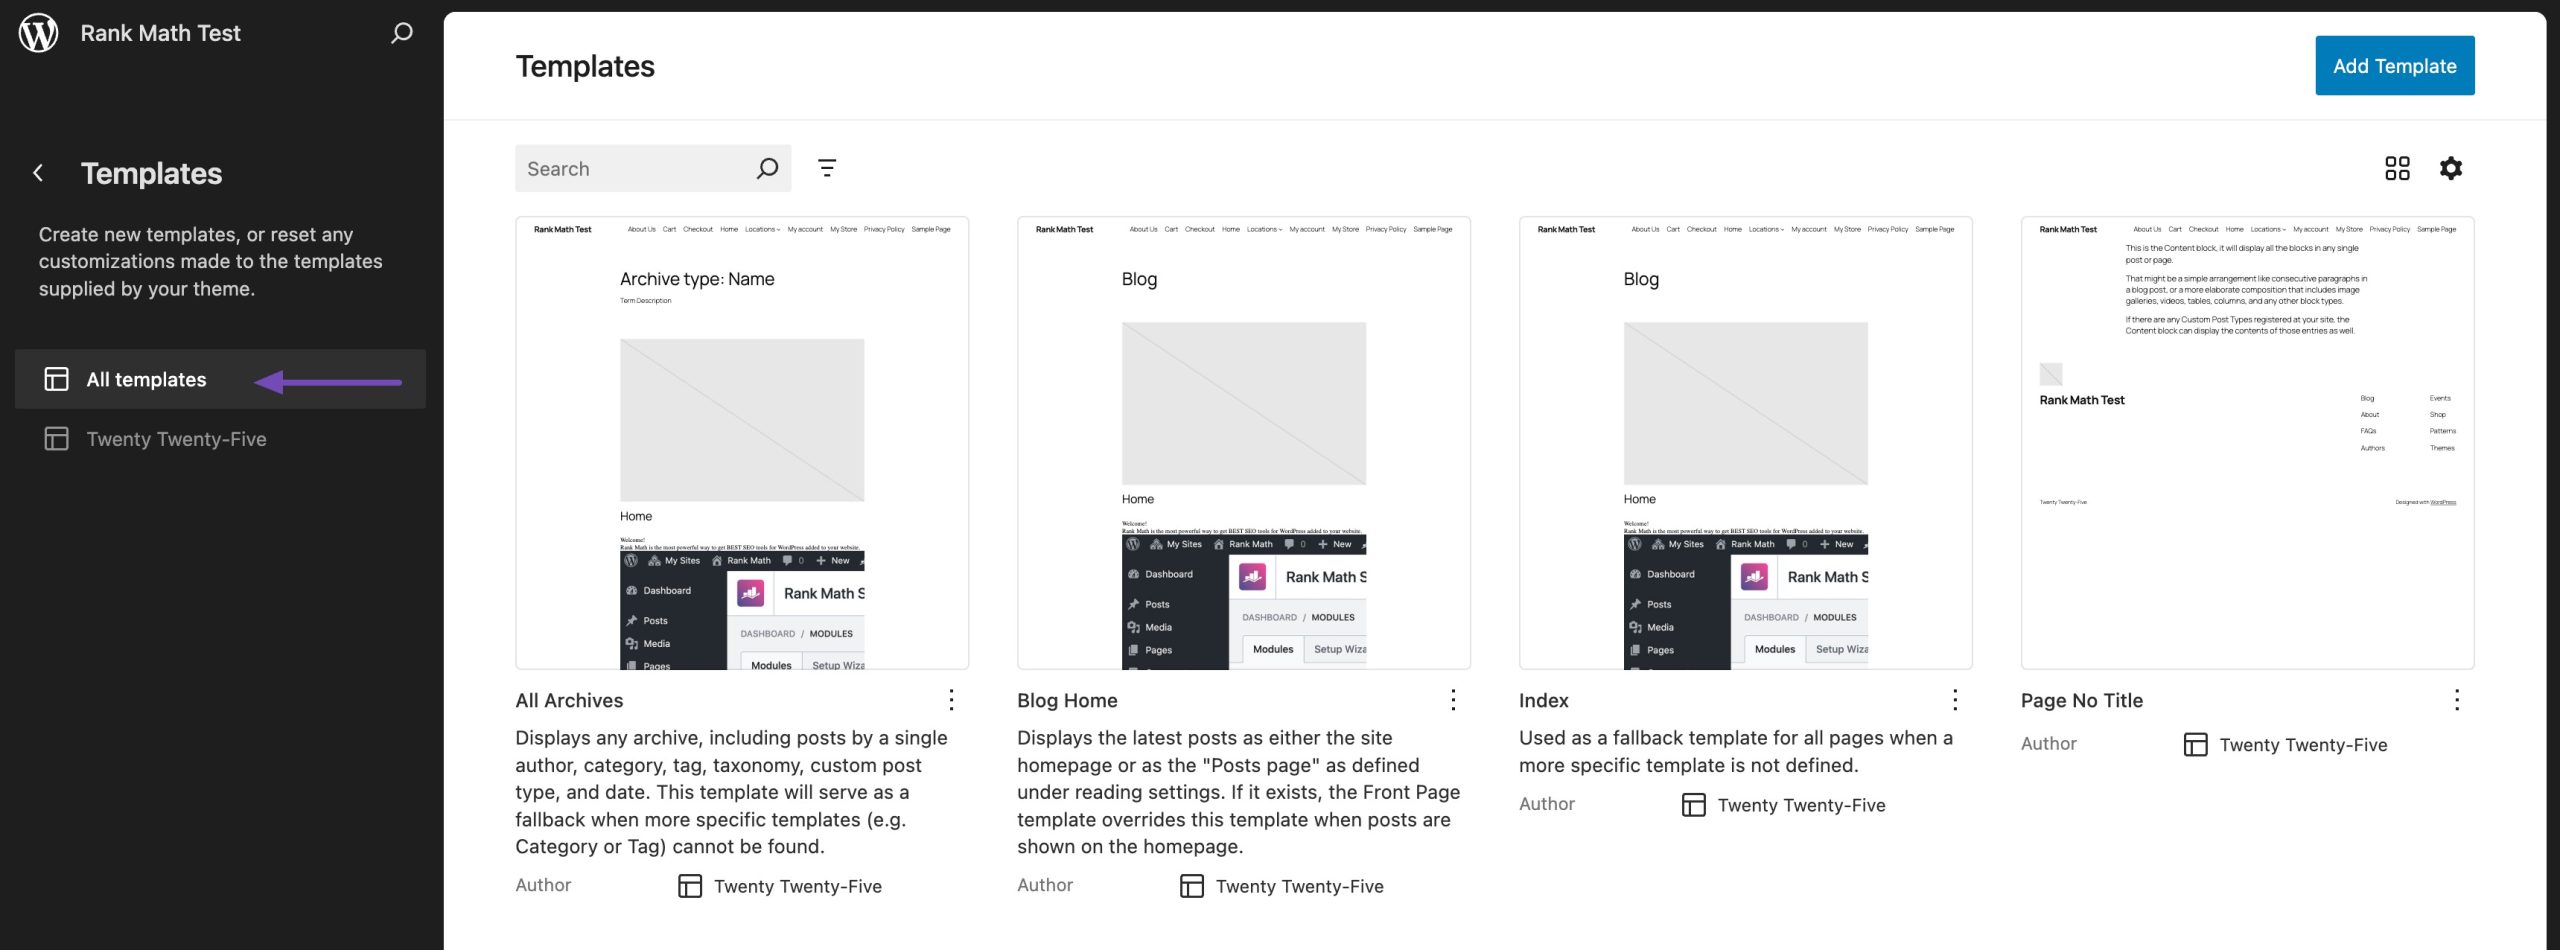
To change the font size using the Full-Site Editor in WordPress, navigate to your WordPress dashboard and click Aussehen → Editor to open the Full-Site Editor.
Once inside, select the template or template part where you want to adjust the font size.
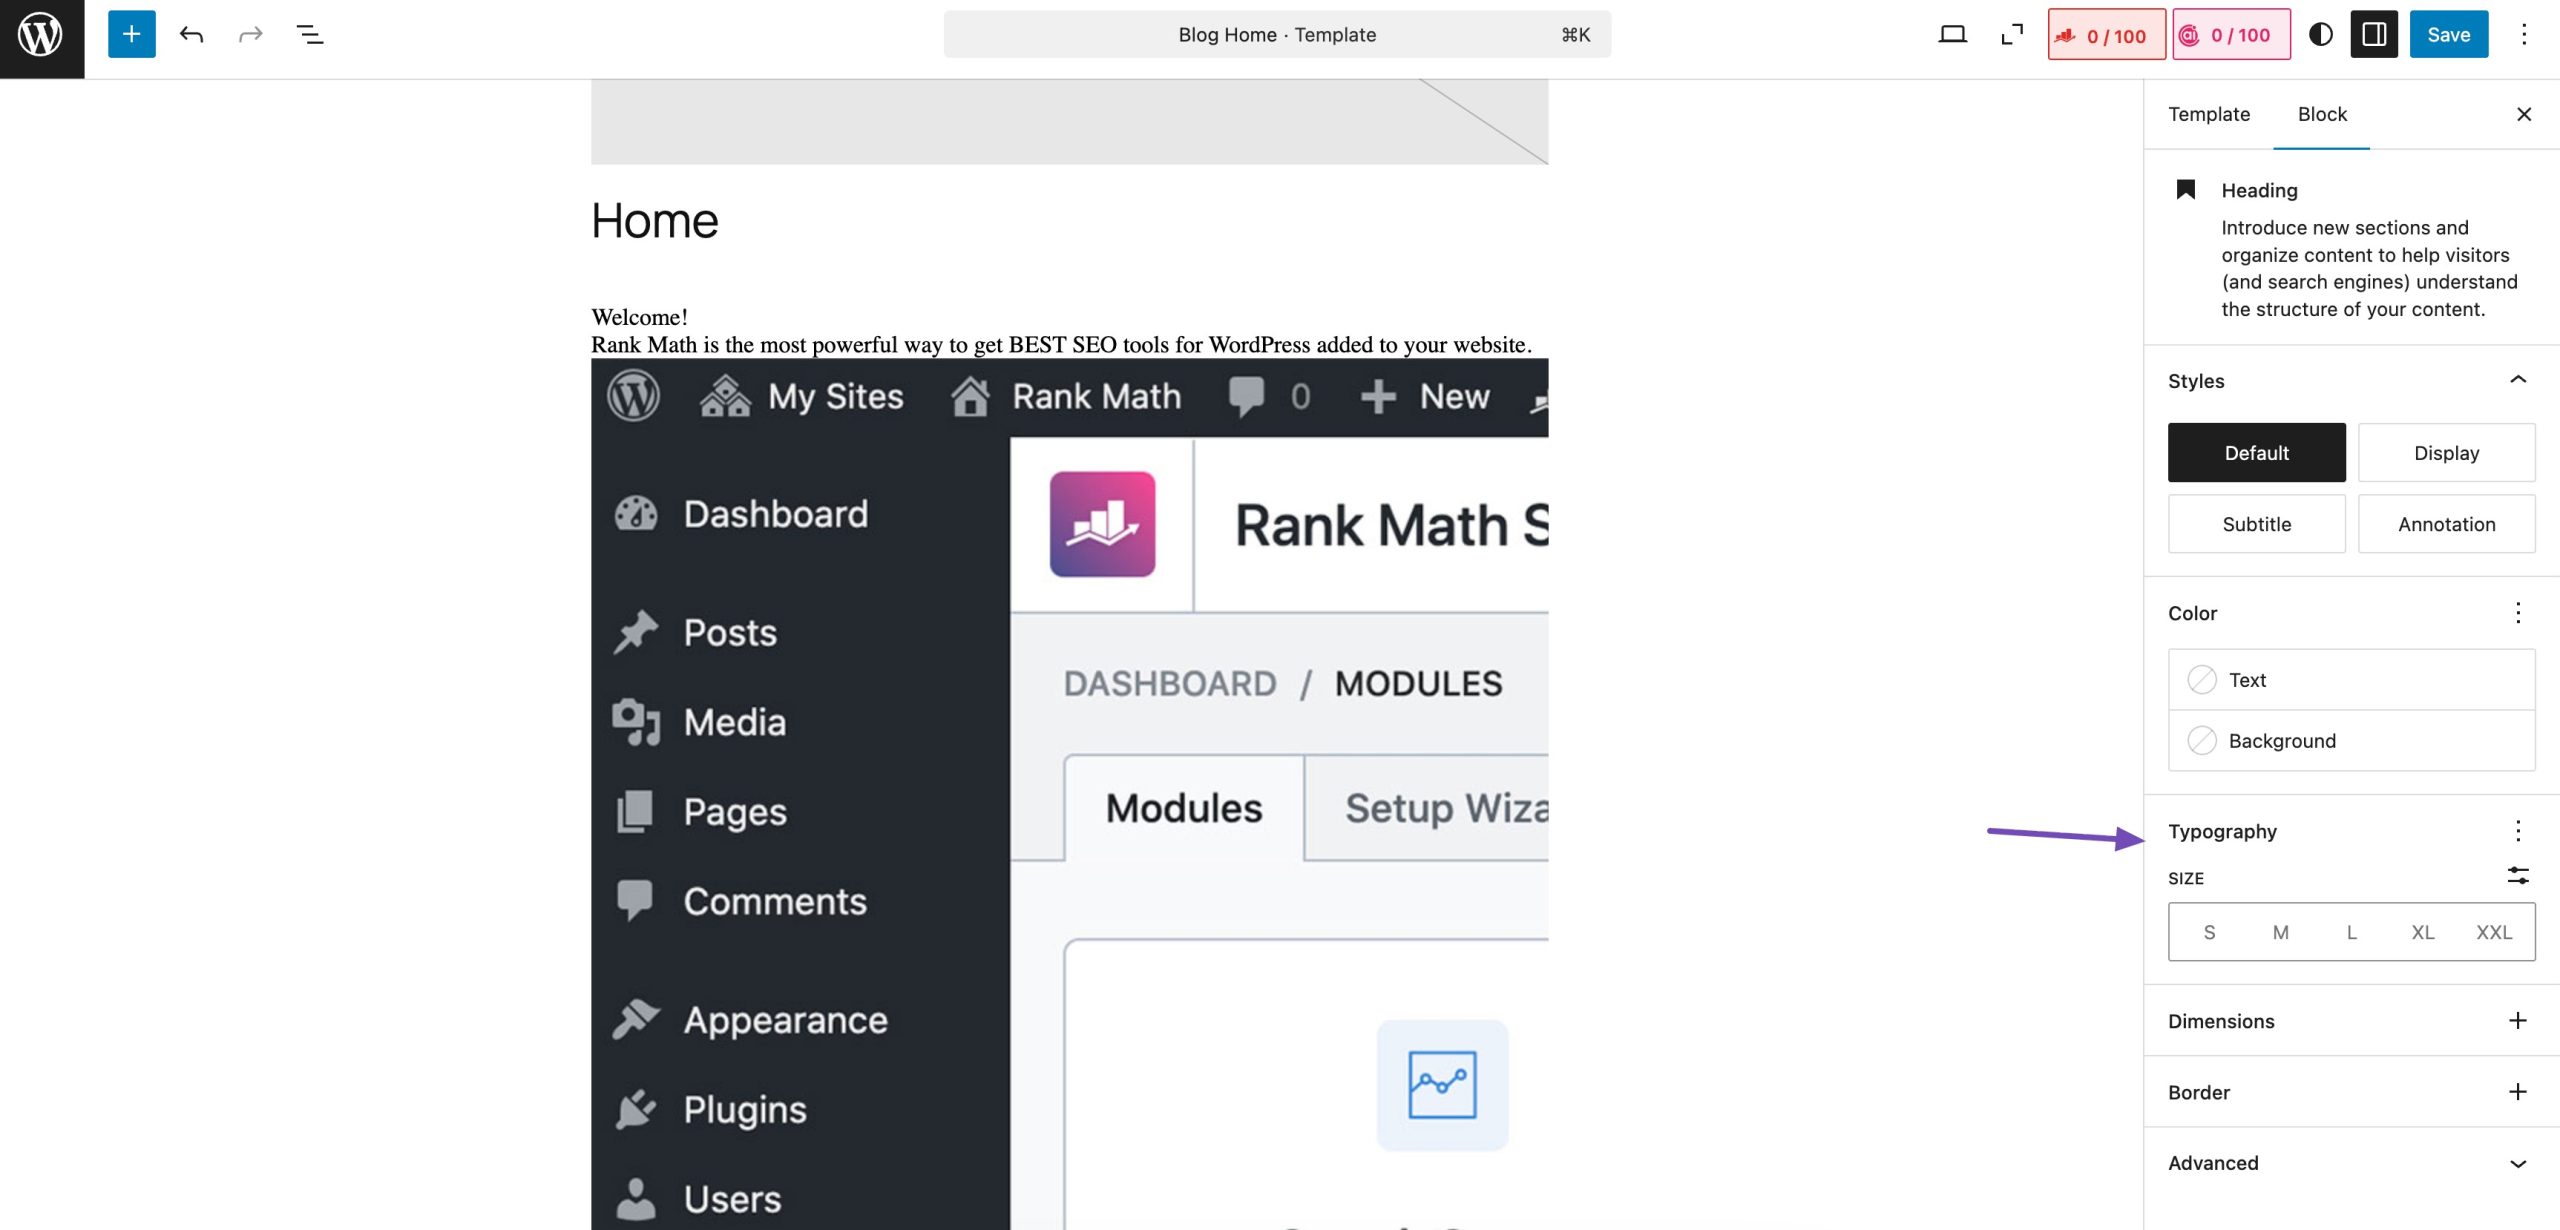
In the settings panel, locate the Typography section and expand it. Here, you will find the option to change the Font Size. You can select from predefined sizes like small, medium, large, and extra-large or enter a custom size for more precise control.
After selecting the desired font size, review the changes in the editor preview to ensure they appear as expected.
Once satisfied with the adjustments, click Speichern to apply the changes site-wide.
2.4 Verwenden des CSS-Codes
Using CSS to change the font size in WordPress requires adding a few lines of code, but it gives you full control over your site’s typography. With CSS, you can adjust the default paragraph size across your entire website for a consistent look.
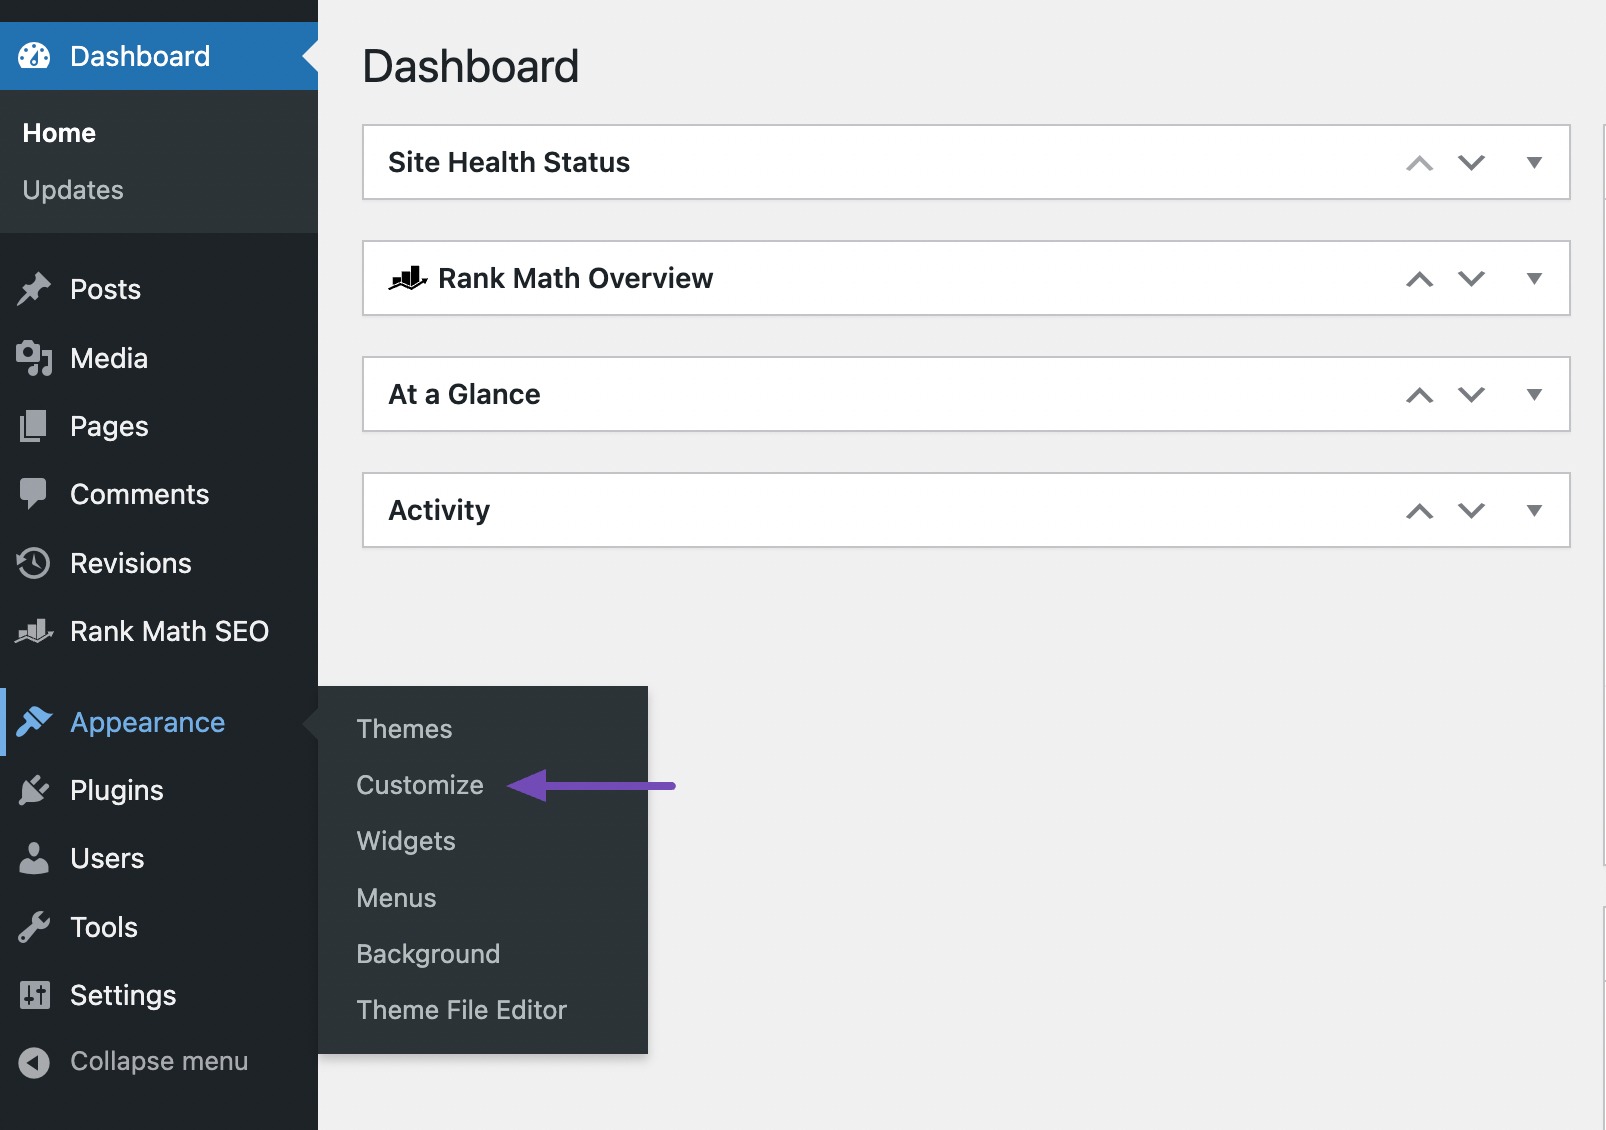
The easiest way to do this is by navigating to Appearance → Customize and using the Theme Customizer.
Some WordPress themes have built-in options to adjust font size, making it easy to customize text without writing any code. If your theme includes this feature, you can modify font sizes directly from the settings. However, if your theme doesn’t offer this option, you can still take control by using custom CSS.
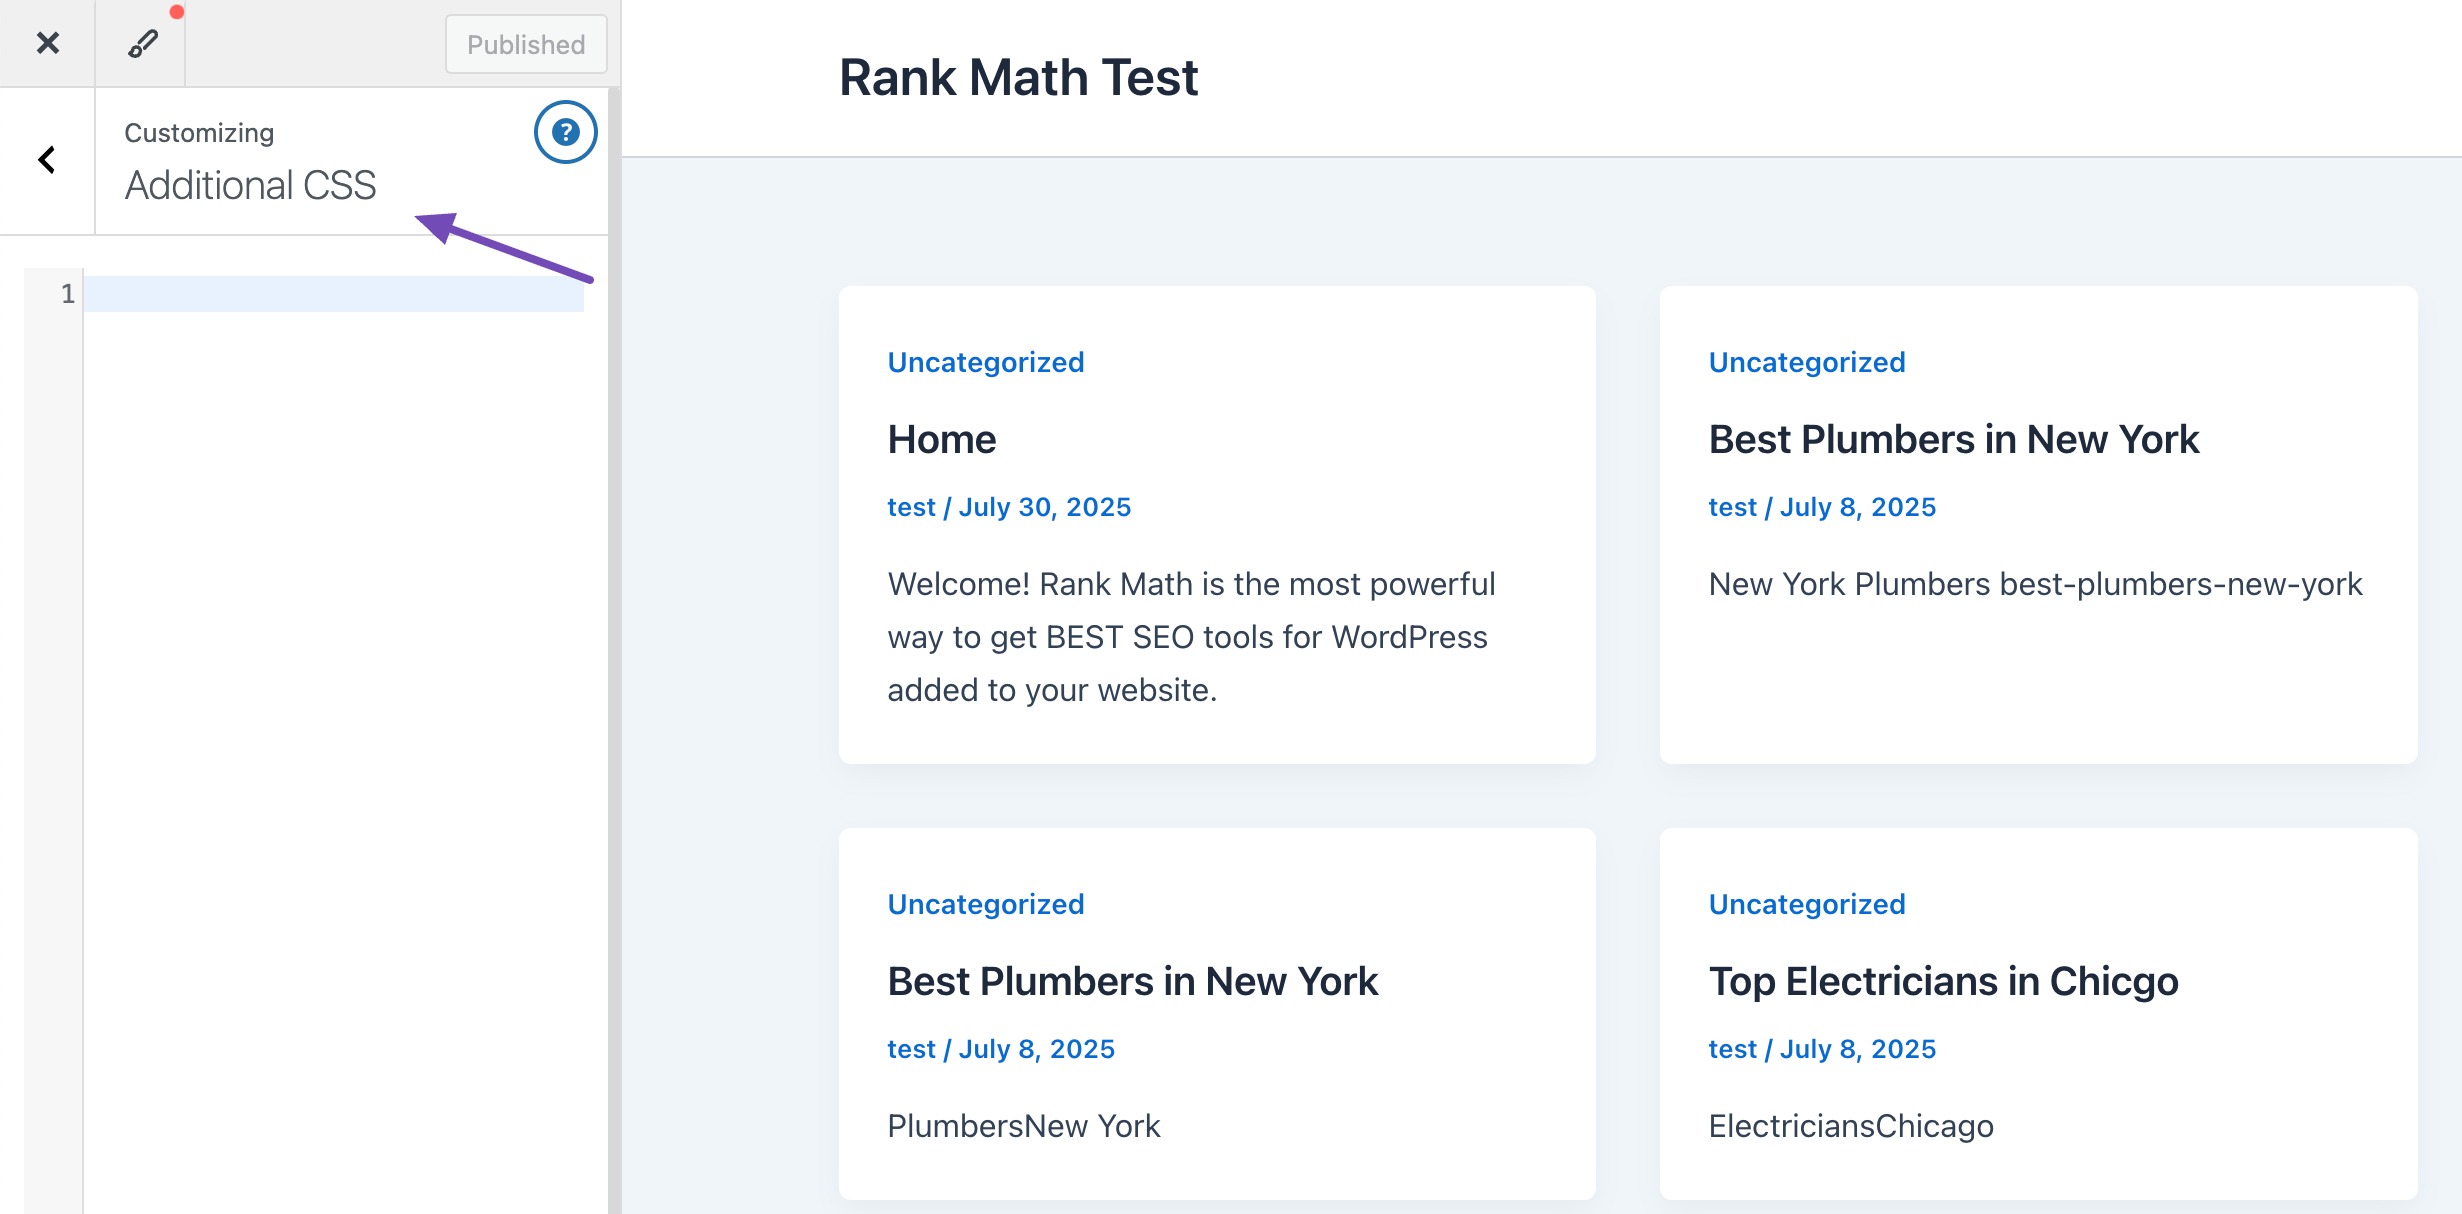
Navigieren Sie dazu zu Appearance → Customize → Additional CSS in your WordPress dashboard. Here, you can add font size rules and instantly see the changes in the live preview. This allows you to fine-tune your website’s font exactly how you want it.
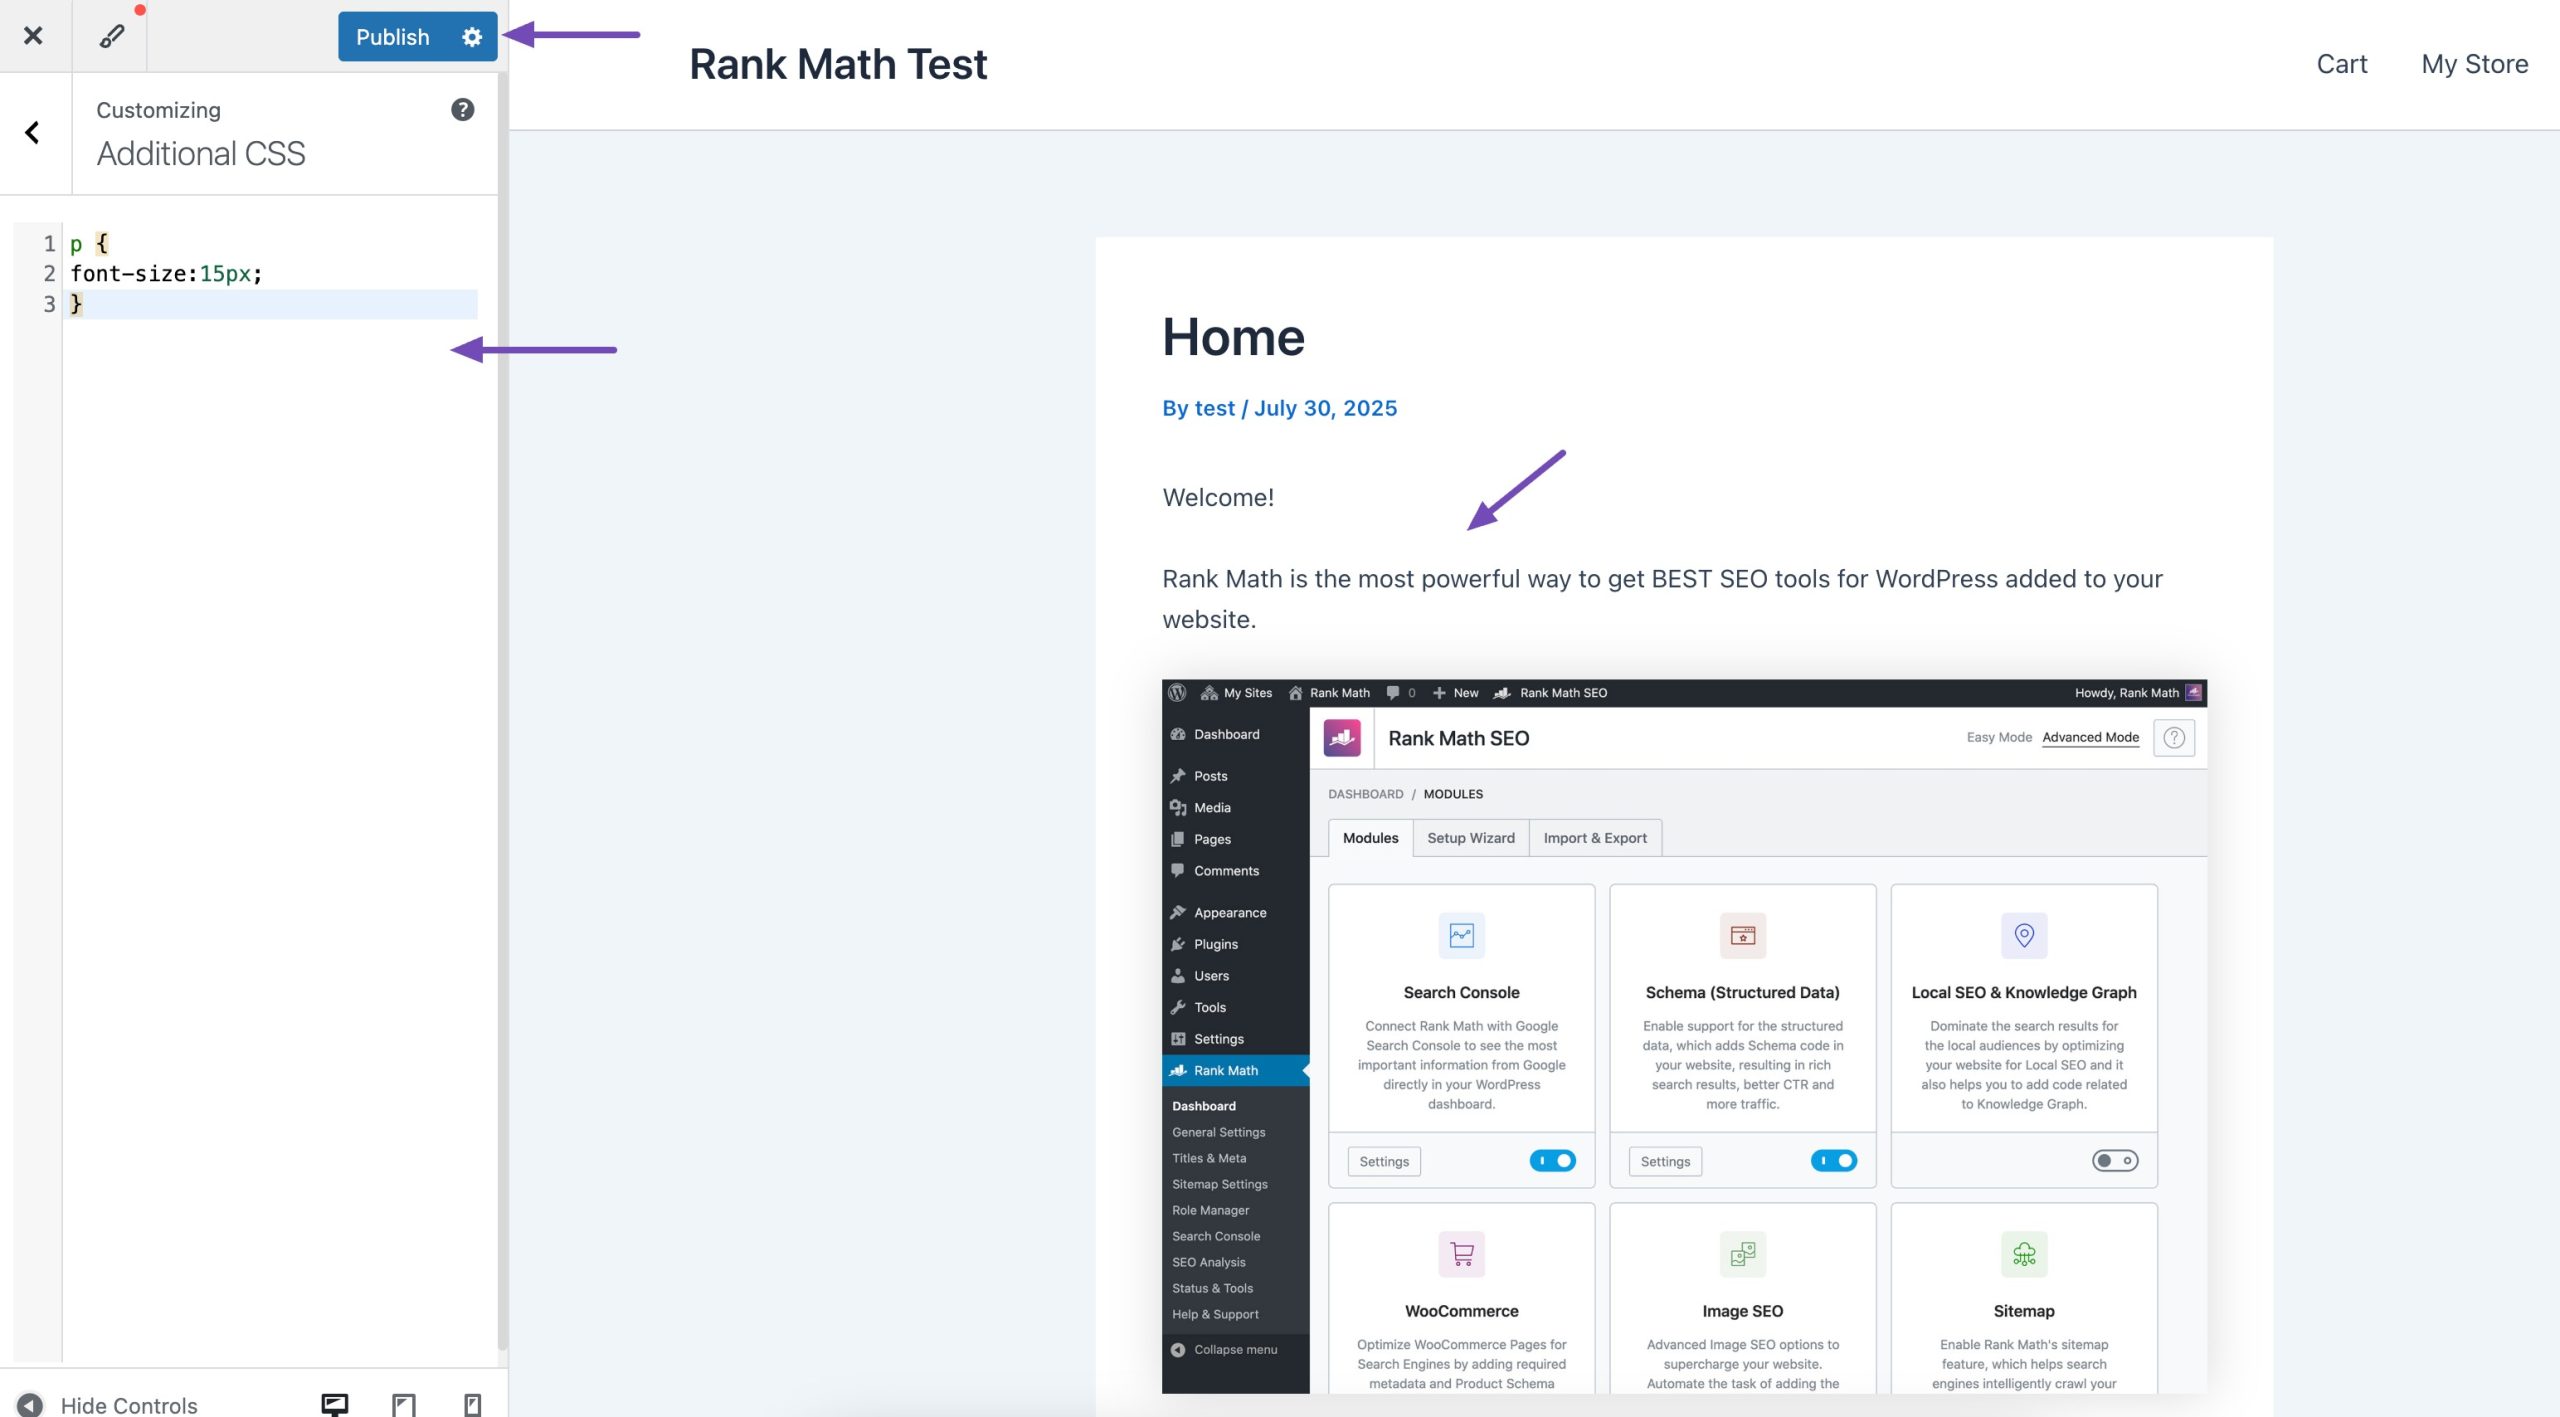
Fügen Sie Ihren Code in das CSS-Textfeld ein. Beispielsweise haben wir die Schriftgröße auf „15px“ geändert, Sie können eine andere Schriftgröße wählen.
p { Schriftgröße: 15px; }
Die Änderungen werden sofort in der Vorschau auf der rechten Seite des Bildschirms sichtbar. Um es live zu schalten, klicken Sie auf Veröffentlichen Schaltfläche oben auf Ihrem Bildschirm, sobald Sie mit der Schriftgröße zufrieden sind.
Der obige Code ändert die Schriftgröße nur für Absätze. Wenn Sie die Schriftgröße für alle H2-Unterüberschriften ändern möchten, ändern Sie den obigen Code wie unten gezeigt.
h2 { Schriftgröße: 32px; }
3 Fazit
Typography has a big impact on how visitors experience your website. The right font size makes your content easier to read, keeps people engaged, and gives your site a polished look.
The good news is that changing font sizes in WordPress doesn’t have to be complicated. If you’re comfortable with CSS, you can customize your theme directly. But if you prefer a simpler approach, plugins make it quick and hassle-free.
By choosing the method that works best for you, you’ll improve readability, enhance user experience, and create a site that feels professional and accessible.
What about you? What font sizes or design tweaks do you use to make your content stand out? Let us know by @rankmathseo twittern. 💬